How to Bake Magical Cakes That Actually Stand Up (And Taste Amazing)
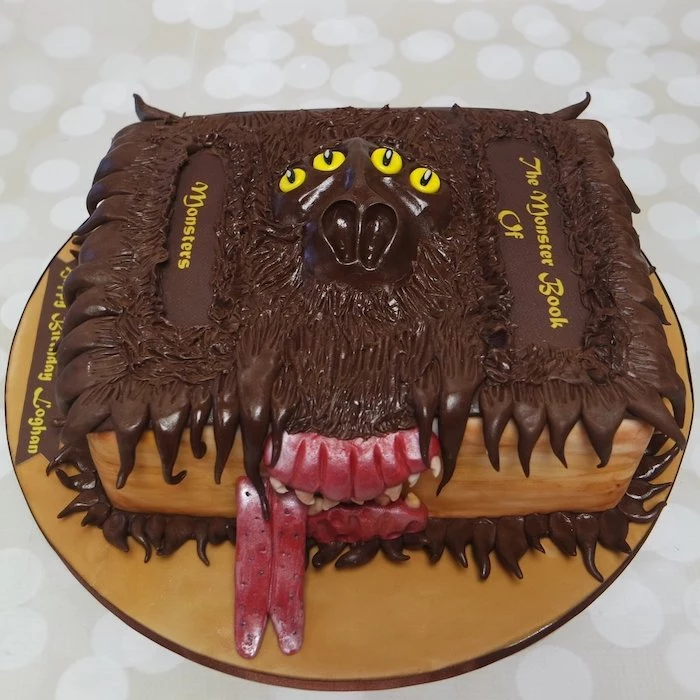
I’ve been a professional baker for what feels like a lifetime, building everything from delicate sugar flowers to towering wedding cakes. But honestly, the projects that really get my heart racing are the incredible themed cakes. A while back, a client came to me asking for a cake that looked exactly like the Monster Book of Monsters for their kid’s birthday. They were clear: they wanted it to look genuinely furry and menacing, not like some cute cartoon. That project taught me so much about sculpting, texturing, and balancing an artistic idea with, well, gravity. It’s one thing to see an epic cake online; it’s a whole other challenge to make it stand up on a table.
In this article
These literary-inspired, magical cakes are a huge deal right now, and I see tons of home bakers giving them a shot. The problem? It often ends in frustration. The cake starts leaning, the fondant tears, or the final look is just… off. So, this is me sharing the pro-level knowledge that makes these cakes actually work. We’re going way beyond just pretty pictures to look at the structure and techniques that will help you build a cake that not only looks incredible but is also stable and delicious from the inside out.
The Foundation: It All Starts with the Right Cake
Before you even think about a single sprinkle or decoration, we need to talk about your cake base. The absolute biggest mistake beginners make is picking the wrong kind of cake. That light, airy sponge you get from the grocery store is perfect for a simple dessert, but it will absolutely collapse under the weight of fondant and detailed decorations.
For any cake that’s going to be carved or stacked, you need something with serious structural integrity.
Why a Sturdy Cake Is Non-Negotiable
A strong cake structure comes from the right balance of ingredients. The pros almost always lean on denser recipes, like a classic pound cake or a rich chocolate mud cake. A pound cake uses a high ratio of fat (butter) and flour, which creates a tight, dense crumb that’s firm and a dream to carve. It doesn’t fall apart. A chocolate mud cake, another bakery workhorse, uses melted chocolate and butter to create a super moist yet incredibly sturdy cake. The high fat content also means it stays fresh and won’t dry out, even if you bake it a day or two ahead of time.
Think of it like building with bricks versus building with sponges. You need solid bricks. A standard boxed cake mix is engineered for lightness and fluff. It’s just not built for this kind of heavy lifting. I always tell my trainees that using a box mix for a sculpted cake is like trying to build a house on a foundation of sand.
My Go-To Chocolate Mud Cake Recipe
This is a slightly scaled-down version of the recipe we use in the shop. It’s reliable, forgiving, and so delicious that you’ll want to eat the scraps. (No judgment, we all do it.)
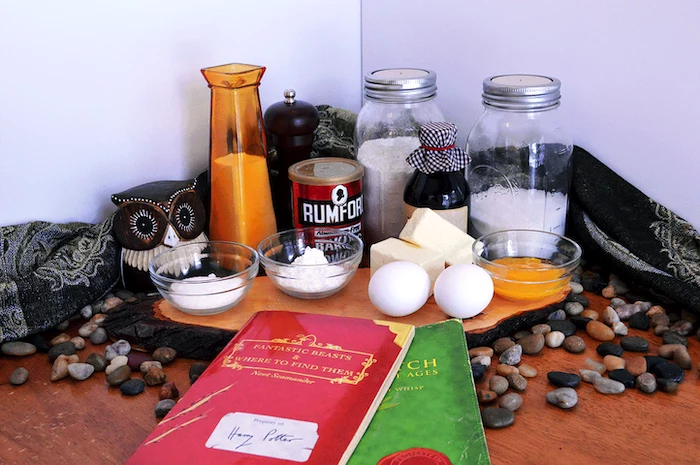
Ingredients:
- 250g (about 1 3/4 cups) all-purpose flour
- 85g (about 1 cup) high-quality unsweetened cocoa powder
- 350g (about 1 3/4 cups) granulated sugar
- 2.5 tsp baking soda
- 1 tsp baking powder
- 1/2 tsp salt
- 2 large eggs, at room temperature
- 250ml (about 1 cup) buttermilk, at room temperature
- 125ml (about 1/2 cup) vegetable oil
- 250ml (about 1 cup) hot, strong coffee
- 2 tsp vanilla extract
The Method:
- Preheat your oven to 160°C (325°F). Grease and flour two 8-inch round cake pans. Quick tip: I always line the bottom with a circle of parchment paper, too. It’s a cheap insurance policy to guarantee your cake won’t stick.
- In a large bowl, whisk together the flour, cocoa powder, sugar, baking soda, baking powder, and salt. Make sure you break up any lumps in the cocoa powder.
- In another bowl, whisk the eggs, buttermilk, oil, and vanilla.
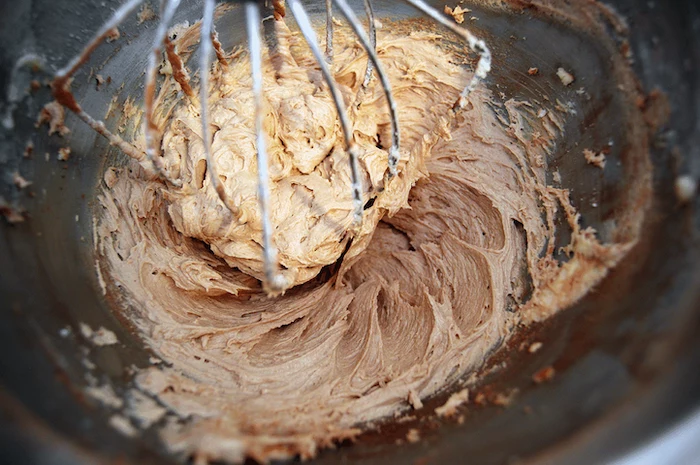
- Pour the wet ingredients into the dry. Mix with an electric mixer on low speed just until it’s combined. Seriously, don’t overmix here—it makes the cake tough.
- Slowly pour in the hot coffee while mixing on low. The batter will look very thin. Don’t panic! This is totally normal. The hot coffee helps “bloom” the cocoa, making the chocolate flavor incredibly deep.
- Divide the batter evenly between your pans. Bake for 35-45 minutes. You’ll know it’s done when a wooden skewer stuck in the center comes out with just a few moist crumbs.
- Let the cakes cool in the pans for about 15 minutes before turning them out onto a wire rack to cool completely. For sculpting, the best thing you can do is wrap them tightly in plastic wrap and chill them overnight. A cold cake is a million times easier to carve.
A Few Quick Questions You Might Have…
Total Time? From start to finish, you’re looking at about 20 minutes of prep, 45 minutes of baking, and at least 2-3 hours of cooling before you should even think about carving. The overnight chill is best!
Help, my cake seems dry! What did I do? Nine times out of ten, it was slightly overbaked. Next time, check it a few minutes earlier. The other culprit could be measuring flour incorrectly. Always spoon flour into your measuring cup and level it off instead of scooping directly from the bag.
Can I use 9-inch pans? You sure can! The layers will be a bit thinner, so start checking for doneness around the 30-minute mark.
The Unseen Magic: Structure is Everything
A cake that looks amazing but topples over is, to be frank, a failure. The internal structure is the most critical part of any complex cake. We’re dealing with basic physics here—load, gravity, and stability. In the bakery, we easily spend more time on structure than we do on the pretty decorations.
Ganache: The Hard-Shell Armor for Your Cake
For that sharp, professional finish, you need a chocolate ganache shell. Ganache is just a simple mix of chocolate and heavy cream, but when it cools, it forms a hard, protective layer around the cake. It’s like a delicious suit of armor that locks in moisture and gives you a perfectly smooth, stable surface for fondant.
So, why not just use buttercream? Think of it this way: ganache is like a hard-shell helmet for your cake. It’s firm, protective, and holds its shape. Buttercream, on the other hand, is more like a soft beanie. It’s nice, but it offers zero structural support. I’ve seen so many tiered cakes fail because they were only coated in buttercream. It’s just not strong enough to handle the weight, especially in a warm room.
Ganache Ratios the Pros Use:
- For Dark Chocolate: 2 parts dark chocolate to 1 part heavy cream, by weight. (For example, 500g chocolate to 250g cream). This sets up very hard and is perfect for sculpted cakes or warmer weather.
- For Milk or White Chocolate: 3 parts chocolate to 1 part heavy cream, by weight. (For example, 750g chocolate to 250g cream). These chocolates are softer, so they need a higher ratio to get firm.
To make it, just chop your chocolate finely and put it in a heatproof bowl. Heat the cream until it just starts to simmer, then pour it over the chocolate. Let it sit for five minutes (don’t touch it!). Then, stir gently from the center outwards until it’s silky smooth. Let it cool at room temperature until it’s a thick, spreadable, peanut-butter-like consistency before you slather it on your cake.
Heads up! What if my ganache splits? If it looks oily or separated, don’t throw it out! Just add a tablespoon of warm (not hot!) cream and stir gently from the middle. It should come right back together.
Dowels and Cake Boards: Your Cake’s Skeleton
This part is not optional. Any cake with more than one tier needs internal support. Each tier must sit on its own cardboard cake circle. Then, you insert dowels into the lower tier to support the board and the cake above it. This transfers all the weight down to the plate, so the cake below isn’t getting crushed.
We use thick plastic dowels or even bubble tea straws. Please, never use wooden skewers or uncooked spaghetti—they just aren’t strong enough. The most common mistake that causes a leaning cake? The dowels aren’t cut to the exact same height. A quick tip: Insert your first dowel, mark it right at the surface of the cake, pull it out, and use it as a guide to cut all the others perfectly.
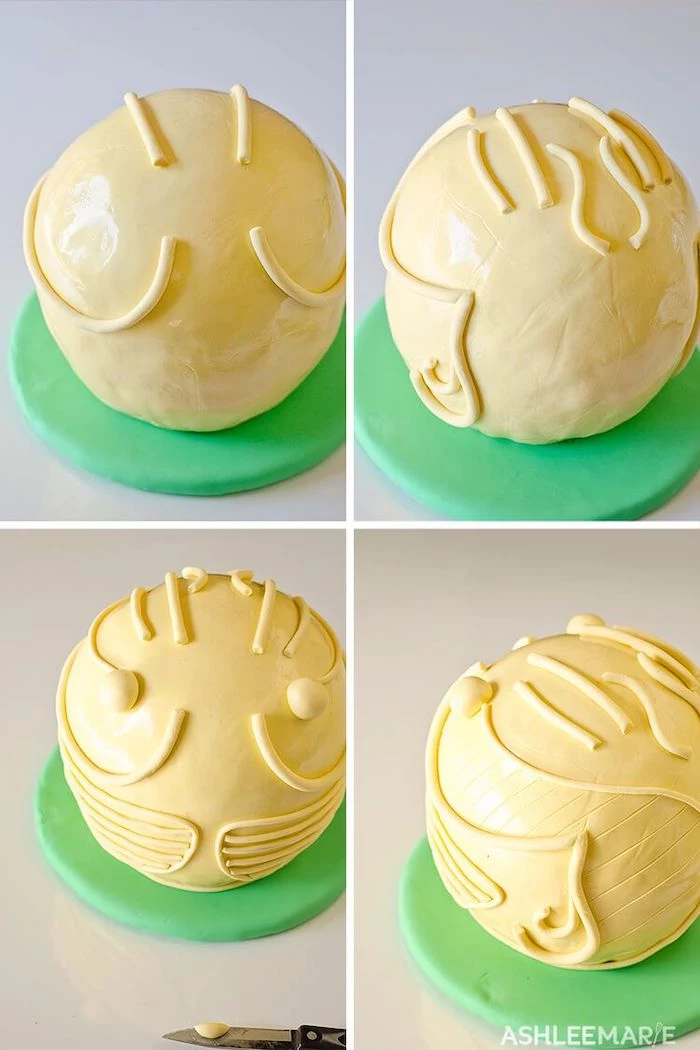
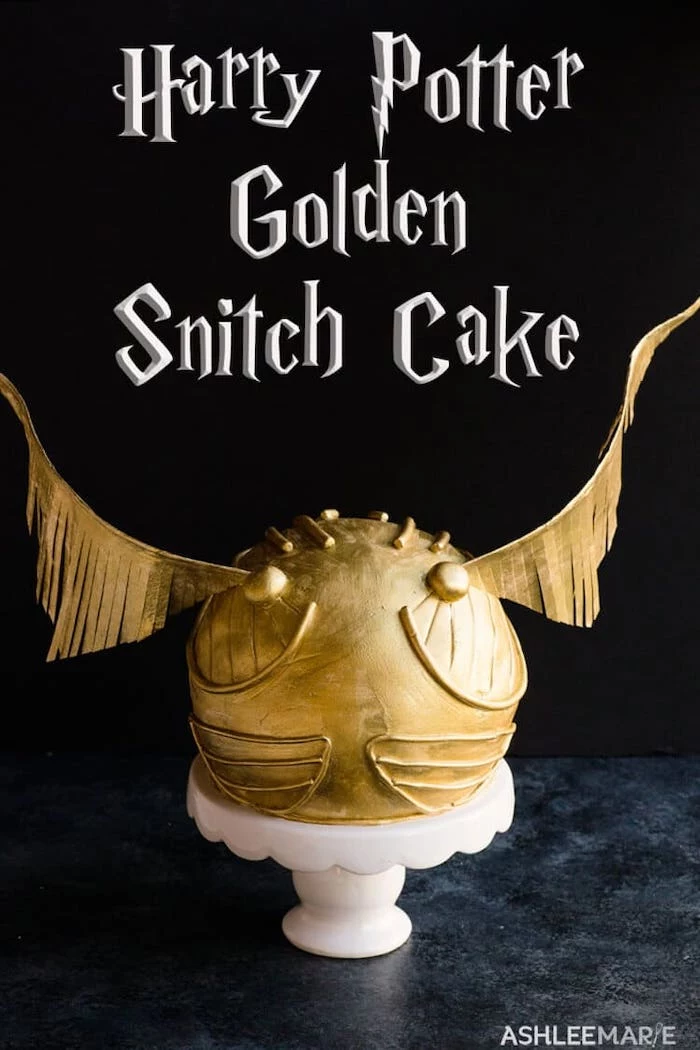
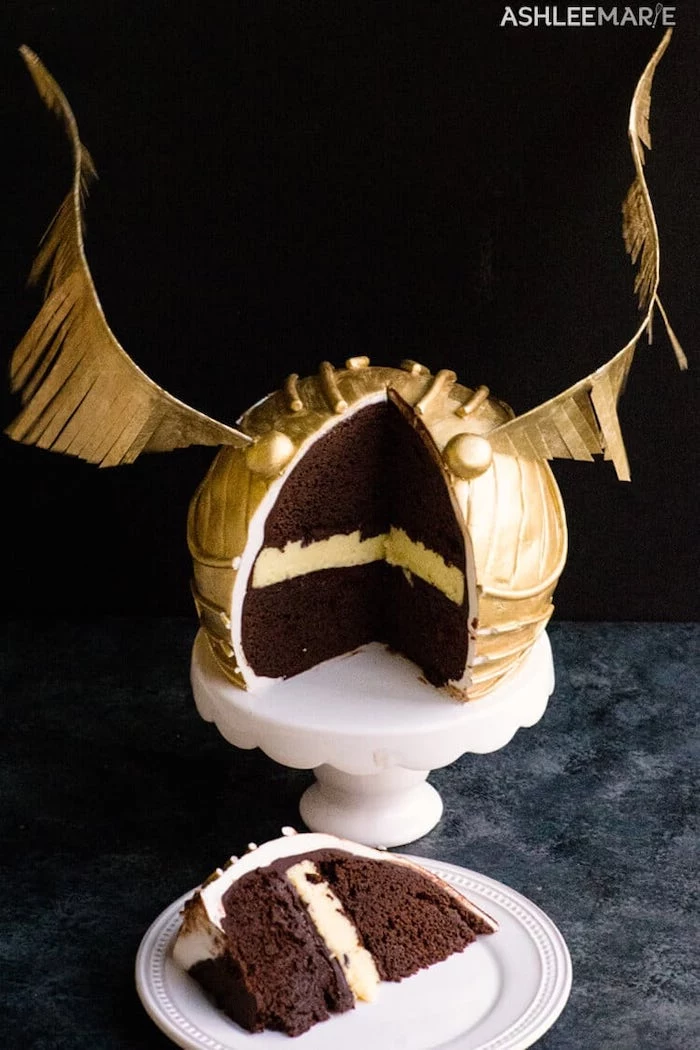
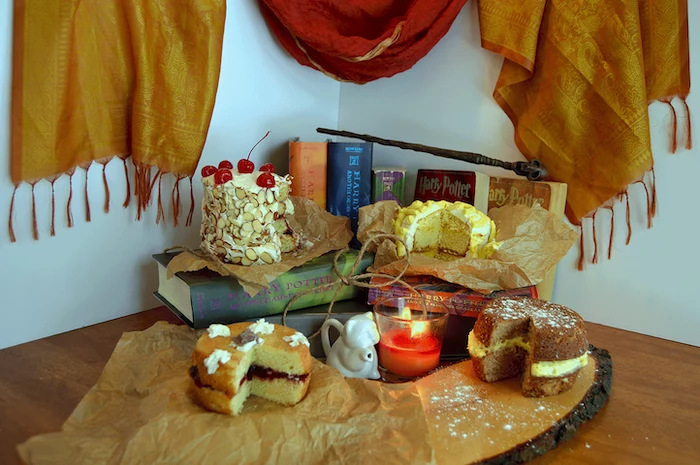
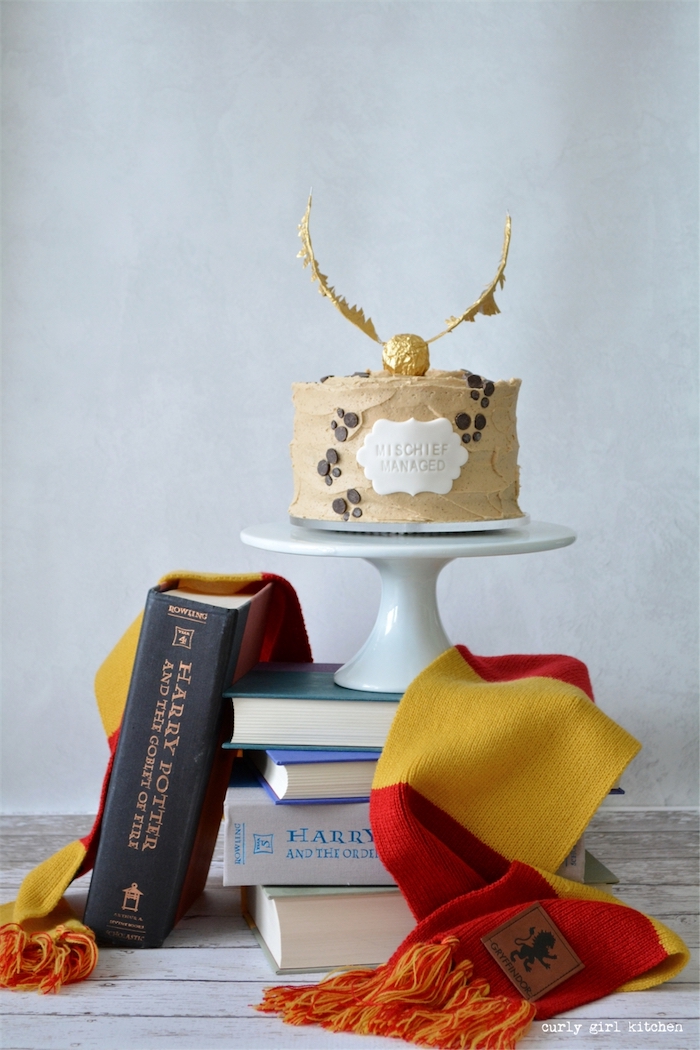
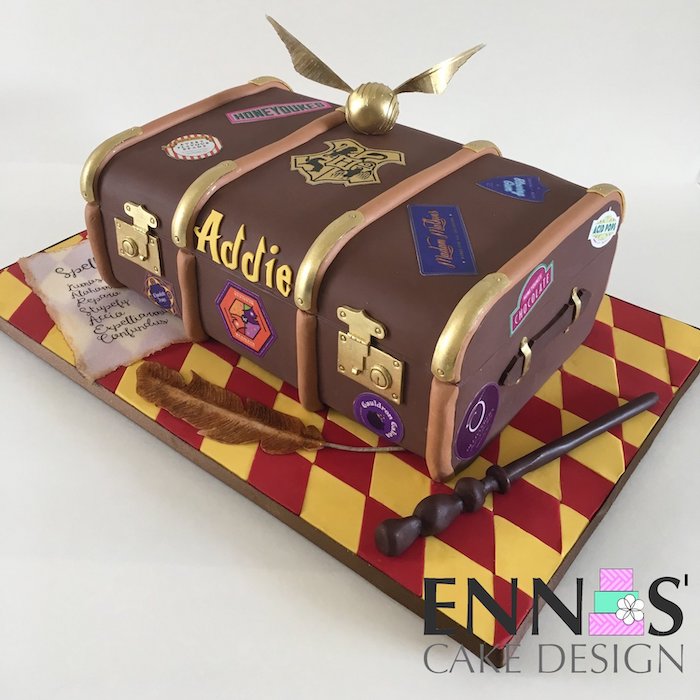
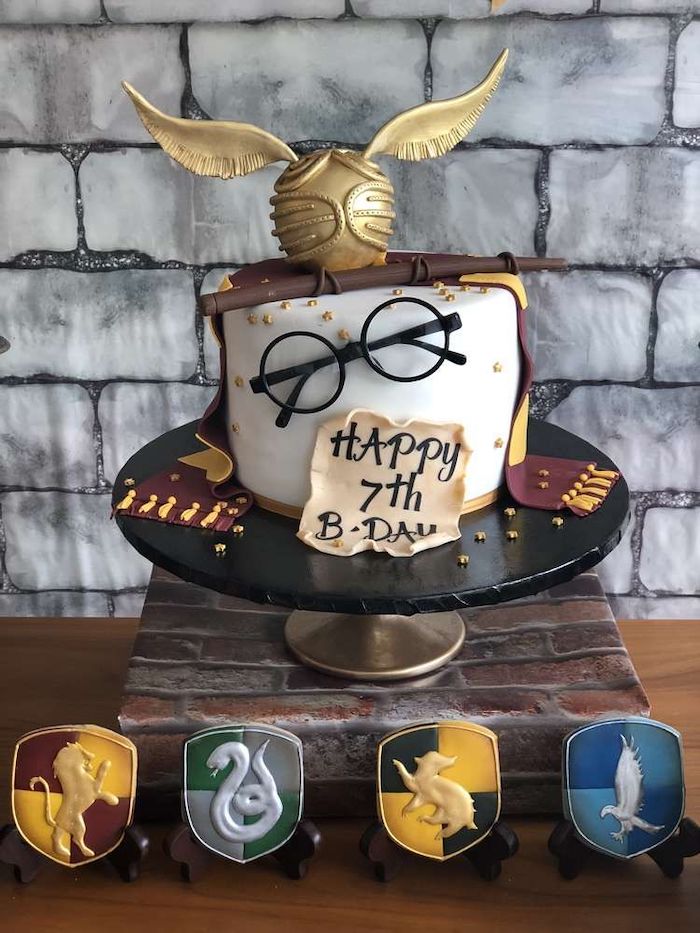
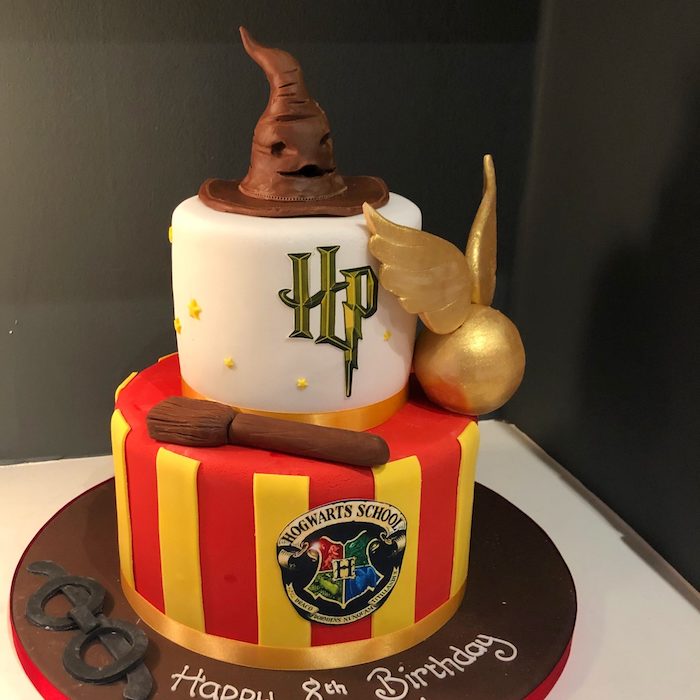
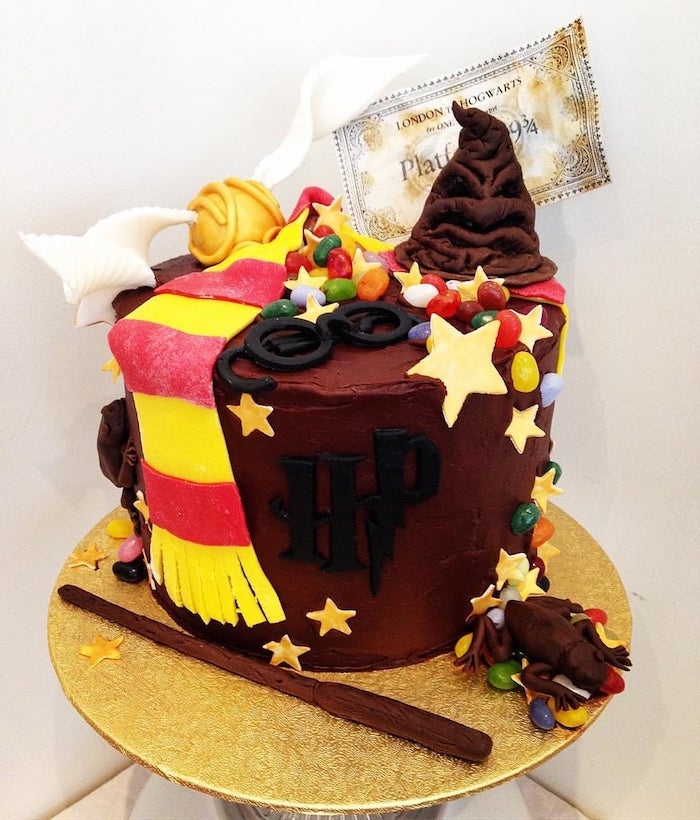
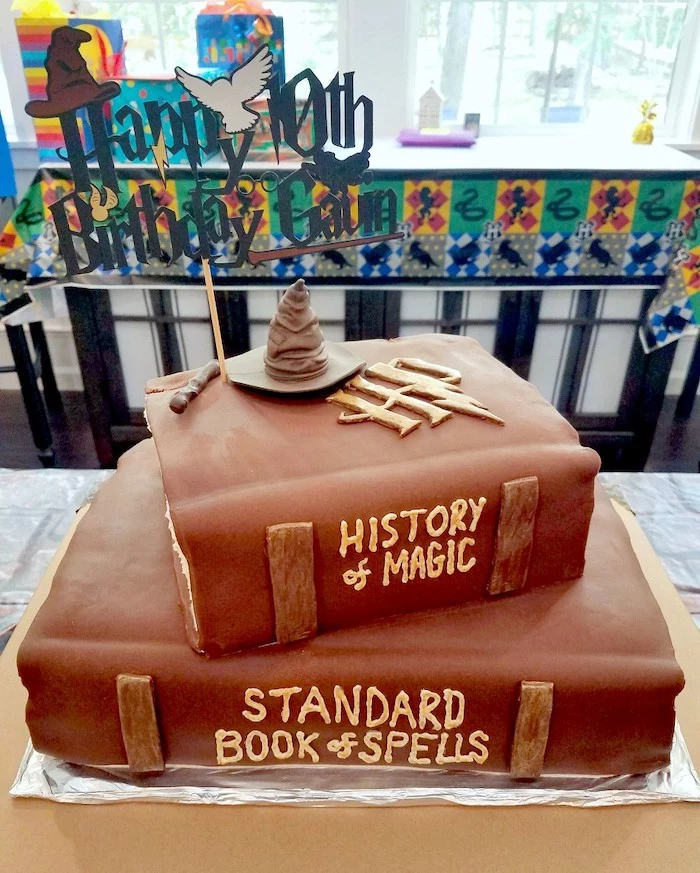
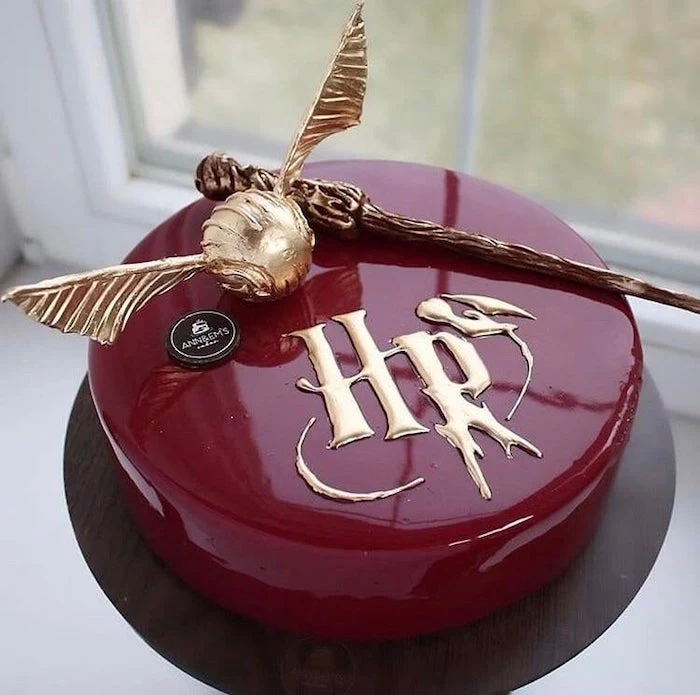
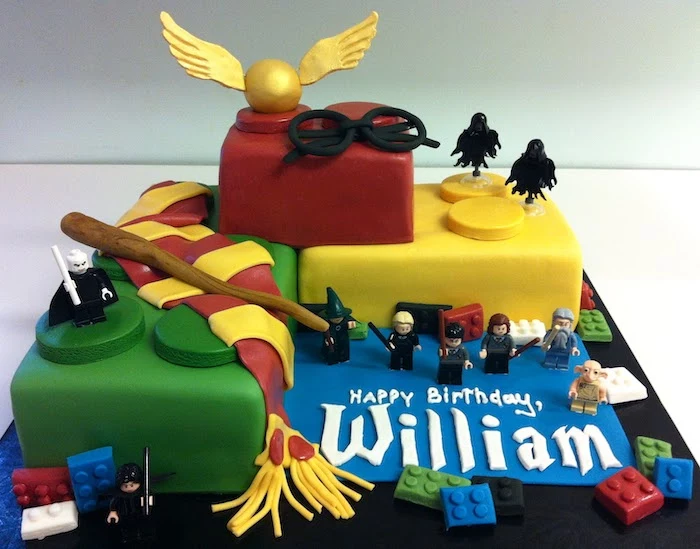
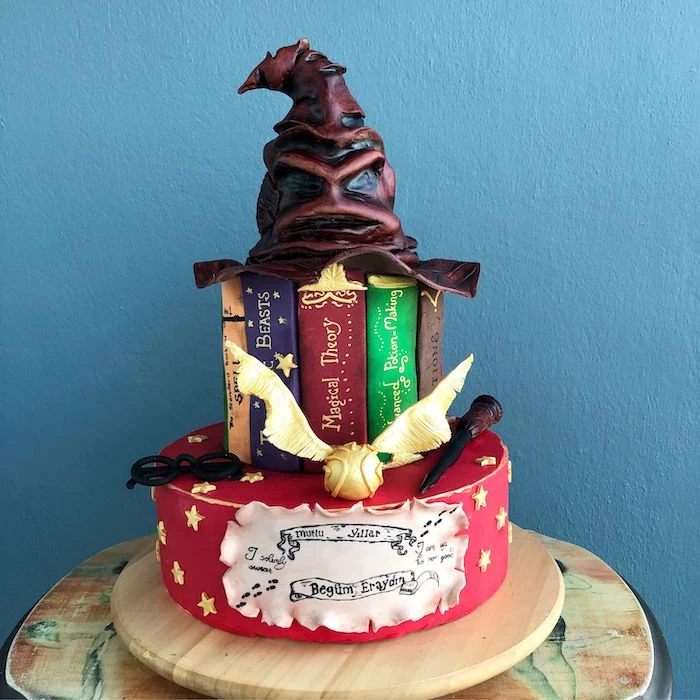
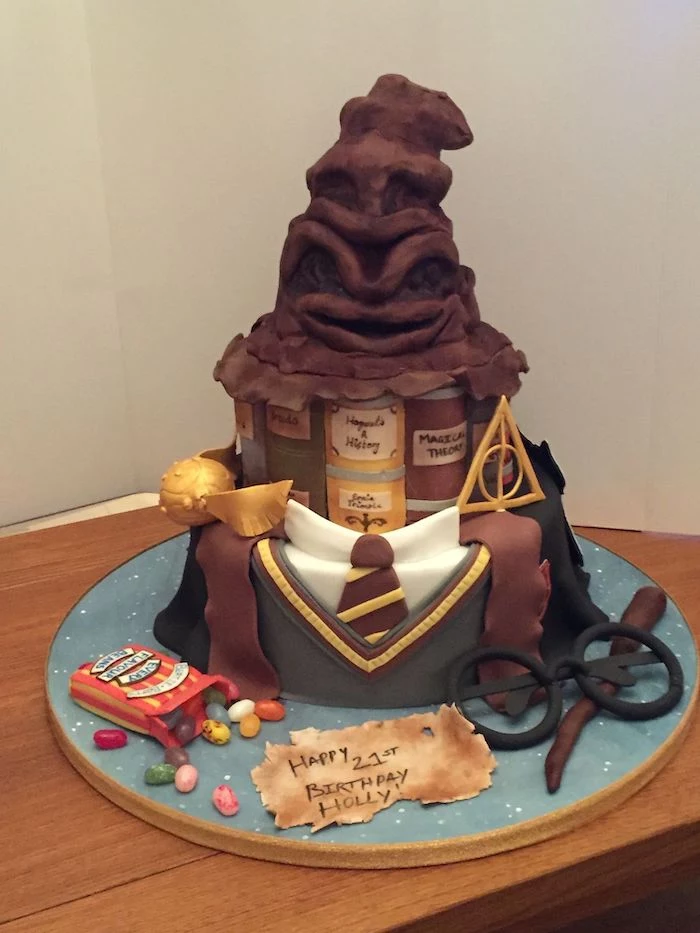
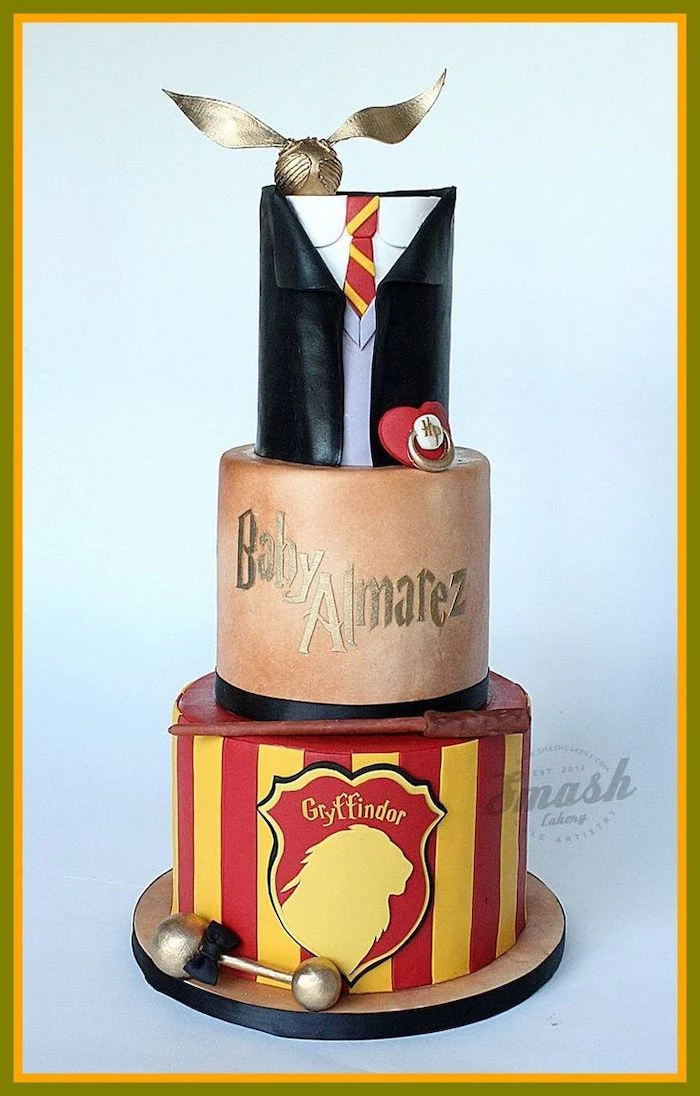
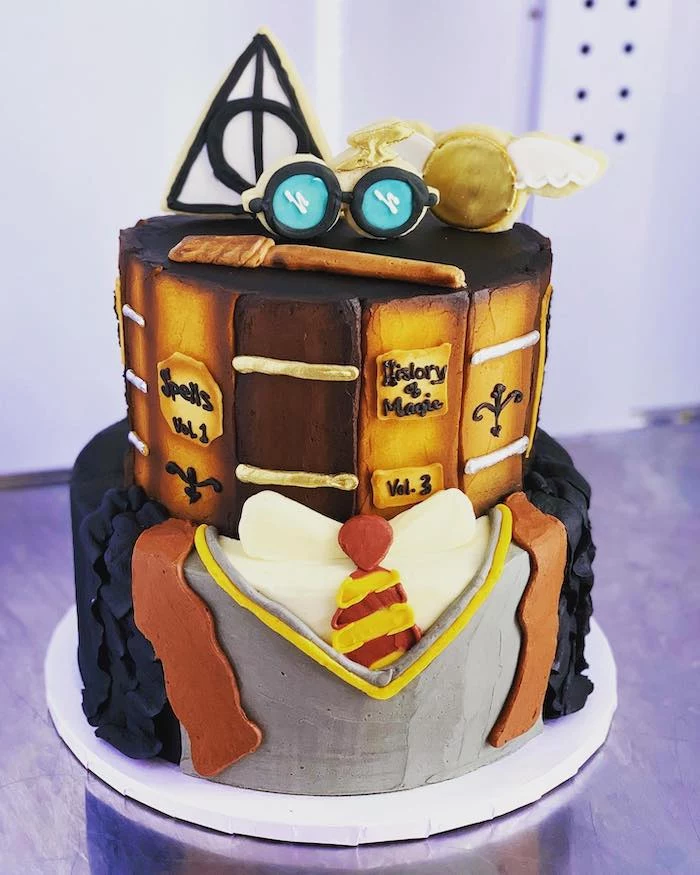
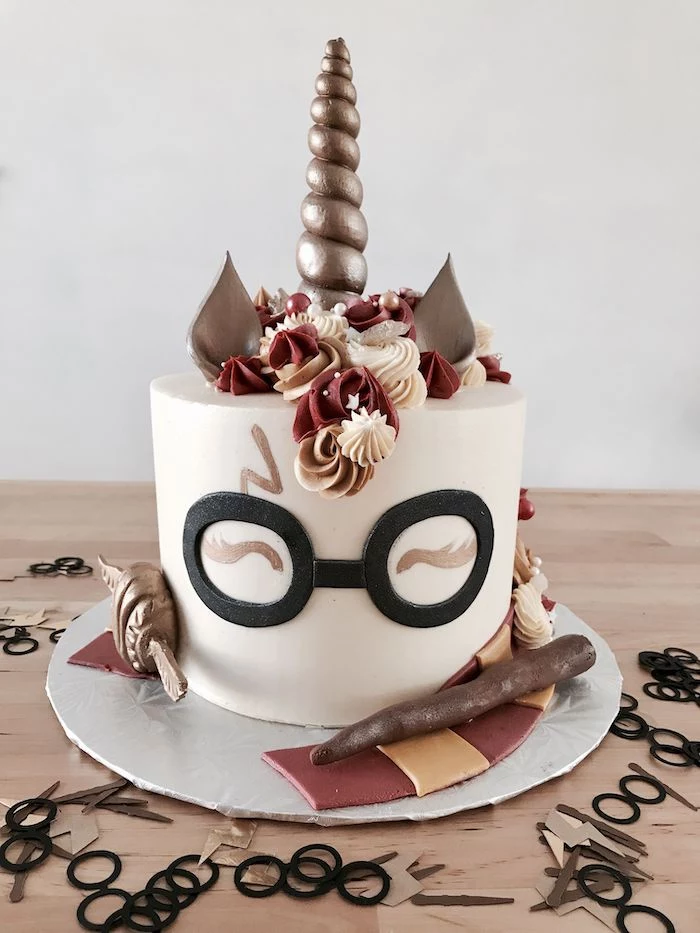
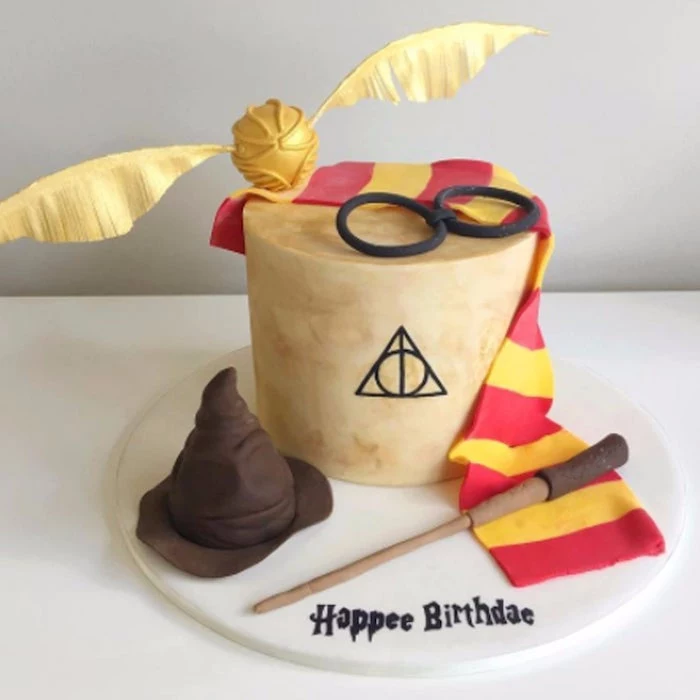
Project Breakdown: The Golden Snitch Cake
This is a fantastic first project for learning basic sculpting. It looks complicated, but it’s totally manageable if you take it step-by-step. Let’s do this.
Your Shopping List:
- A 6-inch ball pan (two half-spheres) – This will run you about $15-20 at a craft store or online.
- Your sturdy cake, baked and chilled overnight.
- Chocolate ganache.
- About 2 lbs of yellow or gold-colored fondant. A good brand like Satin Ice costs around $15-20 for a 2lb tub. You can find it at places like Michael’s, Jo-Ann, or specialty baking supply stores.
- Edible gold dust and a small bottle of clear, high-proof alcohol (like vodka) or lemon extract.
- A few sheets of wafer paper (Grade 0.27mm is great for this).
- Food-safe floral wire.
- A small, clean paintbrush you’ll use only for food.
Total Project Cost: If you have to buy everything new, expect to spend around $50-60 on the specialty supplies.
Total Time: Set aside a solid afternoon for this. Probably 5-6 hours, not counting the time for the cake to bake and chill.
Step-by-Step Guide:
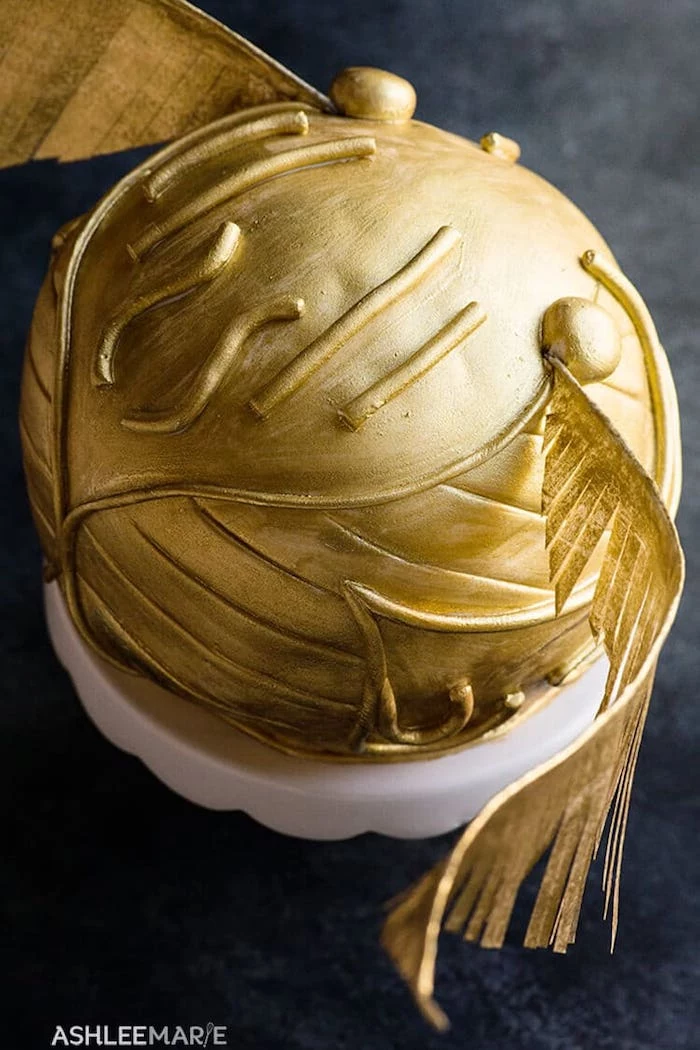
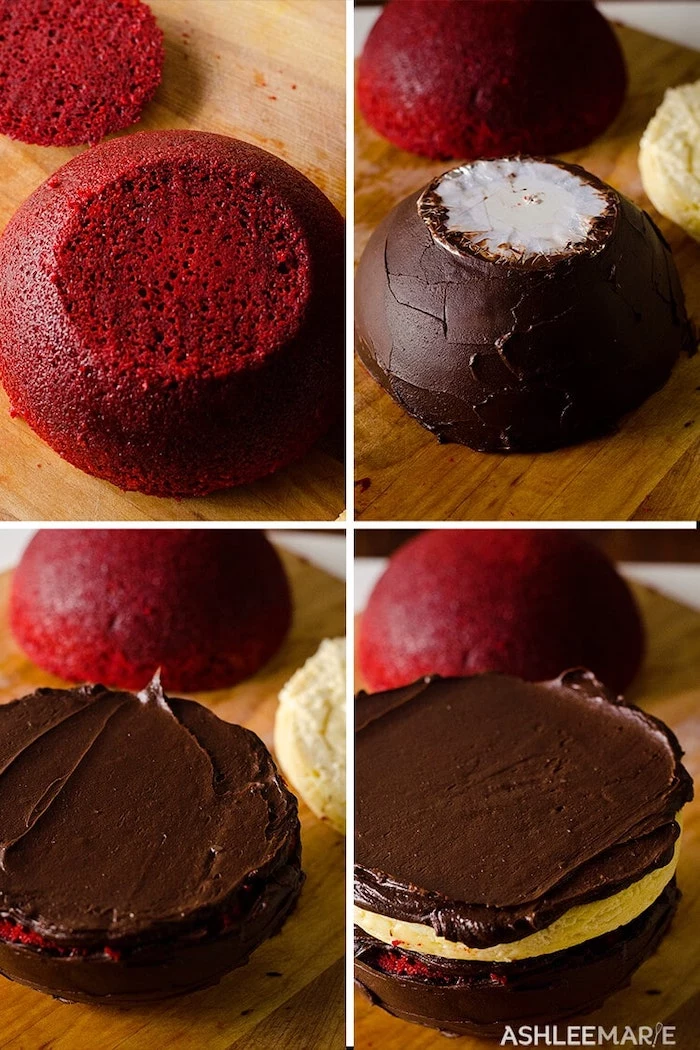
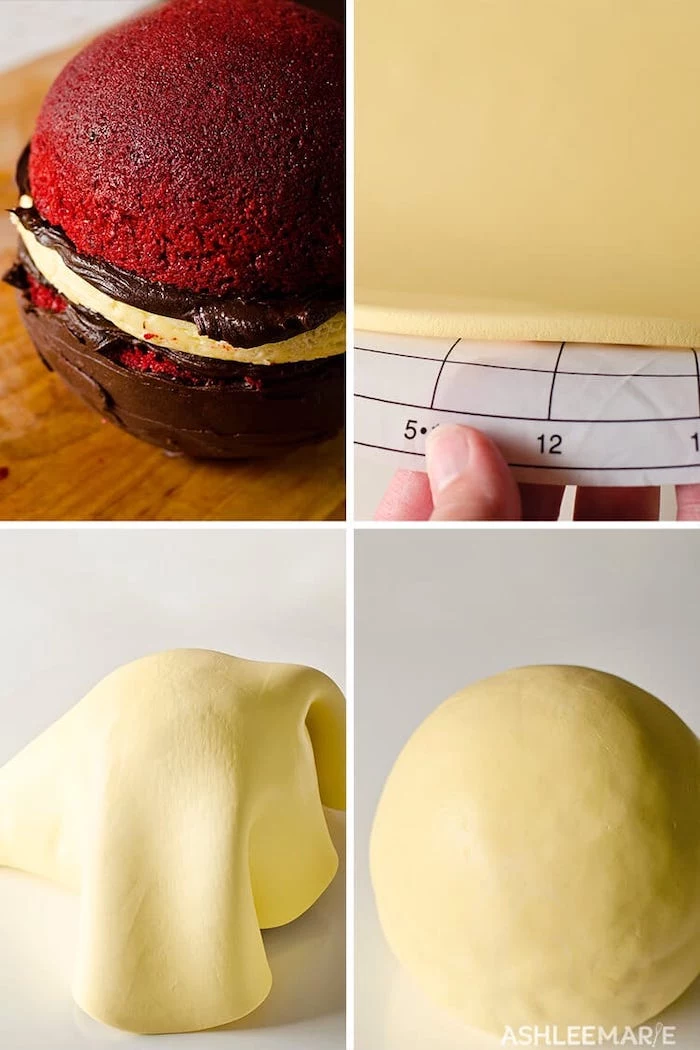
- Build the Sphere: Level the flat tops of your two half-sphere cakes. Spread a layer of ganache on one half and stick the other on top. Boom, you have a sphere.
- Carve and Stabilize: Place the sphere on a small, sturdy cake board. Now, carefully shave a small flat spot on the very bottom. This is CRUCIAL. If you don’t, your cake will try to roll away.
- The Ganache Shell: Apply a thick, even coat of your peanut-butter-consistency ganache all over the sphere. Use a spatula or bench scraper to get it as smooth as possible. Let it set completely, either on the counter for a few hours or in the fridge for about 30 minutes.
- Cover with Fondant: Knead your fondant until it’s pliable. Roll it out into a big circle, about 1/8-inch thick. Gently drape it over your ganached sphere. Smooth from the top down with your hands, gently lifting and stretching the fondant to work out the pleats at the bottom. Trim the excess with a sharp knife.
- Add the Details: Roll out thin ropes of fondant to create the ridges on the Snitch. A tiny dab of water is all you need to stick them on. Too much water will make it a slimy mess.
- Make the Wings: Cut your wafer paper into a wing shape. Wafer paper is basically edible paper made from potato starch, and you can buy it online or at specialty shops. To make it look more realistic, you can lightly score it with a knife to create feather textures. Attach a piece of food-safe wire to the base of each wing with a bit of melted white chocolate or edible glue. Let them dry completely.
- The Golden Finish: In a small bowl, mix some gold dust with a few drops of vodka. Why vodka? The alcohol evaporates almost instantly, leaving behind a perfect metallic paint. Lemon extract works too! Paint the whole cake and the wings. You might need two coats.
- Final Assembly: Once everything is dry, carefully poke the wire ends of the wings into the sides of the cake.
A Quick Note on ‘Edibles’: Always, always use products labeled ‘edible’. Some things are labeled ‘non-toxic’, but that doesn’t mean they’re food. It’s a critical food safety rule I drill into my staff.
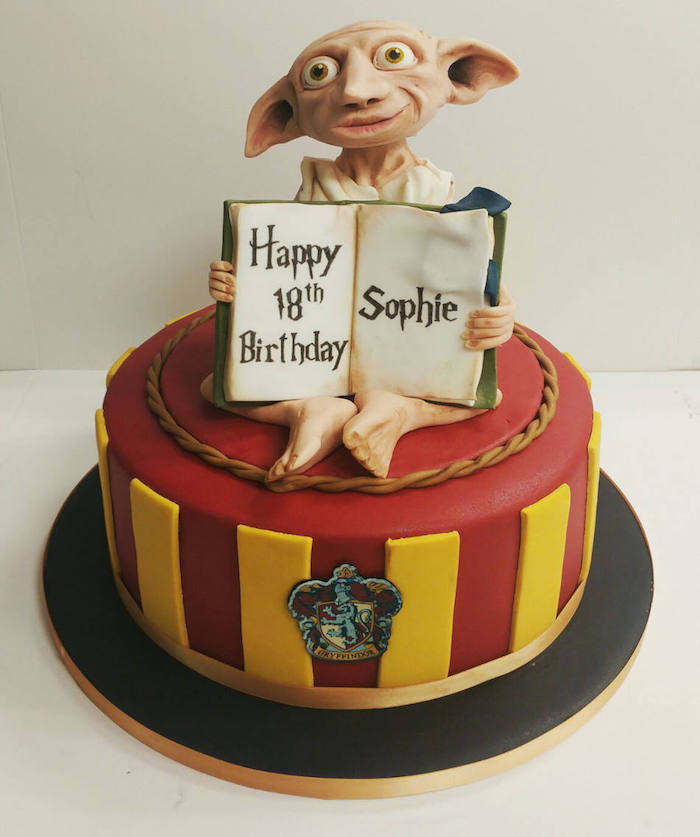
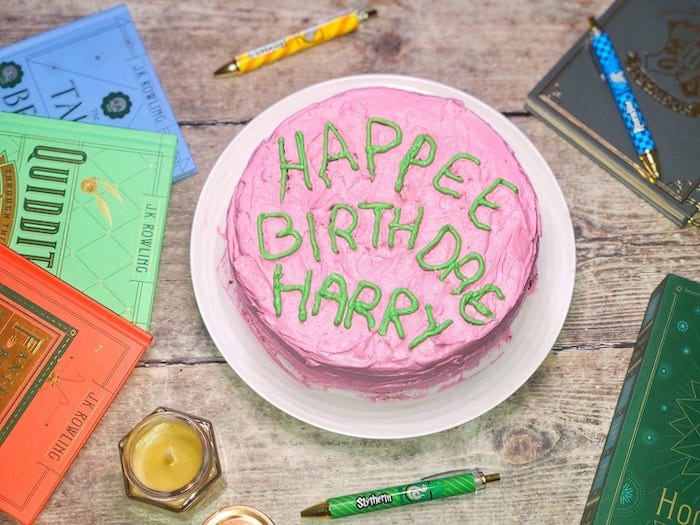
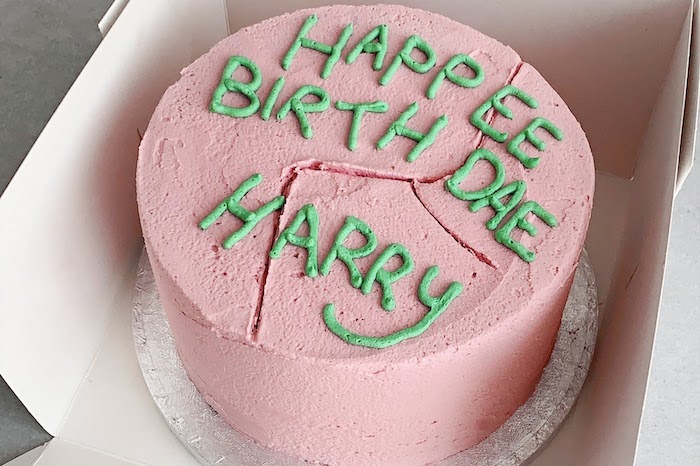
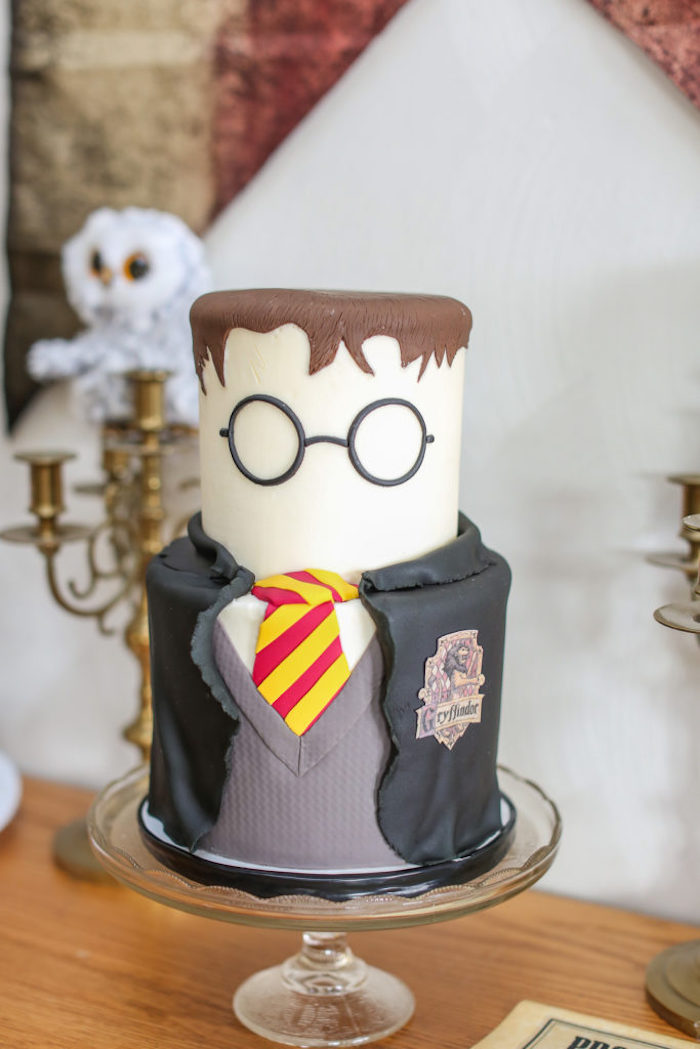
Project Breakdown: The ‘Happee Birthdae’ Cake
This cake is all about charm and character. Its beauty is in its imperfection, which makes it a fantastic project if you’re just starting out. No need to stress over smooth sides or perfect lettering!
The whole goal here is to capture that lovingly homemade feel. This is a cake made by someone who’s not a master baker, and that’s what makes it so great.
- The Cake: A simple round cake is perfect. Don’t even worry if it has a slight dome on top—it actually adds to the look.
- The Frosting: This is one of the rare times I’d recommend a simple American buttercream over ganache. We want that slightly crusty, imperfect texture. Just mix powdered sugar, butter, a splash of milk, and vanilla. To get that iconic cracked look, frost the cake, then pop it in the fridge until the surface is firm. Then, take a spatula and gently press and pull at the surface to create cracks.
- The Colors: Getting the colors right is key. The pink should be a slightly muted, dusty rose, not a hot pink. The green is a classic leaf green. Good to know: Use gel food colors (like Americolor or Chefmaster) instead of the liquid drops from the grocery store. Gels are super concentrated and won’t thin out your frosting.
- The Lettering: The messy writing is the star of the show. Use a piping bag with your green frosting. Don’t even bother with a piping tip; just snip a small hole in the end of the bag. Write ‘Happee Birthdae Harry’ just like that. Let your hand be a little shaky. The mistakes are what make it perfect.
It’s funny, I once had a client order a huge, polished wedding cake, but for the groom’s cake, she wanted this exact design. She said it represented the start of their story, reading the books together as kids. It’s a great reminder that a cake’s real value doesn’t always come from technical perfection.
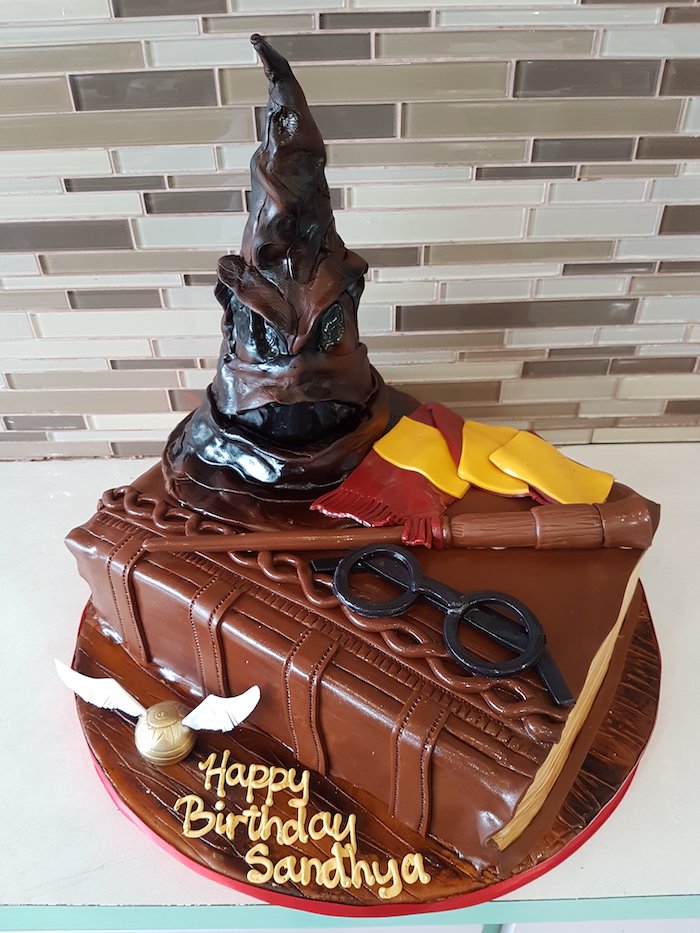
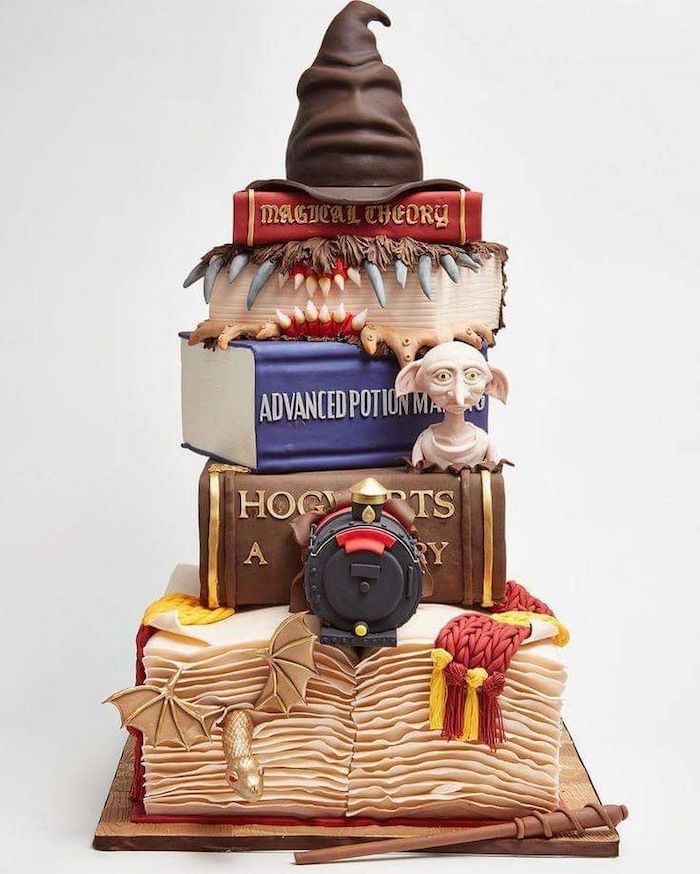
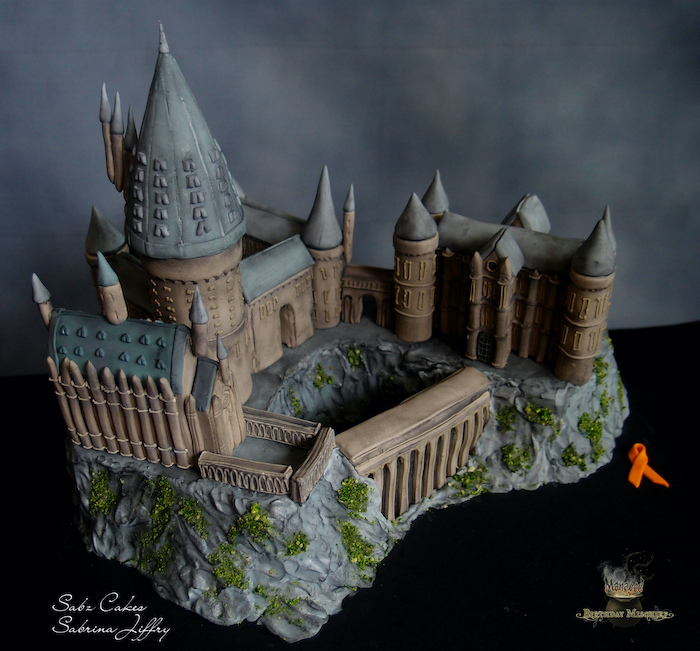
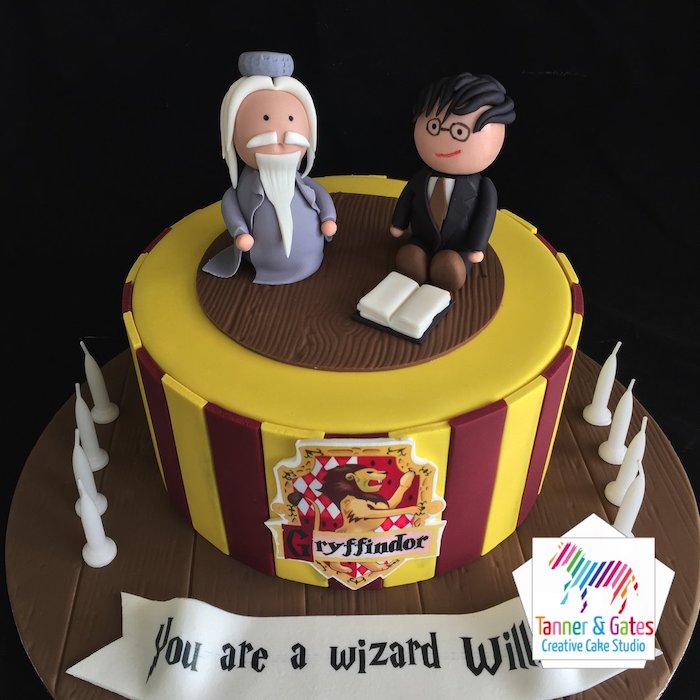
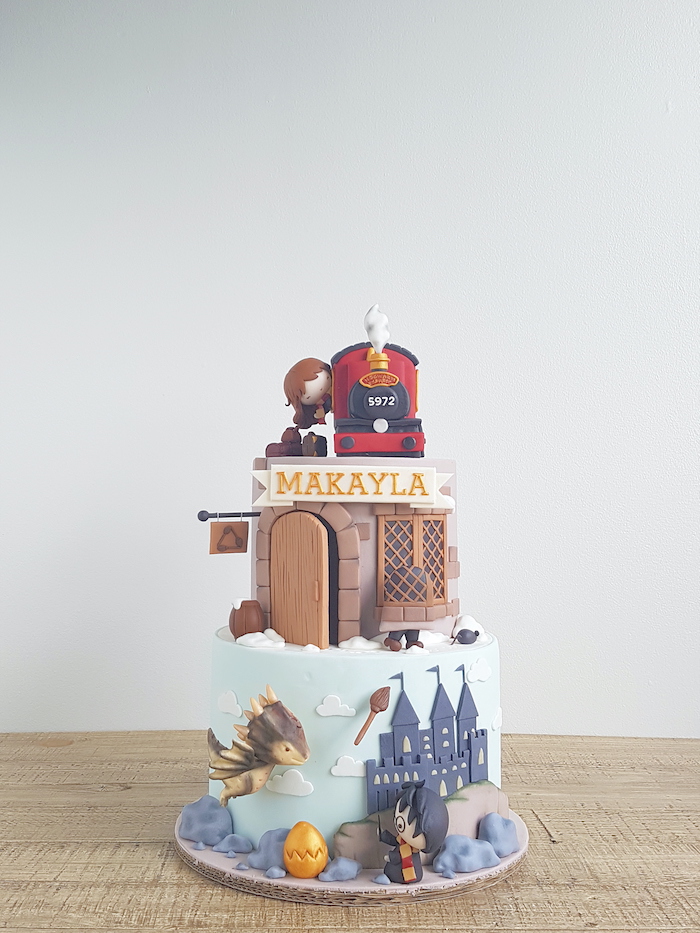
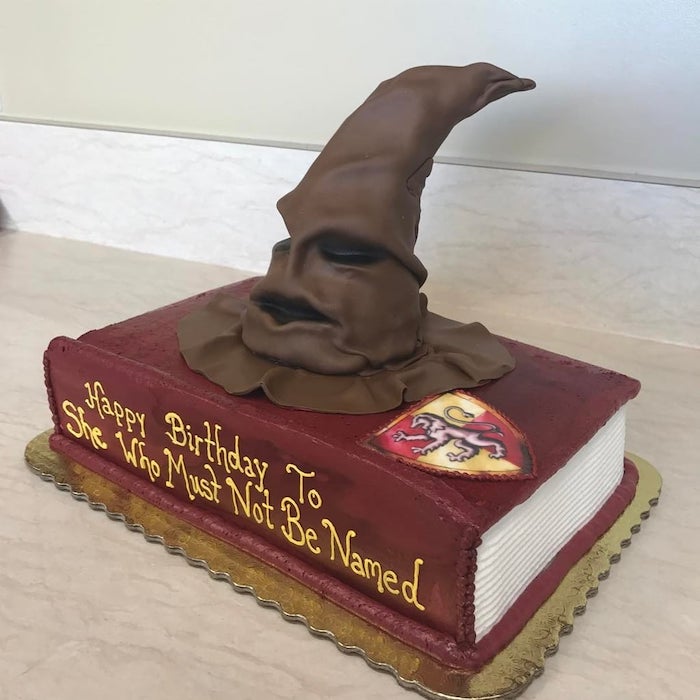
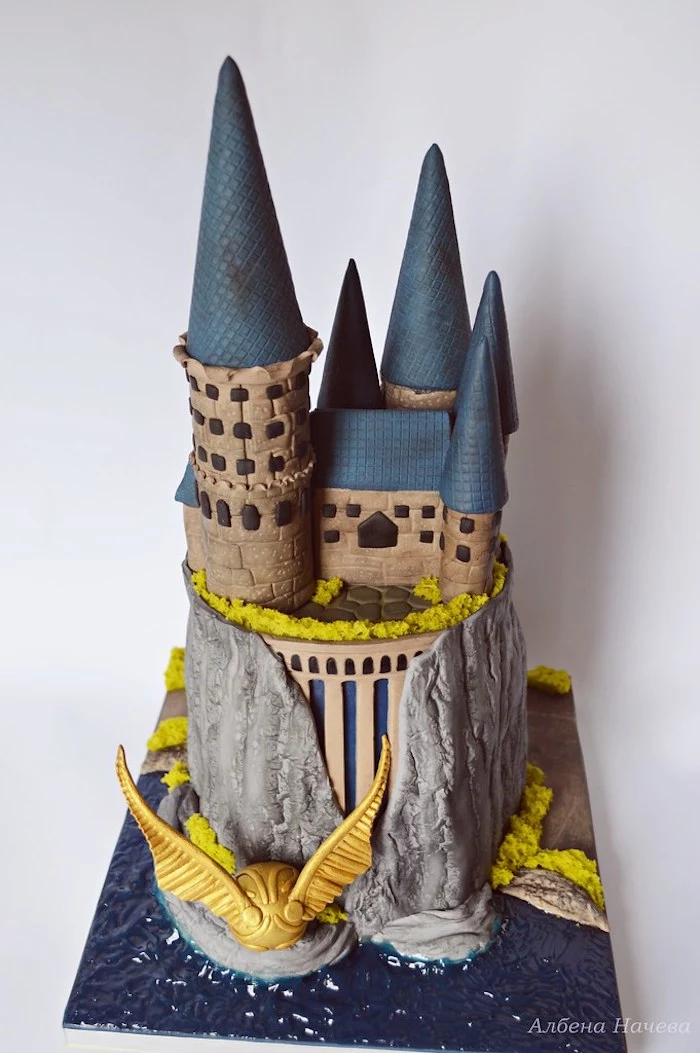
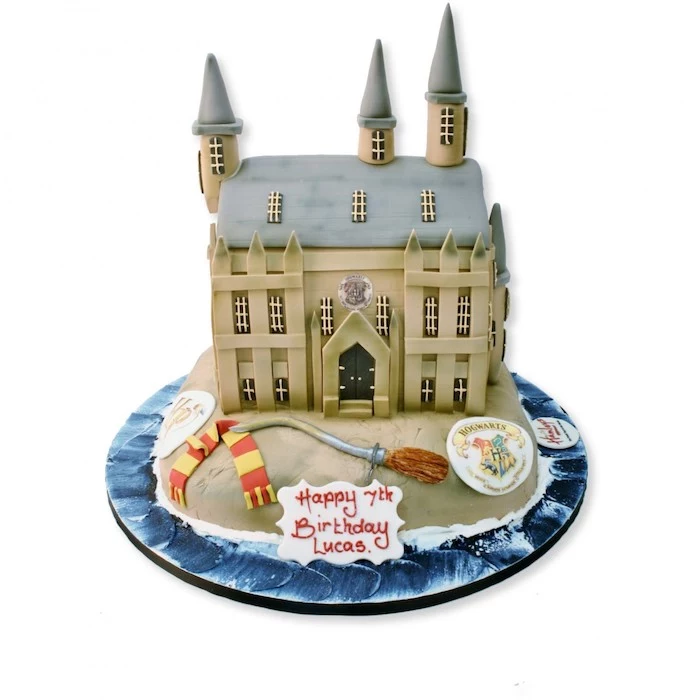
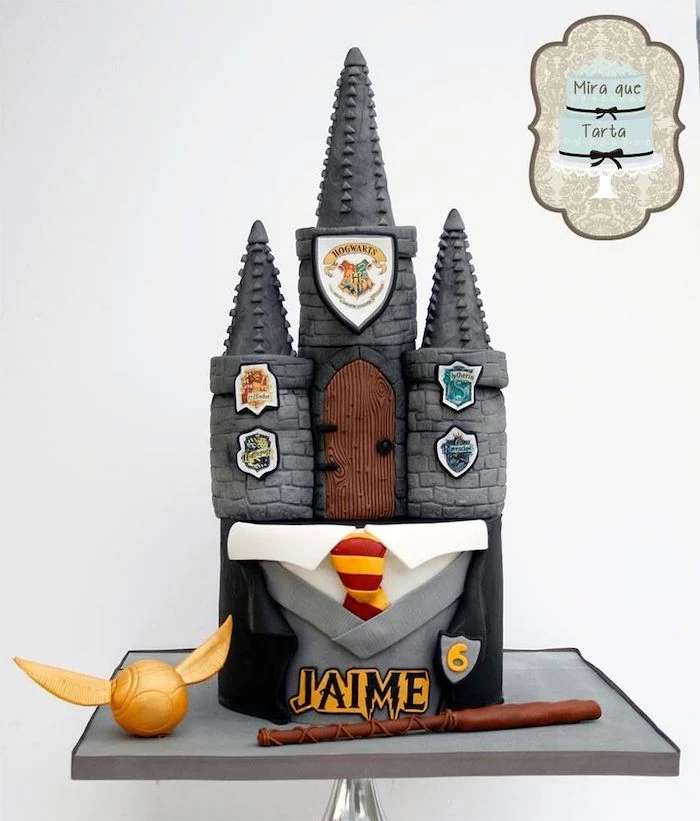
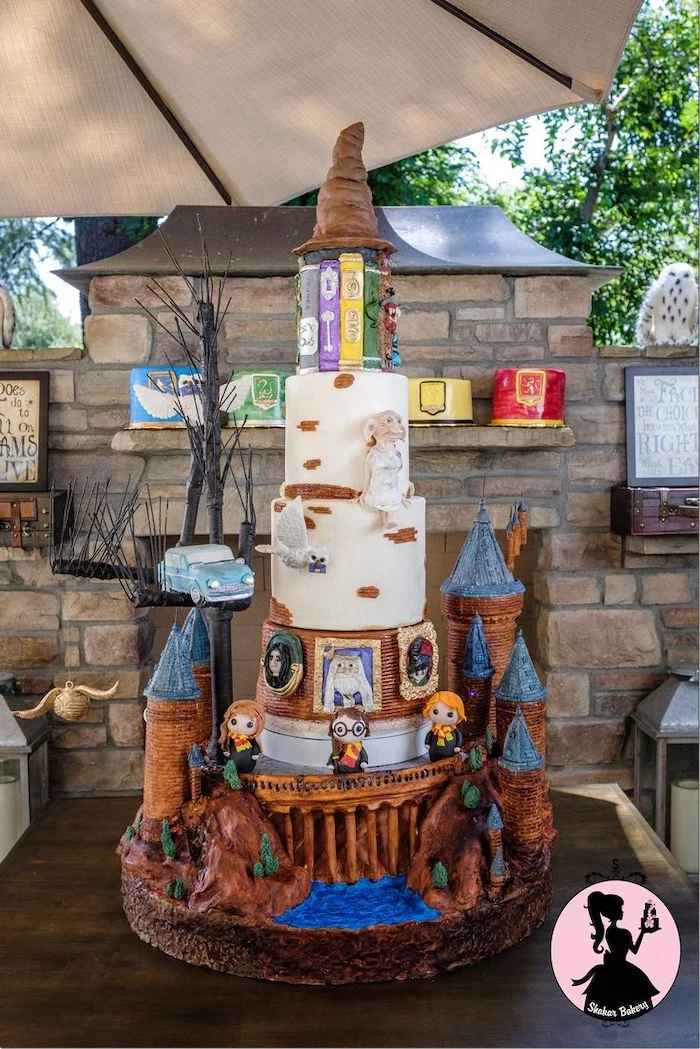
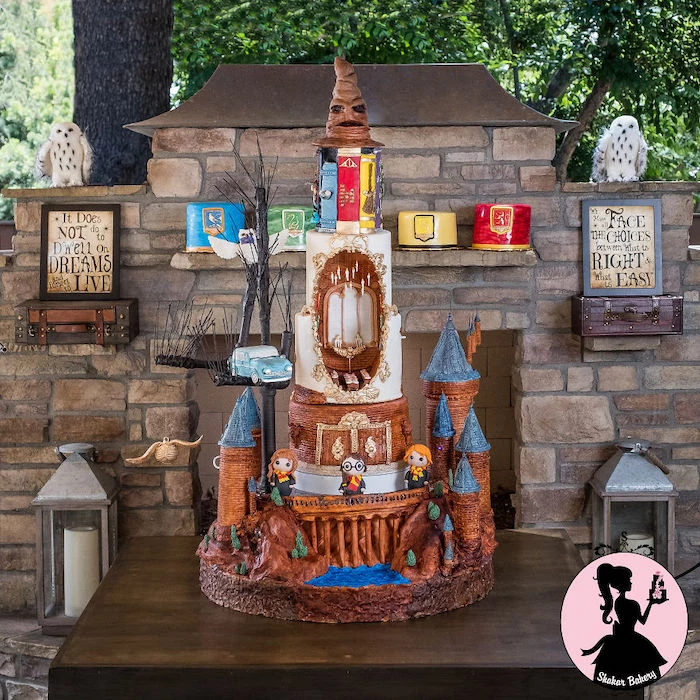
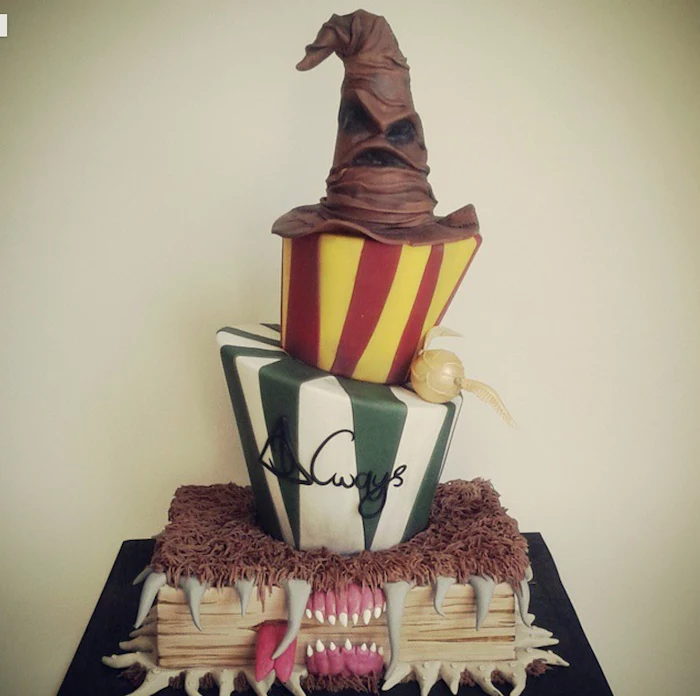
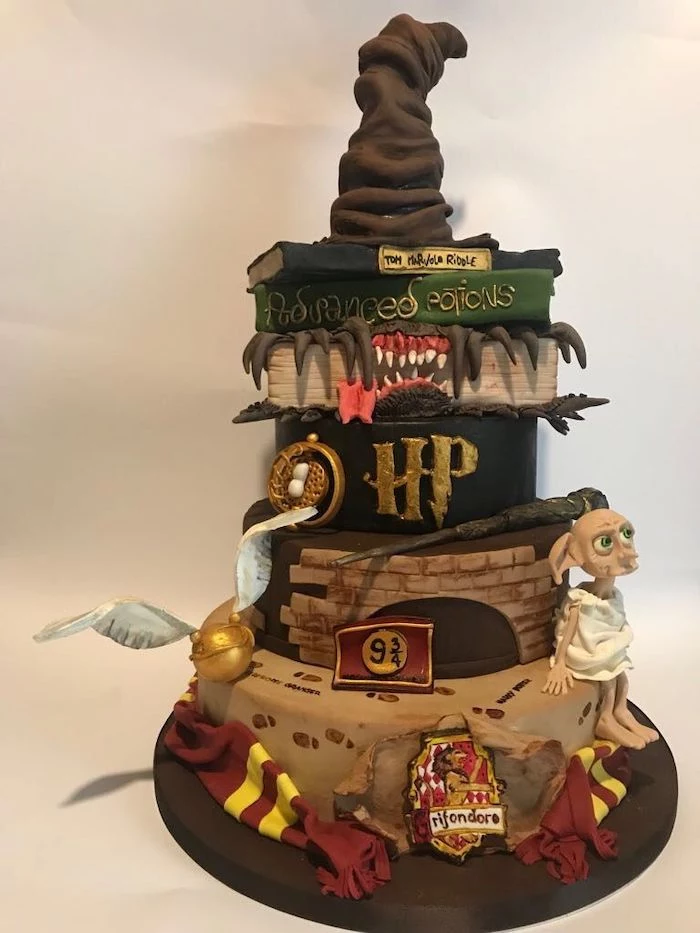
Moving to Advanced Structures: Monster Books & Castles
Okay, projects like these are on a whole different level. They require serious planning, internal supports, and many, many hours. I wouldn’t recommend jumping into these as a beginner. This is where you graduate from baker to cake engineer. A full castle cake can take a professional team over a week to build.
Sculpting with Rice Krispie Treats (RKT)
For big, lightweight, or weirdly shaped parts—like the cover of the Monster Book or castle turrets—we don’t use cake. We use RKT. But it’s not the soft, gooey kind you eat. We make a much denser version for sculpting by using about half the amount of marshmallow and butter from the standard recipe. This creates a stiff, clay-like material you can press into a mold or carve with a serrated knife once it’s cool.
Internal Frames and Food Safety
For a giant structure, you absolutely need a non-edible internal frame built from food-safe materials, like sanitized PVC pipes and food-grade plastic plates. The cake never touches these materials directly; it sits on its own cardboard rounds. We literally draw up a blueprint before we even bake the first layer.

Next-Level Texturing and Coloring
- Monster Fur: For that book’s fur, we rolled out a sheet of brown fondant and then spent hours snipping at it with a small, clean pair of scissors to create a shaggy texture.
- Stone Walls: We get realistic stone texture by pressing silicone texture mats into the fondant. Then, we use an airbrush with different shades of grey and brown to create an aged, weathered look.
- Isomalt for Windows: Those glowing castle windows are made from isomalt, a sugar substitute you can melt and pour like glass. But a word of warning: this stuff is extremely dangerous. It melts at over 150°C / 300°F and can cause severe burns. This is a pro-only technique that requires special gloves and eye protection.
Honestly, for a cake this complex, you’re not just paying for a cake; you’re paying for engineering. If a big, heavy cake isn’t built right, it can collapse and genuinely hurt someone. For projects of this scale, I’d strongly advise you to hire a professional.
Safety, Storage, and Transport: The Final Boss
You did it! Your amazing cake is finished. Now you just have to get it to its destination in one piece.
Food Safety First
This is my top priority. The ‘temperature danger zone’ where bacteria loves to grow is between 5°C and 60°C (41°F and 140°F).
- Fillings Matter: If your cake has a perishable filling like cream cheese frosting or fresh fruit, it HAS to be refrigerated. A cake with a stable ganache shell can sit at a cool room temperature for a day, but one with a cream cheese filling cannot.
- Keep it Clean: Use clean tools, clean surfaces, and wash your hands constantly. It’s second nature in a pro kitchen, and it should be at home, too.
Getting Your Cake from A to B
I’ve heard absolute horror stories of cakes sliding around in the car. Here’s how to avoid disaster.
- Chill the Cake: A cold cake is a firm cake. Always chill it thoroughly before it has to travel.
- Use a Sturdy Box: The box should be just a little bigger than the cake board. Too much wiggle room is your enemy.
- Find a Level Surface: Trust me on this: the floor of your car is your best friend, not the seat. Put a non-slip mat under the box to be extra safe.
- Drive Like a Grandma: No sudden stops, no sharp turns. It sounds obvious, but you’d be surprised what you forget when you’re in a hurry.
Making these cakes is a craft that blends science, art, and a bit of engineering. It takes practice and a lot of patience. Start simple, master a stable cake and a smooth ganache finish, and build your skills from there. Every cake you make, perfect or not, is a lesson. And that, right there, is its own kind of magic.
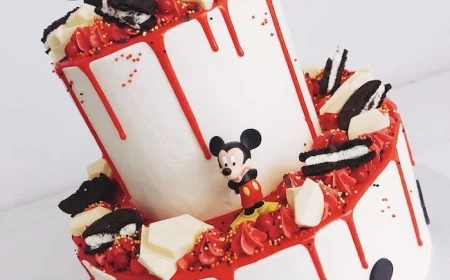
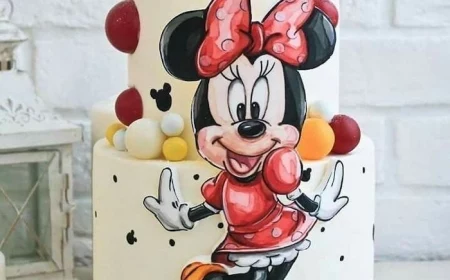
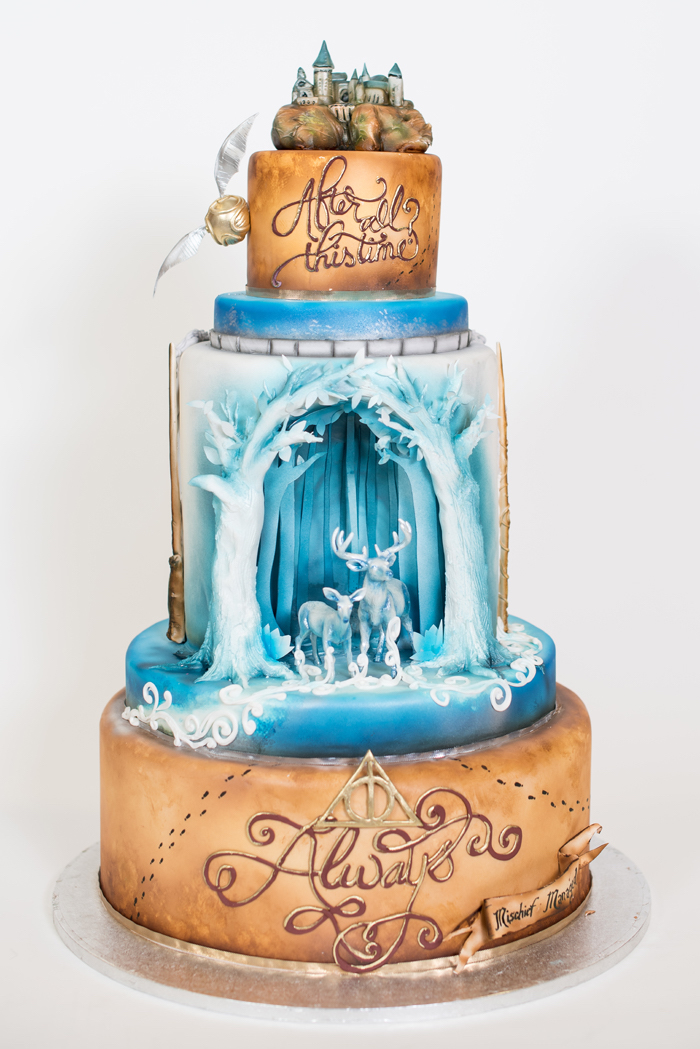
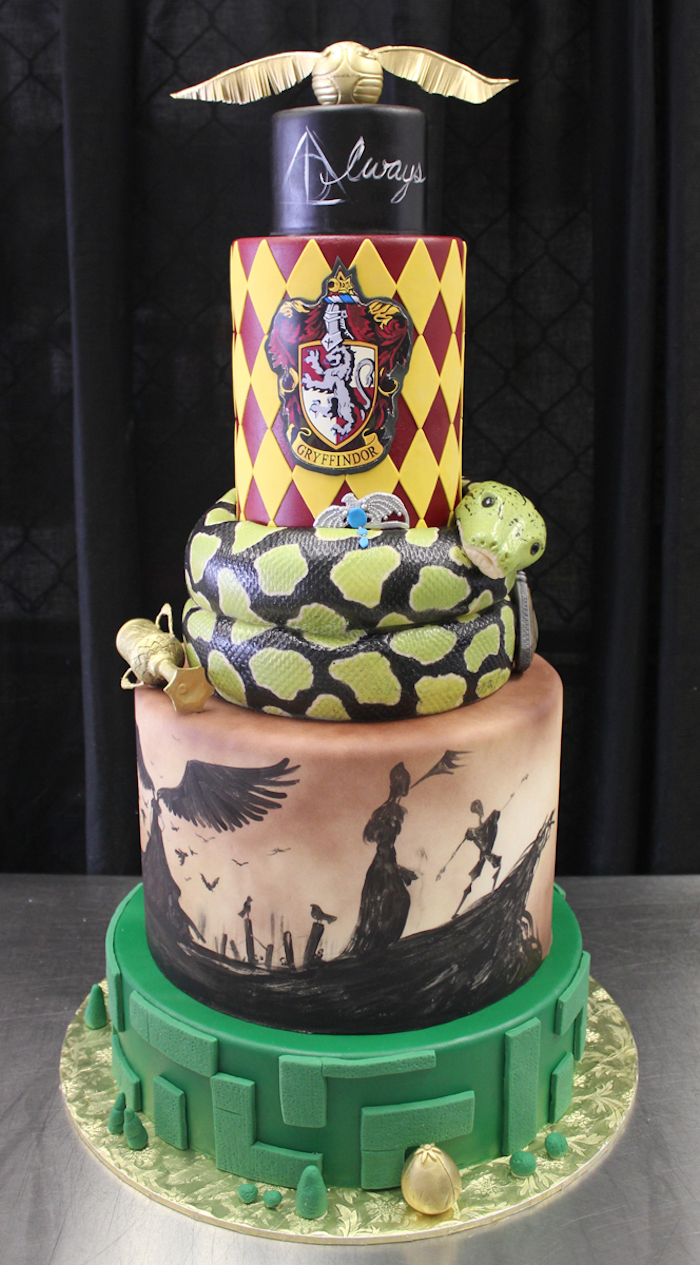
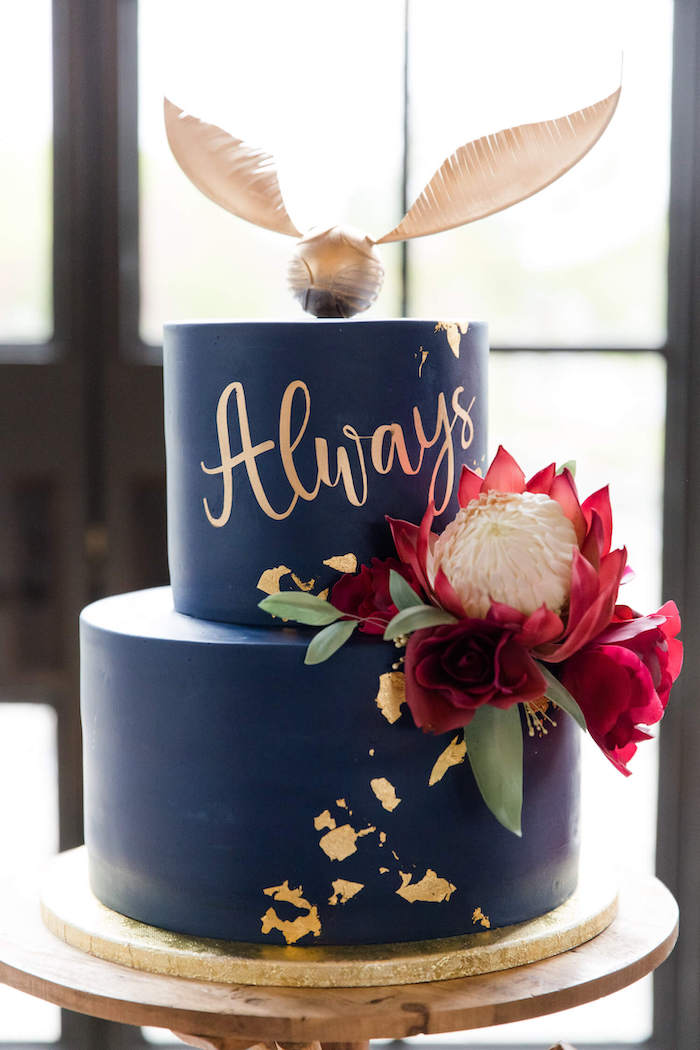
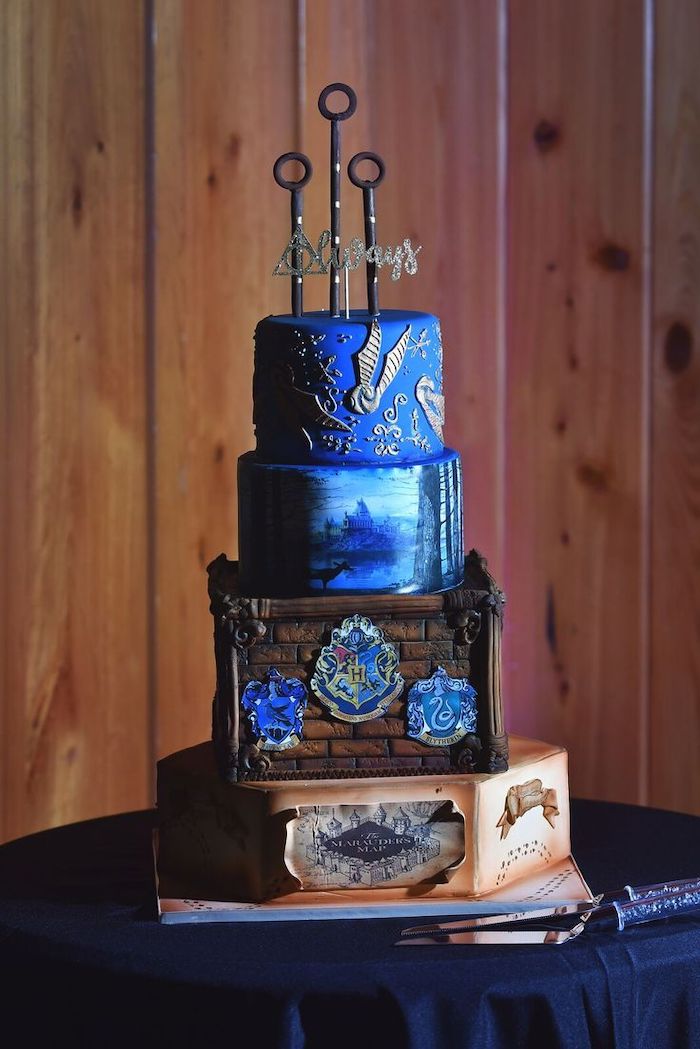
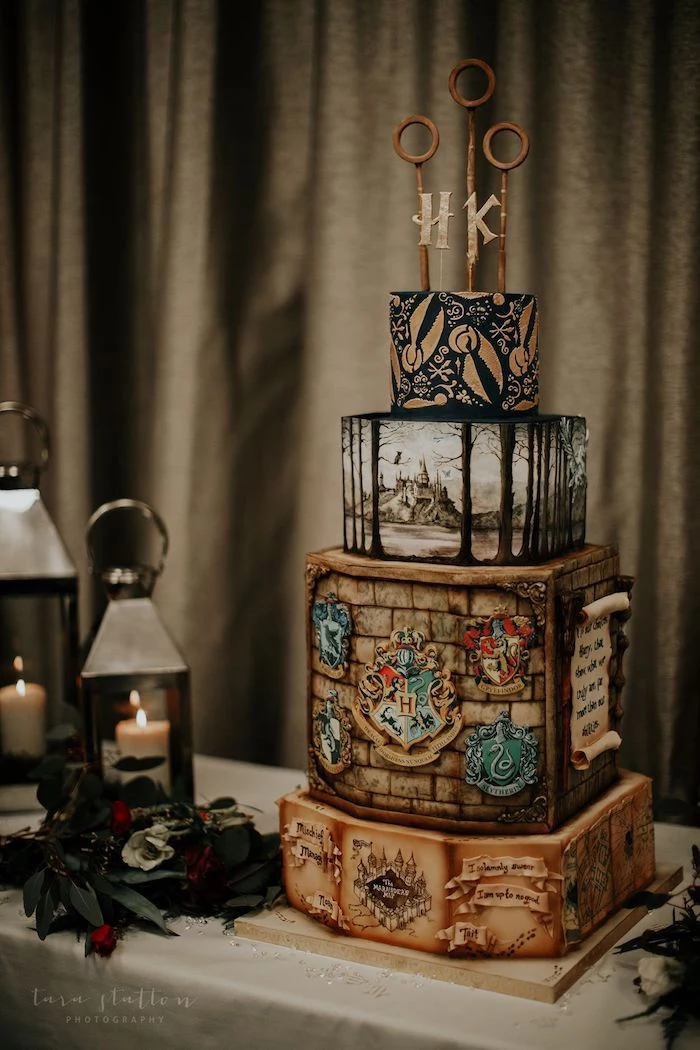
Inspiration Gallery
The Ganache Shield: Before applying fondant to a carved cake, a solid layer of chocolate ganache is your best friend. A 2:1 ratio (dark chocolate to heavy cream) creates a rock-hard shell when chilled. Apply it, smooth it with a hot bench scraper, and let it set completely. This creates perfectly sharp edges and a stable surface that prevents the cake from bulging under the fondant’s weight.
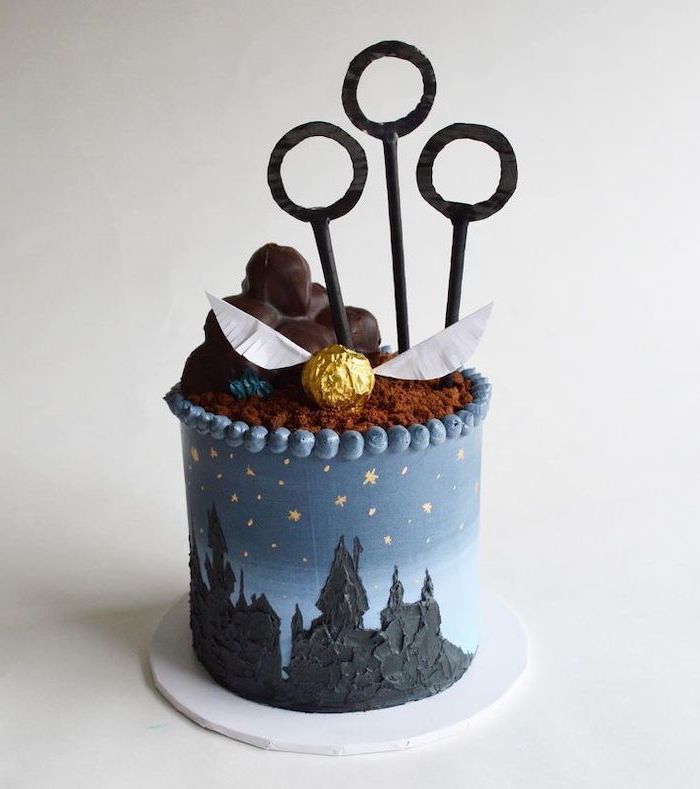
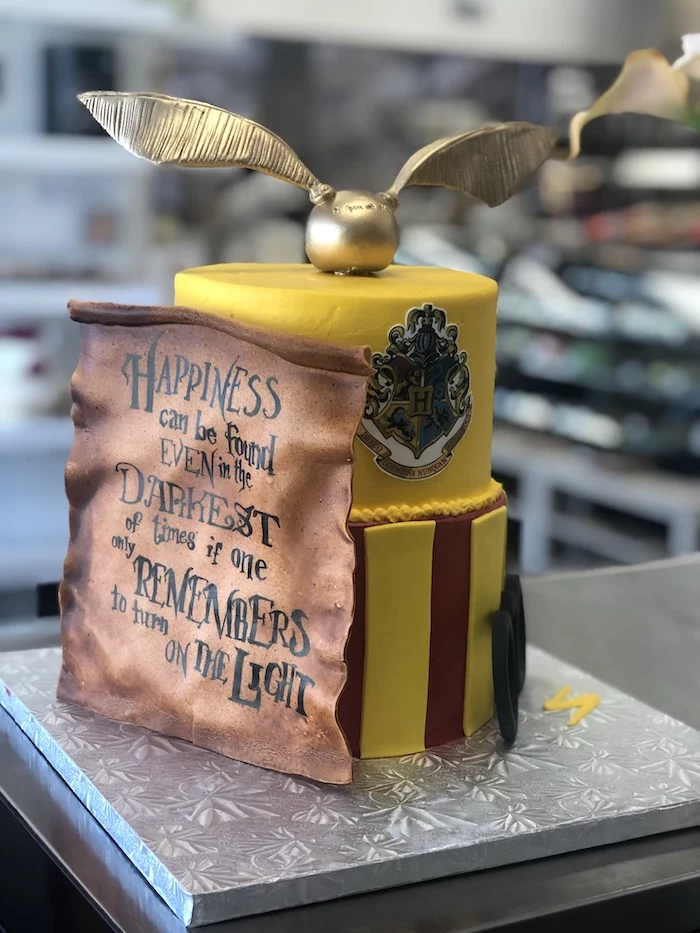
Did you know? Isomalt, the sugar substitute used for creating edible glass, gems, and water effects, must be heated to over 300°F (150°C). It requires respect and care, but the magical, transparent results are impossible to achieve with any other edible medium.
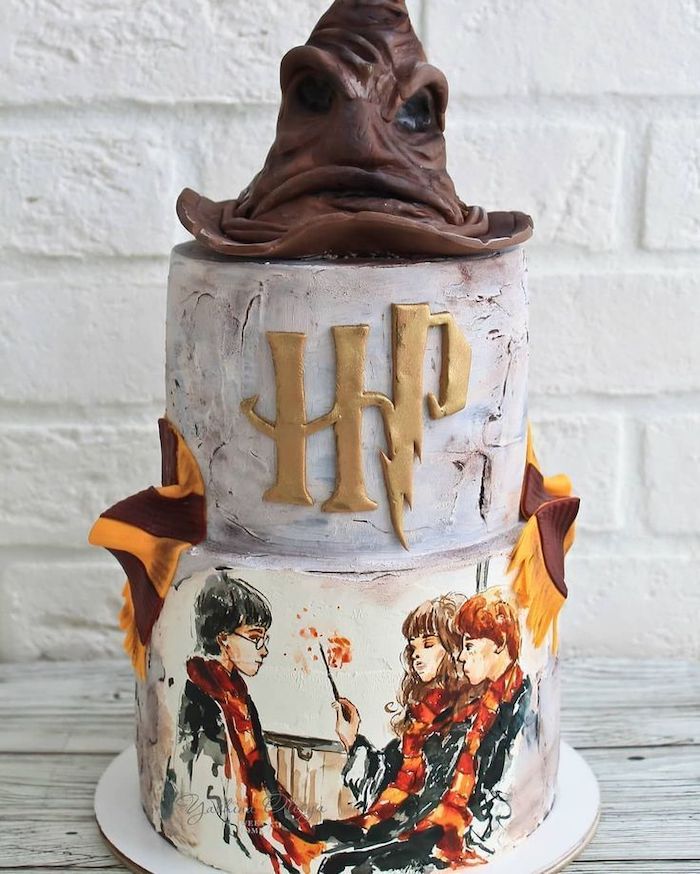
How do I get my colors so vibrant and deep, like a Slytherin green or a Gryffindor red?
The secret is to let your colors develop. When you add gel color (brands like Americolor or Chefmaster are fantastic) to fondant or buttercream, the shade you see initially is not the final result. Mix it to a shade lighter than you want, then cover it and let it rest for at least an hour, or even overnight. The color will deepen significantly as the dye molecules saturate the sugar.

- Create realistic fur for a Monster Book of Monsters by snipping at the fondant with small, sterile scissors.
- Press a crumpled piece of aluminum foil onto grey fondant to mimic the texture of a stone wall for a castle cake.
- Use a wood grain impression mat or a clean, stiff brush to give brown fondant the look of an old wand or a treasure chest.
The key to magic is texture. Even simple techniques can transform a smooth cake into a realistic object.

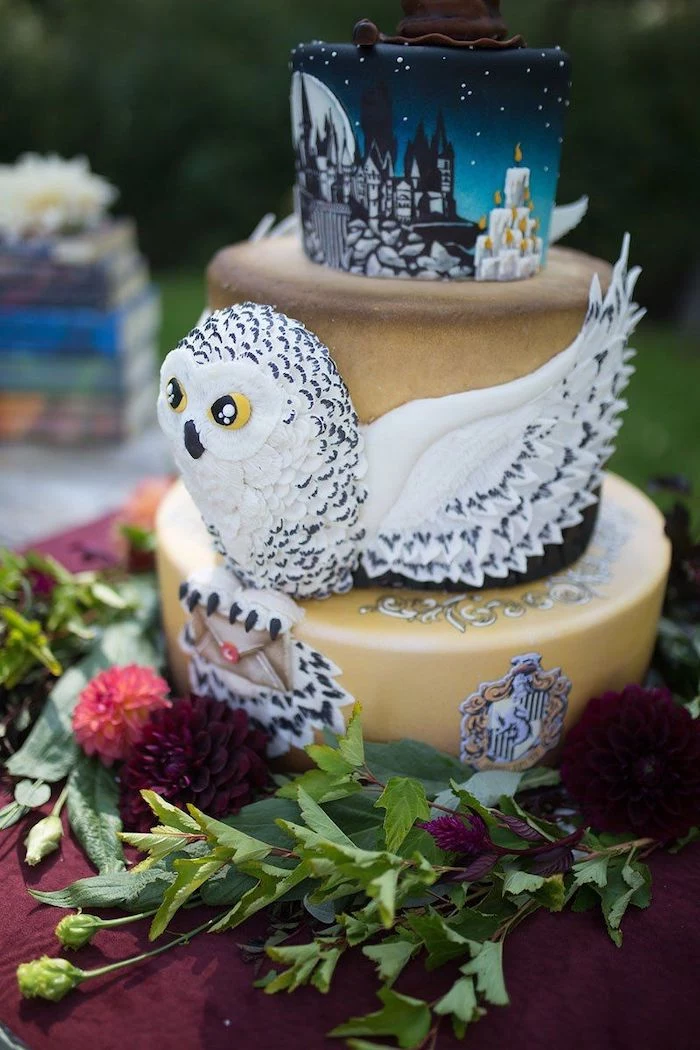
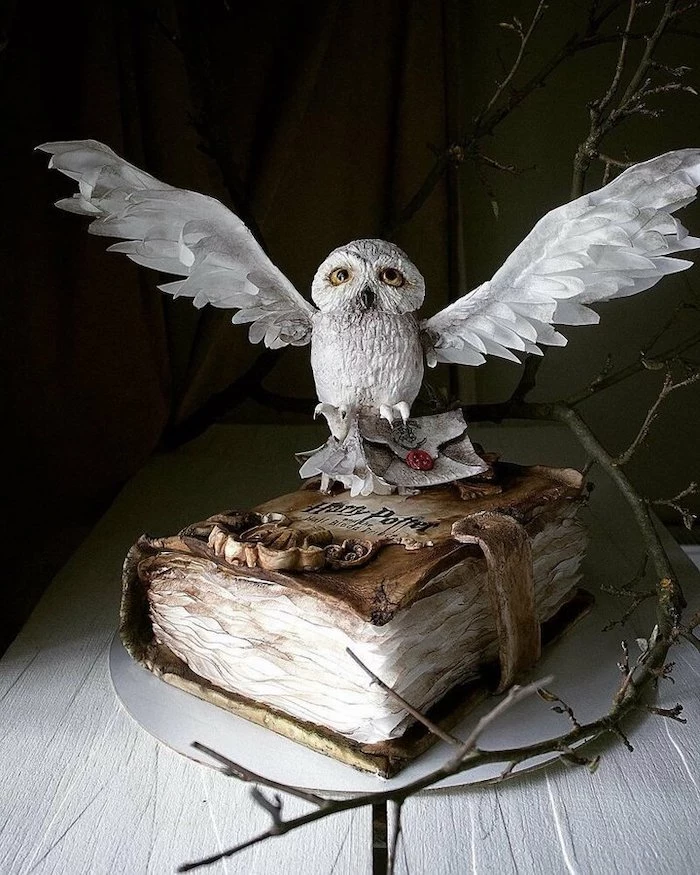
Modeling Chocolate: Your go-to for sculpted elements like wands, faces, or a golden snitch. It holds its shape beautifully and blends like clay. It’s more forgiving than fondant for detailed work.
Gumpaste: The choice for delicate, air-dried pieces like flower petals, feathers, or lettering that need to be hard and lightweight. It dries rock-solid but is brittle.
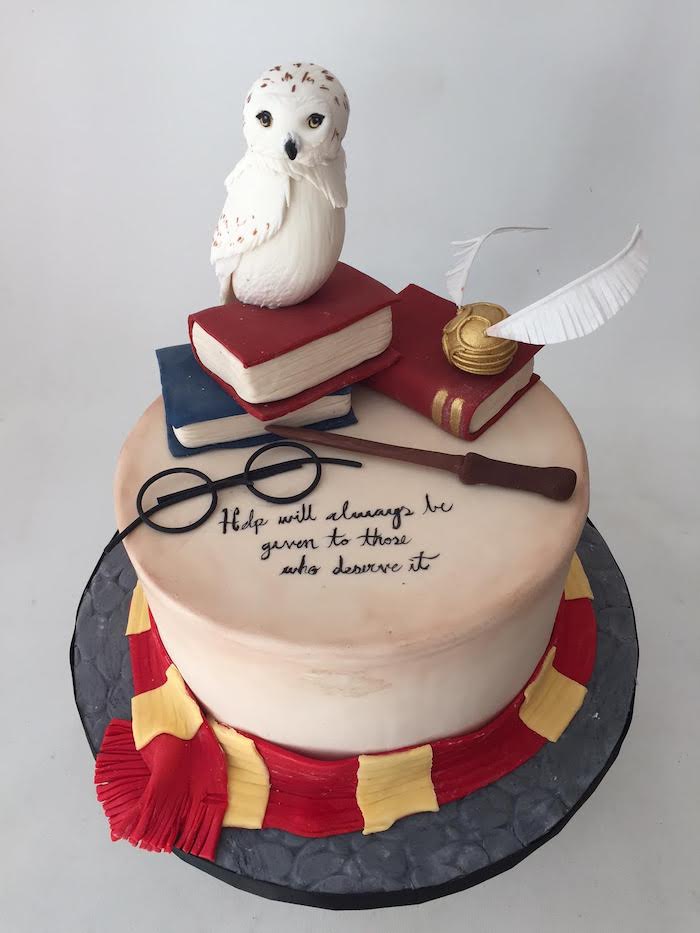
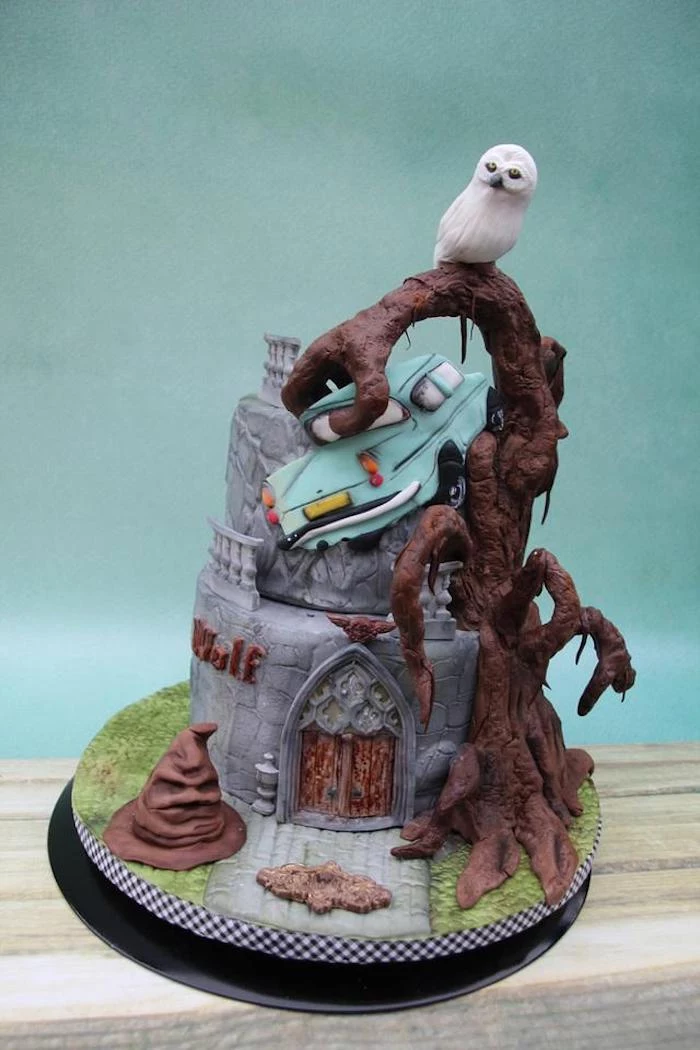
For a figure like Hedwig, you might use modeling chocolate for the body and gumpaste for the individual feathers.
Don’t throw away cake scraps from carving! Mix them with a little buttercream or ganache to create a firm, delicious cake-pop-style dough. This is perfect for sculpting smaller details, like the turrets on a Hogwarts castle or the rounded shape of a cauldron, saving you time and reducing waste.
A single teaspoon of black gel food coloring contains an immense amount of dye. Over-saturating your buttercream or fondant to achieve a deep black can not only stain mouths but also leave a bitter, chemical aftertaste.
To avoid this, start with a chocolate-based buttercream or dark chocolate fondant. You’ll need far less black food coloring to reach a true, deep black, preserving the delicious taste of your creation.
For towering cakes, standard plastic dowels might not be enough. Consider a central support system. A threaded metal rod (available at hardware stores, just ensure it’s food-safe or encased in a straw) can be run through the center of all your tiers, bolted at the bottom of the baseboard. This provides unparalleled stability for transport and display.
The Unsung Hero: Cake Boards. Never stack a tier directly onto another cake. Each cake tier, no matter how small, needs its own cardboard cake round underneath. The dowels in the tier below will support this board, transferring the weight down to the base, not onto the soft cake below it. This is the fundamental principle of cake engineering.
- Always use a spirit level to check your tiers are perfectly horizontal as you stack.
- A small, offset spatula is invaluable for smoothing ganache in tight corners.
- Bubble tea straws are a fantastic, wide, and easy-to-cut alternative to traditional cake dowels for lighter tiers.

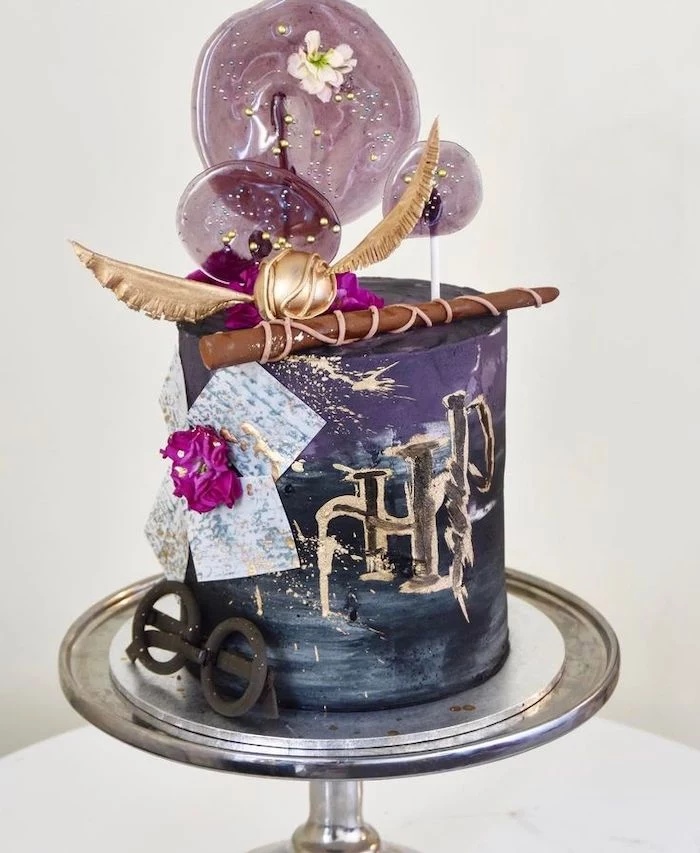
Want to create ethereal, floating effects, like a Patronus or wisps of magic? Wafer paper is your answer. This edible paper can be cut, steamed to become pliable, and shaped into incredible, lightweight forms that seem to defy gravity. Attach them to your cake with a tiny bit of clear piping gel.

My sculpted cake started to lean after a few hours! What happened?
This is likely due to the cake ‘settling’. After stacking and filling, the weight of the tiers compresses the cake and filling, causing slight bulging or leaning. Always let a filled and stacked cake settle for several hours (or overnight in the fridge) before you do the final ganache coat and fondant work. This allows the structure to stabilize before you commit to the decoration.
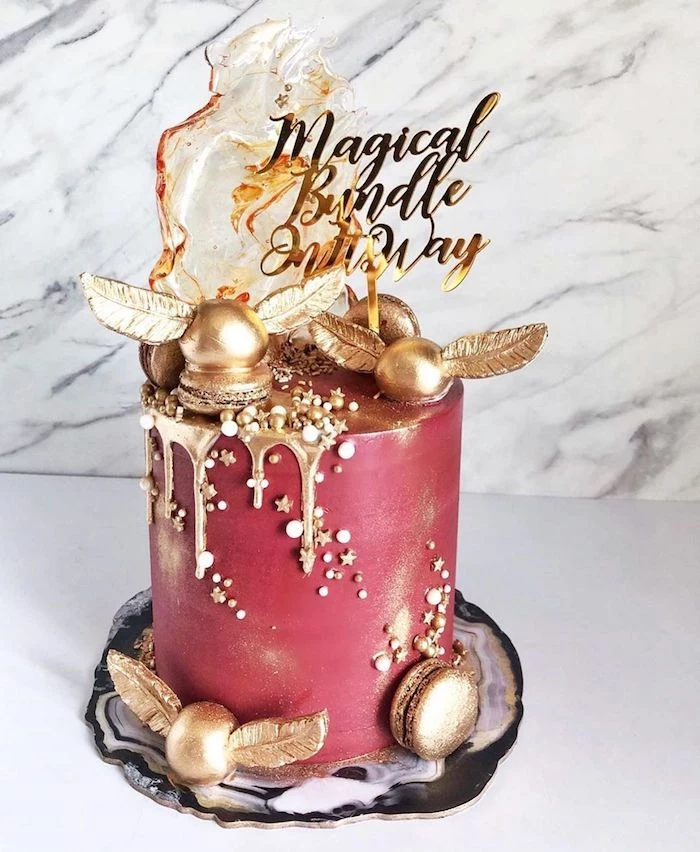
For that magical shimmer, edible dusts are essential. Use a soft, fluffy brush to apply lustre dusts (like those from Rolkem or Roxy & Rich) for a pearlescent sheen on a Patronus. For an intense metallic finish on a Golden Snitch or coins for Gringotts, mix metallic highlighter dust with a few drops of clear, high-proof alcohol (like vodka) to create a vivid, edible paint.

Transporting a magical masterpiece is nerve-wracking. Always use a cake box that is taller than your cake. Place a non-slip mat (like a piece of shelf liner) in the trunk or on the floor of your car, and put the box on top of it. Drive slowly, and avoid sharp turns and sudden stops. The floor of the car is much more level and stable than the seat.
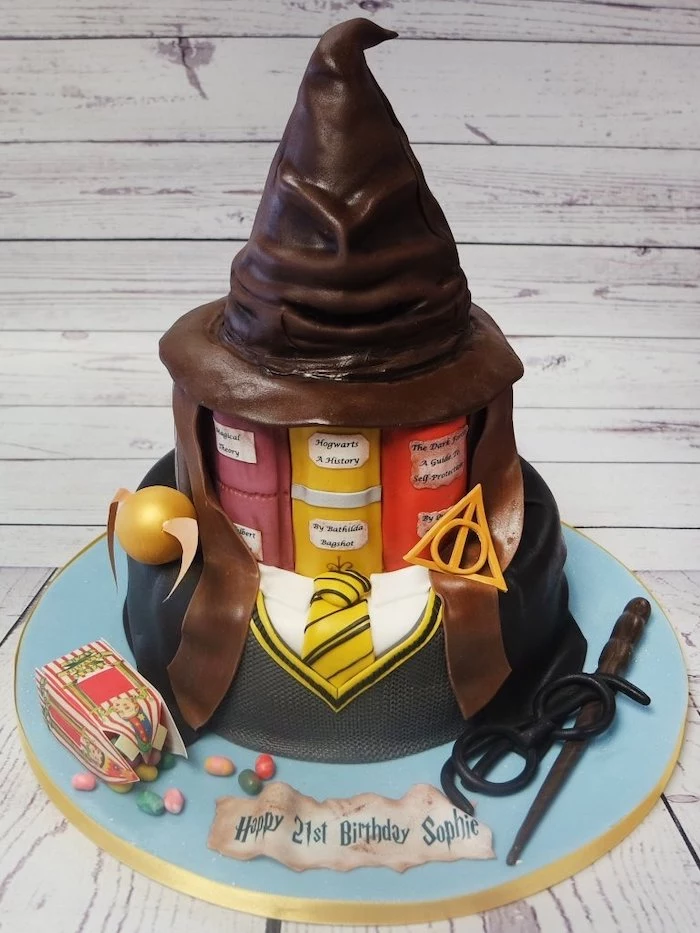
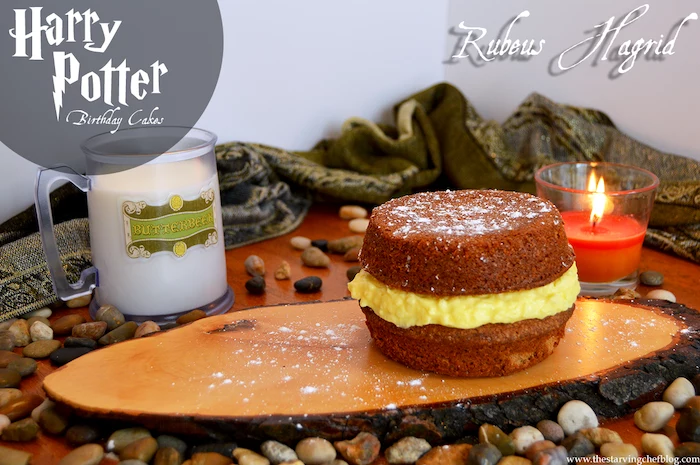
- Get that iconic ‘Happee Birthdae Harry’ look right.
- The lettering should be uneven and childlike.
- Use two shades of green: a base lime green with darker green squiggles on top.
The secret? Don’t aim for perfection. The charm of Hagrid’s cake is in its heartfelt imperfection. A slightly wobbly, misspelled message is more authentic.

Satin Ice Fondant: A popular all-rounder, known for its great taste and pliability. It’s a forgiving choice for beginners covering a classic round cake.
The Sugar paste™ Fondant: A professional favourite for sculpted cakes. It’s known for its incredible elasticity and resistance to tearing and elephant skin, making it ideal for covering sharp edges and complex shapes without cracking.
For a demanding project like the Monster Book of Monsters, The Sugar paste™ would provide the durability you need.
Think beyond the cake itself. Your presentation board is part of the story. Cover a thick cake drum in black fondant and splatter it with white edible paint for a night sky effect. Or, use brown and grey fondant to create a cobblestone floor for a Diagon Alley-themed cake. It elevates the entire design.
A critical rule for stability: Your dowels should all be cut to the exact same height. Use one as a guide to trim all the others. They must be tall enough to support the cake board above, but not so tall that the board is visibly lifted off the cake. Precision here prevents wobbly tiers.

According to a 2019 survey by the Craft & Hobby Association, ‘baking and cake decorating’ is one of the top 5 most popular creative hobbies, with millions of home bakers seeking to replicate professional results.
This surge in interest means more access to professional-grade tools and ingredients than ever before. Brands that were once trade-only are now readily available online, empowering home bakers to tackle truly magical projects.
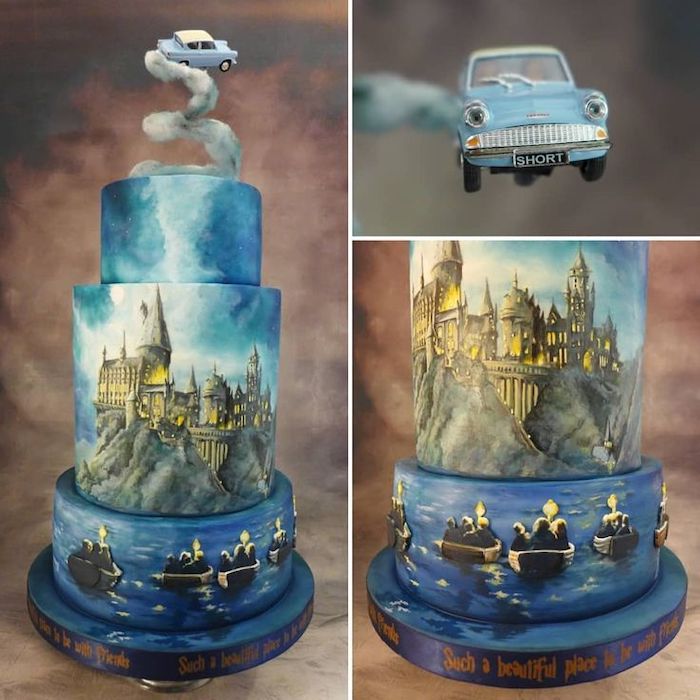
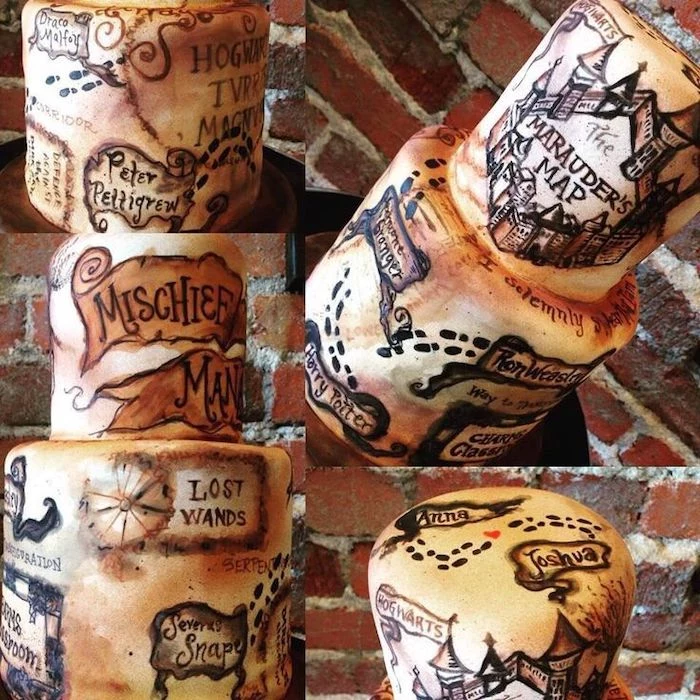
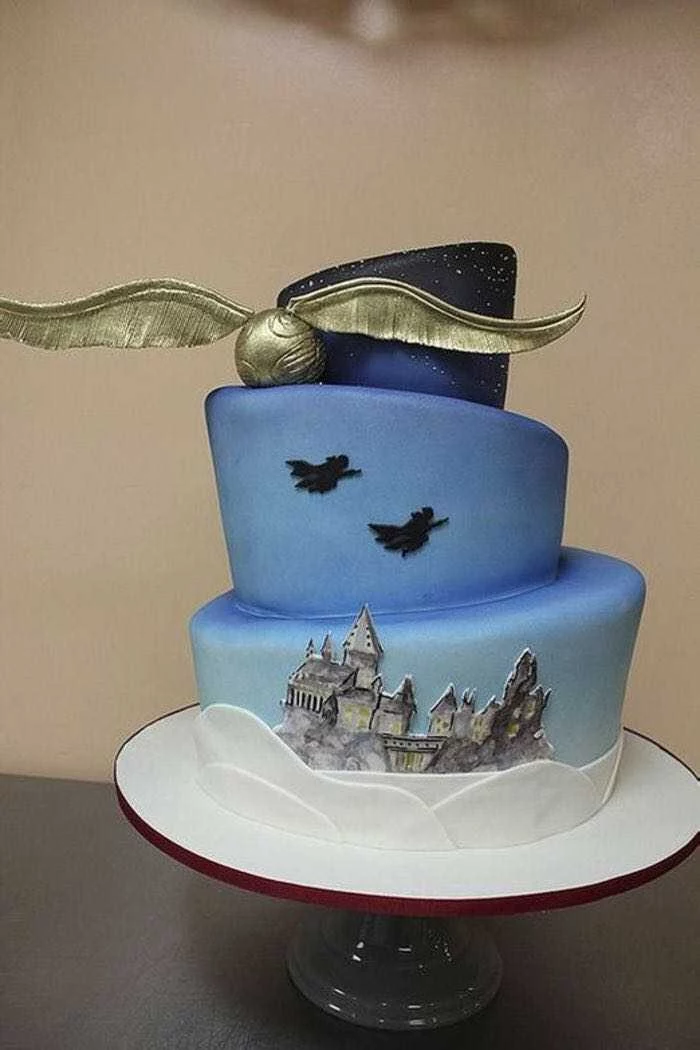
To paint a detailed scene, like the Hogwarts castle against a night sky, treat your fondant-covered cake like a canvas. Use food-grade gel colors diluted with a little clear alcohol. Start with the background colors, letting them dry slightly, then layer on the details with finer brushes. It’s a true blend of baking and artistry.

Is it possible to make a gravity-defying cake element on a budget?
Absolutely. For a simple illusion, like a pouring potion cauldron, you don’t need expensive custom-made structures. A food-safe metal straw or a wooden skewer can serve as the main support. Anchor it firmly in the cake, then build up the ‘pouring’ stream around it using melted chocolate or modeling chocolate. It’s an affordable way to add a dose of magic.
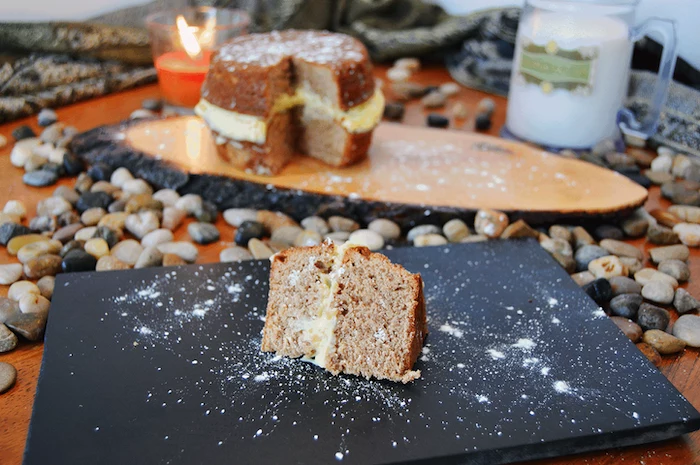
The feeling of cutting into a perfectly structured cake is pure satisfaction. The knife should glide through the fondant and ganache shell, revealing clean, even layers of cake and filling inside. It’s the final proof that your magical creation is not just a pretty face—it’s a delicious, well-engineered dessert from the inside out.


- Work in a cool, dry room. Humidity is the enemy of fondant and sugar work.
- Knead your fondant thoroughly to activate the gums for a smooth, pliable texture.
- Measure your cake’s height and circumference before rolling out fondant to ensure you have enough coverage.


Don’t forget the airbrush! For subtle gradients, like a sunset sky behind the Hogwarts Express or the ethereal glow of a Patronus, an airbrush is your best tool. Using edible airbrush colors (like those from Kopykake) allows you to build up soft, blended colors that are nearly impossible to achieve with a paintbrush, adding depth and realism to your magical world.