The Real Deal on Micro Braids: A Pro’s Guide to Getting Them Right
After more than two decades in the hair business, I can tell you that few styles are as stunning or as serious as micro braids. I’ve spent thousands of hours in the salon, meticulously parting, braiding, and teaching others the craft. Trends come and go, but the rules for keeping hair healthy under a protective style? Those are timeless.
In this article
Let’s be clear: micro braids are a major commitment. We’re talking time, money, and a dedicated care routine. When they’re done right, they are pure art and a fantastic way to protect your hair. But when they’re done poorly… well, they can cause damage that takes a long, long time to fix.
So, forget the glossy photos for a minute. This is a real-talk guide from a pro’s perspective. We’re going to get into the nitty-gritty of what makes a good braid, the techniques the best stylists use, and the honest truth about who should (and shouldn’t) get this style. My goal is to arm you with the knowledge to find a great braider and protect your hair.

First, Let’s Talk Hair Health (The Non-Negotiable Part)
So many people think braiding is just a simple, repetitive motion. But honestly, doing it right means understanding the hair itself and the forces you’re putting on it. This is what separates a stylist who just does braids from a true hair care professional.
Each strand of your hair has a protective outer layer, kind of like overlapping shingles on a roof. A good braider works to smooth that layer down as they go. Someone with less experience can rough it up, which leads to frizz and weak spots. Then you add the extension hair, which brings weight. While micro braids are great because they distribute that weight across hundreds of tiny braids, each individual section of your own hair has to be strong enough to hold its share. If the section is too small for the braid, you’re setting yourself up for breakage right at the root.

And that brings us to the most critical part: tension.
The number one problem I end up fixing for new clients is damage from braids that were installed way too tightly. When a braid pulls constantly on the scalp, it inflames the hair follicle. You might even see those little red, painful bumps around the braids. That’s your scalp screaming for help! If that pulling doesn’t stop, it can lead to something called traction alopecia. And heads up, this isn’t just temporary shedding. It’s a type of permanent hair loss where the follicle gets so damaged it just gives up and stops growing hair. The hairline is especially vulnerable. A good stylist aims for ‘snug,’ never ‘tight.’ You should be able to smile or turn your head without feeling a sharp, pulling pain. If a stylist ever tells you “beauty is pain,” you need to walk out and find someone else.

A Look Inside the Salon: How the Pros Do It
The difference between a gorgeous, healthy set of micro braids and a disaster is all in the details. Here’s the methodical process we follow that puts your hair’s health above everything else.
Step 1: The Consultation and Serious Prep
Before a single braid is made, a good stylist will have a thorough chat with you. They should look at your hair’s density, check your scalp, and assess your hairline. If you’re a good candidate, then the real prep begins. It’s way more than a simple shampoo.
First, we do a clarifying wash to get rid of any product buildup or oil. Then comes a deep moisturizing conditioner or mask, often left to work its magic under a steamer for about 15-20 minutes. This super-hydrates the hair before it gets tucked away. Finally, we do a careful blow-dry to stretch the hair, which makes parting cleaner and the whole process smoother.

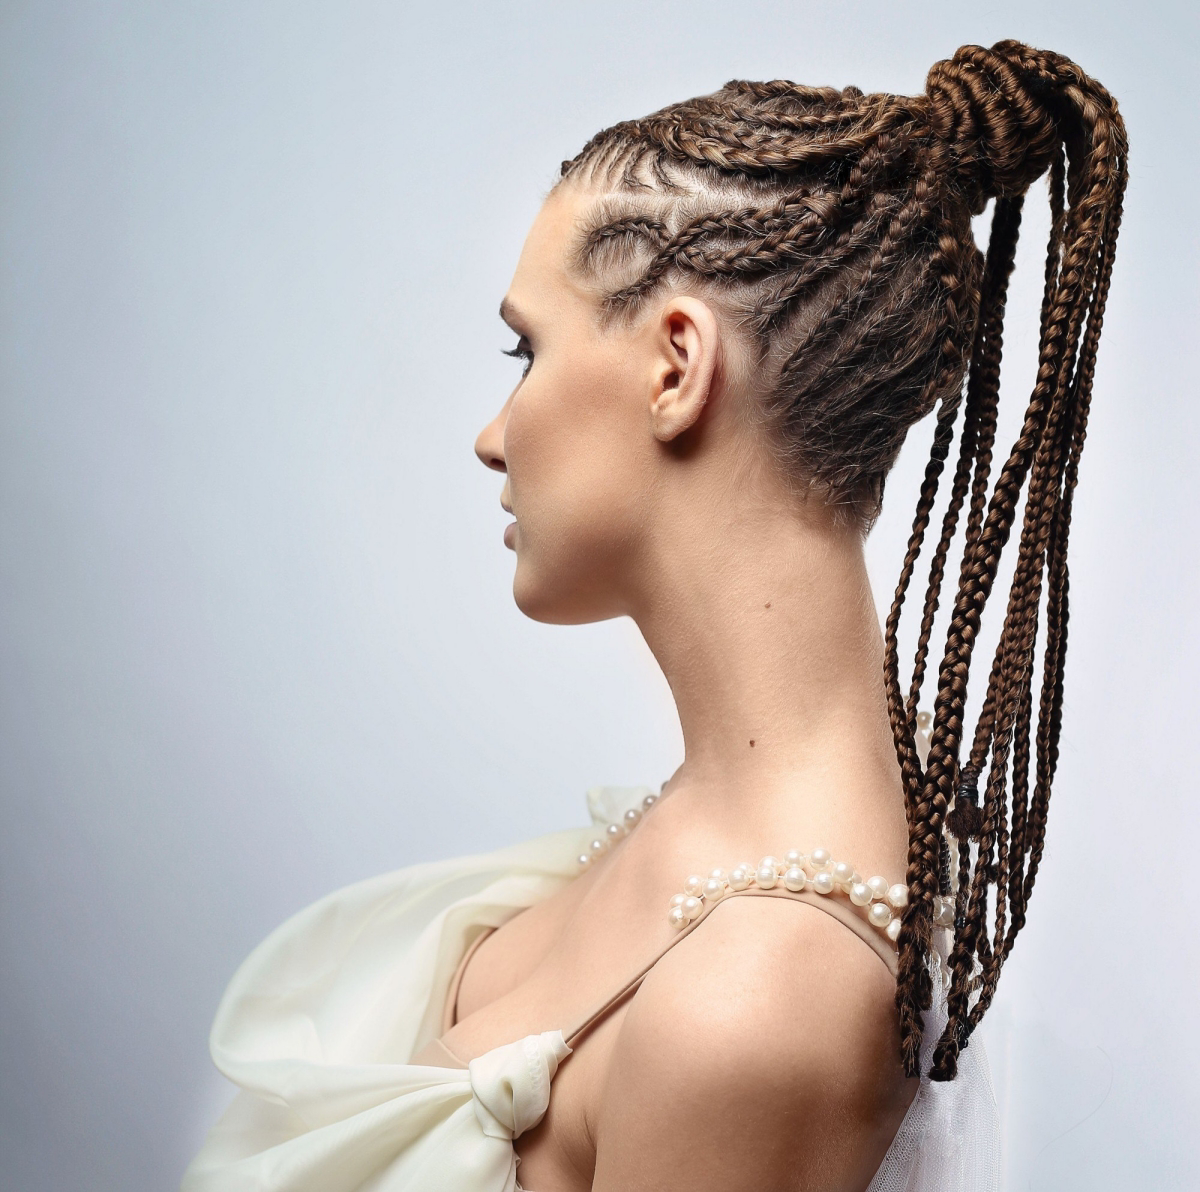
Step 2: The Art of the Perfect Part
Parting is everything. Clean, consistent parts are the sign of a true professional. For micro braids, we typically use a brick-lay pattern. This means the parts in one row are offset from the parts below, just like a brick wall. It helps the braids lay flatter and gives you a fuller look with less scalp showing.
Every single section needs to be consistent. If a section is too big, the braid looks bulky at the root. If it’s too small, it won’t be able to support the weight of the extension hair, leading straight to that breakage risk we talked about.
Step 3: The Feed-In Method for a Healthier Scalp
This is a game-changer. Instead of starting the braid with a big, thick knot of extension hair right at the scalp, the feed-in method is way more gentle. We start by braiding just your natural hair for a few links, and then we gradually feed in small pieces of the synthetic hair. This creates a braid that starts thin and naturally tapers to its full thickness, putting way less stress on your scalp.

Step 4: Sealing the Deal (Safely!)
To keep the braids from unraveling, the ends need to be sealed. The industry standard is a quick dip in hot water. And please, safety first! We’re talking hot, not boiling, water (around 180°F is perfect). A towel is always draped over the client’s shoulders to prevent any splashes. We dip the ends for about 15 seconds, and that’s enough to fuse the synthetic fibers.
What we never do? Use a lighter to burn the ends. The risk is just too high, and it creates scratchy, hard plastic tips. Hair glue is another shortcut to avoid; it’s a nightmare to remove and can cause a ton of breakage.
Your Shopping List: Hair and Supplies
Okay, let’s get practical. The final look depends heavily on the hair you choose. For micro braids, we almost always use synthetic hair. Human hair is just too heavy and way too expensive for this particular style.

- The Best Hair to Buy: Your best bet is high-quality Kanekalon hair. It’s lightweight, grips well, and seals perfectly with hot water. Look for trusted brands like X-Pression or Spectra Pre-Stretched hair at your local beauty supply store or online. The pre-stretched kind saves a ton of time and gives a more natural, less bulky finish.
- How Much You’ll Need: This is the big question, right? For a full head of micro braids, you’ll generally need between 5 to 8 packs of hair, depending on the length and thickness you want. Each pack usually costs between $4 and $7.
Good to know: Some people have a sensitivity to the coating on synthetic hair. If your scalp gets itchy easily, you can do an apple cider vinegar rinse on the hair before your appointment.
Quick ACV Rinse How-To: In a clean sink or basin, mix about 1 part apple cider vinegar with 3 parts cool water. Let the bundles of braiding hair soak in it for 20 minutes. Rinse them really well with plain water, and then hang them to air dry completely. This simple step can be a lifesaver for preventing an itchy scalp!
The Honest Chat: Are Micro Braids Right for You?
This is where I have the most frank conversations. This style isn’t for everyone, and it’s my job to make sure you know what you’re signing up for.
First, your hair has to be in good shape. If you have thinning edges, an active scalp condition, or hair that’s brittle from damage, this style will only make things worse. We have to start with a healthy foundation. Your lifestyle also matters. If you’re a serious athlete or swimmer, you’ll need a more intense maintenance routine to keep your scalp clean and dry.
And then there’s the time and money. I’m always upfront about this. A full installation can take anywhere from 8 to 12 hours. It’s an investment. Price-wise, you can expect to pay anywhere from $300 for a newer but skilled stylist to over $800 for a master braider in a major city. If a price seems too good to be true, it probably is.

Oh, and on the DIY question? I strongly, strongly advise against it. It’s almost impossible to get the parts clean and the tension even when you can’t see what you’re doing. I’ve spent too many hours fixing damage from DIY attempts. This is one style where paying a professional is absolutely worth it.
Keeping Your Braids Looking Great: Aftercare and Takedown
Getting the braids is just step one. How you care for them at home determines how long they last and how healthy your hair is when they come out. A good rule of thumb is to keep them in for a maximum of 8 to 10 weeks.
- Washing (Every 1-2 Weeks): Mix 1 part sulfate-free shampoo with about 4 parts water in an applicator bottle. Apply it directly to your scalp and massage gently with your fingertips (never your nails!). Let the suds run down the braids, but don’t scrub them. Rinse like your hair’s life depends on it.
- Drying is CRUCIAL: Squeeze out excess water with a microfiber towel and let your hair air dry completely. This can take hours, but a damp scalp is a breeding ground for mildew. No, thank you. A hooded dryer on a cool setting is your best friend here.
- Daily Moisture: A light spritz of a braid spray with ingredients like aloe or tea tree oil on your scalp is great.
- Night Care: Always, always, always sleep with your hair in a big satin bonnet or scarf. This is non-negotiable for reducing frizz and protecting your edges.
- The First 48 Hours: For the first couple of nights, let your braids hang loose. Avoid tight ponytails or buns to give your scalp time to settle. A gentle scalp massage can help ease that initial “new braid” tightness.
When it’s time for removal, be patient. Set aside a whole day. Cut the braids an inch or two below your own hair, and then carefully unbraid each one. And don’t panic when you see the shed hair! You naturally lose 50-100 hairs a day, and all of that has been trapped in the braids for weeks. Seeing a baseball-sized puff of hair is totally normal and expected.

Micro braids are a beautiful art form with a rich cultural history. By respecting the craft, investing in a skilled professional, and committing to proper care, you can rock this stunning style without ever compromising the health of your hair.
Galerie d’inspiration

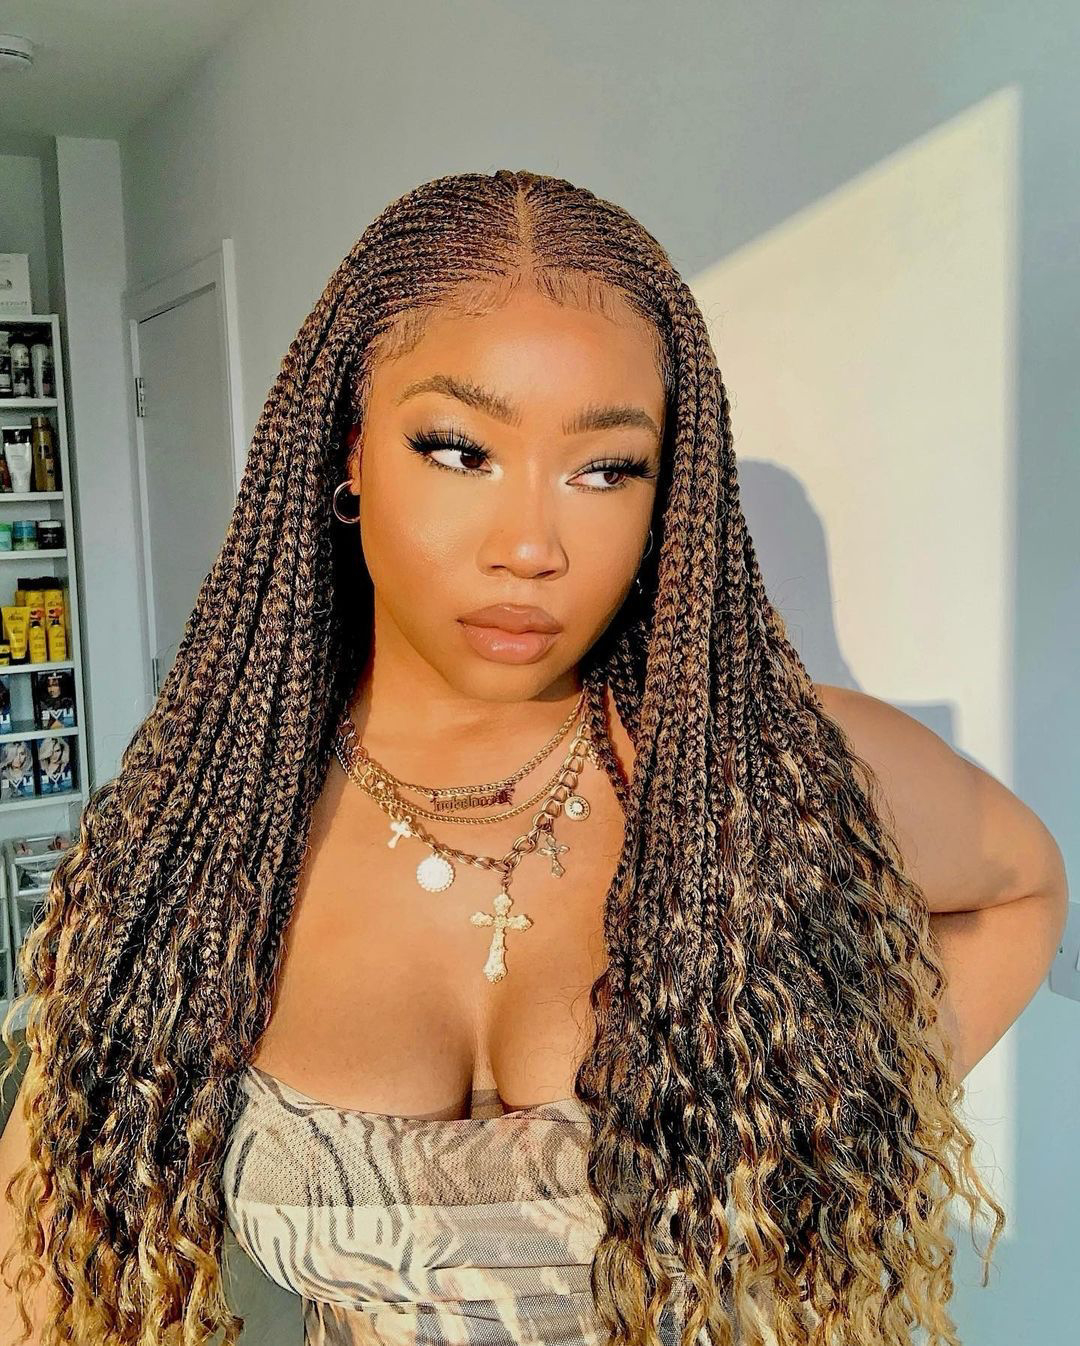
Human Hair Extensions: The gold standard for movement, longevity, and styling versatility. They can be curled, straightened, and colored just like your own hair. The ends look incredibly natural and can be maintained with products like a light leave-in conditioner.
High-Quality Synthetic (Kanekalon/Toyokalon): A more budget-friendly choice that has come a long way. It’s lighter than human hair but can be stiff initially. It’s not suitable for heat styling, and the ends are typically sealed with heat (burning), which can sometimes feel scratchy against the skin.
For the most seamless look, human hair is unmatched, but modern synthetics offer a stunning result when installed by a skilled braider.

Traction alopecia, a type of hair loss caused by prolonged or repetitive tension on the hair root, can become permanent if the pulling persists over a long period.
This is the medical reality behind your stylist’s warnings. Those little bumps and feelings of soreness aren’t just temporary discomfort; they are signs of inflammation at the follicle. The American Academy of Dermatology Association confirms that styles that constantly pull on the hair can scar the follicles, preventing new hair from growing. Listening to your scalp isn’t just a suggestion—it’s the key to protecting your hairline for years to come.

- Focus shampoo on the scalp, not the braids themselves.
- Gently squeeze diluted shampoo through the length of the braids.
- Rinse thoroughly to prevent buildup, which can cause odor and irritation.
- Never rub braids with a towel; squeeze out excess water and let them air-dry or use a hooded dryer on a low, cool setting.

How do I keep my braids from looking dull and my scalp from getting dry?
The secret is light, consistent moisture. Heavy greases, pomades, and thick butters are a micro braid’s worst enemy, leading to flaky, visible buildup that’s difficult to wash out. Instead, opt for a daily routine using a lightweight braid spray or a nourishing scalp oil. Look for products with natural oils like jojoba or almond. A few drops of Mielle Organics Rosemary Mint Scalp & Hair Strengthening Oil massaged directly onto your partings can soothe itchiness and promote healthy growth without weighing your braids down.

The Takedown Trap: One of the biggest mistakes happens after the style has run its course—rushing the removal process. Being impatient and yanking at knots will cause more breakage than the braids ever did. Set aside a full day. Work in small sections, spritz each braid with a mix of water and conditioner to give it slip, and use the pointy end of a rat-tail comb to gently unbraid from the bottom up. Be prepared for a significant amount of shed hair; it’s the natural shedding from the past weeks, all coming out at once.
- Extends the life of your style by 2-3 weeks.
- Keeps your most visible sections looking fresh and neat.
- Reduces the frequency of full, time-consuming installations.
The secret? A hairline touch-up. Around the 4 to 6-week mark, ask your stylist to carefully take down and reinstall just the first two or three rows of braids around your hairline and main parting. It’s a faster, cheaper session that makes a world of difference.
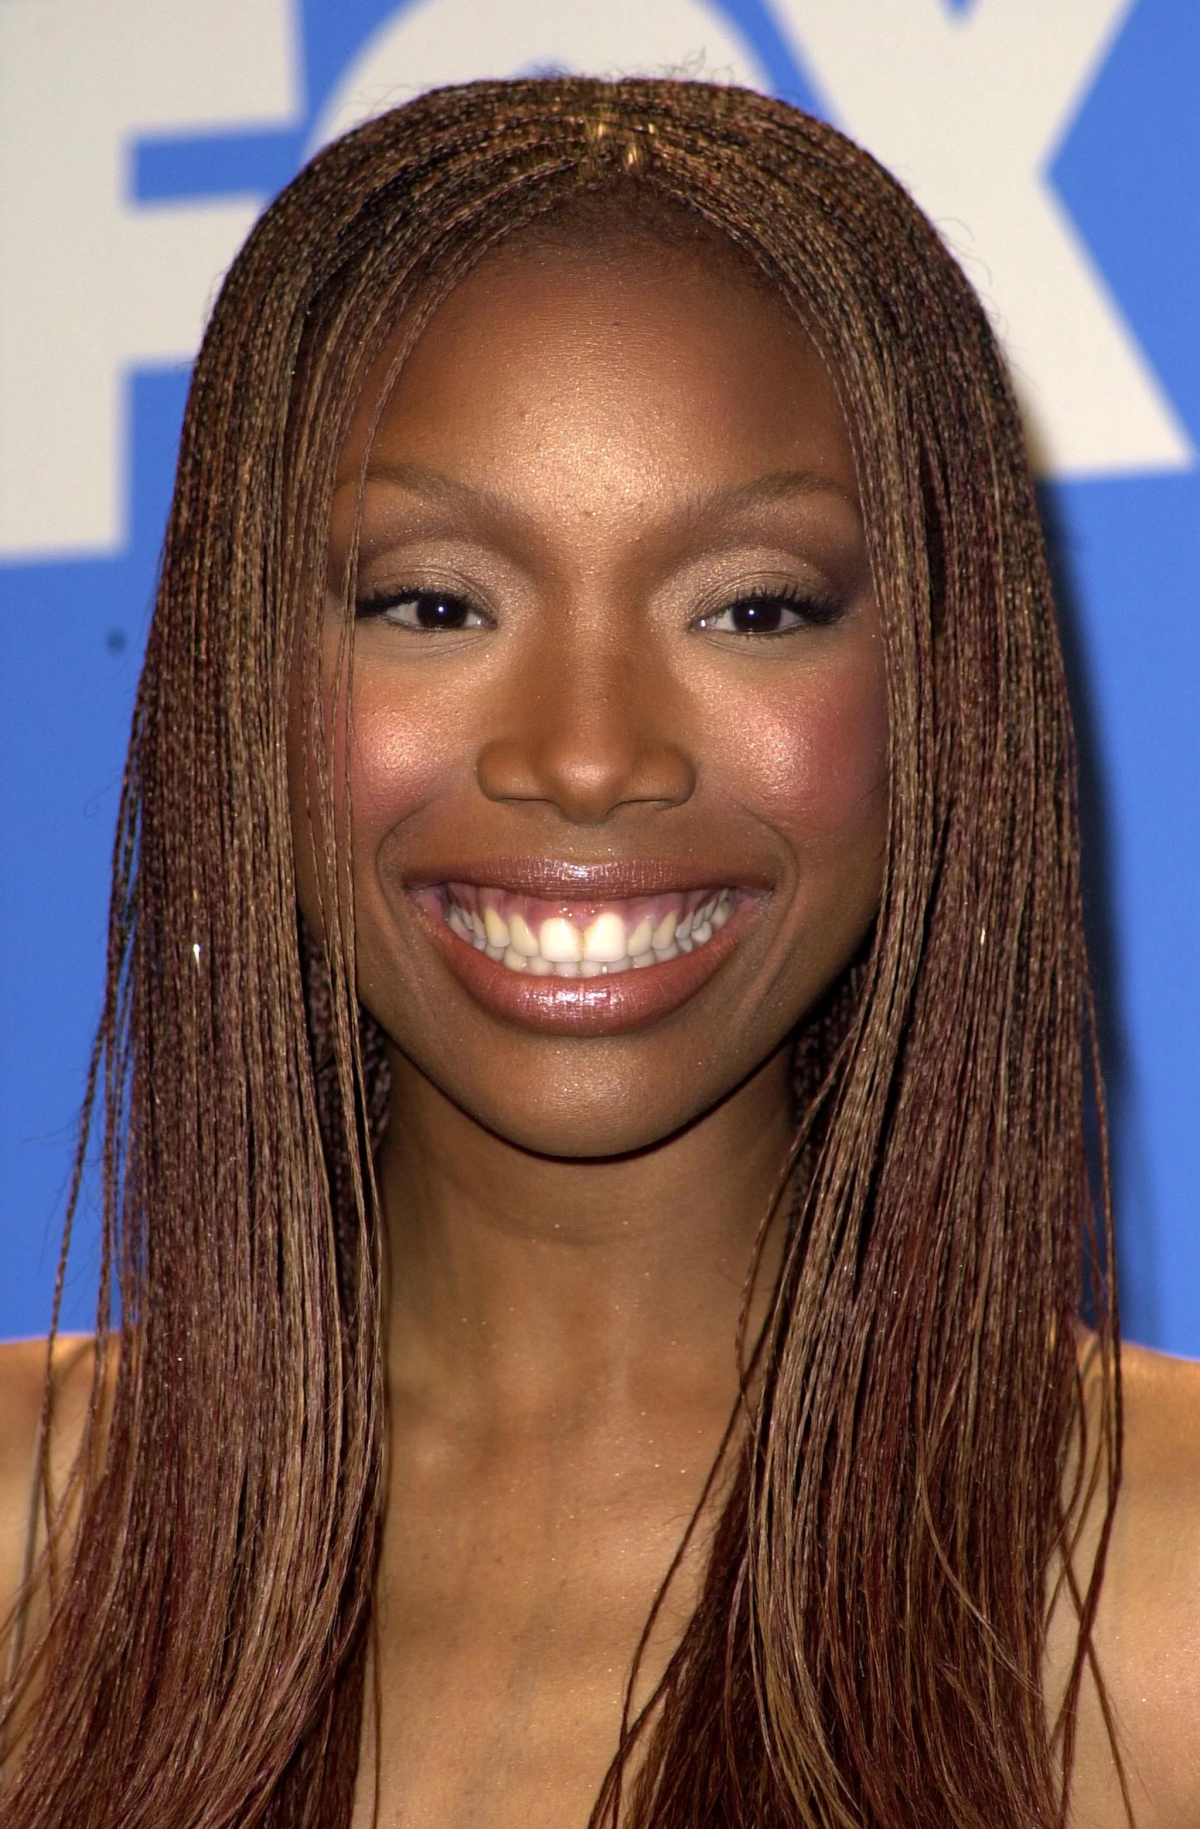
Inspired by the iconic, super-long micro braids worn by Brandy in the ’90s, the style has a deep-rooted cultural significance. It represents a fusion of traditional African braiding techniques with contemporary Black American style, symbolizing beauty, patience, and identity.


