The Real Reason Your Hairstyle Doesn’t Last (And How to Fix It for Good)
After years and years of working with hair—backstage at shows, on set for shoots, and in my own salon—I can tell you the number one question I get isn’t about the latest trends. It’s always, “How do I make my hairstyle actually last?” It’s that feeling of frustration when your beautiful updo starts sagging before you’ve even had your first drink at the party. So many people think there’s some secret product or a magic wand involved.
In this article
Honestly, the truth is a lot less magical and a lot more practical. A hairstyle that lasts isn’t about luck; it’s about engineering. Think of it like building a house. You can’t just throw up the walls and hope for the best. You have to pour a solid foundation first. That’s what we’re going to talk about—the real, professional approach to building a style that feels secure and looks amazing all night long.
First Things First: The Foundation is Everything
Before a single bobby pin even comes out of the box, the real work begins. I’d say a good 50-60% of your hairstyle’s success is determined by what you do before you start styling. This is the step most people rush through at home, and it’s the biggest difference between an amateur look and a pro-level finish. Heads up: plan for a solid 15 to 30 minutes just on this prep work. It’s worth it, I promise.
Know Your Materials: A Quick Guide to Your Hair
You have to know what you’re working with. Hair is a fiber, and its texture and condition completely dictate how it’s going to behave. Fine hair, for example, is silky and often too slippery to hold a style. It needs products that create some grit. Coarse hair has natural body but can be heavy and resistant. And then there’s porosity—your hair’s ability to absorb moisture.
Good to know: You can figure out your hair’s porosity with a simple test. Just drop a clean, dry strand of your hair into a glass of water. If it floats, you have low porosity (meaning the cuticle is tight and can resist products). If it sinks, you have high porosity (it soaks up product, but can also get frizzy fast). Knowing this helps you pick the right stuff to put in it.
The Big Myth About Squeaky Clean Hair
So many clients show up for an updo with freshly washed, silky hair, thinking they’re giving me the perfect canvas. But actually, it’s one of the hardest things to work with! The natural oils that build up a day after washing give the hair essential grip and texture, helping pins stay put.
If you absolutely must wash your hair the day of, you have to add that texture back in. A classic pro trick is to use dry shampoo on clean, dry hair. We’re not using it to soak up oil here; we’re using it for the fine, powdery grit it adds to the roots. It gives the hair some ‘tooth,’ making it a thousand times easier to work with.
Quick Win: In a hurry? The fastest way to get grip is to flip your head upside down and blast the roots with a bit of dry shampoo for 5 seconds. Instant texture for a no-slip ponytail!
Your Scaffolding: A Guide to Pre-Styling Products
I learned a hard lesson early in my career about skimping on products. I watched a bridesmaid’s beautiful chignon slowly droop during a ceremony because I hadn’t prepped her fine hair enough. Never again. Now, I see products as the essential scaffolding for any serious style.
- Mousse: This is your volume-builder. Applied to damp hair before you blow-dry, it makes each strand feel thicker. How much? For fine or short hair, think a golf ball-sized puff. For thick or long hair, go for a lemon-sized amount.
- Texturizing Spray: This is my holy grail for updos. It gives hair that perfectly grippy, second-day feel. For a great drugstore option that costs around $7, you can try something like Not Your Mother’s Beach Babe spray. In a professional kit, you might find something pricier but amazing like Oribe’s Dry Texturizing Spray, which runs closer to $50.
- Heat Protectant: This is a non-negotiable. Applying a 400-degree iron to your hair without protection is like pulling a pan from the oven with your bare hands. Don’t do it.
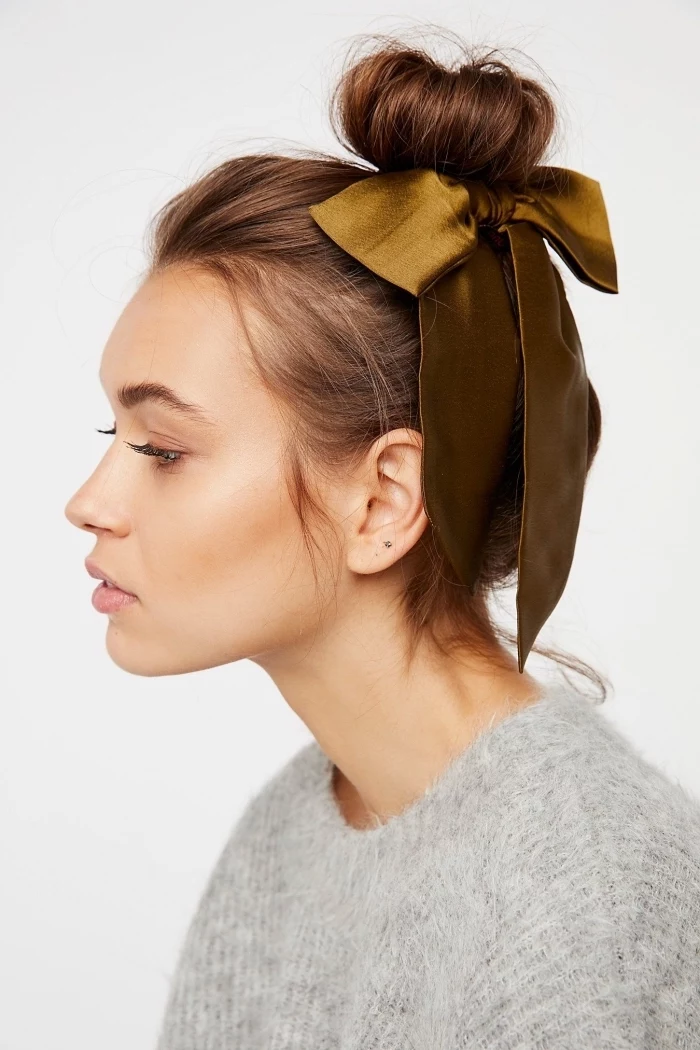
- Hairspray: You need two kinds. A flexible-hold spray is for during the styling process, allowing you to shape the hair without making it crunchy. A firm-hold spray is for the very end to lock it all down. When you spray, hold the can about 10-12 inches away to create a fine mist, not a sticky, wet spot.
Mastering the Core Techniques
Okay, with your hair prepped and ready, you can start building. A few key techniques are the backbone of almost every updo I’ve ever created.
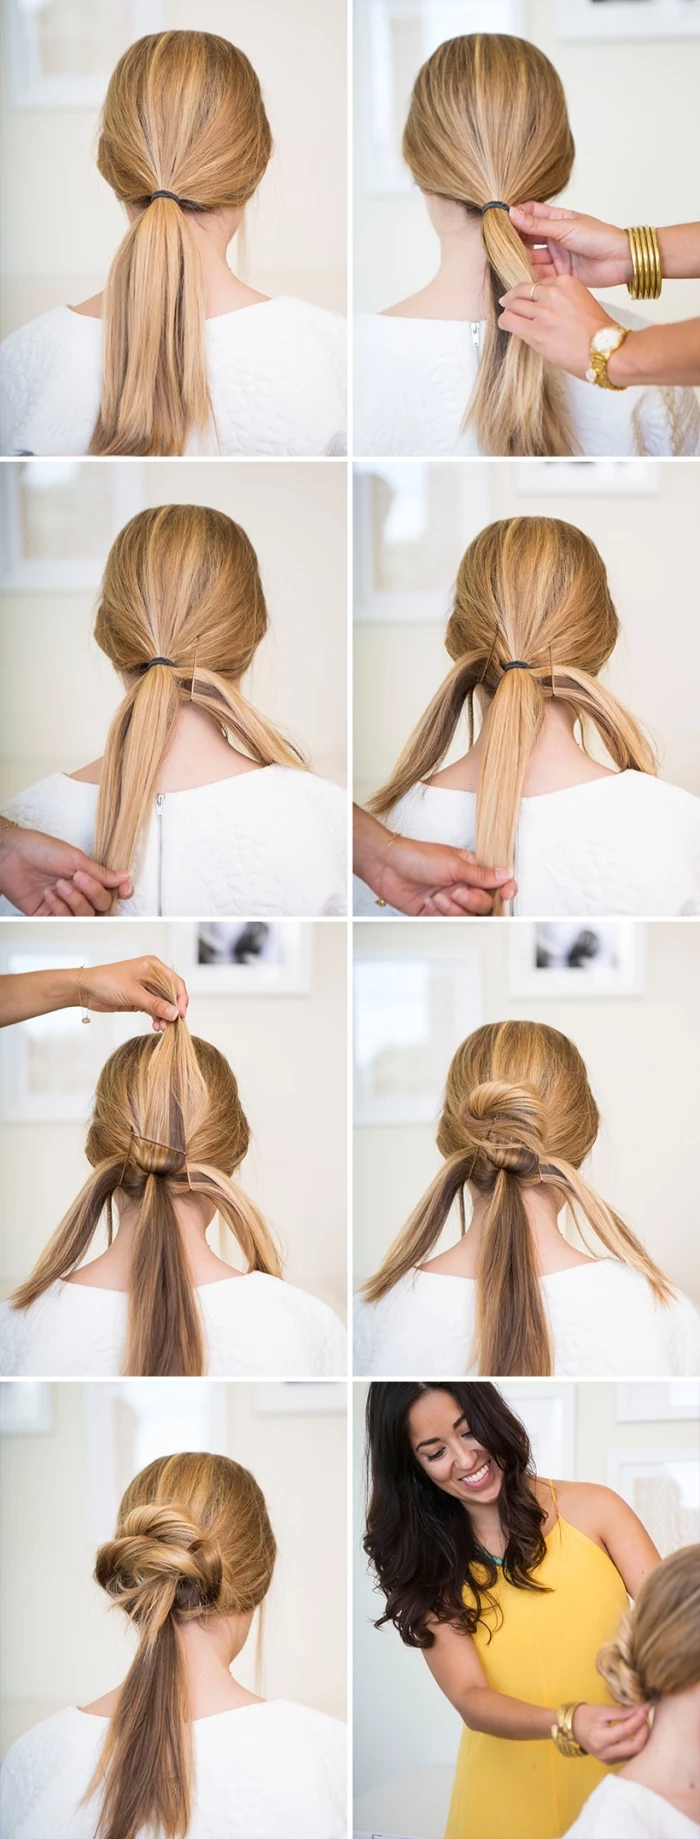
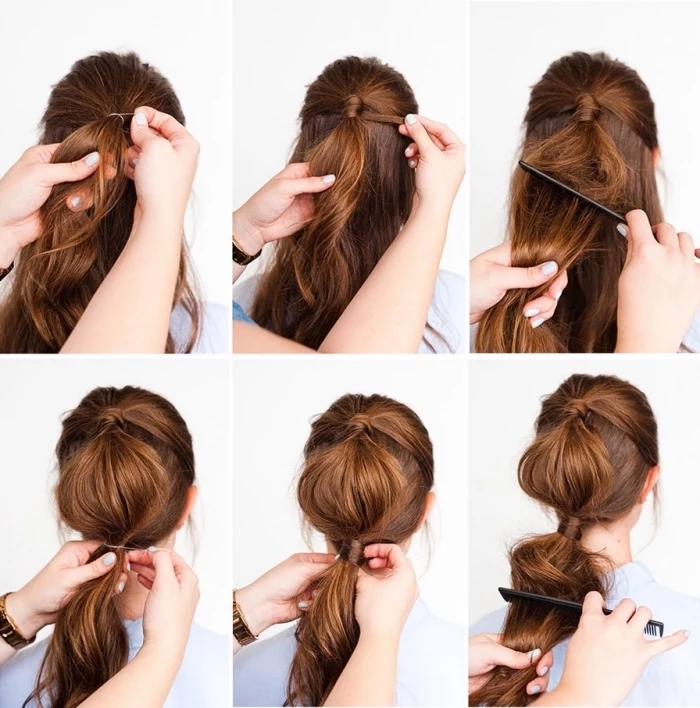
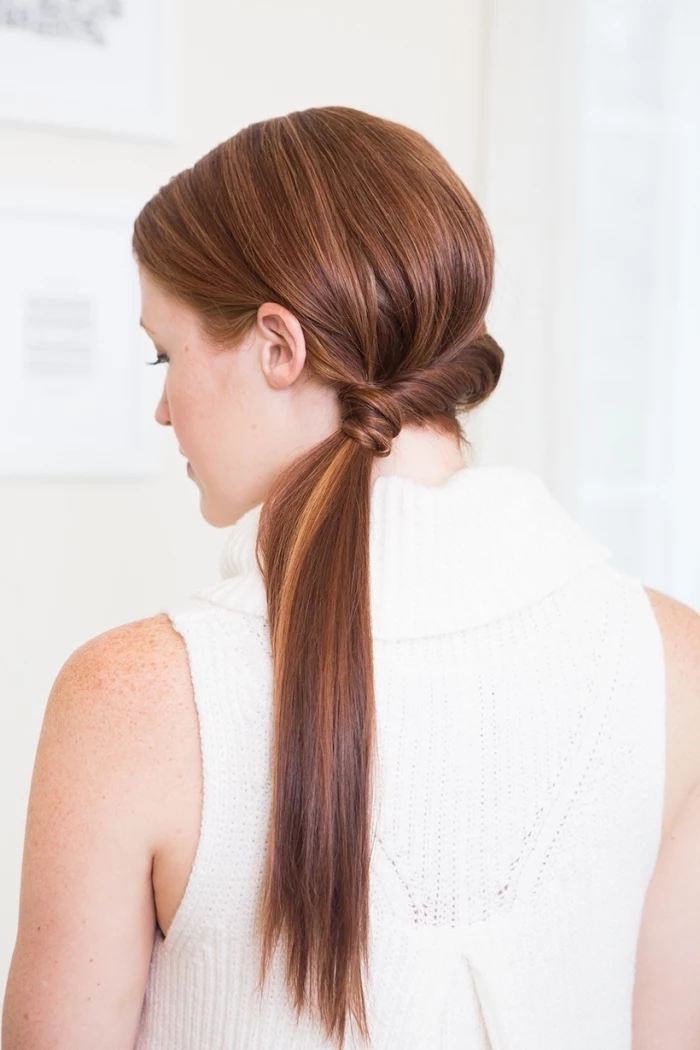
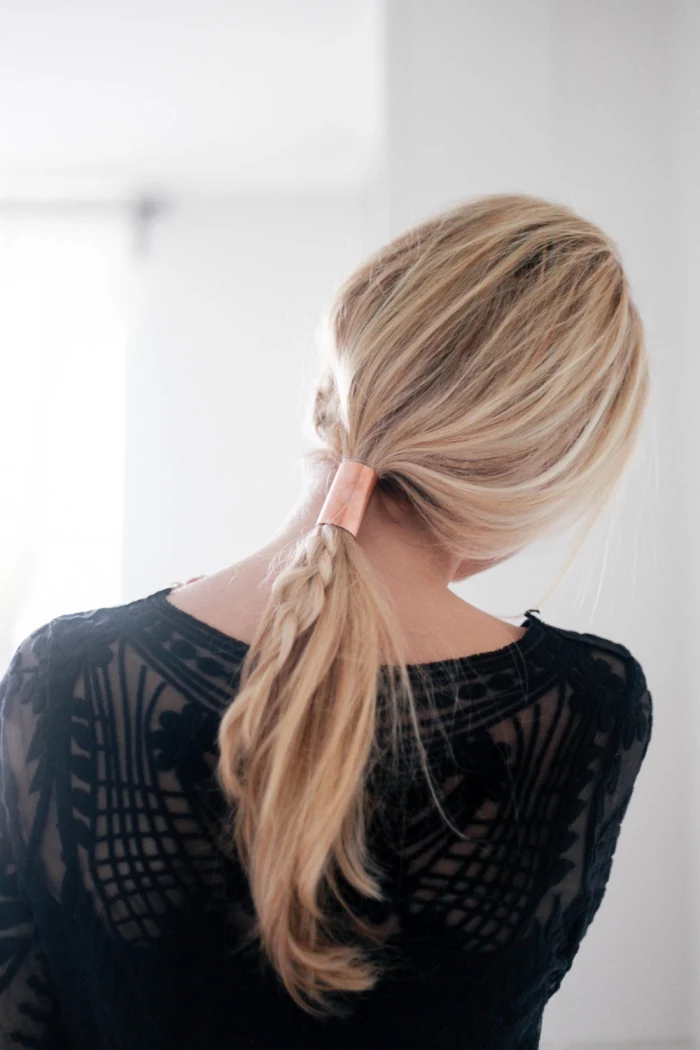
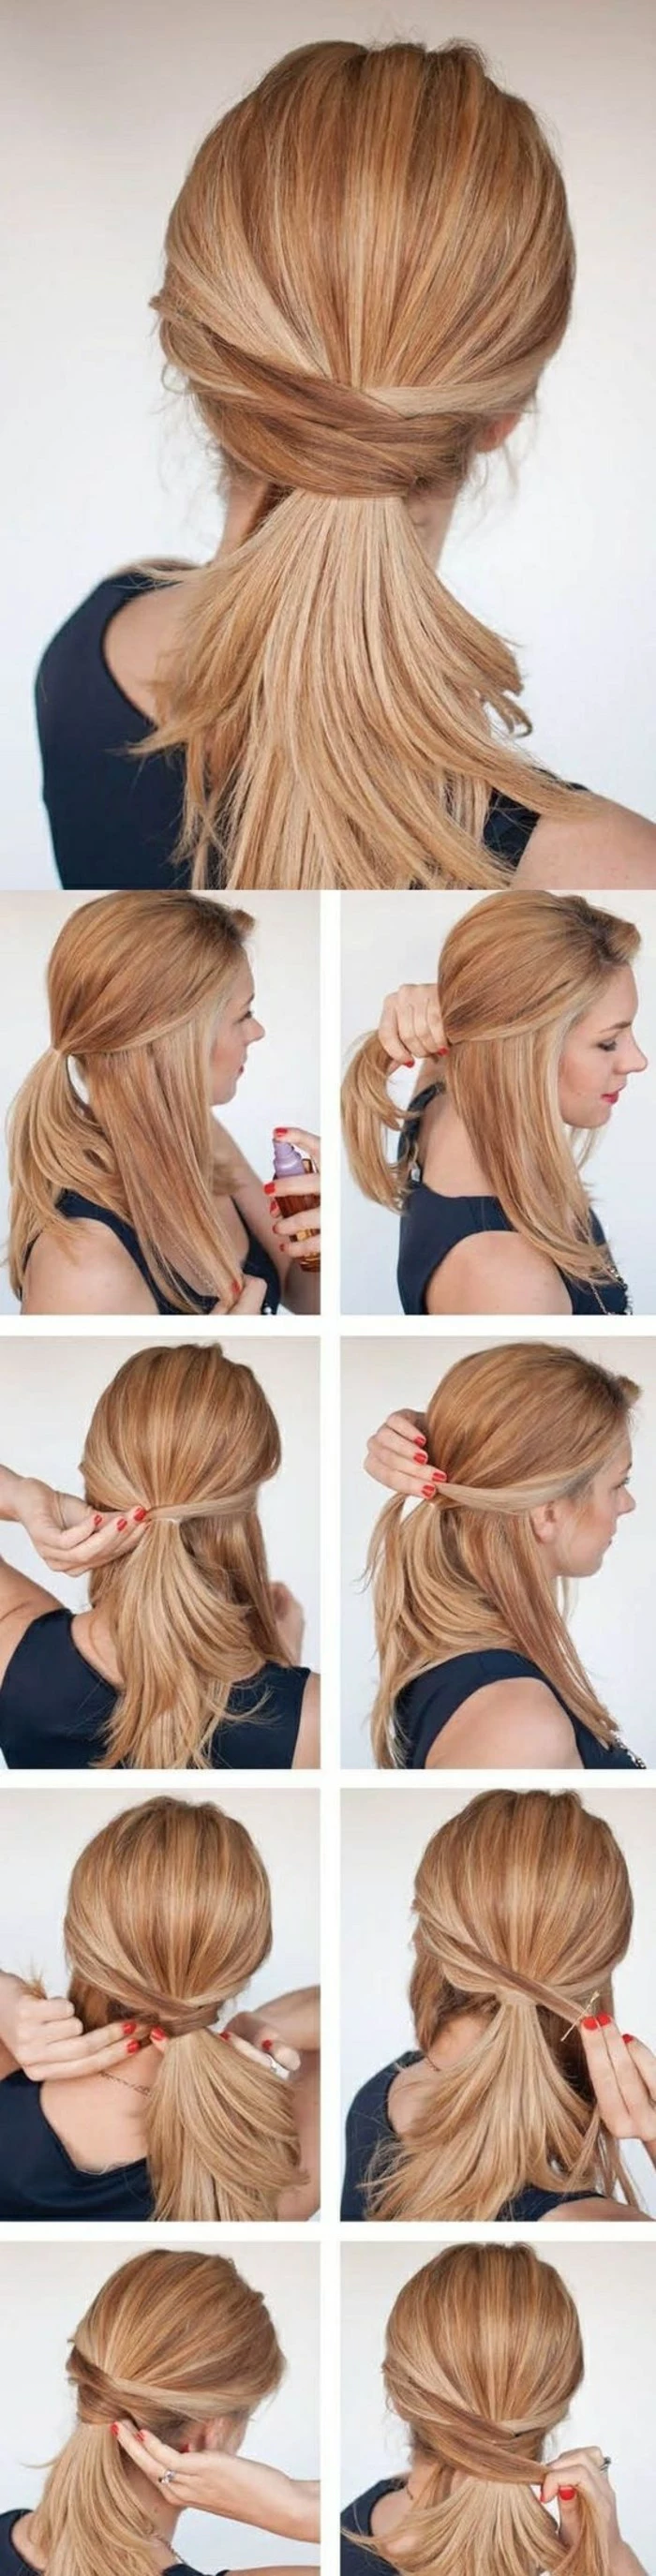
The Polished Ponytail: A Perfect Base
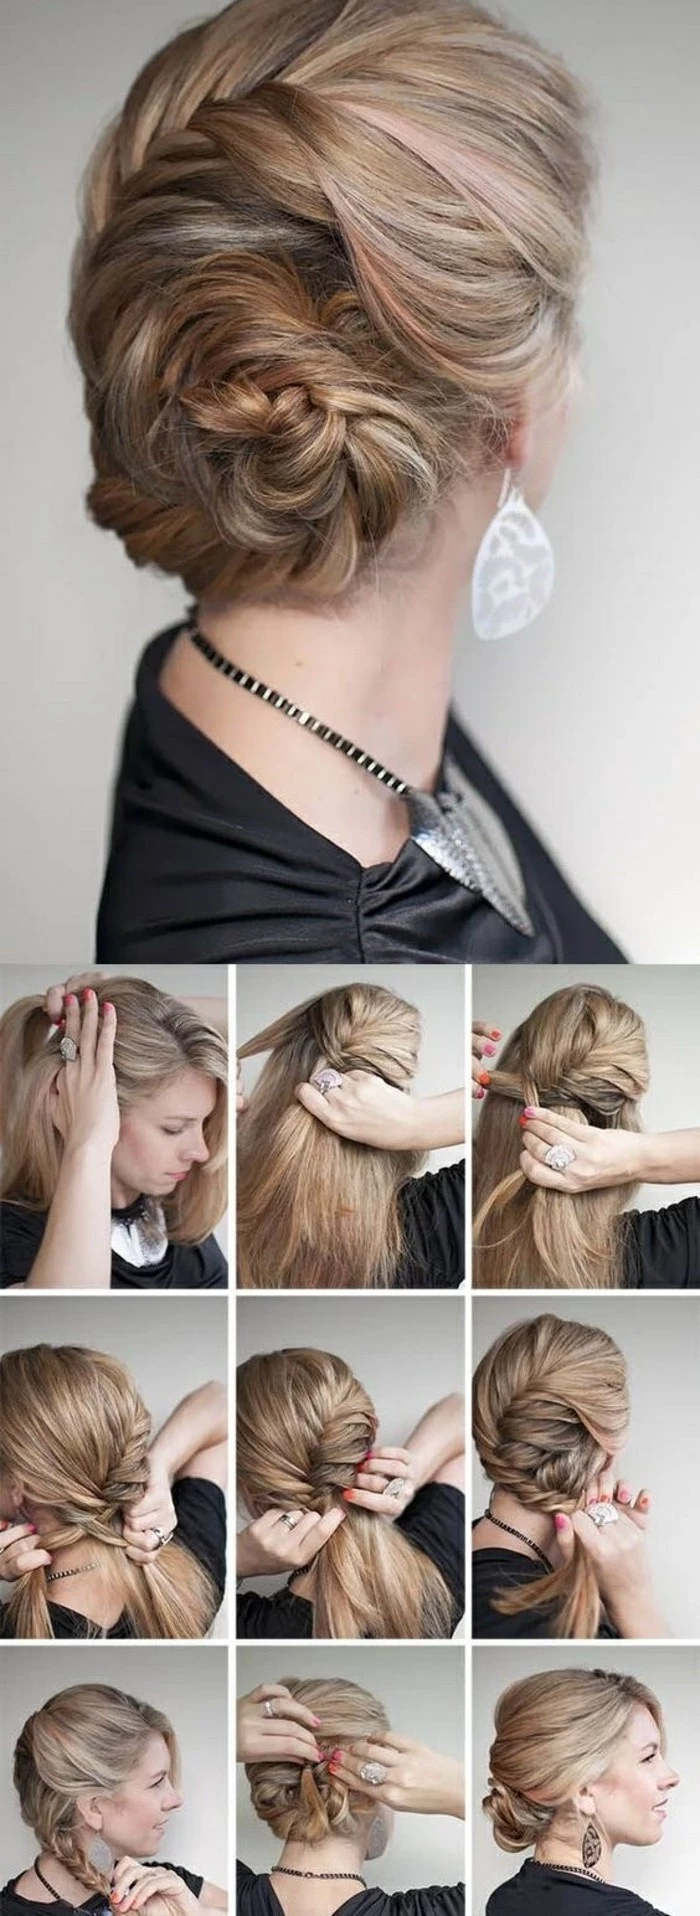
A sleek, bump-free ponytail can be a style on its own or the anchor for a great bun. The secret is to divide and conquer. First, section your hair from the crown forward, and clip it out of the way. Smooth the bottom section into a ponytail first, then bring the top section back to join it. This little trick prevents that annoying bubble that can form at the crown.
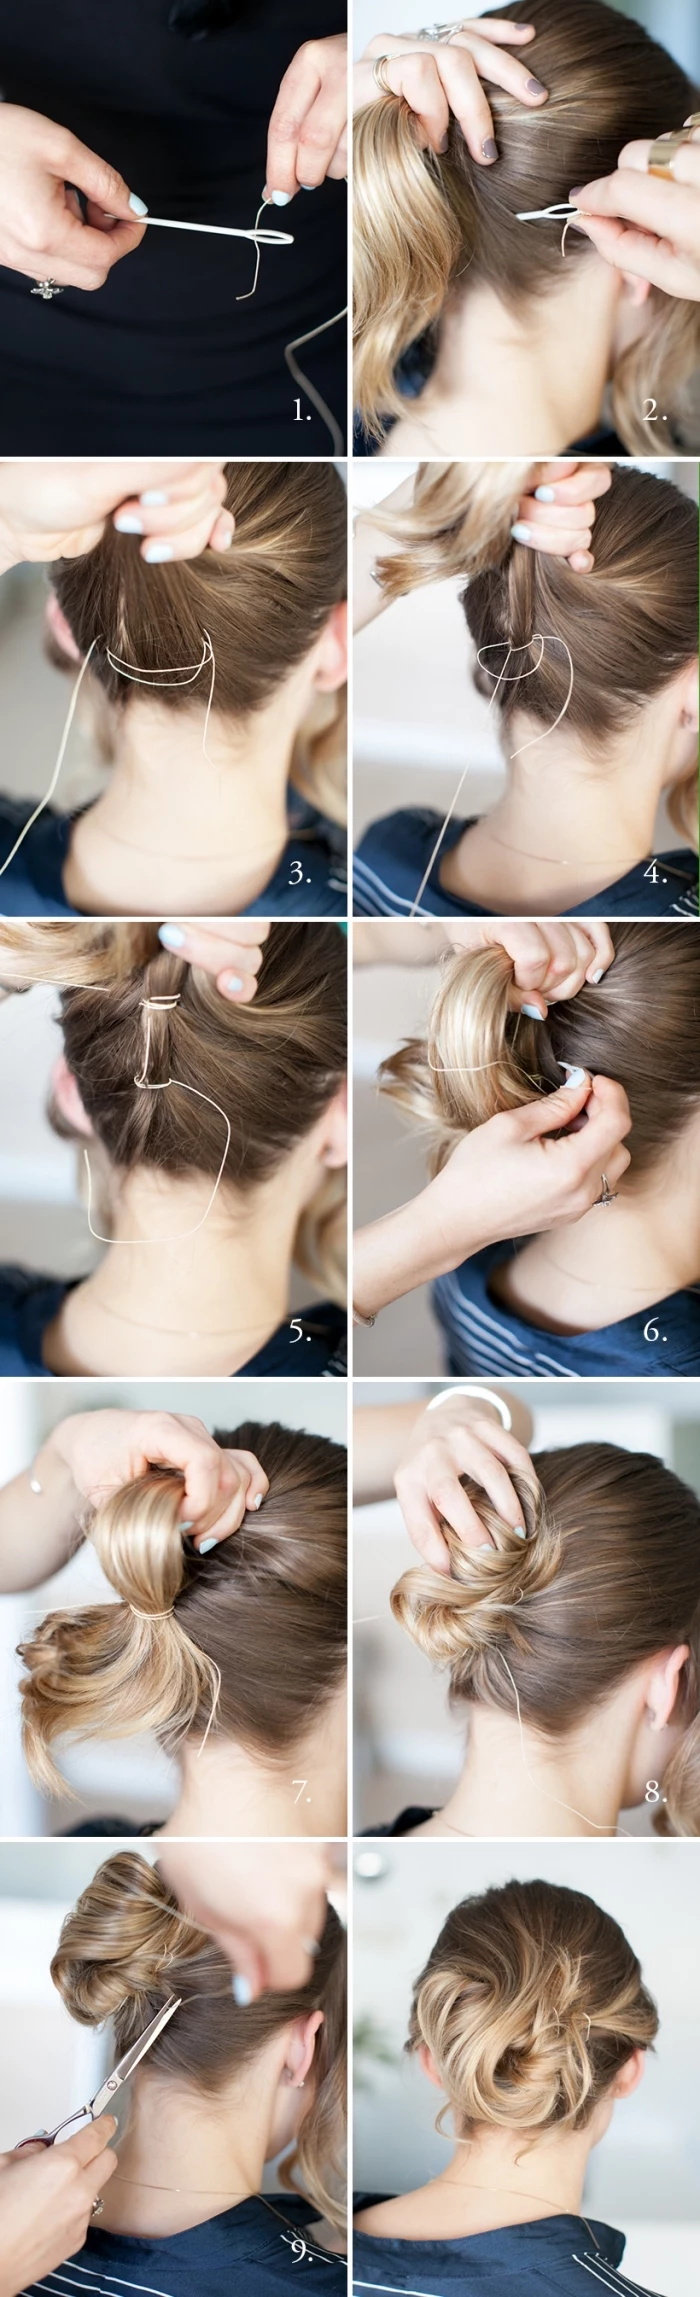
By the way, instead of a regular hair tie, the pros often use an elastic bungee hook. It’s an elastic with a small hook on each end. It sounds intimidating, but it’s not! The trick is to hook the first one into the top of the ponytail base, wrap the elastic tightly around, and then hook the second one underneath to hide it. This gives you a super tight, secure base without ripping your hair out. You can find a pack of them for under $10 at Sally Beauty or online.
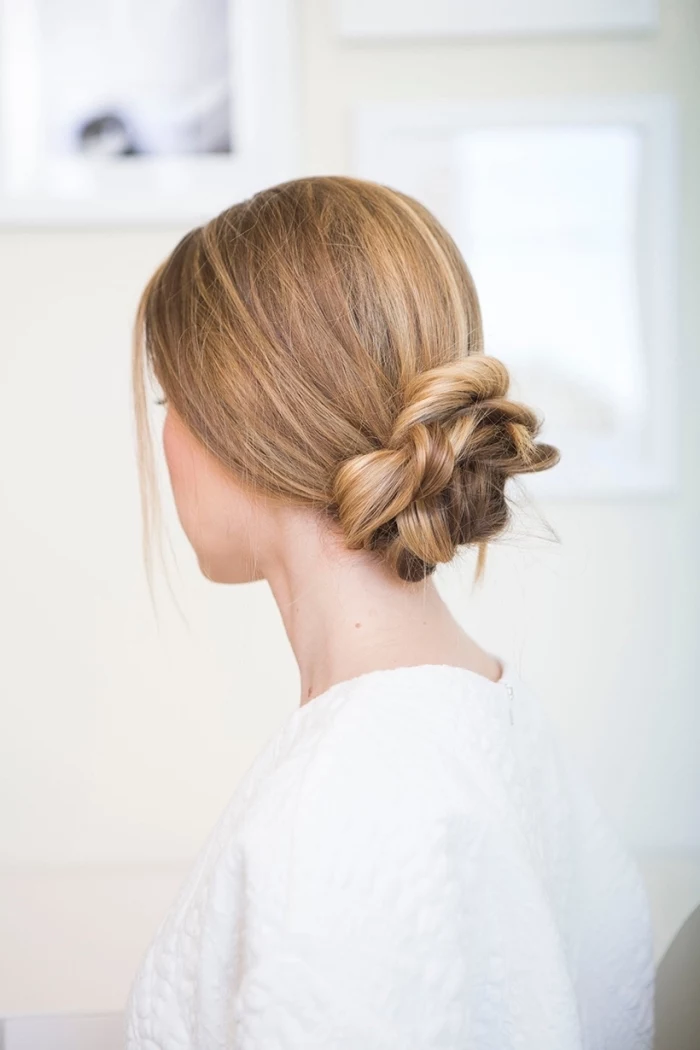
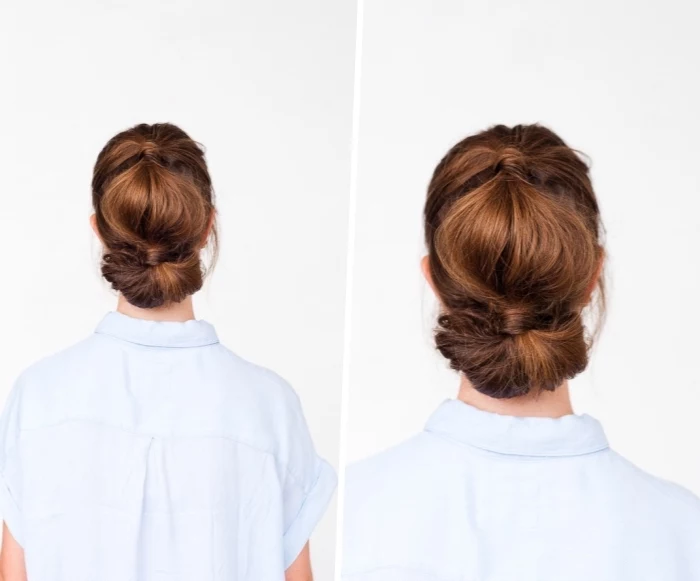
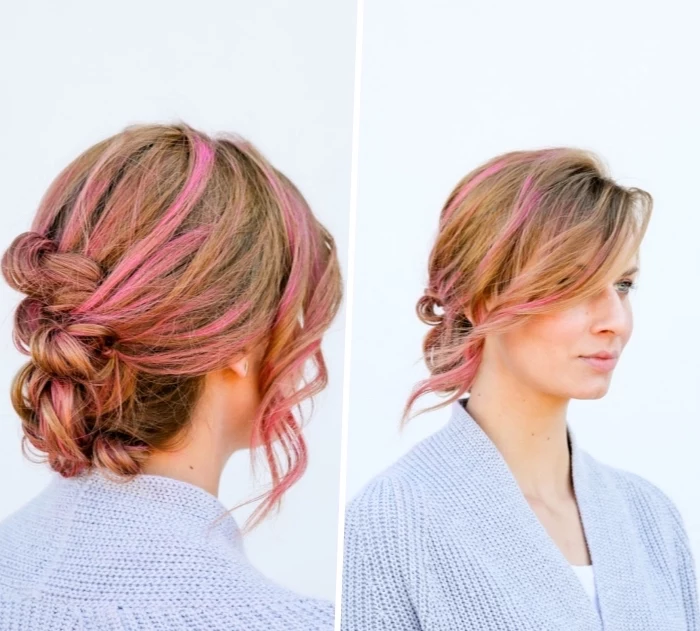
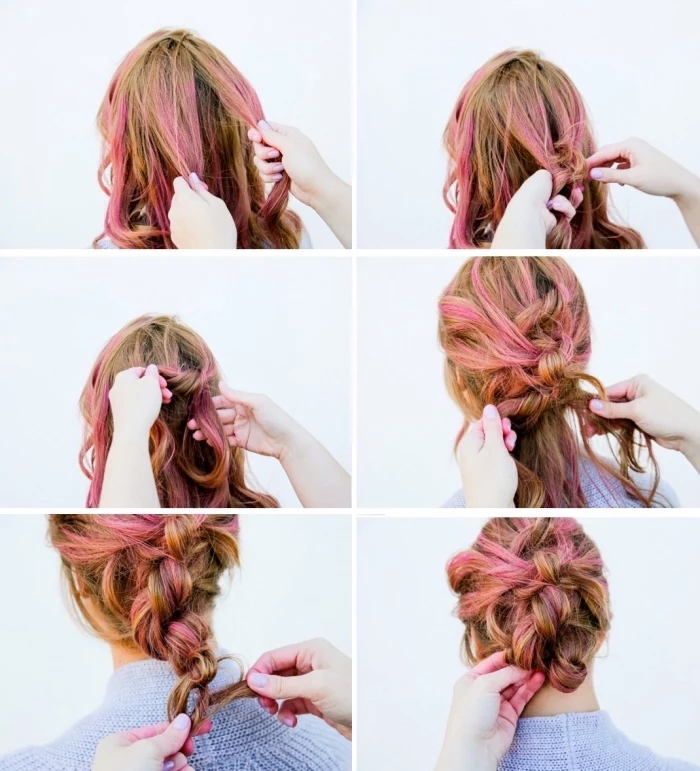
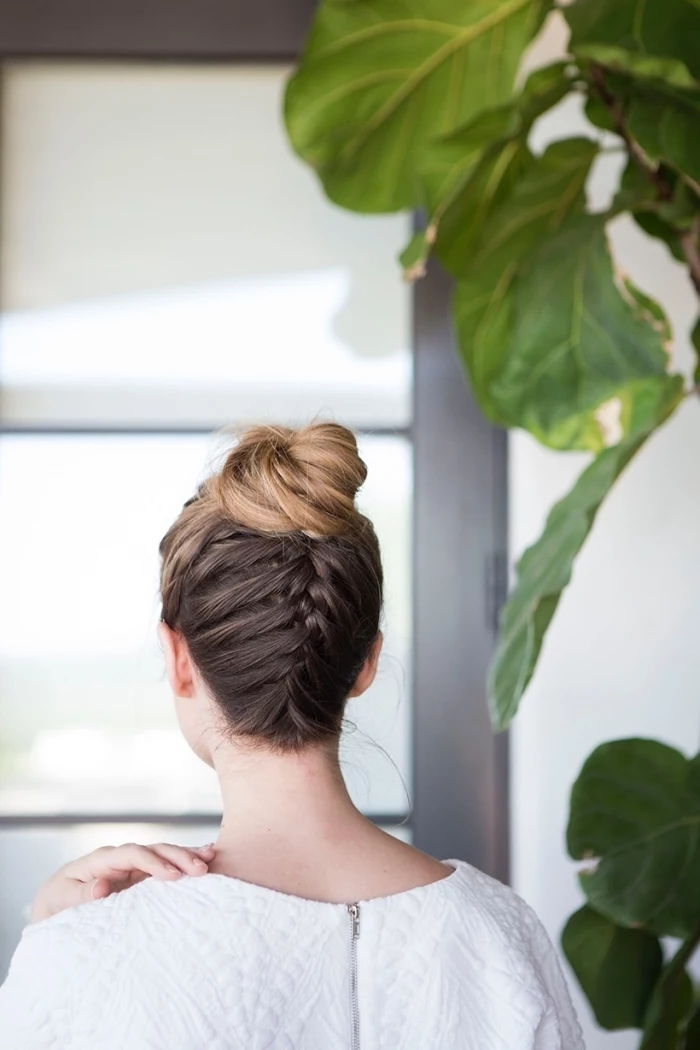
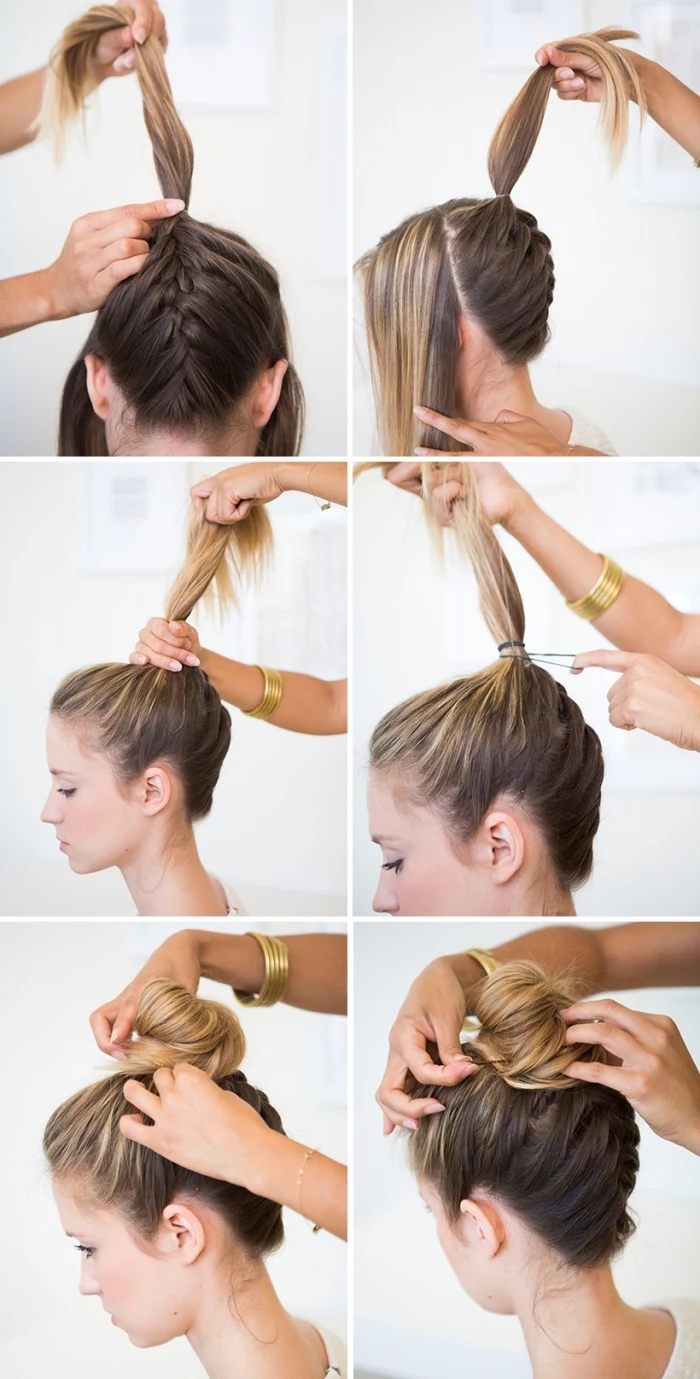
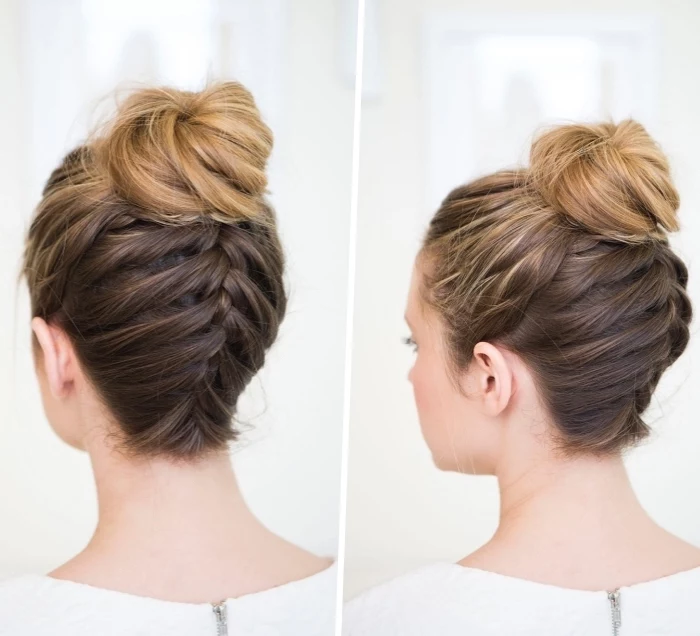
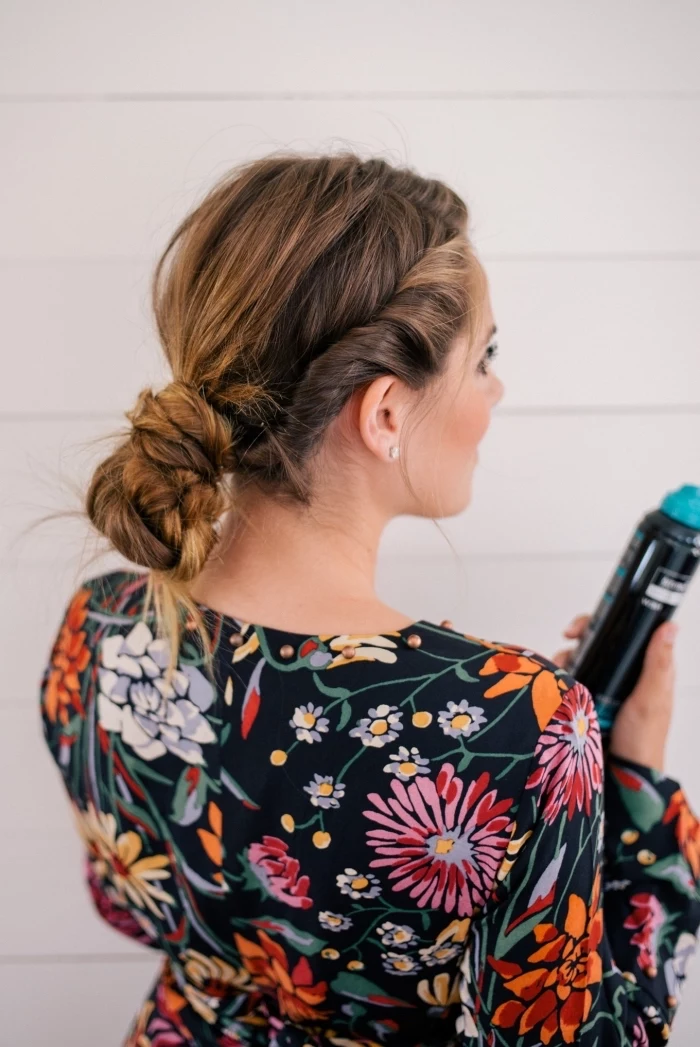
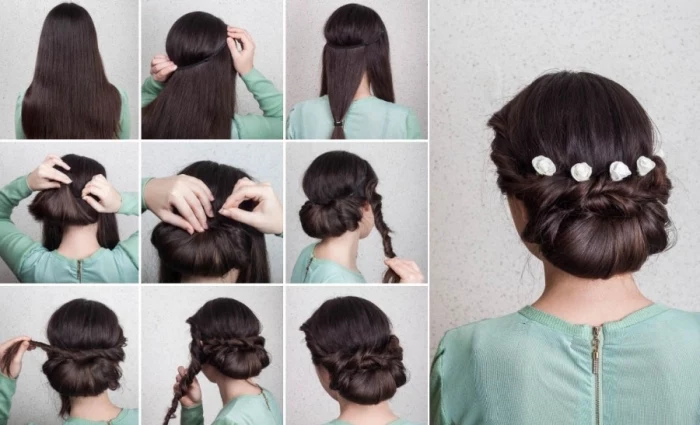
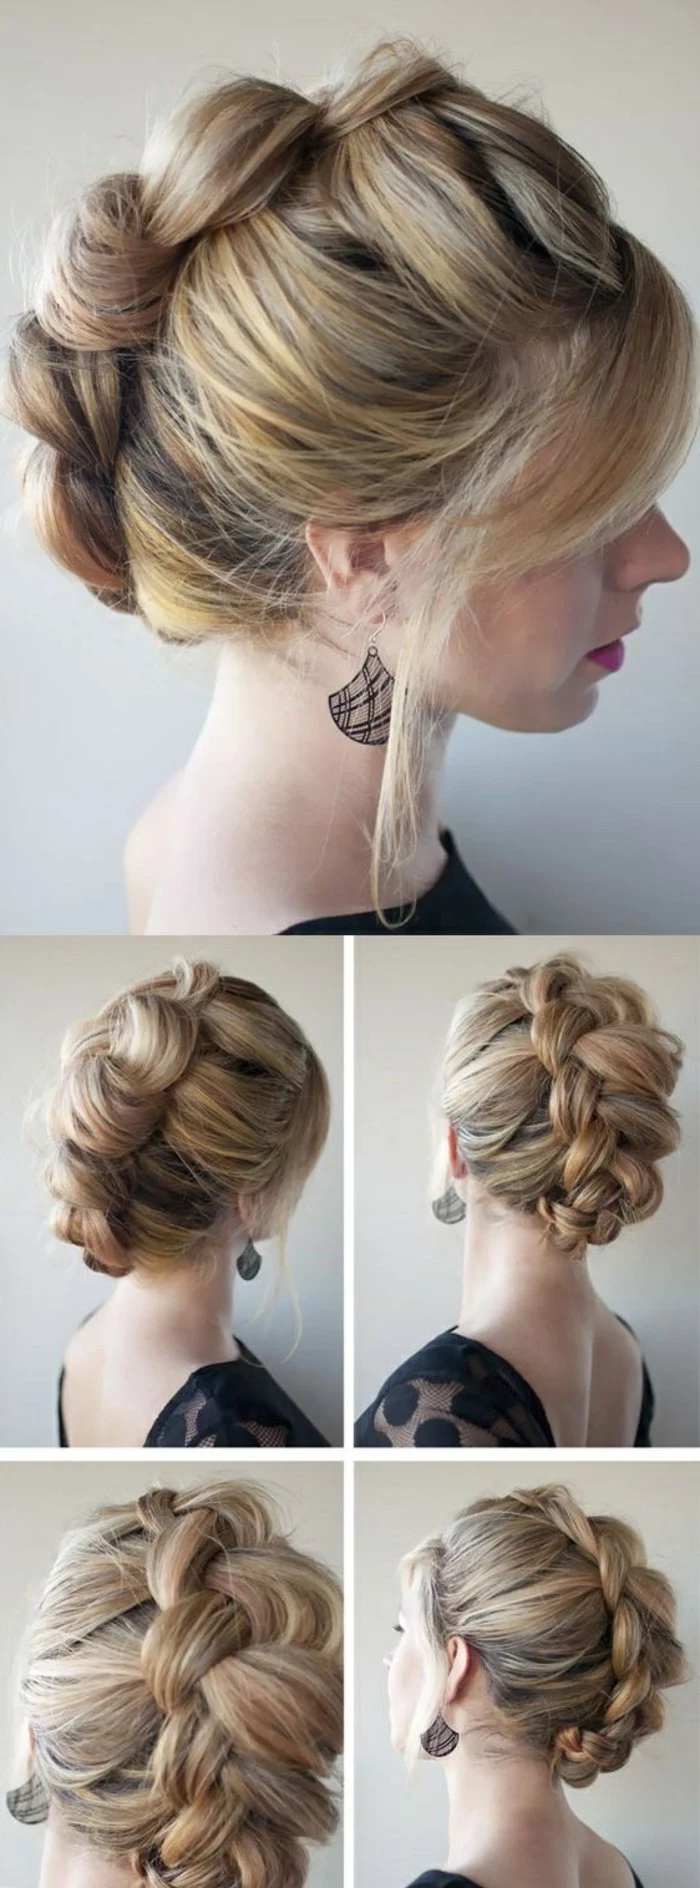
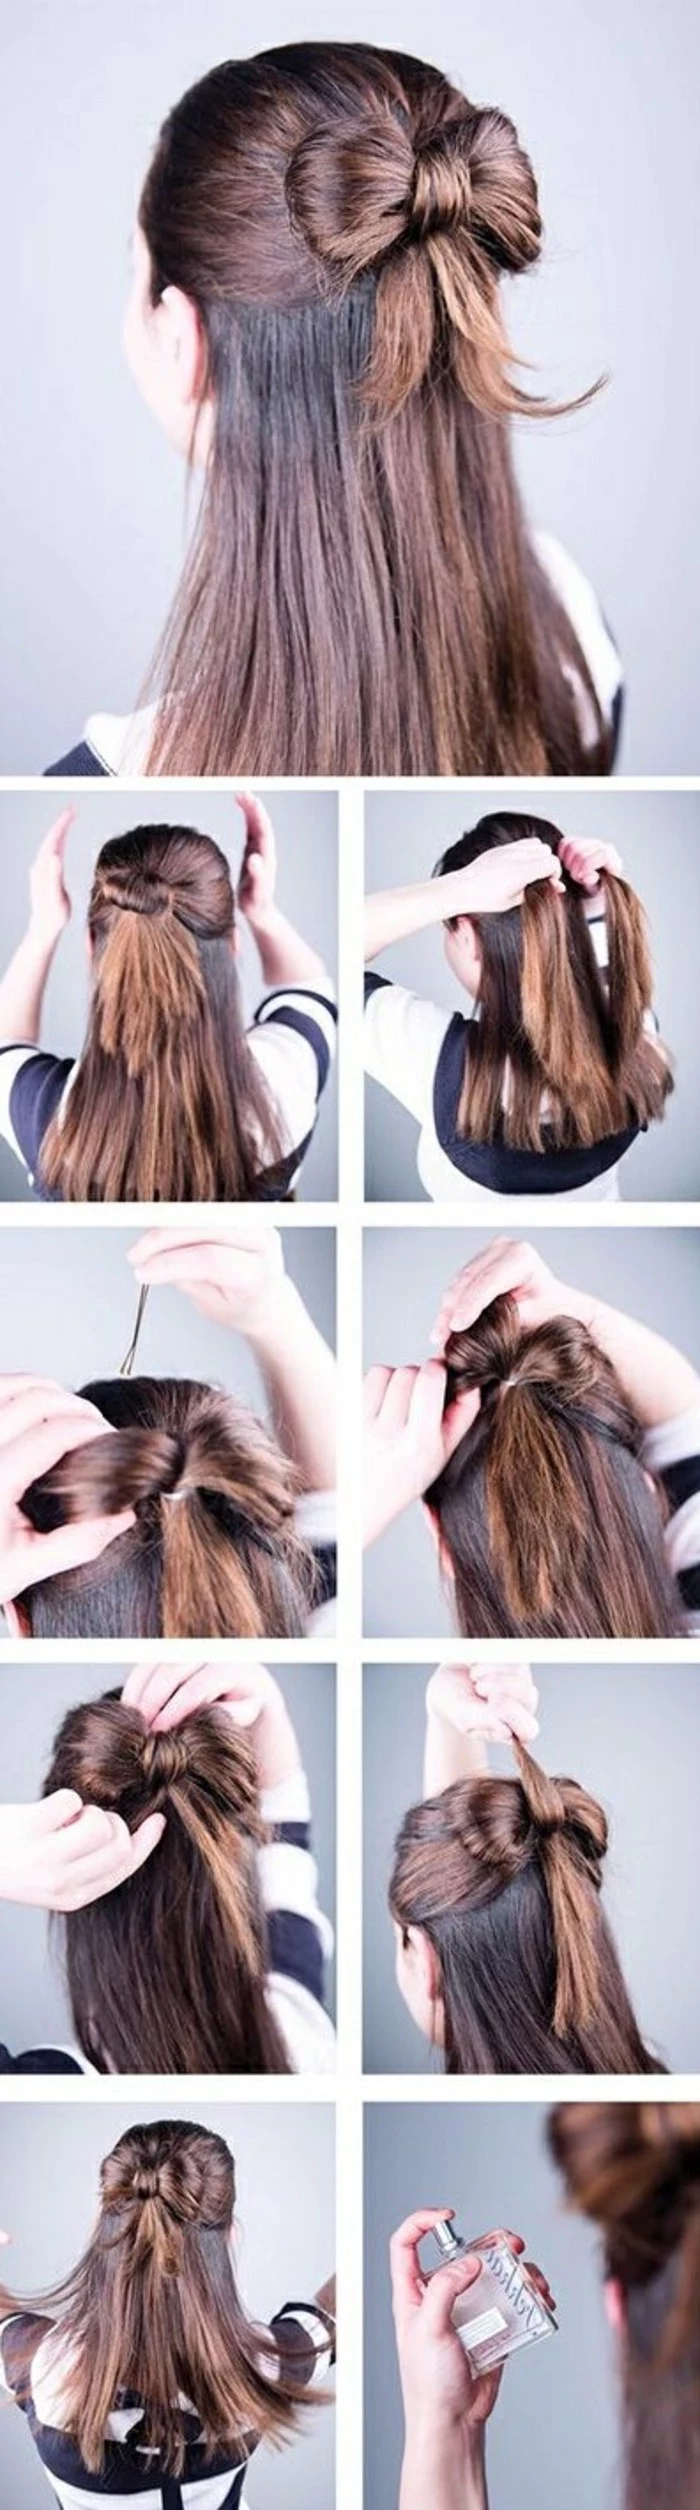
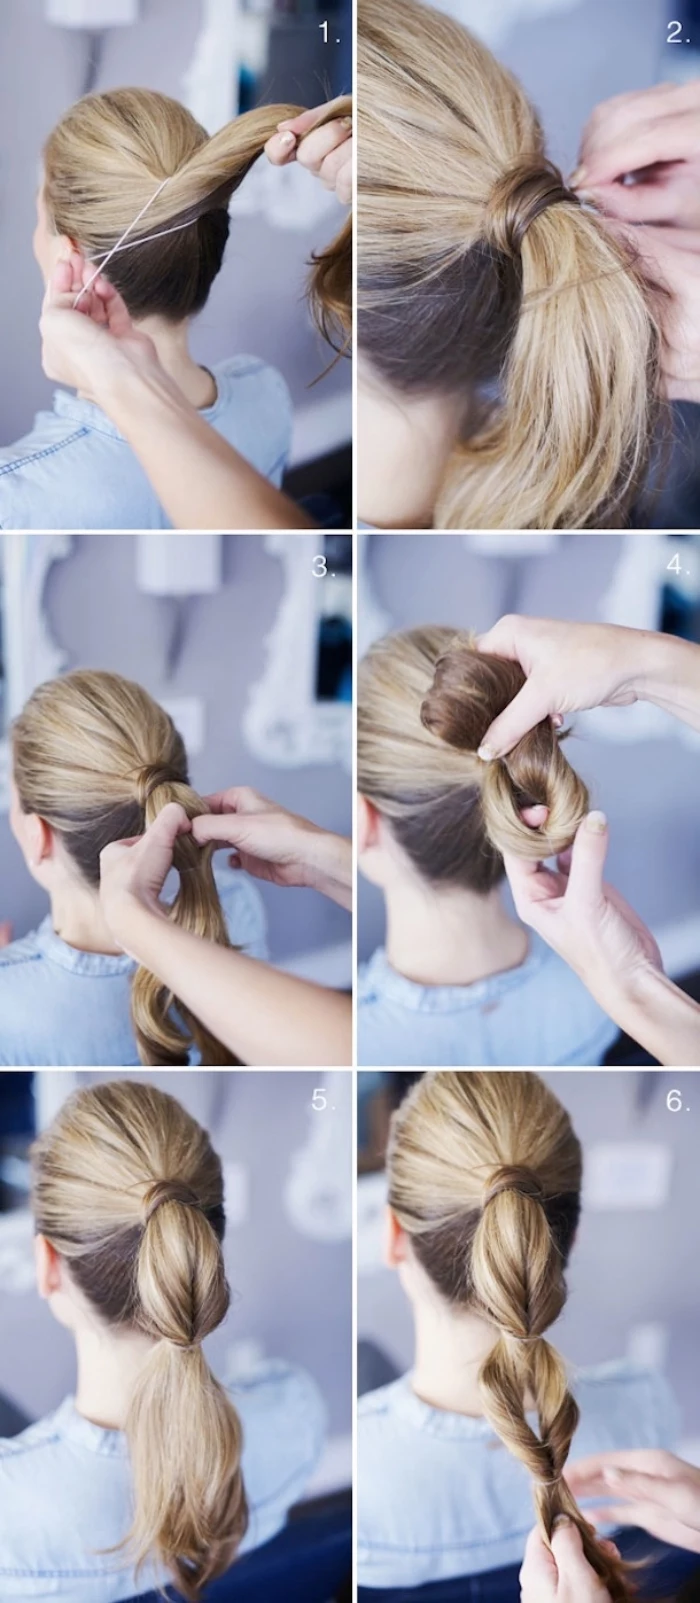
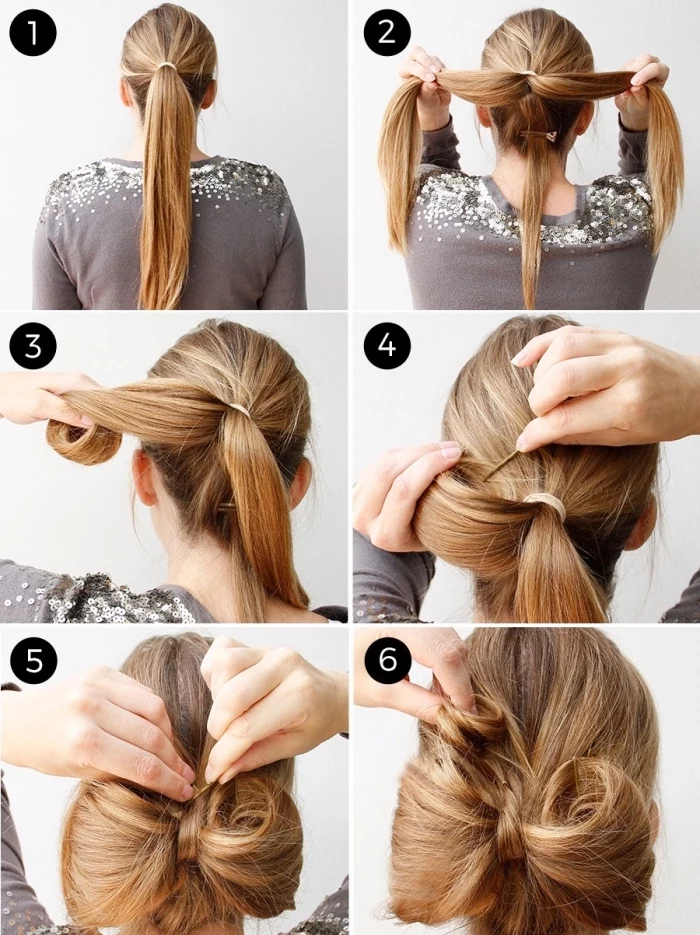
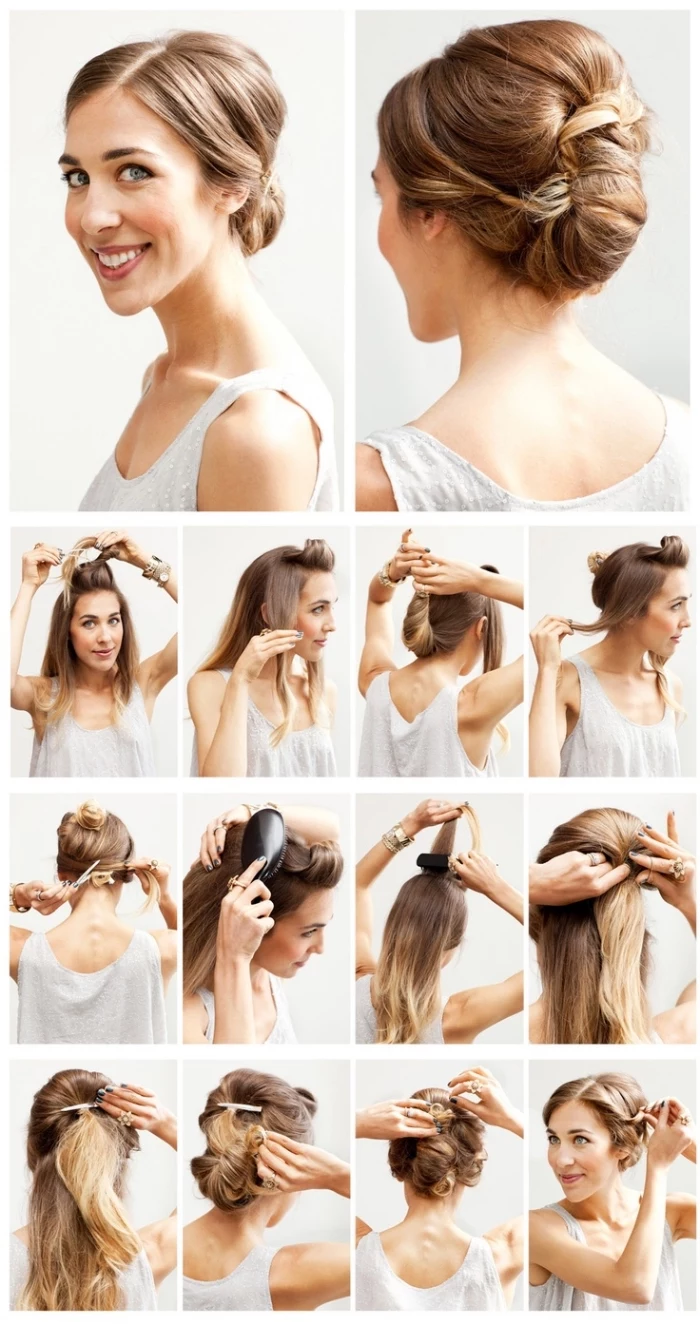
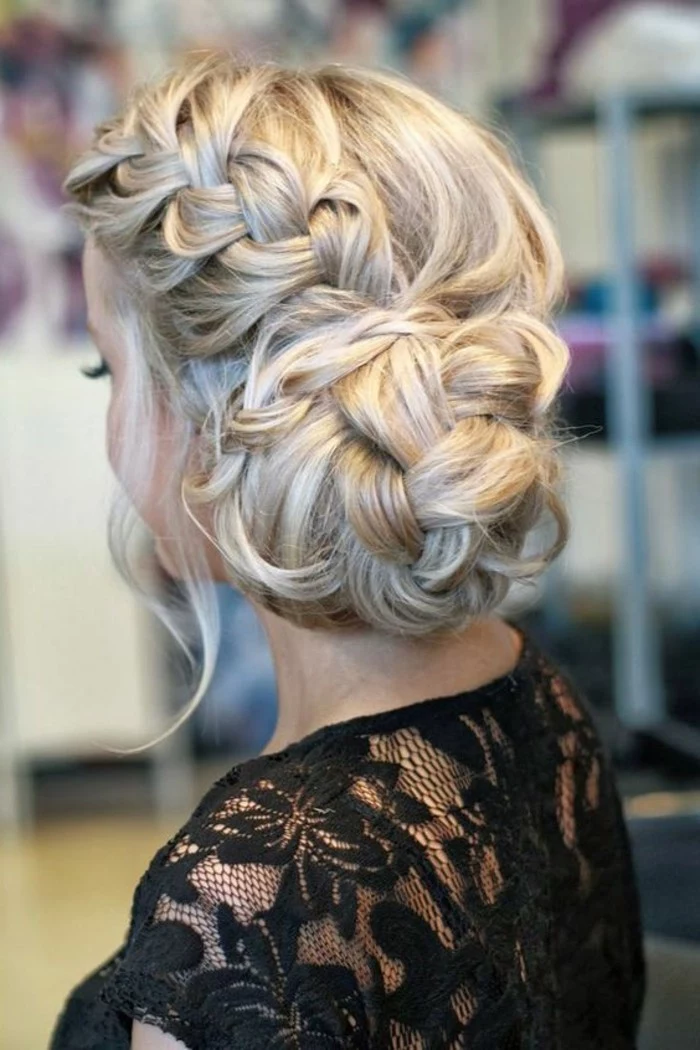
Building a Bun That Won’t Budge
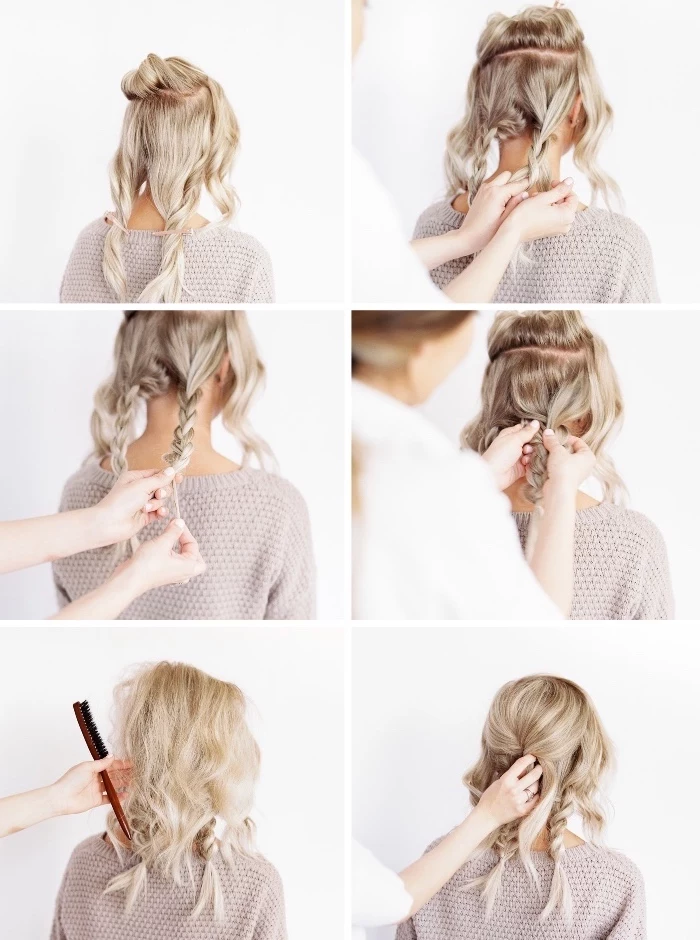
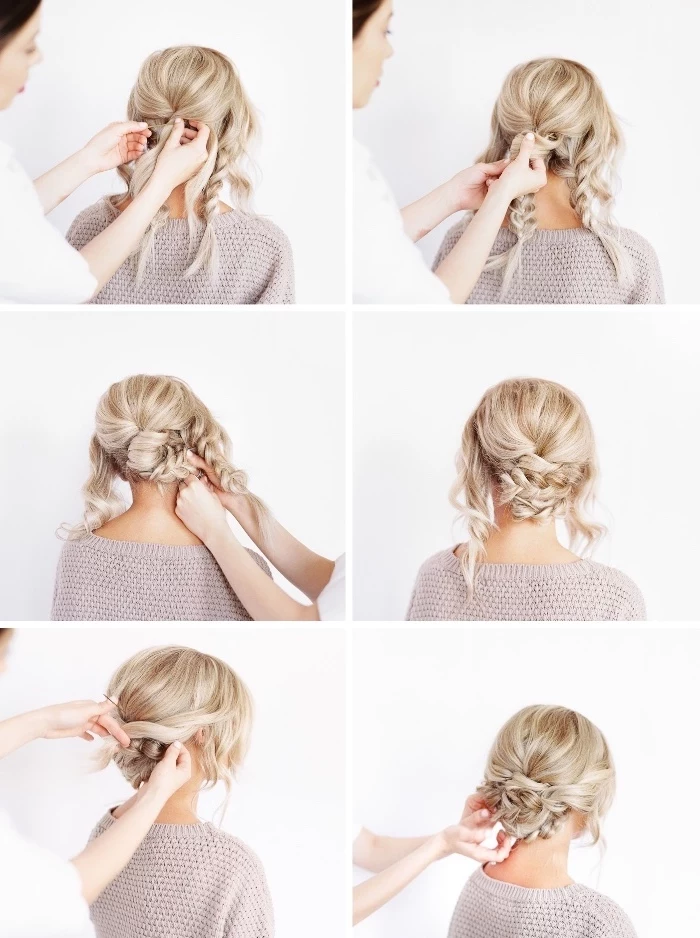
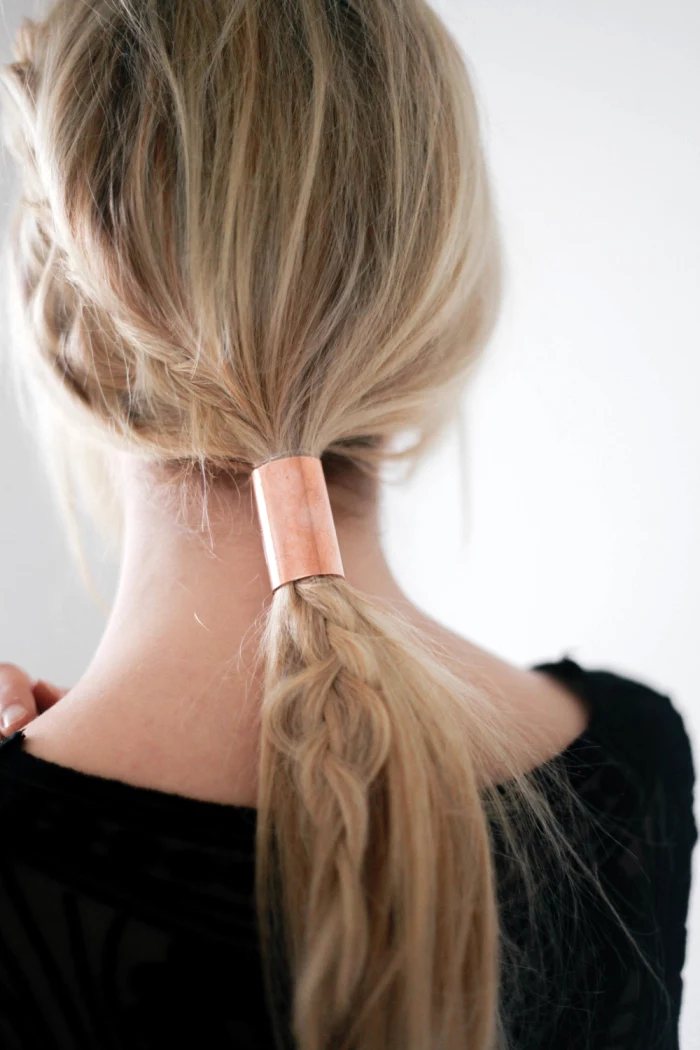
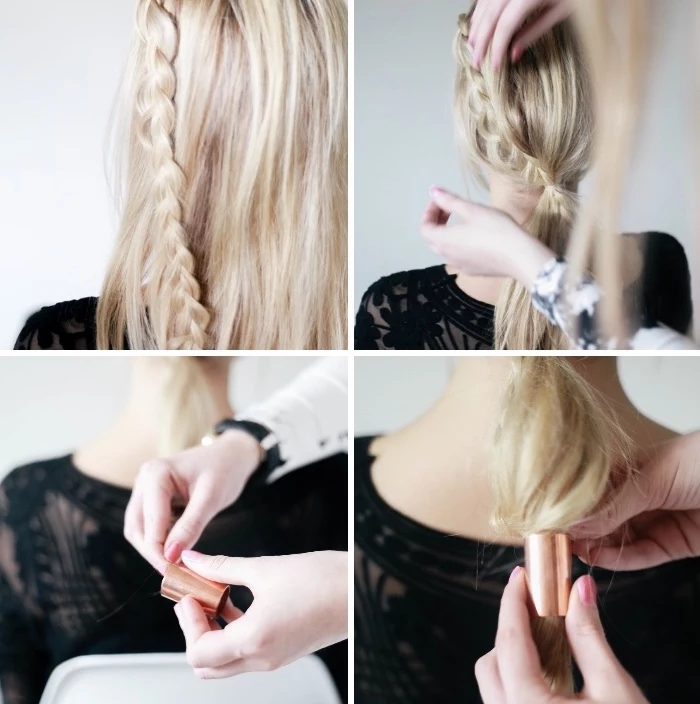
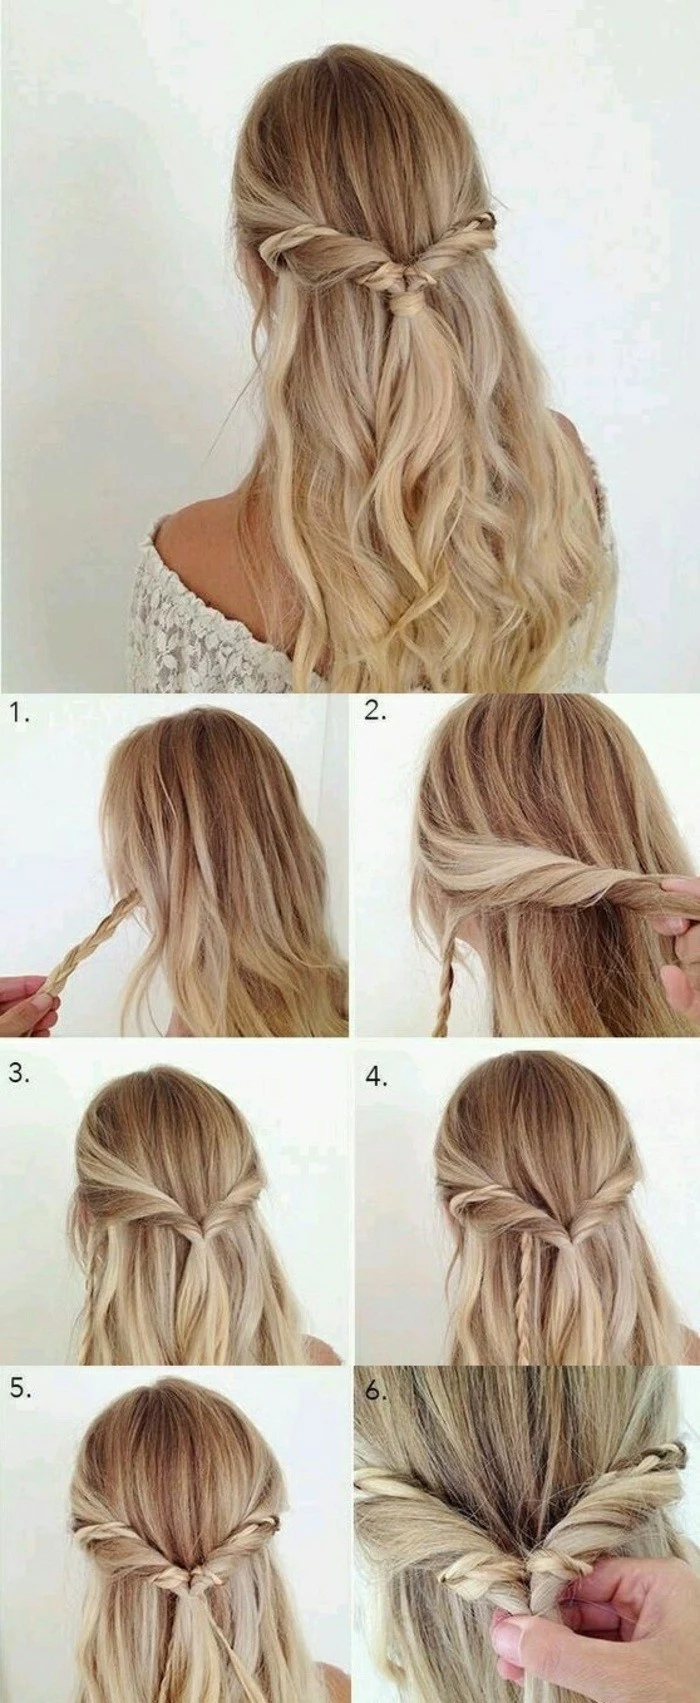
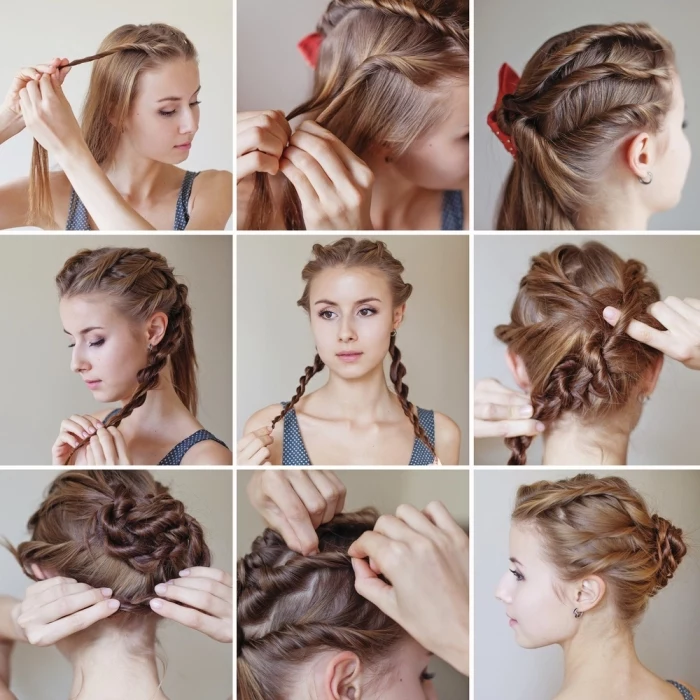
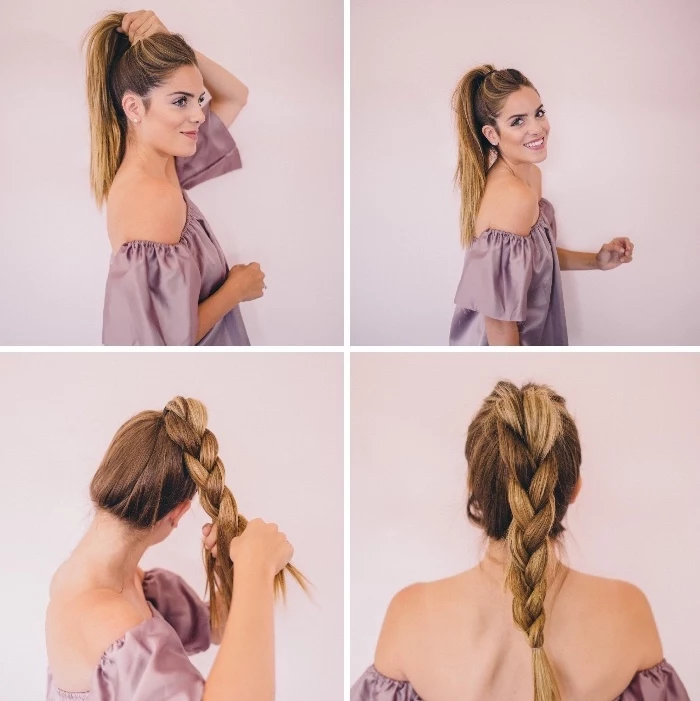
Just twisting your ponytail into a lump and sticking pins in it is a recipe for a heavy, droopy bun. Instead, try the braided method. After you’ve made your secure ponytail, do a simple three-strand braid all the way down. The braid creates dozens of little pockets for bobby pins to grab onto—it’s like an internal support system.
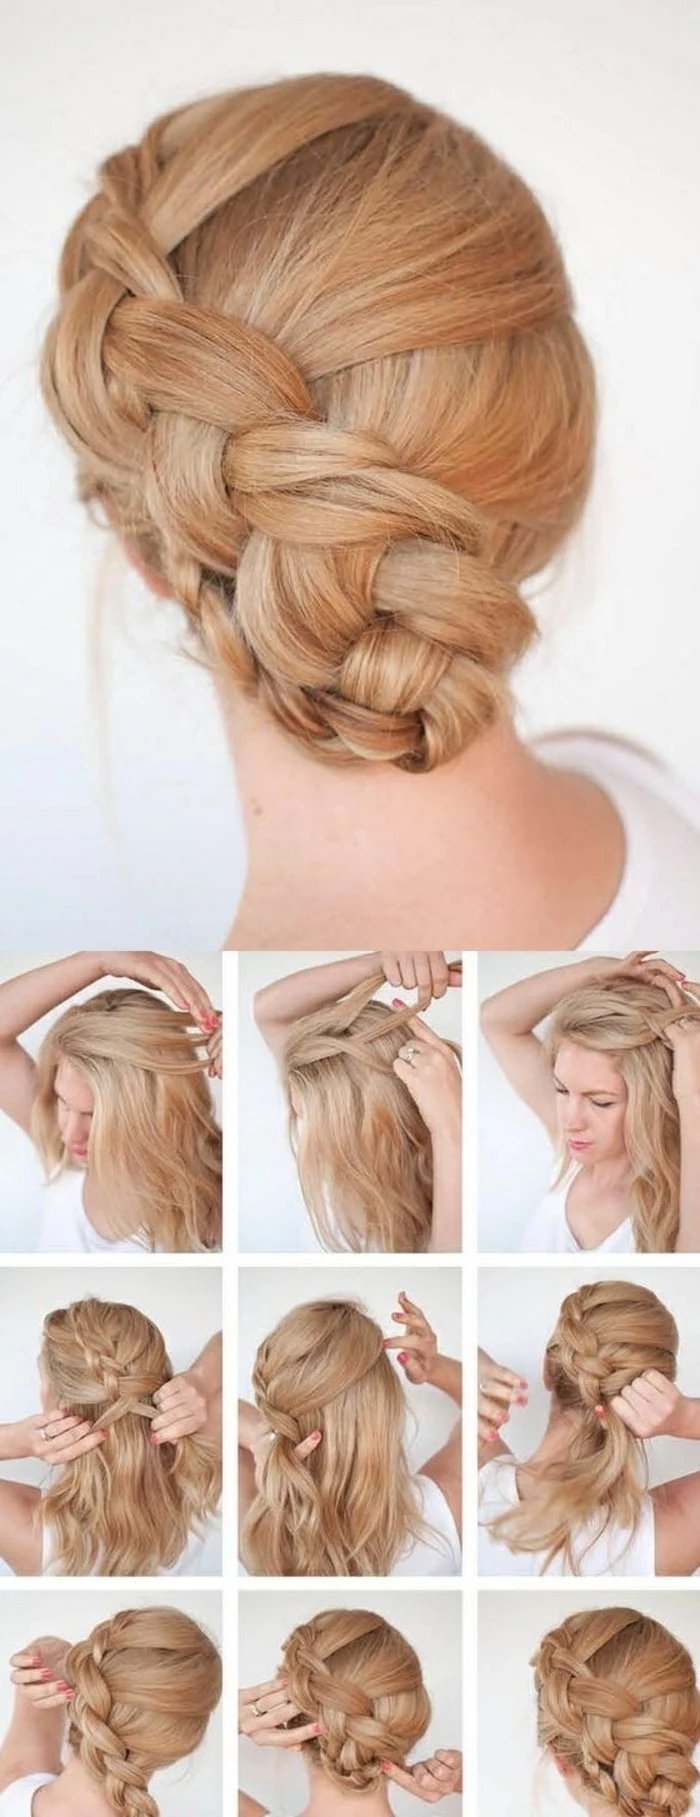
Before you wrap it, gently pull on the outer edges of the braid to fatten it up. This is called ‘pancaking,’ and it gives you a fuller, softer look. Then, coil the pancaked braid around the base and get ready to pin.
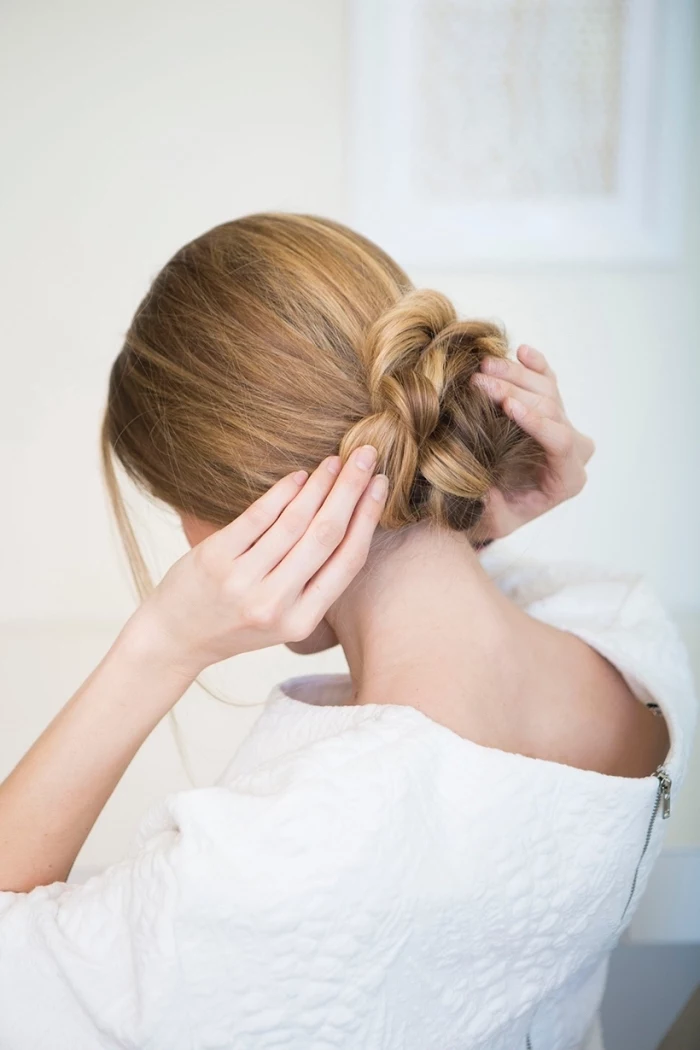
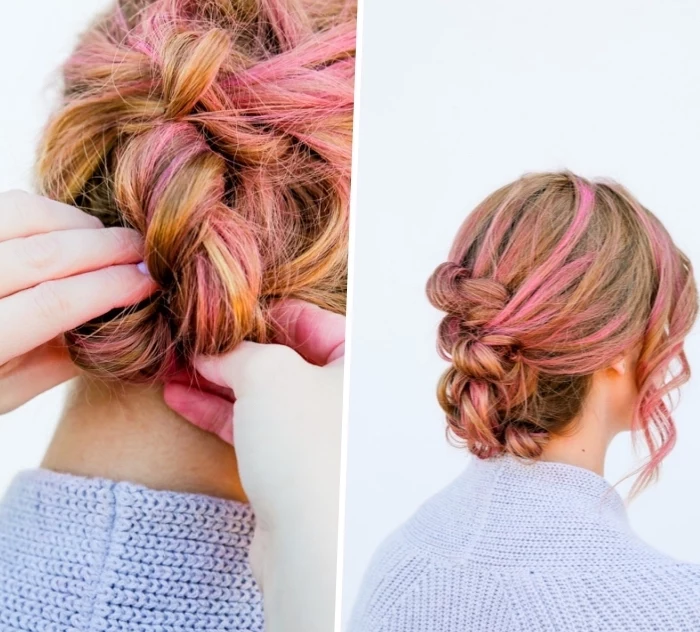
The Art of Pinning (Yes, It’s an Art)
When I train new stylists, we spend hours just on pinning. Most people use bobby pins all wrong. First, let’s clear this up: bobby pins and hairpins are two totally different tools. Bobby pins, the ones that are closed tight, are for HOLDING things down securely. Hairpins, those open, U-shaped ones, are for SHAPING and securing looser sections of hair without squishing them. For a bun, you want bobby pins.
The technique is called ‘scoop and anchor.’ You open the bobby pin slightly, scoop up a small piece of hair from the outer edge of your bun, then—and this is the important part—you pivot the pin and push it into the base hair against your scalp. You’re literally anchoring the bun to the hair on your head. A properly pinned bun shouldn’t need more than 6 to 10 pins, even for thick hair. Invest in some good, professional matte pins; the cheap shiny ones from the drugstore just don’t have the same grip.
Real-World Styling: Adapting to Your Hair
Tutorials are great, but real life means dealing with humidity, different hair types, and other challenges.
- For Fine or Thin Hair: Your best friends are volume and grip. Prep is everything. A lesser-known trick is to use a small mesh donut as a base. Put your ponytail through it, then arrange your hair around it to create the illusion of more hair. The pins will also anchor beautifully into the mesh.
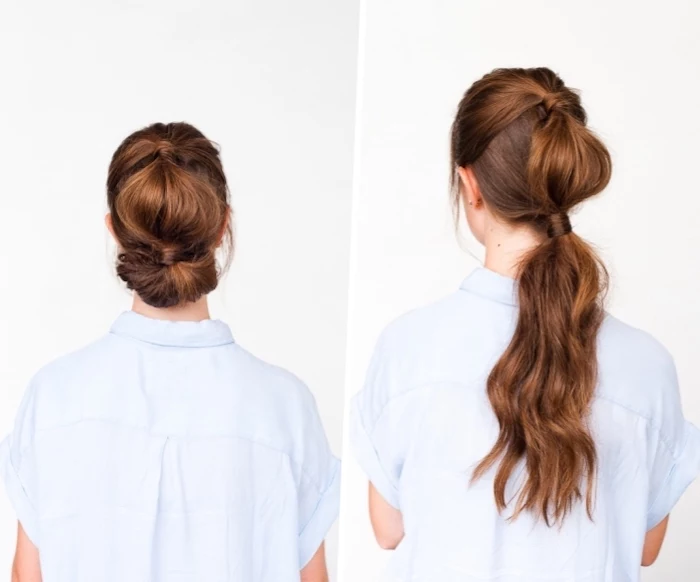
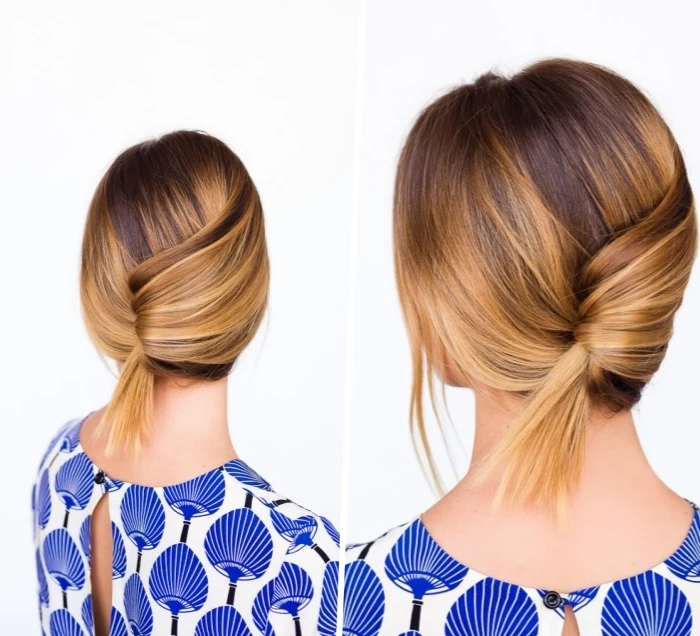
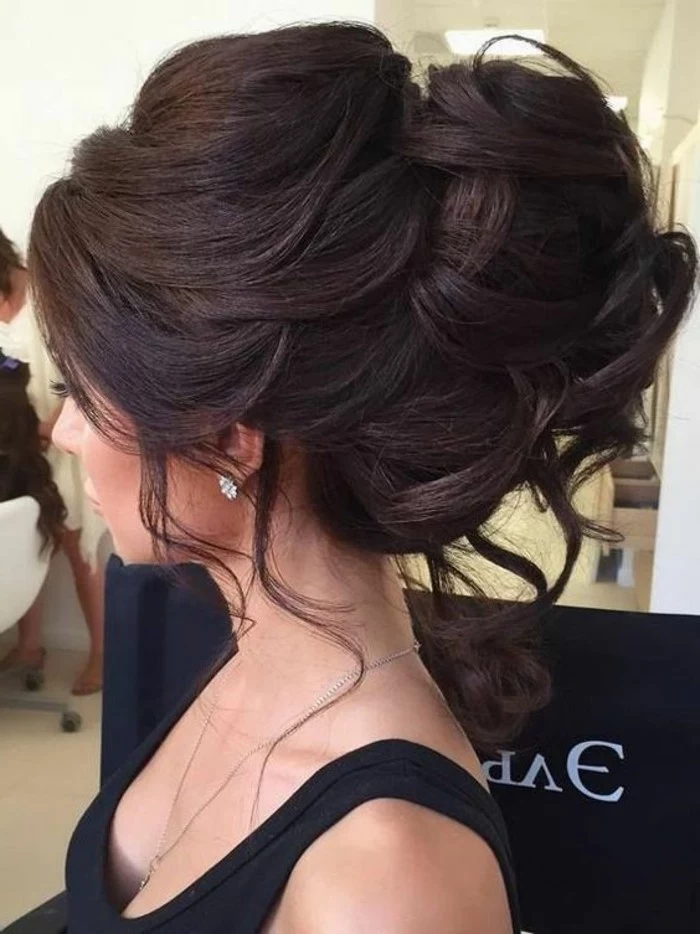
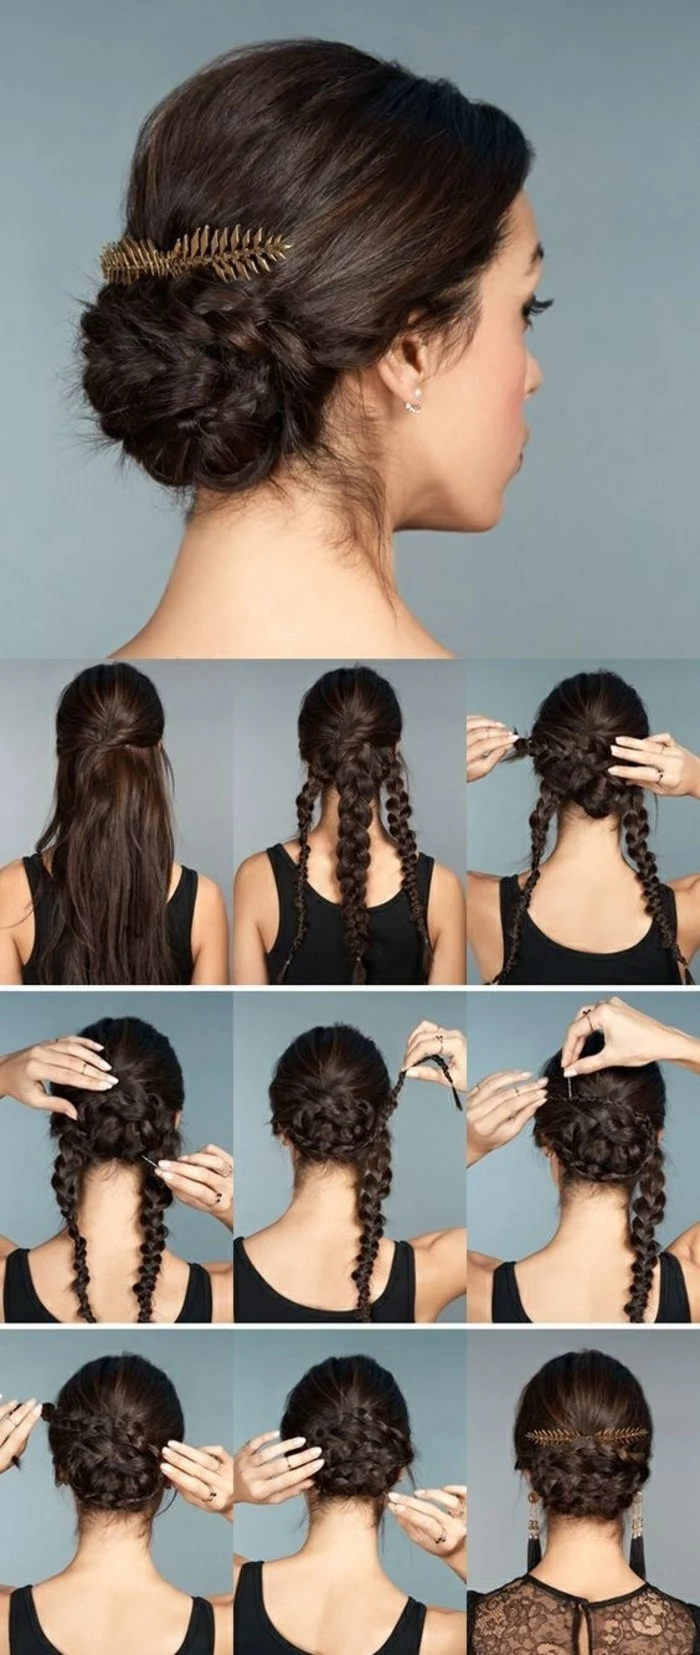
- For Thick or Heavy Hair: Your challenge is weight. To avoid a headache-inducing style, try creating two ponytails—one at the crown, one just below it—and then combine them into a single bun. This distributes the weight and gives you so much more control.
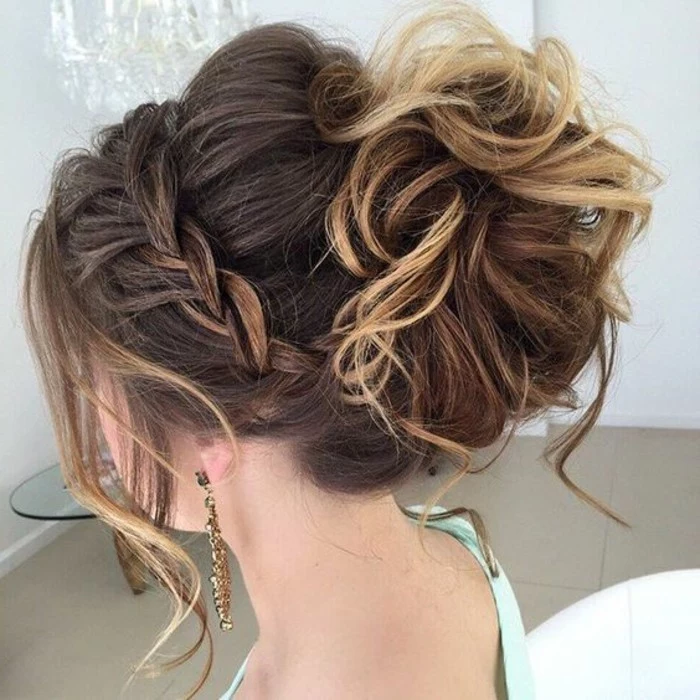
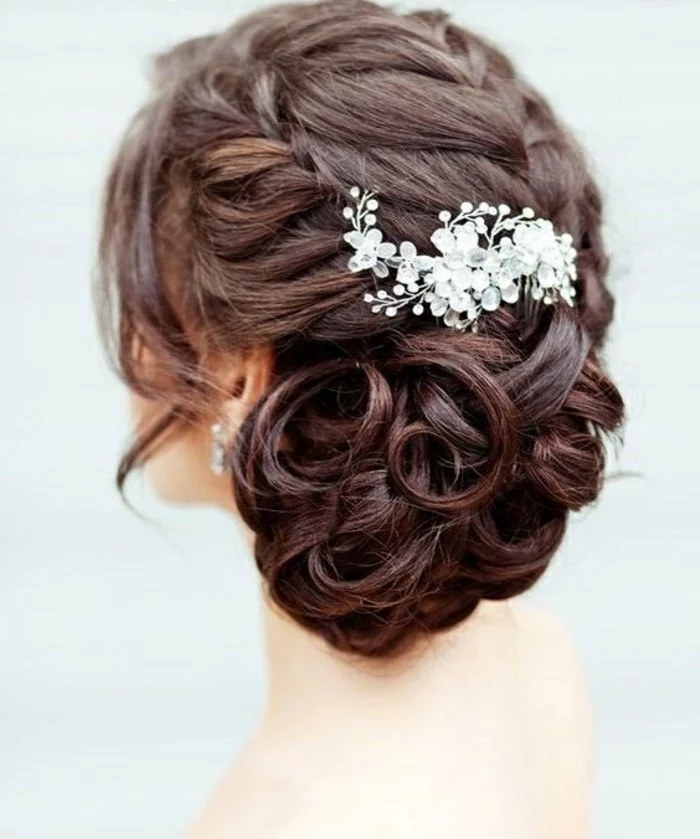
- For Curly or Coily Hair: Please, work with your amazing texture, not against it! Instead of pulling hair tight, think of it as sculpting. Gently gather sections of curls and pin them into place with U-shaped hairpins, which won’t crush their beautiful pattern.
A Few Final Words on Tools and Safety
You don’t need a whole salon, but a few key items will make a world of difference.
A good teasing brush is one of them. The ones with mixed boar and nylon bristles are far better than a simple comb. But a lot of people are scared of teasing because they just end up with a tangled mess. Here’s how to do it right: 1. Hold a small section of hair taut. 2. Place the brush at the mid-shaft, not the ends. 3. Use two or three short, gentle pushes down toward the scalp. That’s it! This creates a soft cushion of volume, not a rat’s nest. A quality one will cost you between $10 and $20, and it’s totally worth it.
And a serious safety warning: heat damage is real. If your hot tool is making your hair smoke or smell burnt, it is way too hot. For most hair, 325-375°F is plenty. Also, be mindful of tension. If a hairstyle is physically hurting your scalp, it’s too tight and can lead to hair loss over time. Beauty shouldn’t be painful.
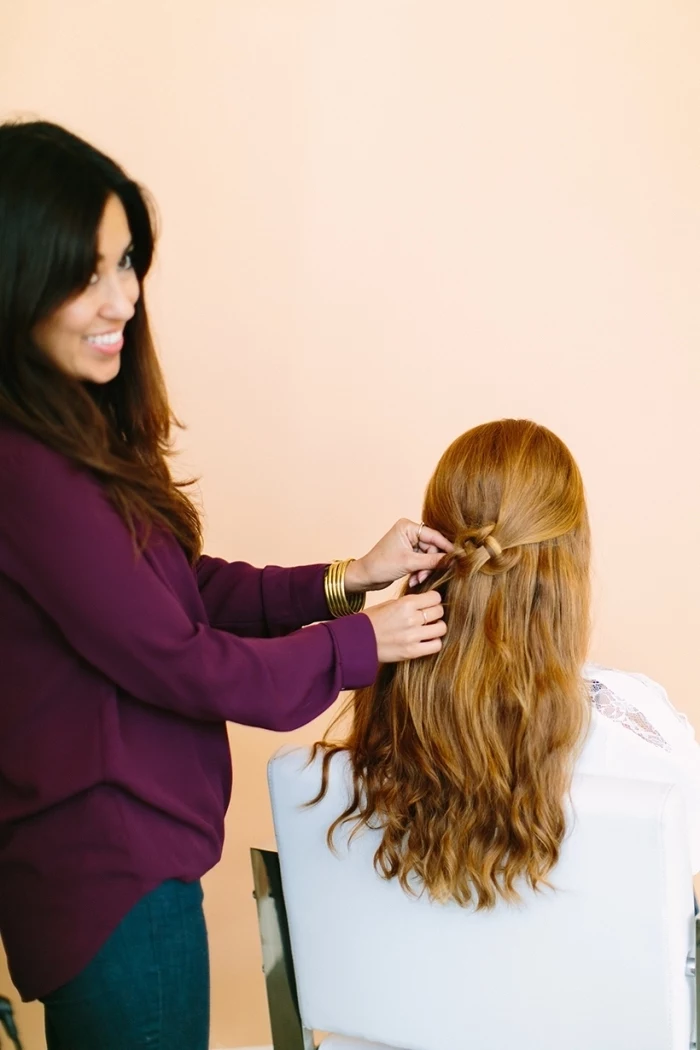
So, can you do this at home? Absolutely. But for a really huge event like a wedding, hiring a pro is about more than just the style. You’re paying for their experience, their ability to troubleshoot on the fly, and the peace of mind that lets you just relax and enjoy your day. Think of it as the difference between cooking a nice dinner and catering a massive party. With these principles, though, your everyday styling game will be stronger, more beautiful, and built to last.
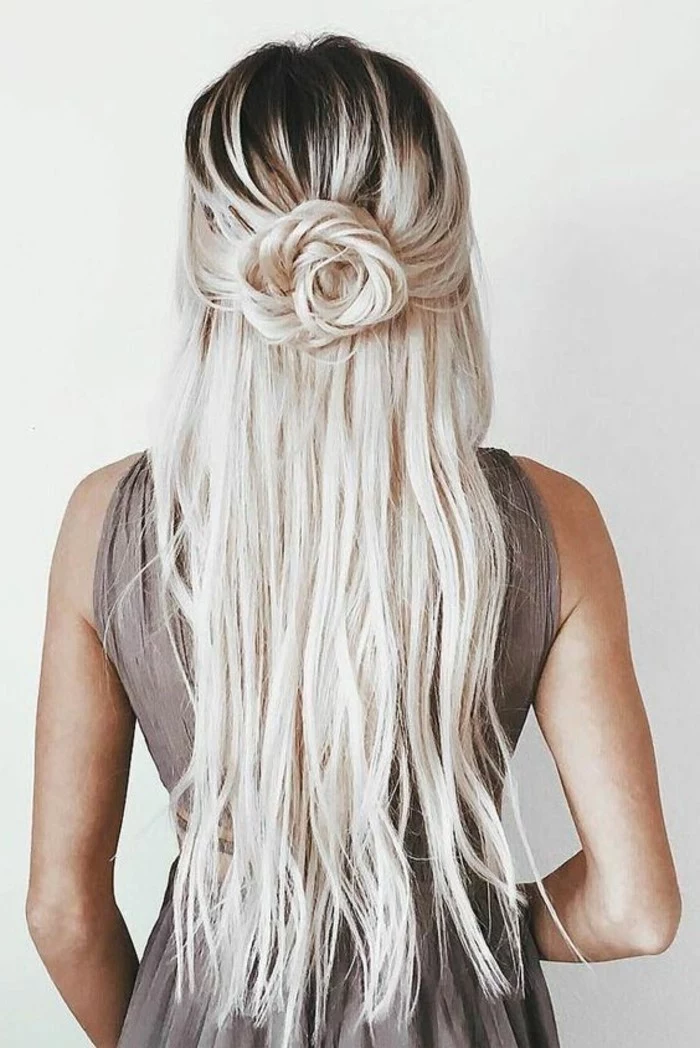
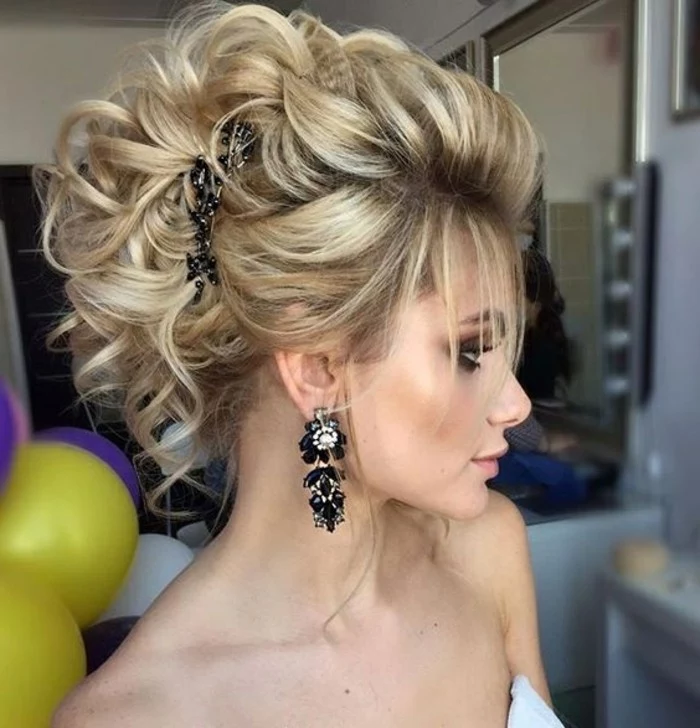
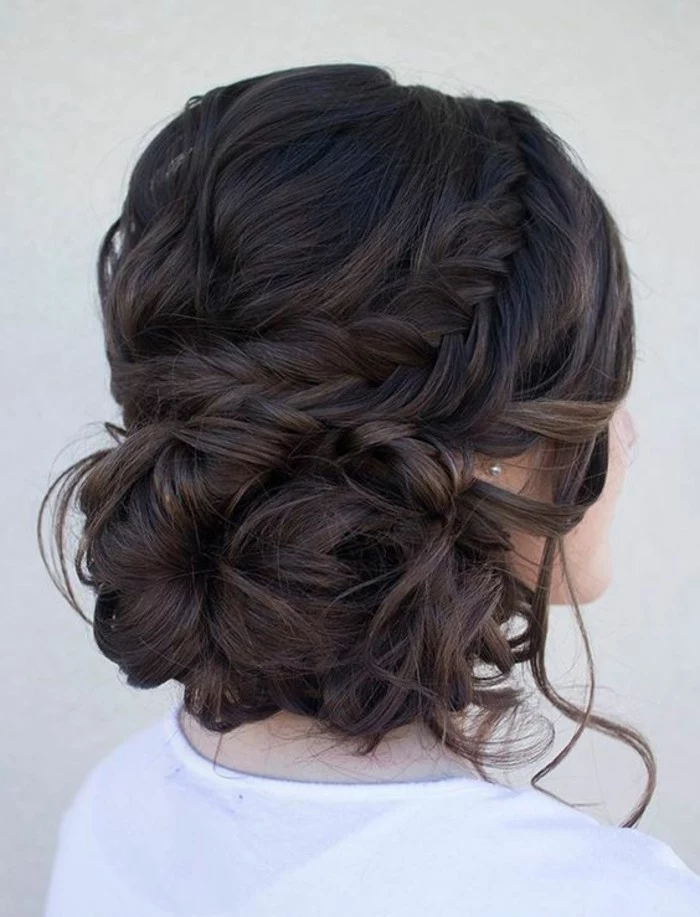
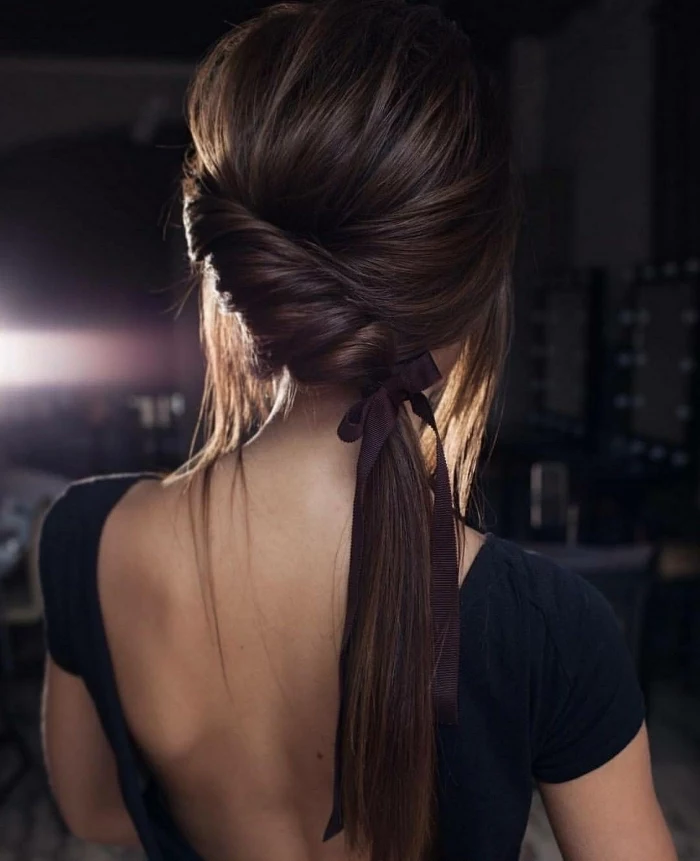
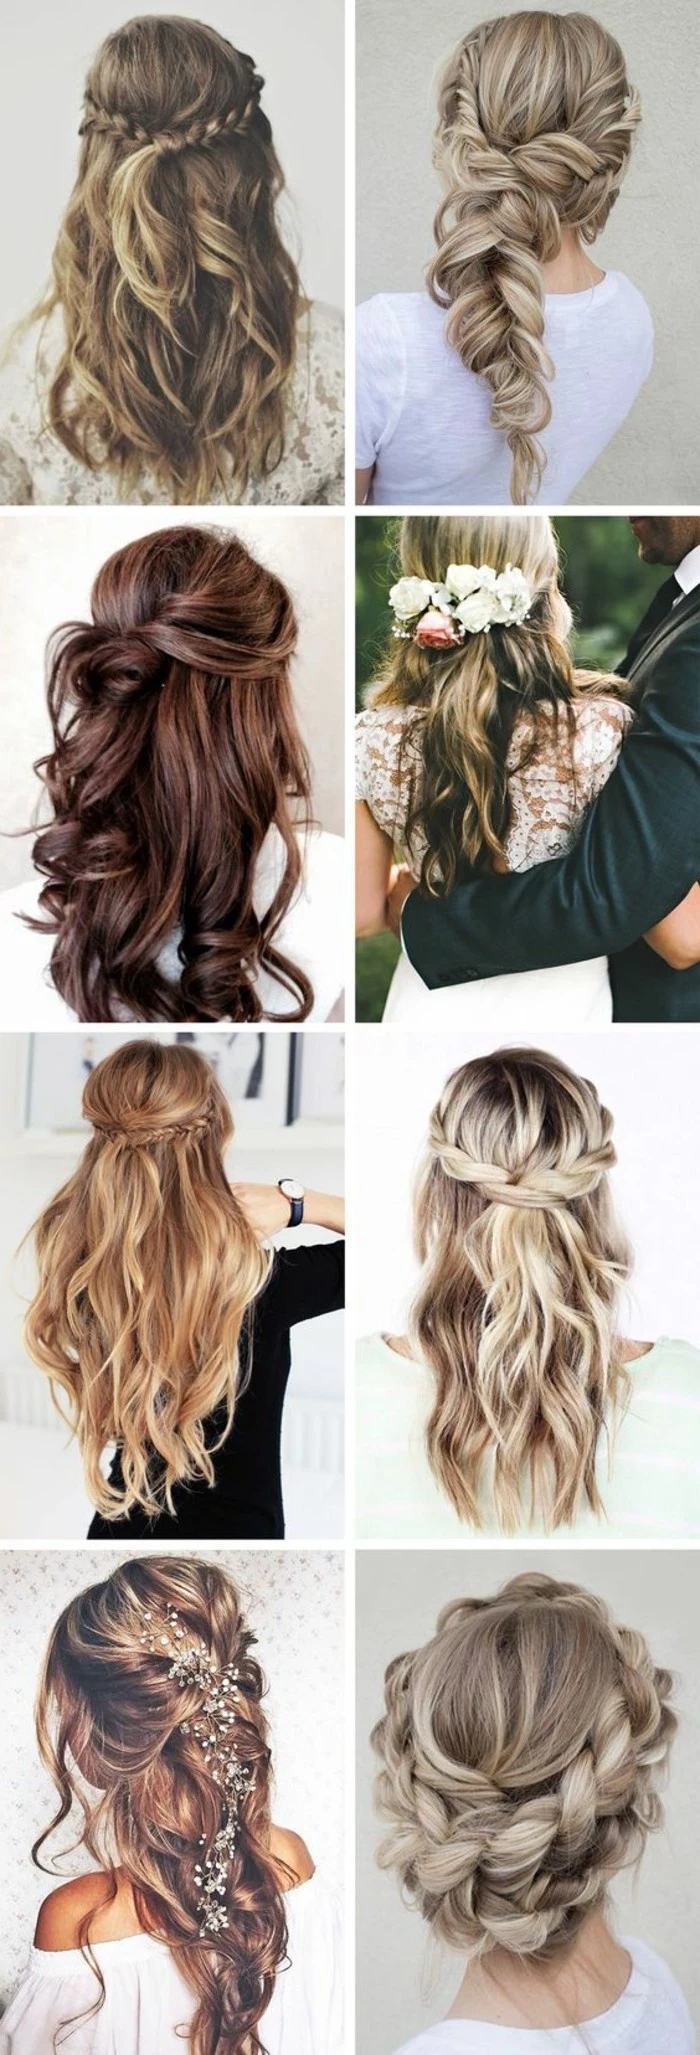
Inspiration Gallery
Stylists often say that hair styled on the second or even third day holds much better than freshly washed, silky hair. The natural oils provide a slight grip that product alone can’t replicate. If you must wash your hair on the day of styling, skip the conditioner on the roots and mid-lengths to avoid making them too slick.
- A texturizing spray, like Oribe Dry Texturizing Spray, to give fine hair grit.
- A root-lifting mousse applied to damp hair before blow-drying to build volume from the base.
- A thermal protectant that doesn’t add oil, such as Kérastase Genesis Defense Thermique.
- A strong-hold, yet brushable, hairspray for the finishing touch.
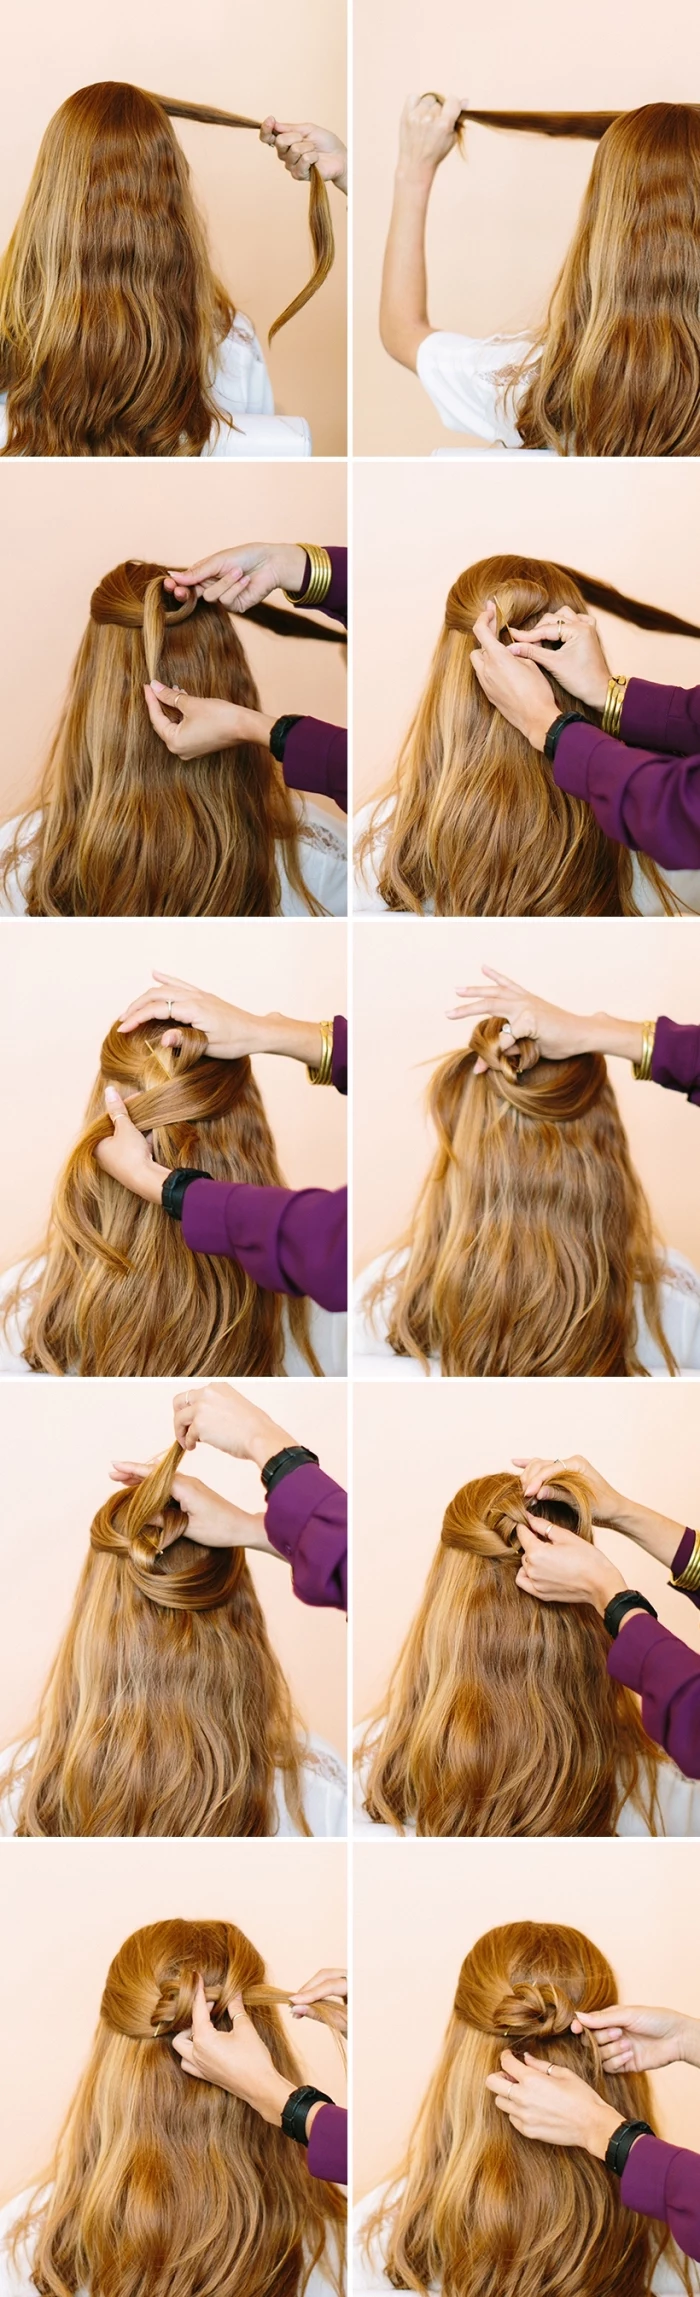
The biggest bobby pin mistake: Using them with the wavy side up. The ridges are designed to grip the hair and should always face the scalp. For an even stronger hold, try crisscrossing two pins to form an ‘X’ at key anchor points in your updo.
The secret to invisible support lies in the

How do I stop my style from frizzing and falling apart in humidity?
Humidity is the enemy of hold. The key is to create a barrier. Start with an anti-humidity shampoo and conditioner. Before styling, apply a humidity-blocking product like Color Wow Dream Coat. Once your style is complete, finish with a light, anti-humidity hairspray. The goal is to seal the hair cuticle so it can’t absorb moisture from the air.
Bobby Pins: Best for securing small, tight sections and flyaways close to the scalp. They offer a firm, clamping grip.
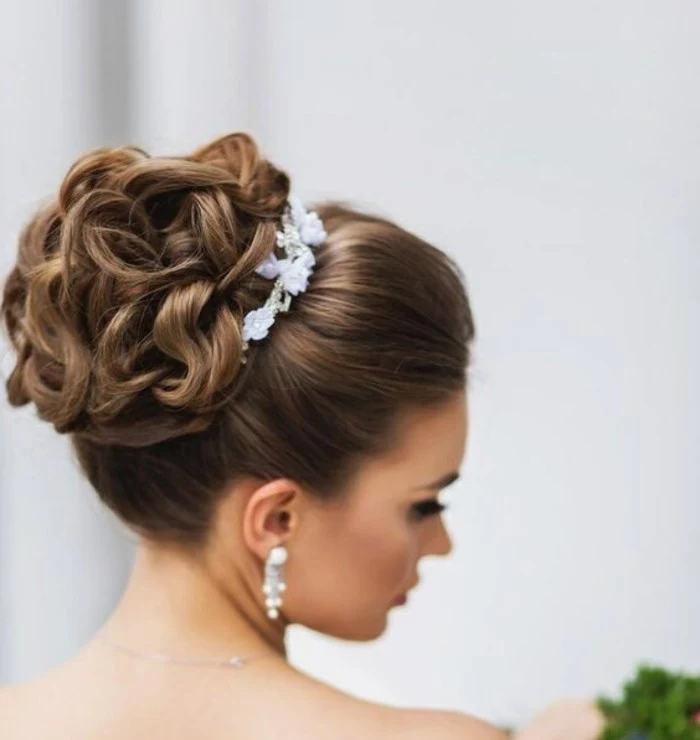
French Hair Pins (U-pins): Ideal for securing larger shapes like buns and chignons. They provide a softer hold and are less likely to leave dents, perfect for creating that ‘effortlessly secured’ look.
For a robust but airy updo, use French pins for the main shape and bobby pins to tuck in any stray ends.


Many texturizing sprays use ingredients like zeolite, a volcanic mineral, to create friction between hair strands.
This is why they are so effective on clean, slippery hair. Unlike hairspray, which glues strands together, a texturizer adds microscopic rough particles to the hair shaft, creating volume and a pliable, piecey texture that’s perfect for building braids and updos that need to grip onto themselves.
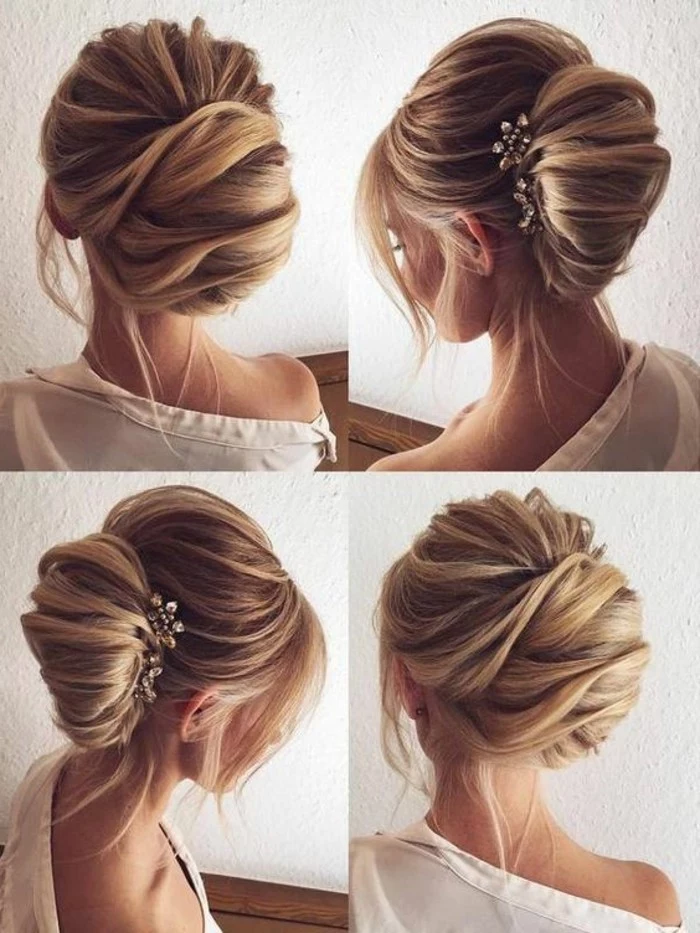
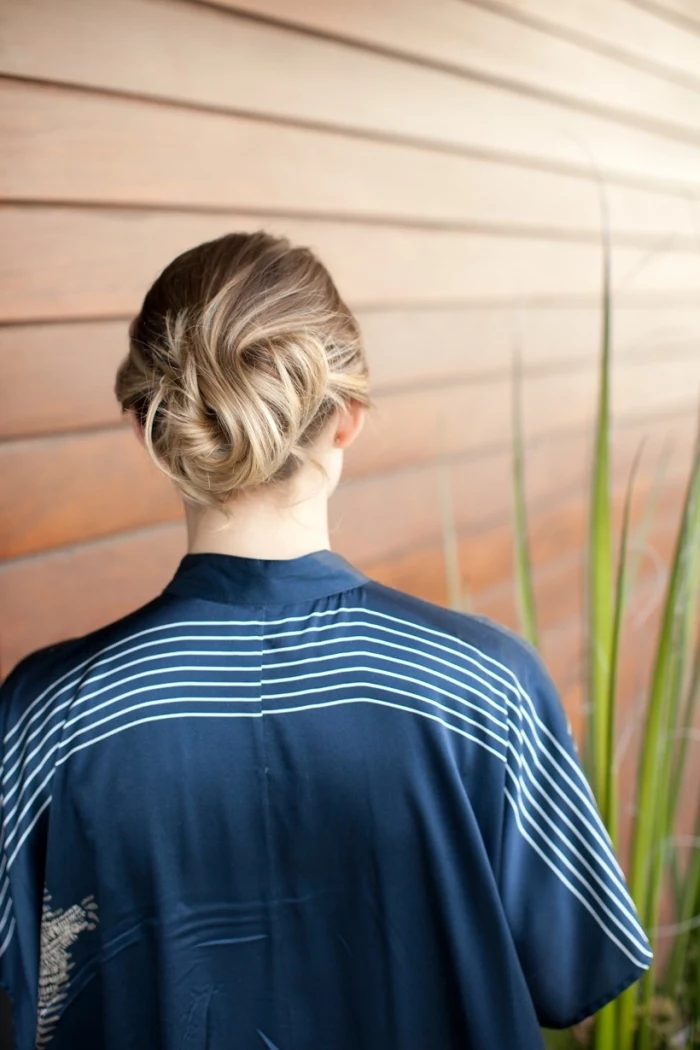
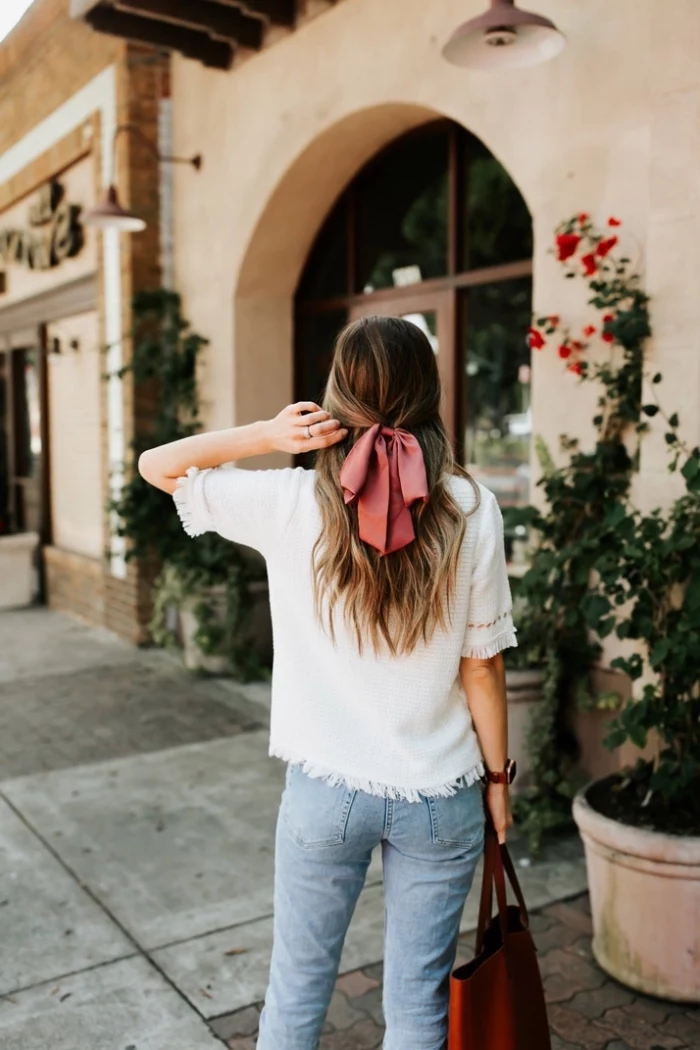
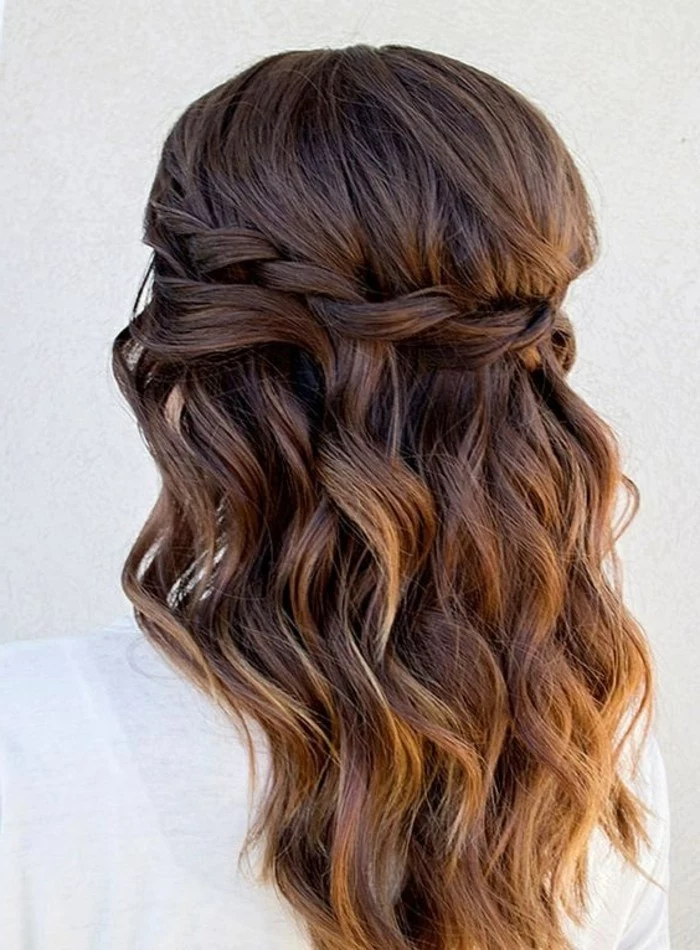
- It feels secure without being tight or causing a headache.
- It has softness and movement, avoiding the dreaded ‘helmet head’.
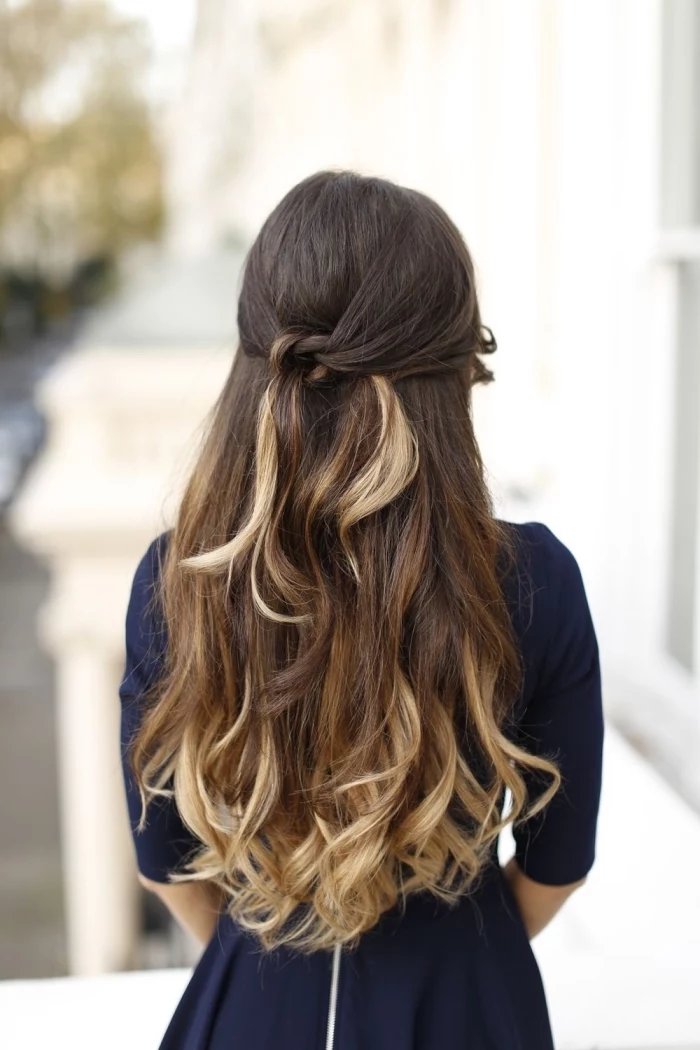
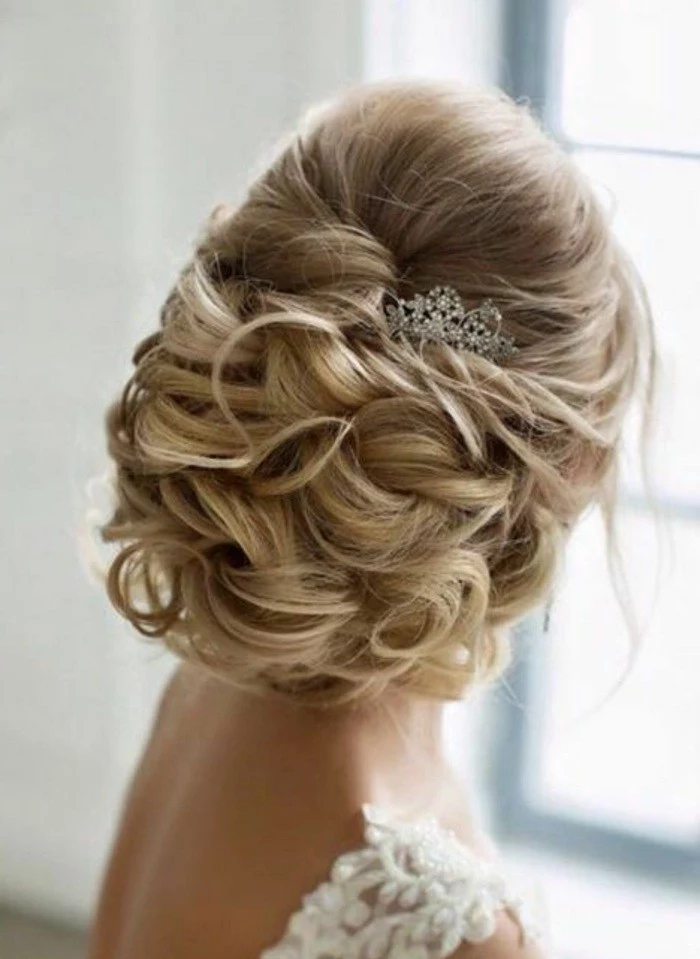
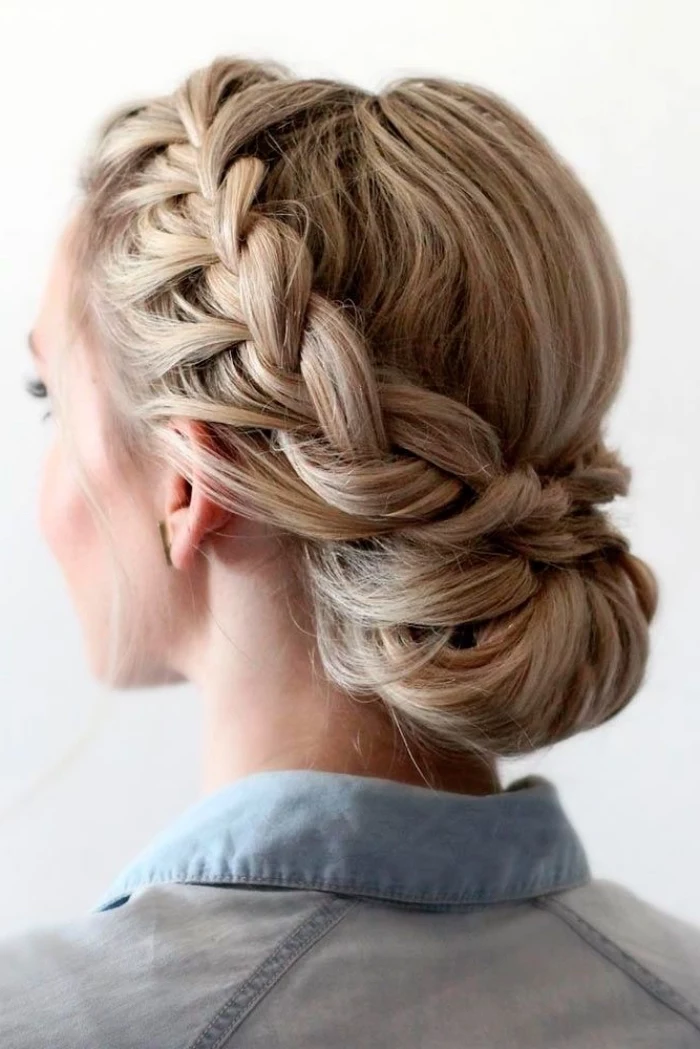
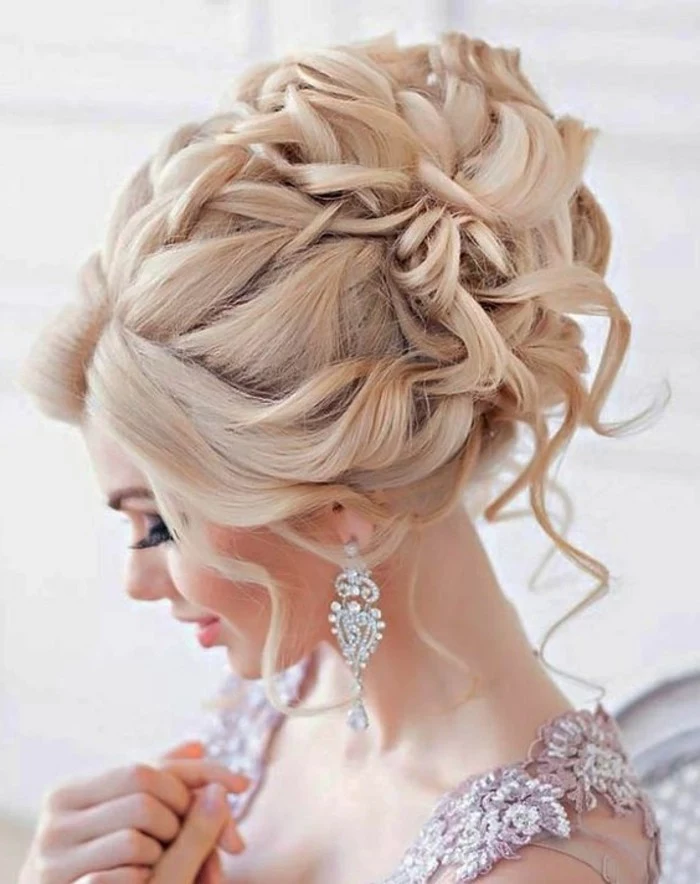
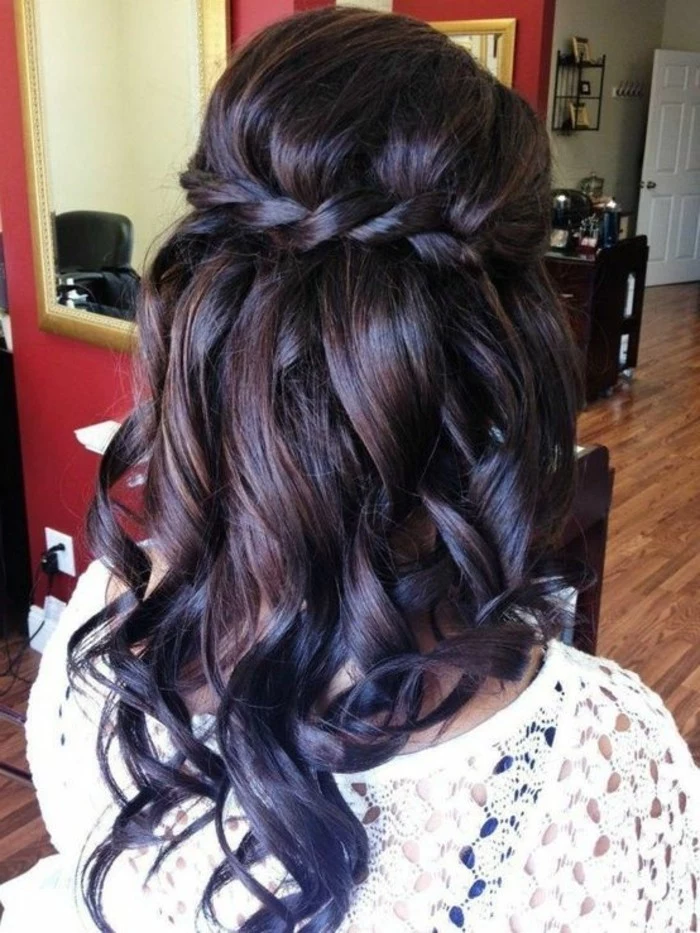
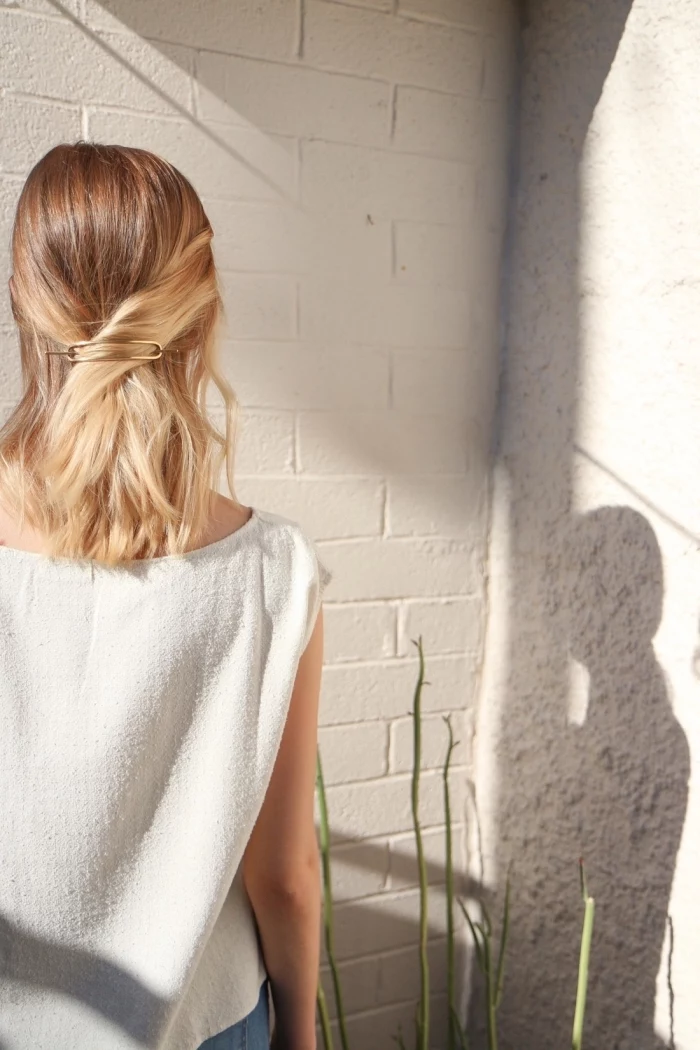
The secret? Sectioning. Build your style in layers. Secure the foundational, structural parts of the hair tightly to the head, then overlay softer, more loosely pinned sections on top for a look that’s both durable and delicate.
For the ultra-sleek, ‘clean girl’ bun that lasts all day, the magic isn’t just gel. It’s about layering products. Start with damp hair and apply a smoothing cream. Blow-dry it straight back. Then, work a strong-hold pomade or wax through the roots with your fingers before brushing it into a tight ponytail. This waxy base prevents flyaways and holds much longer than hairspray alone.
- Don’t just pull out the pins. This causes breakage. Instead, use your fingers to gently wiggle each pin loose.
- Generously spritz your hair with a leave-in conditioner or detangling spray to give it some slip.
- Use a wide-tooth comb, starting from the ends and working your way up to the roots, to gently undo the teasing and tangles.
- Never, ever brush a heavily styled, product-laden updo from root to tip.

The hairstylist’s secret weapon: L’Oréal’s Elnett Satin Hairspray. It’s a backstage staple for a reason. It provides incredible hold but remains so fine and brushable that you can layer it, style over it, and brush it out at the end of the night without leaving a sticky, crunchy residue. It’s proof that you don’t need to spend a fortune for professional-grade results.
A single strand of healthy hair can stretch up to 30% of its original length before breaking.
This elasticity is crucial for styling. When you create a curl or wave, you are stretching one side of the hair shaft more than the other. Products that provide hold essentially work to lock the hair in this stretched, styled state, preventing it from reverting to its natural form.

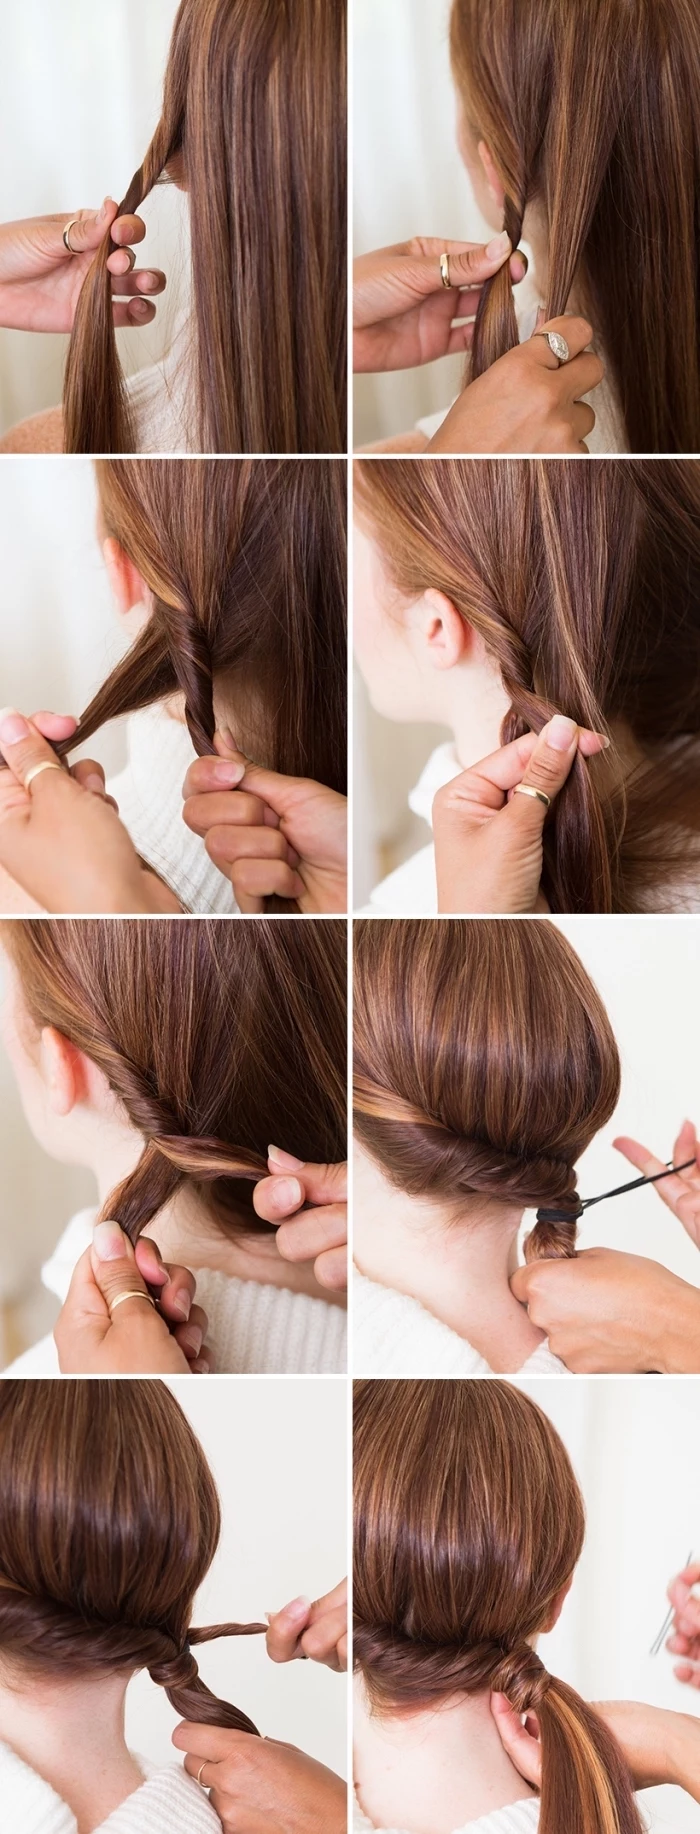
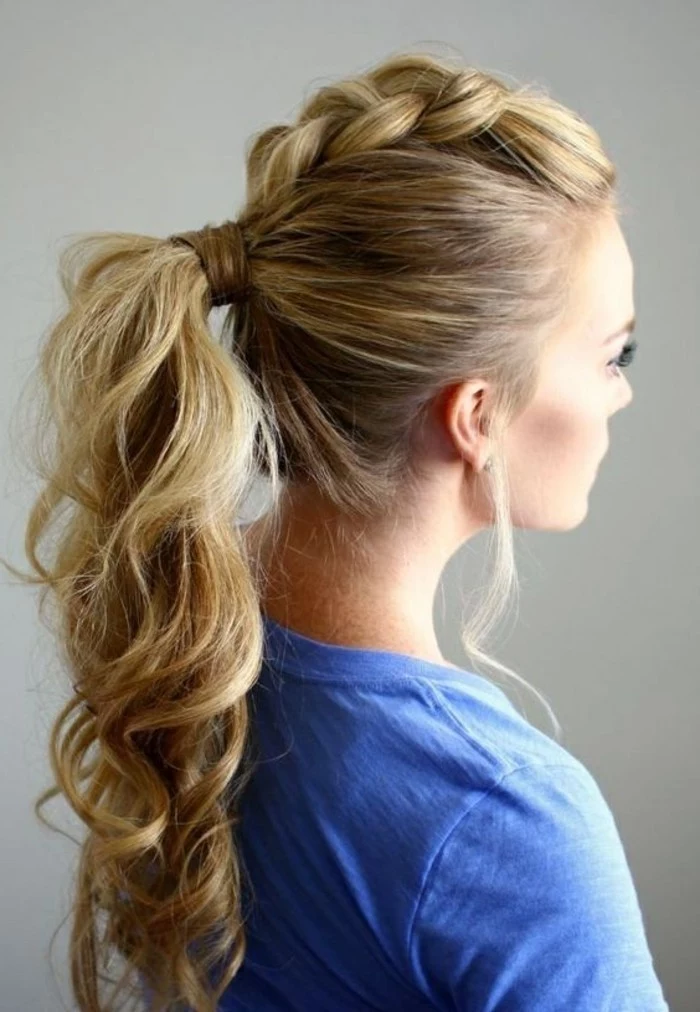
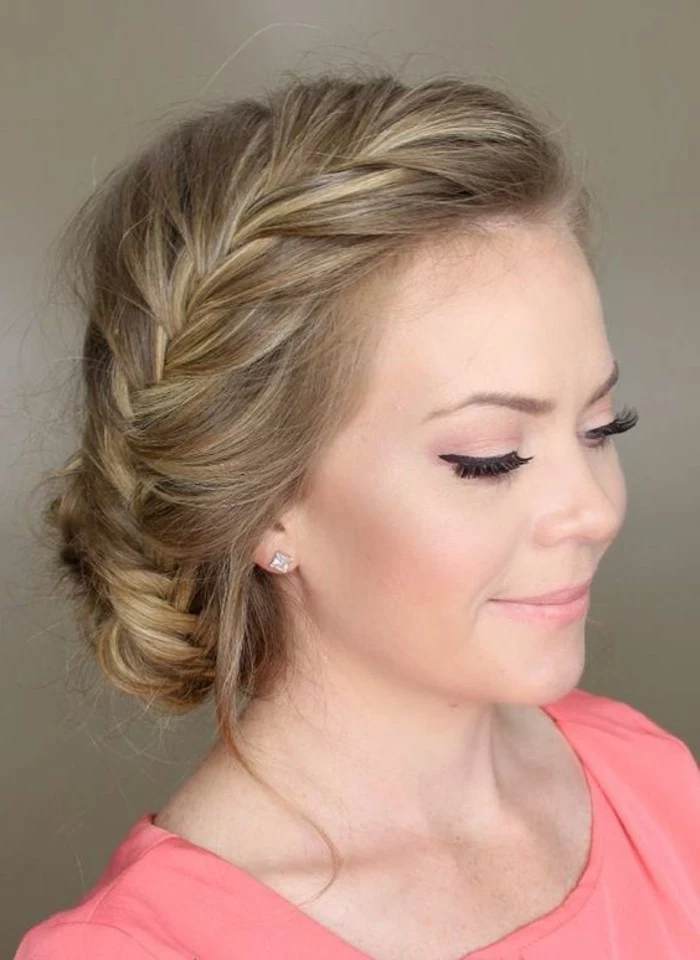
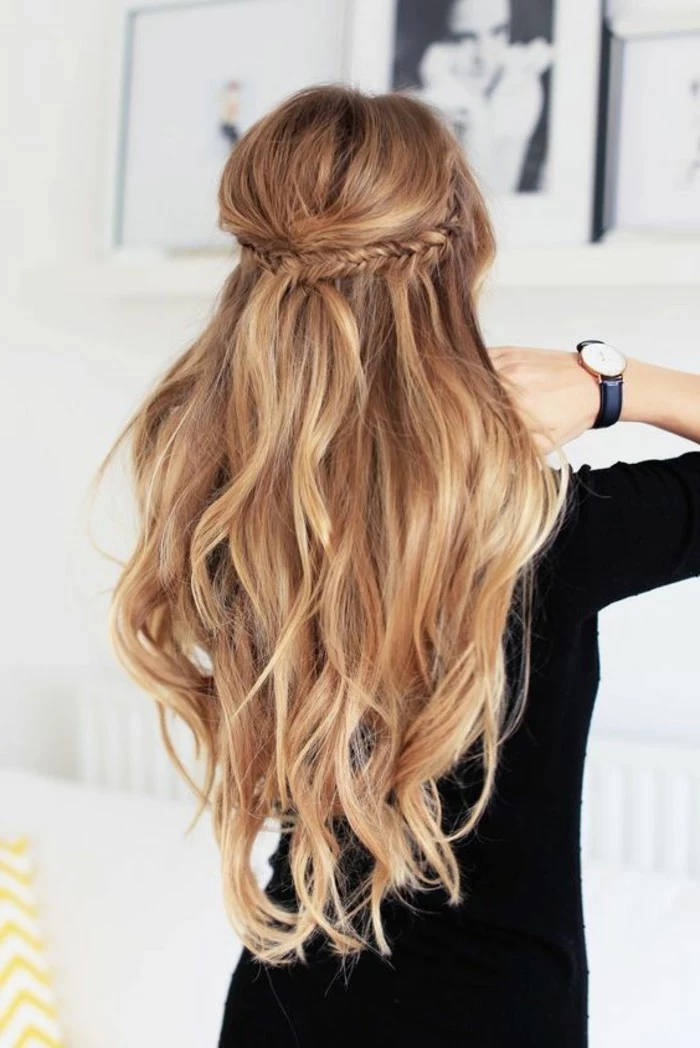
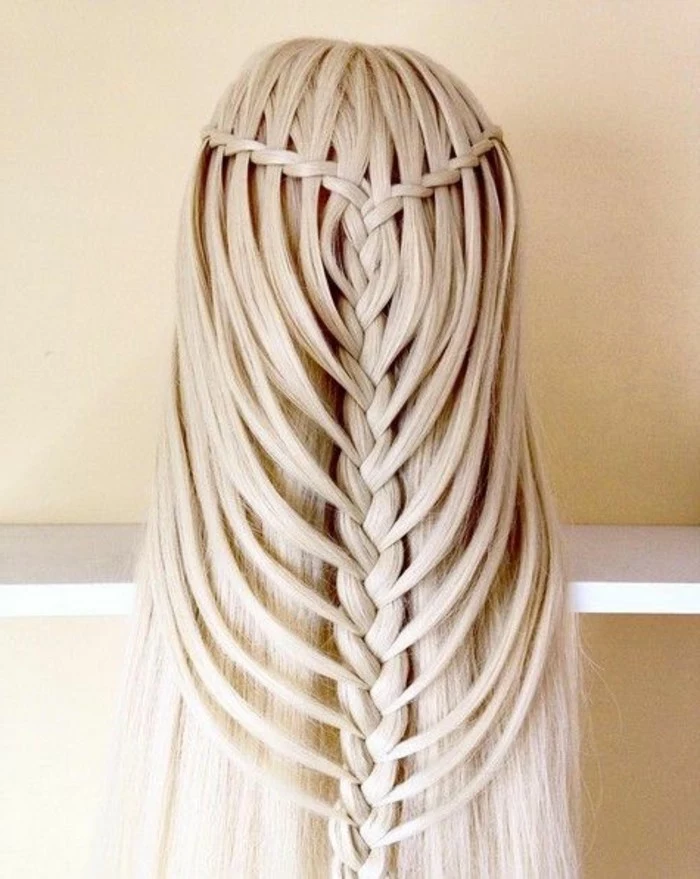
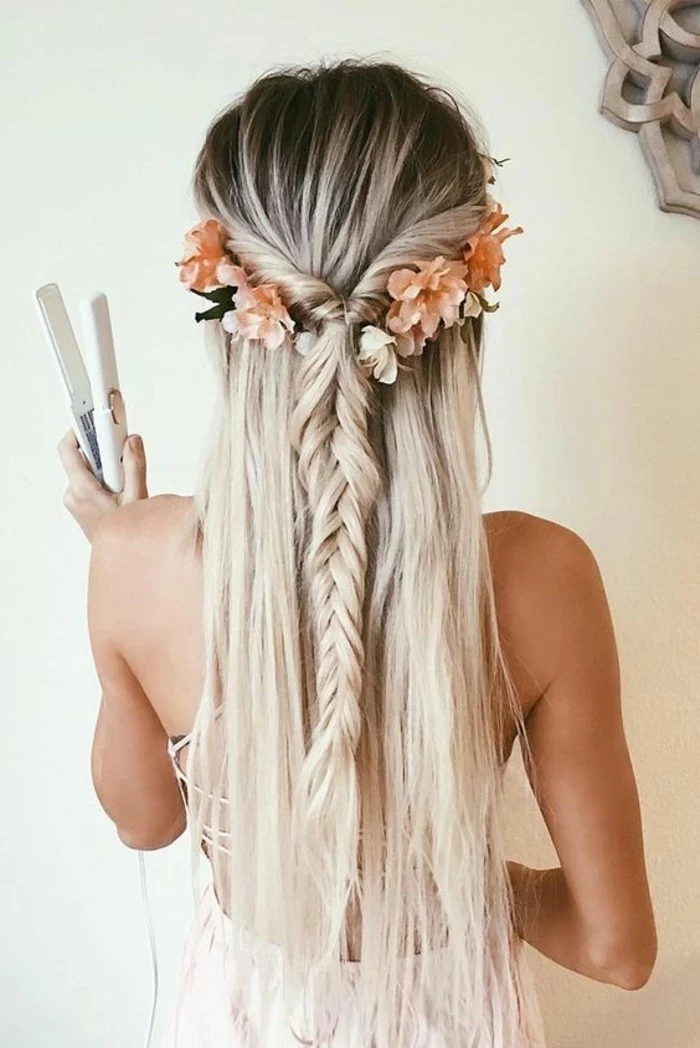
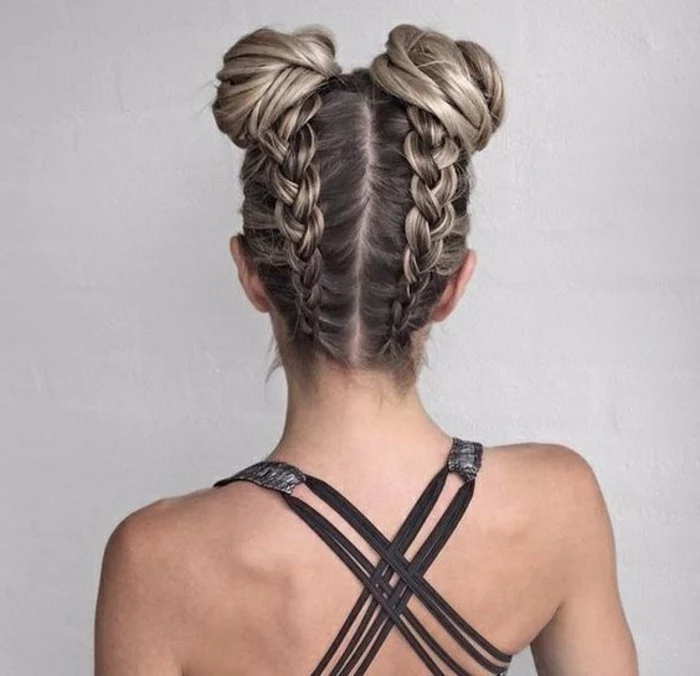
Want instant beachy grit for braids that hold? Make your own salt spray. It’s the perfect prep for adding texture to fine or silky hair.
- Mix one cup of warm water with one tablespoon of sea salt (not table salt).
- Add a teaspoon of a lightweight leave-in conditioner or a few drops of argan oil to counteract the drying effect of the salt.
- Pour into a spray bottle, shake well, and mist onto damp or dry hair before styling.
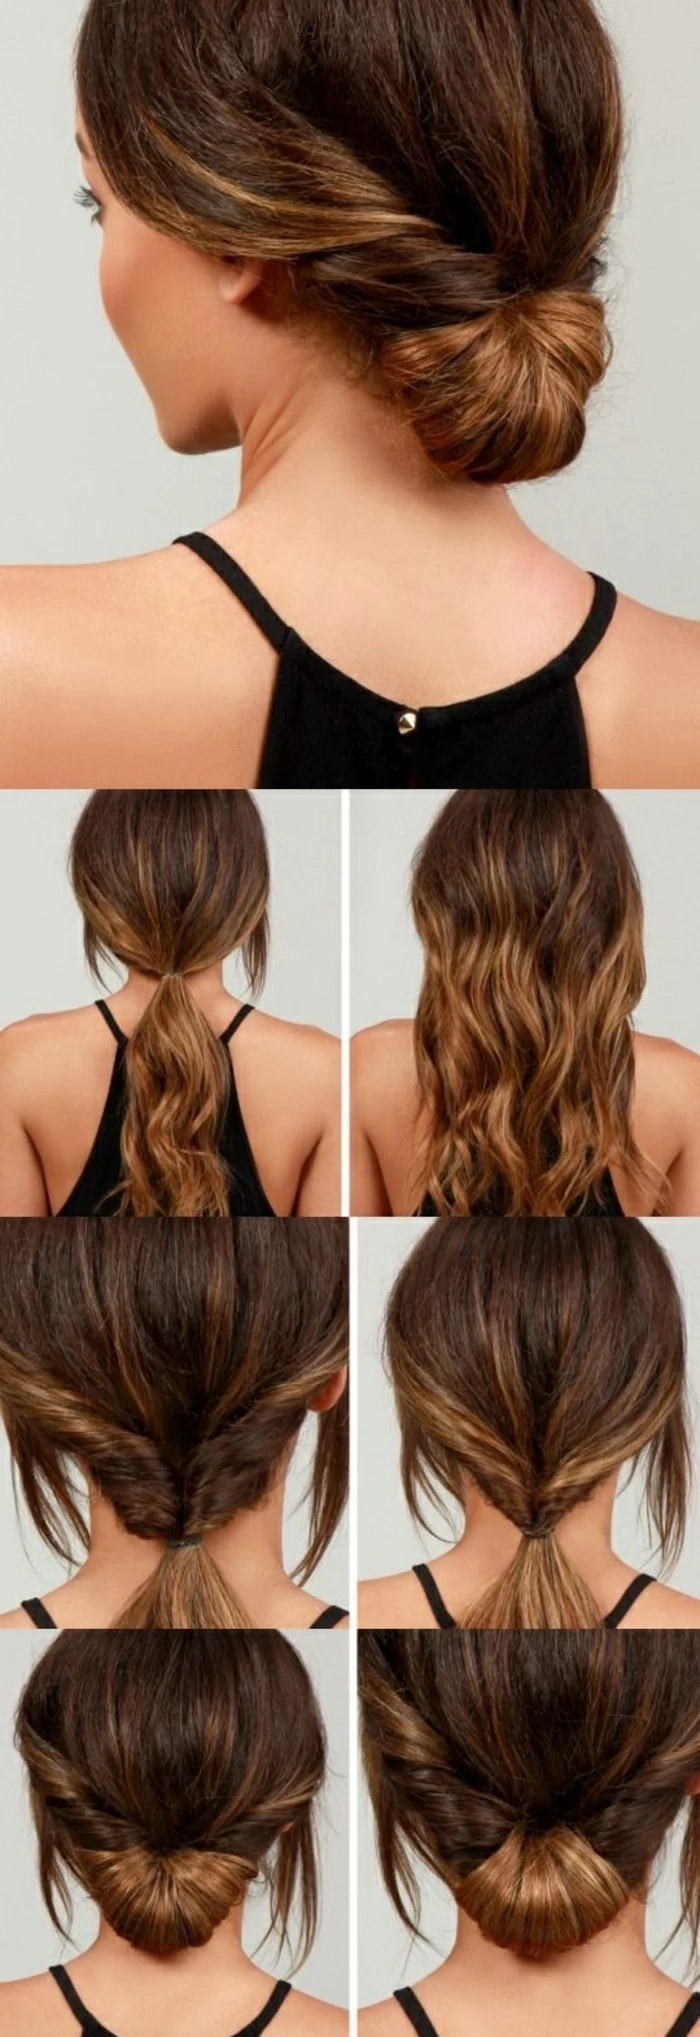


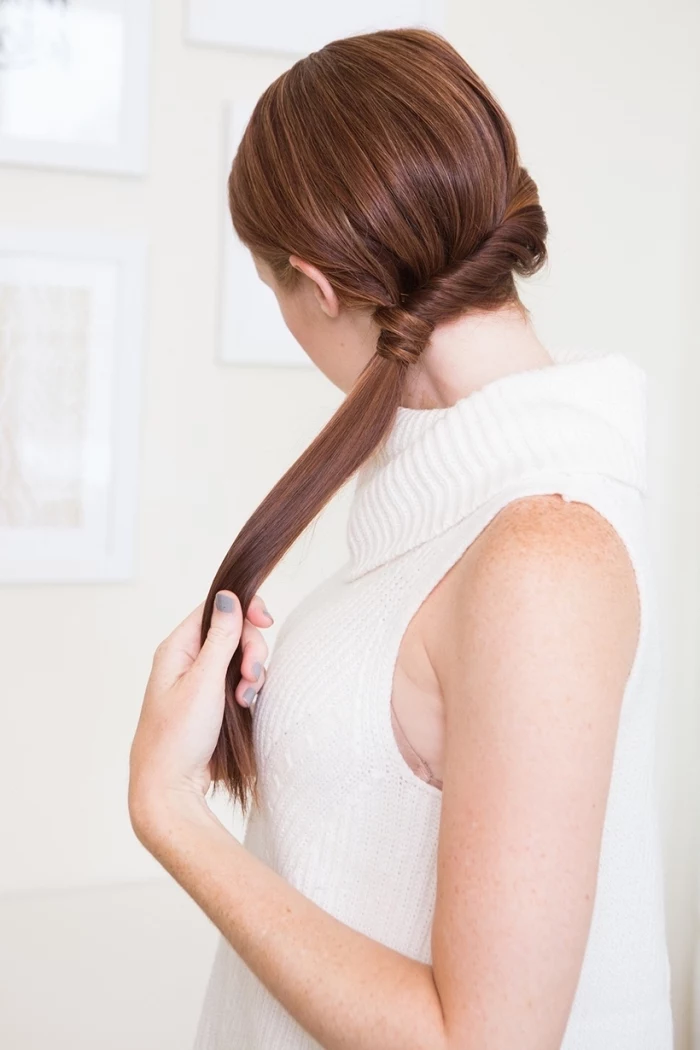
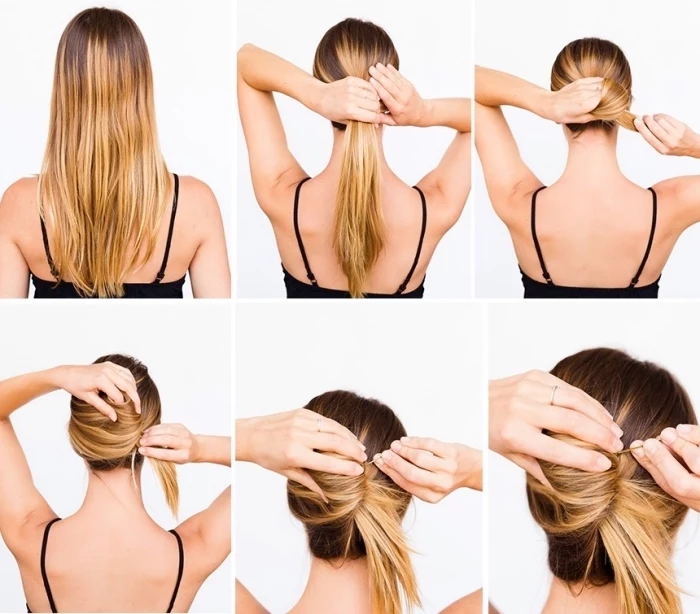
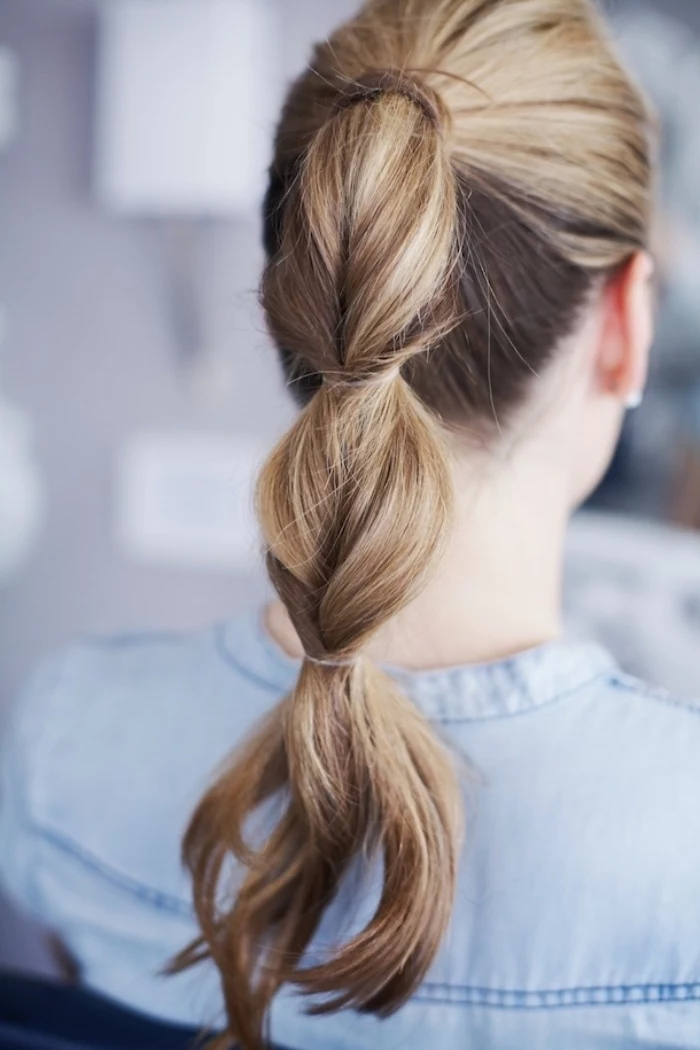
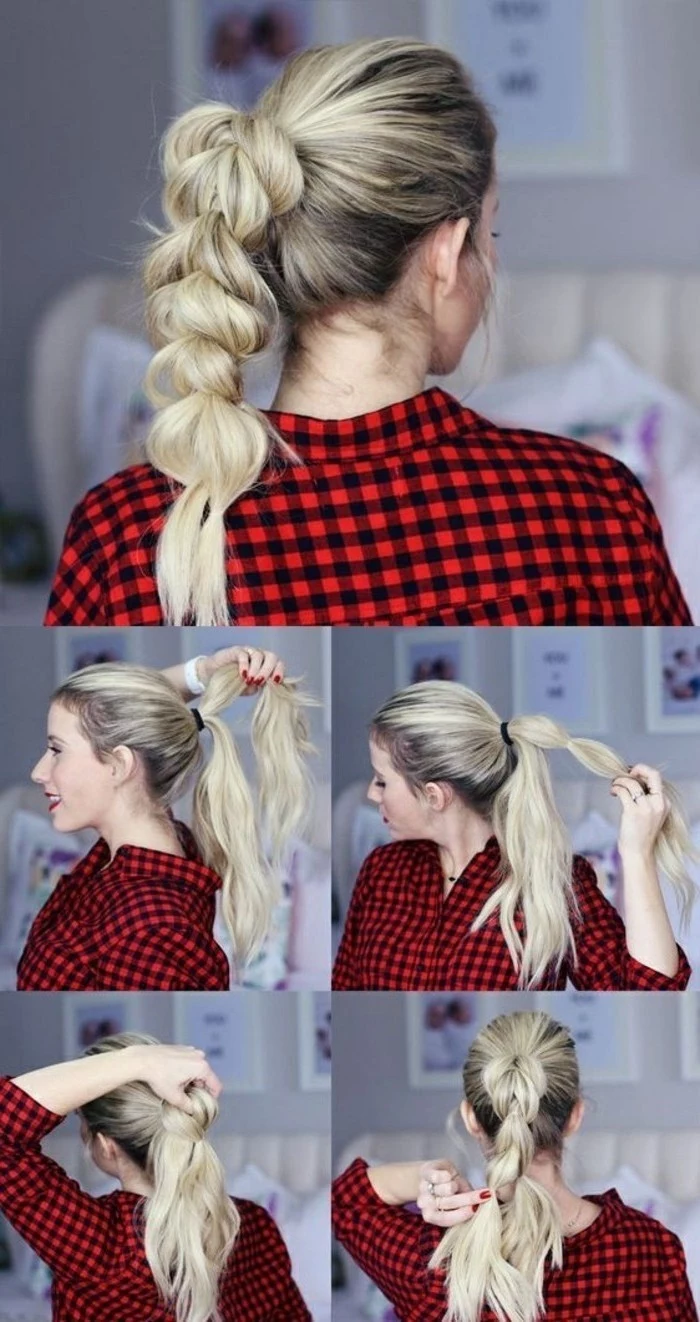
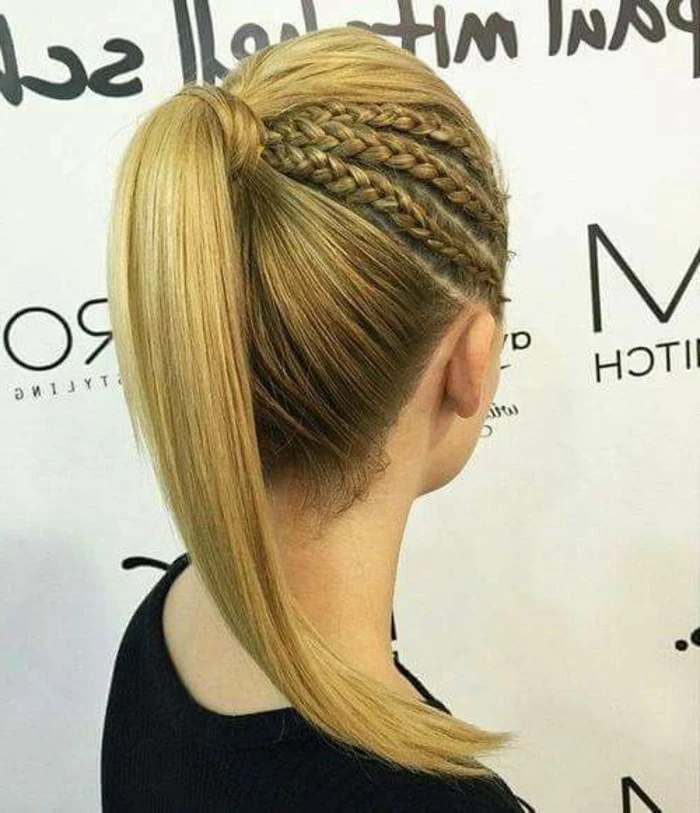
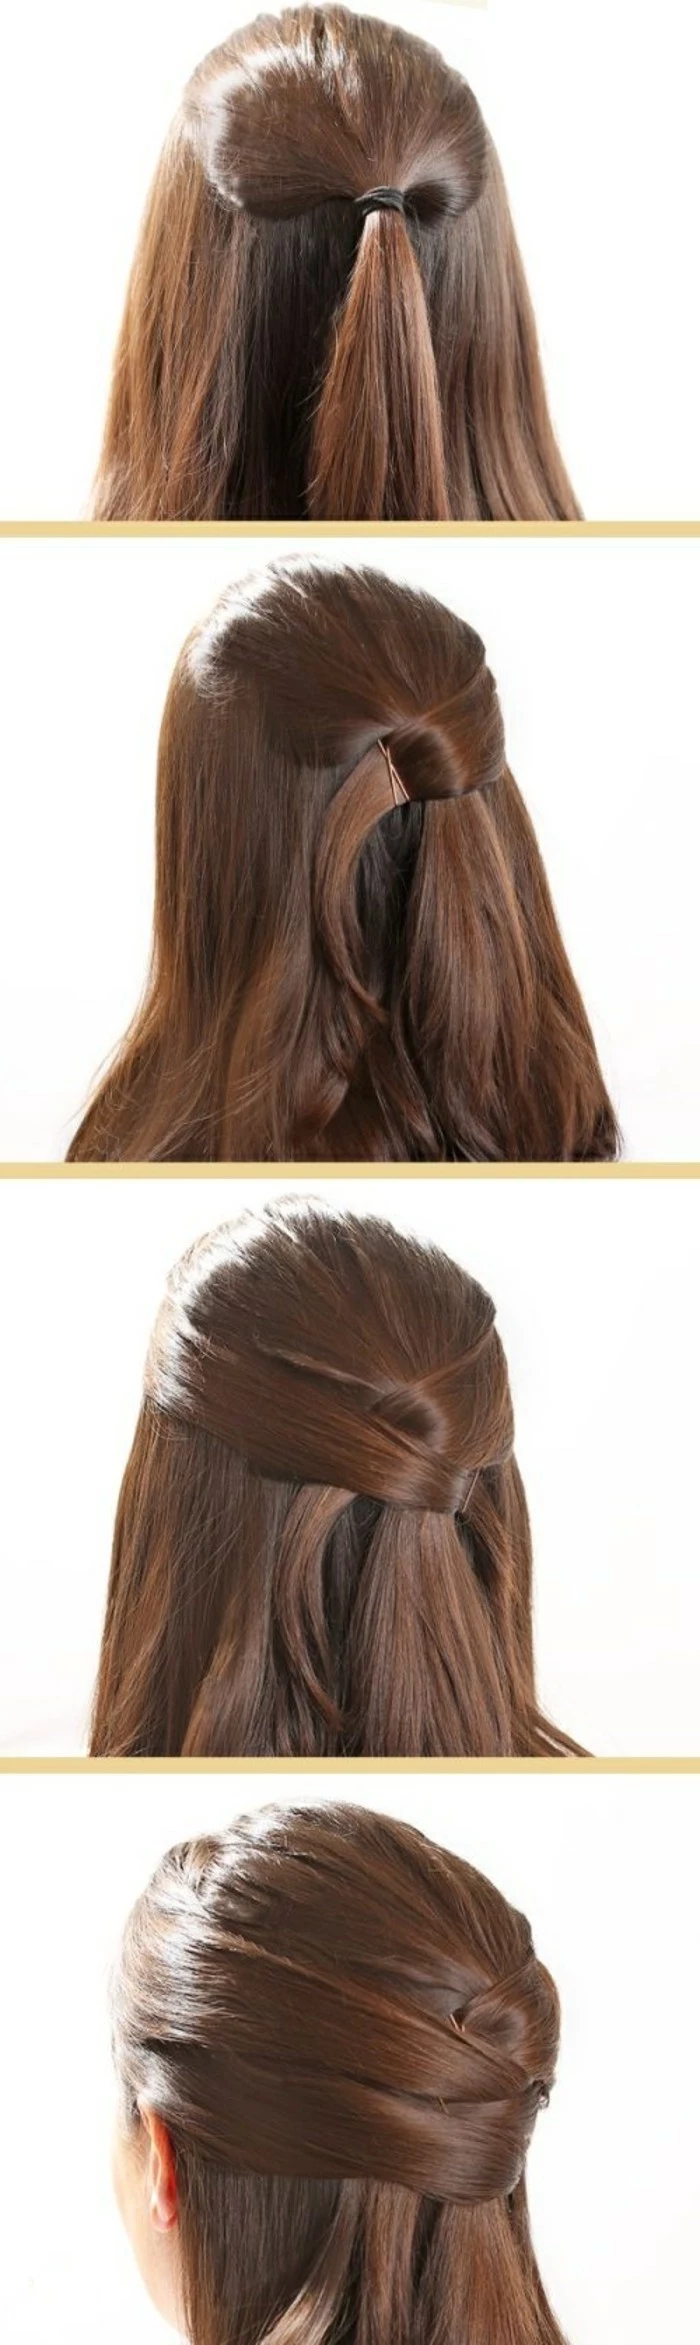
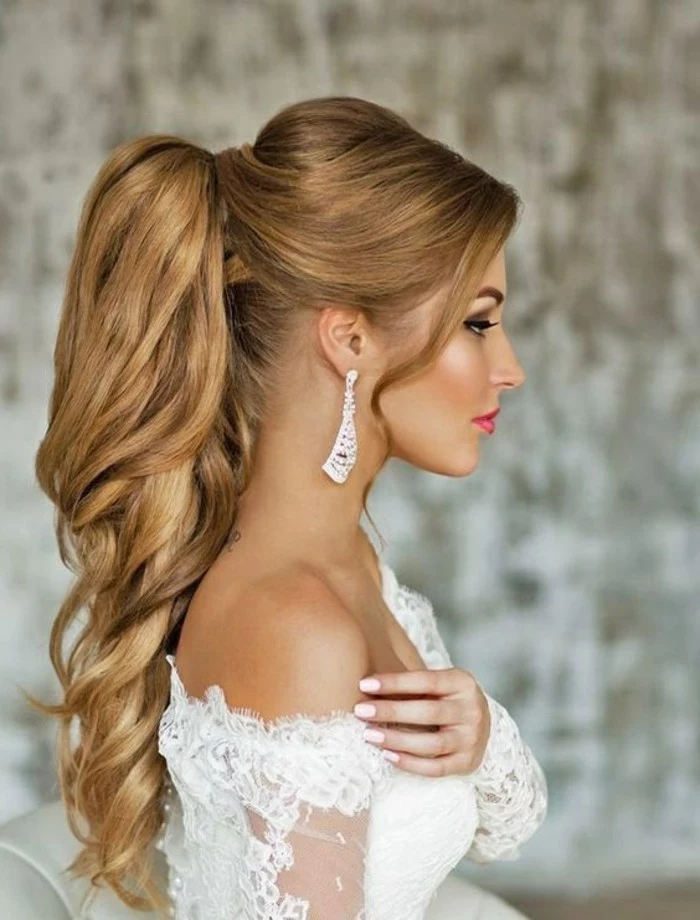
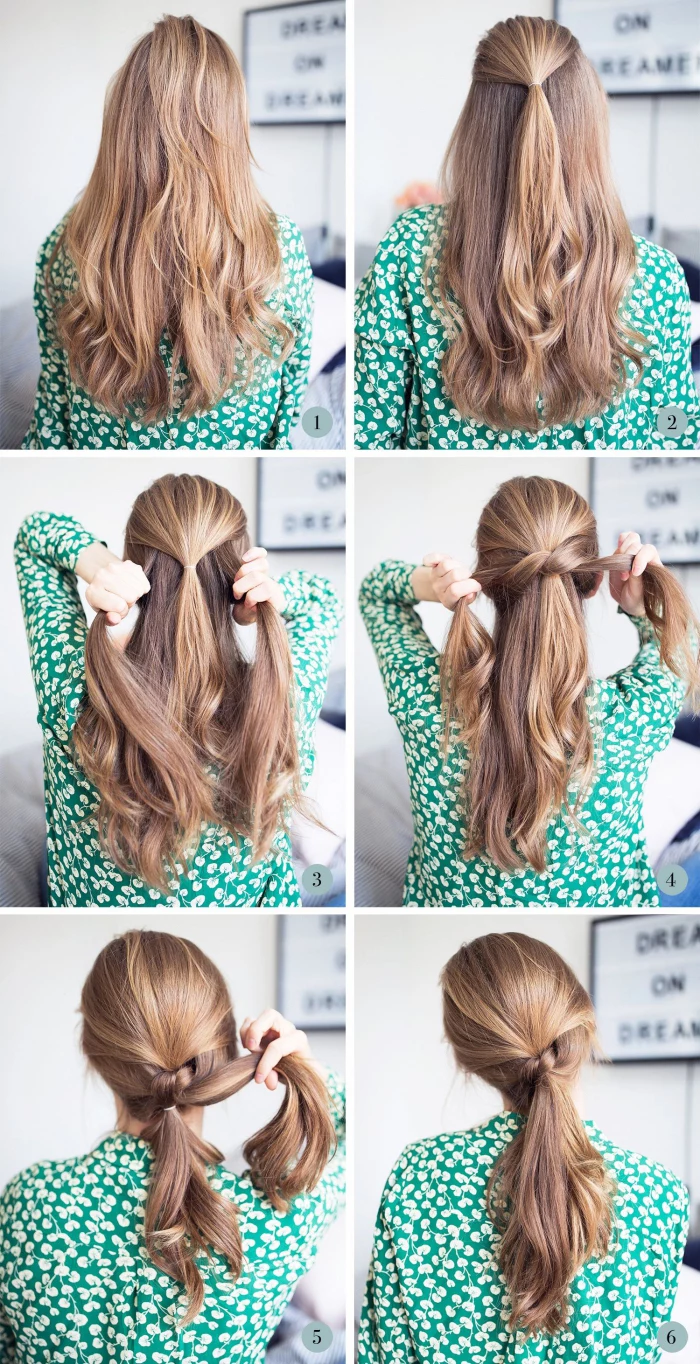
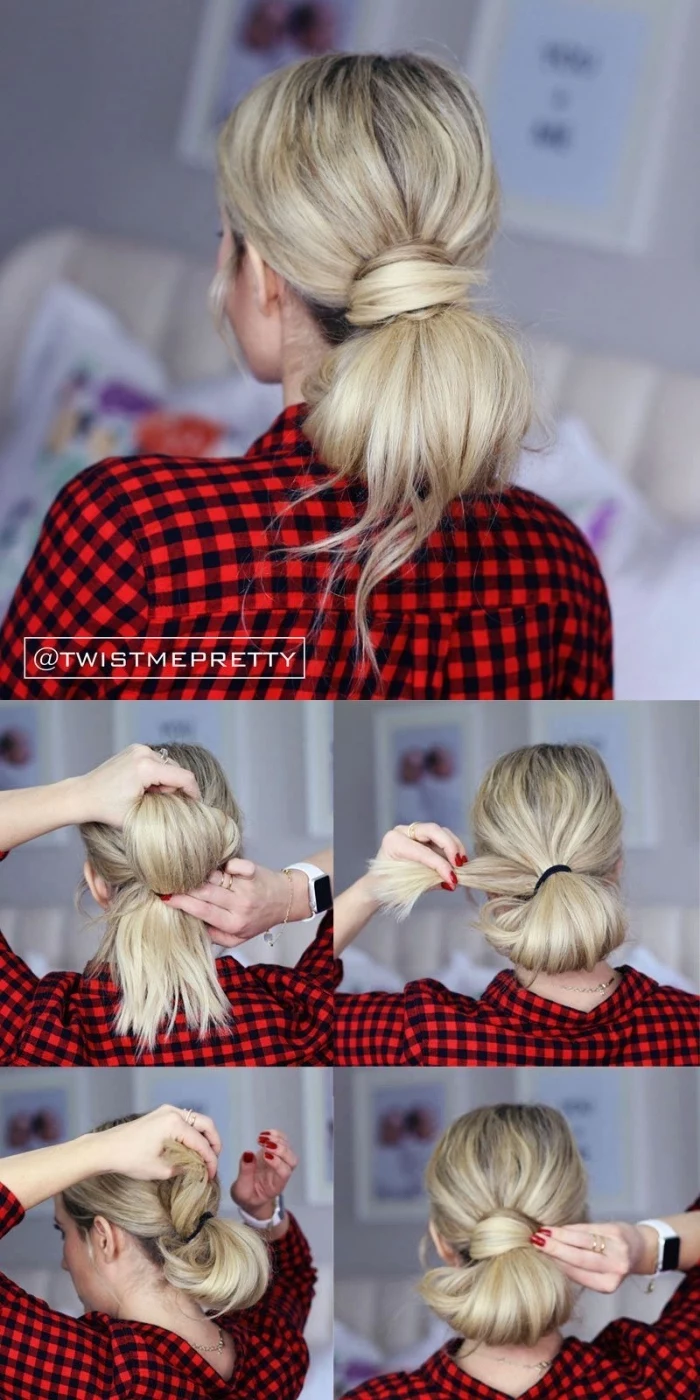
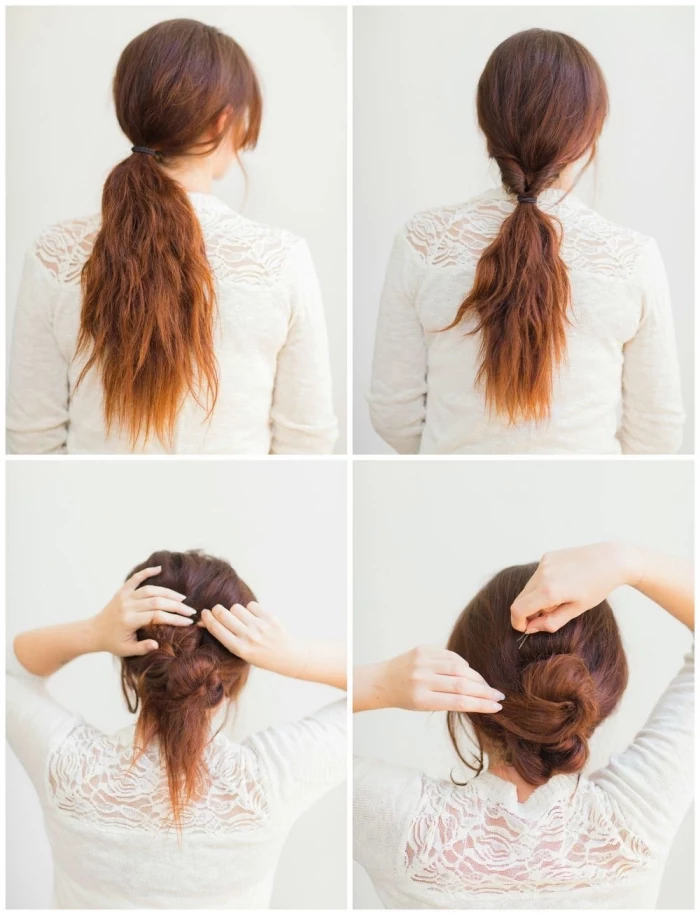
Why does my sleek, high ponytail always droop after an hour?
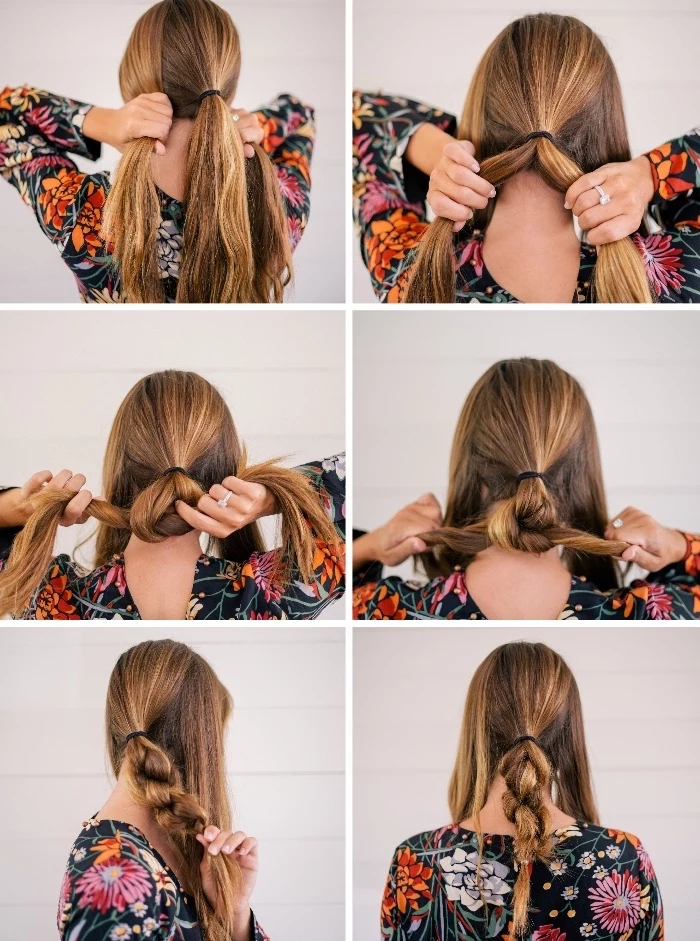
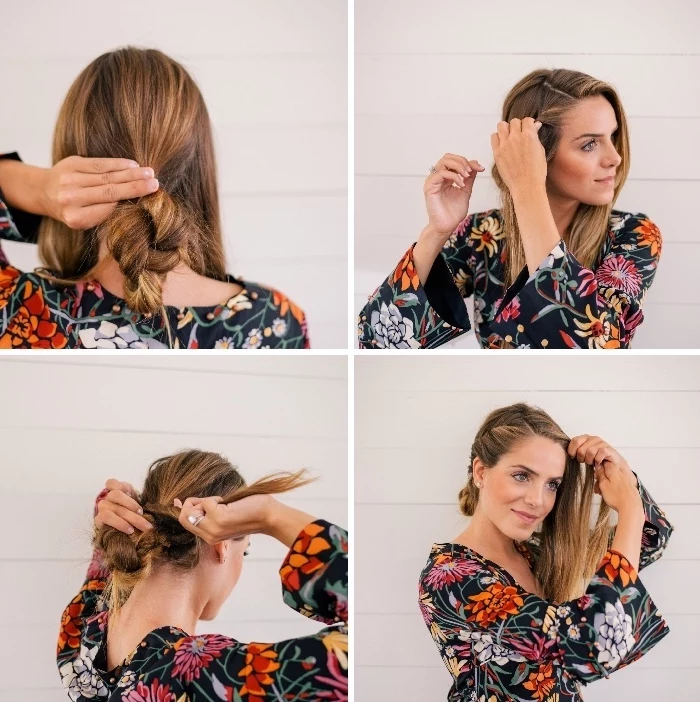
It’s likely due to gravity and a weak foundation. Instead of one hair tie, use two. First, create a small half-ponytail with the top section of your hair. Then, gather the bottom section and join it with the first, securing both together with a second, strong elastic like a BLAX hair tie. For extra lift, insert two bobby pins vertically through the bottom of your hair tie, pointing towards the crown of your head.
Mousse: Best applied to damp hair from root to tip. It expands as it dries, creating all-over volume and a slightly stiff texture that’s an excellent base for any updo. Think of it as a primer for your whole head.
Volumizing Spray: This is for targeted lift. Sprayed directly at the roots before blow-drying, it gives lift right where you need it without affecting the texture of your lengths and ends.
For a high-volume style, use mousse all over and then add a root spray for maximum lift at the crown.

A Yale University study found that ‘bad hair days’ can lead to increased self-doubt and social insecurity.
This highlights why a hairstyle that lasts is more than just vanity. It’s about confidence. Knowing your look is secure allows you to forget about it and focus on your event, conversation, or performance. A reliable style empowers you to feel self-assured from the moment you walk out the door until the very end of the night.
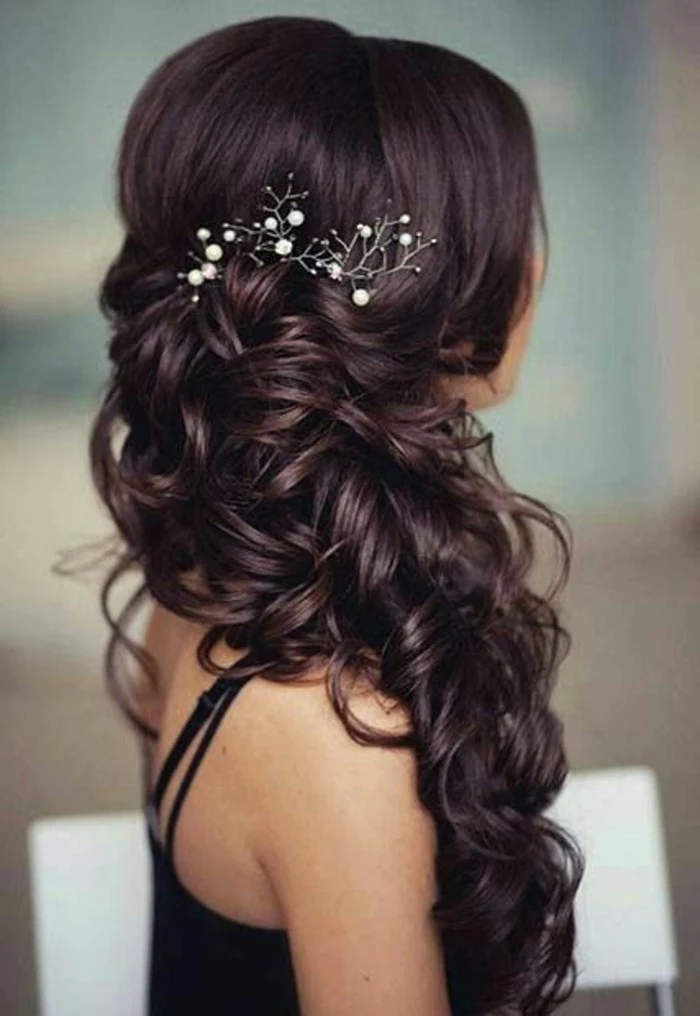

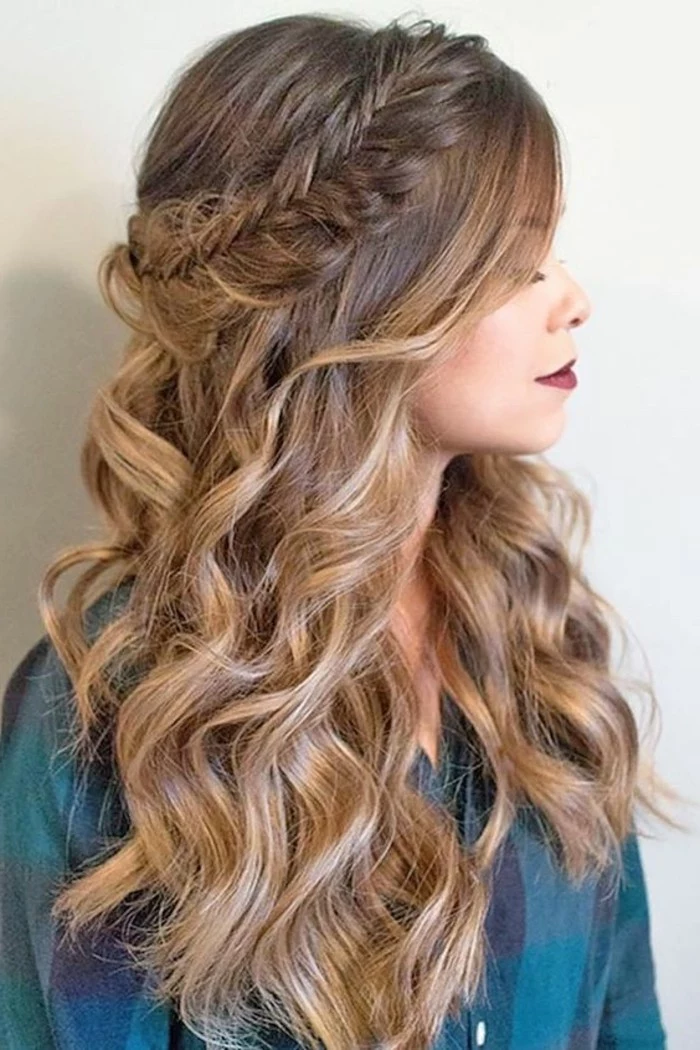
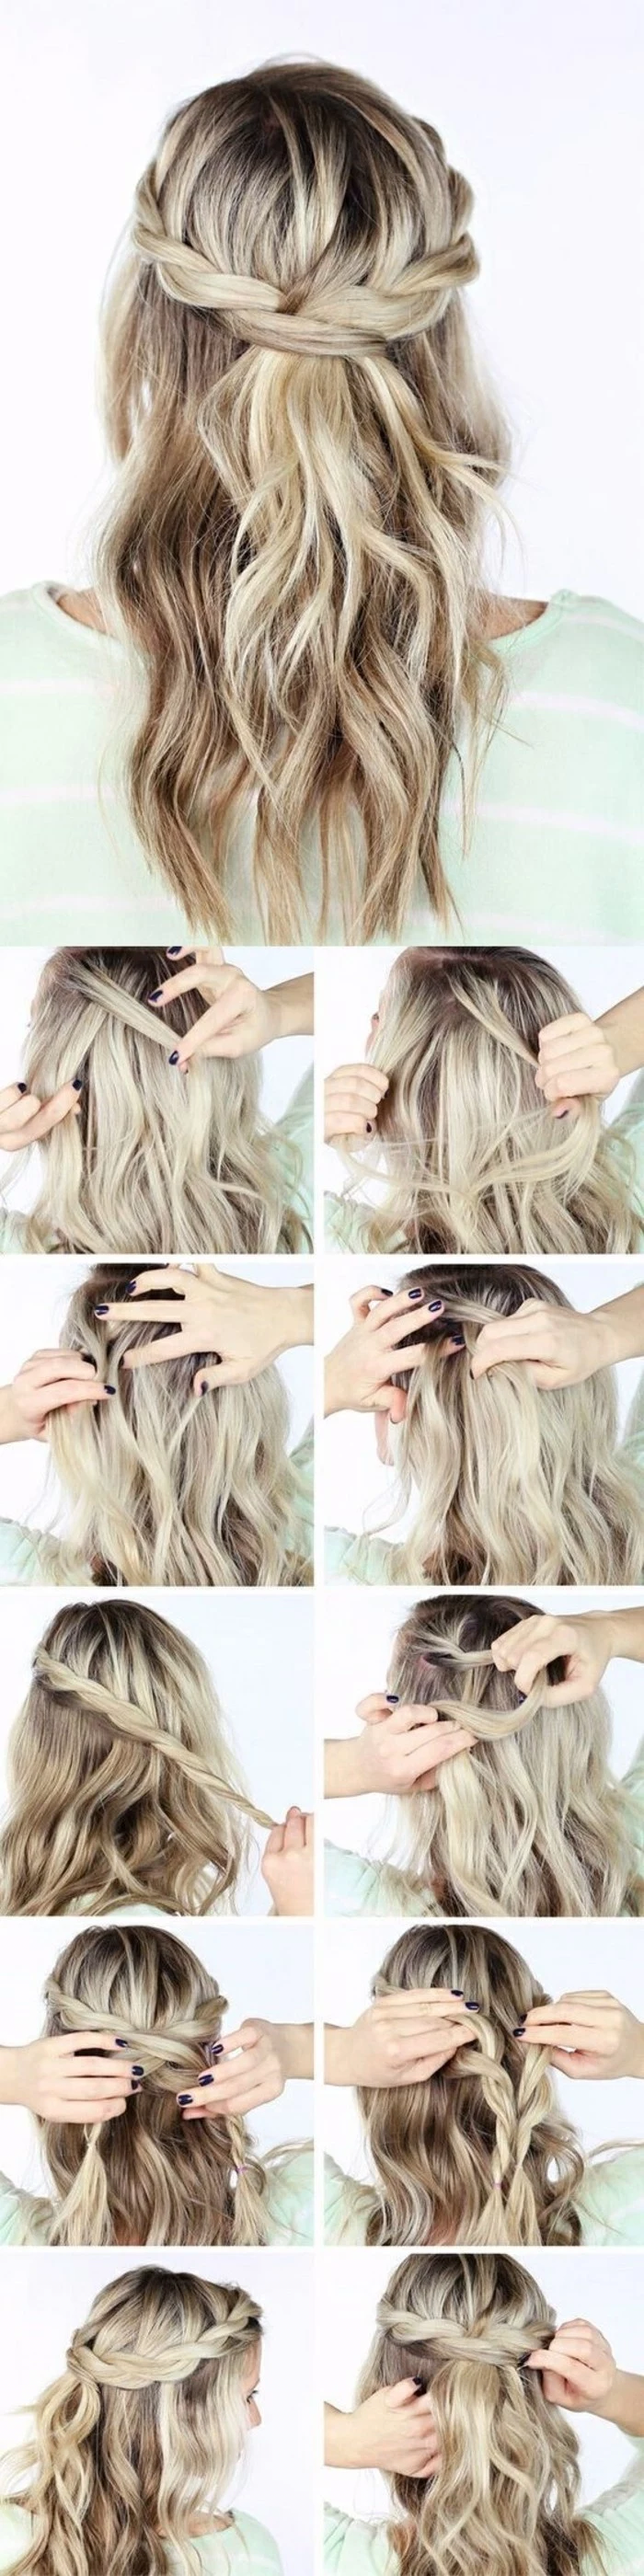
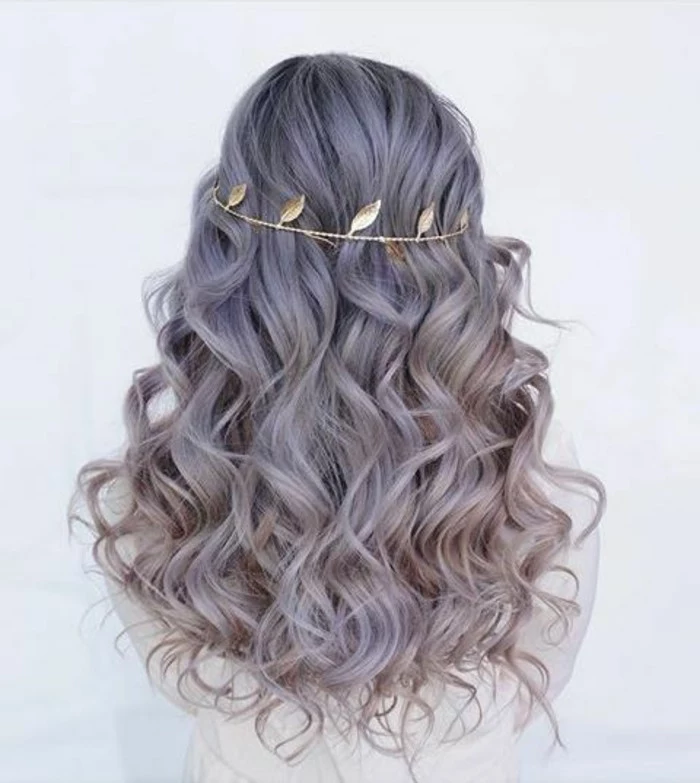
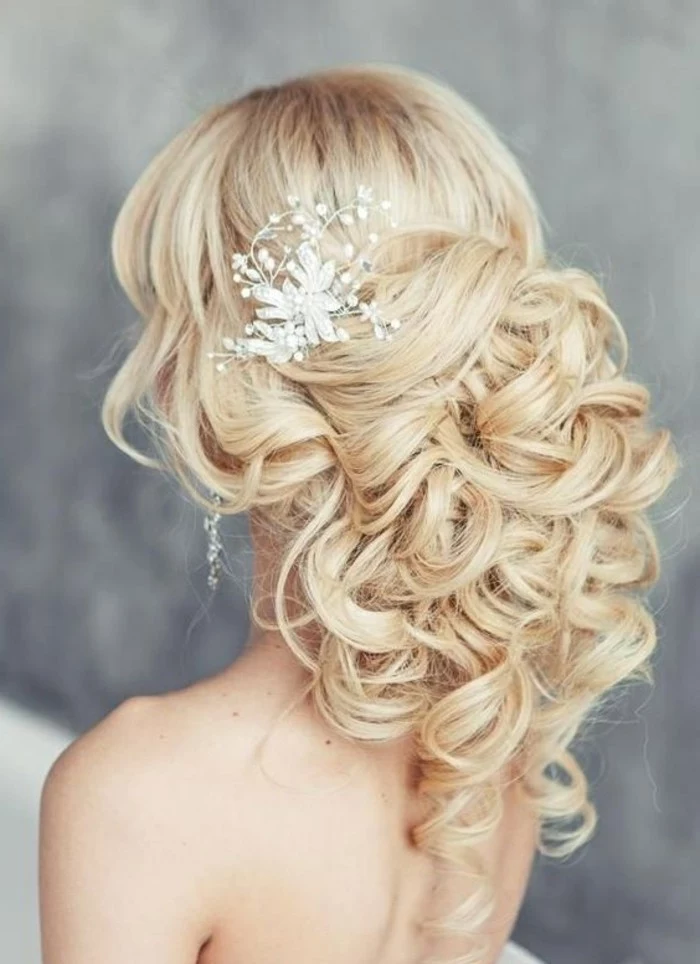
- The curls are defined and bouncy.
- The style holds its shape for hours, even overnight.
The secret? Let your curls cool down completely. After using a curling iron or wand, either pin each fresh curl to your scalp to cool or let it fall into your palm for 10-15 seconds. Heat makes hair pliable; cooling locks it into its new shape. Styling warm hair is a guaranteed recipe for droopy waves.
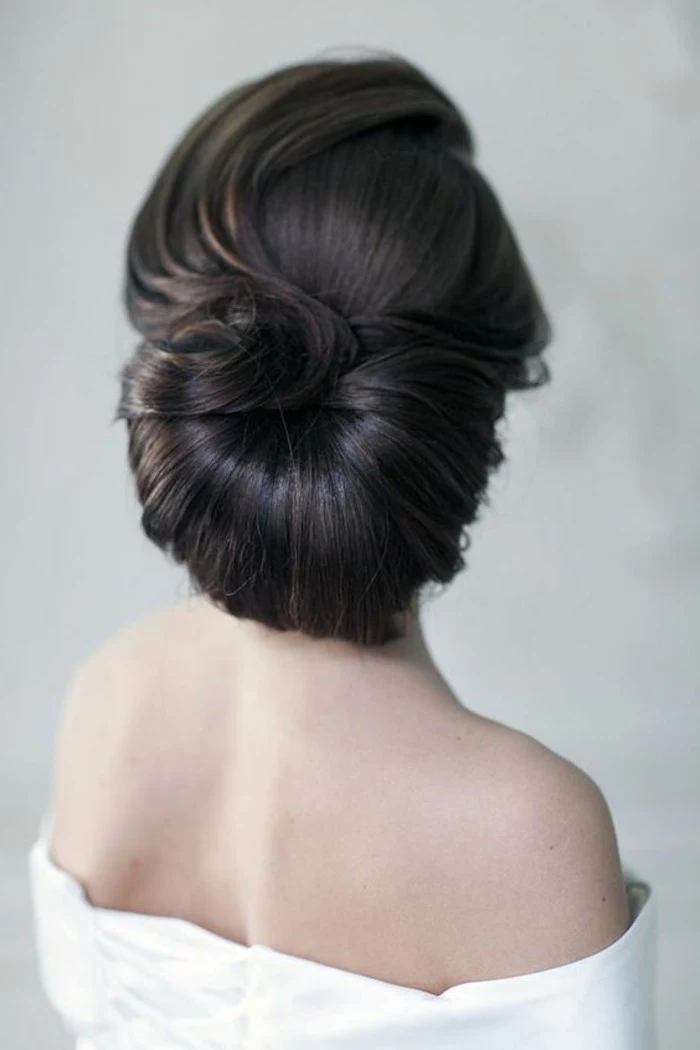
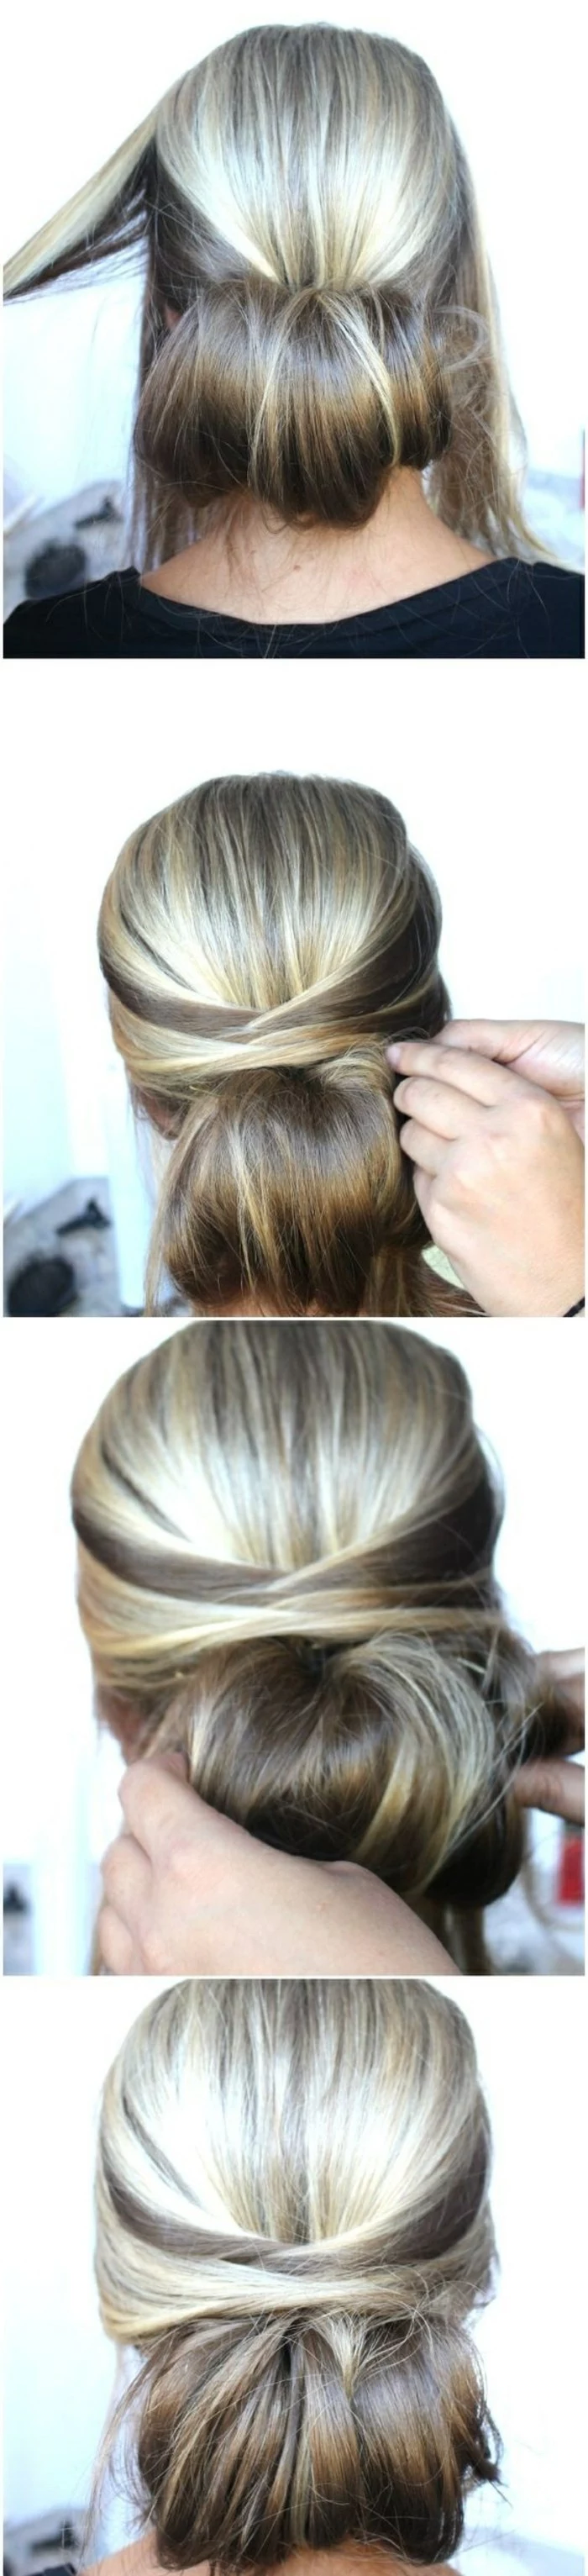
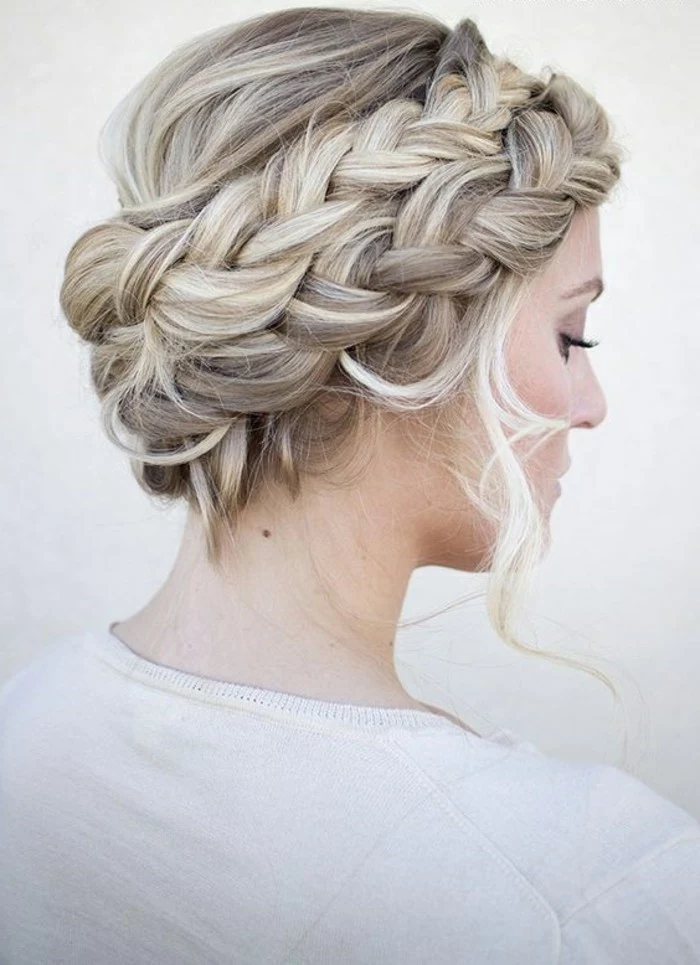
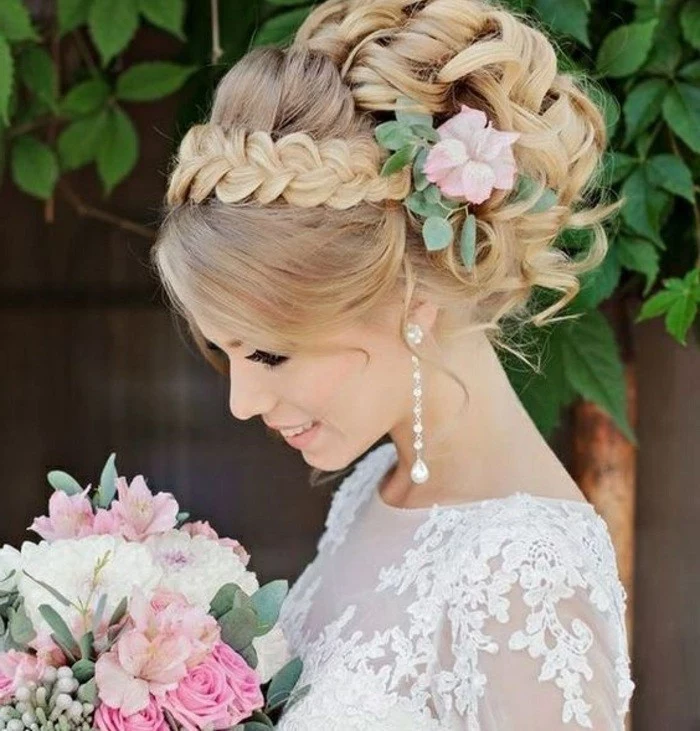
Think Victorian-era updos that stayed in place for days. Their secret wasn’t hairspray, but structural aids. Women used ‘rats’ or ‘hair rats’—small pads made of their own collected hair (or mesh forms)—to create voluminous shapes. They would build their style around these forms, giving the hair something to grip onto. This principle still works today with modern bun makers or hair donuts for a full, secure chignon.


Relying on just one product: A long-lasting style is a cocktail. You need a texturizer for grip, a mousse for volume, and a spray for hold. One product can’t do it all. Too much silicone: Shine serums and some conditioners coat the hair, making it too slippery for pins to grip. Use them sparingly, and only on the ends. Touching your hair: Constantly patting, twisting, or adjusting your hair transfers oils from your hands and weakens the structure. Once it’s done, leave it alone!

The foundation for your foundation: A clarifying wash. If your hair is weighed down by product buildup, even the best styling prep won’t work. Once a week, or before a major event, use a clarifying shampoo like Bumble and bumble Sunday Shampoo to strip away residues from silicones, waxes, and oils. This creates a clean canvas, allowing your prep products to work directly on the hair fiber for maximum effectiveness.
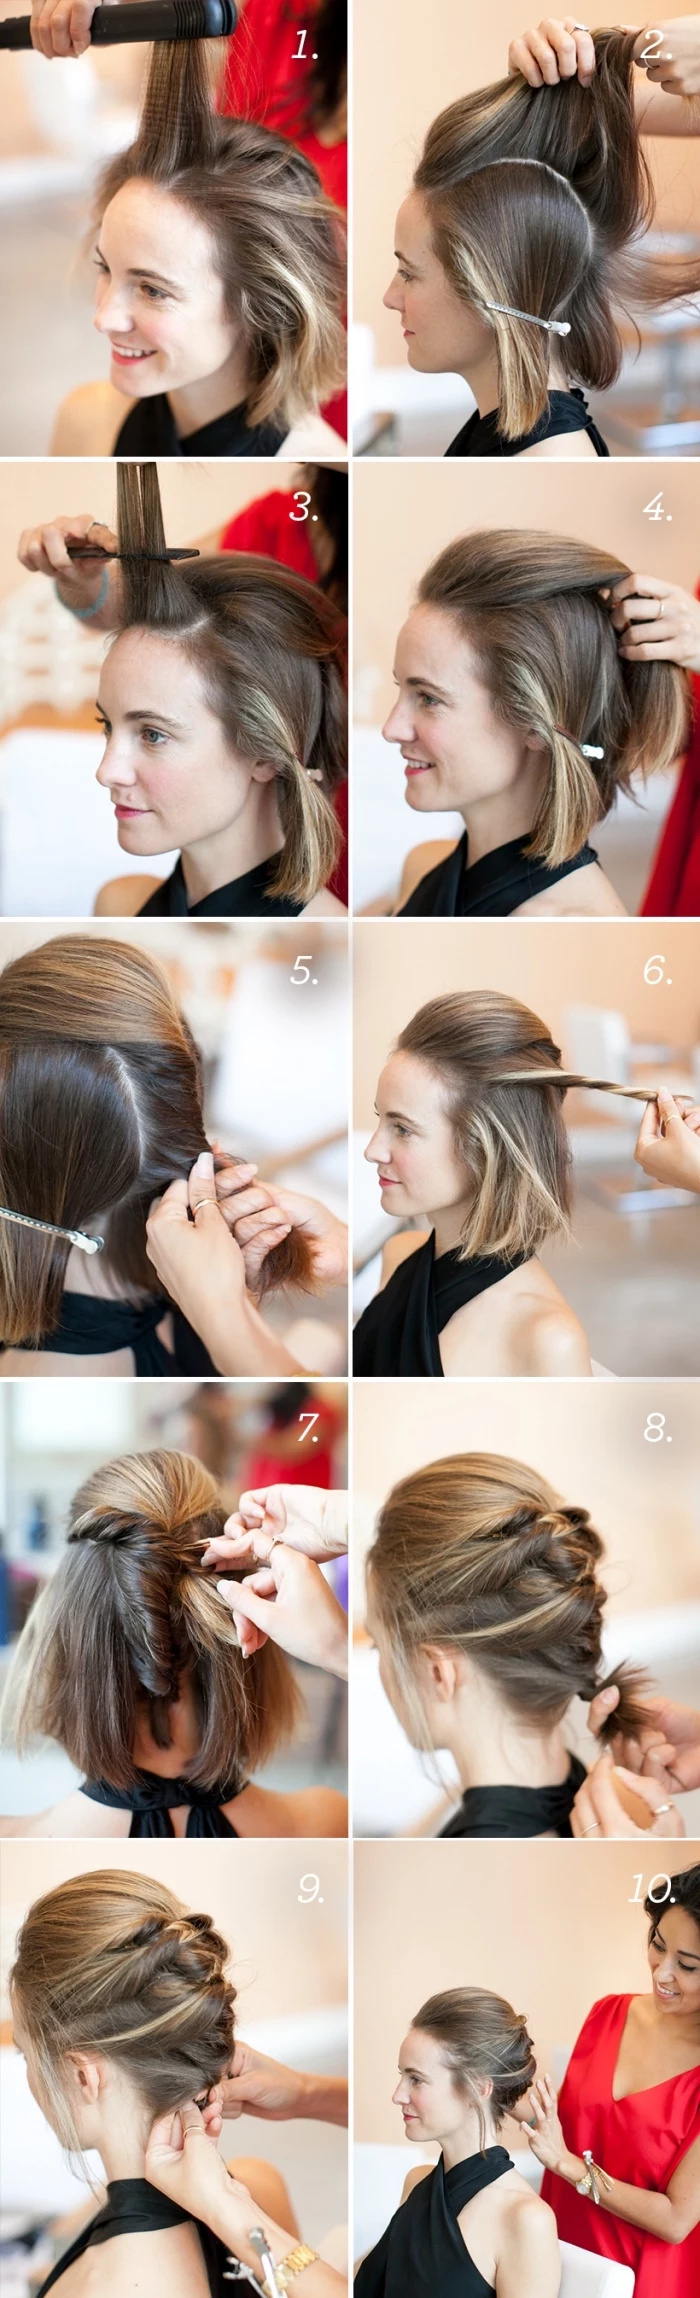
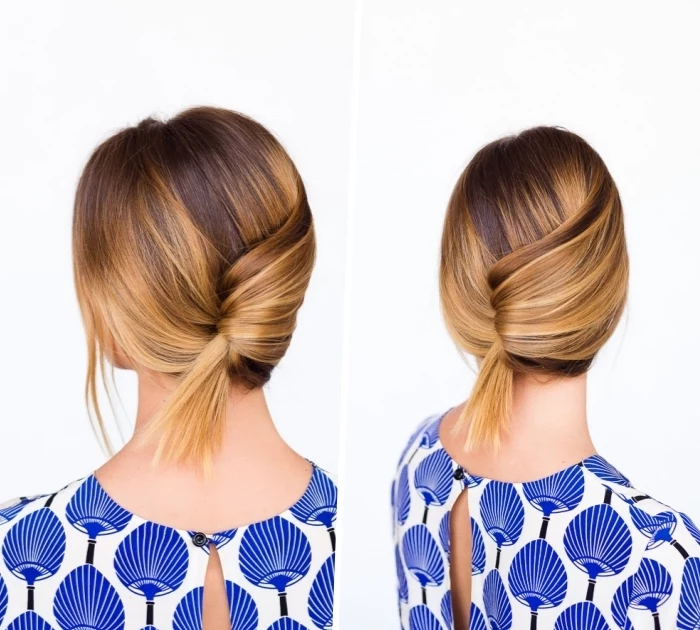
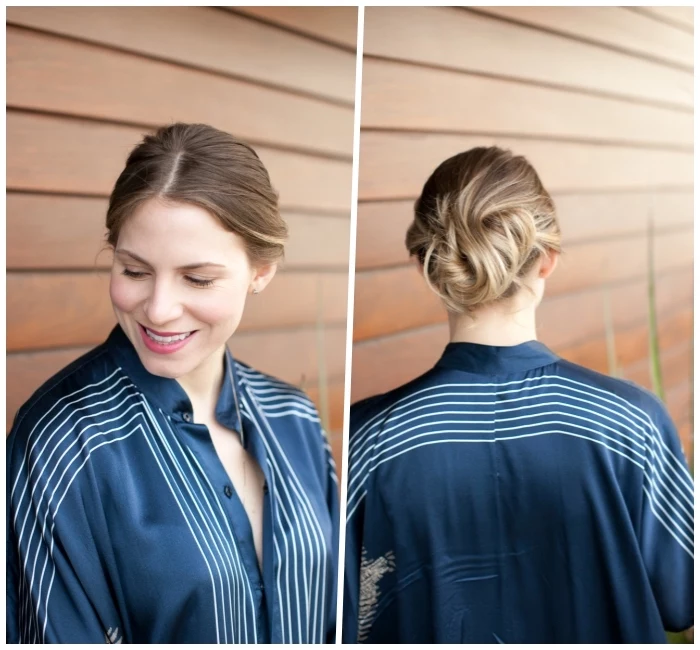
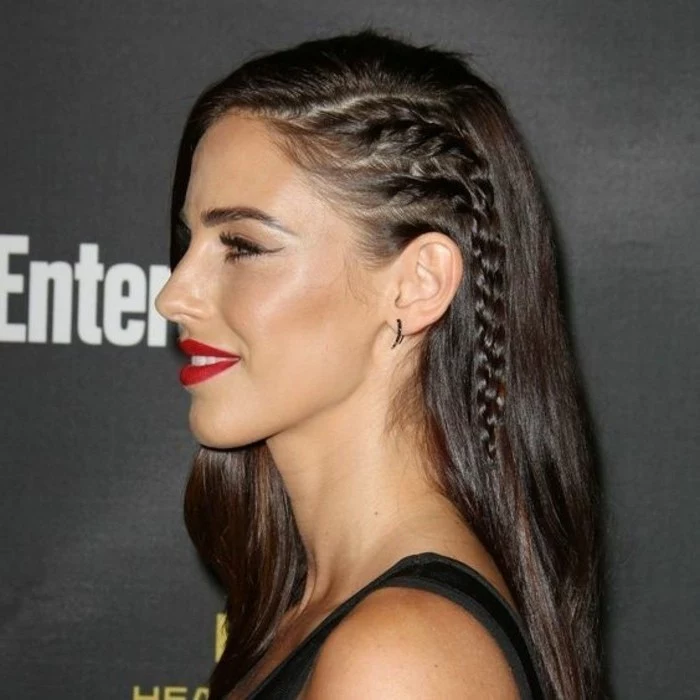
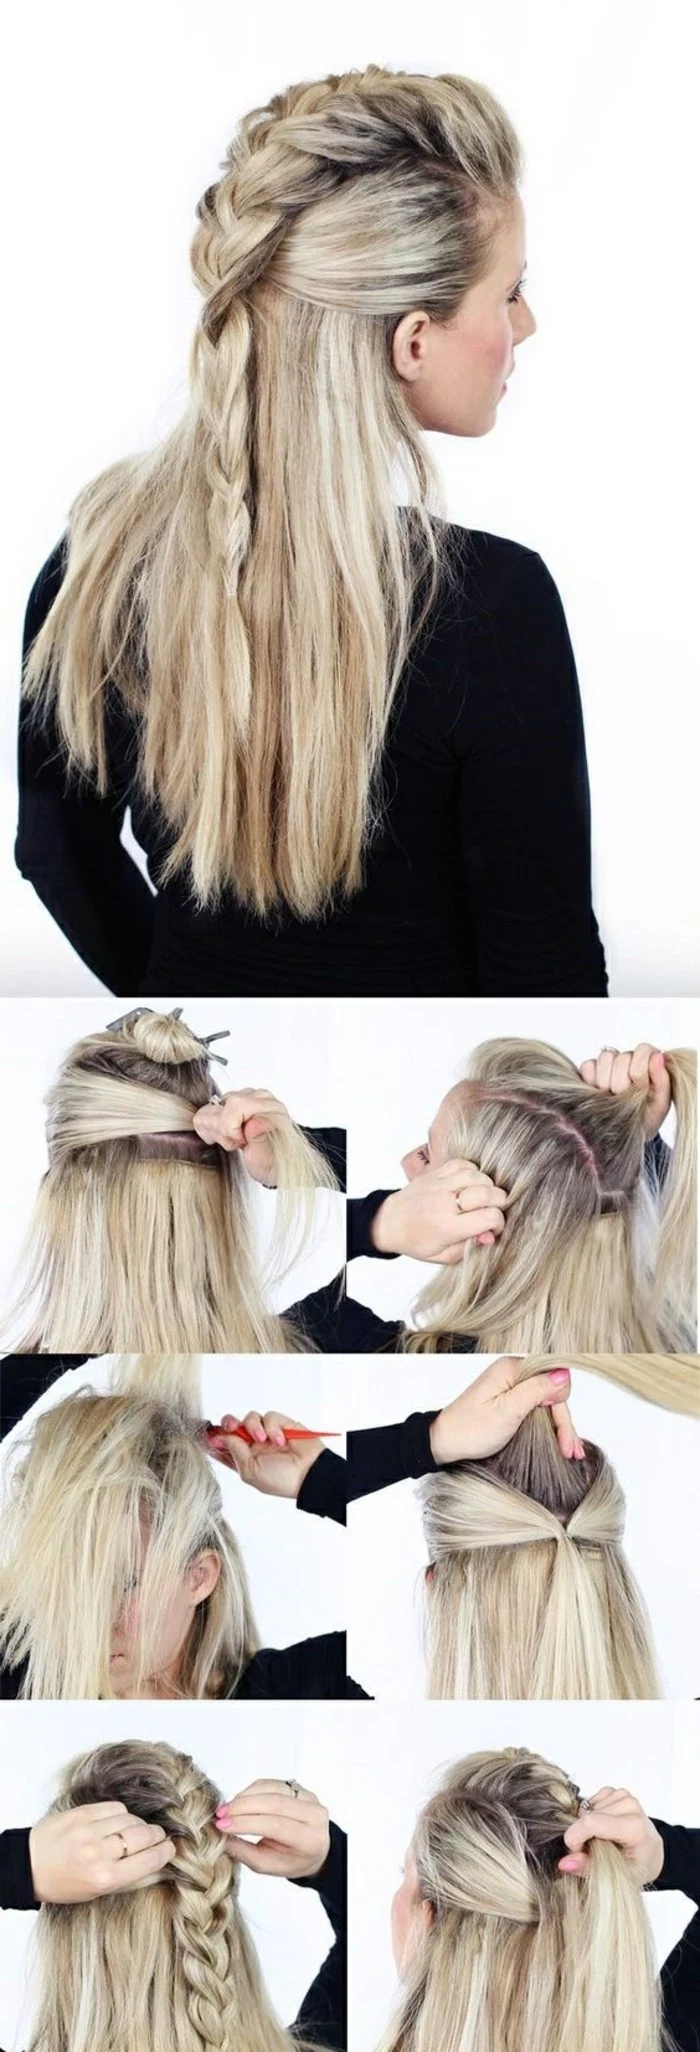
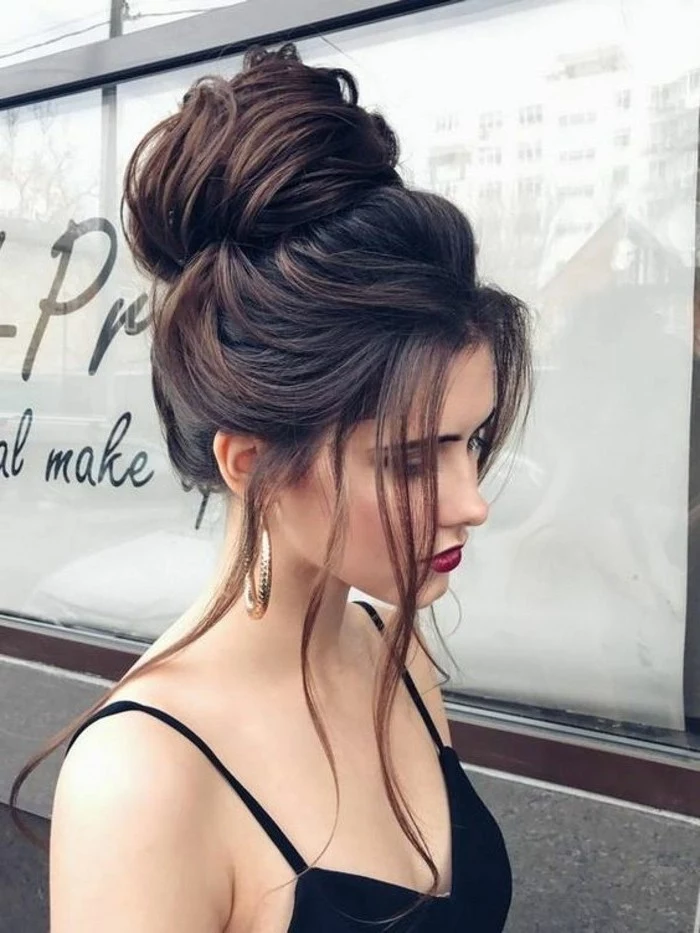
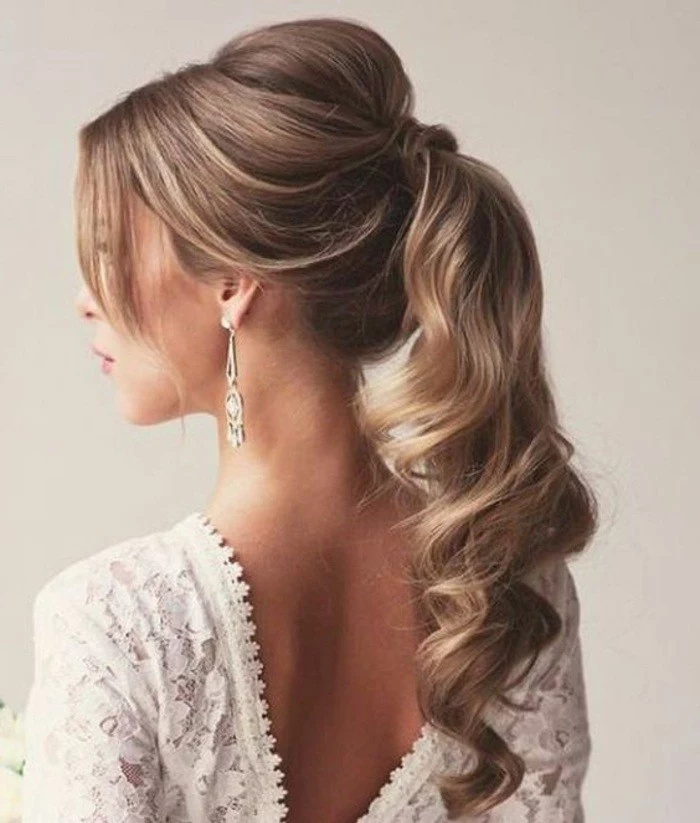
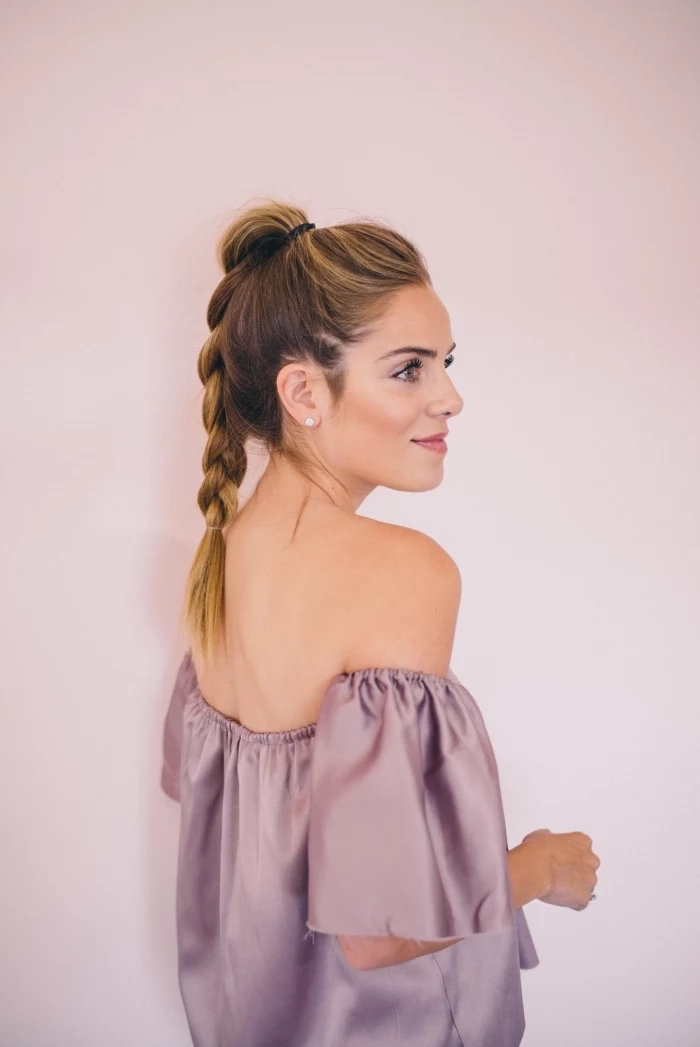
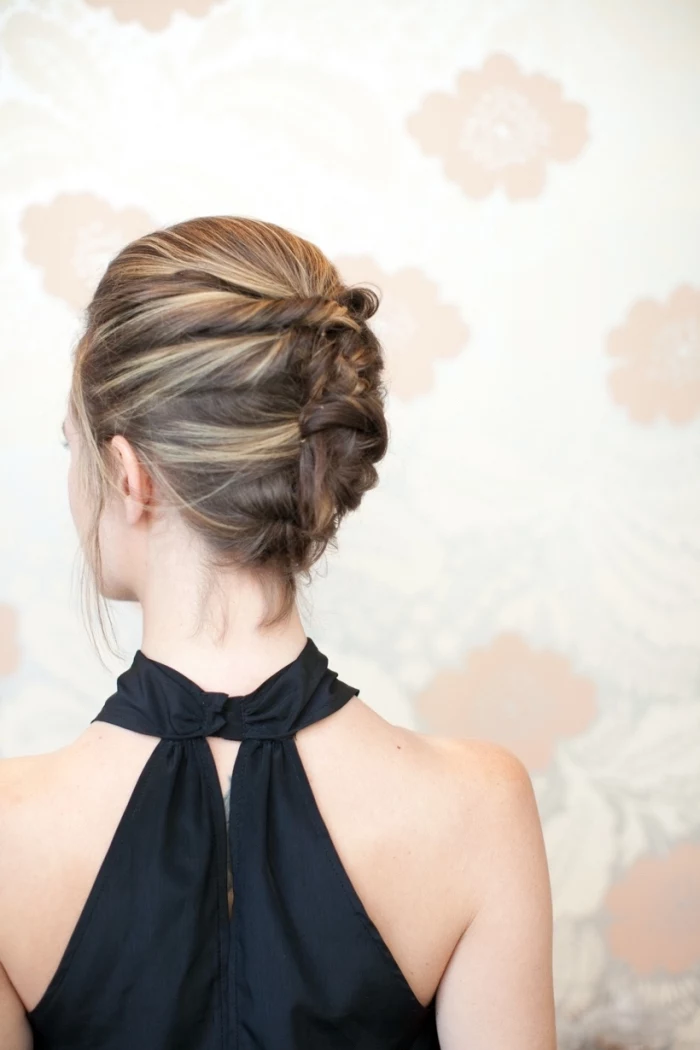
For a modern updo, the contrast between sleek and textured is key. This prevents the style from looking dated or overly severe.
- Create the ‘business’ part first: Use a smoothing pomade and a fine-tooth comb to get the front and sides perfectly sleek and tight to the head.
- Then, create the ‘party’ in the back: Gently backcomb the ponytail or section you’re about to pin up, and use a texturizing spray to give it airy volume before shaping it.
My fine hair is so silky that even bobby pins slide right out. What can I do?
You need to give the pins something to grab onto. Before inserting them, lay your bobby pins on a paper towel and spray them with a dry shampoo or a strong-hold hairspray. Let them dry for a minute. This gives them a matte, slightly sticky coating that will grip onto fine hair like magic. It’s a game-changing trick for slippery hair types.


Shine Spray: A fine mist of silicone or oil-based spray applied at the very end. Its only job is to add a glossy, reflective finish. Use sparingly to avoid weighing the hair down.
Finishing Hairspray: This is a strong-hold spray used as the final step to lock everything in place and tame any last-minute flyaways. Its main purpose is hold, not shine.
For a red-carpet look, use your finishing spray first, let it dry, then add a light mist of shine spray over the top.


