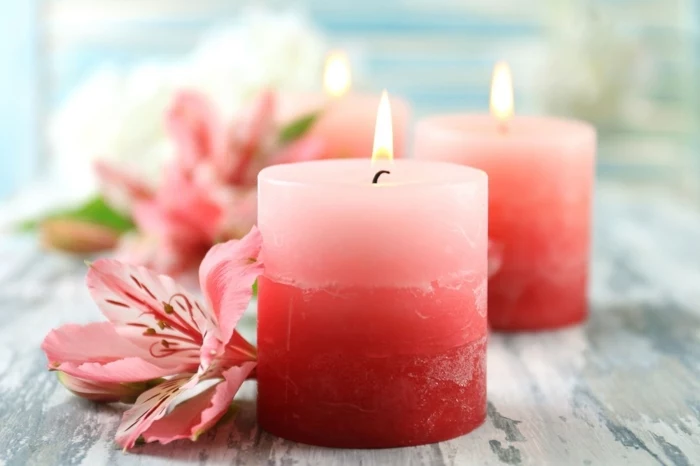
I’ve spent years making candles, and if there’s one lesson that’s stuck with me, it’s that nothing should go to waste. That last bit of wax at the bottom of a jar isn’t trash; it’s a resource, just waiting for a second chance. Reclaiming old candle wax is more than just a way to save a few bucks—it connects you to the whole process and, honestly, it’s incredibly satisfying.
But let’s be real. Lots of people try this, and the results often look… well, a bit sad. A lumpy, sooty candle that tunnels straight down the middle isn’t exactly the goal. The problem is that reclaimed wax is a mystery grab bag of different wax types, old scents, and who-knows-what else. To turn those scraps into a candle that’s beautiful, safe, and burns like a dream, you need a little know-how. This isn’t just a DIY hack; it’s about learning the fundamentals of the craft.
So, I’m going to walk you through the exact methods the pros use, minus the jargon. We’ll cover everything from cleaning out old jars to picking the right wick (the
1 mistake most people make). I’ll even share some of the blunders I’ve made over the years so you can skip the frustration. By the end, you’ll be able to turn that pile of leftovers into a candle you’re genuinely proud of.
By the way, if you don’t have enough scraps for a full candle yet, here’s a quick win: make wax melts! It’s a super low-stakes way to use up smaller amounts of wax and doesn’t require any stressful wick testing. Just melt, add a little extra scent if you want, and pour into a silicone mold. Easy.
First Things First: Getting the Wax Out
Before you can even think about melting, you have to get that stubborn leftover wax out of its original container. It seems simple, but there are a couple of tricks to make it painless.
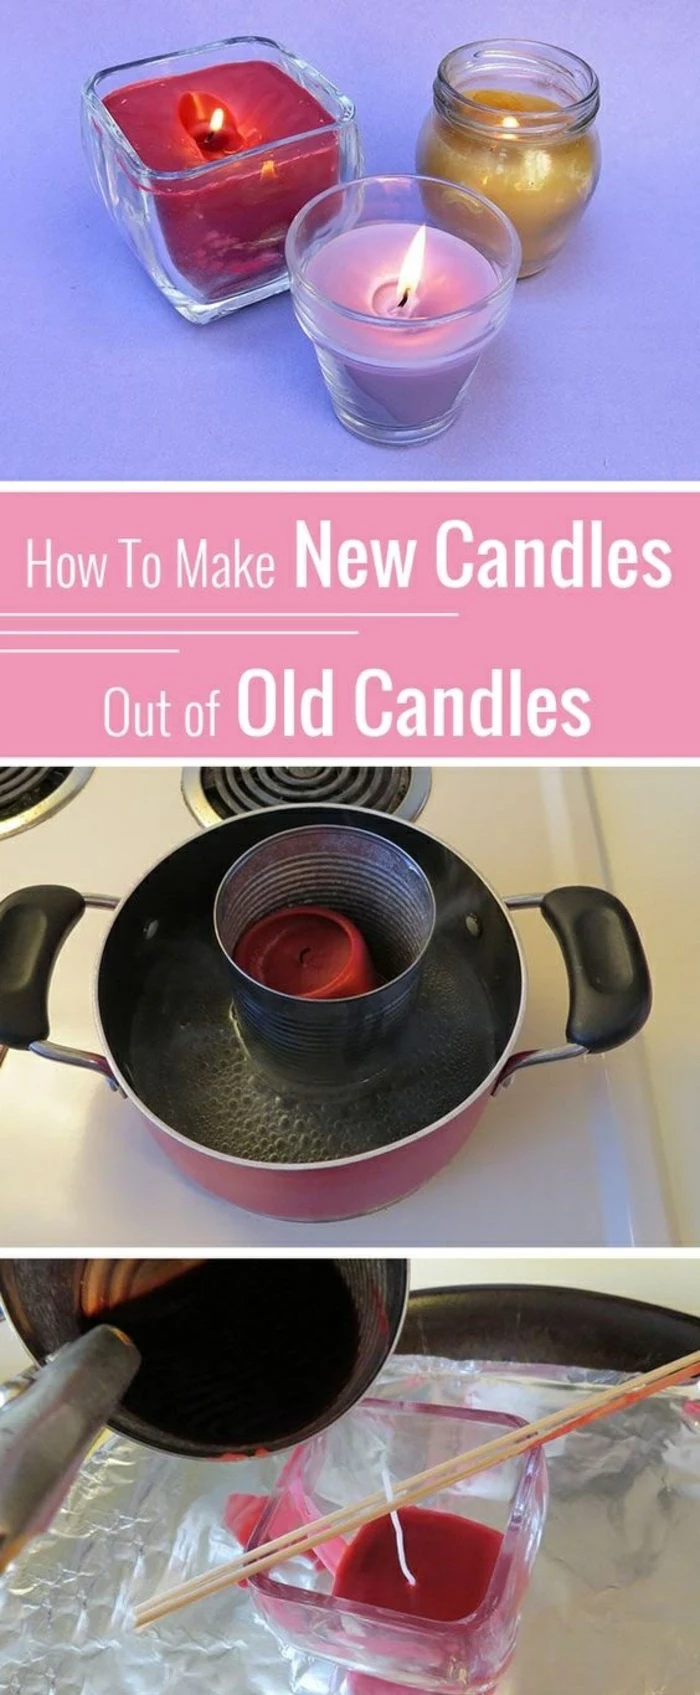
The Freezer Method: This works great for harder waxes like paraffin or beeswax. Just pop the candle jar in your freezer for a few hours. The wax will shrink and harden, and you can usually turn the jar upside down and tap it out. Sometimes a butter knife can help pry it loose, but be gentle so you don’t crack the glass.
The Hot Water Method: Perfect for softer waxes like soy. Place your candle jar on a protected surface (like a towel or potholder) and pour hot—but not boiling—water into it, leaving some space at the top. The hot water will melt the wax, causing it to float. Let it cool completely, and the wax will form a solid disk on top of the water that you can just lift out.
Once you’ve rescued the wax, use a spoon or pliers to pop off the old metal wick tab at the bottom and scrape out any obvious soot or debris.
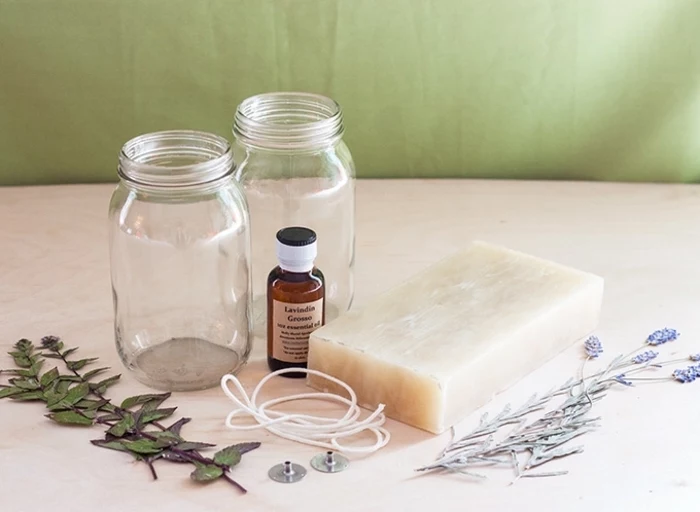
Setting Up Your Workspace (Without Ruining Your Kitchen)
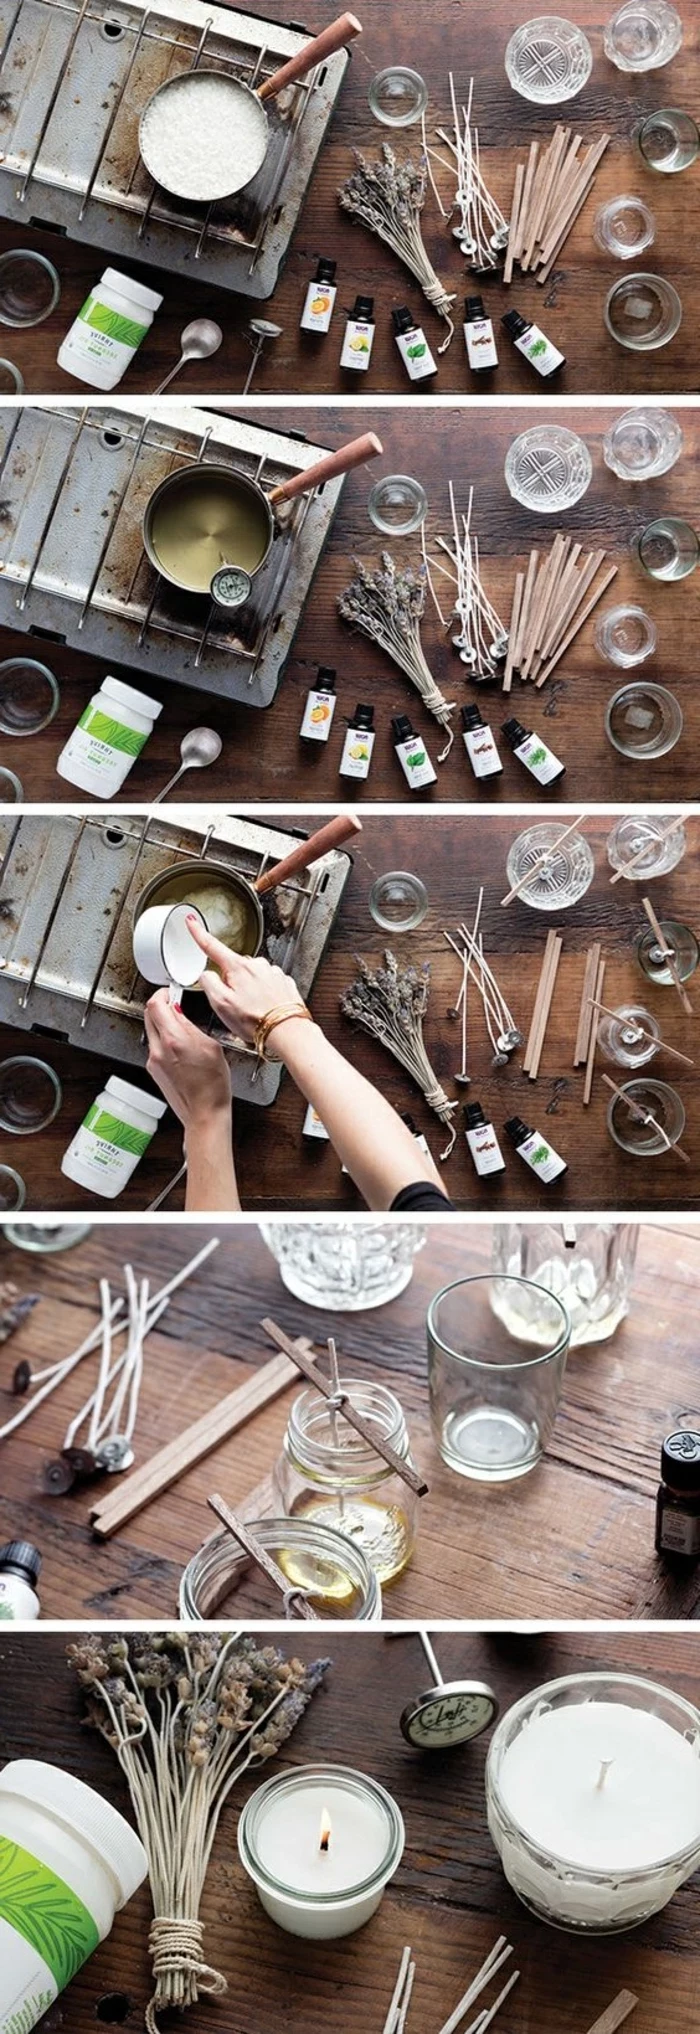
Your success starts with a dedicated and safe setup. I’ve seen beginners try to melt wax in their favorite saucepan, and I have to tell you, it’s a terrible idea. Wax is a pain to clean and can ruin your cookware. A few dedicated tools will make your life so much easier and safer.
The Essential Gear
You don’t need a ton of fancy equipment, but a few items are non-negotiable for doing this right.
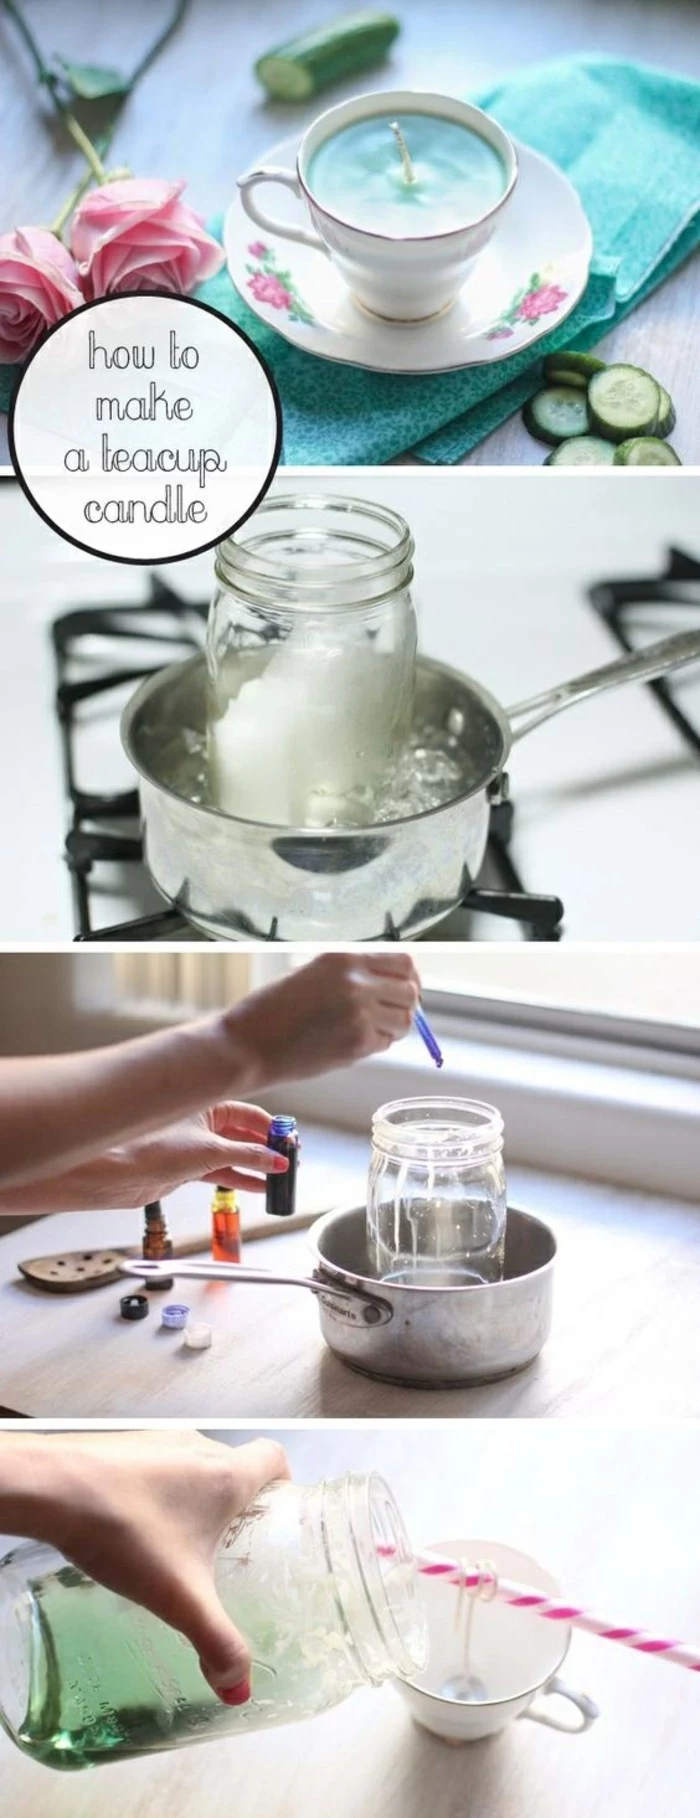
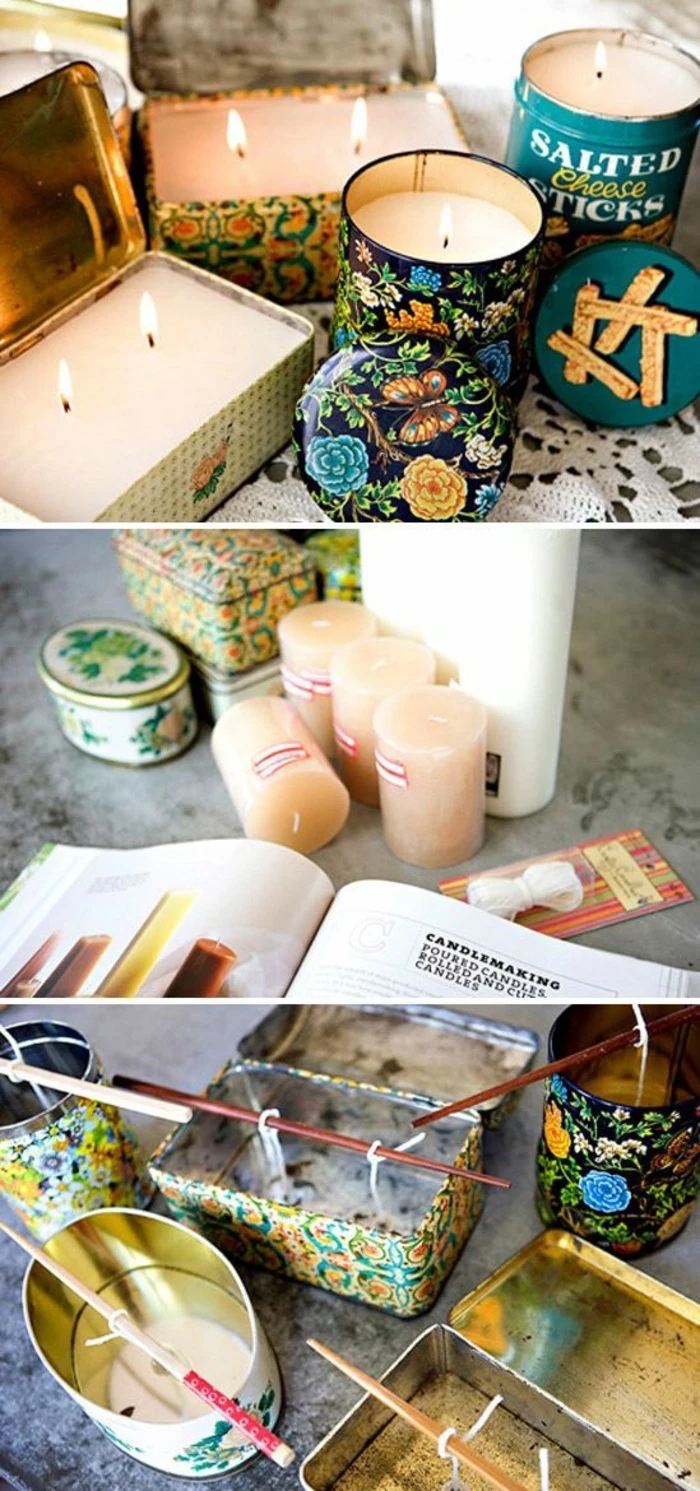
A Double Boiler Setup: NEVER melt wax directly on a stove burner. It’s a massive fire hazard. A dedicated electric wax melter is awesome if you get serious, but a simple DIY double boiler is perfect. Just use a large pot for water and a smaller, heat-safe pouring pot for the wax. You can find pouring pots at craft stores or online for about $15-$25.
Digital Scale: This is a must. Candle making is a science, and that means measuring by weight, not volume. A basic digital kitchen scale that measures in grams or ounces is all you need. They usually cost around $15 at Target or on Amazon.
Digital Thermometer: You simply cannot make good candles without one. Temperature controls everything. A candy or meat thermometer works perfectly.
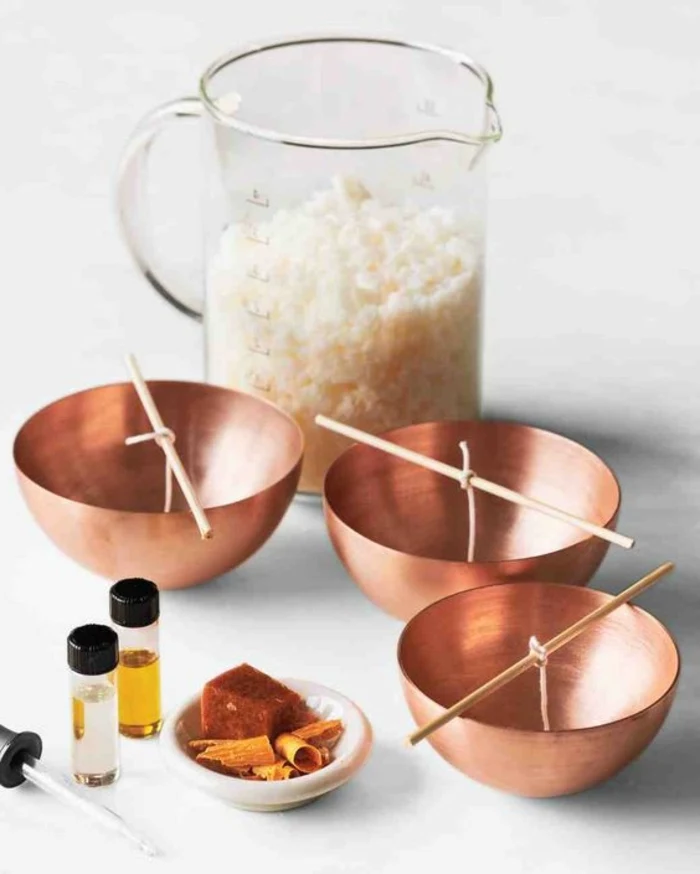
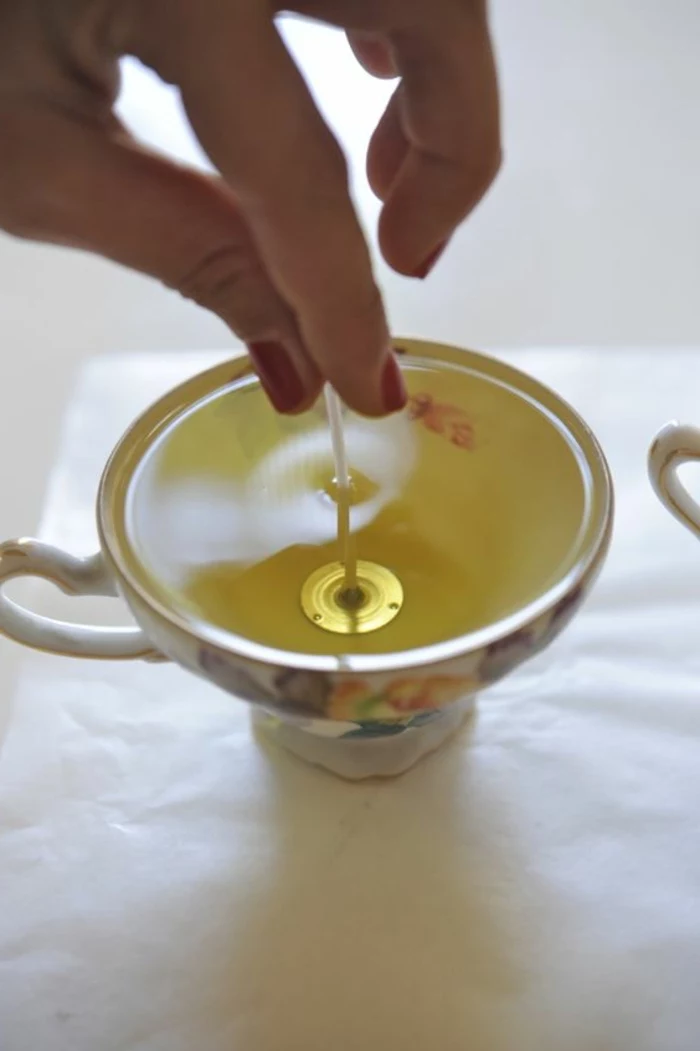
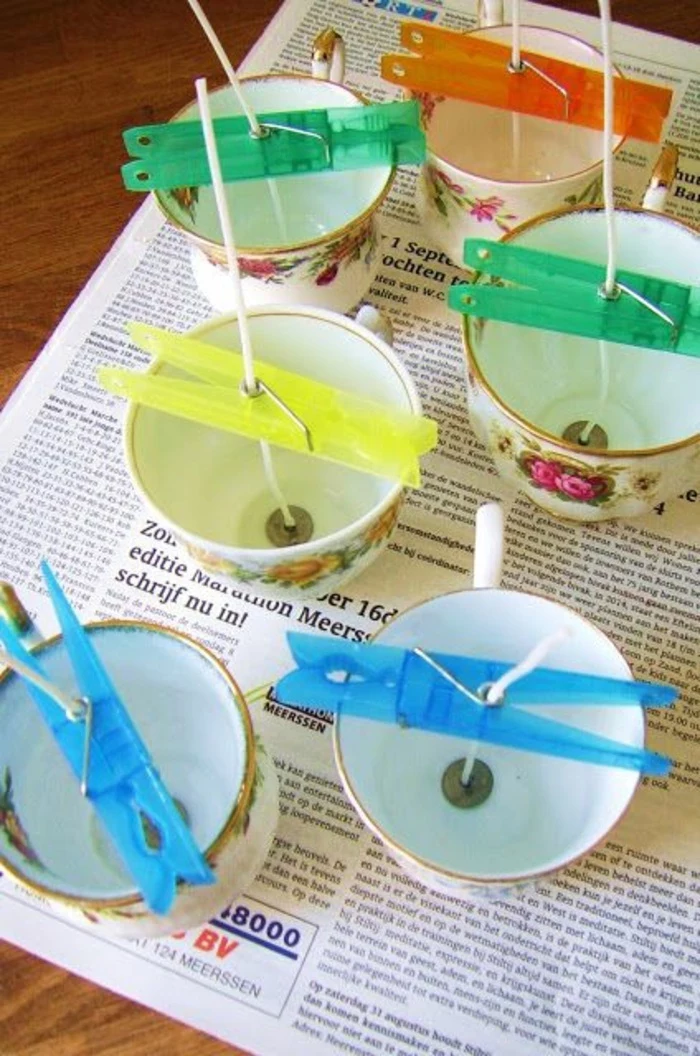
Wick Centering Tools: These hold the wick straight while the wax cools. You can buy fancy ones, but honestly, two chopsticks or a clothespin laid across the jar opening works just as well.
Heat Gun: This is a pro tool for fixing cosmetic issues like lumpy tops. A gentle wave of a heat gun smooths everything out beautifully. A hairdryer on high can work in a pinch, but it tends to blow the wax around.
Safety Stuff: Have a Class B fire extinguisher nearby (that’s the one for flammable liquids like oil and wax). Keep paper towels handy for spills and wear old clothes. Hot wax splashes can cause some nasty burns, so be careful.
Good to know: For supplies like pouring pots, wicks, and fragrances, check out reputable online suppliers like CandleScience, The Flaming Candle, or Bramble Berry. They have way better selection and quality than big-box craft stores.
Understanding the Raw Material
Before you melt anything, it helps to know what you’re working with. A candle is basically a tiny, controlled fuel-delivery system, and the wax type dictates everything. With reclaimed wax, you’re dealing with a blend, so a little knowledge goes a long way.
Common Wax Types
Your scraps are probably a mix of these. Don’t stress about identifying them perfectly, but it’s good to know their general personalities.
Paraffin Wax: The old-school, traditional choice. It’s a champ at holding strong scents and bright colors. It also shrinks when it cools, which is why it often needs a second pour to fill in a hole in the center.
Soy Wax: A super popular natural wax made from soybeans. It’s known for its creamy look and easy cleanup (just soap and water!). Its downsides? It’s prone to “frosting” (white crystalline patches) and sometimes pulls away from glass containers, creating “wet spots.”
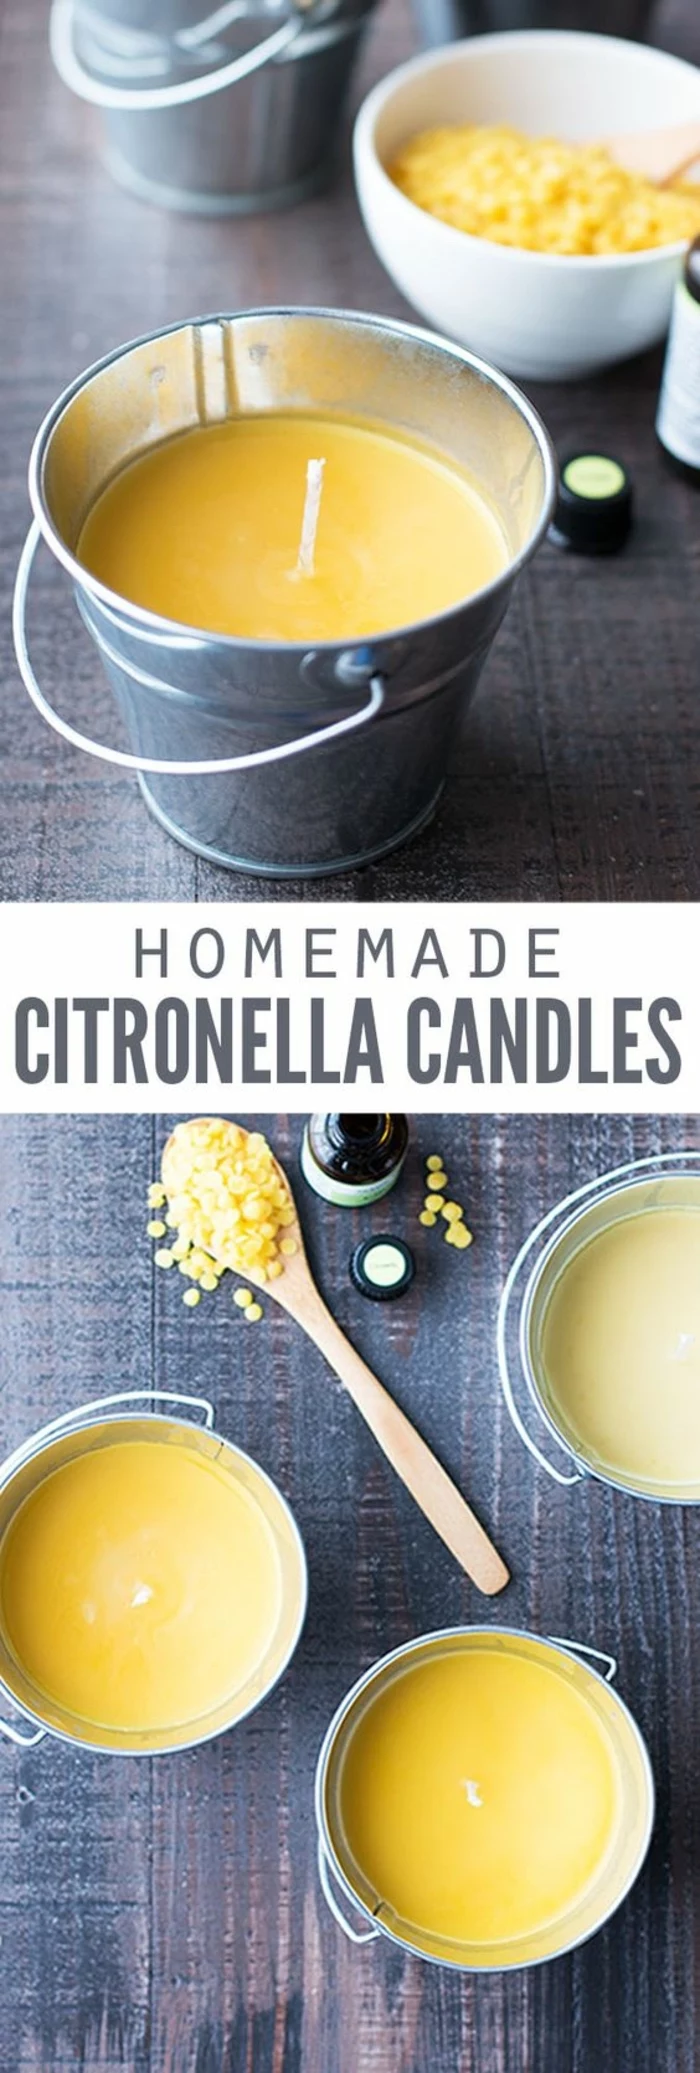
Beeswax: A beautiful natural wax with a subtle honey scent all its own. It burns slowly and has a high melt point. Like paraffin, it shrinks as it cools.
Palm Wax: This wax creates gorgeous, feathery crystal patterns as it cools. It’s very hard and has a high melt point. There are ethical concerns around its production, so many pros now only use sustainably sourced palm wax.
Key Terms to Know
Understanding these will help you figure out what’s going on with your wax.
Melt Point: The temperature where solid wax starts to become liquid. You want to melt your wax slowly and not overheat it past this point.
Flash Point: This is the temperature at which the wax vapors can ignite if they hit a flame. It’s very high (usually over 350°F), but it’s the most important safety number. This is exactly why you always, always use a double boiler.
Fragrance Load: The amount of fragrance oil a wax can hold, measured as a percentage of the total weight. Go over this limit, and the oil can literally sweat out of the finished candle.
Cure Time: This is the magic waiting period. It’s the time a candle needs to sit after being poured for the wax and fragrance to fully bond and stabilize. For most waxes, this is anywhere from 3 days to two weeks. Skipping this step is why a lot of homemade candles have no scent when they burn.
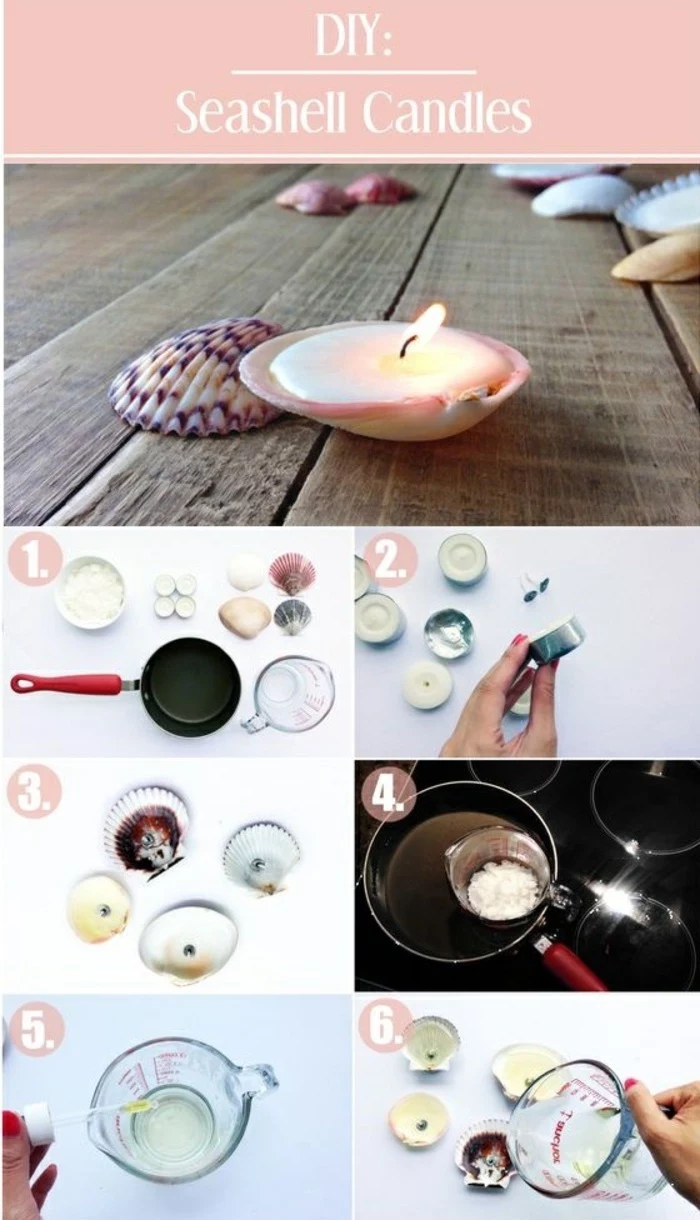
The Prep Work: Sorting and Cleaning
Heads up: this is the most labor-intensive part of the whole process. It can easily take an hour or two, so put on some music and settle in. Getting your wax clean before you melt it is the secret to a high-quality finished product.
Sort Your Scraps: If you can, try to group similar waxes together. If you can’t tell the type, at least sort by color. This will prevent you from ending up with a murky, brownish-gray candle.
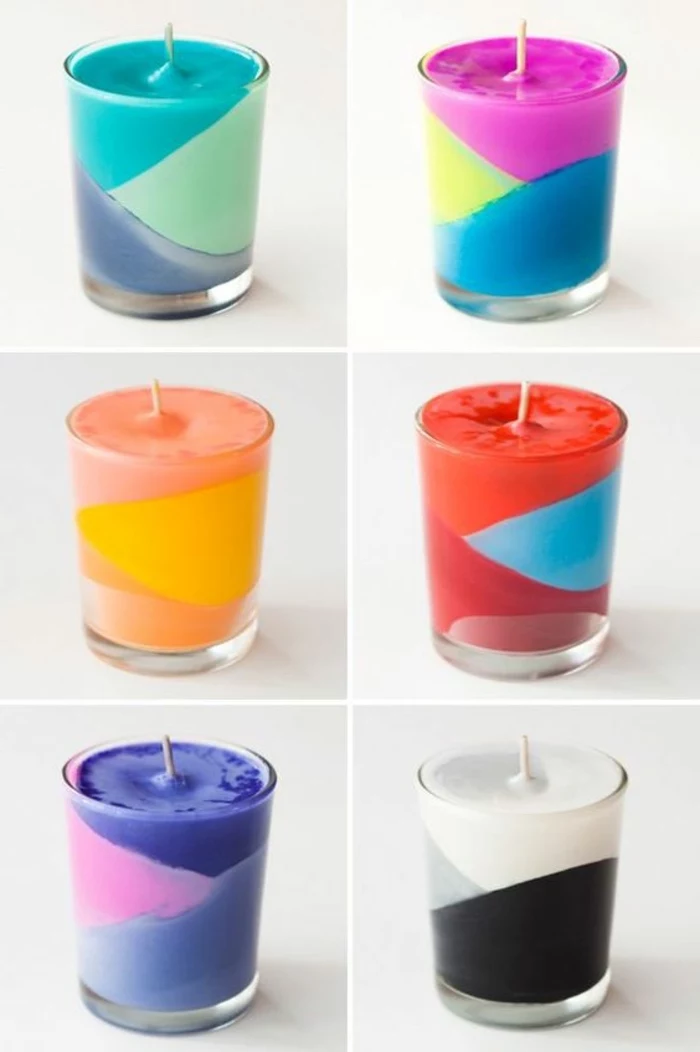
Quick Tip: If you do end up with a weird color, embrace it! You can either pour it into an opaque or dark-colored container so the color doesn’t matter, or you can add a little bit of black candle dye to create a very chic, sophisticated dark wax.
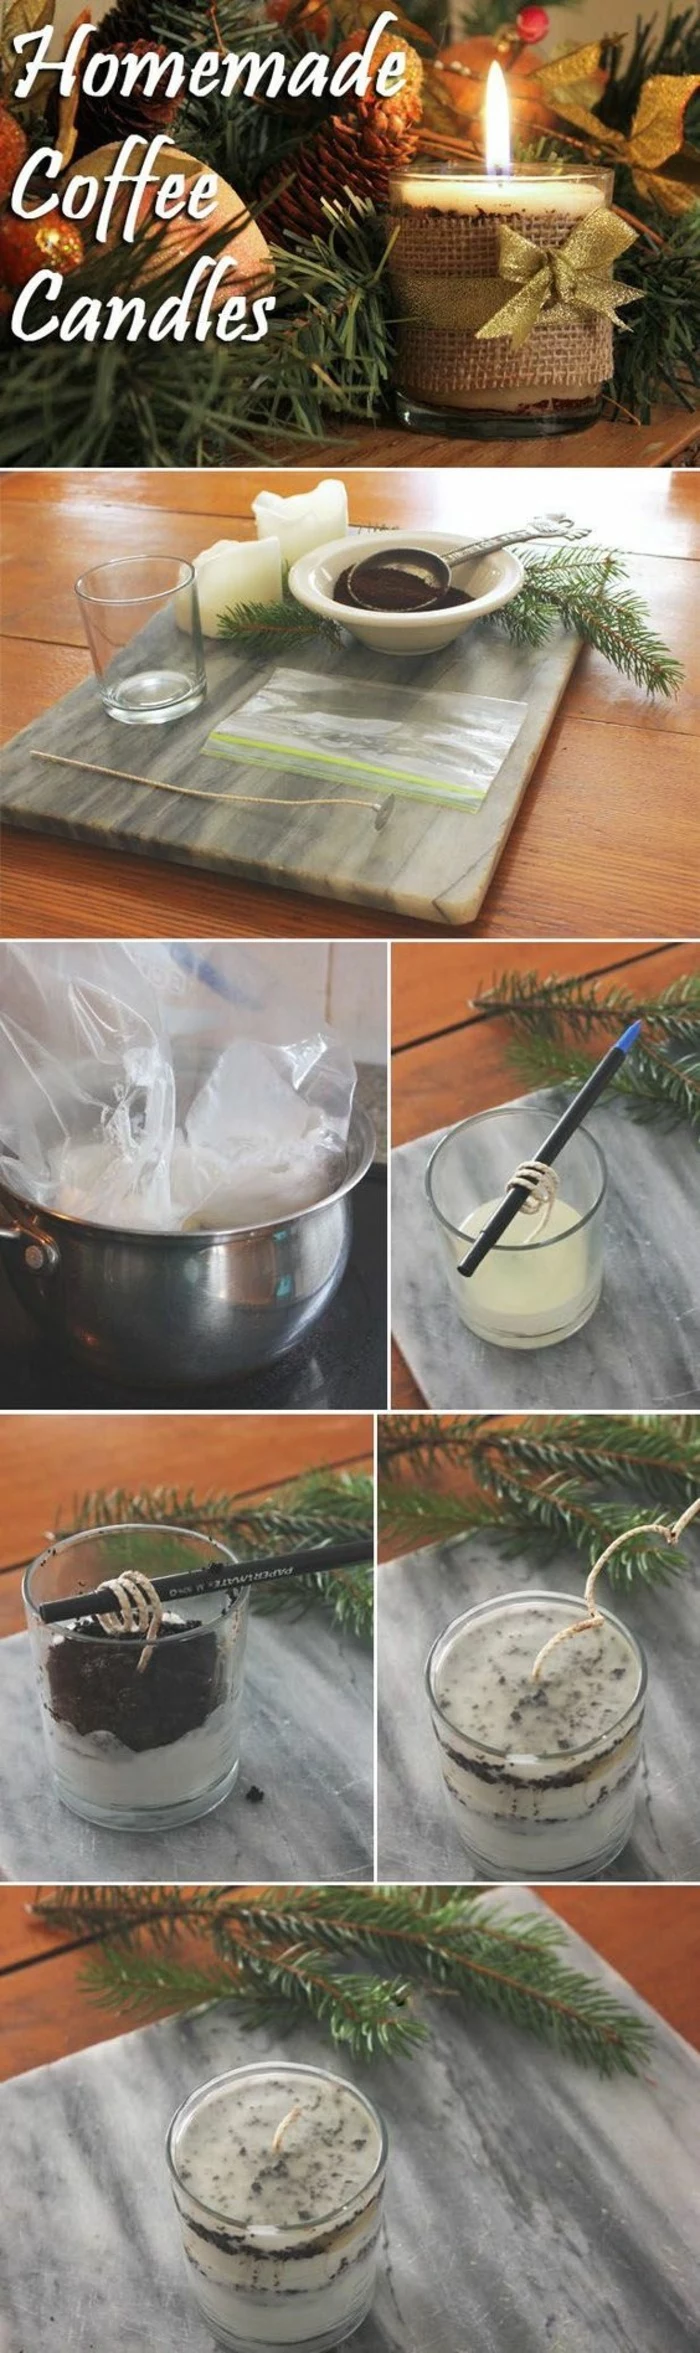
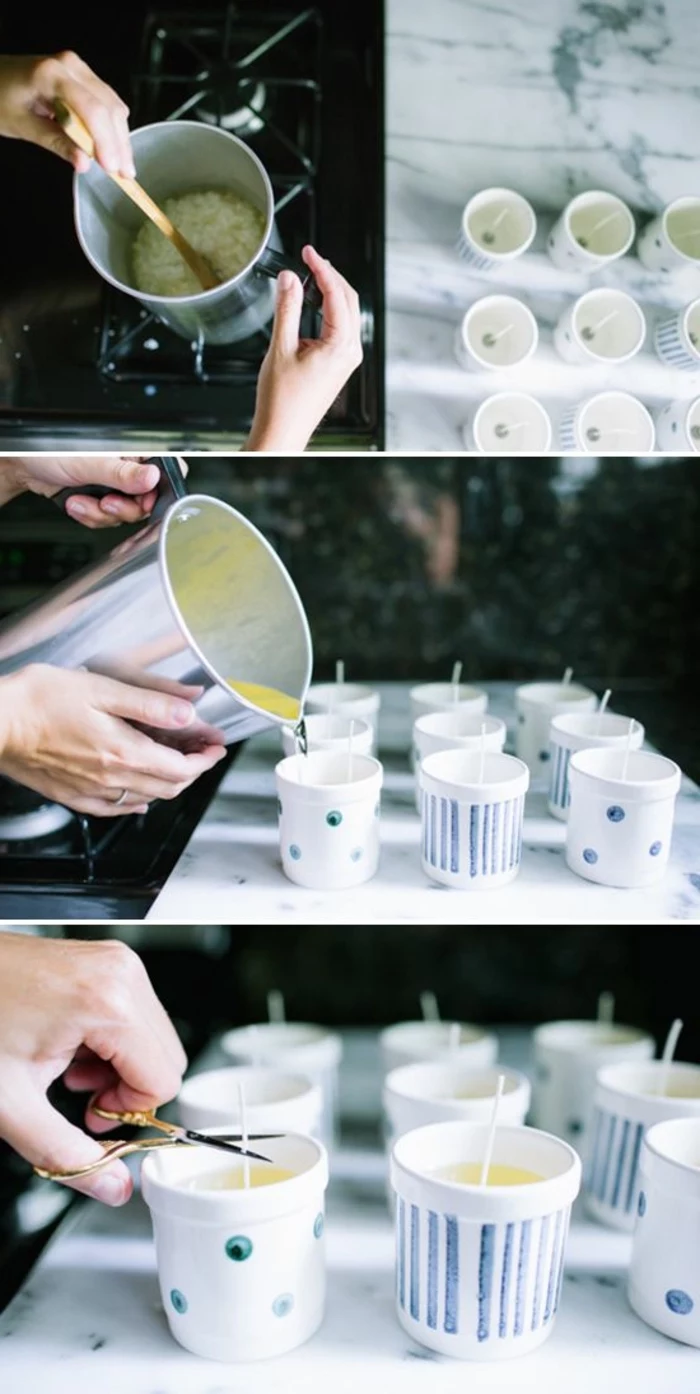
The First Melt & Filter: Place your cleaned scraps in your pouring pot inside the double boiler. Gently heat the wax to about 180°F (82°C). This is hot enough to melt everything and let all the gunk sink to the bottom.
Filter Out the Gunk: Once it’s all liquid, it’s time to filter. I do this by pouring the hot wax through a fine-mesh metal sieve lined with a paper towel or a coffee filter. Set the sieve over a clean, heat-safe container (an old coffee can is perfect) and pour slowly. You will be horrified and amazed at the black soot and old wick bits you collect. This clean, filtered wax is now your ready-to-use base.
A word of caution: this is messy. Cover your work surface with newspaper or a silicone mat. And whatever you do, never pour wax down the drain. It will solidify and create a plumbing nightmare. Let any waste wax cool in a disposable container and toss it in the trash.
The Heart of the Craft: Wicking, Pouring, and Curing
This is where the magic happens. Getting the wick, temperature, and pouring technique right will transform your funky reclaimed wax into a work of art.
Choosing a Wick: The
1 Amateur Mistake
I can spot a homemade candle from a mile away just by looking at the wick. An incorrect wick isn’t just ugly; it’s a safety hazard.
Wick too small? It will “tunnel,” burning a narrow hole right down the middle and wasting all the wax along the sides of the jar.
Wick too big? This is a real fire risk. It creates a giant, sooty flame that can make the container dangerously hot, potentially causing it to crack. I once saw a student’s test candle shatter because the wick was way too big. Hot wax everywhere. It was a powerful lesson.
Since you’re working with an unknown blend of waxes, you can’t just follow a standard sizing chart. The only real way to know is to do a burn test. This is what the pros do for every single new candle design.
Make a Test Candle: Use the same container you plan for your final candle. For a standard 3-inch diameter jar, a good starting point is to buy a wick sample pack. I’d suggest the CD (Stabilo) series and testing something in the CD-10 to CD-18 range.
Let It Cure: This is crucial! You must let the test candle cure for at least 4-5 days before you test it. Patience!
The Burn Test: Light it up and let it burn for 3-4 hours. A perfect burn will have a melt pool (the liquid wax) that reaches all the way to the edges of the container and is about 1/4 to 1/2 inch deep. The flame should be calm and steady, with no smoke or soot.
Analyze and Adjust: If it tunneled, you need a bigger wick (e.g., go from a CD-12 to a CD-14). If the flame was huge and the melt pool is super deep, you need a smaller wick. Keep a notebook of your tests!
The Art of the Pour
Pour temperature is everything for the final look. Too hot, and the wax can crack or shrink. Too cold, and you get a lumpy, ugly top.
Your reclaimed wax probably has a muddled scent. You can add new fragrance oil to give it a new personality, but be conservative. I’d suggest a low fragrance load, maybe 4-6% by weight, since there’s already some in there. Add the fragrance when the wax is around 185°F (85°C), and stir gently for two full minutes to make sure it fully bonds.
A good pouring temperature for most blended waxes is around 160-170°F (71-77°C). Pour slowly and steadily into your pre-wicked container. Then, don’t touch it! Let it cool completely at room temperature, away from drafts.
Oh yeah, and you might get a sinkhole around the wick, especially if your blend has paraffin or beeswax. This is totally normal. To fix it, just reheat your leftover wax a little hotter than your first pour (maybe 175°F) and do a thin “second pour” over the top to fill the hole and create a perfectly smooth surface.
Pro-Level Cleanup & Troubleshooting
You’ve poured your candles, and now there’s a waxy mess. Here’s how to deal with it and fix any common issues.
The Easiest Cleanup Method
Don’t even think about soap and water yet. While the pouring pot and your tools are still warm, wipe out as much wax as you can with a paper towel. For the last stubborn film, use a paper towel soaked in 99% isopropyl alcohol (you can get this at any pharmacy). It cuts right through the wax and leaves your gear sparkling clean. It’s a total game-changer.
Fixing Common Problems
Problem: White, chalky stuff on my candle (“Frosting”). Solution: This is a classic soy wax issue. It’s usually caused by pouring too hot or cooling too fast. Try a lower pour temperature next time. A little trick is to gently warm your jars with a heat gun right before you pour.
Problem: Ugly spots where the wax pulled away from the glass (“Wet Spots”). Solution: Again, this is usually a cooling issue. Pre-warming your jars helps a ton. Also, make sure your jars are spotlessly clean before you start. Any fingerprints or dust can cause this.
Problem: I can’t smell my candle when it’s burning! Solution: 99% of the time, this is a wicking problem. Your wick is probably too small and isn’t getting the melt pool hot enough to release the scent. Try the next size up. It could also be that you didn’t let it cure long enough.
The Final Word: Safety Is Not Optional
I saved the most important part for last. Look, this is a wonderfully rewarding craft, but you are playing with hot, flammable liquid. Safety is the one area where there are no shortcuts.
Never, ever leave melting wax unattended. If you have to walk away, turn off the heat. Period.
Keep a Class B fire extinguisher within arm’s reach. And know how to use it.
NEVER use water on a wax fire. It will splatter the burning wax and spread the fire. Smother the flame with a metal lid or use your extinguisher.
Work in a well-ventilated area. Open a window.
Label your finished candles. Even for yourself, it’s a good habit. A simple warning label on the bottom should say: “Burn within sight. Keep away from flammable objects. Keep away from children and pets.” This is standard practice for a reason.
Making candles from reclaimed wax is a journey. Your first batch might not be perfect, and that’s completely okay. Every candle is a lesson. So keep your notebook, trust the process, and soon you’ll be turning what was once destined for the trash into something that brings warmth and light into your home.
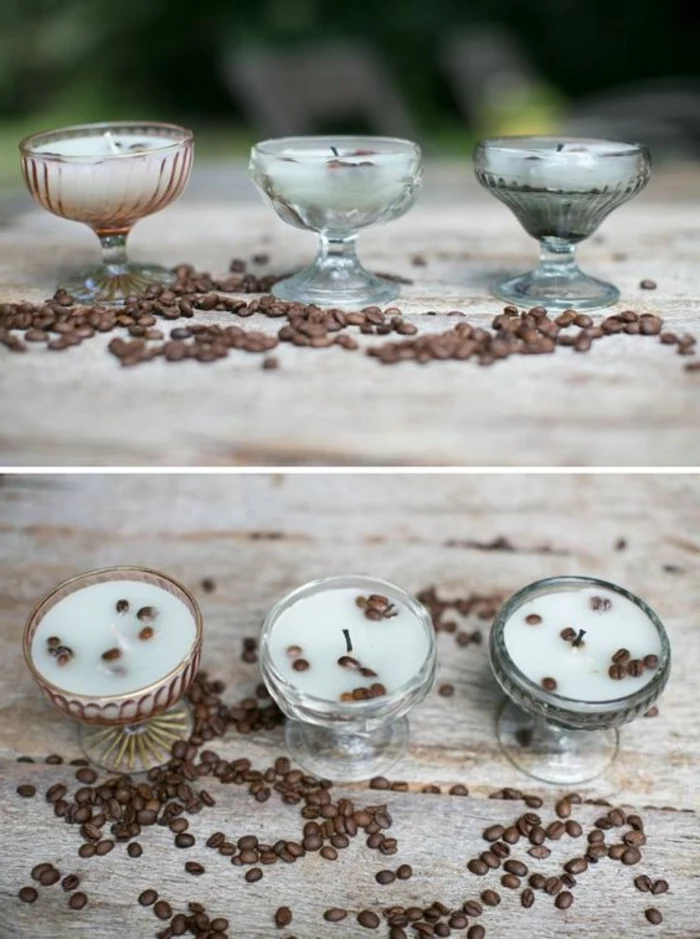
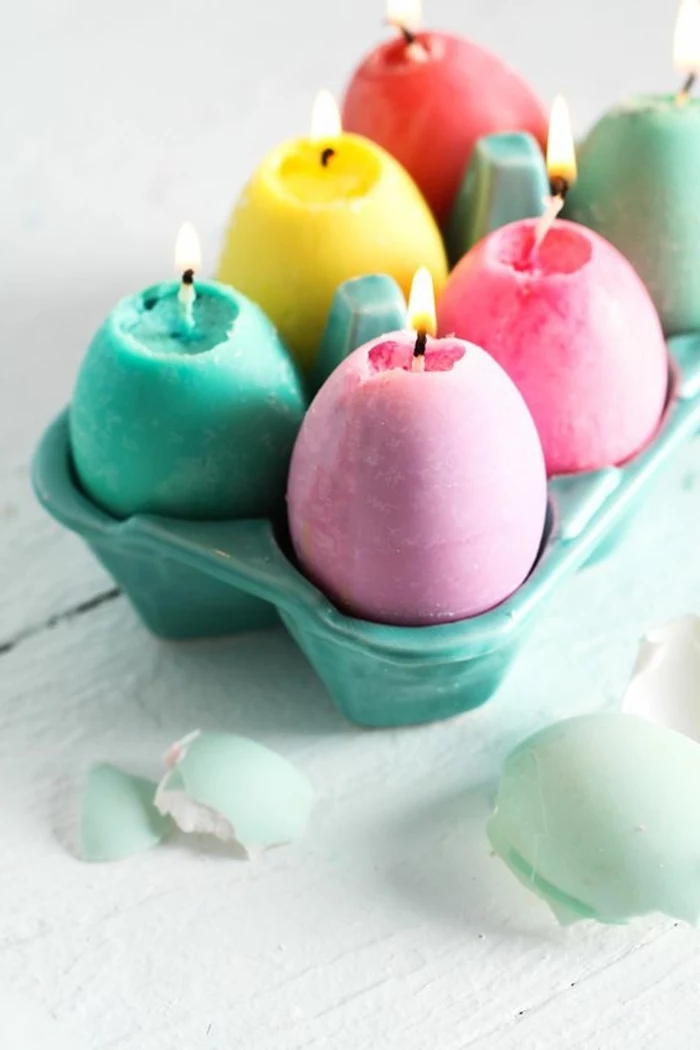
Inspiration Gallery
Did you know every fragrance oil has a ‘flash point’—the temperature at which it can vaporize and ignite?
This is crucial for safety and scent. Adding your fragrance oil to wax that is too hot (well above its flash point) can cause the delicate top notes to burn off, leaving a weak or distorted scent. A good rule of thumb is to add fragrance around 185°F (85°C) and stir gently for two minutes to ensure it binds properly with the wax.
A gentle, crackling sound like a tiny fireplace. A modern, horizontal flame that casts a wide glow. An excellent scent throw due to the large melt pool it creates.
The secret? Using a wooden wick. They offer a unique sensory experience but require proper sizing. Brands like The Wooden Wick Co. provide helpful guides to match the wick to your jar diameter perfectly. Remember to trim them short—about 1/8 inch above the wax—before each burn.
My cooled candle has a rough, pitted surface. What went wrong?
This is a classic issue with natural waxes like soy! It’s often caused by cooling too quickly. To achieve that smooth, professional top, try warming your container slightly with a heat gun before pouring, and let the candle cool slowly in a draft-free room. A gentle tap on the counter right after pouring can also help release trapped air bubbles.
When blending different wax scraps, you’re playing the role of a chemist. A common pro trick is to add a small amount of stearic acid (about one tablespoon per pound of wax) to your melted soy or paraffin scraps. This natural, plant-derived additive helps harden the final candle, increases opacity for a creamier look, and can even extend the burn time for a more stable, high-end finish.
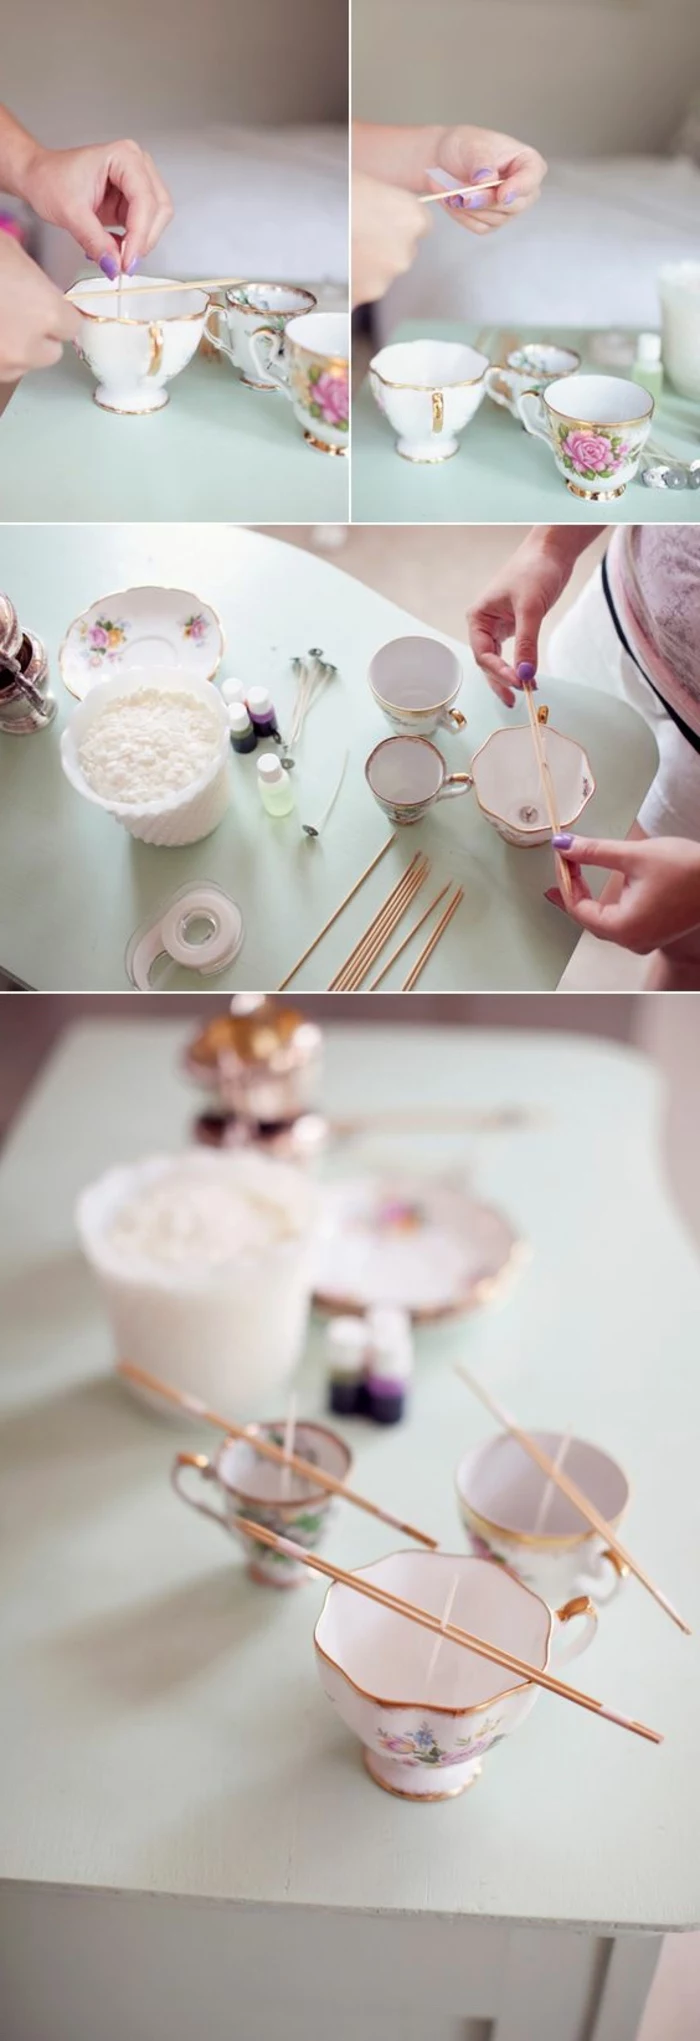
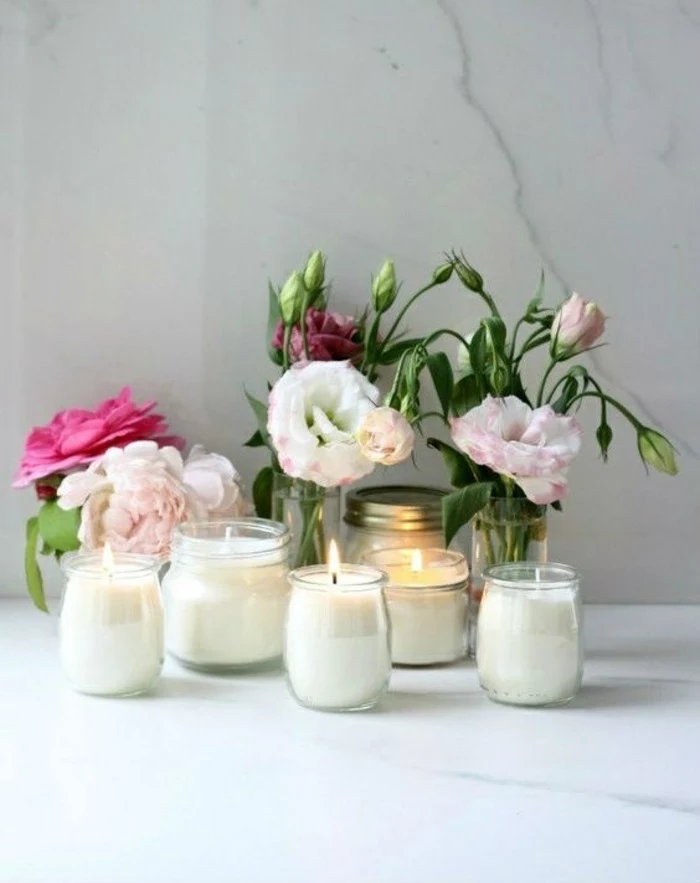
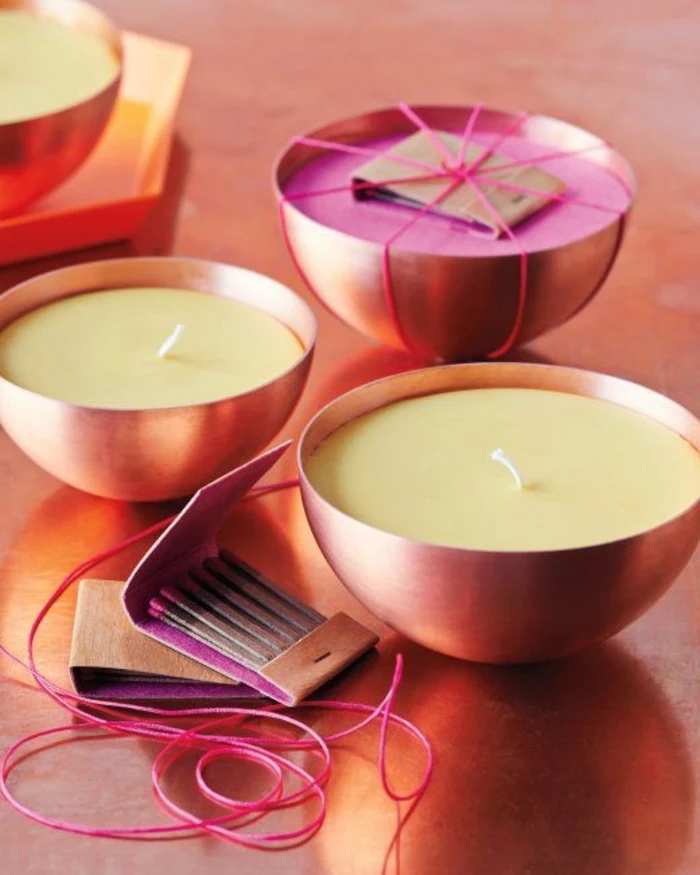
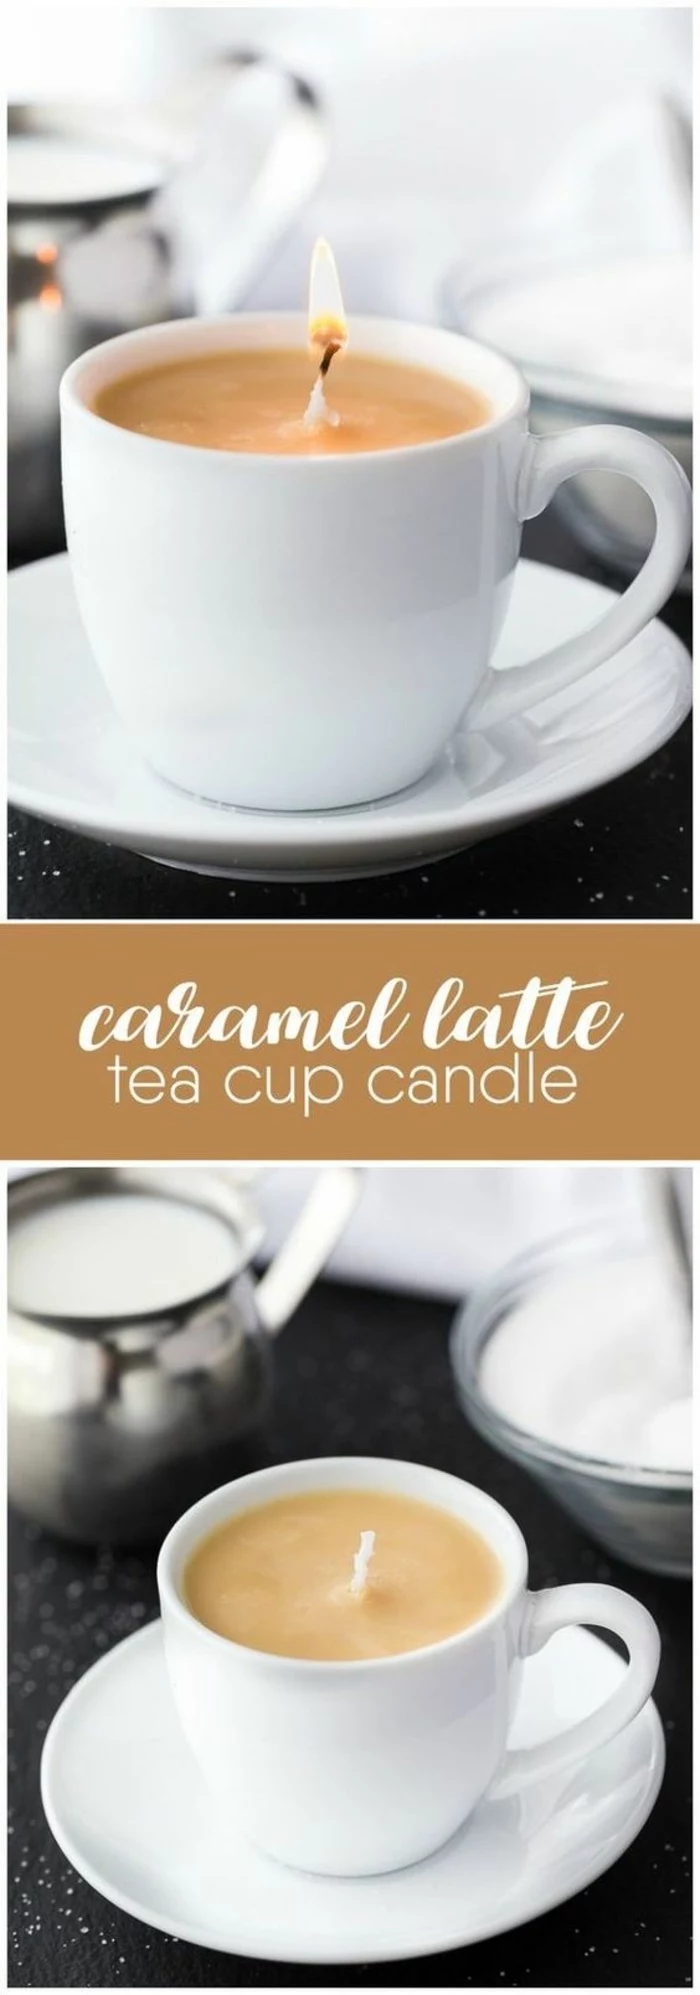
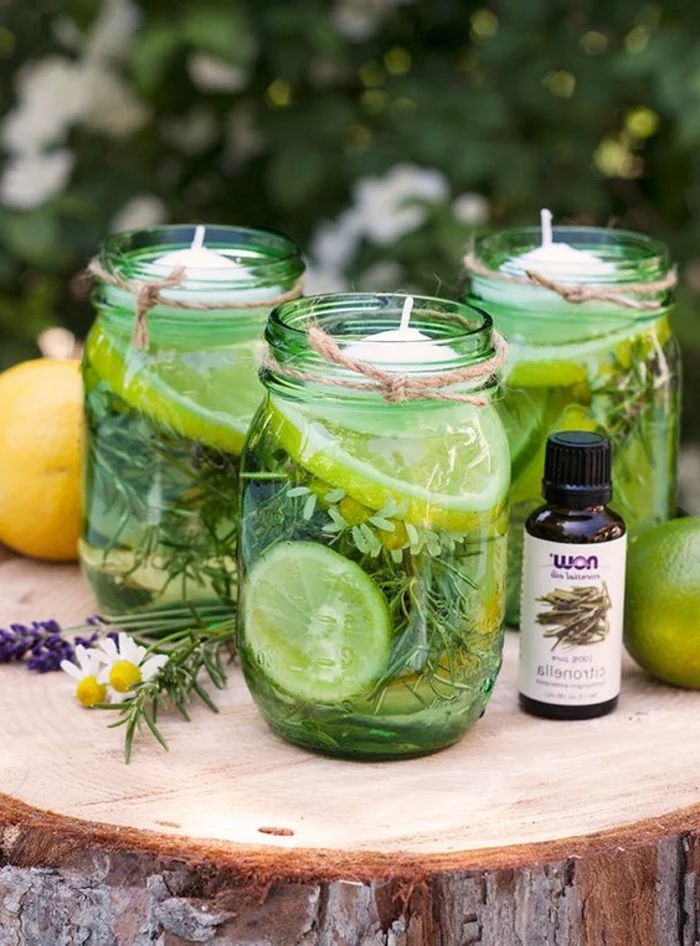
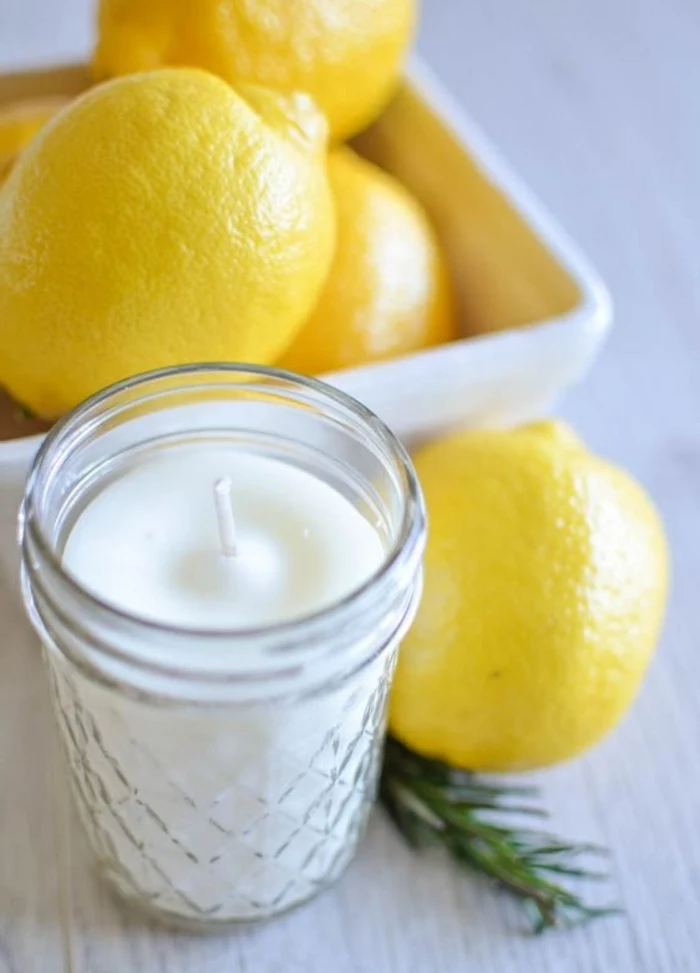
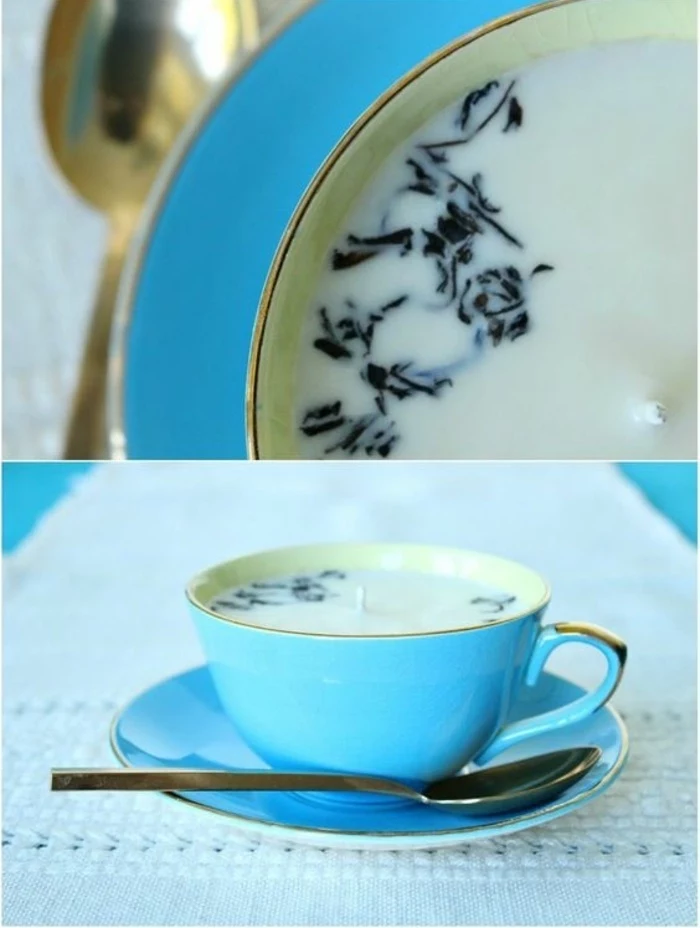
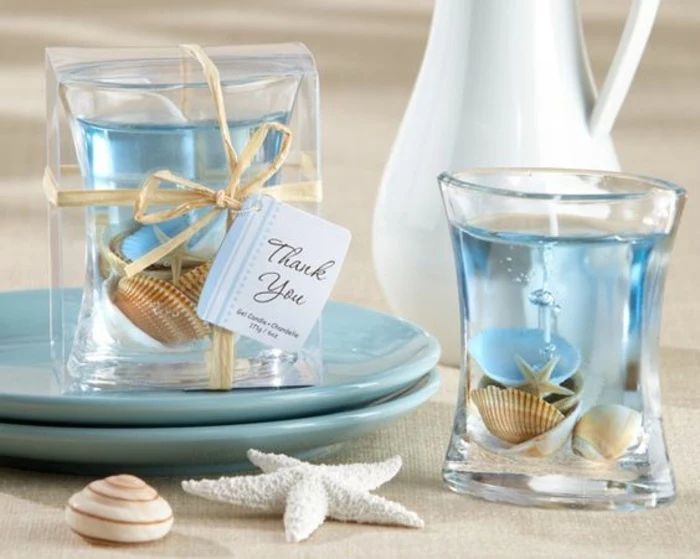
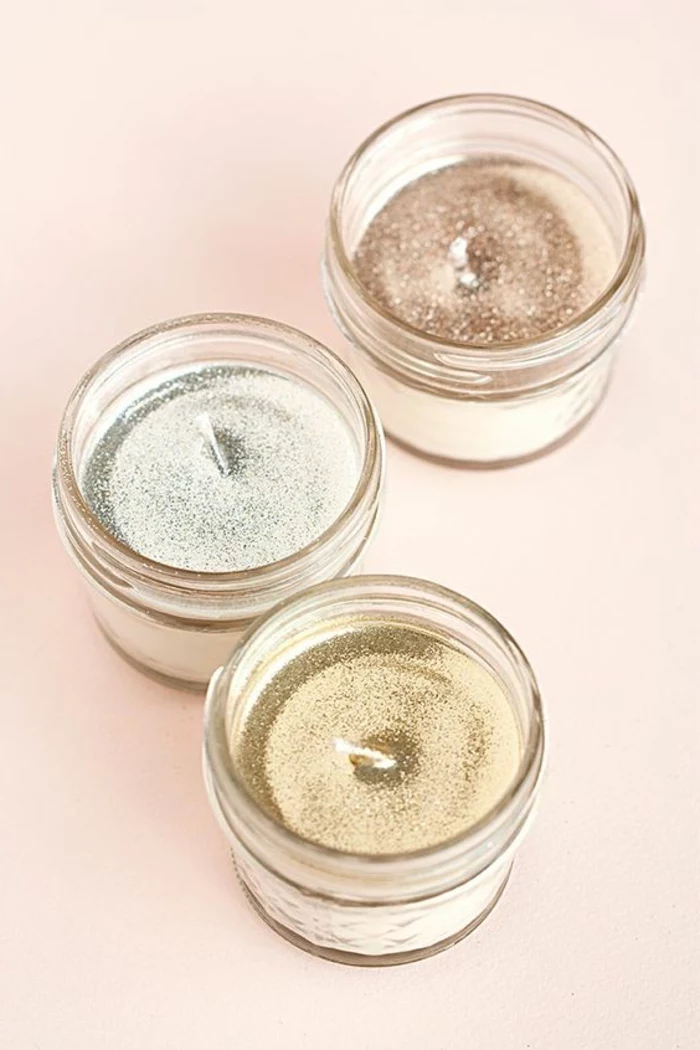
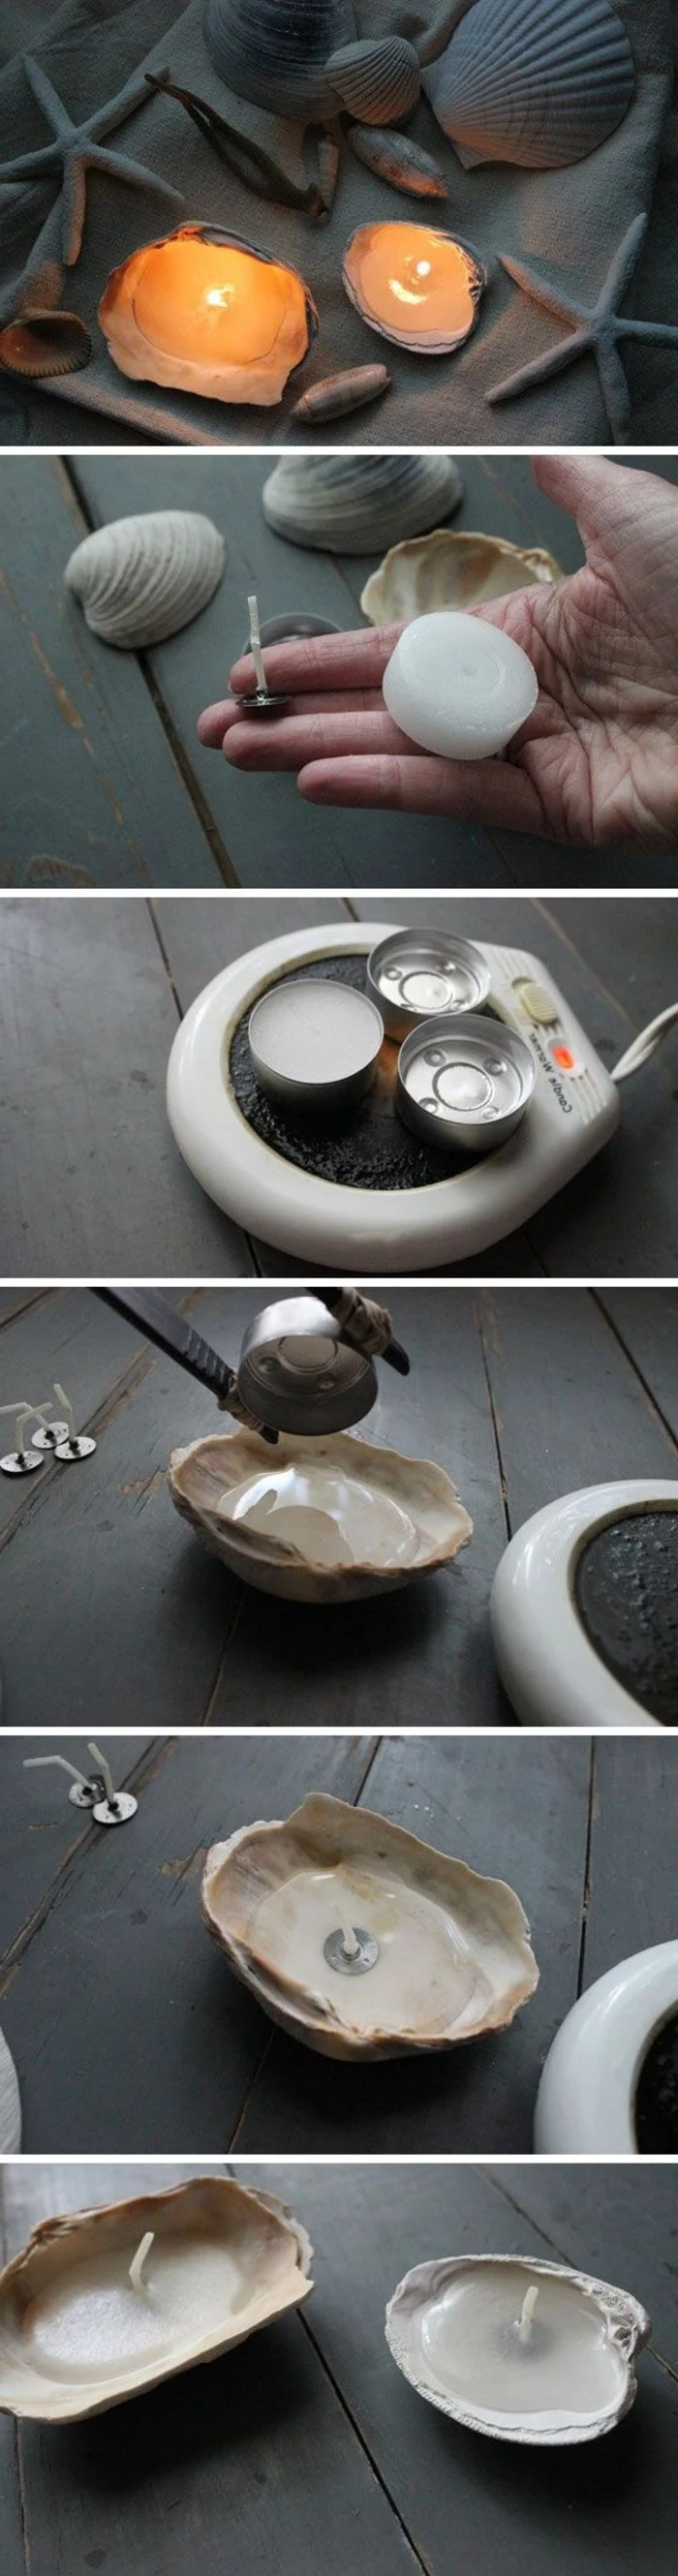
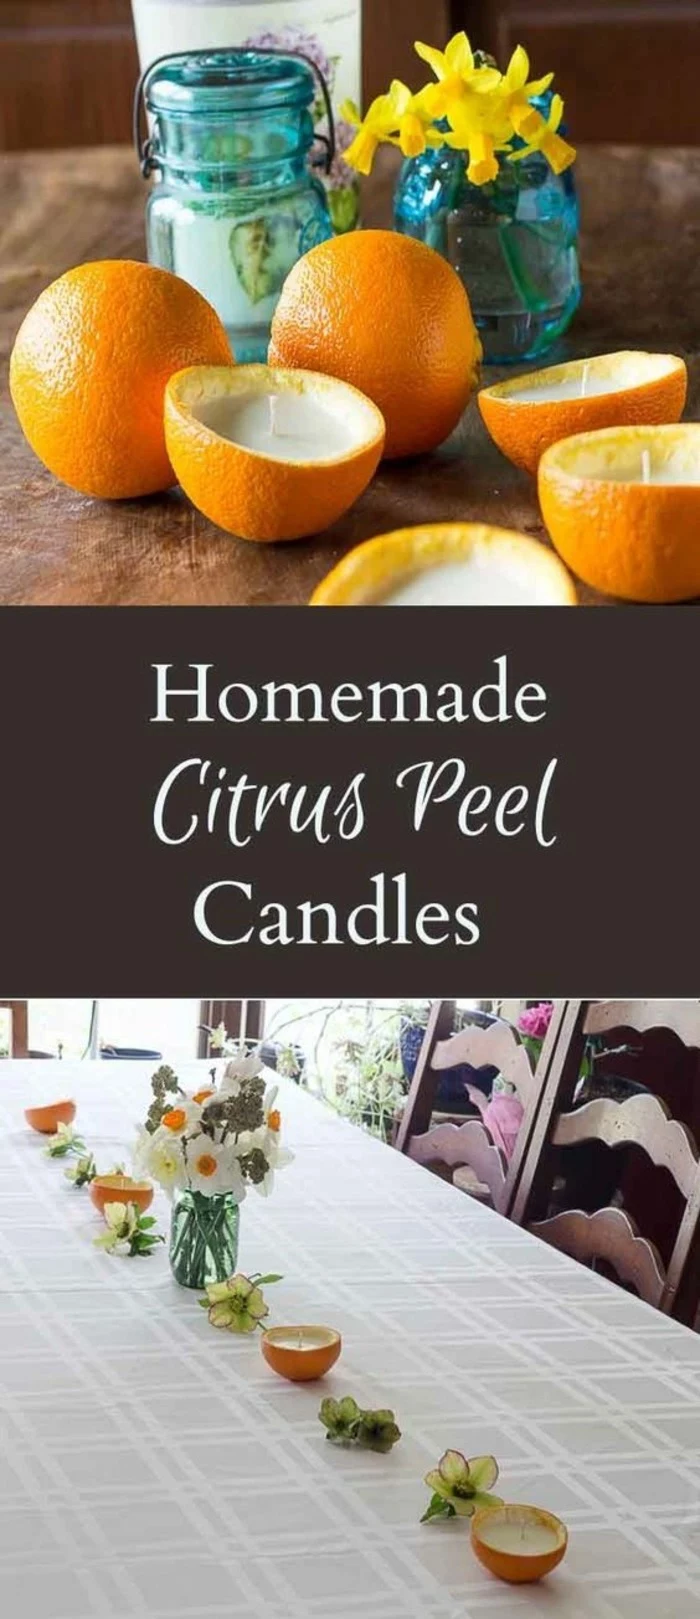
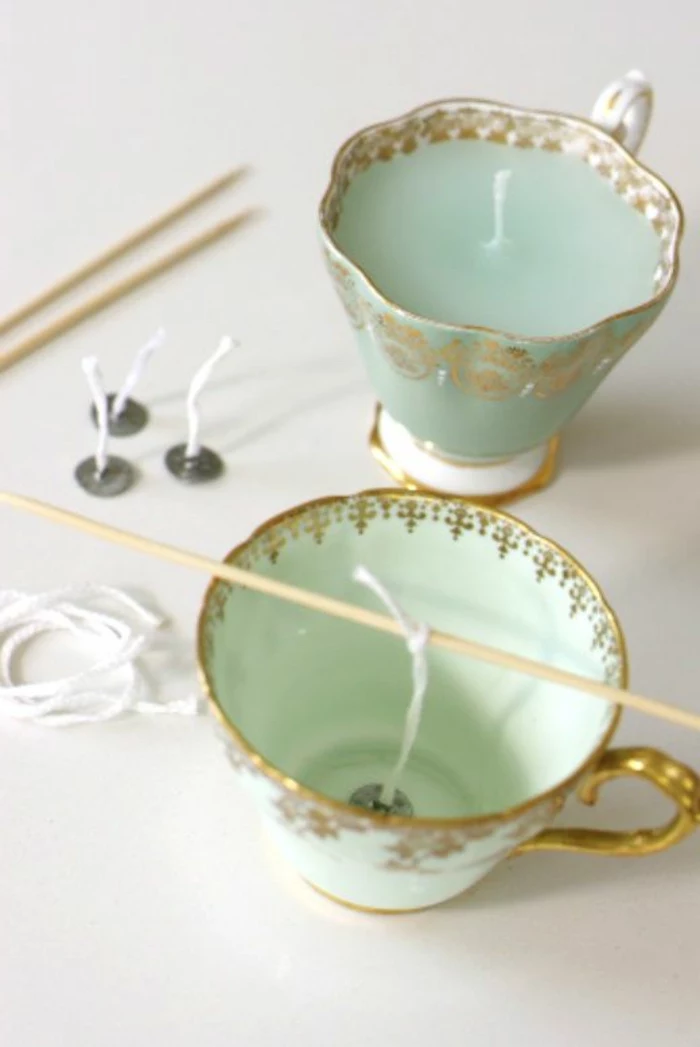
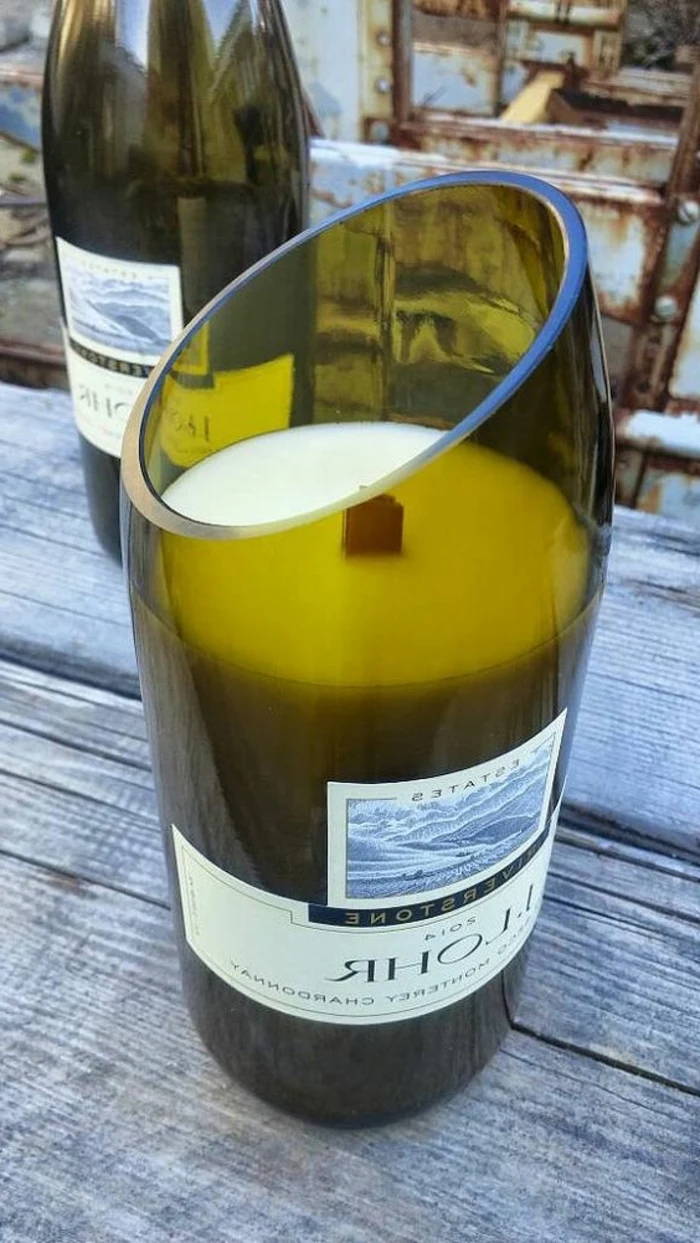
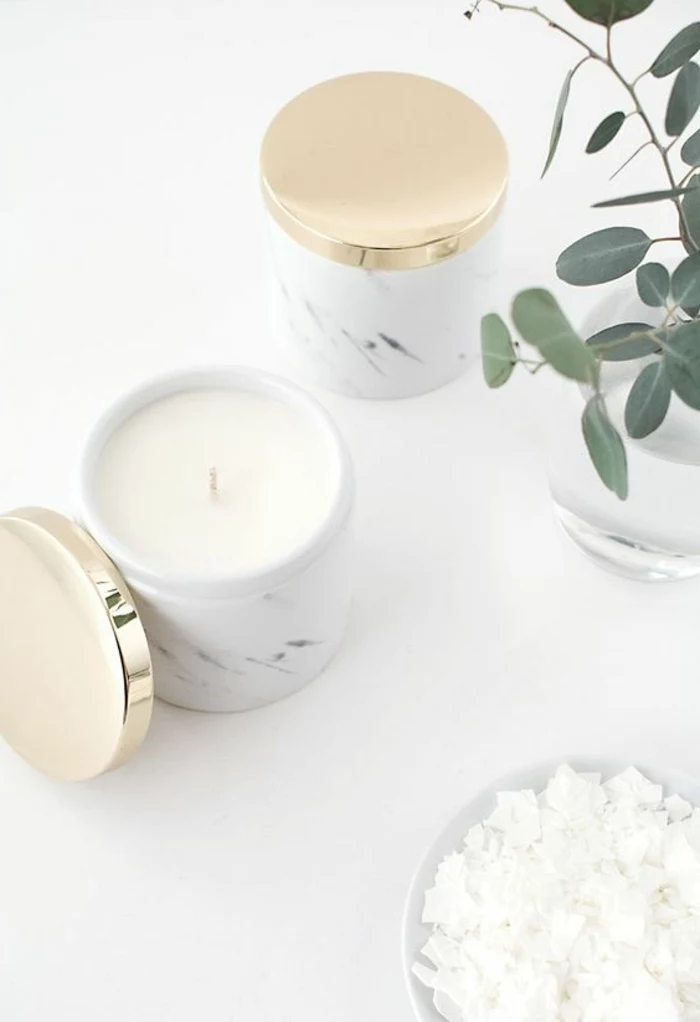
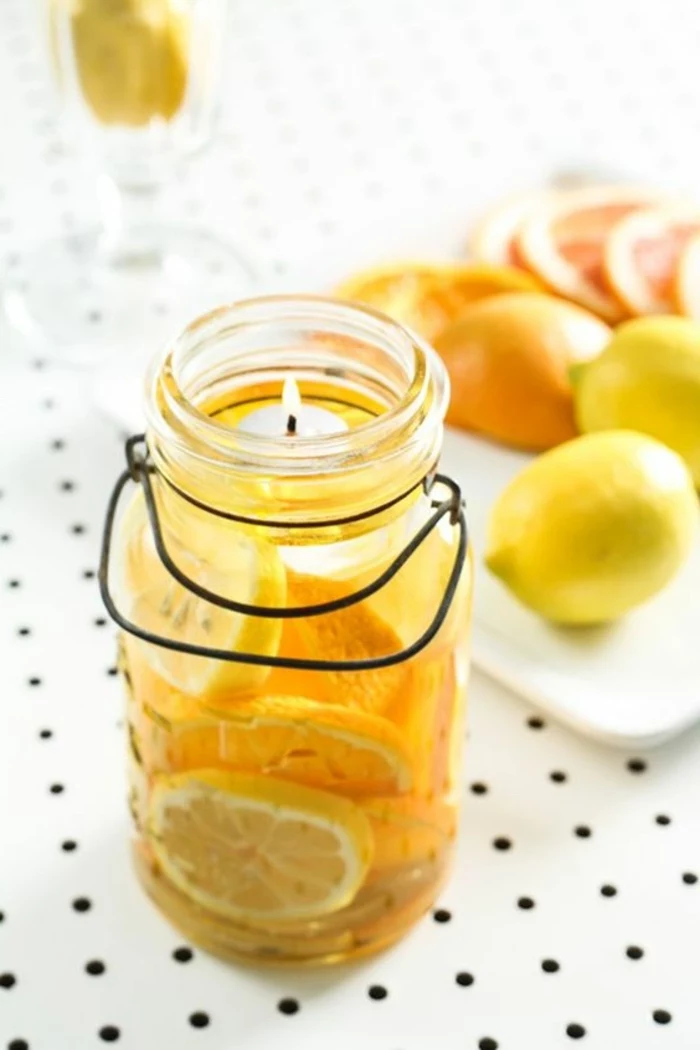
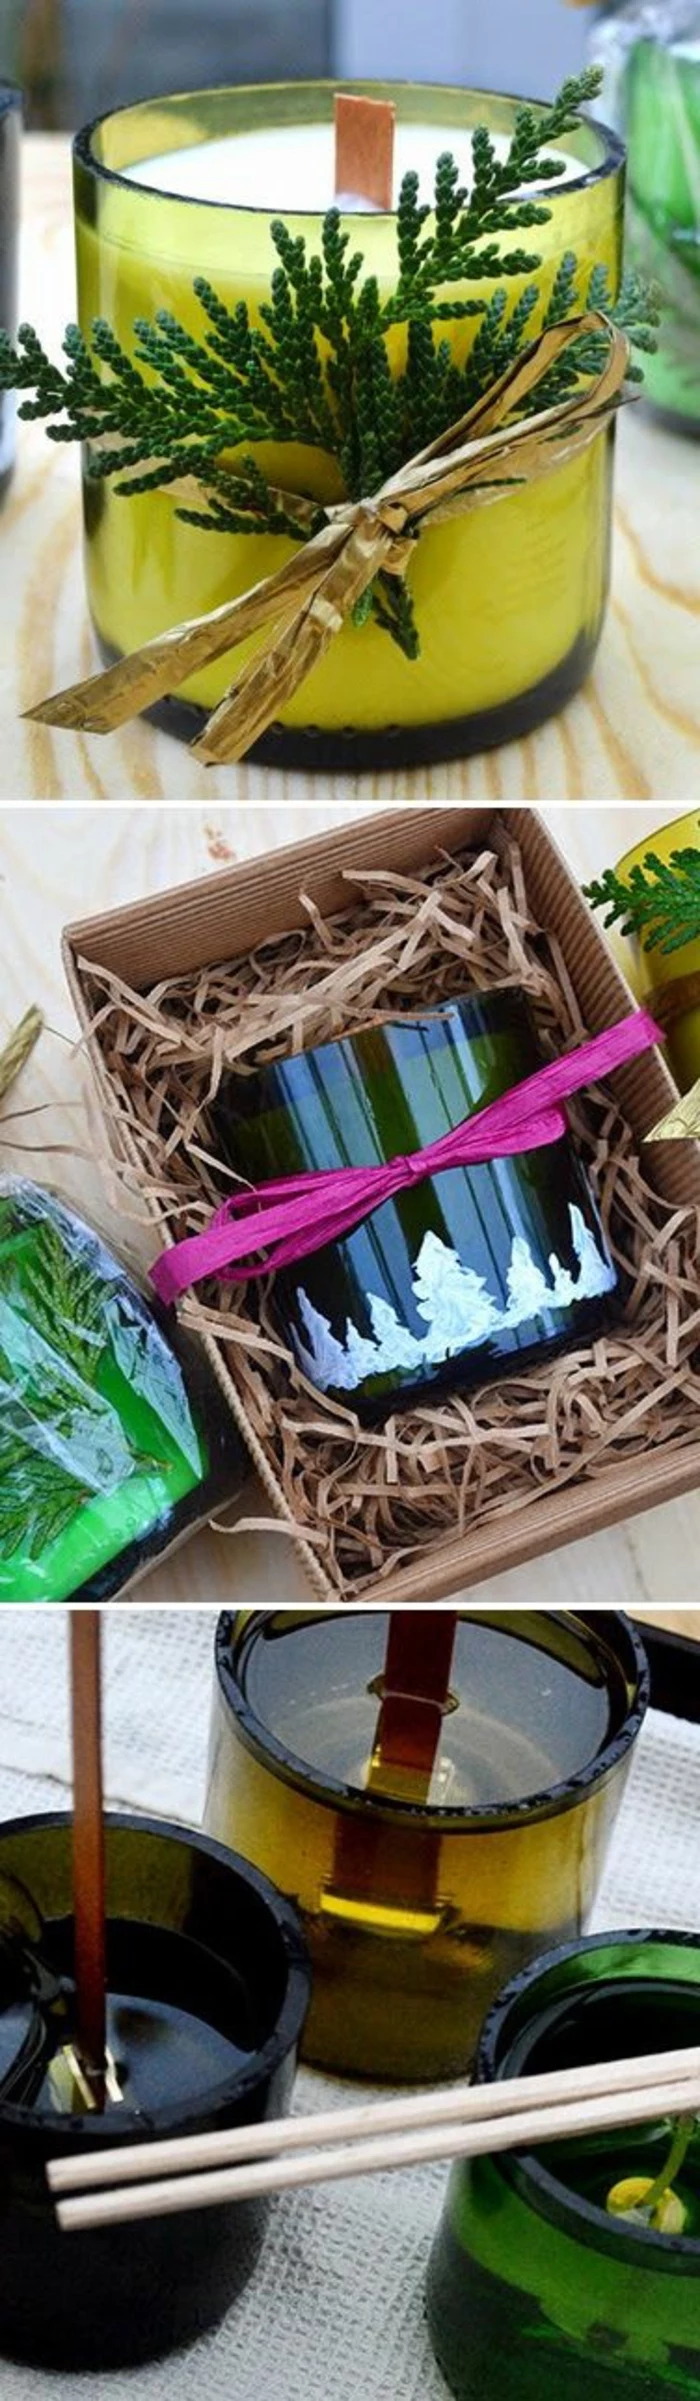
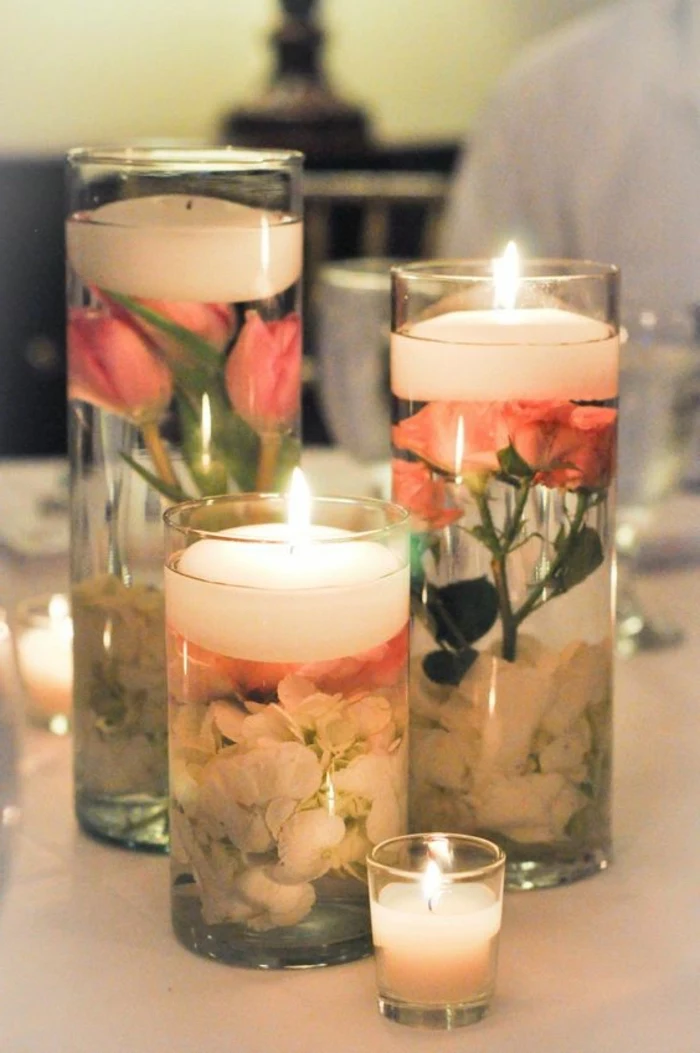
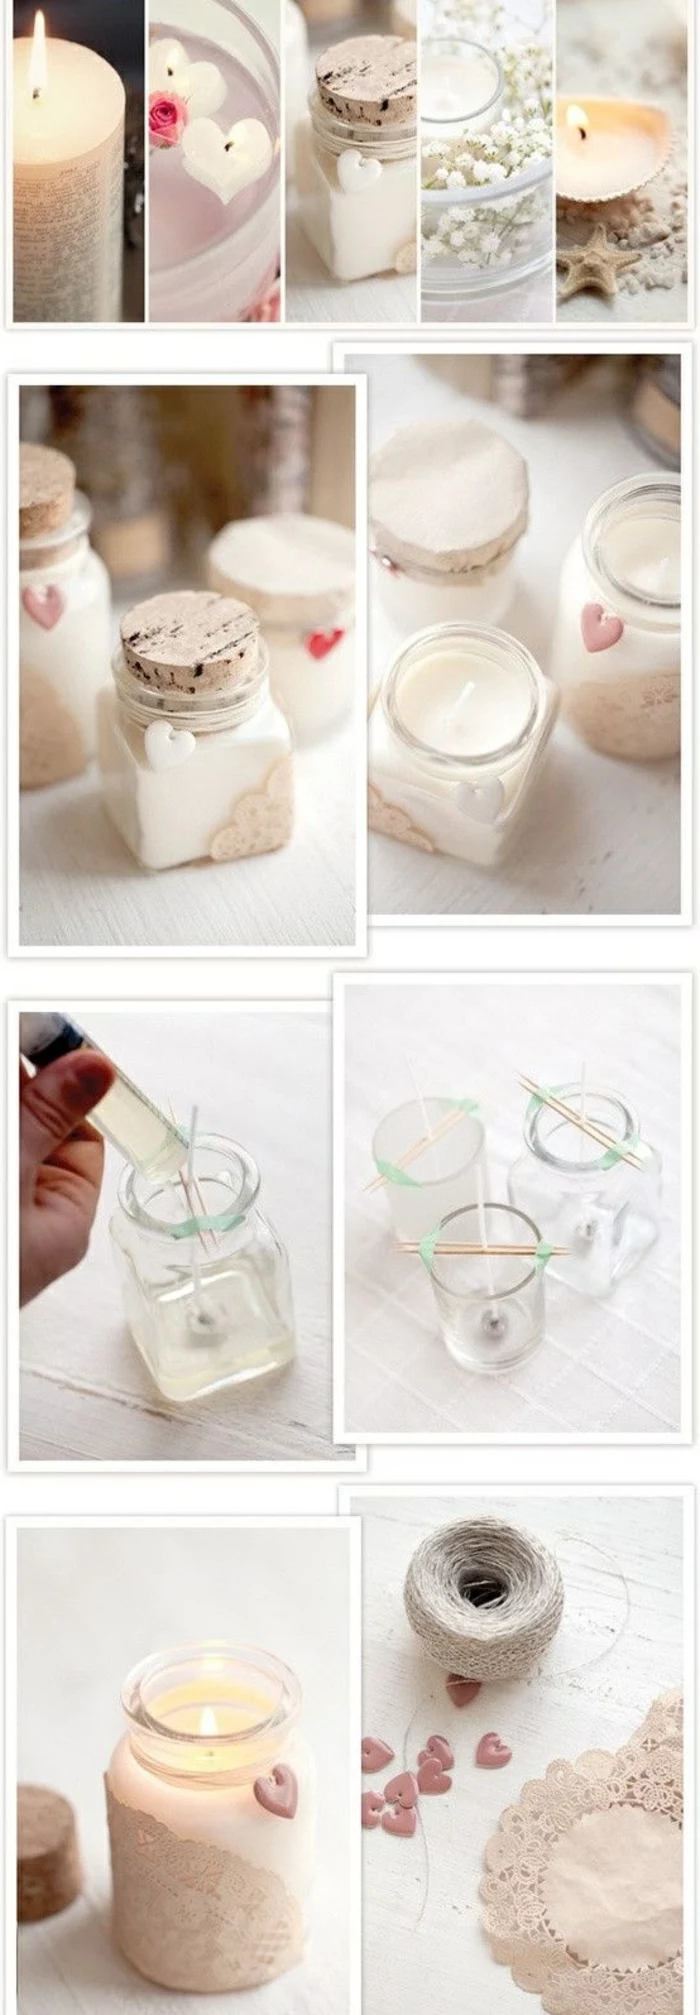
The container you choose is half the magic. Think beyond the standard jar and look for vessels that tell a story.
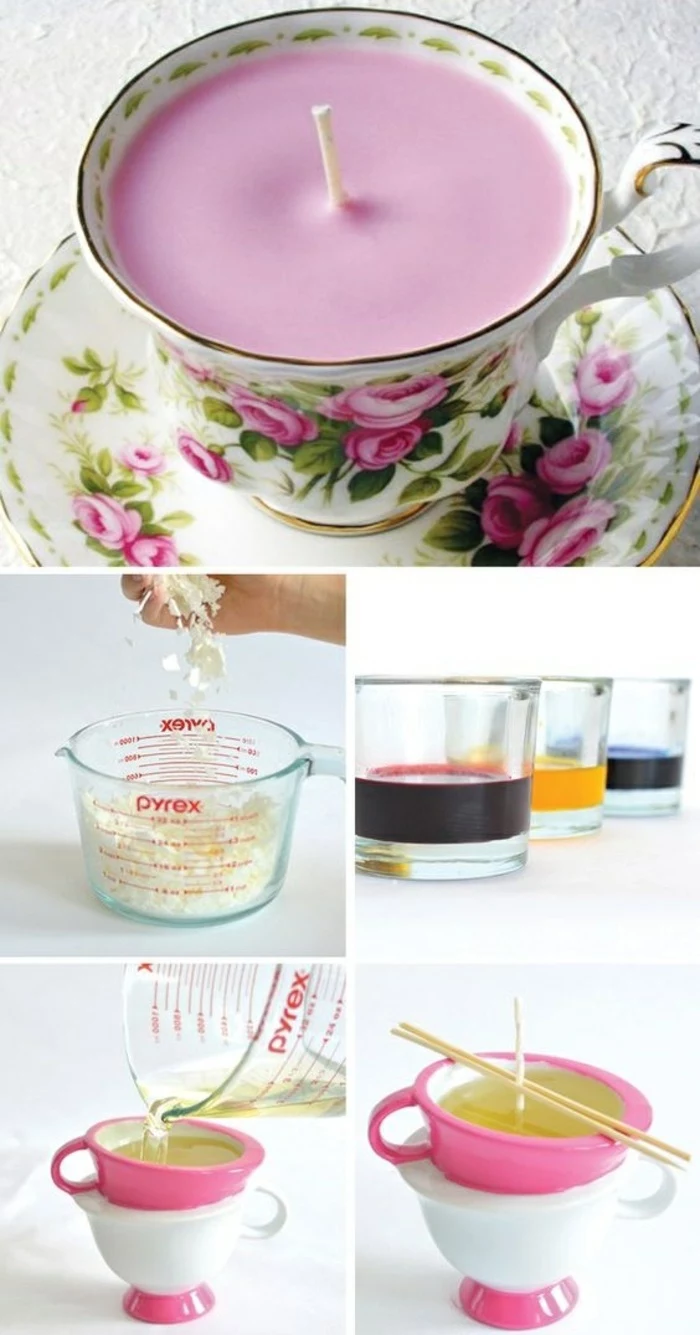
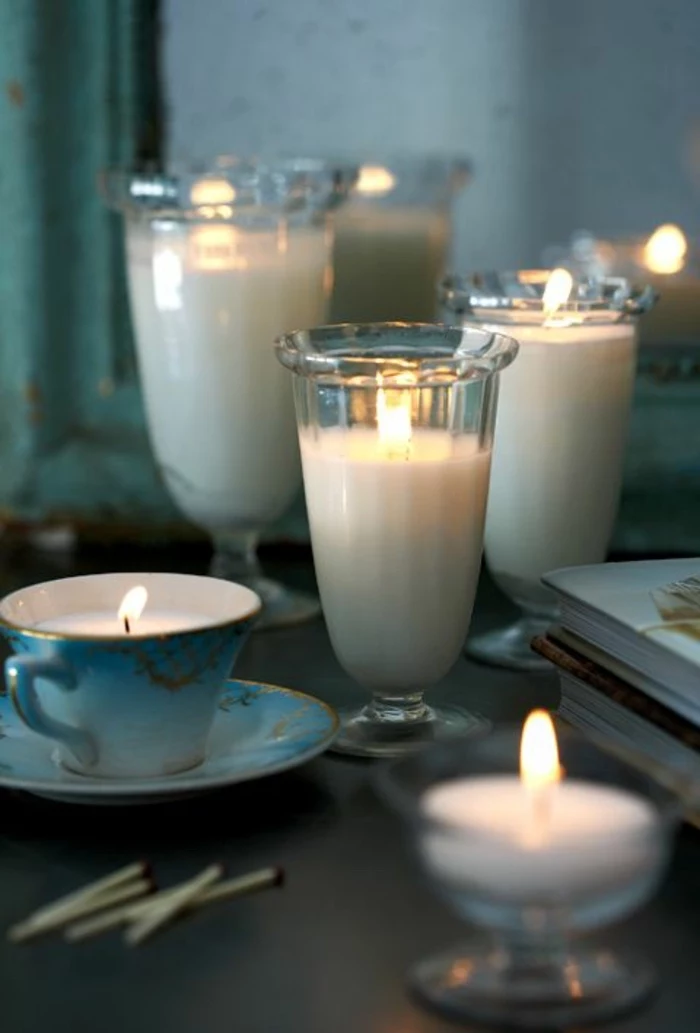
Vintage Teacups: Perfect for a delicate, romantic look.
Amber Glass Jars: Give off a warm, apothecary vibe.
Ceramic Bowls: Offer a rustic, handcrafted feel.
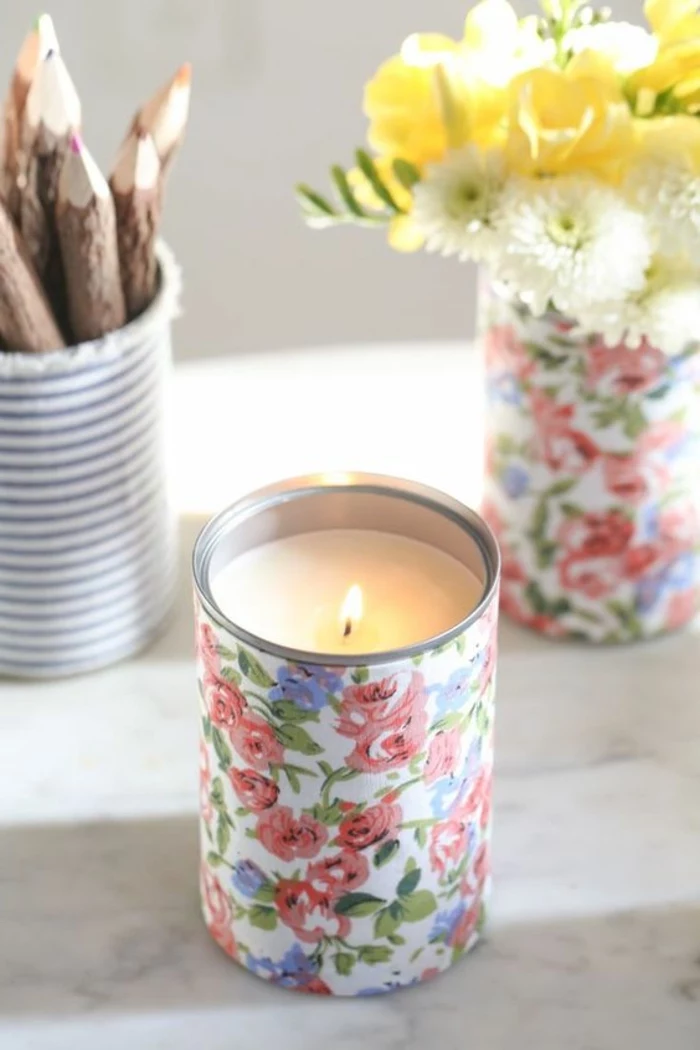
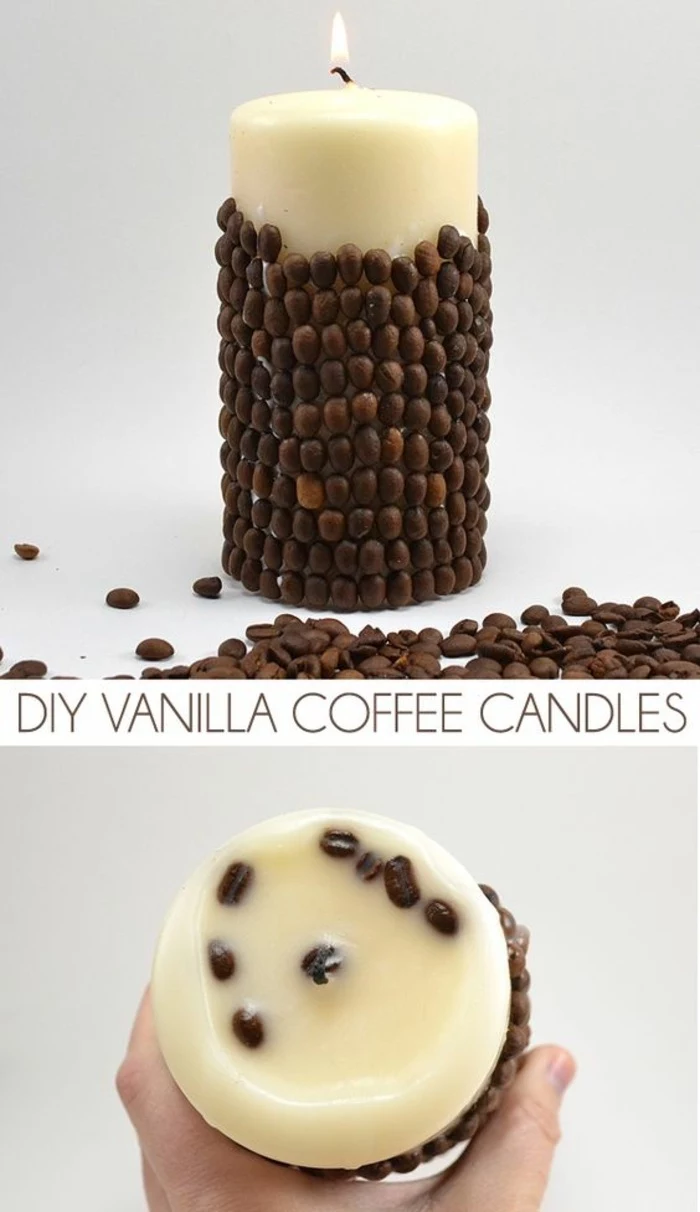
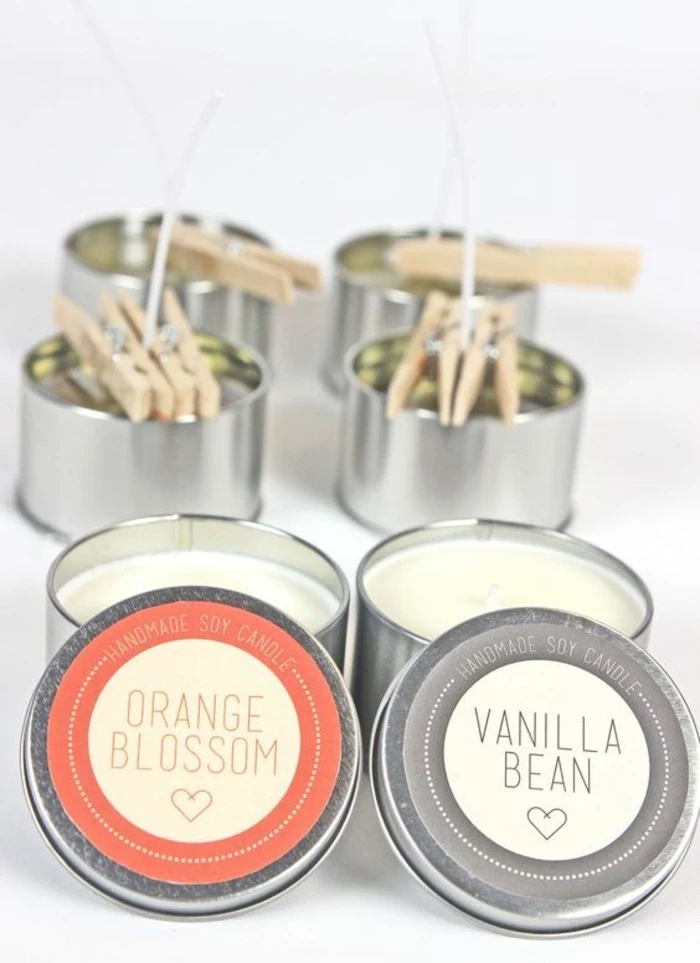
Upcycled Tins: Think old cookie or tea tins for a quirky, pop-art style.
For centuries, beeswax was the candle of choice for churches and royalty, as it burns cleanly, brightly, and gives off a naturally sweet, honeyed scent without any additives.
The biggest scent mistake: Overloading your wax. Most waxes, especially natural ones like soy, can only hold 6-10% fragrance oil by weight. Adding more won’t make the candle stronger; it will cause the oil to seep out, creating a greasy candle that can be a fire hazard. Always measure your wax and fragrance oil with a kitchen scale for accuracy.
Fragrance Oils: Synthetic, lab-created scents designed for stability in high heat. They offer a huge variety of complex aromas (like ‘Sea Salt & Orchid’) and provide a strong, consistent ‘hot throw’.
Essential Oils: Natural, plant-derived oils. Their scent can be more subtle and may alter when heated. Best for a true-to-nature, aromatherapy experience, but less potent in a burning candle.
For recycled wax, fragrance oils from a supplier like Bramble Berry or The Flaming Candle are often more reliable.
Never leave melting wax unattended on the stove.
Always use a double boiler or a makeshift one; never direct heat.
Keep water away from molten wax—even a single drop can cause it to spatter dangerously.
Work on a protected surface like cardboard or newspaper.
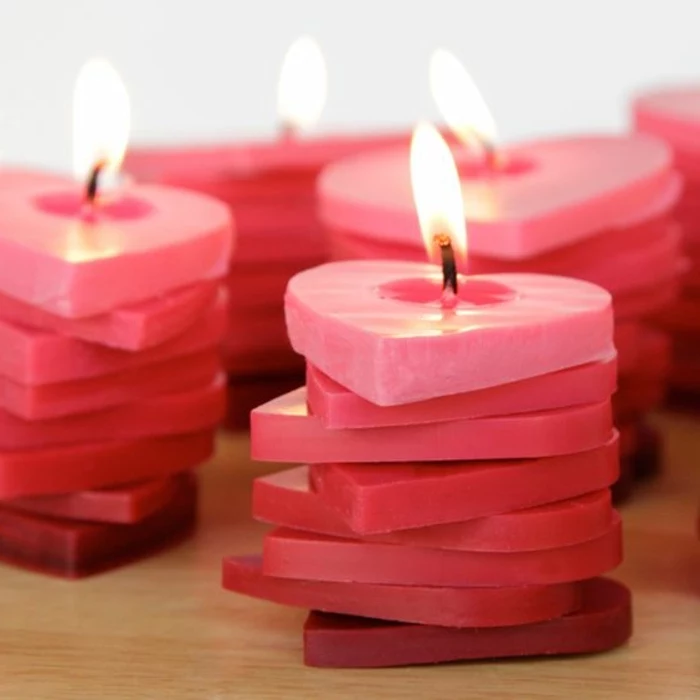
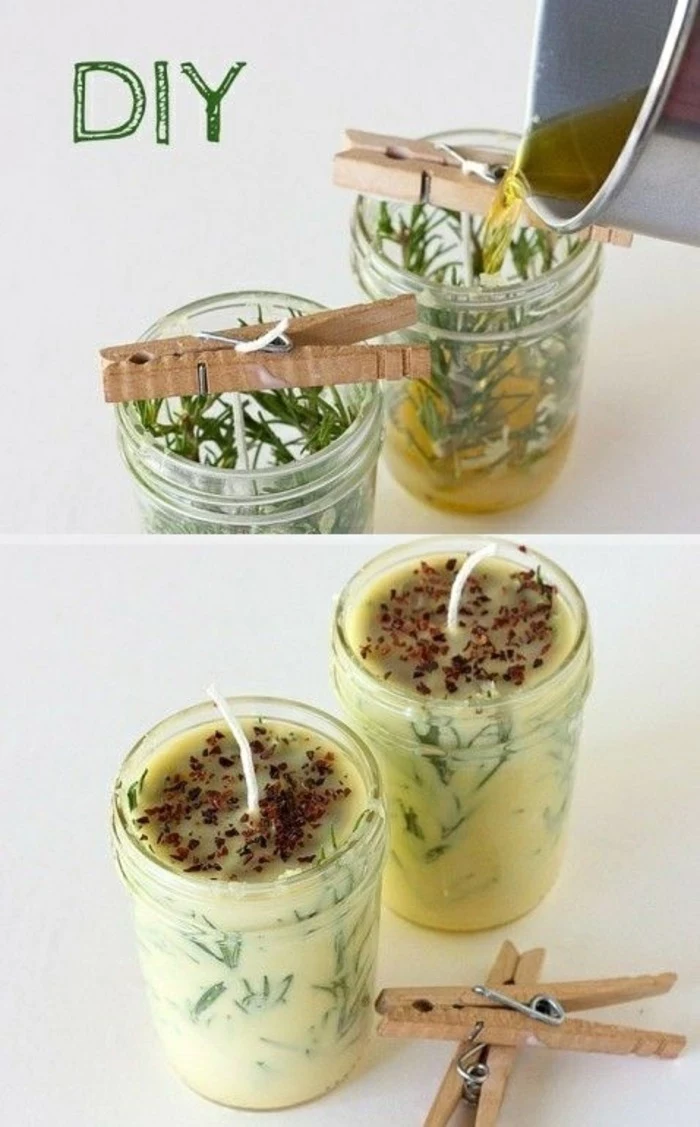
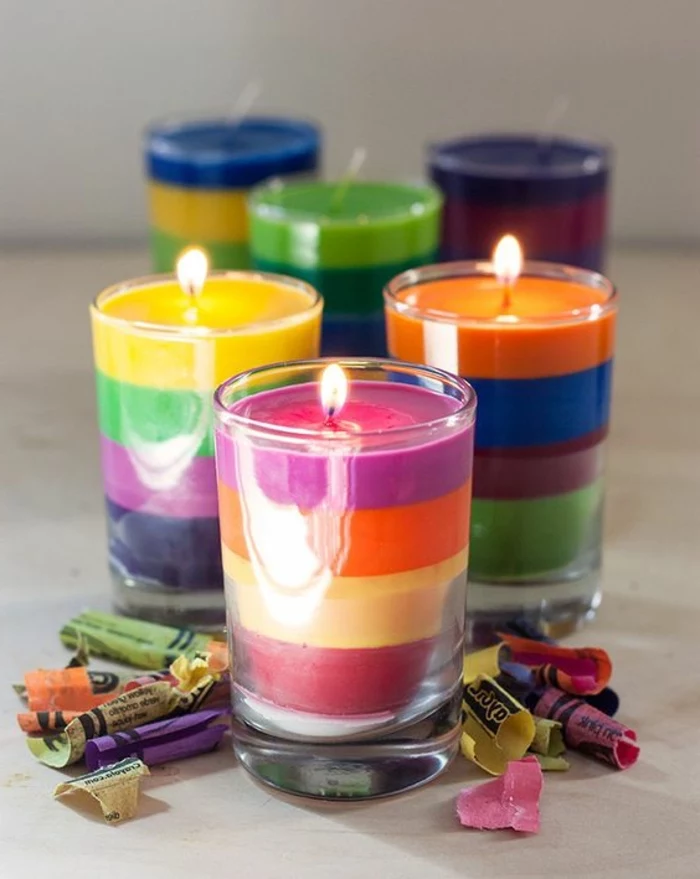
Don’t have enough of one color wax? Embrace it! Create a beautiful layered candle. Pour your first color and let it set completely—you can even pop it in the fridge for 20 minutes to speed it up. To ensure the next layer adheres, gently poke a few small holes in the surface of the set wax. Pour the second color at a slightly cooler temperature (around 160°F or 71°C) to avoid melting the layer below.
A candle’s ‘memory’ is formed during its very first burn.
To prevent that dreaded tunneling, you must let the candle burn long enough for the melted wax pool to reach the entire edge of the container. This can take 2-4 hours. If you extinguish it too soon, it will only ever burn down the center, wasting most of the wax. This first burn sets the pattern for every burn after.
When mixing scented wax scraps, you risk creating a muddled mess. Instead, group your leftovers by scent family before melting to create a more harmonious blend.
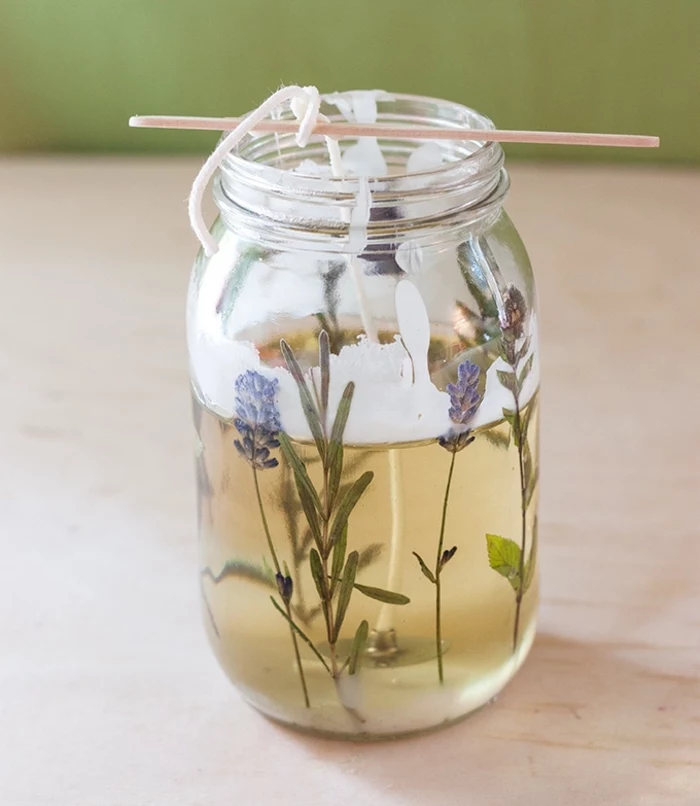
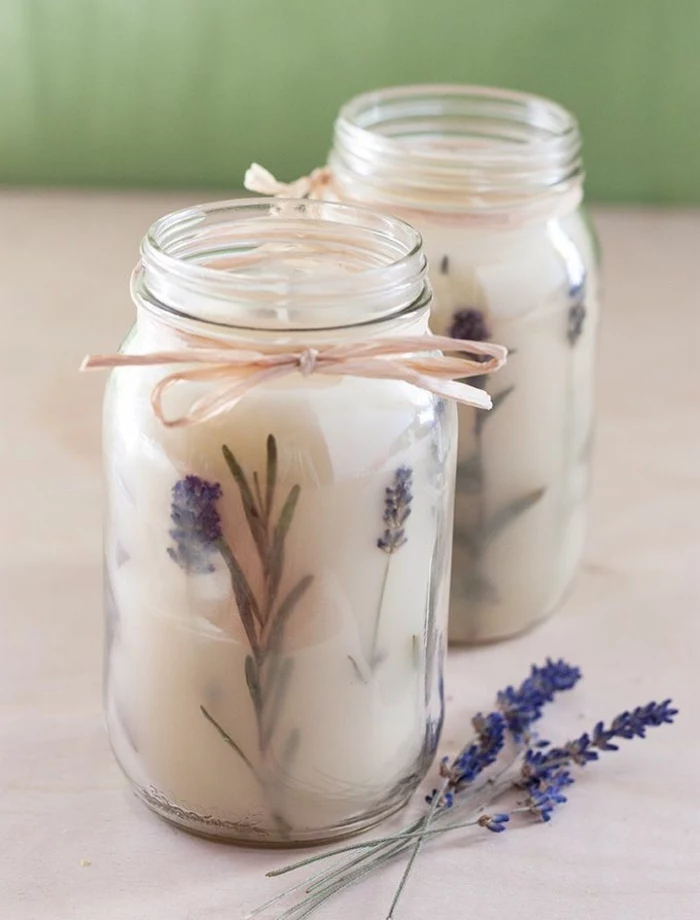
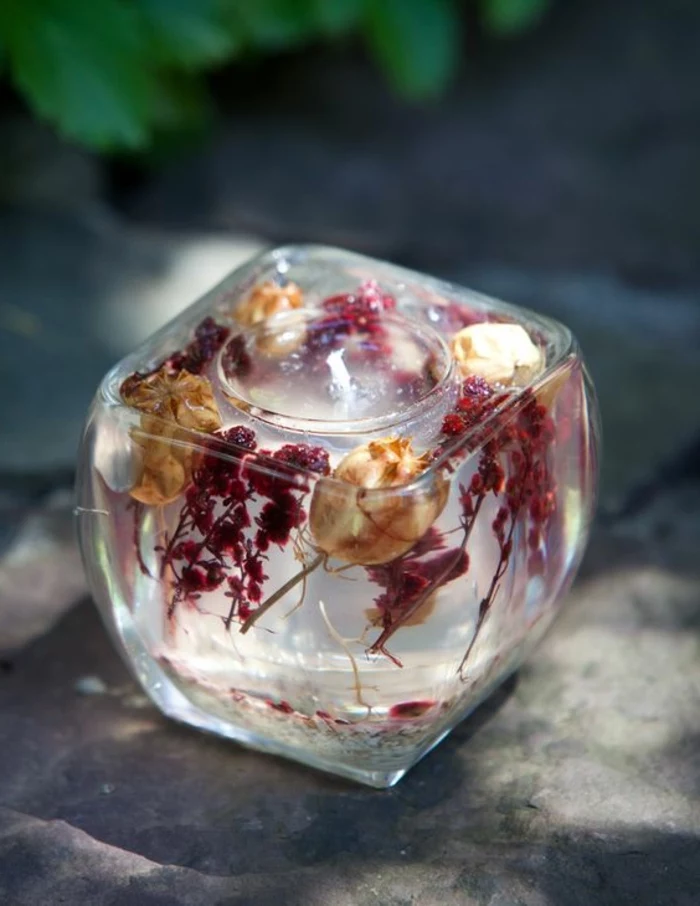
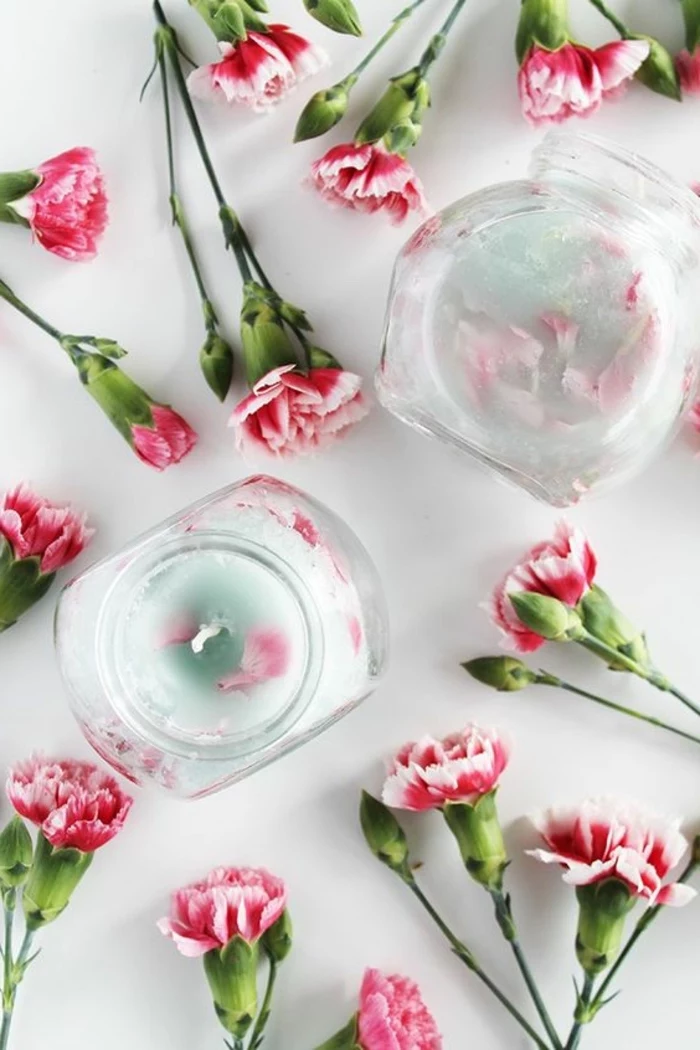
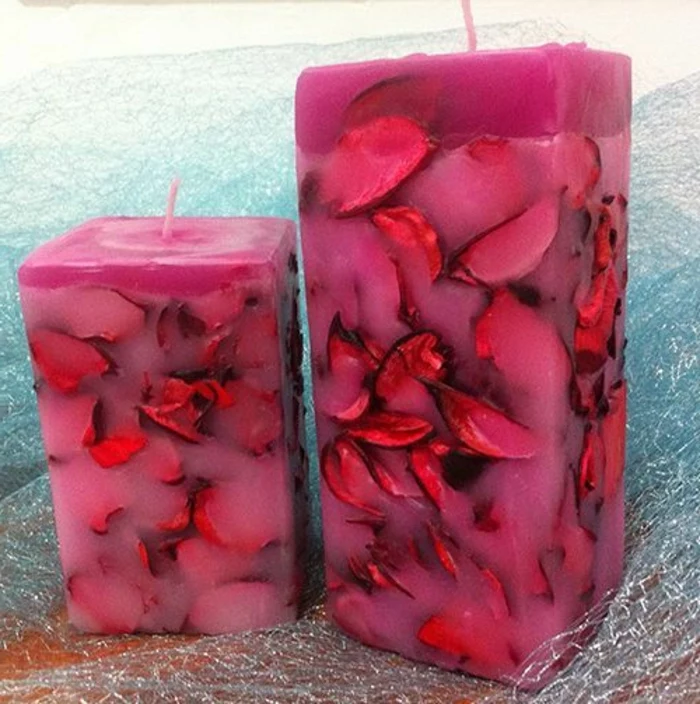
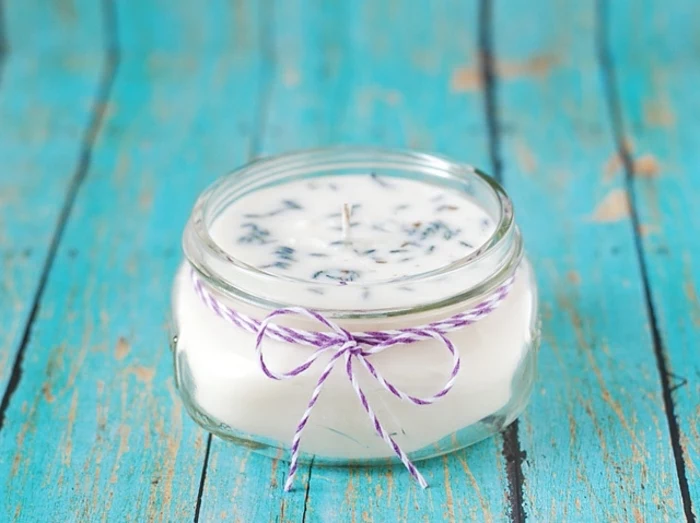
A crucial safety note: While embedding dried flowers or herbs looks beautiful, only place them around the very top edges of the candle, far from the wick, after you’ve poured the wax. Never mix them throughout the candle itself. As it burns, these items can float into the flame and become a serious fire hazard. Aesthetics should never compromise safety.
What’s the easiest way to clean my wax melting pot?
Never pour excess wax down the drain! While the pot is still warm, wipe out as much as possible with a paper towel. Then, add a squirt of a citrus-based cleaner or a splash of rubbing alcohol and wipe again to cut through the greasy, waxy film. For stubborn, hardened wax, you can gently heat the pot again to liquefy the residue before wiping.
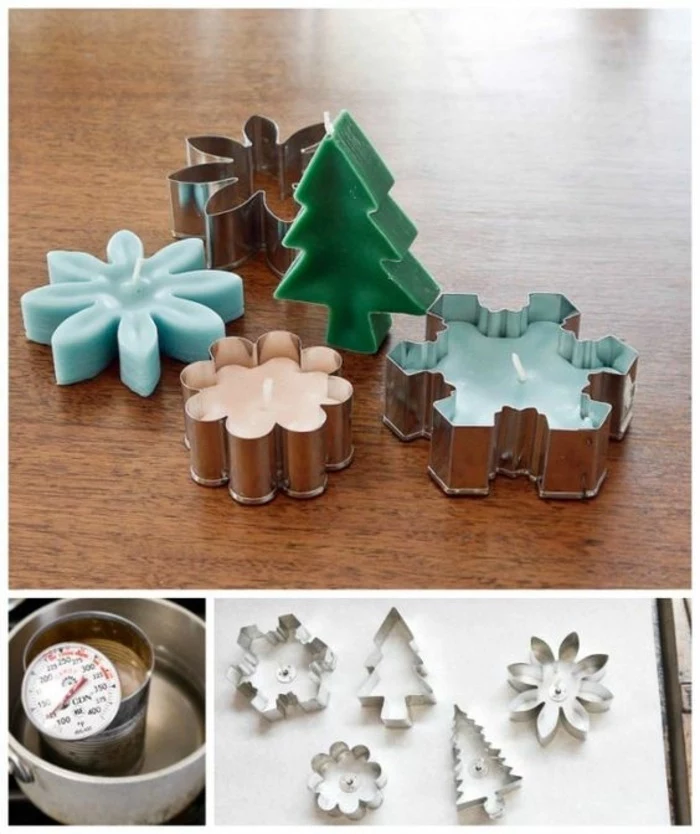
Looking for a container with an industrial, minimalist edge? Try making your own concrete or jesmonite vessel. You can find countless silicone molds online, from simple cylinders to geometric shapes. A fast-setting mix like Quikrete or Cement All from a hardware store works perfectly. The raw, textured finish of concrete provides a stunning contrast to the smooth, warm glow of the candle wax inside.
Create DIY fire starters by mixing wax with cotton balls or dryer lint in a cardboard egg carton.
Make scented wax sachets by pouring wax into small silicone molds to hang in closets or drawers.
Seal handwritten letters with a drop of colored wax for a vintage-style touch.
Lubricate sticking wooden drawers or window sashes by rubbing a block of unscented wax on the runners.
The ‘hot throw’ of a candle—the scent it gives off while burning—is a complex reaction where the chemical bond between the wax and the oil breaks under heat, releasing fragrance molecules into the air.
Patience is a virtue: Your candle isn’t ready to light the moment it’s hard. It needs to ‘cure’ for at least 4-5 days (and up to two weeks for 100% soy wax). This allows the fragrance oil to fully bind with the wax crystals on a molecular level. The result is a much stronger and more stable scent throw when you finally light it.
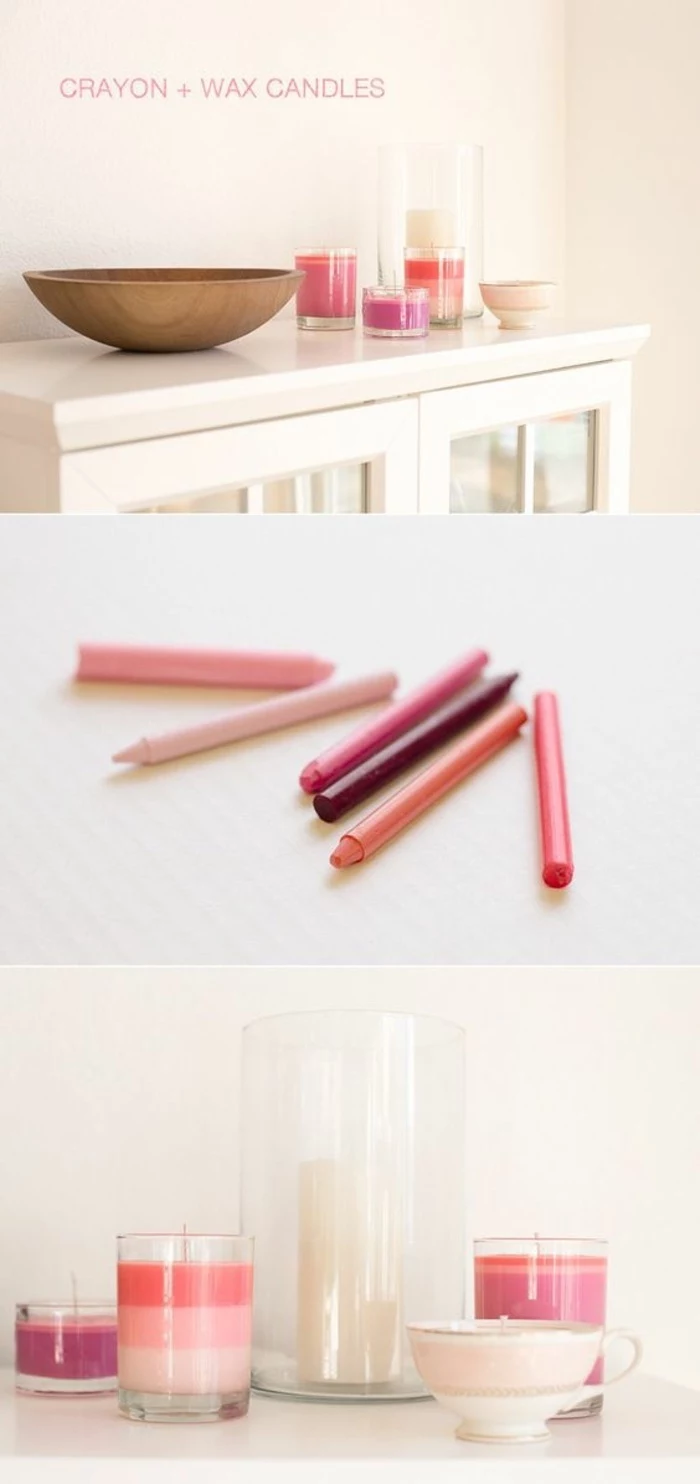
To get a deep, rich color, you must use dye chips or liquid candle dye, not crayons. While tempting, the pigments in wax crayons are not designed for combustion and will clog your wick, leading to a weak or self-extinguishing flame. A tiny amount of proper candle dye from a supplier like Pro Candle Supply or Candle-licious goes a very long way.
Soy Wax Scraps: Creamy, opaque appearance. Prone to ‘frosting’ (white crystalline patterns) but burns slower and cleaner. A natural, renewable resource.
Paraffin Wax Scraps: More translucent, allowing for more vibrant colors. Generally provides a smoother finish. A petroleum byproduct that can release soot if the wick isn’t trimmed.
Mixing them often gives you the best of both worlds: the clean burn of soy with the smooth finish of paraffin.
If the final surface of your candle is just slightly imperfect, there’s an easy fix. Use a hair dryer or a craft heat gun on its lowest setting and gently wave it back and forth a few inches above the surface. The top layer of wax will melt just enough to smooth out any bumps or small sinkholes, giving you that perfect, glossy finish.
I don’t have a double boiler. Can I still do this?
Absolutely! Create a makeshift one by placing a heat-proof pouring pot (a dedicated aluminum pitcher from a craft store is ideal) inside a larger saucepan. Fill the saucepan with a few inches of water, making sure it doesn’t float the smaller pot. Bring the water to a gentle simmer. This method ensures your wax melts evenly and safely without scorching.
Wipe the inside of the glass clean of any drips before the wax fully sets.
Trim the wick to 1/4 inch before you give it as a gift.
Add a custom label with the scent name, printed on sticker paper.
Tie a piece of rustic twine or a silk ribbon around the jar for a final flourish.
A common mistake is choosing a wick based on the height of the jar. The wick’s size should actually be matched to the *diameter* of your container. A wick that’s too small will cause tunneling, while one that’s too large will create a dangerously large flame and excess soot. Most wick suppliers, like CandleScience, provide detailed sizing charts to help you find the perfect match for your specific jar.
A candle wick’s job is not just to hold a flame, but to act as a fuel pump, drawing melted wax up through the braided fibers via capillary action to feed the flame.
This is why a clogged (from crayon pigment) or improperly sized wick fails. If it can’t draw fuel efficiently, the flame will struggle and die out.
John combines 12 years of experience in event planning, interior styling, and lifestyle curation. With a degree in Visual Arts from California Institute of the Arts and certifications in event design, he has styled luxury weddings, corporate events, and celebrity celebrations. John believes in creating memorable experiences through innovative design and attention to detail.
To provide the best experiences, we use technologies like cookies to store and/or access device information. Consenting to these technologies will allow us to process data such as browsing behavior or unique IDs on this site. Not consenting or withdrawing consent, may adversely affect certain features and functions.
Functional
Always active
The technical storage or access is strictly necessary for the legitimate purpose of enabling the use of a specific service explicitly requested by the subscriber or user, or for the sole purpose of carrying out the transmission of a communication over an electronic communications network.
Preferences
The technical storage or access is necessary for the legitimate purpose of storing preferences that are not requested by the subscriber or user.
Statistics
The technical storage or access that is used exclusively for statistical purposes.The technical storage or access that is used exclusively for anonymous statistical purposes. Without a subpoena, voluntary compliance on the part of your Internet Service Provider, or additional records from a third party, information stored or retrieved for this purpose alone cannot usually be used to identify you.
Marketing
The technical storage or access is required to create user profiles to send advertising, or to track the user on a website or across several websites for similar marketing purposes.