Your Home’s First Impression: A Pro’s Guide to Nailing the Entryway
I’ve walked through thousands of front doors in my time as a builder. Some grand, some humble. But you know what? The first ten feet inside that door tell you almost everything you need to know about a home. That space—the foyer, the hall, whatever you call it—is your home’s handshake. It’s where you drop the outside world and step into your sanctuary. And honestly, it’s too often an afterthought. A chaotic dumping ground for keys, mail, and muddy boots.
In this article
Over the years, I’ve helped so many people reclaim this critical space. We’ve turned cramped, dark hallways into bright, welcoming zones and carved out functional storage where it seemed impossible. This isn’t just about throwing up a coat of paint or hanging a mirror. It’s about figuring out what the space needs to do. It has to be tough, it has to work hard, and it has to set the tone for your entire home. So, this isn’t a guide full of fleeting trends. This is about building something that lasts, using solid techniques I’ve learned from decades on the job.
The Foundation: Get Your Floors and Walls Right First
Before you even dream about a cool light fixture or a big piece of art, you have to look down and around. The floors and walls are the bones of your entrance, and they take a beating. We’re talking wet boots, dripping umbrellas, bags getting scraped along the wall… you get the idea. Getting this foundation right is, without a doubt, the most important part of the project.
Choosing Flooring That Can Take a Punch
Your entryway floor is a workhorse. It needs to stand up to water, grit, and constant traffic. When I’m planning a project, this is always where we start. Your choice here impacts everything else.
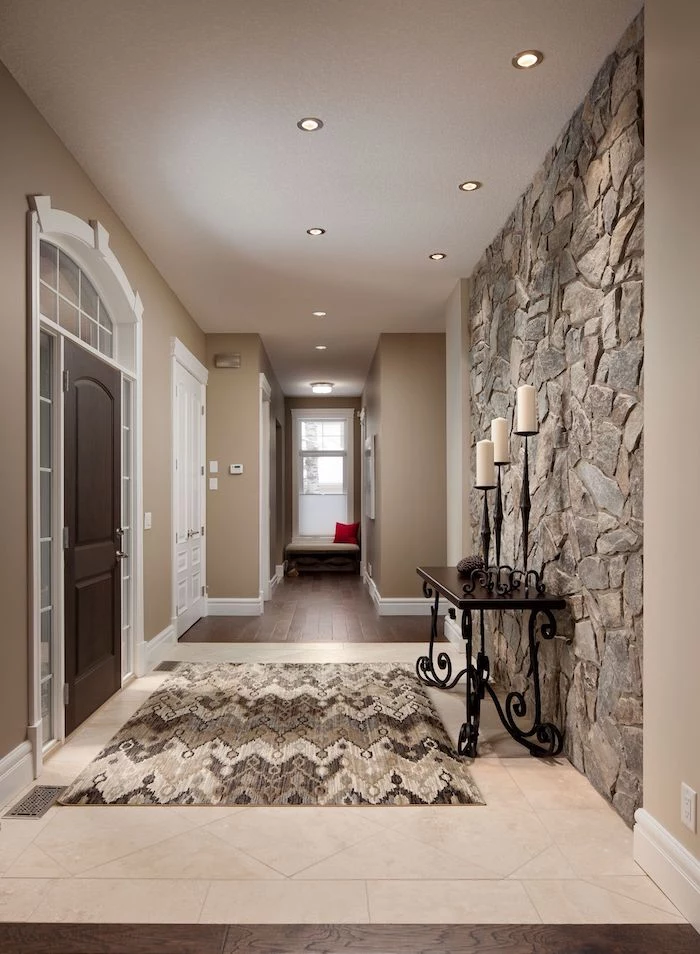
Porcelain & Ceramic Tile: This is my top recommendation for most entryways, especially if you live anywhere with real weather. It’s just incredibly durable. The key is to check the PEI rating, which measures hardness. For a home entrance, don’t even consider anything less than a PEI 3. A PEI 4 is even better—it’s what they use in light commercial spaces, so you know it’ll handle your family’s foot traffic for ages. Cost-wise, you can find great options anywhere from $2 to $10 per square foot. The real secret, though, isn’t the tile itself, it’s what’s underneath. The subfloor has to be rock solid. I’ve seen gorgeous tile jobs crack in a year because the subfloor had too much flex. We ALWAYS install an uncoupling membrane (you’ve probably seen the bright orange stuff, like Schluter-DITRA). It’s a non-negotiable step that separates the tile from the subfloor, preventing cracks from movement. A small tiling job is a solid weekend project for a motivated DIYer.
Natural Stone: Slate, travertine, or granite can look absolutely stunning and timeless. But they’re a bit high-maintenance. Most natural stone is porous, meaning it will soak up water and stains like a sponge. I once saw a beautiful unsealed limestone foyer get ruined by a single glass of spilled red wine. The stain was there for good. So, if you go with stone, you MUST seal it properly after installation and plan on re-sealing it every few years. It’s a commitment, but the look is incredible. Price-wise, expect to pay more, typically in the $5 to $30 per square foot range, plus the sealer.
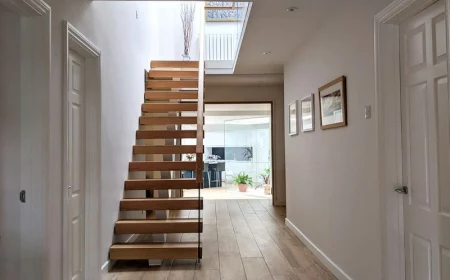
Hardwood & Engineered Wood: Look, I get it. A continuous wood floor flowing from the entrance into the rest of the house is a fantastic look. But you have to be careful. Solid hardwood can warp and cup if it’s constantly getting wet from snowy boots. Engineered hardwood is often a more stable choice here because its plywood base handles moisture changes better. If you go with wood, a tough-as-nails finish is critical. I’d go with a commercial-grade polyurethane in a satin sheen. Why satin? It does a much better job of hiding the inevitable small scratches than a high-gloss finish. And by the way, having high-quality doormats both inside and outside isn’t a suggestion—it’s a requirement to protect your investment.
Prepping Walls for the Scuffs of Life
Entryway walls get abused. A quick coat of cheap, flat paint will look grubby in six months. The secret to a finish that lasts is 90% in the prep work.
If your walls have a lot of dings and dents, deal with them first. For small holes, a good quality spackle like DAP will do the trick. For bigger issues or wavy walls, we do what’s called a skim coat. This means spreading a thin layer of joint compound over the whole wall and sanding it perfectly smooth. It’s a dusty, messy job that can take a couple of days with drying time, but it creates a flawless canvas.
Once it’s smooth, you have to prime. Never skip primer! Then for the paint itself, choose an eggshell, satin, or semi-gloss finish. A matte finish might look chic, but it’s impossible to clean without leaving shiny spots. An eggshell or satin finish, like Benjamin Moore’s Scuff-X, is scrubbable without being overly shiny. It’s what the pros use for a reason.
Heads up on safety: If your house is older, be careful when you’re sanding. There’s a chance the old paint could contain lead. Grab a test kit from any hardware store for about $10—it’s cheap peace of mind. If it tests positive, DO NOT dry sand it. The dust is seriously toxic. It’s often best to call in a certified pro for that kind of work.
Let There Be Light (and a Sense of Space)
Most entryways are naturally dark and can feel like a cave. But with the right combination of light and reflection, you can make the space feel twice as big and a whole lot more welcoming.
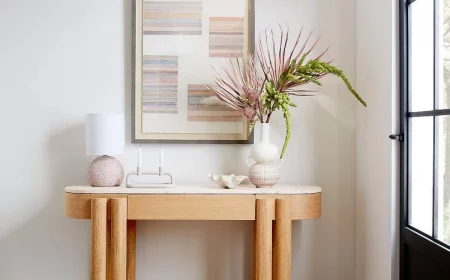
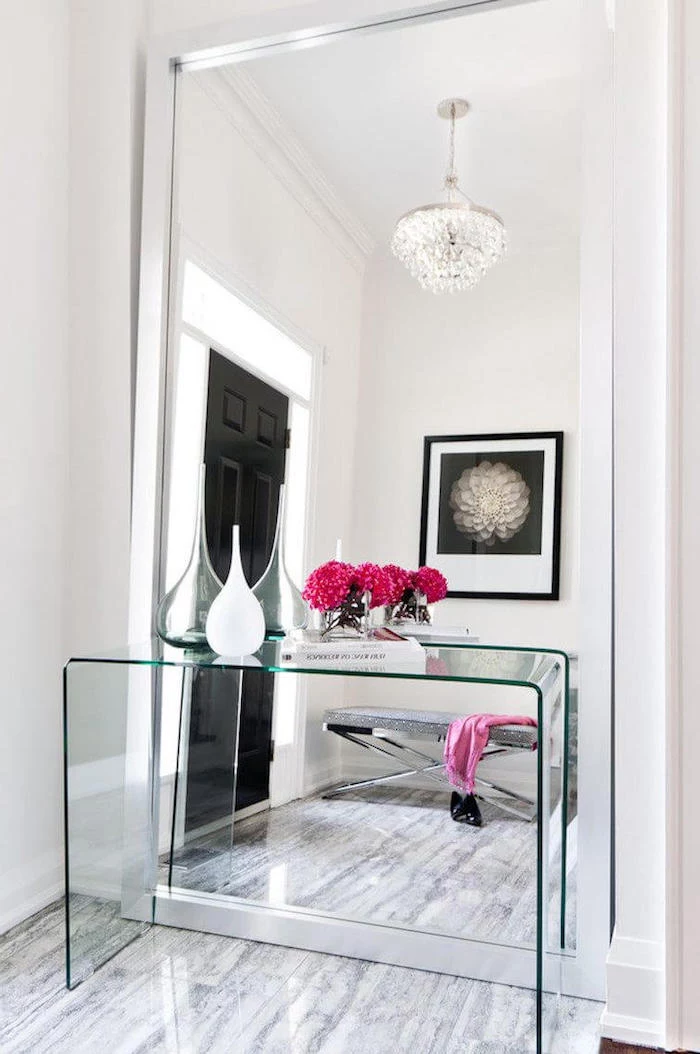
The Oldest Trick in the Book: A Big Mirror
It’s a simple concept: a mirror bounces light. If you hang a large mirror on the wall opposite your main light source (be it a window or a fixture), you’re literally doubling the light in that spot. It also creates an illusion of depth, tricking your brain into thinking the room continues. It’s a powerful effect.
How to Hang a Heavy Mirror Without Causing a Disaster
This is where I see some really scary mistakes. A big, heavy mirror can weigh 50, 75, even 100 pounds. A simple nail in the drywall is an accident waiting to happen. To do it right:
- Find the Studs: Use an electronic stud finder (a must-have tool for about $20) to locate the vertical wood beams in your wall. They’re usually 16 inches apart.
- Use Studs if Possible: The best-case scenario is to drive heavy-duty screws directly into two separate studs.
- If You Can’t Use Studs: Do NOT use those little plastic drywall anchors for anything heavy. They will fail. Instead, you need a toggle bolt or a snap-toggle. These have metal wings that fan out behind the drywall, distributing the weight over a much larger area. A quick tip: always buy anchors rated for at least twice the weight of your mirror. It’s a cheap insurance policy.
- Use Two Hooks: Always hang something heavy from two points. It balances the load and keeps it level.
Layer Your Lighting Like a Pro
One single, blazing overhead light is the worst. It feels like an interrogation room. Instead, think of your lighting in three layers:
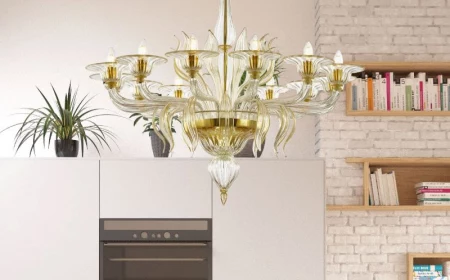
- Ambient: This is your main, overall light. A flush-mount for a standard ceiling, or a cool chandelier if you have the height.
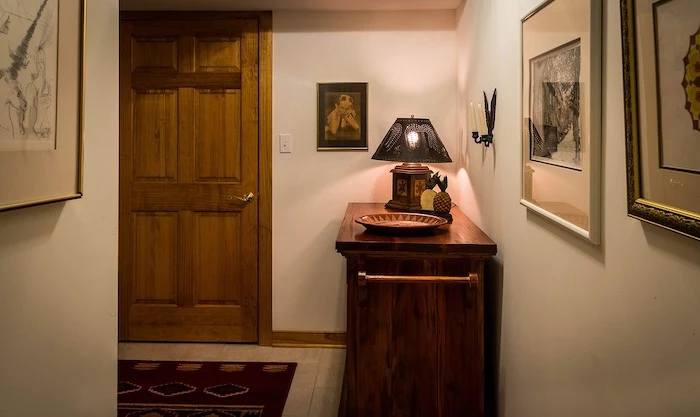
- Task: This is focused light for a specific job. Think of a small, warm lamp on a console table—perfect for finding your keys.
- Accent: This is for adding a little drama. A small spotlight pointed at a piece of art or a textured wall can look amazing.
Oh yeah, and put your main light on a dimmer switch! It’s a $25 upgrade that lets you control the mood instantly. And when you’re buying bulbs, look for a color temperature around 2700K. That gives you that warm, cozy, yellowish light you want in a home, not the cool, blue light of an office. And while I’m comfortable swapping a fixture, please, if you need to run new wires, hire a licensed electrician. It’s not worth the risk.
Storage That Actually Works
An entryway has to manage clutter. Period. The best solutions combine open storage for the stuff you grab daily (keys, bags) and closed storage for everything else.
Building a Simple, Sturdy Bench
A bench is probably the single most useful piece of entryway furniture. If you’re a bit handy, you can build a fantastic one in a weekend. Here’s a shopping list for a basic 4-foot bench:
- One 4’x4′ sheet of 3/4-inch cabinet-grade birch plywood
- One 8-foot 1×3 board for the support apron
- A box of 1 1/4-inch pocket-hole screws
- Wood glue, primer, and good quality furniture paint
The secret to making it strong isn’t just screws; it’s using pocket-hole joinery. You can get a basic Kreg jig for about $40, and it is worth every single penny if you plan to build more than one project. It allows you to create super-strong joints easily. Always add a support piece (an apron) under the front and back edges of the top to keep it from sagging over time.
What if My Entryway is TINY?
I hear you. What if your “foyer” is just a 3×3 foot square of tile inside the door of your apartment? You have to think vertically. Forget bulky furniture on the floor. Instead, look for:
- Wall-mounted solutions: A slim, floating console table (some are only 10 inches deep) gives you a surface for keys without taking up floor space.
- Vertical storage: A tall, narrow coat tree or a wall-mounted hook system uses air space instead of floor space.
- High shelving: A single shelf mounted high up on the wall, close to the ceiling, is a perfect spot for baskets to hold seasonal items like hats and gloves.
- A tall, skinny mirror: It will still bounce light and make the space feel bigger without requiring a huge, empty wall.
Quick Win: Go buy a real doormat today. And I mean a real one—made of coir or rubber with deep grooves that actually scrape dirt off shoes. Get one for outside the door AND one for inside. It’s a $30 fix that will save your floors and your sanity.
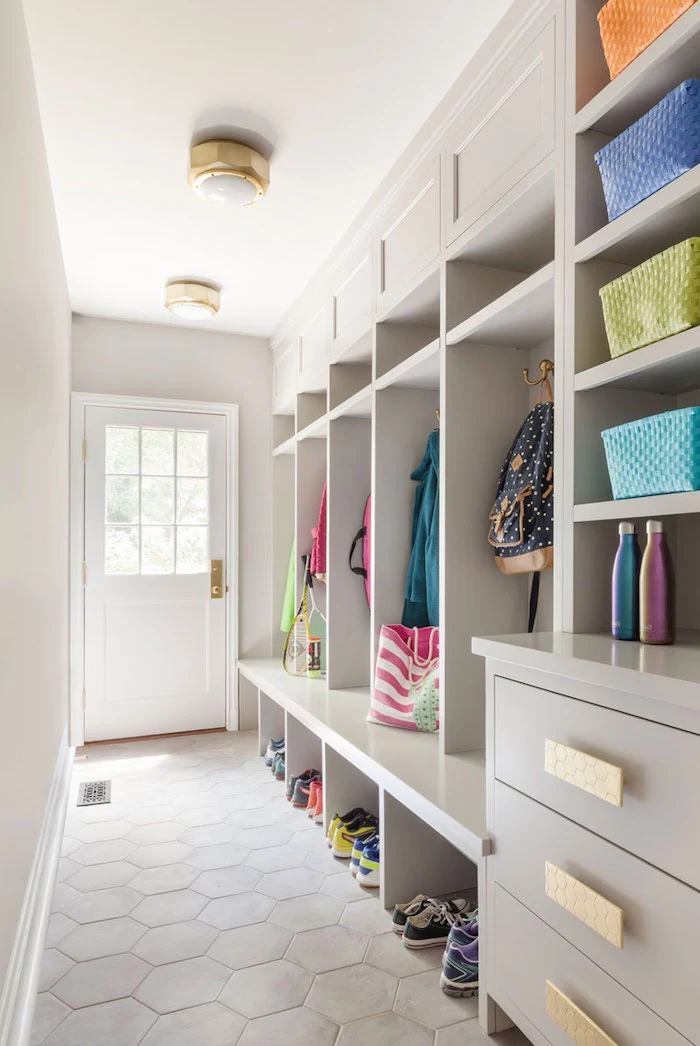
When to Go For Built-Ins
For a truly seamless, high-end look, nothing beats custom built-ins. This is where you get a unit of cubbies, hooks, and cabinets built perfectly for your space. But let’s be real, this is an advanced project. If you’re a skilled DIY-er with cabinetry experience, go for it. For most people, this is when you call a pro. A good carpenter can design something that maximizes every inch and looks like it was always part of the house. Budget-wise, you should expect a project like this to start in the $1,000-$3,000 range, depending on size and complexity, but it’s an investment that adds real value.
The Finishing Touches
Okay, with the hard stuff done, you can add the personality. This is the fun part!
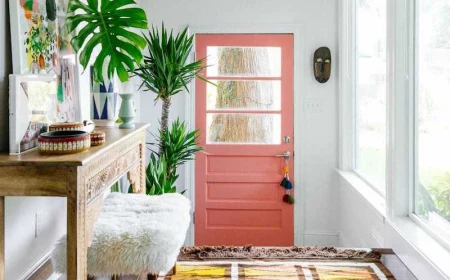
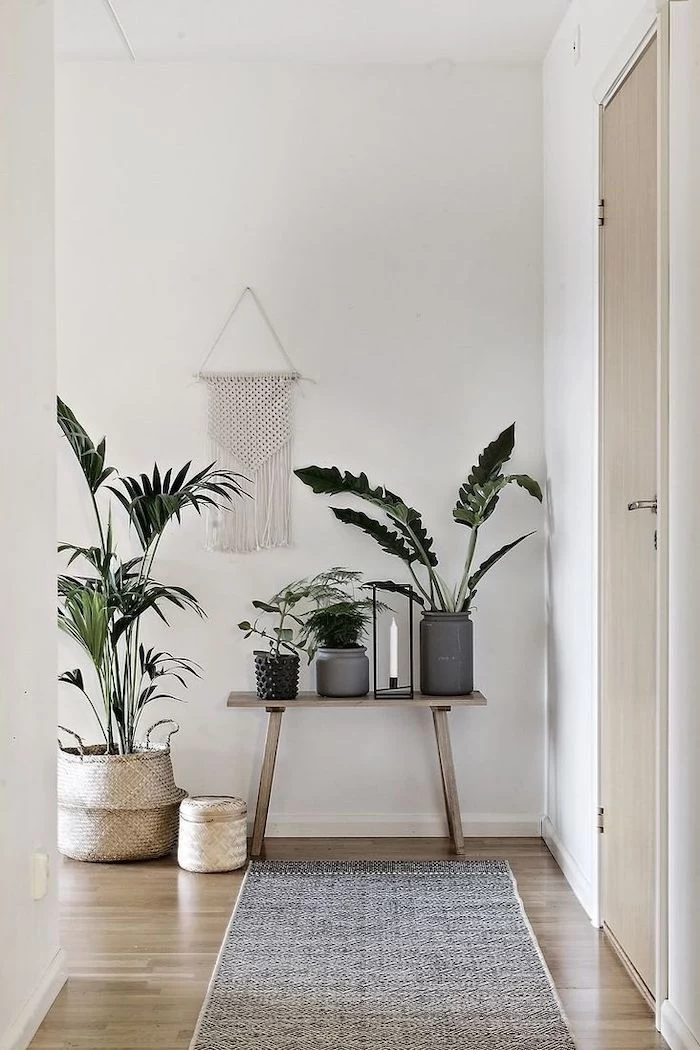
A common mistake I see is people trying to keep plants in dark entryways. You can’t fight a lack of light. But some plants are tough as nails. A Snake Plant, a ZZ Plant, or a Pothos can all handle low-light conditions. Just do them a favor: keep them in the plastic nursery pot with drainage holes, and just set that pot inside your decorative one. When you water, take the plastic pot to the sink, let it drain completely, and then put it back. This prevents root rot, the #1 killer of houseplants.
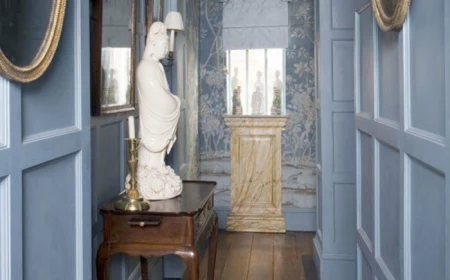
Finally, every great entryway has a focal point. It could be a cool antique console table, a huge piece of art, or a unique sculpture. Whatever it is, give it space to be the star. Don’t clutter it up. Let the rest of the entryway support it, not compete with it.
A Final Word on Planning
A great entryway doesn’t happen by accident. It comes from a good plan. Before you buy anything, measure your space. Think about how you use it. Do you need a place to sit and take off shoes? Where will the mail go? How many coats need a hook? Make sure you leave a clear path to walk through—at least 36 inches is standard and feels comfortable.
Start with the bones—floors and walls. Layer in the lighting and main furniture. Save the art and plants for last. Take your time, use good materials, and don’t be afraid to call for help when you’re in over your head. Building a proper entrance is one of the most satisfying projects you can do. It brings a sense of order and welcome to your home every single time you walk through the door. It’s a job worth doing right.