Don’t Panic, But Be Smart: A Real-Talk Guide to Lead Paint Safety
I’ve been renovating old houses for what feels like a lifetime. I learned the trades from the ground up, and one of my first jobs was on this gorgeous, classic home with incredible wood trim. Of course, it was buried under layers of thick, cracking paint. My task? Sand it all down. For days, I created clouds of fine dust, completely focused on getting the surface perfectly smooth. Nobody, not even the seasoned pros on the crew, said a word about lead. A few weeks later, the homeowner’s young child got really sick. It was lead poisoning.
In this article
That experience hit me hard. It taught me a lesson I’ve carried with me ever since: what you can’t see can absolutely hurt you, your family, and your clients. It’s the invisible threat that’s the most dangerous.
Today, safety is the absolute first step on every single job site. Many older homes, especially those built before the late 1970s, are almost guaranteed to have lead-based paint. It was a premium product back in the day, but we now know the serious dangers it poses. This guide isn’t meant to scare you. It’s here to give you the practical, real-world knowledge I’ve picked up over the years, so you can tackle your project without putting anyone at risk.
Understanding the Hazard: It’s All About the Dust
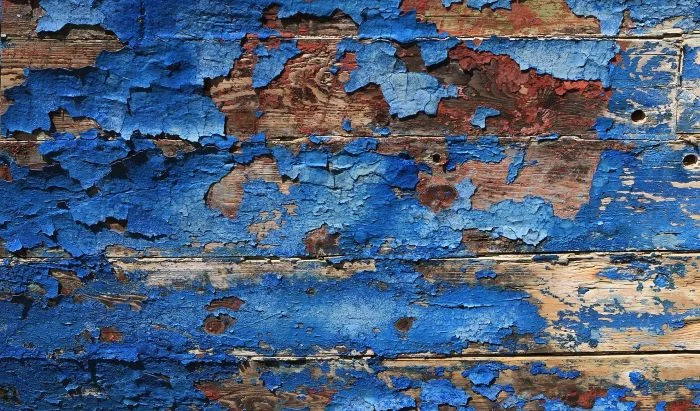
First things first: the real enemy isn’t the paint quietly sitting on your wall. The danger is in the microscopic, invisible lead dust that gets created whenever that paint is disturbed. Think about any normal renovation task—sanding, scraping, demolition, even just opening and closing an old window for years. All these actions can release a toxic storm of lead particles into your home.
Did you know? An amount of lead dust equal to a single sugar packet is enough to poison a child. That’s why this is so critical.
So why was lead even used in the first place? Honestly, for a long time, it was a wonder ingredient. It made paint dry faster, last longer, and resist moisture. The colors were more vibrant and durable. It was the high-performance choice. It wasn’t until later that the severe health consequences became widely understood, leading to its ban in residential use in 1978. That date is your magic number. If your house was built before then, you have to assume lead paint is present until you prove it’s not.
When this dust gets inhaled or ingested, it wreaks havoc. It’s especially devastating for children, whose developing brains and nervous systems are highly vulnerable. Even tiny amounts can lead to learning disabilities, behavioral issues, and a lower IQ. For adults, it can cause high blood pressure, joint pain, and memory problems. The dust is heavy and settles on floors, windowsills, and toys, making it incredibly easy for kids, who are always on the floor and putting things in their mouths, to be exposed.
Step 1: Find Out for Sure Before You Start
Before you even think about picking up a scraper or sander, you MUST figure out if you’re dealing with lead. Guessing is not a strategy. I’ve seen people see a fresh coat of latex paint and assume they’re safe, only to sand right through it into the toxic layers below.
DIY Test Kits: A Good First Look
For a quick, initial check, you can grab an EPA-recognized home test kit. The most common ones are the 3M LeadCheck swabs, which you can find at Home Depot or Lowe’s for about $10 to $15 for a two-pack. They’re great for a quick confirmation.
Here’s how to use them right:
- Prep the Spot: Pick a hidden area, like inside a closet. You need to test ALL the layers, so use a utility knife to cut a small notch deep enough to expose every layer of paint, right down to the bare wood or plaster.
- Activate the Swab: Squeeze and shake it according to the instructions. The tip will turn a mustard-yellow color when it’s ready.
- Test It: Rub the activated tip in the notch for about 30 seconds.
- Check the Color: If the tip or the paint turns red or pink, you’ve got lead. Simple as that.
Heads up: These swabs are a good screening tool, but they aren’t foolproof. They can sometimes give a false negative if the lead level is low. If you have kids or are planning a big renovation, I always recommend going a step further.
Professional Testing: The Gold Standard
For big projects, we bring in a certified lead inspector. They use a special device called an X-ray fluorescence (XRF) analyzer, which is a handheld machine that gives instant, precise readings without damaging your walls. It tells you exactly where the lead is and how concentrated it is.
Be prepared, a professional XRF inspection isn’t cheap—it can run anywhere from $300 to $700, depending on the size of your house. But honestly, it’s the only way to know for sure, and that peace of mind is priceless.
Step 2: Your Safety Bubble and Gear
Once you know you have lead, your next job is to create a fortress. The goal is to completely seal off the work area so that zero dust escapes into the rest of your home. This is where most DIY projects go wrong.
Building Your Containment Zone
Think of it like you’re building a bubble around your project.
- Empty the room. Get everything out—furniture, rugs, curtains. If something is too big to move, wrap it completely in two layers of 6-mil plastic sheeting. Seal every seam with tape.
- Seal it off. Shut down your home’s HVAC system so dust doesn’t circulate. Cover vents, unused doors, and windows with more 6-mil plastic, taping all four sides down securely.
- Make an airlock. On the one door you’ll use to get in and out, hang two overlapping sheets of plastic. This little buffer zone helps keep the dust contained when you enter and exit.
- Cover the floor. Lay down at least two layers of 6-mil plastic, running it about a foot up the walls and taping it to create a basin that will catch every single flake and speck of dust.
Your Personal Armor (PPE)
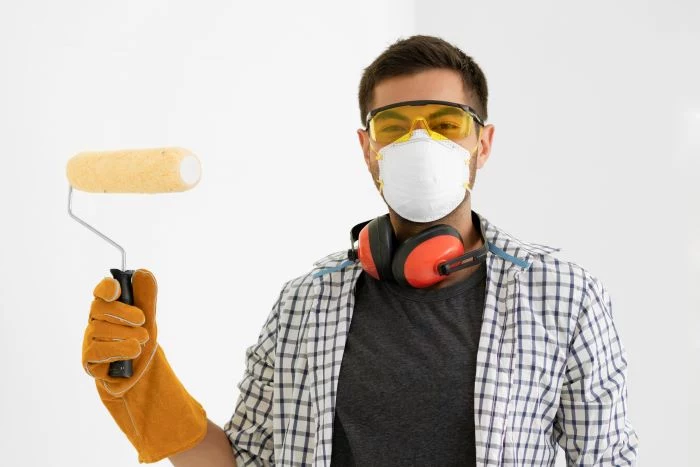
A simple paper mask won’t cut it. Your personal protective equipment is non-negotiable.
Here’s your basic shopping list, which will probably run you between $75 and $100 for a solid starter kit:
- A Real Respirator: This is the most important item. You need a half-mask respirator with either P100 or N100 filter cartridges. These capture 99.97% of airborne particles. You can find a good one for $30-$50. Quick tip: Get the P100 filters. The ‘P’ stands for ‘oil-proof,’ which means they won’t break down if you’re using chemical strippers. The ‘N’ filters will. Also, you must be clean-shaven for the mask to seal properly against your face.
- Disposable Coveralls: Get the ones with a hood and booties. They cost about $15 and prevent you from tracking toxic dust all over your house on your clothes.
- Gloves and Goggles: Simple disposable nitrile gloves and basic safety goggles are a must to protect your hands and eyes.
I once had a new guy who thought the full suit was overkill. He worked in jeans and a t-shirt. At the end of the day, he walked out and sat on the client’s clean front porch. We had to decontaminate the entire area. It was a lesson he never forgot: there are no shortcuts with lead safety.
Step 3: Safe Removal (or Covering It Up)
How you remove the paint is just as critical as your prep work. The main rule is to minimize dust. That means some common renovation methods are absolutely off-limits.
NEVER DO THIS:
- Dry Sanding or Scraping: Using a power sander without a HEPA-filtered vacuum attachment is the single worst thing you can do. It creates a toxic dust storm.
- Open-Flame Torching: A heat gun above 1,100°F or a torch will vaporize the lead, which is even more dangerous to breathe in.
- Uncontained Power Washing: Blasting exterior lead paint will contaminate the soil for yards around your house.
Choosing Your Method: A Quick Comparison
Instead of the dangerous stuff, pros use methods that control the dust. Deciding between them depends on your project’s needs, budget, and how much time you have.
- Wet Scraping & Sanding: This is our go-to. You just mist the surface with a spray bottle of water as you work. The water keeps the dust from becoming airborne, so it just clumps and falls onto the plastic below. It’s more work and definitely slower, but it’s cheap and effective. Best for flat surfaces and removing already-peeling paint.
- Chemical Strippers: For intricate trim or many layers of paint, a gel or paste stripper is a great choice. You brush it on, wait for it to soften the paint, and then scrape the gunk off. The eco-friendly soy or citrus-based strippers are much safer to use indoors, but be warned: they can take hours, sometimes even a full day, to work. This can be a messy, all-weekend job, but it creates very little dust.
- Encapsulation: Sometimes, removing the paint isn’t the best plan. If the paint is in decent shape (not peeling or flaking), you can seal it with a special paint called an encapsulant. This is much thicker and more durable than regular paint. It’s a fantastic, cost-effective solution for large, stable surfaces like plaster walls. Plan on a day for prep and application. However, never use it on high-friction areas like window jambs or door frames—the rubbing will wear it down over time.
Feeling Overwhelmed? A 2-Minute Safety Win
Not ready for a full-on project but still worried? Here’s something you can do right now. Grab a disposable damp paper towel and a little all-purpose cleaner. Gently wipe down the insides of all your old windowsills and the floor beneath them. This is a major hotspot for lead dust accumulation. Fold the towel inward, seal it in a plastic bag, and toss it. It takes two minutes and removes a primary source of exposure.
Step 4: The Cleanup is Everything
You can do every other step perfectly, but if you mess up the final cleanup, the entire job was a failure. You have to leave the area cleaner than when you started.
We use a three-pass system:
- Bag the Debris: While still in your gear, carefully mist and fold all the plastic sheeting inward to contain the dust. Seal it in a 6-mil contractor bag using a gooseneck tie (twist, fold over, and tape shut).
- HEPA Vacuum Everything: With a real HEPA vacuum (a regular shop-vac will just blow the lead dust back into the air), vacuum everything. Start with the ceiling, move down the walls, and finish with the floor.
- Wash and Rinse: This is the final, critical step. Using two buckets—one for a cleaning solution, one for clean rinse water—wipe down every single surface again, top to bottom. Wash with one rag, rinse with a clean one. Change your rinse water constantly.
Remember, all this waste—plastic, rags, filters—is hazardous. You can’t just throw it in the trash. Call your local sanitation or public works department to ask about proper disposal for lead-contaminated debris.
When to Skip the DIY and Call a Pro
Look, I’m all for empowering homeowners, but it’s crucial to be realistic. There are times when you absolutely should not do this yourself.
Hire an EPA-certified lead abatement contractor if:
- You have children under 6 or a pregnant person at home. The risk is just too high. Don’t gamble with their health.
- The job is bigger than 6 square feet of interior paint or 20 square feet on the exterior.
- The paint is already in terrible, flaky condition.
- The project involves major demolition or window replacement.
A certified pro has the training and specialized equipment to do the job right. When you’re looking for one, don’t just trust a sticker on a truck. Google “EPA Lead-Safe Certified Firm Locator” to find a legitimate, certified company in your area. Ask to see their certification. If a contractor ever dismisses your concerns about lead, show them the door.
Final Thoughts
This guide shares the practices we use every day to keep people safe. It’s based on years in the trenches and strict industry rules. But lead is a serious, permanent health hazard. The information here is for education, not a replacement for certified training. When in doubt, always put your family’s health first and call a professional. It’s an investment that pays off for a lifetime.