Face Painting Secrets: How to Look Incredible This Halloween (Without Wrecking Your Skin)
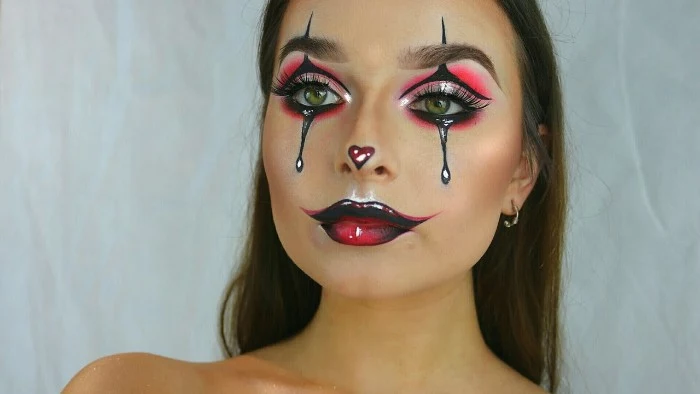
I’ve spent a couple of decades working with makeup, and trust me, I’ve seen it all. From the intense heat of theater lights to the breakneck pace of indie film sets, one thing always holds true: nothing transforms a person quite like a phenomenal face paint job. It’s so much more than just part of a costume; it’s like building a new identity from scratch.
In this article
But I’ve learned that the line between a show-stopping creation and a smudged, itchy nightmare really comes down to just a few key things. You need the right products, solid techniques, and a genuine respect for your canvas—which happens to be your skin.
A lot of people think face painting is just for kids’ parties, but to do it well, and more importantly, safely, you need a bit of insider knowledge. This is my guide to sharing that pro-level know-how with you. We’re going to get into the fundamentals that let you create anything you can dream up, from a ghoulish zombie to an incredible anatomical skull.
First, Let’s Talk Paint: Why Your Skin Will Thank You
Before a single brush touches your face, we have to talk about the paint itself. Honestly, this is the most critical part. I once had a client show up for a fancy Halloween party booking with a bag full of craft-store acrylics and Sharpies, super proud of their budget haul. I had to politely refuse the job until we got our hands on proper, skin-safe materials. It’s a serious conversation I’ve had more times than I can count.
So, why can’t you just use that cheap paint from the art aisle? Simple. Those products are absolutely not made for your skin. Craft paints often contain ingredients like formaldehyde, ammonia, or even heavy metals that can trigger nasty allergic reactions. Plus, acrylics create a plastic-like layer that doesn’t let your skin breathe. It’s a fast track to clogged pores, breakouts, and painful red rashes.
And the worst part? Trying to scrub that stuff off can literally damage your skin’s protective barrier, leaving it raw and irritated. Always, ALWAYS use products that are labeled “cosmetic-grade,” “skin-safe,” or compliant with cosmetic safety regulations. Your face will thank you.
Your Pro Paint Options: A Quick Rundown
In my own kit, I carry a few different types of paint. Knowing the difference will help you pick the right tool for the job. No tables here, just the straight scoop on what works.
1. Water-Activated Paints (The All-Rounder)
These are the MVP for both beginners and pros. You’ll see them sold in solid cakes. They’re activated with water, and you can find a great 8-color palette for around $35 to $45 from trusted brands online or at specialty makeup stores. This single palette is often all you need to start.
- Beginner-Friendliness: High! They’re easy to use and forgiving.
- Cost: Very budget-friendly to get started.
- Smudge-Proof Factor: Low to medium. They will run if you sweat a lot, so for a long night of dancing, you’ll definitely need a good setting spray.
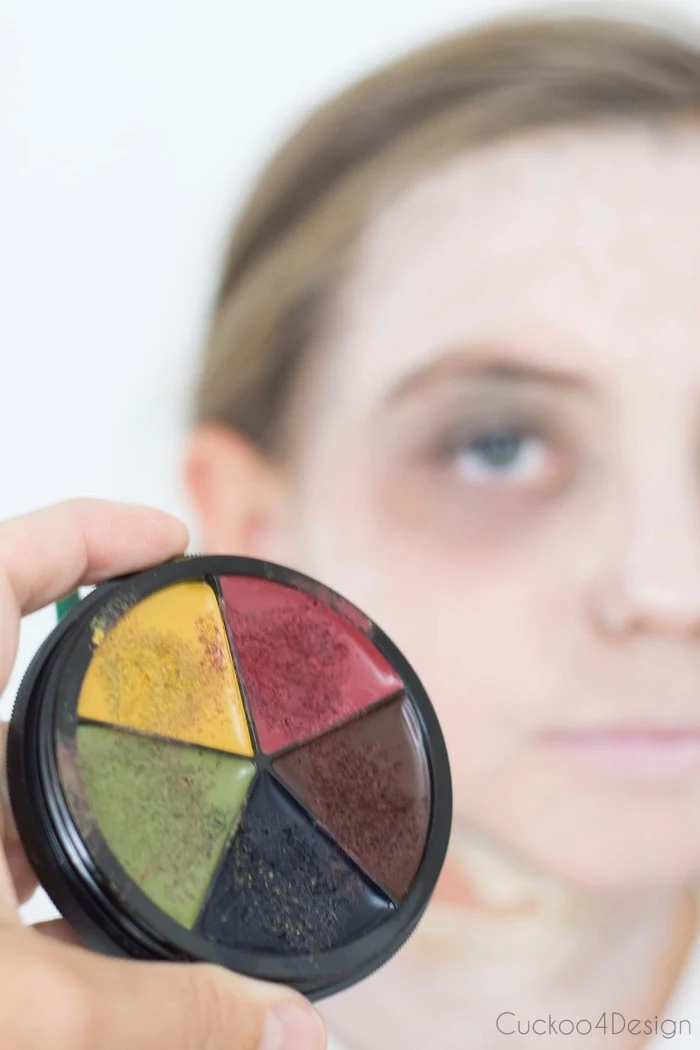
2. Cream-Based Makeup (The Blender’s Dream)
Think of those classic theatrical makeup sticks or wheels. These are oil or wax-based, giving them a thick, rich texture that’s amazing for blending.
- Beginner-Friendliness: Medium. They take a little getting used to.
- Cost: A bit more than water-activated, with a good color wheel running you about $15 to $25.
- Smudge-Proof Factor: Zero, unless you set it! This is non-negotiable. You HAVE to generously pat on a translucent setting powder to lock it in place. If you skip this, you’ll have a smudgy mess that transfers onto everything.
3. Alcohol-Activated Paints (The Advanced Option)
This is the heavy-duty stuff we use in film for effects that need to be 100% waterproof and sweat-proof. They’re activated with 99% isopropyl alcohol.
- Beginner-Friendliness: VERY low. This is for experienced users only.
- Cost: High. These are professional products and are priced accordingly.
- Smudge-Proof Factor: Bulletproof. This stuff does not budge.
- Heads up! The 99% alcohol can be extremely drying and irritating. Never use it near the eyes, nose, or mouth, and always work in a well-ventilated space.
Quick lesson learned the hard way: Always, always do a patch test. Early in my career, a child I was painting developed red welts right before my eyes. The product was a top-tier, skin-safe brand. The poor kid just had a sensitivity to a specific red pigment, which is surprisingly common. Since that day, I’m a stickler for this rule: 24 hours before you do the full look, apply a small dab of each color to your inner elbow. It’s a tiny step that can save you a world of hurt.
Building Your Starter Kit (Without Breaking the Bank)
Great paint is one thing, but you need the right tools to apply it. You don’t need to spend a fortune, but a few key items will make a huge difference.
The Bare Minimum Kit (around $40):
- One Water-Activated Palette: An 8-color palette is plenty to start with. The Mehron Paradise AQ basic palette is a classic for a reason and costs about $35. You can find it on Amazon or at theatrical supply stores.
- A Couple of Brushes: Grab a
2 round brush (for tiny details) and a
4 round brush (for thicker lines) from any art supply store. Choose synthetic bristles—they’re easier to clean and more durable. This should only set you back about $5.
- Sponges: A pack of high-density makeup sponges is perfect. Pat, don’t wipe, for a smooth base.
The Upgraded Kit (around $65-$75):
- Everything above, PLUS:
- Translucent Setting Powder: Essential if you’re using cream paints. A good one costs about $10-$15.
- Finishing/Setting Spray: This is a game-changer for making water-activated paints last. A decent bottle is about $12.
- A Flat Brush and a Liner Brush: A half-inch flat brush gives you clean, sharp lines, and a thin liner brush is the secret to elegant swirls and tendrils.
Lesser-known trick: Make your own stipple sponge! Just take a regular, coarse kitchen sponge and tear a piece off. The rough, torn edges are perfect for creating textures like a 5 o’clock shadow or road rash. It’s free and works beautifully.
The Basic Skills That Make All the Difference
Okay, your station is set up. Now for the fun part. Mastering these core skills is way more valuable than just copying a tutorial.
Let’s do a quick troubleshooting session first. These are the most common mistakes I see and how to fix them:
- The Problem: My white base is streaky and patchy.
The Quick Fix: You’re likely using too much water and wiping instead of patting. Your sponge should be damp, not dripping. Load it with a creamy, not watery, paint. Then dab, dab, dab the color on. Patience is key! - The Problem: My colors are turning into a muddy mess.
The Quick Fix: You’re blending wet paint into wet paint. You need to let layers dry! Apply your base color, let it dry completely, then add your next color. This keeps everything crisp and clean. - The Problem: My lines are shaky and wobbly.
The Quick Fix: Stabilize your hand! Rest the pinky or heel of your painting hand gently on the person’s chin or shoulder (or your own). This provides an anchor and gives you much more control.
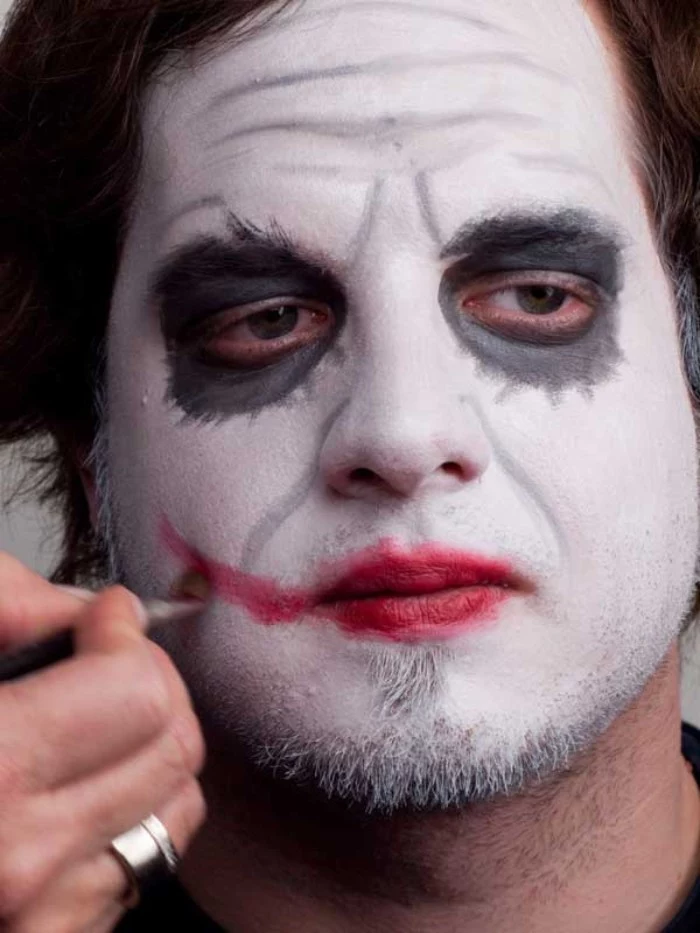
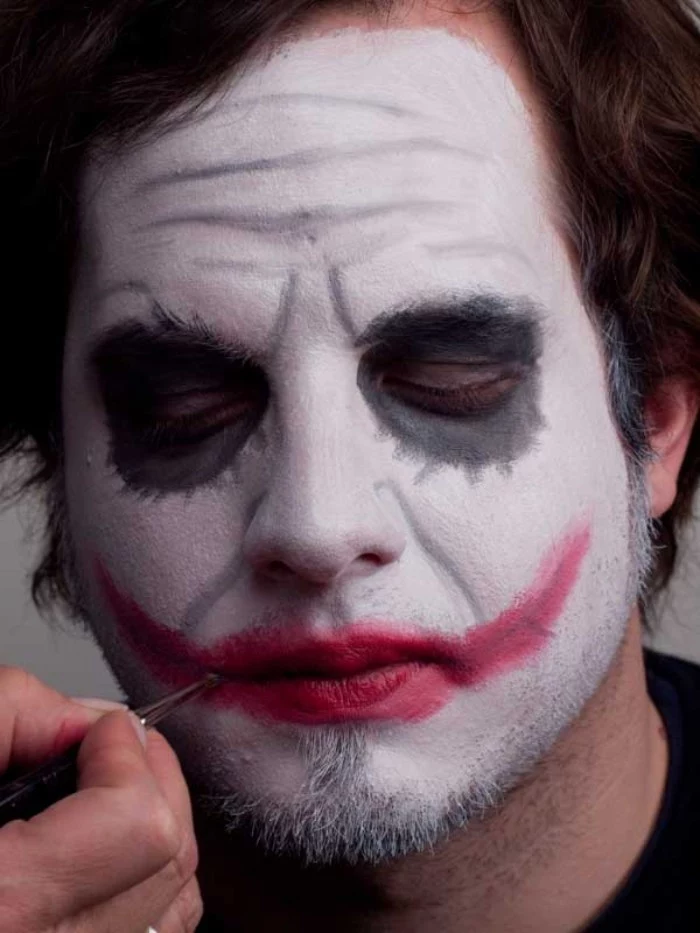
Deconstructing the Classics: A Step-by-Step Guide
Let’s apply these skills to a couple of Halloween staples. For a beginner, set aside a good chunk of time—rushing is the enemy of good face paint!
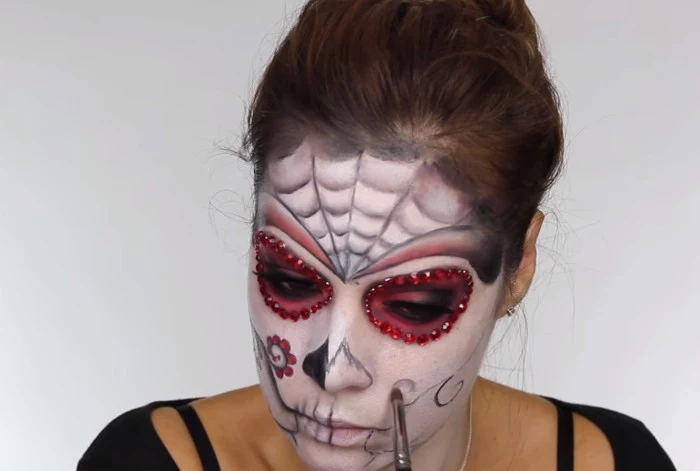
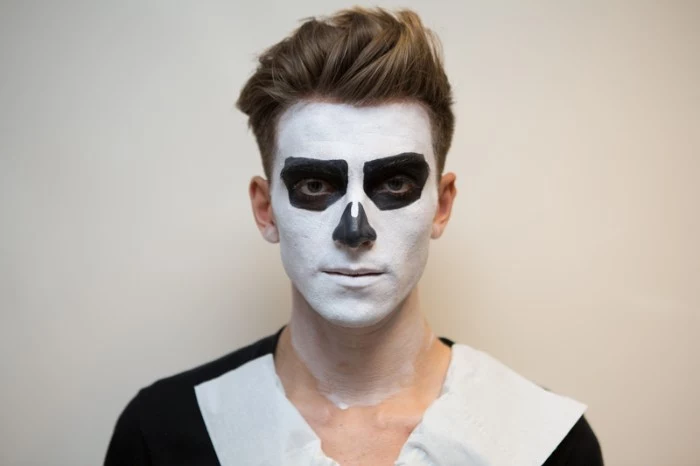
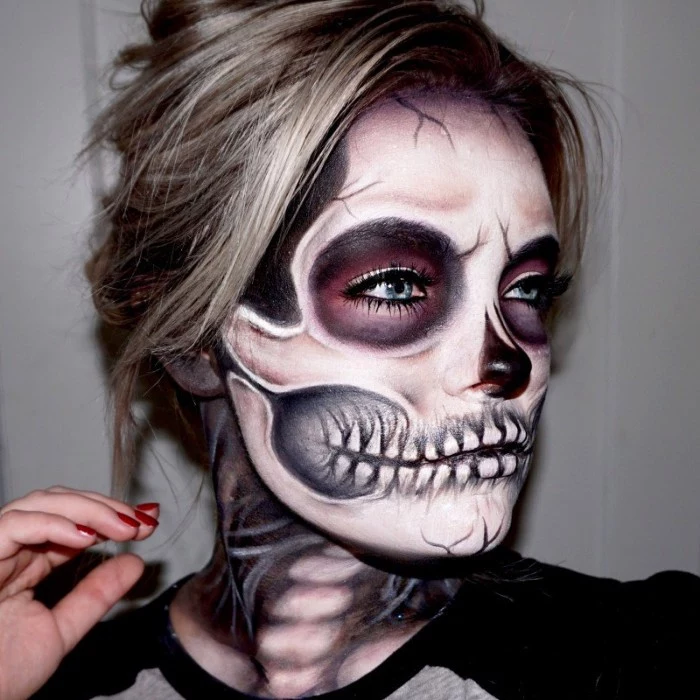
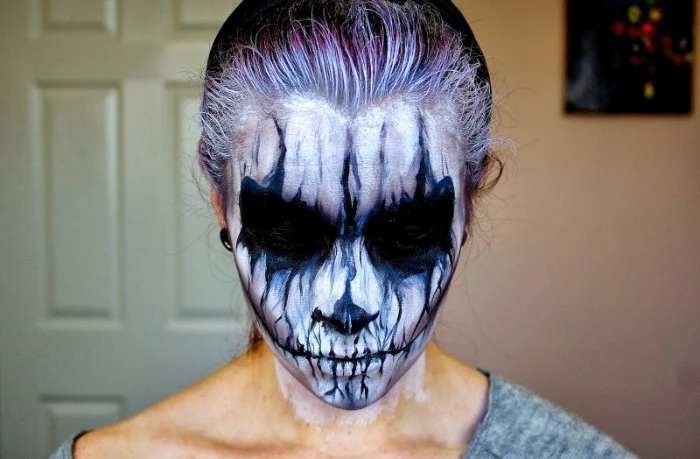
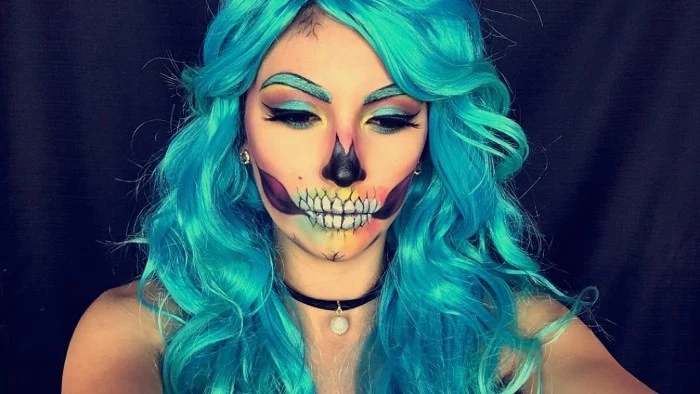
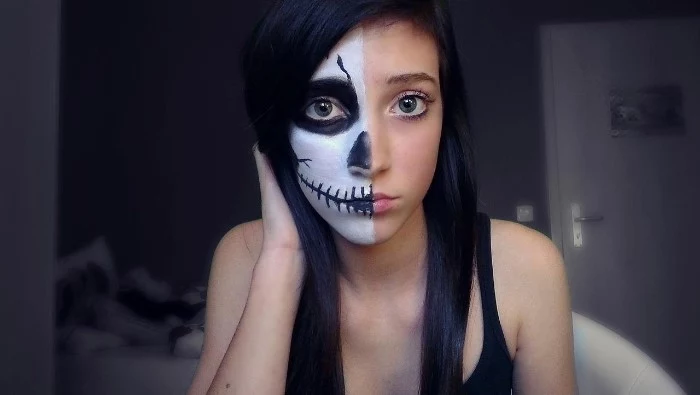
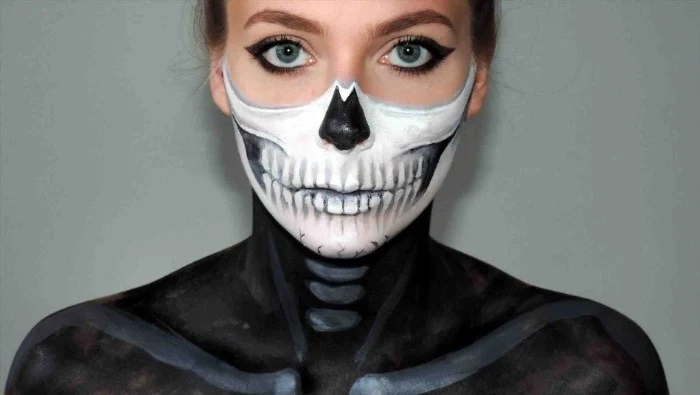
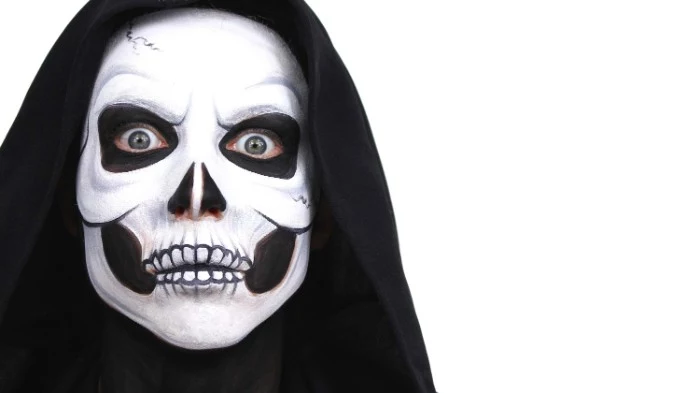
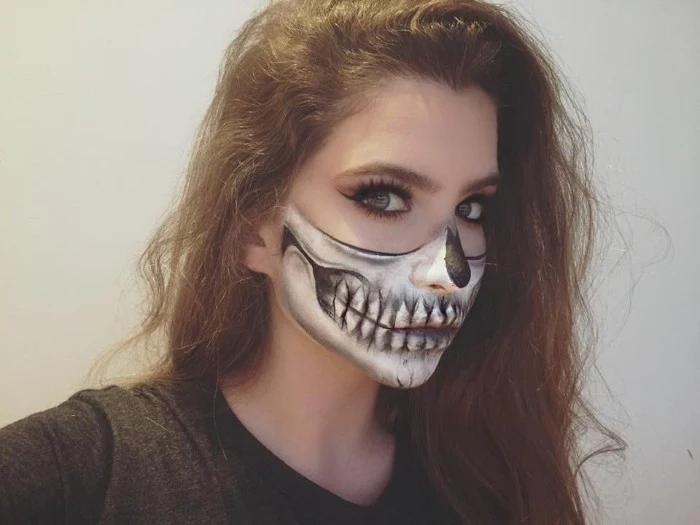
The Anatomical Skull
(Beginner time estimate: 1.5 – 2 hours)
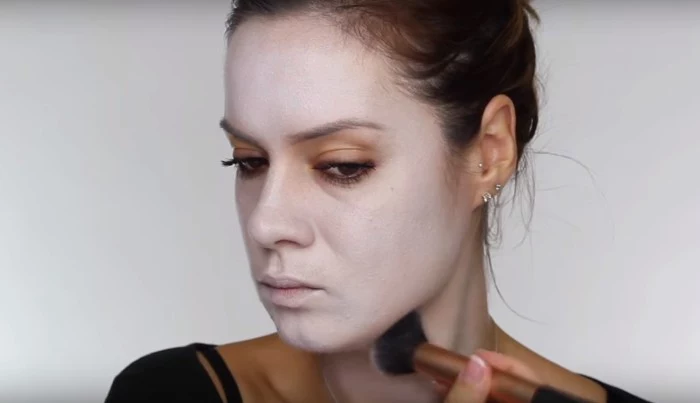
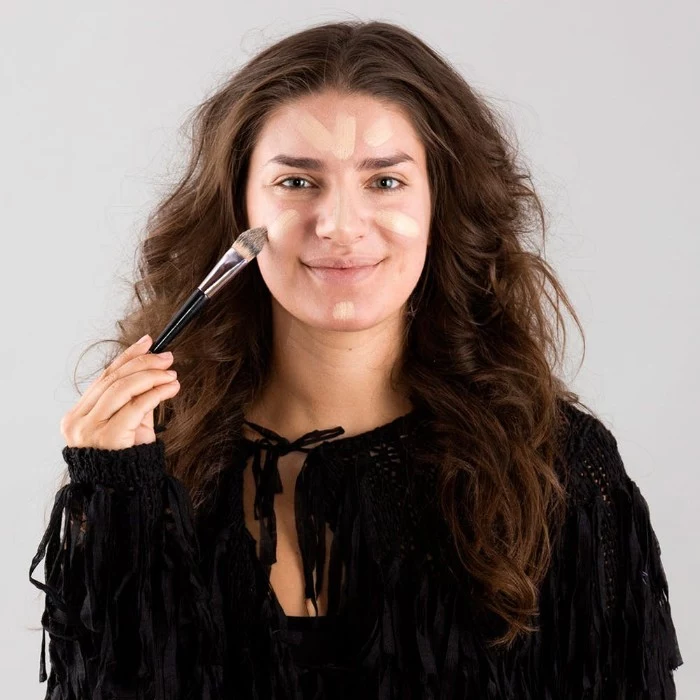
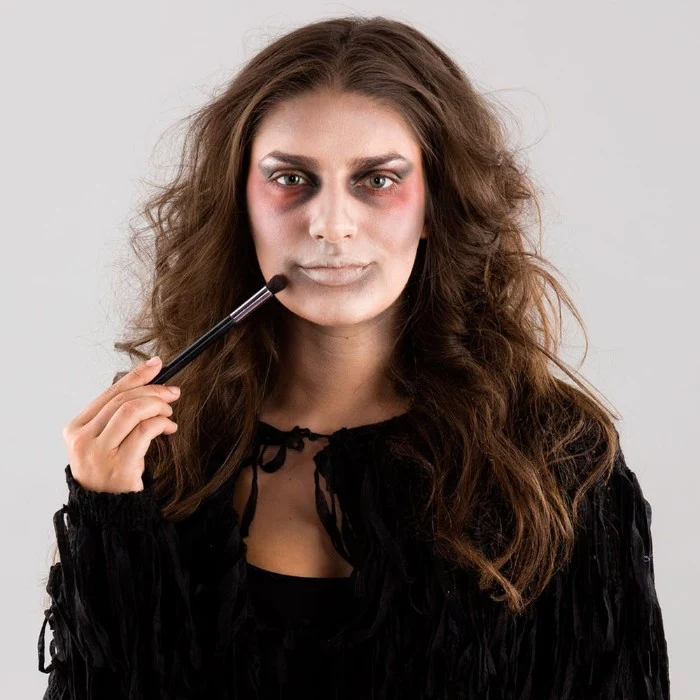
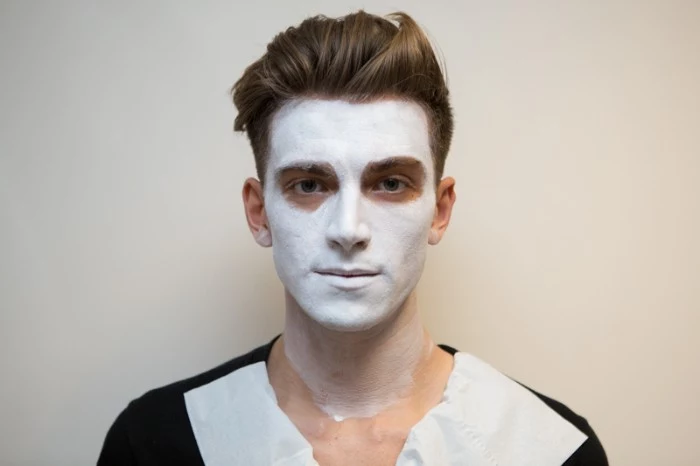
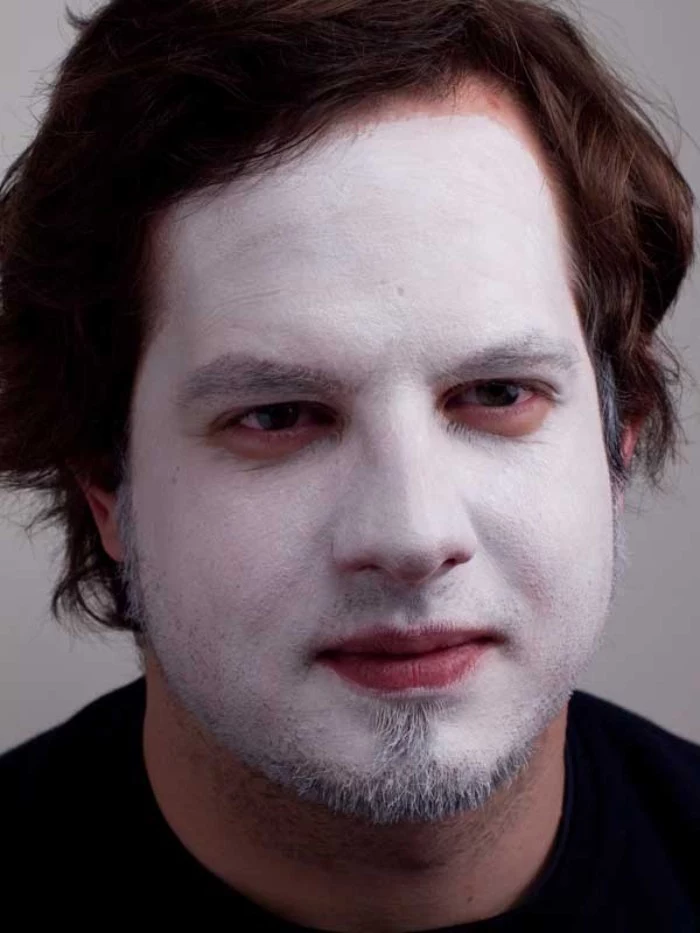
- The Base: Start with an even, white base coat using a dabbing motion with your sponge. Let it dry completely.
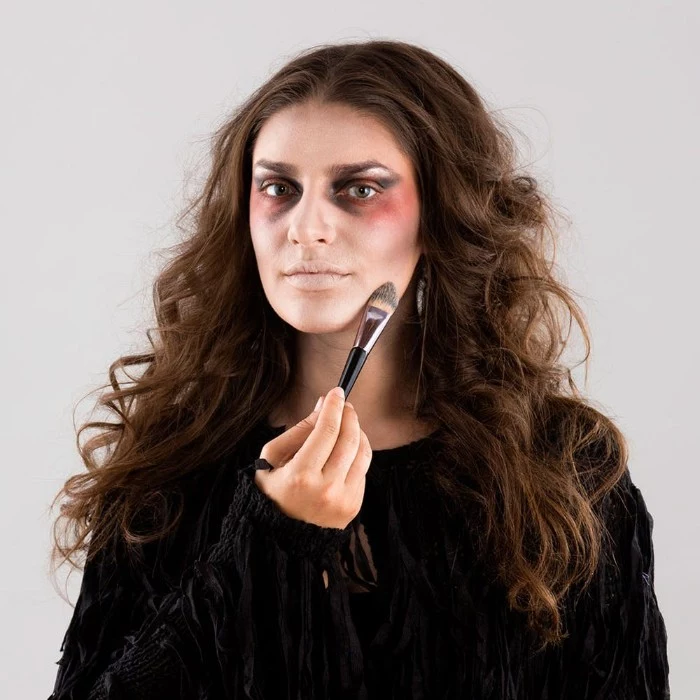
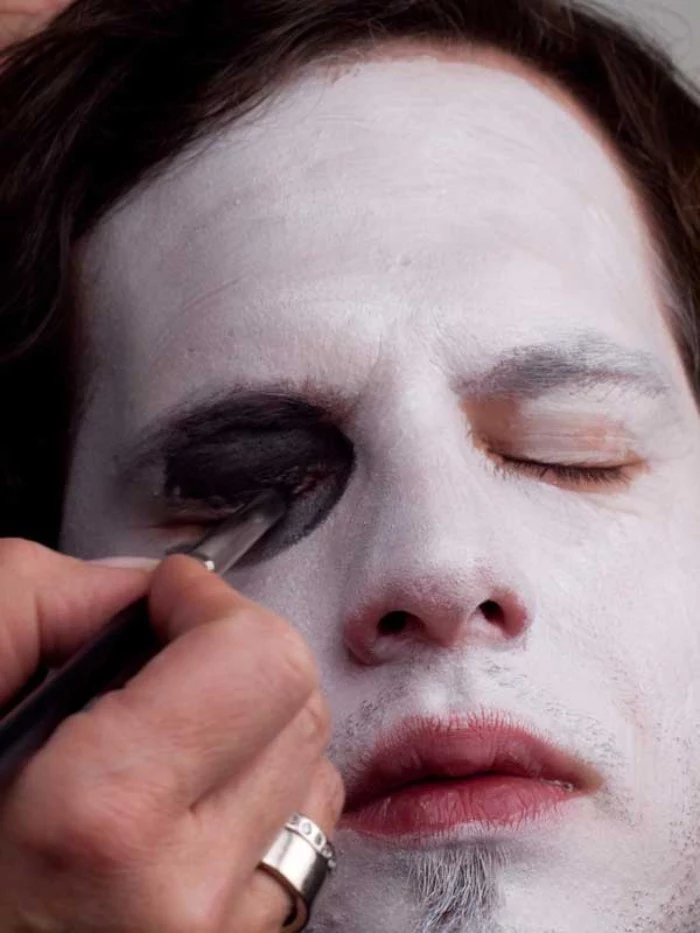
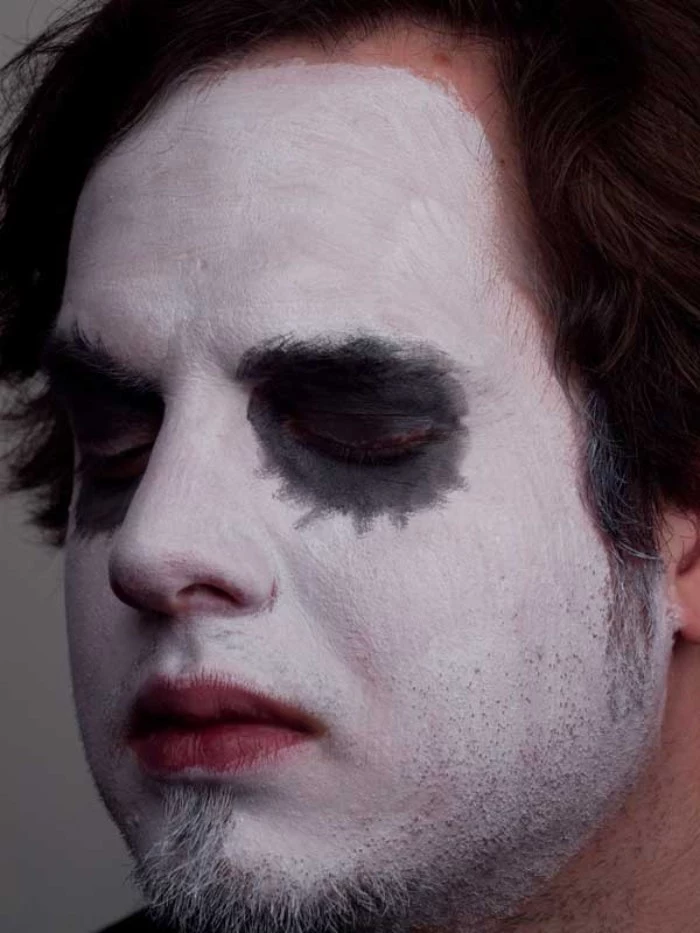
- Map the Shadows: Before you add any black, use a light grey or brown on a sponge to gently shade the areas that should look sunken in. Think of the hollows of your temples and under your cheekbones. This creates dimension right away.
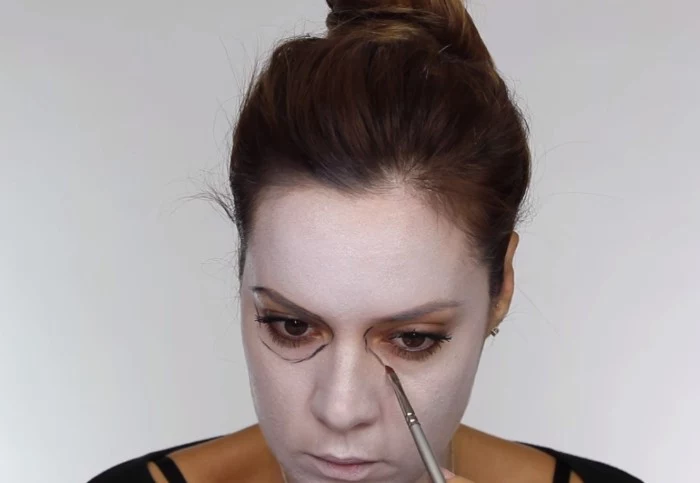
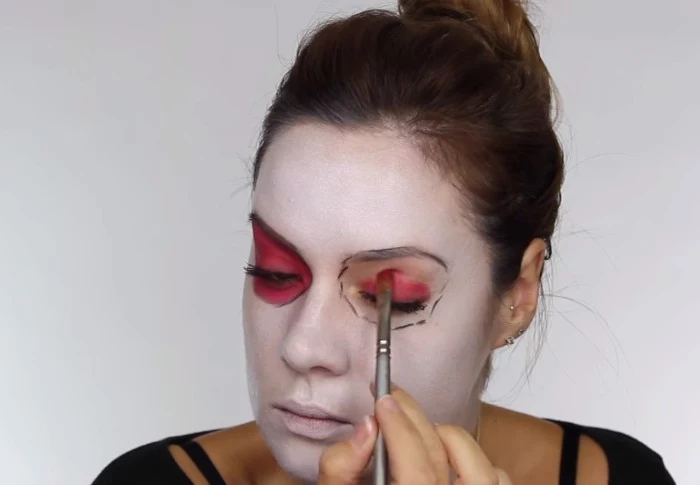
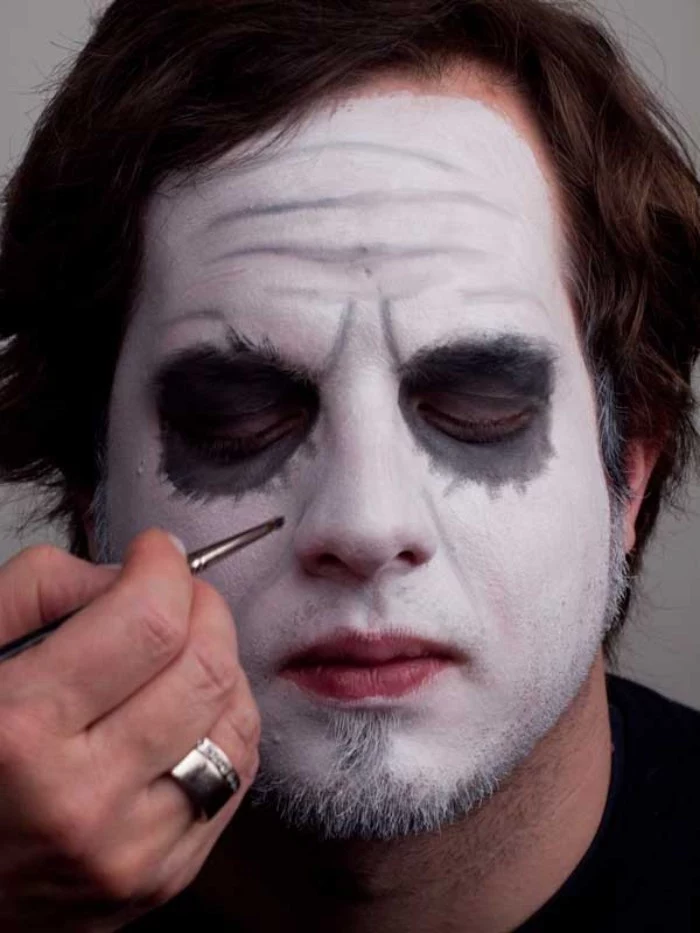
- Eyes and Nose: The eye sockets are big circles, not eye shapes. They should go above your eyebrows and down onto your cheeks. For the nose, paint a soft, inverted triangle or heart shape, not a hard-edged triangle.
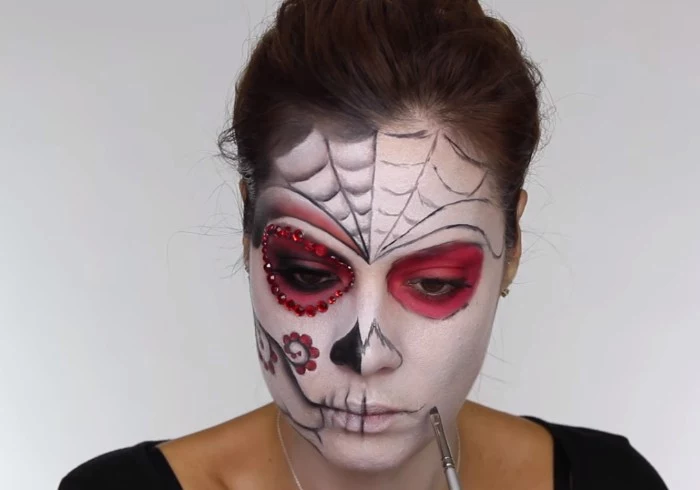
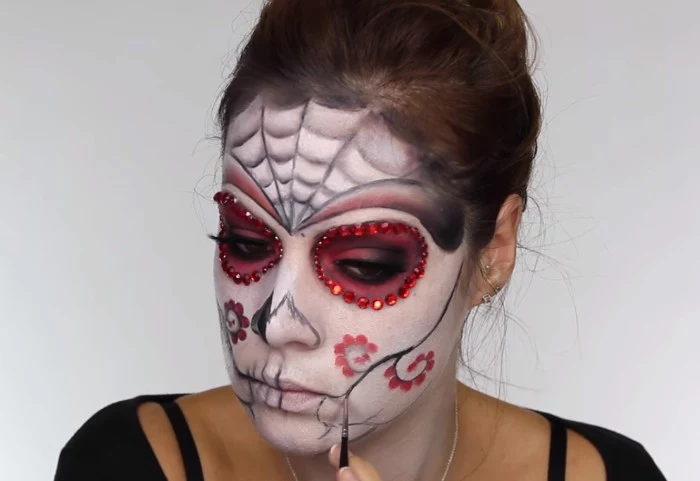
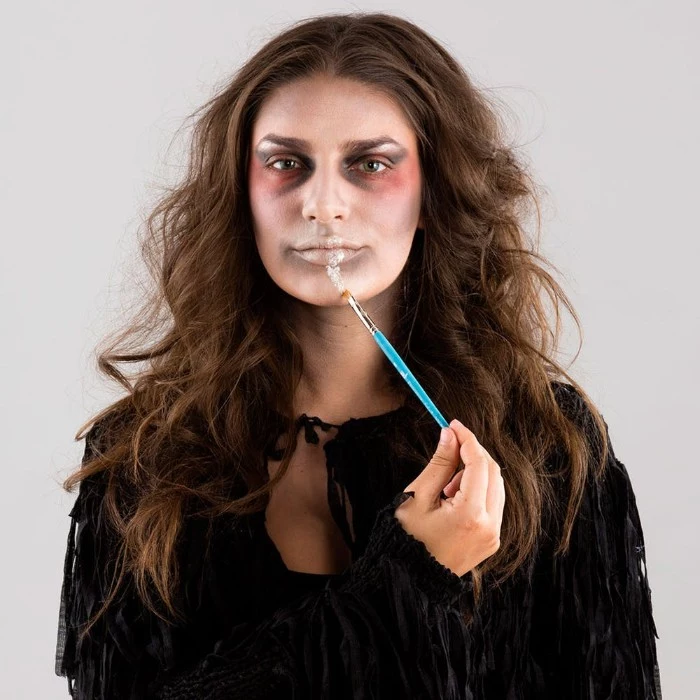
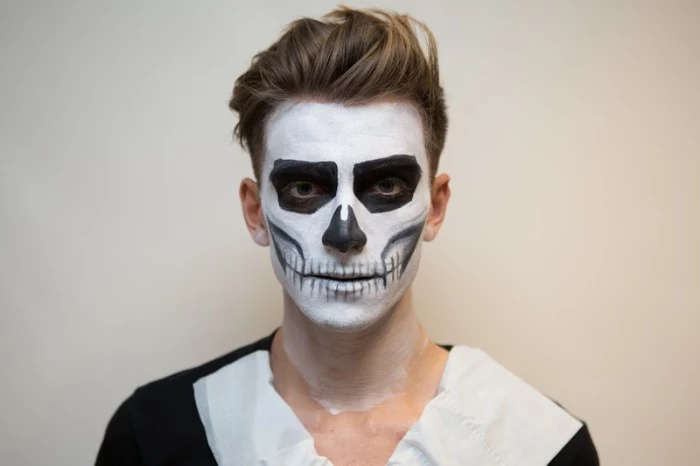
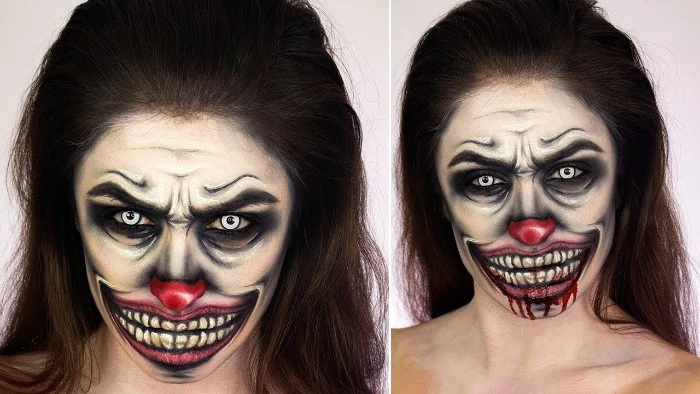
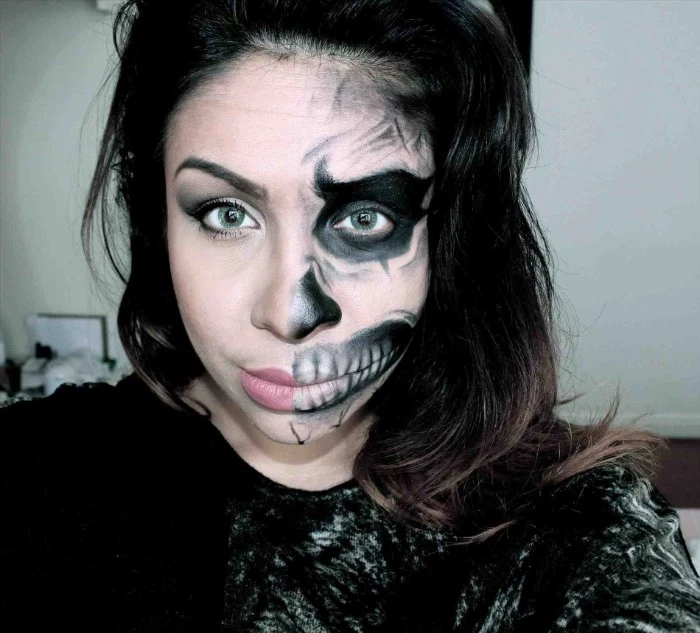
- The Teeth Illusion: This is the trick! Don’t paint teeth over your lips. Black out your lips completely first. THEN, paint the vertical teeth lines starting above and below your lip line. This creates the incredible illusion that your flesh is gone.
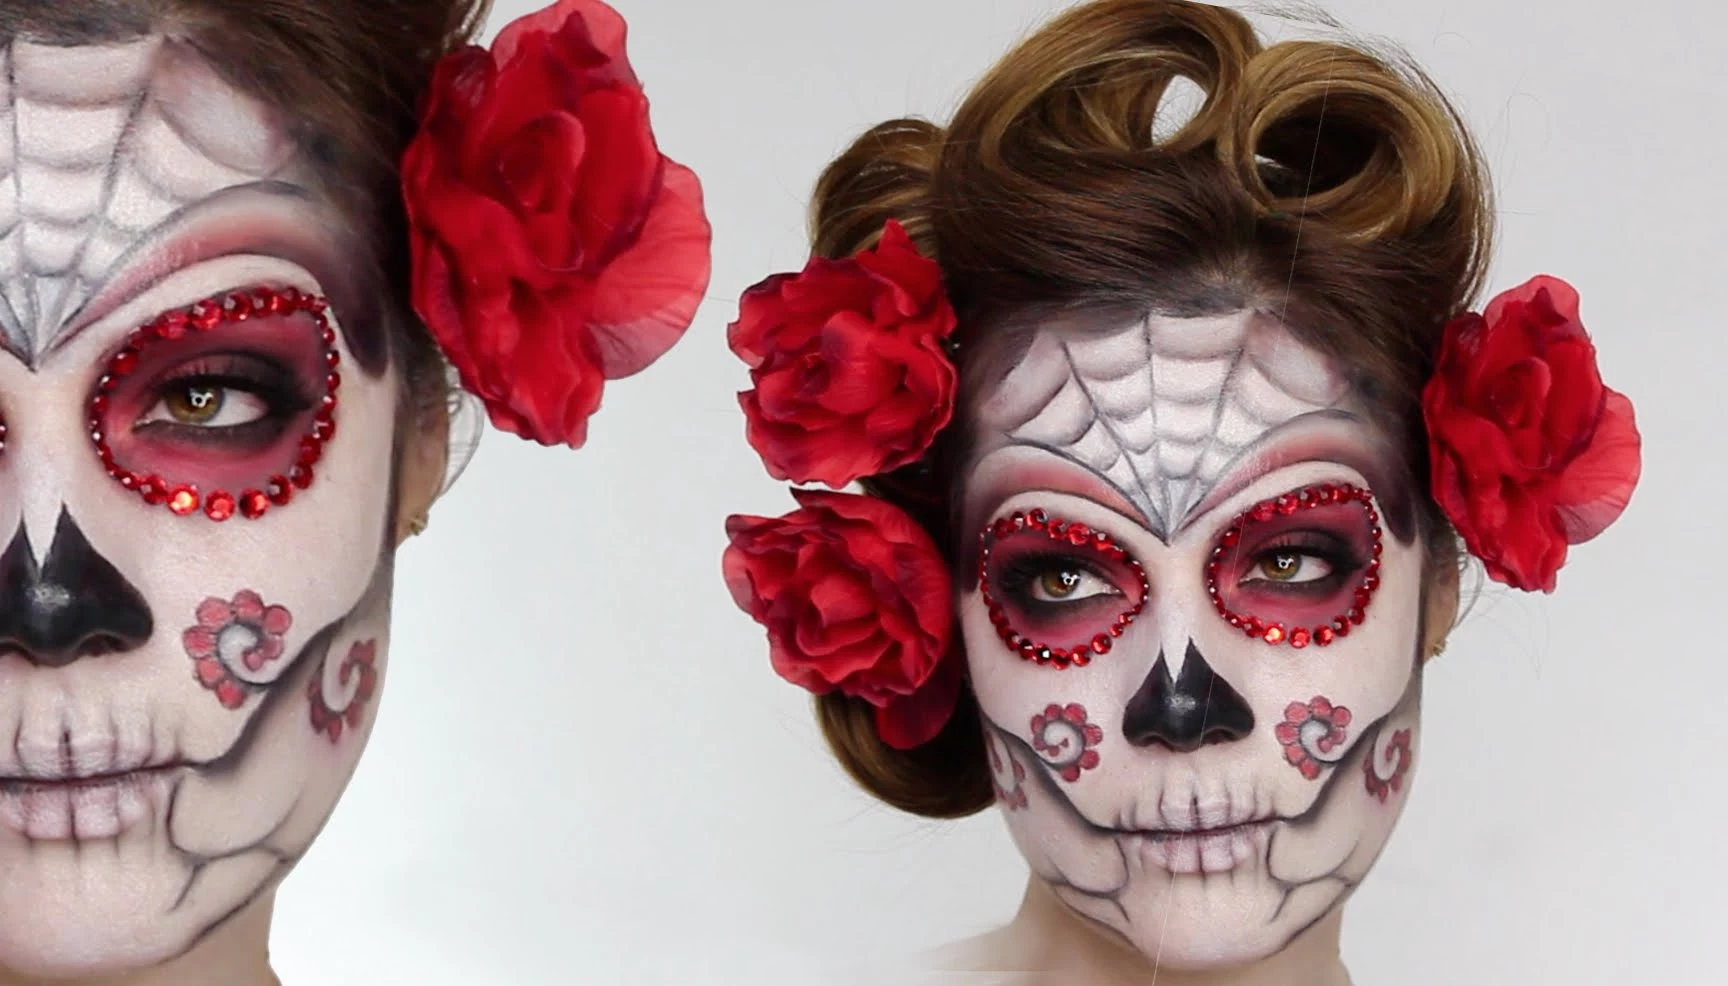
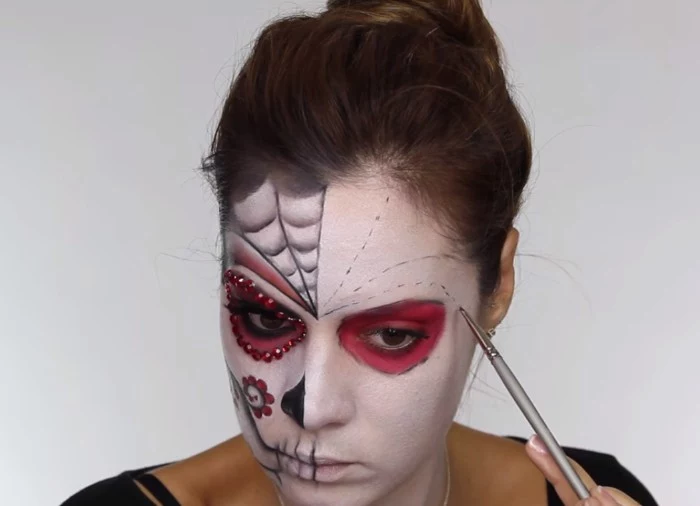
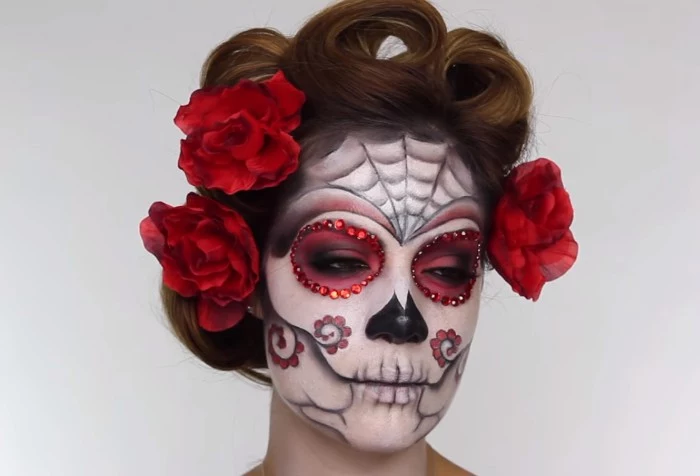
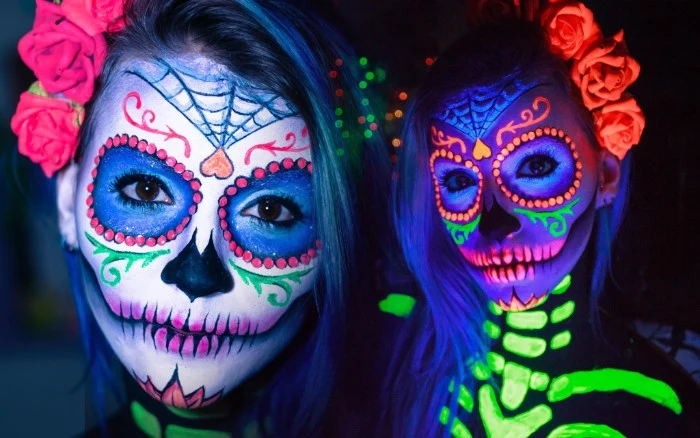
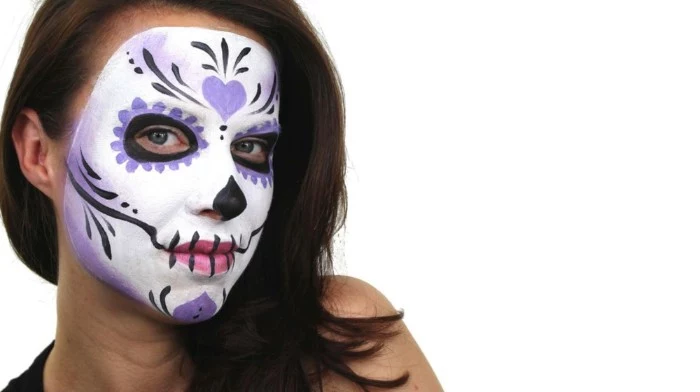
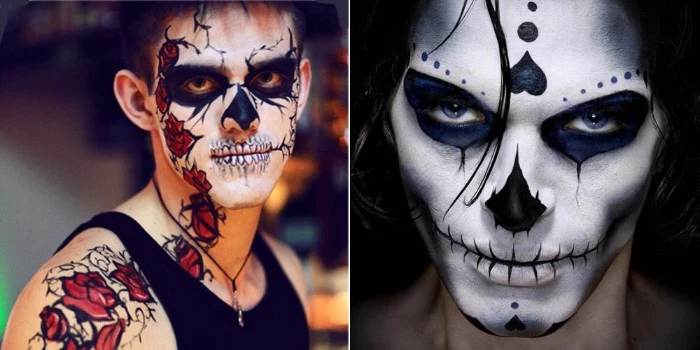
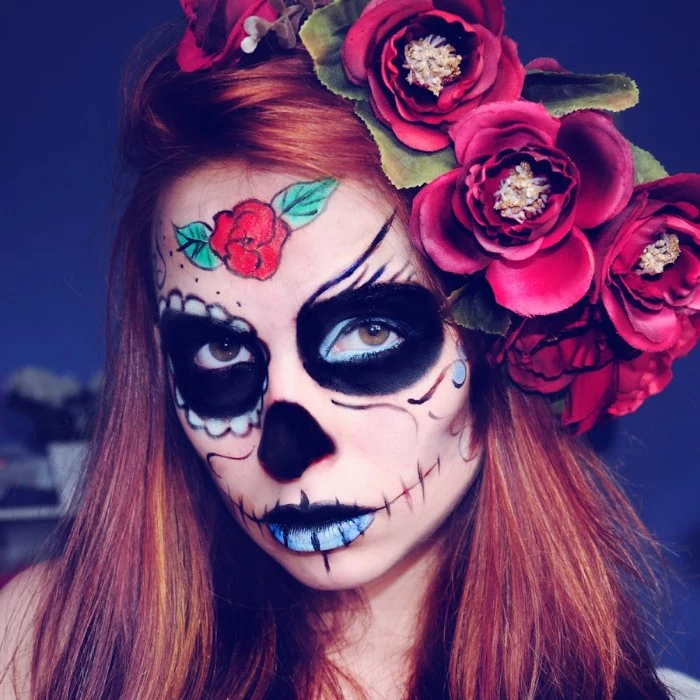
By the way, it’s good to know that the colorful sugar skull (Calavera) isn’t a spooky design. It’s from the Mexican holiday Día de los Muertos, a joyful celebration of life and family. If you choose that beautiful style, it’s wonderful to do so with respect for its rich cultural meaning.
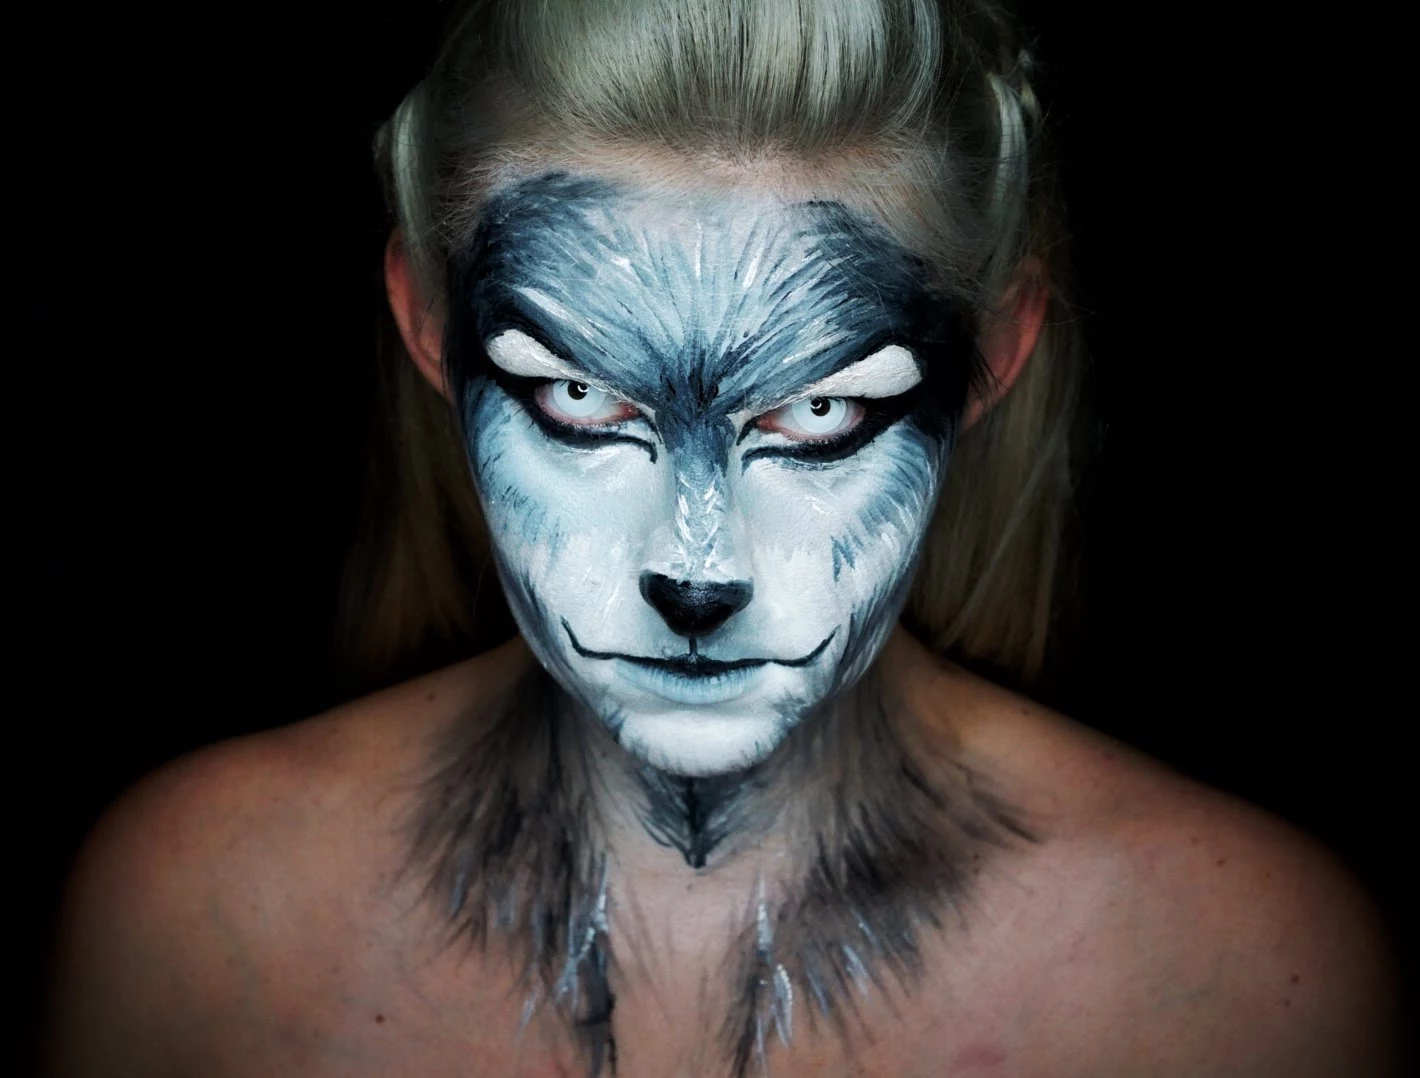
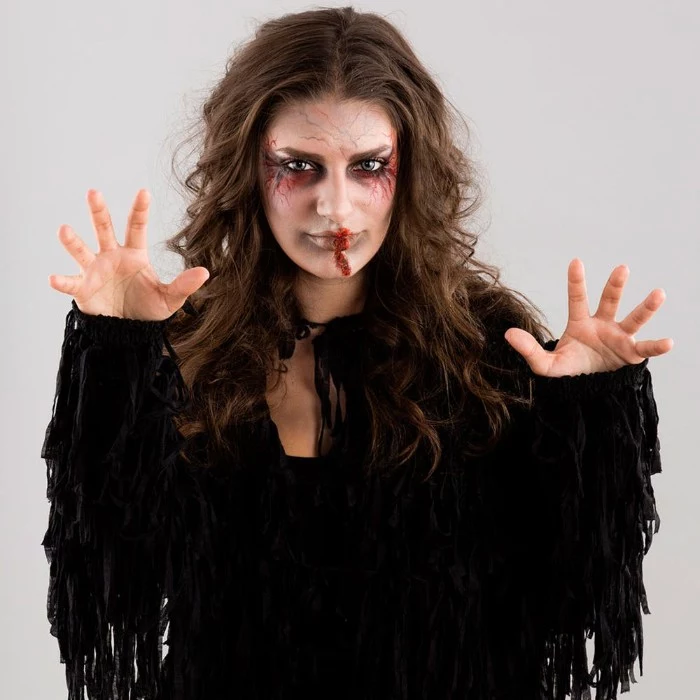
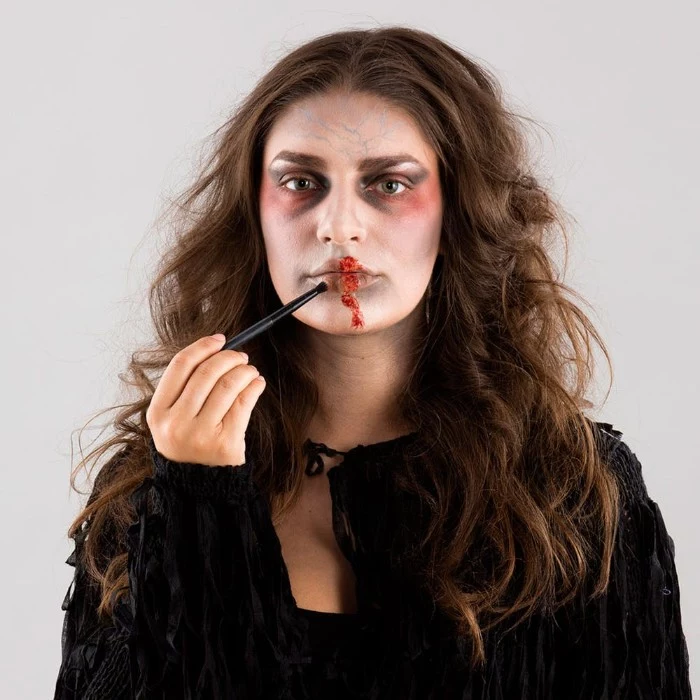
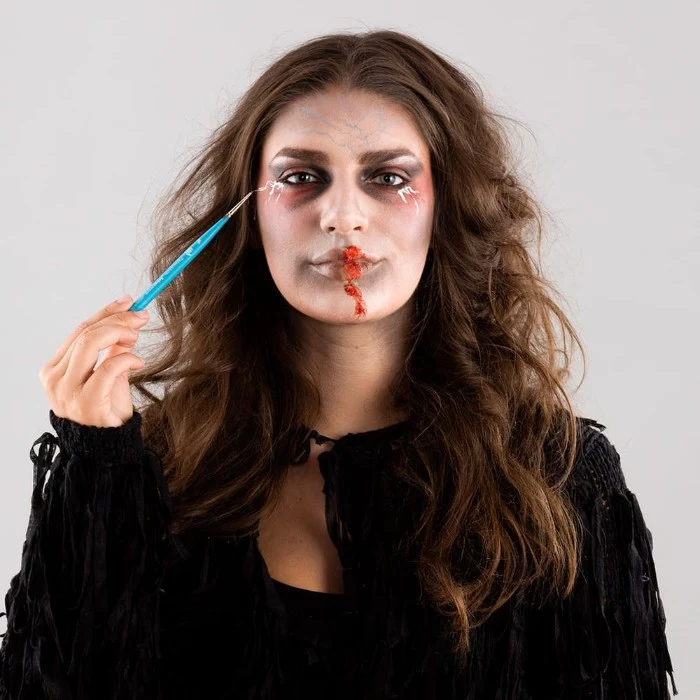
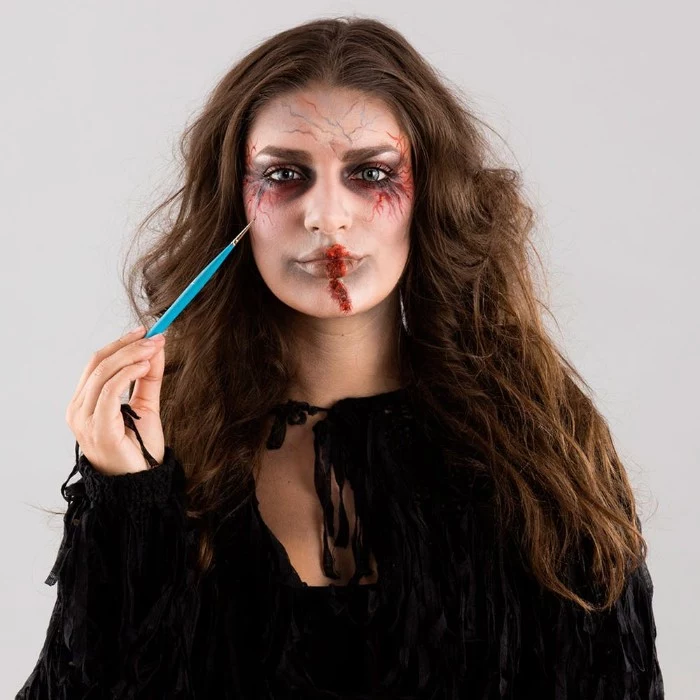
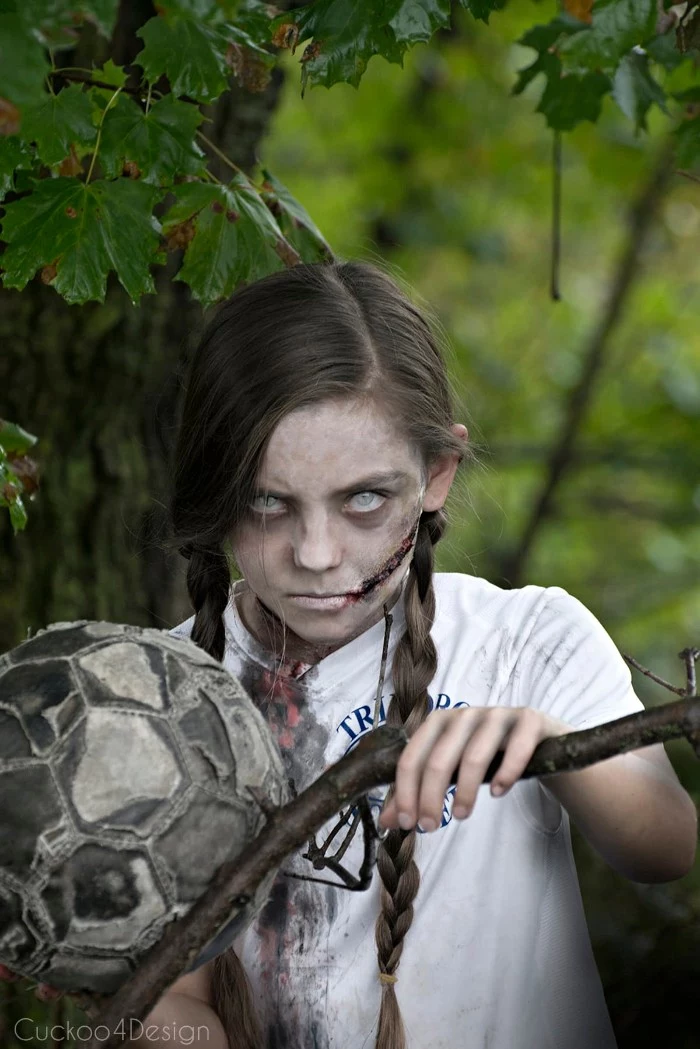
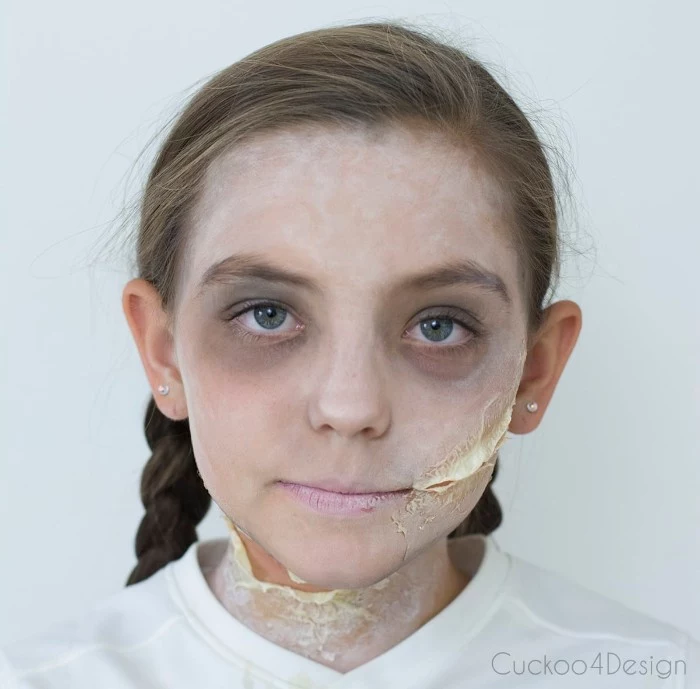
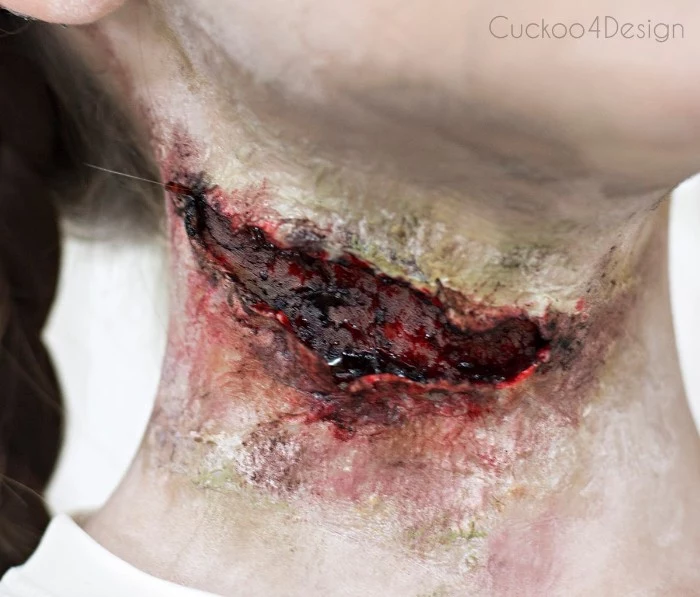
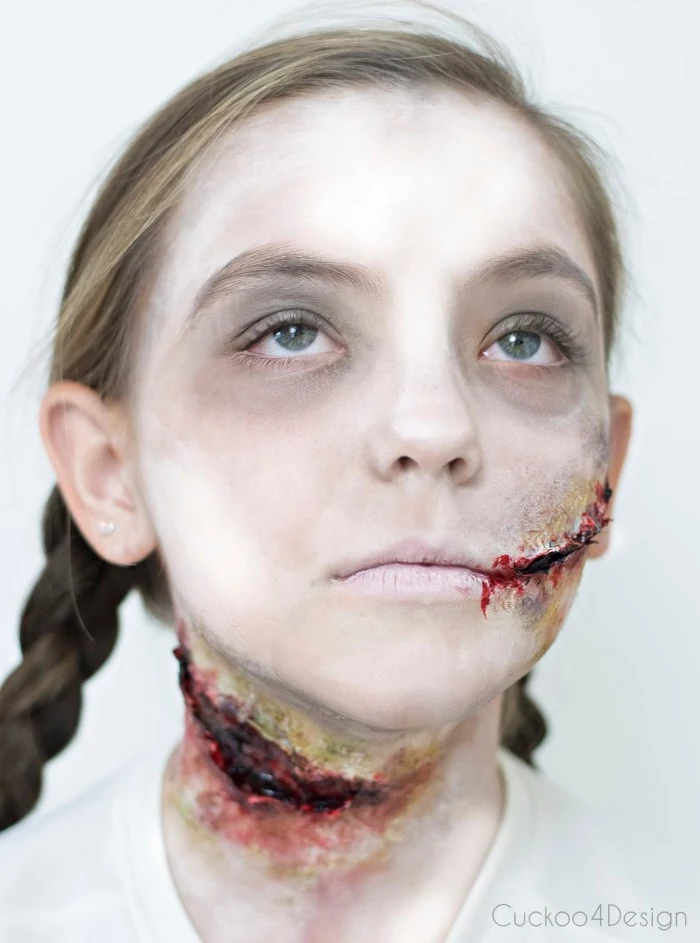
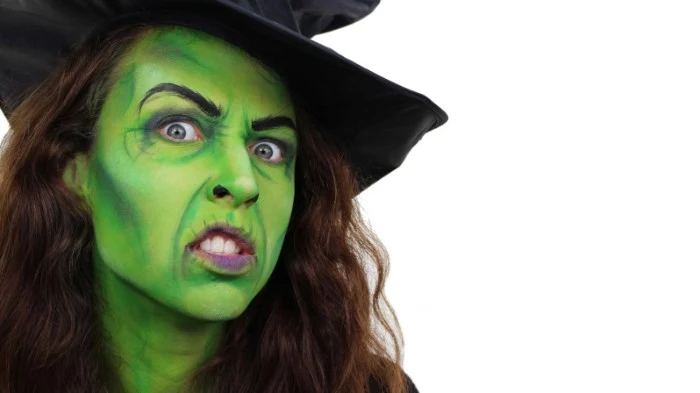
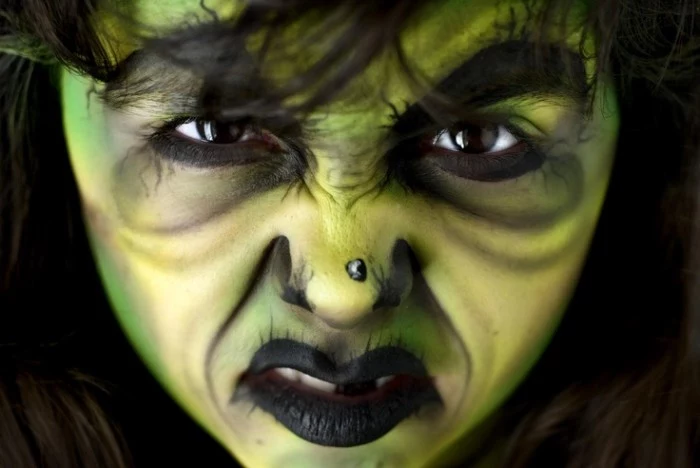
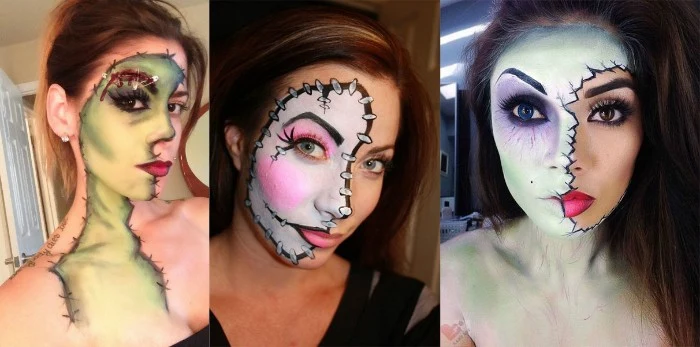
The Convincing Zombie
(Beginner time estimate: 1 – 1.5 hours)
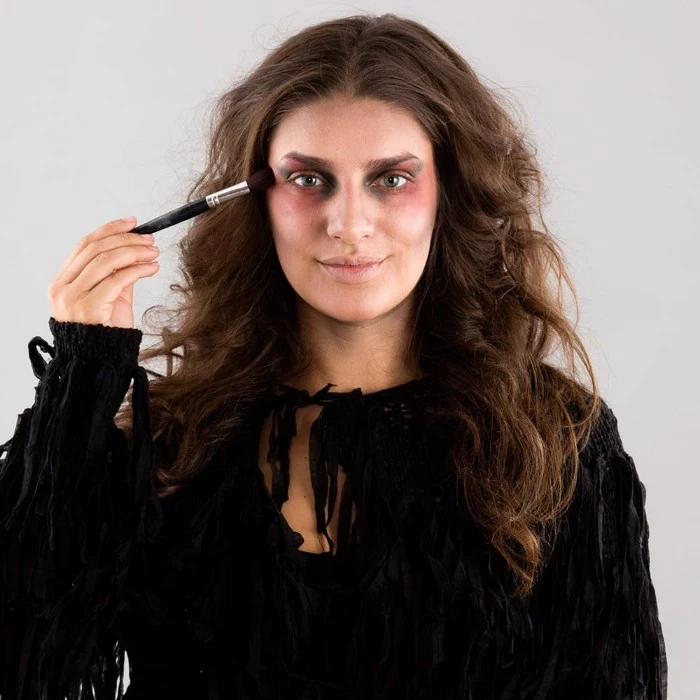
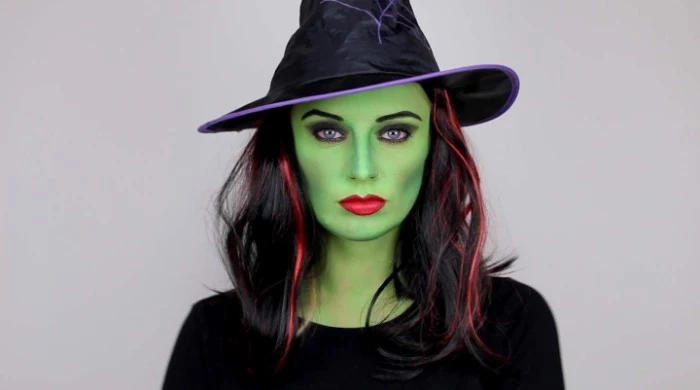
- The Palette of Decay: A great zombie isn’t just pale. Use a sponge to mottle on sickly colors like pale green, faint yellow, and a touch of purple. The unevenness is what sells the look.
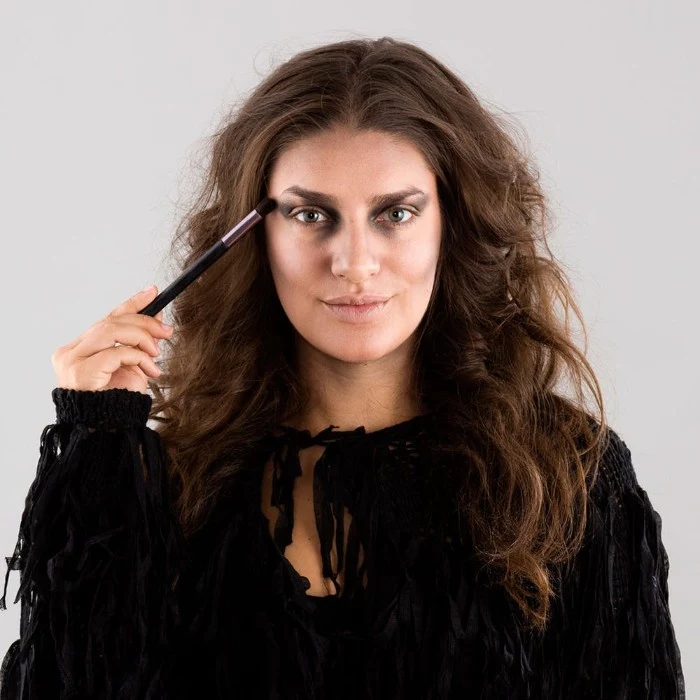
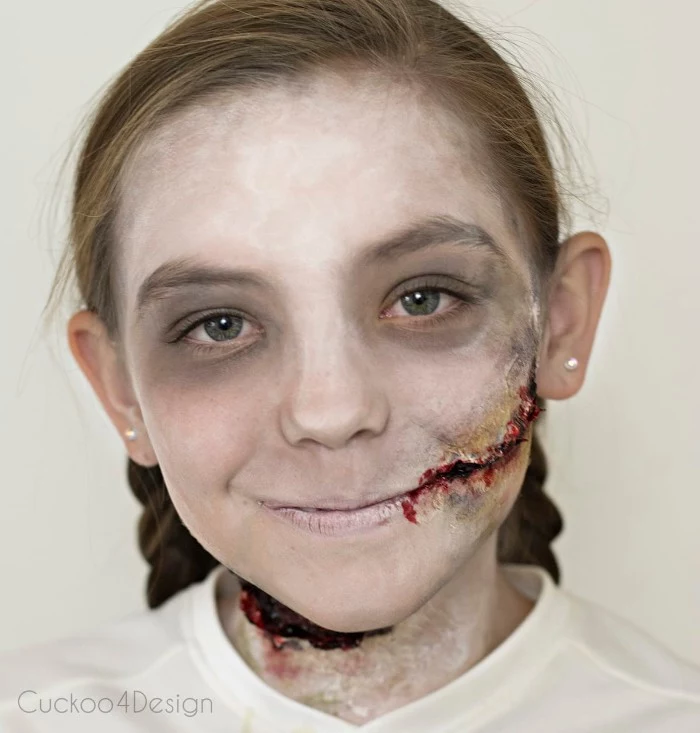
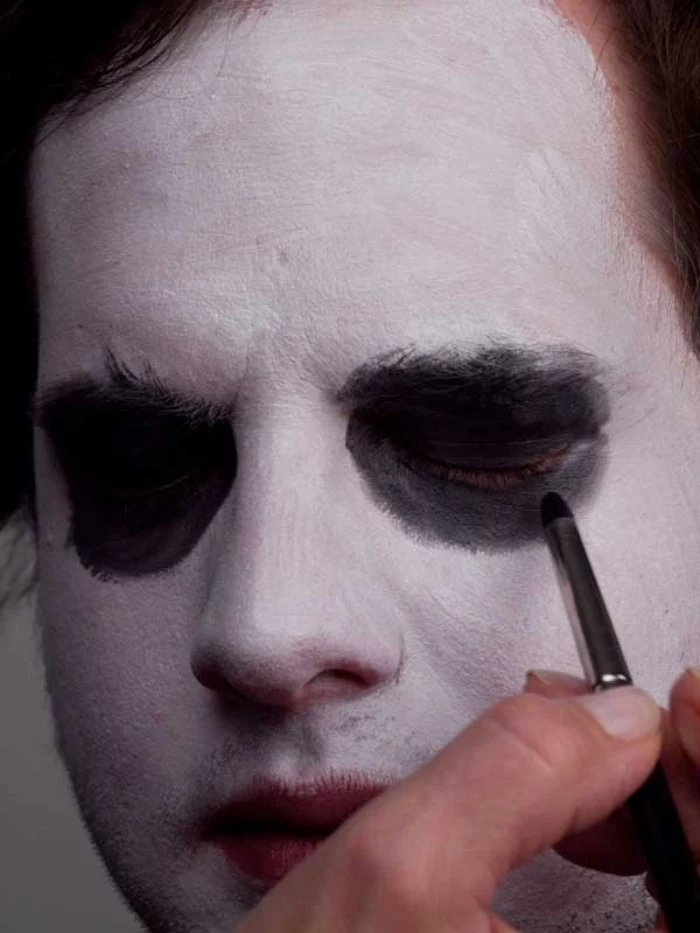
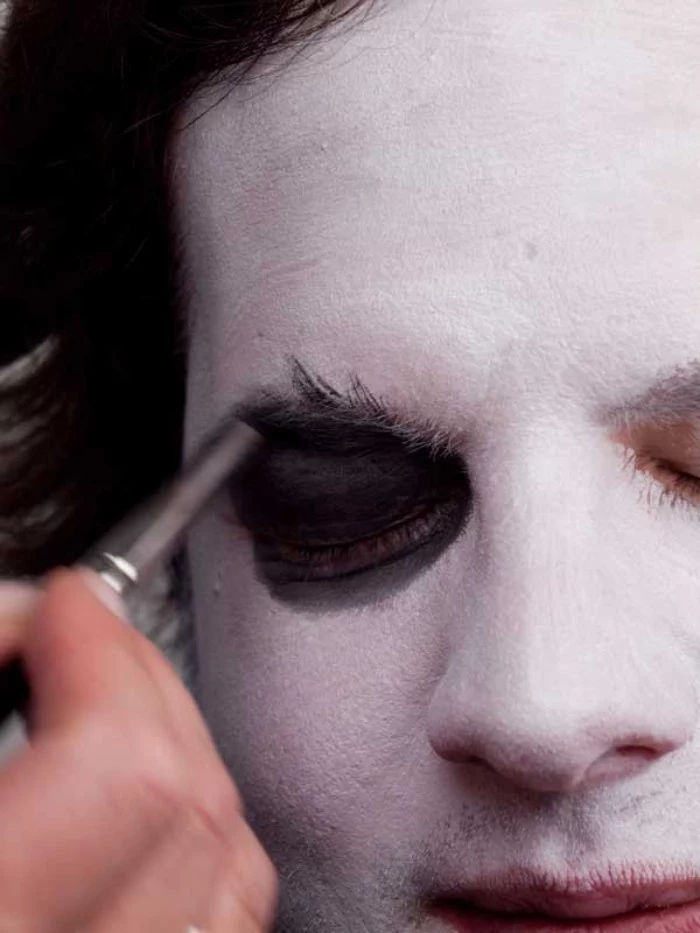
- Sunken Features: Use a matte grey or purplish-brown shadow to make the face look gaunt. Blend it into the hollows of the cheeks and around the eyes.
- Add Some Gross Texture: Want to level up? Mix some uncooked oatmeal or grits with a little liquid latex. (WARNING: Always do a patch test for a latex allergy first! Apply a small dot to your inner arm 24 hours beforehand). Dapple this mixture on to create lumpy, rotting skin. Once dry, you can paint over it.
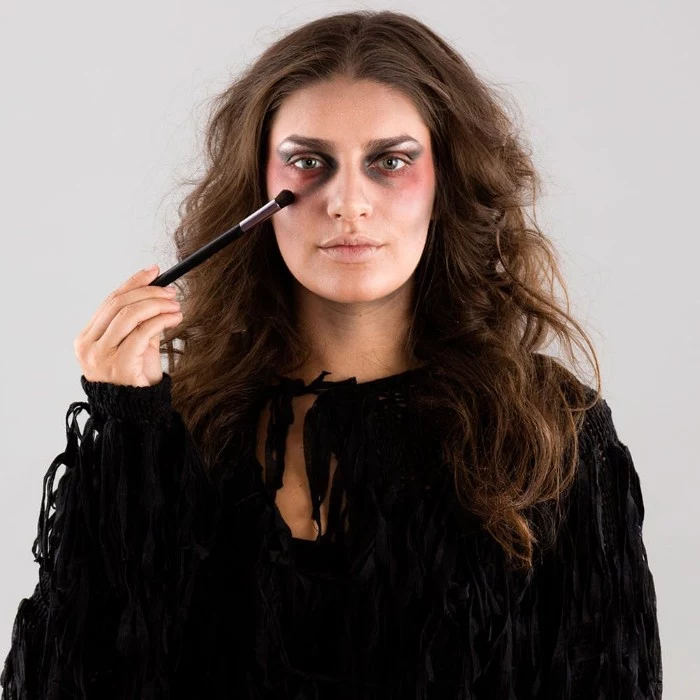
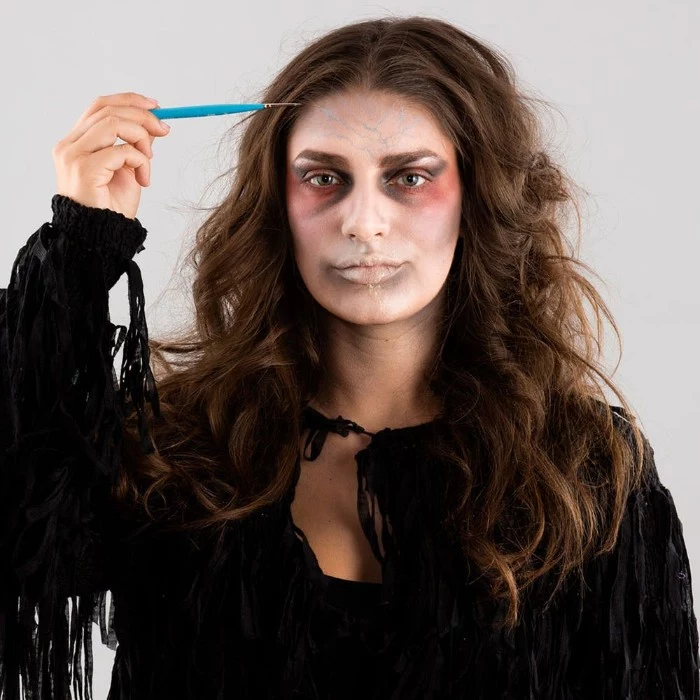
- Delicate Veins: Use a super-fine liner brush with thinned-down blue or purple paint. Lightly drag and wiggle the brush on the temples and cheeks to create subtle, broken veins. This tiny detail adds a huge dose of realism.
The Aftermath: How to Get It All Off Safely
Okay, the party’s over. Don’t you dare just attack your face with a bar of soap. Your job as an artist isn’t done until the paint is safely removed.
The secret is oil. Oil dissolves most paints, especially stubborn creams. Gently massage an oil-based cleanser, coconut oil, or even plain baby oil all over the design. You’ll see the makeup start to melt and break apart.
Next, use a soft, damp washcloth to gently wipe away the oily sludge. No scrubbing! Once most of it is gone, follow up with your regular gentle face wash to remove any residue.
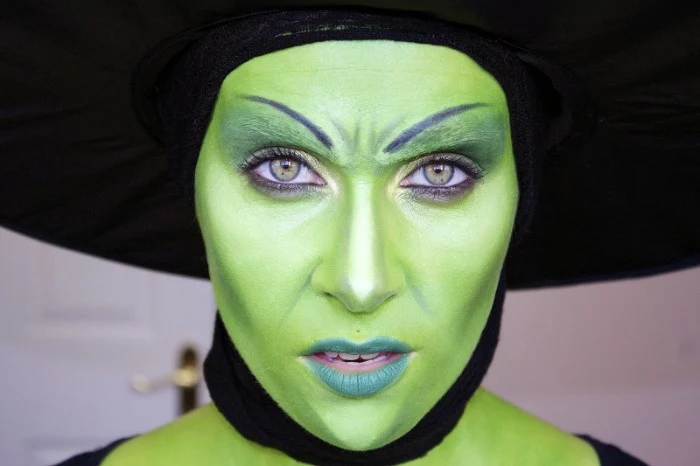
Good to know: Very strong pigments like deep greens and reds can sometimes leave a faint stain for a day or so. This is normal, even with cosmetic-grade paints. Don’t panic and scrub your skin raw—it will fade.
Creating a killer look is an art form that blends creativity with safety. I hope these tips make you feel ready to go beyond just copying a picture you found online. Understand your materials, be kind to your skin, and practice. Your first try might be a little wobbly, but we all start there. Have fun bringing your creature to life!
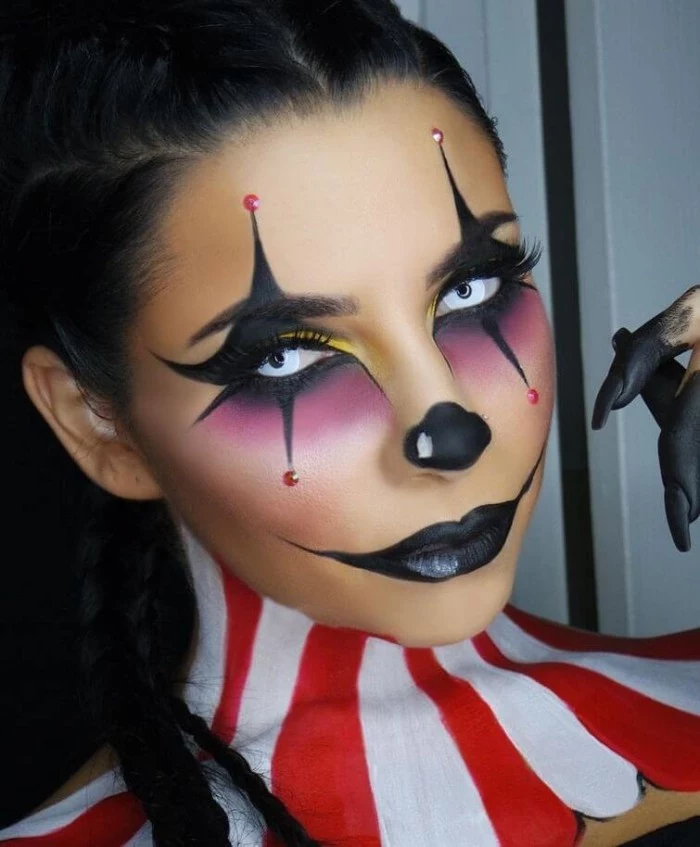
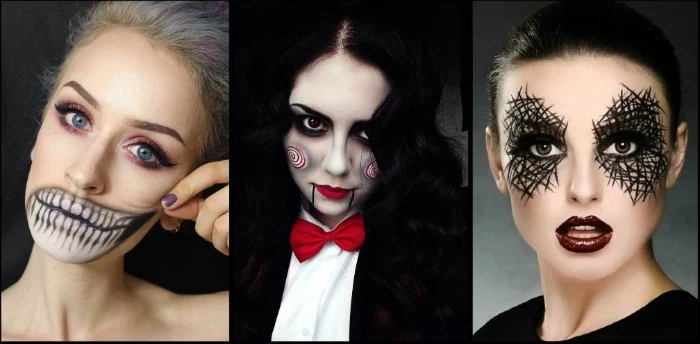
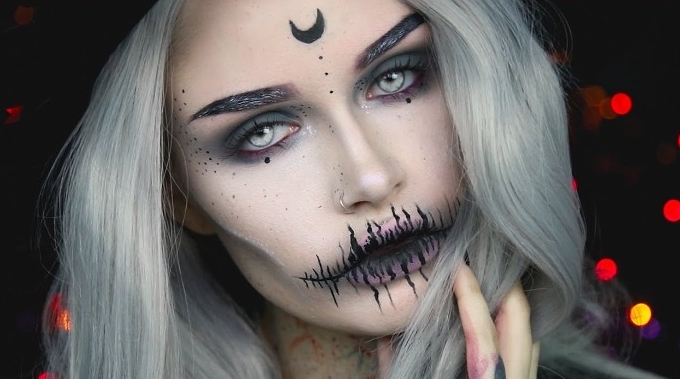
Inspiration Gallery

The Pro’s Secret Weapon: Before you even think about color, consider applying a barrier cream. Products like Kryolan’s Pro Shield Barrier Foam or Mehron’s Barrier Spray create an invisible film between your skin and the makeup. This not only makes the final removal process incredibly easy but also protects sensitive skin from potential irritation, letting you wear your masterpiece in comfort all night long.
- Prevents smudging under hot party lights.
- Stops your intricate line work from bleeding.
- Gives a professional, matte, or dewy finish depending on the product.
The secret? A high-quality setting spray. Once your design is complete, a generous mist of a theatrical spray like Ben Nye’s Final Seal or Urban Decay’s All Nighter will lock everything in place for hours.
Did you know? The most common face painting injuries are not from the paint itself, but from cosmetic-grade glitter getting into the eyes. Always use an adhesive gel and apply it carefully, keeping a safe distance from the waterline.
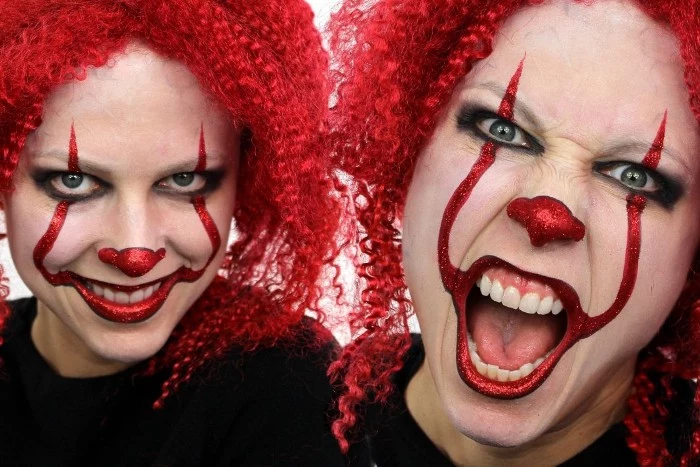
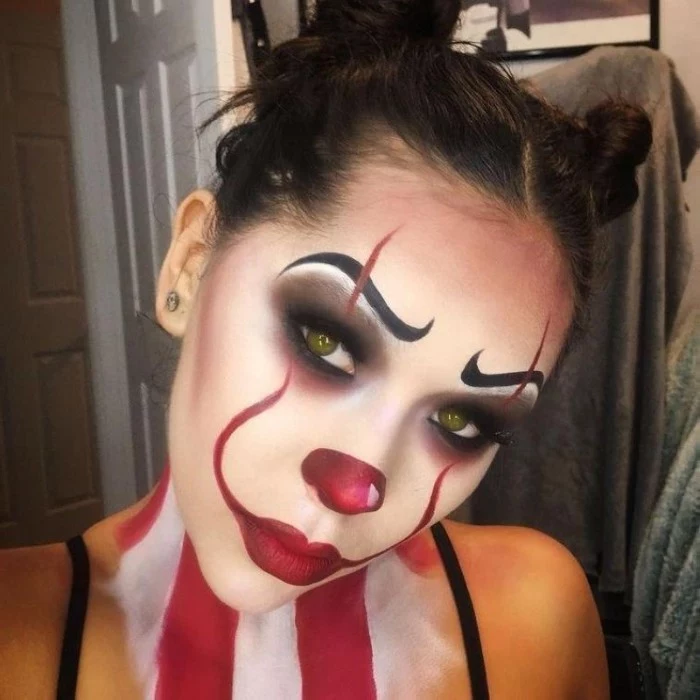
How do I get that perfectly opaque, crack-free white base for a skull or clown?
The trick is layering. Start with a damp (not soaking wet) sponge and apply a thin, even layer of a high-quality water-activated white paint, like Diamond FX or TAG Body Art. Let it dry completely. Then, go over it with a second thin layer, stippling the sponge to build coverage without reactivating the paint underneath. Patience is the key to a flawless canvas.
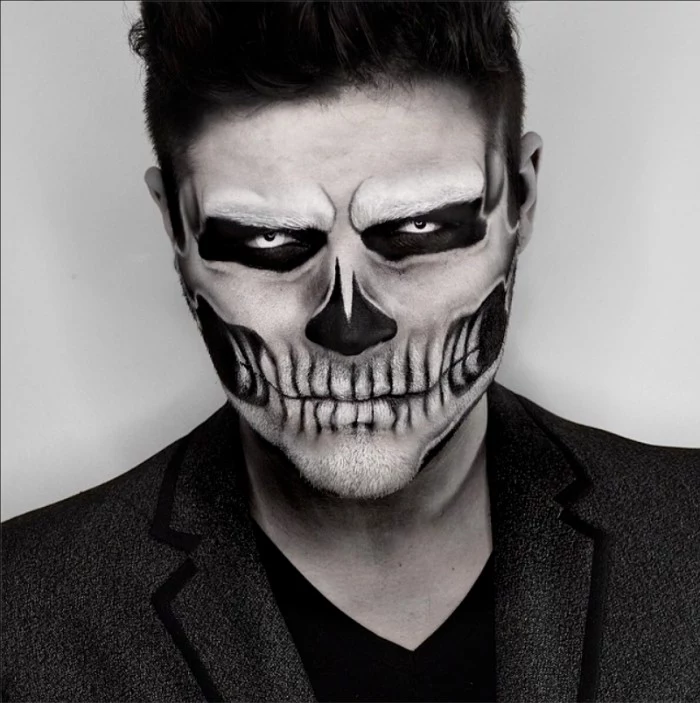
Adding dimension is what separates an amateur look from a stunning one. To create convincing hollows for a skull or gaunt zombie, don’t just use black. Start by blending a soft grey or brown into the areas you want to recede (cheekbones, temples), then layer a smaller amount of pure black right in the deepest part. This gradient creates a realistic illusion of depth.
Water-Activated Paints: These are the most common and beginner-friendly. Brands like Mehron Paradise AQ are activated with a small amount of water, apply like watercolor, and are easy to wash off. Perfect for parties and detailed line work.
Grease Paints: Oil-based and highly pigmented, these offer bold coverage but require setting with powder to prevent smudging. They are a classic choice for clowns and traditional theater makeup.
For most Halloween looks, water-activated paints offer more versatility and comfort.
Your toolkit is as important as your paint. Here’s a basic pro-level brush set to invest in:
- A wide, flat brush: For applying the base color quickly and evenly.
- A medium filbert brush: Its curved edge is perfect for blending colors and creating soft shapes.
- A #2 round brush: The essential tool for fine lines, swirls, and outlining details.
- A petal brush: Shaped like a teardrop, it’s ideal for creating flower petals and scales with a single stroke.
According to the FDA, color additives used in cosmetics must be specifically approved for use on the skin. The pigments in craft acrylics do not meet this standard and can contain materials that are toxic when absorbed.
This is why reading the label is non-negotiable. Always look for phrases like
Don’t neglect the aftercare! The most crucial step happens after the party. Vigorously scrubbing with soap and water can damage your skin barrier. Instead, start by massaging an oil-based cleanser or even simple coconut oil over your entire design. This will dissolve the pigments gently. Let it sit for a minute before wiping away with a soft, damp cloth. Finish with your regular gentle face wash.


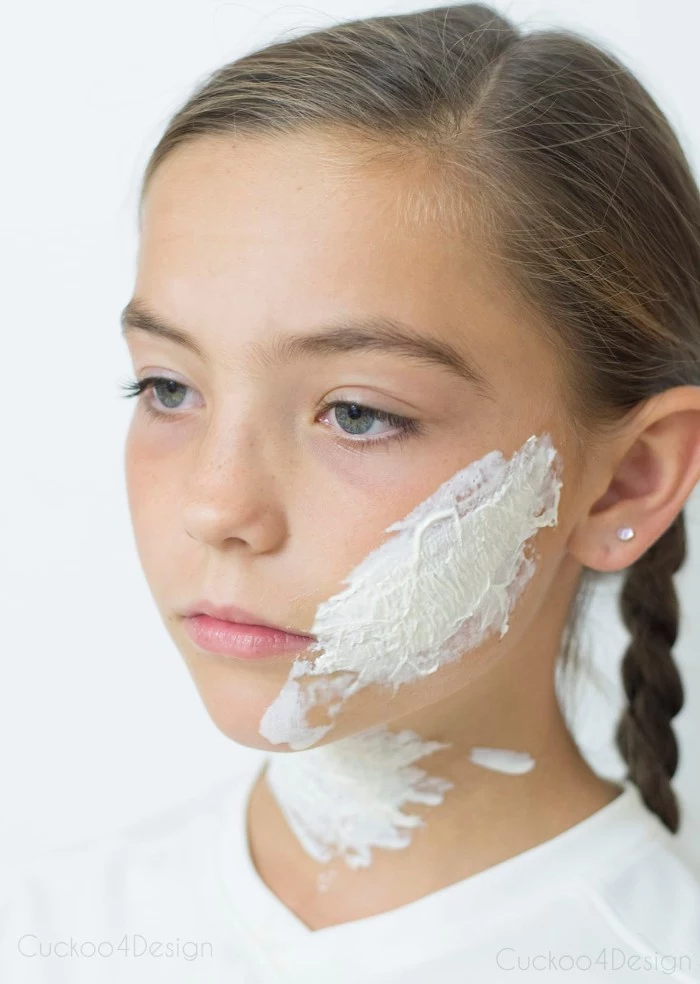
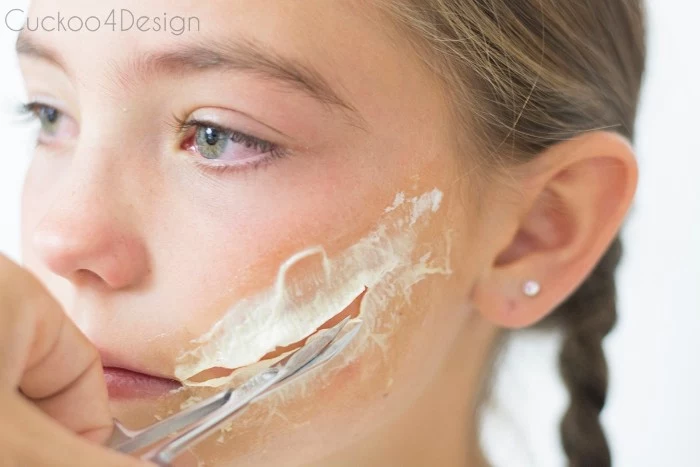
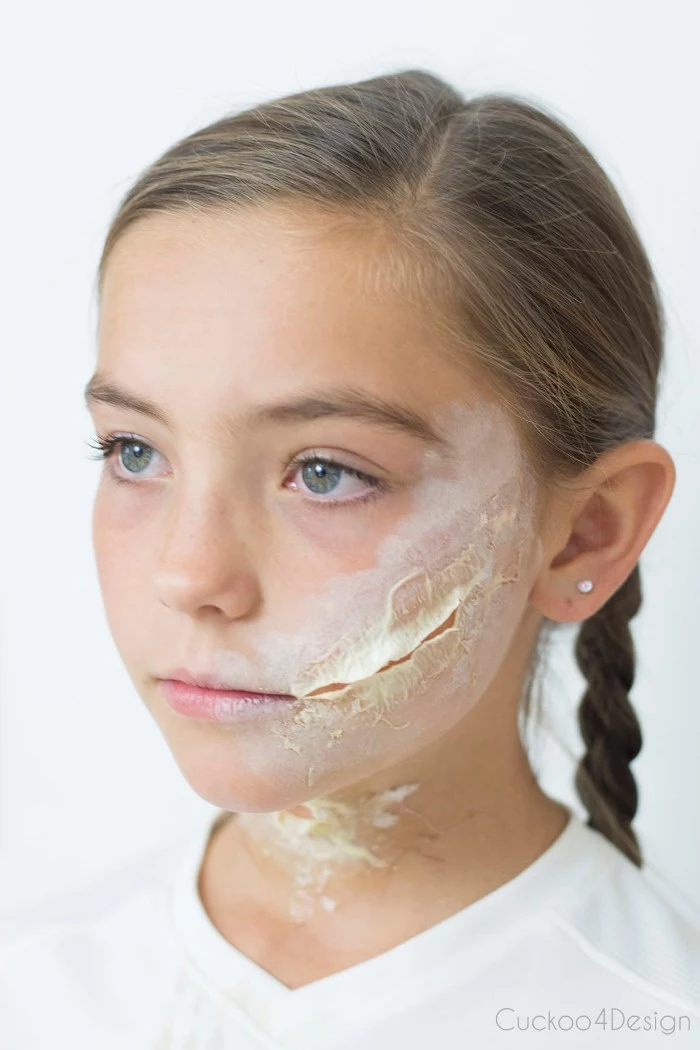
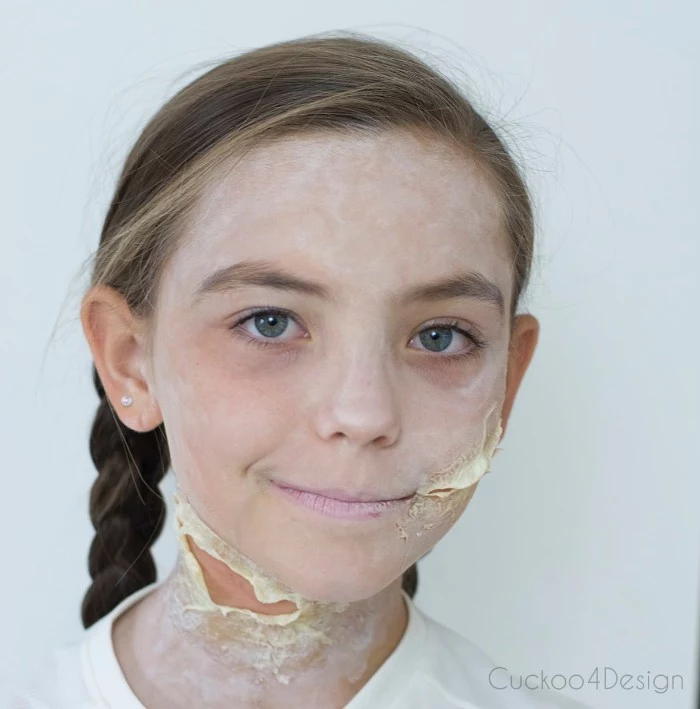
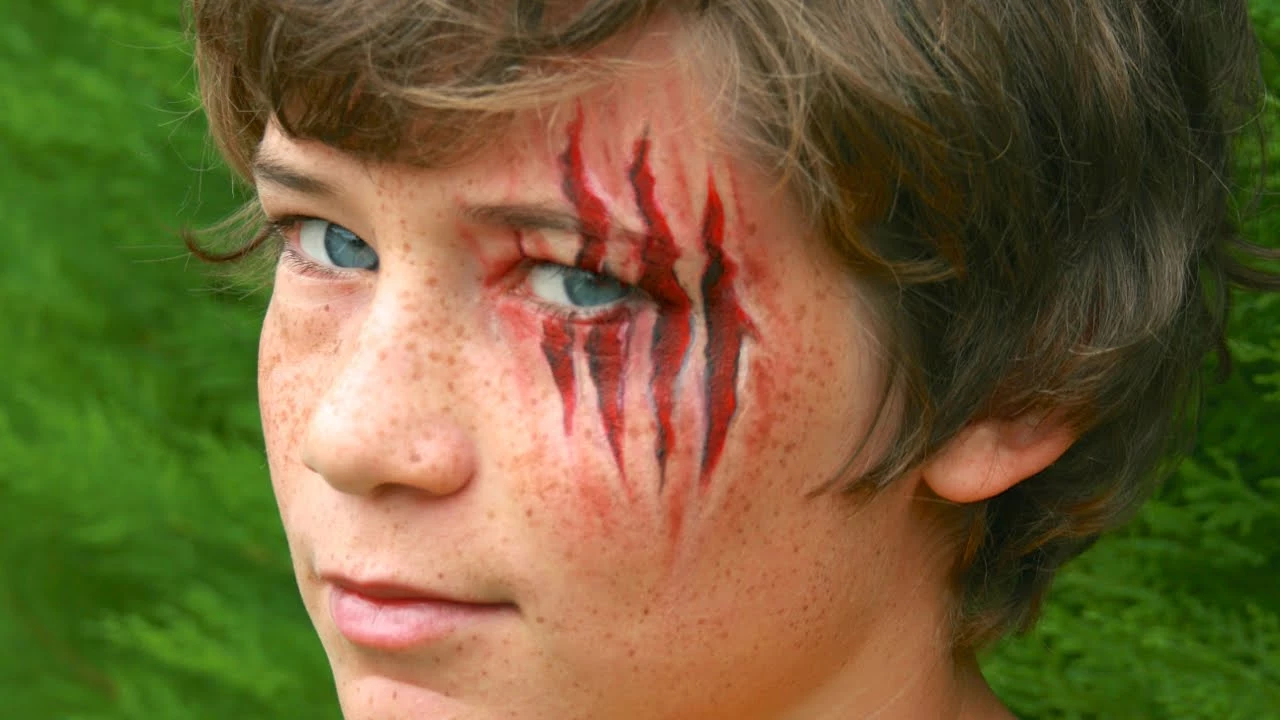
For creating gruesome textures like scars, burns, or rotting flesh, professionals turn to special effects products. Rigid Collodion is a clear liquid that puckers the skin as it dries to create realistic indented scar effects. For raised wounds or gashes, 3rd Degree Silicone is a two-part putty that can be molded directly on the skin for hyper-realistic results.
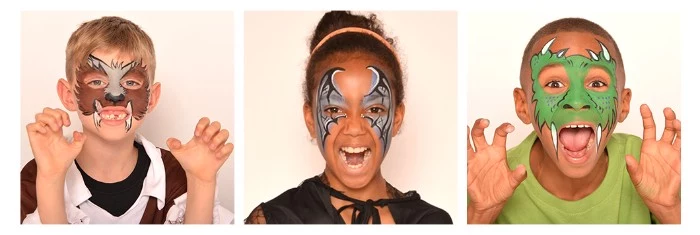
Want perfectly symmetrical designs or repeating patterns like scales?
Use stencils! You can buy pre-made sets specifically for face painting from brands like BAM Stencils, which offer everything from reptilian skin to intricate floral patterns. For a DIY approach, use a thin, flexible plastic sheet (like a folder divider) and carefully cut out your design with a craft knife. Just press it firmly against the skin and dab the paint on with a sponge.

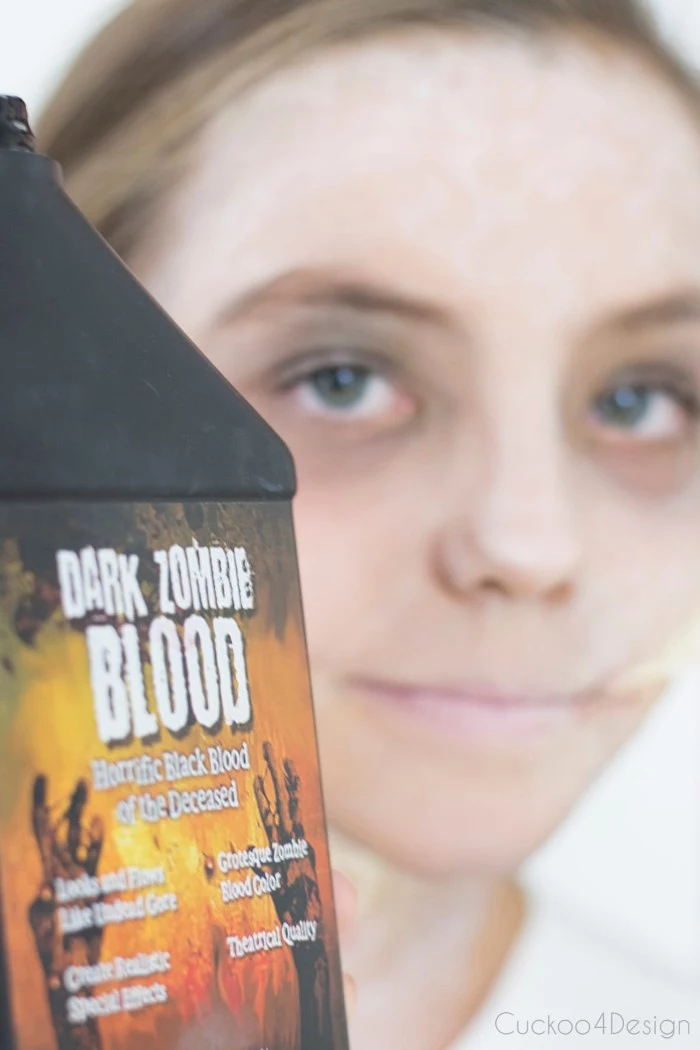
- For a wet, freshly-bleeding look, use a thick, syrupy blood gel.
- For splatters, flick a runny, liquid blood off a stiff brush.
- For older, dried blood, mix a dark, brownish-red paint with a bit of coffee grounds for a clotted texture.
The secret? Layering different types of fake blood. A single type can look flat and fake. Combining different colors and consistencies, like those from a brand like Mehron’s Stage Blood, creates a disturbingly realistic effect.
The sugar skull, or Calavera, is a beautiful but often misunderstood design. It originates from Día de los Muertos (Day of the Dead), a Mexican holiday celebrating the lives of deceased loved ones. While visually stunning for Halloween, remember its cultural roots: it’s a symbol of joyful remembrance, not fear. Incorporating bright, celebratory colors like marigold yellow, hot pink, and turquoise honors its festive origin.
A common mistake: applying water-activated paint too thickly. It might look more opaque at first, but as it dries, it’s highly likely to crack and flake off with your facial expressions. The professional method is to build up opacity with multiple thin, even layers, allowing each one to dry in between.
- A small, portable mirror.
- The key colors of your design on a small palette or in sample pots.
- A fine detail brush for touch-ups.
- A cotton bud with a bit of makeup remover for correcting smudges.
- Translucent setting powder and a small puff for reducing shine.
Be prepared for the night! A small touch-up kit in your bag can be a lifesaver, ensuring your creation looks as good at midnight as it did at 7 pm.
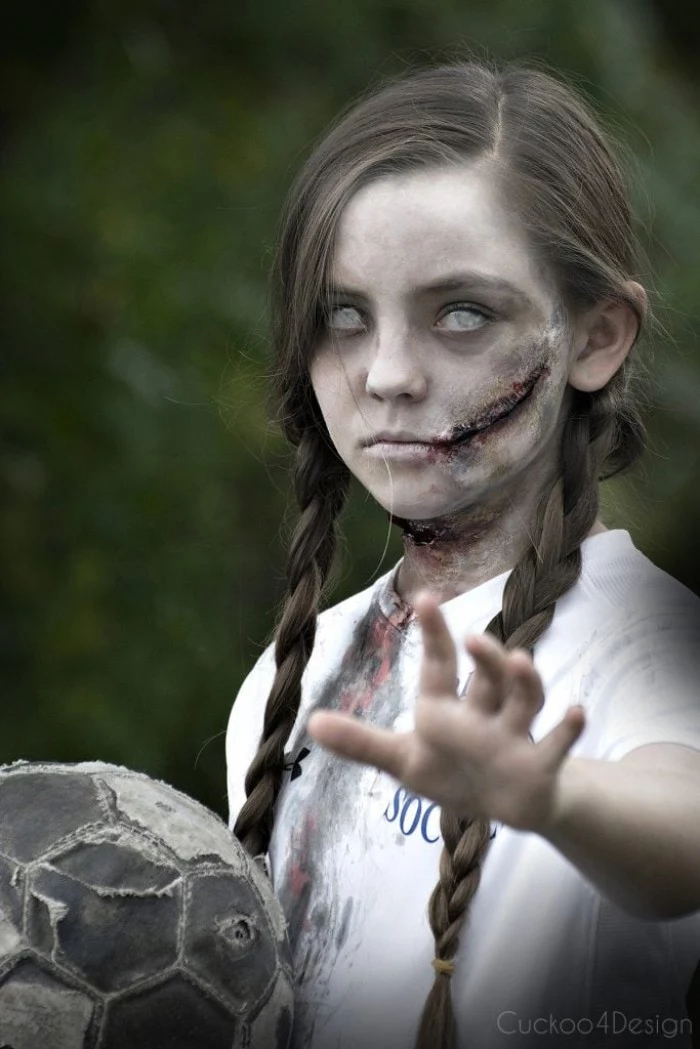
To make your eyes truly pop, consider special effects contact lenses. They can elevate a simple zombie look to terrifyingly realistic or give a fantasy creature an otherworldly gaze. Always buy from a reputable supplier that requires a prescription, like Gothika or PinkyParadise, to ensure the lenses are safe and FDA-approved. Never share lenses or buy them from unverified costume shops.
Are there good vegan and cruelty-free options?
Absolutely. The professional makeup world is increasingly focused on ethical products. Brands like Mehron have extensive vegan lines (including their famous Paradise Makeup AQ), and TAG Body Art is known for being completely vegan-friendly and not tested on animals. You don’t have to compromise on quality to stick to your principles.
Quick Tip for Blending: To create a smooth transition between two colors, apply both colors next to each other while they are still slightly damp. Then, use a clean, slightly damp sponge or brush to lightly tap and blend along the line where they meet. This technique, called stippling, creates a seamless gradient.
Sponge Application: Use a high-density sponge (like a Hydra sponge) for applying your base coat. It covers large areas quickly and provides an even, smooth foundation.
Brush Application: Use brushes for all detail work. Brushes give you precision and control for sharp lines, swirls, and intricate patterns that are impossible to achieve with a sponge.
A combination of both is essential for a professional-looking result.

For a look that needs to be completely sweat-proof and waterproof, professionals use alcohol-activated paints.
These paints, like those in the Skin Illustrator palettes, are activated with 99% isopropyl alcohol and are incredibly durable. They won’t budge until removed with a special solvent or high-proof alcohol. It’s overkill for a house party, but perfect for performances or haunted house actors who need their makeup to last through intense conditions.
Add a touch of magic with blacklight-reactive makeup. Neon UV paints from brands like Moon Glow or TAG Body Art look bright in daylight but come alive with an intense, otherworldly glow under UV or blacklight. It’s a fantastic way to create a surprise effect for a rave or dark party environment.

Don’t forget the neck and ears! One of the biggest giveaways of a face paint design is stopping abruptly at the jawline. To create a truly immersive character, always blend your base color down your neck and onto your ears. This small step makes the transformation far more believable and complete.
- Start with a very damp sponge and a light hand.
- Build color slowly; you can always add more.
- Use stippling motions rather than wiping.
The challenge? A dark, patchy base. This often happens from using too much paint and not enough water, or vice-versa. Finding that perfect creamy consistency with your water-activated cake is the first skill to master.
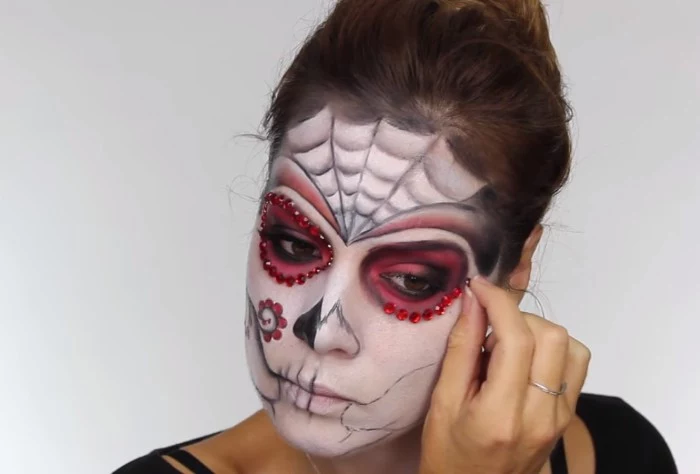
Want to add some glamour to your goul? Cosmetic-grade adhesive and flat-backed rhinestones are your best friends. Apply a tiny dot of a skin-safe glue, like Duo Eyelash Adhesive, wait 30 seconds for it to get tacky, then press the gem on with tweezers. It’s a simple way to embellish sugar skulls or add a focal point to any fantasy design.