Killer Halloween Nails: Your Pro Guide to Nailing It (Without the Fails)
I’ve been a nail tech for a long time, and honestly, nothing beats the buzz of Halloween season. It’s the one time of year my clients throw caution to the wind. They don’t just want a new color; they want tiny works of art on their fingertips. We’re talking sculpted acrylic skulls, hand-painted haunted houses, and the perfect, most realistic blood drip. This is way beyond slapping on a sticker, folks. This is about craft.
In this article
- First Things First: You Can’t Build on a Weak Foundation
- Choosing Your Weapon: A Guide to Polish Types
- Pro Techniques for Those Classic Halloween Looks
- Stylistic Palettes: Thinking Beyond Orange and Black
- When to Call a Pro (and What to Expect on the Bill)
- The Final Word: Aftercare and Safe Removal
- Inspiration Gallery
But over the years, I’ve also seen the dark side: chipped masterpieces, damaged nails, and nasty reactions. So, I decided to lay it all out. Whether you’re trying a spooky look at home or working with your favorite tech, knowing the right way to do things makes all the difference. A killer manicure starts way before the black polish ever comes out.
First Things First: You Can’t Build on a Weak Foundation
You wouldn’t build a house on shaky ground, right? Same goes for your nails. The most incredible design will look terrible and won’t last on a nail that’s damaged or poorly prepped. This is a non-negotiable step in my salon, and it should be for you at home, too.
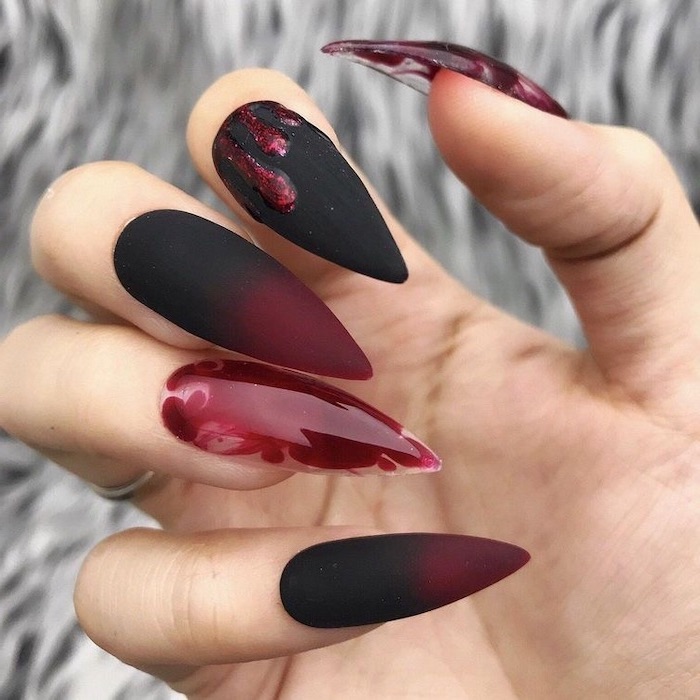
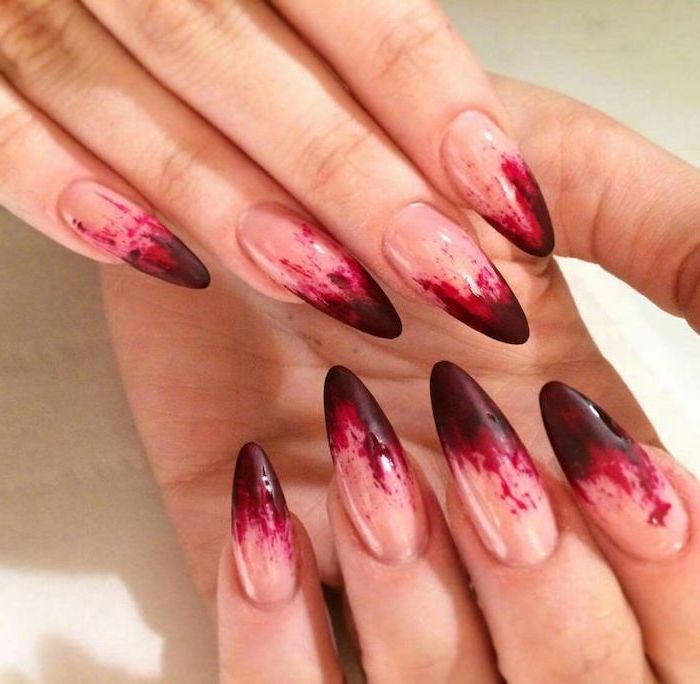
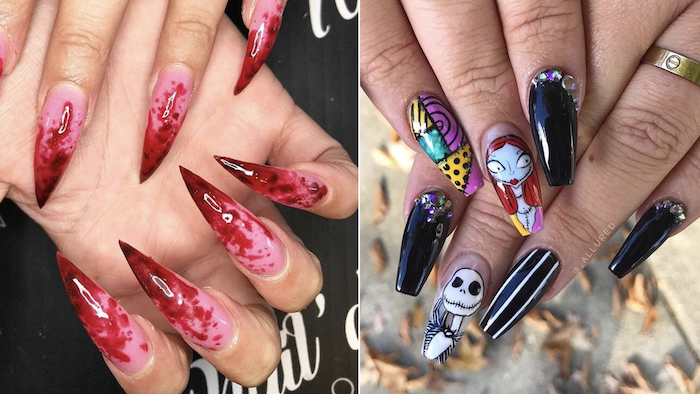
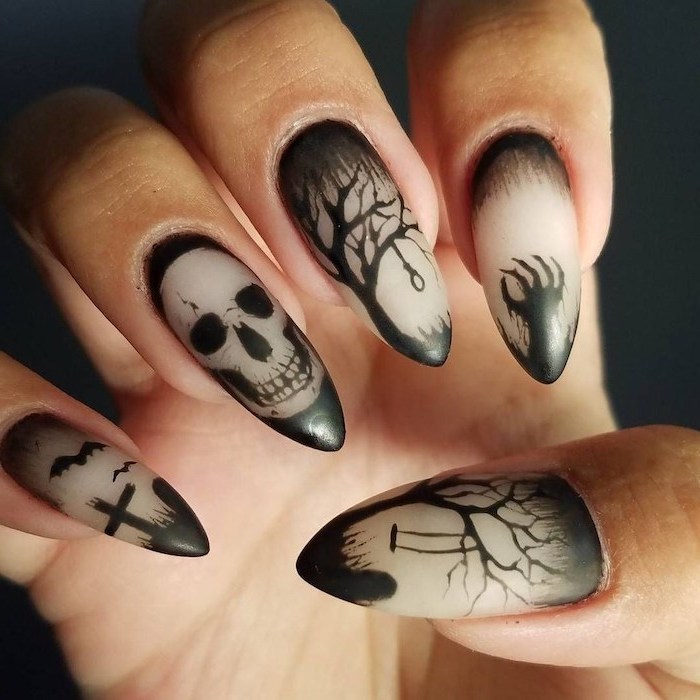
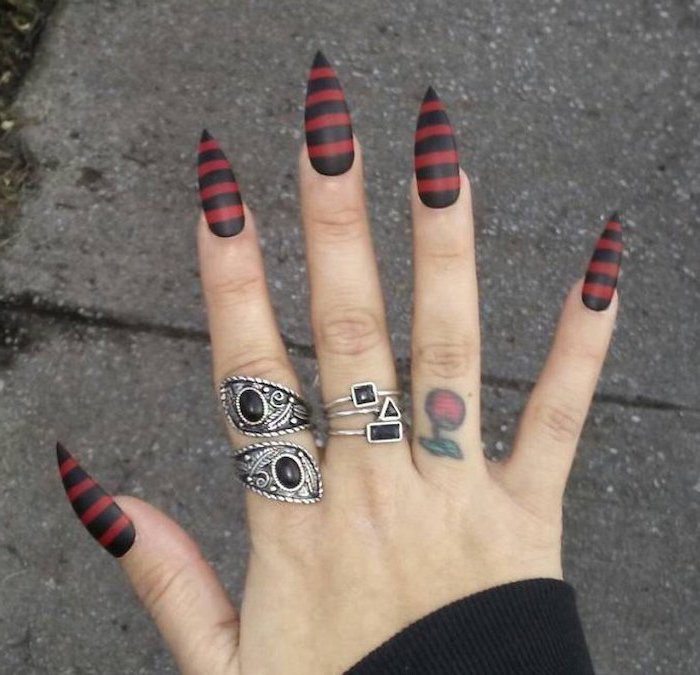
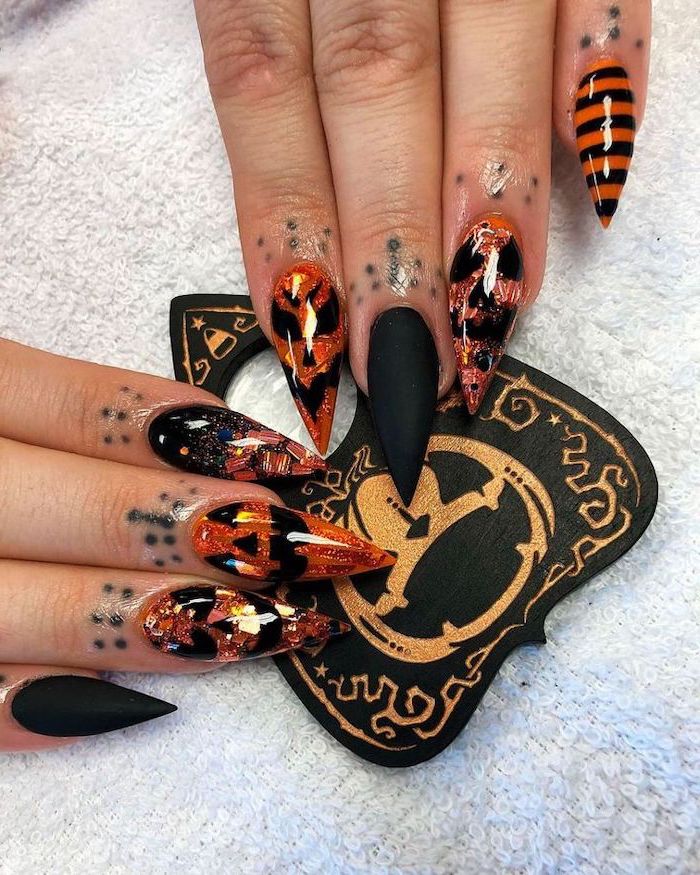
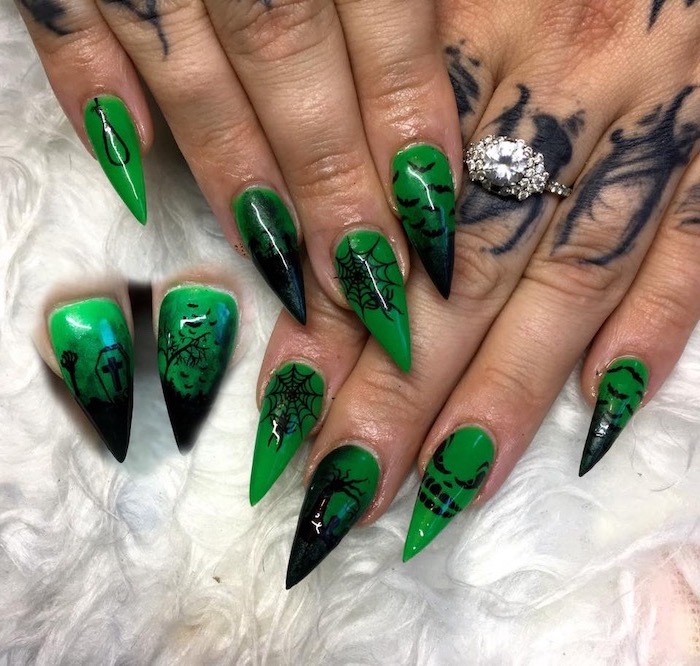
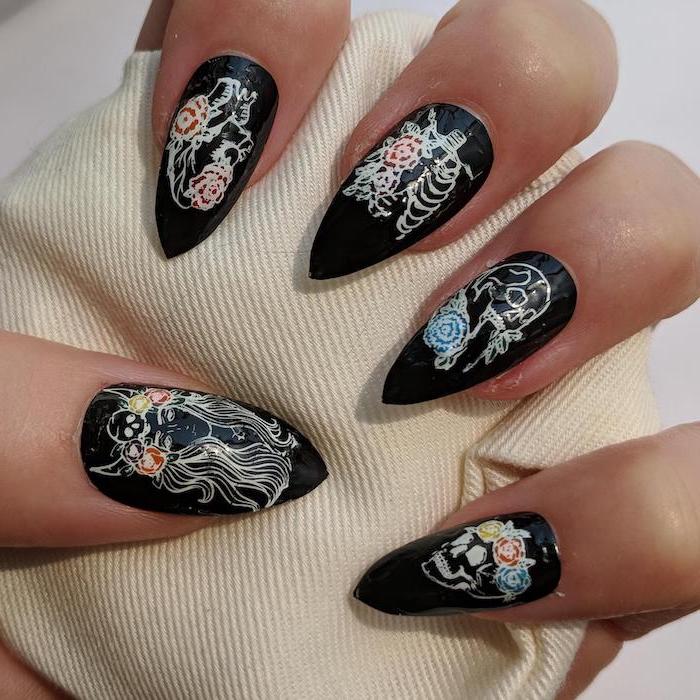
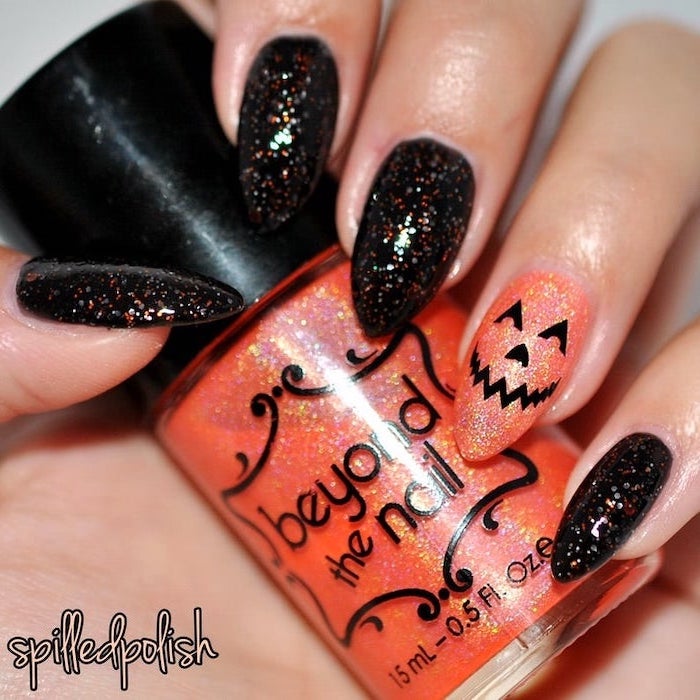
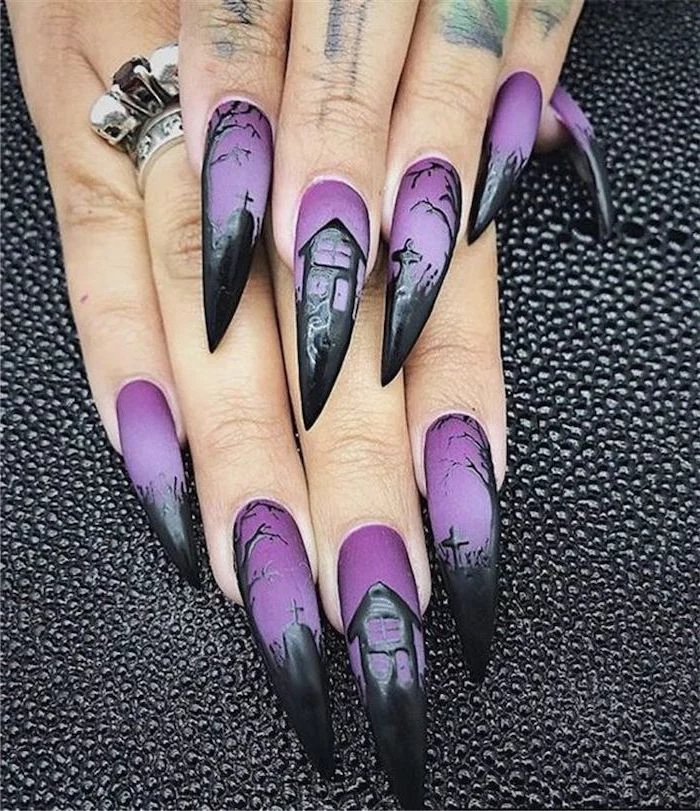
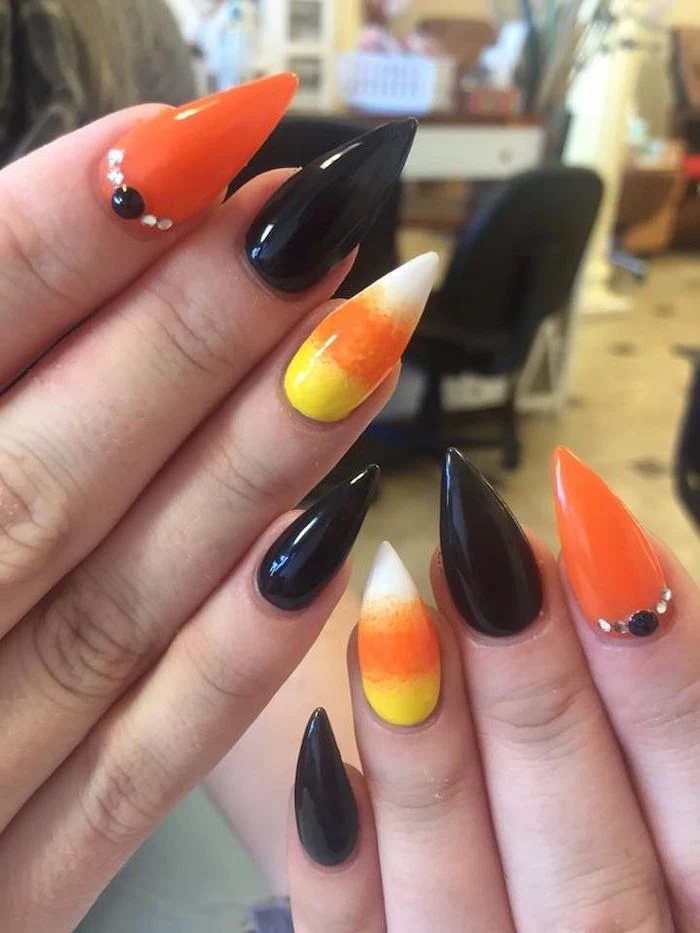
Proper prep starts with shaping. For Halloween, dramatic shapes like a sharp stiletto or a crisp coffin cut are fantastic canvases. The point of a stiletto is just begging for a blood drip, while the wide, flat surface of a coffin nail is perfect for painting a whole scene. A quick tip: use a 180-grit file for shaping. It’s strong enough to get the job done without being overly aggressive.
Next up is cuticle care, and this is where so many people go wrong. At home, please don’t cut your own cuticles! The risk of nipping live tissue and causing an infection is just too high. Instead, grab a good quality cuticle remover—the gel from Sally Hansen is a classic for a reason and costs under $10. Let it sit for a minute, then gently push everything back with an orangewood stick. It’s safer and just as effective.
Finally, you need to prep the nail surface itself. The goal is to remove shine, not layers of your nail. Lightly—and I mean lightly—buff the nail plate with a fine-grit buffer, something 220-grit or higher. Then, wipe the nail clean with a lint-free pad soaked in 99% isopropyl alcohol. This gets rid of all the dust and oils that cause polish to lift later.
Heads up! If your nails are peeling, brittle, or showing any weird signs like yellowing or thickening, just stop. Don’t cover it with polish. That’ll only trap moisture and make it worse. A good tech will always refuse to work on unhealthy nails—it’s our job to protect you.
Choosing Your Weapon: A Guide to Polish Types
Okay, so what kind of polish should you use? It really depends on how complex your design is and how long you want it to last. Let’s break it down.
For the DIY crowd, there’s traditional lacquer. This is your classic, air-dry nail polish. It’s great for simpler designs you plan to wear for a Halloween party and then take off. Its biggest downside? It chips. To make it last, you absolutely must use a solid base coat (to stop those deep reds and blacks from staining) and a durable top coat.
In the salon, our workhorse is gel polish. This stuff doesn’t air-dry; it cures (hardens) under an LED or UV lamp. It’s super durable and can last for two to three weeks without a single chip, making it perfect for intricate art you want to show off. A huge plus is that you can play around with the design until it’s perfect before you lock it in with the light. You can’t do that with fast-drying lacquer.
By the way, you might have heard about gel allergies. They’re often linked to an ingredient called HEMA found in some formulas, especially when uncured gel touches the skin repeatedly. This is a huge reason why I recommend leaving gel to the pros. We’re trained to apply it without touching the skin and to use the right lamp to ensure a full cure.
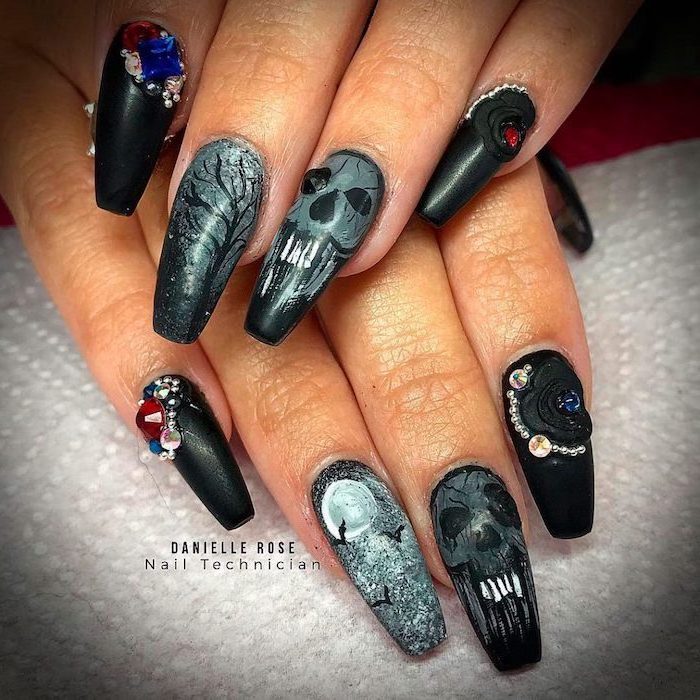
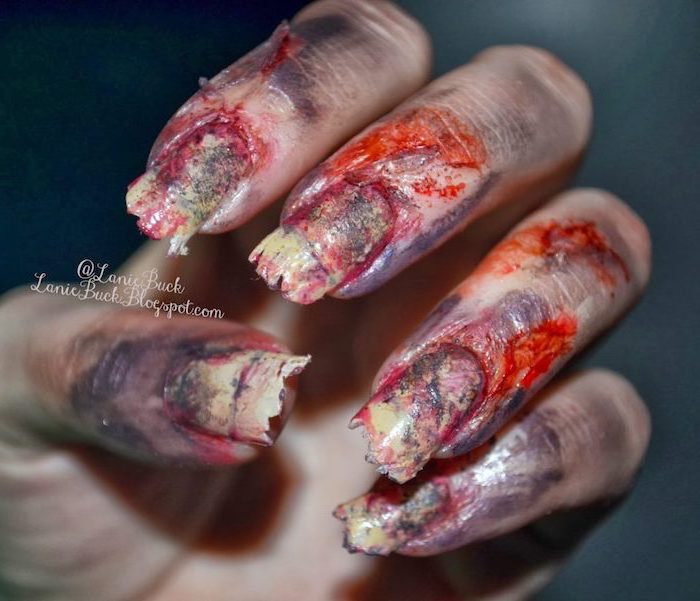
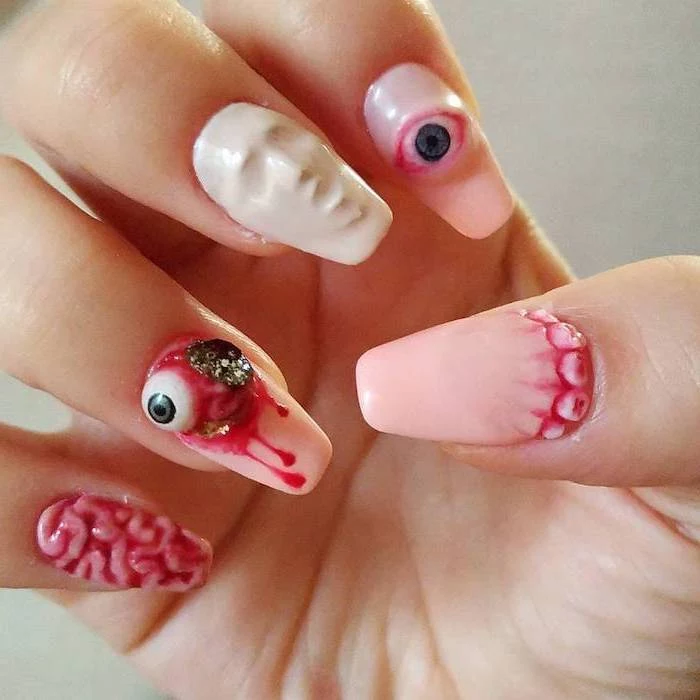
And then there’s the heavy-duty stuff: acrylic and builder gel. These are for adding length, strength, or 3D elements like sculpted bones or scars. This is advanced-level work that requires serious training to apply and remove without wrecking your natural nails. Definitely not a DIY project for a Saturday night!
Pro Techniques for Those Classic Halloween Looks
Ready for the fun part? Here’s how to create some of the most requested spooky effects, broken down step-by-step.
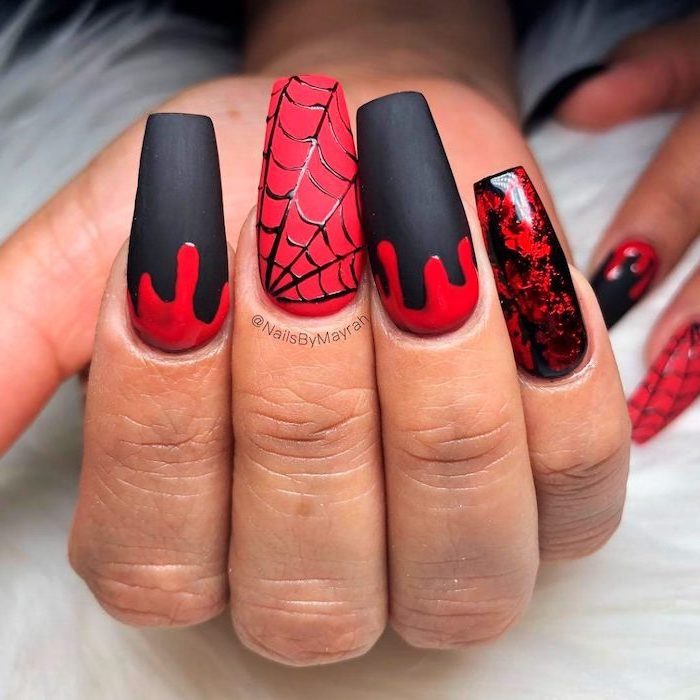
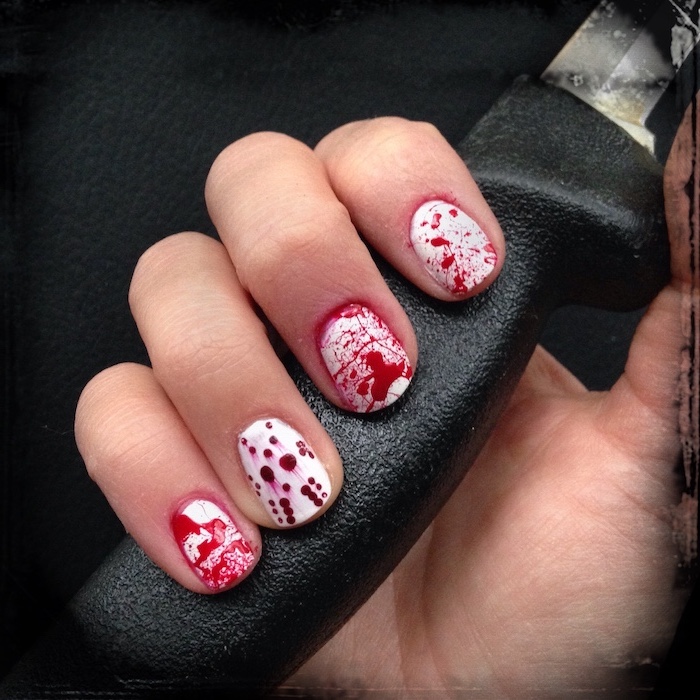
The Perfect Blood Drip
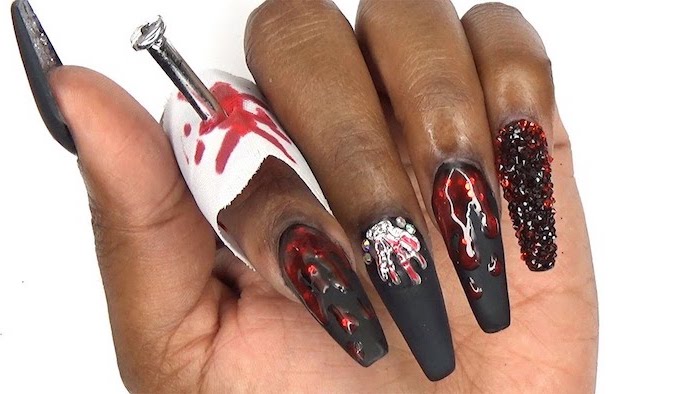
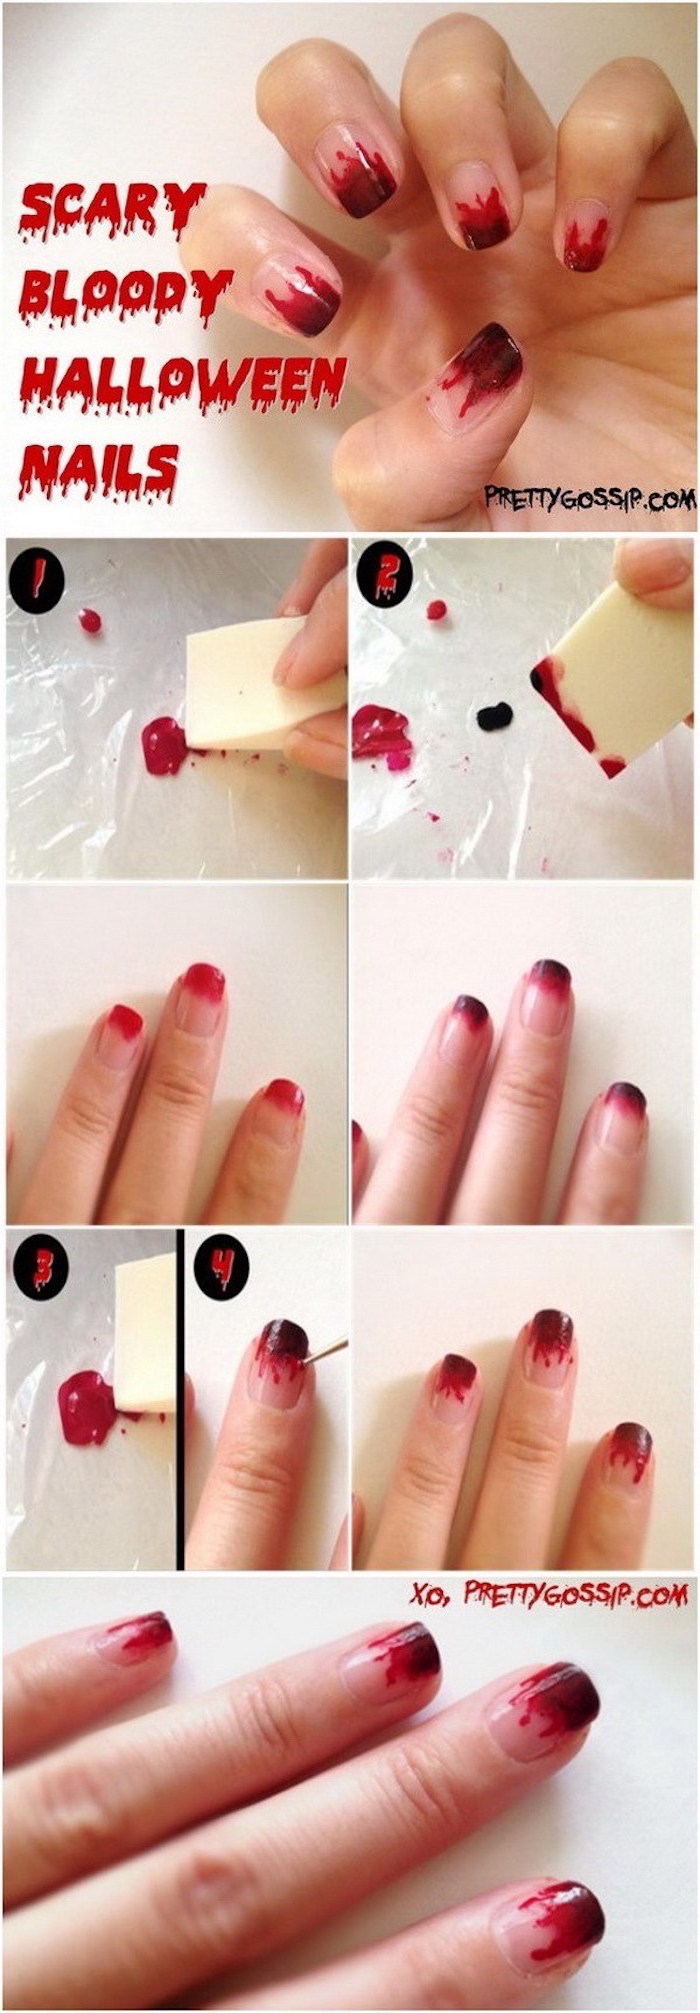
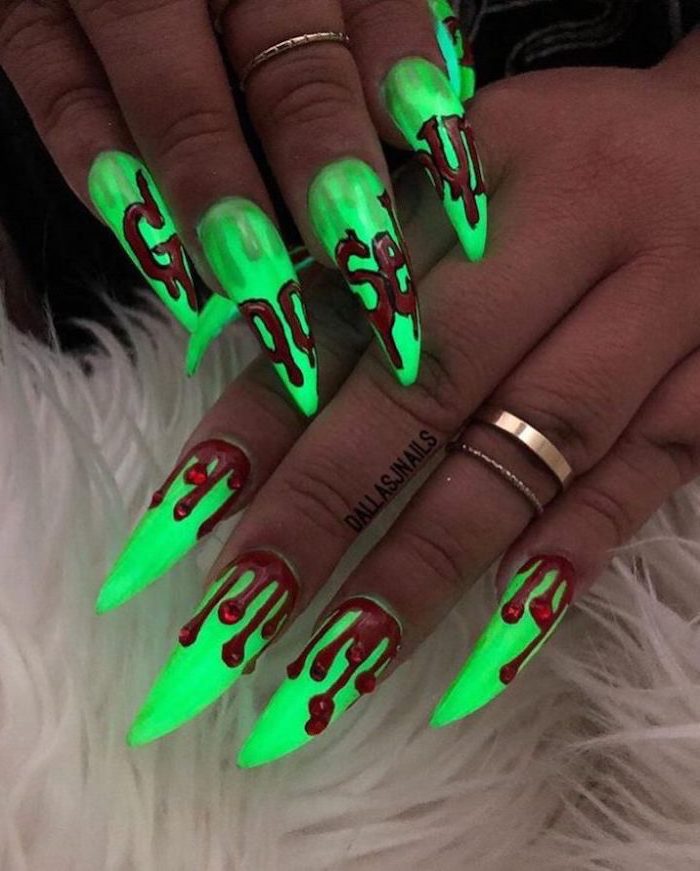
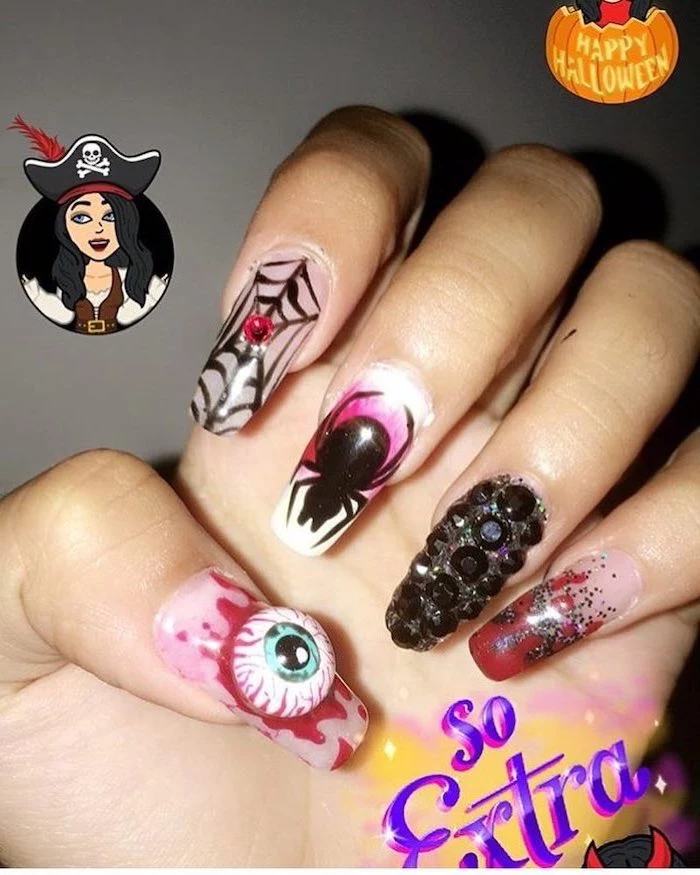
A good blood drip looks viscous and fresh, not like a cartoon. The secret is all in the tools and the color. To get this look, you’ll need a deep, juicy red—I’m a huge fan of Essie’s ‘Wicked’—a cheap dotting tool set from Amazon (they’re like $5), and a super glossy top coat like Seche Vite to get that ‘wet’ finish.
Here’s the method: Start with your base color totally dry. Dip a medium-sized dotting tool in your red polish and place a bead where you want the drip to end. Then, using a smaller dotting tool, gently pull a thin, slightly wobbly line up from that bead toward your cuticle. The trick is to pull the polish that’s already there, which creates a natural taper. A common mistake is making the drips too perfect. Let them be a little uneven and vary the lengths!
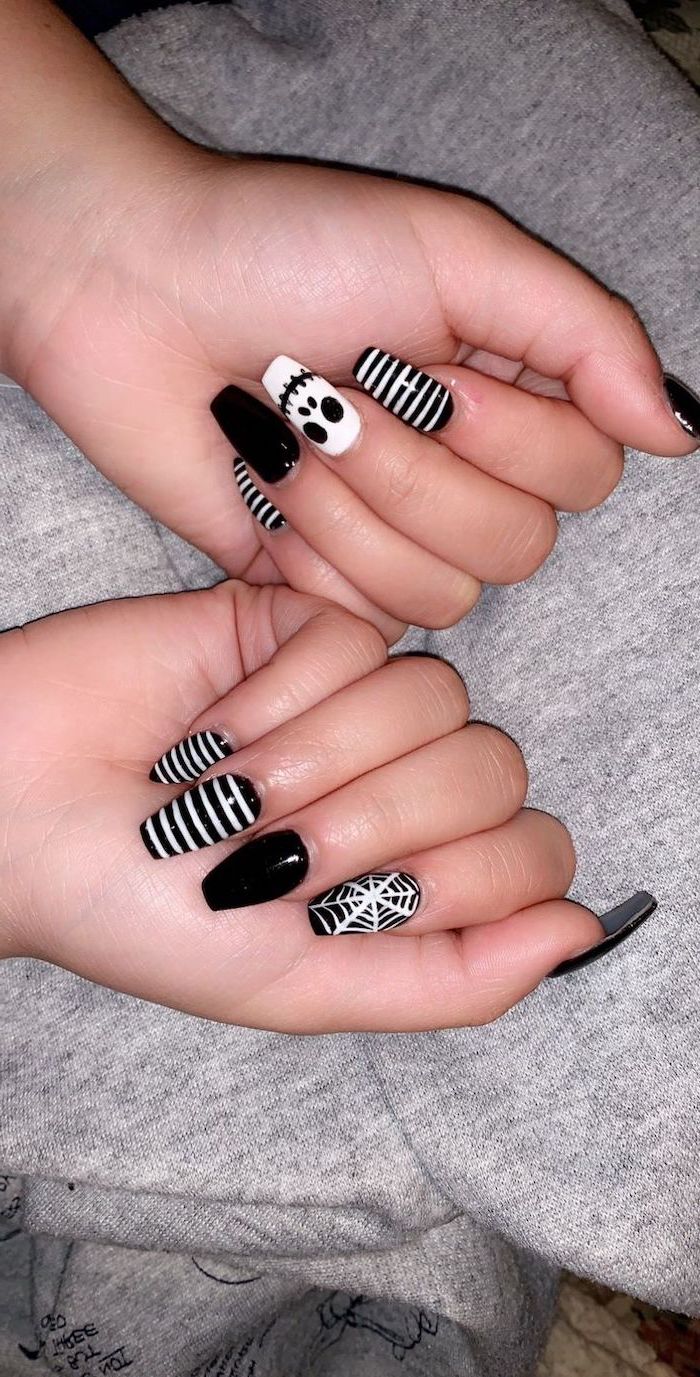
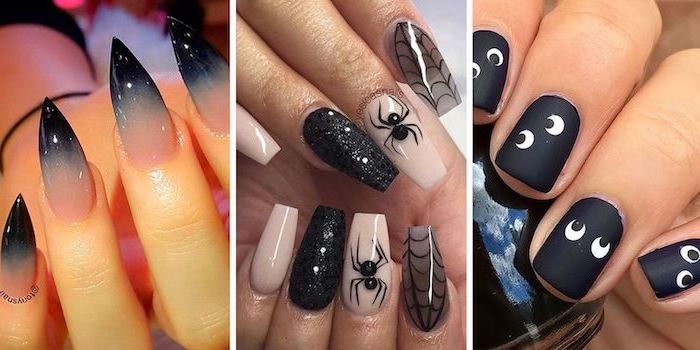
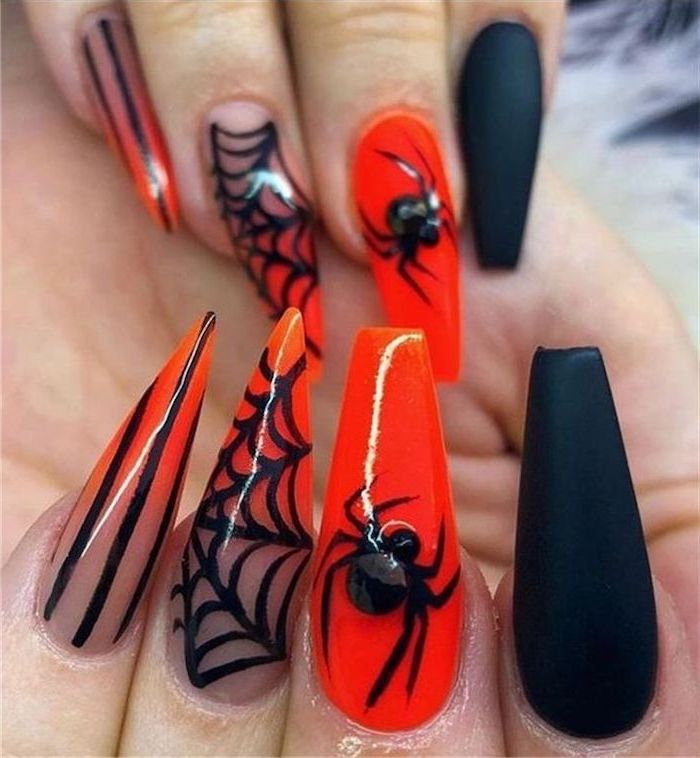
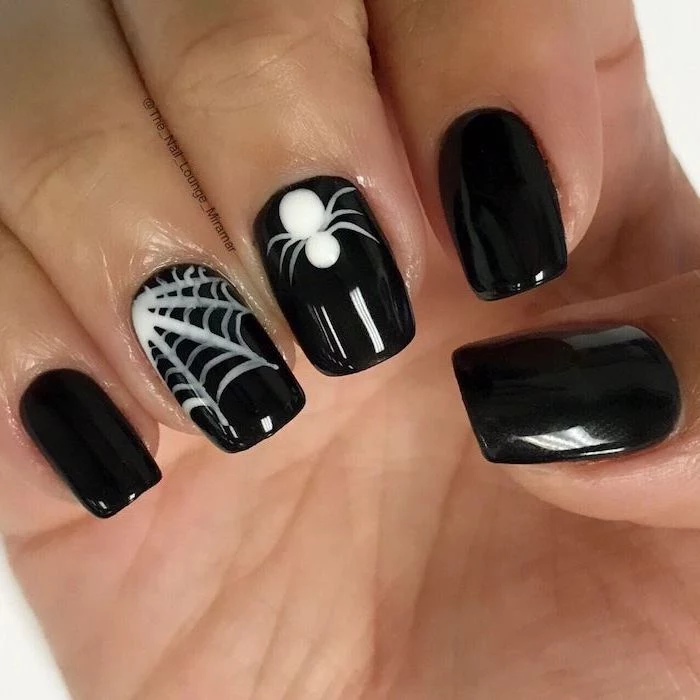
Delicate Spiderwebs
This is a true test of a steady hand. The goal is whisper-thin lines. You’ll need a highly pigmented black or white and, most importantly, a long, thin liner brush (look for sets on Amazon with a 10-15mm brush). The long bristles help you pull smooth, steady lines. First, paint the ‘spokes’ radiating from a point. Then, connect them with curved lines that look like little smiles. Use the lightest pressure possible—let the brush do the work. If you’re a beginner, plan on this taking about 10-15 minutes per nail. Don’t rush it!
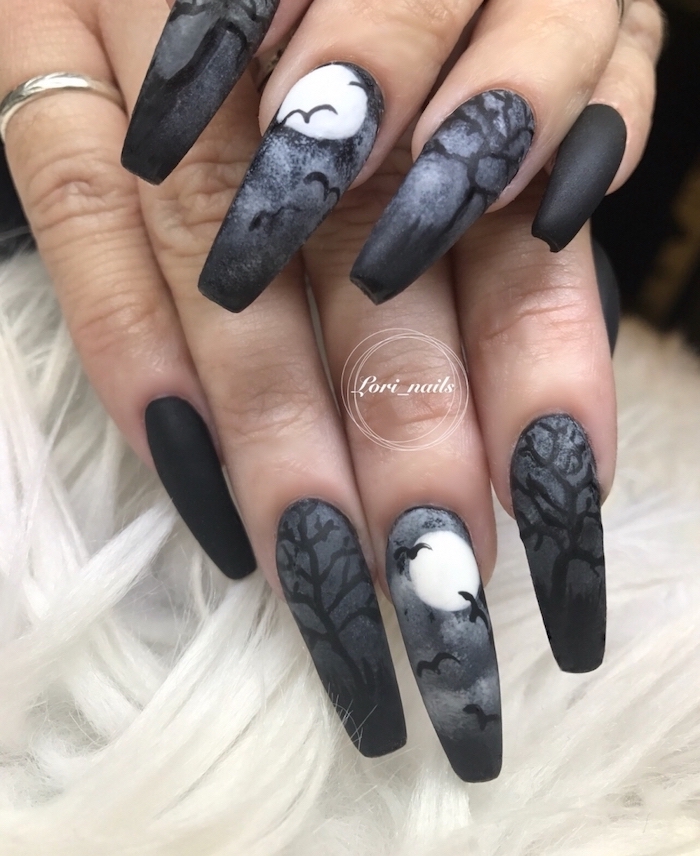
Ethereal Ghosts and Smoke
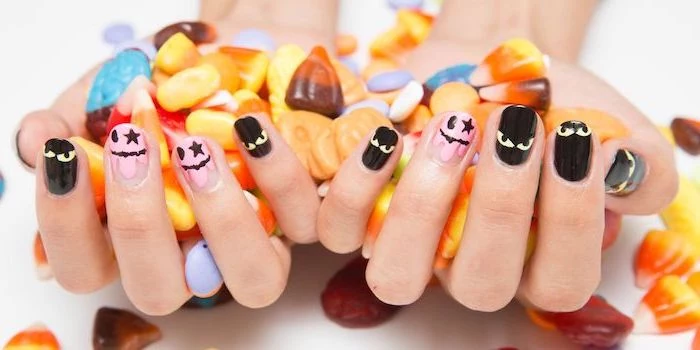
Want that spooky, transparent ghost effect? It’s all about layering. One of the coolest pro tricks for this is using “blooming gel,” which you can find from brands like Modelones or Makartt online. You apply your dark base color and cure it, then add a layer of blooming gel (don’t cure it!). Place a dot of white gel polish onto the wet blooming gel, and it will slowly spread out into a soft, cloudy shape. Once you like it, cure it to stop the spread. Then you can add little black dots for eyes. So cool!
Stylistic Palettes: Thinking Beyond Orange and Black
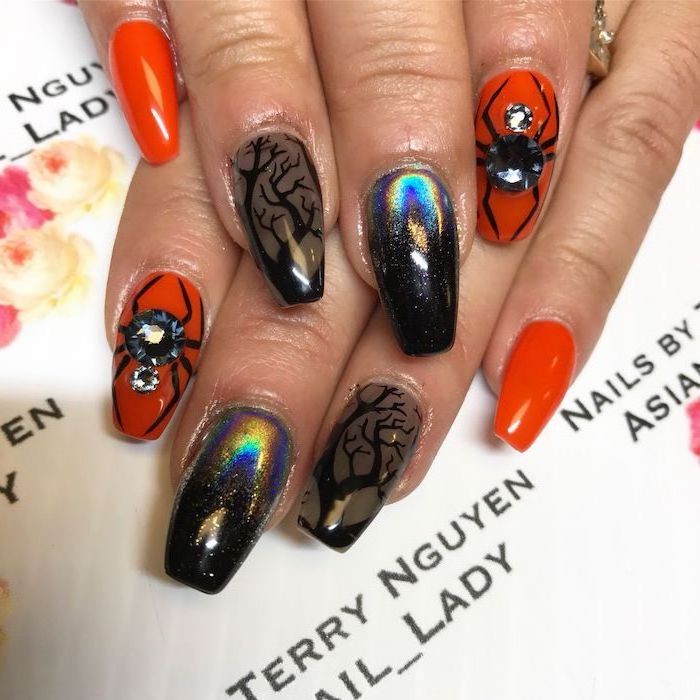
While orange and black are Halloween royalty, so many other vibes are popular now. The color palette you choose really sets the tone.
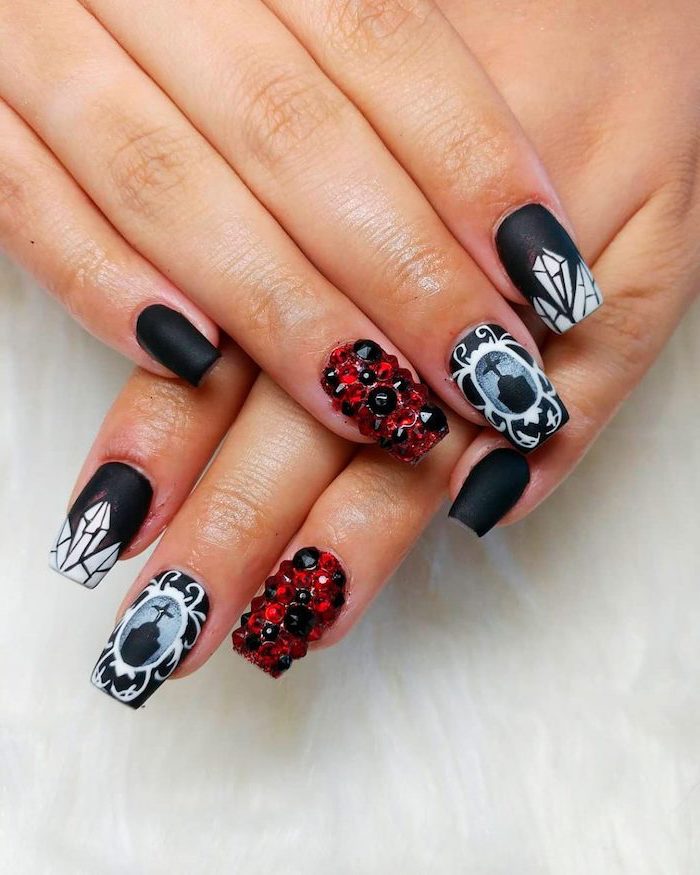
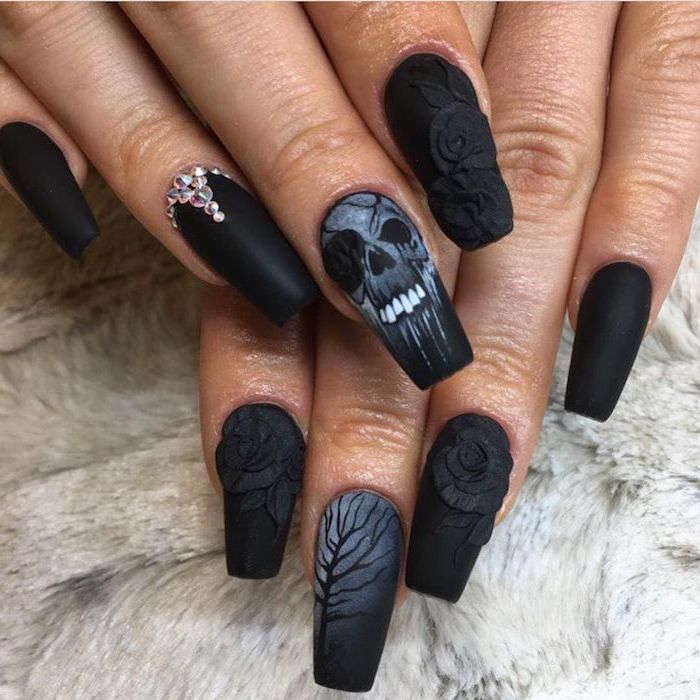
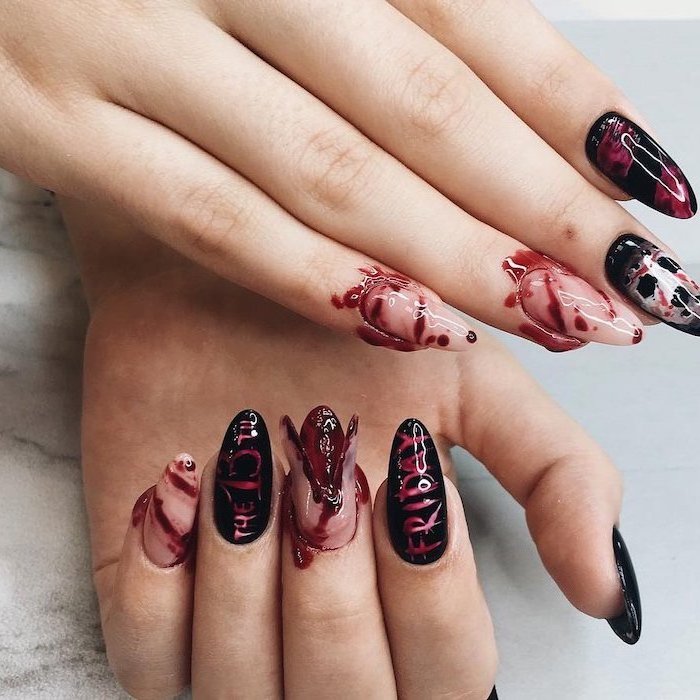
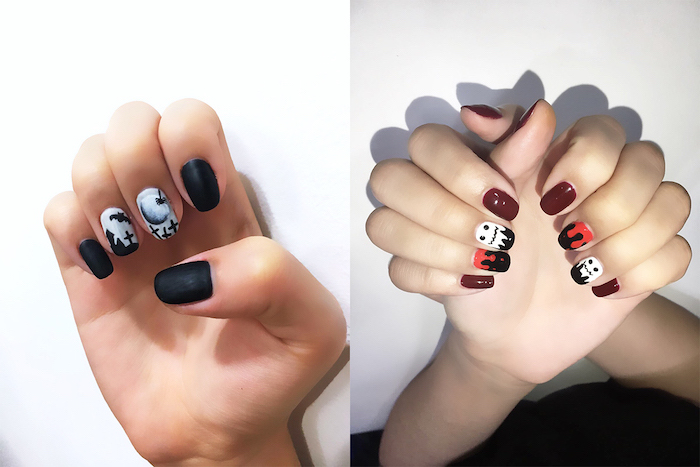
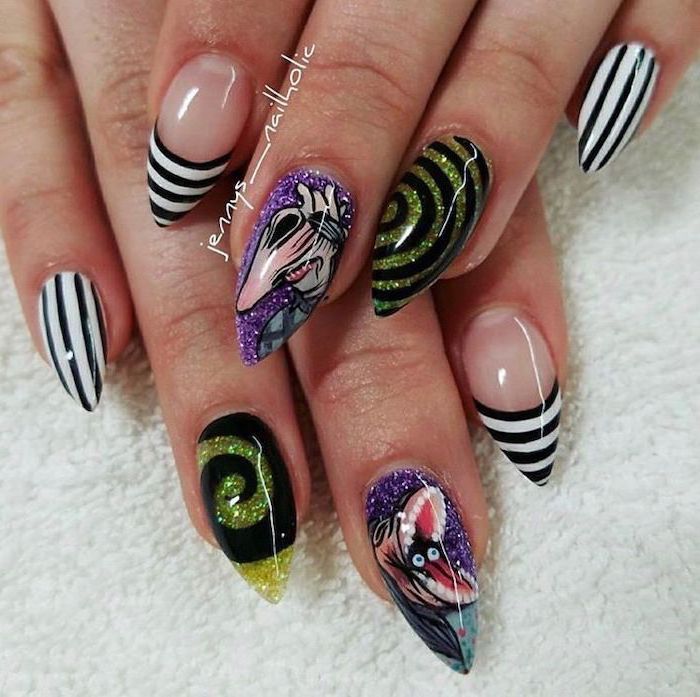
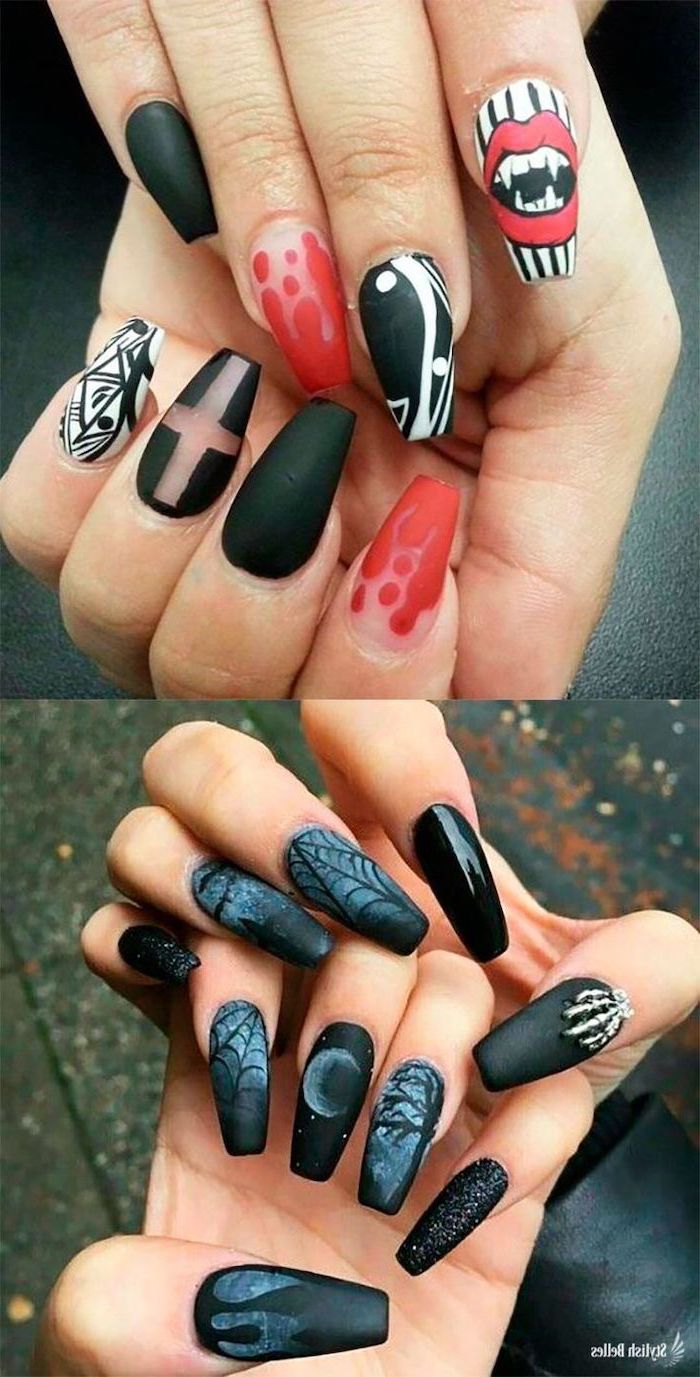
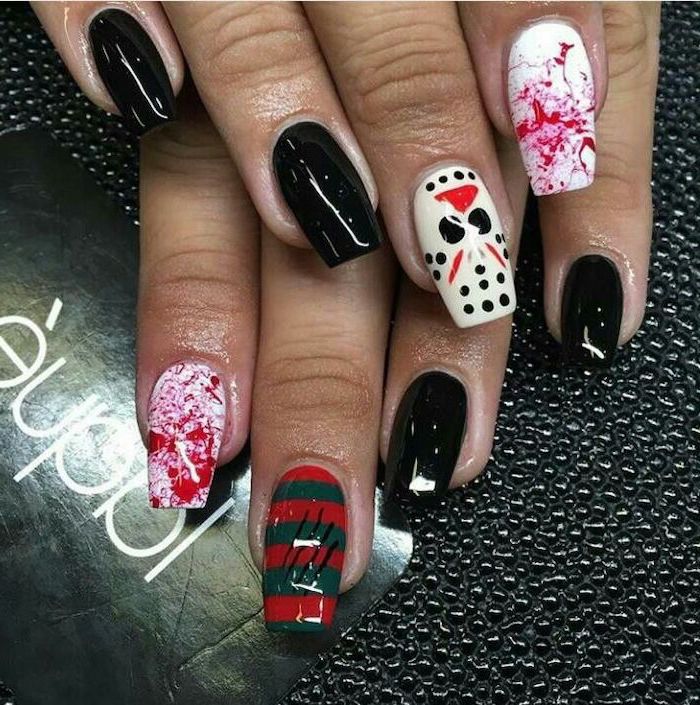
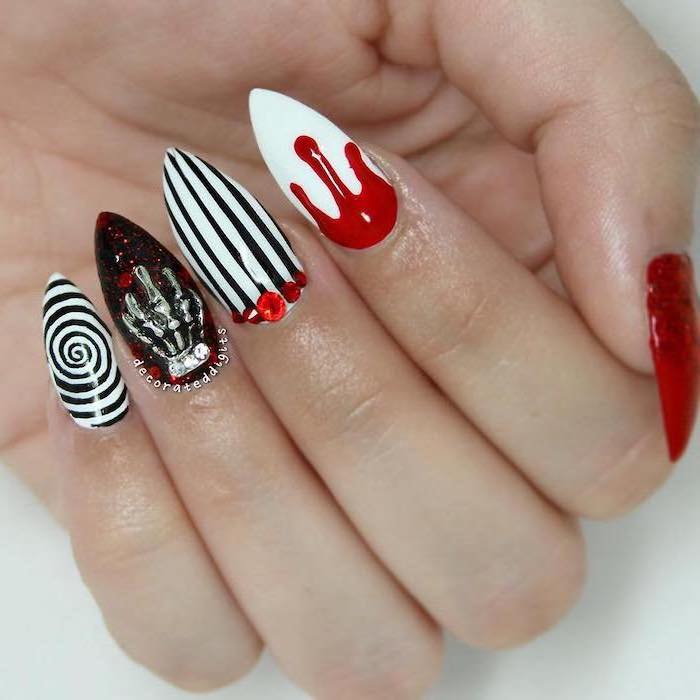
- Classic Gothic: Think deep blood reds, stark blacks, and ghostly whites. It’s dramatic and sharp. These designs almost always look best with a high-gloss top coat.
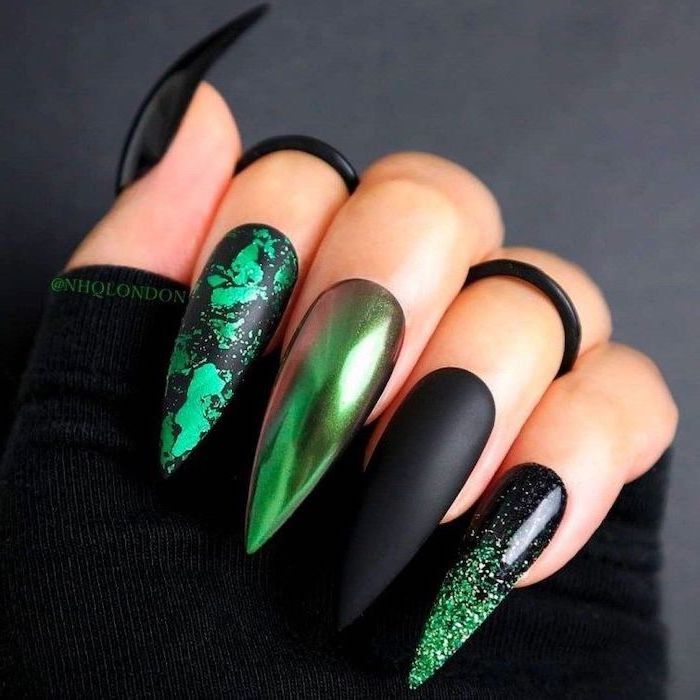
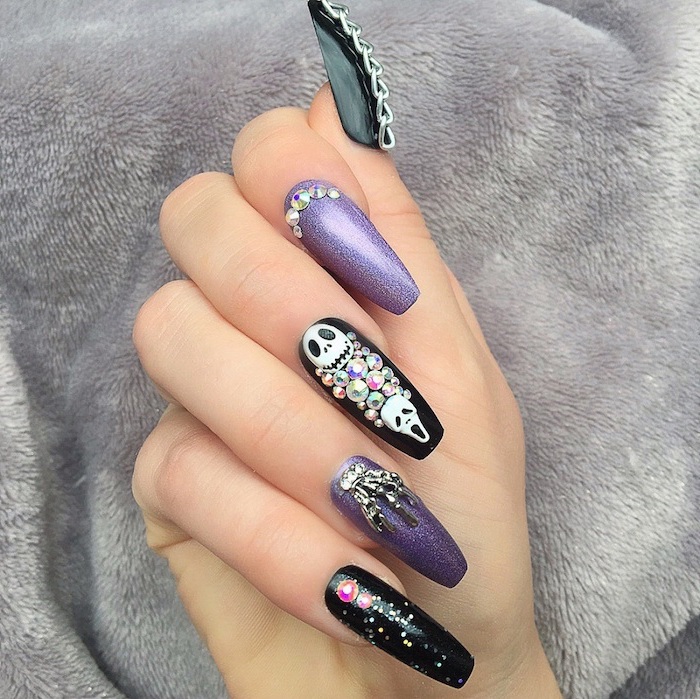
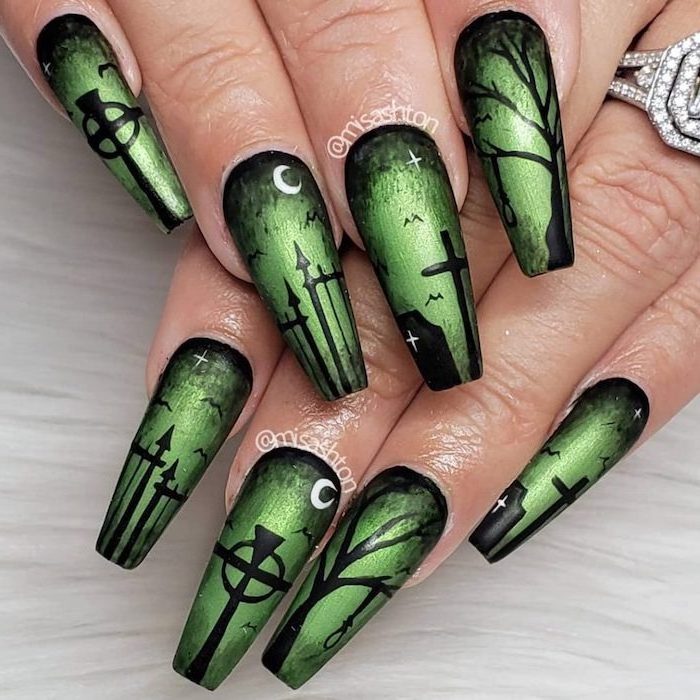
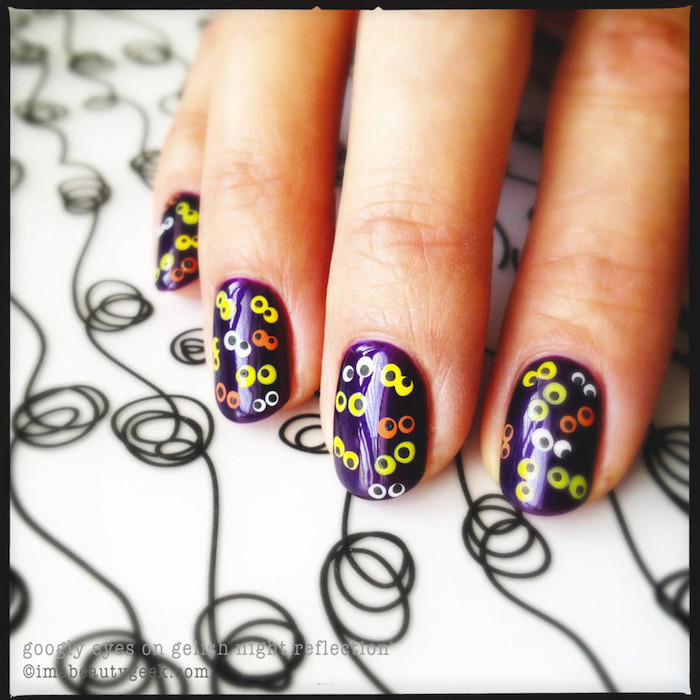
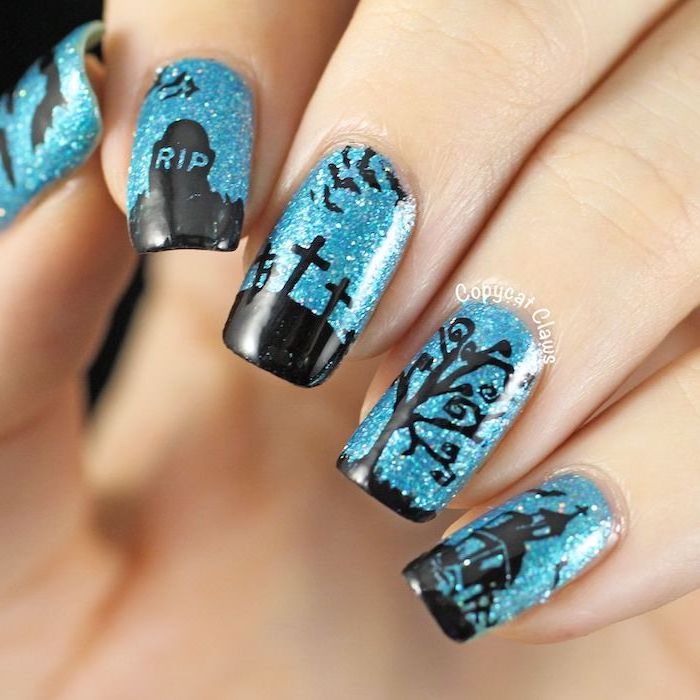
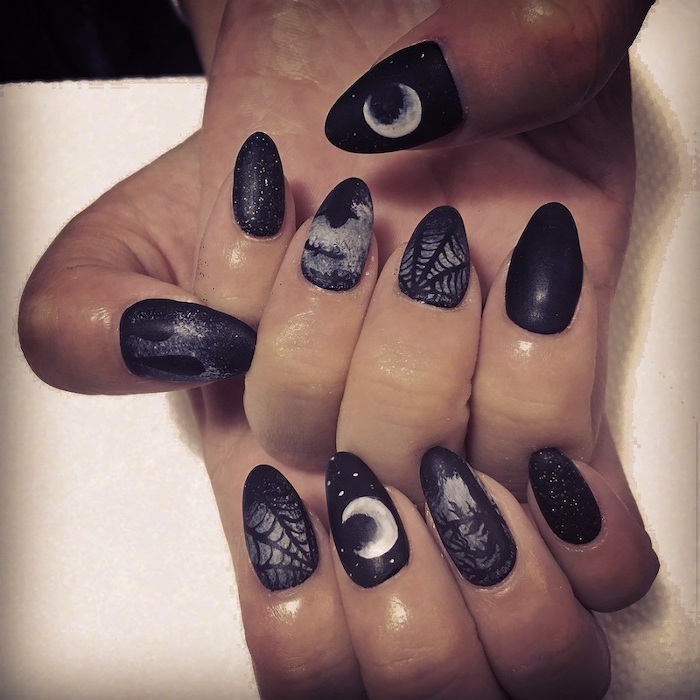
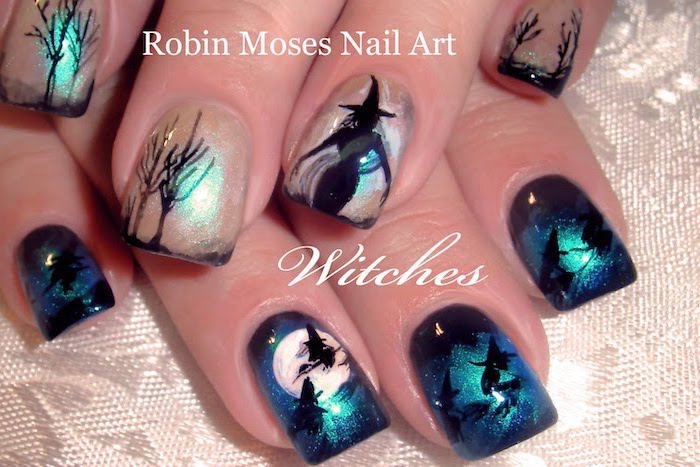
- Witchy & Mystical: This is less gore, more magic. We’re talking deep purples, forest greens, and midnight blues, often accented with metallic gold or silver for moons and stars.
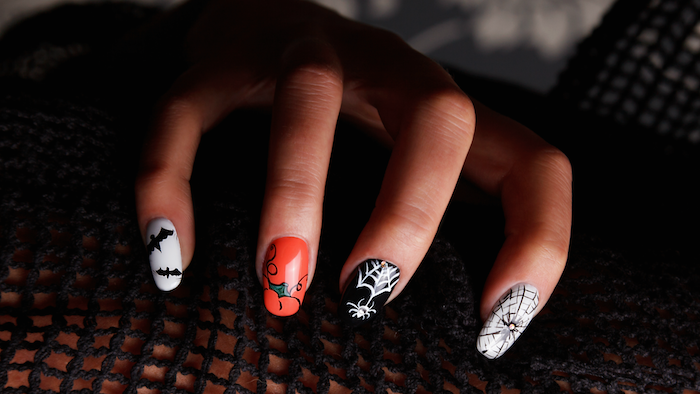
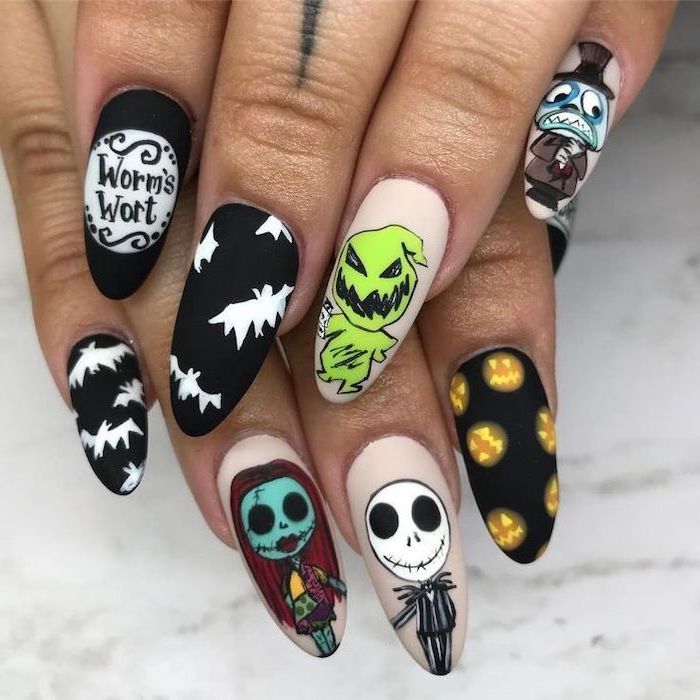
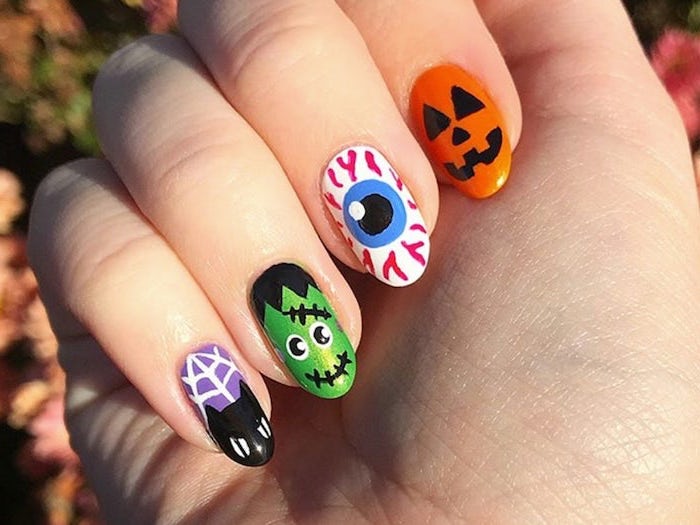
- Pastel Goth: This style uses soft lavenders, pastel pinks, and mint greens, but for spooky subjects like smiling ghosts or friendly bats. It’s the contrast that makes it so fun.
Quick win: In a rush? A matte top coat over any deep, vampy color instantly makes it feel spooky and on-theme. It’s a 60-second trick that looks incredibly chic and intentional.
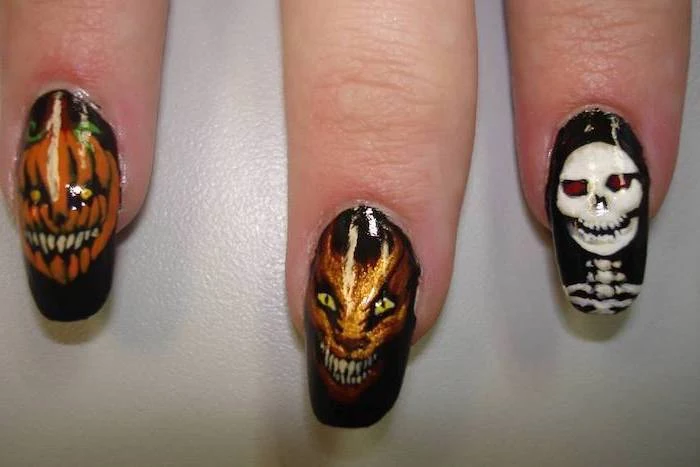
When to Call a Pro (and What to Expect on the Bill)
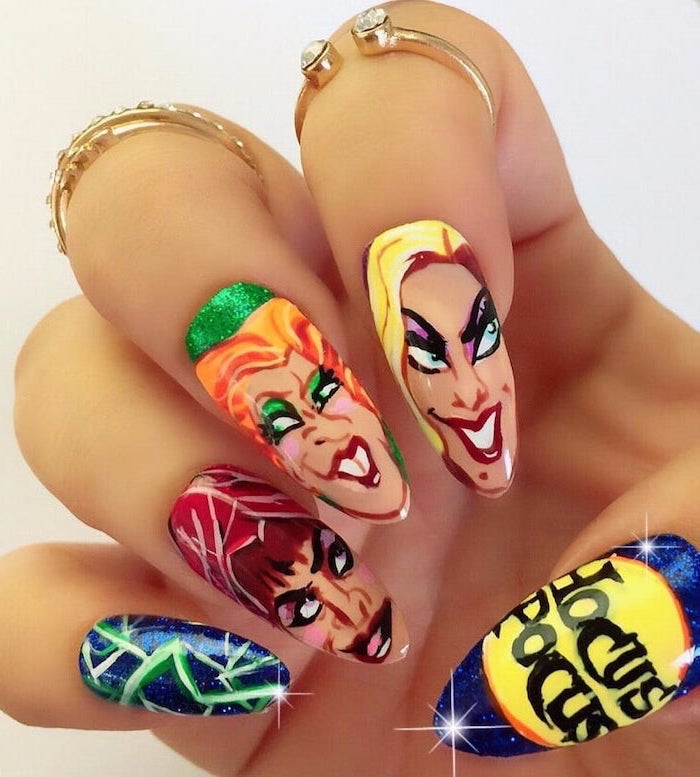
Some designs, like painting a perfect movie character or sculpting a 3D scar, are best left to a professional. And it’s good to know what you’re getting into, price-wise. A standard one-color gel manicure might run you between $35 and $50, depending on where you live. But when you start adding detailed art, the price goes up.
For example, adding a delicate spiderweb to each nail could bring the total to around $65 to $85. Want a full set of hand-painted characters? That’s a true luxury service that can take hours and easily run into the triple digits. You’re not just paying for polish; you’re paying for an artist’s time, skill, and expertise.
The Final Word: Aftercare and Safe Removal
You’ve got your amazing nails—now you have to live with them! To make them last, use cuticle oil daily, wear gloves when you do dishes, and please, don’t use your nails as tools to open cans or scrape things.
And now for the most important part: removal. Never, EVER peel or pry off your gel or acrylic nails. Honestly, the worst nail damage I’ve ever seen comes from this. I once had a new client come in with nails so thin and painful she could barely stand to have them touched. She’d peeled off a gel set at home, taking half her natural nail with it. We spent months nursing them back to health.
If you absolutely must remove gel at home, here’s how to do it with minimal damage (the foil-wrap method): 1. Break the Seal: Gently file off the shiny top coat with a regular nail file. 2. Soak a Cotton Ball: Saturate a small piece of a cotton ball in 100% acetone. 3. Place and Wrap: Put the soaked cotton on your nail and wrap your fingertip tightly in a small square of aluminum foil. 4. Wait it Out: Let it sit for about 15 minutes. No peeking! 5. Gently Scrape: Unwrap one finger. The gel should look lifted and easily flake off with a gentle push from an orangewood stick. If it doesn’t, re-wrap and wait another 5 minutes.
Whether you go for a simple DIY design or a full-blown masterpiece from a pro, Halloween is the absolute best time to have fun with your nails. It’s a little bit of spooky, a little bit of creative, and a whole lot of you.
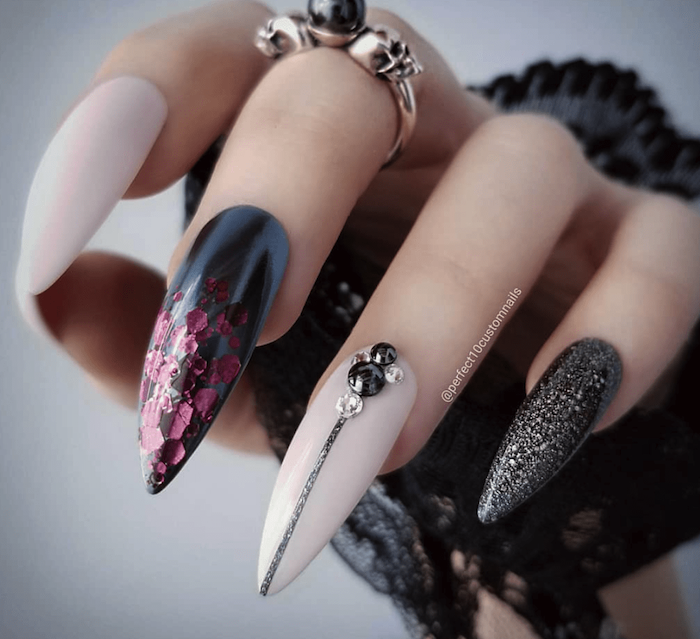
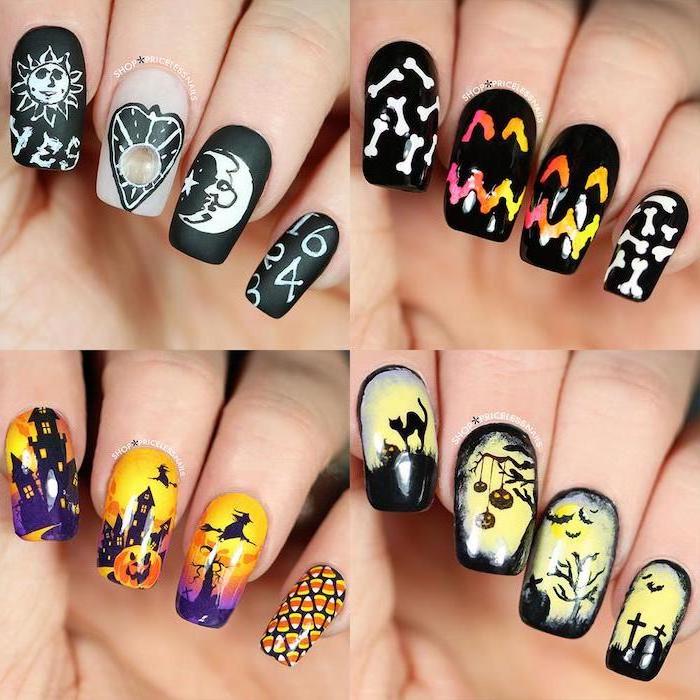
Inspiration Gallery
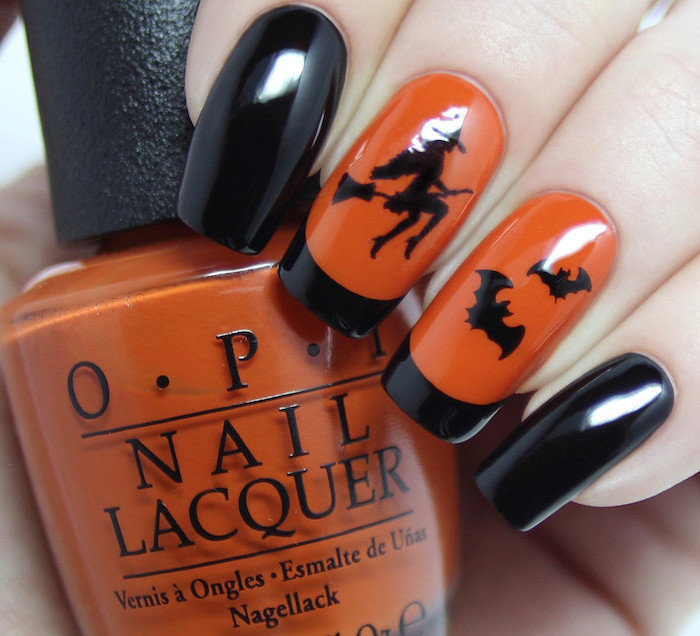
The secret to a salon-quality finish at home? Don’t skip the top coat. For intricate designs, a good one is non-negotiable. It smooths out tiny bumps from glitter or layered art, adds a professional-looking gloss (or matte effect), and most importantly, shields your masterpiece from the fatal chip. Seche Vite is a cult classic for its fast-drying, glassy finish, while OPI’s Matte Top Coat can instantly give any color a spooky, velvety look.
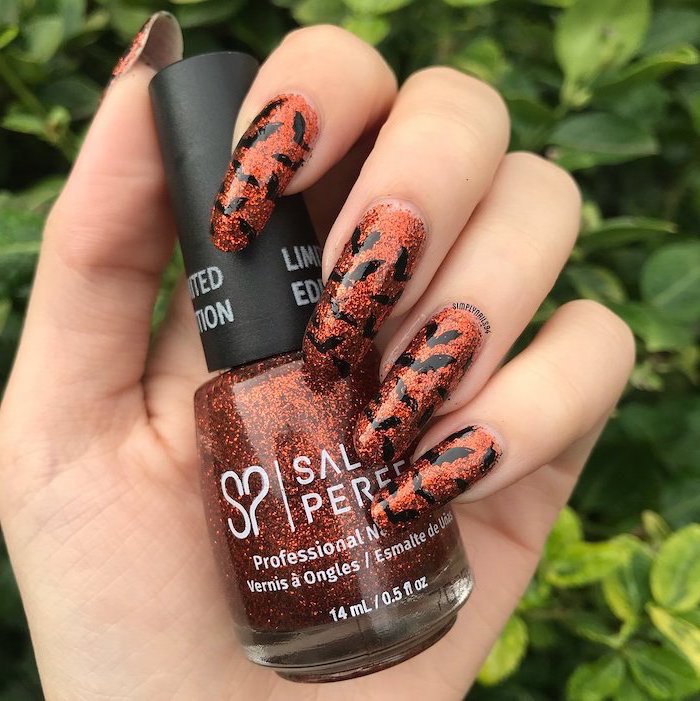
Over 35% of annual nail polish sales occur in the fall, with a significant spike in October driven by demand for black, orange, and deep red shades.
This boom isn’t just about color; it’s about creativity. Brands now release entire Halloween collections with unique finishes—think crackle effects, holographic glitters, and glow-in-the-dark top coats—to meet the demand for truly standout nail art during the spooky season.
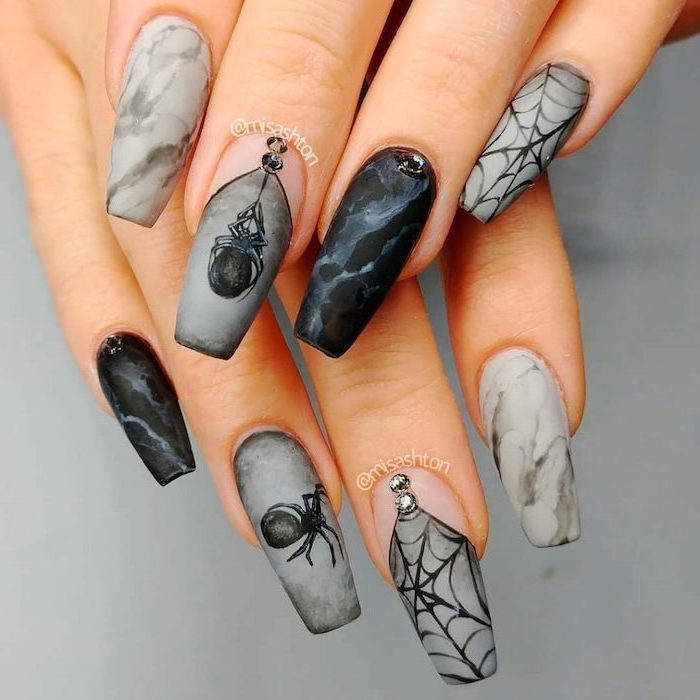
Want those ultra-fine, spidery lines for a perfect web?
Forget the clumsy brush that comes with the polish. Your best friends are detailer brushes, often sold in affordable sets online or at art supply stores. Look for a ‘000’ or ‘script’ liner brush for the longest, thinnest strokes. For perfect dots—like spider bodies or eyes—a simple dotting tool is invaluable. In a pinch, a toothpick or the head of a pin works surprisingly well!
Matte Top Coat: Creates a flat, velvety, non-reflective finish. Perfect for making colors look deeper and designs like ghosts or spiderwebs appear more graphic and stark.
Glossy Top Coat: The classic high-shine finish. It makes glitter and metallic polishes pop and is essential for encapsulating 3D charms or creating a wet ‘blood drip’ look.
For a truly professional effect, try mixing textures on one hand—a matte black nail next to a glossy, blood-red accent nail.
Thinking beyond the classic orange and black? Halloween is the perfect time for moody, dramatic color pairings.
- Plum and Silver: A sophisticated, witchy combination. Think deep purple with silver chrome accents or glitter.
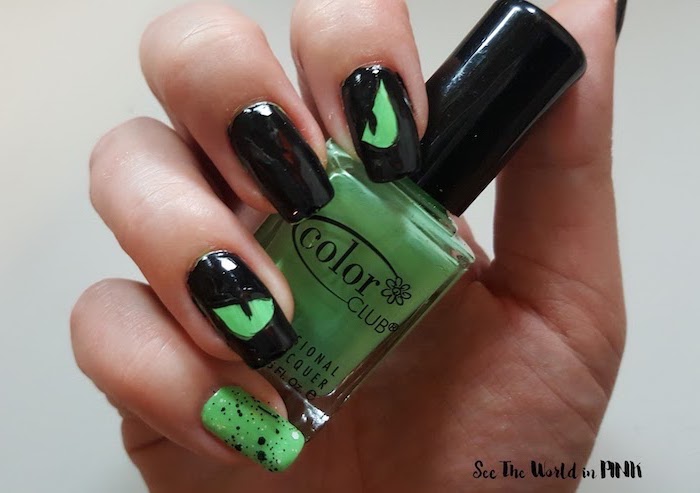
- Forest Green and Bone White: Evokes a creepy, graveyard-at-midnight feeling. Ideal for zombie or Frankenstein-inspired designs.
- Blood Red and Nude: Creates a striking negative space design, making drips and splatters look like they’re on bare skin.
Don’t stain your natural nails! A base coat is non-negotiable when using highly pigmented polishes like black, deep red, or dark green. Without it, the pigments can leech into the top layers of your nail plate, leaving a stubborn yellow or grey tinge that can take weeks to grow out. Orly’s
- Perfectly crisp, repeating patterns.
- Intricate details impossible to do by hand.
- Amazingly fast application for a full set.
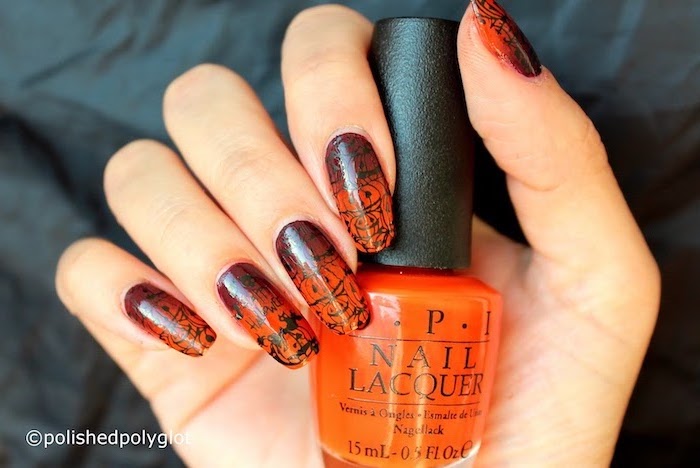
The secret? Nail stamping. With a stamping plate (brands like Maniology and Moyou London are leaders), a stamper, and a scraper, you can transfer complex designs like lace, skulls, or bats onto your nail in seconds. It’s the ultimate shortcut to professional-looking Halloween art.
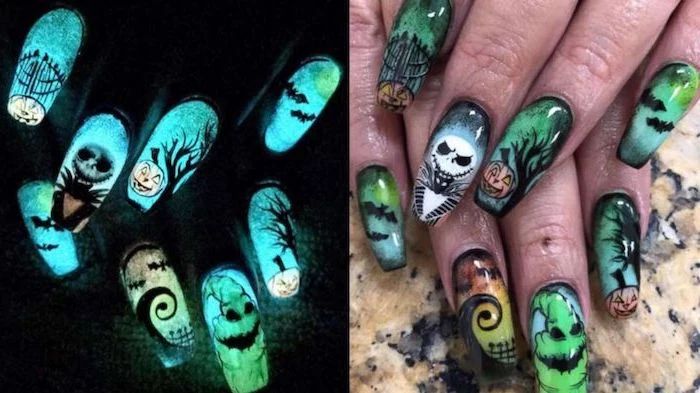
Why aren’t my glow-in-the-dark nails glowing?
Most glow-in-the-dark polishes need to be ‘charged’ by a light source. For the most intense effect, hold your finished manicure under a bright lamp or a UV flashlight for a minute or two right before you head out. Applying the glow polish over a white or light-colored base will also make the effect much brighter than applying it over black.
The ‘sugar spun’ technique is perfect for creating 3D, stringy spiderwebs. You’ll need a special, gooey nail art gel (often called spider gel). After curing your base color, dip a thin tool into the gel and pull it away, stretching the gel into a thin strand. Drape these strands across your nail to build a web-like texture before applying your top coat and curing one final time. It’s messy but the effect is incredibly realistic!

- Nail Glue: Stronger bond for heavier charms (like metal skulls or large rhinestones). Apply a tiny dot to the nail, press the charm on, and hold. Best for acrylics or gel.
- Thick Gel Topcoat: A better option for regular polish. Place the charm on your wet topcoat, then ‘flash cure’ it with a small LED light before doing a full cure. This ‘anchors’ it in place.

Press-On Nails: Perfect for a single night. You can find incredibly elaborate, pre-made Halloween designs. Application is fast, and removal with warm, soapy water is damage-free. Ideal for those who can’t wear wild nails to work.
Salon Gel Manicure: A two-to-three-week commitment. The design will be custom, durable, and perfectly applied. It will survive parties, costume changes, and daily life, but requires a professional soak-off for safe removal.
Choose press-ons for a stunning one-night look, and gel for a durable design that lasts through the whole spooky season.
Warning: Never use craft glitter for nail art.
Craft glitter is often made of metal and cut into sharp, hexagonal shapes. If it gets in your eye, it can cause serious scratches to your cornea. Always use cosmetic-grade glitter, which is made from plastic and cut into rounded shapes, making it safe for use on the body and nails.
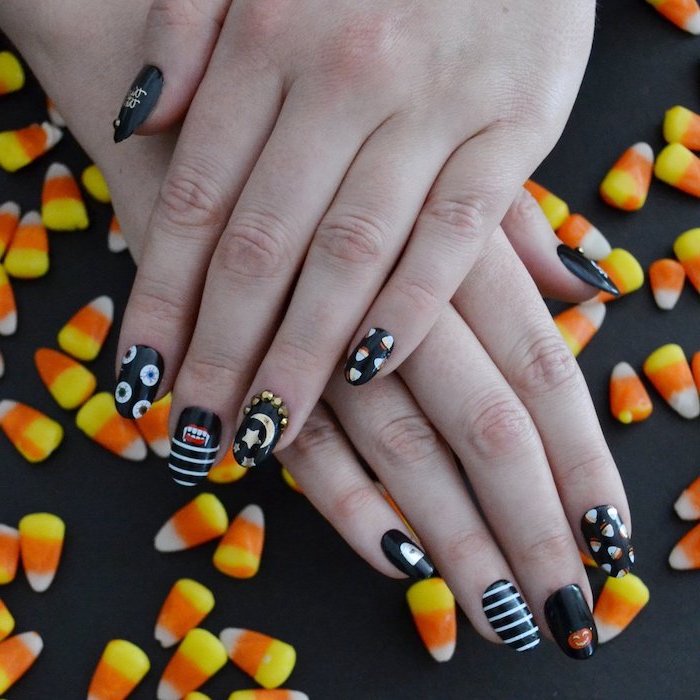
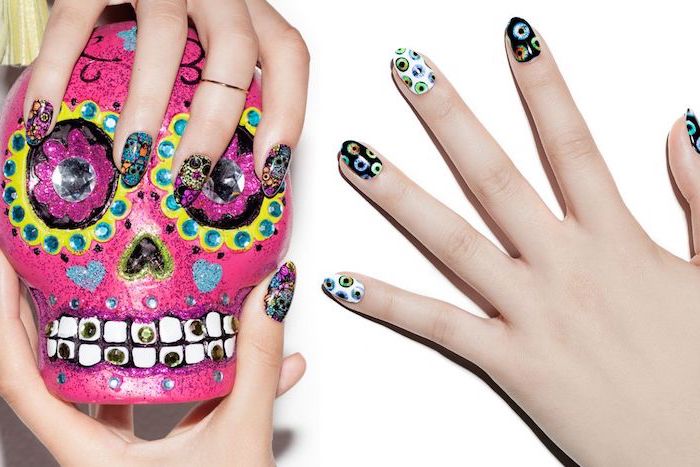
Love the textured look of a ‘sugar skull’ nail? You don’t need fancy tools. Simply paint your nail white. Then, using the tip of a toothpick dipped in black polish, create the eye sockets and nose. For the intricate dots and floral patterns, use the heads of different-sized pins dipped in brightly colored polish. The variety in pinhead sizes will give you all the dot sizes you need for a beautiful, detailed design.
Give your nails a post-Halloween detox. After a week of heavy polish and potentially dehydrating acetone removal, your nails and cuticles need some TLC.
- Gently buff the nails to smooth any remaining residue.
- Massage a rich cuticle oil, like CND SolarOil, into the nail beds and surrounding skin twice a day.
- Apply a strengthening treatment, like OPI Nail Envy, for a few days to help them recover their resilience.
The ‘negative space’ trend is perfect for a modern, chic Halloween look. Instead of painting the entire nail, let some of your natural nail show through. Try painting just the tip of the nail with a black ‘drip’ design, or create a ‘floating’ ghost in the middle of a clear-coated nail. It’s minimalist, sophisticated, and surprisingly easy to do.

The secret to easy glitter removal: the PVA glue base coat method. Before any polish, apply a thin layer of regular white school glue (like Elmer’s) to your nail and let it dry completely clear. Then, apply your glitter polish on top as usual. When you’re ready to remove it, you can simply peel the entire layer of polish off in one go, no scrubbing required!
The ‘blood splatter’ effect seen in many tutorials uses a simple, clever trick: a coffee stirrer straw. Dip the end of the straw into red polish, aim it at your nail (over a protected surface!), and blow a short, sharp puff of air through the other end.

My chrome powder isn’t looking like a mirror! What’s wrong?
The key to a true chrome finish is a no-wipe gel top coat. After curing your base color, apply the no-wipe top coat and cure it. While it’s still warm from the lamp, use a small silicone tool or a sponge eyeshadow applicator to firmly rub the chrome powder onto the nail surface. The powder will only adhere properly to the ultra-smooth, non-tacky surface of a no-wipe top coat.

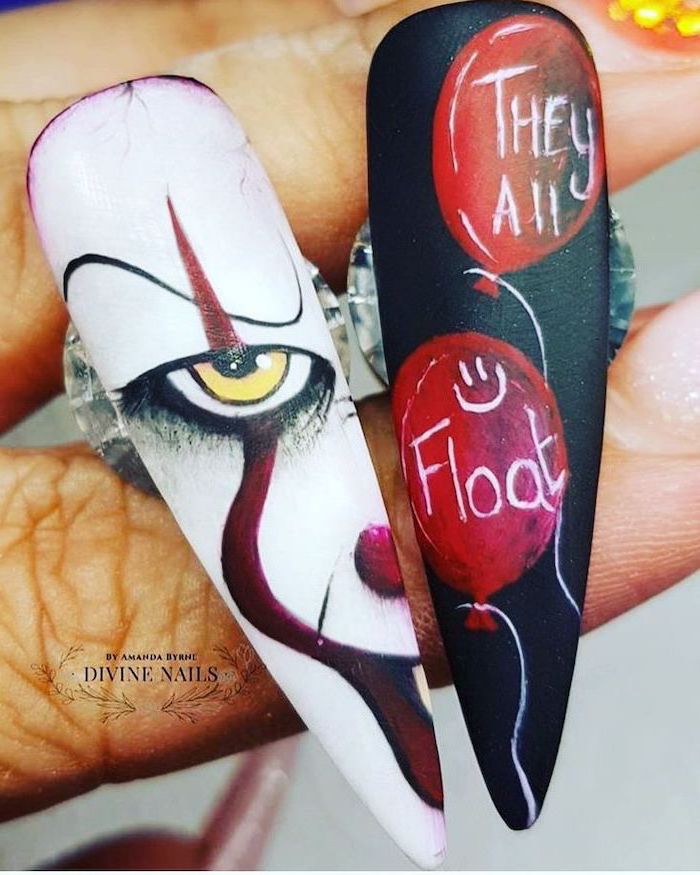
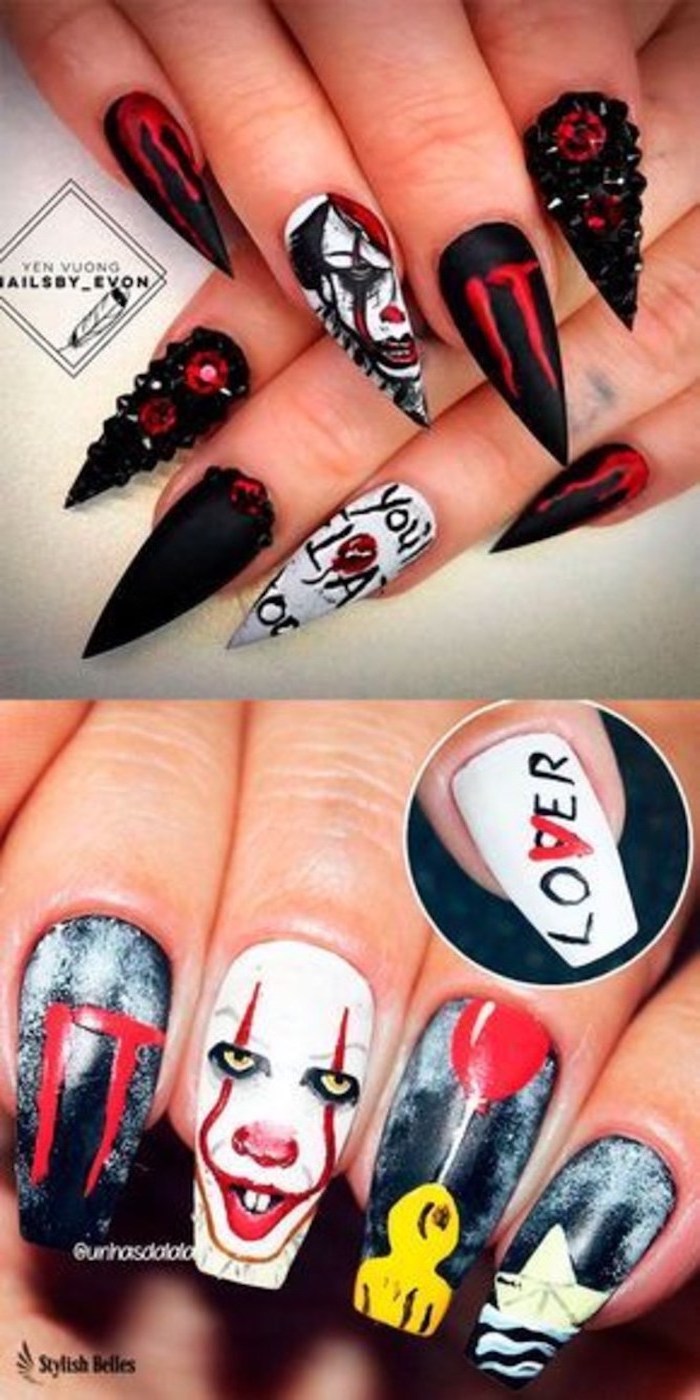
Channel classic horror cinema for a unique manicure. Think beyond simple ghosts. A black-and-white design with sharp, angular lines can evoke German Expressionist films like The Cabinet of Dr. Caligari. The iconic, patterned carpet from The Shining makes for a surprisingly creepy and geometric nail art design. Or try a single, unnerving red balloon on a pale gray background for a nod to Stephen King’s IT.

3D Sculpting Gel: For creating raised elements like bones, horns, or textured scars. This thick, putty-like gel (often sold in pots) can be molded with a small brush and alcohol before curing under a lamp. It’s for advanced users but offers unparalleled texture.
Blooming Gel: For watercolor or smoky effects. Apply a coat of blooming gel over your base color (don’t cure it!), then add drops of another color. The blooming gel will make the color spread out in a soft, ethereal pattern. Perfect for creating ghosts or a mysterious fog effect.

- Durable and won’t chip.
- Protects intricate hand-painted art.
- Creates an ultra-smooth, professional surface.
The trick? A gel ‘overlay’. Even if you’re using regular polish for your Halloween colors and art, you can ask a nail tech to apply a clear gel base and top coat over your natural nails. You can then do your art at home on top of the gel base, and even seal it with a regular top coat. You get the strength of gel with the flexibility of changing your design.
Take your spooky look to the next level by coordinating your nails with your costume. If you’re going as a vampire, a sharp stiletto nail with a deep red ‘ombré’ fade to a black tip is a must. Dressing as a mermaid skeleton? Try an iridescent chrome base with hand-painted black bones on top. The details sell the entire look.
Indie brands like Holo Taco, Cirque Colors, and Mooncat have become Halloween go-to’s because they specialize in unique finishes that mainstream brands often don’t produce, such as intense linear holos, reflective glitters, and thermal polishes that change color with temperature.

One of the most common mistakes: applying polish too thickly. It feels like a shortcut, but thick coats take forever to dry, are more prone to smudging, and can bubble as solvents try to escape. The professional method is to apply two to three very thin coats, allowing each one to dry for a few minutes in between. This builds up opaque color that is stronger and dries faster overall.