Forget the Costume Bag: How to Build Something You’re Actually Proud Of
I’ve spent a good part of my life in workshops, and if I had to describe the smell, it’d be a mix of curing latex, hot EVA foam, and very, very strong coffee. My hands have been stained just about every color you can imagine. Over the years, I’ve built everything from giant monster suits for haunted houses to finely detailed gear for historical enthusiasts. And you know what? I’ve seen a fantastic shift in that time.
In this article
More and more people are ditching those flimsy, disposable costumes that come in a plastic bag. They want to create something with some real presence, something that tells a story the second they walk into a room. And that, my friends, is the real magic of making something with your own two hands.
This isn’t about just picking a character. It’s about understanding the craft behind them and building something that feels real, even if it’s completely out of this world. Whether you’ve got a month or just a weekend, the core ideas are the same. So let’s walk through the process that the pros use, and I’ll show you how to build a costume you’ll be proud of long after the candy is gone.

First Things First: Nail Down Your Concept
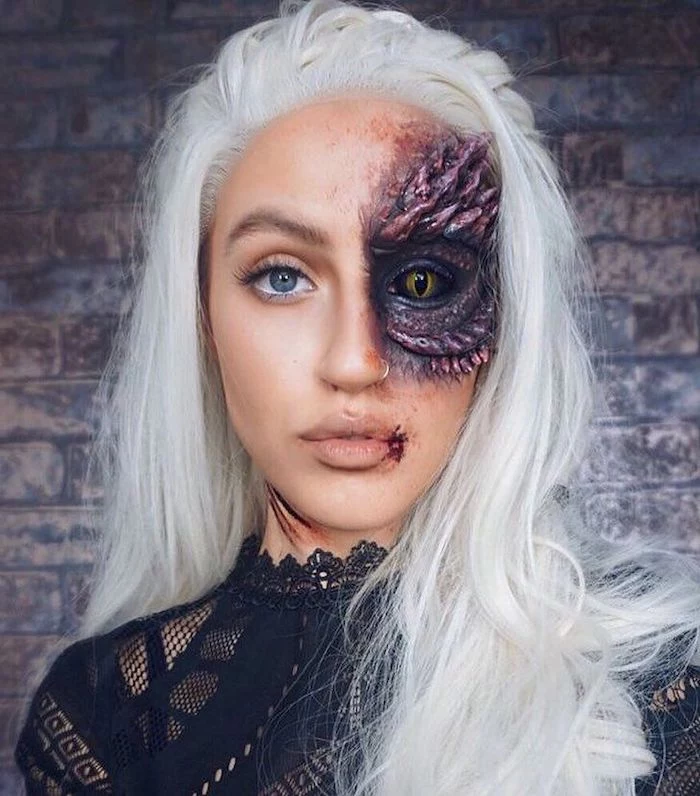
Before you touch a single piece of fabric or foam, you need a rock-solid idea. It’s so much deeper than just, “I want to be a vampire.” What kind of vampire are we talking about here? Is it a noble, ancient creature living in a gothic castle? Or is it a feral, monstrous beast that just crawled out of the deep woods?
The first might be draped in rich velvets and carry themselves with a regal air. The second? Probably clad in tattered leathers, moving with a hunched, animal-like energy. See? The details tell the story.
The first question I always ask is, “What do you want people to feel when they see you?” Intimidated? Amused? Awed? The answer to that question guides everything else. You’re mainly playing with three things: silhouette, color, and texture. A character with broad, sharp shoulders has an intimidating silhouette. On the flip side, soft, rounded shapes and flowing fabrics feel gentle and ethereal. Color is just as key. Deep reds and blacks can scream passion or danger, while earthy greens and browns feel more grounded and natural.
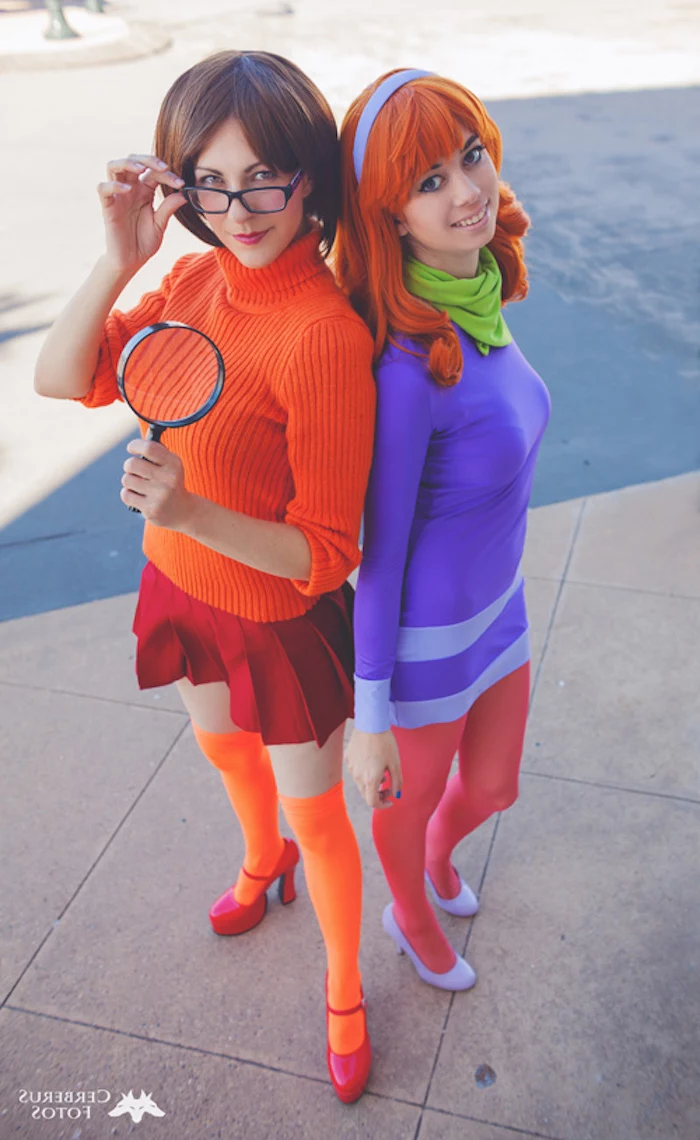
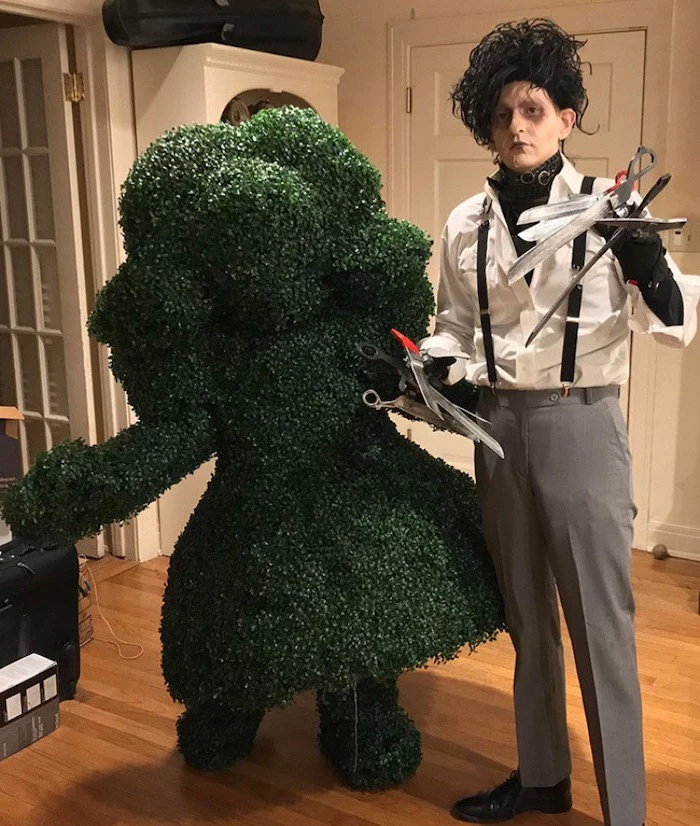
A little pro-tip: try to sidestep whatever the big blockbuster trend is for the year. If a huge sci-fi movie just dropped, you can bet the party will be flooded with licensed costumes. Instead, look to classic literature, folklore, or even abstract concepts for inspiration. I once helped someone create a costume based on the idea of a “drought.” We used makeup to create a cracked-earth texture on their skin, used fabrics in dusty yellows and browns, and added accessories made from dried, brittle branches. It was totally unique but instantly recognizable. That’s a strong concept.
Choosing Your Materials (This is Where the Magic Happens)
Your choice of materials is probably the biggest factor in whether your costume looks amazing or… not so amazing. This is where so many projects go wrong. The wrong stuff can look cheap, fall apart halfway through the night, or just be horribly uncomfortable.
Let’s Talk Fabric
Walking into a fabric store can be overwhelming. My advice? Walk right past the aisle with that shiny, paper-thin “costume satin.” It frays if you look at it wrong, wrinkles like crazy, and just looks like plastic under most lights. Instead, look for fabrics with some decent weight and texture. For a heroic cape, think about velveteen or a bottom-weight twill. For rugged gear, canvas, denim, or good-quality faux leather are your best friends.
Oh, and thrift stores are an absolute goldmine. An old leather jacket or a heavy wool coat, which you can get for maybe $15-$20, can be taken apart and repurposed into incredible armor pieces or accessories.
Distressing is how you give brand-new fabric a soul. You can take a bit of fine-grit sandpaper to the edges and seams to create realistic wear. Soaking fabric in a bath of strong black tea or coffee will give it a fantastic, aged look. For a grimy, lived-in feel, I use a “wash”—which is just watered-down acrylic paint. A good ratio to start with is about one part black or brown paint to five parts water. You want it to be thin, like dirty water. Just brush it on and wipe most of it off, letting the color settle into the creases.
EVA Foam: Your New Best Friend for Armor
For armor and props, nothing beats EVA foam. It’s the same stuff used in those puzzle-piece floor mats, and it’s a game-changer. You can find it at places like Harbor Freight, where a pack of six large mats will run you about $25 and is often enough for a full torso and shoulder armor. For more variety in thickness, online shops like TNT Cosplay Supply are fantastic.
You’ll want thicker foam (8mm-10mm) for big, rigid plates like a chest piece, and thinner foam (2mm-4mm) for detailed or flexible areas. The best part? It’s super lightweight, so you can wear a full suit of armor without collapsing from exhaustion. You cut it with a utility knife and shape it with a heat gun.
Heads up on adhesives, because this is critical. A lot of beginners reach for hot glue. While it’s fine for small details, it creates bulky, weak seams that can pop open when you move. The professional standard is contact cement. I personally lean on brands like Barge. You paint a thin layer on both edges, let it dry for about 10 minutes until it’s just tacky, and then press them together. The bond is instant and incredibly strong.
But seriously, let’s talk about safety. I can’t stress this enough: work with contact cement in a very well-ventilated area. I mean outdoors, or in a garage with the door wide open. You need a respirator mask with organic vapor cartridges, not just a simple dust mask. Trust me, I’ve seen people try to do this in a bathroom with the fan on. Don’t be that person. Your brain cells will thank you later. I learned the hard way that if you press the pieces together when the cement is still wet, you get a gooey, weak mess you have to peel apart and start over. Let it get tacky!
Putting It All Together Like a Pro
Okay, you’ve got your concept and your materials. Now it’s time to build. Patience is your best friend here. Rushing will always show in the final product.
A Beginner’s First Project: The Foam Bracer
Feeling intimidated? Let’s start small. A foam bracer (or forearm guard) is the perfect first project. It teaches you all the basic skills in a single afternoon.
1. Make a Pattern: Wrap your forearm in plastic wrap, then cover it with painter’s tape. Draw the shape of your bracer right on the tape. Carefully cut it off, and you’ve got a perfect custom pattern.
2. Cut the Foam: Trace your pattern onto a piece of 6mm or 8mm EVA foam and cut it out with a sharp utility knife. Always use a fresh blade for clean edges!
3. Heat Shape: Use a heat gun to gently warm the foam. Hold the gun about 6 inches away and keep it moving. You’ll see the surface get a slight sheen—that’s the sign it’s ready. Now you can bend it into a curve that fits your arm. Hold it for a minute until it cools.

4. Seal and Prime: The heat already sealed the foam’s pores. Now, hit it with a few light coats of a flexible primer. Plasti Dip spray, which costs about $8 a can, is the go-to for this.
5. Paint and Finish: Once the primer is dry, you can paint it with regular acrylics! A base coat of metallic silver, followed by a black wash to bring out the details, looks amazing.
This whole process should only take a few hours and maybe $50 in startup supplies (foam, glue, a knife), but the skills you learn are the foundation for everything else.
Getting Serious with Construction
For more complex pieces, that tape-patterning method is your secret weapon. It ensures every piece is contoured perfectly to your body.
When it comes to sewing, don’t panic if you’re not an expert. A simple straight stitch can handle most things. And before you cut into that beautiful, expensive fabric, do a mockup first! Use some cheap muslin or even an old bedsheet to test your pattern and make sure everything fits. It’s an extra step that can save you a world of heartache and money.

Finishing Touches: Makeup and Effects
Your costume doesn’t stop at your neck! Your face and hands are part of the illusion, but this is where you need to be the most careful.
Safety First, Always.
This part is non-negotiable. NEVER, EVER use craft store acrylic paint on your skin. I cannot say this enough. It contains chemicals not meant for skin and can cause terrible rashes or even chemical burns. I once had to help an actor at a haunt who’d used spray paint on his arms; he ended up with painful blisters that took weeks to heal. It’s not worth it. Stick to cosmetic-grade makeup from trusted brands like Mehron or Ben Nye. A starter palette might cost you $20-$30, but it’s safe and designed for this exact purpose.
The same rule applies to glues. Don’t use super glue on your skin. Use medical-grade adhesives like Pros-Aide or Spirit Gum, and—just as important—get the specific remover that goes with them. Trying to peel off a prosthetic stuck on with Pros-Aide without remover can literally tear your skin.

Wearing it in the Real World
A costume that looks great on a mannequin can be a total nightmare to wear to a party. Think about the practical stuff.
Can you sit down? Can you fit through a doorway? I learned that one the hard way after building a massive demon suit with wings that couldn’t clear the entrance to the event hall. Vision is also a huge safety issue. If you’re making a mask, try using black mesh fabric over larger eye sockets. From a few feet away it looks like a black void, but you can actually see out of it. And please, add some hidden ventilation holes. A sealed mask becomes a sweat-box in minutes.
And no matter how well you build something, accidents happen. Always carry a small day-of repair kit. Mine is pretty simple and has saved me countless times. You’ll want to pack a few essentials: safety pins in a few sizes, a needle with some black and white thread, a small pair of scissors or a multi-tool, and a little bit of your key adhesive (like a travel-size tube of contact cement or a mini hot glue gun) for emergency fixes. A little touch-up paint in a small container is also a lifesaver.

Building a great costume is an incredible process. It’s part art, part engineering, and all magic. You get to bring something to life with your own two hands. And honestly, that’s a feeling no store-bought bag can ever give you.
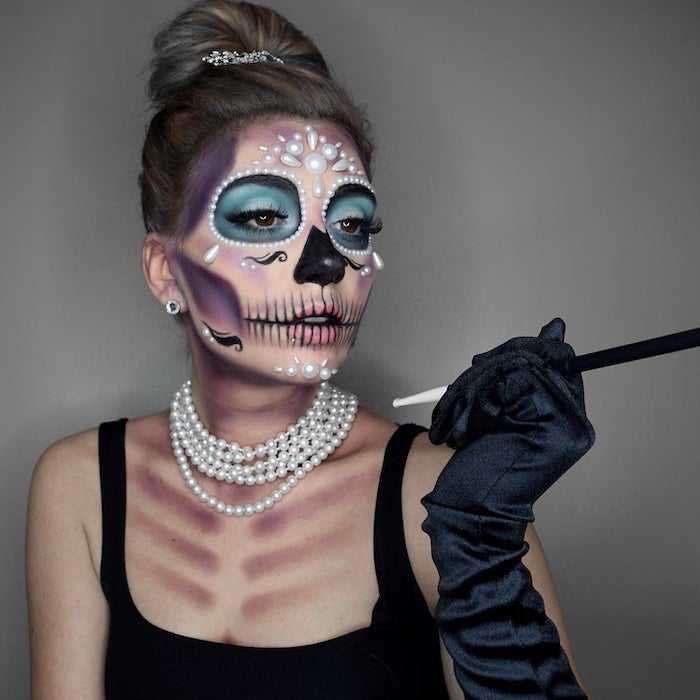
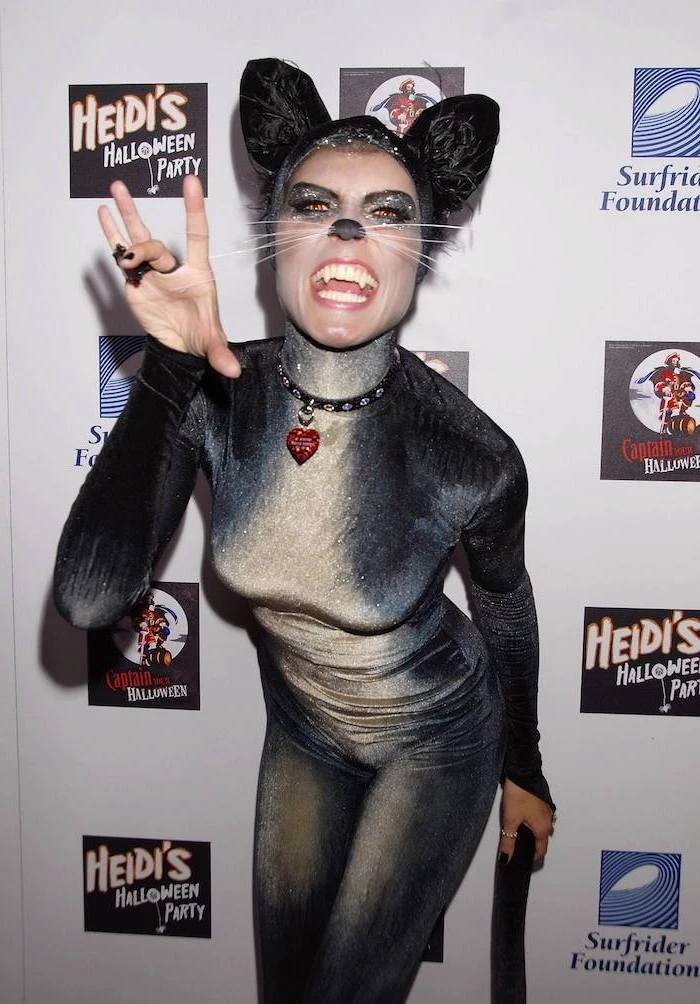
Inspiration Gallery


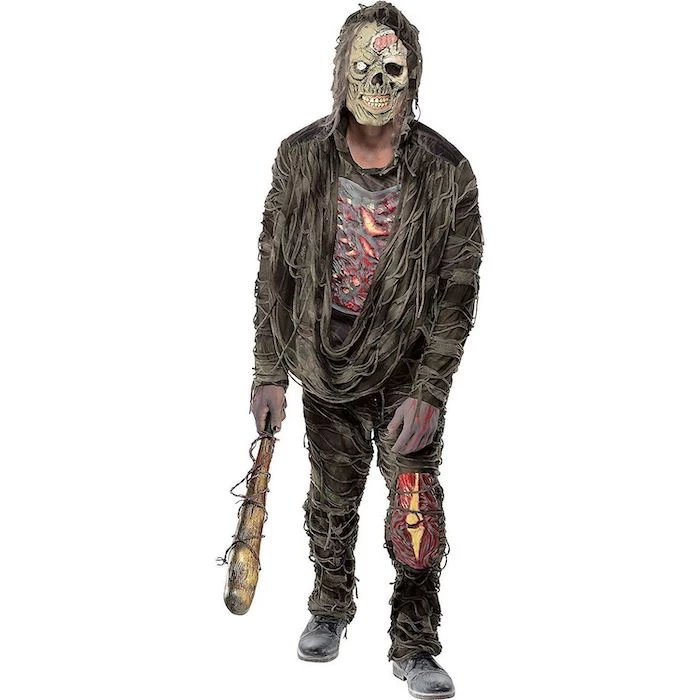
Don’t let your paint job sink and disappear. Before a single drop of color touches your foam armor, seal it! A few even coats of a flexible sealant like Plasti Dip or a mixture of Mod Podge and water will create a non-porous surface. This crucial step makes your colors pop and prevents the foam from soaking up all your hard work.


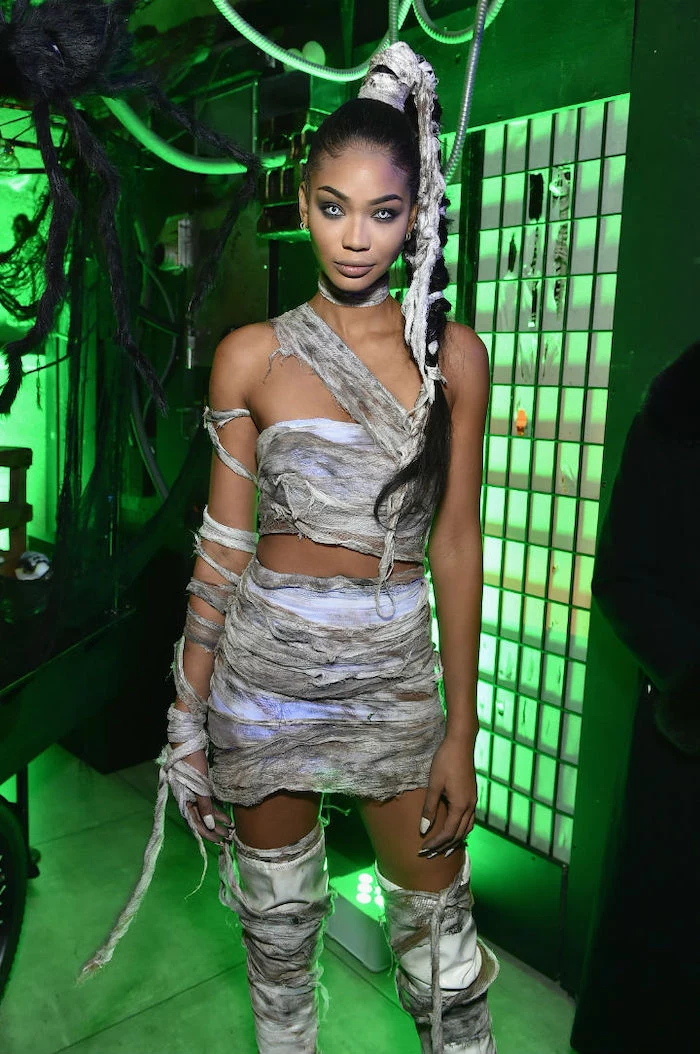
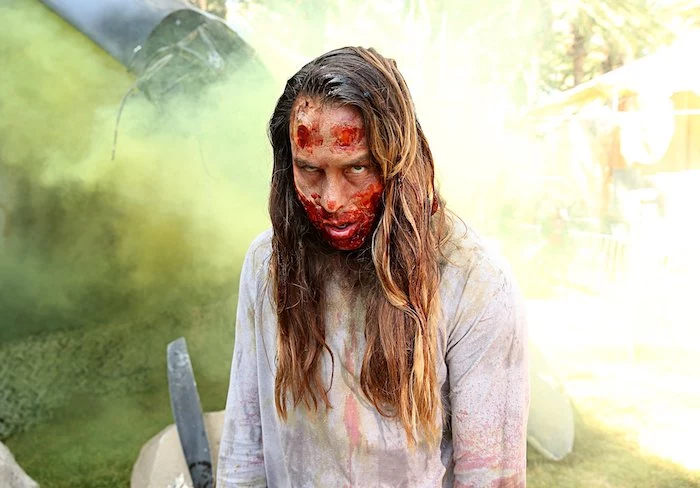
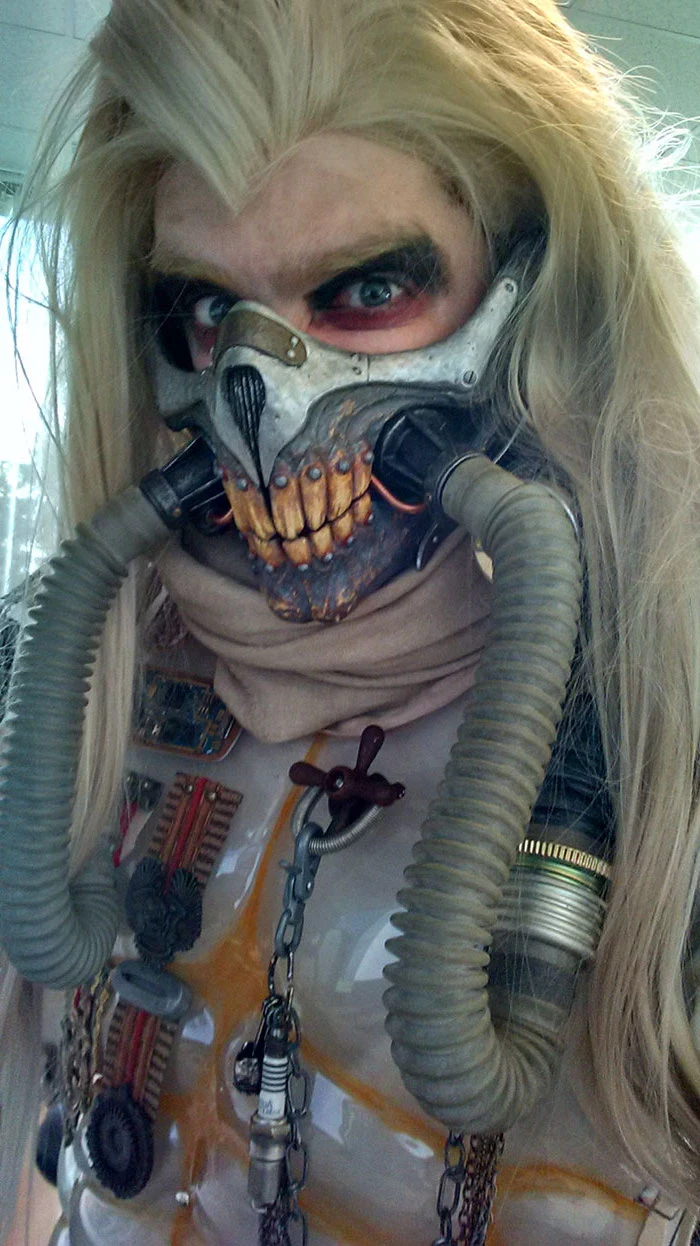
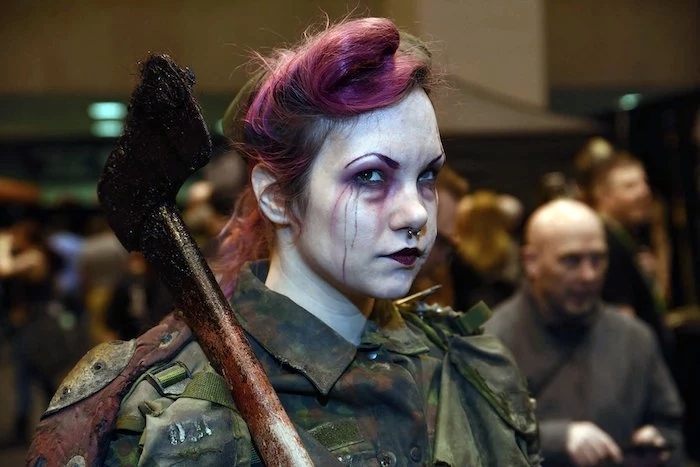
- Realism lies in the grime. Your post-apocalyptic scavenger shouldn’t look like they just left the dry cleaner. A simple ‘black wash’—a mix of black acrylic paint and water—slathered on and wiped off can instantly add years of age and depth to any prop or costume piece.
- For a dusty, long-abandoned look, try lightly dusting surfaces with fuller’s earth or even cocoa powder.


Your most important tool is safety. When using a heat gun to shape foam or a Dremel to carve details, always work in a well-ventilated area and wear a respirator. Those fumes from heating plastics and foam are no joke, and fine dust particles shouldn’t be in your lungs. Protect yourself so you can keep creating for years to come.


How will that pauldron actually stay on your shoulder? Planning your attachments is as important as the piece itself. Think about mobility and comfort.
- Nylon Strapping & Buckles: The workhorse for most armor. Adjustable and reliable.
- High-Strength Velcro: Excellent for pieces that need to be removed quickly, but can be bulky.
- Neodymium Magnets: Sewn or glued into fabric and foam, these offer a magical, seamless attachment for lighter pieces like gauntlets or chest emblems.

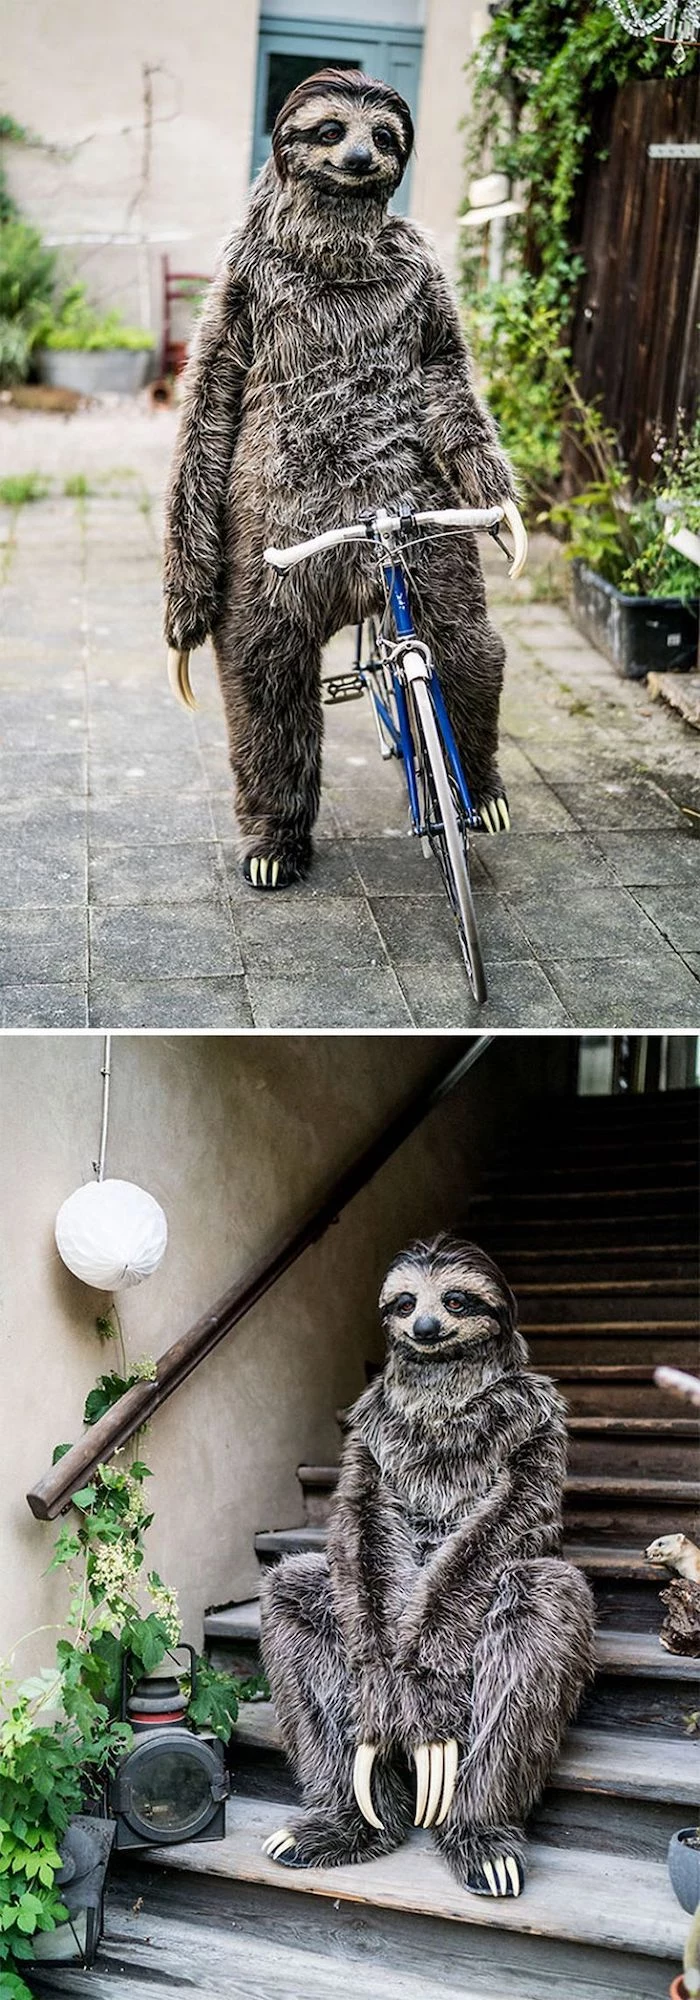
My wig looks like a shiny, plastic mess. How can I make it look more natural?
The secret is to break up that factory shine and shape. First, give it a gentle wash with fabric softener to reduce static and soften the fibers. Then, a light dusting of baby powder or dry shampoo can instantly remove that unnatural gloss. For styling, avoid high heat! Use a steamer and a wig comb, or a low-heat styling tool. For gravity-defying styles, a product like Got2b Glued Blasting Freeze Spray is a cosplayer’s best friend.


EVA Foam: The go-to for beginners and pros alike. It’s lightweight, cheap, and comes in various thicknesses. Perfect for creating base armor shapes, muscular under-suits, and large-scale props. It’s shaped with a heat gun and carved with a craft knife or Dremel.
Worbla: A brand of thermoplastic sheet. When heated, it becomes moldable like clay and is self-adhesive. It’s excellent for capturing fine details, reinforcing foam, and creating durable, thin armor pieces. It’s more expensive but incredibly strong.
Many propmakers use a combination of both for the best results.


The global market for cosplay costumes was valued at over $4.6 billion in 2020 and is rapidly growing.
What does this mean for you, the home creator? A bigger market fuels innovation. There are more specialized materials available online than ever before, from flexible foam clays to pre-programmed LED strips. It also means a massive community has emerged, sharing tutorials on YouTube and patterns on Etsy, making it easier than ever to learn the skills you need.

- It can be scored to look like aged wood grain.
- It can be textured to look like worn leather.
- It can be shaped to form organic, rounded armor.
The secret? A simple heat gun. By applying heat to high-density EVA foam, you can use everyday objects—a crumpled ball of aluminum foil, the edge of a rock, a wood-grain-stamped roller—to press textures directly into its surface before painting.


Not every piece of your costume needs to be built from scratch. A thrift store can be your greatest asset. That $10 leather jacket can be cut up for straps and panels. An old pair of work boots can be the perfect base for futuristic armored greaves. Look for silhouettes and materials, not the item itself. The art is in the transformation.
The Cosplayer’s Emergency Kit
- E6000 or a similar flexible super glue: For on-the-spot repairs of foam or plastic.
- Safety Pins: The universal solution for a sudden fabric tear or a strap that won’t stay put.
- Hot Glue Gun (cordless if possible): A quick fix for almost anything, though not always the most durable.
- Gaffer’s Tape: Stronger and less residue than duct tape. The pro’s choice.
- A small sewing kit: A needle and thread in your costume’s primary colors can be a lifesaver.


A hard truth: An amazing costume is worthless if you can’t walk in it. Your footwear choice can make or break your day at a convention or party. If you’re modifying shoes, prioritize comfort. Add insoles. Do a test run. If a character is barefoot, consider flesh-colored sandals or slip-on shoes to protect your feet while maintaining the illusion.

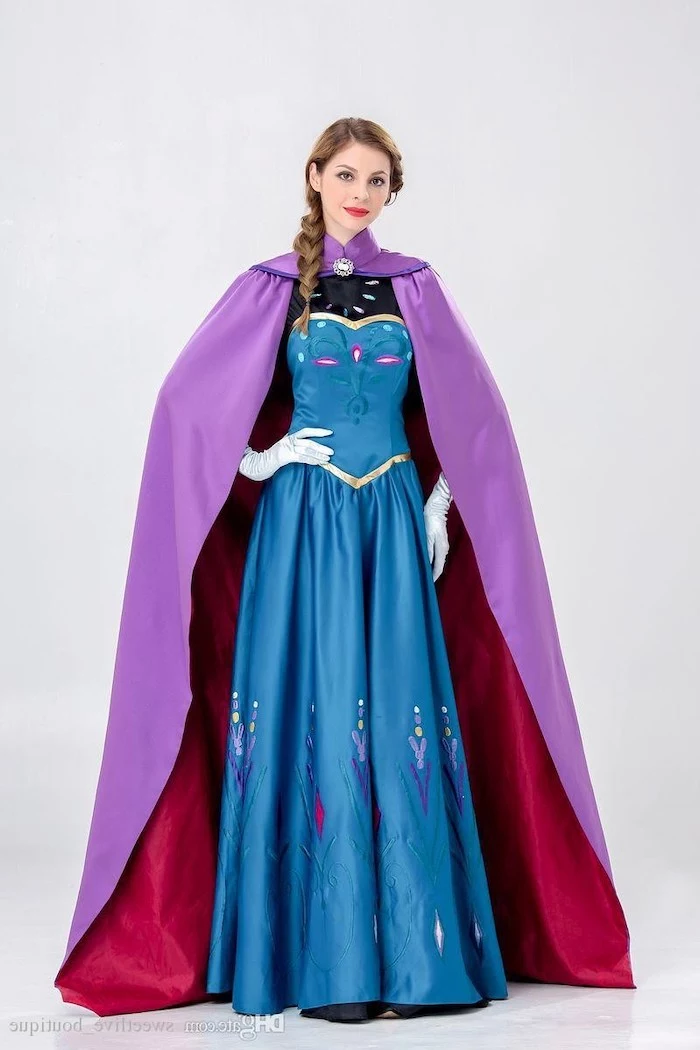
A single yard of heavy wool can weigh up to 2 pounds, while a yard of lightweight cotton voile weighs just a few ounces.
This is critical when designing a costume with large, flowing elements like a cape or gown. While a heavy velvet looks luxurious, wearing it for 8 hours can cause serious neck and shoulder strain. Consider lighter alternatives like velveteen or even faux-suede upholstery fabric to achieve the look without the punishing weight.

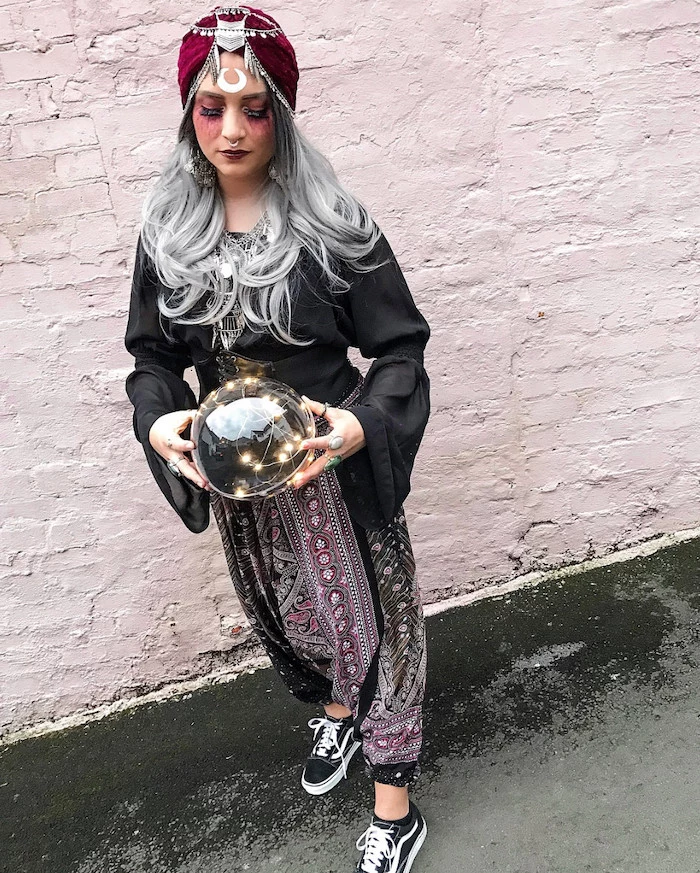
Adding lights can elevate a costume from great to breathtaking. You don’t need to be an electrical engineer to start.
- Fairy Lights: Battery-powered LED strings are cheap and easy to integrate into magical staffs or ethereal garments.
- LED Puck Lights: These simple, self-contained lights are perfect for creating a glow in a prop, like an ‘arc reactor’.
- NeoPixels: For the more ambitious, strips and rings from a brand like Adafruit can be programmed for custom colors and animations, creating truly dynamic effects.


How do I get that ultra-shiny, true metal look on my foam props?
The secret isn’t just silver paint. The magic lies in the prep work. Start by sanding your sealed foam piece to be as smooth as glass. Apply several coats of a high-gloss black base coat—this is non-negotiable for a reflective finish. Once cured, the final step is to use a metal-finish wax paste like Rub ‘n’ Buff, or for a true chrome look, buffing graphite powder directly onto the glossy black surface. The tiny graphite particles will create an almost mirror-like shine.

Contact Cement: The professional’s choice for bonding foam. Apply a thin layer to both surfaces, let it dry until tacky, and press them together for an incredibly strong, permanent, and flexible bond. Brands like Barge are a workshop staple.
Hot Glue: Perfect for beginners, quick mock-ups, and attaching details that don’t bear any weight. It’s fast and forgiving, but can become brittle and fail under stress or in high heat.
Use hot glue for detailing, use contact cement for construction.


A single, high-detail Mandalorian helmet can take over 100 hours of print time on a standard FDM 3D printer.
3D printing is not a ‘push button, get part’ solution. After the print finishes, you still have hours of sanding, filling with products like Bondo, priming, and painting ahead of you. It’s an incredibly powerful tool for creating accurate, hard-surface parts, but be prepared to invest as much time in post-processing as you do in printing.


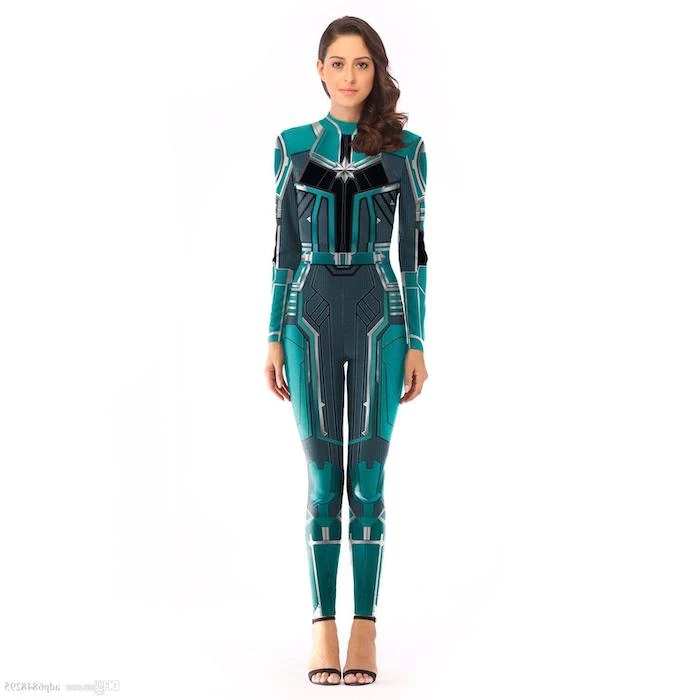
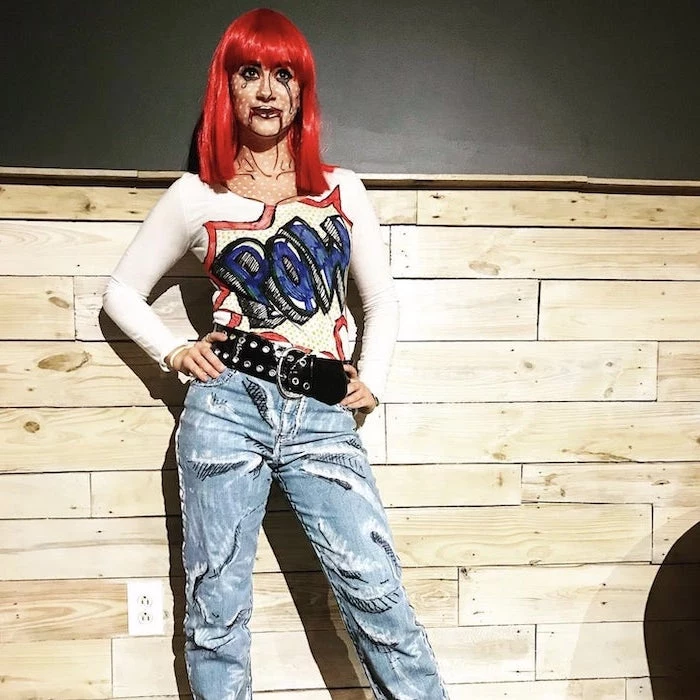
- Bold, vibrant, flat colors.
- Thick, black outlines that define every edge.
- A look that seems to have jumped straight out of a comic book or video game.
The technique is called cel-shading, popularized by games like Borderlands. It’s an advanced painting style where you use a fine brush and black paint to meticulously outline every edge, seam, and detail on your costume, creating a stunning 2D-on-3D effect.


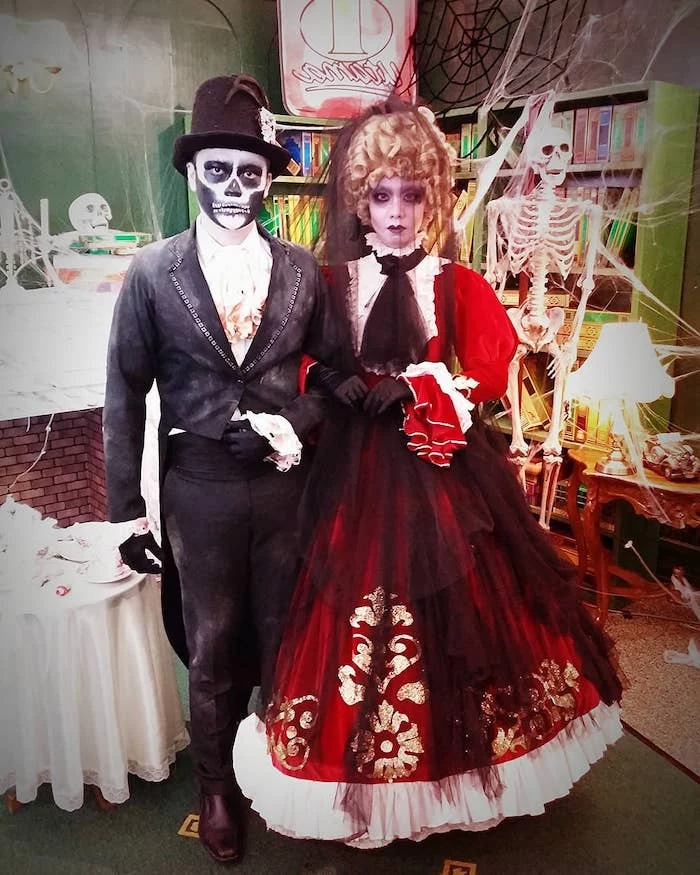
Your face is part of the costume. For full-body color changes or intricate details, don’t use cheap Halloween-store face paint. Invest in professional-grade, water-activated body paints from brands like Mehron, Ben Nye, or Kryolan. They offer opaque coverage, are much more comfortable to wear, and won’t crack. Always finish with a barrier spray like Blue Marble SELR to lock your work in place and prevent smudging.


A pristine suit of armor rarely tells a story. Creating battle damage adds instant history and realism. Here’s a quick guide:
- Slashes & Cuts: Carve deep grooves into your foam with a Dremel tool or a soldering iron (in a well-ventilated area!).
- Bullet Holes: Briefly blast a spot with a heat gun, then press a rounded object (like a pen cap) into the softened foam.
- Painting the Damage: Paint the inside of the new ‘damage’ with a metallic silver, then add a dark brown or black wash to simulate dirt and oil.


The single most overlooked aspect of a helmet build: Airflow. A sealed helmet can become dangerously hot and fill with CO2 from your own breath. Plan for ventilation from the very beginning. Disguise holes in the design (in the ‘gills’ of a creature mask, or the mouth vent of a sci-fi helmet) and consider installing small, quiet computer fans wired to a battery pack for active air circulation.

Can’t find the perfect shade of green for your elf tunic? Dye it yourself! Custom dyeing fabric ensures your color palette is precise and unique. But not all dyes work on all fabrics.
- Rit DyeMore for Synthetics: Polyester and other synthetic fabrics won’t take regular dye. You need a specialized dye like this.
- Standard All-Purpose Dye: Works best on natural fibers like cotton, linen, and rayon.
- Acid Dyes: Needed for protein fibers like wool and silk.

My costume is huge! How do I get it to the event without breaking it?
Think like a set designer: build it to be broken down. Design your creation in modular pieces that can be detached for transport. Use a combination of bolts, strong magnets, and hidden clasps. Invest in large, sturdy plastic storage tubs—they are far superior to cardboard boxes. Pack soft fabric pieces around fragile armor parts to cushion them during the journey.

2mm Craft Foam: This is the thin, flexible foam found in any craft store. It’s too flimsy for construction but is perfect for adding fine, raised details. Think filigree on armor, emblems, or decorative trim.
6-10mm EVA Foam: This is your structural workhorse. High-density floor mats or rolls from cosplay suppliers are used to build the actual base of armor pieces like breastplates and greaves, providing substance and shape.
Use both: Layer the thin craft foam on top of the thick EVA foam to create complex, multi-level designs.