Your Ultimate Guide to DIY Family Costumes (Without the Drama)
I’ve spent a lot of time surrounded by fabrics, foam, and paint. My workshop has seen it all, from big stage productions to super-detailed custom props. But honestly, the projects that stick with me the most are the Halloween costumes I’ve cobbled together for my own family. There’s just something magical about seeing a shared idea turn into a real, wearable thing.
In this article
A great family costume isn’t about shelling out for a pricey, pre-packaged kit from a big-box store. It’s about the teamwork, the shared laughs over a glue-gun mishap, and the pride of making something cool together. That feeling is the real treat, and it lasts way longer than the candy.
So, this isn’t just another list of trendy costume ideas. This is a look under the hood at how you can plan, choose the right stuff, and build costumes that are comfy, tough enough for a night of trick-or-treating, and genuinely fun to wear. Let’s get into it.
First Things First: Nailing the Family Theme
The best group costumes start with a killer concept. Before you even think about touching scissors, a little planning goes a long way. A solid theme makes your group instantly recognizable and makes everyone feel like they’re part of the same team. The pros think about silhouette, color, and character types, and those same ideas are gold for a family costume.
Finding Your Vibe
Start by brainstorming as a family. What movies, books, or games are you all obsessed with right now? A shared passion is the perfect launchpad. But be practical about it. Think about the ages and personalities in your crew. A complex theme with giant props is probably a nightmare for a toddler, and a teenager might veto anything they find remotely embarrassing. The goal here is getting everyone on board, not starting a family feud.
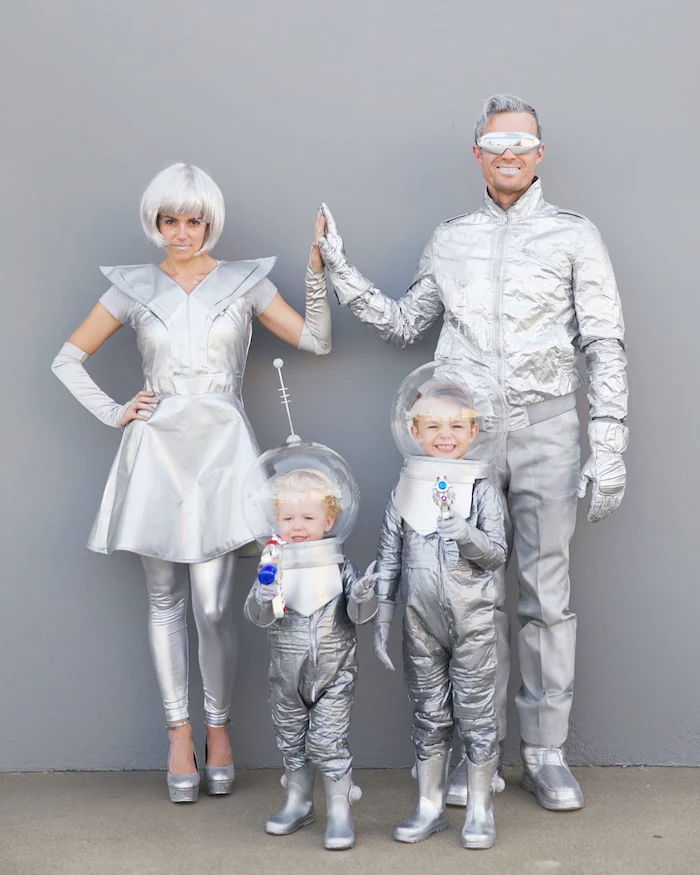
Oh yeah, and think about the actual logistics of Halloween night. Will you be walking for hours? Crammed into an indoor party? The function of the costume is just as important as how it looks. I once built an incredible robot family costume out of huge foam pieces. It looked amazing in photos, but trying to get three little robots into our minivan was a puzzle I hadn’t prepared for. Lesson learned: always, always consider mobility and transportation!
Heads up on timing, too. A common pitfall is starting too late. Give yourself more time than you think you need. A good rule of thumb? Brainstorm in September. That gives you a weekend for planning and supply runs, a couple of weekends for building, and the final week for all those little details and last-minute fixes.
The Power of Shape and Color
Silhouette is just a fancy word for the costume’s overall shape. It’s what makes a witch’s pointed hat or a superhero’s broad shoulders stand out, even from a distance in the dark. As you plan, think about how each costume’s shape will look next to the others. Do they tell a story together?
Color is your other secret weapon. A unified color palette is what pulls the whole group together. Think about those classic superhero families in their red, black, and white. Even without a logo, you know exactly who they are. You don’t all have to wear the exact same color, either. Just pick a palette of 3-4 coordinating colors that you can use across all the costumes. It gives everyone a bit of individuality while keeping that awesome team look.
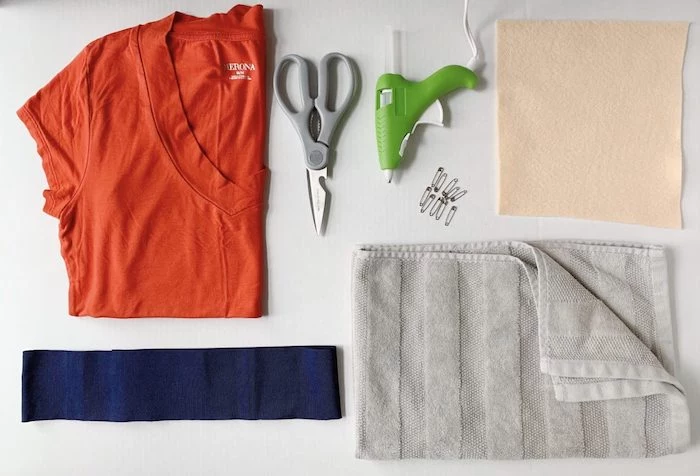
A Crafter’s Guide to a Successful Supply Run
Walking into a craft store can be seriously overwhelming. Let’s cut through the noise and talk about the materials that actually work for costumes. These are the staples I always keep around because they’re versatile and reliable.
Fabric: Let’s Go Beyond Basic Felt
Look, felt has its place, but it has major limits. It doesn’t hang well, it gets pilly, and it has zero stretch. For most costumes, you’ll want to level up.
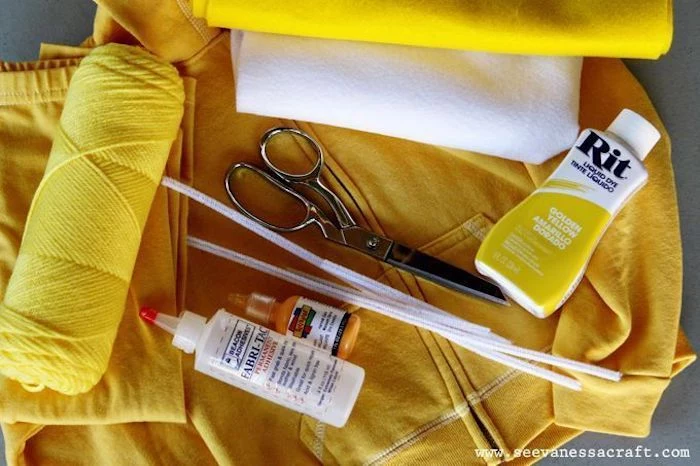
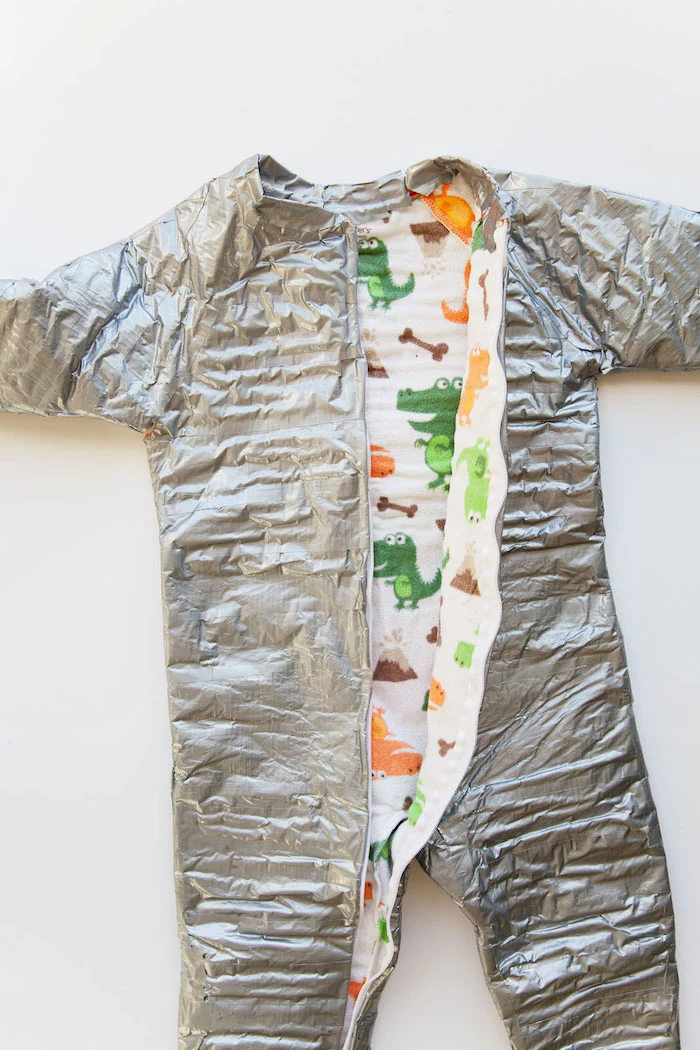
- Fleece: This is my go-to for kid-friendly costumes, hands down. It’s soft, warm, and super forgiving. Best part? It doesn’t fray when you cut it, so you can often get away without hemming any edges. It’s perfect for animal costumes and cozy onesies. Expect to pay around $8-$15 a yard.
- Spandex Blends: If you’re making anything form-fitting like a superhero suit, you absolutely need 4-way stretch. That means it stretches both vertically and horizontally. To check, look for a blend on the fabric bolt label—something like ‘95% Polyester, 5% Spandex’ is a great sign. And don’t be shy; pull on the fabric in the store. If it stretches both up-and-down and side-to-side, you’re golden. This fabric is pricier, often $20+ a yard, but it’s essential for comfort and movement.
- Cotton & Broadcloth: These are solid choices for things like capes, tunics, or aprons. They’re easy to sew and breathable, but man, do they wrinkle.
- Faux Fur & Vinyl: Want to add awesome texture? These are your friends. Faux fur is great for monsters, and vinyl can give you a cool leather or futuristic look. Quick tip: they can be a pain to sew. Use a heavy-duty needle and make your stitches longer than usual to prevent tearing.
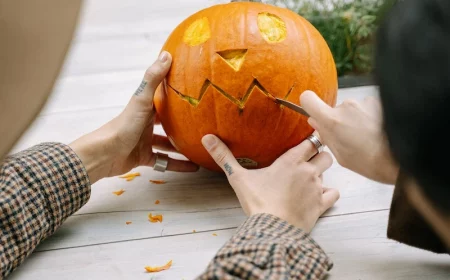
Building Blocks: Foam and the Glues that Hold It Together

For armor, big props, or structured headpieces, you need foam. I’ve built entire suits of armor from this stuff.
- EVA Foam: This is the secret weapon. It’s the same material used for those anti-fatigue floor mats. You can grab a pack of four for about $20-$25 at hardware stores like Home Depot or Harbor Freight. For more specialized projects, you can also buy it in specific thicknesses online from cosplay supply websites. It’s light, cuts with a utility knife, and you can shape it with a heat gun.
- Upholstery Foam: This is the soft, squishy foam from inside cushions. It’s perfect for creating those big, cartoonish shapes or padded muscle suits. You can carve it up with an electric kitchen knife or sharp scissors.
Now, let’s talk about making things stick. Choosing the right adhesive is critical, and they are definitely not all created equal.
- Hot Glue: It’s fast and easy, but it’s not the strongest. It creates a stiff bond that can crack on anything flexible, and it can melt some foams. I mostly use it for attaching small, non-structural bits or for quickly mocking up a piece before committing to a stronger glue.
- Contact Cement: This is the professional’s choice for bonding EVA foam. You paint a thin layer on BOTH surfaces, wait about 10-15 minutes until it’s tacky (not wet!), and then press them together. The bond is instant, permanent, and flexible. BUT, a huge safety warning: The fumes are no joke. You absolutely MUST use this in a well-ventilated area—ideally outdoors—and wear a respirator with organic vapor cartridges. A simple dust mask will not protect you.
- E6000 (or similar): This is the patient crafter’s friend. It’s a super-strong, clear, flexible glue that’s great for attaching different materials together, like foam to fabric. The only catch is the long cure time; it can take a full 24 hours to reach maximum strength.

Putting It All Together: Construction Tips for Everyone
You don’t need to be a master tailor to make a great costume. Knowing a few core methods can get you surprisingly far.
No-Sew is Your Friend
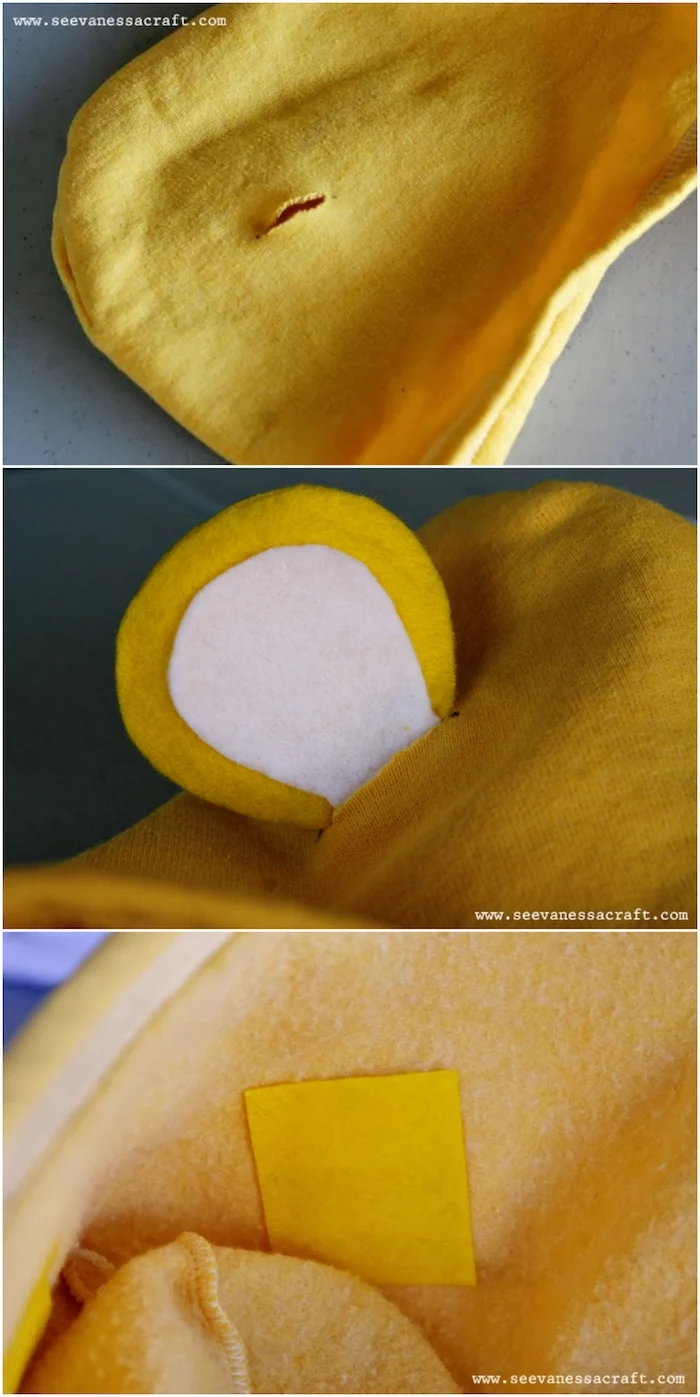
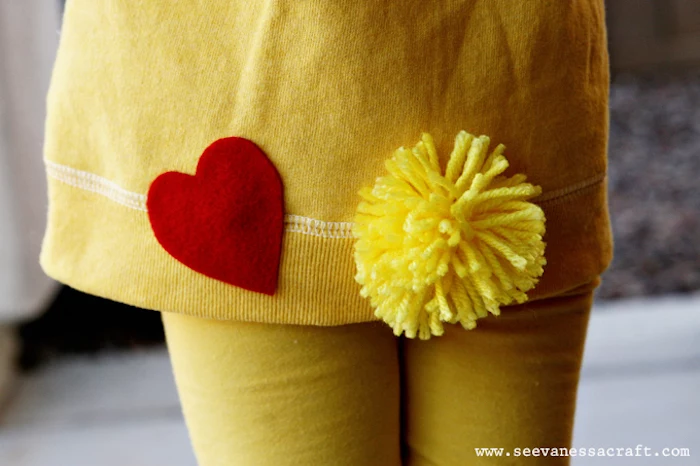
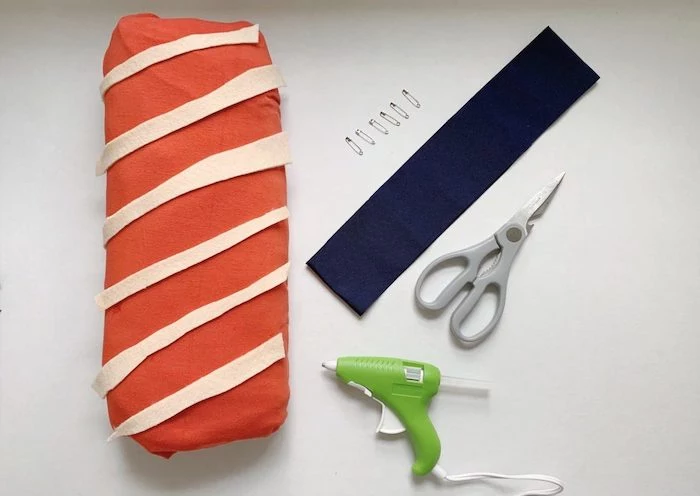
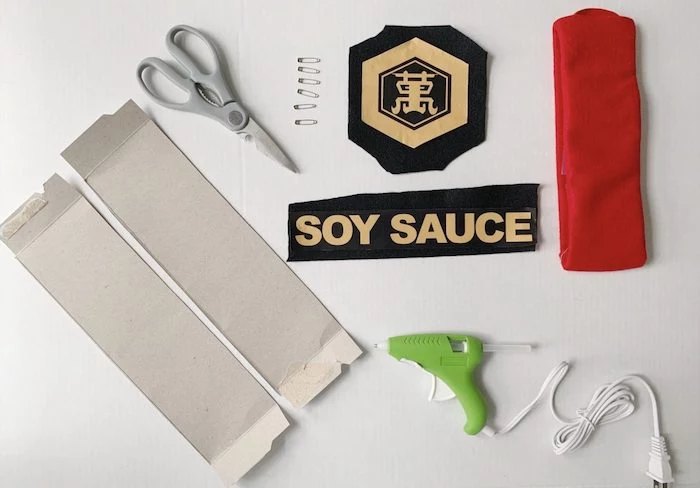
A huge time-saver is to modify clothes you already have. A plain sweatsuit or a t-shirt dress can be the perfect canvas. Take the classic baby sushi costume. Instead of a bulky pillow for the shrimp, which can be unsafe, try this: create a pouch out of orange fleece, stuff it with soft polyester fiberfill (like Poly-Fil), and attach it to a white onesie with a few simple stitches or fabric glue. It’s way lighter and more comfortable for the baby. And for the parents? A simple white crossover top (a “gi”) from a martial arts supply store makes a great chef costume, and a red fabric-wrapped headband is way more durable than cardboard for the soy sauce.
Just the Sewing Basics
If you have a sewing machine (and know how to use it for a straight line), a whole new world opens up. You don’t need fancy skills. Simple patterns for capes, tunics, and elastic-waist pants are everywhere online. A simple cape is a fantastic beginner project; it teaches you how to handle fabric and sew a straight hem.
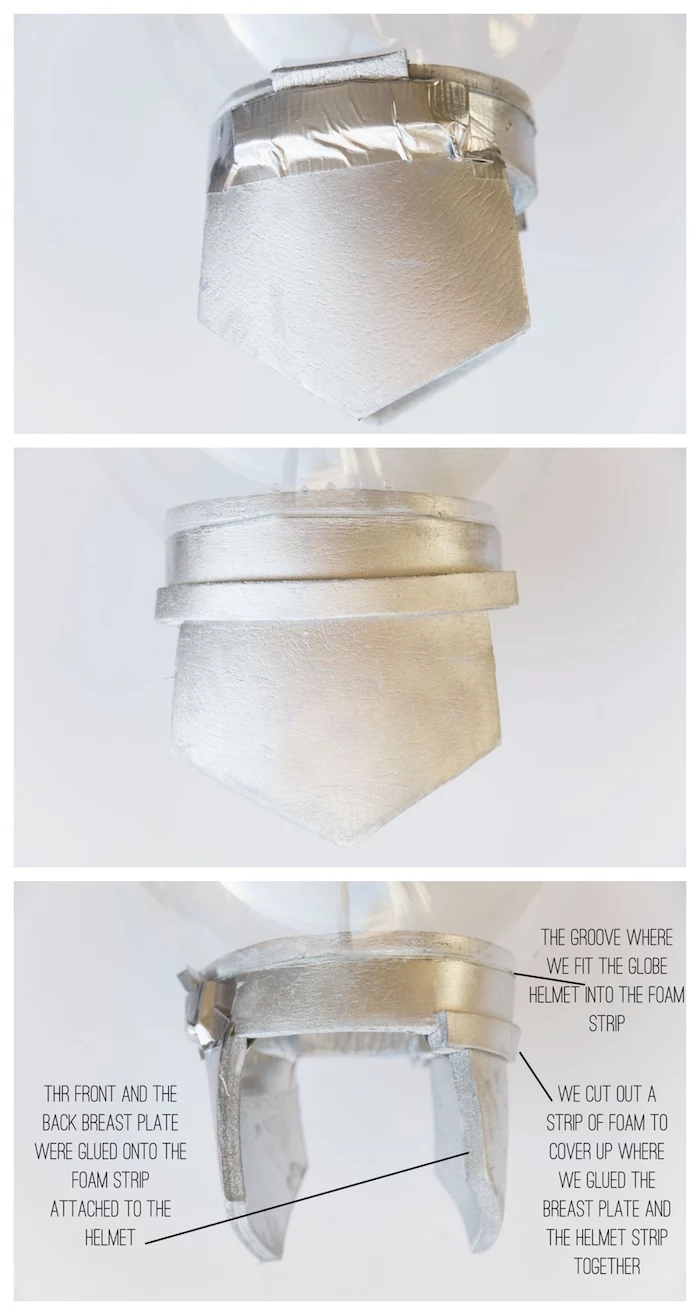
Your First Foam Project: The Hero Shield
Making props can seem intimidating, but EVA foam makes it so accessible. Feeling nervous? Start with something small, like a hero mask from a $2 sheet of craft foam. It’s a 30-minute project that teaches you the basics of cutting and gluing.
Ready for something bigger? Let’s make a shield.
- Pattern: Draw your shape on poster board first to get the size right.
- Cut: Trace the pattern onto a 10mm EVA foam mat. Use a fresh, sharp blade in a utility knife and make several shallow passes for a clean cut.
- Shape: To get a curve, gently heat the foam with a heat gun (keep it moving!). Once it’s warm and floppy, bend it over your knee or a large bowl and hold it until it cools.
- Seal: This is a step people always skip! EVA foam is a sponge; it will soak up your paint. Hit the entire surface with your heat gun to close the foam’s cells. Then, for a perfect painting surface, spray it with a few coats of a flexible primer like Plasti Dip.
- Paint: Use flexible acrylic paints. I once tried to paint unsealed foam and it was a disaster—the foam just drank the paint, and it cracked the second I bent it. Always seal your foam! Protect your finished paint job with a clear sealant spray.
By the way, a project like this is very budget-friendly. You’re looking at about $20 for foam mats, $8 for Plasti Dip, $10 for some craft paints, and $7 for a clear coat. You can get it all done for under $50!
The Details That Make It Awesome
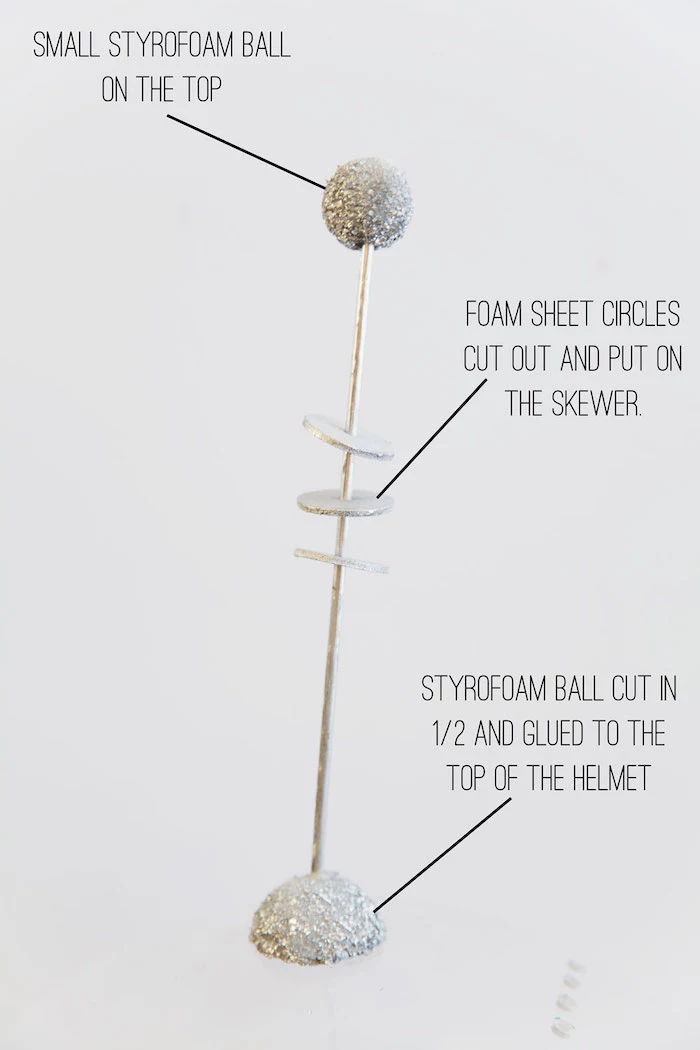
Weathering and Aging
Sometimes, a costume looks better when it looks a little beat up. A space adventurer’s suit needs some scuffs, right? This is called weathering. An easy trick is a “blackwash.” Just mix some black acrylic paint with water, brush it all over your piece (especially in the cracks), and then wipe off the excess with a paper towel. It leaves grime in the crevices and instantly adds depth.
Makeup and Wigs
For kids, stick with water-based, hypoallergenic face paints. For adults, pro-grade stage makeup offers way better color and staying power. And please, resist the shiny party store wig. You can find much better, matte-finish wigs online from cosplay suppliers for just a few dollars more. A little dry shampoo can also work wonders to tone down the shine on a cheaper wig.
The Most Important Thing: Costume Safety
In my professional work, safety is priority number one. A costume is a total failure if it’s unsafe, especially for kids. Please take these points seriously.
- Vision & Ventilation: Any mask or helmet needs tons of airflow and a clear line of sight. A child can get disoriented or have trouble breathing fast. I always add extra, hidden air holes. Can you breathe easily in it? Can you see your own feet?
- Chemicals: I can’t stress this enough. When using spray paints, sealants, or contact cement, you MUST work outside or in a space with serious ventilation. Wear a proper respirator rated for organic vapors (an N95 dust mask is NOT enough).
- Fire Safety: Most costume materials (foam, synthetic fabrics) are very flammable. Stay far away from open flames like candles, bonfires, or heaters.
- Mobility: Make sure everyone can move freely. Capes shouldn’t be a tripping hazard, and nothing should be so tight that it cuts off circulation.
When to Buy vs. DIY
Part of being smart is knowing your limits. While DIY is awesome, some things are better left to others. If a costume needs complex sewing or electronics, it might be time to look for help. There’s no shame in buying a well-made base piece and customizing it yourself. Check out places like Etsy—you can commission specific pieces from talented crafters to complete your family’s look.
Building family costumes is really about making memories. It’s a project full of planning, problem-solving, and creativity. Don’t be afraid to mess up. Every single costume maker has a box of failed experiments. Those are just learning experiences. The real win is the time you spend together, bringing a crazy idea to life. Happy crafting!
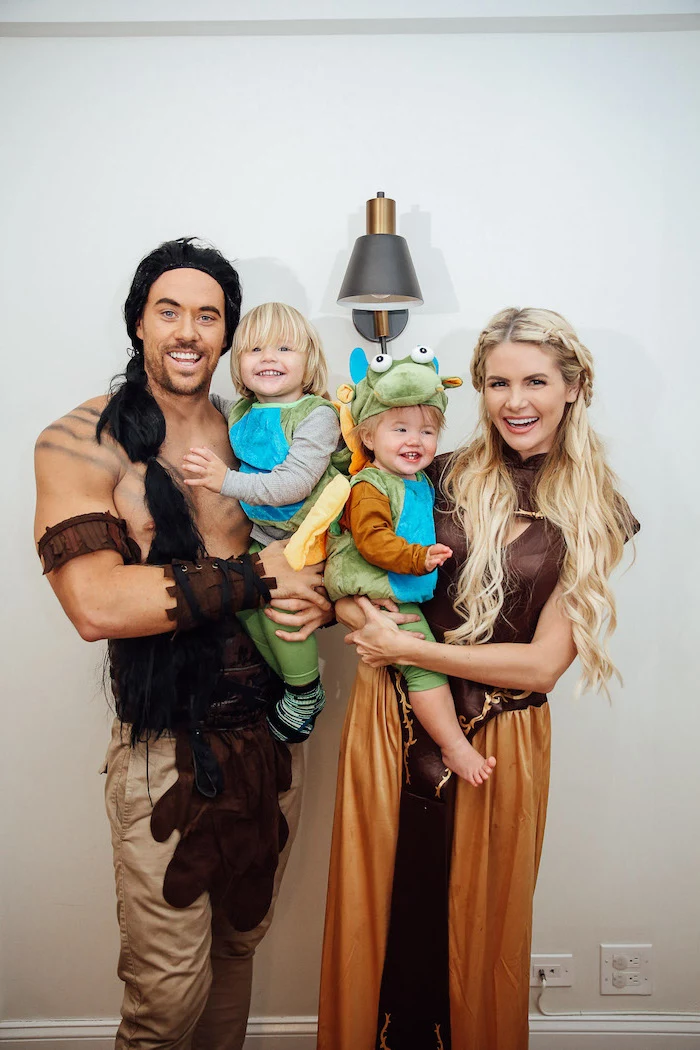
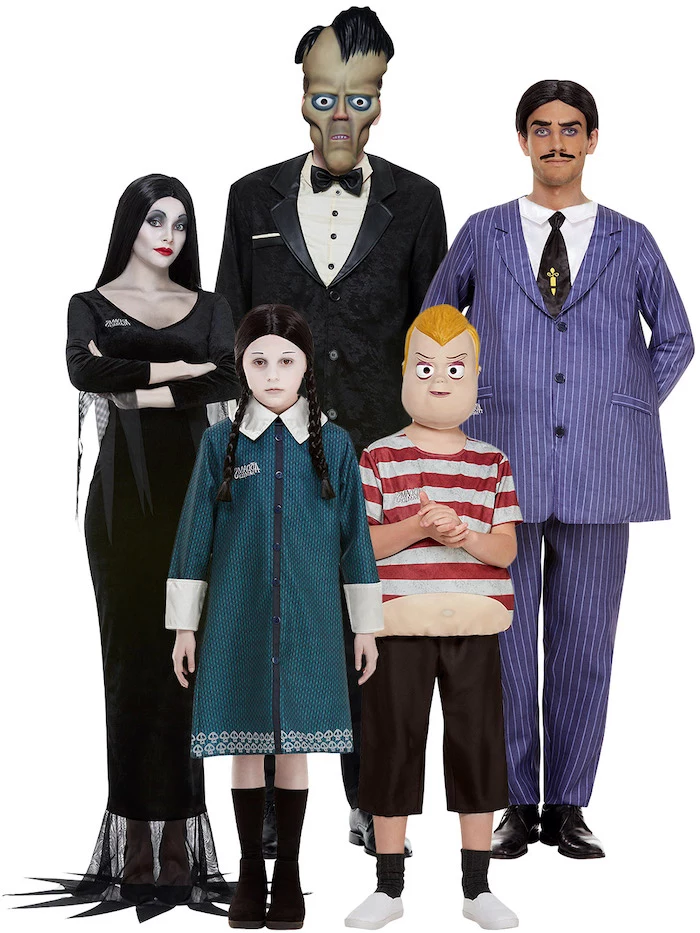
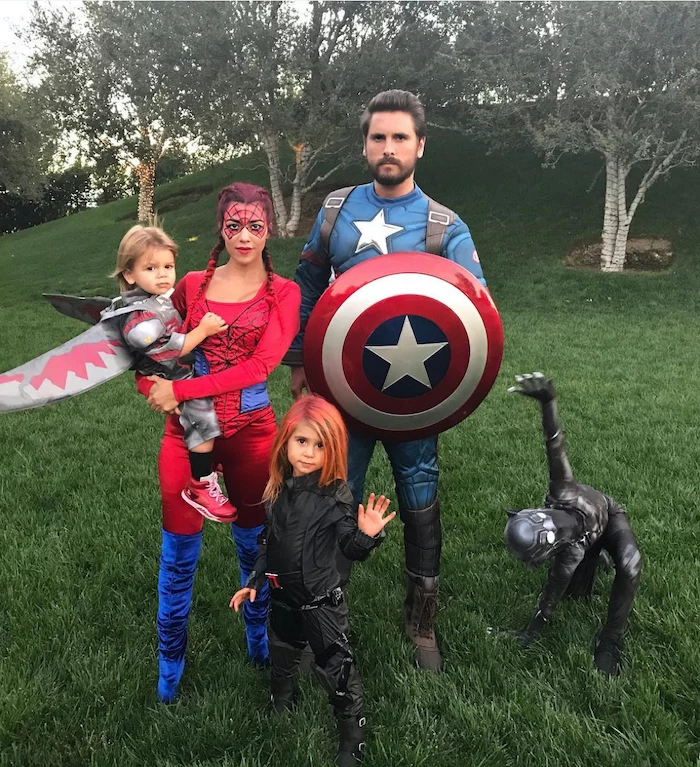
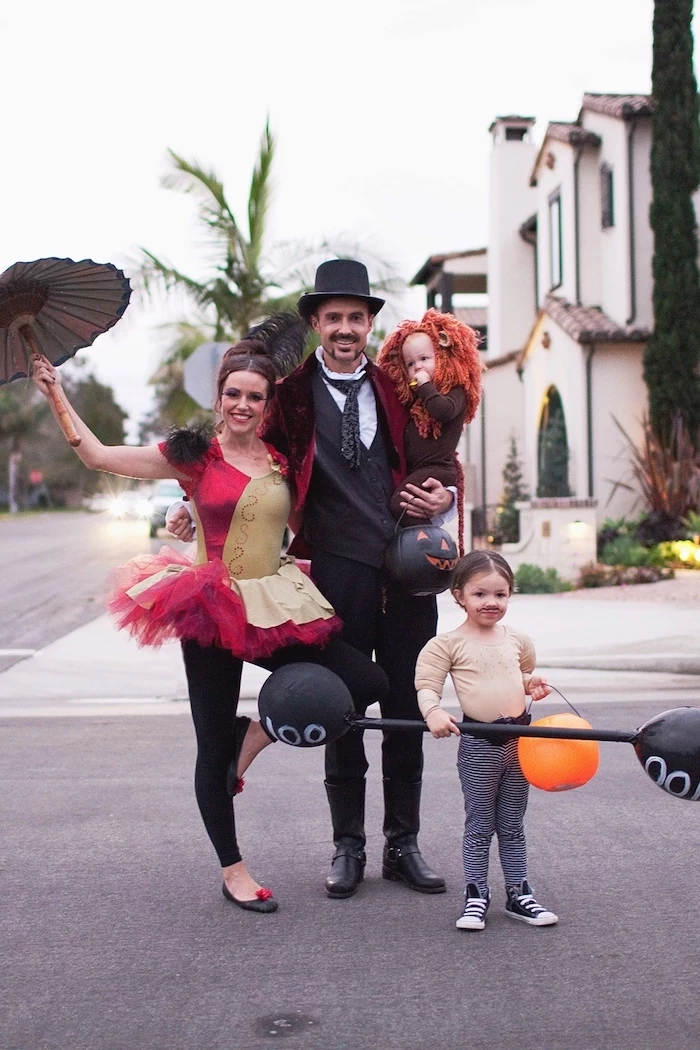
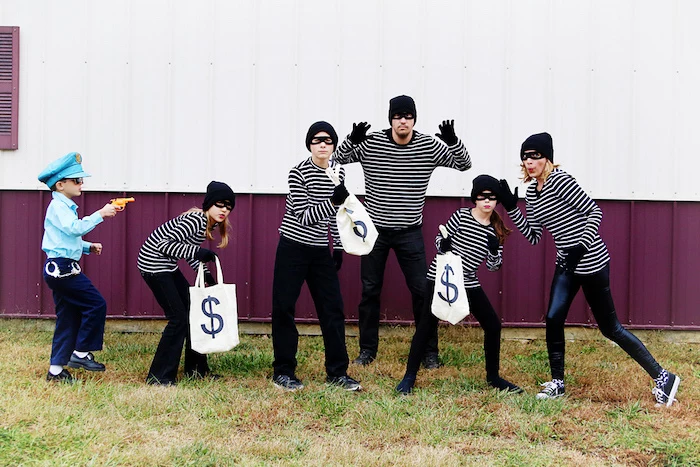
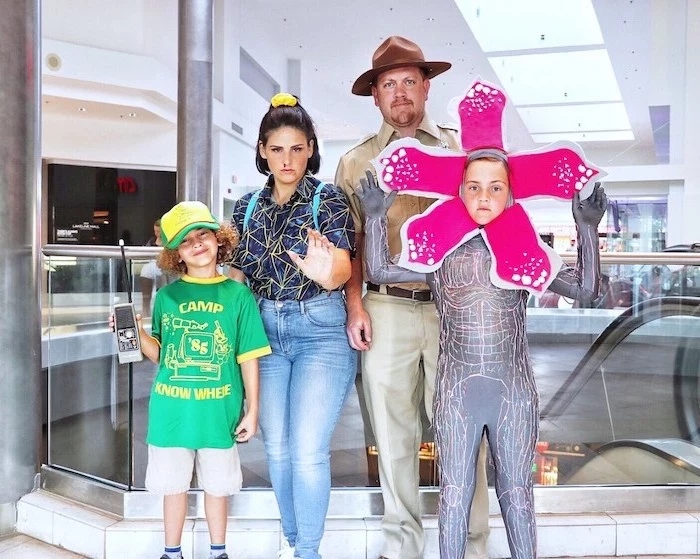
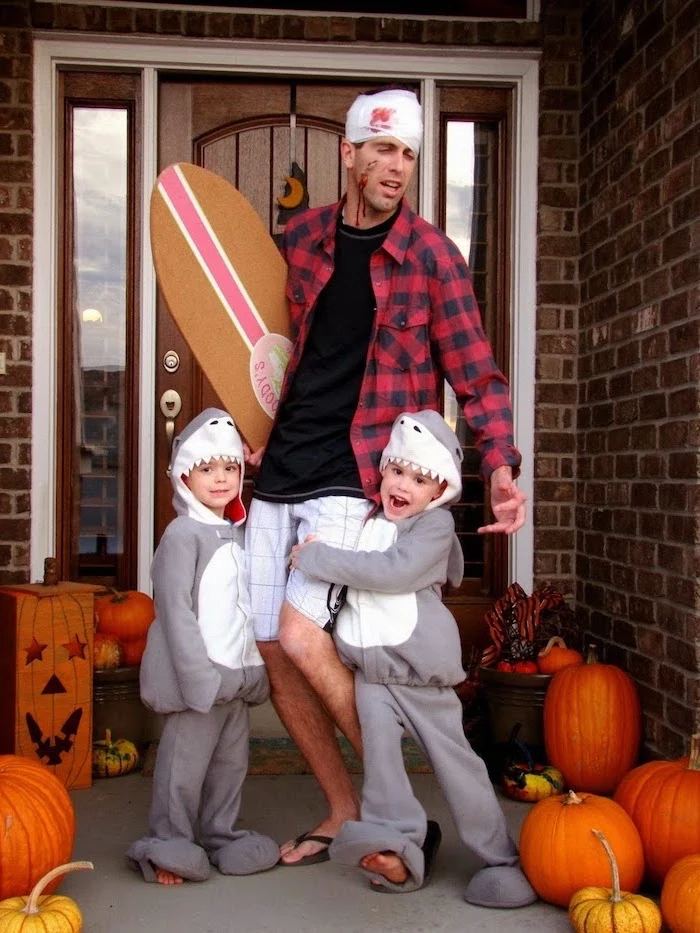
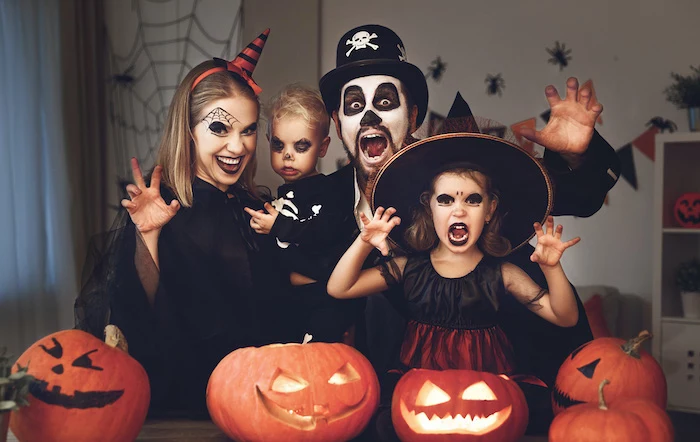
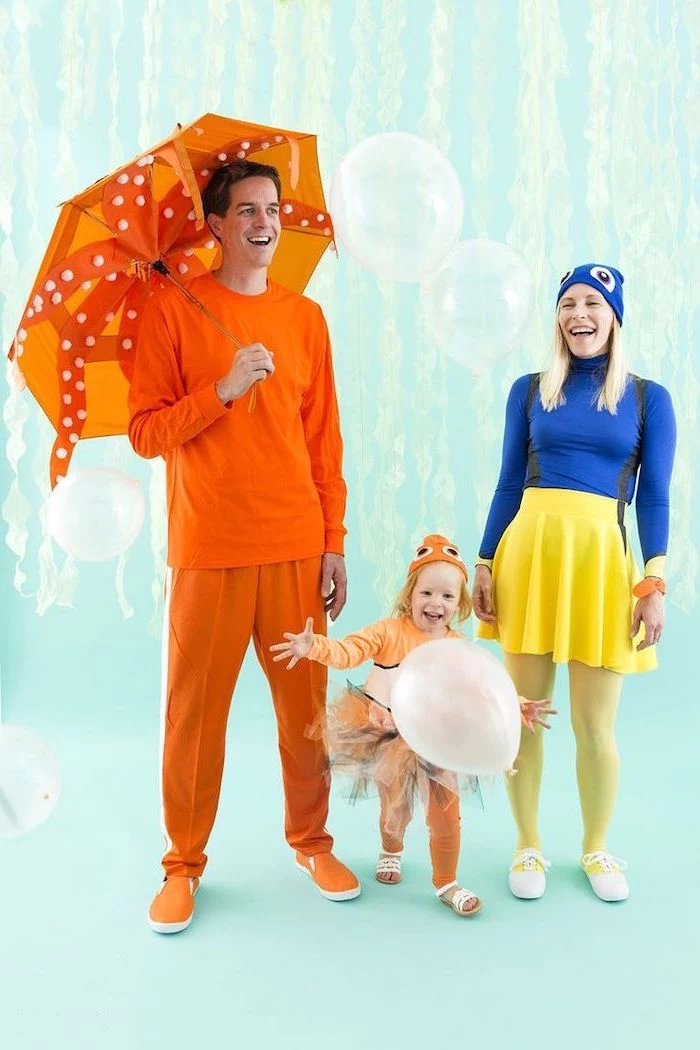
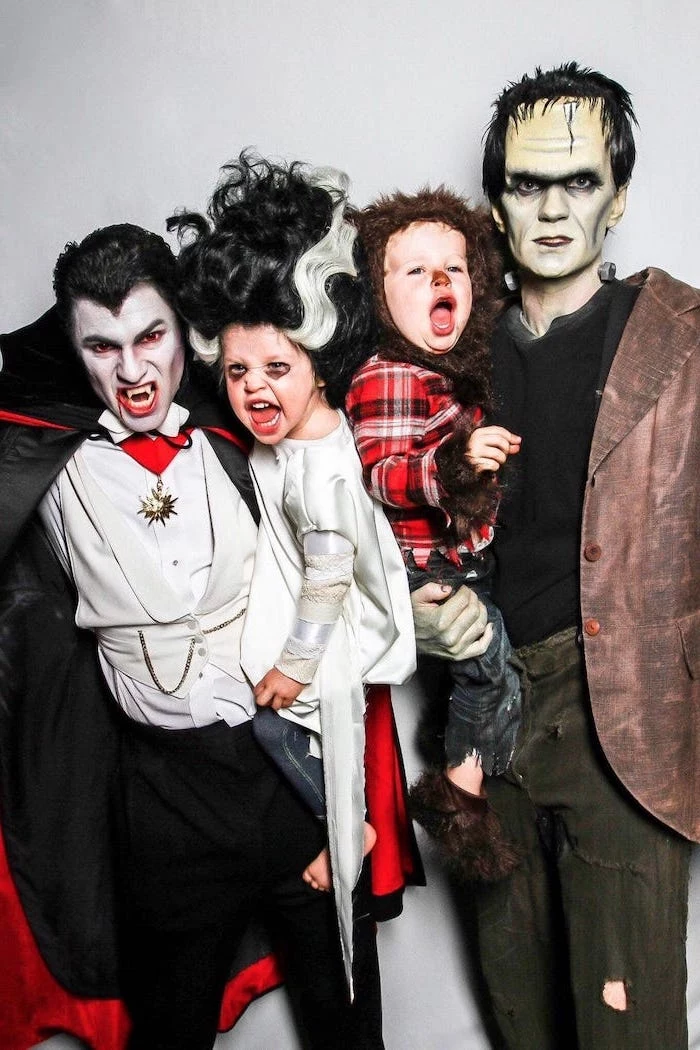
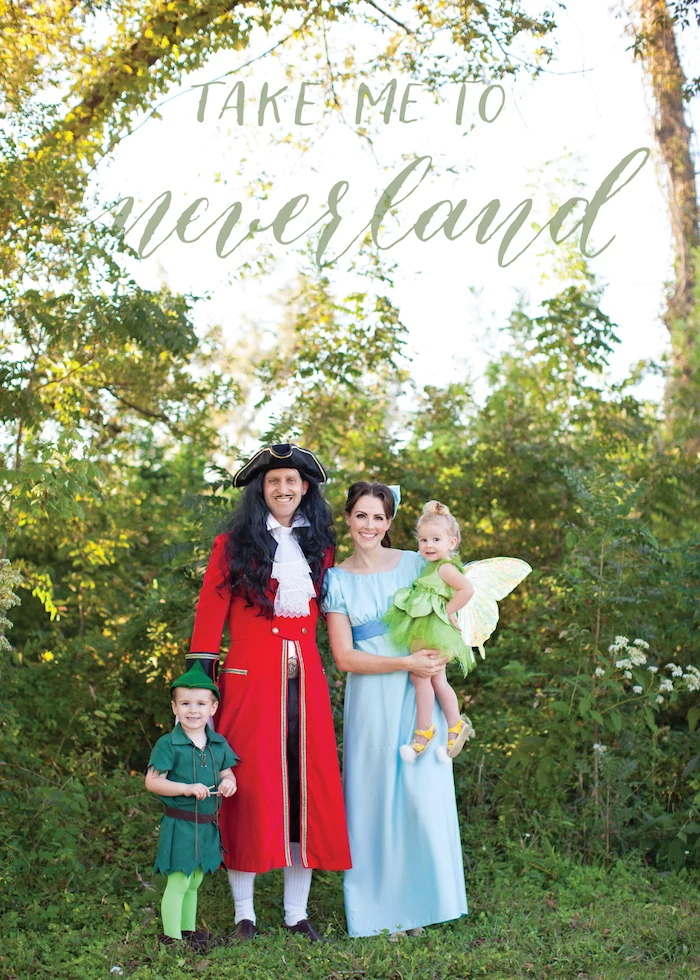
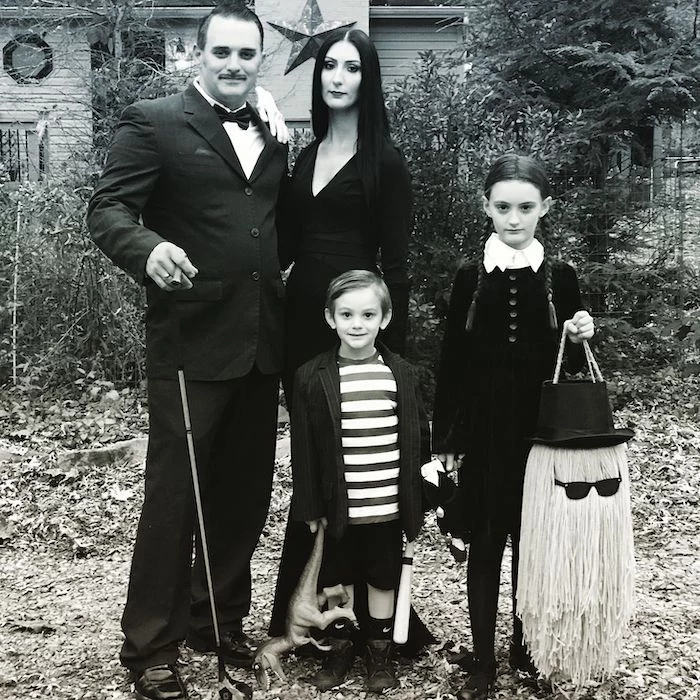
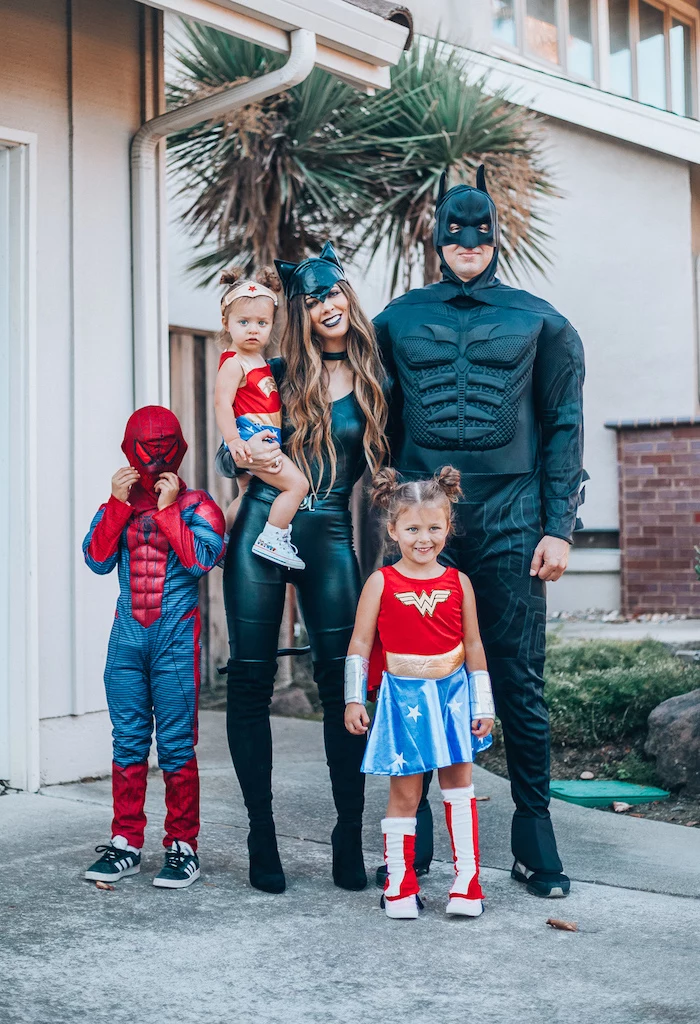
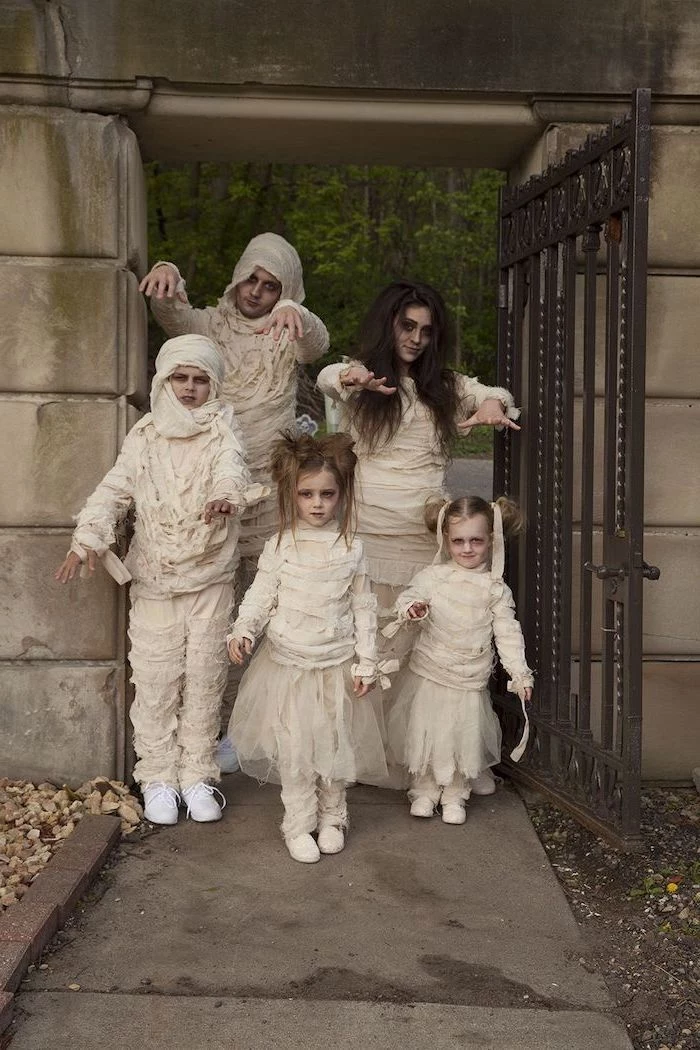
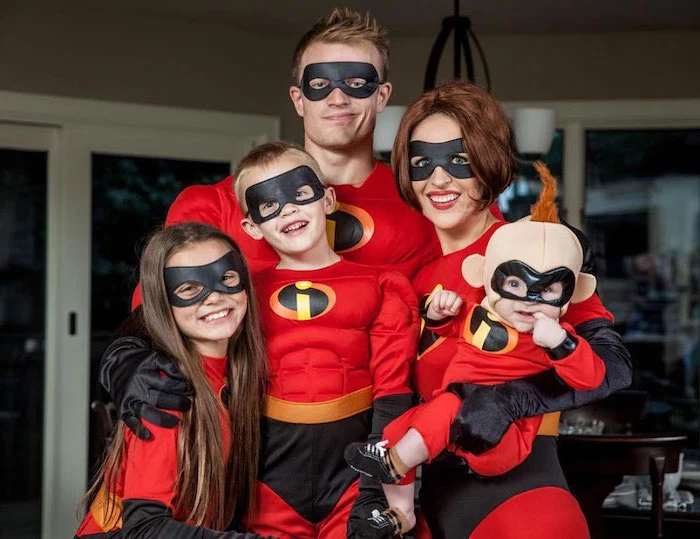
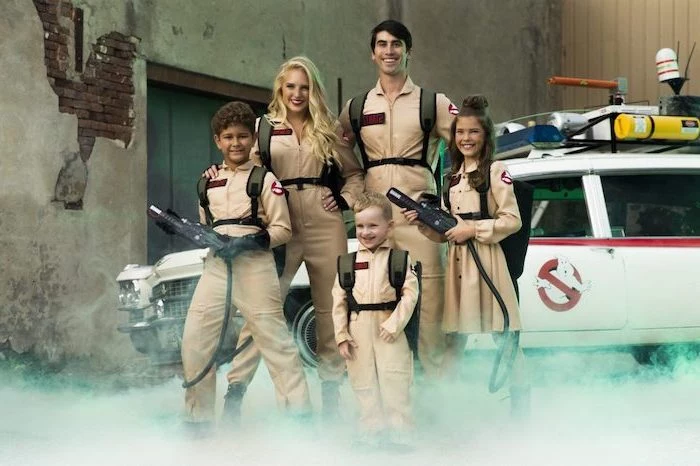
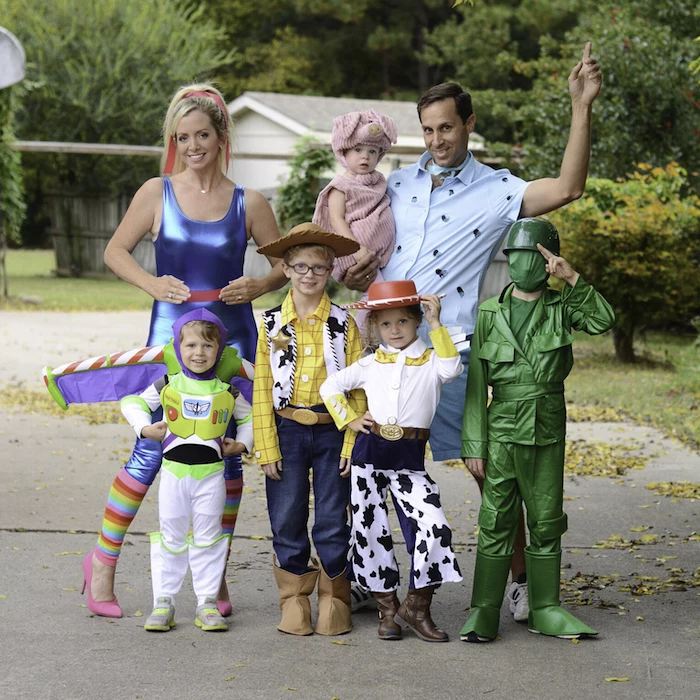
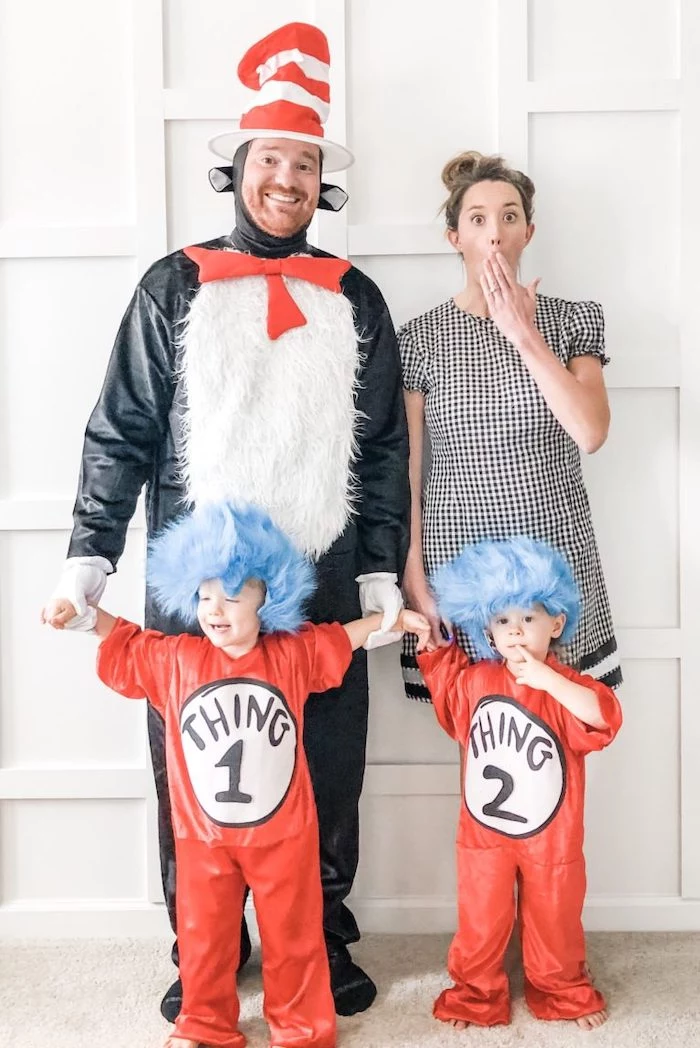
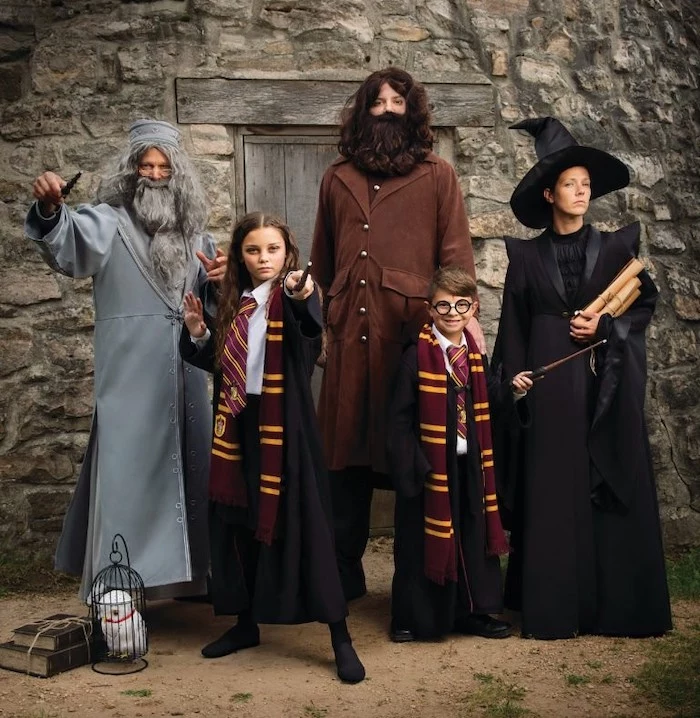
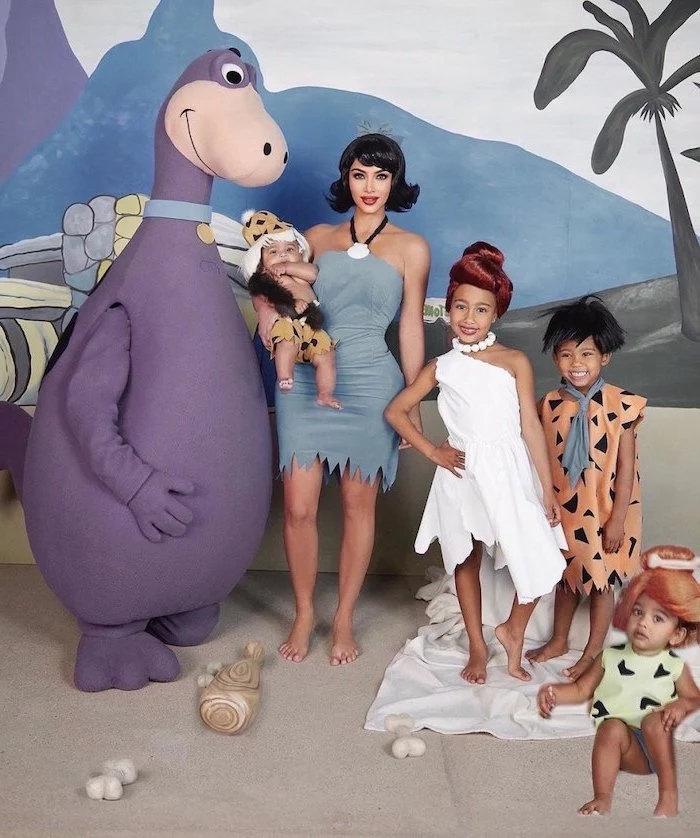
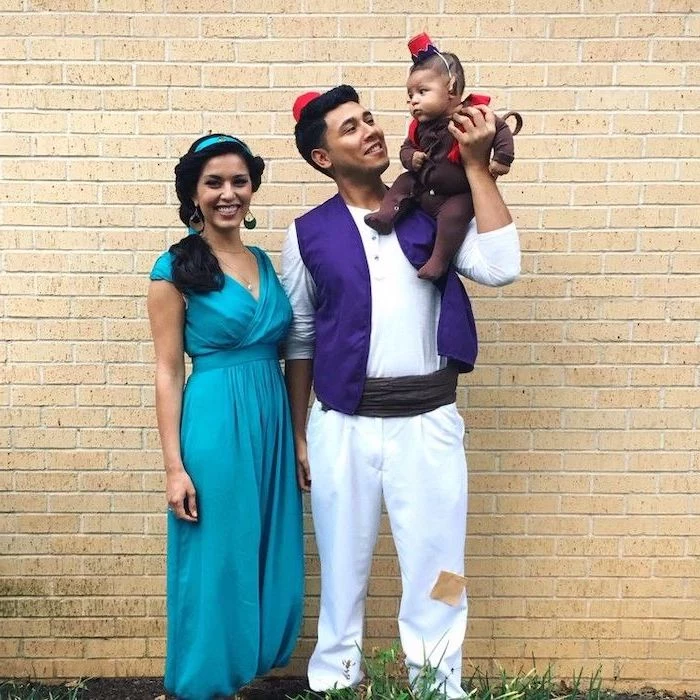
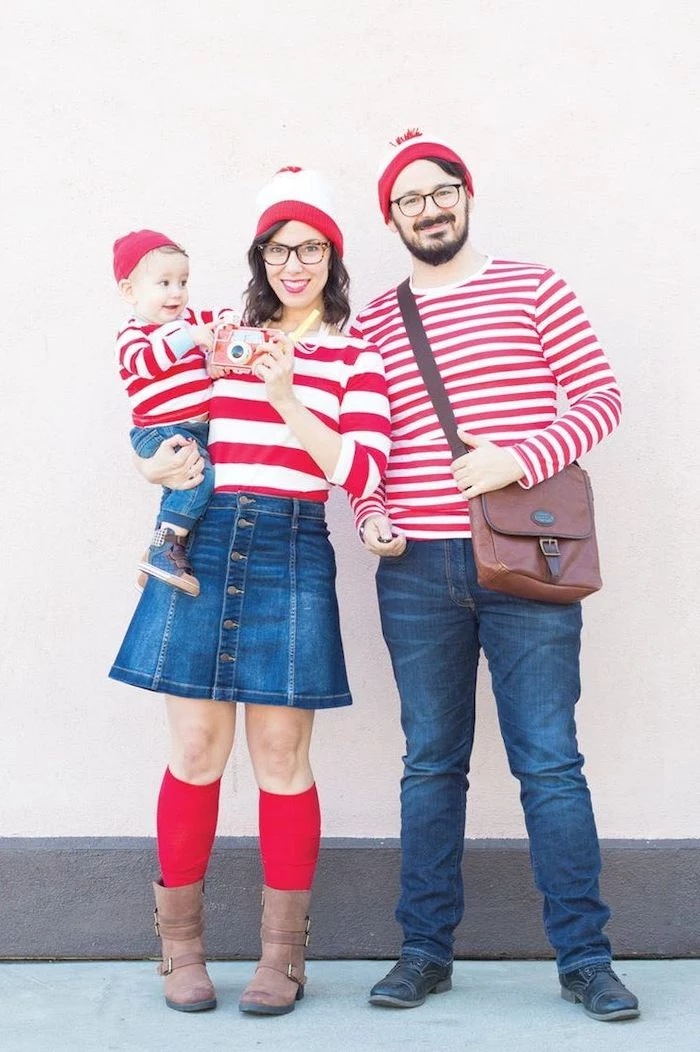
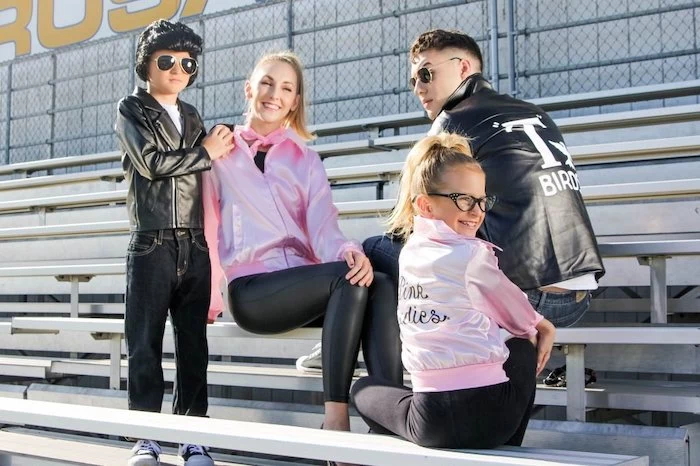
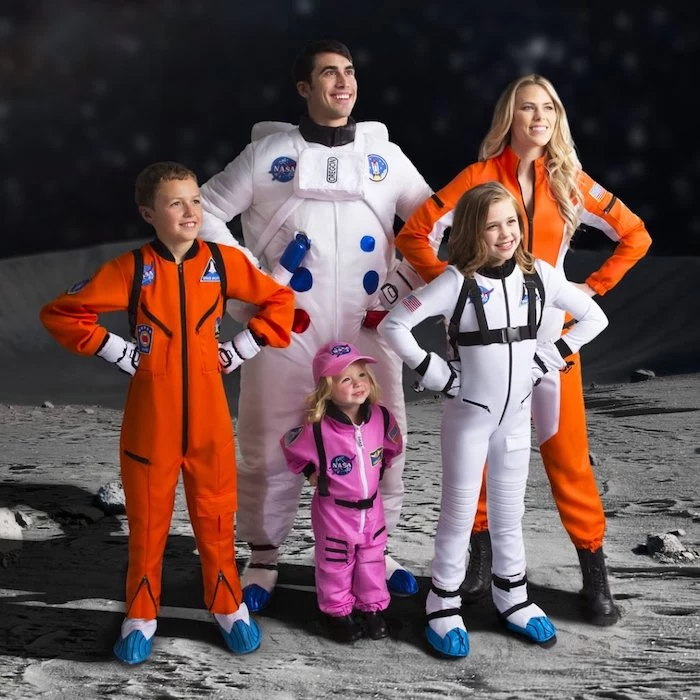
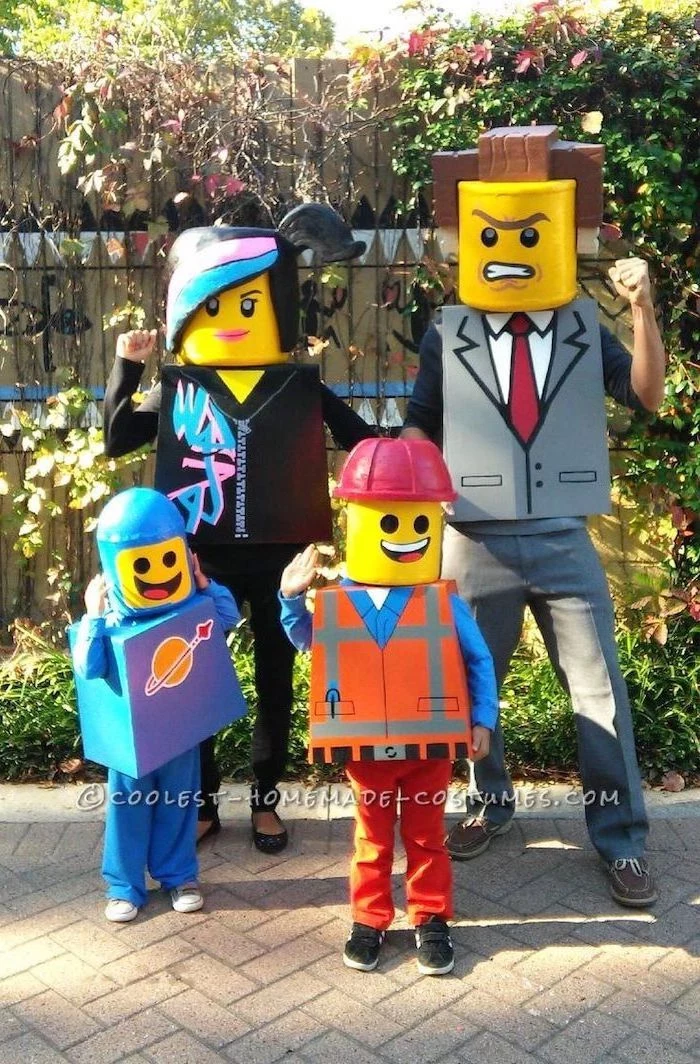
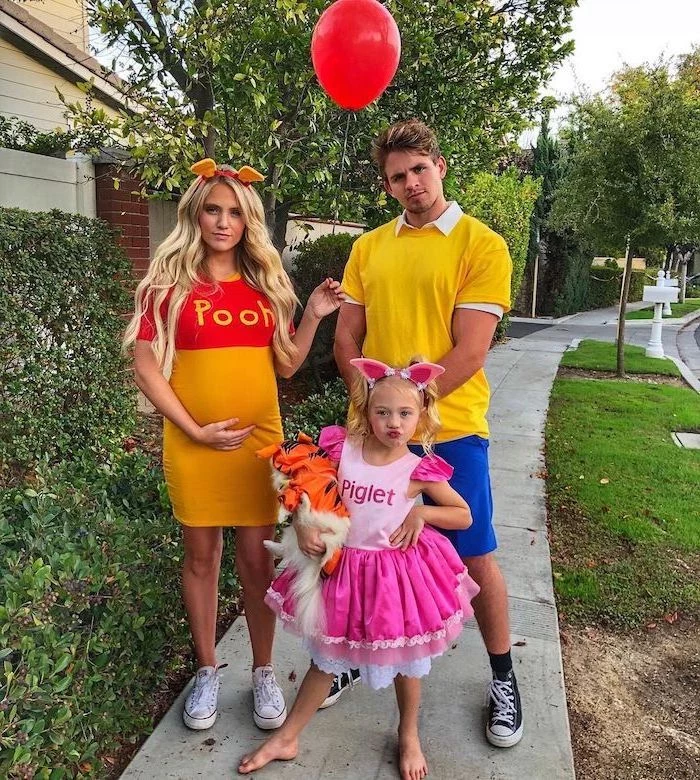
Inspirational Gallery
The right glue is a game-changer: Don’t just grab any white craft glue! For foam-to-foam connections, like in armor or props, a contact cement like Barge is the professional’s choice. For fabric, a flexible adhesive like Aleene’s Fabric Fusion is essential to prevent stiffness and cracking. And for quick, non-structural attachments, a hot glue gun is your best friend—just keep it away from heat-sensitive materials like thin vinyl.
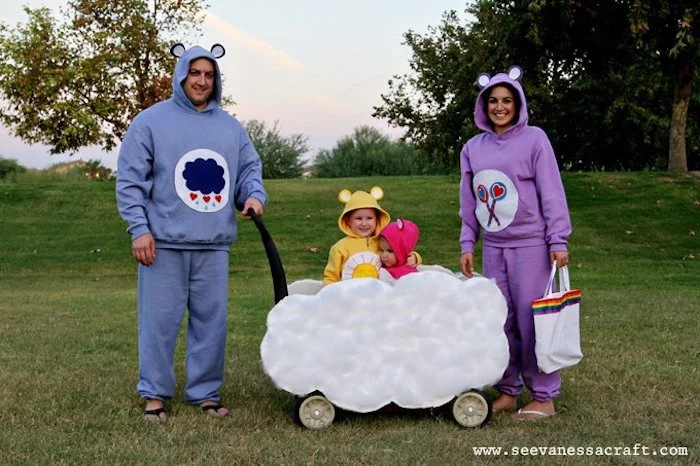
- Create a bold, unified look with a single color palette.
- Ensure props are lightweight and easy to carry, especially for kids.
- Add a surprising detail that’s only visible up close.
The secret? A successful group costume tells a story at a glance.
How do you make props that look heavy but are light enough for a child to carry?
The answer is insulation foam! Look for XPS foam boards (the pink or blue kind) at your local hardware store. It’s incredibly lightweight, easy to carve with a utility knife or hot wire cutter, and can be sanded smooth. A coat of Mod Podge before painting will seal it and give you a perfect surface for creating a realistic stone, wood, or metal finish.
According to a study on group dynamics, individuals in coordinated group attire report a stronger sense of belonging and cooperation.
This isn’t just about looking good for a photo; creating and wearing a family costume actually strengthens your ‘team’ identity for the night. It’s a visual cue to yourselves and others that you’re a unit, navigating the Halloween chaos together.
Don’t have a sewing machine? No problem. The world of DIY costumes is full of no-sew solutions that are surprisingly sturdy.
- Hem Tape: An iron-activated adhesive tape (like HeatnBond) creates clean, strong hems on capes or tunics without a single stitch.
- Safety Pins: An old classic for a reason. Use them on the inside of garments for quick fixes or to attach layered elements.
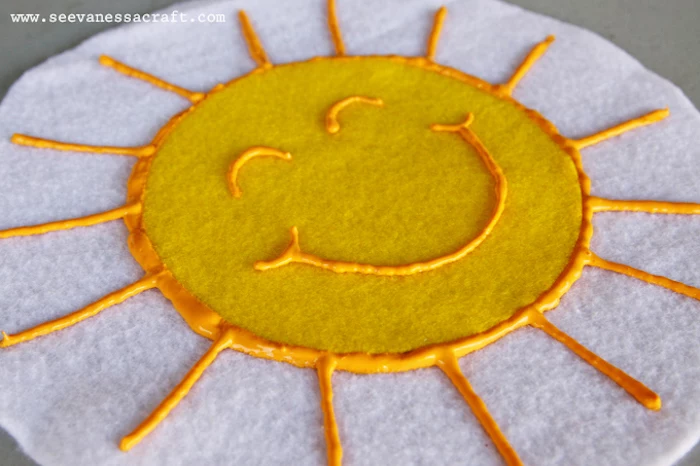
- Fabric Glue: As mentioned, a flexible glue is perfect for attaching patches, felt shapes, or other decorations permanently.
Felt Sheets: Inexpensive, available in every color, and doesn’t fray when cut. Perfect for emblems, masks, and small details. A stack of assorted colors from a craft store like Michaels is a must-have.
Cardboard: The ultimate free material. Use it as a base for shields, helmets, or even structured wings. Reinforce joints with hot glue and duct tape for durability.
For a few dollars, these two materials can form the foundation of almost any imaginative costume.
When it comes to costume makeup, consistency is key to tying your family’s look together. Even if the characters are different, using the same brand or style of makeup creates a subtle cohesion. For bold, long-lasting color that won’t sweat off, look beyond typical Halloween store kits. A starter palette from a theatrical brand like Mehron or Ben Nye provides highly pigmented, water-activated paints that are professional quality but still easy for beginners to use.
“The most successful costumes are often 80% silhouette and 20% detail.” – Bill Doran, Punished Props Academy
Focus on creating recognizable shapes first. A pointy hat and a long robe instantly reads ‘wizard,’ even before you add any intricate runes. Get the core shapes right for each family member, and your theme will be instantly clear to everyone.
Involving the little ones is part of the fun, but safety and age-appropriateness are crucial. Give them tasks they can master, like painting cardboard props (with washable paint!), sorting pom-poms by color, applying stickers, or ‘testing’ the comfort of the costume pieces. It gives them ownership of the project without putting them near hot glue guns or sharp scissors.

- A Mini Hot Glue Gun & Extra Sticks: For on-the-go repairs to props or accessories.
- Safety Pins (Various Sizes): The ultimate quick fix for a torn seam or a cape that won’t stay put.
- Double-Sided Fashion Tape: To secure shifting necklines or keep a mask from slipping.
- Black & White Zip Ties: Surprisingly effective for re-attaching a stubborn piece of armor or a prop handle.
My kids want to be glowing skeletons. How can I add lights safely?
Battery-powered LED strips or ‘fairy lights’ are your best friend! They are low-heat, flexible, and readily available. For a skeleton, you can use fabric glue or hand-stitch the thin wire onto a black sweatsuit. For extra diffusion and durability, try feeding the lights through clear vinyl tubing (found at hardware stores) before attaching them. Always secure the battery pack in an accessible pocket for easy on/off access.
Important point: Do a full dress rehearsal a few days before Halloween. This isn’t just for photos! It’s your chance to see if a strap is too tight, if a mask impairs vision too much, or if a toddler will actually tolerate wearing the hat. A 15-minute test run at home can save you from a major meltdown halfway through trick-or-treating.
Don’t overlook the power of a great wig. It can completely transform a person’s look and is often the key piece that makes a character instantly recognizable. For family costumes, buying wigs in the same style but different colors (for a pop-art or cartoon theme) or from the same ‘world’ (like spiky anime wigs) can create amazing group cohesion. Brands like Arda Wigs are popular with cosplayers for their quality and range of styles.

Did you know that adding a fabric medium (like Liquitex Professional Fabric Medium) to regular acrylic paint makes it flexible and permanent on clothing?
This simple mixture prevents the paint from getting stiff, cracking, or washing out. It’s the secret to hand-painting detailed logos or patterns onto t-shirts or stretchy leggings, ensuring your hard work lasts well beyond Halloween night.
- Durable enough for a night of running and playing.
- Comfortable in your local climate (breathable for warm areas, easy to layer for the cold).
- Easy to get in and out of for bathroom breaks!
The secret? Your best-looking costume is worthless if it’s a nightmare to wear. Prioritize function and comfort from the very beginning.

Think beyond characters and consider abstract concepts for a truly unique family theme. What about dressing as the four seasons? Or different weather phenomena, with one person as a rainbow, another as a thundercloud, and a baby as a single sunbeam? This approach allows for incredible creativity with textures, colors, and materials, and you’re guaranteed not to run into another family with the same idea.
Velcro Strips: Great for pieces that need to be removed quickly, like a detachable cape or a child’s mask. Use the heavy-duty, adhesive-backed kind for a secure hold that requires no sewing.
Plastic Snaps: More secure and discreet than Velcro. A simple snap fastener kit (like those from KAMsnaps) is inexpensive and perfect for attaching armor pieces or closing a tunic where a zipper would ruin the look.
For durability, snaps are superior, but for convenience, Velcro wins.
Your recycling bin is a treasure trove. A large cardboard box can become a robot body, a Minecraft character, or a car. Plastic bottles can be cut and painted to become futuristic goggles or rocket boosters. Egg cartons make excellent dragon scales or bumpy alien skin. Before you buy new materials, challenge the family to see what you can create from what you already have.
A 2021 Pinterest trend report showed a 40% increase in searches for ‘upcycled Halloween costumes’.
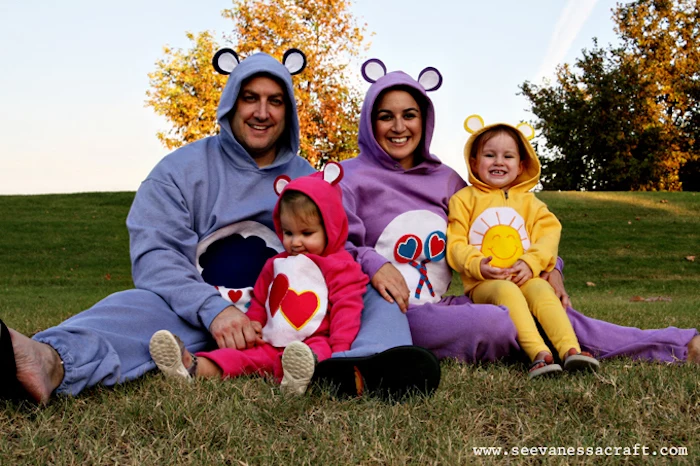
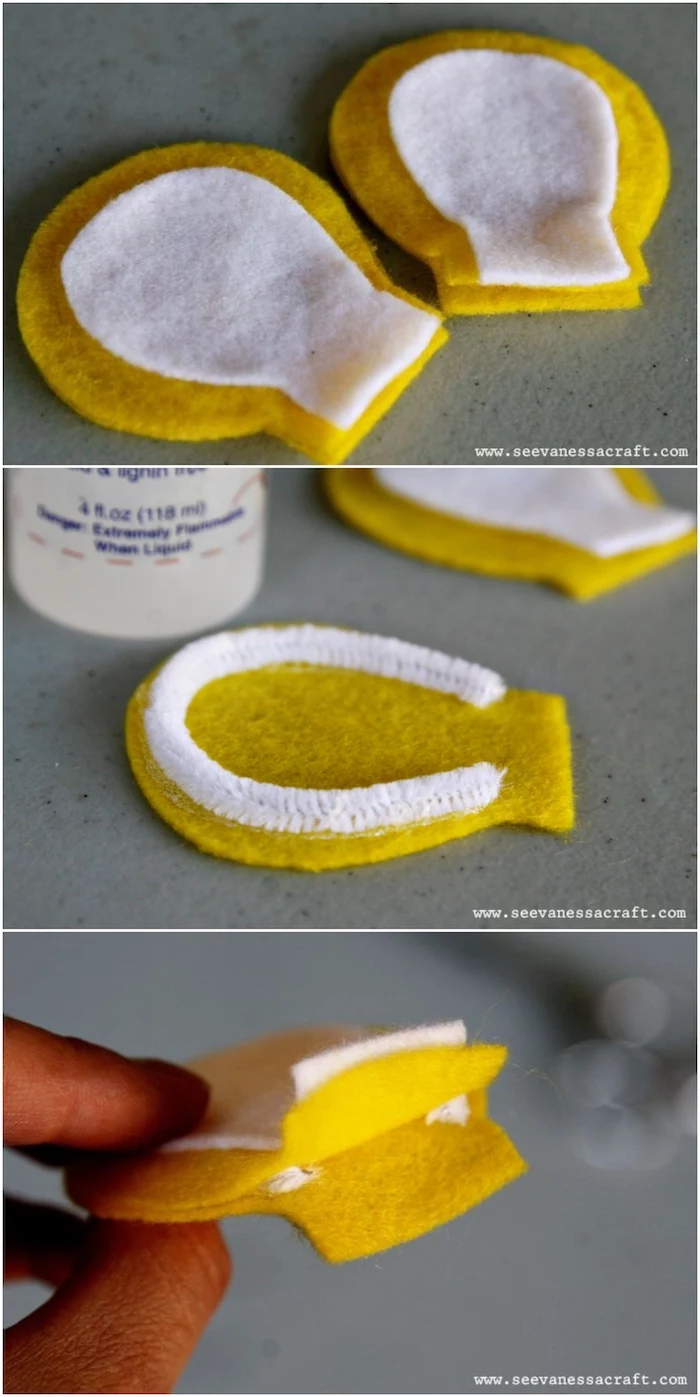
This trend reflects a growing desire for sustainable and creative solutions. Before you start from scratch, look in your closets. An old prom dress can be zombified, a boring sweatshirt can become a Care Bear, and a collection of mismatched socks can be sewn into a fantastic monster costume.
Creating realistic texture can elevate a simple costume to something spectacular. For faux fur, try dry-brushing a darker paint color onto a lighter-colored faux fur fabric to create depth. For metallic armor, a base coat of black spray paint followed by a light dusting of silver or ‘graphite’ spray (like Rust-Oleum’s metallic finishes) creates an instant weathered, realistic look that’s far more convincing than a flat silver.
What’s the biggest mistake beginners make with fabric?
Choosing the wrong type for the job. Don’t use non-stretch cotton for a form-fitting superhero suit—it will rip. Instead, opt for a 4-way stretch spandex. Similarly, avoid heavy upholstery fabric for a child’s flowing cape; it will be too cumbersome. Always consider the fabric’s weight, drape, and stretch before you buy.
Preserve your hard work for future Halloweens or dress-up play. Hand-wash any fabric pieces gently and allow them to air dry completely. For structural items made of foam or cardboard, wipe them down and store them in a large plastic bin to protect them from being crushed or getting damp. Labeling the bin with the costume theme will make it easy to find next year!
Crucial Safety Tip: If your family will be trick-or-treating after dark, discreetly incorporate reflective tape into your costumes. It can be hidden on the back of a cape, along the seams of pants, or on the soles of shoes. This small addition makes everyone dramatically more visible to cars, ensuring a safe and stress-free night.
Your hardware store’s aisles are full of unconventional costume supplies. PVC pipes make for excellent, lightweight staff or lightsaber hilts. Zip ties are perfect for connecting foam armor plates. In the paint section, you’ll find spray paints specifically formulated for plastic, which adhere much better to props and masks than standard craft paints. Think outside the craft store!
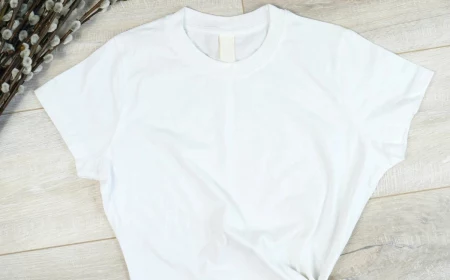
A simple hoodie or sweatsuit is the ultimate family costume base. It’s comfortable, comes in every color, and requires no sewing skills to decorate.
- Add felt spots and ears for a family of leopards.
- Glue on white felt circles and a paper cone for a group of garden gnomes.
- Use fabric paint to draw bones for an instant skeleton crew.