My No-Fail Halloween Appetizer Playbook: Tips from a Pro
I’ve catered hundreds of events over the years, from stuffy corporate functions to fancy weddings. Each one has its quirks, but honestly, the parties that really let you have some fun are the themed ones. And Halloween? It’s in a league of its own. It’s the one time of year you can really lean into creative, fun food that gets people talking.
In this article
But I’ve learned something crucial: a killer party spread isn’t just about making food that looks like a spider or a ghost. It’s about smart planning and using reliable techniques so the food tastes as incredible as it looks. So many hosts fall into the same trap—they see some super elaborate appetizer on social media, spend a whole day making it, and then watch it sadly wilt an hour after the guests arrive. Or worse, they pick recipes so complicated they spend the entire party stuck in the kitchen. Not fun.
My whole approach is built around balancing that visual “wow” factor with total practicality. This guide is my personal collection of the recipes and strategies I lean on. I’m not just going to give you steps; I’m going to tell you the why behind them. We’ll cover everything from keeping food safe to timing your prep, so you can actually enjoy your own party.
First Things First: Safety and Strategy
Before we even think about ingredients, we have to talk about the two things that can make or break any party: food safety and a solid game plan. Trust me, a guest getting sick is a way bigger horror story than any fake cobweb decoration.
The Temperature Danger Zone is Real
In the food world, we live by the rules of the Temperature Danger Zone. It’s the range between 40°F and 140°F where bacteria just love to multiply. Any perishable food—and that includes most appetizers with dairy, meat, or eggs—shouldn’t hang out in this zone for more than two hours, period. If your party is in a warm room, that window shrinks to just one hour. This is non-negotiable stuff.
So what does that actually mean for your party? You can’t just put out a big bowl of taco dip at 7 PM and hope for the best at midnight. I always serve food in waves. I’ll set out smaller platters and then swap them out for fresh ones every 90 minutes or so. A quick tip: If your party starts at 7 PM, literally set a phone alarm for 8:30 PM labeled “Swap Dips.” Don’t mess around with food safety!
Planning Your Spread Like a Pro
A great appetizer table is all about variety and flow. I usually think about it in a few key categories:
- Something Hot, Something Cold: You really need a mix. Hot appetizers feel more substantial and comforting, but cold ones are generally easier to manage and can sit out (within those safety limits!) with less fuss.
- Make-Ahead vs. Last-Minute: The secret to a stress-free party is a menu that’s about 80% make-ahead. For most recipes, you can prep the components a day or two in advance. The final cooking or assembly happens right before you serve.
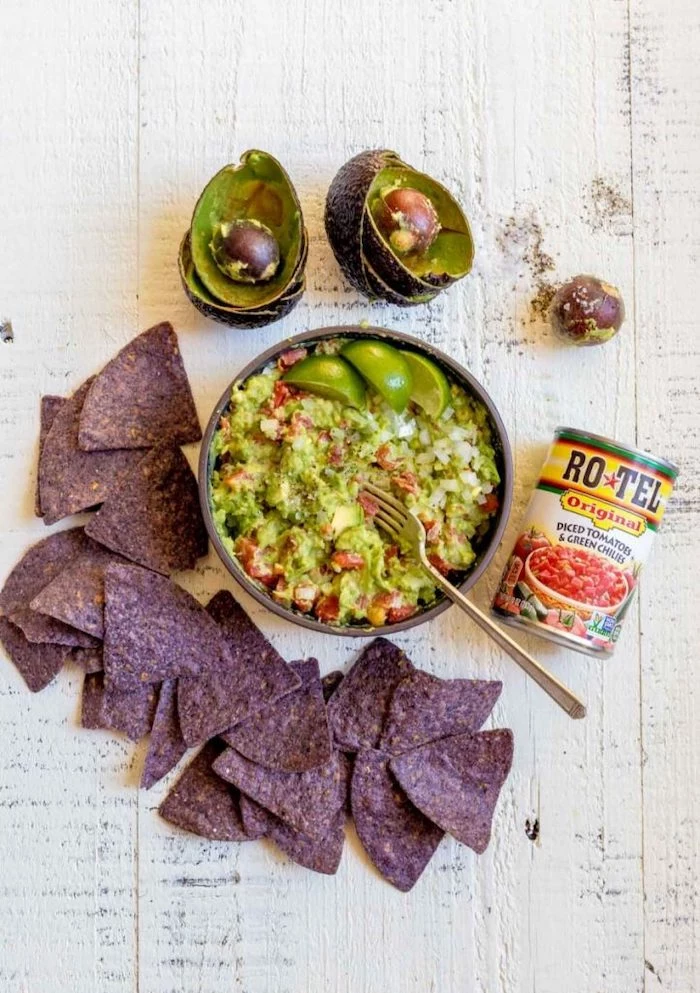
- Flavors and Textures: You want a little bit of everything—creamy, crunchy, savory, and tangy. A whole table of cheese-based dips gets old fast. Think about contrast. A sharp, bright salsa helps cut through the richness of a gooey baked brie. Crunchy tortilla chips are the perfect partner for a silky-smooth guacamole.
- Dietary Options: Even for a casual party, having a couple of designated gluten-free or vegetarian options is a really thoughtful touch. You can get cheap, cute little chalkboard labels from a craft store or Amazon for a few bucks. It saves you from answering “What’s in this?” all night and helps guests with allergies feel safe.
Oh, and here’s a sample game plan for a party of around 20 people. Don’t overdo it! I’d make one batch of the Mummified Jalapeño Poppers (hot), one big bowl of a hearty “Graveyard” taco dip (cold), and then just buy some good-quality pita and tortilla chips and maybe a simple fruit platter. Done. Easy, balanced, and delicious.
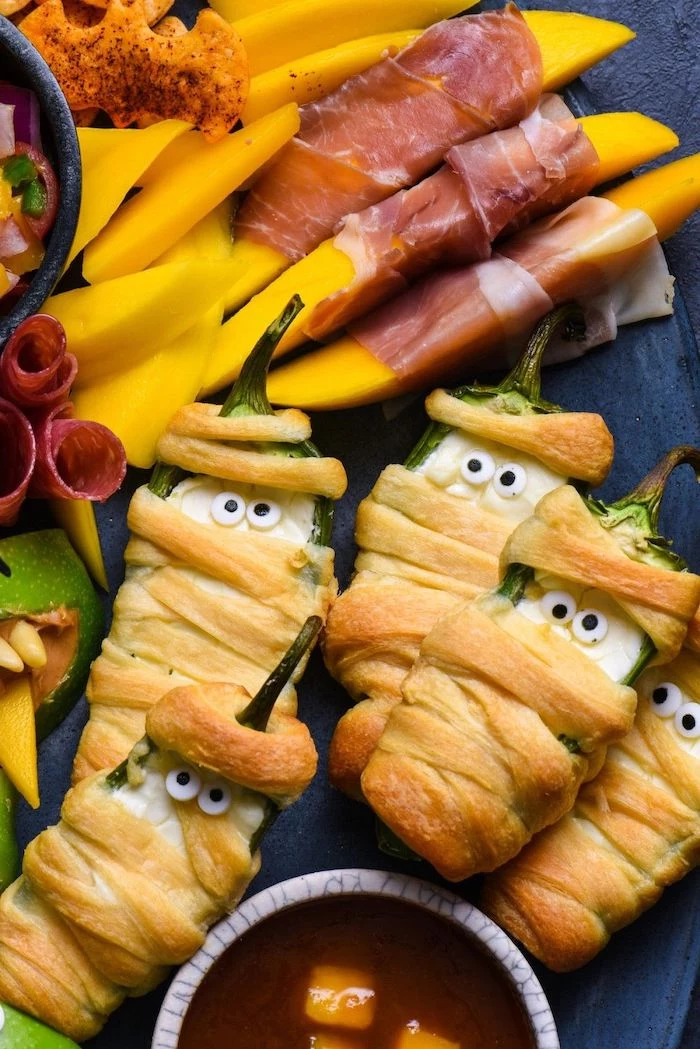
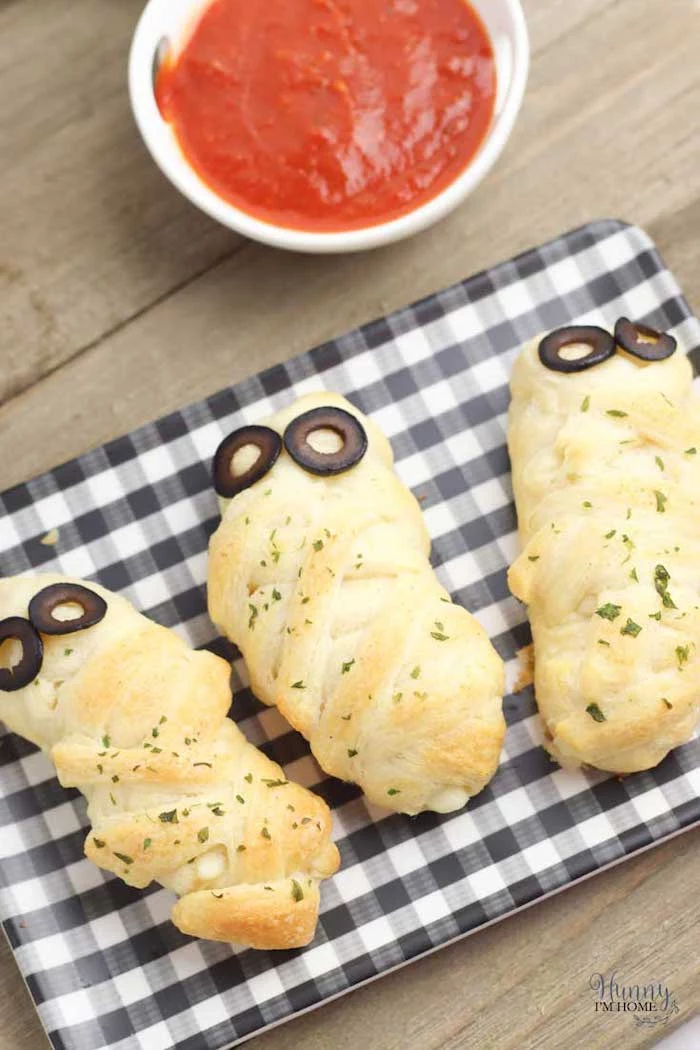
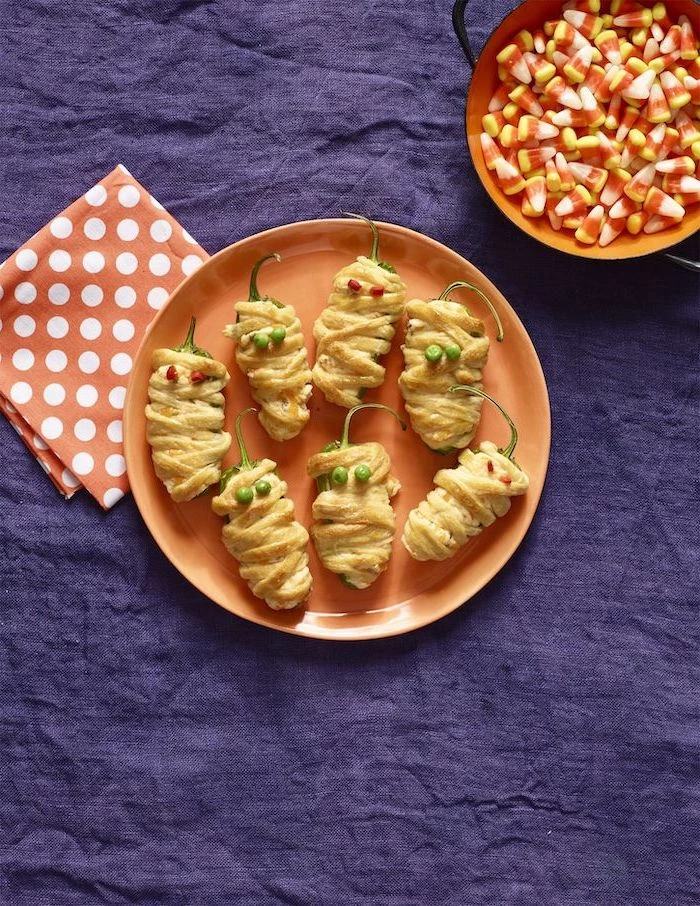
Recipe Spotlight: Mummified Jalapeño Poppers
Okay, let’s get to the good stuff. These poppers are an absolute crowd-pleaser. They hit all the right notes: creamy, spicy, savory, and they look adorable. The key to making them amazing instead of just okay is all in the prep. We want a crispy, golden-brown mummy, not a soggy, greasy mess.
This is a pretty budget-friendly appetizer, too. All in, a batch should run you between $15 and $20, depending on where you shop. As for time, plan for about 20-25 minutes of prep and another 15-20 minutes of baking.
What You’ll Need
- Jalapeños: 12 large, straight-ish ones. They’re just easier to fill and wrap.
- Cream Cheese: One 8-ounce block of full-fat cream cheese, softened. Don’t use the whipped kind from a tub; it has too much water and will make the filling runny.
- Shredded Cheese: 1 cup of sharp cheddar or a Monterey jack blend.
- Seasoning: 1/2 teaspoon garlic powder and a pinch of salt.
- The Wrapping: One can of refrigerated crescent roll dough.
- The Eyes: A small tube of black decorating gel or some candy eyeballs. You can find these in the baking aisle at stores like Michael’s or Walmart, especially around the holidays.

Let’s Make Some Mummies
1. Prep the Peppers (The Important Part): First, preheat your oven to 400°F and line a baking sheet with parchment paper. Now, for the jalapeños. Heads up! Seriously, wear disposable gloves for this step. The oils from the peppers can stay on your skin for hours, and you do not want to accidentally rub your eyes later. Slice each jalapeño in half lengthwise. Use a small spoon or a melon baller to scrape out all the seeds and the white pith inside. This is where most of the intense heat lives, so a good scrape will give you pleasant warmth instead of a five-alarm fire.
2. Make the Filling: In a medium bowl, mix your softened cream cheese, shredded cheese, garlic powder, and salt until it’s all nicely combined.
3. Fill ’em Up: Spoon the cheese mixture evenly into each jalapeño half. Don’t overfill them, or the cheese will ooze out everywhere while baking. A common mistake is a cheese explosion in the oven. To prevent this, a quick pro tip is to pop the filled peppers into the fridge for 15 minutes before wrapping. This helps the cheese set up.

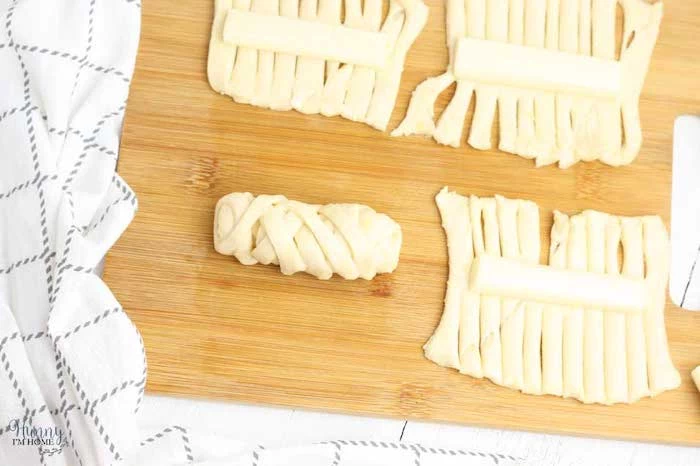
4. Wrap Your Mummies: Unroll the crescent dough and press the perforations together to form a solid rectangle. Using a pizza cutter or a knife, slice the dough into thin strips (about 1/4 inch wide). Now, wrap a few strips around each filled jalapeño half, leaving a little space near the top for the eyes. Crisscross them to make it look like mummy bandages. It doesn’t have to be perfect; messy is part of the charm!
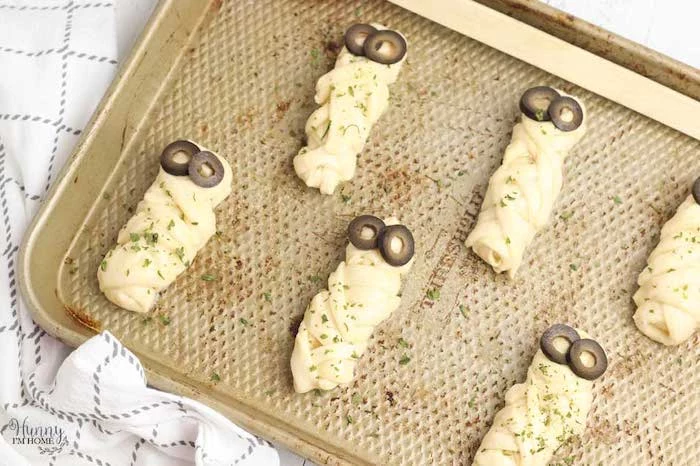
5. Bake and Finish: Place the wrapped poppers on your prepared baking sheet. Bake for 15-20 minutes, or until the dough is golden brown and the cheese is bubbly. Let them cool for a few minutes before using the decorating gel or a dab of cream cheese to stick on your candy eyeballs.
Wrapping Dough: A Quick Aside
By the way, I recommend crescent roll dough because it’s easy to find, affordable (usually $3-$4 a can), and bakes up with a soft, buttery texture that’s perfect for the poppers. Some people like to use puff pastry, which gives you a flakier, crispier result. It’s a great option, but it can be a bit trickier to work with and puffs up a lot, sometimes overwhelming the pepper. For this recipe, I stick with the simple, reliable crescent dough.
No Time? Here’s a Quick Win
Feeling overwhelmed and short on time? Don’t stress. Grab a log of goat cheese, roll it in some everything bagel seasoning, and stick a nice cheese knife in it. Serve with crackers. It looks fancy, takes about 30 seconds to assemble, and tastes amazing. Nobody has to know it wasn’t part of the original plan!
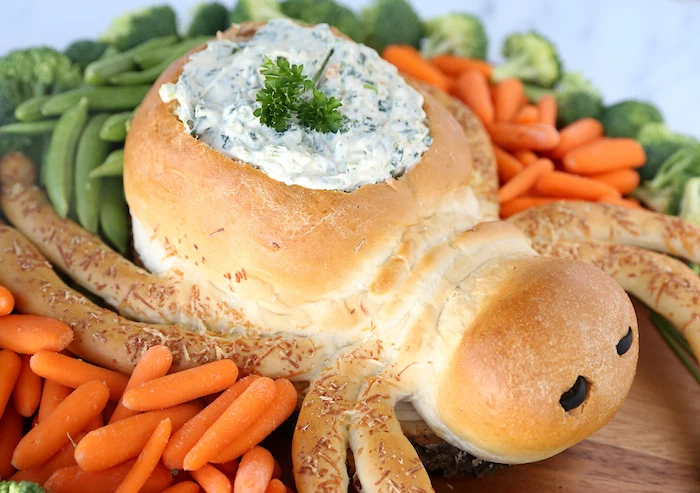
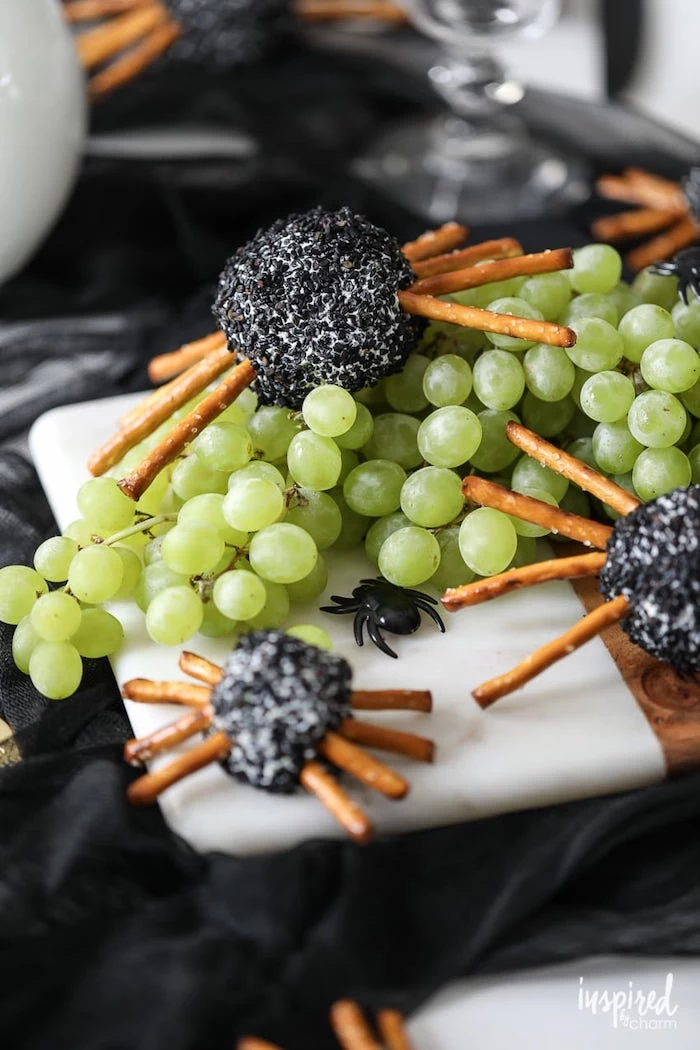
Inspiration Gallery
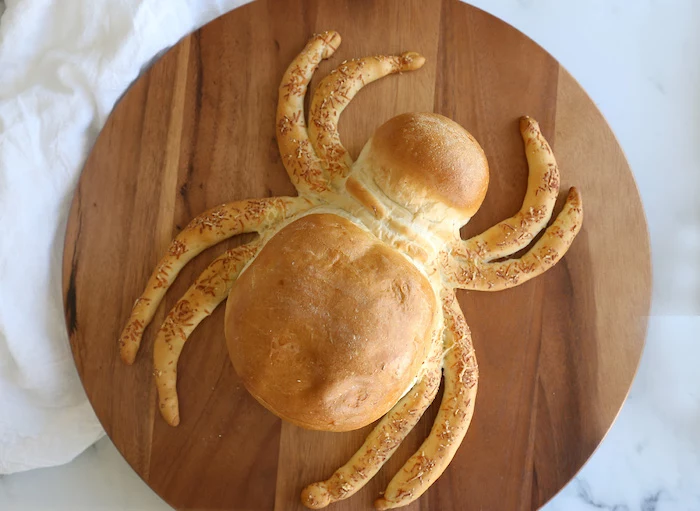
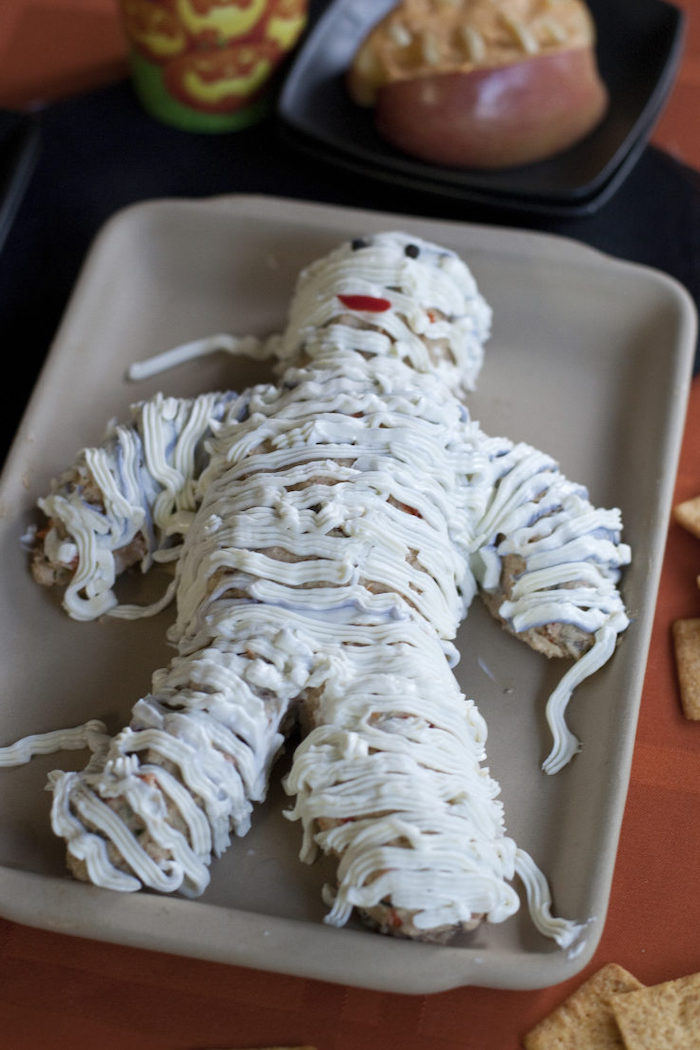
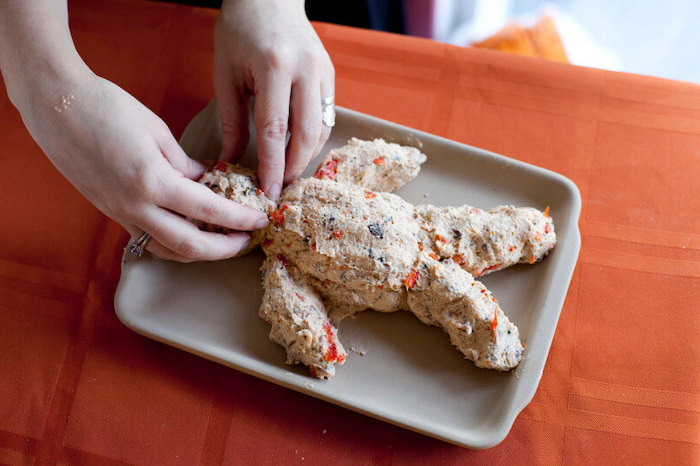
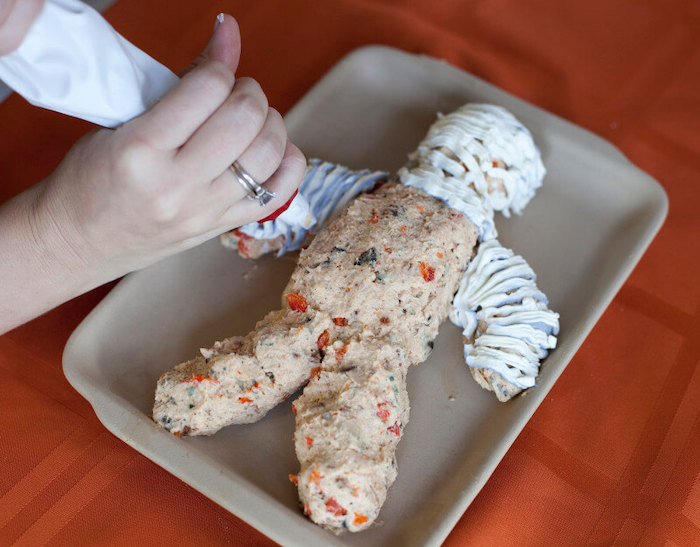
The secret to a killer cheeseball? It’s all about the temperature and the coating. For a firm, perfectly round spider body or pumpkin shape, you must chill the cream cheese mixture for at least two hours—overnight is even better. When it’s time to coat, toast your nuts or crush your pretzels first. This small step deepens their flavor and adds a superior crunch that stands up to the creamy base.
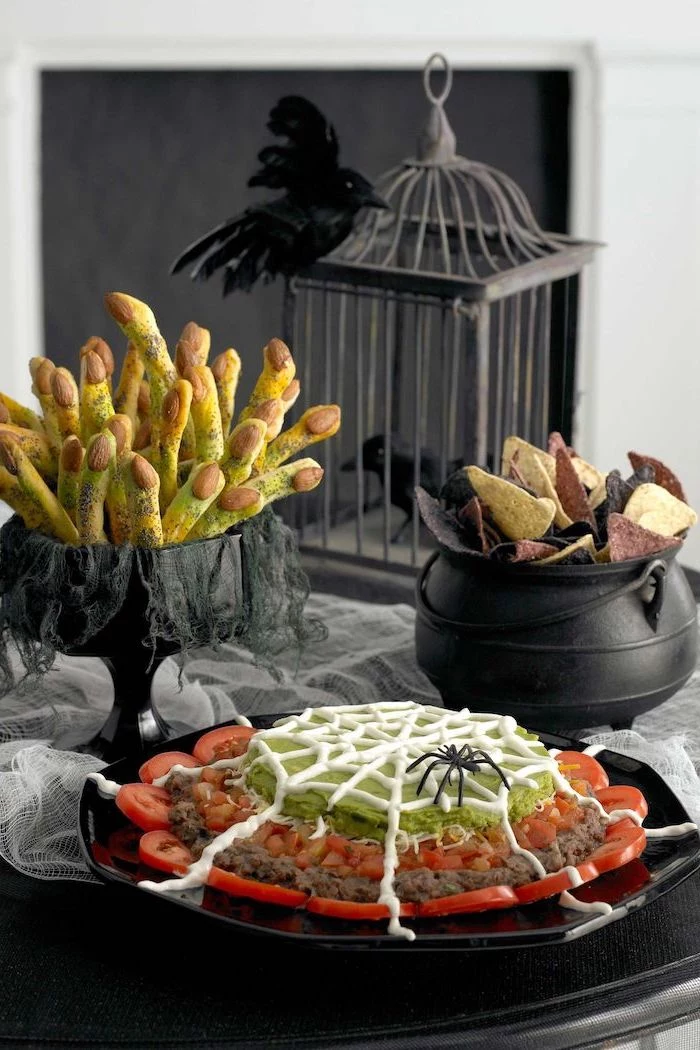
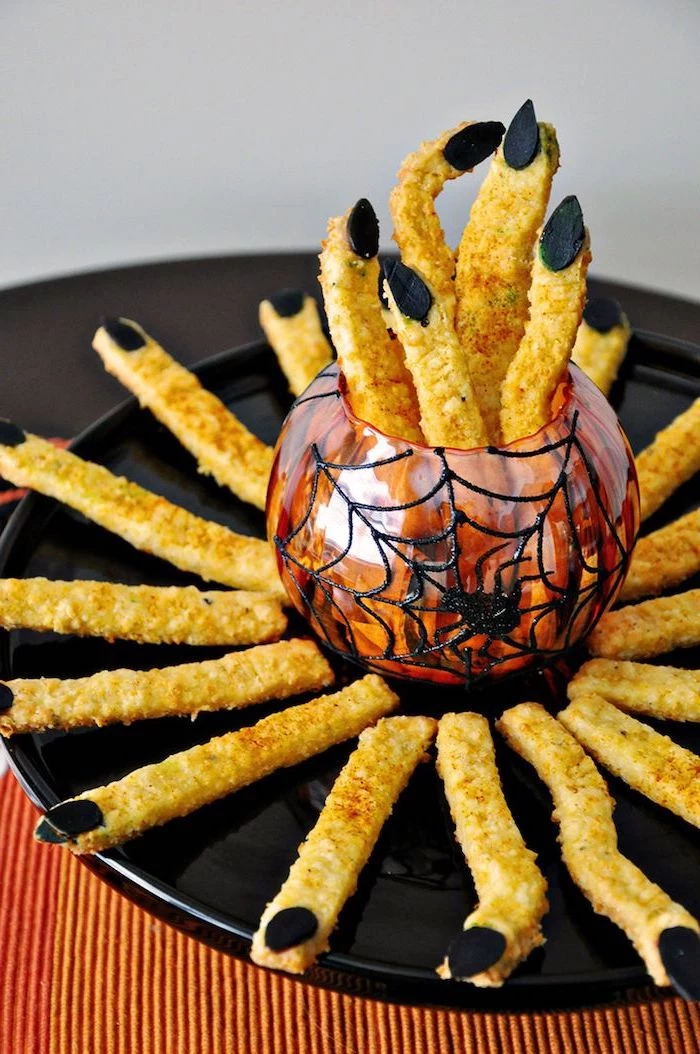
- Create ‘witch finger’ breadsticks by pressing a sliced almond onto the tip of each dough strip before baking.
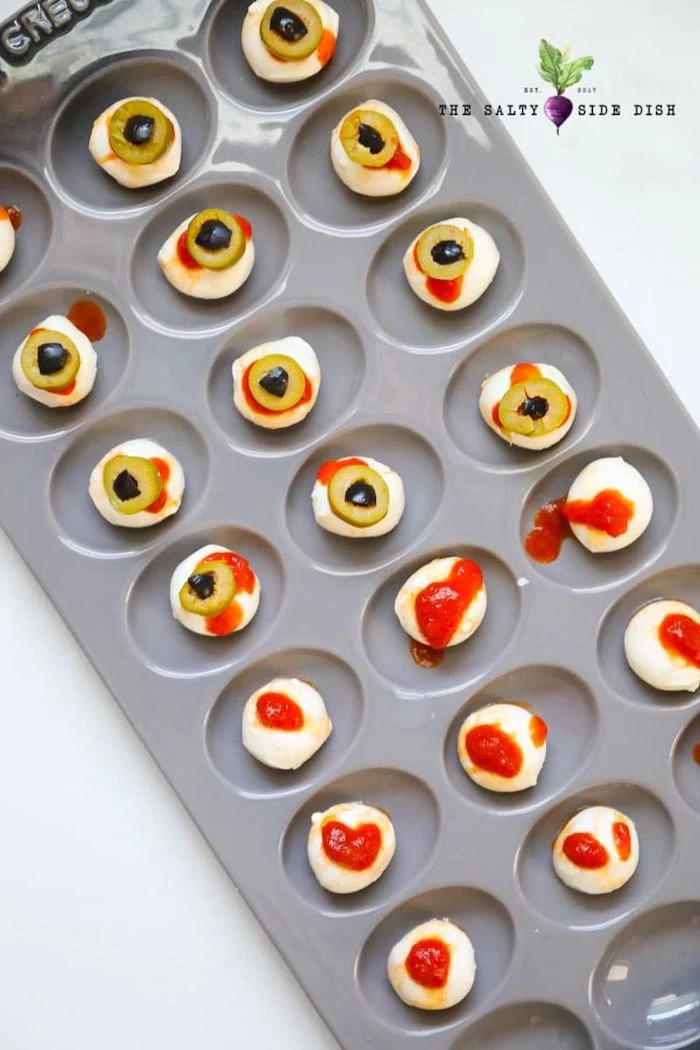
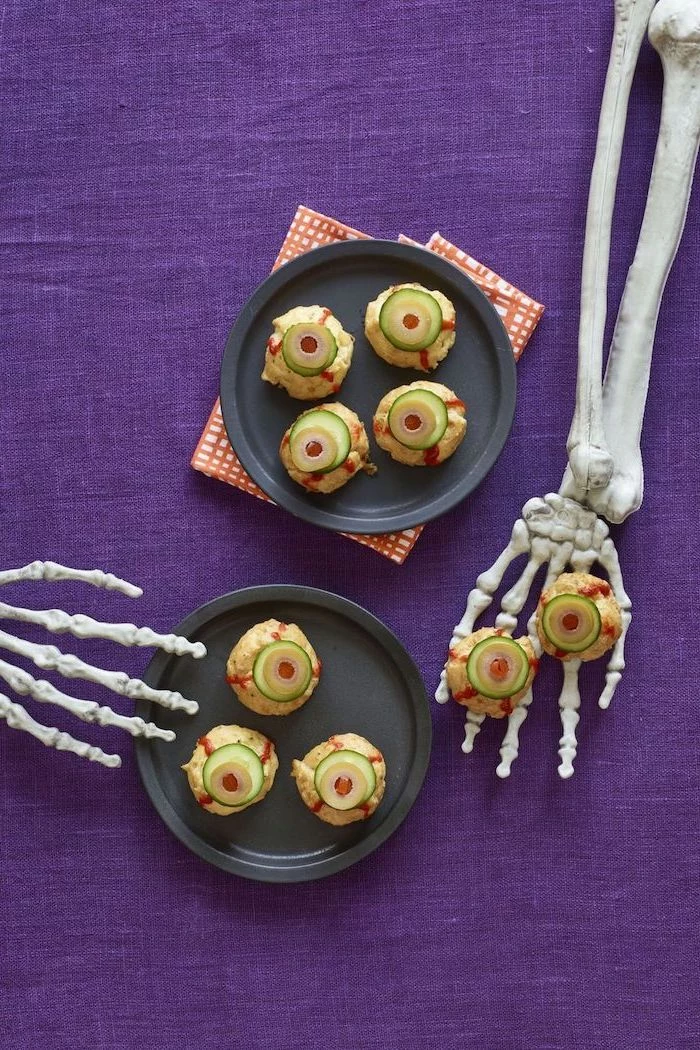
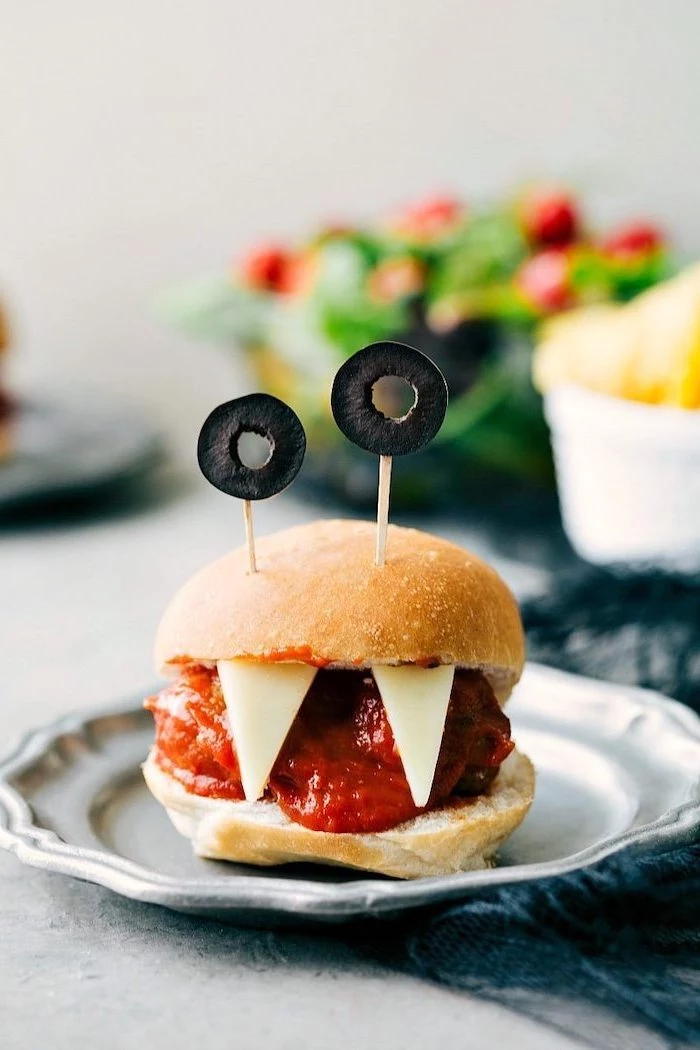
- Turn simple meatballs into ‘eyeballs’ by placing a small circle of mozzarella and a sliced black olive on top.
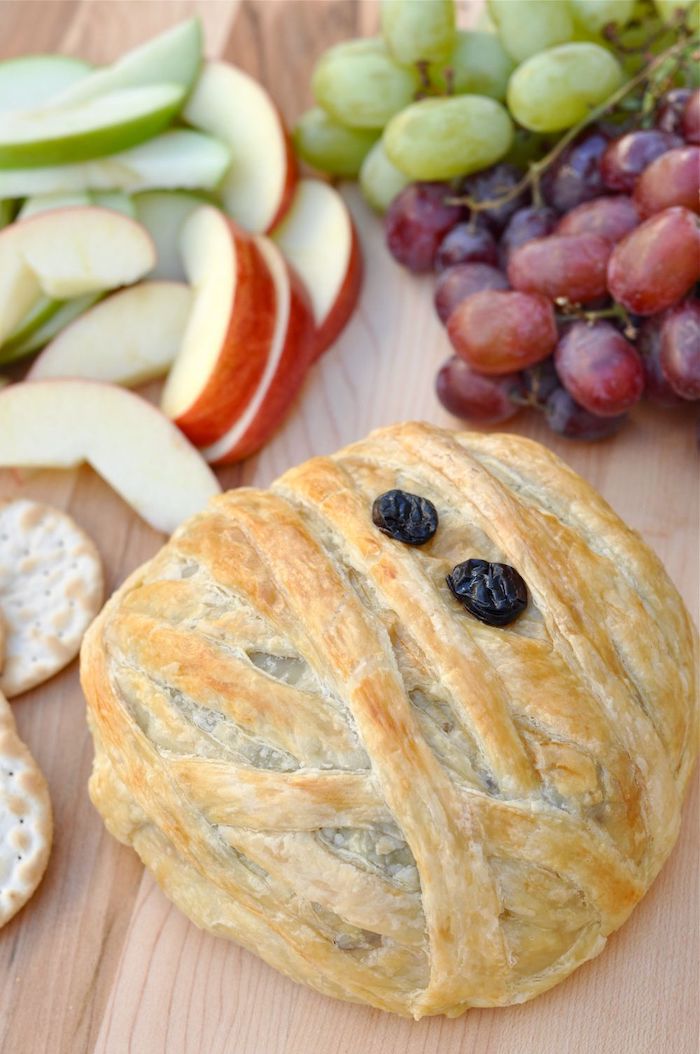
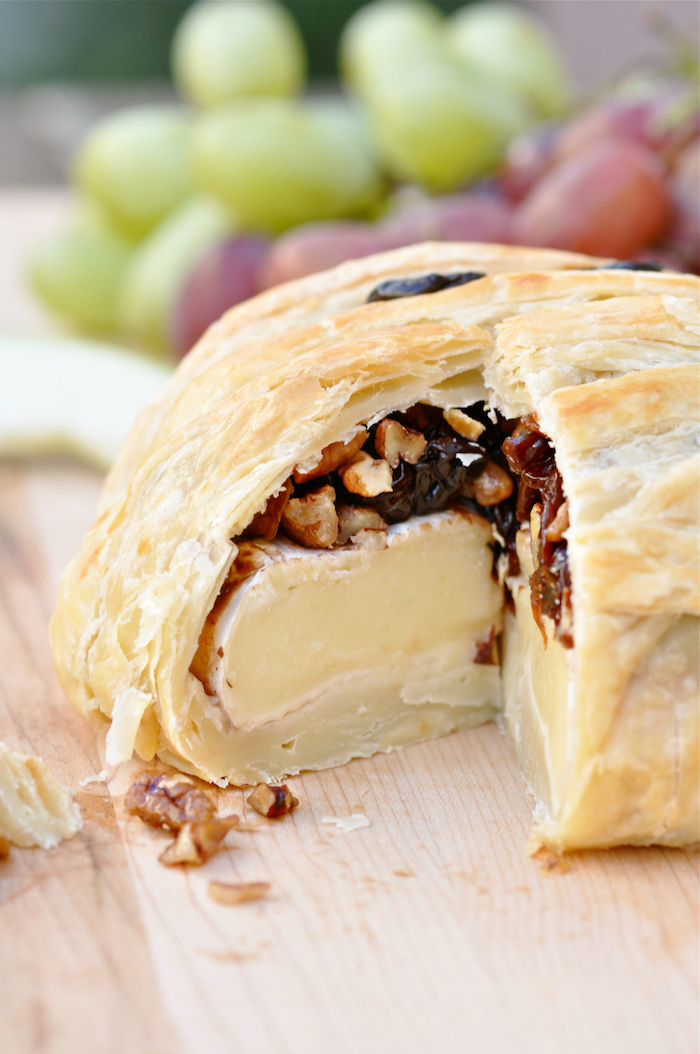
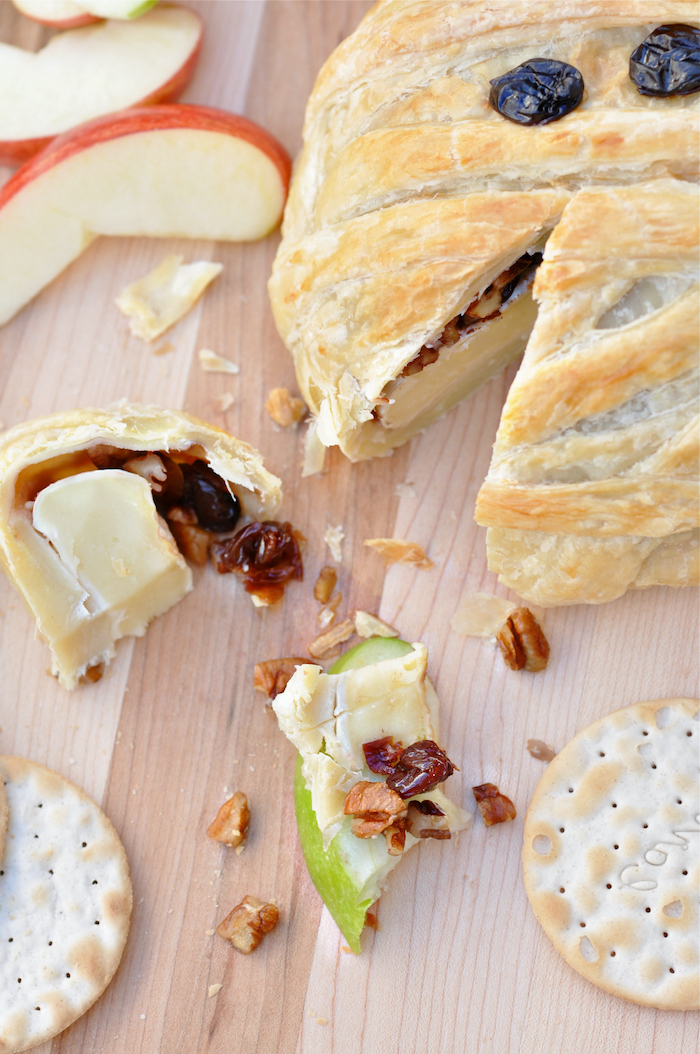
- Make ‘bandages’ for mummy-dogs or baked brie with pre-made puff pastry, like the one from Pepperidge Farm, for a buttery, flaky result with zero fuss.
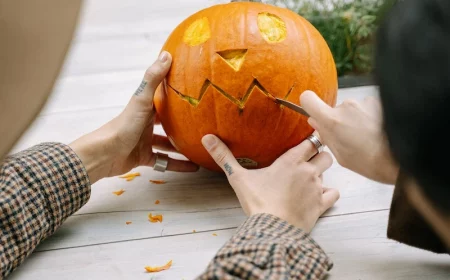
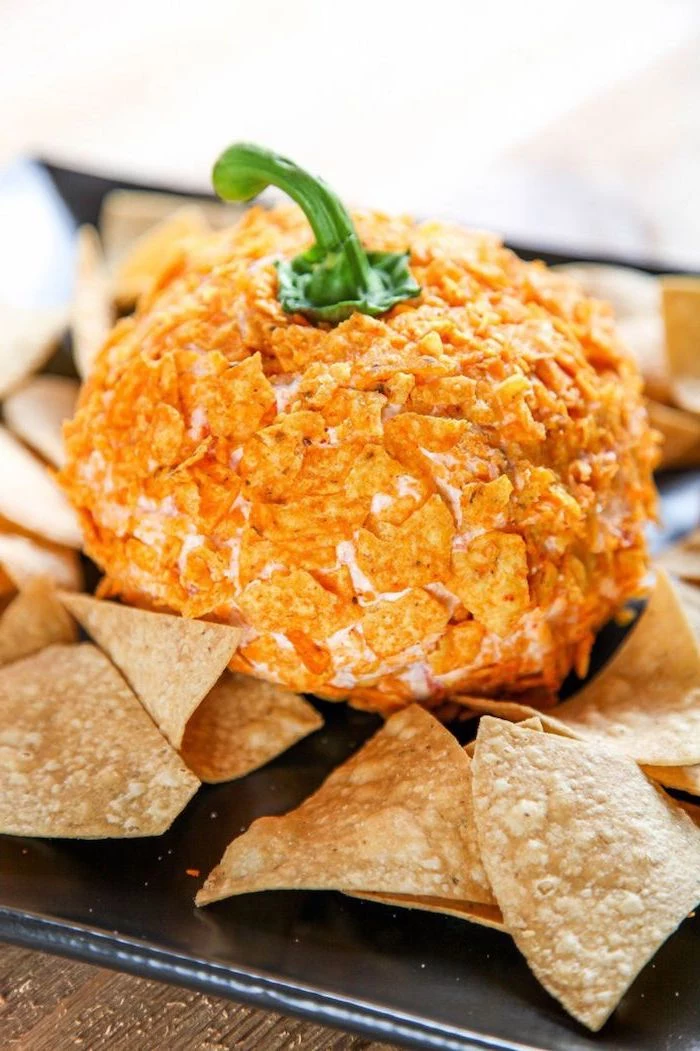
Nearly one-quarter of all the pumpkins sold in the U.S. each year are purchased for Halloween.
Don’t just carve them! That savory pumpkin flesh is perfect for a creamy, smoky dip. Roast it with garlic and sage, then blend with cream cheese and a pinch of smoked paprika. Serve it warm in a hollowed-out mini pumpkin for a stunning centerpiece that’s 100% edible.
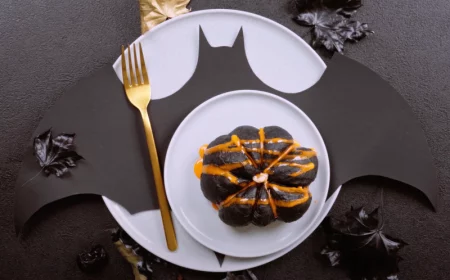
How do I make foods truly black without a weird aftertaste?
The key is to ditch the watery liquid food coloring from the grocery store. For a deep, impressive black in your dips or frostings, you need gel-based food coloring. Brands like Americolor (Super Black) or Wilton (Black Icing Color) are highly concentrated, so you use far less, preserving the original flavor of your recipe. For a more natural approach, activated charcoal powder or black tahini can create dramatic dark hues in savory dishes.
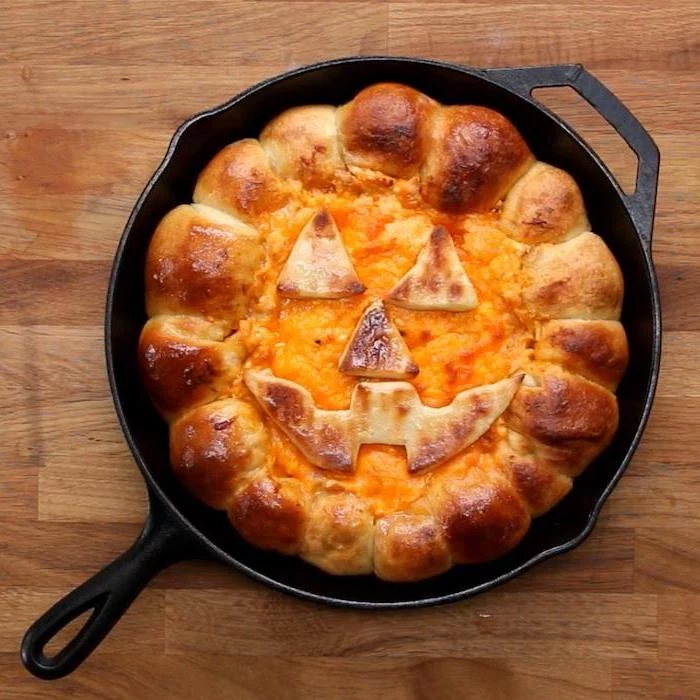
Pro-Tip: To keep hot dips like spinach-artichoke or buffalo chicken warm for hours without a slow cooker, use a small cast-iron skillet. Heat the dip in the skillet in the oven, and the iron will retain the heat for a surprisingly long time on the buffet table. Place it on a wooden board or trivet to protect your surfaces.
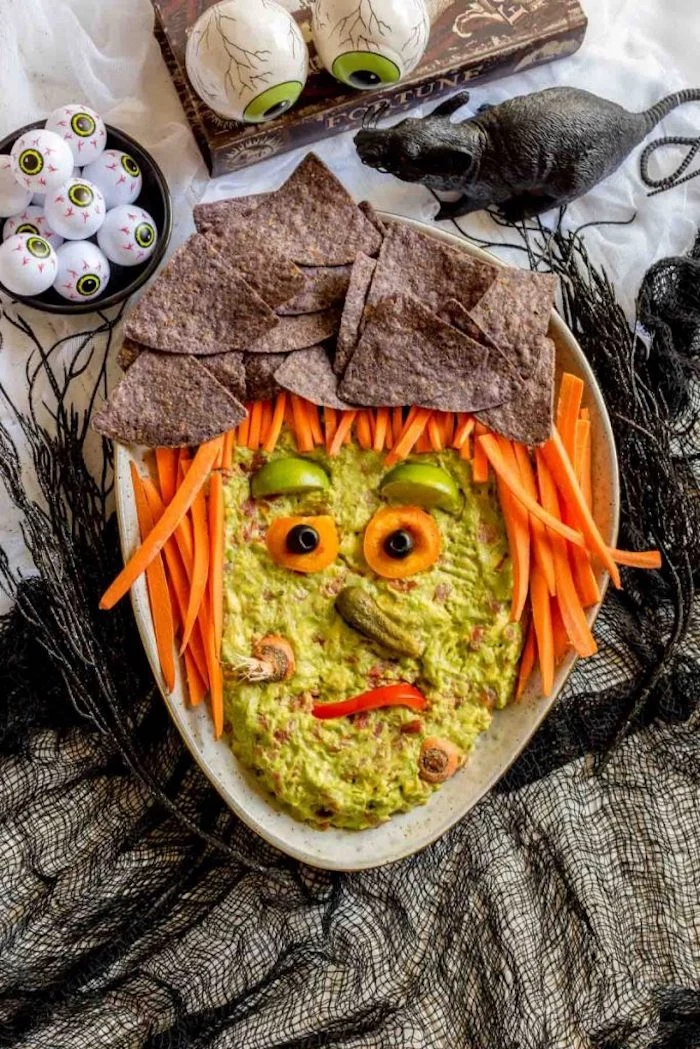
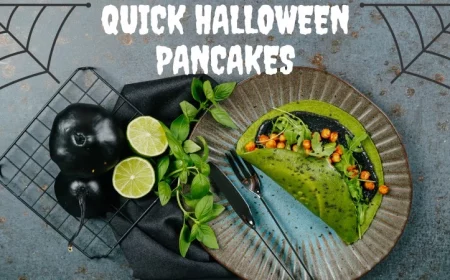
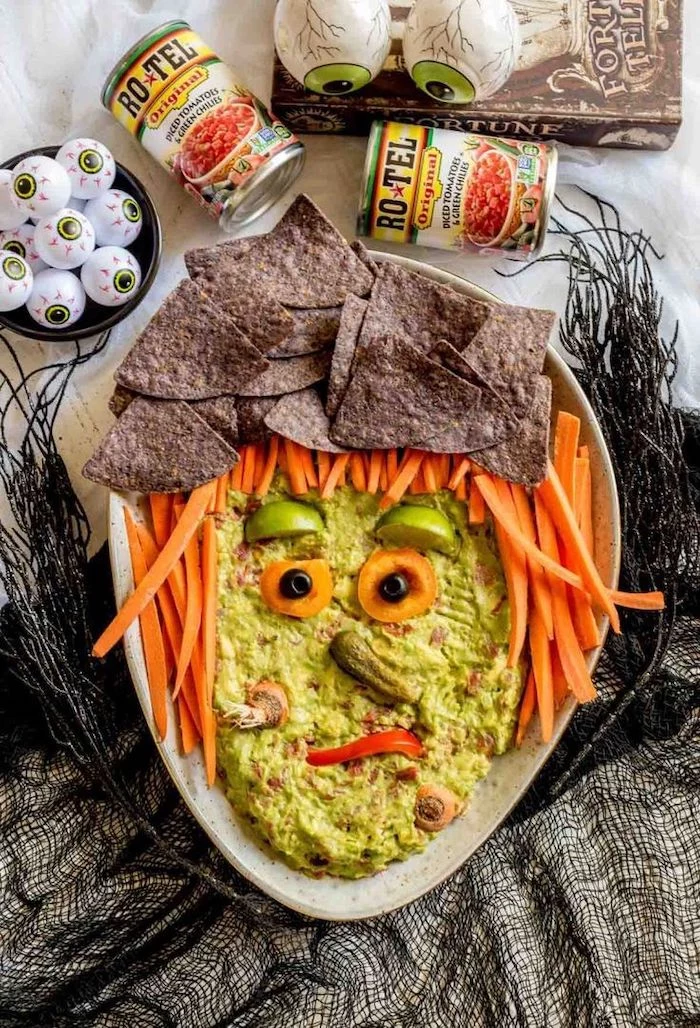
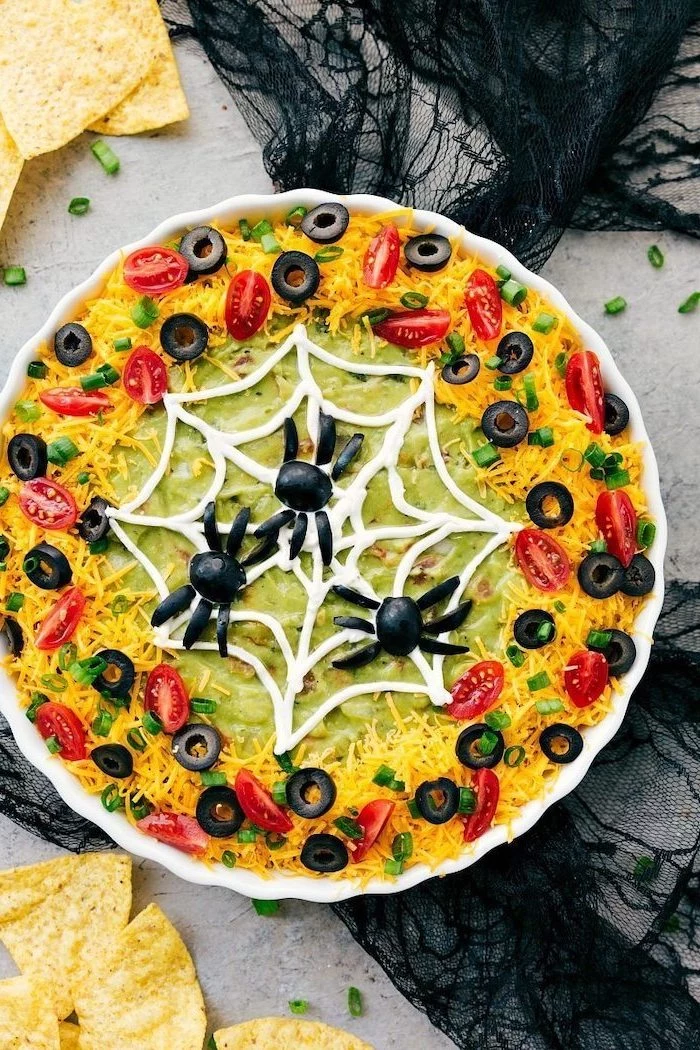
Create a visually arresting platter by playing with contrasts. Don’t just stick to orange and black. Introduce a deep, bloody red with a beet hummus, a ghostly white with a whipped feta dip, and a monstrous green using an herby guacamole. These vibrant colors pop against dark platters and make the spread look more abundant and appetizing.
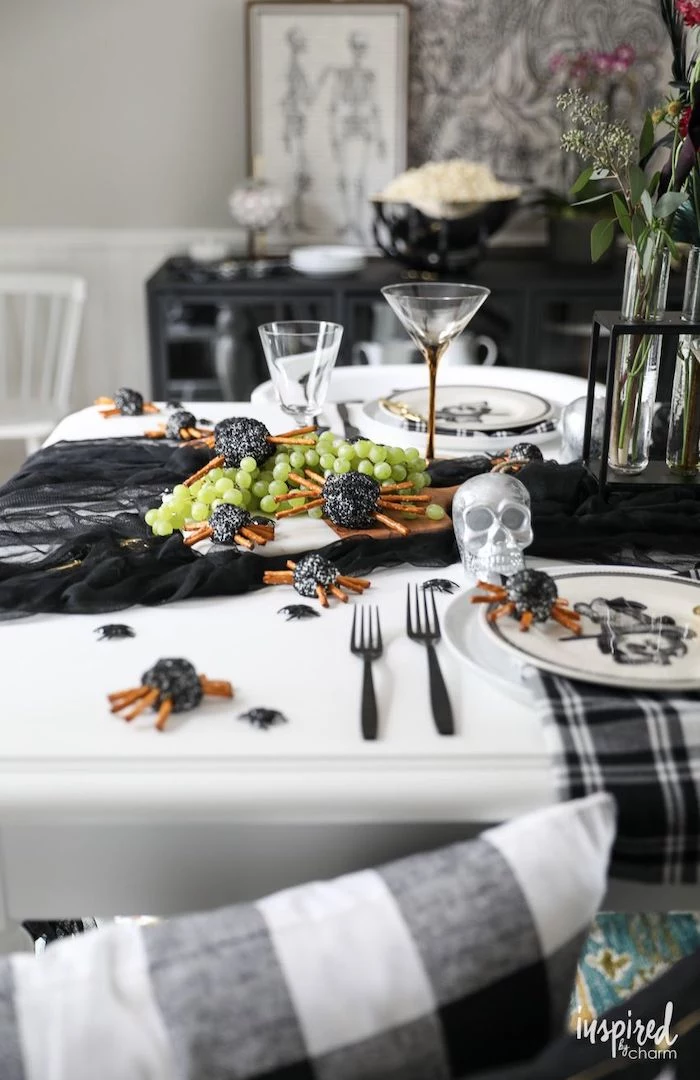
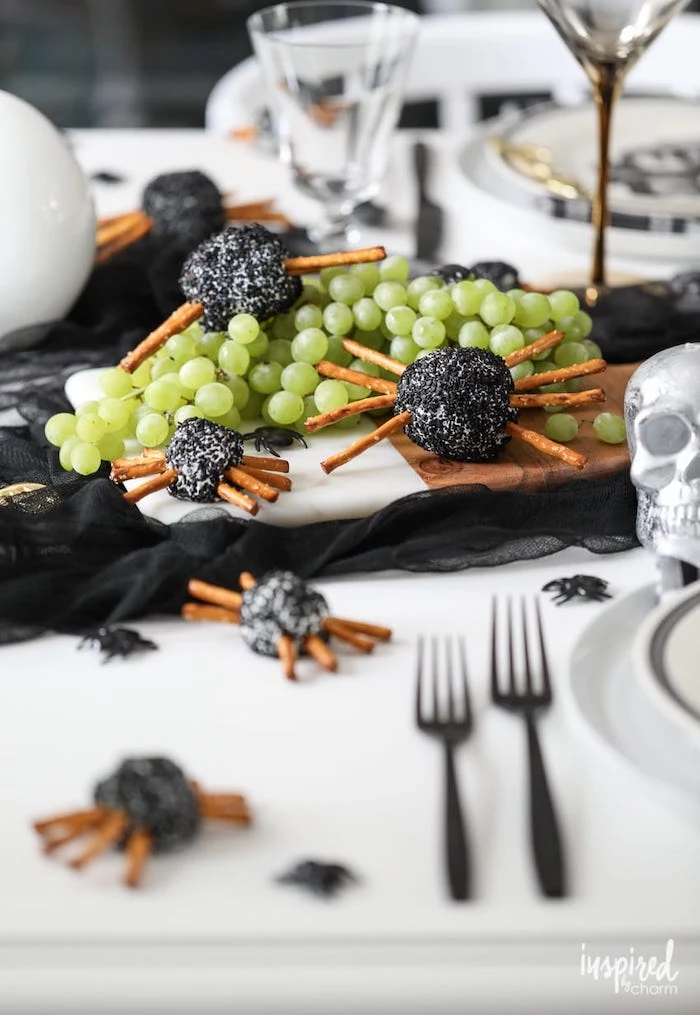
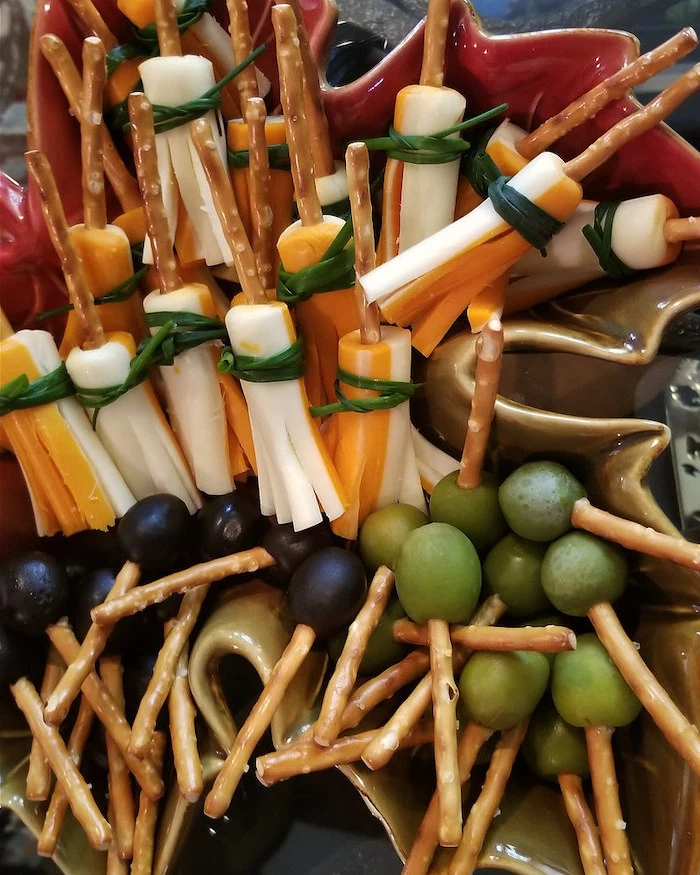
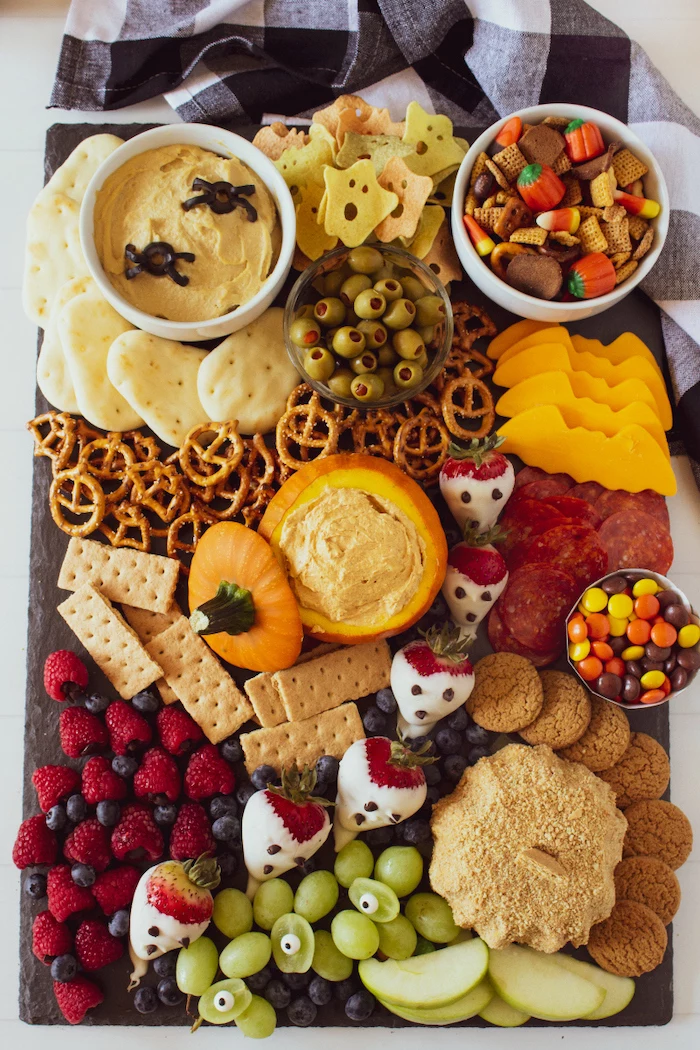
The ‘Char-Spook-erie’ board is the biggest trend in Halloween entertaining right now.
It’s a spooky twist on the classic charcuterie board. Think dark elements: black grapes, blackberries, dark bread like pumpernickel, and cheeses with dark rinds. Salami ‘roses’ can look like fleshy flowers, and a small plastic skeleton placed in the middle adds the perfect macabre touch.

Hot-smoked paprika: For an instant touch of smoky, fireside flavor in your dips and marinades.
Black garlic: Provides a sweet, molasses-like umami kick that is far more complex than regular garlic. Perfect for elevating a simple dip.
Both are powerful, so start with a small amount and taste as you go.

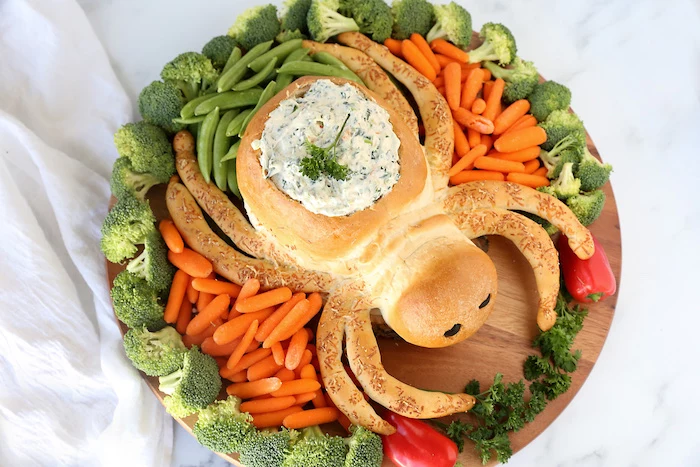
One of the most common mistakes is a lack of texture. If all your appetizers are soft dips and creamy spreads, your guests will experience palate fatigue. Always ensure a variety of crunchy, crispy elements. Think beyond basic chips: include crunchy breadsticks, crisp apple slices, seedy crackers, and fresh, snappy vegetables like bell pepper strips or jicama sticks.


- Keeps appetizers from bleeding into each other.
- Adds dramatic height and dimension to your table.
- Makes it easier for guests to grab what they want.
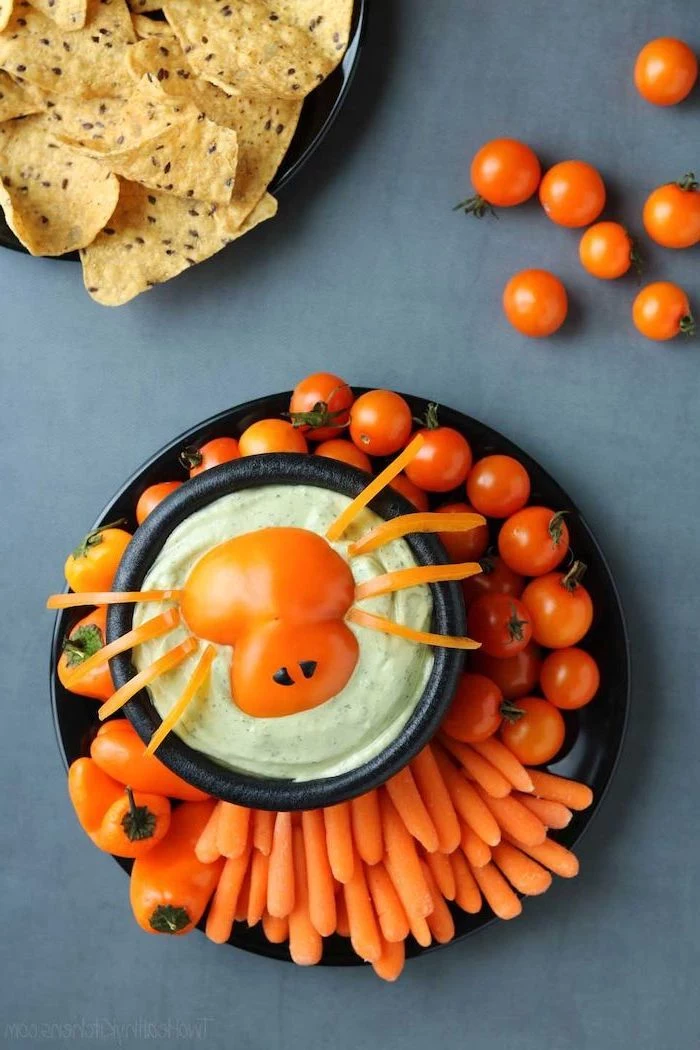
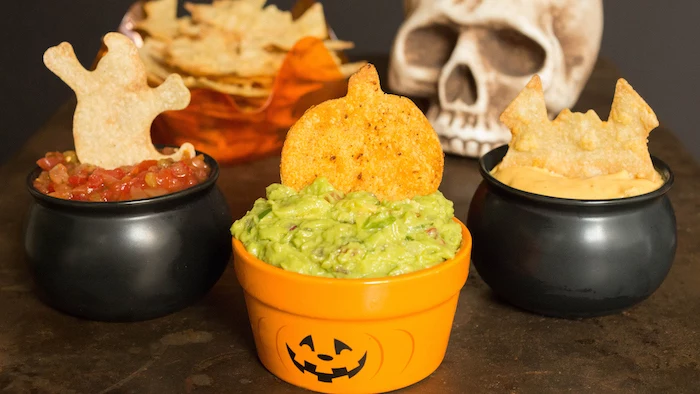
The secret? Contain your dips! Instead of spreading them on a platter, serve them in individual mini cauldrons, hollowed-out bell peppers, or simple black ramekins.
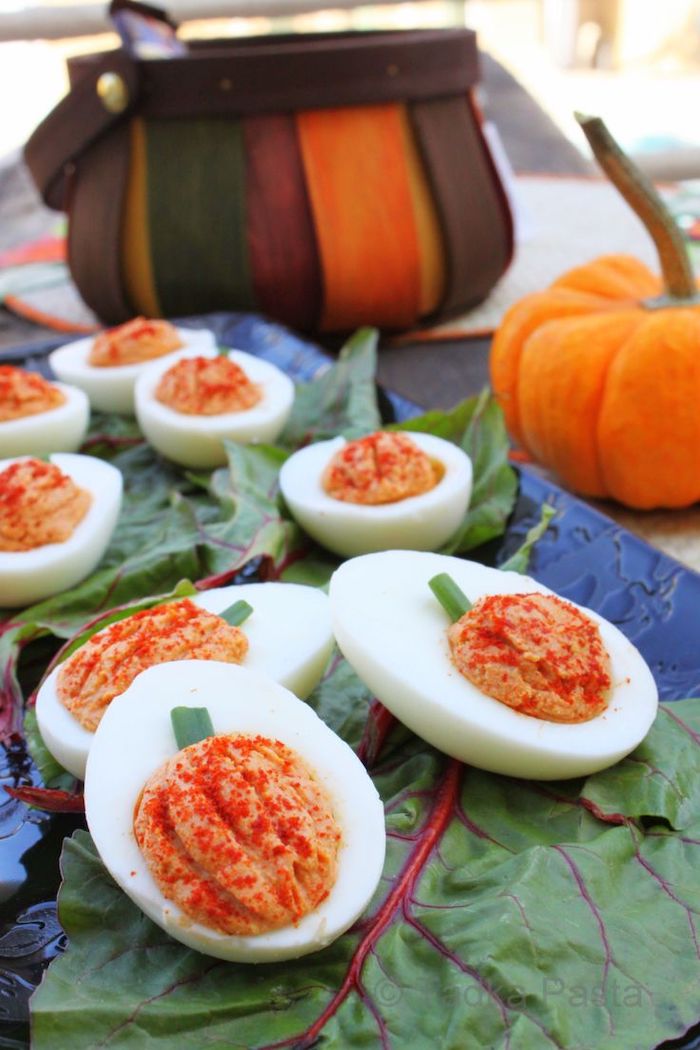
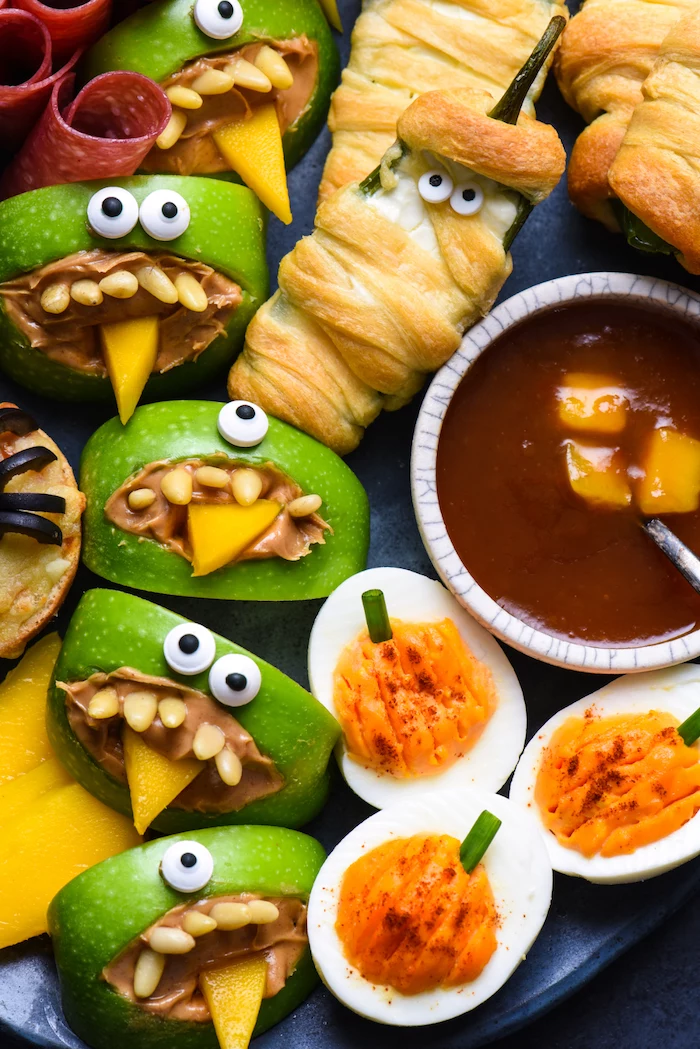
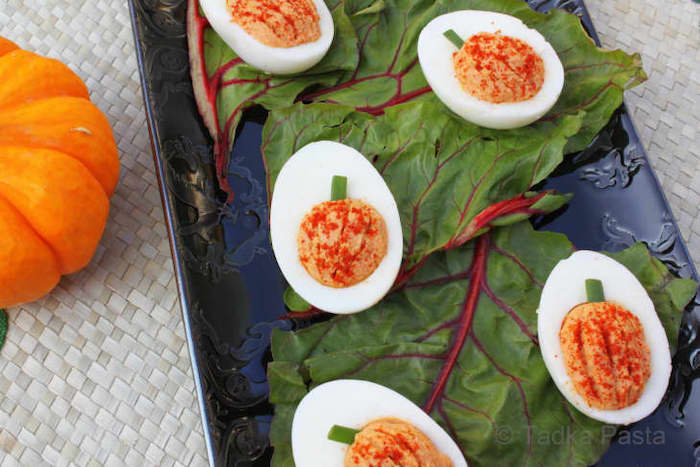
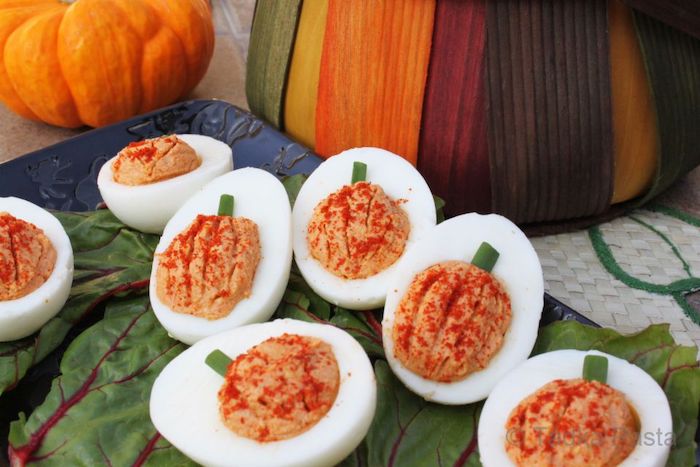
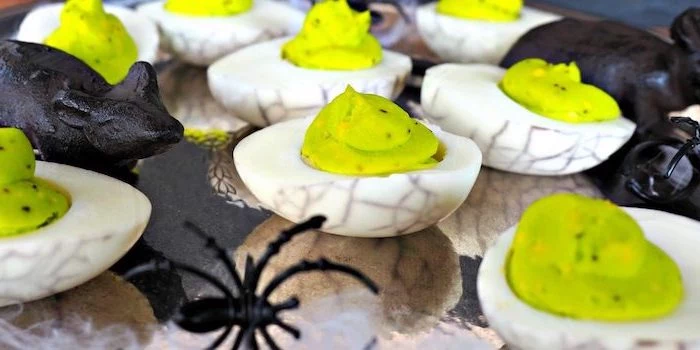
Making deviled eggs? You can hard-boil the eggs and prepare the yolk filling a full day in advance. Store the cooked egg whites covered in the fridge, and keep the filling in a sealed piping bag. When it’s party time, simply snip the end of the bag and pipe the filling into the whites. It takes 5 minutes and they look perfectly fresh.
What about drinks to match the mood?
A smoky rosemary gin and tonic is a perfect pairing. The herbal notes of the gin and the smoky aroma of a lightly charred rosemary sprig complement savory appetizers wonderfully. For a non-alcoholic version, mix cranberry juice, a splash of apple cider vinegar for sharpness, and top with a smoky ginger ale like Fever-Tree. Garnish both with that smoking rosemary sprig for theatrical flair.
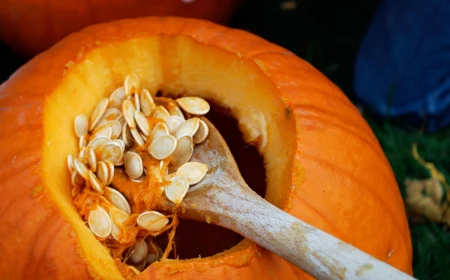
Don’t throw out your pumpkin carving scraps! The stringy guts can be boiled down to make a flavorful vegetable stock for a future soup. The seeds, of course, can be rinsed, dried, and roasted with salt, cumin, and a little cayenne for a spicy, addictive snack that costs you nothing.
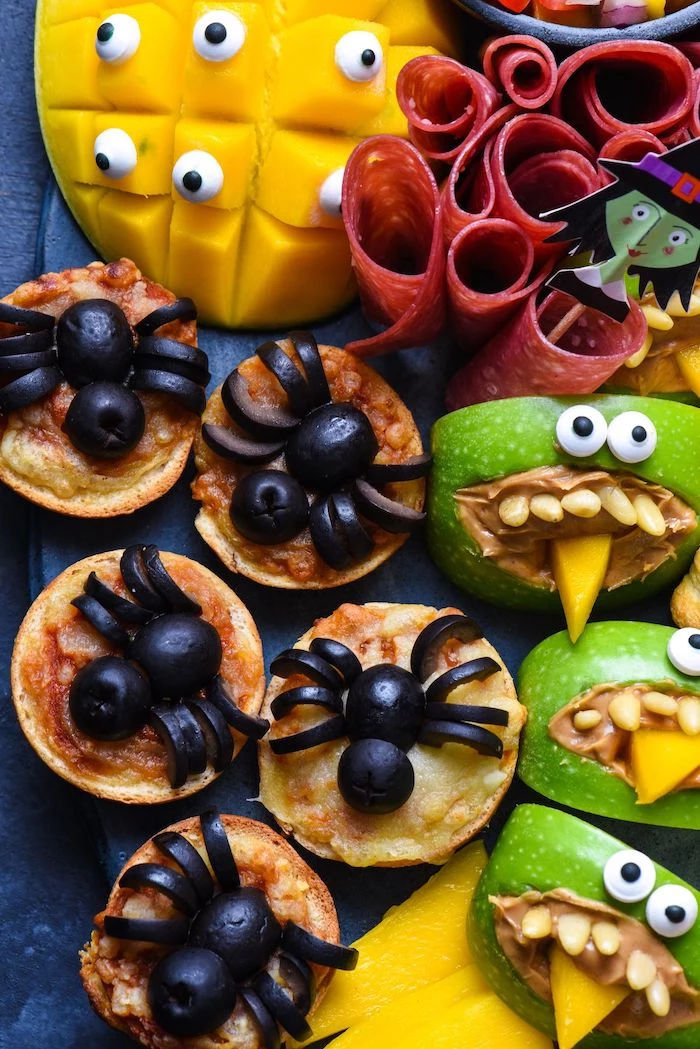
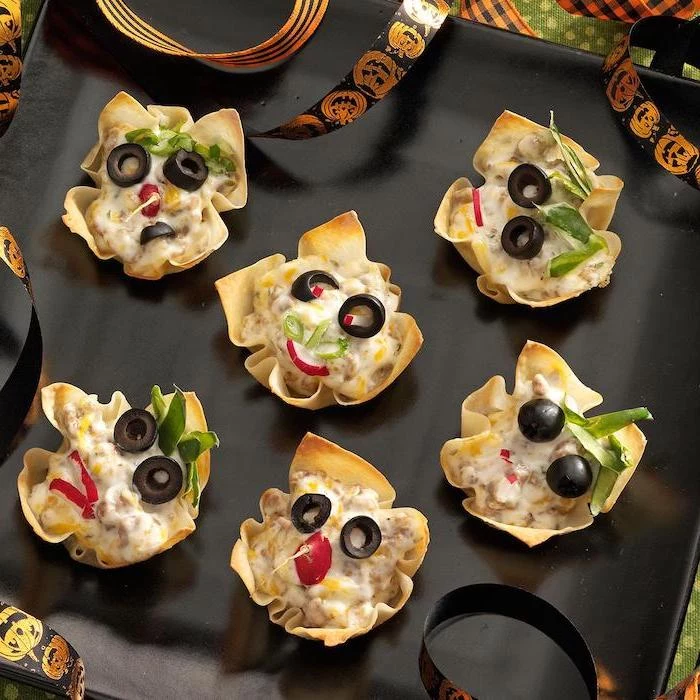
Store-bought time-saver: Use frozen mini quiches (like those from Nancy’s or an Aldi brand) and top them with a tiny ‘spider’ made from a halved black olive for the body and tiny slivers of olive for the legs. It’s an elegant, savory bite that looks completely custom.
For an incredibly easy ‘cobweb’ effect on brownies or a dark platter, use melted marshmallows. After they’ve melted in the microwave, let them cool for a minute until they are no longer hot but still pliable. Then, use your fingers to pull and stretch the marshmallow goo into thin, web-like strands over your dish. It’s fast, edible, and looks fantastic.
- ‘Blood Spatter’ Popcorn: Drizzle melted butter mixed with red food coloring over plain popcorn.
- Olive Spiders: Press two halves of a black olive together on a cracker with cream cheese.
- ‘Severed Finger’ Carrots: Use a dab of cream cheese to ‘glue’ a slivered almond ‘fingernail’ onto the tip of a baby carrot.
Squid Ink: Offers a briny, salty flavor and a deep, rich black color. It’s best used in savory pasta, risotto, or bread where its oceanic taste is a welcome addition.
Activated Charcoal: Virtually flavorless, making it ideal for coloring foods black without altering their taste. Perfect for cocktails, lemonade, or even a dramatic black cheese dip.
For most Halloween appetizers, activated charcoal is the more versatile choice.
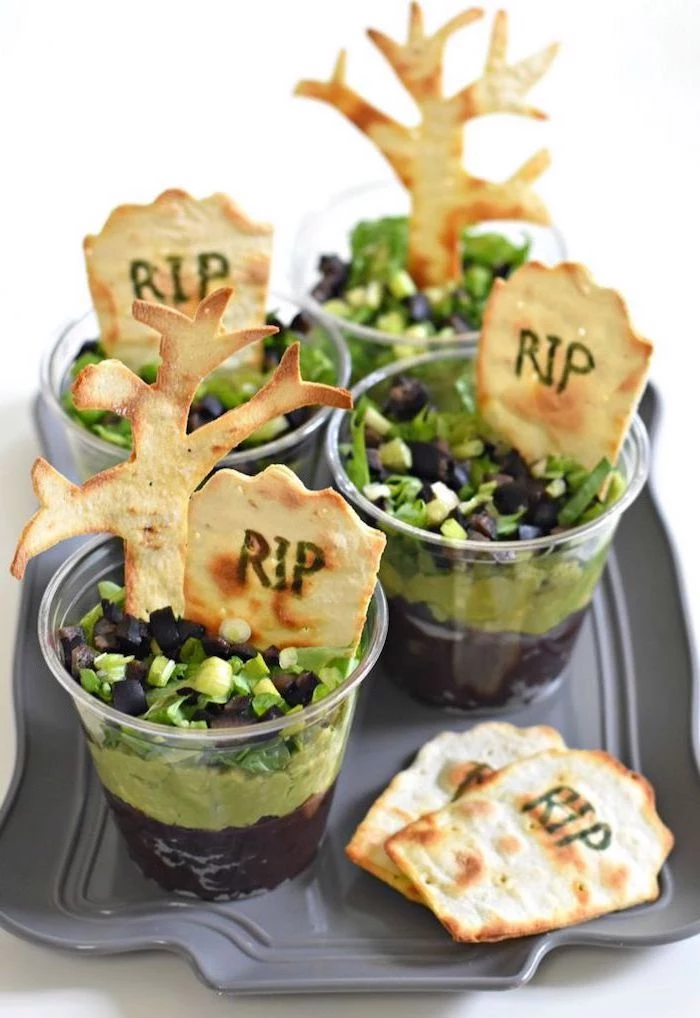
Evoke a graveyard scene on your buffet. Spread a dark dip like black bean hummus on a rectangular platter for the ‘dirt’. Use rectangular crackers as ‘tombstones’, sticking them upright into the dip. Finish with ‘moss’ by sprinkling finely chopped parsley or cilantro around the base of the crackers.
Even the most committed theme-lover needs a break. Always include one or two delicious, high-quality, but completely non-themed options. A simple bowl of good olives or a classic cheese and cracker selection ensures that less adventurous eaters or kids have something appealing to snack on, too.
A 2015 study from the Crossmodal Research Laboratory at Oxford University confirmed that serving food on a black plate can enhance its perceived saltiness or savory qualities.
This is a powerful psychological trick for your Halloween spread. Serving dips, cheeses, and other savory bites on black or dark gray slate platters can actually make them taste richer and more flavorful to your guests.
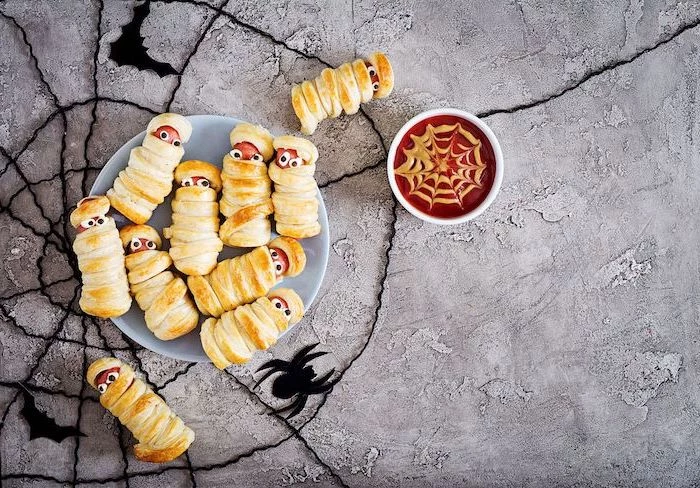
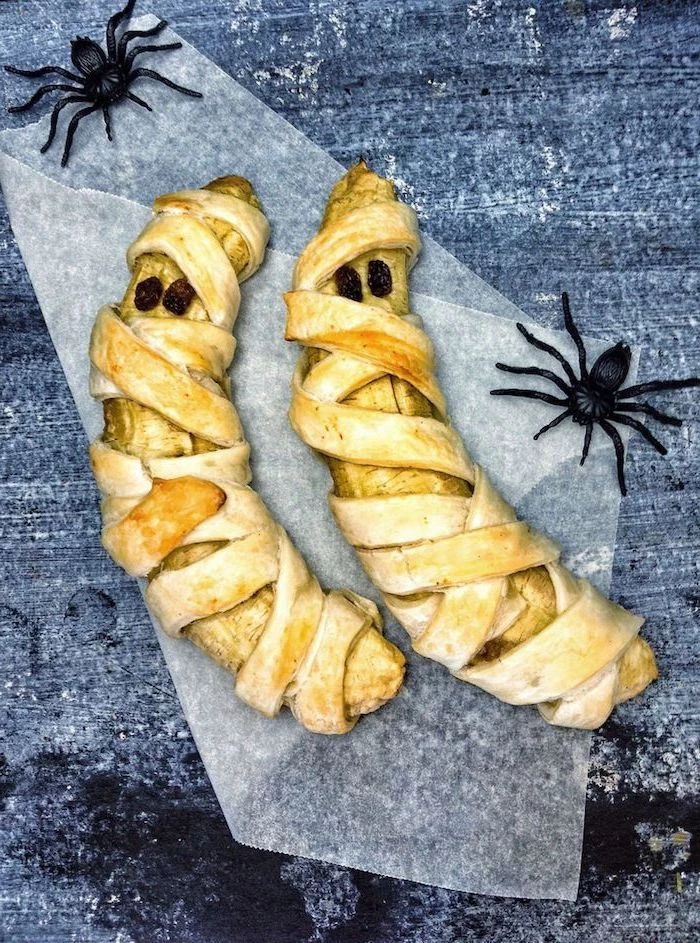
My jalapeno ‘mummies’ are falling apart! Why?
The likely culprit is moisture. After you remove the seeds from your jalapeno halves, pat them thoroughly dry with a paper towel, both inside and out. Any excess water will turn to steam in the oven, preventing the pastry ‘bandages’ from crisping up and adhering properly to the pepper.
- It’s savory and earthy.
- It’s unexpectedly creamy.
- It provides a shocking, ghoulish color naturally.
The secret is black tahini. Use it in place of regular tahini in your favorite hummus recipe for a dip that is as delicious as it is dark and dramatic.
For a sweet-and-spicy option, create an easy ‘blood’ dipping sauce for savory items like chicken wings or spring rolls. Simply heat up a jar of red pepper jelly (like Tabasco’s) or smooth apricot jam and stir in a few drops of red food coloring and a pinch of cayenne pepper for an extra kick. It looks gruesome but tastes divine.
A final pro touch: Lighting. Swap out a few standard bulbs in the lamps near your food table for orange or purple ones. The dim, colored light makes everything feel more mysterious and can hide small imperfections, making your spooky spread look even more spectacular.