Forget the Kits: Your Ultimate Guide to Dyeing Beautiful Eggs at Home
I can still smell my grandmother’s kitchen in the springtime. It was this amazing mix of simmering onion skins and that sharp, clean scent of vinegar. On the counter, a dozen white eggs would be waiting. For her, dyeing eggs wasn’t about those plastic kits with weird wire dippers. It was a tradition, a clever way to use what was already in the pantry to make something beautiful. Honestly, those afternoons taught me more than just how to stain an eggshell; they were lessons in patience and the simple magic of kitchen chemistry.
In this article
Over the years, I’ve run workshops and taught my own kids, and I’ve seen it all—the pure joy of pulling a perfect robin’s egg blue from a dye bath, but also the frustration of cracked shells and splotchy colors. So, this guide is everything I’ve learned packed into one place. We’re going to cover the techniques that actually work, why they work, and most importantly, how to know which eggs are for the Easter basket and which are just for looking pretty on the shelf.
First Things First: Your Egg-Dyeing Toolkit
Before you get started, let’s do a quick kitchen raid. Having everything ready makes the whole process so much smoother. You don’t need much, and you probably have most of it already.
- Eggs, obviously! White eggs give you the brightest colors, but brown eggs can create some stunning, earthy tones.
- A large pot or saucepan for boiling.
- White vinegar. This is non-negotiable! It’s the secret to getting color to stick.
- A slotted spoon or tongs for safely moving eggs.
- Bowls or jars for your dye baths. Mason jars are perfect for this.
- Paper towels or a rack for drying your finished masterpieces.
- Your color source! This could be liquid food coloring (which you can get for $3-$5 at any grocery store) or kitchen scraps like onion skins and cabbage.
The Foundation: Prepping the Perfect Egg
Your final creation is only as good as the canvas you start with. Taking a few extra minutes here to prep your eggs properly will save you a world of headaches later on. Trust me on this.

Choosing Your Canvas
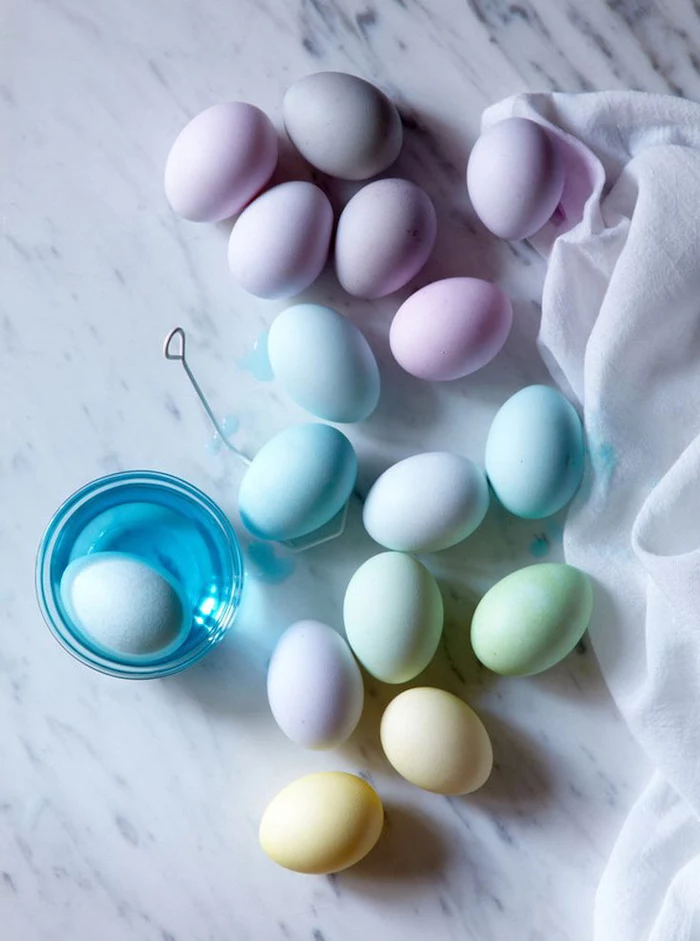
For the most vibrant, pop-art colors, you’ve gotta start with white eggs. They’re a blank slate. But don’t discount brown eggs! They produce these wonderfully deep, muted shades. A yellow dye on a brown egg might turn into a rich gold, and blue can become a deep forest green. It’s fun to experiment.
Good to know: Eggs that are a week or so old are often way easier to peel than farm-fresh ones. A great tip if you actually plan on eating your creations!
How to Boil an Egg Without Disaster
The goal here is a firm, fully cooked egg with zero cracks. A crack lets dye seep inside, which is a big no-no with certain dyes, and it just makes the shell weaker. This is my go-to method that prevents that awful gray-green ring around the yolk.
- Place your eggs in a single layer in a saucepan. Don’t crowd them, or they’ll knock together and crack.
- Cover them with cold water by about an inch. Starting cold helps them heat up slowly, which is the key to preventing cracks from temperature shock.
- Bring the water to a full, rolling boil.
- The second it boils, turn off the heat, slide the pan off the burner, and pop on a tight-fitting lid.
- Let the eggs stand in that hot water for 12 minutes. Not 11, not 13. Twelve is the magic number for a perfect large egg.
- Give them an ice bath. Use a slotted spoon to move the eggs into a bowl of ice water. This stops the cooking instantly and makes them easier to peel. That green ring on the yolk? It’s just a harmless reaction from overcooking, and the ice bath totally prevents it.
Let the eggs cool down completely before you start dyeing. A warm egg can sometimes take the dye unevenly.
The Science of Color (It’s Simpler Than You Think)
Ever wonder why you need vinegar? It’s not just for the smell! Eggshells are made of calcium carbonate, and under a microscope, they’re covered in thousands of tiny pores. Vinegar, being an acid, ever-so-gently roughens up that surface. This microscopic etching gives the dye molecules something to grab onto, leading to a much deeper and more permanent color.
You don’t need to go crazy with it. My go-to ratio is one tablespoon of plain white vinegar for every one cup of dye liquid. Any more and the vinegar can start to make the shell feel chalky. Heat helps, too, which is why a lot of natural dyeing methods involve simmering.
The Dyer’s Toolkit: Edible vs. Decorative
This is the most important question you need to ask: Are these eggs for eating or just for show? The answer changes everything. If a dye isn’t specifically labeled as food-safe, assume it’s not. Chemicals can and do seep through that porous shell.
For Edible Eggs: Food-Safe & Fun
These methods are my go-to for any egg that might end up in someone’s mouth. Safety first, always.
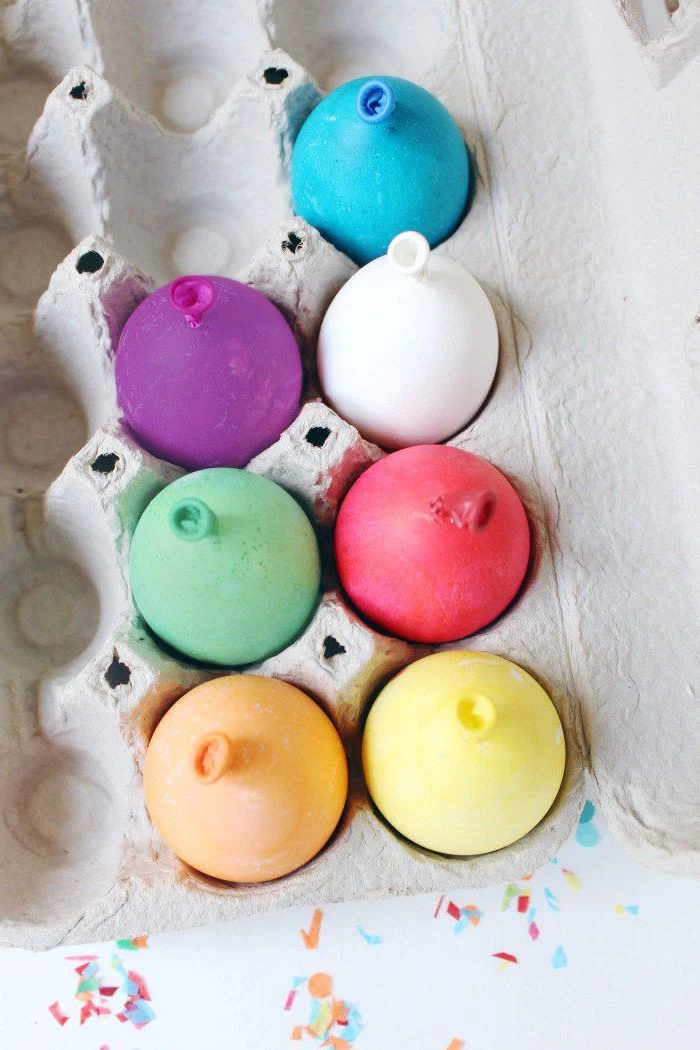
1. Food Coloring: The Quick Win
This is your fastest path to bright, consistent colors. A basic kit from the store is fine, but I find that the little bottles of food coloring from the baking aisle offer more control and last for years. Gel colorings are super concentrated and give you incredibly deep shades.
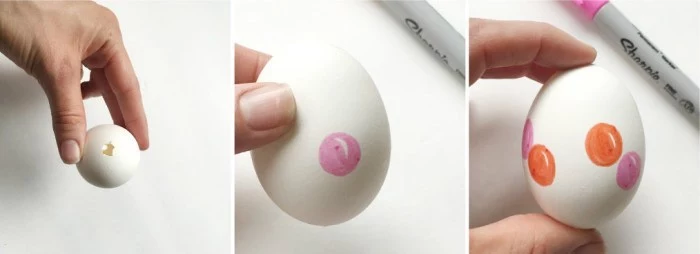
- Technique: For every cup of hot tap water, add one tablespoon of white vinegar and about 20 drops of liquid food coloring (or a tiny dab of gel). Stir it up, and submerge your egg for 5-10 minutes. A shorter time gives you pastels; longer gives you bold hues. It’s a 15-minute project, tops.
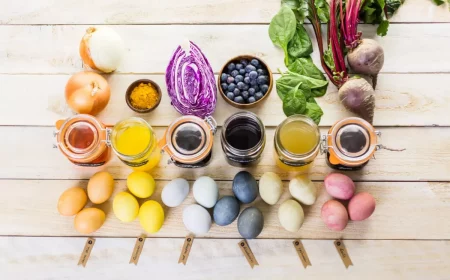
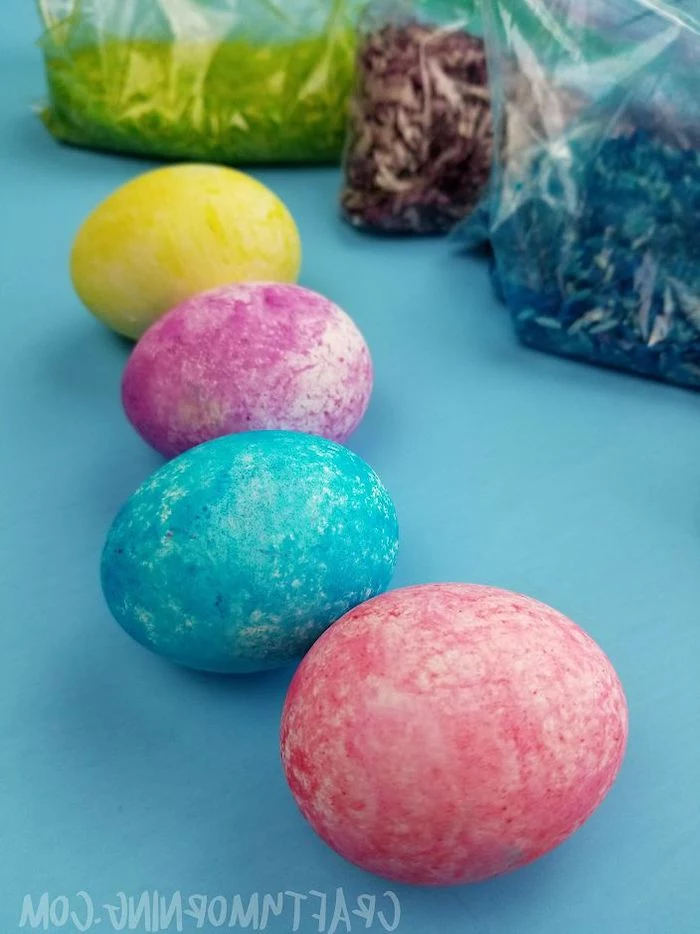
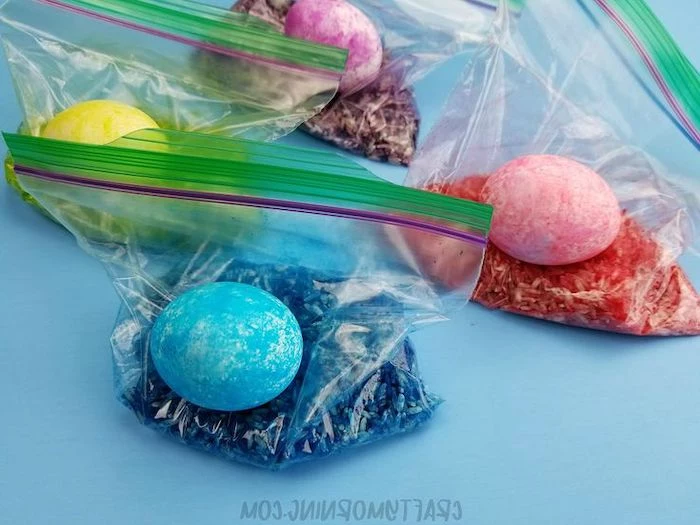
2. Natural Dyes: The Slow-Burn Method
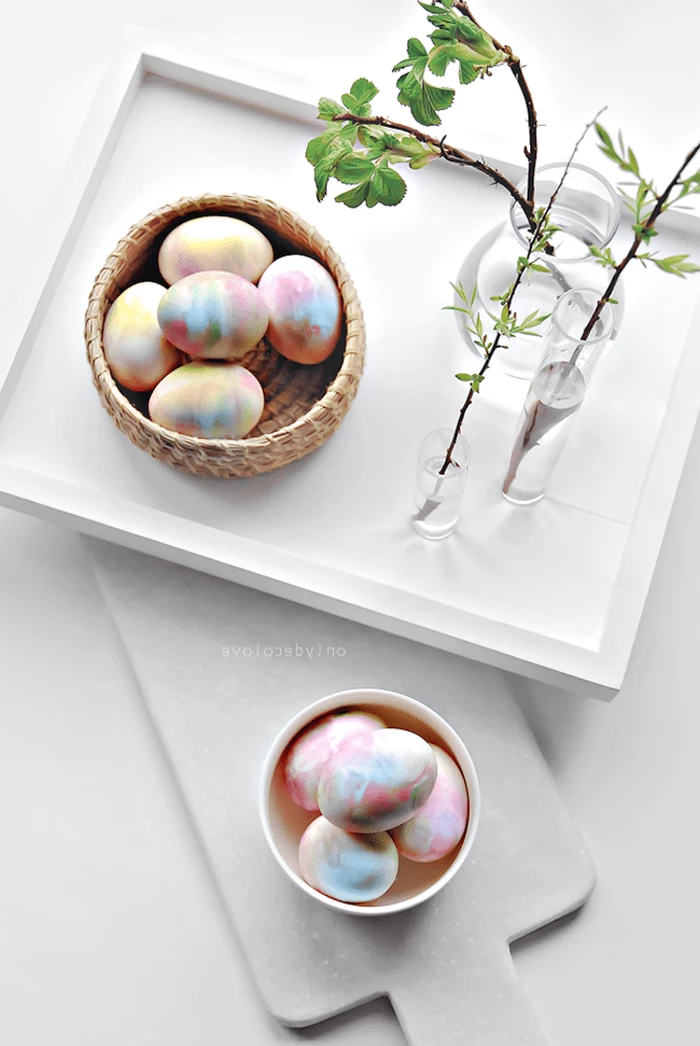
This is the traditional way, and it’s a beautiful process. The colors are softer and more complex, and it feels like you’re making something from scratch. This is a weekend project, as it can take from 1-8 hours, but the cost is practically zero if you’re using kitchen scraps.

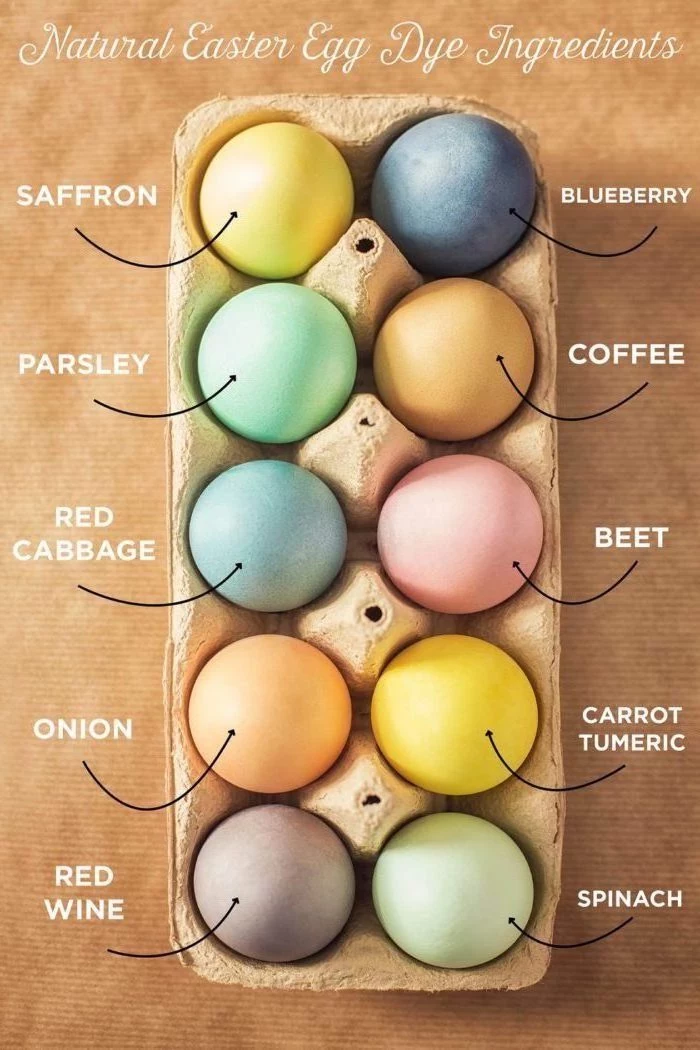
- Deep Gold: Use 2-3 tablespoons of turmeric powder per quart of water. Heads up, this one stains fast and bright!
- Earthy Brown: The papery outer skins from 4-5 yellow onions per quart of water. The whole kitchen will smell amazing.
- Rich Coffee Brown: Just use strongly brewed coffee or black tea instead of water.
- Dusty Pink/Red: Use shredded beets or soak the eggs in cranberry juice.
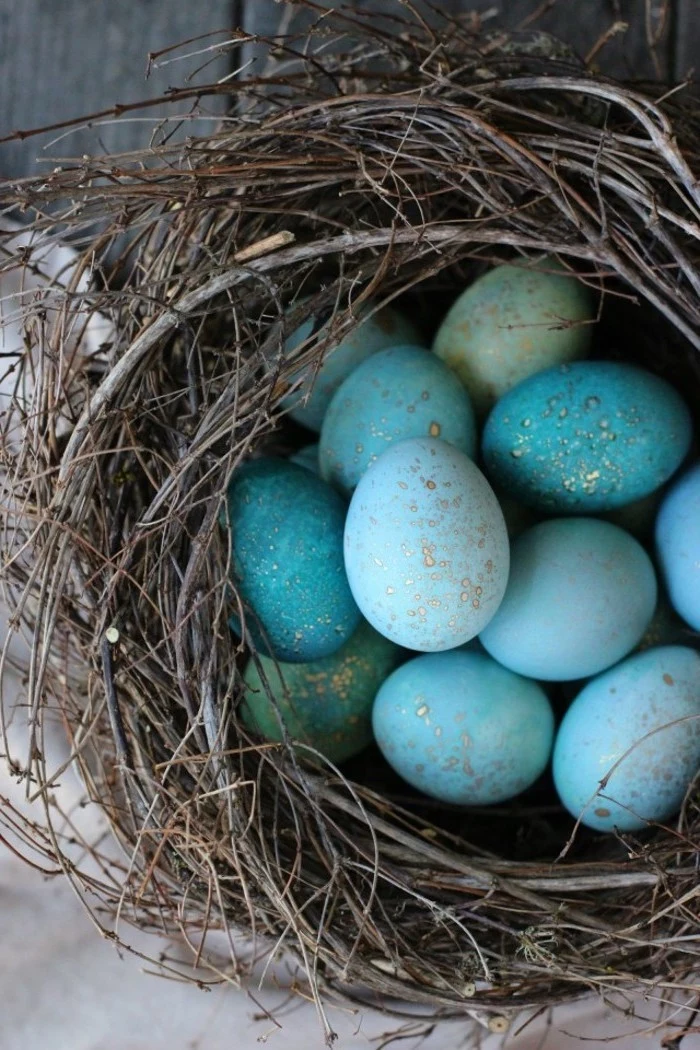
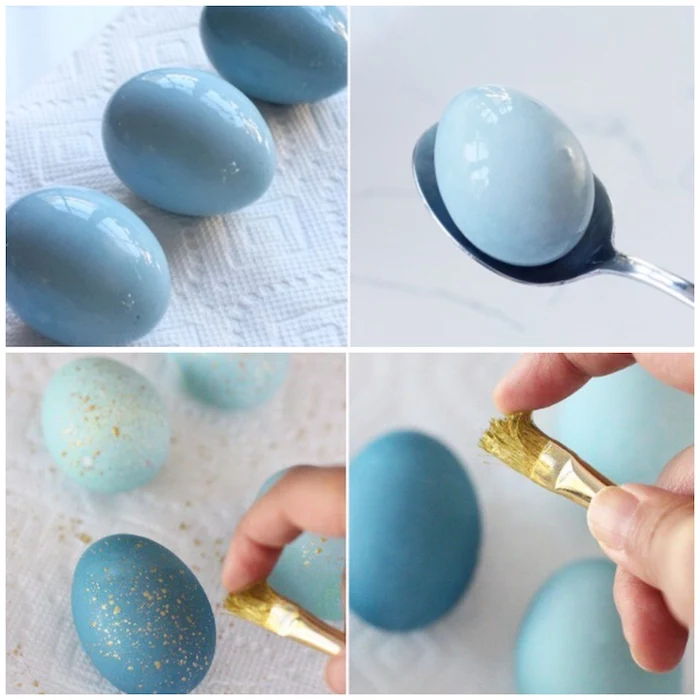
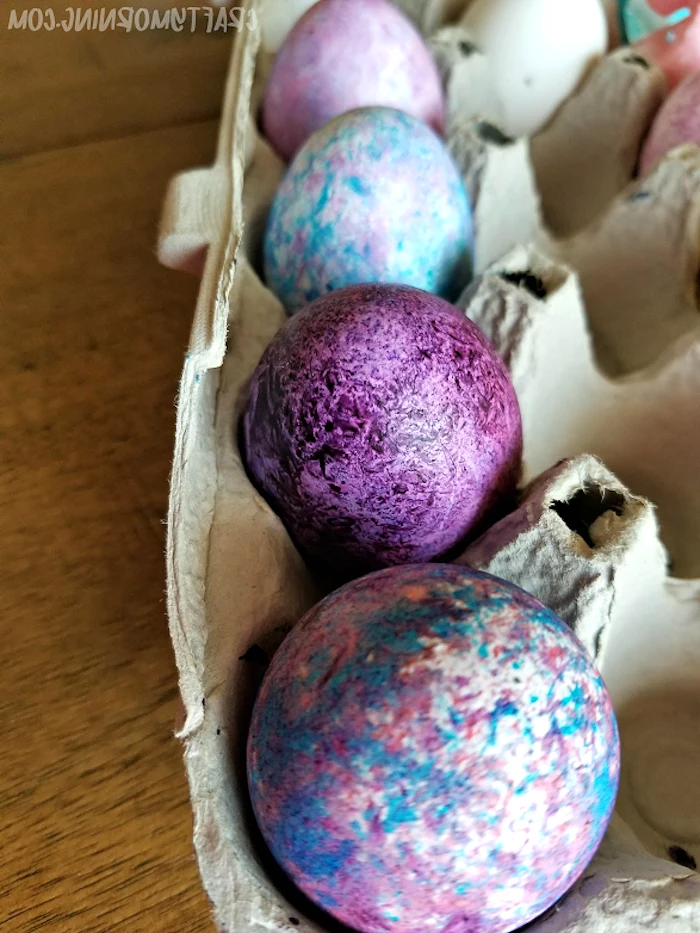
- Robin’s Egg Blue: And now for the shocker… chopped RED cabbage creates the most incredible blue. To get the best color, I let the eggs soak overnight in the cooled cabbage dye right in the fridge.
By the way, getting a good green naturally is tough. My best results have come from dyeing an egg yellow with turmeric first, letting it dry, and then dipping it into the blue cabbage dye. It’s color theory in action!
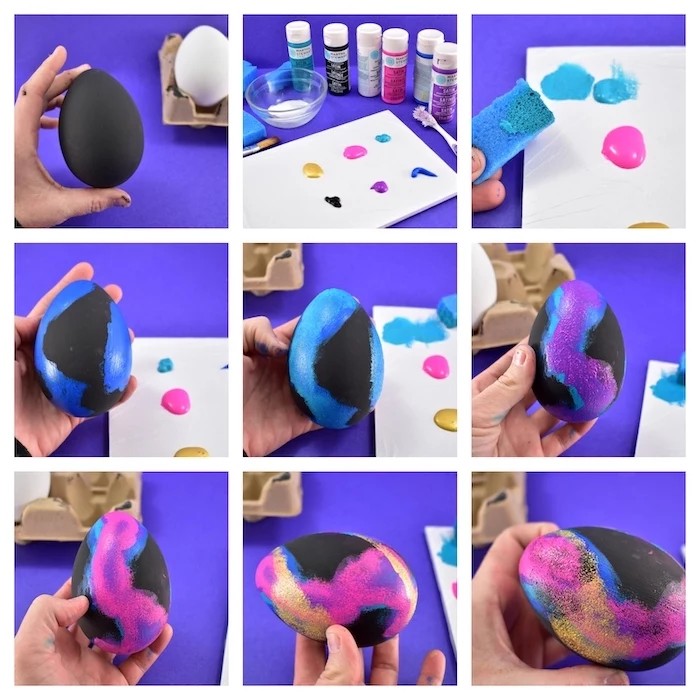
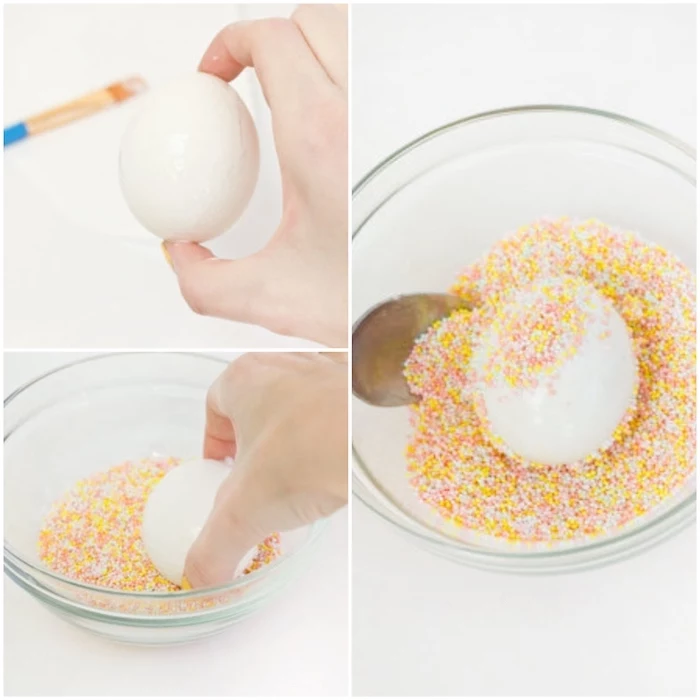
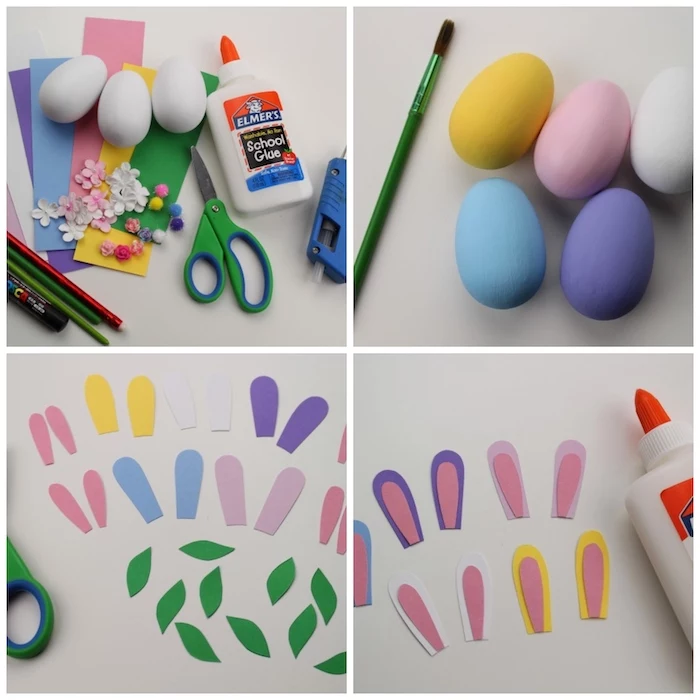
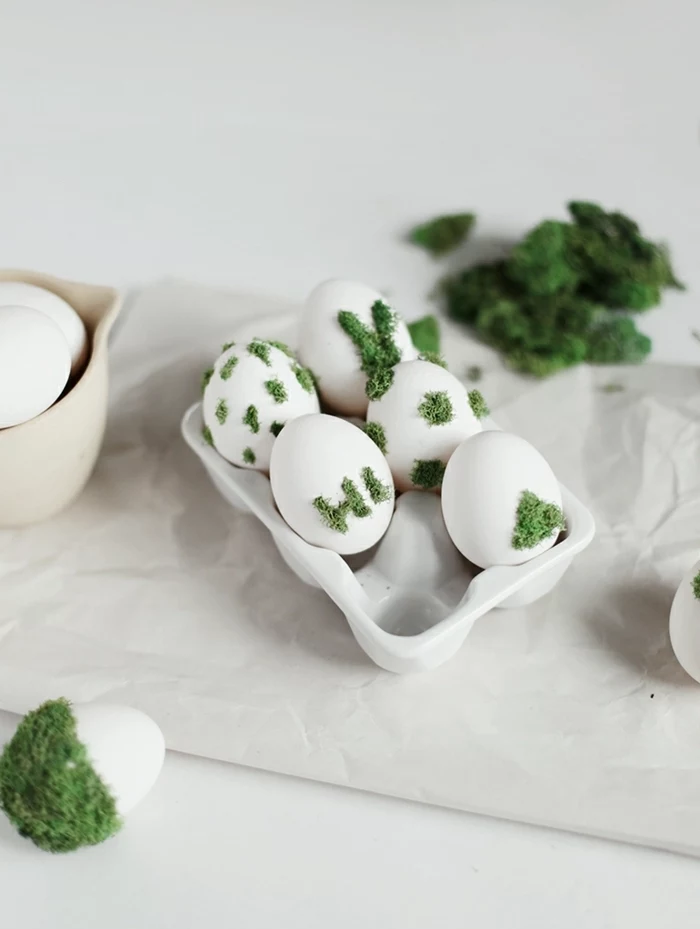
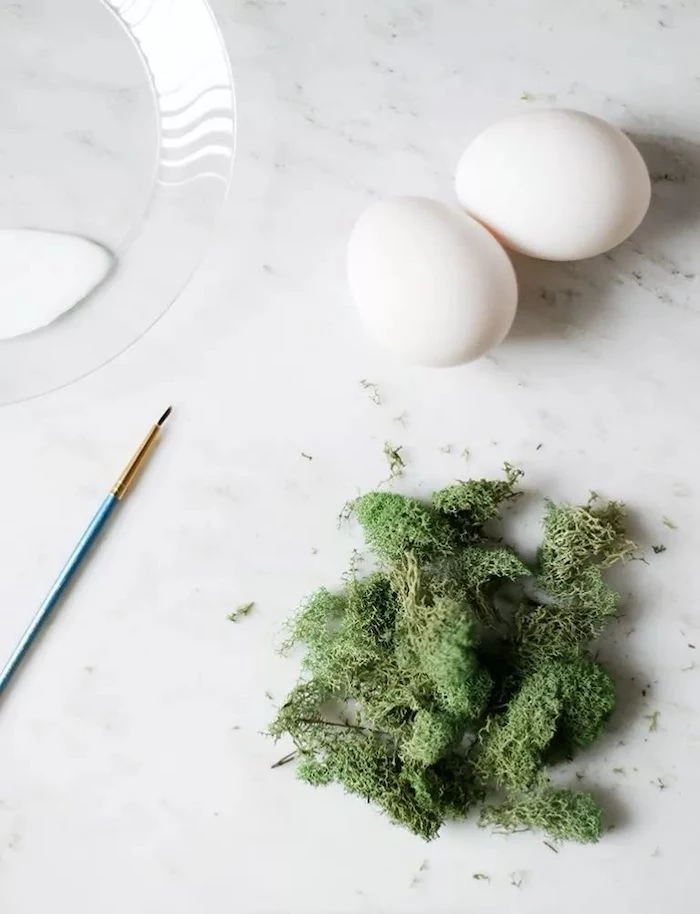
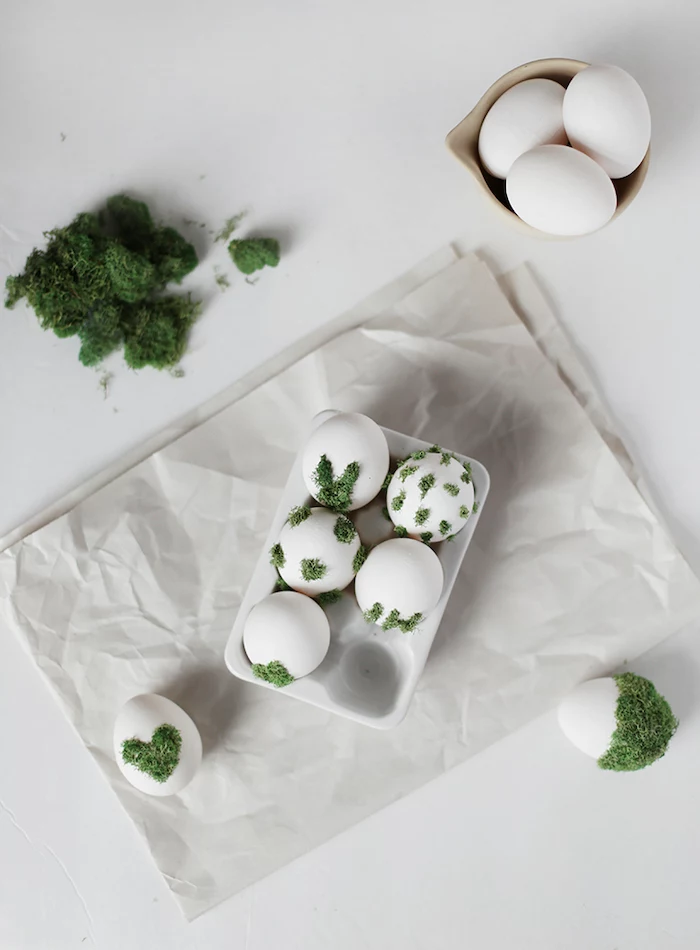
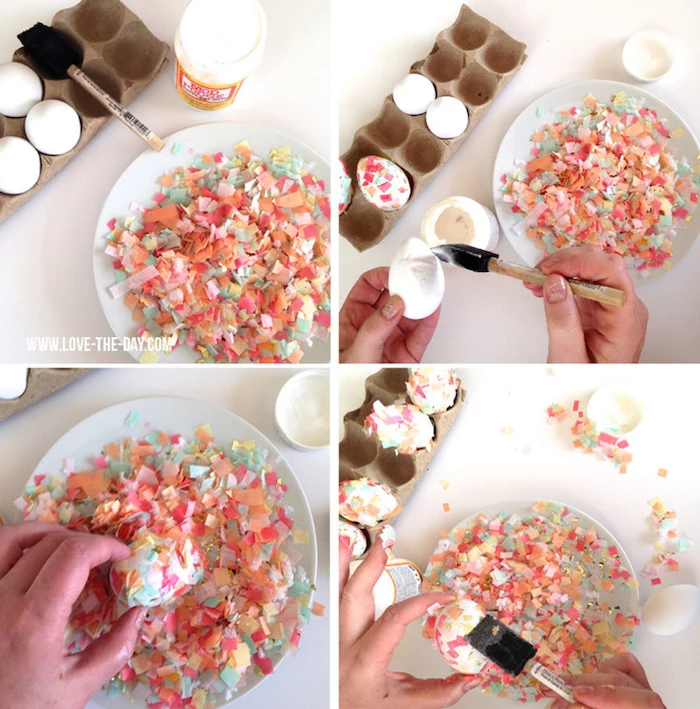
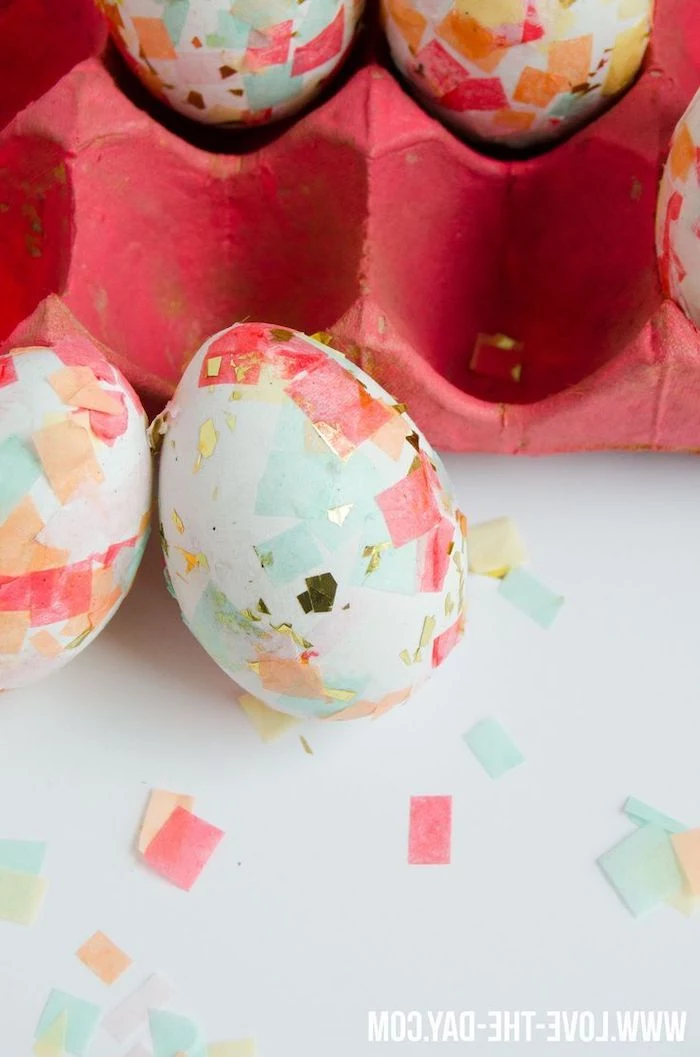
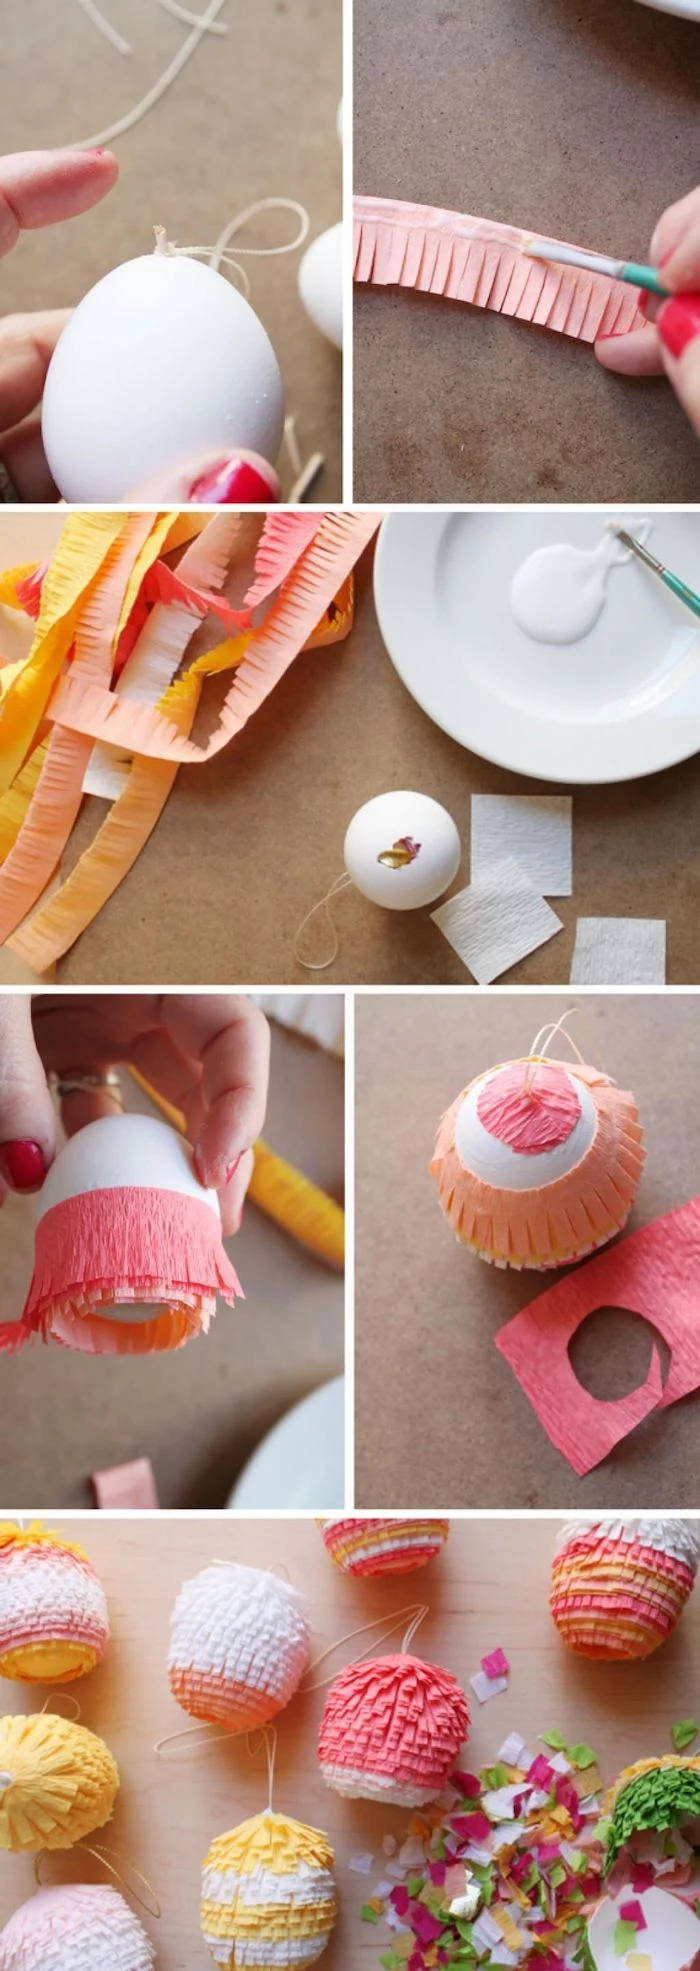
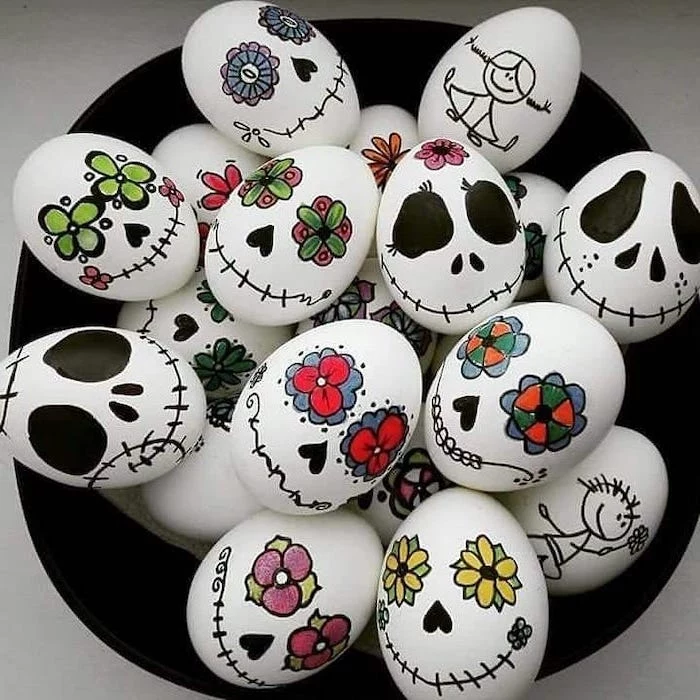
For Decorative Eggs Only: Get Creative
Some of the coolest effects use materials that are NOT food-safe. For these, I always use hollowed-out eggs. I can’t stress this enough: do not use these methods on eggs you plan to eat.
Quick Tip: How to Blow an Egg
It sounds weird, but it’s easy. First, use a pushpin to make a small hole at the pointy end and a slightly larger one at the bottom. Then, unbend a paperclip and poke it inside the larger hole to break the yolk. Now for the fun part: put your mouth over the small hole and blow firmly. The insides will come out the bottom. Rinse the empty shell with water and let it dry completely before decorating.
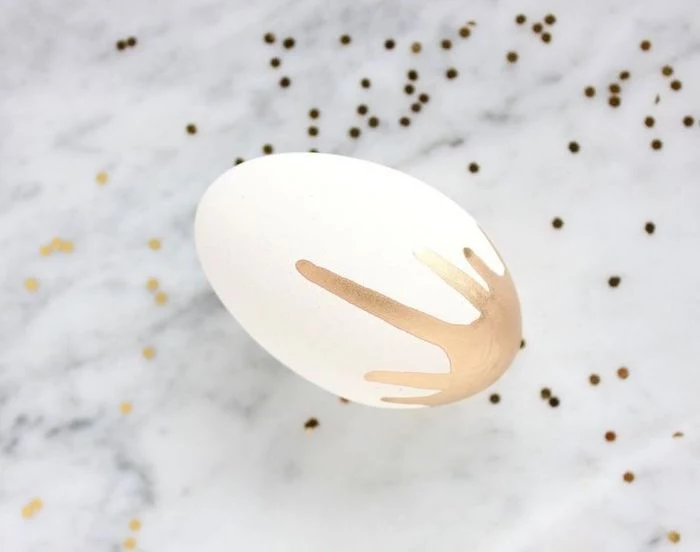
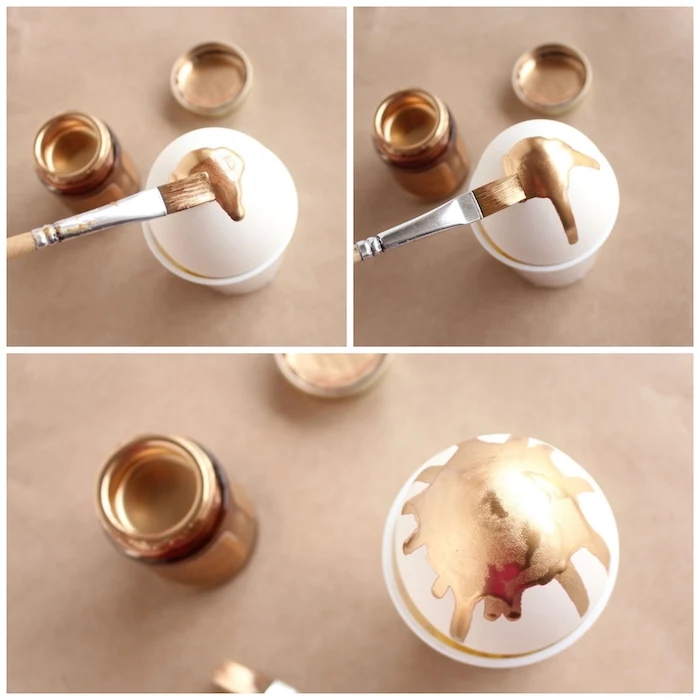
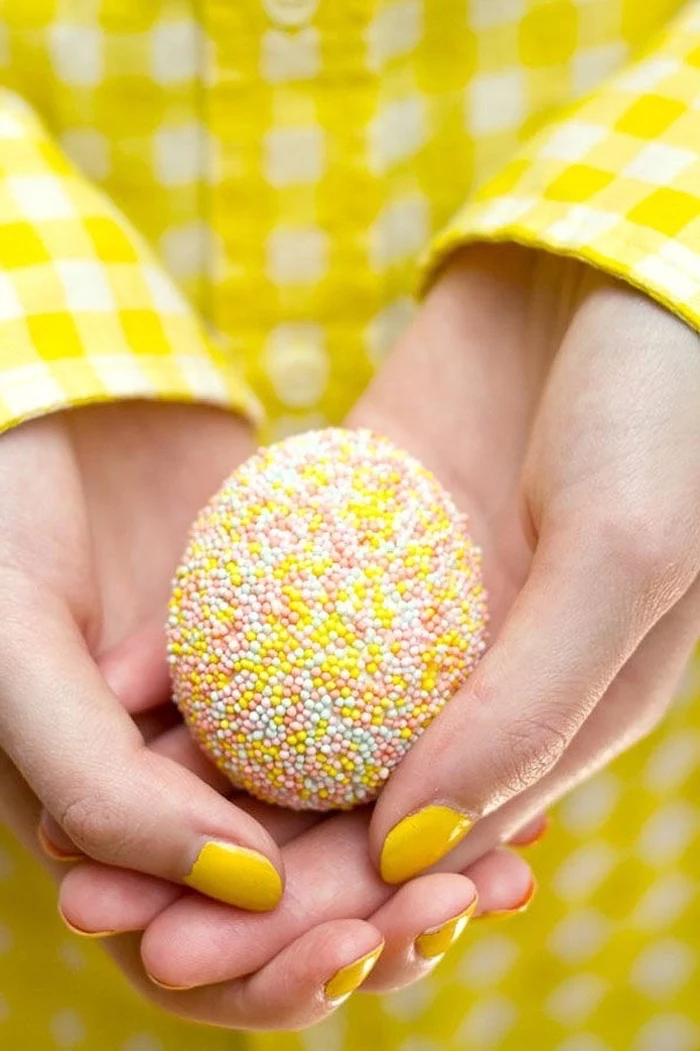
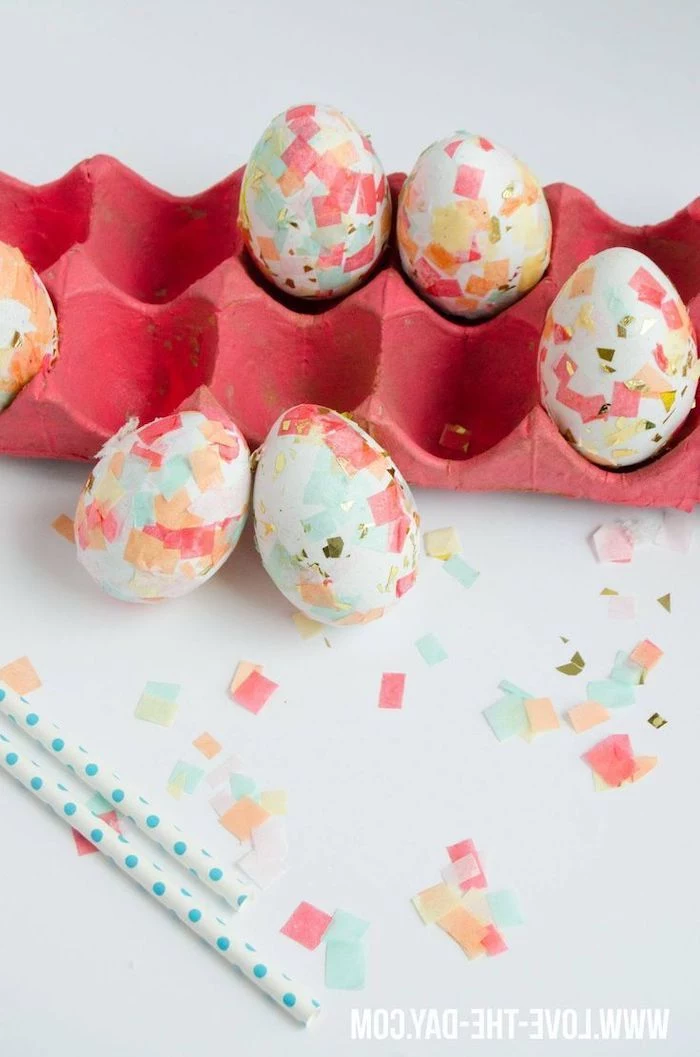
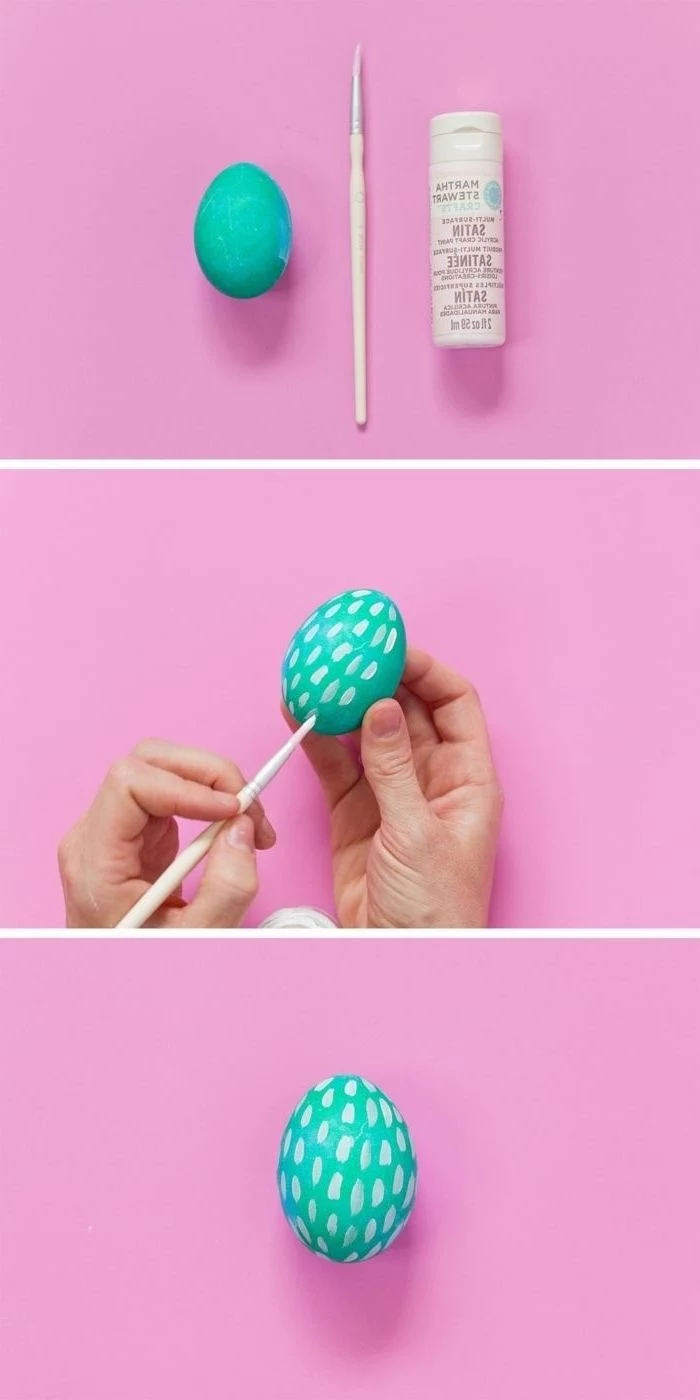
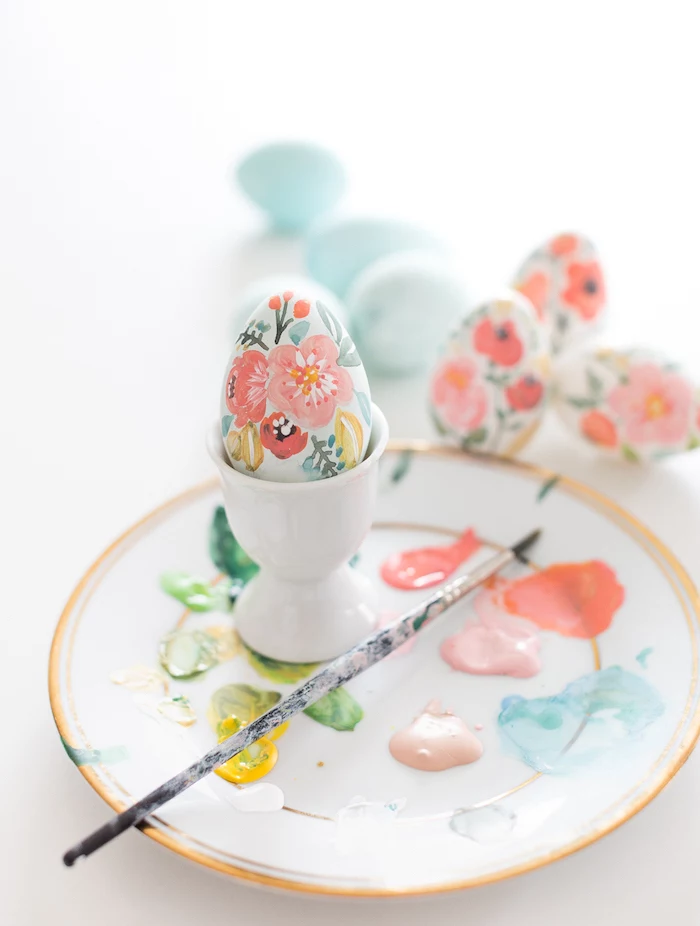
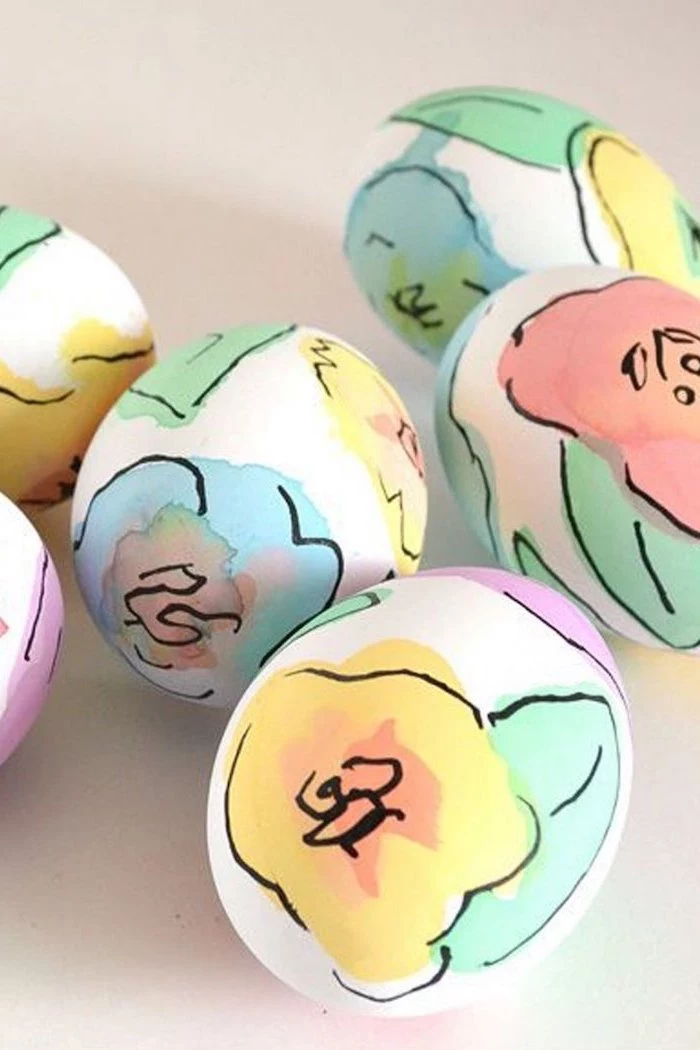
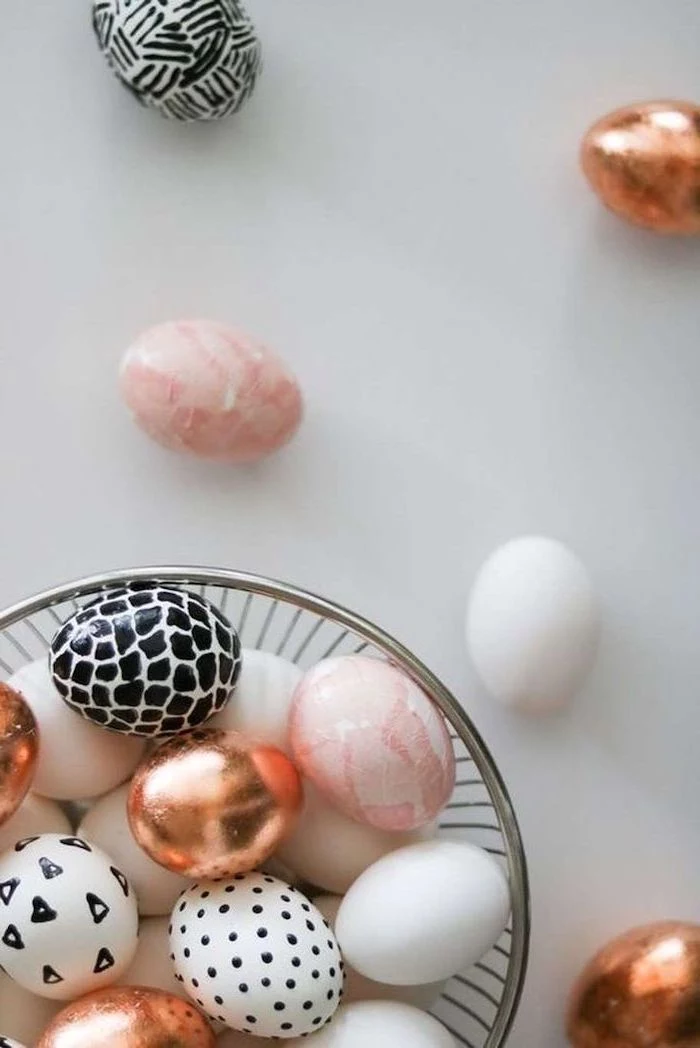
1. Acrylic Paint: For galaxy eggs or detailed patterns, acrylic paint is your friend. You can get a set of basic colors for under $15 at any craft store. Sponge it on for texture or paint freehand.
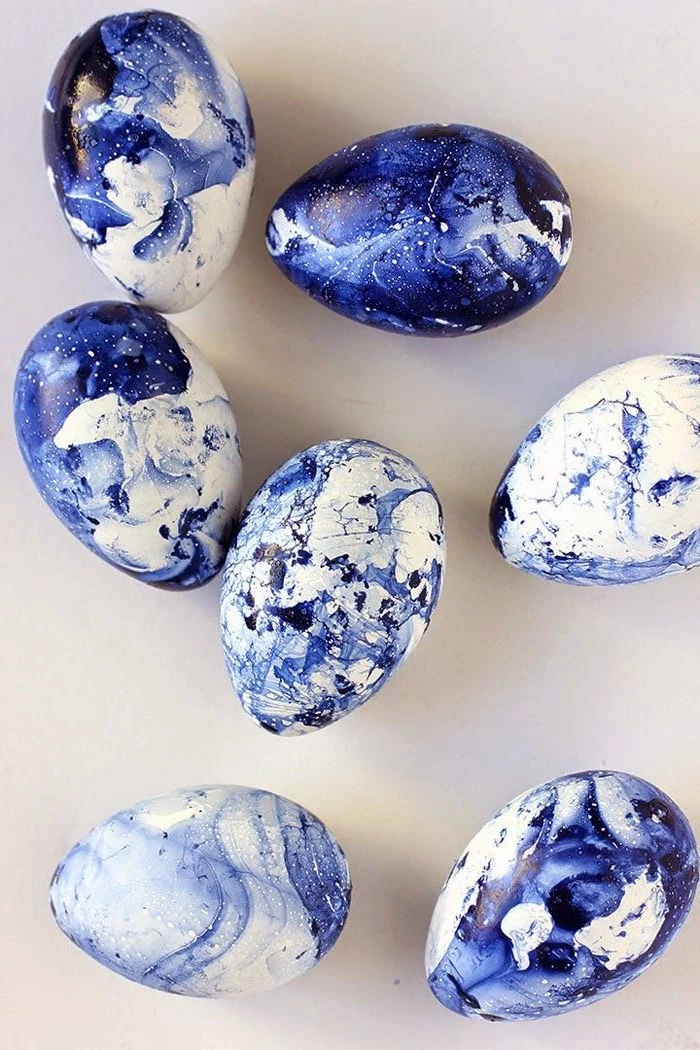
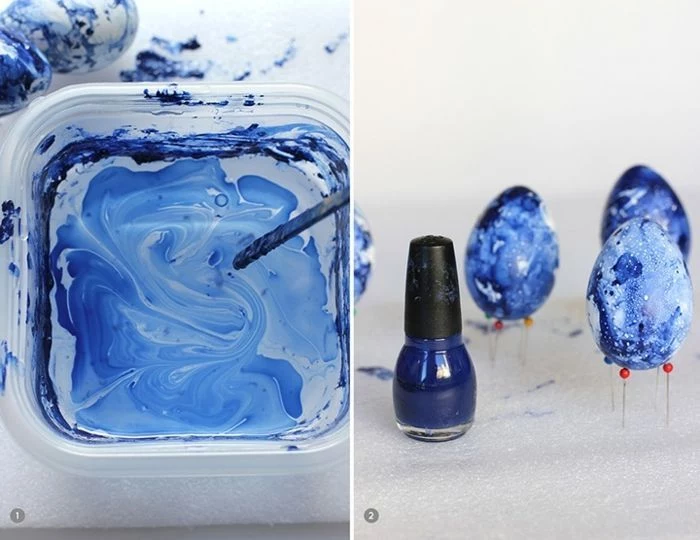
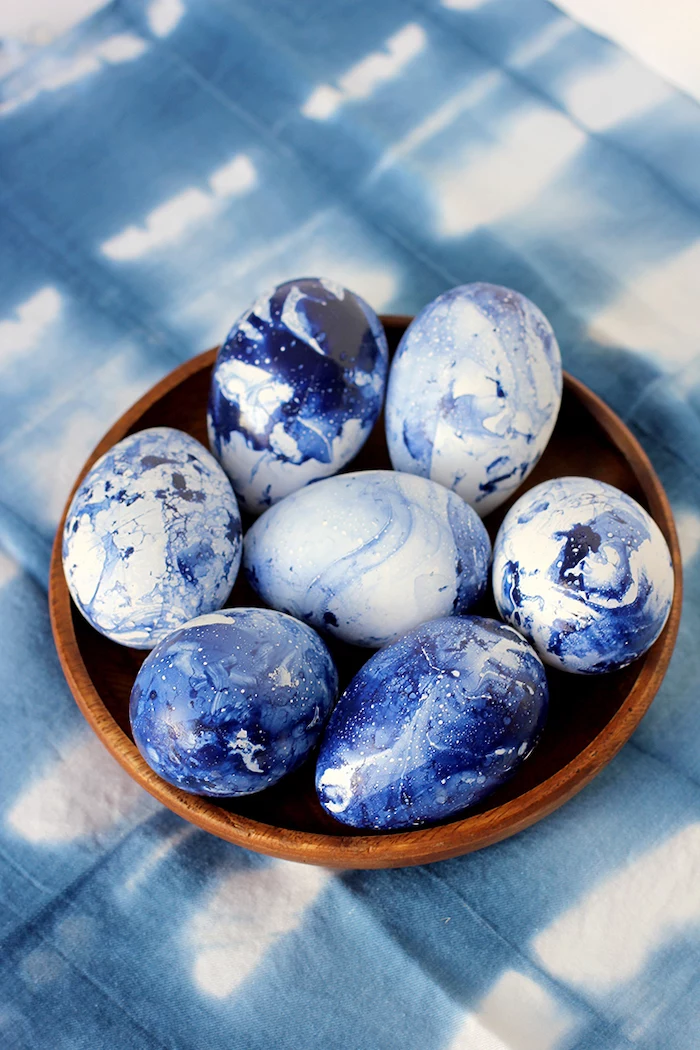
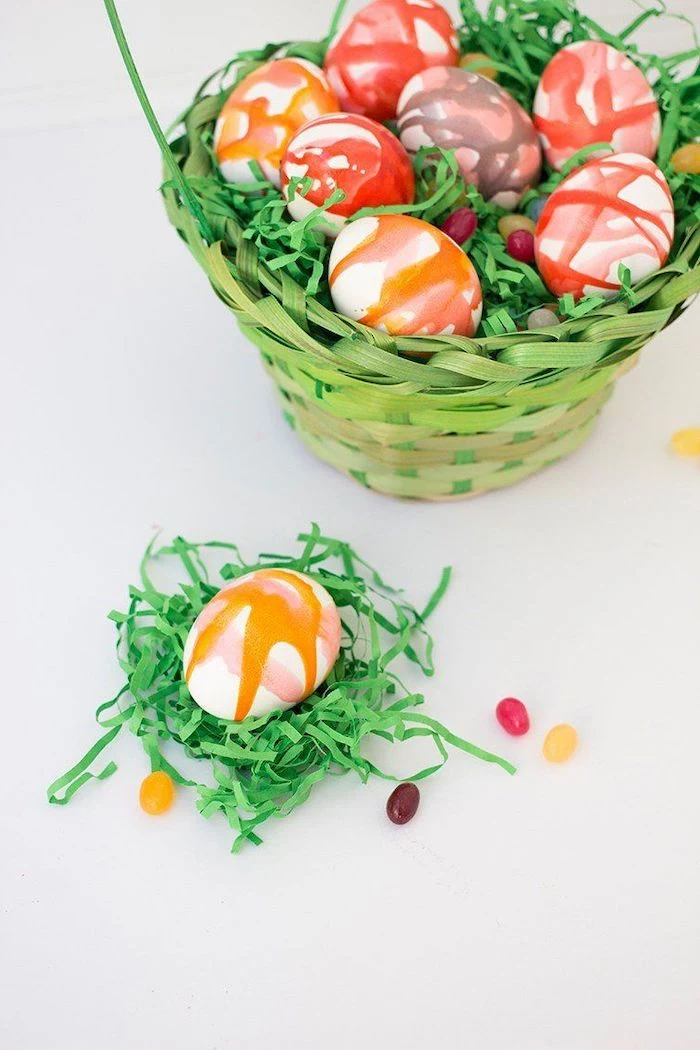
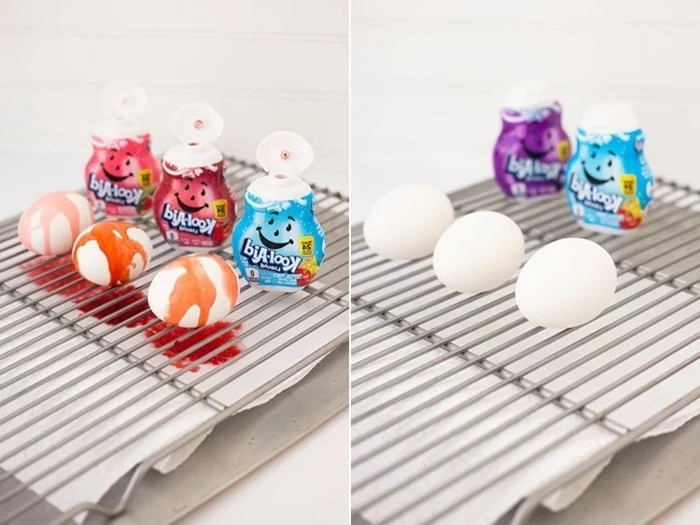
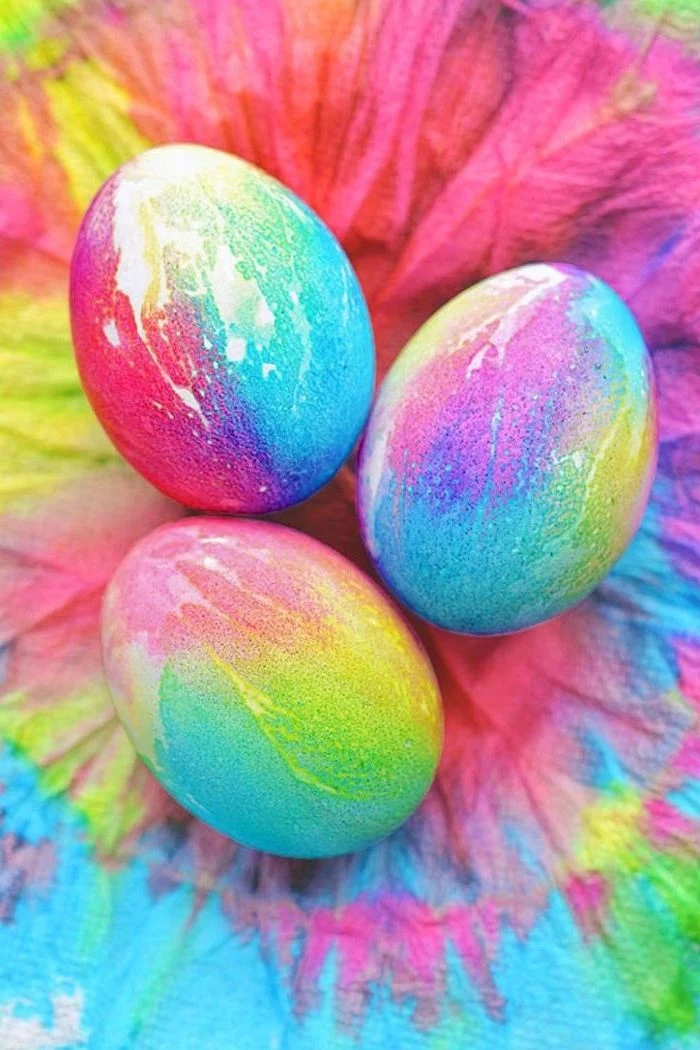
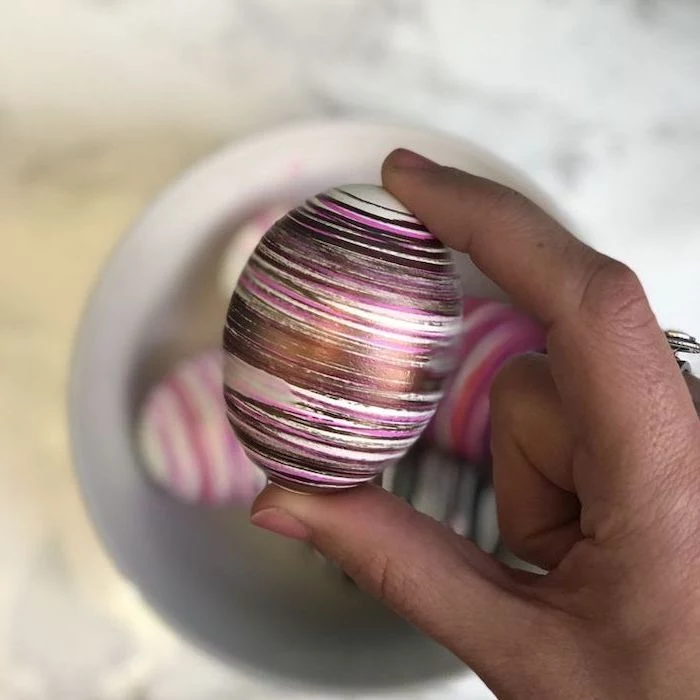
2. Nail Polish Marbling: This creates incredible, unpredictable swirls. Fill a disposable container with room-temperature water. Drip a few drops of different nail polishes onto the surface and swirl with a toothpick. Then, just dip your hollow egg. Work in a well-ventilated area and wear gloves! Quick Cleanup Tip: A little nail polish remover on a cotton ball will clean up any drips on your workspace.
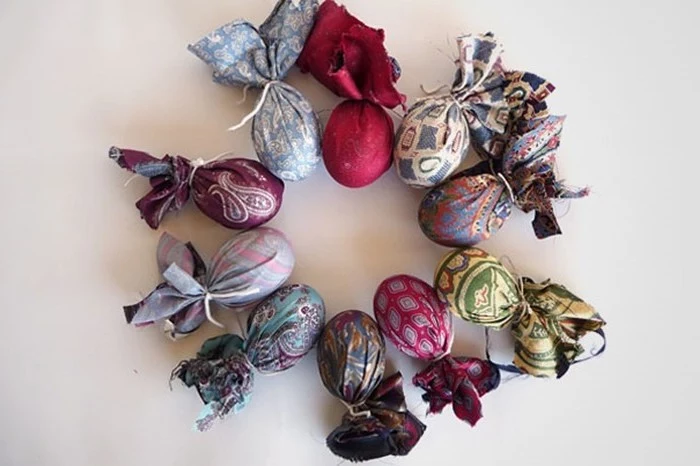
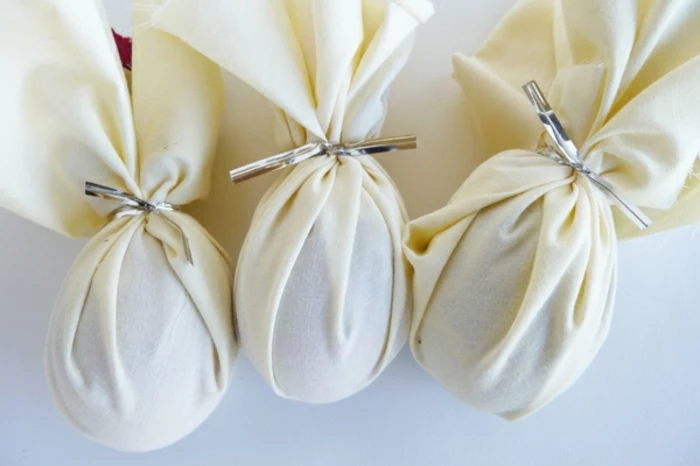
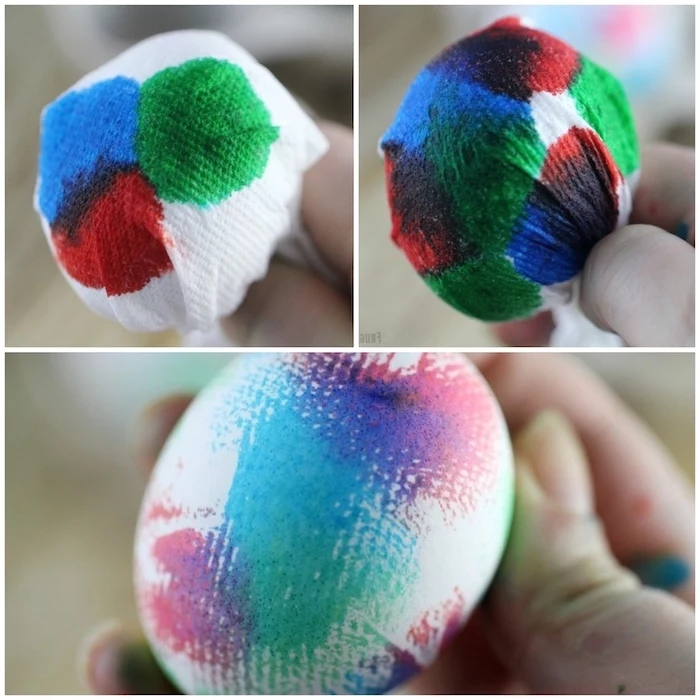
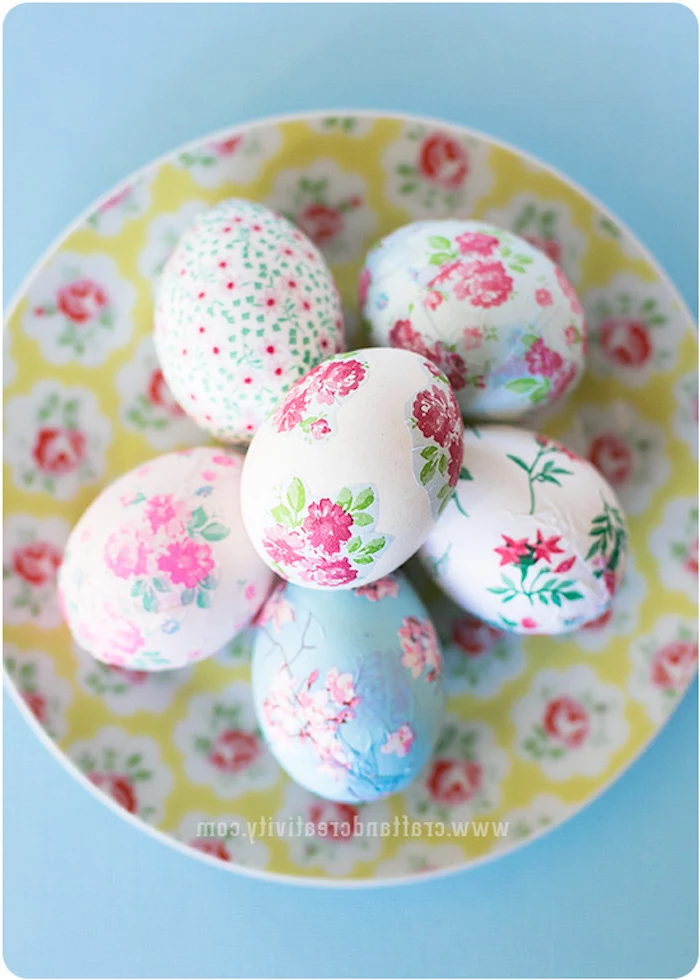
3. Silk Tie Transfer: This is a classic, and it feels like magic. You need a tie or scarf made of 100% silk. Polyester won’t work. Trust me on this—the first time I tried, I used a cheap polyester tie and ended up with a sad, slightly damp, beige egg. A total fail! Check the label. You can find old silk ties at thrift stores for a couple of bucks. Wrap a piece of the silk tightly around a raw egg (pattern-side in), wrap that in a piece of white cloth, and simmer it in water with 1/4 cup of vinegar for 20 minutes. Let it cool completely before the grand unwrapping.
Core Dyeing Techniques
Once you’ve got your colors, you can play with how you apply them.
Solid Color Immersion: The basics. Just dunk the egg in the dye. The longer it soaks, the deeper the color. Use a slotted spoon to prevent splashing and cracks.
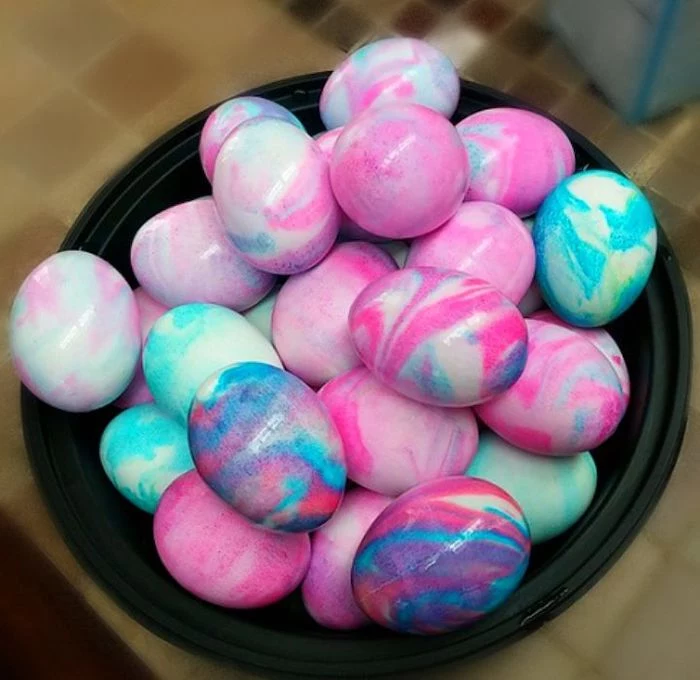
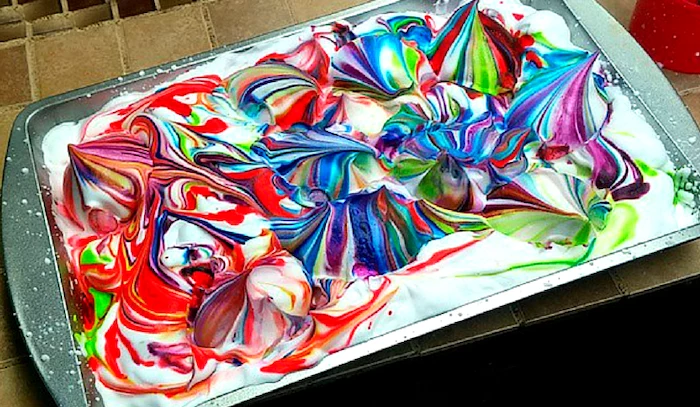
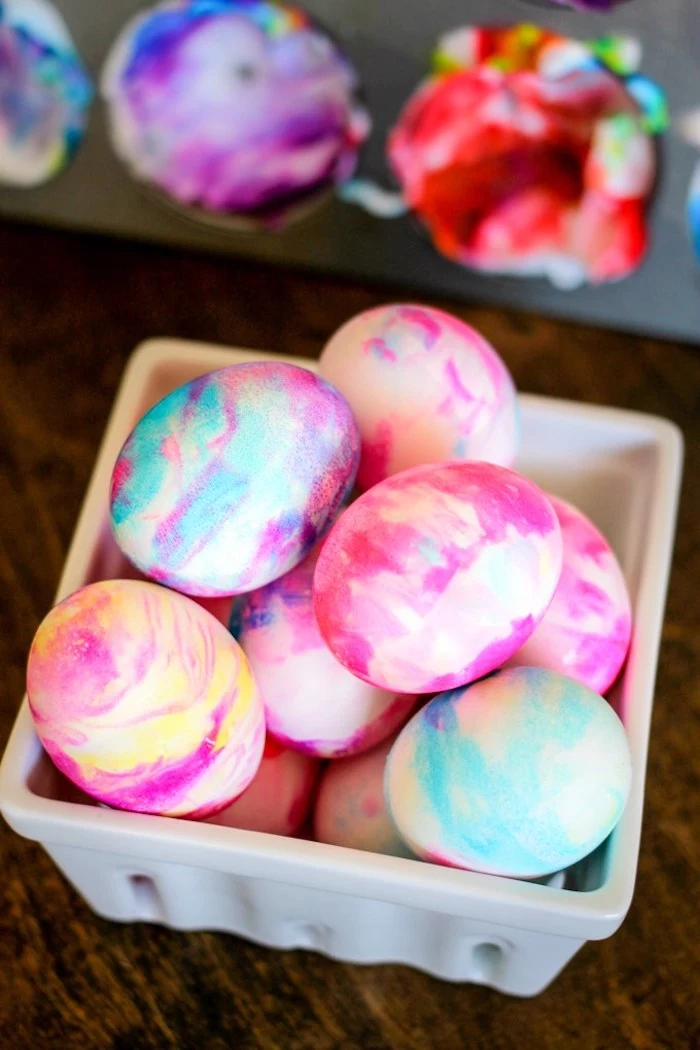
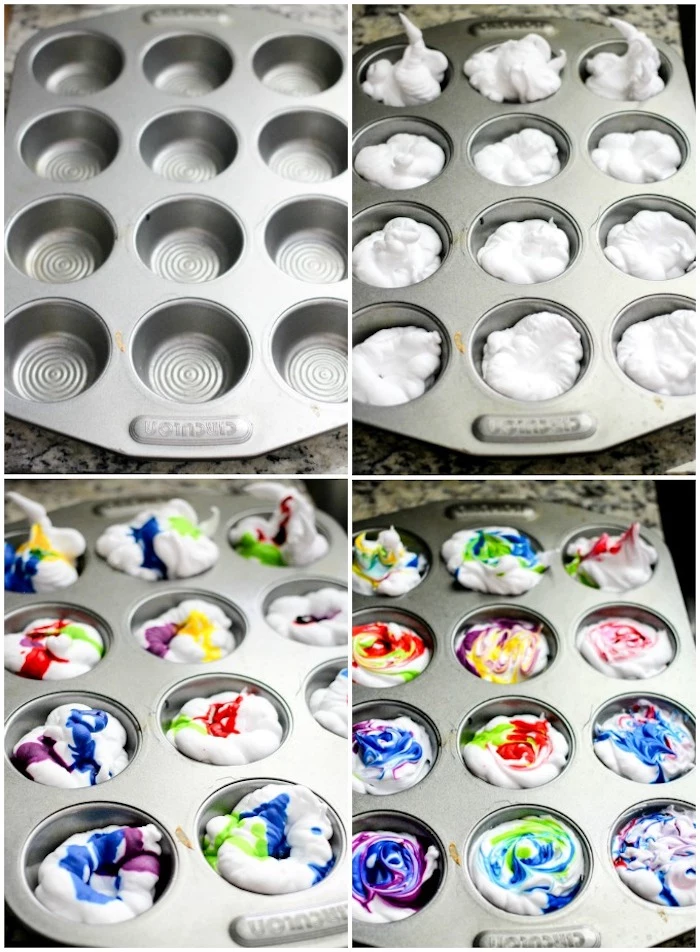
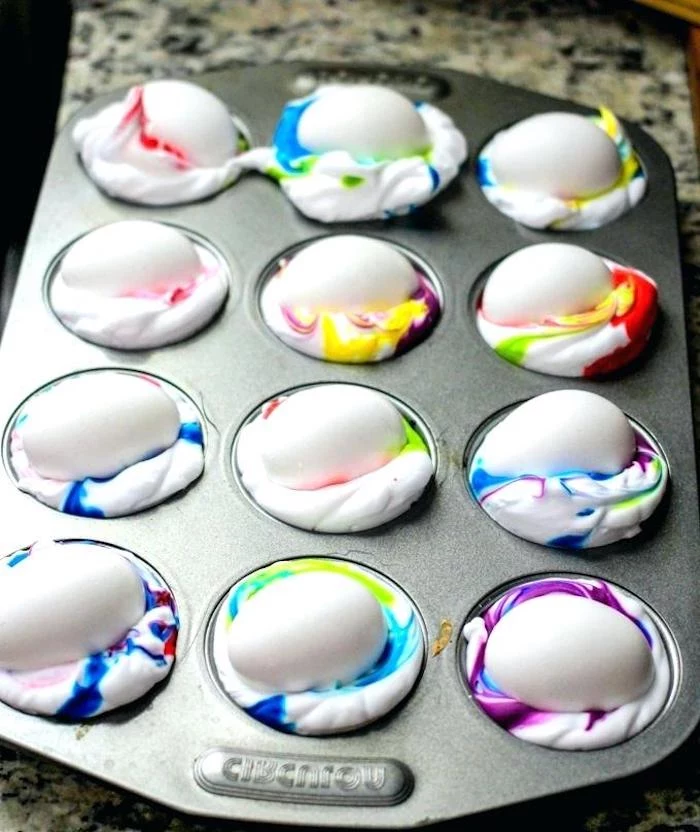
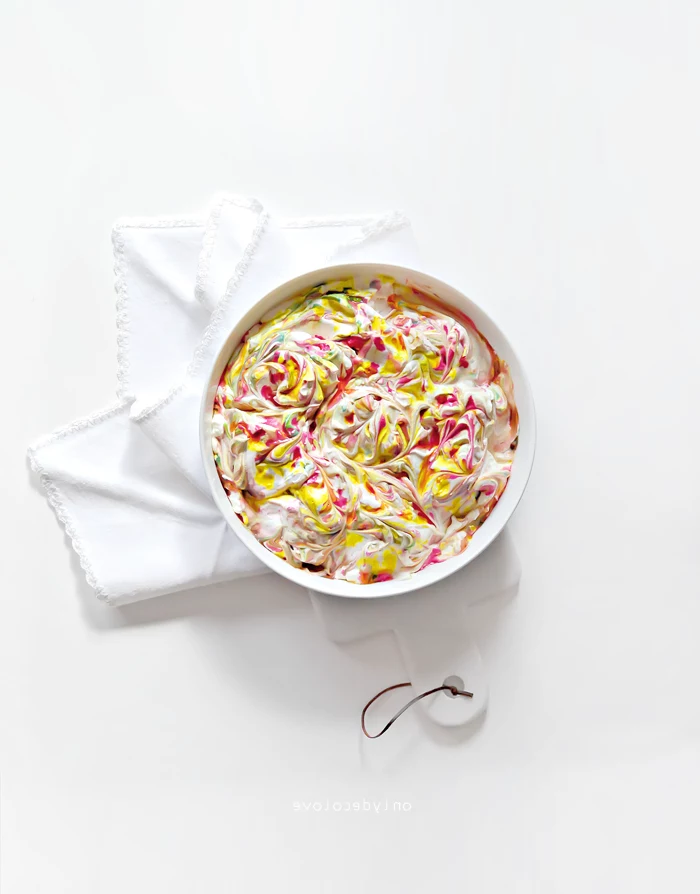
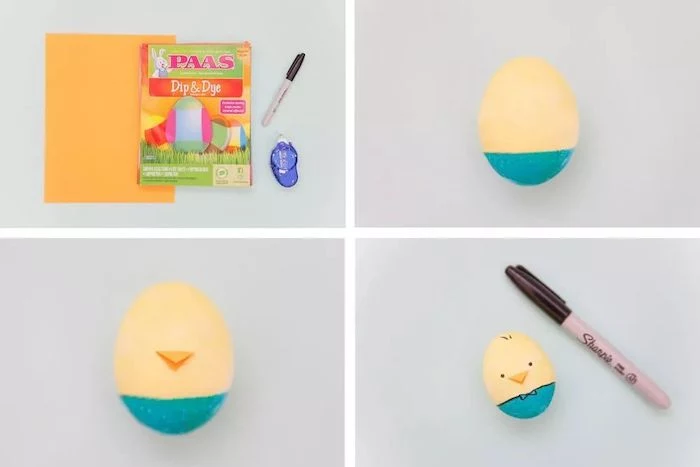
The Whipped Cream Method (Edible & Fun!): This creates a cool tie-dye effect and is great for kids. Spread a layer of real whipped cream (from a can is perfect) in a baking dish. Drip on some food coloring, swirl it gently with a toothpick, and then roll a dry, hard-boiled egg across the surface. Let it sit for at least 30 minutes before rinsing it under cool water. Heads up: This one’s messy, but since it’s just whipped cream and food coloring, cleanup is a breeze with a damp cloth.
Resist Dyeing (Creating Patterns): This is just a fancy term for blocking the dye.
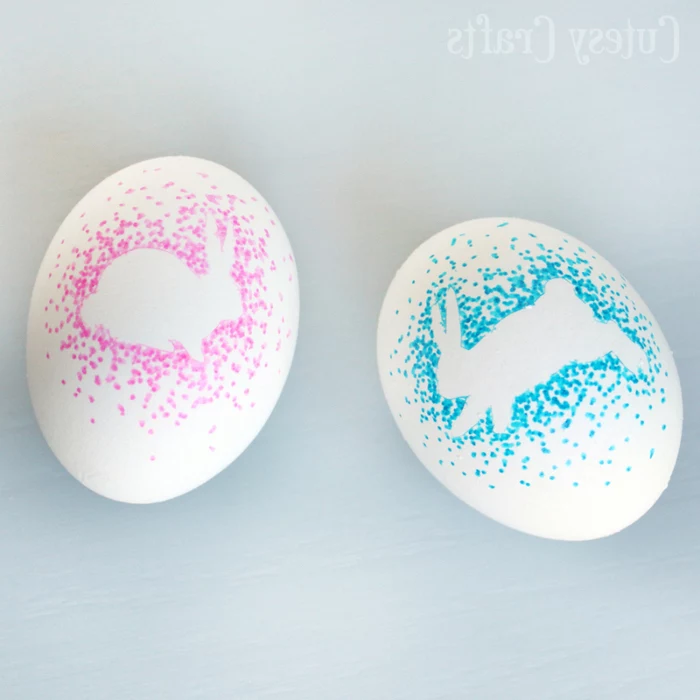
- Quick Win: Got 5 minutes? Grab a hard-boiled egg and a wax crayon. Draw a secret message or pattern, then dip it in dye for a few minutes. The wax repels the dye, and your design appears like magic. It’s the easiest way to feel like an artist.
- Rubber Band Stripes: Wrap rubber bands around an egg before dyeing to create clean white stripes.
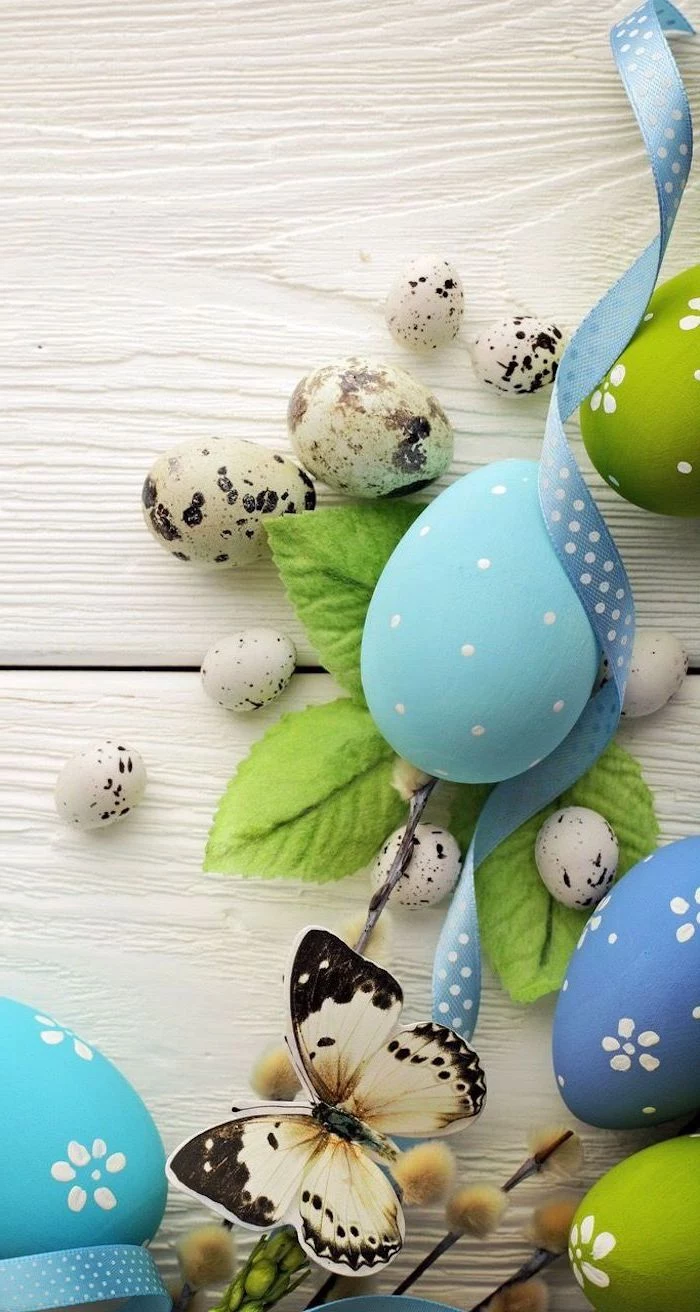
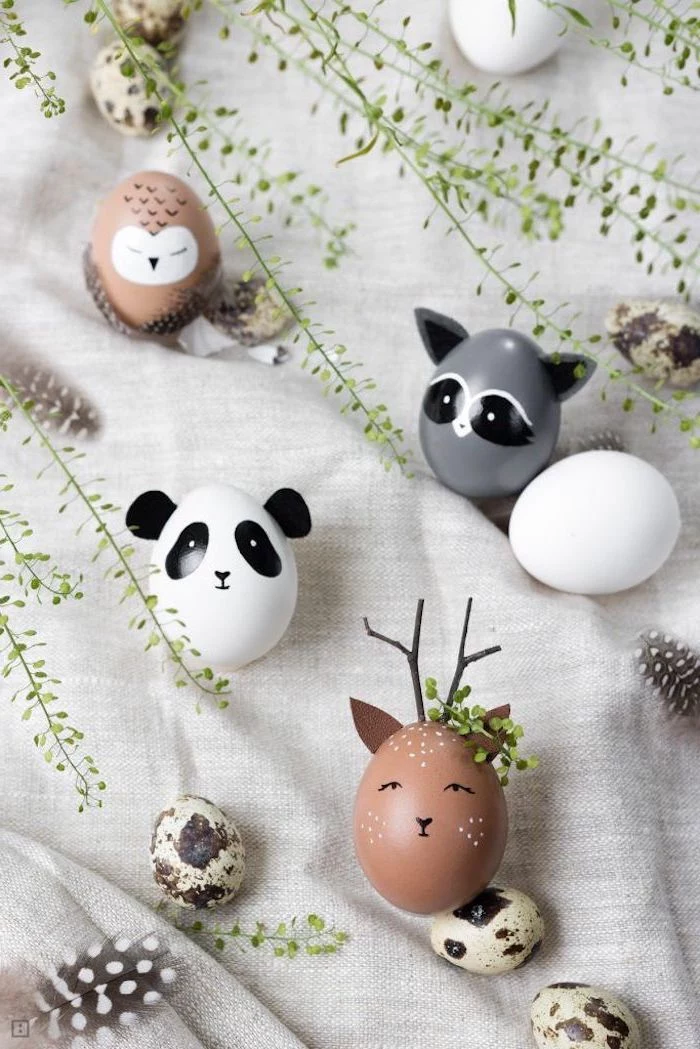
- Natural Silhouettes: Place a small, flat leaf (like parsley) on an egg, stretch a piece of nylon stocking over it to hold it in place, and then dye it. The result is a beautiful, perfect silhouette of the leaf.
Troubleshooting: When Things Go Wrong
Don’t worry, it happens to everyone. Here are some common problems and how to fix them.
- Problem: The color is splotchy.
Solution: This usually means there were natural oils from your hands on the shell. Before dyeing, give your cooled eggs a quick wipe with a vinegar-soaked paper towel. It cleans and preps the shell perfectly. - Problem: My natural dyes are super pale.
Solution: Patience! A deep blue from cabbage can take all night. For richer colors with onion skins or turmeric, you can try simmering the eggs directly in the strained dye solution for about 20 minutes. Just be gentle, as they’re more likely to crack this way. - Problem: My nail polish just sank to the bottom!
Solution: Ah, a classic! This almost always means your water is too cold. Dump it out and try again with room-temperature water. The polish should float on the surface. - Problem: An egg cracked while boiling.
Solution: If it’s a hairline crack, it’s fine for dyeing and eating. If it’s a big crack with white leaking out, just set that one aside for egg salad. Don’t dye it.
Finishing Touches and Storing Your Eggs
Once your beautiful, edible eggs are dry, they need to be treated like any other hard-boiled egg. The official food safety rule is that they shouldn’t be out of the fridge for more than two hours. So, if you’re having an egg hunt, keep it quick and get them back in the cold!
Oh, and one last thing. Want that glossy, professional sheen on your finished eggs? After they’re completely dry, rub them with a tiny bit of vegetable oil on a paper towel. It makes the colors pop and look incredible.
At the end of the day, dyeing eggs is about slowing down and making something with your own hands. Whether you go for the quick pop of food coloring or the slow magic of a simmering pot of onion skins, the goal is the same: to add a little color and joy to the season. Don’t be afraid to make mistakes—an unexpected color is just part of the story you’ll tell next year.
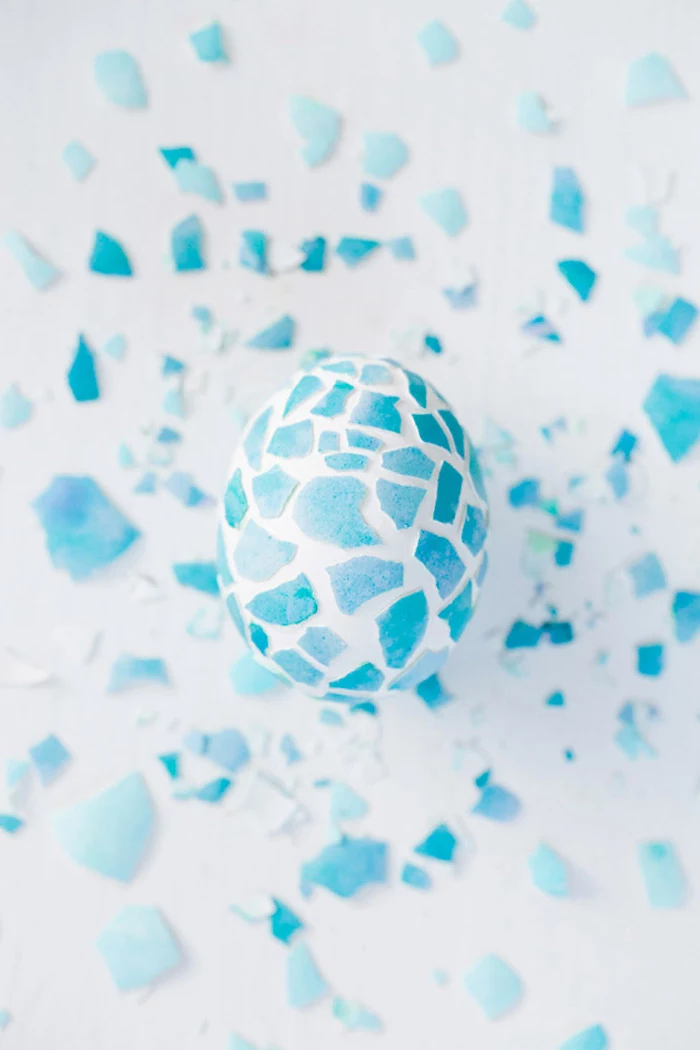
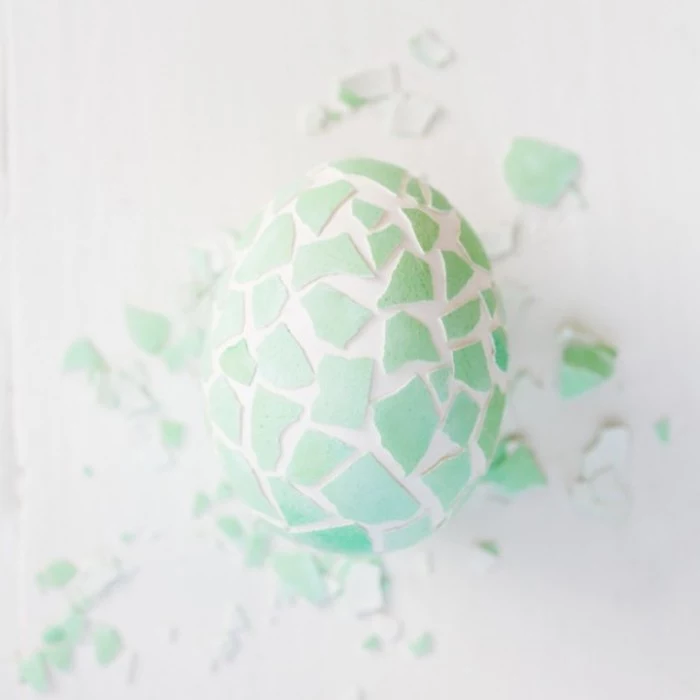
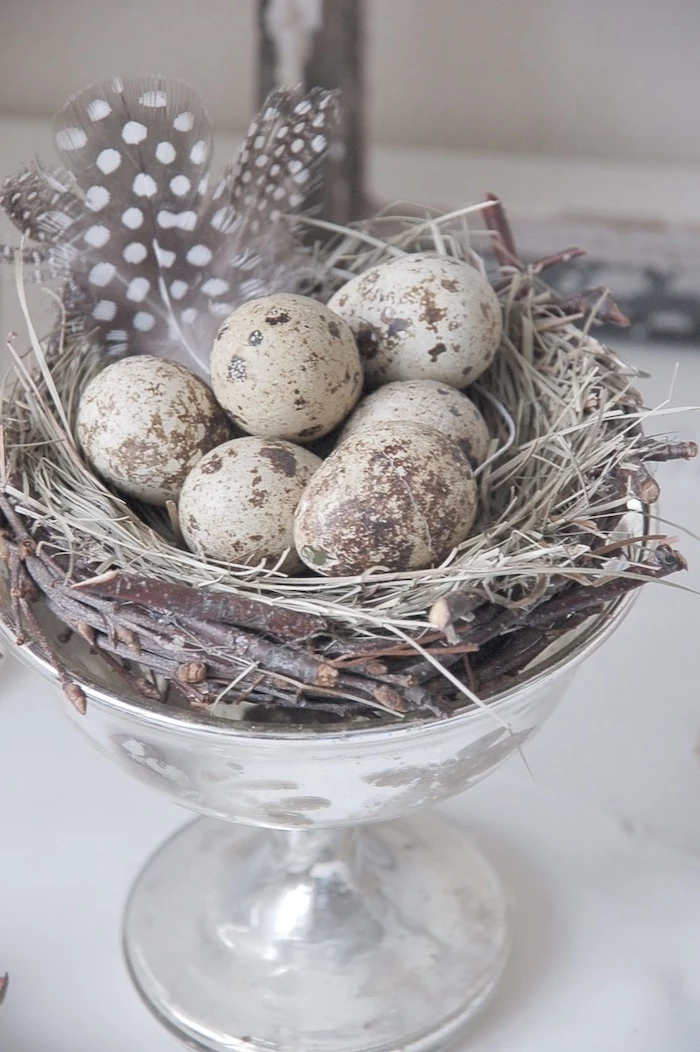
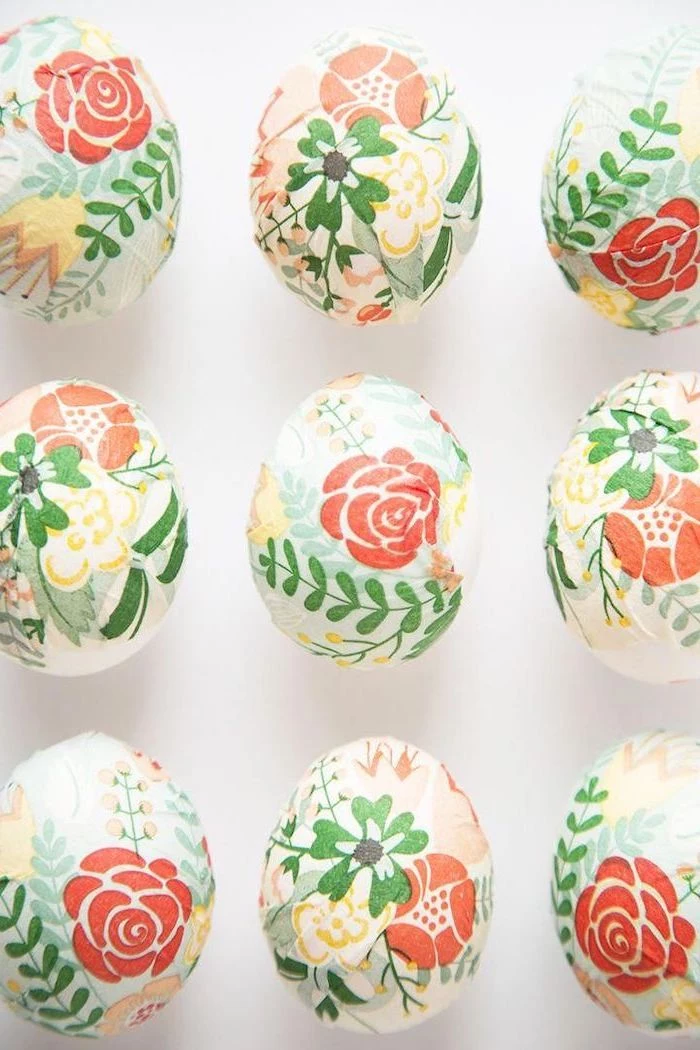
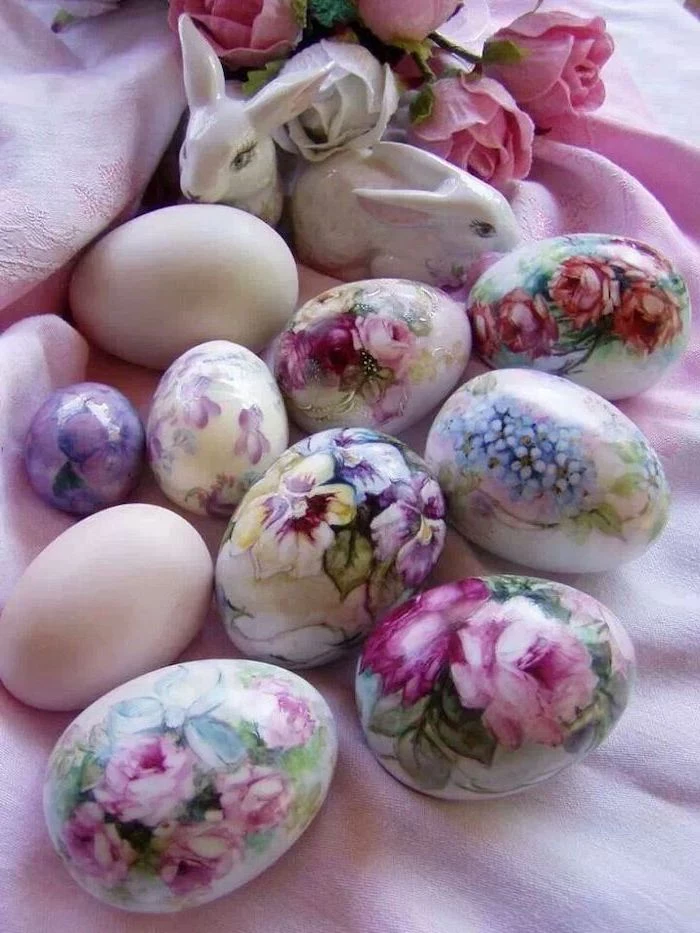
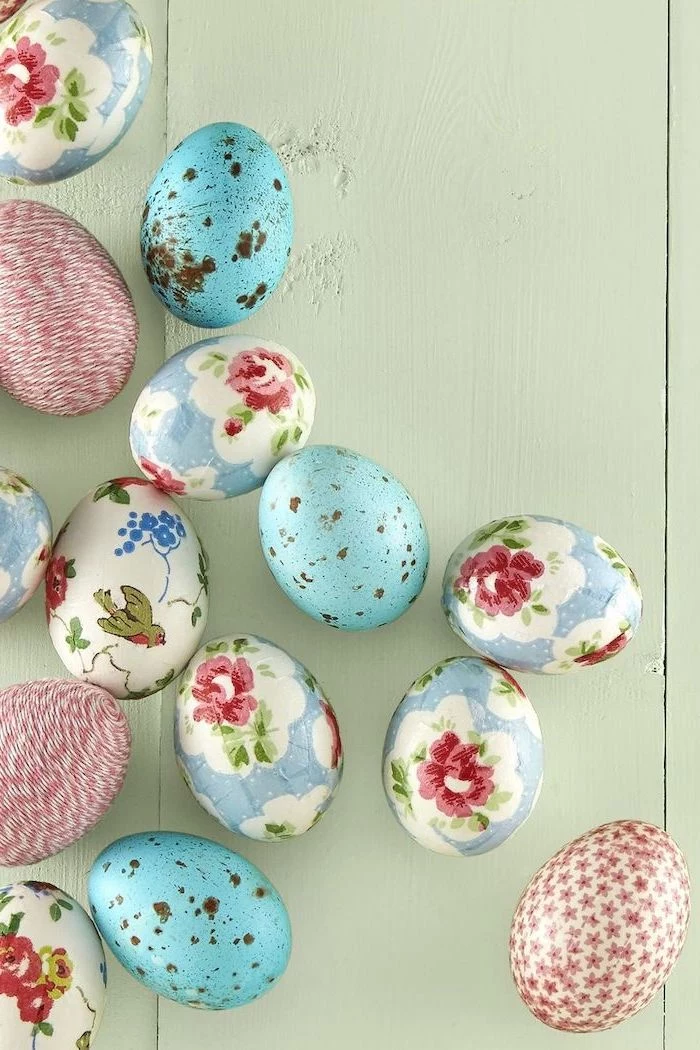
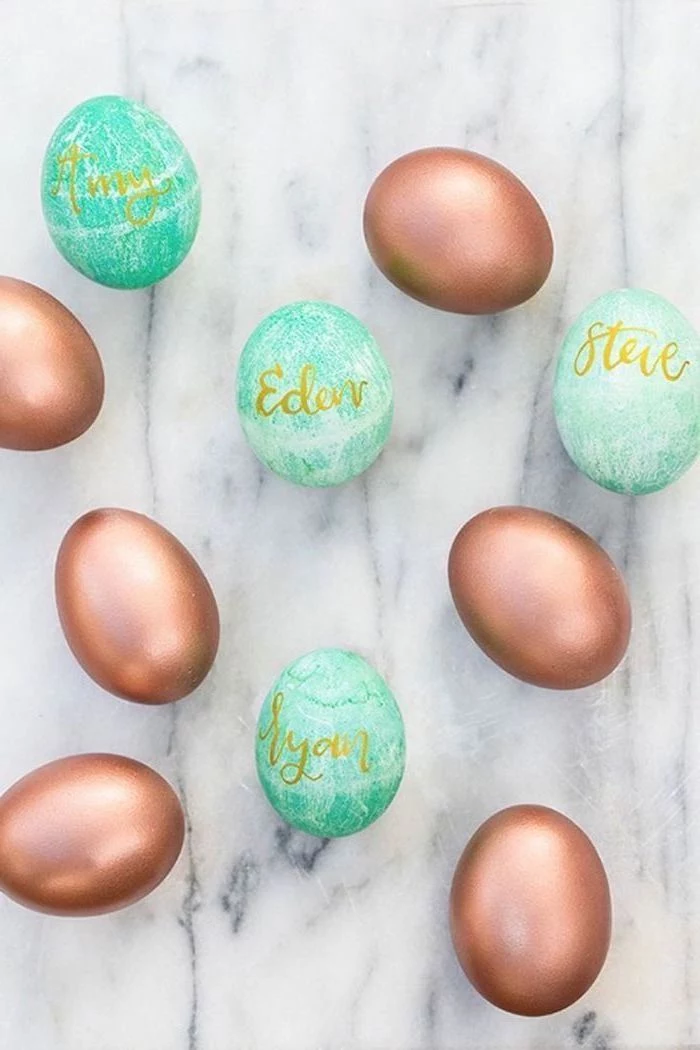
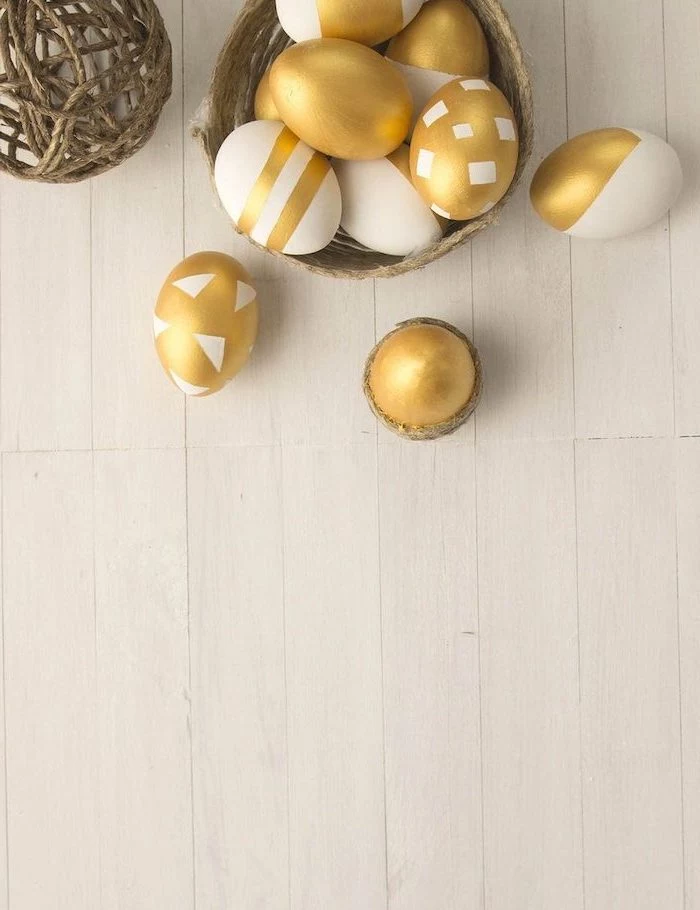
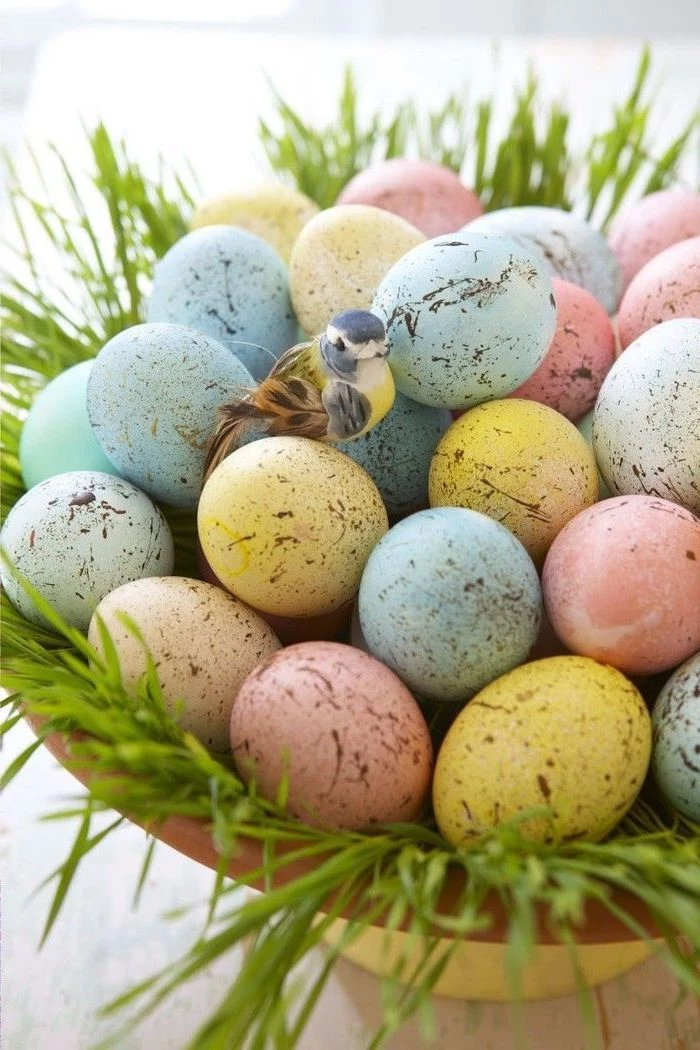
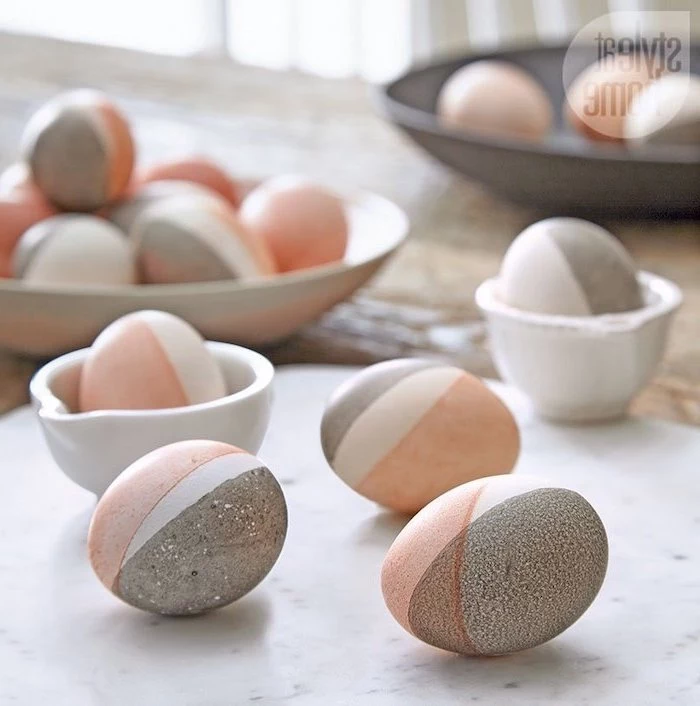
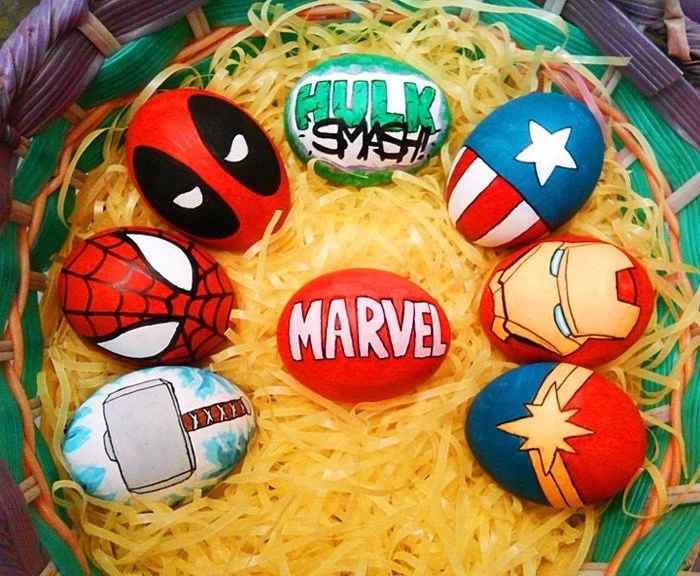
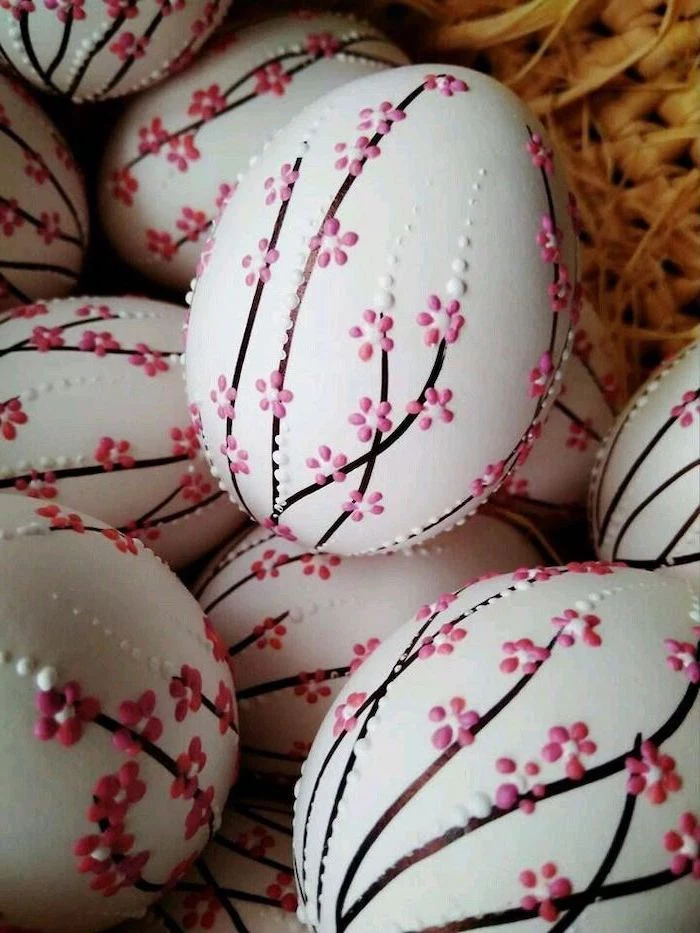
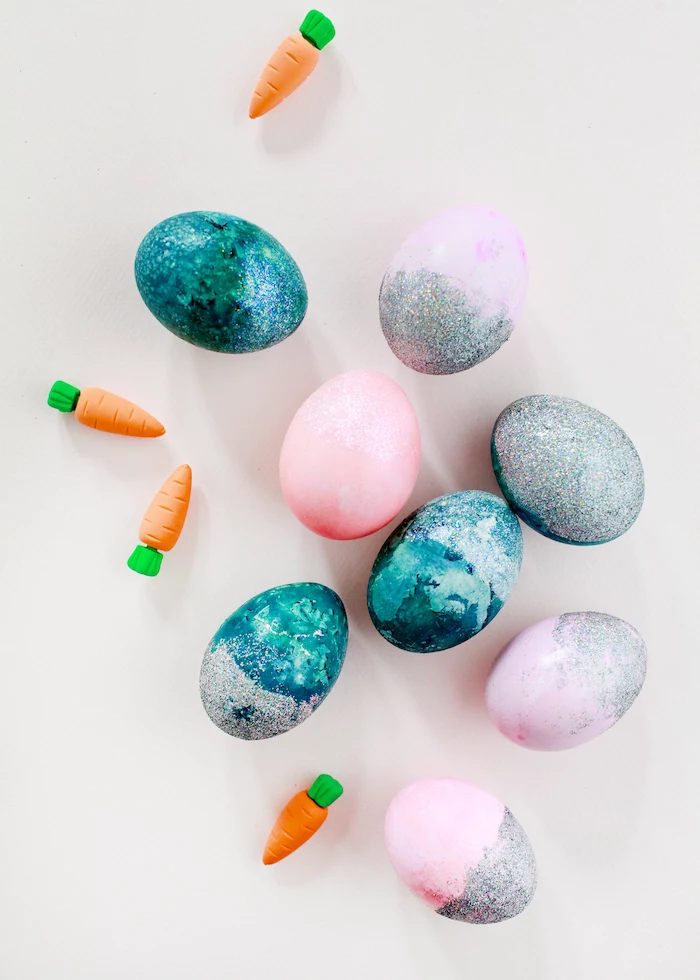
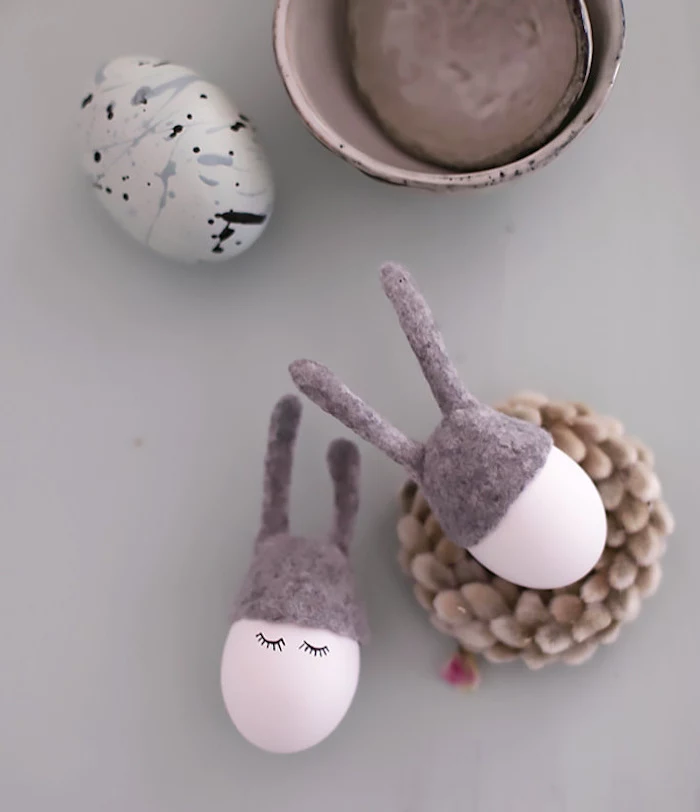
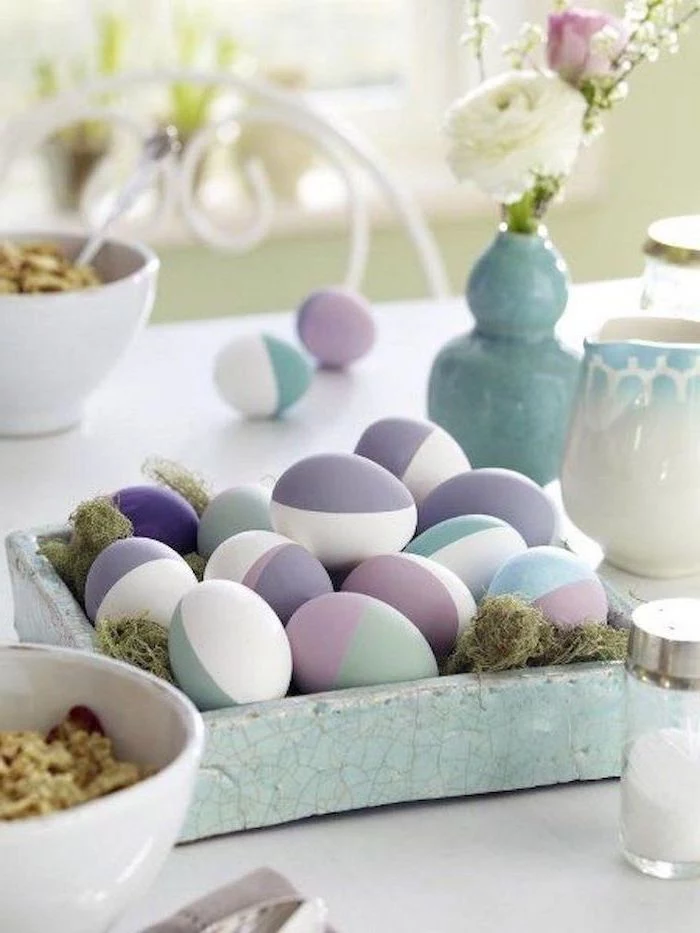
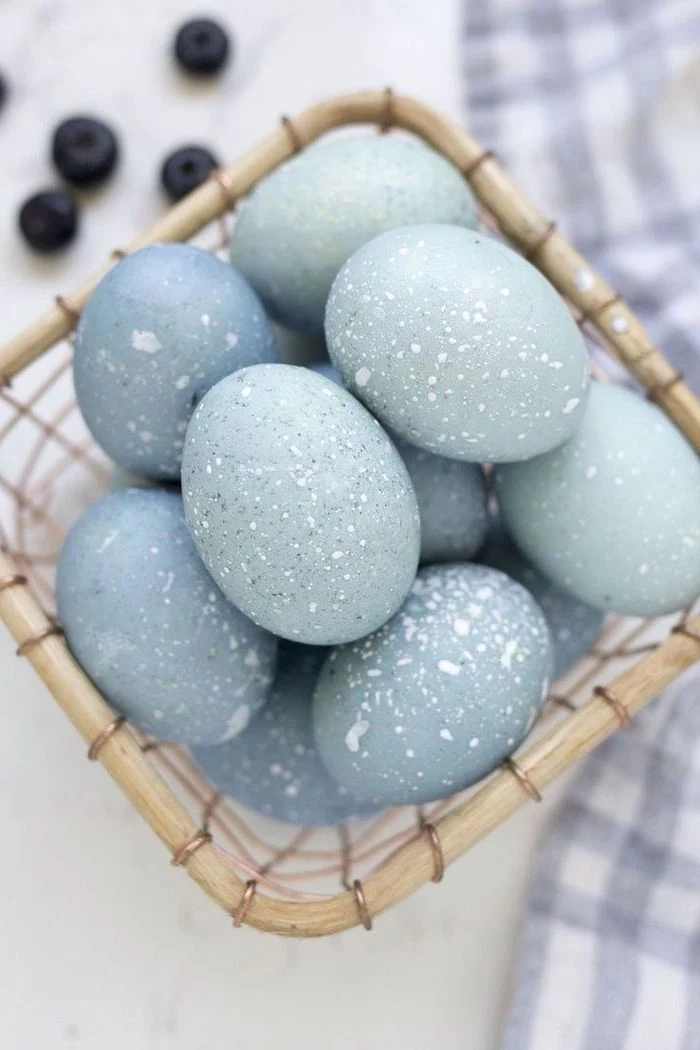
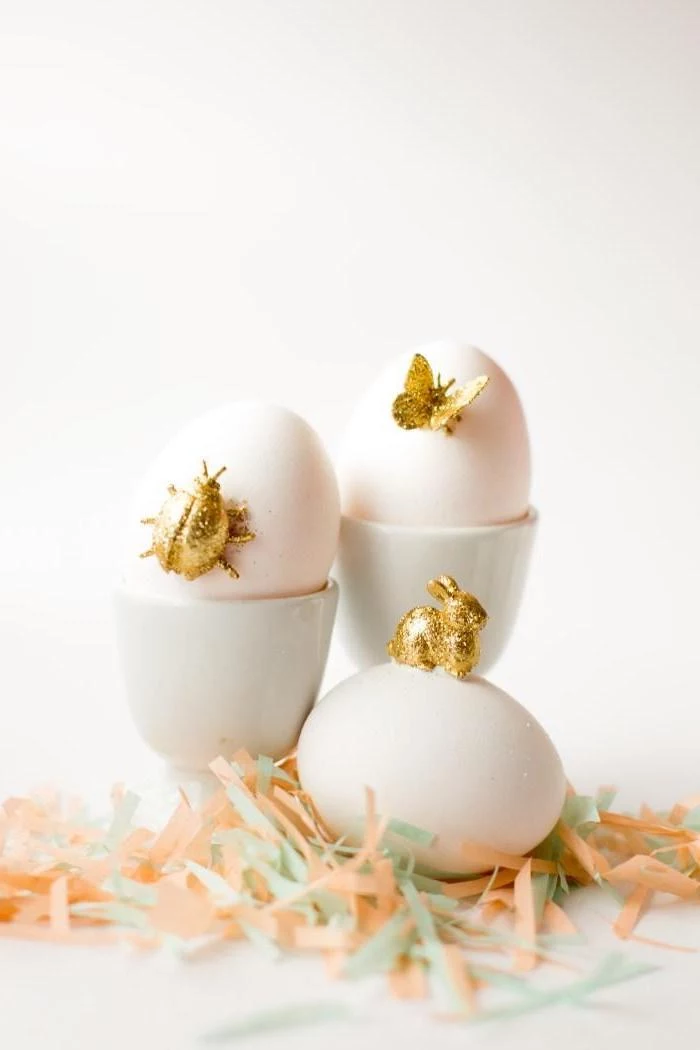
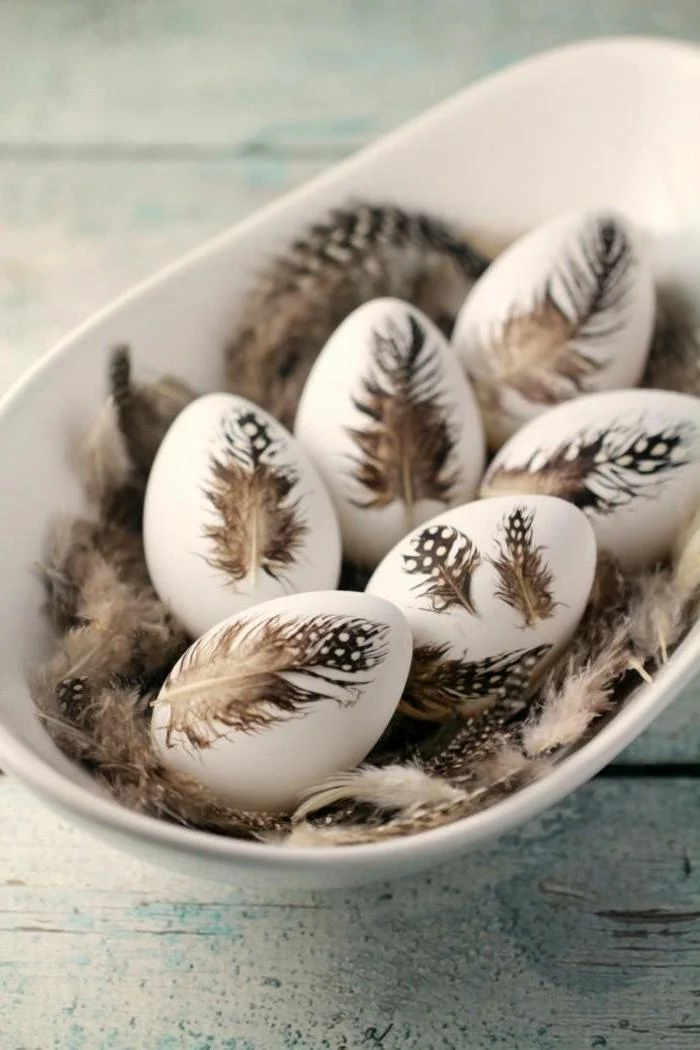
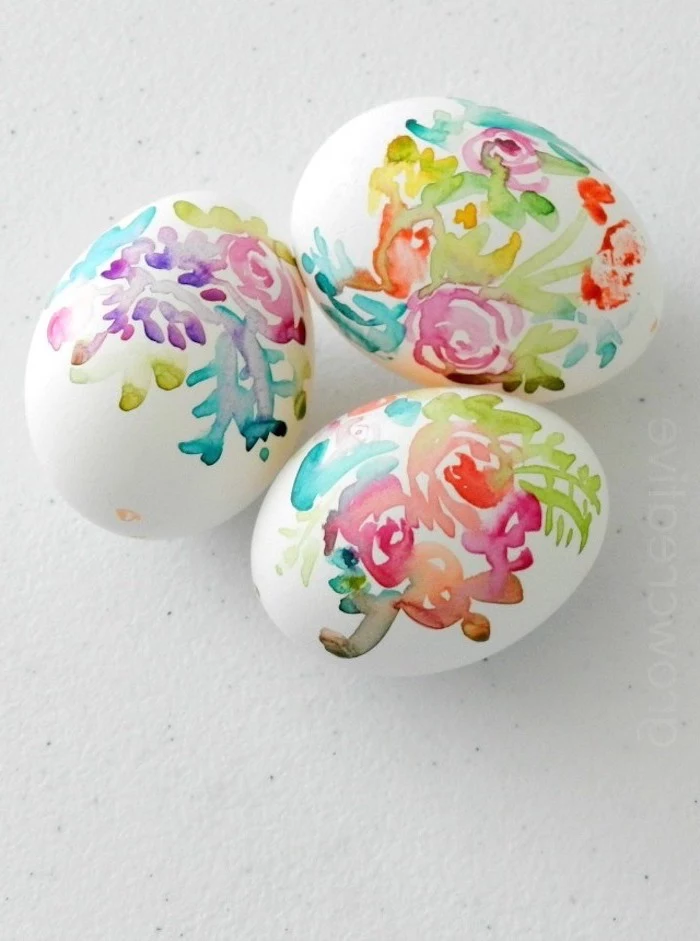
Inspiration Gallery

The Shaving Cream vs. Whipped Cream Debate: For vibrant, marbled eggs perfect for display, classic Barbasol foam shaving cream is your best bet due to its firm texture. For edible creations: Use a tub of Cool Whip or a similar whipped topping. The colors will be slightly softer, but the result is completely food-safe and just as fun for kids.


The tradition of dyeing eggs, or Pysanky, in Ukraine is a revered art form where intricate designs are drawn onto the egg with wax and a special stylus called a ‘kistka’ before each color dip.

How do I get my natural dyes to be more vibrant?
Patience and concentration are your allies. For a deep color, don’t be afraid to double the amount of dyestuff (like onion skins or cabbage leaves) and let your eggs soak for several hours, or even overnight in the refrigerator. A longer soak allows the pigments to fully penetrate the shell, transforming pale pastels into rich, earthy jewel tones.

- Create sharp, geometric lines with rubber bands.
- Draw secret messages or intricate patterns with a white crayon.
- Use small leaves or flowers, pressed against the egg and held in place with a piece of nylon stocking, for a beautiful botanical print.
The trick? Apply these resists before the egg ever touches the dye.
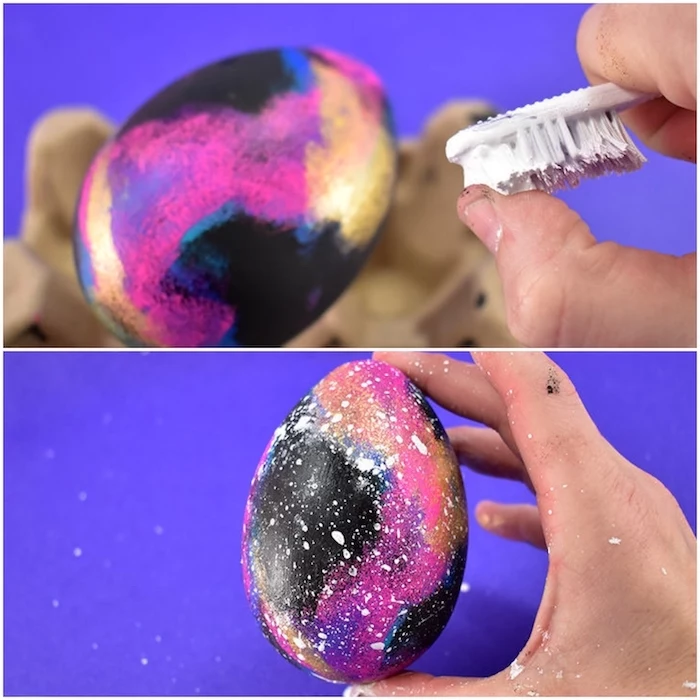
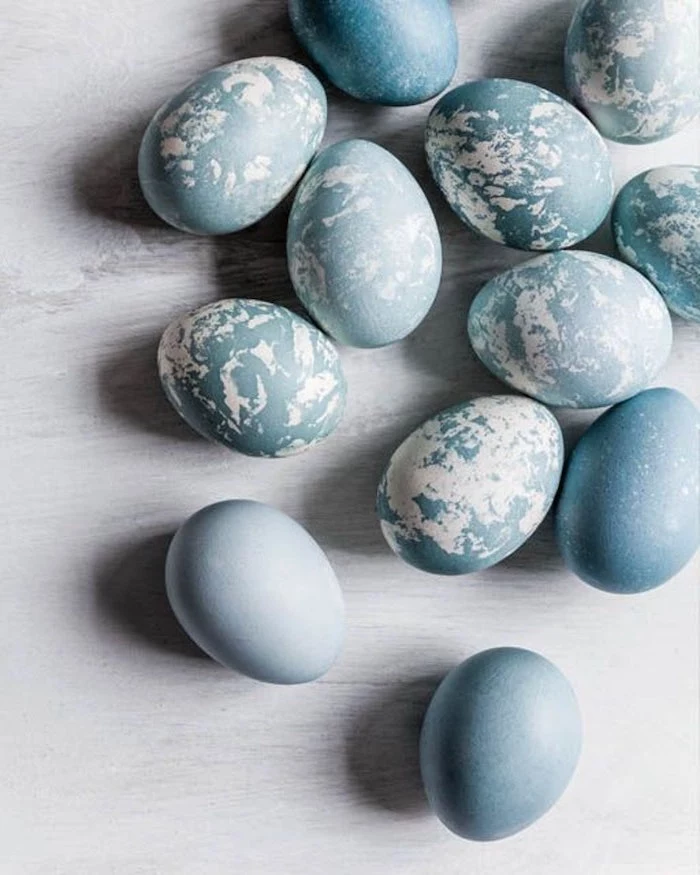
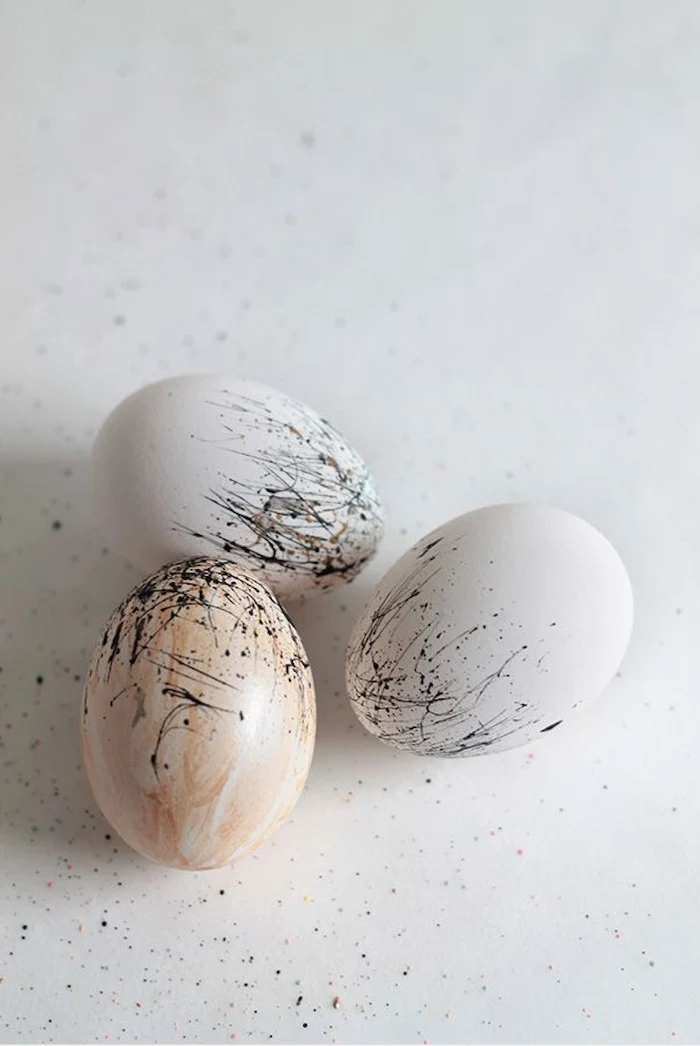
For a stunning, speckled robin’s egg effect, dip an old toothbrush into a dark dye (like one made from coffee grounds or a deep blue food coloring). Hold the brush about a foot from your dyed eggs and gently run your thumb over the bristles to flick tiny droplets of color onto the shells.


Did you know? Only 100% silk will transfer its pattern using the boiling method. To test a tie or scarf scrap, carefully snip a tiny piece and burn it. Real silk smells like burning hair and leaves a fine ash. Polyester will melt into a hard, plastic bead.


Once your masterpieces are completely dry, give them a gentle polish for a lovely, subtle sheen. Pour a tiny amount of a neutral cooking oil, like vegetable or sunflower oil, onto a paper towel and gently buff the surface of each egg. It makes the colors pop and look professionally finished.


According to food scientists at North Carolina State University, hard-boiled eggs should not be left at room temperature for more than two hours to be considered safe to eat.
This means any eggs used in a prolonged Easter egg hunt or left out as decoration should be for admiring, not snacking. When in doubt, toss it out or relegate it to the display basket.

Create a sophisticated, cohesive look by planning your color palette in advance. For a modern farmhouse aesthetic, try dyeing brown eggs with:
- Spinach: for a soft, mossy green.
- Yellow Onion Skins: for a rich, terracotta orange.
- Avocado Pits & Skins: for a dusty, muted pink.


My colors all blended into a muddy brown with the shaving cream method. What happened?
You likely over-mixed! The key to vibrant swirls is to add your drops of food coloring (gel colors from brands like Wilton work best for intensity) and use a skewer or toothpick to gently drag the colors through the cream just once or twice. Less is more to keep the colors distinct.
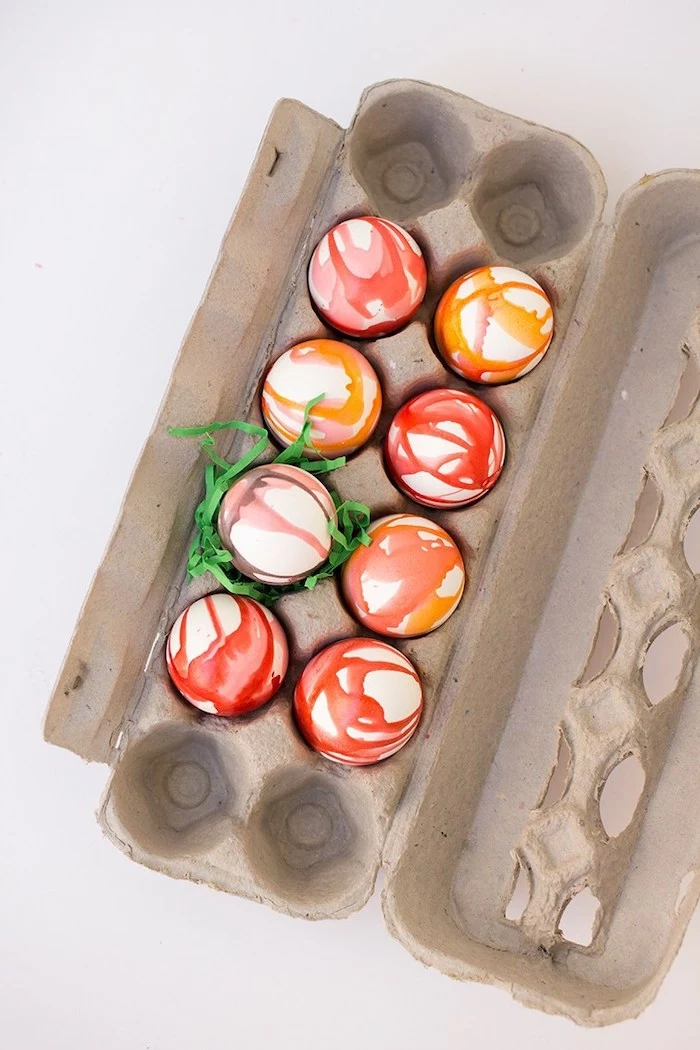
Hot Bath vs. Cold Bath: A hot dye bath (adding eggs to the simmering dye) creates color faster and often results in a more uniform, even tone. A cold dye bath (placing cooled, hard-boiled eggs into a cooled dye liquid) takes longer but can produce more interesting, subtly mottled textures.

Don’t throw away that leftover red wine! Simmering eggs in a bath of red wine (with a splash of vinegar) will produce incredibly deep, almost crystalline purple-gray eggs. The tartaric acid in the wine etches the shell in a unique way, creating a beautiful, sugary texture.

For a matte, chalky finish: Instead of vinegar, try adding a teaspoon of baking soda to your dye bath. The alkaline environment reacts differently with the eggshell, preventing a sheen and creating a soft, non-glossy surface that’s perfect for a rustic or primitive decorating style.

In Greece, Easter eggs are traditionally dyed a deep, vibrant red to symbolize the blood and sacrifice of Christ and the promise of rebirth. They are often the centerpiece of the Easter table.
If an egg cracks while boiling, remove it immediately. The proteins leaking from the crack can interfere with the dye and create a splotchy, uneven result on the other eggs in the pot. Save it for egg salad and continue with the uncracked ones.

- Get a deep gold from simmering with turmeric powder.
- Achieve a lovely lavender blue with frozen blueberries.
- Brew strong black coffee for a rich, dark brown.
Your pantry is a treasure trove of potential dyes waiting to be discovered.

Safety First for Tie-Dye Eggs: When using the silk-tie method, be aware that the dyes in fabric are not rated for food safety. These beautiful, patterned eggs are for decoration only. Never eat eggs dyed with this technique, especially if using vintage ties which could contain harmful chemicals.

For an ombré or gradient effect, place an egg in a jar of dye. Every 20-30 minutes, add a bit of water to the jar to slightly dilute the dye bath. This gradually lightens the color being deposited, creating a beautiful transition from dark to light on a single egg.

Important reminder: Always wash your eggs with a little soap and water before boiling. Oils and residue from your hands or the carton can create invisible barriers on the shell, leading to frustratingly patchy and uneven color absorption.


Embrace the unexpected beauty of brown eggs. While white eggs provide a blank canvas for true colors, brown eggs lend an instant earthy, deep undertone. A red cabbage dye that makes a white egg blue will create a stunning slate-gray or deep teal on a brown egg.

The world’s most expensive Easter egg is not one you can make at home. The ‘Rothschild Egg’ by Fabergé, featuring a diamond-encrusted cockerel, was sold at auction for $18.5 million in 2007.

Why aren’t my silk-tie patterns transferring clearly?
The key is a tight wrap! After wrapping the egg in the silk, you must wrap it again, very snugly, in a piece of white cotton fabric (like from an old pillowcase) and tie it off tightly. This second layer presses the silk firmly against the eggshell, ensuring a crisp pattern transfer during boiling.


Liquid vs. Gel Food Coloring: For classic, pastel dye baths, a few drops of standard liquid food coloring like McCormick’s is perfect. For high-impact techniques like shaving cream marbling where you need intense, concentrated color that doesn’t run, a thick gel coloring from a brand like Ann Clark or Wilton is far superior.

Don’t pour your used natural dye baths down the drain just yet! If the color is still strong, you can use them to dye small skeins of natural wool yarn or even squares of silk fabric for other craft projects. It’s a wonderful way to give your beautiful colors a second life.

- A brilliant, saturated fuchsia pink.
- A deep, moody magenta.
- A soft, delicate rose.
The secret to these shades? Not flowers, but beets. Use the juice from canned beets for intense color, or simmer chopped raw beets for more subtle, natural tones.