Handmade Gifts for Dad That Don’t Look… Well, Handmade
For as long as I can remember, my workshop has smelled of sawdust, leather, and linseed oil. I’ve spent countless hours in there, building things and fixing things. But honestly, the most rewarding projects have always been the gifts I’ve made, especially for my own dad. He was one of those guys who never asked for anything, which made finding the right gift a real challenge. It was never about what he needed; it was about creating something that meant something.
In this article
Let’s be clear: making a gift by hand isn’t about saving a few bucks. It’s about investing your time and attention into something tangible. Those tiny imperfections—the ones you’ll notice even if no one else does—aren’t mistakes. They’re the signature of your effort, proof that it came from a real person, not a factory assembly line. This guide is for anyone who wants to give a gift with that kind of heart. We’re going to dig into real techniques and materials to create something genuinely special.
And I’ll share what I’ve learned from my own mistakes along the way, so you can craft something you’re truly proud to give.
First Things First: Choose the Right Project
Before you even think about picking up a tool, you need to do just that—think. A great finished product starts with a bit of honest planning. Just ask yourself three quick questions:
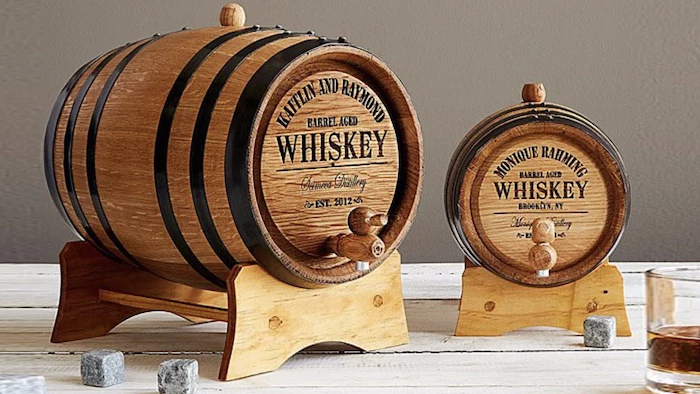
- Who is this gift actually for? Is your dad a grill master? A guy who loves a quiet evening with a book and a whiskey? Or is he constantly misplacing his keys? The best gift is one that slots right into his daily life. A beautiful set of steak branders is kind of pointless if he’s a vegetarian, right?
- What are my real skills right now? Be honest with yourself here. If you’ve never used a power saw, maybe don’t start with a project that requires intricate joinery. There is absolutely no shame in a simple project executed perfectly. In fact, that’s way more impressive than a complicated one that’s falling apart. Think of it in levels: beginners should stick to projects focused on sanding and finishing. If you’re a bit more comfortable, you can tackle things with simple cuts and drilling.
- What tools and space do I actually have? Some projects need good ventilation or specific tools you might not own. Don’t plan on a huge woodworking project if you live in a small apartment with no balcony. We’ll cover options for all kinds of situations.
Thinking this through will save you a ton of frustration. The goal is a finished gift, not a half-done project collecting dust in the corner.
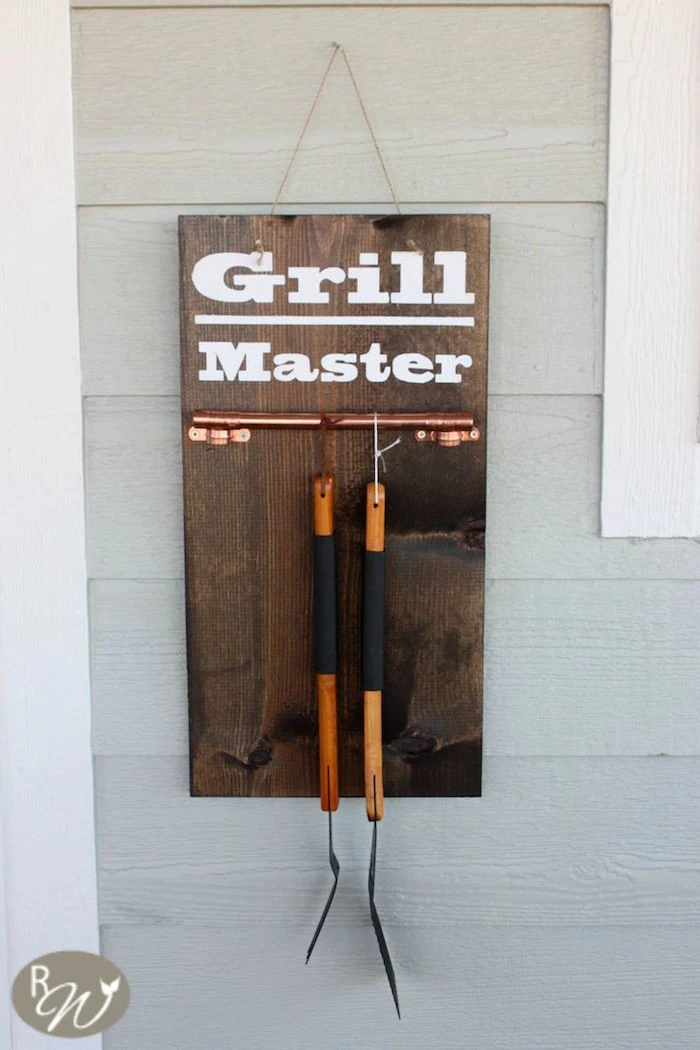
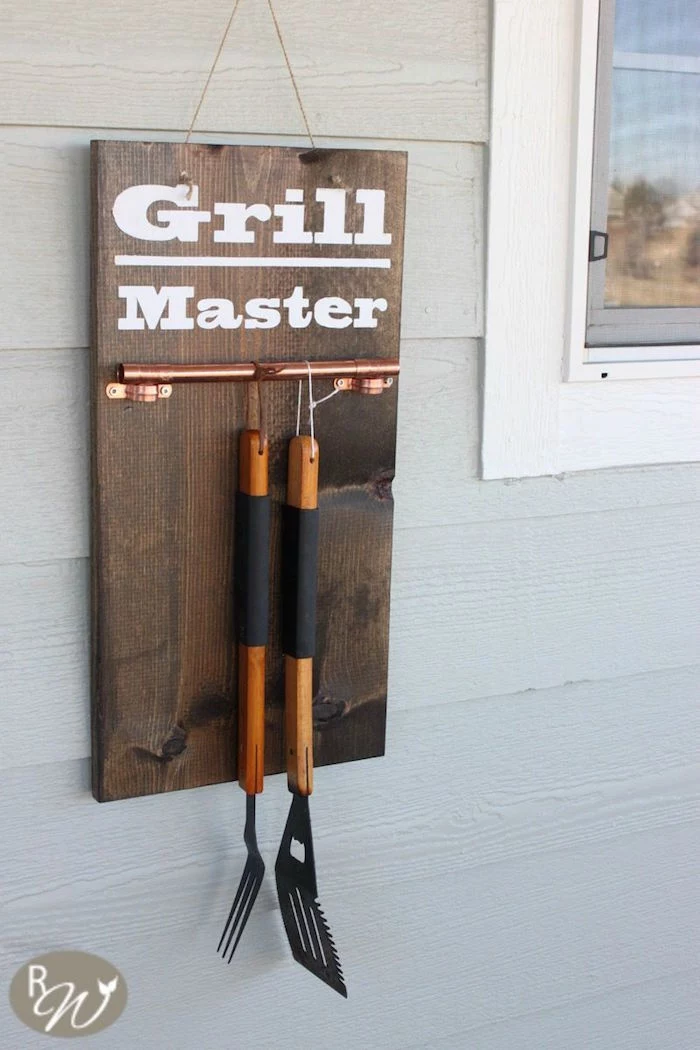
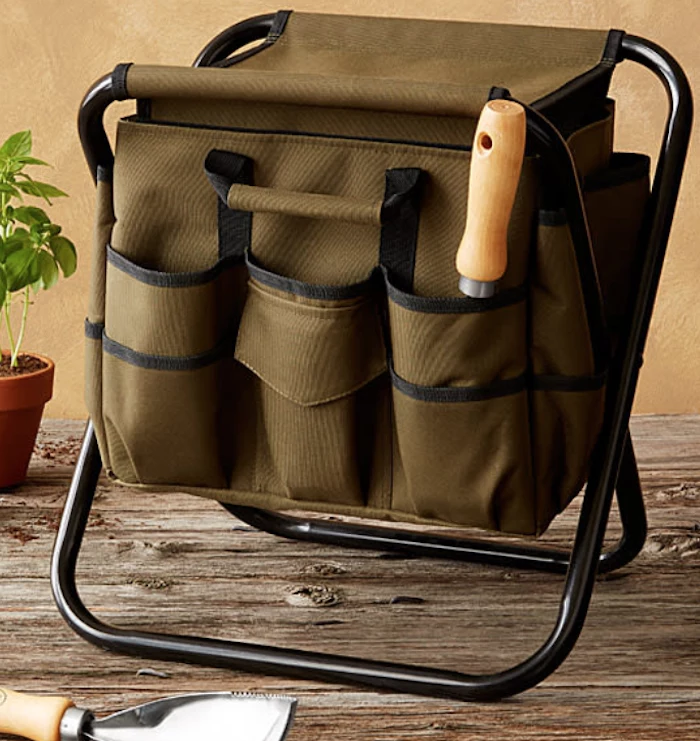
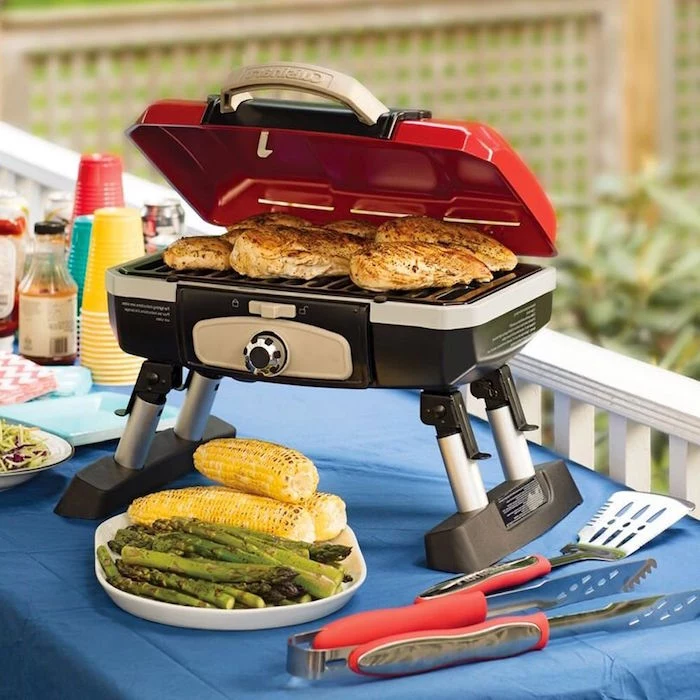
Project 1: The ‘Lasts-a-Lifetime’ Grill Tool Holder
So many dads love to grill. A sturdy, well-made tool holder is a practical gift he’ll use for years, unlike the flimsy ones from big-box stores that rust out after one season. This project is perfect for learning some basic woodworking and finishing skills that really make a difference.
By the way, you should plan for this to take about 2-3 hours of active work, plus a day or so for the stain to fully dry. All in, you’re probably looking at a budget of $30-$45, which is pretty great for a custom gift.
Why Your Choice of Materials Is a Big Deal
You can’t just grab any old piece of wood for this. Since it’s going to live outside, it has to stand up to moisture, sun, and temperature swings. This is where a little material science goes a long way.
- The Right Wood: I’d strongly recommend either cedar or cypress. Both woods have natural oils that make them resistant to rot and bugs. Pine is definitely cheaper, but it will start to look sad and degraded pretty quickly unless it’s pressure-treated—and you probably don’t want those chemicals right next to your cooking area. Hardwoods like oak are tough, but they’re also heavy and can get pricey. For a project like this, a good cedar board is the perfect sweet spot between workability and durability.
- The Right Finish: The stain isn’t just for looks. An oil-based penetrating stain is key here. It soaks into the wood fibers to protect them from the inside out. Film finishes, like polyurethane, just create a plastic-like layer on top. That layer can crack and peel in the sun, trapping moisture underneath and actually causing the wood to rot. For outdoor stuff, always go with an oil-based deck or fence stain with a UV inhibitor. You’ll have to reapply it every couple of years, but it’s a simple wipe-on job that keeps the wood healthy.
The Pro-Level Walkthrough
Here’s how to make something that looks and feels like quality. You can find all of these materials in one trip to a hardware store like Lowe’s or Home Depot.
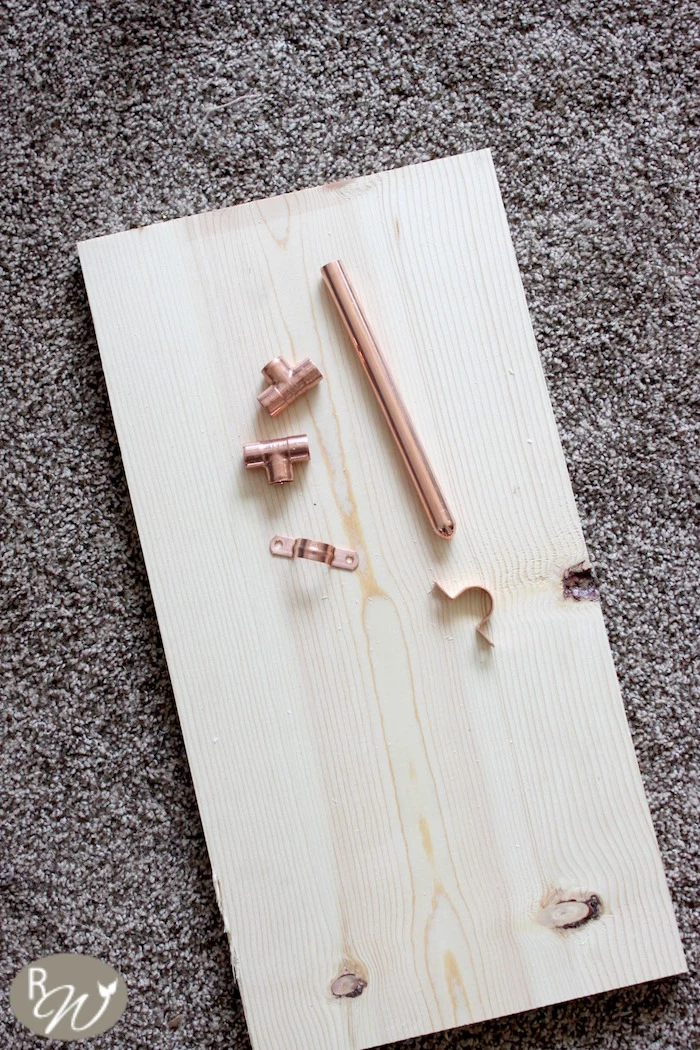
What You’ll Need:
- One cedar board: Get a board that’s 1-inch thick, 6 inches wide, and 24 inches long. (Heads up: a “1×6” board is actually ¾” thick and 5.5″ wide). This should cost you between $8 and $15.
- Oil-based penetrating stain: A small can of deck or fence stain is perfect. Expect to pay $10-$15.
- Solid brass or stainless steel hardware: Get some cool hooks or knobs. The key is solid brass or stainless—avoid anything zinc-plated, because it will rust. Budget about $10-$15 for a set of 4-5 hooks.
- Heavy-duty D-ring hangers: You’ll need two for the back. A small pack is only a couple of bucks.
- Sandpaper: One sheet of 120-grit and one of 220-grit will do.
- Some clean rags for applying the stain.
Quick Tip: Don’t have a saw? Most big hardware stores will cut your board to 24 inches for you, often for free or a very small fee. Just ask!
Step-by-Step, The Right Way:
- Prep is Everything: Don’t just give the board a lazy once-over with sandpaper. Start with the 120-grit paper and always sand with the grain of the wood. If you sand across the grain, you’ll leave scratches that won’t show up until you stain… and then they will scream at you. Trust me, I learned that the hard way.
- Ease the Edges: After sanding, use the sandpaper to slightly round over all the sharp edges. The pros call this “breaking” or “easing the edge.” It not only looks more finished and feels better to the touch, but it also helps prevent the edges from splintering later on. Once that’s done, give the whole thing a final, light sanding with the 220-grit paper for a super smooth finish.
- Mark Your Hook Spots: Use a tape measure to plan where your hooks will go. A good rule of thumb is to place your first hook about 3 inches in from the end, and then space the others evenly, maybe 4-5 inches apart. Make a small pencil mark for each one.
- Drill Pilot Holes: This is a non-negotiable step! One of the most common beginner mistakes is skipping this and splitting the wood. Choose a drill bit that is slightly smaller than the screw for your hook, and drill a shallow hole at each mark.
- Apply the Stain: Dip a clean rag into your oil stain and wipe a generous coat onto the wood. Let it soak in for about 10-15 minutes (check the can for specific instructions). Then—and this is important—use a clean, dry rag to wipe off ALL of the excess stain. If you leave a thick layer on the surface, it won’t dry properly and you’ll end up with a sticky, tacky mess that collects dust.
- CRITICAL SAFETY NOTE: Oil-soaked rags can spontaneously combust as they dry. This is a real fire hazard. Do not just bunch them up and throw them in the trash. Lay them out flat on a concrete surface like your driveway or garage floor, away from anything flammable, until they are completely dry and stiff. Only then is it safe to throw them away.
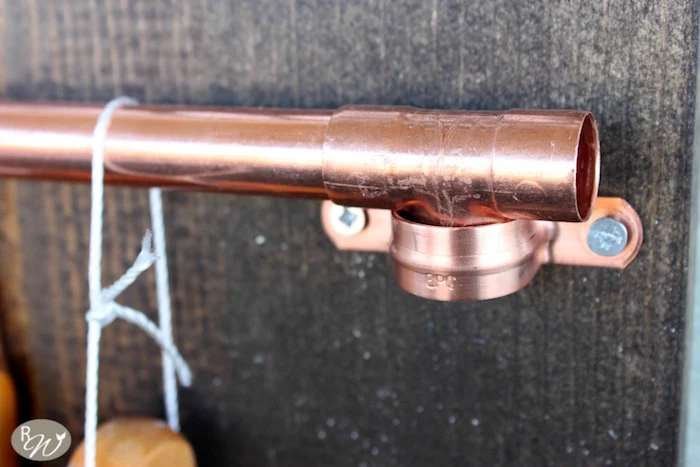
- Attach the Hardware: Once the stain is fully dry (give it at least 24 hours), screw your hooks into the pilot holes you drilled. Then, flip the board over. To attach the D-rings so it hangs straight, measure down the exact same distance from the top edge on both the left and right sides before screwing them in.
And that’s it. You’ve just created a high-quality, practical, and meaningful gift that will be used and appreciated for a long, long time.
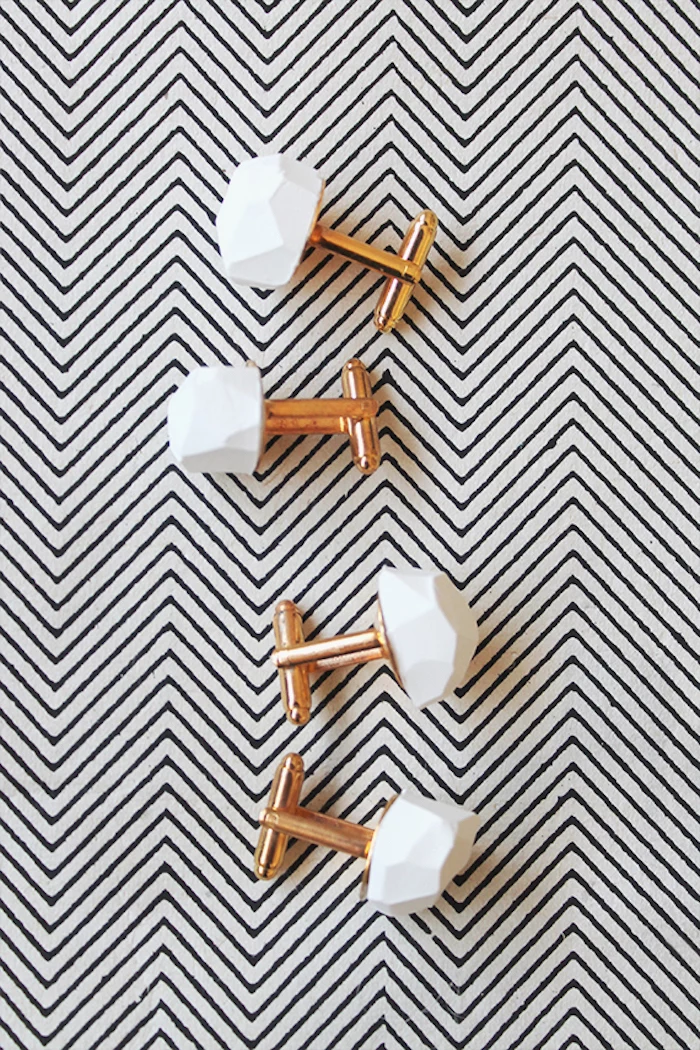
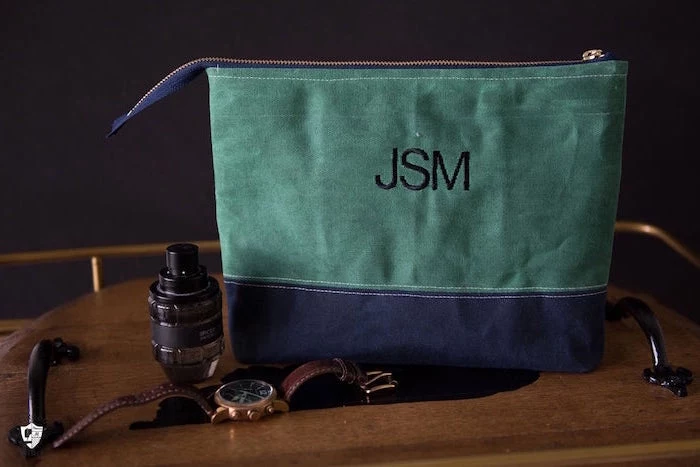
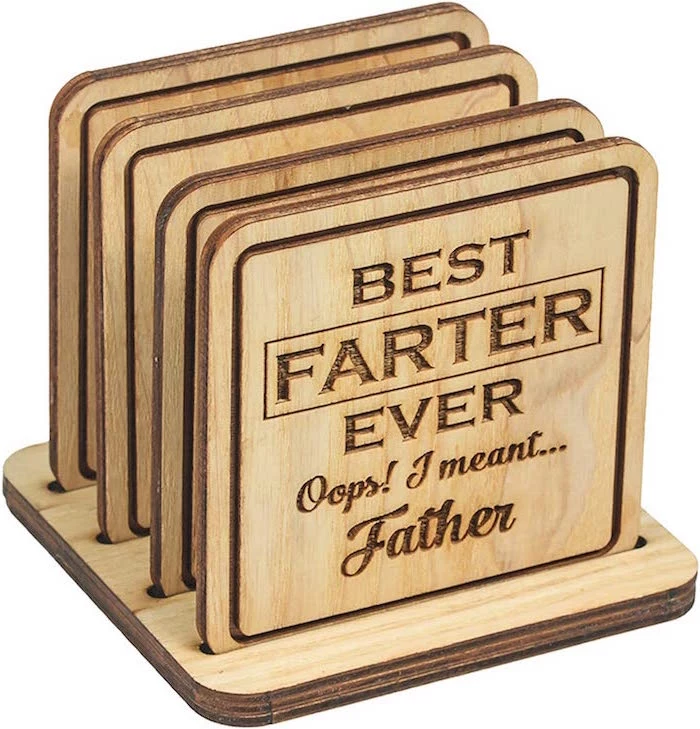
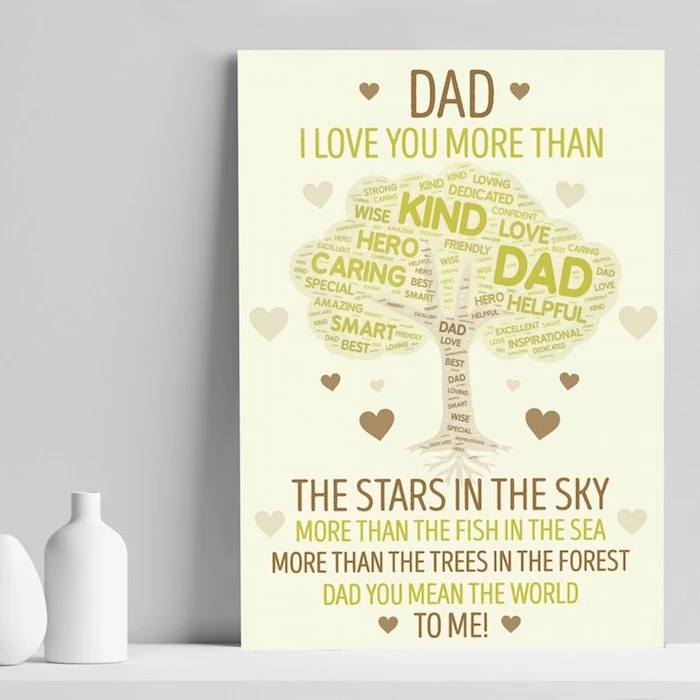
Inspirational Gallery


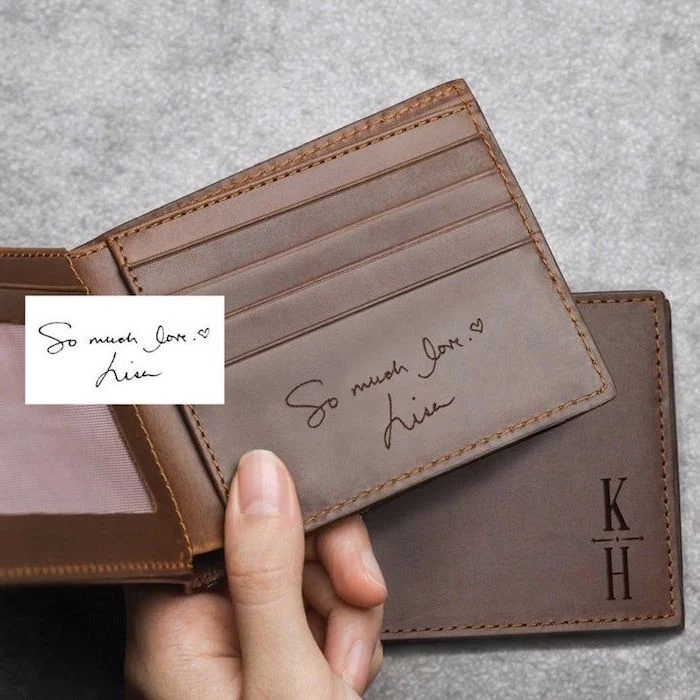
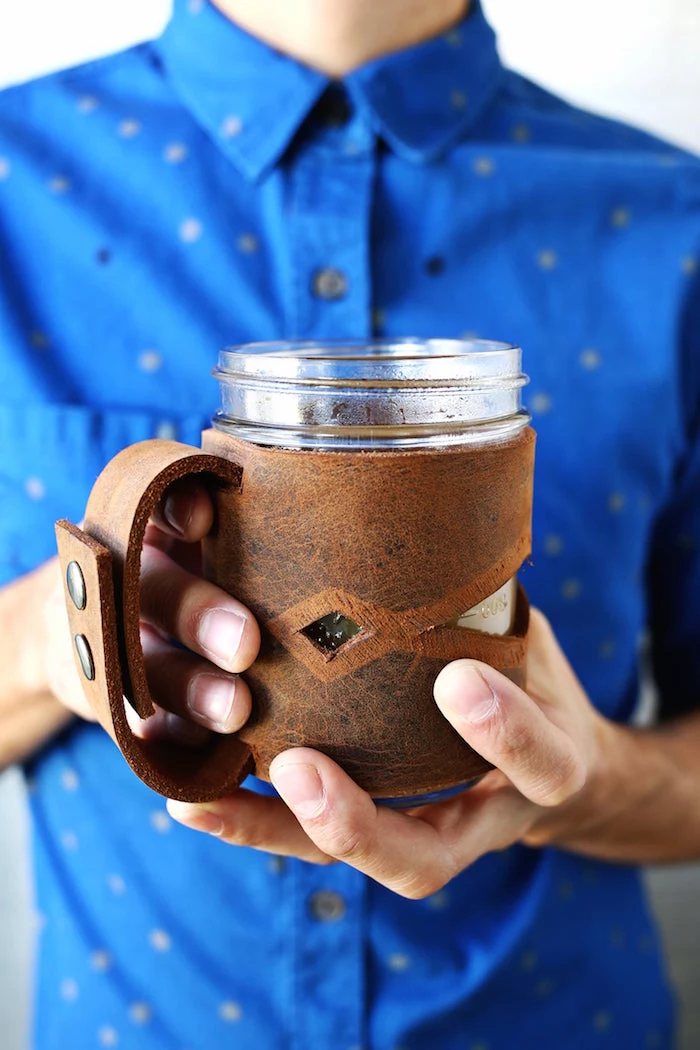
The patina that develops on a piece of full-grain leather over time is a story. Each scratch and mark tells of an adventure.
When selecting leather for a wallet or keychain, opt for full-grain or top-grain vegetable-tanned leather. Unlike cheaper “genuine leather,” it ages beautifully and gains character with use. Brands like Horween or Wickett & Craig offer premium hides that will make your gift last a lifetime.
For a truly professional finish on wood, sanding is non-negotiable. Don’t just give it a quick once-over. Work your way through the grits sequentially. Start with a medium grit like 120 to remove imperfections, then move to a finer 180, and finish with a silky-smooth 220. Wiping the wood with a damp cloth between grits raises the grain, allowing you to knock it down for an even smoother surface.
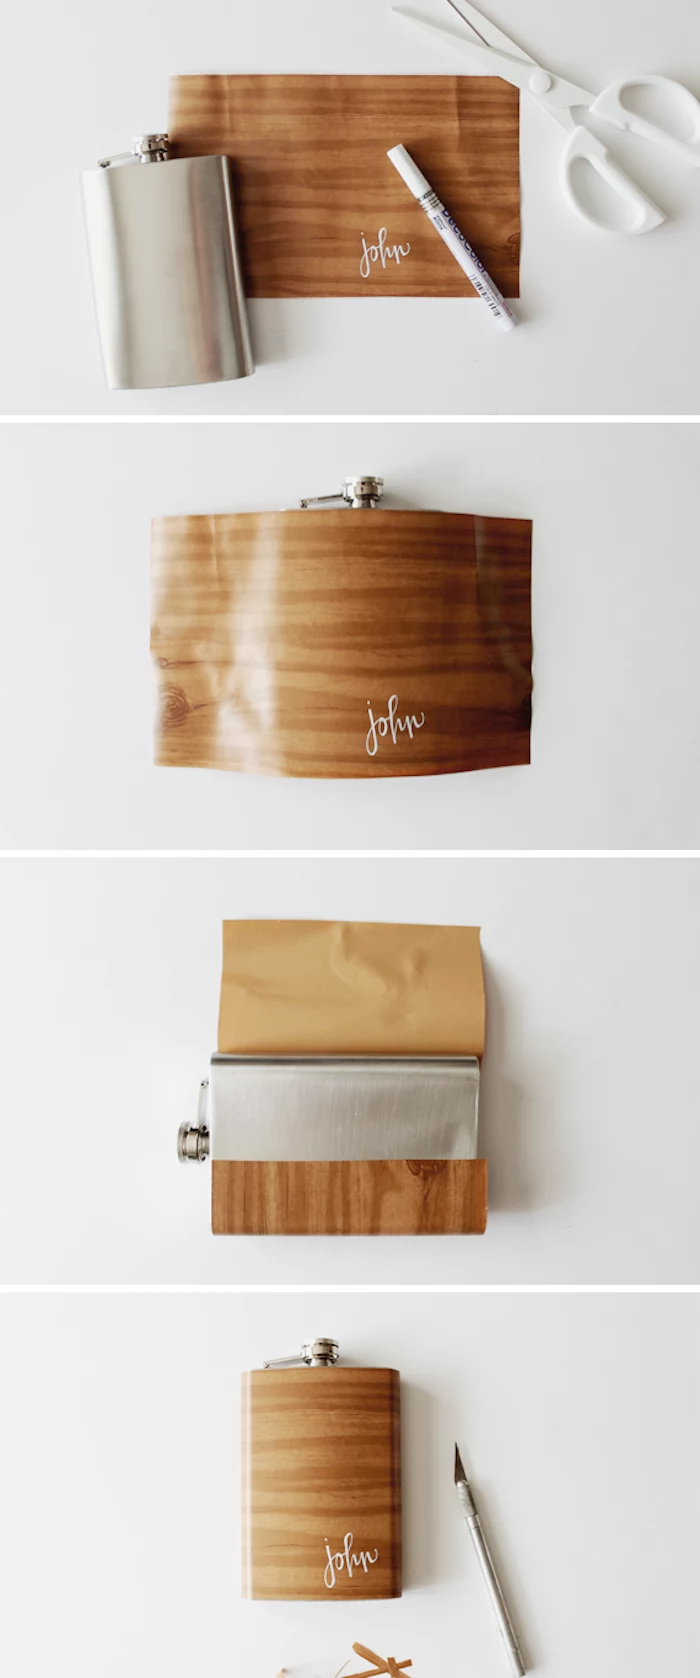
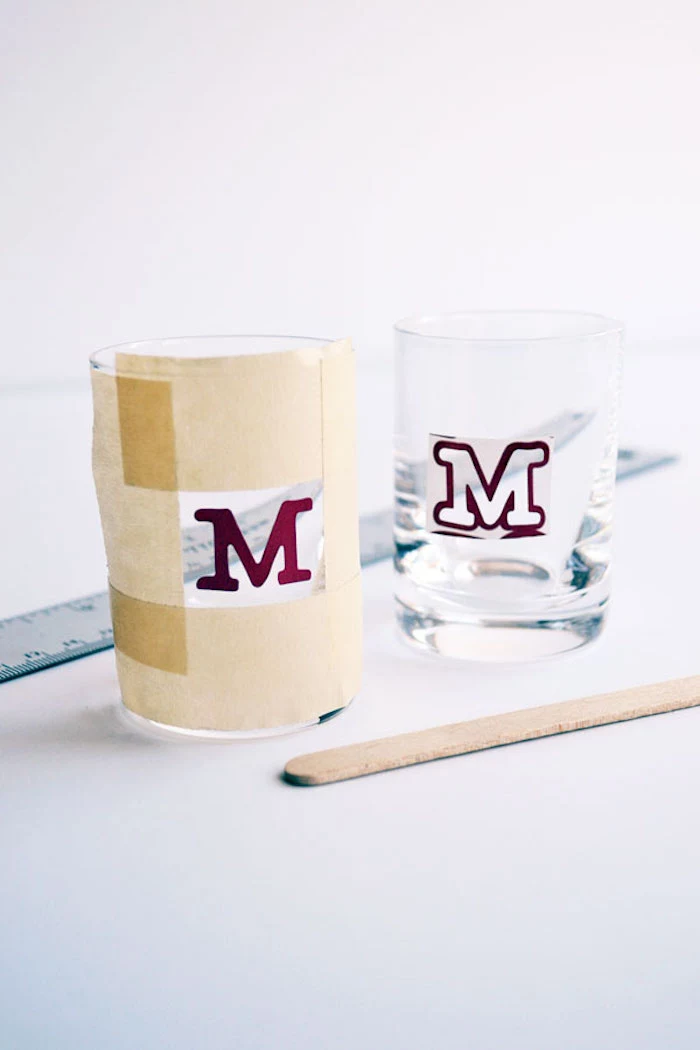
The Secret to Sharp, Crisp Lines: When personalizing with paint or a wood stain, painter’s tape is your best friend. But for an absolutely perfect edge, first seal the tape’s edge with a thin layer of the wood’s clear base coat. Let it dry, then apply your color. The clear coat fills any tiny gaps, preventing the color from bleeding underneath. The result? A line so sharp it looks printed.
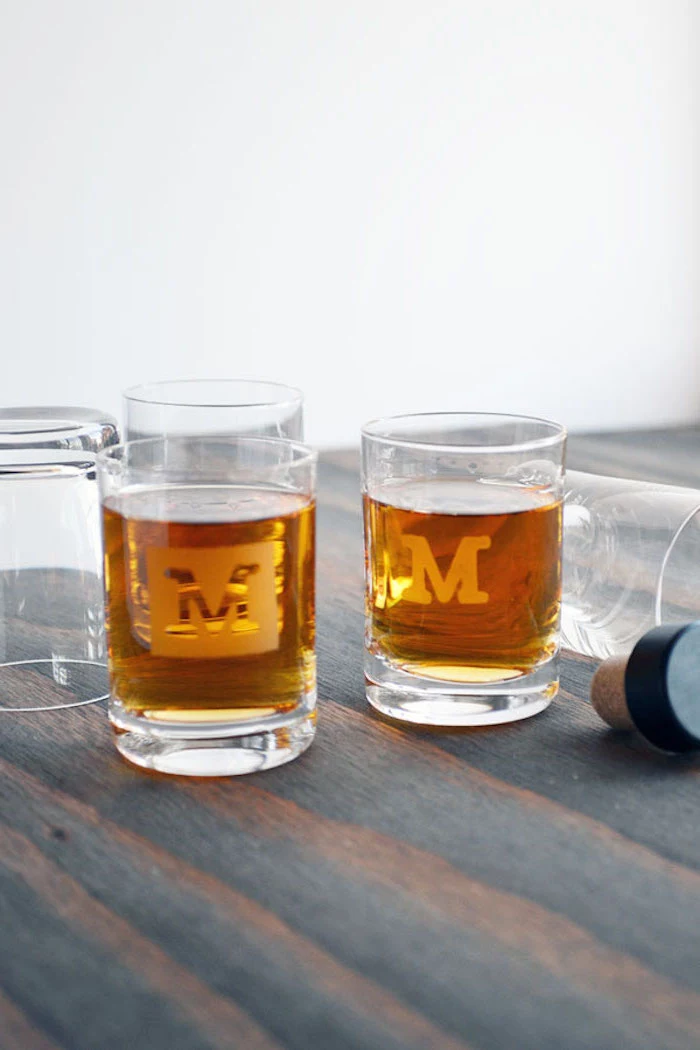
Want to engrave glass but don’t have a laser?
A simple Dremel rotary tool with a diamond-point bit gives you incredible control for etching a custom design, monogram, or message onto a pint glass or whiskey tumbler. Practice on an old jar first to get a feel for the pressure. For a foolproof result, print your design, tape it to the inside of the glass, and simply trace the lines.
- Durable and food-safe
- Accentuates the natural wood grain
- Easy to re-apply and repair scratches
The secret? A simple mineral oil and beeswax finish. Perfect for cutting boards or coasters, this non-toxic, traditional finish is easy to make yourself or buy pre-mixed from brands like Walrus Oil. It brings out the wood’s warmth without the plastic feel of polyurethane.
“The details are not the details. They make the design.” – Charles Eames
Important tip: When drilling into wood, especially near an edge, always drill a pilot hole first. This small starter hole guides the larger drill bit, prevents the wood from splitting, and ensures your screw goes in straight. It’s a 30-second step that separates amateur-looking work from professional craftsmanship.

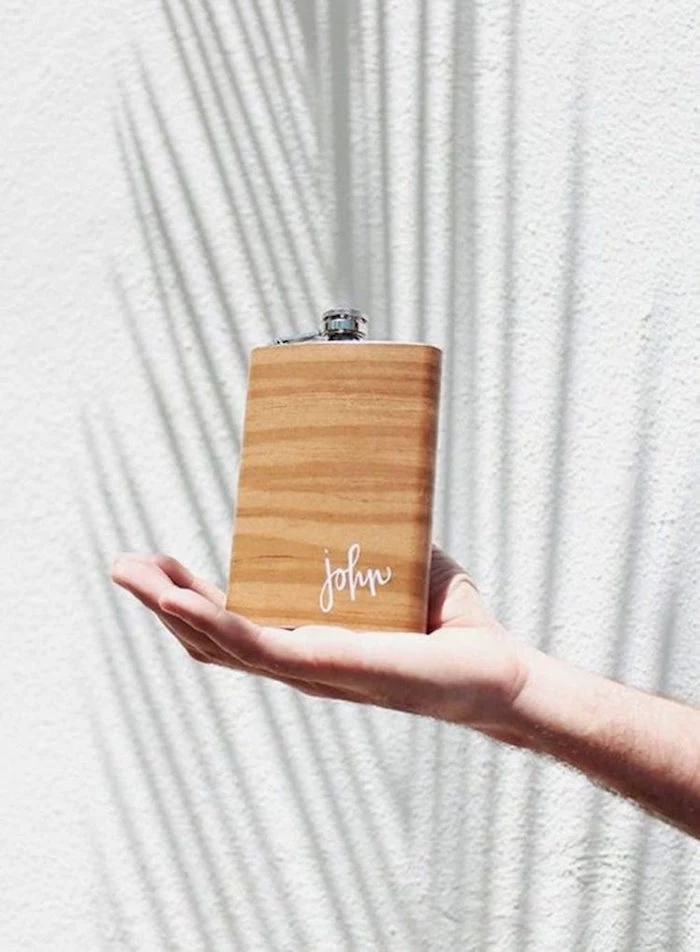
Go beyond a simple monogram. Consider personalizing a gift with the geographic coordinates of a meaningful place: where he met your mom, his childhood home, or a favorite fishing spot. It’s a subtle, modern, and deeply personal touch that turns a simple object into a cherished keepsake.
Wood Glue: Ideal for wood-to-wood joints that need a strong, permanent bond. Titebond II is a workshop standard, offering water resistance for projects that might get damp.
Two-Part Epoxy: The choice for bonding different materials, like wood to metal or concrete. It fills gaps well and creates an incredibly tough, waterproof bond. Great for setting hardware into a custom piece.
For a simple wooden box, use wood glue. For attaching metal legs to a wooden stand, reach for epoxy.
Is your dad a grill master or a home cook? A custom spice blend is a thoughtful and easy project. Start with a good base and add his favorite flavors.
- Smoky & Sweet Rub Base: Smoked paprika, brown sugar, kosher salt, black pepper.
- Add-ins for a kick: Cayenne pepper, chipotle powder.
- For an earthy note: Cumin, garlic powder, onion powder.
Package it in a simple glass jar with a custom-printed label for a polished look.
A 2016 study in the Journal of Marketing found that givers of handmade gifts felt a stronger connection to the recipient, a phenomenon the researchers called “love-made.”
This explains why the time spent in the workshop feels so rewarding. You’re not just assembling materials; you’re infusing the object with care and personal connection, which is palpable when the gift is given and received.

A leather valet tray is a stylish way to organize keys, a watch, and loose change. It requires minimal tools and looks incredibly sophisticated. You just need one square piece of 6-8 oz vegetable-tanned leather.
- Cut a square (e.g., 8×8 inches).
- Dampen the leather slightly with a sponge.
- Pinch the corners together and secure with brass rivets or Chicago screws for a no-sew, masculine finish.
You can stamp his initials in a corner before folding for that final custom touch.
Don’t overlook concrete as a material. It’s inexpensive, versatile, and has a modern, industrial aesthetic. Using a simple silicone mold (or even a sturdy plastic container), you can cast custom coasters, a phone stand, or a desktop organizer. Add a bit of concrete pigment like those from Quikrete to create a charcoal gray or earthy terra cotta color.

How do I choose the right wood?
While pine is cheap and accessible, it’s soft and can look a bit rustic. For a gift that feels more substantial and premium, consider hardwoods. Walnut offers a rich, dark chocolate color. White Oak has a classic, sturdy look with beautiful grain, and Cherry will darken to a handsome reddish-brown over time. Ask your local lumberyard for off-cuts—they are often perfect for small projects at a fraction of the cost.
- It adds a subtle, professional signature.
- It’s a permanent mark of your effort.
- It can be hidden on the back or bottom of the piece.
The finishing touch? A maker’s mark. Before you apply the final coat of oil or varnish, use a wood-burning pen or a custom steel stamp to add your initials and the year on the underside of the project. It’s a timeless way to sign your work.
Did you know that many high-end furniture makers use reclaimed wood? It’s often sourced from old barns, factories, and warehouses, giving it a history and character that new lumber can’t match.
For your project, look for reclaimed wood on Etsy or at local architectural salvage yards. The nail holes, saw marks, and aged coloring can become the most beautiful feature of your gift, telling a story before it even begins its new life.

Wood Burning Pen: Offers an organic, hand-drawn look. The variable temperature controls on a model like the TRUArt Stage 2 allow for shading and different line weights. Best for artistic, freehand designs.
Laser Engraving Service: Provides machine precision for perfect text and complex logos. Many local maker spaces or online services like Ponoko offer this for a small fee. Best for clean, modern typography or detailed graphics.
Choose the pen for a rustic feel and the laser for a sharp, contemporary finish.
One common mistake: Rushing the finish. A great project can be ruined by a sloppy final coat. Apply thin layers of your chosen finish (like Danish oil or a wipe-on poly), allowing ample drying time between coats as recommended on the can. Lightly sand with a very fine grit (400 grit) between coats for an incredibly smooth, professional result.

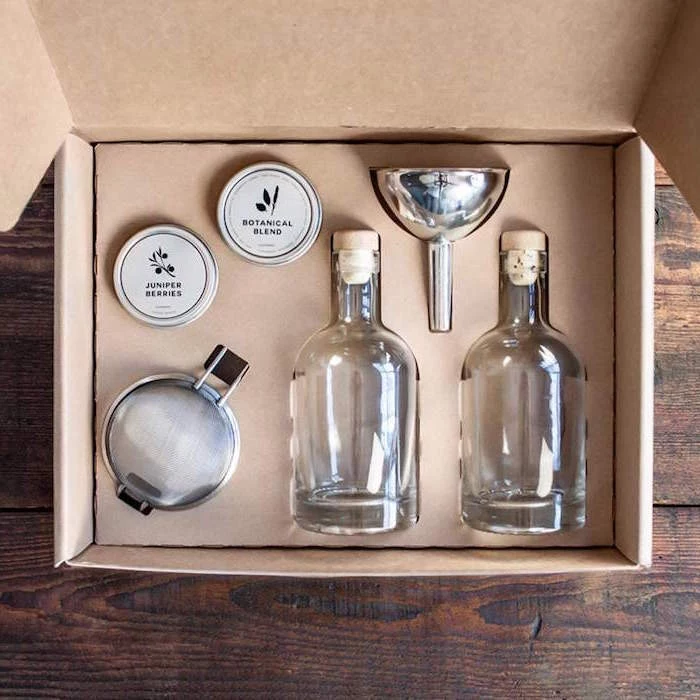
For the dad who appreciates a good drink, a set of homemade infused simple syrups is a fantastic gift. They’re perfect for cocktails, coffee, or even sparkling water.
- Spiced Orange: Simmer a 1:1 sugar and water mixture with orange peels and a cinnamon stick.
- Rosemary-Grapefruit: Infuse the syrup with fresh rosemary sprigs and grapefruit zest.
Bottle them in small glass flasks with waterproof, custom-designed labels.


According to a study by the Environmental Protection Agency, construction and demolition debris accounts for more than twice the amount of generated municipal solid waste in the U.S.
Giving old materials a new life is not just trendy; it’s a meaningful act. A gift made from a piece of his own old workbench, a fallen tree from the backyard, or salvaged hardware honors the past while creating something new and useful.

What’s the best way to present the final gift?
The presentation is the final step of the craft. Don’t just put it in a generic gift bag. Wrap a wooden gift in simple kraft paper tied with leather cord. For a smaller item, place it in a wooden box filled with wood shavings from the project itself. It connects the final product back to the process and shows care in every last detail.

A bottle opener can be more than just a functional tool. Create a wall-mounted version with a magnetic cap catch. All you need is a nice piece of hardwood (like oak or maple), a simple cast iron opener fixture, and a powerful rare-earth magnet. Drill a shallow hole on the back of the wood to embed the magnet just below the opener. It’s a simple, impressive piece of ‘workshop magic’.
The essential tool you’re probably overlooking: Good clamps. Whether you’re gluing wood, holding a piece for drilling, or securing a stencil, a solid set of clamps is crucial. A project’s strength often comes down to a tight, perfectly aligned glue-up. A couple of quick-grip bar clamps from a brand like Irwin are a fantastic investment for any maker.
- It looks clean and modern.
- It holds heavy items securely.
- It allows the gift to be easily removed or repositioned.
The secret is a French Cleat. This simple system uses two interlocking 45-degree bevels—one on the wall and one on the gift (like a spice rack or tool holder). It’s a classic woodworking technique that provides incredibly strong, invisible support.
To protect a handmade wooden cutting board or set of coasters, regular maintenance is key. Instruct your dad to hand wash it only (never in the dishwasher!) and to re-apply a coat of food-grade mineral oil or a board conditioner like Howard Butcher Block Conditioner whenever the wood starts to look dry or faded. This prevents cracking and keeps it looking new for years.


