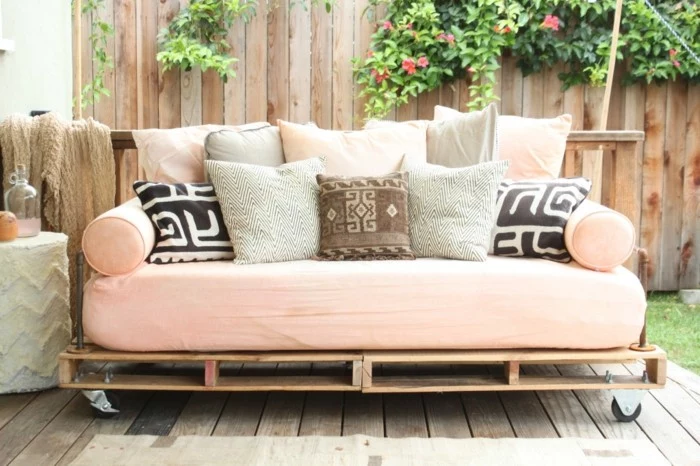
The Real-Deal Guide to Building a Pallet Couch (That Won’t Fall Apart)
I’ve been in the workshop for a good long while, turning piles of wood into furniture people actually use. And you see trends come and go. But one that’s really stuck around is building with pallets. I get the appeal, I really do. You take this industrial, often overlooked thing and turn it into something with a bit of rustic charm for your home. It feels resourceful and looks cool in the pictures.
In this article
- First Things First: Choosing Pallets That Are Actually Safe
- Let’s Talk Structure: Screws vs. Bolts
- The Gear and Materials You’ll Actually Need
- The Build: A Realistic Timeline and Process
- Making It Your Own: Custom Touches
- Let’s Talk Cushions (And Your Budget)
- Final Checks and a Little Pep Talk
- Inspiration Gallery
Honestly, most people see a photo online and think, “Hey, I can do that this weekend!” They picture stacking a couple of pallets, tossing on some pillows, and calling it a day.
And that’s where I need to jump in. A well-built pallet couch is fantastic—it’s sturdy, safe, and surprisingly comfortable. But a poorly built one? It’s a wobbly, splinter-filled disaster waiting to happen. The big difference between the two comes down to knowing what you’re doing and having a little patience. I’ve built these for clients, for my own patio, and I’ve shown plenty of people how to do it right. So let’s get past the pretty pictures and talk about the real work that makes a pallet couch last.
First Things First: Choosing Pallets That Are Actually Safe
Before you even think about saws or screws, we need to have a serious talk about the wood itself. This is, without a doubt, the most important step. Picking the wrong pallet can mean bringing nasty chemicals or bacteria right into your living space, and that’s a risk you just don’t want to take.
Over the years, the pros have learned to spot the good ones by looking for a specific stamp. Most pallets used for shipping across borders have to be treated to prevent pests from hitching a ride. They’re marked with a stamp that looks like a little wheat symbol. Next to that symbol, you’ll find some letters that tell you everything you need to know.
Here’s what to look for:
- HT (Heat Treated): This is the good stuff. It means the wood was heated to a high temperature to kill any bugs, no chemicals involved. These are the pallets you want for any furniture project. Safe and sound.
- MB (Methyl Bromide): Okay, this is a big one. If you see a pallet stamped with MB, walk away. Seriously. Don’t touch it, don’t even think about it. It’s a toxic chemical that can leach out of the wood over time. It’s just not worth the health risk.
- DB (Debarked): This just means they took the bark off. You’ll often see it with an HT stamp, and it’s totally fine.
- KD (Kiln-Dried): Another good sign, often paired with HT. It means the wood has less moisture, so it’s more stable and less likely to warp on you later.
If a pallet has no stamp at all? I’d pass. You have no idea what it carried or where it’s been. It could have been used for anything from leaky chemicals to food products that have long since spoiled. Better to be safe than sorry.
Your Safe Pallet Checklist
When you find a potential stack of pallets, run through this quick mental checklist:
- Is there an HT stamp? (Yes? Great!)
- Is there an MB stamp? (If yes, it’s a hard no.)
- Does it look clean? Avoid any major, weird-looking stains or oily patches.
- Give it a sniff. Does it smell funky or sour? If so, leave it. I once had to ditch a whole batch of seemingly clean pallets because a sour smell emerged when I started sanding. Trust your gut.
Oh yeah, and where do you find them? Your best bet is small, local businesses that get shipments of dry goods—think landscaping suppliers, hardware stores, or even print shops. But always, ALWAYS ask for permission. Many businesses reuse them or have a pickup service. If you see brightly colored pallets (often blue or red), those are usually part of a rental pool. Taking them is technically theft, so stick to the plain wood ones that businesses are happy to give away.
Let’s Talk Structure: Screws vs. Bolts
A pallet is made to be lifted by a forklift, not to support your friends flopping down for a movie night. Understanding this is key. When you stack pallets, the weight is transferred through the stringers (the solid wood blocks or boards between the top and bottom slats). That’s fine for an evenly distributed load, but people create intense pressure points. That’s why you can’t just stack them—you have to fasten them into one solid unit.
Many online guides say to just use long screws. From my experience, that’s a recipe for a wobbly couch down the line. Here’s the real breakdown of fasteners:
For something like this, nails are a non-starter. They just can’t handle the daily shifting of weight and will work themselves loose. Deck screws are a step up, but they can snap under the shearing force of someone plopping down. They’re fine for attaching a decorative piece, but not for the main frame.
Your better options are structural screws, often called lag bolts. They’re much thicker and stronger. But the gold standard? Carriage bolts with nuts and washers. This is the pro method. A bolt goes all the way through the wood and is clamped tight with a nut. It creates a connection that won’t pull apart or shear. For a standard base made of two stacked pallets, I use four 3/8-inch carriage bolts, one near each corner, to lock it all together. It’s a little extra work, but the peace of mind is worth it.
The Gear and Materials You’ll Actually Need
Having the right tools makes any job easier and safer. Don’t skimp here, especially on the safety stuff. Here’s a realistic shopping list.
The Tools:
- Safety First: Seriously. Get safety glasses, sturdy work gloves, and a good dust mask. Pallet wood dust is not something you want to be breathing in.
- A Good Saw: A circular saw is great for straight cuts, but a jigsaw works too. Heads up! A reciprocating saw with a metal-cutting blade is a game-changer for taking pallets apart without splitting the wood.
- Power Drill/Driver: Essential for pilot holes and screws.
- Orbital Sander: Don’t even try to sand a pallet by hand. It’s a nightmare. An orbital sander is a must-have.
- The Basics: Pry bar, hammer, measuring tape, and a carpenter’s square.
Your Shopping List:
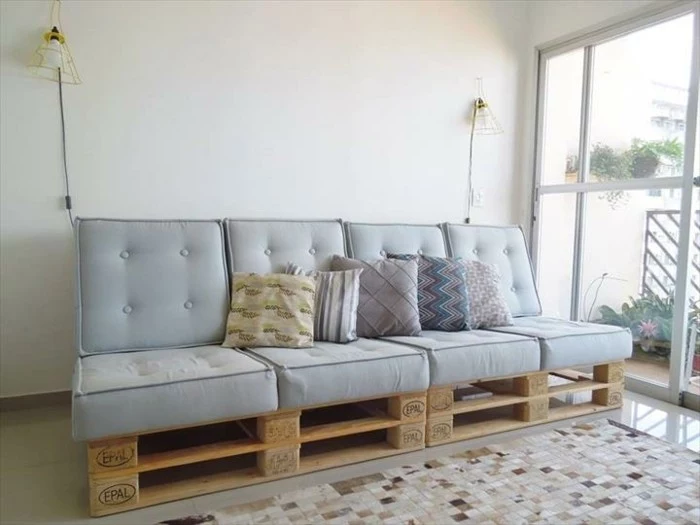
- Pallets: You’ll want 3-4 identical, HT-stamped pallets. A standard US pallet is usually 48″ long by 40″ wide. Using identical ones makes lining everything up so much easier.
- Fasteners: Get a box of 2.5-inch deck screws for secondary attachments. For the main frame, you’ll need about 8-12 carriage bolts (3/8-inch thick and 4-5 inches long) with matching nuts and washers. This should cost you around $10 to $15 at a hardware store.
- Sandpaper: Get discs for your sander in 80, 120, and 150-grit.
- Wood Filler & Primer: You’ll need filler for old nail holes and a good stain-blocking primer. Pallet wood can bleed resin through paint, and primer stops that.
- Finish: Your choice of paint or stain. If it’s for outdoor use, you absolutely need a sealer like a marine-grade spar urethane to protect it from the elements. A good can of sealer can run you $25 to $40.

The Build: A Realistic Timeline and Process
Okay, let’s get building. A quick reality check: this isn’t a one-afternoon project. For a really good result, plan on this taking a couple of weekends.
Weekend 1: The Prep Work
- Day 1 (Sourcing & Cleaning): This is your mission for day one. Find your pallets, get them home, and give them a serious scrub with a stiff brush and a pressure washer or strong hose.
- Day 2-3 (Drying): Let them dry completely in the sun for a couple of days. You want that wood nice and dry before you start working with it.
Weekend 2: The Fun Part
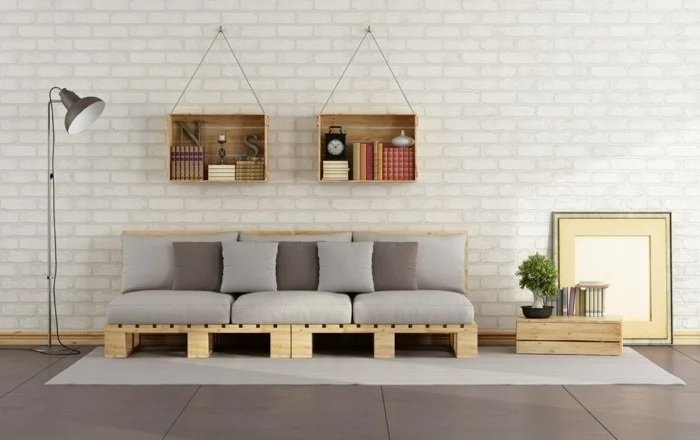
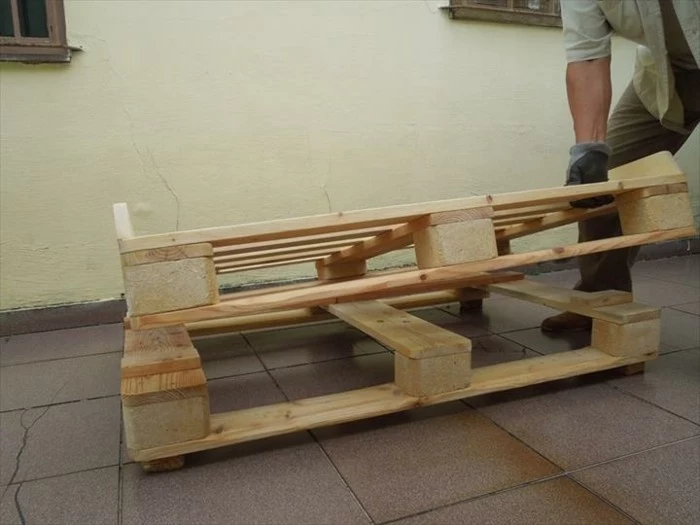
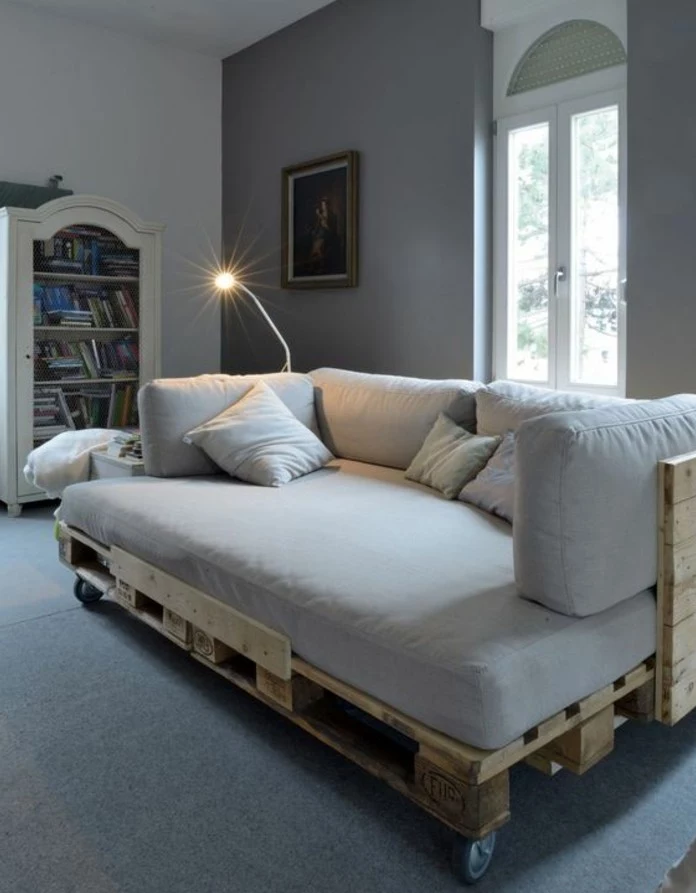
- Day 4 (Sanding & Assembly): This is the most labor-intensive day. Put on your safety gear and get to sanding. Start with 80-grit to remove the rough layer, then move to 120-grit, and finish with 150-grit for a smooth touch. Once smooth, you can assemble. Stack two pallets for the base. A standard 48″x40″ pallet gives you a seat about 12 inches high before cushions. Drill your holes through the stringers and secure them with those carriage bolts. It should feel like one solid block when you’re done.
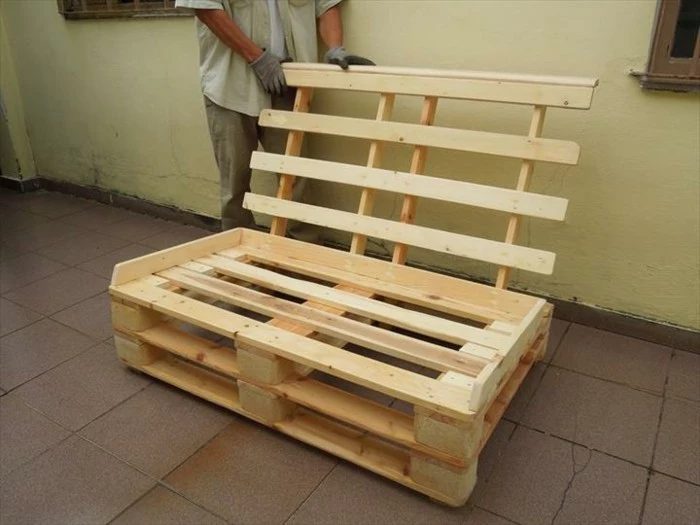
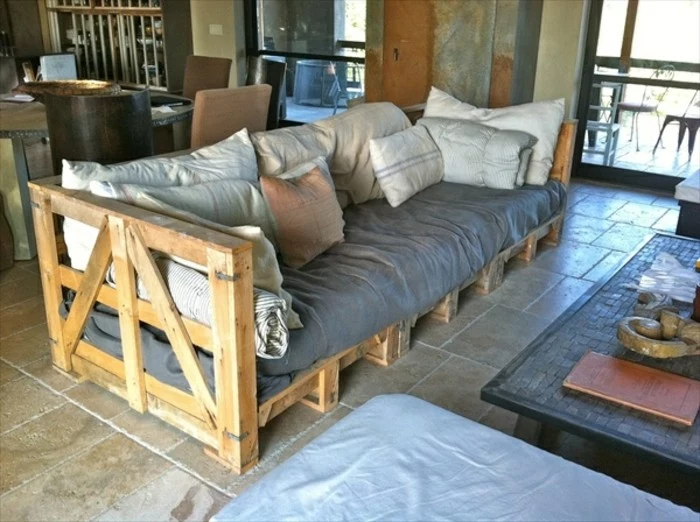
- Day 5 (Backrest & Finishing): Stand a third pallet up vertically for the backrest. The best way to secure it is with triangular braces. Cut two pieces of wood (from your fourth pallet) and attach them at a 45-degree angle, running from the side of the backrest down to the base. This creates a super-strong support. Bolt the backrest to the base as well for extra security. Then, it’s time for primer, paint, and sealer. Don’t rush the drying times between coats!
Making It Your Own: Custom Touches
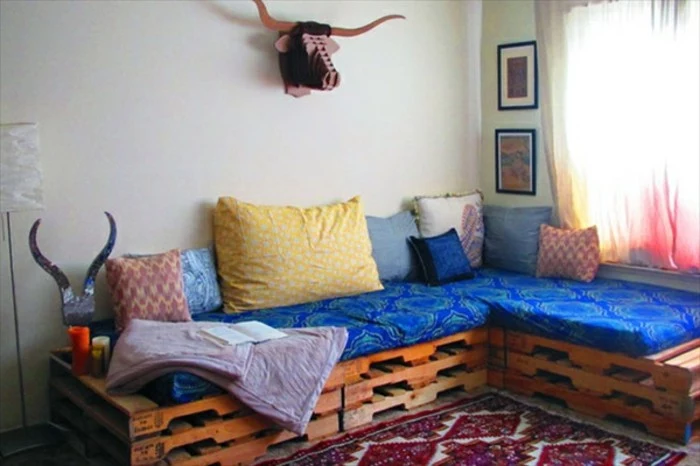
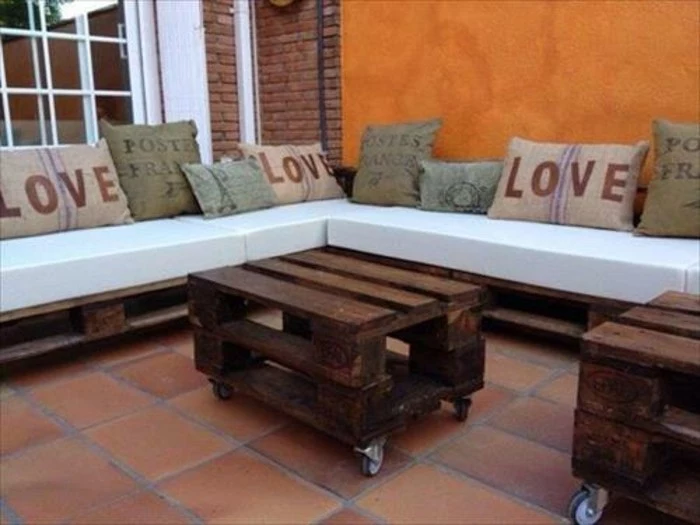
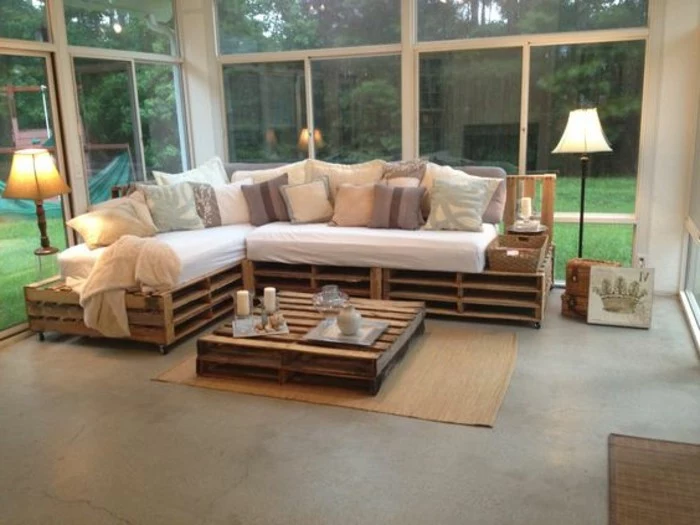
Once you’ve got the basic build down, you can get creative. L-shaped sectionals are totally possible, you just need to be extra careful about reinforcing the corner where the two sections meet. Metal corner brackets are your friend here.
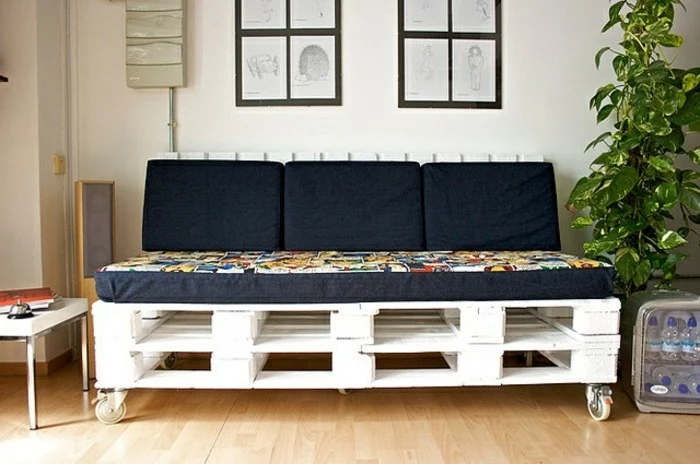
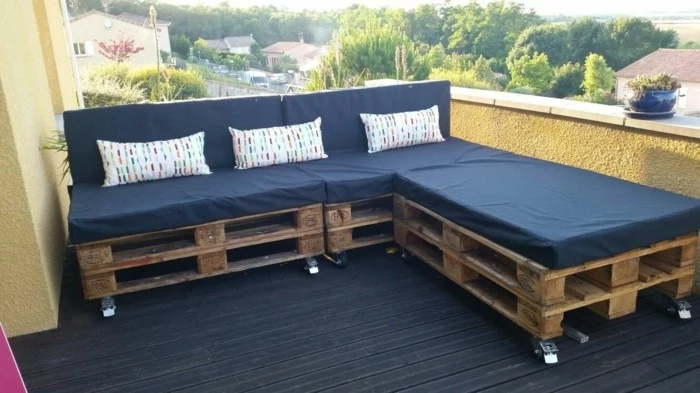
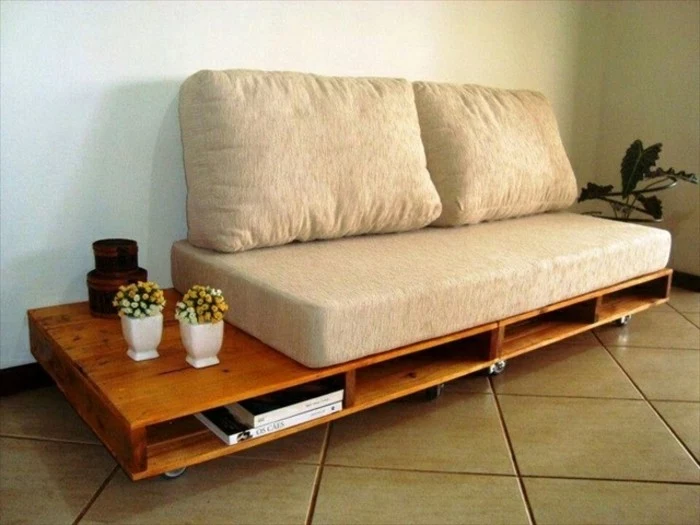
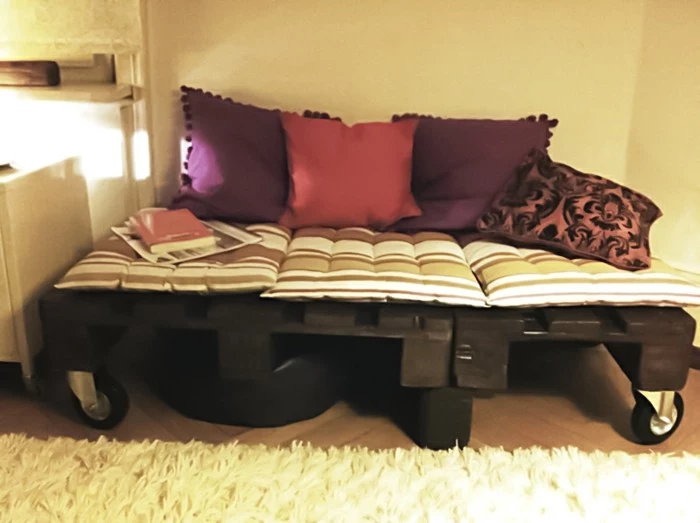
Adding heavy-duty locking casters is another great upgrade, making the couch easy to move for cleaning. Just make sure you attach them to the solid stringers on the bottom, not the thin deck boards.
Let’s Talk Cushions (And Your Budget)
Here’s the part that often surprises people: a pallet couch is only as good as its cushions, and this is where you’ll spend most of your money. Don’t cheap out here.
You need high-density foam that’s at least 4 inches thick—I prefer 5 or 6 inches for real comfort. For a standard 48″x40″ base, getting foam custom-cut can cost anywhere from $150 to $300 from an upholstery supply shop or online. It’s an investment, but it’s what makes the couch actually usable. For a budget-friendly alternative, some people use firm crib mattresses, which are often waterproof. Just double-check the dimensions first.

For the fabric, choose something tough. If it’s going outside, you absolutely must use a weather-resistant fabric like Sunbrella to prevent fading and mildew.
Final Checks and a Little Pep Talk
Before you show off your creation, do one last check. Run your hands over every surface to feel for splinters. Push hard on the backrest. Sit on it. Have a friend sit on it. Listen for creaks. It should feel rock solid.
Remember, you built this, so you are responsible for its safety. It’s a good idea to check the bolts every few months to make sure everything is still tight.
So, here’s your first mission, should you choose to accept it: Just focus on finding the pallets this week. That’s it. Go talk to some local business owners, look for that HT stamp, and get your materials home. Scoring the wood is the first big win!
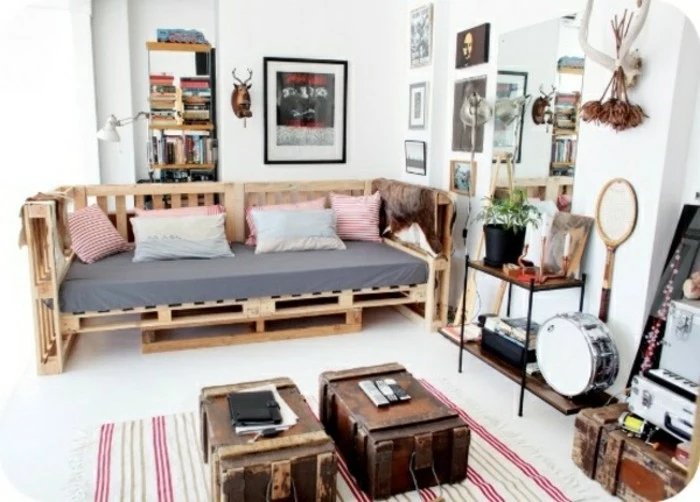
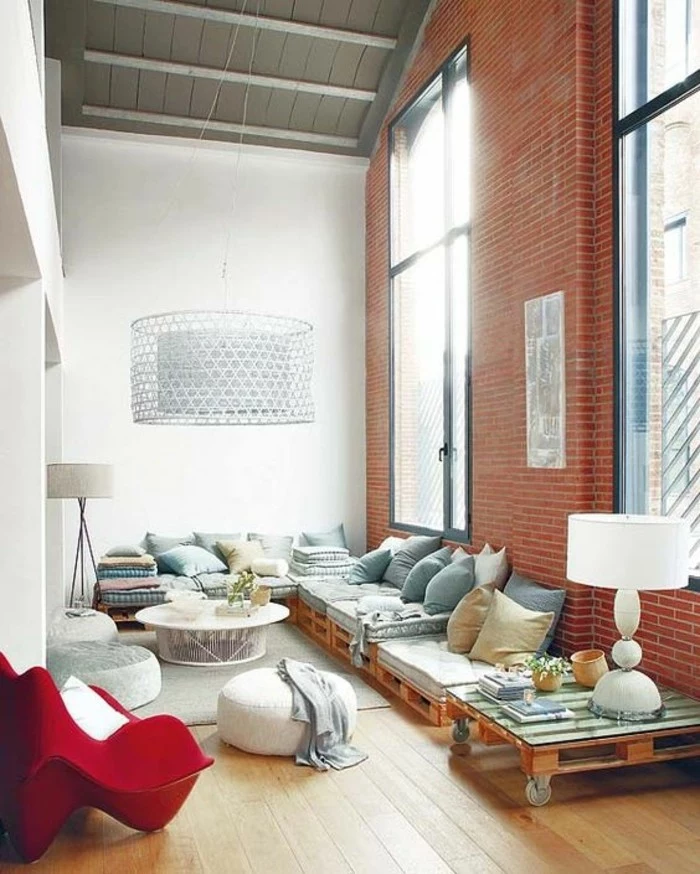
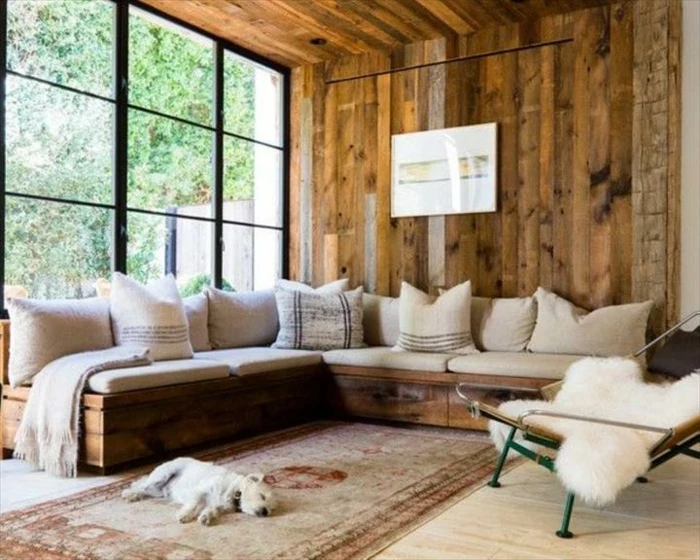
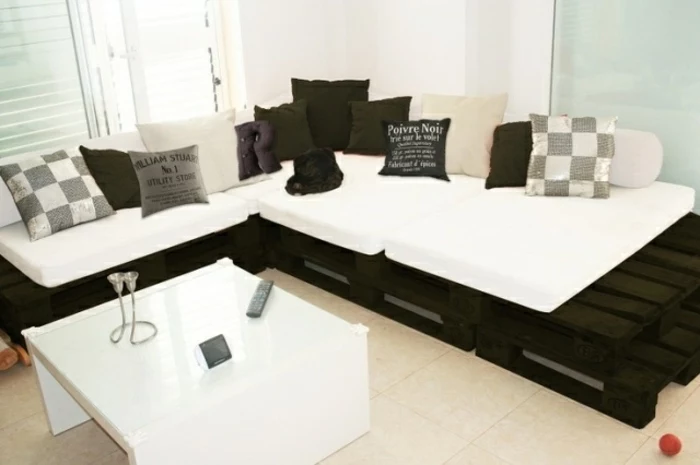
Inspiration Gallery
The right screw makes all the difference: Forget standard wood screws. For joining pallets, you need something with serious bite. Opt for 3-inch or 4-inch structural screws, like those from brands such as GRK or Spax. Their self-tapping tips and washer heads pull the dense pallet wood together tightly, preventing the dreaded wobble over time.
- A cohesive, industrial look.
- A smooth, easy-to-clean surface.
- Protection against moisture and spills.
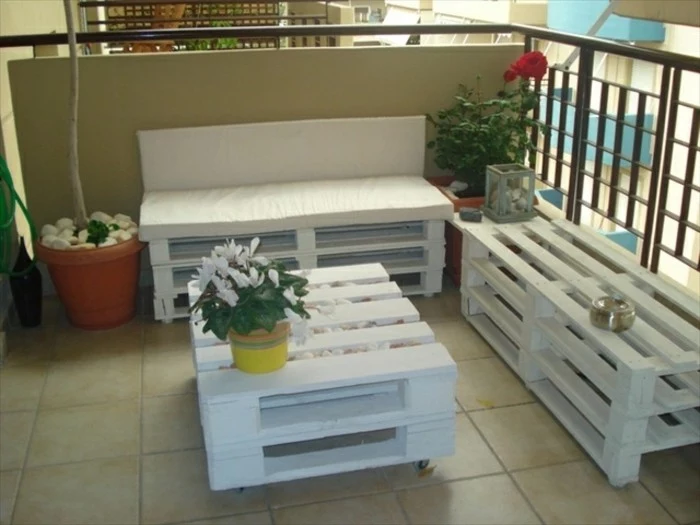
The secret? A quality finish. For a bold statement, try Behr’s Premium Plus Exterior paint in a satin or semi-gloss finish. Its durability is perfect for high-traffic furniture, even indoors.
How do I build a sturdy backrest that won’t give way?
The simplest method is to use another pallet, stood vertically. Secure it to the base pallets using metal L-brackets (at least four per pallet) and heavy-duty structural screws. For a more angled, ergonomic recline, cut a pallet in half lengthwise and attach it at a slight angle using wooden support blocks cut at 15-20 degrees.
A standard 48” x 40” pallet is designed to hold a dynamic load of over 2,500 pounds.
While you won’t be loading it with cement bags, this incredible strength is what makes pallets such a fantastic building material. It means that once properly reinforced and joined, your couch frame itself is practically indestructible, ready to handle years of movie nights and family gatherings.
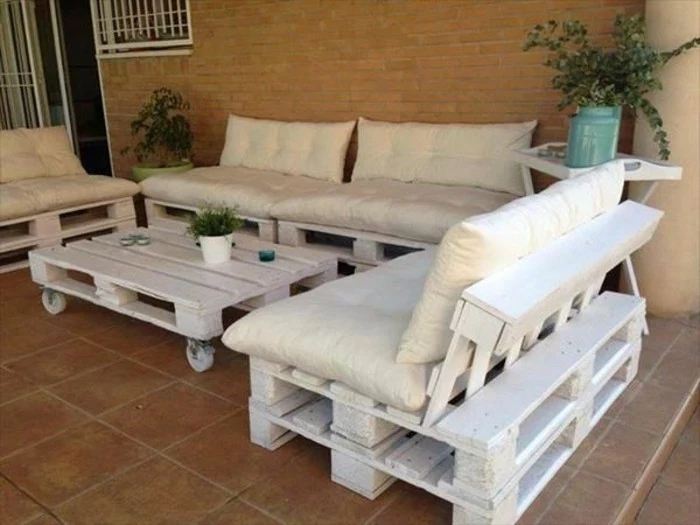
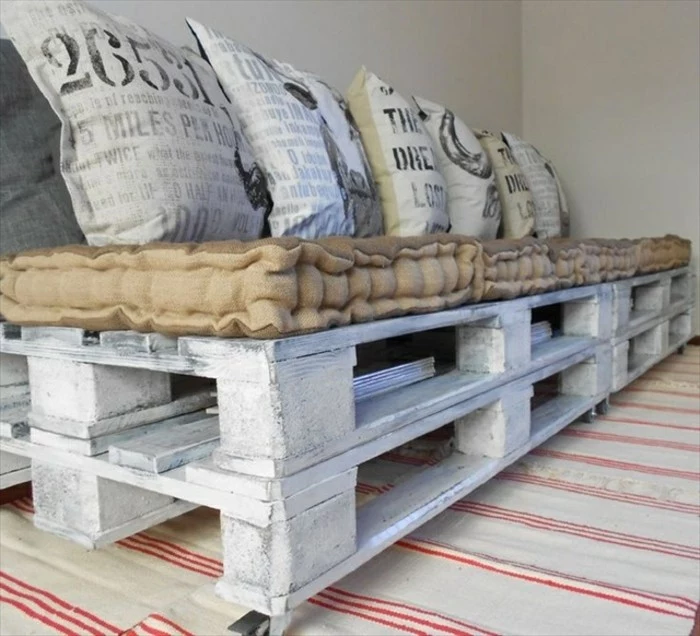
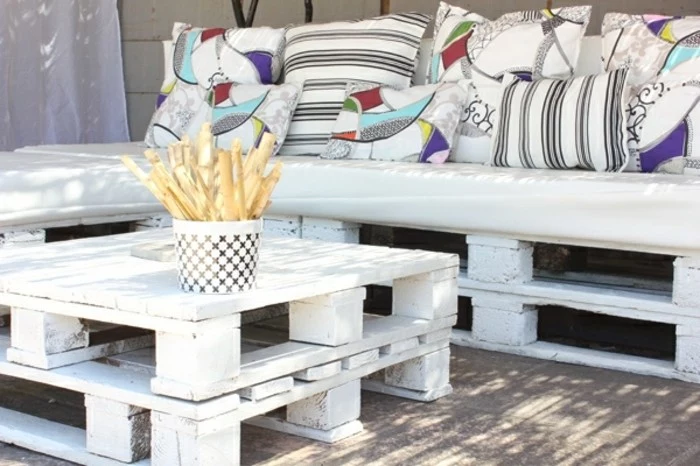
For that authentic, rustic-chic vibe, consider a whitewash instead of solid paint. Mix one part white latex paint (like Sherwin-Williams’ Pure White) with one part water. Brush it on, then immediately wipe most of it off with a clean rag. This technique highlights the wood grain and texture, giving your couch a soft, weathered look that feels both airy and grounded.
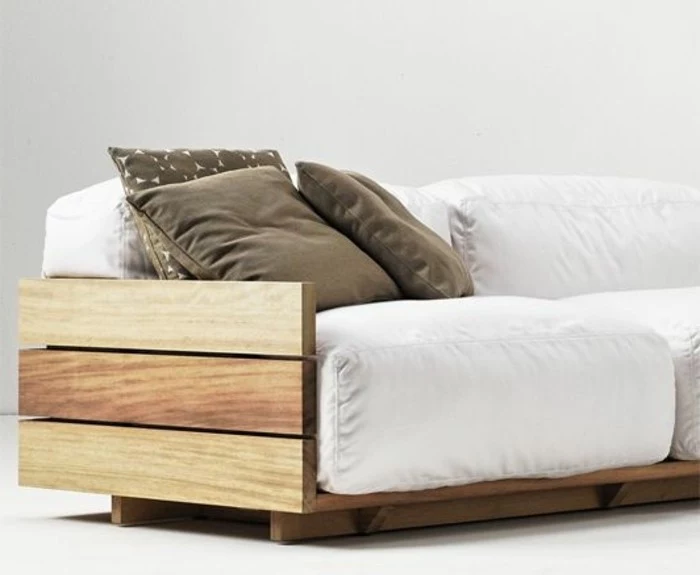
- High-Density Foam: Firm, supportive, and holds its shape exceptionally well. Ideal for the main seat cushions where you need longevity.
- Memory Foam Topper: Adding a 1-2 inch layer on top of high-density foam provides that luxurious, sink-in comfort.
- Dacron Wrap: Always wrap your foam in Dacron batting before putting it in the cover. It softens the edges, makes the cushions look fuller, and helps them slide into the covers easily.
For outdoor longevity, sealing is not optional. A product like Thompson’s WaterSeal or a marine-grade varnish creates an essential barrier against rain and humidity, preventing rot and mildew. Apply at least two coats, paying special attention to the end grains and feet of the pallets, as these areas absorb the most moisture from the ground.
The concept of the pallet was patented in 1924, but its widespread use exploded during World War II to streamline the logistics of moving war supplies.
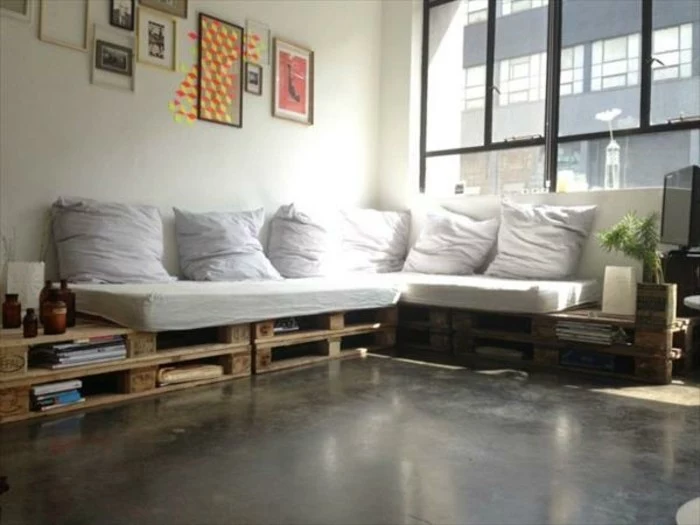
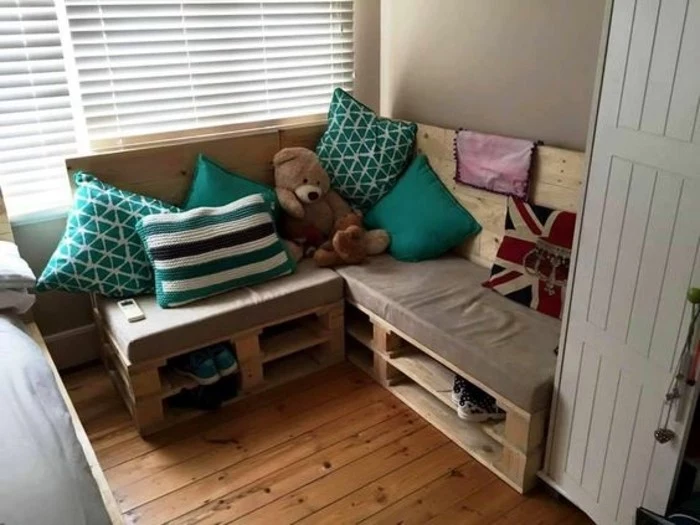
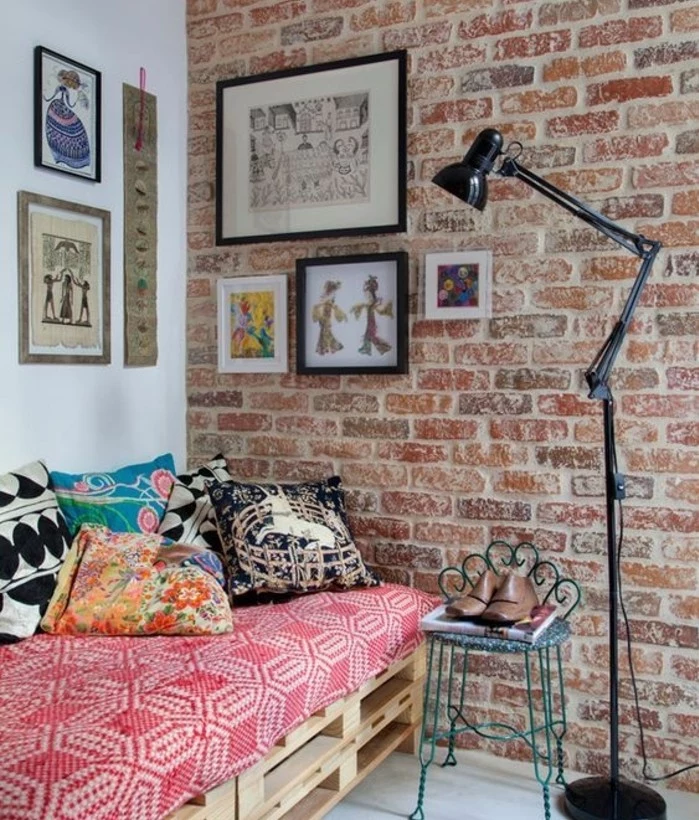
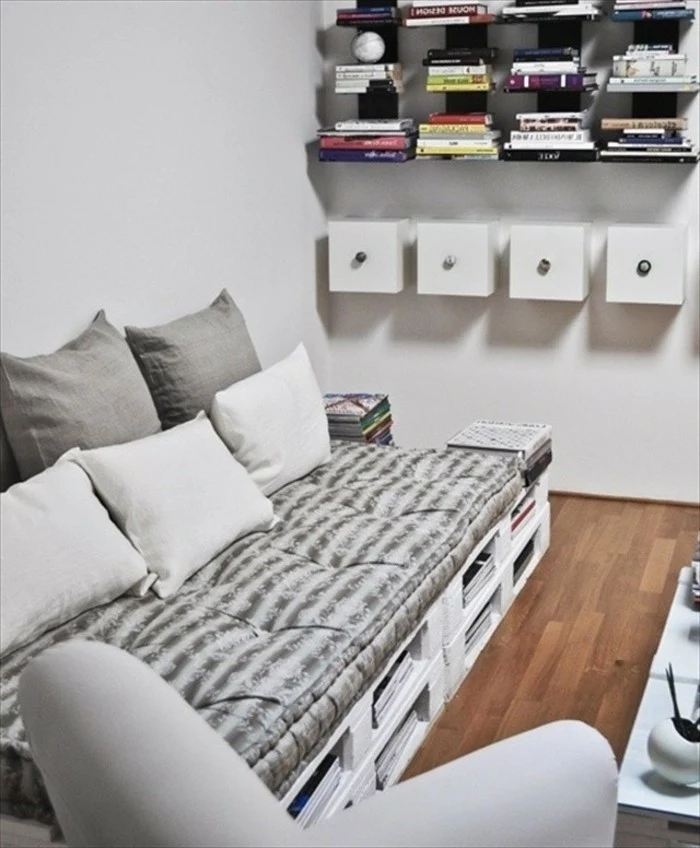
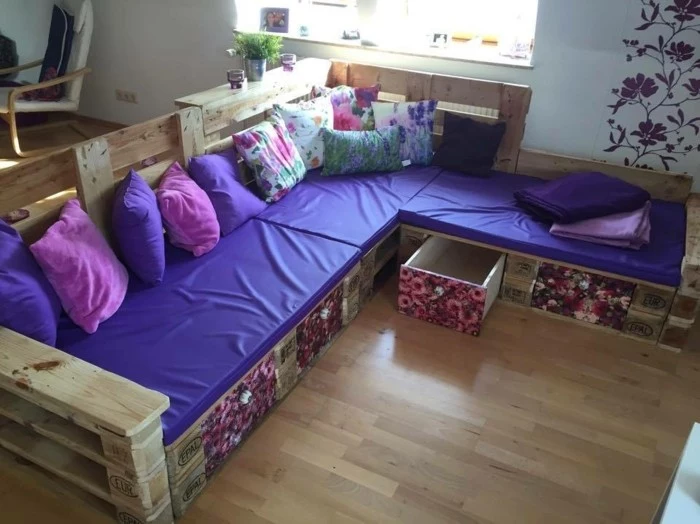
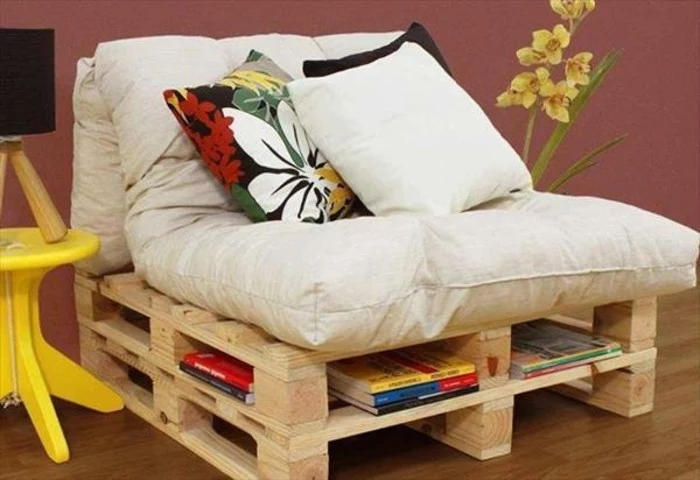
Don’t let the empty spaces in the pallets go to waste! These built-in cubbies are perfect for stylish storage. Slide in some custom-fit wicker baskets for blankets, line them with felt for a soft spot to tuck away magazines, or even install low-voltage LED strip lighting inside for a dramatic, floating glow in the evening.

What about casters? Are they a good idea?
Absolutely, especially for a patio or a multi-use room. Choose heavy-duty locking casters with a load rating of at least 150 lbs each. Installing them on each corner makes cleaning under the couch a breeze and allows you to easily reconfigure your space. Always ensure at least two of the wheels are the locking type to keep your sofa from rolling away!
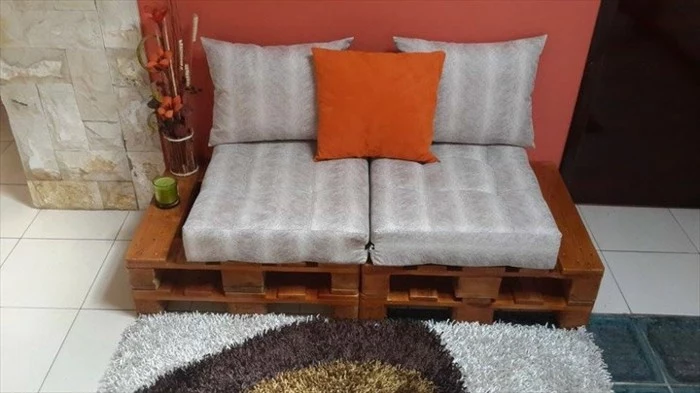
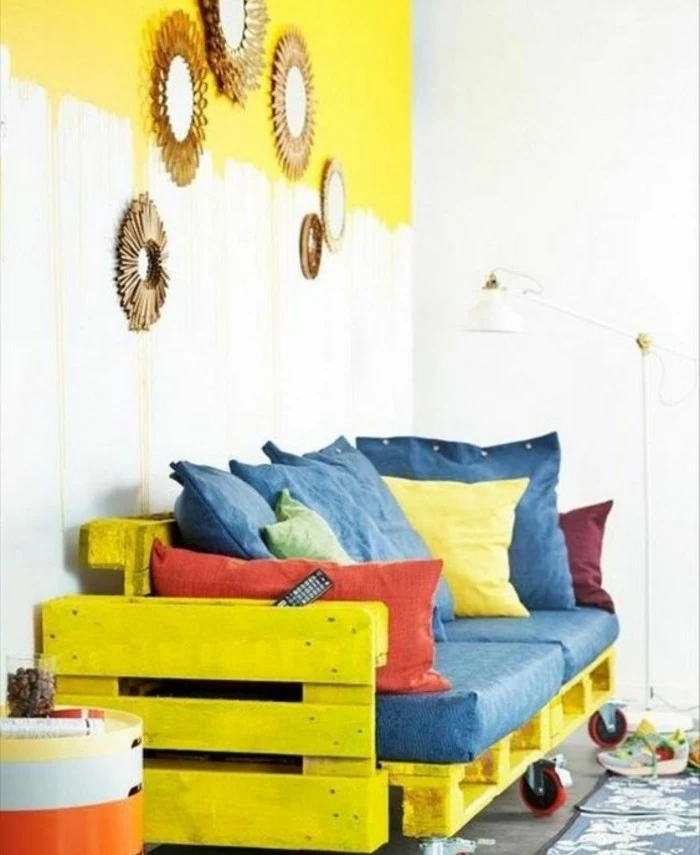
Chalk Paint Finish: Offers a matte, velvety texture perfect for a shabby-chic or modern farmhouse look. Brands like Annie Sloan are famous for requiring minimal prep sanding.
Wood Stain Finish: Enhances the natural grain of the wood for a more rustic or mid-century feel. A dark walnut stain from Minwax can give a surprisingly sophisticated look.
For durability, both finishes should be sealed with a clear polycrylic or wax topcoat.
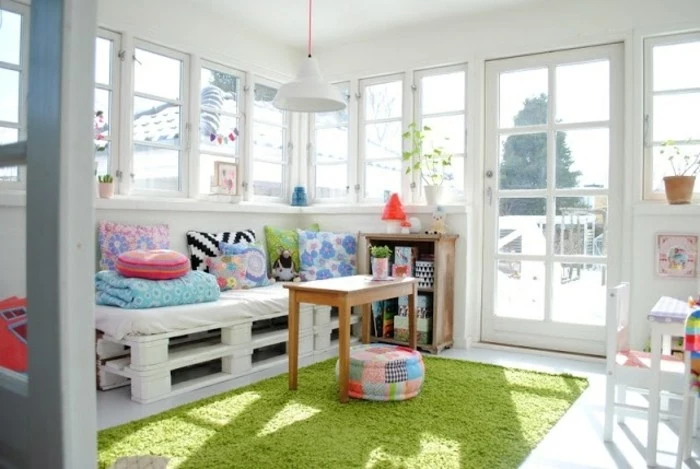

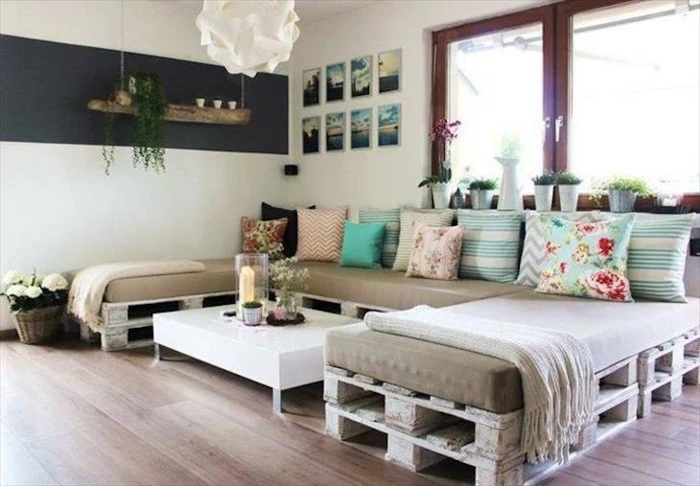
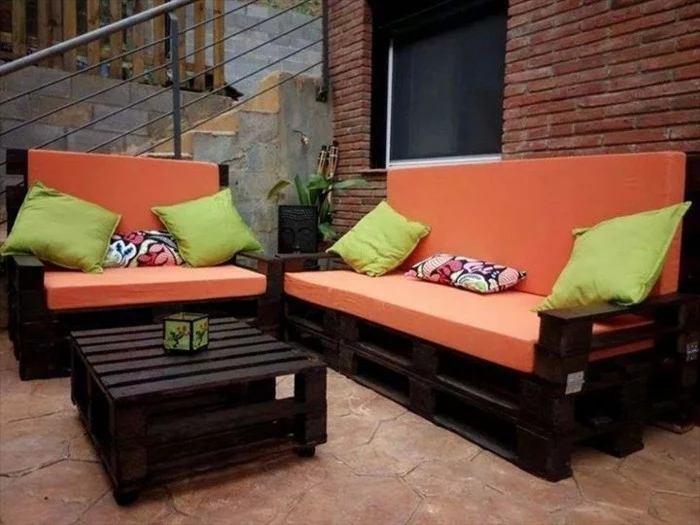
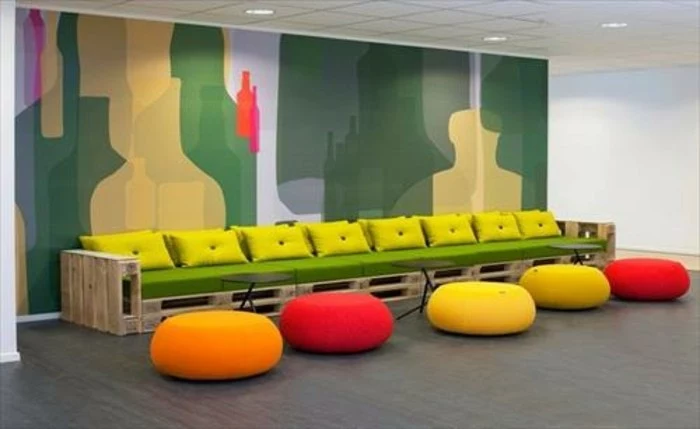
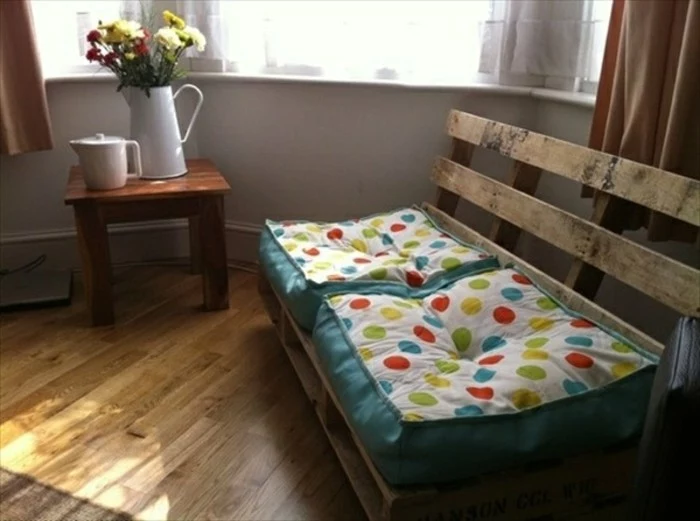
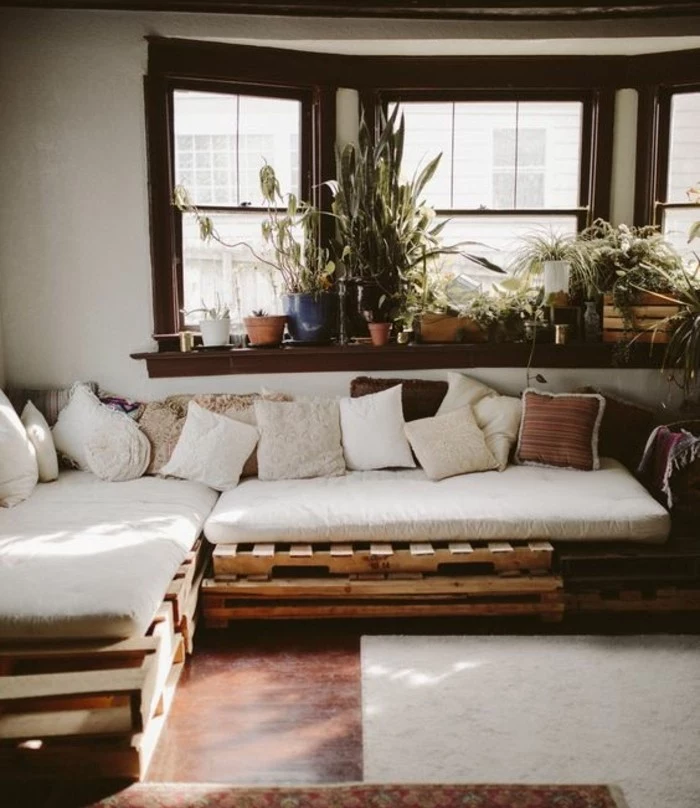
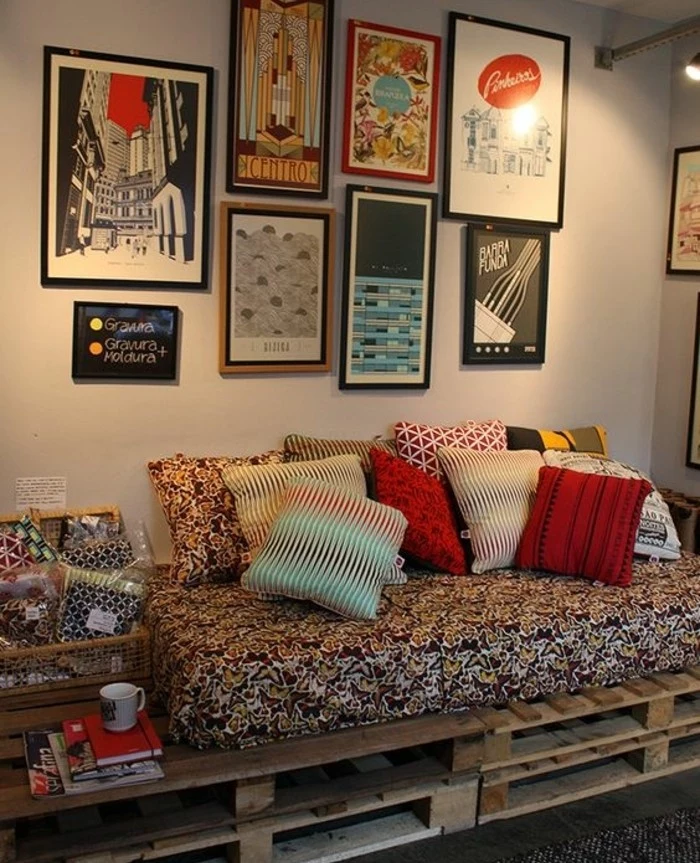
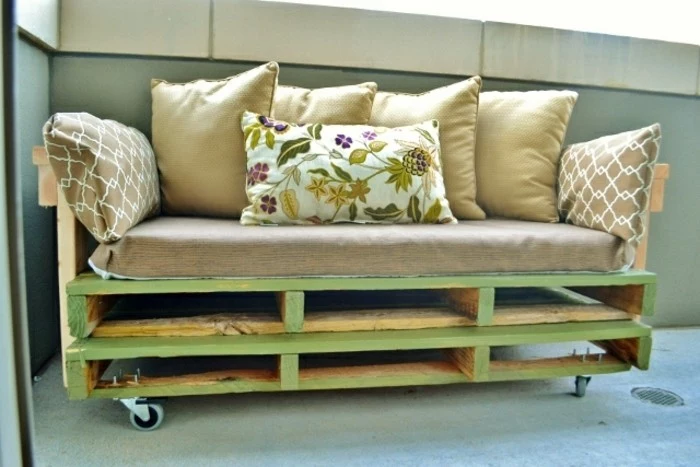
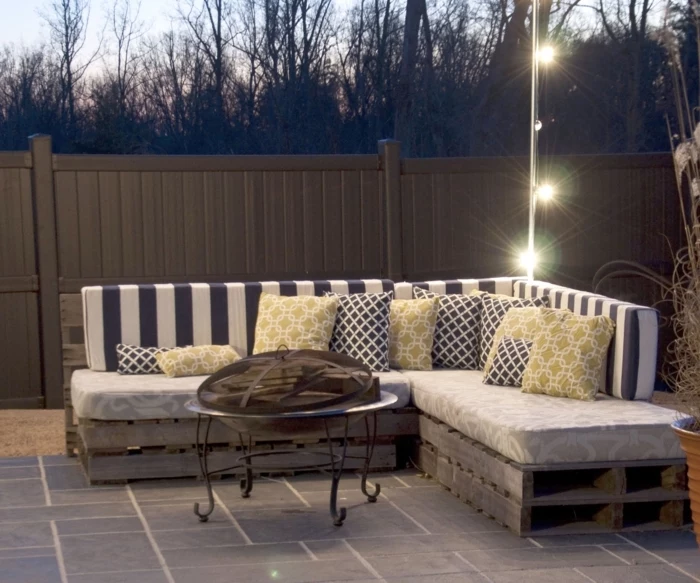
Go beyond the basic square cushion. The low, deep frame of a pallet couch is the perfect canvas for layering textiles. Start with your base cushions, then pile on the personality. Mix textures like a chunky knit throw, some faux fur pillows, and classic linen cushions. This creates visual depth and an irresistible ‘come and get cozy’ vibe.
- A pry bar or cat’s paw
- A rubber mallet
- A reciprocating saw (like a Sawzall) with a blade for cutting nails
These are your best friends for dismantling a pallet without splitting the valuable deck boards you’ll want to use for backrests or armrests.
Pro Tip for a splinter-free finish: Start with a coarse 60-grit sandpaper to aggressively knock down rough spots and remove splinters. Then, move to a 120-grit for a smoother touch. For surfaces that will have direct contact, like armrests, finish with a final pass of 220-grit sandpaper. It feels like a lot of work, but your hands (and your guests) will thank you.
Upcycling a single wooden pallet can save approximately 15 to 20 board feet of new lumber from being harvested.
Building your couch isn’t just a style choice; it’s a small act of conservation. You’re diverting a bulky item from the landfill and reducing the demand for new resources, giving that industrial wood a second, much more comfortable life.


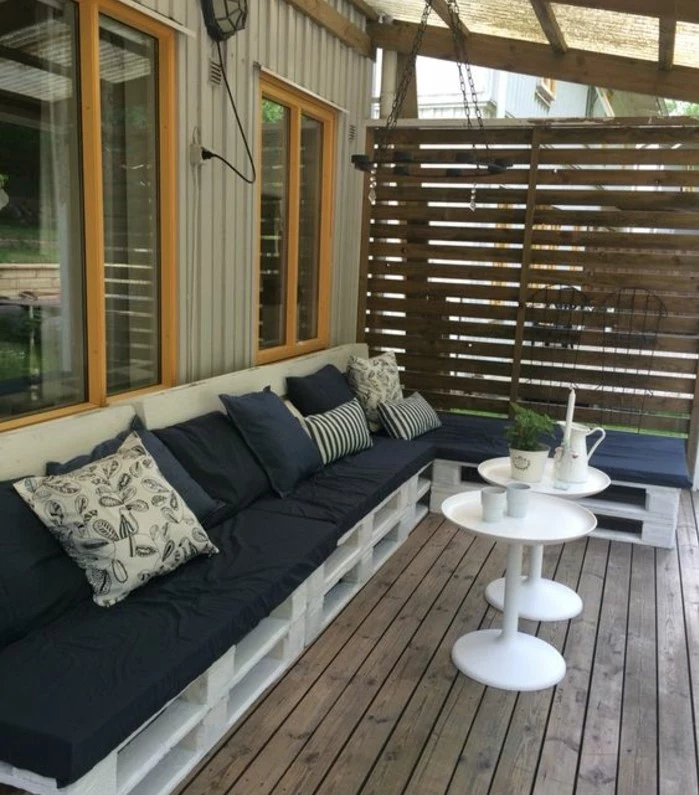
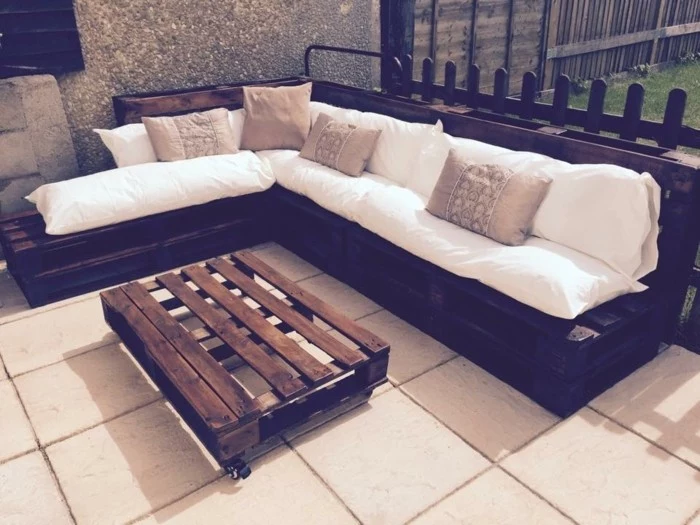
If you’re planning an outdoor pallet couch, choosing the right fabric for your cushions is crucial. Look for solution-dyed acrylic fabrics like those from Sunbrella. They are specifically engineered to resist fading from UV rays, are water-repellent, and inhibit mildew growth, ensuring your cushions look great for many seasons.
I found a pallet with a color stain on it. Is it safe?
Be cautious. While some colored pallets are simply from a company’s branding, others can indicate specific uses. For example, red pallets are often used by the CHEP company and are part of a rental pool, not meant for public use. Blue pallets are common in Europe (EPAL). If you can’t identify the source or what the color signifies, it’s safer to find another pallet, especially if it’s not clearly stamped ‘HT’.

For an L-shaped or corner sectional, your configuration is key. A common setup involves three pallets for the long side and two for the shorter side, with one pallet serving as the corner piece for both sections. Lay them out on the floor first to visualize the space. Secure them not only to each other along the sides but also using flat metal mending plates underneath where the sections join to prevent any separation.
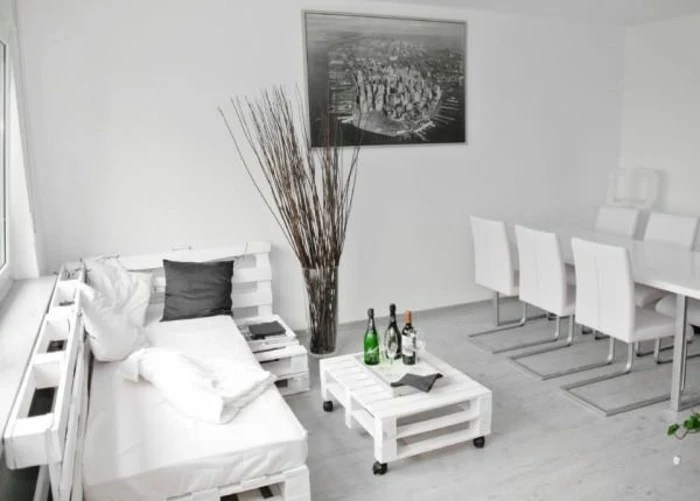
- Get that perfectly even, professional-looking coat.
- Avoid drips and brush marks on the uneven surfaces.
- Cut your painting time in half.
The secret? A paint sprayer. For a project this size with so many nooks and crannies, renting or buying a simple sprayer like the Wagner FLEXiO 3500 can be a game-changer, providing a flawless finish with much less effort.
A common mistake is miscalculating cushion size. Before you build, decide on your cushions! Standard seat cushion depths are around 24-25 inches. A standard 40-inch wide pallet makes a very deep seat once you add a backrest. You may need to trim the pallet depth or plan for extra-large back pillows to make it comfortable. Measure twice, build once!
“The essence of interior design will always be about people and how they live. It is about the realities of what makes for an attractive, civilized, meaningful environment, not about fashion or what’s in or what’s out.” – Albert Hadley

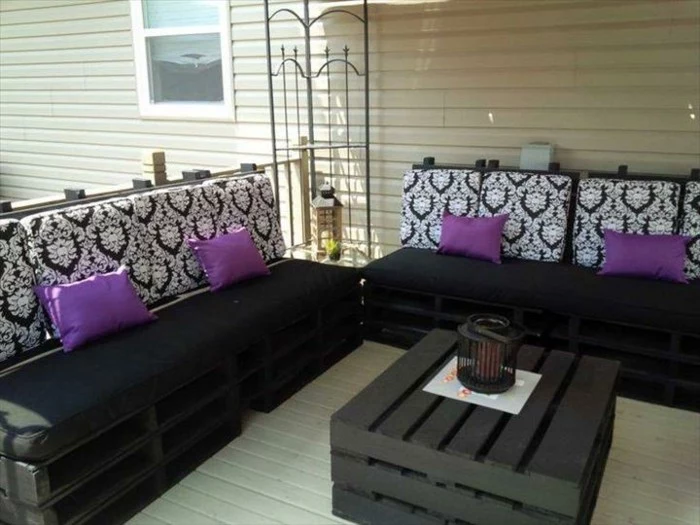
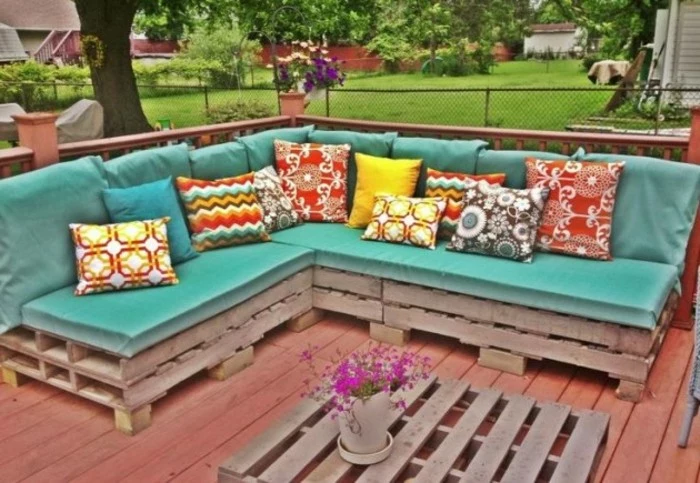
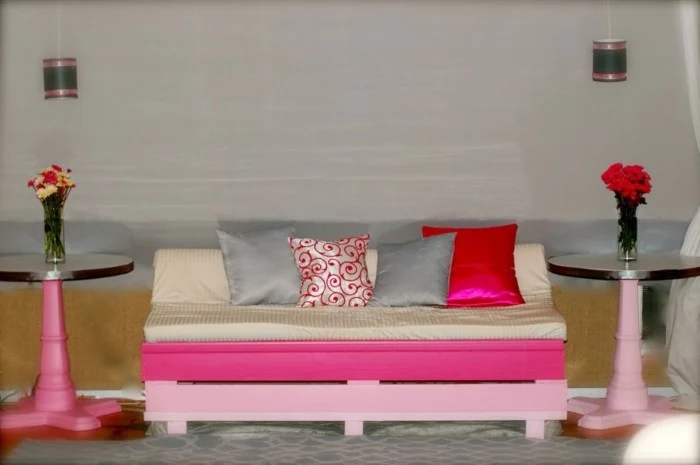
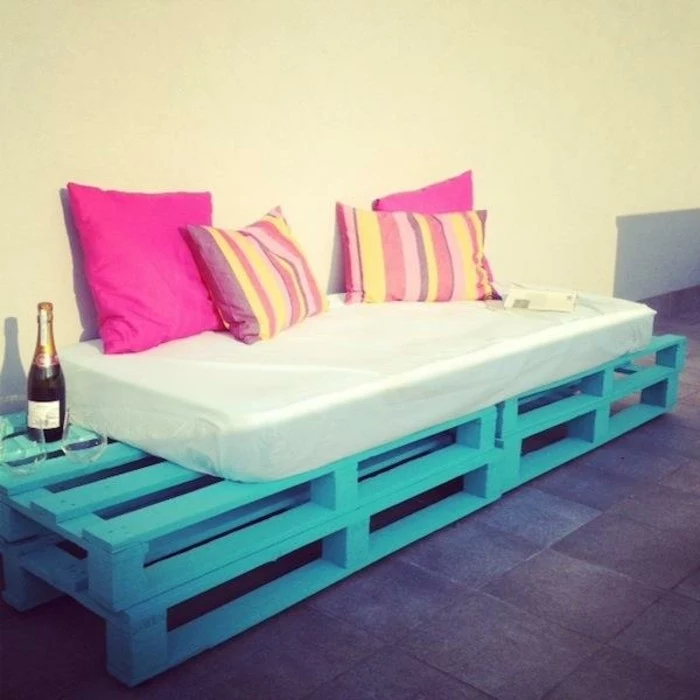
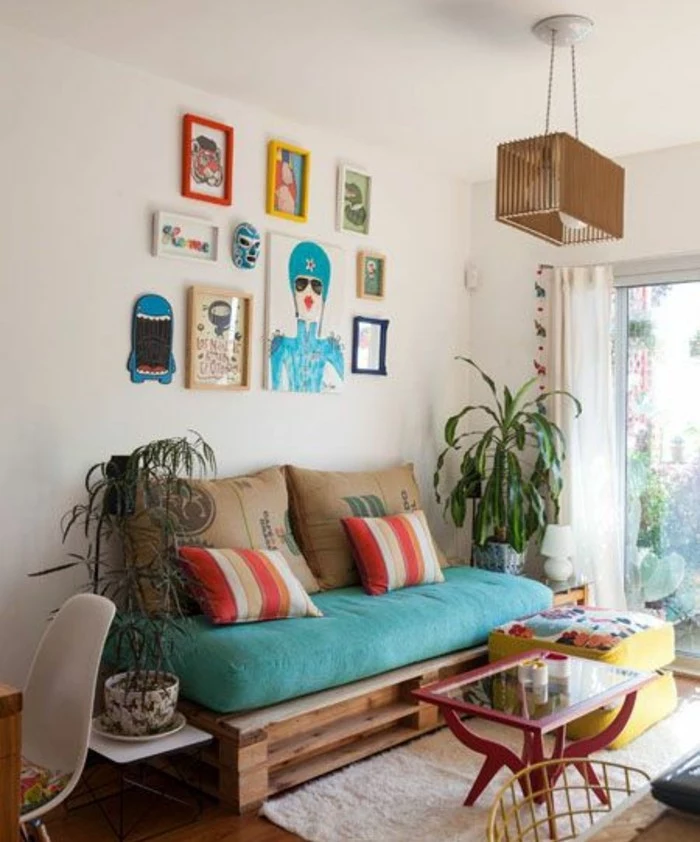
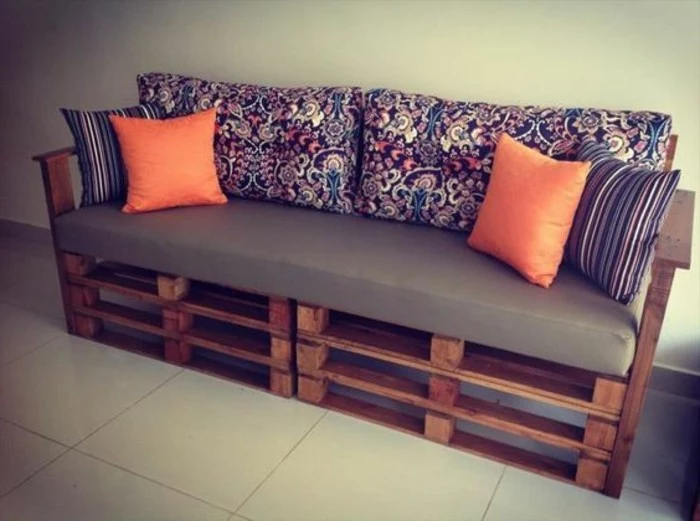
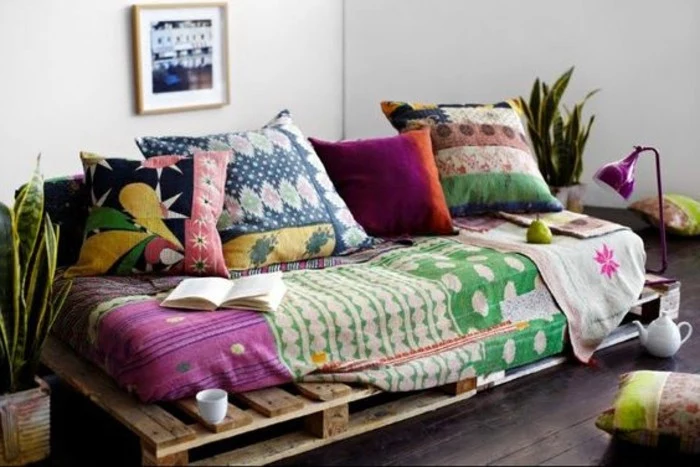
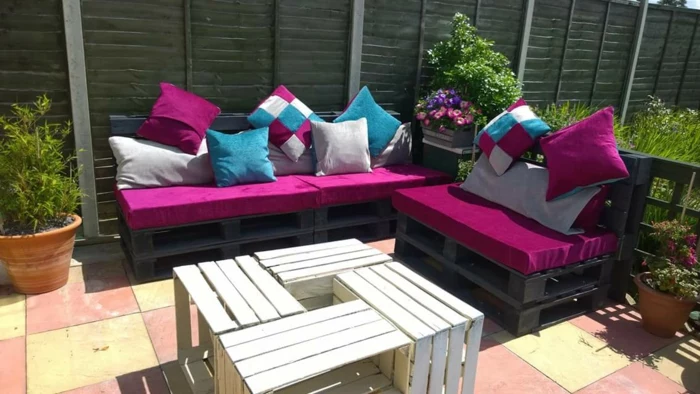
Create a Moroccan riad feel on your patio. Paint the pallets with a vibrant turquoise or a deep indigo blue. For cushions, skip the uniform look and go for a mix of rich jewel tones—fuschia, orange, and gold. Look for fabrics with kilim or quatrefoil patterns and finish the look with a brass tray on a matching pallet coffee table.
A single deck screw isn’t enough. When stacking pallets for height, you must secure them. After stacking, drill pilot holes and drive 4-inch structural screws down through the top pallet’s support blocks into the blocks of the one below. Use at least six screws per pallet layer to create a single, solid, unified base.
Before you bring any pallet indoors, even a clean-looking HT-stamped one, give it a thorough power wash or scrub it down with a stiff brush and a solution of water and vinegar or a mild detergent. This removes dirt, grime, and any potential spiderwebs or organic matter hiding in the crevices. Let it dry completely in the sun for a few days before you start sanding or cutting.
- Source pallets for free from local businesses (ask first!).
- Sew your own cushion covers from durable canvas drop cloths.
- Use foam from an old mattress or camping pads for the filling.
A pallet couch can be one of the most budget-friendly furniture projects imaginable. The wood is often free; the real investment is your time and creativity.