So You Want a Vaulted Ceiling? Here’s What Nobody Tells You.
I’ve been in the home renovation game for a long time, and if there’s one feature that gets homeowners dreaming, it’s a vaulted ceiling. People come to me with pictures, their eyes lit up at the thought of those soaring, light-filled spaces. And I totally get it. A great vault can make a room feel twice as big without adding a single square foot.
In this article
But I’ve also been the guy called in to fix the ones that went sideways. I’m talking about sagging rooflines, insane heating bills, and living rooms that echo like a gymnasium. The glossy photos don’t show you the nitty-gritty engineering or the day-to-day realities.
So, let’s have the real conversation I have with every client before we even think about touching a sledgehammer. This isn’t to scare you off, but to make sure the dream you’re chasing is one you can actually live in—comfortably and safely. We’ll get into the structure, the costs, and all the little things that make a big difference.
First Things First: Why Your Roof Isn’t Falling In Right Now
Most people assume a vaulted ceiling is just a matter of tearing out the flat one. Oh, if only it were that simple. To get why it’s a big deal, you have to understand the basic physics of your roof.
Think of a standard roof structure as a series of simple triangles. The angled rafters hold up the roof, and gravity is constantly trying to push those rafters down and out, forcing your home’s walls apart. What’s stopping your house from doing the splits? The flat ceiling joists. They are the bottom of the triangle, tying the walls together and resisting that outward force. They’re basically the unsung heroes holding everything in place.
By the way, that attic space they create is also the perfect, easy-to-access spot for dumping tons of insulation and running all your wiring. Convenient, right?
When we go for a vaulted ceiling, we are literally removing that structural tie. If you just cut out the ceiling joists, your roof would slowly begin to sag and the walls would bow outwards. It’s a dangerous and incredibly expensive mess to fix.
So, how do we stop that from happening? There are two main pro-level solutions:
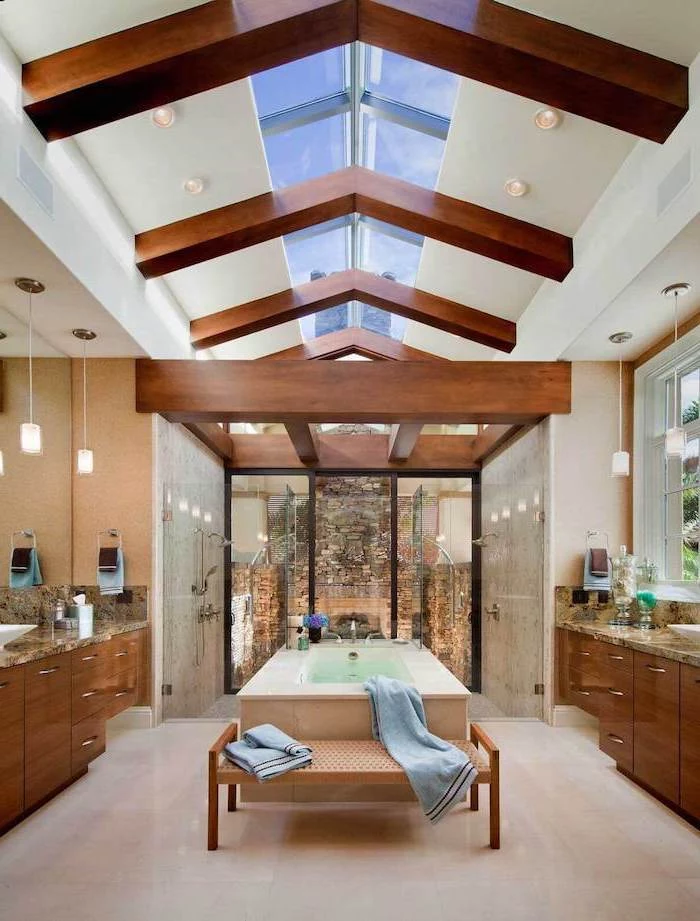
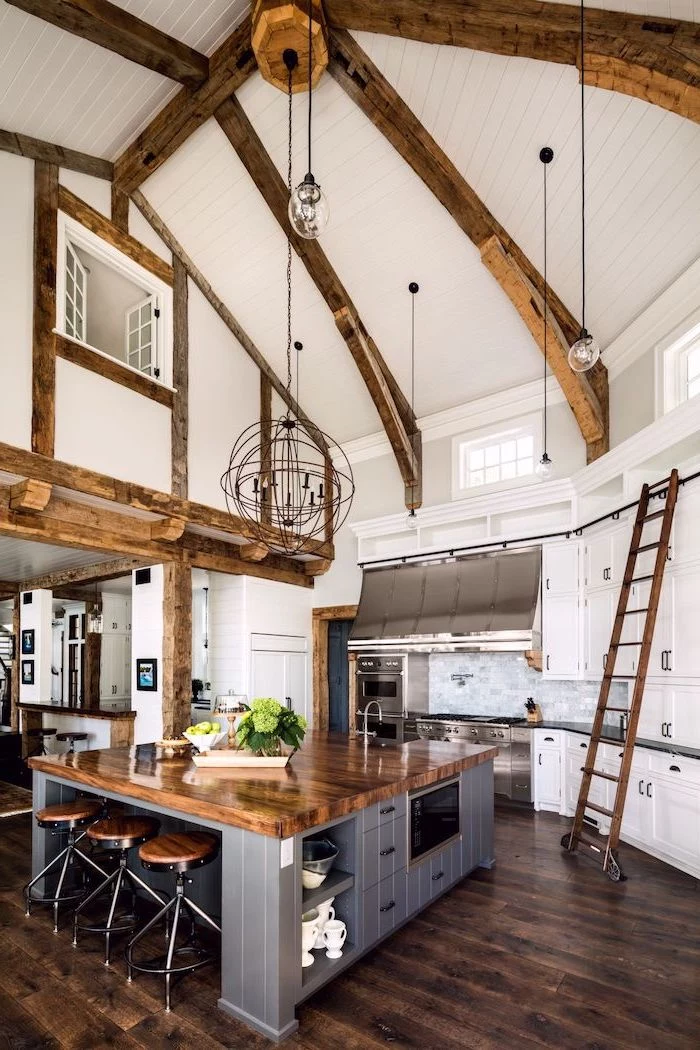
- A Structural Ridge Beam: This is the gold standard, especially for renovations. We install a massive, engineered beam at the very peak of the roof. This beam carries the entire roof load and transfers it down through posts in the walls to the foundation. The rafters then hang from this beam, so they’re no longer pushing the walls out. These aren’t just big pieces of wood; they’re usually heavy-duty products like Laminated Veneer Lumber (LVL) and have to be sized by a structural engineer. No exceptions.
- Collar or Rafter Ties: Sometimes you’ll see horizontal beams connecting the rafters partway up the slope. If they’re low down (in the bottom third), they’re called rafter ties and can work like ceiling joists, just higher up. If they’re way up high, they’re collar ties, and honestly, they’re often more for show than for stopping your walls from bowing. Their effectiveness depends entirely on their placement and engineering.
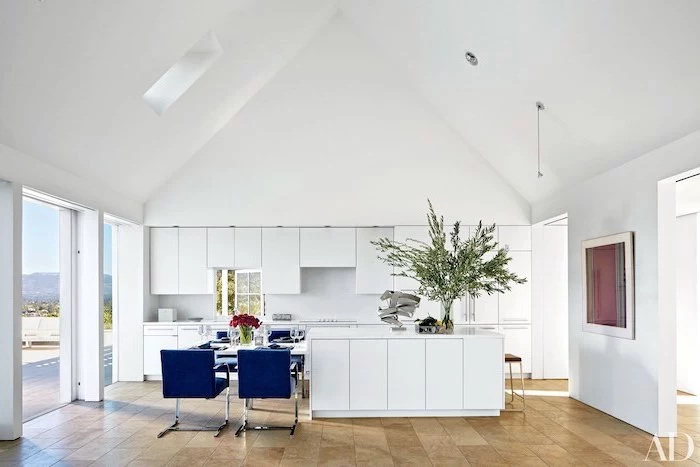
New Build vs. Retrofit: Planning Ahead vs. Major Surgery
Creating a vault in a house you’re building from scratch is one thing. Tearing out a ceiling in your existing home is another world entirely. One is simple planning; the other is a full-on surgical procedure.
In a new build, it’s designed in from the start. We can use pre-made “scissor trusses” that already have the vault shape built-in. A crane pops them in place, and we’re good to go. It’s efficient and adds very little to the overall cost.
But a retrofit? That’s where the real work—and money—comes in. It’s one of the most invasive renovations you can undertake. Here’s what that actually looks like, based on a typical ranch-style house project:
- The Plan: First, you hire a structural engineer. They’ll assess your home and draw up the official plans. Expect to pay between $1,500 and $3,000 for this service, but it’s the most important money you’ll spend. With those plans, your contractor can get the building permits.
- The Mess: We seal off the room, but let’s be real: the dust gets everywhere. We build temporary walls inside to hold up the roof, then we demolish the ceiling, yanking out drywall, insulation, and all those ceiling joists.
- The Big Lift: That engineered ridge beam is no joke. A 32-foot LVL beam can weigh close to 800 pounds. You can’t just carry it through the front door. We have to hire a crane, cut a slot in your roof, and carefully lift the beam into place. It’s a tense, half-day operation that costs around $800 to $1,200 for the crane rental alone.
- The Rebuild: Once the beam is set, we re-frame everything, tying the old rafters to the new beam. Then comes new electrical for lighting, new insulation (we’ll get to that), and finally, all new drywall, taping, and painting.
Heads up! You should probably plan on not living in your house during the demolition and framing. The noise and dust are intense, and for a few days, you literally have a hole in your roof. Budget for an Airbnb or a hotel for at least a week.
Let’s Talk Real Money: A Sample Retrofit Budget
So what does all this cost? When contractors say “tens of thousands,” it can be frustrating. For a standard 25×15 foot living room, you’re likely in the $30,000 to $45,000+ range. Here’s a rough, no-frills breakdown from a recent project:
- Engineer & Permits: ~$4,000
- Crane Rental: ~$1,000
- LVL Beam & Support Posts: ~$3,500
- Labor (Demo, Framing, Install): ~$18,000
- Insulation (Spray Foam): ~$5,500
- Drywall, Finishing & Paint: ~$7,000
- Total Ballpark: ~$39,000
This doesn’t even include new lighting fixtures, paint, or any surprises we find in the walls. The price goes up with complexity. A quick way to gauge your own project? Go outside and look at your roof. If it’s a simple A-shape (a gable roof), it’s a prime candidate. If you have a bunch of intersecting rooflines (hips and valleys), expect the complexity and cost to climb significantly.
Hiring a Pro: Red Flags to Watch For
This is not a DIY project. Finding the right contractor is critical. Here are some giant red flags:

- “You don’t need an engineer.” RUN. This is the biggest red flag. Any contractor who suggests skipping the engineering phase is risking your home’s structural integrity to save a few bucks.
- No mention of insulation. If their bid doesn’t have a detailed line item for insulation, ask them what their plan is. A vaulted ceiling without a proper insulation strategy is a recipe for disaster.
- A vague, one-page quote. A professional bid will be broken down into categories: demolition, structural work, electrical, insulation, drywall, etc. This shows they’ve thought through the entire process.
The Big Problem: The Energy Penalty
Here’s the part that often gets glossed over. Hot air rises. In a room with a 20-foot peak, all your expensive heat will collect up there while you shiver down below. Your thermostat will work overtime, and your heating bills can easily jump 15-30%.
For years, builders just stuffed fiberglass batts between the rafters. We know better now. The modern solution is to create an unvented, conditioned roof assembly. It’s more expensive upfront but pays for itself in comfort and energy savings.
- The Best: Spray Foam. We spray closed-cell foam directly to the underside of the roof deck. It costs more—around $3 to $5 per square foot—but it creates a perfect air seal and insulates phenomenally well. It stops heat from escaping and makes the entire roof structure part of your home’s conditioned space. In my opinion, it’s the only way to do it right.
- The Good: Rigid Foam & Batts. A less expensive but still effective method involves a hybrid approach. We install rigid foam boards against the roof deck, seal all the seams, and then fill the rest of the rafter bay with high-density fiberglass or mineral wool batts. It’s more labor-intensive but can save you some money on materials.
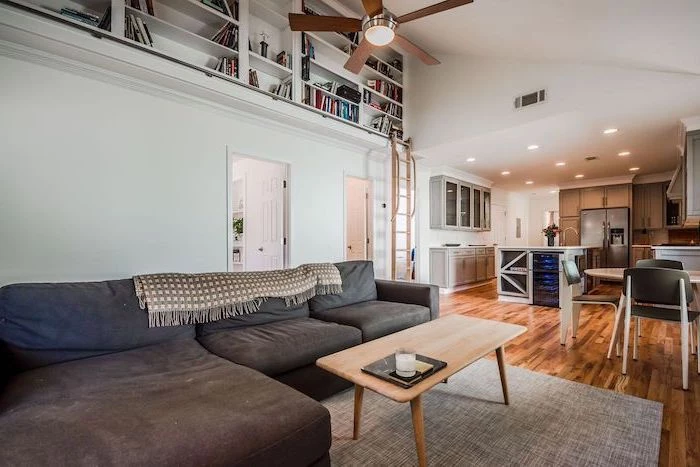
And please, get a good ceiling fan. It’s not just a decoration. Running it in reverse (clockwise) on low in the winter gently pushes all that trapped hot air from the peak back down into the room. It’s a game-changer.
Finishing Touches That Make a Difference
Once the hard part is over, you get to make it beautiful. The materials you choose will define the entire feel of the room.
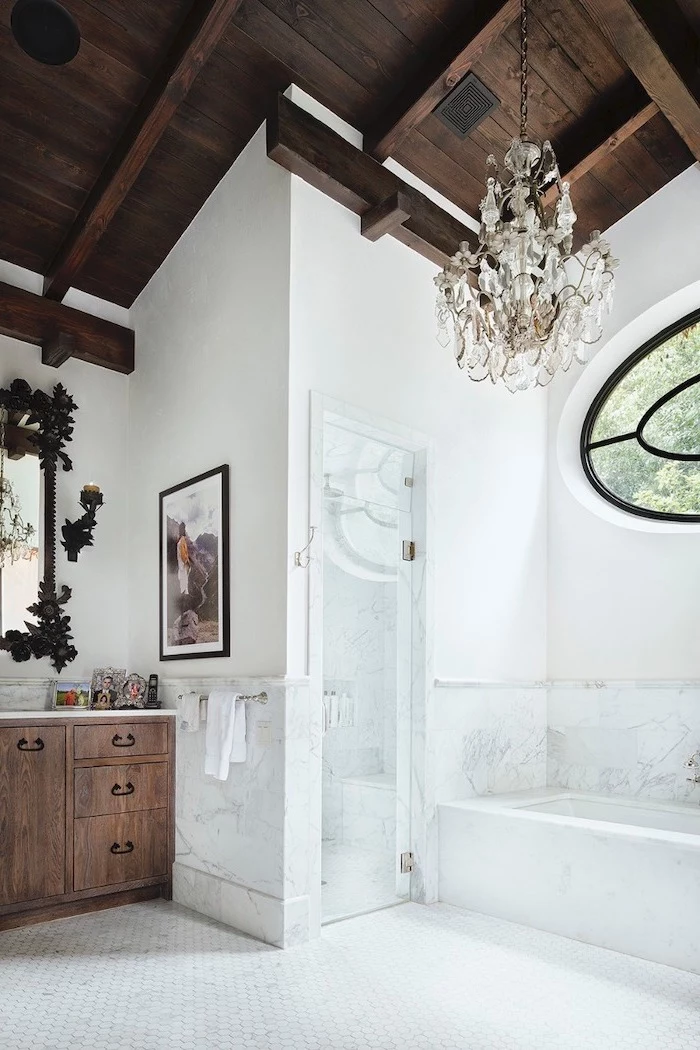
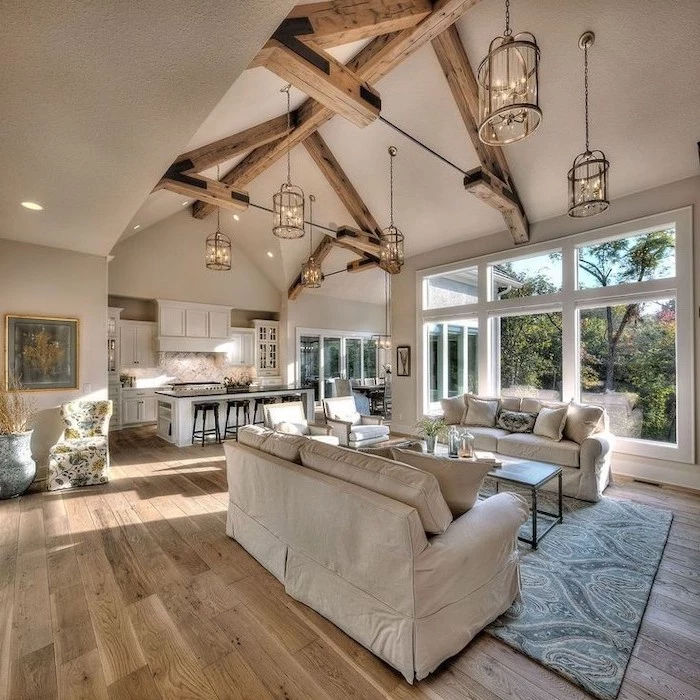
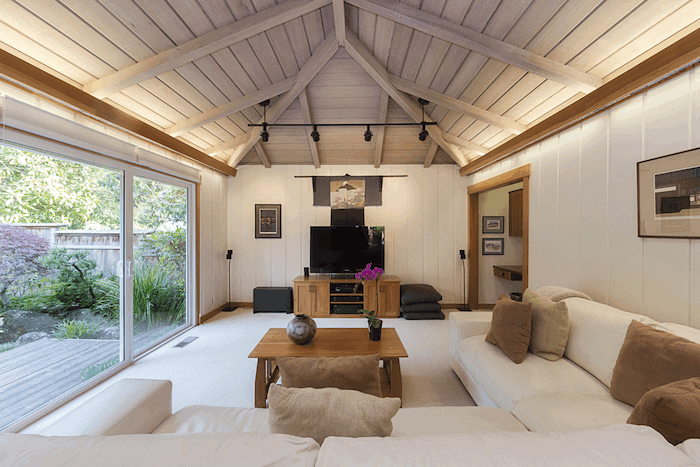
Beams: Real or Fake?
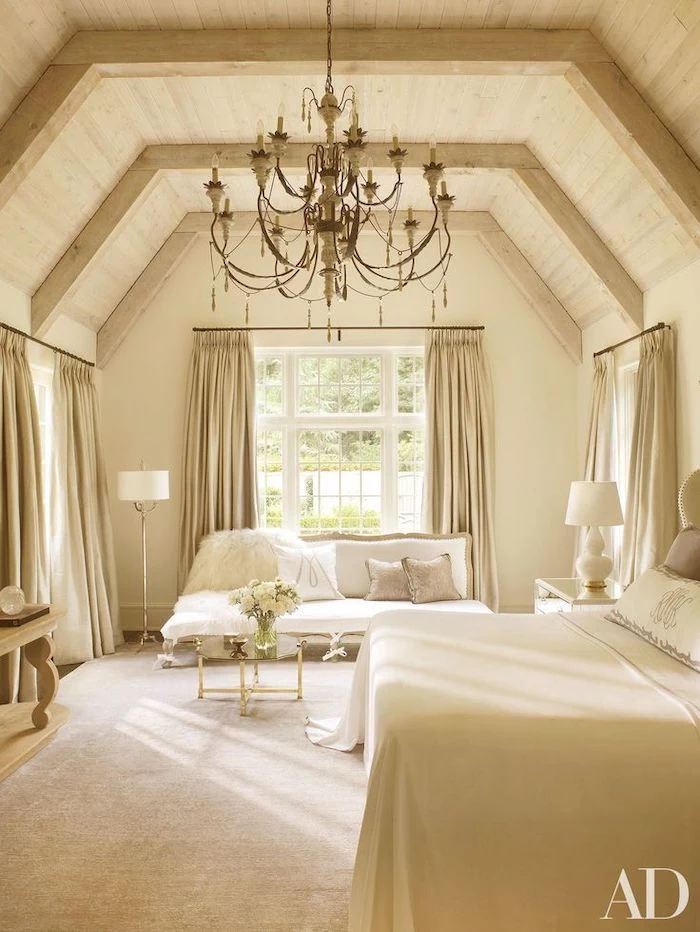
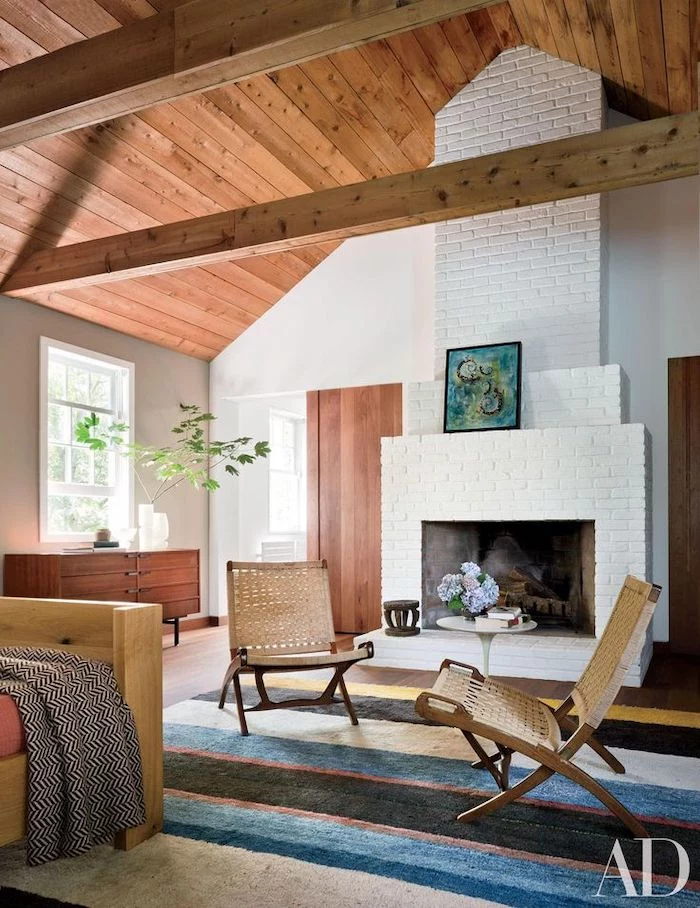
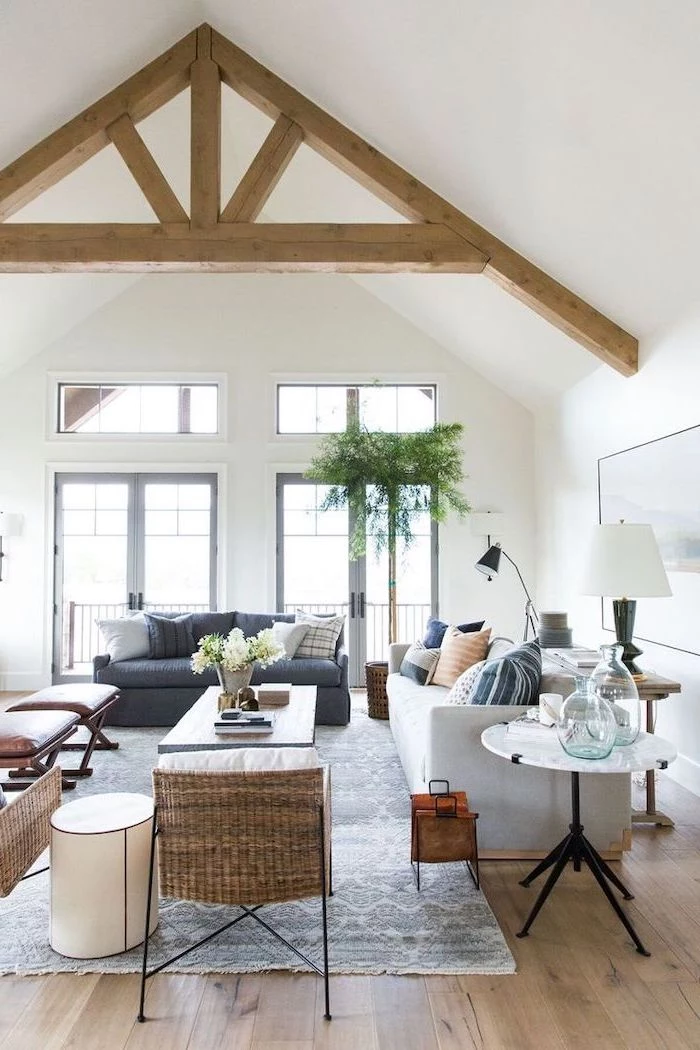
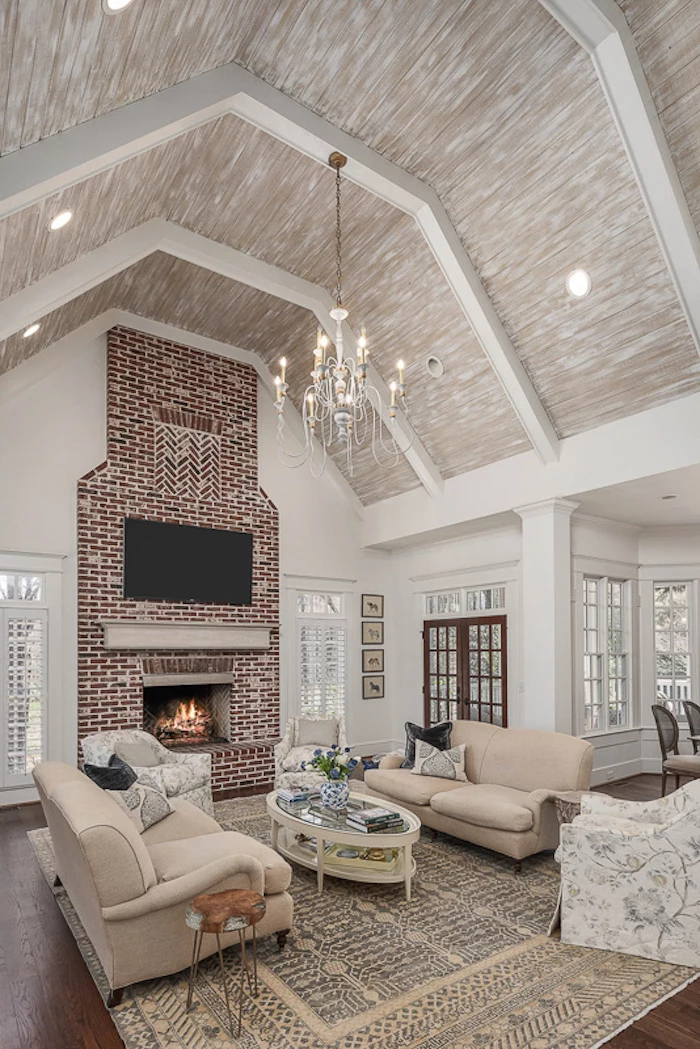
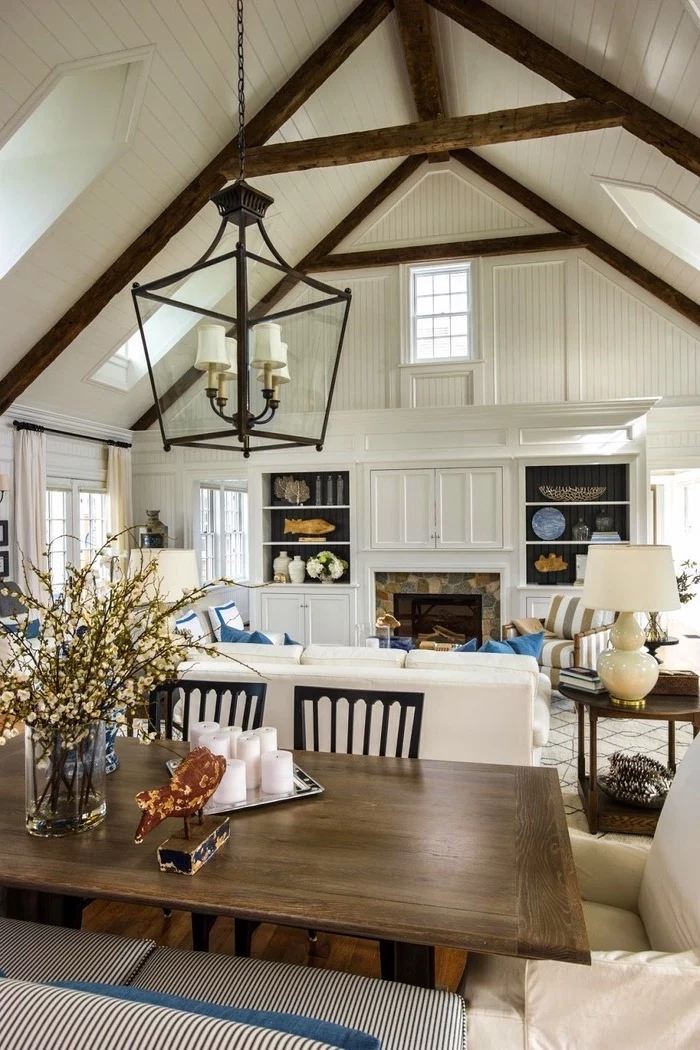
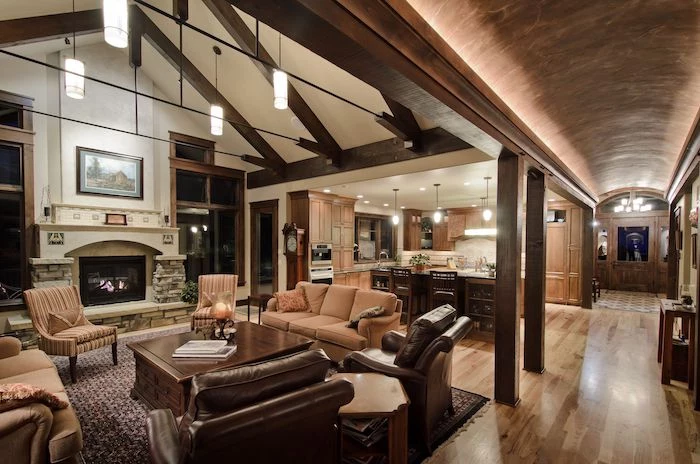
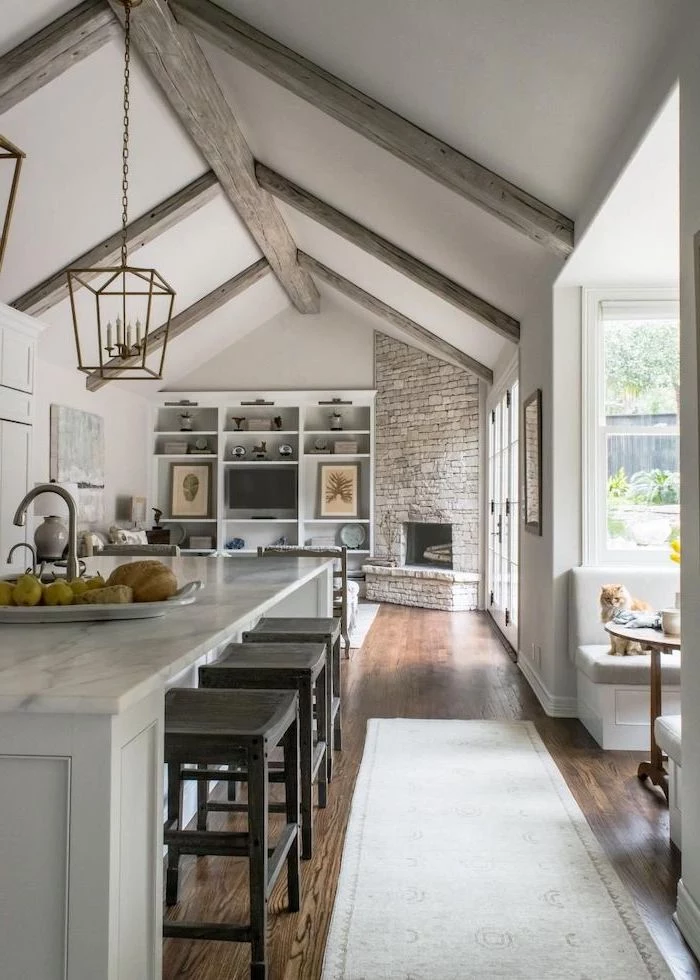
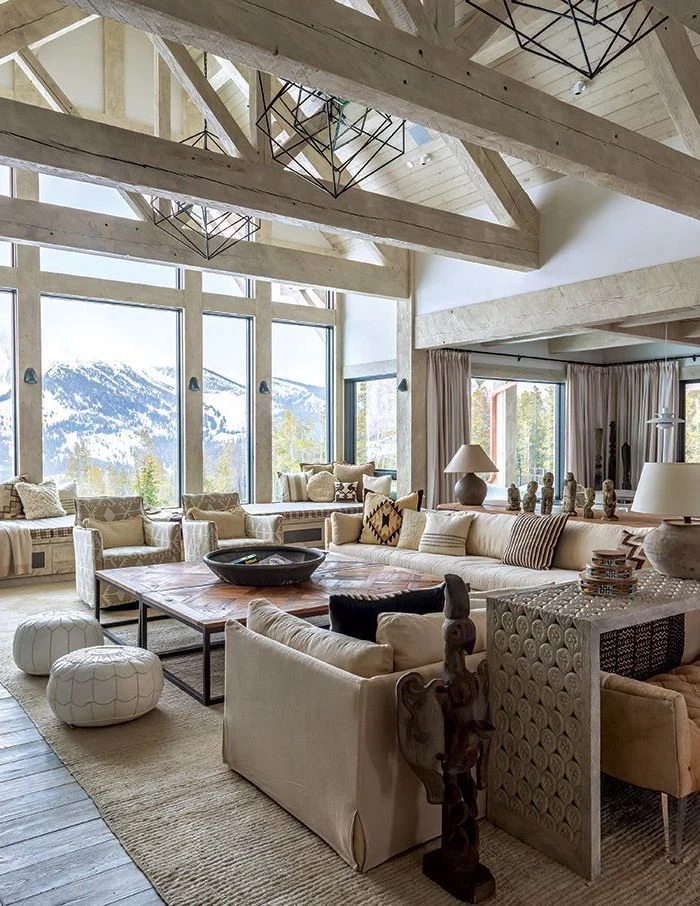
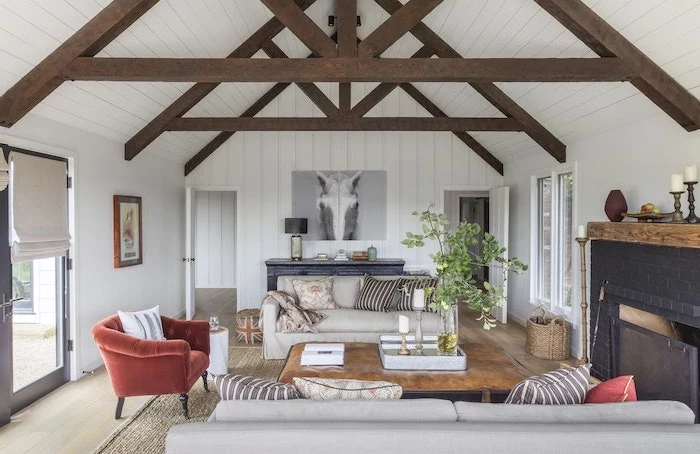
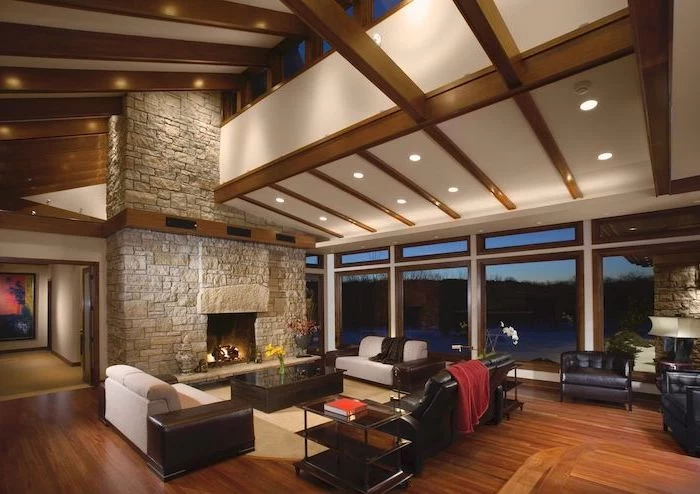
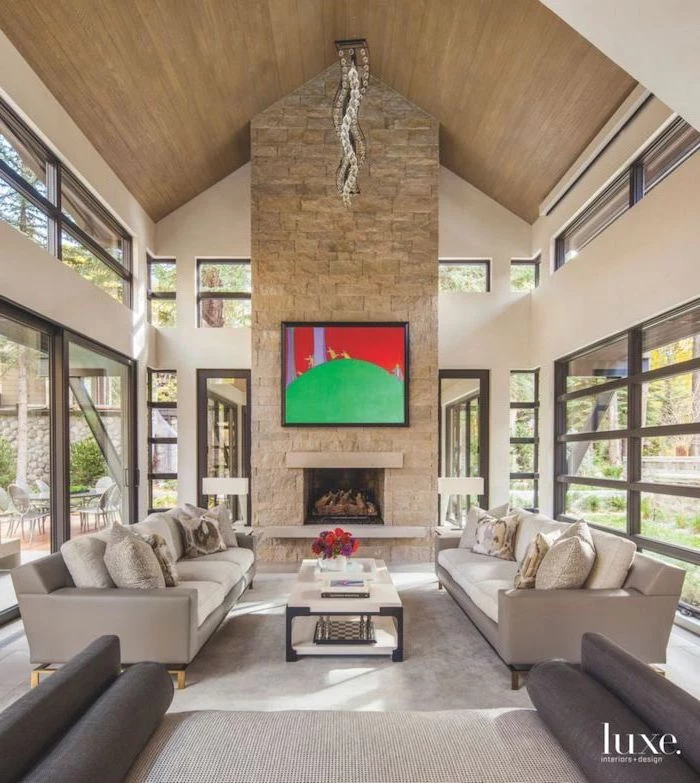
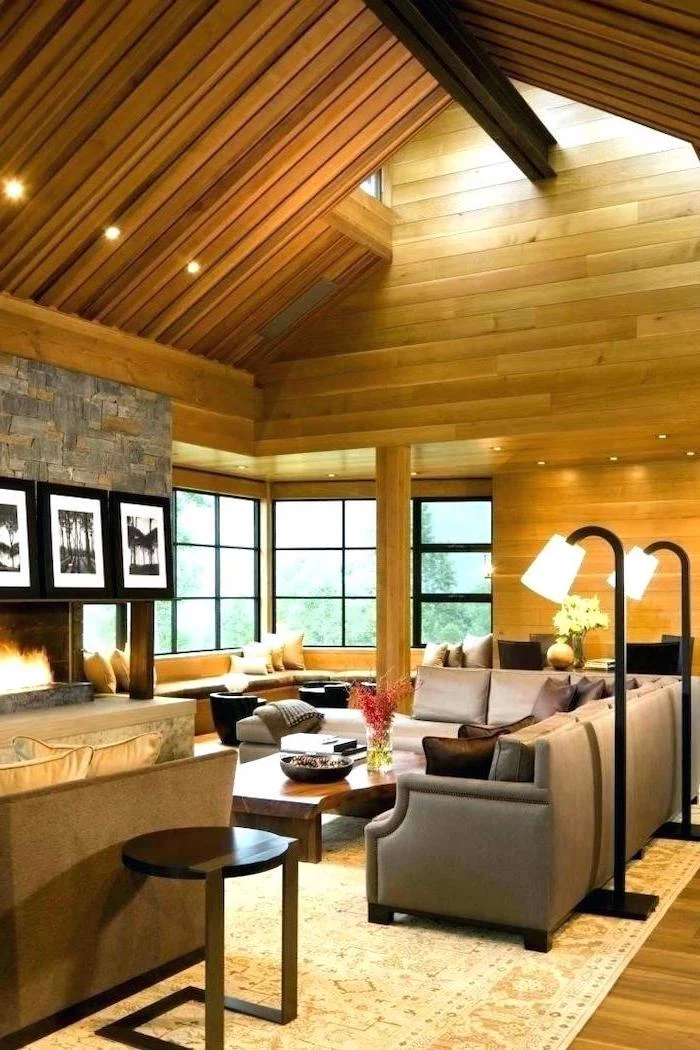
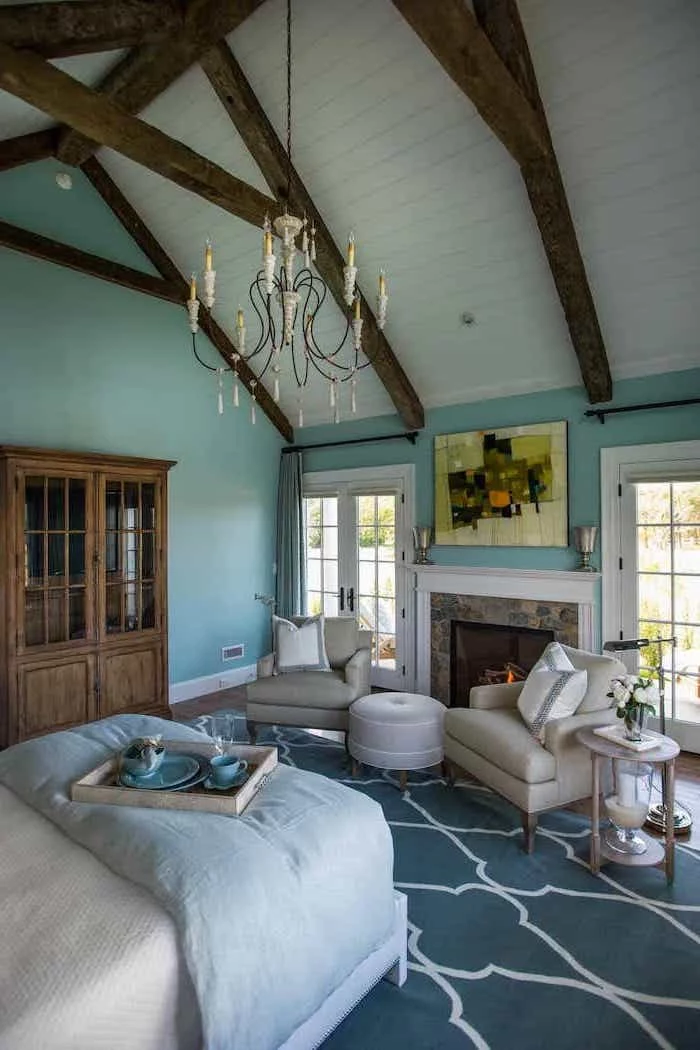
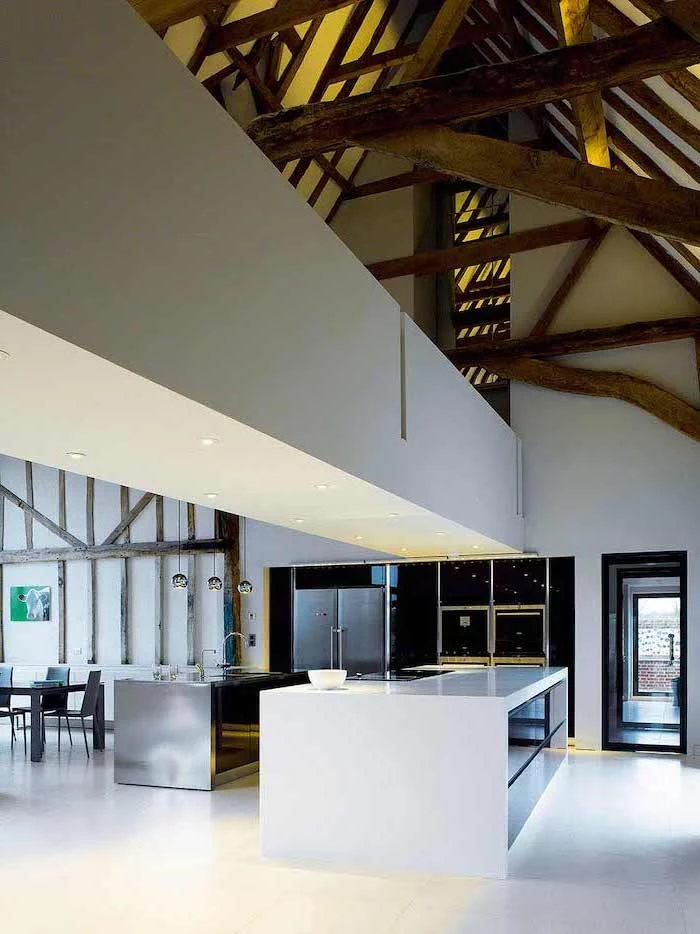
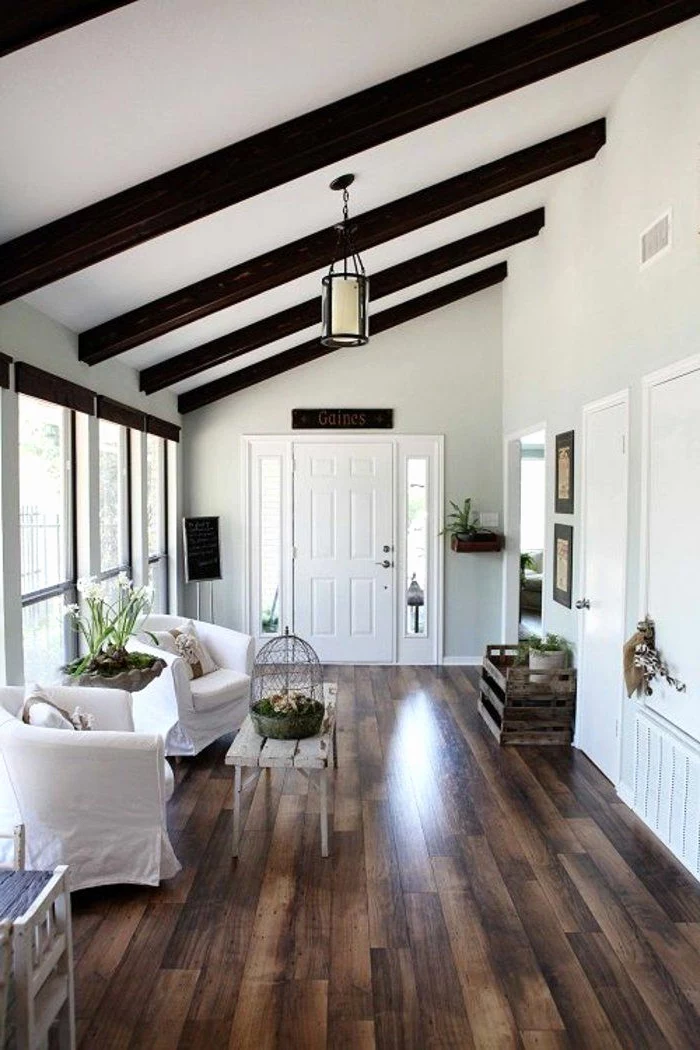
Exposed beams are fantastic, but you have options. Structural beams are the real deal—the glulam or fir beams actually holding up your roof. They’re expensive and their placement is dictated by physics, not your design preference.
More often, people opt for decorative beams. These are lightweight, three-sided hollow boxes that look like solid timber. They’re much cheaper and can be placed anywhere. A little pro tip: We often use these hollow beams to hide wiring for speakers or overhead lights. It’s a clean, clever trick that solves a lot of problems.
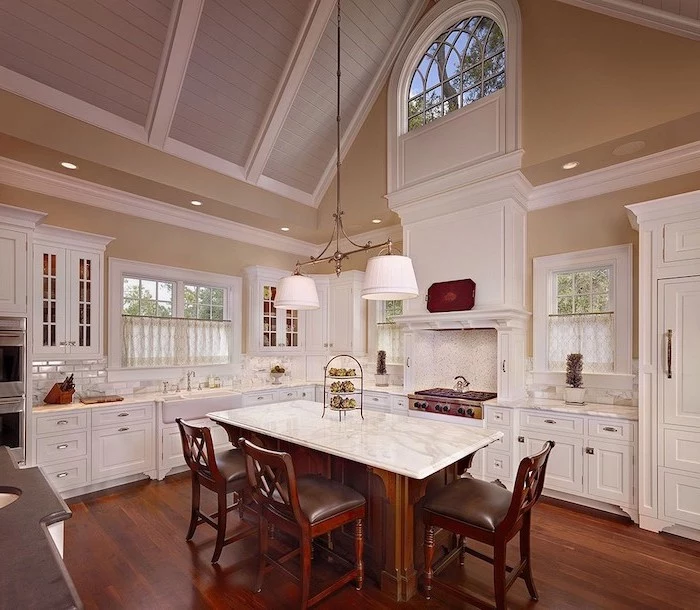
Ceiling Materials
Drywall is standard, but tongue-and-groove (T&G) wood planks can be stunning. Pine or poplar boards give you anything from a rustic cabin to a clean coastal vibe. Quick tip: The wood MUST sit inside your house for at least a week before installation to acclimate to the humidity. If you skip this, it will shrink after it’s up, creating ugly gaps. Trust me on this one.
Lighting the Space
Lighting a tall room is an art. A common mistake is just scattering a few recessed lights across the ceiling. From 20 feet up, they create sad little puddles of light on the floor and leave the upper part of the room feeling like a dark cave.
You need a layered approach:
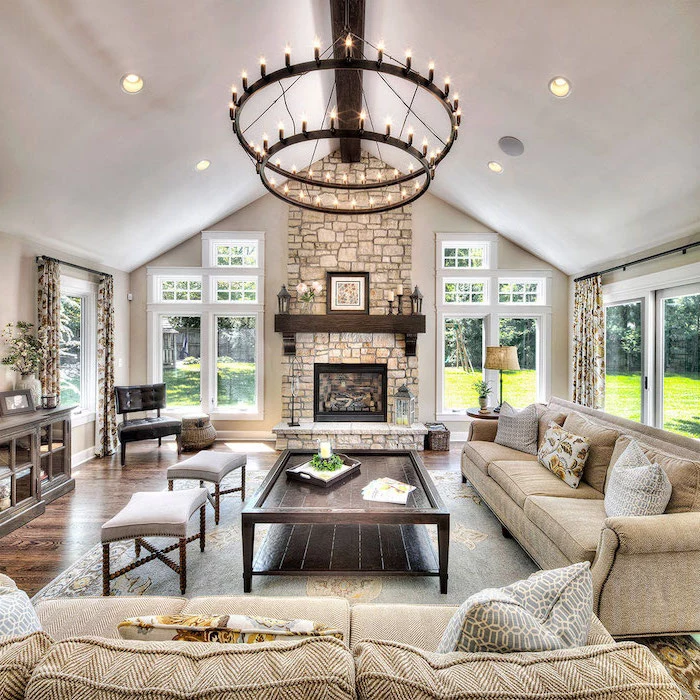
- Ambient Light: A big, central chandelier or pendant to provide general light and a focal point.
- Task Light: Focused lighting where you need it, like pendants over an island or a reading lamp by a sofa.
- Accent Light: Spotlights aimed at artwork, a fireplace, or washing light up the ceiling itself to make the space feel even bigger.
Combining these makes the room feel warm, inviting, and actually usable after the sun goes down. A vaulted ceiling is a huge undertaking, but when it’s done right—with proper engineering, insulation, and thoughtful design—it’s absolutely worth it.
Inspiration Gallery
Don’t underestimate the power of texture. While drywall is a clean, modern choice, cladding a vaulted ceiling in tongue-and-groove pine or cedar adds instant warmth and a rustic-chic vibe. For a more polished look, consider applied mouldings to create a coffered effect on the angled planes.
- Changing a lightbulb can suddenly require a 16-foot ladder.
- Dust and cobwebs gather at the highest peak, out of reach of standard cleaning tools.
- Washing skylights becomes a specialized, and sometimes costly, task.
The secret? Invest in a high-quality extendable pole with multiple attachments and plan for professional cleaning in your annual budget.
Acoustics are not an afterthought: A vaulted room can create an unpleasant echo chamber. Soft furnishings are your first line of defense. Think large, plush area rugs (like those from a brand like Article or West Elm), thick curtains, upholstered furniture, and even textile wall art to absorb sound and make the space feel intimate, not cavernous.

Heat rises. It’s a simple fact of physics that becomes a major financial factor with a vaulted ceiling. An improperly insulated vaulted ceiling can increase heating costs by 10-25% as all the warm air gathers uselessly at the peak.
Thinking about beams? They aren’t just structural; they’re a major design statement. Your choice defines the room’s character:
- Reclaimed Wood: Offers a rich patina and authentic history, perfect for farmhouse or industrial styles. Each beam tells a story.
- Glulam Beams: Engineered for strength and stability, these have a clean, contemporary look with uniform grain, ideal for modern or Scandinavian designs.
- Faux Beams: Lightweight polyurethane options are purely decorative, but modern versions from brands like Ekena Millwork are incredibly realistic and perfect for hiding wiring.
Can I use a ceiling fan in a room with a vaulted ceiling?
Absolutely, and you probably should! A fan is crucial for both summer cooling and winter heating. In winter, running the fan in reverse at a low speed pushes the warm air that has collected at the peak back down into the living space. You’ll need a model with a downrod long enough to position the blades 8-9 feet above the floor for optimal circulation. Look for high-CFM (cubic feet per minute) models for large spaces.
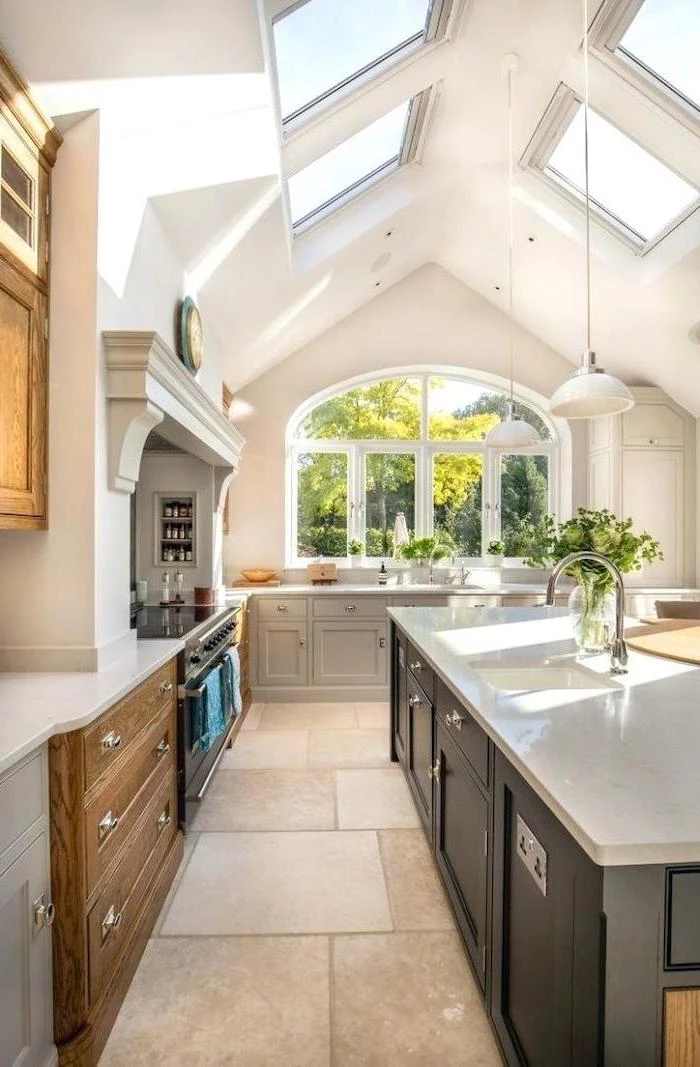
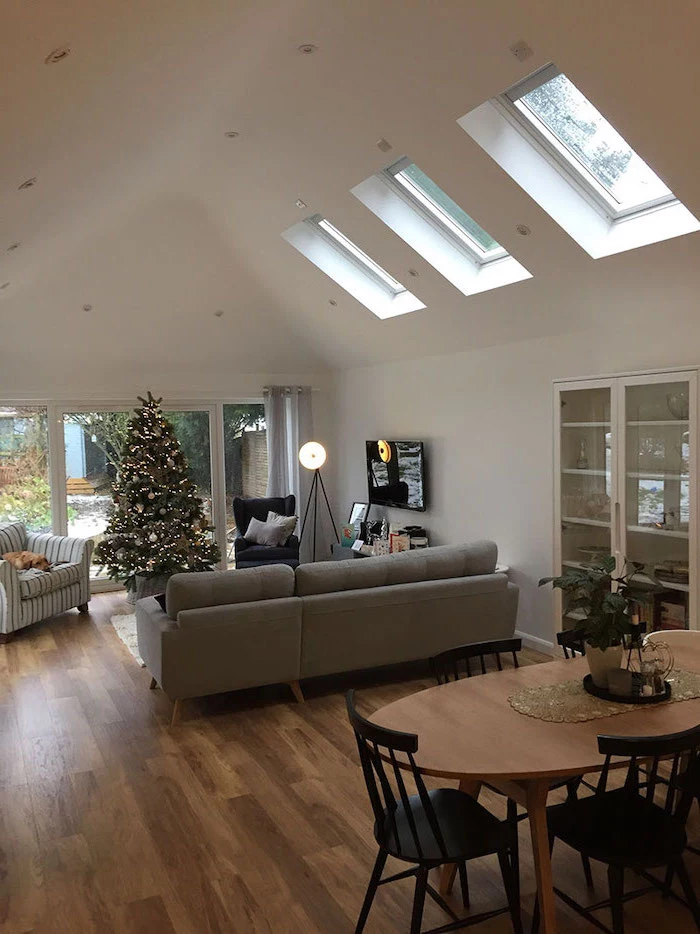
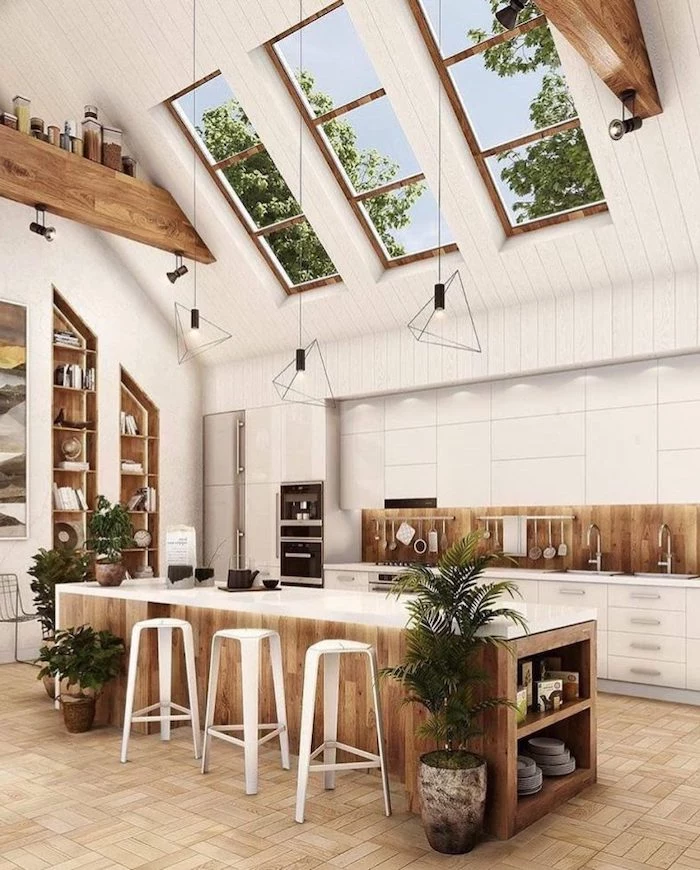
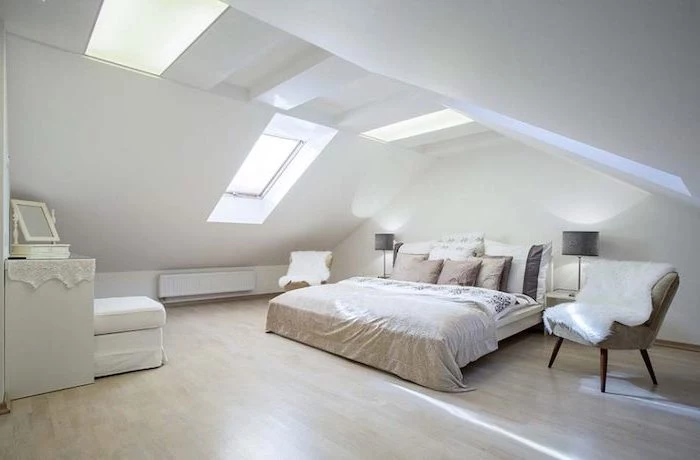
Skylight Placement: A single, central skylight brightens the middle of the room. This works, but it can feel like a spotlight.
Strategic Grouping: Placing two or three smaller skylights, like the Velux ‘No Leak’ models, along one side of the vault creates a wash of light that feels more natural and highlights the ceiling’s architecture.
For north-facing rooms, skylights are a game-changer for bringing in consistent, soft light throughout the day.
According to a study in the Journal of Clinical Sleep Medicine, office workers with more window exposure got an average of 46 minutes more sleep per night.
This same principle applies at home. Vaulted ceilings allow for taller windows and skylights, flooding your space with the kind of natural light that can regulate your circadian rhythm, improve mood, and boost productivity. It’s a wellness feature built right into your home’s architecture.
- It can make a room feel cozier, not colder, in the winter.
- It keeps your energy bills from skyrocketing.
- It works silently and invisibly.
The secret? Radiant floor heating. By heating the room from the ground up, you feel the warmth directly, rather than waiting for the air in your massive vaulted space to heat up. It’s an ideal pairing for these grand rooms.
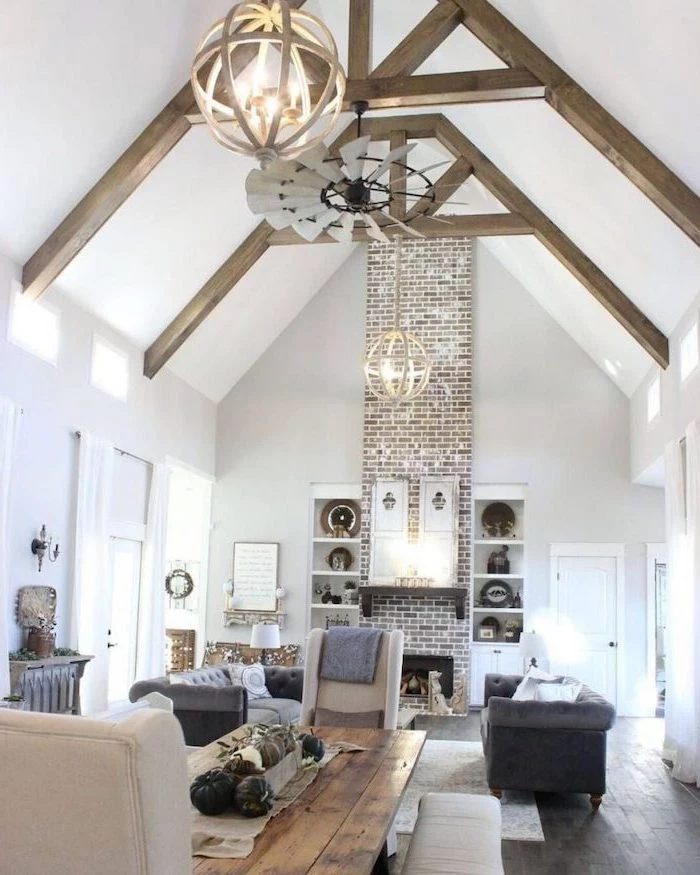
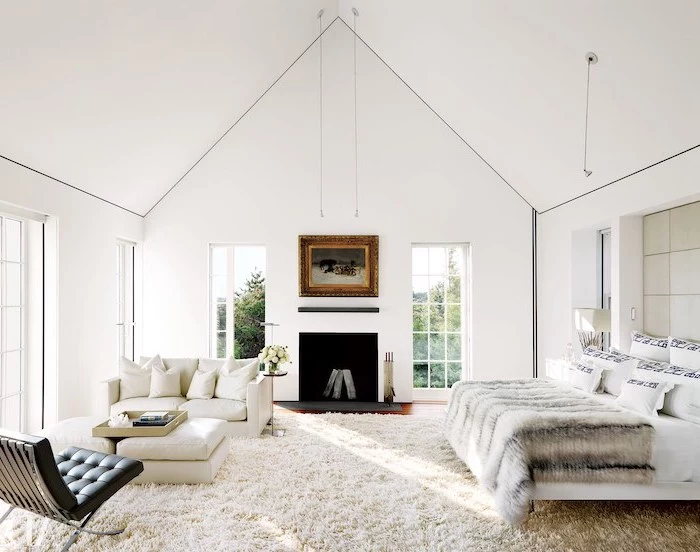
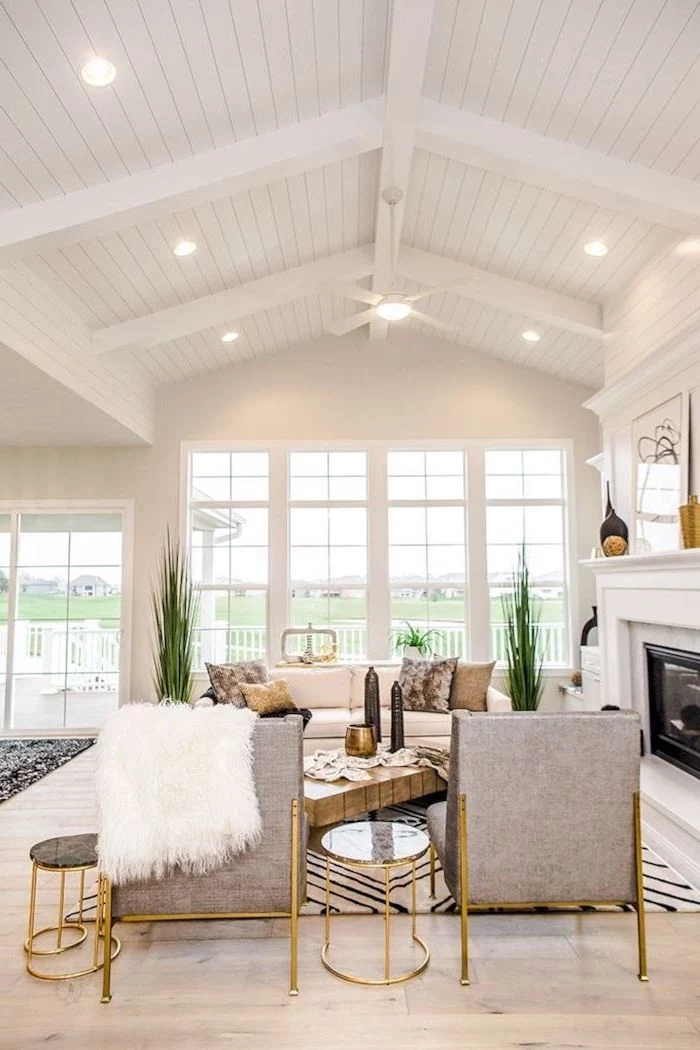
When painting a vaulted ceiling, color choice is everything. A crisp white, like Sherwin-Williams’ ‘Pure White,’ will maximize the sense of height and light. However, painting the ceiling a dark, dramatic color like charcoal or navy can create a stunning, cozy effect, drawing the eye upward while making the large space feel more intimate and enveloping.
Layer Your Lighting
One central fixture won’t cut it. A successful lighting plan for a vaulted room has three layers:
- Ambient: Recessed cans or track lighting angled to wash the ceiling and walls.
- Task: Pendants over an island or reading lamps next to a chair.
- Accent: A dramatic chandelier for a focal point, or uplighting to highlight beams.
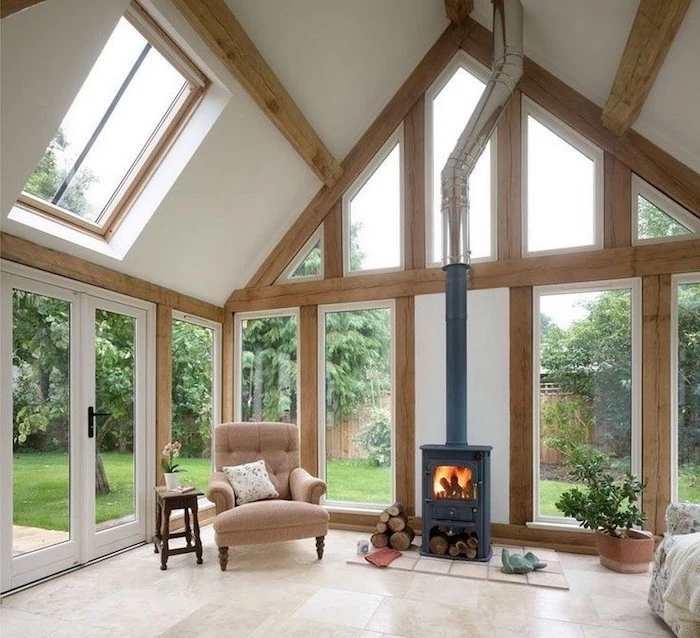
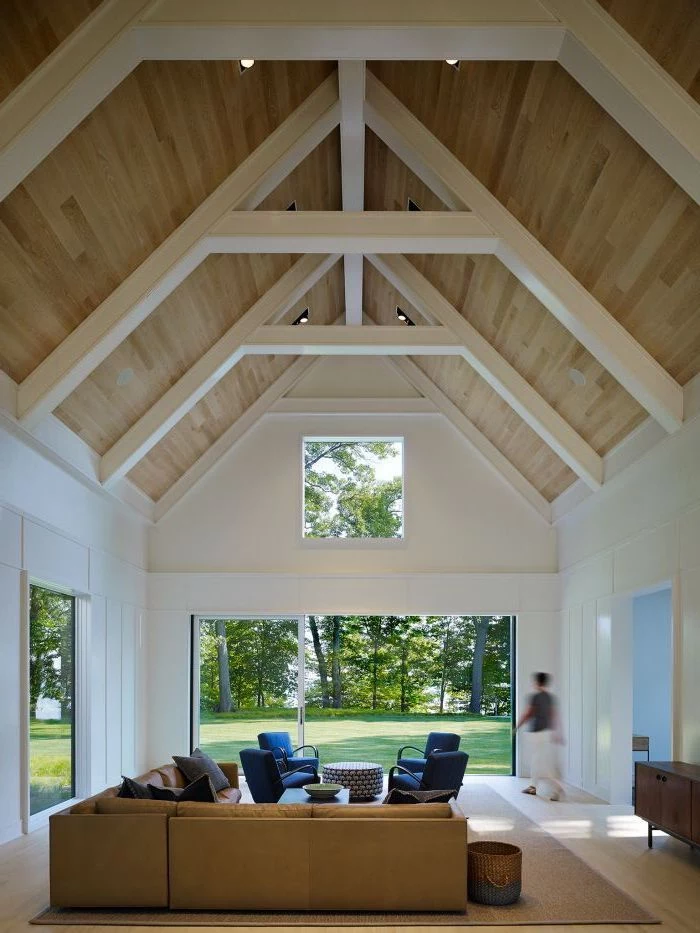
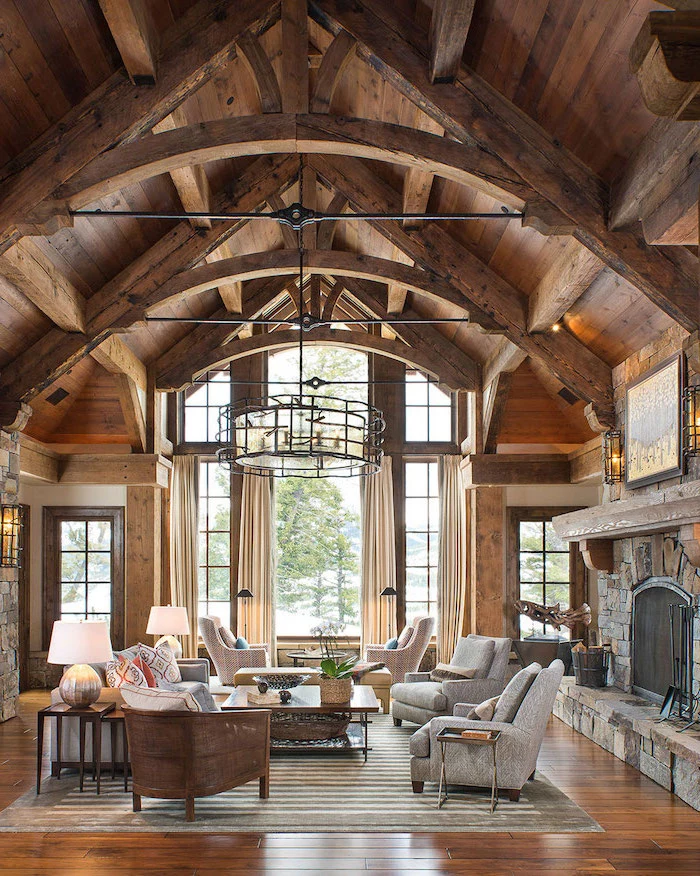
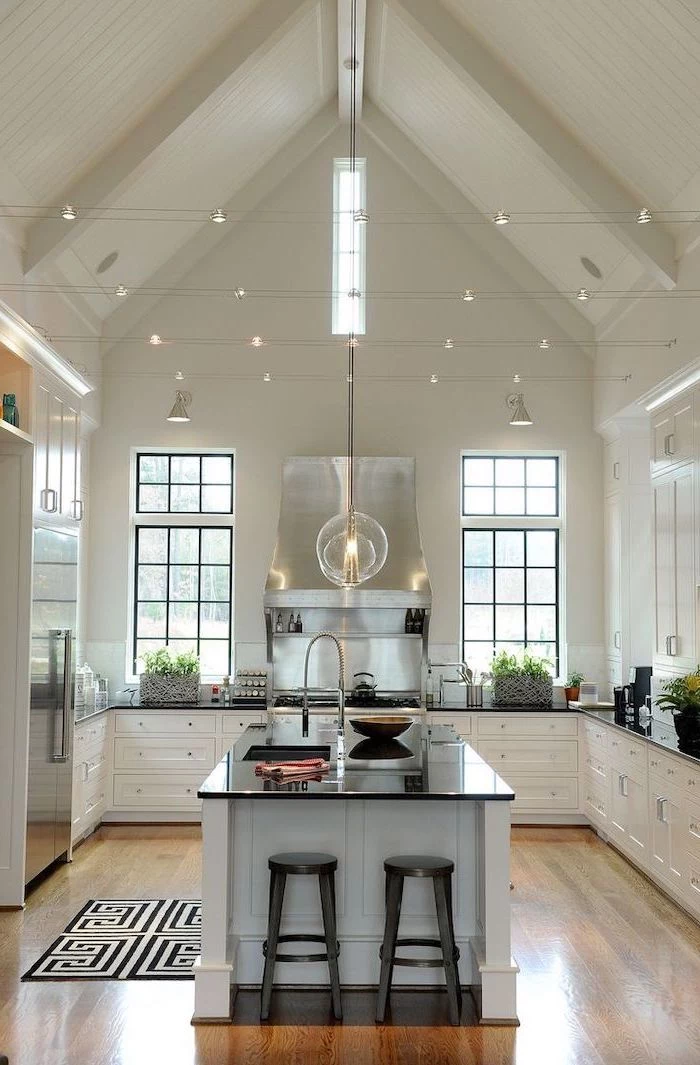
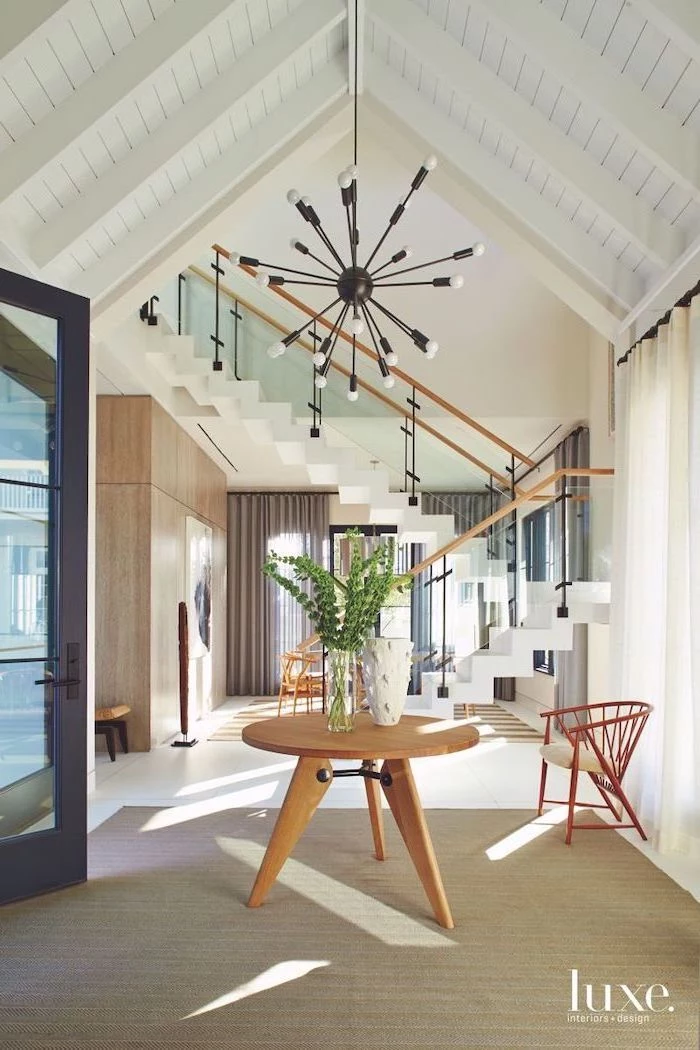
The Ridge Beam Rule: If your contractor’s plan involves a structural ridge beam, you’re on the right track. This large, engineered beam runs along the peak of the roof, carrying the load and allowing the rafters to rest on it. This often eliminates the need for collar ties, giving you that clean, uninterrupted soaring space you’re dreaming of.
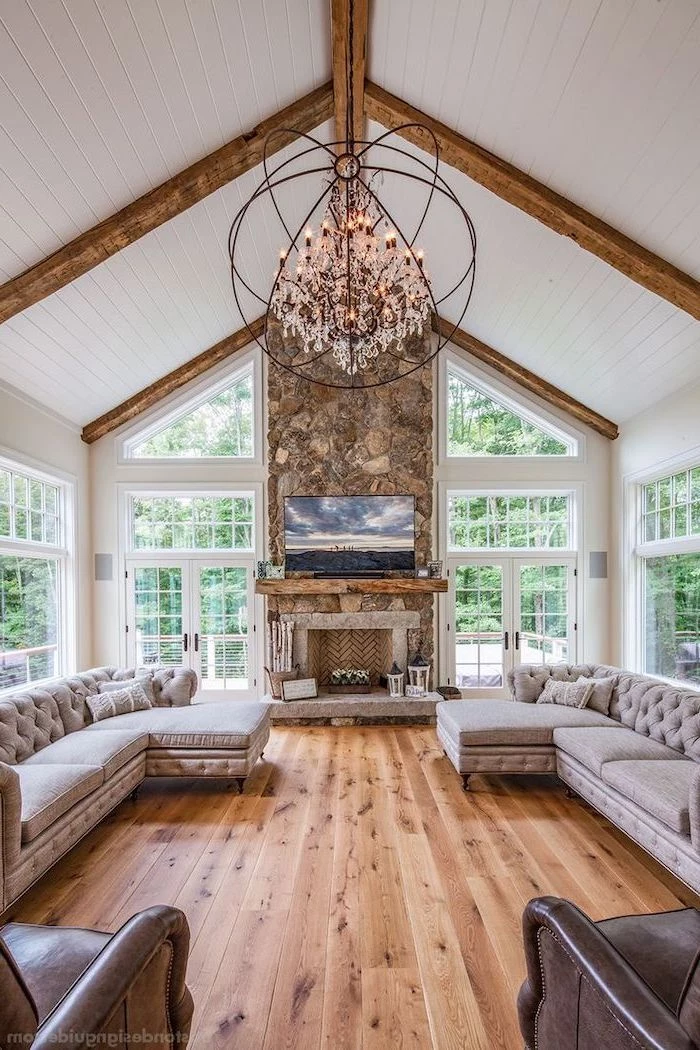
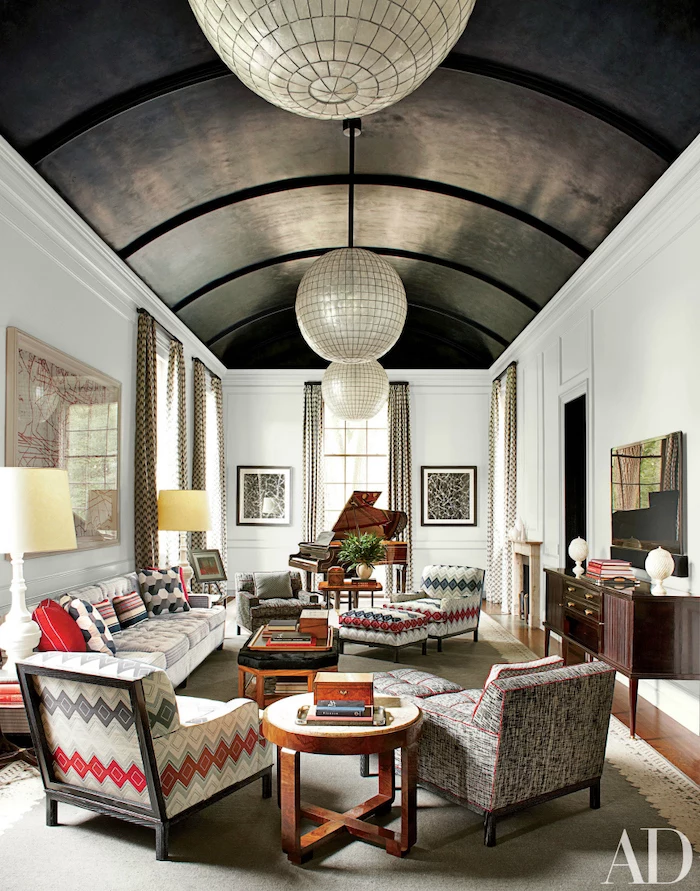
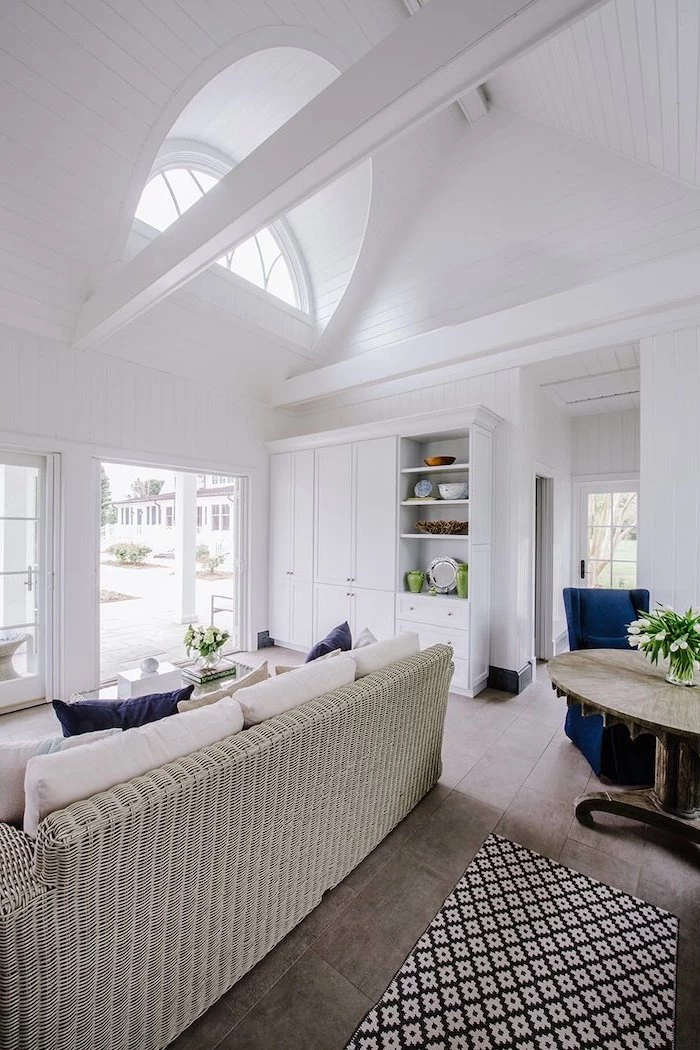
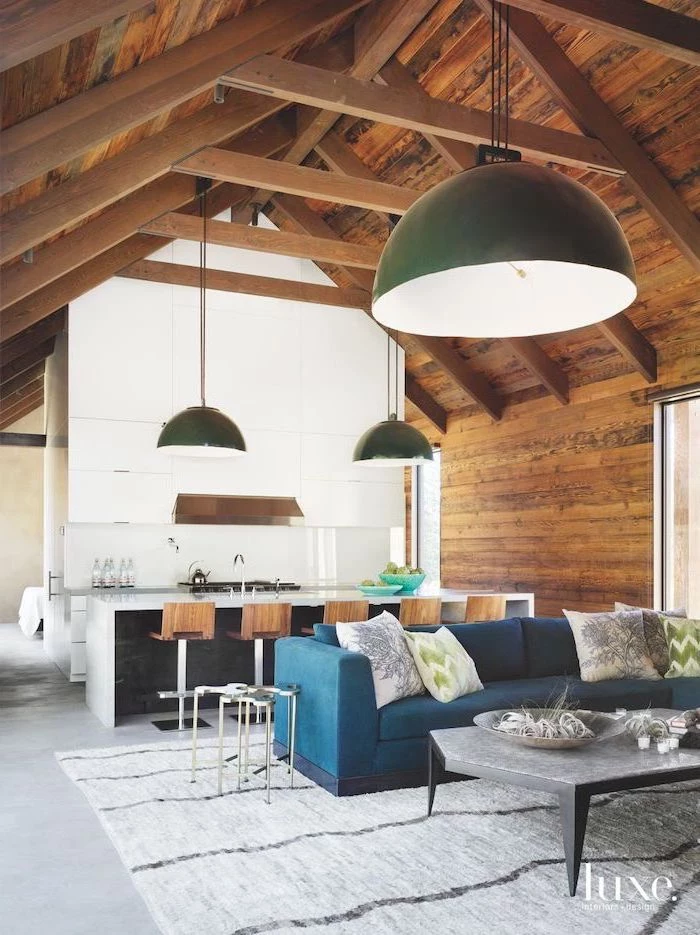
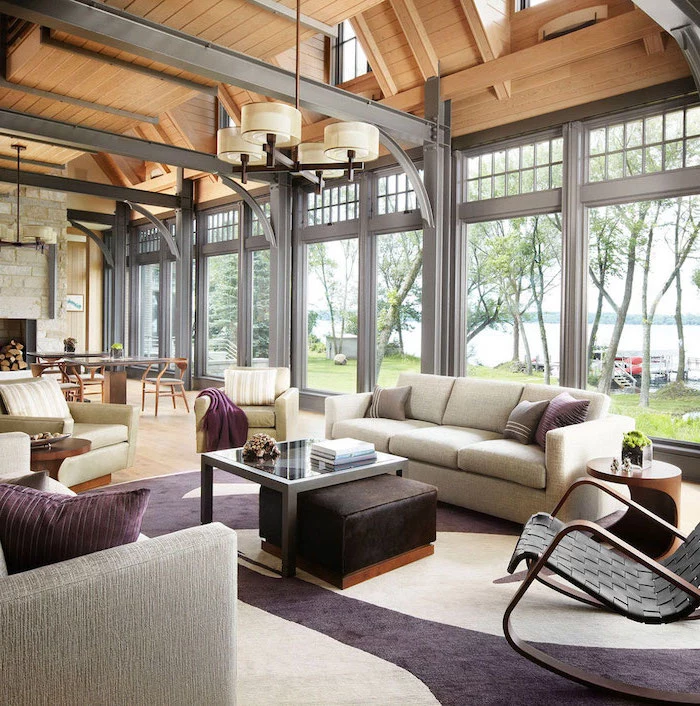
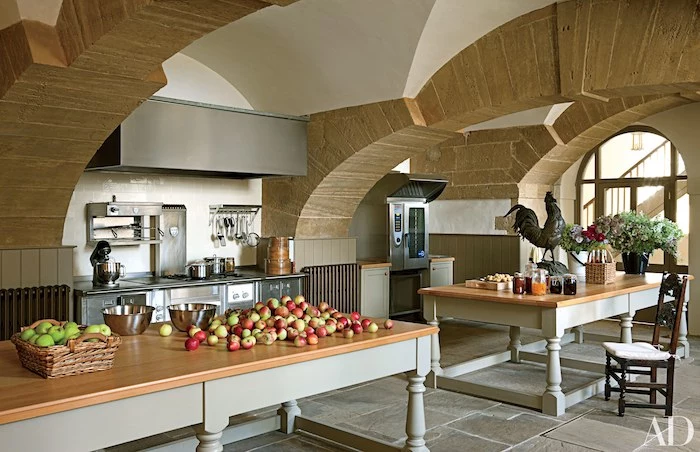
The barrel vault, a continuous arch shape, dates back to ancient Egypt and Mesopotamia and was perfected by the Romans for structures like the Colosseum. Bringing one into your home connects your space to thousands of years of architectural history.
Not all vaults are created equal. The slope and shape dramatically alter a room’s feel.
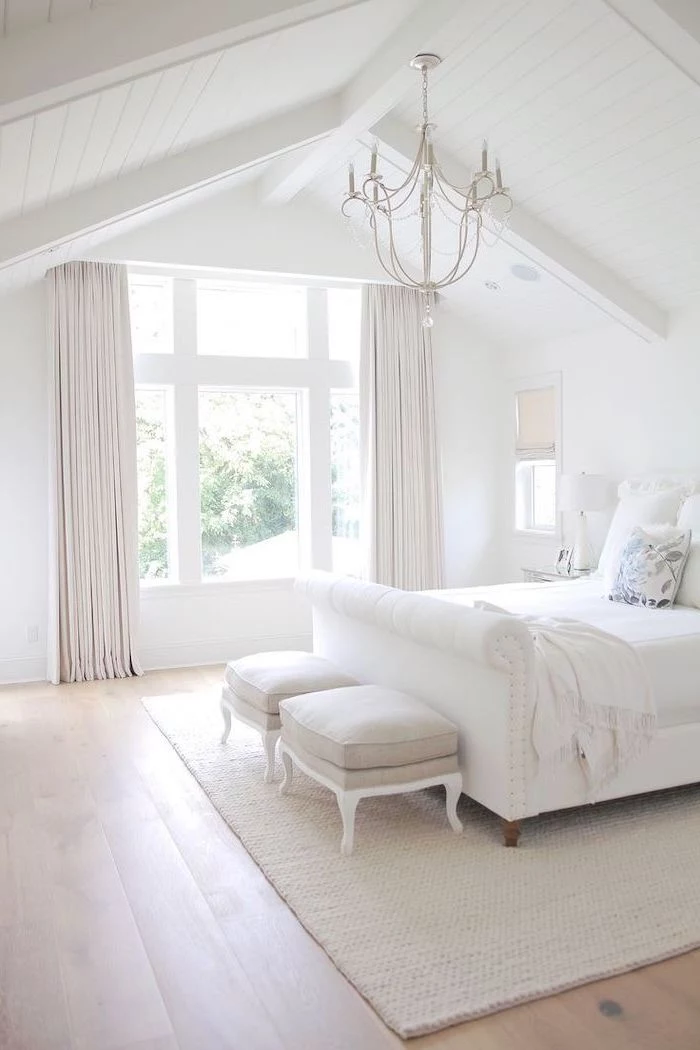
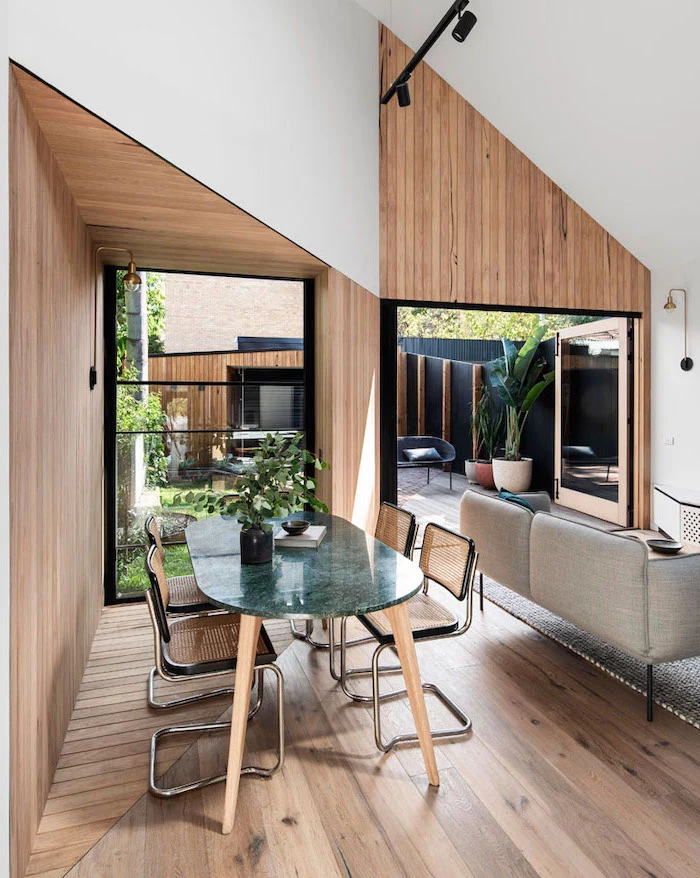
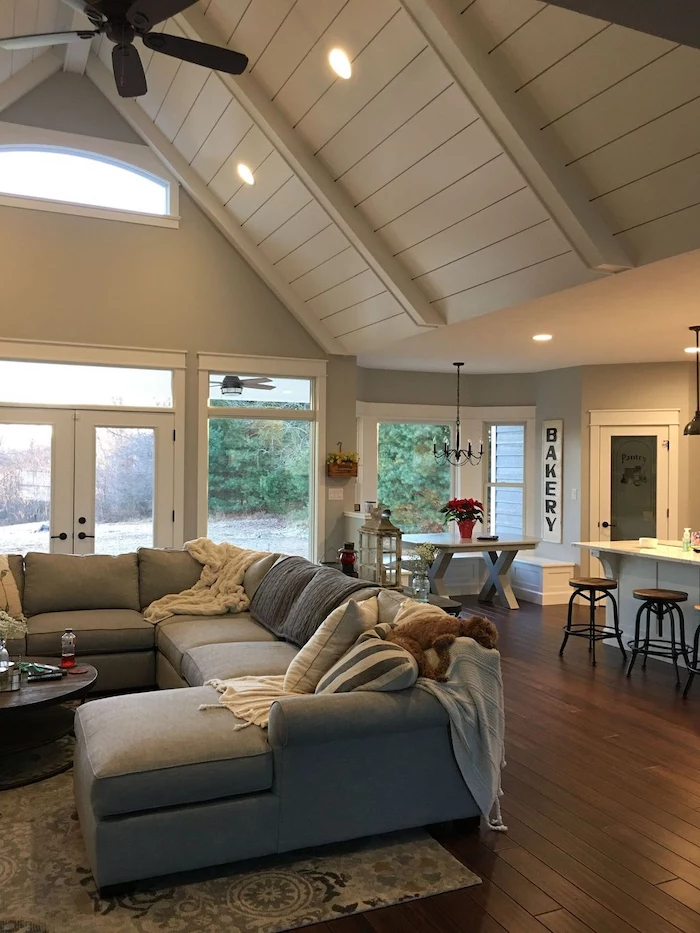
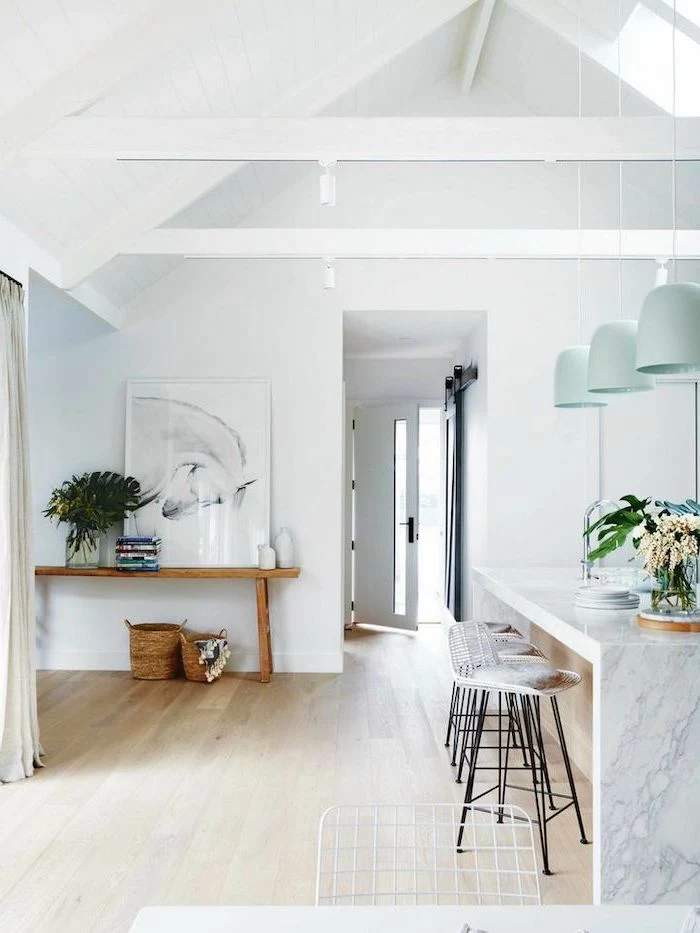
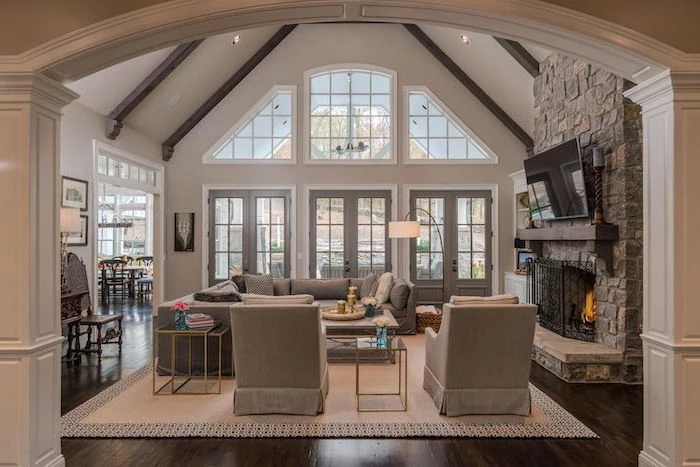
- Cathedral Ceiling: Symmetrical, with two straight sides meeting at a high peak in the center of the room. Classic, formal, and grand.
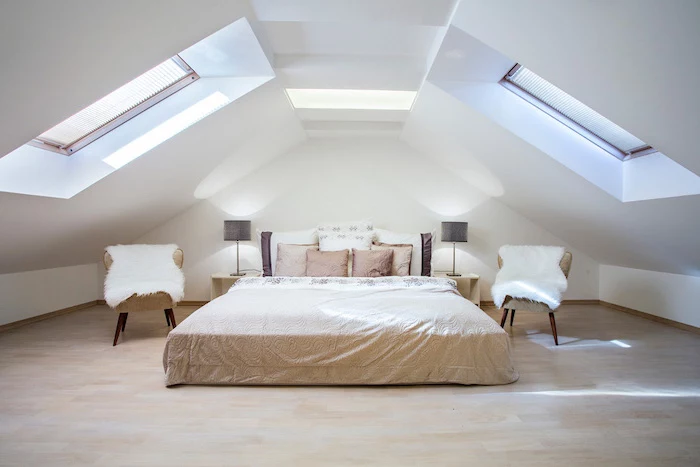
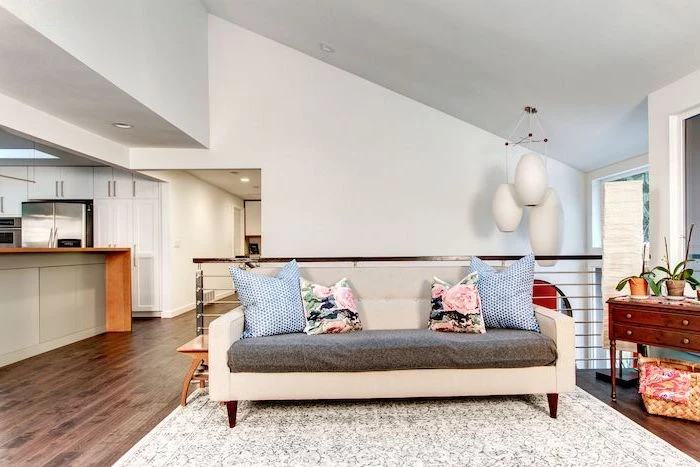
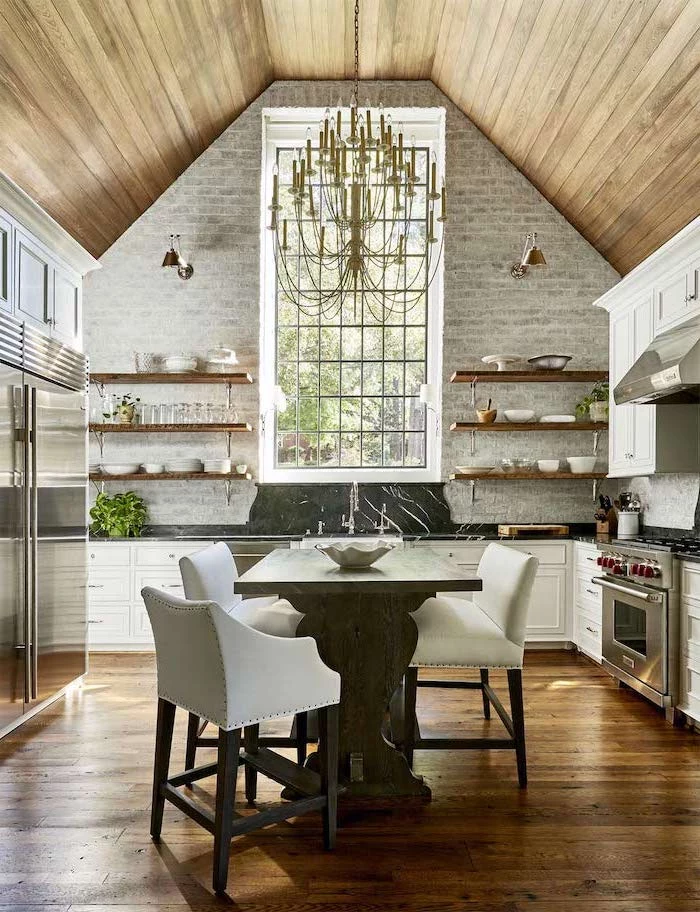
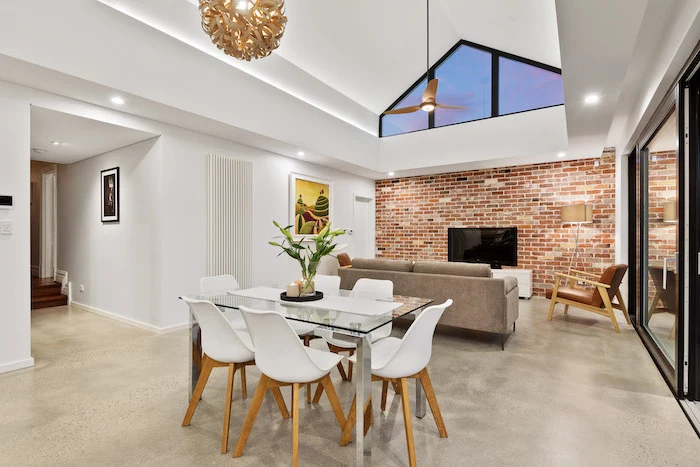
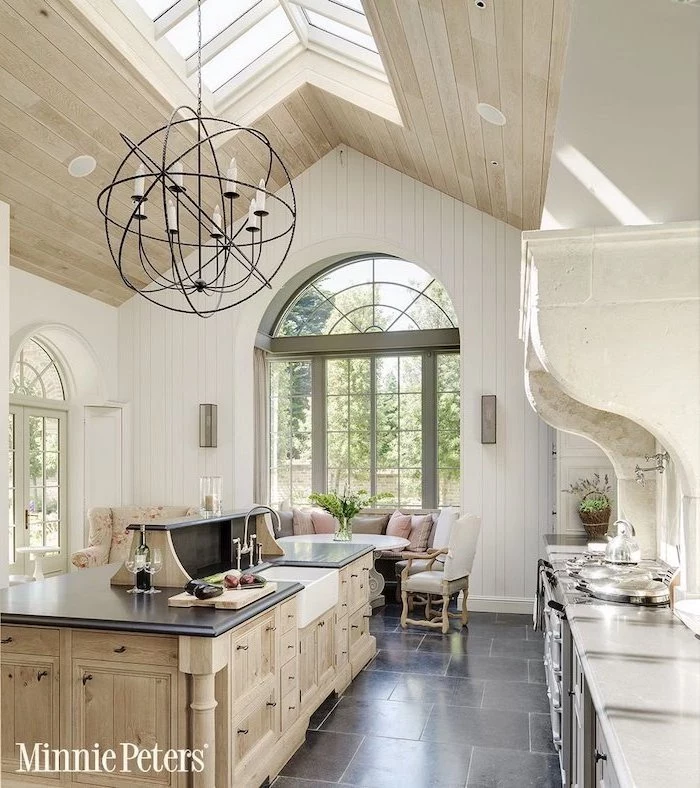
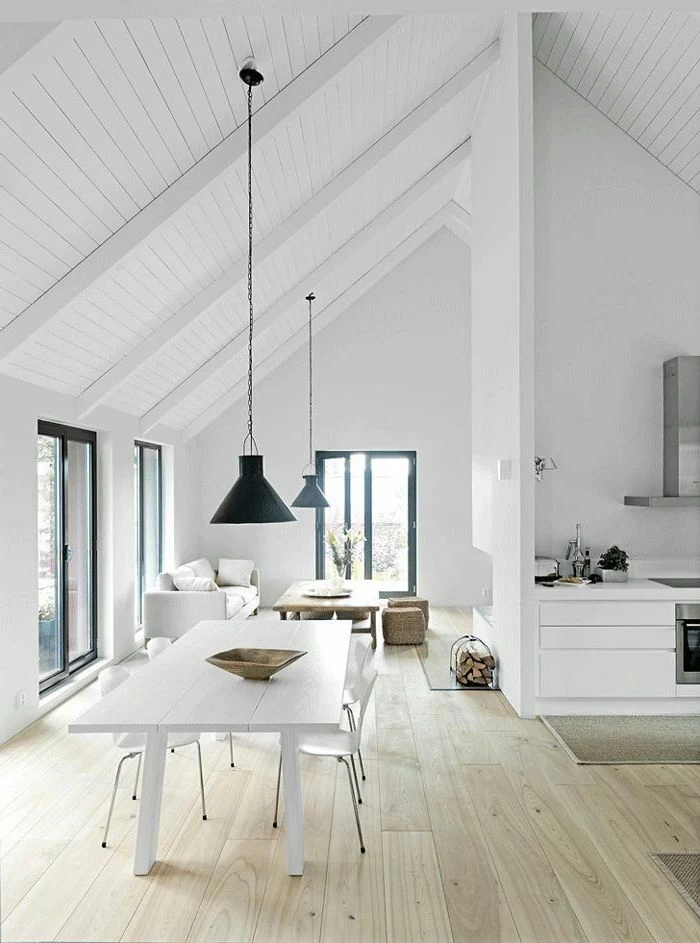
- Shed Ceiling: A single, sloped plane. It’s a modern, asymmetrical look that’s great for adding height and fitting in clerestory windows for extra light.
- Barrel Ceiling: A semi-cylindrical arch. It creates a softer, more intimate feeling than a sharp-angled cathedral ceiling.
Does adding a vaulted ceiling add resale value?
It can, but it’s not guaranteed. A well-engineered, beautifully lit, and properly insulated vaulted ceiling is a major selling point. However, one that causes astronomical heating bills, weird echoes, or shows signs of structural stress can be a red flag for savvy buyers. The quality of execution is what determines the return on investment.
Spray Foam Insulation: Creates a perfect air seal by expanding to fill every crack and crevice. It has a high R-value per inch, crucial for the shallow cavities of a ‘hot roof’ assembly common with vaults. Brands like Icynene are industry leaders.
Fiberglass Batts: A more traditional and budget-friendly option. However, it’s much harder to achieve a perfect air seal, and any gaps can lead to condensation, moisture issues, and heat loss.
For vaulted ceilings, most building scientists strongly recommend closed-cell spray foam for long-term performance.
Sound levels are measured in decibels (dB). A quiet library is about 40 dB. A normal conversation is 60 dB. In a room with a vaulted ceiling and hard surfaces, that conversation can sound louder and create echoes, raising the ambient noise level uncomfortably.
This is why acoustic planning is so important. It’s not just about avoiding an echo; it’s about creating a comfortable, serene soundscape for your daily life.
- It makes the room feel even taller.
- It draws the eye upward to the beautiful architecture.
- It adds a subtle layer of sophistication.
The trick? Paint the walls a slightly darker shade than the ceiling. Even a subtle difference in whites or greys will create a visual lift, enhancing the vault’s impressive height without overwhelming the space.
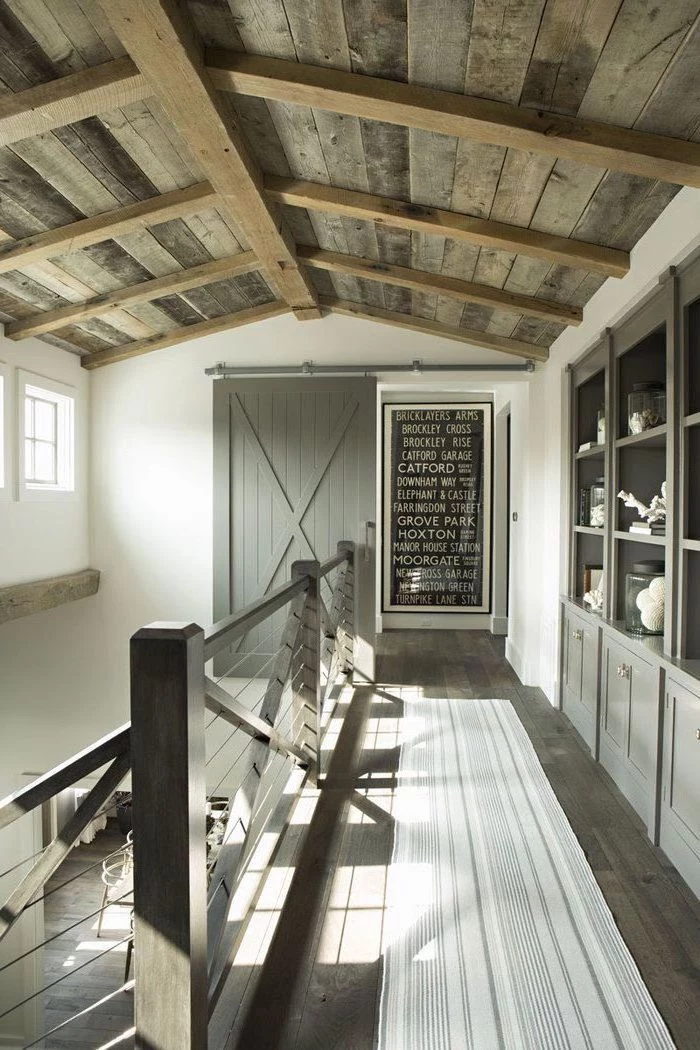
The modern farmhouse trend has made shiplap a go-to for vaulted ceilings. For a clean look, install it horizontally and paint it a bright white. For a more rustic or coastal feel, consider a ‘nickel gap’ installation (leaving a nickel’s width between boards) or using a light, pickled wood finish.
- Engineering Fees: Never skimp. A structural engineer’s report is non-negotiable.
- Insulation Upgrade: High R-value spray foam is more expensive upfront but pays for itself.
- Lighting & Scaffolding: The cost of electricians working at height, plus scaffolding rental, adds up.
- HVAC Modification: Your existing system may need to be rezoned or upgraded to handle the new air volume.
An important consideration: A vaulted ceiling project means your roof structure is fundamentally altered. Before you begin, have a professional roofer inspect the condition of your shingles, underlayment, and flashing. It is far more cost-effective to address any roofing issues while the structure is already being worked on than to fix a leak a few years later.
‘We shape our buildings; thereafter they shape us.’ – Winston Churchill
This is profoundly true for a vaulted space. The added height and light don’t just change a room; they change how you feel within it, fostering a sense of openness, freedom, and inspiration that a standard 8-foot ceiling rarely can.
The windows are just as important as the vault itself. Tall windows that follow the line of the ceiling enhance the verticality and connect the indoor space to the outdoors.
- Gable-end windows: Large, often triangular or trapezoidal windows on the wall at the end of the vault are a classic choice.
- Clerestory windows: A band of windows placed high up on the wall, just below the ceiling line, brings in light while maintaining privacy.
Is it messy and disruptive to add a vault to an existing home?
Yes, there’s no way around it. This is not a weekend project. It involves major demolition of the existing ceiling, significant structural work, and potential relocation of wiring, plumbing, and HVAC lines. Expect a layer of dust over everything and to have the room (and potentially adjacent rooms) out of commission for several weeks.
Standard Glazing: Double-paned with a basic Low-E coating is the minimum for skylights.
Laminated Glass: Features a protective interlayer, similar to a car’s windshield. If the glass breaks, the fragments adhere to the interlayer. This is often a building code requirement for skylights installed high above living spaces.
For safety and peace of mind, laminated glass is the superior choice for any skylight you’ll be living under.