Stained Glass Isn’t Just for Churches Anymore: A Guide for Modern Homes
I’ll never forget a client who came into my studio, circling a piece I was working on. She loved the idea of stained glass but was hesitant. “Isn’t it a bit… old-fashioned for my place?” It’s a question I hear all the time. So many of us picture stained glass and immediately think of historic churches or old, stuffy houses. It’s seen as this beautiful but maybe dated art form.
In this article
- The Magic of Light and Glass
- How It’s Made: Lead vs. Copper Foil
- Bringing Your Vision to Life: The Commissioning Process
- First, Where Do You Even Find an Artist?
- The Step-by-Step Journey of a Custom Piece
- Let’s Talk Money: What Does It Actually Cost?
- Common Pitfalls to Avoid
- 1: Not getting a final drawing to sign off on. A rough sketch is great for ideas, but a scaled, final drawing ensures you both know exactly what’s being built. No surprises. Mistake
- Not Ready for a Big Commission? Start Small.
- Smart Placement: Where It Works Best
- Borrowing from Classic Styles
- Keeping It Beautiful: Care and Maintenance
- Inspiration Gallery
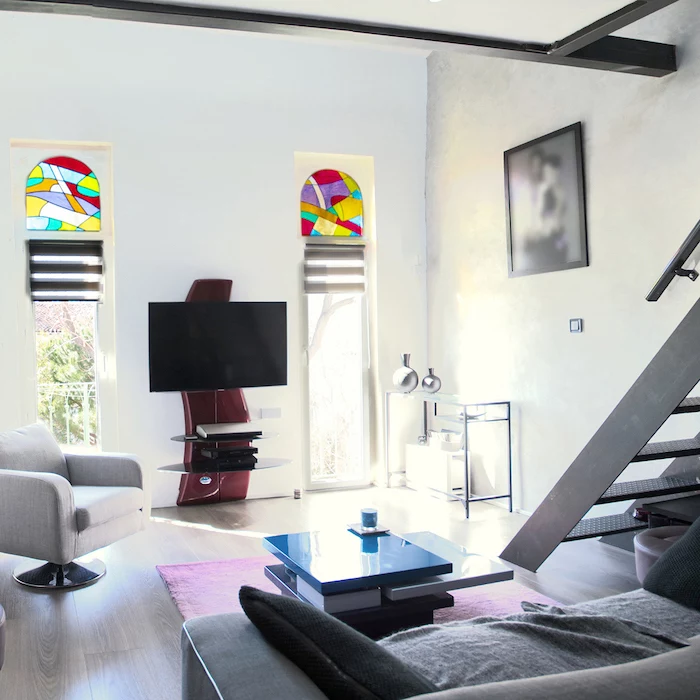
And I get it. But honestly, that view misses the whole point. This craft isn’t about recreating the past; it’s about painting with light. After years at the workbench, surrounded by glass, lead, and solder, I’ve learned that its true magic is in how it can completely transform a room’s atmosphere. A well-designed panel can feel just as right in a minimalist modern home as it does in a century-old building.
So, let’s walk through it all. This is your guide to understanding the materials, the process, and how to make stained glass a vibrant, personal part of your own home, from someone who’s seen it all.
The Magic of Light and Glass
Before you can even think about a design, you have to understand how glass plays with light. It’s way more than just slotting some color into a window frame. You’re literally curating the light that enters your space. Glass artists primarily work with two families of sheet glass, and your choice here will completely change the vibe of a room.
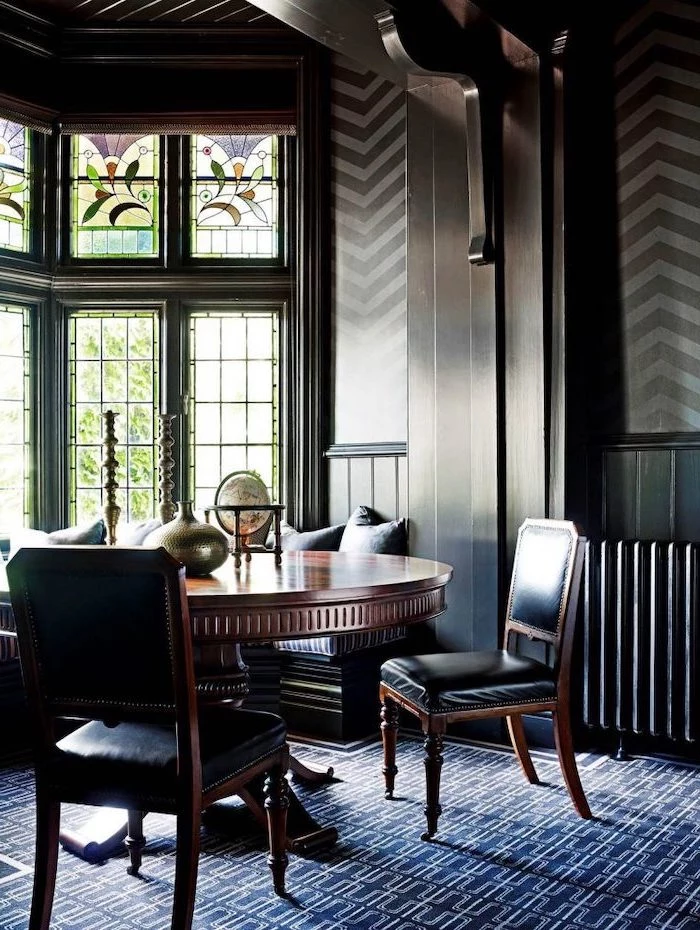
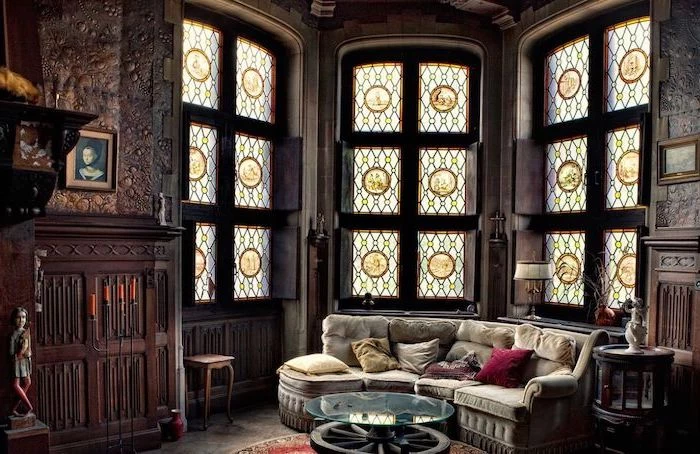
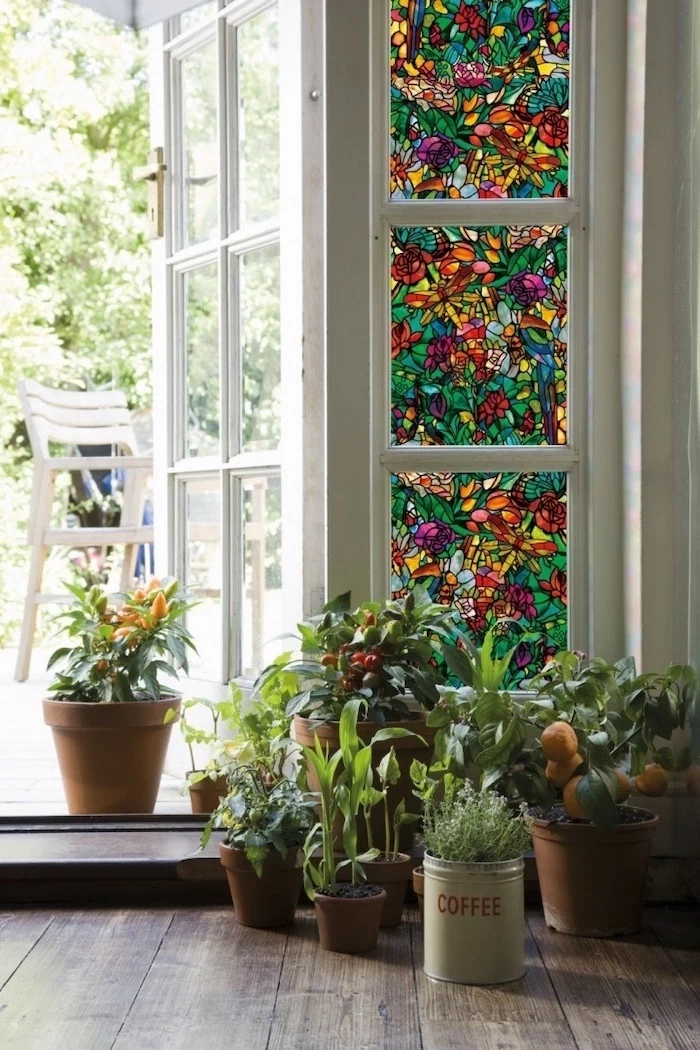
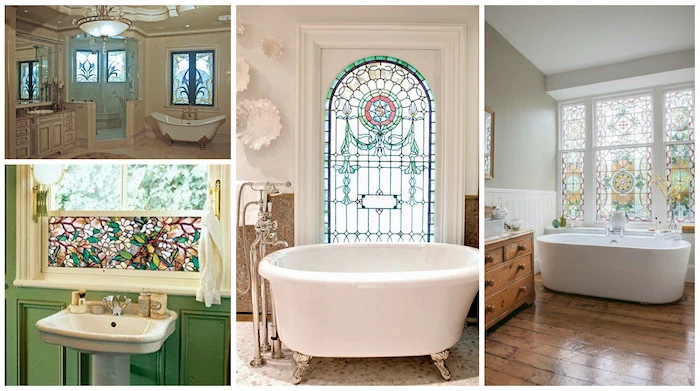
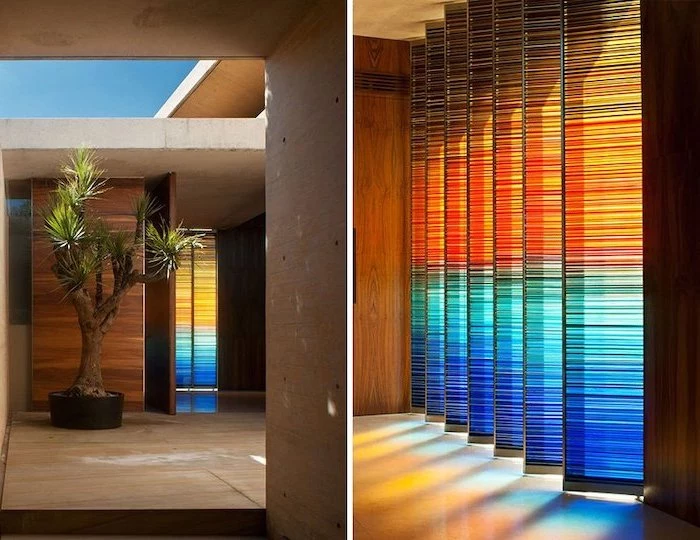
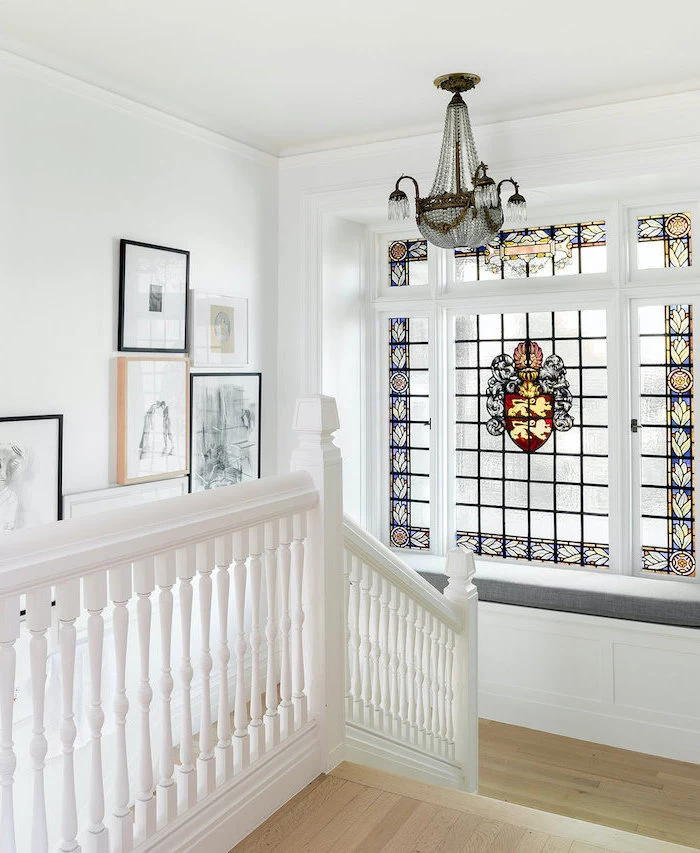
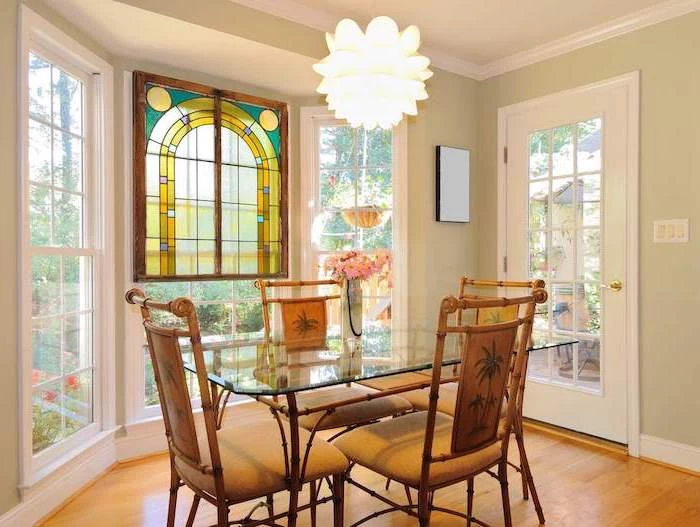
First, you have cathedral glass. This is the transparent, colored stuff. You can see through it, although different textures might distort the view a bit. This is the glass that throws those vivid patches of color across your floor and walls when the sun hits it just right. We use this when the goal is to add brilliant color without making a room feel darker.
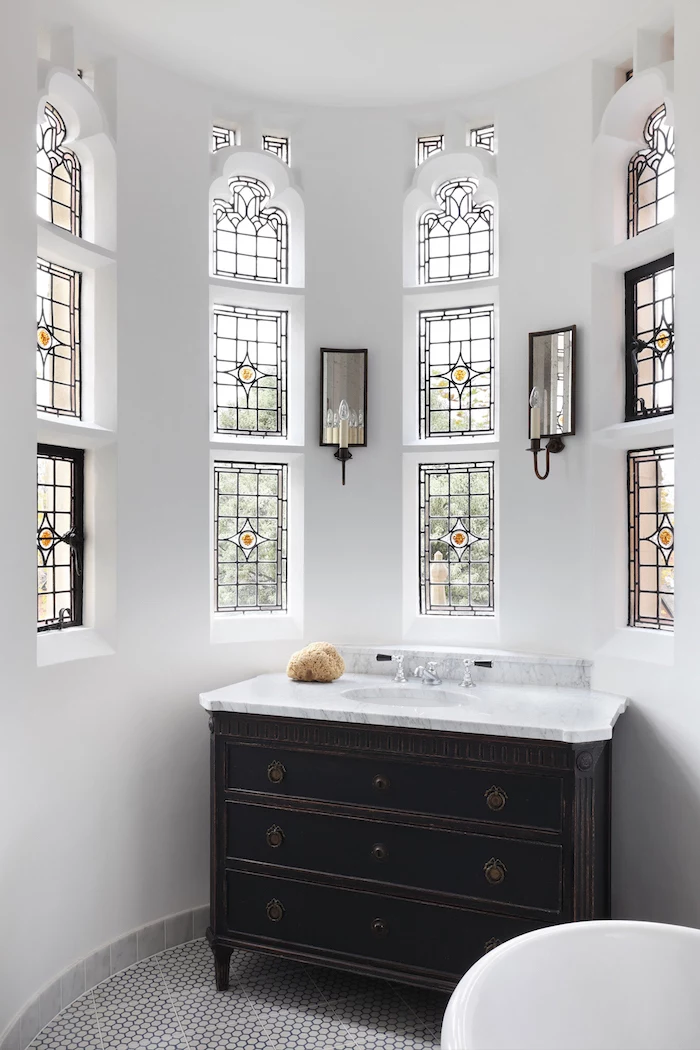
Then there’s opalescent glass, which is milky and opaque. This type of glass was made incredibly popular by American artists who wanted a softer, more painterly effect. It has tiny particles mixed right in that scatter light, so you can’t really see through it. This makes it absolutely perfect for privacy. Instead of casting colored light, the glass itself glows with a soft, even luminosity. It’s a go-to for bathrooms, entryways, and anywhere you want light but not a clear view.
By the way, most interesting pieces use a mix of both. An artist might use opalescent glass for the petals of a flower to give them a soft, solid feel, but use a streaky cathedral glass for the sky behind it to let more light pour in.
It’s All About Texture
The surface of the glass is just as important as its color. Texture is what makes light dance. When I’m picking glass for a project, I always hold it up to a window to see what it does—it’s a crucial gut check.
- Smooth Glass: Gives you the purest color and the clearest view. Simple and clean.
- Waterglass: This one has a gentle, flowing ripple that makes light look like it’s shimmering on water. It’s gorgeous.
- Hammered Glass: Covered in small, round divots, this texture shatters light into thousands of tiny, sparkling points.
- Seedy Glass: This glass has tiny air bubbles trapped inside, which catch the light and create a vintage, effervescent look.
Quick tip: Go to a window in your home right now and hold up a colored glass bottle or jar. See how the light changes color and projects onto the surface behind it? That’s the magic we’re talking about. Now imagine an entire panel designed to do that intentionally.
How It’s Made: Lead vs. Copper Foil
Every stained glass panel is basically a puzzle held together by metal. The two main techniques, lead came and copper foil, produce very different looks. The right choice really depends on your design, the panel’s size, and where it’s going to live.
The traditional method uses lead came. This is the old-school technique you see in historic buildings. The came is a long, H-shaped strip of lead. The artist cuts the glass to size, slots the edges into the channel of the ‘H’, and solders the joints where the lead lines meet. The result is a panel with strong, bold lines that are a core part of the design. It’s fantastic for geometric patterns and larger, more graphic compositions. Once it’s assembled, a special putty is forced into all the gaps, which makes the panel rigid and weatherproof. This is why it’s the standard for exterior windows.
The other option is the copper foil method, which is a more modern invention often associated with those famous, intricate lamps. Instead of lead channels, the edge of every single piece of glass is wrapped in an adhesive copper tape. The pieces are then arranged, and the artist melts solder over the copper seams to join everything together. This technique allows for incredible detail—delicate curves, tiny pieces, and flowing, organic lines that would be impossible with lead. A copper foil panel isn’t as rigid on its own, so larger pieces often need a hidden metal frame or internal bars to keep them from sagging over time. With this method, the quality of the soldering is everything; a smooth, solid solder bead is what gives the piece its strength.
So, what’s the takeaway for a modern home? It really comes down to the look you want. Are you after the bold, architectural quality of lead lines, or the delicate, detailed precision of copper foil?
Bringing Your Vision to Life: The Commissioning Process
Getting a custom piece is an amazing experience, but it can feel a little mysterious if you’ve never done it before. Here’s how it usually works and what you can do to make it go smoothly.
First, Where Do You Even Find an Artist?
This is often the first hurdle. You say “find a local artist,” but where? Here are a few solid places to start:
- Professional Organizations: The Stained Glass Association of America (SGAA) has a member directory on their website. It’s a great way to find vetted professionals in your area.
- Online Marketplaces: Search for “custom stained glass [your city]” on Etsy. Many artists who do large commissions also sell smaller items there and are happy to chat about bigger projects.
- Local Art Shows: Visit juried art and craft fairs. You get to see their work in person and talk to the artist directly, which is the best way to see if you vibe with their style.
The Step-by-Step Journey of a Custom Piece
Once you find an artist you like, the process generally follows a clear path so there are no surprises.
- Consultation: This is the initial chat where you discuss your ideas, the location for the piece, your budget, and the overall style of your home. You should bring photos of the space, rough measurements, and any inspiration images you have (they don’t have to be of stained glass!).
- Sketch & Quote: The artist will then work up some initial design concepts and provide a quote. This is the creative back-and-forth where you refine the design together.
- Final Drawing & Glass Selection: Once you’ve settled on a design, you’ll get a full-scale, final drawing to approve. You’ll also look at actual glass samples to pick out the colors and textures. This is my favorite part!
- Fabrication: Now the artist gets to work. This is the longest part of the process, involving hours of precise cutting, grinding, foiling or leading, and soldering.
- Installation: The final step! Depending on the project, the artist may install it themselves or coordinate with a contractor, especially for complex jobs like entryways.
A heads up on timing: a small, simple panel might take 3-4 weeks from design approval to completion. A large, complex window could easily take 3-6 months. Be sure to ask about the artist’s current schedule.
Let’s Talk Money: What Does It Actually Cost?
Being open about your budget is key. Custom stained glass is a skilled craft, and the price reflects the hours of labor, material costs, and pure artistry. Prices can range anywhere from $150 to over $500 per square foot. To make that feel real, a typical entryway transom window, say 2 feet by 4 feet (8 sq ft) with a moderately complex geometric design, might land somewhere in the $1,800 to $4,000 range, depending heavily on the glass you choose and the construction method.
Common Pitfalls to Avoid
From my experience, a couple of small things can prevent major headaches down the road.
- Mistake
1: Not getting a final drawing to sign off on.
A rough sketch is great for ideas, but a scaled, final drawing ensures you both know exactly what’s being built. No surprises. - Mistake
2: Not discussing installation costs upfront.
The price for the panel and the price for installing it are often two different things. Make sure you’re clear on whether installation is included in the quote or if it’s a separate cost.
Not Ready for a Big Commission? Start Small.
If a big custom project feels like too much, you don’t have to miss out. There are tons of talented artists making beautiful, pre-made hanging panels. Think of it as buying a painting for your window. You can find stunning pieces on places like Etsy or at local art markets, often for a few hundred dollars. It’s a fantastic way to dip your toe in the water and bring a piece of handcrafted art into your home without the commitment of a full installation.
Smart Placement: Where It Works Best
The location of your panel is everything. It dictates the design, the glass type, and the installation.
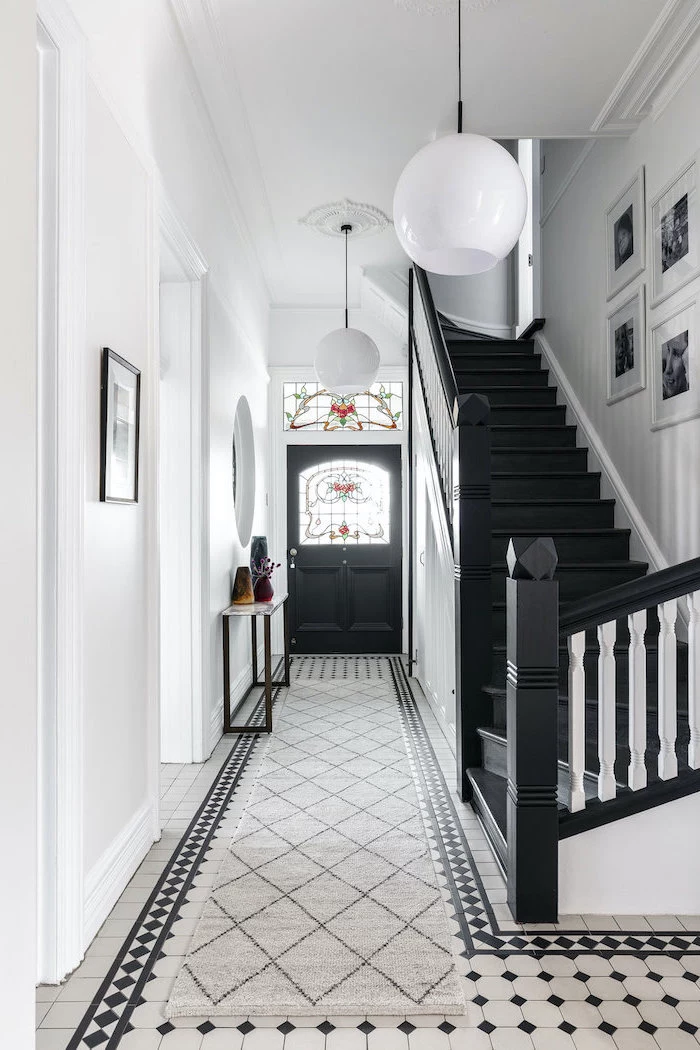
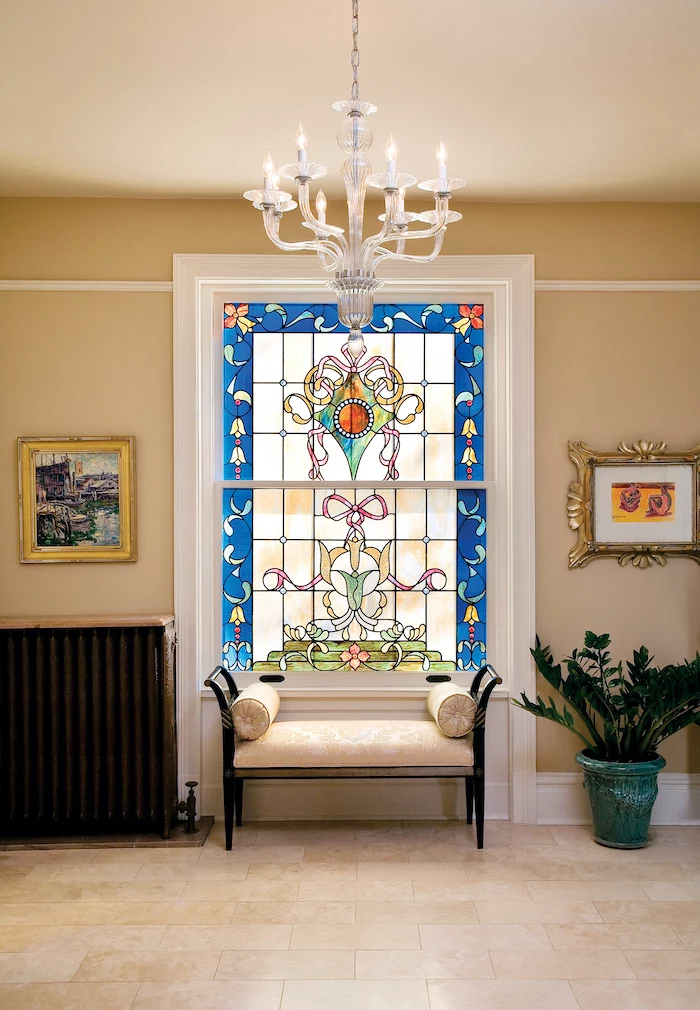
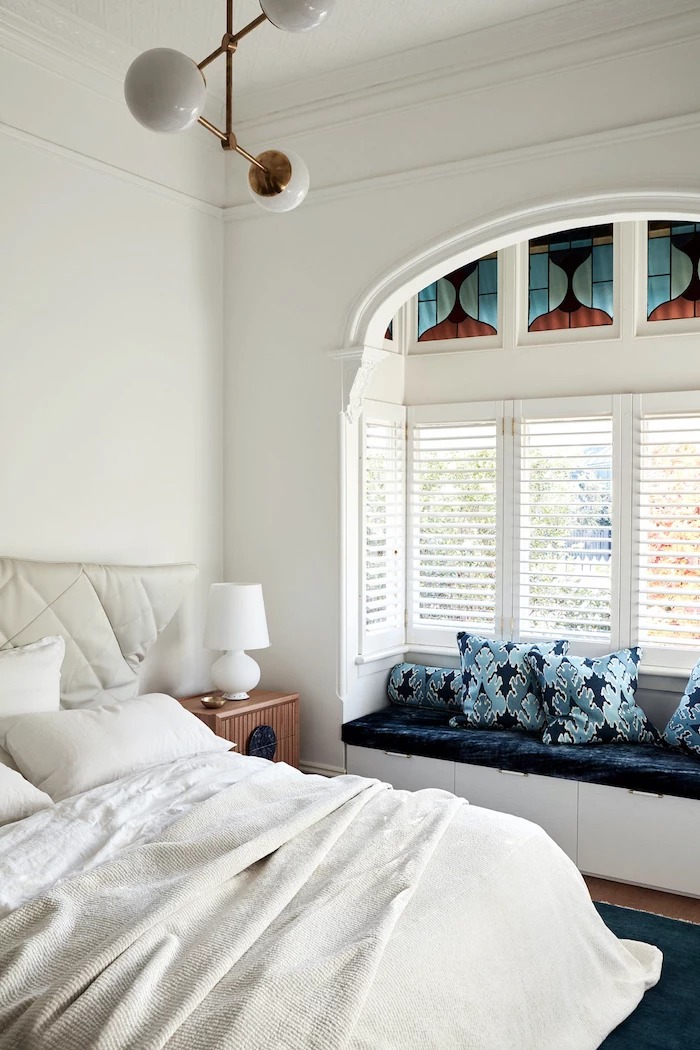
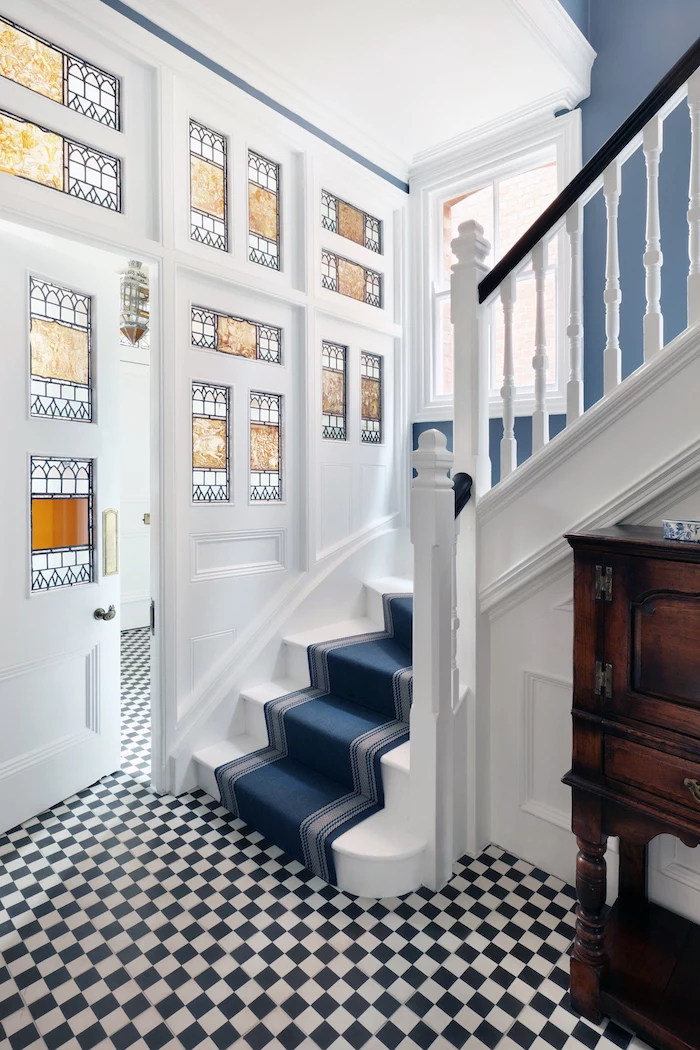
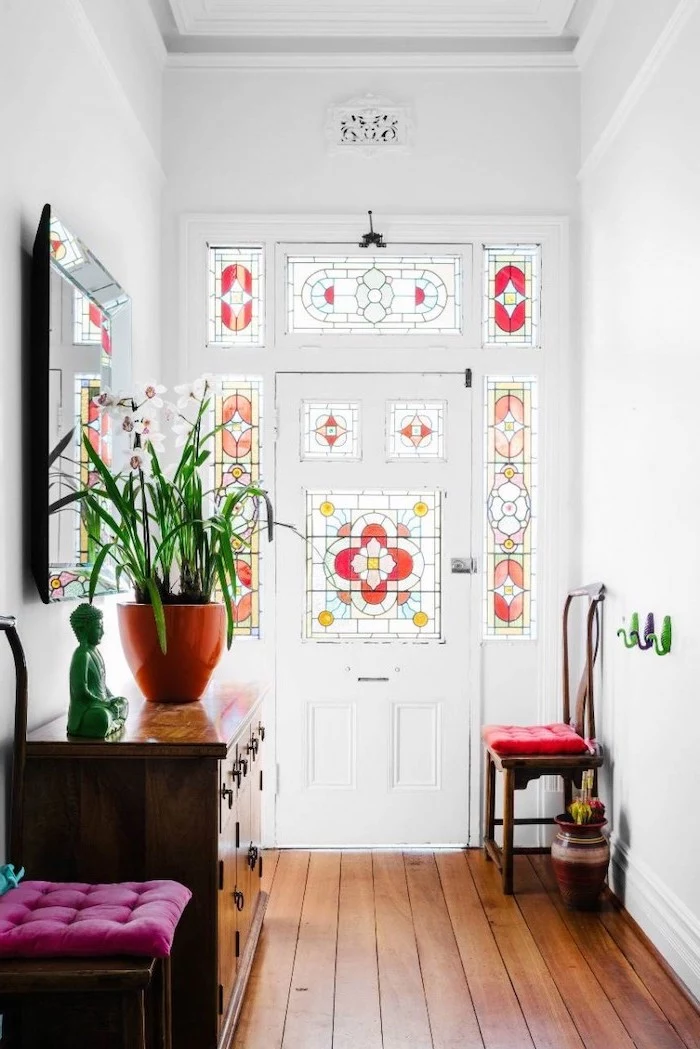
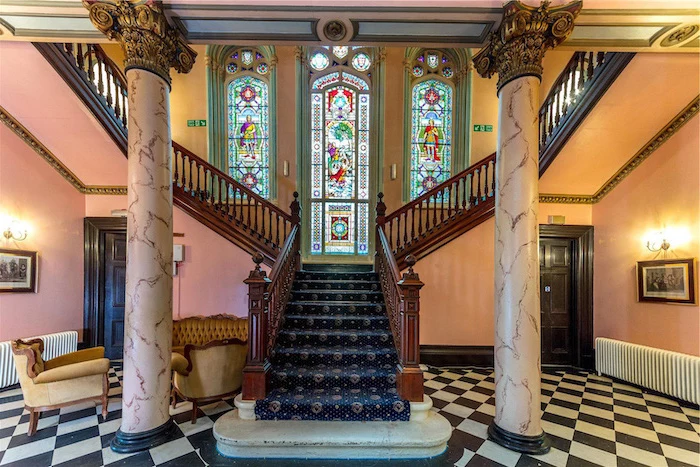
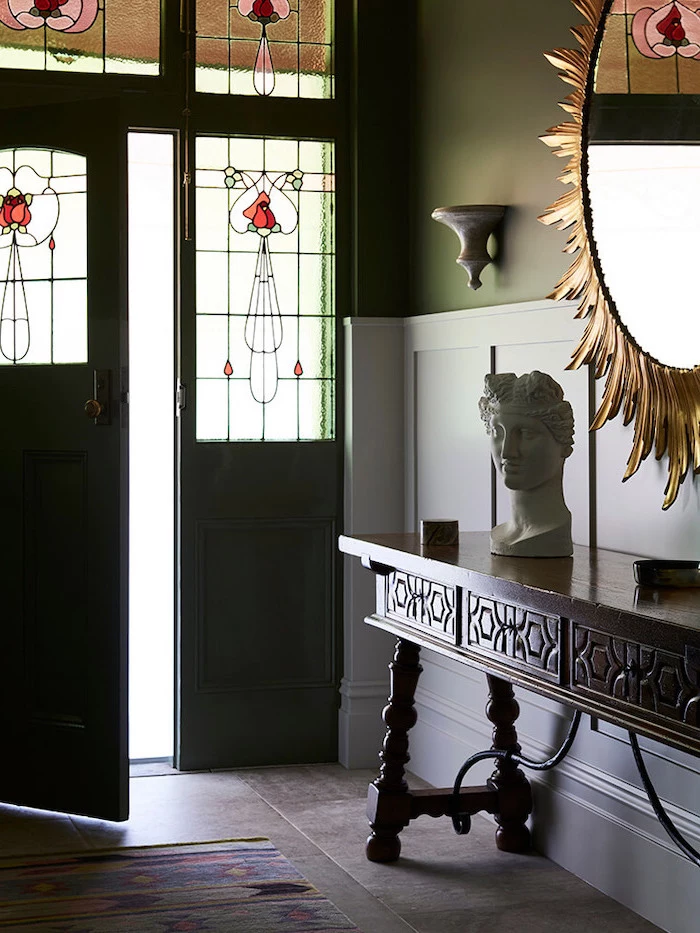
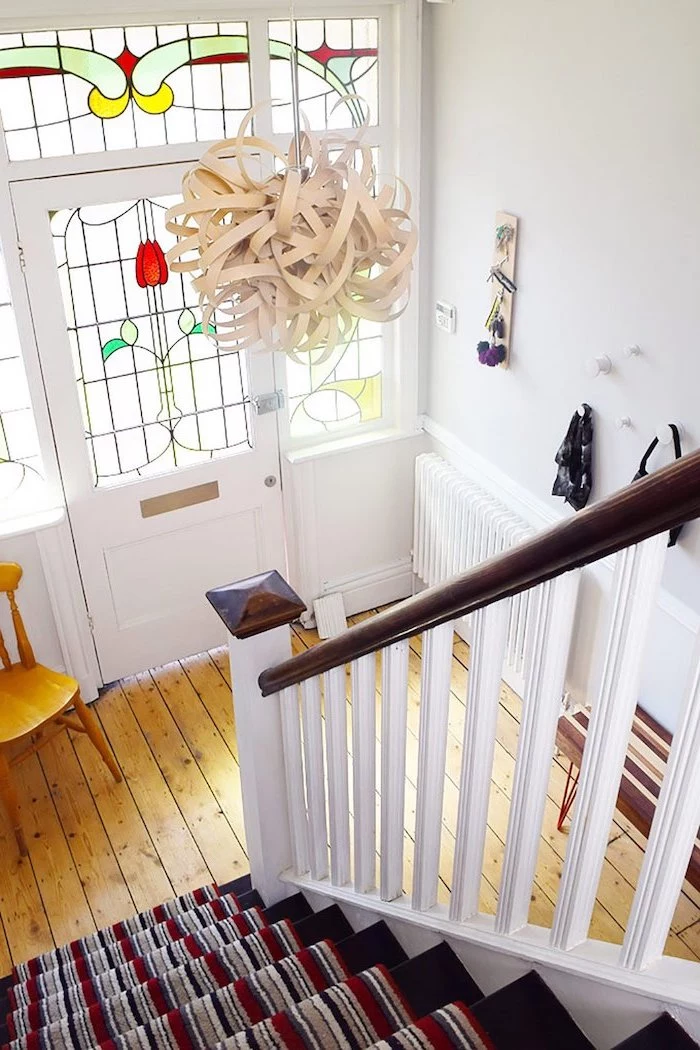
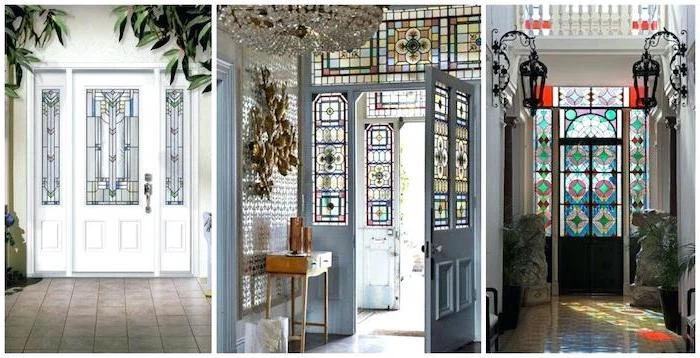
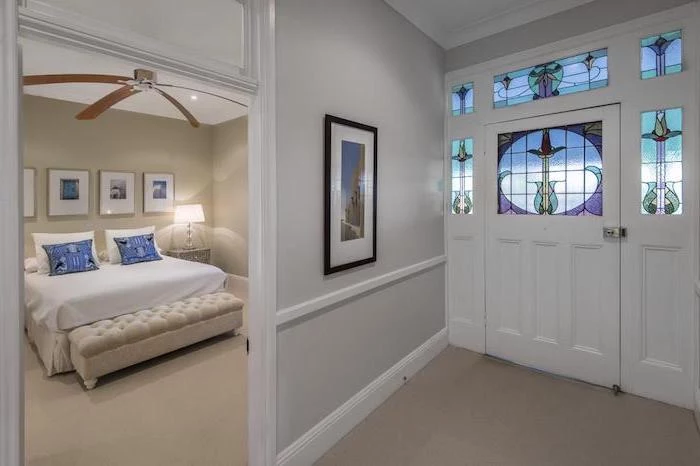
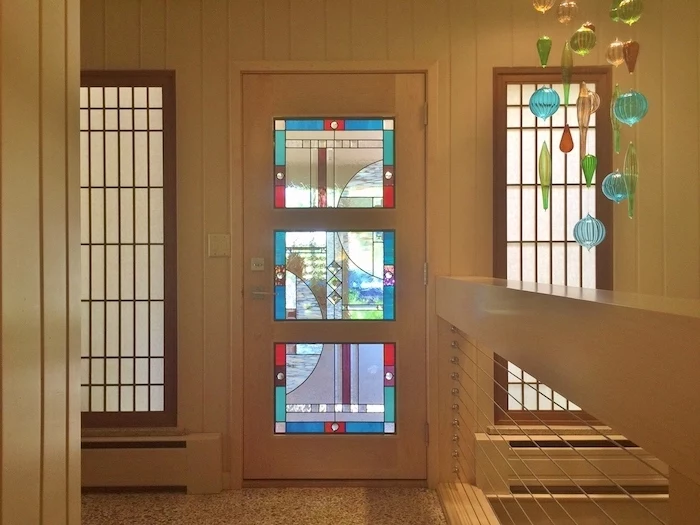
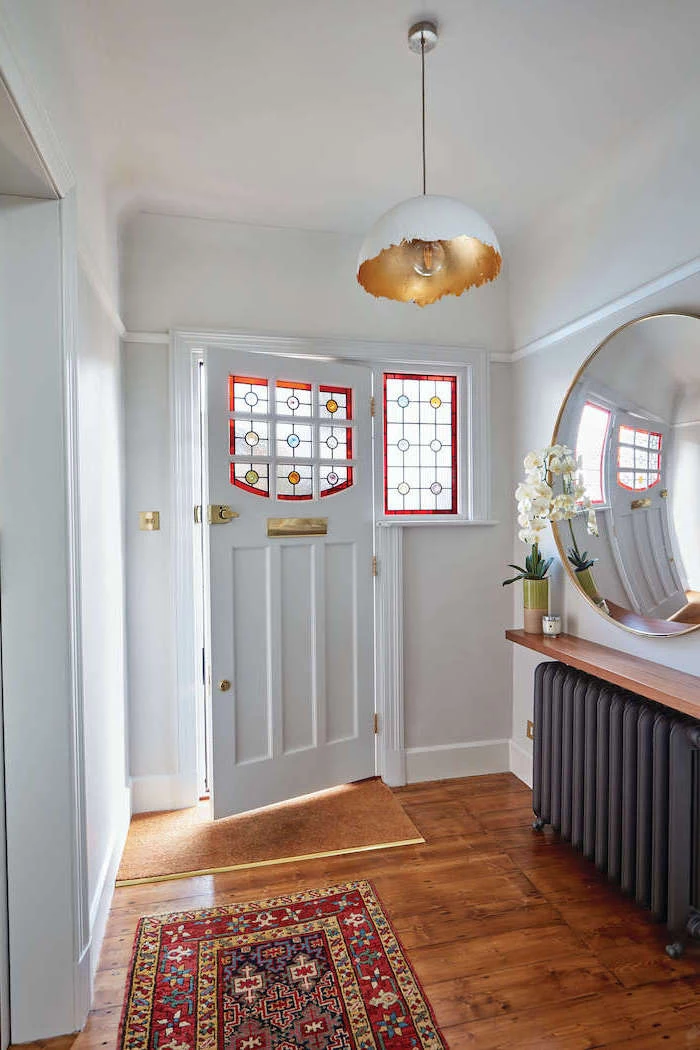
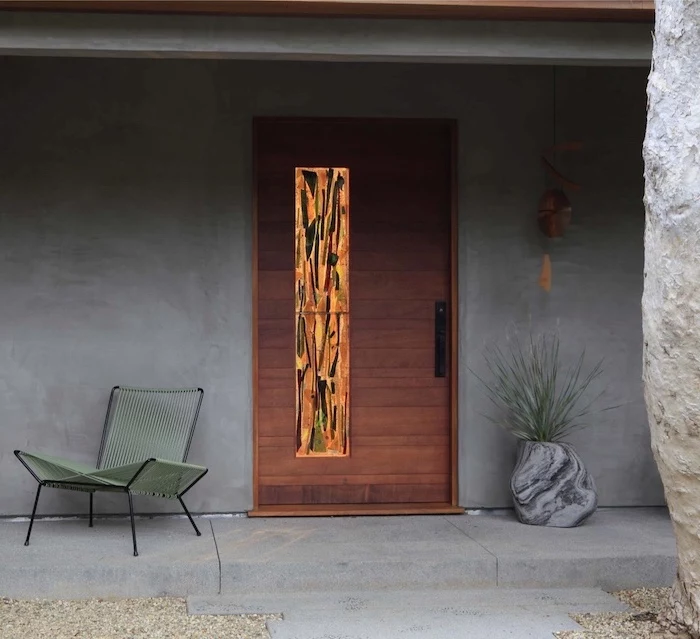
Entryways are a classic for a reason. An insert in your front door, sidelights, or a transom window above the door adds a deeply personal touch. A simple, abstract geometric design can look incredibly sharp and modern. A quick pro tip: for an exterior door, the panel MUST be protected. We always have it sealed inside an insulated glass unit (IGU) with tempered safety glass on both sides. This protects the art, provides insulation, and meets building codes.
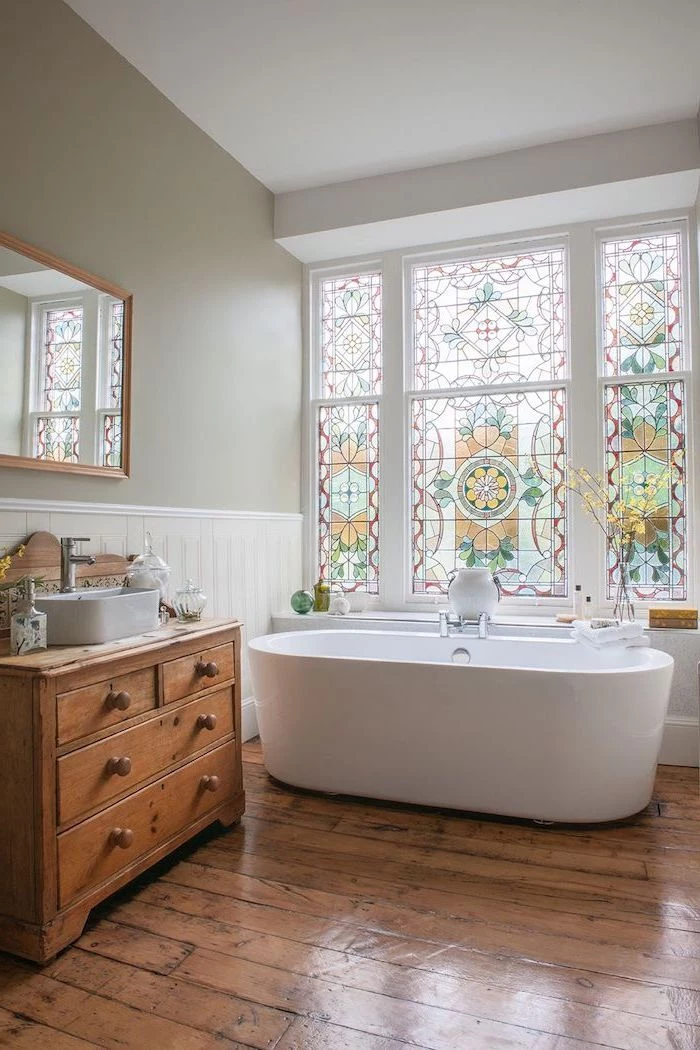
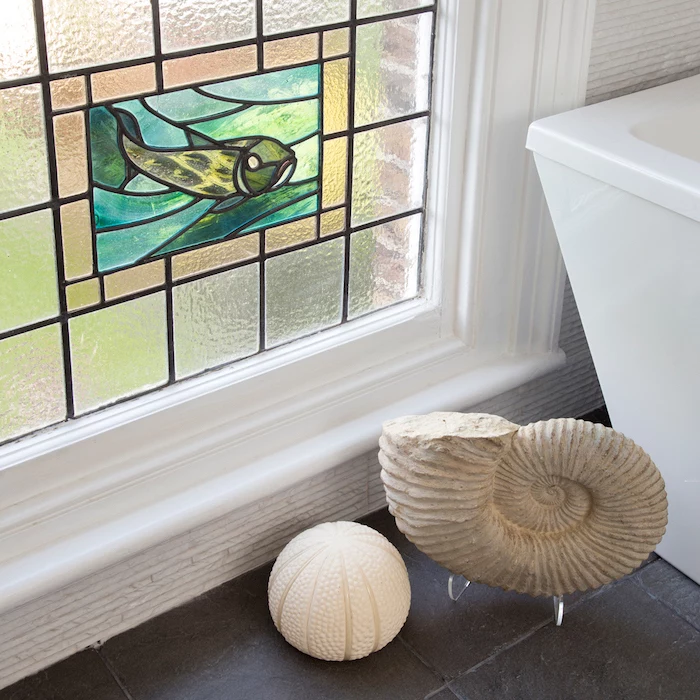
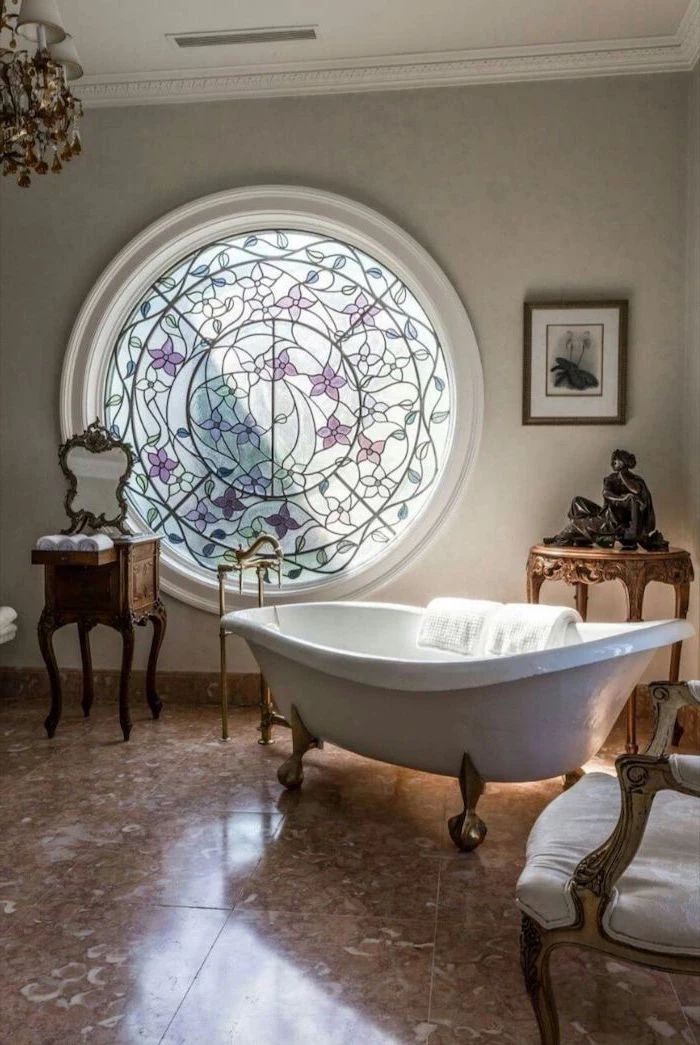
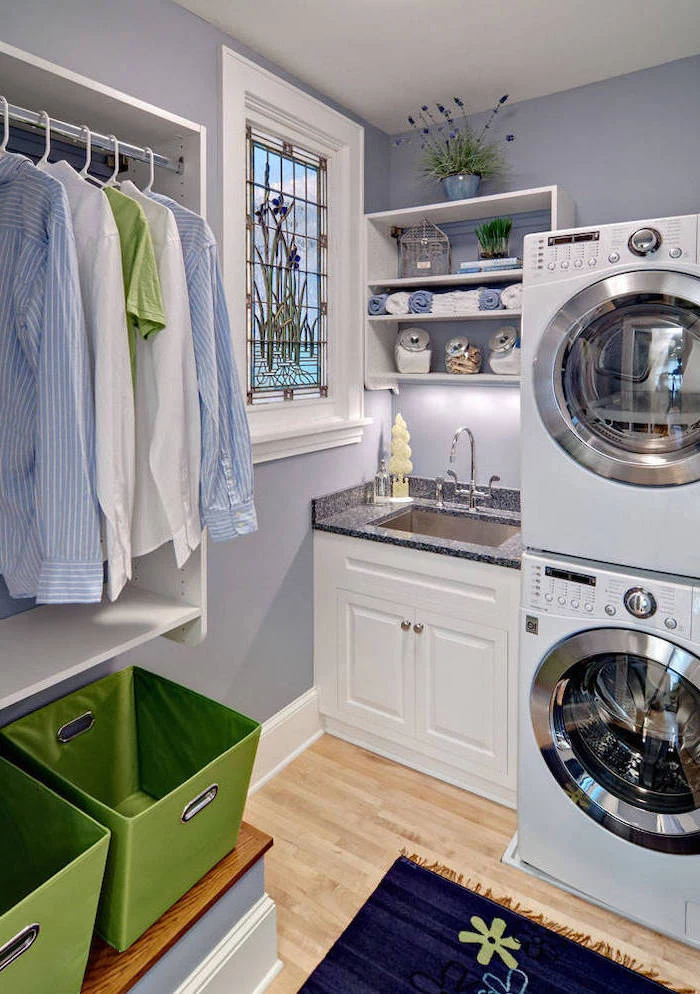
Bathrooms are probably the most practical application. You need privacy but want light, right? Heavily textured or opalescent glass is the perfect answer. It floods the room with soft, diffused light while completely obscuring the view. But be careful: building codes for wet locations are very strict. Any glass near a tub or in a shower has to be safety glass. Again, this means sealing the panel inside a code-compliant IGU. To check your local rules, a good starting point is to Google “[Your City] building code fenestration” or “safety glazing requirements.”
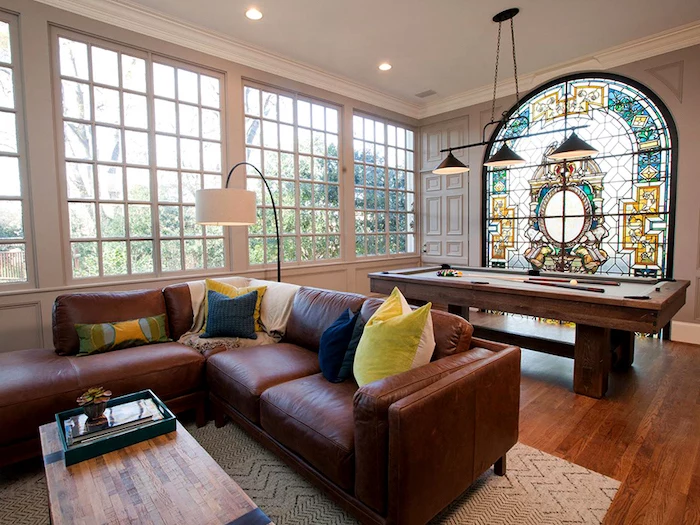
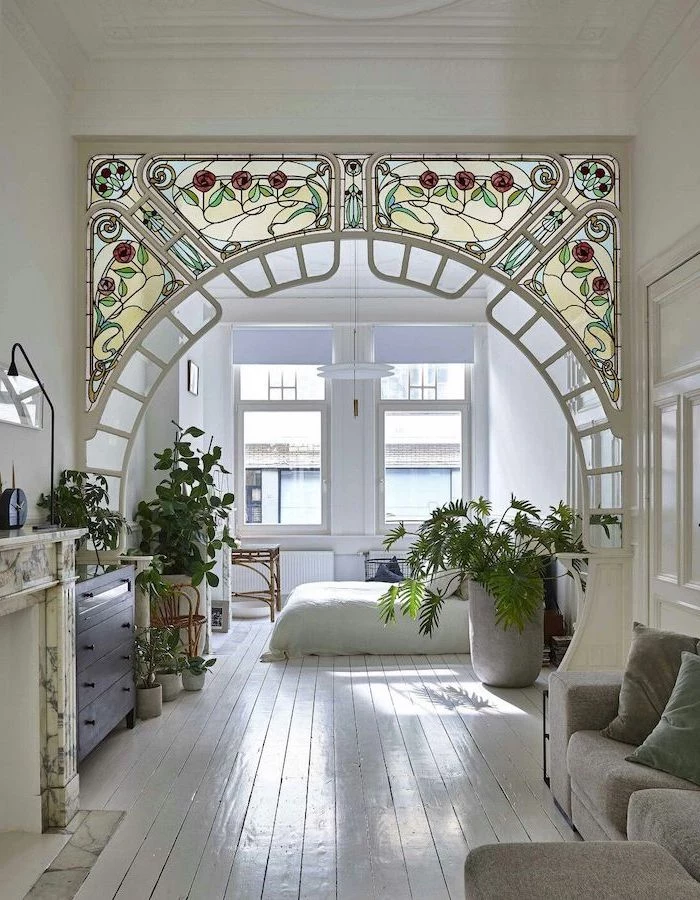
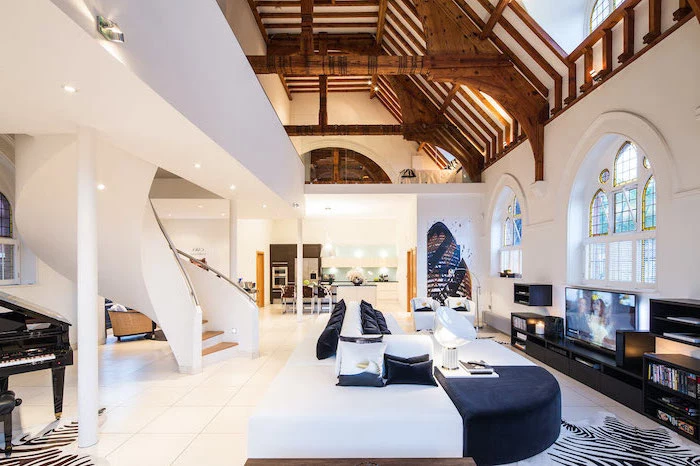
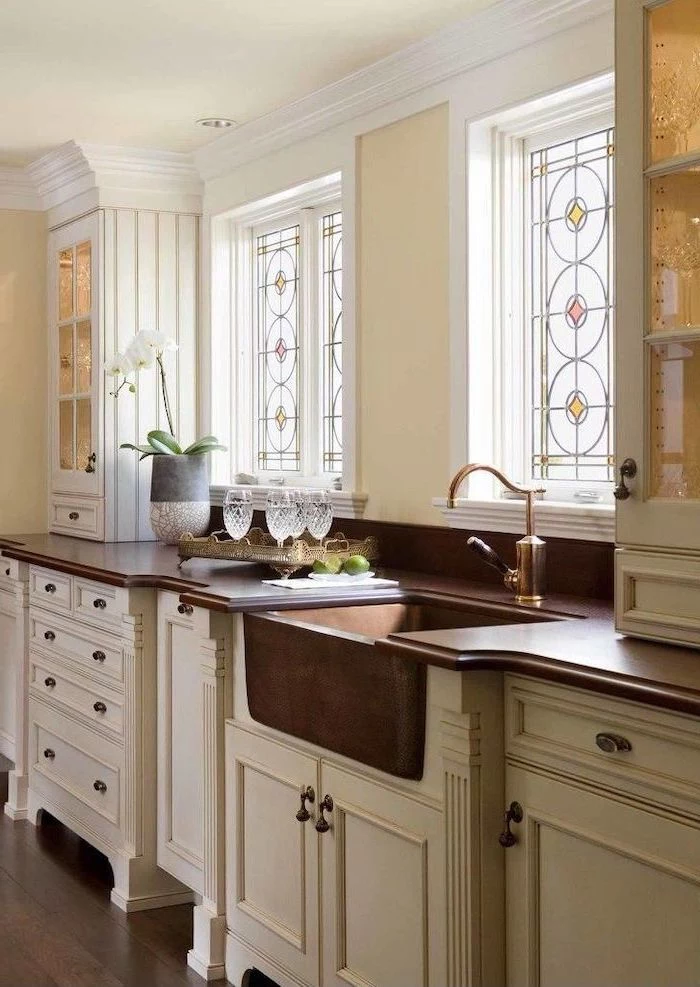
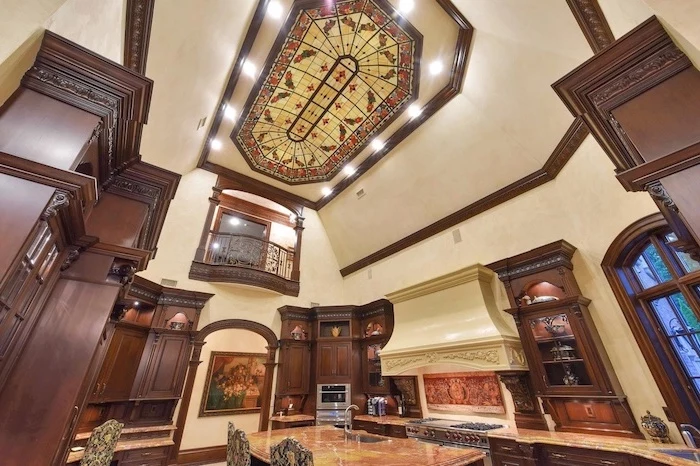
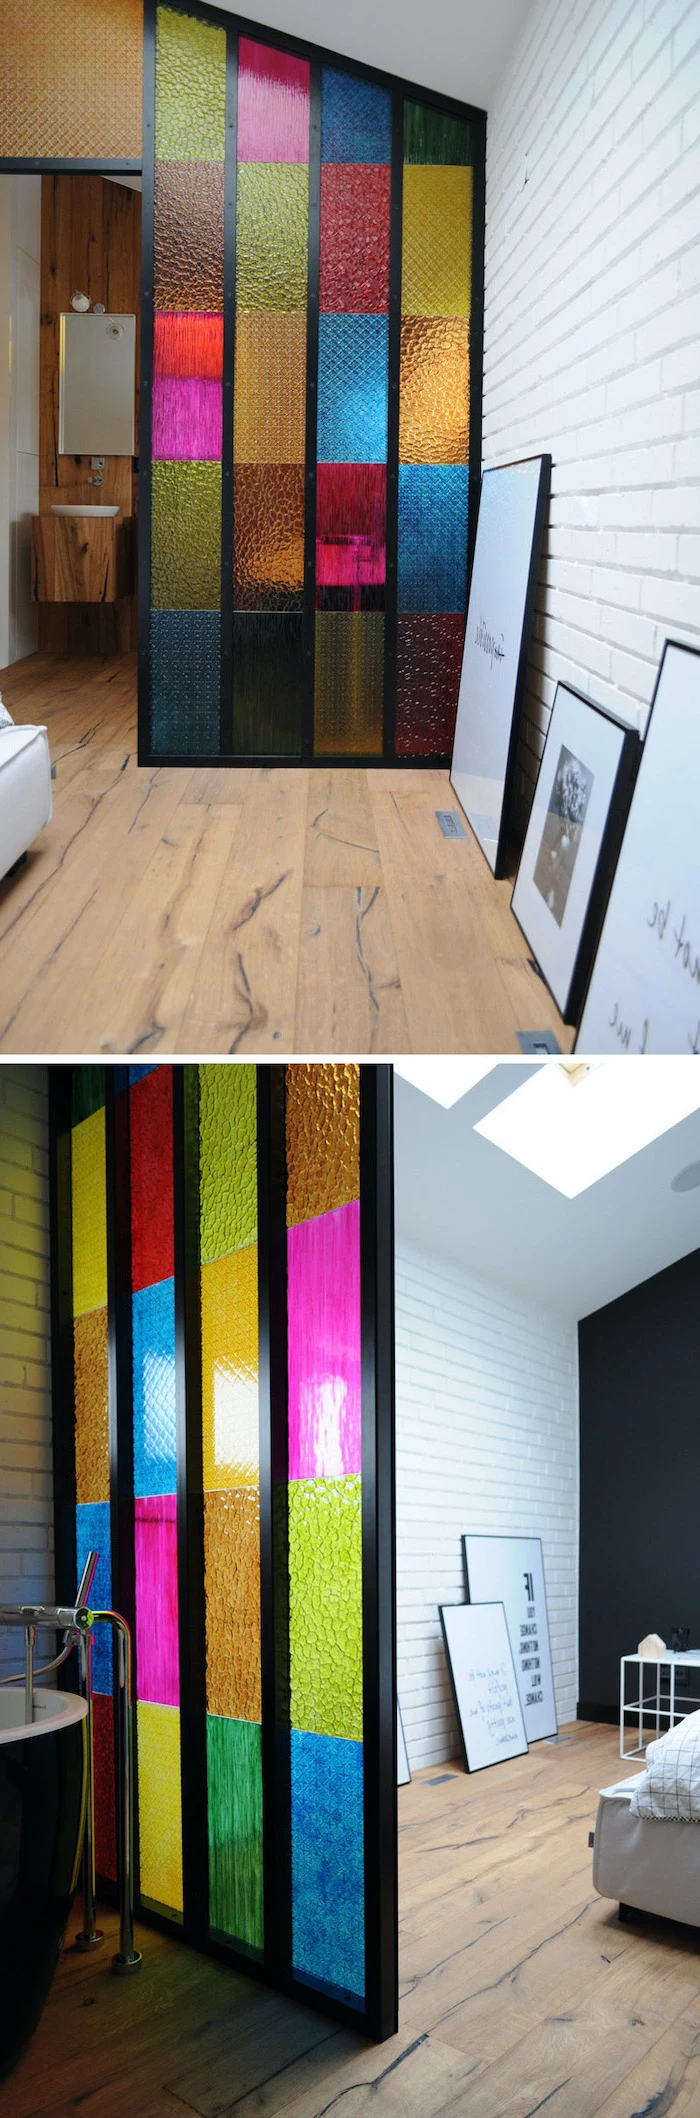
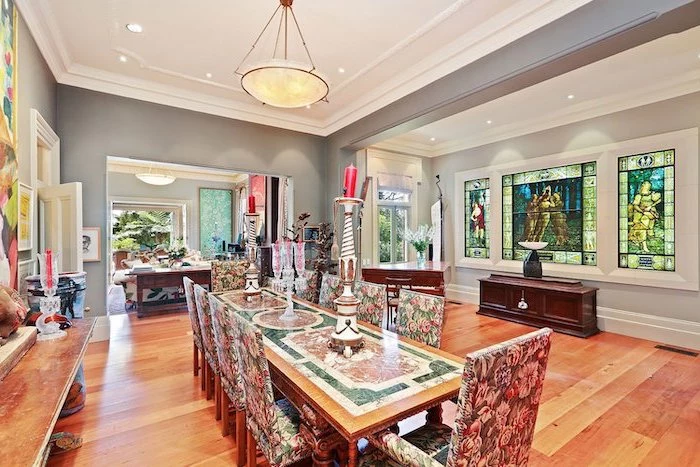
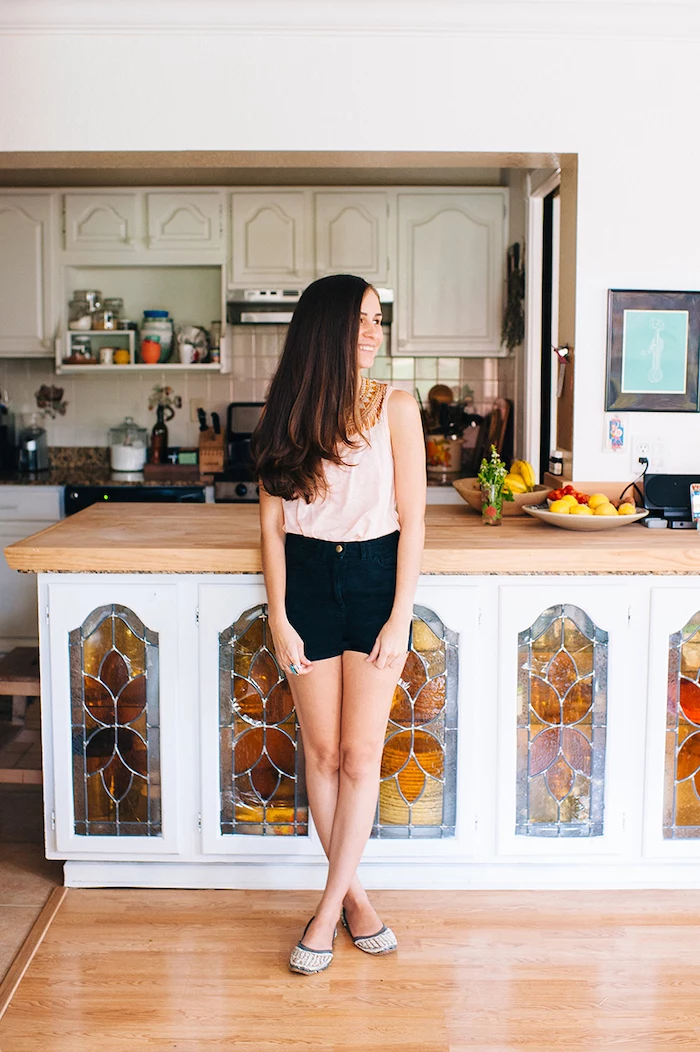
Stained glass can also work wonders inside the home. A large hanging panel can act as a stunning room divider. Small inserts in kitchen or library cabinet doors can add a controlled pop of color. Just remember, anything large and structural needs to be properly framed and mounted by a professional.
Borrowing from Classic Styles
While we’re avoiding overly traditional looks, we can definitely take inspiration from some classic design movements that translate beautifully to modern spaces.
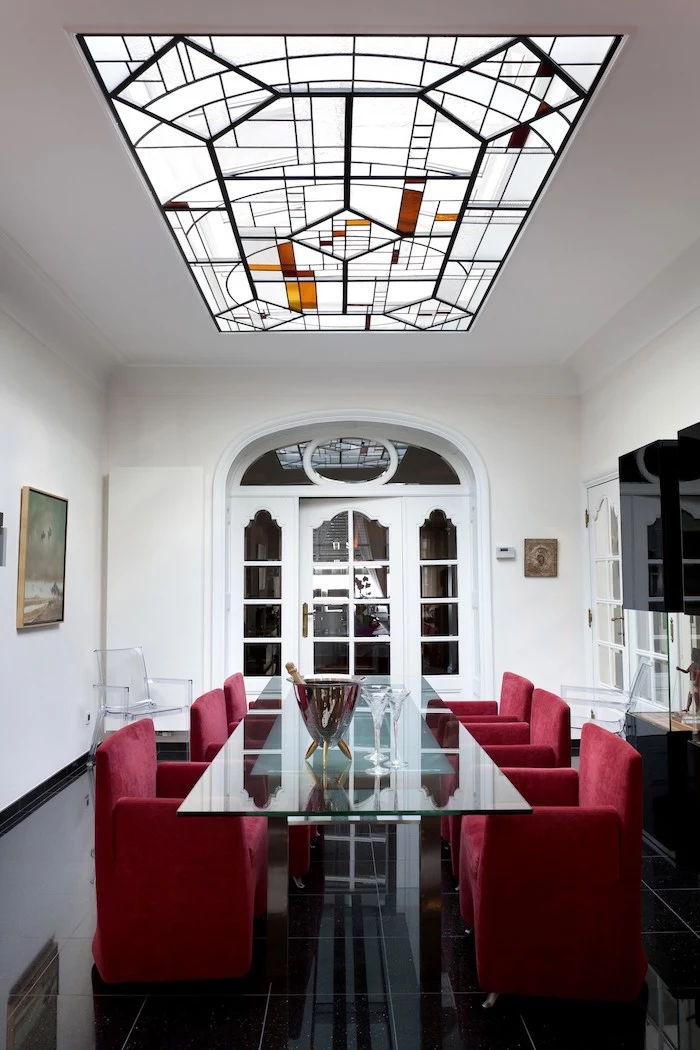
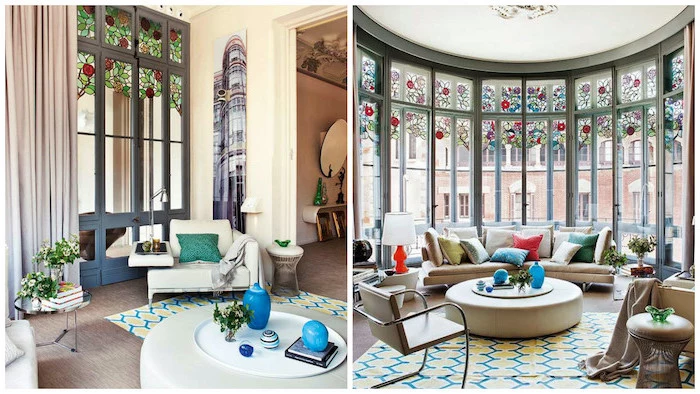
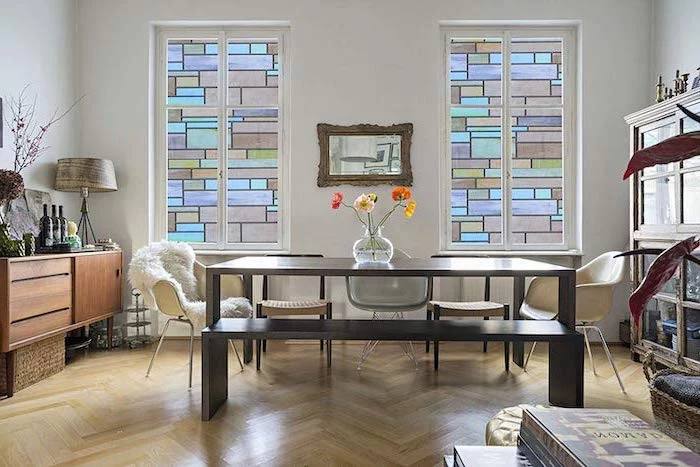
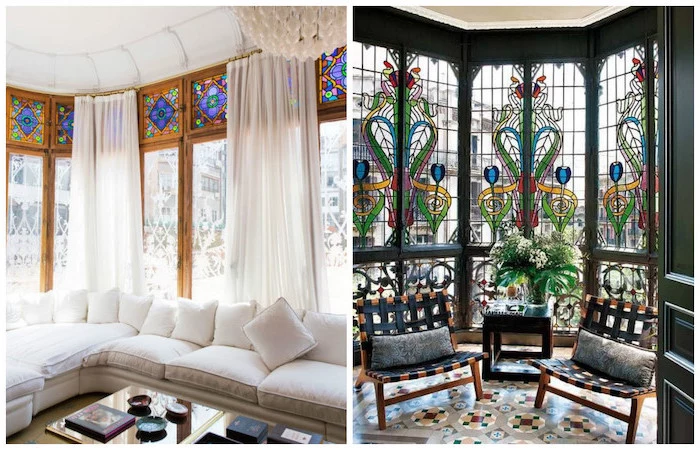
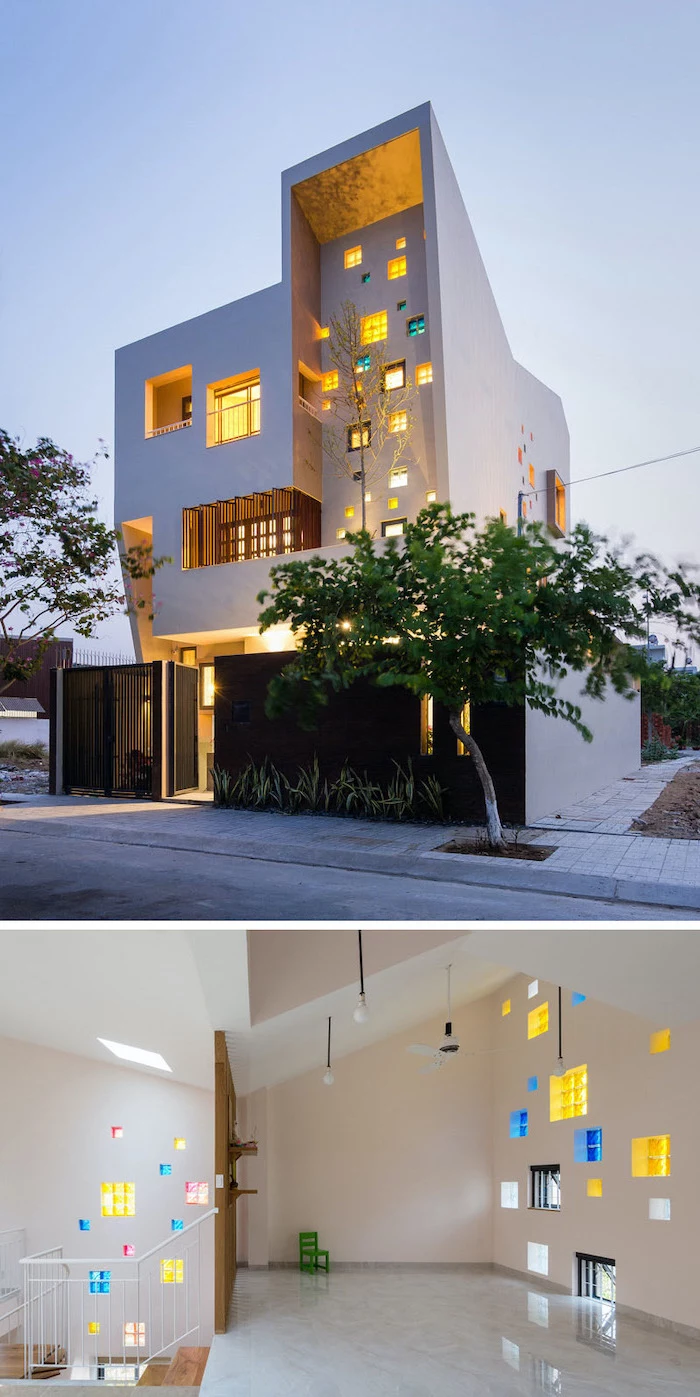
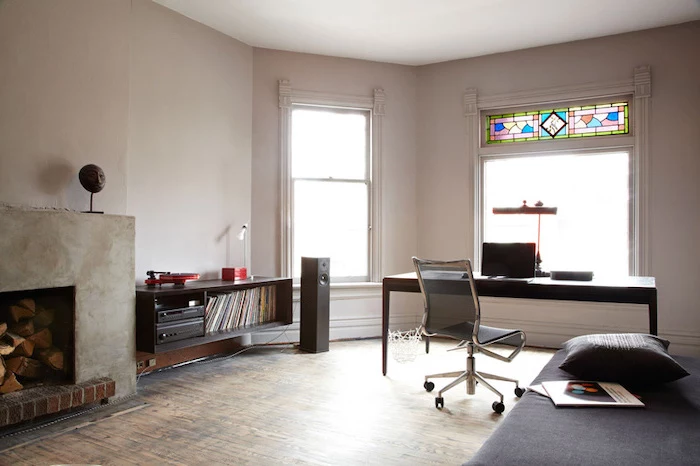
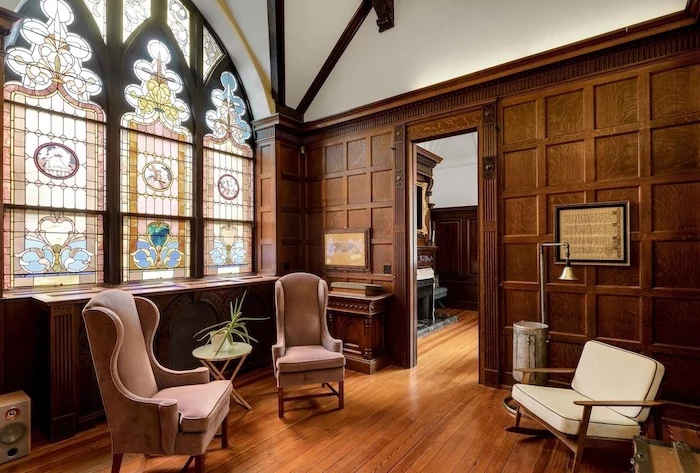
For instance, there’s a well-known architectural style that heavily featured stained glass. It used strong geometric lines, often with zinc or copper-toned metal, and lots of clear textured glass. Color was used sparingly, almost like a tiny jewel in a larger composition. These abstract, architectural designs are a perfect match for contemporary homes.
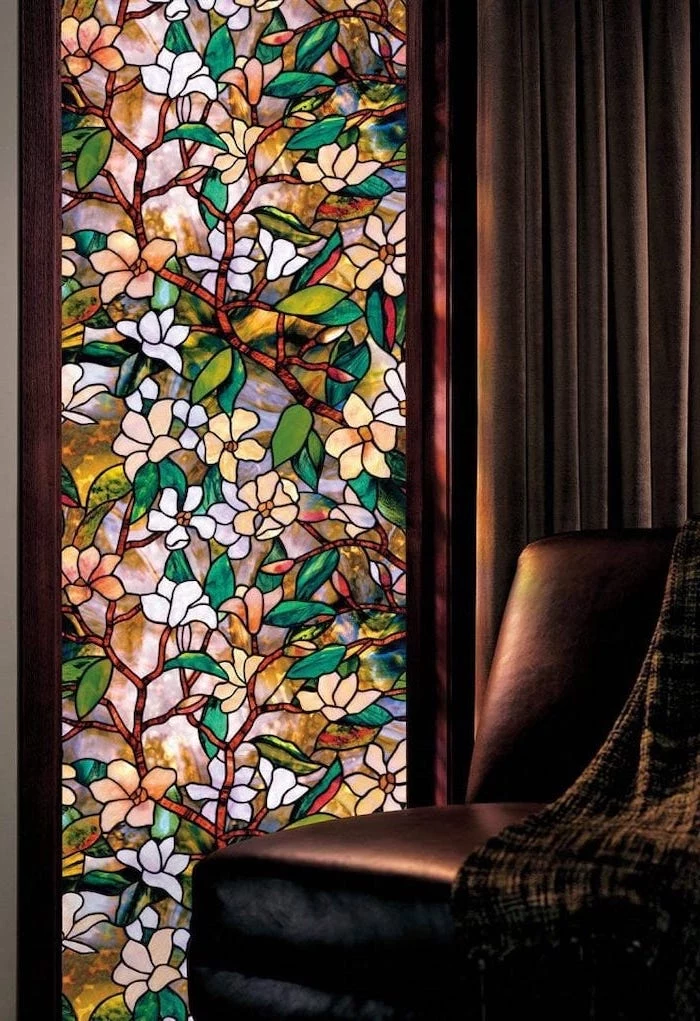
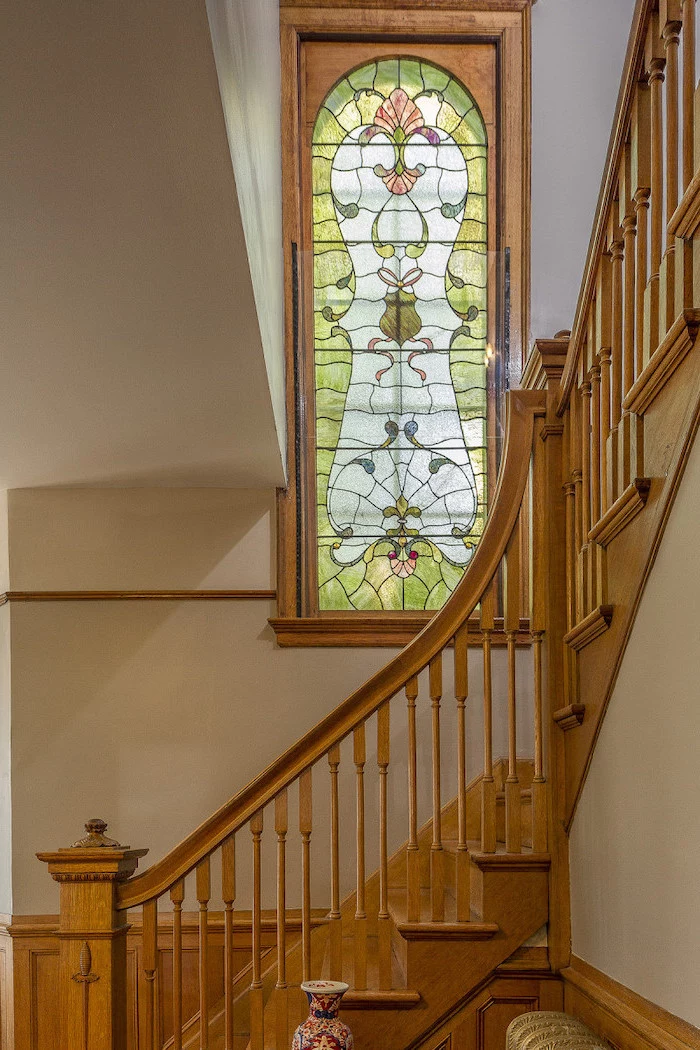
On the other end of the spectrum is a style known for its flowing, organic lines inspired by nature—think curving vines and stylized flowers. While a full-blown piece in this style might feel too busy for a minimalist room, we can borrow elements. I’ve often taken a single, graceful curve from an old pattern and used it in an otherwise simple, modern design.
Keeping It Beautiful: Care and Maintenance
A well-made panel will last for generations with very little fuss. For cleaning, keep it simple. Dust it with a soft, dry microfiber cloth. If it’s grimy, you can make your own gentle cleaner: just mix a few drops of a pH-neutral soap (like original blue Dawn) in a cup of distilled water. Lightly dampen a soft cloth, wipe the glass, and then dry it with a clean, lint-free cloth. Heads up: NEVER use ammonia-based cleaners (like Windex) or anything abrasive. Ammonia can corrode the metal over time, and abrasives will scratch the glass.
Every few years, give your panel a quick health check. Look for any new cracks. Check if the panel is starting to bulge or sag. If you gently push on the center, does it feel solid, or does it rattle significantly? A little movement can be normal, but any bulging is a sign that it needs professional attention. Catching it early can save you a much more expensive repair down the line.
At the end of the day, stained glass is so much more than a relic of the past. It’s a living, breathing art form that lets you paint your home with light. By choosing a design that speaks to you and a craftsman who can bring it to life, you can add something that is not only beautiful but deeply personal. It’s a connection to a long history of craft, but its purpose is completely timeless: to bring a unique character and soul into the places we call home.
Inspiration Gallery
When commissioning a custom piece, come prepared with more than just dimensions. Share photos of your room, fabric swatches, and paint chips. A good artist isn’t just filling a space; they are creating a piece that harmonizes with your existing decor. The more context you provide, the more personal and integrated the final artwork will feel.
- A brilliant, clear finish that honors the glass.
- A strengthened structure for a longer lifespan.
The secret? A simple polish. After cleaning with a gentle soap and water, apply a light coat of carnauba wax (like Mother’s California Gold) to the finished panel. Buff it with a soft cloth to make the glass sparkle and protect the lead or copper lines from oxidation.
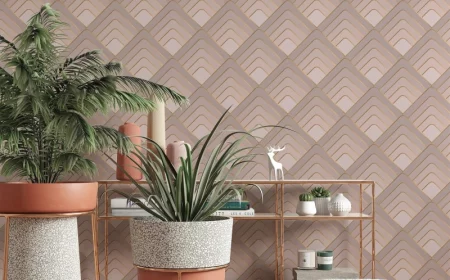
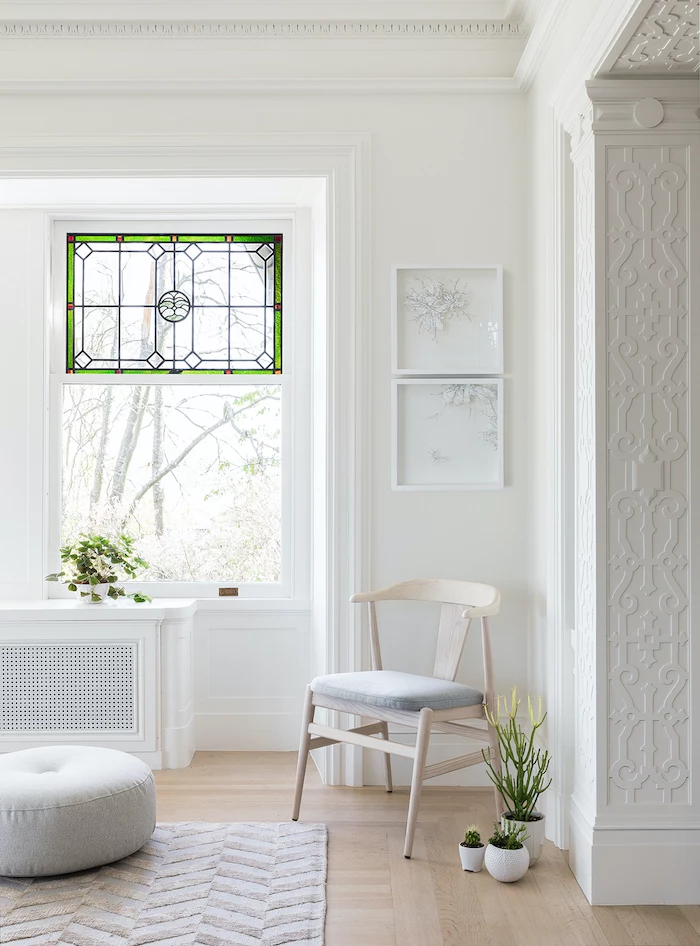
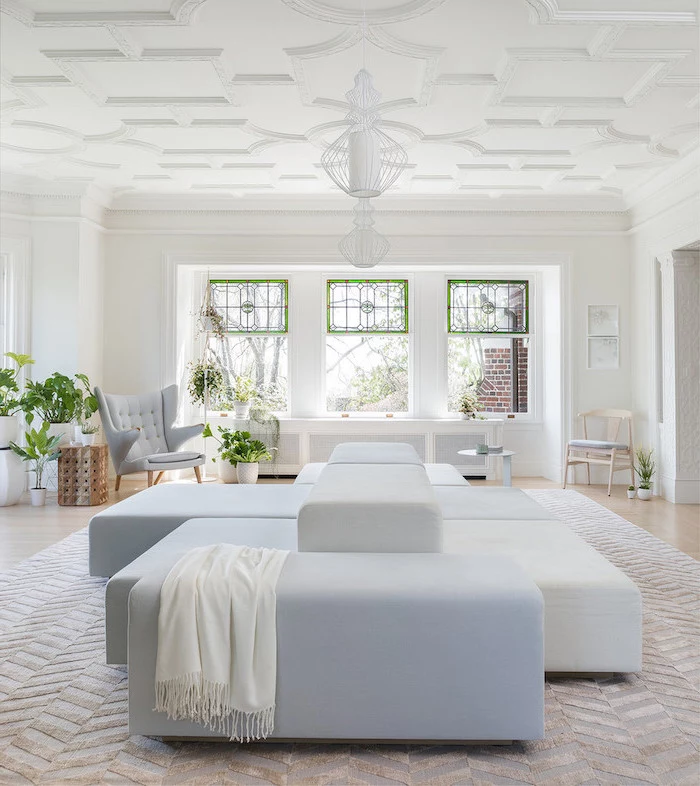
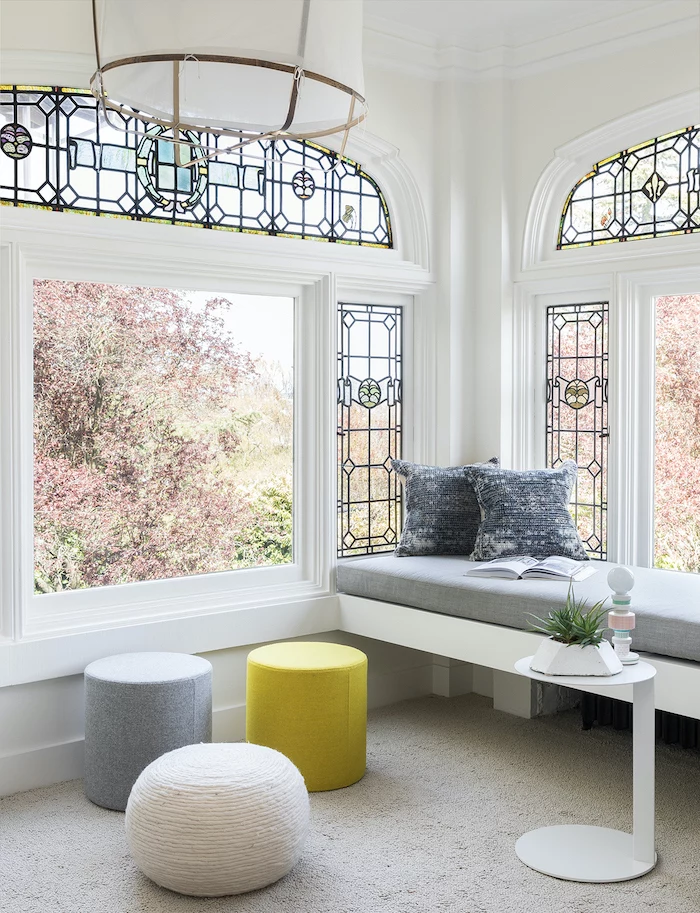
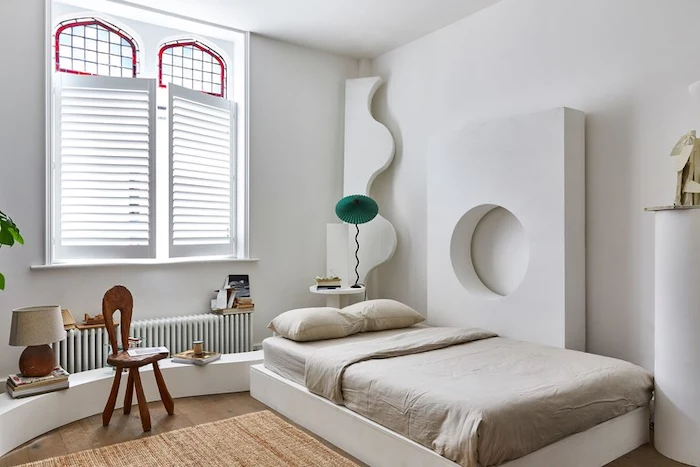
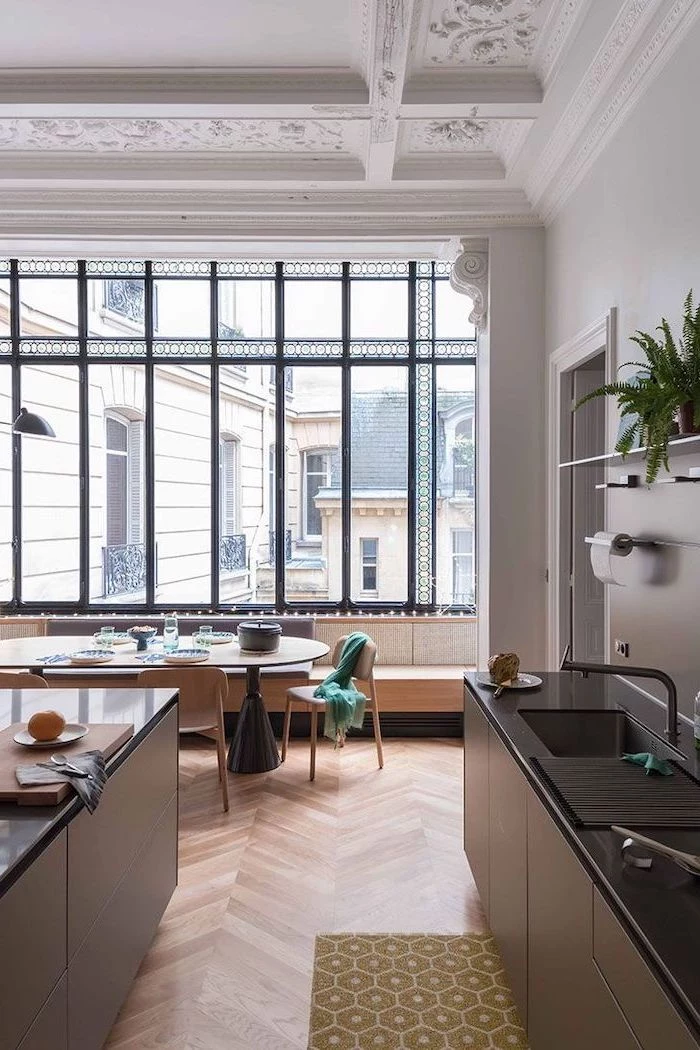
Think beyond color: In minimalist or neutral interiors, the magic of stained glass lies in texture and clear, beveled glass. A panel made entirely of different textured clear glasses—like ‘Waterglass’ for its gentle ripples or ‘Hammered’ for its dimpled surface—can create a stunning play of light and shadow without introducing a single color, adding architectural interest while respecting the serene palette.

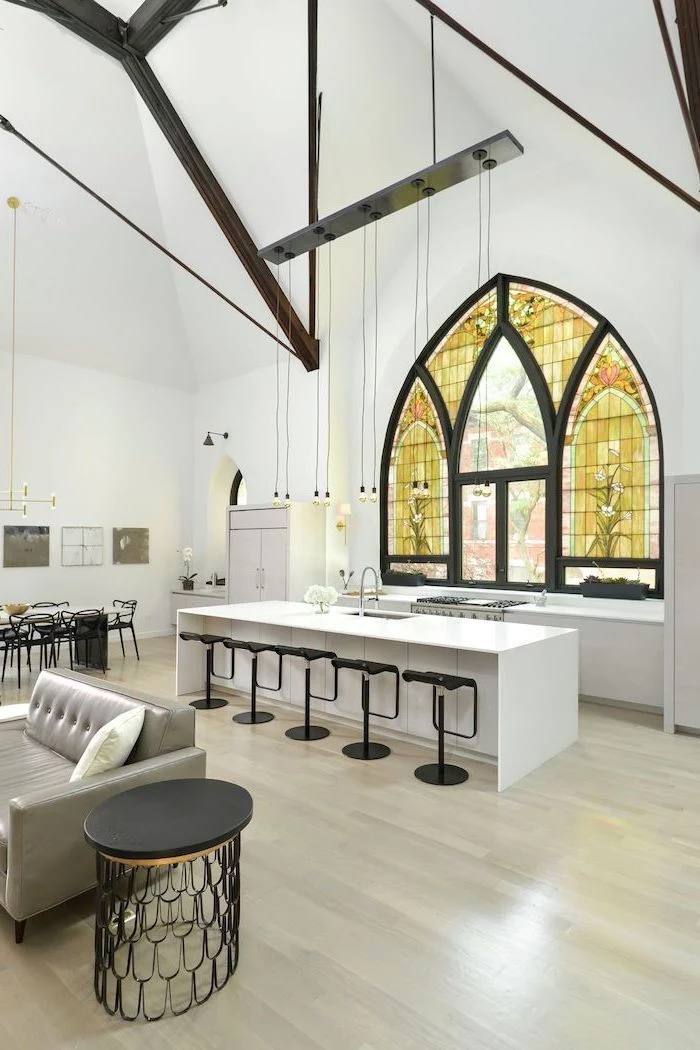
“The mission of an architect is to help people understand how to make life more beautiful, the world a better one for living in, and to give reason, rhyme, and meaning to life.” – Frank Lloyd Wright
Wright was a master of integrating stained glass into his ‘Prairie School’ architecture, using geometric “light screens” not as mere decoration, but as integral parts of the building that connected the interior with nature.
Can you incorporate stained glass without committing to a full window?
Absolutely. Think smaller. Transom windows over doorways, cabinet door inserts, or even a series of hanging panels can introduce the art form on a more manageable scale. These smaller accents act like jewelry for a room, providing a pop of color and craftsmanship without overwhelming the space.
For a soft, painterly glow: Use opalescent glass from brands like Youghiogheny or Uroboros. Its milky quality diffuses light beautifully, making it perfect for creating atmosphere and privacy.
For vibrant, jewel-toned light: Choose cathedral glass. Transparent and rich in color, options from Wissmach or Kokomo Glass will cast brilliant colored patterns across your room when the sun hits.
The choice fundamentally changes how the light in your room behaves.
Ready to try your hand at the craft? The Tiffany copper foil method is often considered more beginner-friendly than traditional lead came. Here’s a quick overview of what you’ll need for a simple suncatcher:
- A few pieces of your chosen glass
- A glass cutter and running pliers
- A grinder to smooth the edges
- Copper foil tape
- Soldering iron and 60/40 solder
- Flux to help the solder flow
Over 75% of the medieval stained glass in England was destroyed during the Reformation and English Civil War.
This highlights the fragility and preciousness of the art form. When you install a stained glass panel, you’re not just adding a decorative element; you’re becoming a custodian of a piece of art with a rich, and sometimes tumultuous, history. Modern panels, properly cared for, are designed to last for generations.
Don’t overlook the frame: The material holding the glass is just as important as the glass itself. A modern, geometric design might look best with a slim, black-patinated zinc frame for its clean, strong lines. A more traditional, flowing Art Nouveau piece often calls for the softer, classic look of lead came, which can be patinated to a pewter or black finish.
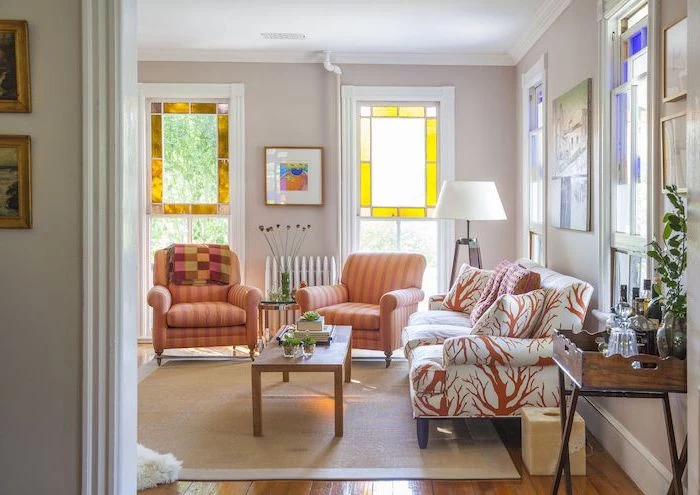
A common mistake is placing a beautiful, intricate panel where it will be constantly backlit by harsh, direct sunlight. This can wash out the subtle colors and textures of the glass. The ideal location is one that receives bright, indirect light, allowing the colors to glow without being overpowered. An east-facing window for soft morning light is often perfect.
- Start by dusting with a soft brush or using canned air to remove grit from the came lines.
- Mix a few drops of pH-neutral soap (like dish soap) in distilled water. Tap water can leave mineral deposits.
- Use a soft, lint-free cloth or a natural sponge, lightly dampened, to gently wipe the glass. Avoid abrasive cleaners at all costs.
- Dry immediately with another clean, soft cloth to prevent streaking.
Is stained glass only for period homes?
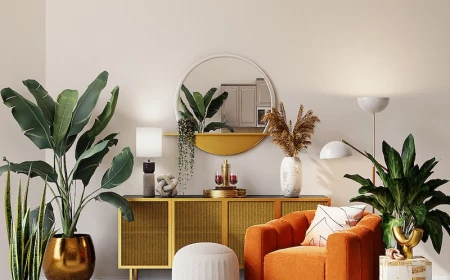
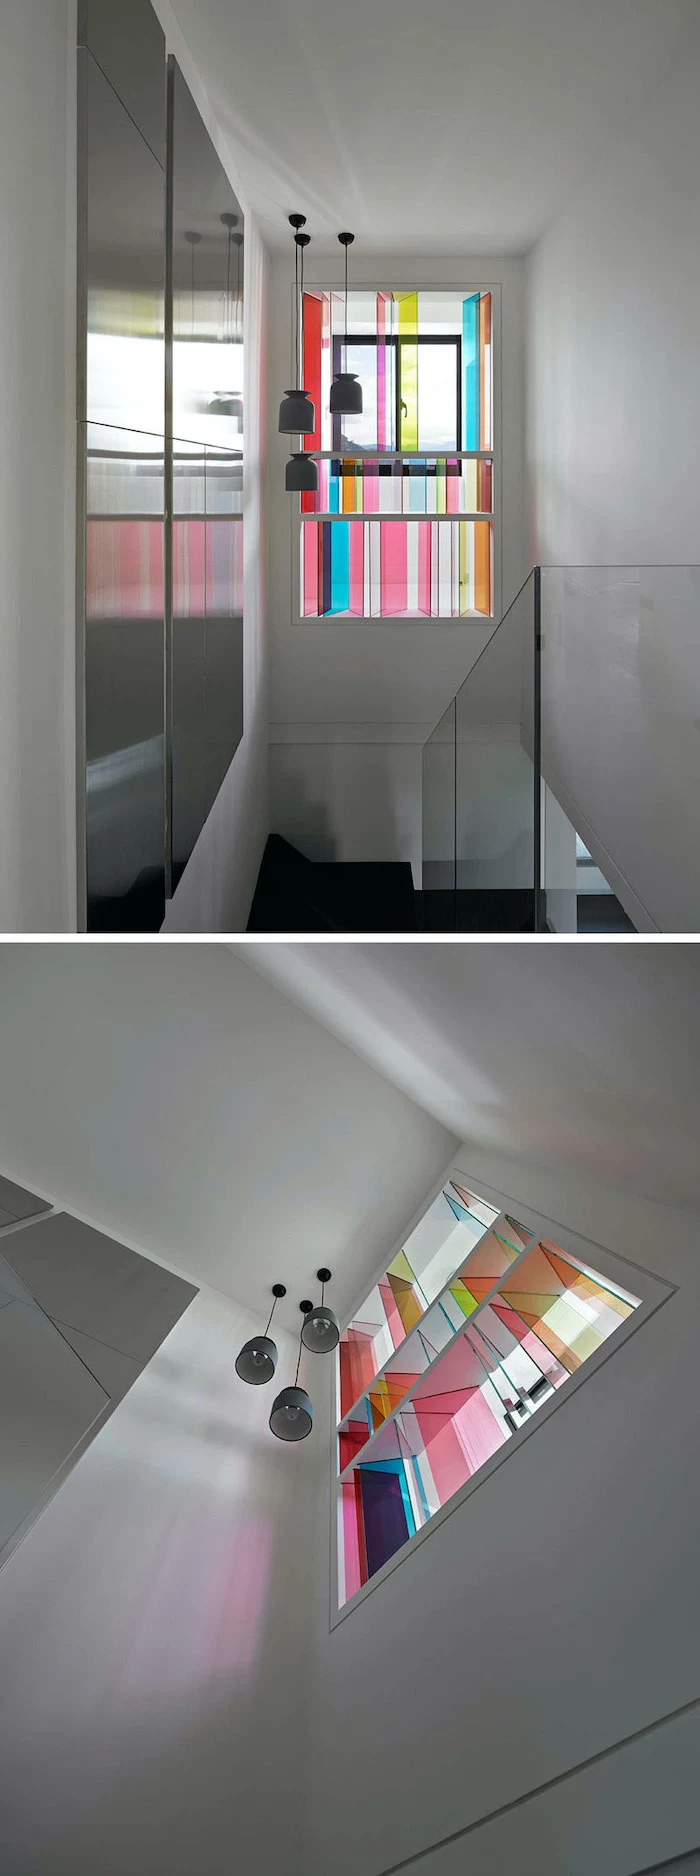
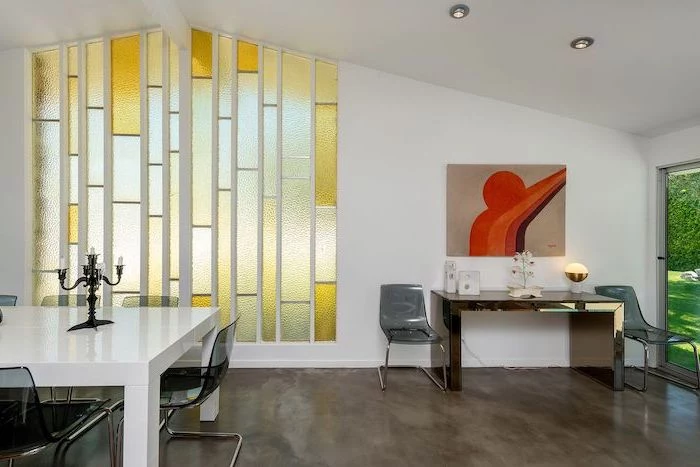
Not at all. The key is adapting the design style. For a Mid-Century Modern home, think bold, abstract geometrics and a limited color palette of ochre, teal, and orange. For an industrial loft, consider a minimalist grid of clear, textured glass in a strong zinc frame. The craft is versatile; it’s the design that makes it contemporary.
“Color is a power which directly influences the soul.” – Wassily Kandinsky
This is the essence of stained glass. A panel with deep blues and purples can create a calming, contemplative atmosphere. A splash of yellow or orange can make a space feel joyful and energetic. When choosing colors, think about the mood you want to evoke in the room.
For an instant touch of Art Deco glamour, look for designs that emphasize symmetry, bold lines, and geometric shapes. Incorporate these elements:
- Clear, beveled glass to create prisms of light.
- Strong black patina on the solder lines for graphic contrast.
- Stylized motifs like sunbursts, chevrons, and stepped forms.
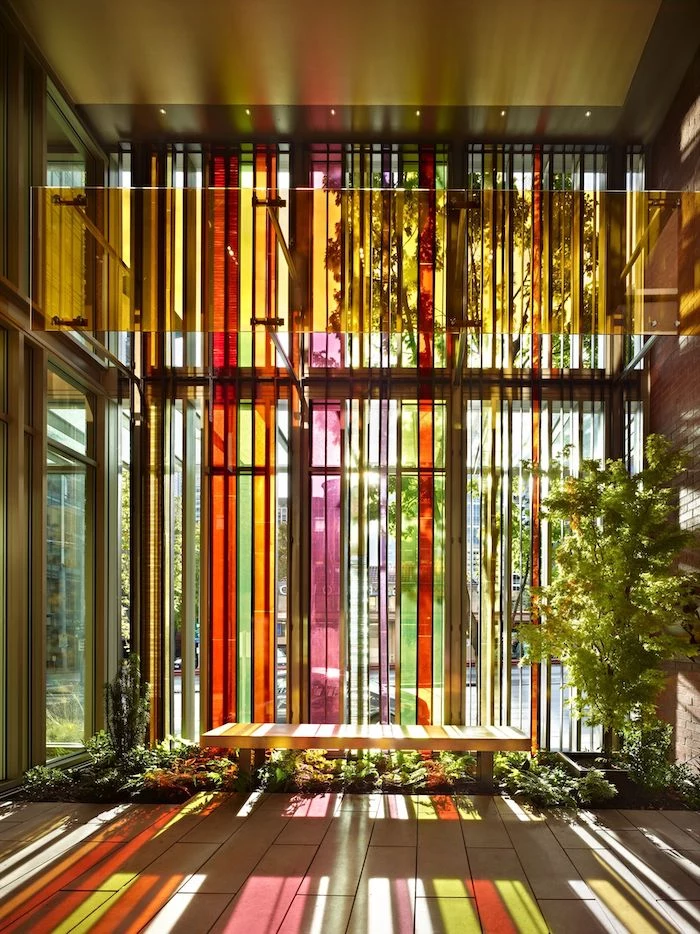
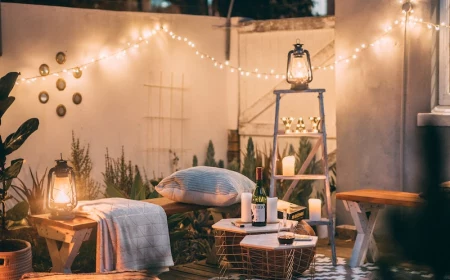
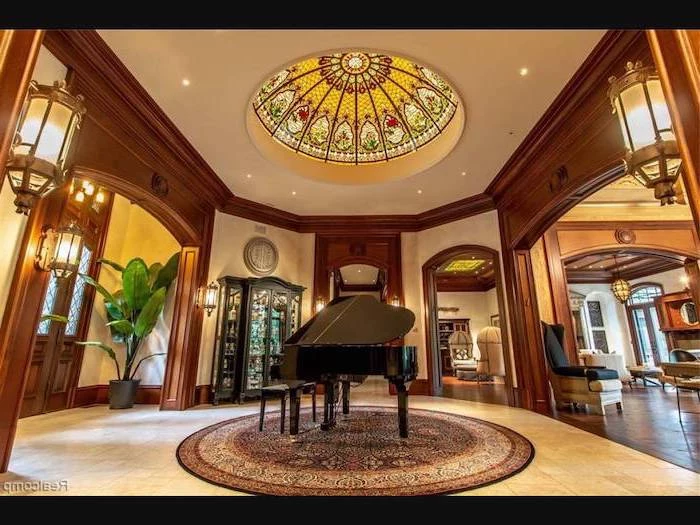
The glow of stained glass isn’t just for daytime. Strategic backlighting can turn your window into a stunning art piece at night. Low-profile LED strips installed around the inside of the window frame can provide a soft, even illumination, allowing you to enjoy the colors and textures long after the sun has set.
Leaded Glass: The traditional method using H-shaped lead channels. It’s flexible, making it ideal for curved designs, and has a classic, soft appearance. It requires cementing for strength and weatherproofing.
Copper Foil (Tiffany-style): Each piece of glass is wrapped in copper tape and then soldered together. This allows for much more intricate and detailed designs with finer lines.
Your artist will recommend the best method based on your design’s complexity and location.
- Adds an unexpected flash of brilliance and sparkle.
- Refracts light into rainbow prisms on sunny days.
- Creates a sense of depth and luxury.
The secret? Bevels. Incorporating clear, beveled glass clusters or borders into your design is a fantastic way to add dynamic light play. They act like crystals, catching the light and breaking it down into its spectral components for a truly magical effect.
Did you know? The American company Kokomo Opalescent Glass, founded in 1888, is the oldest manufacturer of art glass in the world and supplied glass to Louis Comfort Tiffany.
When you commission a piece, you might be using glass with a direct lineage to the masters of the craft. Artists often have their favorite manufacturers, like Bullseye for its vibrant fusible glass or Spectrum for its reliable textures, each bringing its own unique character to a project.
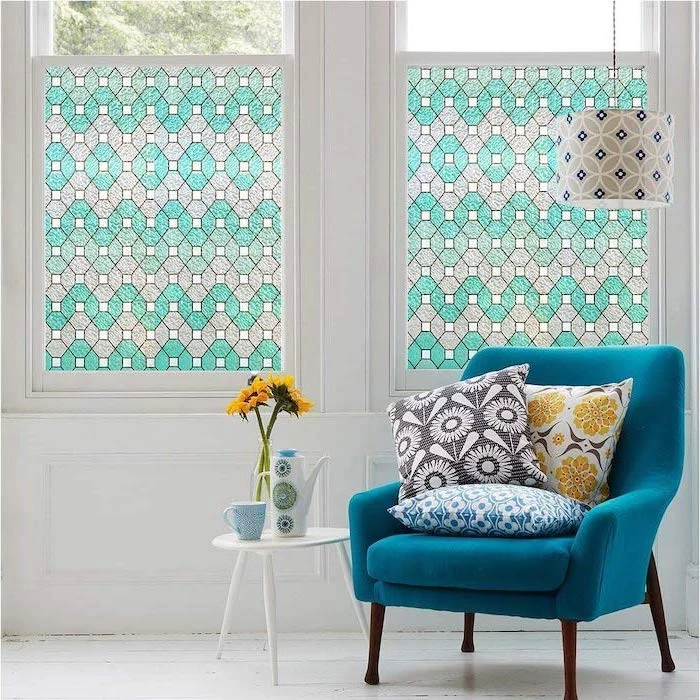
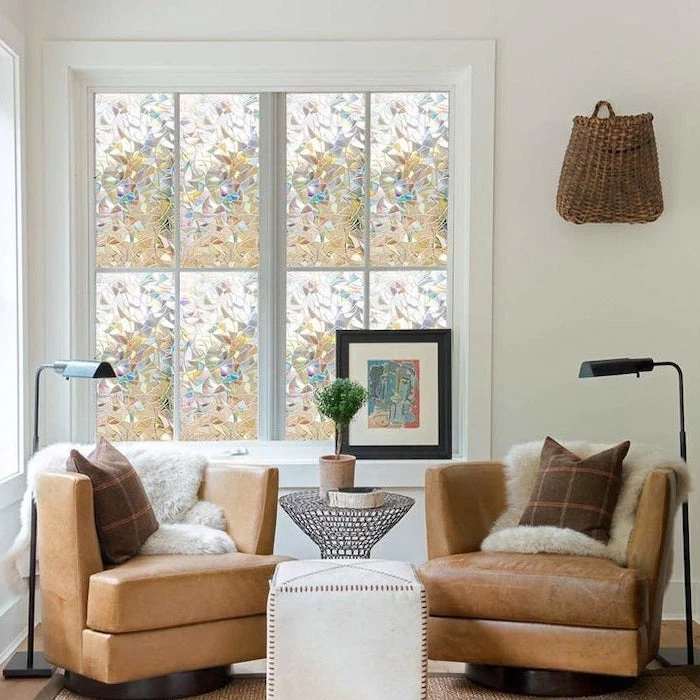
Afraid of commitment? High-quality decorative window films can be a great starting point. Brands like Artscape or GILA offer intricate static-cling designs that mimic the look of stained glass. It’s a budget-friendly, non-permanent way to test out a pattern or add privacy before investing in a permanent, handcrafted piece.
Don’t limit stained glass to exterior windows. An interior door with a stained glass panel can be a breathtaking feature, allowing colored light to flow between a hallway and a living room. It can also be a clever solution for a pantry or bathroom door, providing privacy while still feeling open and artistic.

A Small Crack: A tiny hairline fracture in a single piece of glass might not require a full repair. An artist can sometimes apply a clear epoxy that stabilizes the crack and is nearly invisible, preserving the original glass.
A Broken Panel: If a piece is shattered or the lead is bent, it’s a job for a professional. They will carefully dismantle the section, cut a new piece of matching glass, and re-lead and solder it, seamlessly restoring your panel’s integrity.
- Fewer, larger pieces of glass are less labor-intensive than a complex design with many small cuts.
- Stick to a limited color palette to reduce the cost of materials.
- Choose standard, readily available glass textures over rare, artisanal ones.
- Work with a local artist to avoid expensive shipping and crating costs.
Where did opalescent glass come from?
It was pioneered in the late 19th century by American artists like John La Farge and Louis Comfort Tiffany. They wanted to achieve the shading and texture of painting *within* the glass itself, rather than by painting on its surface. This innovation is what defines the iconic, luminous look of American stained glass.
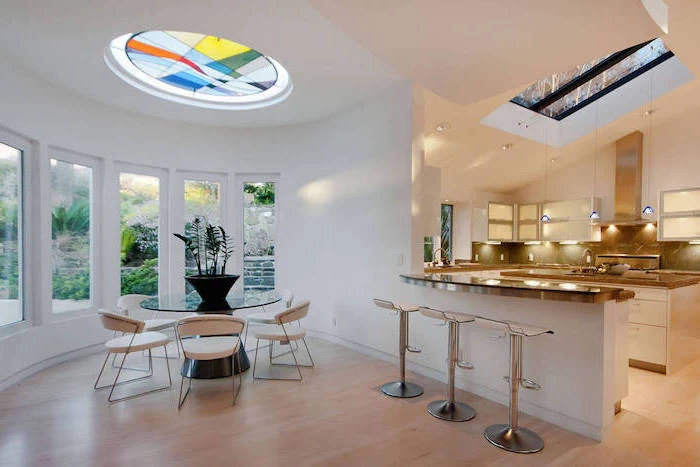
Don’t forget the third dimension. Contemporary artists are moving beyond flat panels to create stunning 3D stained glass objects. Think terrariums with geometric glass sides, sculptural table lamps, and even pendant light fixtures. These pieces engage with a room’s space in a whole new way, becoming functional, light-filled sculptures.
“I use light as a material, but my medium is perception. Light is not the thing to be seen, but the thing that lets us see.” – Judith Schaechter, contemporary stained glass artist