Thinking About Braids? Here’s What Your Barber *Really* Wants You to Know
After years behind the barber chair, I’ve seen men’s hairstyles go through some serious evolution. We’ve moved way beyond the standard fade and lineup, embracing styles that demand more skill, time, and, honestly, a real commitment to hair care. And braids are leading that charge. Sure, they aren’t new, but the way they’re being rocked and the sheer artistry involved are on a whole other level today. I’m not just a barber; I’m a stylist who’s spent more than a decade deep in the world of braided textures. I’ve trained apprentices, fixed more bad jobs than I can count, and helped guys find a look that’s not only sharp but also healthy for their hair.
In this article
- First Things First: Your Hair and Scalp Foundation
- Pro Techniques: What Separates the Amateurs from the Artists
- How to Spot a Pro (And Avoid a Hair Disaster)
- Your Pre-Appointment Checklist
- The Braid Care Playbook: Keeping Them Fresh and Healthy
- Common Mistakes That Can Wreck Your Hair
- Galerie d’inspiration
This is about so much more than looking good for a week. It’s about understanding the craft from the ground up.
Getting braids right is a partnership between you and a skilled pro. It involves knowing your hair, finding the right person for the job, and committing to the upkeep. My goal here is to give you the real talk—the same conversation we’d have in my chair before a comb even touches your head. We’ll cover the techniques, the science of your hair, and the absolute must-dos for keeping your hair and scalp in great shape.

First Things First: Your Hair and Scalp Foundation
Before we even dream about styles, we need to get real about the canvas: your hair and scalp. So many guys walk in with a picture, not knowing if their hair is even ready for the style they want. Understanding your hair isn’t just trivia; it dictates how your braids will look, how long they’ll last, and whether you’re setting yourself up for damage.
Hair Type and Texture 101
Hair is typically categorized by its curl pattern, from straight to coily. Most guys looking for braids have curly or coily hair, and that’s a massive advantage. Those natural bends and coils provide the perfect texture for braids to grip onto, holding the style securely. Can you braid straighter hair? Absolutely. But it often requires more product and a bit more tension to keep it from slipping, which can be risky if your stylist isn’t careful.

Then there’s porosity. This is all about how well your hair absorbs and holds onto moisture. It’s a game-changer for braid health.
Good to know: You can do a simple porosity test at home. Drop a clean strand of your hair into a glass of water. If it sinks pretty quickly, you have high porosity hair. If it floats on top for a while, it’s low porosity. Easy, right?
Why does this matter? Because braids can be drying. High porosity hair drinks up moisture but loses it just as fast, so it needs rich creams and oils sealed in before braiding to keep it from getting brittle. Low porosity hair, on the other hand, has a harder time absorbing product. Using heavy creams will just cause buildup. For this hair type, lighter, water-based moisturizers are the way to go.
Don’t Sleep on Scalp Health
Think of your scalp as the soil in a garden. If the soil is unhealthy, the plants won’t grow well. Braids put your scalp under a unique kind of stress—the parting, the tension, and less access for washing can all cause issues if you’re not on top of it. Before you even book an appointment, your scalp should be clear of major problems like severe dandruff, psoriasis, or any broken skin. Braiding over an irritated scalp can trap bacteria and make things a whole lot worse.
If you’ve got a stubborn scalp issue, do yourself a favor and see a dermatologist first. They can get you on the right track with medicated treatments to get your foundation healthy enough for styling.
Pro Techniques: What Separates the Amateurs from the Artists
Let’s be real, anyone can technically weave three strands of hair. But a professional braider executes a style with precision, consistency, and a deep respect for your hair’s health. The difference is all in the details. Here’s a look at some common styles, but from a pro’s perspective.
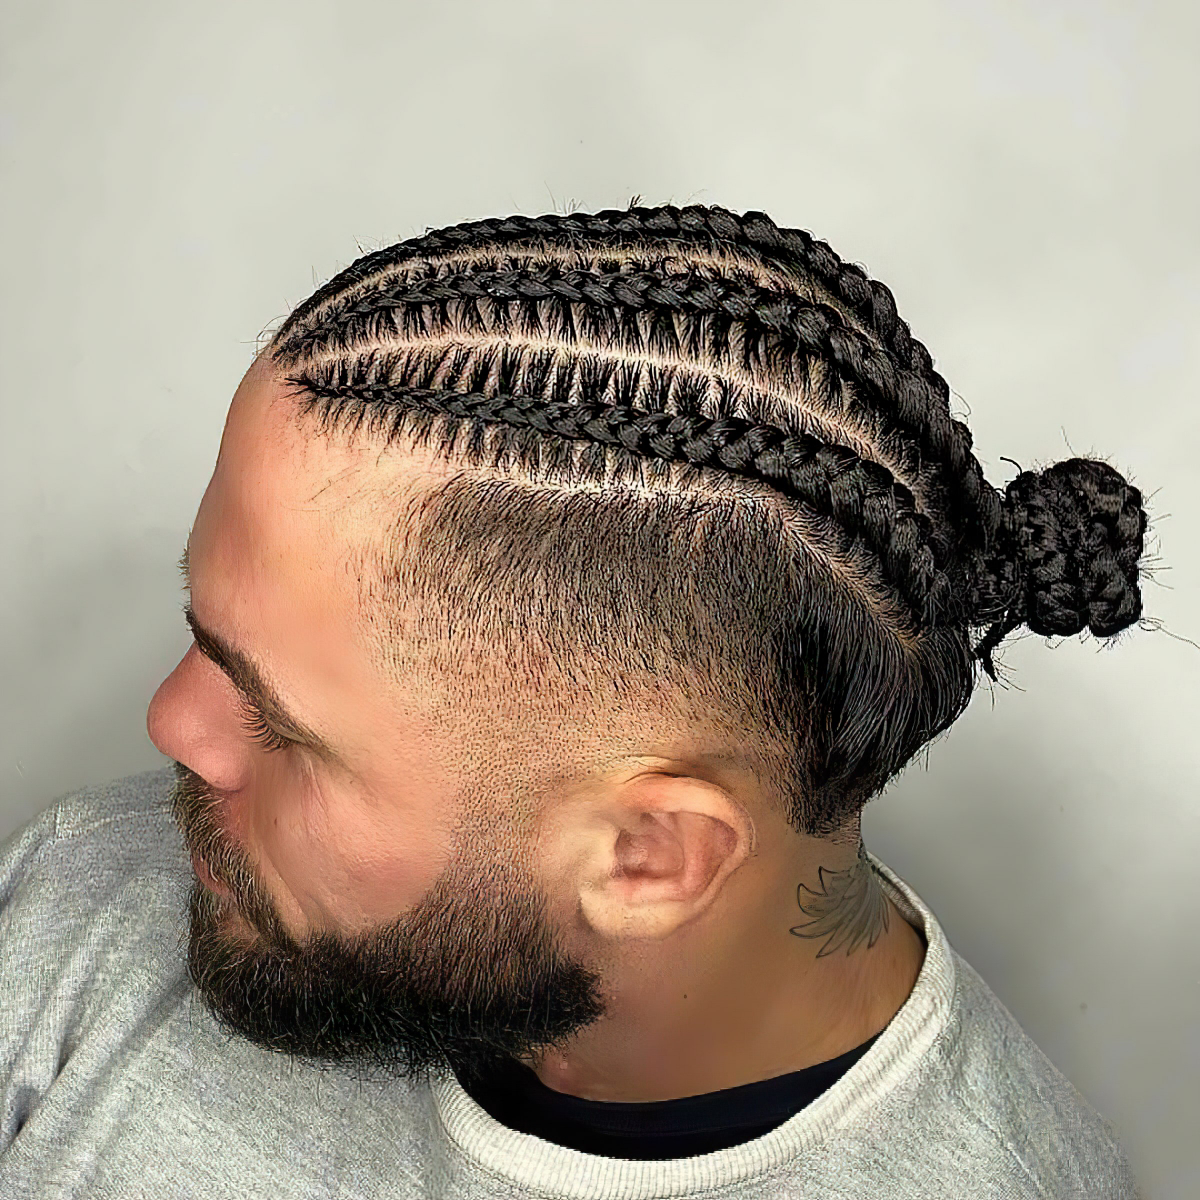
Cornrows: The Classic Foundation
Cornrows are more than just straight-back braids; they are a fundamental technique. The main difference lies in whether the hair is braided under or over.
- Underhand (Dutch Braid): This is what creates that classic, raised cornrow that pops right off the scalp. The braider crosses the outer strands under the middle one. This is the go-to for most men’s cornrow styles because it creates that sharp, three-dimensional look.
- Overhand (French Braid): This method is the opposite—the outer strands go over the middle one. This makes the braid lie flatter against the head. It’s less common for a full head of cornrows but is often used for specific, intricate designs.
A pro’s focus for cornrows always comes down to two things: parting and tension. The parts are the frame for the entire piece of art. They have to be crisp, clean, and consistent. Wobbly lines are a dead giveaway of an inexperienced hand. And tension… this is where true skill shines. The braid needs to be firm enough to be neat and long-lasting, but NEVER so tight that it’s painful or pulling the skin. My rule for trainees is simple: “If the client flinches, you’re pulling too hard.”

Heads up! A little pulling is normal, but if you leave your appointment with a throbbing headache, or if you see little white bulbs at the hair root or painful red bumps forming a few days later, the braids are too tight. This can lead to traction alopecia (hair loss), so don’t be afraid to speak up or, if necessary, take them out.
Now, let’s talk time and money. For simple, straight-back cornrows without extensions, you can expect it to take about 1-2 hours and cost somewhere between $60 and $100. If you’re adding hair or want a more complex design, the time and price will go up from there.
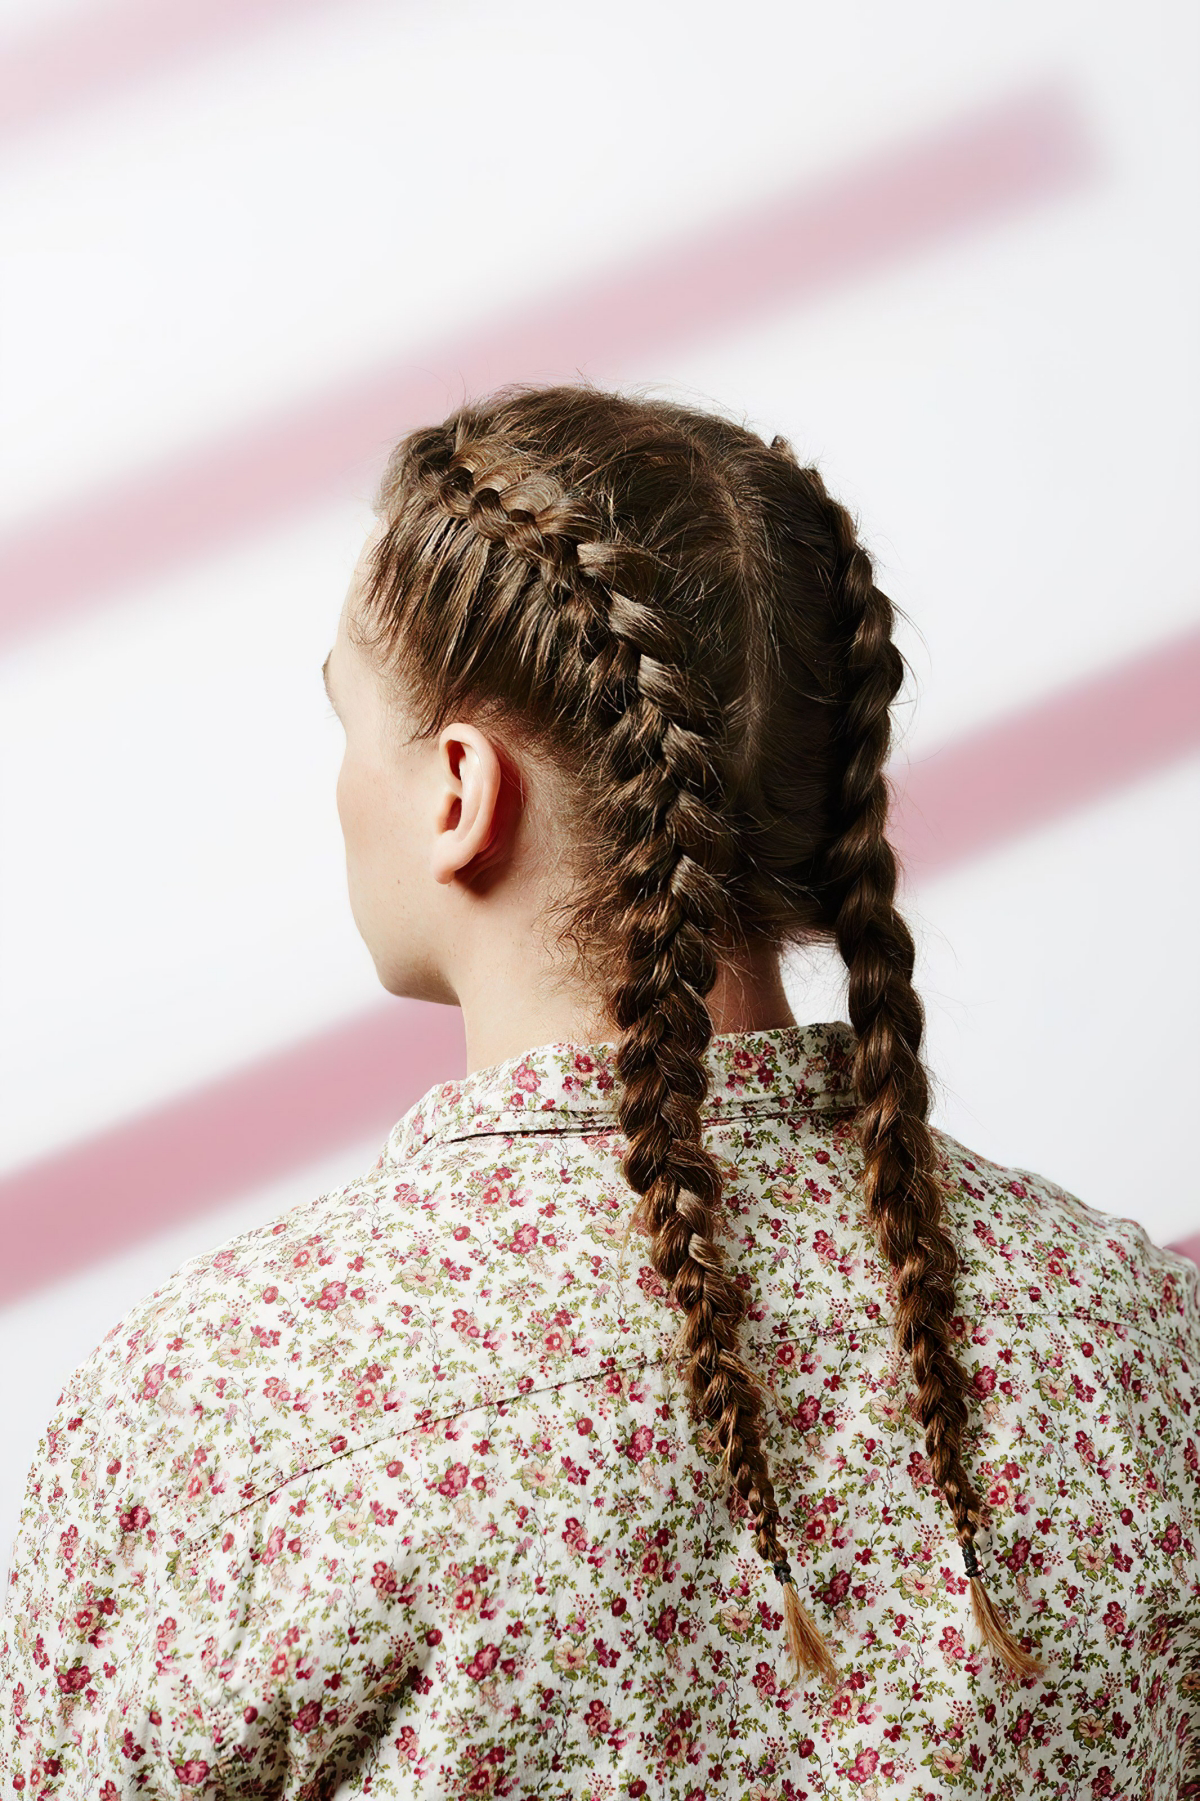
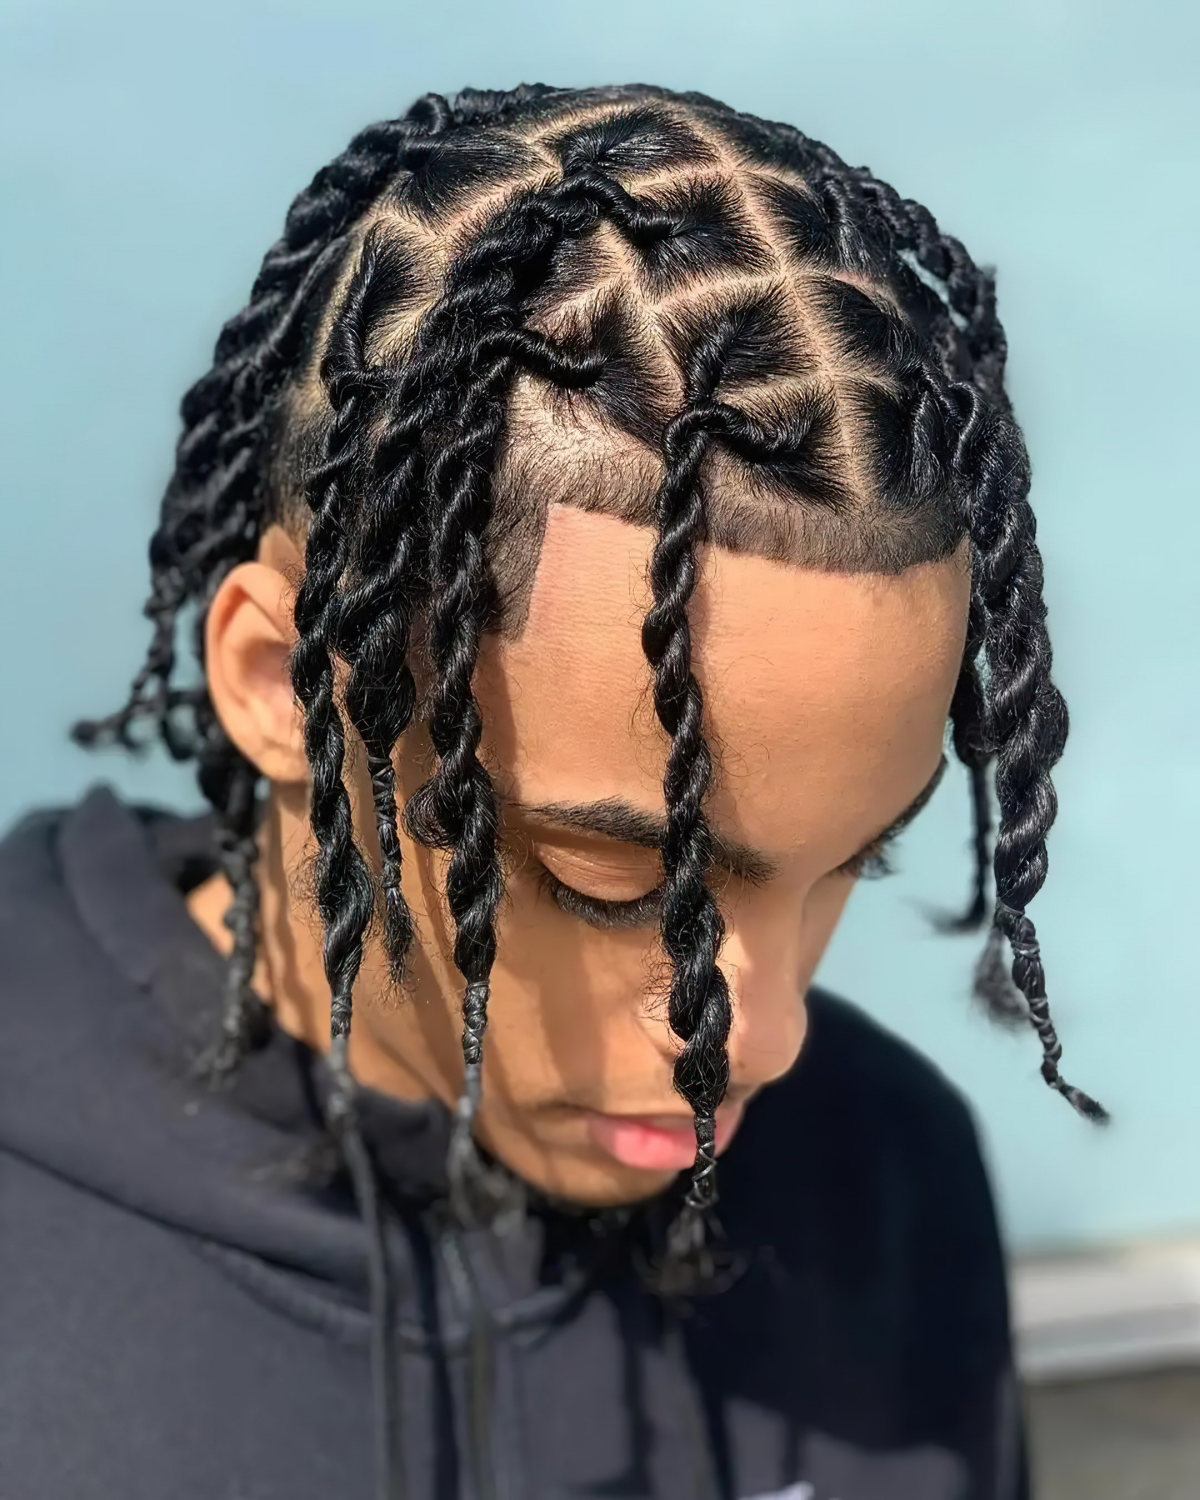
Box Braids: The Marathon of Style
Box braids are individual plaits sectioned off in a grid, and they offer incredible versatility. But they are a serious time commitment. The key here is the parting grid. For a clean look, the boxes—whether square, triangular, or free-form—have to be precise. This takes patience.

For a full head of medium-sized box braids, block out a significant chunk of your day. We’re talking anywhere from 4 to 8 hours. The price reflects that labor, typically ranging from $150 to over $300, depending on the size, length, and your stylist’s skill level.
A quick tip on extensions: When adding hair for cornrows or box braids, the quality of the hair is key. I almost always recommend 100% Kanekalon hair. To make life easier for you and your stylist, buy packs labeled “pre-stretched.” It saves a ton of time and helps create a more natural, tapered look. For a full head of box braids, you’ll generally need 3 to 5 packs, but always ask your stylist beforehand.
How to Spot a Pro (And Avoid a Hair Disaster)
Finding a great braider is like finding a great mechanic—it takes a little research. Don’t just go with the cheapest or closest option. Here’s what to look for:

- Check their portfolio. Look at their social media or website. Are the parts clean and consistent? Do the braids look neat but not painfully tight at the scalp? Look for variety in their work.
- Ask questions! A good stylist will be happy to talk. Ask them about their process for managing tension. Ask what hair they recommend. Their answers will tell you a lot about their experience.
- Read reviews. See what other clients are saying, especially about how long their styles lasted and the health of their hair afterward. A few bad reviews about hair damage are a major red flag.
Your Pre-Appointment Checklist
Want to be your stylist’s favorite client and get the best results? Show up prepared. It makes a huge difference.
- Wash your hair 24-48 hours before. Use a good clarifying shampoo to get rid of any product buildup.
- Follow up with a deep conditioner. Your hair is about to be tucked away, so give it a big drink of moisture.
- Detangle THOROUGHLY. This is non-negotiable. Your hair should be completely knot-free. It makes the parting process smoother and less painful.
- Show up with your hair fully dry and product-free. No heavy oils, greases, or leave-ins. Your stylist will apply the right products for the job.

The Braid Care Playbook: Keeping Them Fresh and Healthy
Okay, so your braids are installed and looking amazing. Now what? Your job is to maintain them. With the right care, you can keep your style looking fresh and, more importantly, protect your own hair underneath.
Your Braid Maintenance Shopping List:
- A spray bottle
- A quality leave-in conditioner (water-based is great)
- A light scalp oil (jojoba, tea tree, or a special scalp serum)
- A silk or satin durag, cap, or pillowcase
- A nozzle-tip bottle for washing
Washing: You should wash your braids, but not like you wash your loose hair. Aim for every 2 to 3 weeks. Water down your shampoo in a nozzle-tip bottle and apply it directly to your scalp. Gently massage with the pads of your fingers (not your nails!) and let the suds run down the length of the braids. Rinse thoroughly to avoid buildup.
Daily Moisture: Your hair still gets thirsty! In your spray bottle, mix about two parts water to one part leave-in conditioner. Lightly mist your braids and scalp every day or two. Follow up by applying a bit of scalp oil directly to your parts to keep your scalp from getting dry and itchy.

Nighttime Protection: This is CRITICAL. Friction from your pillow will cause frizz and breakage. Always, always, always sleep with a silk or satin durag or bonnet. It protects the braids and helps retain moisture.
Common Mistakes That Can Wreck Your Hair
From my experience, a few common mistakes can turn a great protective style into a damaging one. Please avoid these!
- Getting braids that are too tight, especially at the hairline. Your edges are fragile. If it hurts, say something. It’s not worth losing your hair over.
- Neglecting your scalp. An itchy, flaky scalp is a sign it needs attention. Keep it clean and moisturized.
- Leaving braids in for way too long. This is a big one. Braids are a temporary style. Keeping them in for more than 8 weeks is asking for trouble—think matting, buildup, and serious breakage when you finally take them down. Six to eight weeks is the sweet spot.
At the end of the day, braids are an amazing way to express your style. When done right and cared for properly, they not only look fantastic but also give your hair a healthy break from daily manipulation. Just remember it all starts with a healthy foundation and a little bit of know-how.

Galerie d’inspiration

The Tightness Test: Your braids should feel secure, but never painful. If you feel a constant pulling sensation, headaches, or see small bumps forming around the hairline within 48 hours, the tension is too high. This is a direct path to traction alopecia—hair loss that can become permanent. A professional stylist prioritizes your scalp’s health over an ultra-tight look.

Over 80% of hair damage related to braiding stems from improper tension and a lack of scalp moisture.
This isn’t just about looking good; it’s a health commitment. Neglecting your scalp while your hair is in a protective style is the biggest mistake you can make. The foundation of your braids needs regular attention, even when you can’t see it all.

How do I keep my edges looking sharp without causing breakage?
The key is using the right product and a light touch. A water-based edge control gel, like Shine ‘n Jam Magic Fingers or The Doux’s Mousse Def, provides hold without the flaking and drying effects of alcohol-heavy formulas. Apply a small amount with your fingertip or a soft brush, and always wrap your hairline with a satin or silk scarf for at least 30 minutes to set the style.

- Protects your style from frizz and friction
- Prevents your cotton pillowcase from absorbing essential moisture
- Reduces the chance of stray hairs and flyaways
The secret? A non-negotiable night routine. Wearing a silk or satin durag, bonnet, or sleeping on a pillowcase made of the same material is the single most effective way to extend the life and look of your braids.

The world of braids is vast. Beyond the popular box braids, consider exploring styles with deep cultural roots and unique aesthetics. Fulani braids, for instance, often feature a central braid down the middle with others braided towards the sides, decorated with beads. Cornrows can be crafted into intricate geometric or curving patterns, creating a look that’s truly a work of art.


Scalp Spray: A lightweight, water-based spray with ingredients like aloe vera or tea tree oil. Ideal for daily refreshment and soothing itchiness without heavy buildup. Brands like As I Am and Cantu make excellent options.
Scalp Oil: A more intensive treatment, perfect for applying every 2-3 days. Look for nourishing oils like jojoba or almond. Mielle Organics’ Rosemary Mint Scalp Oil is a cult favorite for stimulating growth and maintaining health.
Choose based on your scalp’s needs: spray for quick relief, oil for deep nourishment.

Think of your parting grid as the architecture of your style. Clean, sharp parts are the hallmark of a professional job and fundamentally change the final look.
- Box/Triangle Parts: Classic and versatile, creating a uniform, neat appearance.
- C-Curve Parts: Adds a natural flow and visual interest, especially for styles worn down.
- Freestyle/Organic Parts: For a more casual, less structured vibe that looks effortlessly cool.

That feeling when you first leave the chair with a fresh set of braids is unmatched. It’s more than a hairstyle; it’s a statement of confidence and identity. The precision, the weight, the way it frames your face—it’s an instant upgrade that carries a powerful sense of self.
Wondering if you need to add extensions? It’s all about your goal. Adding synthetic or human hair (like Kanekalon) allows for greater length and thickness than your natural hair might permit. It also lets you play with color without commitment and can help the style last longer by providing a more robust structure. If your hair is already long and dense, you may not need them for a full look.
- Wash your hair 24-48 hours before your appointment, not the morning of. Hair that is slightly damp is harder to grip and part cleanly.
- Avoid heavy oils or creams right before you go in. A light leave-in conditioner is fine, but greasy hair makes the stylist’s job much harder.
- Have a few reference photos, but be open to your stylist’s expert opinion on what will work for your hair type and head shape.


