Your Ultimate Guide to Getting the Perfect Caramel Balayage
As a hair colorist who’s been behind the chair for a good long while, I’ve seen more hair trends than I can count. Most of them fade out, but every now and then, a technique comes along that just sticks. Caramel balayage is definitely one of those keepers.
In this article
- First Things First: Balayage vs. Traditional Foils
- The Science Behind the Color (The Not-Boring Version)
- Finding a Great Stylist & Nailing the Consultation
- What to Expect During Your Appointment (The 3-5 Hour Journey)
- A Little Prep Goes a Long Way: Before You Book
- Keeping That Caramel Glow: At-Home Care
- When Balayage Goes Bad (And How a Pro Can Fix It)
- The Bottom Line: Safety and Cost
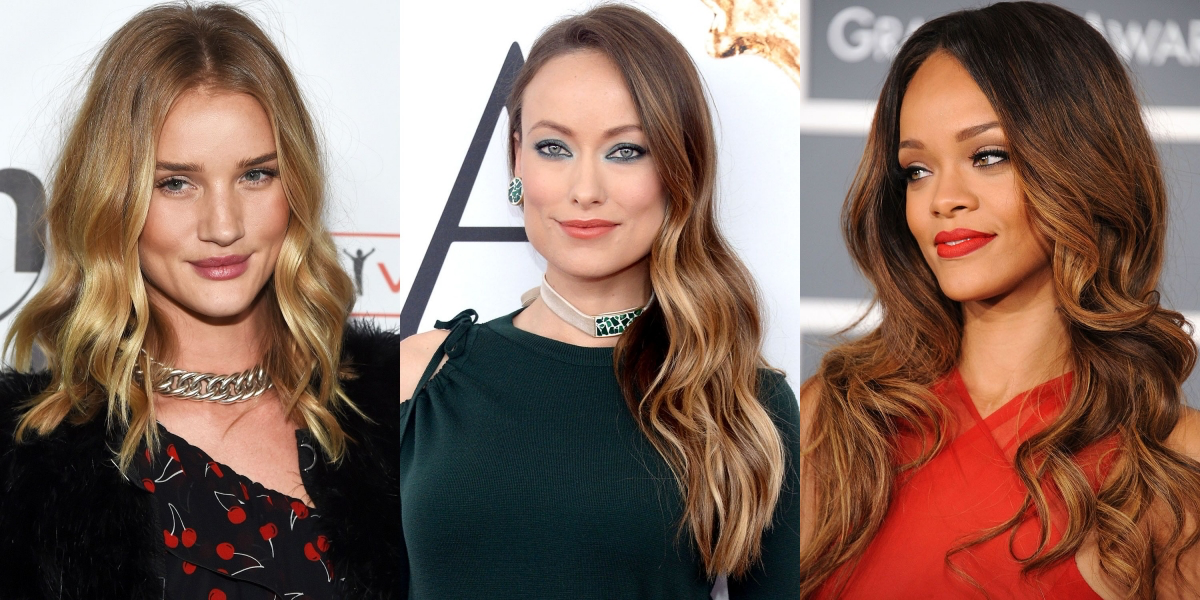
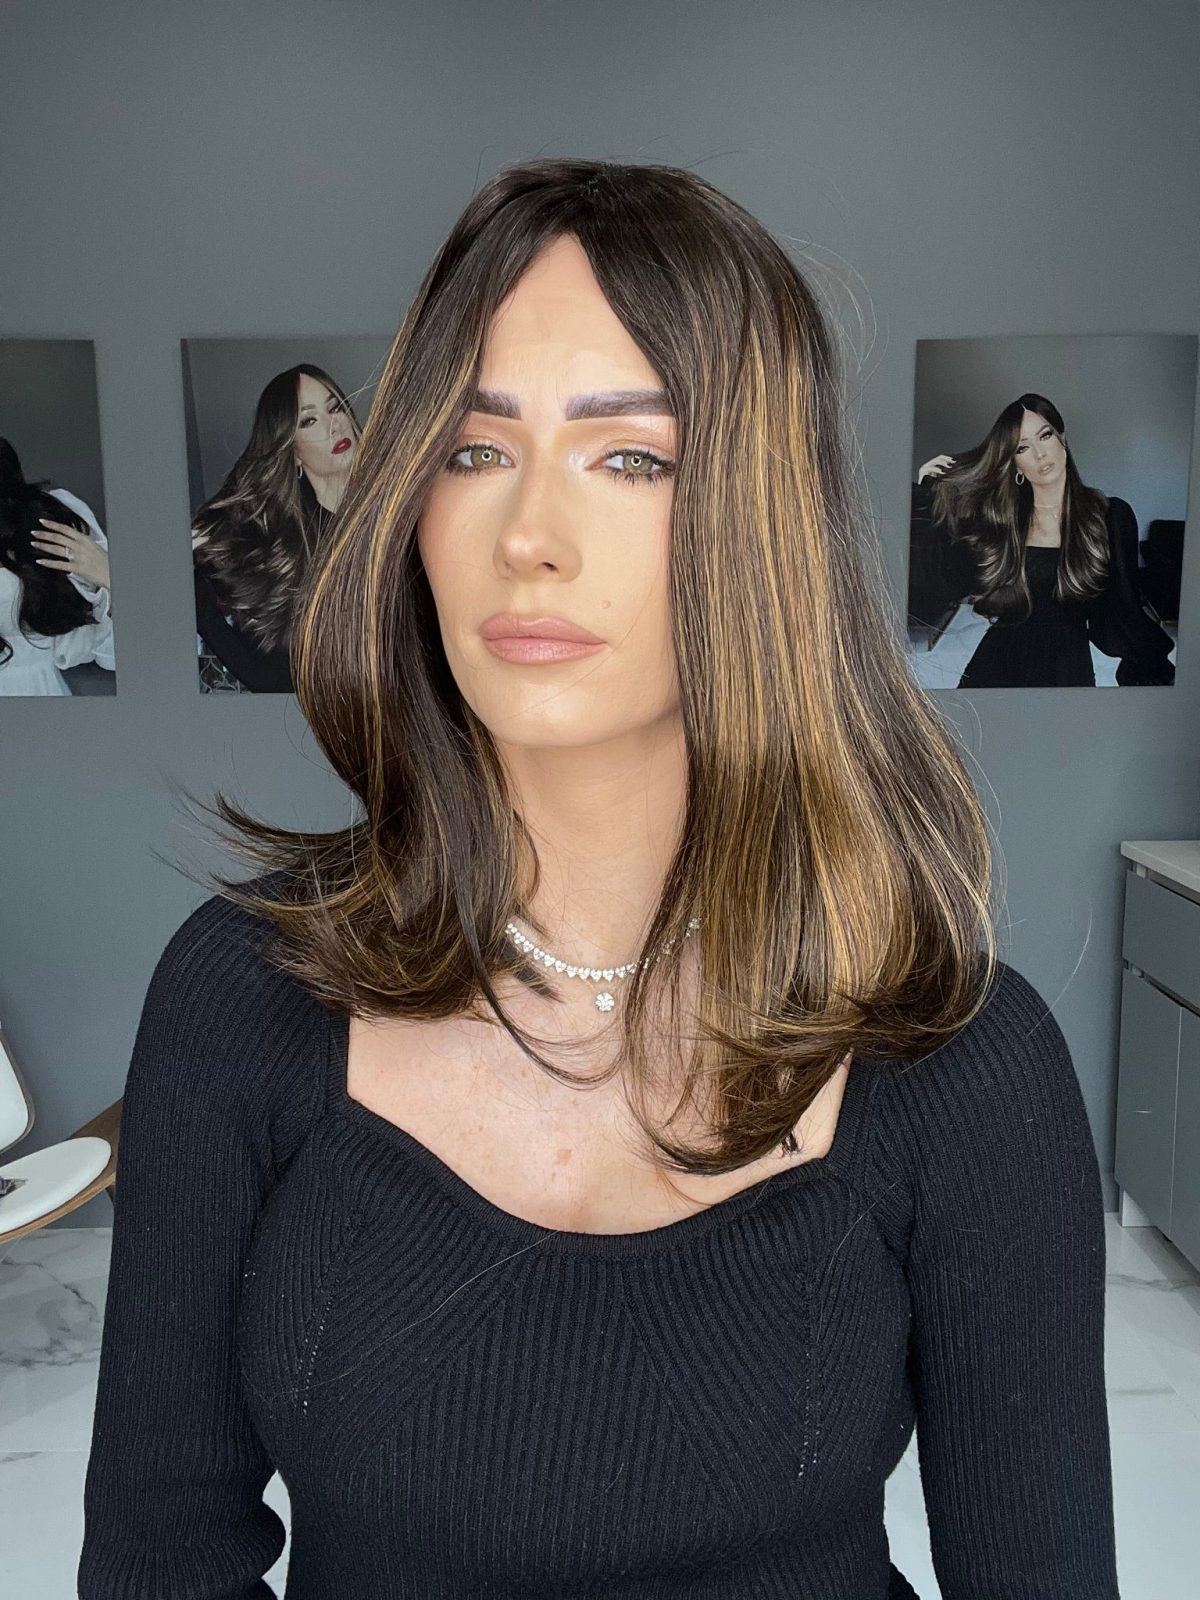
- Galerie d’inspiration
It’s not just a fleeting style; it’s a genuine craft. When it’s done right, the color looks incredibly natural, grows out without any awkward lines, and just makes you feel amazing. But let’s be real, the difference between a decent balayage and a truly jaw-dropping one is huge. It all comes down to the colorist’s skill, a little bit of science, and a good, honest chat before any color even touches your hair.
Clients often walk in with a Pinterest photo, dreaming of that soft, sun-kissed glow. But what they don’t always see is the detailed work that goes into creating it. This isn’t just slapping on some lightener. So, let’s pull back the curtain and walk through what the process really looks like from my side of the chair. This way, you’ll know what to ask for, what to expect, and how to keep your hair looking fantastic long after you leave the salon.
First Things First: Balayage vs. Traditional Foils
So what makes balayage different from the old-school highlights you might be used to? It’s all in the application. The word “balayage” itself is French for “to sweep,” and that’s a perfect description. We use a freehand painting technique, sweeping lightener onto the surface of the hair.
Think of it this way:
- Traditional foils are all about precision and uniformity. We saturate small sections of hair in lightener and wrap them in foil. This creates a very distinct, evenly-lit highlight from root to tip. It’s a more structured look.
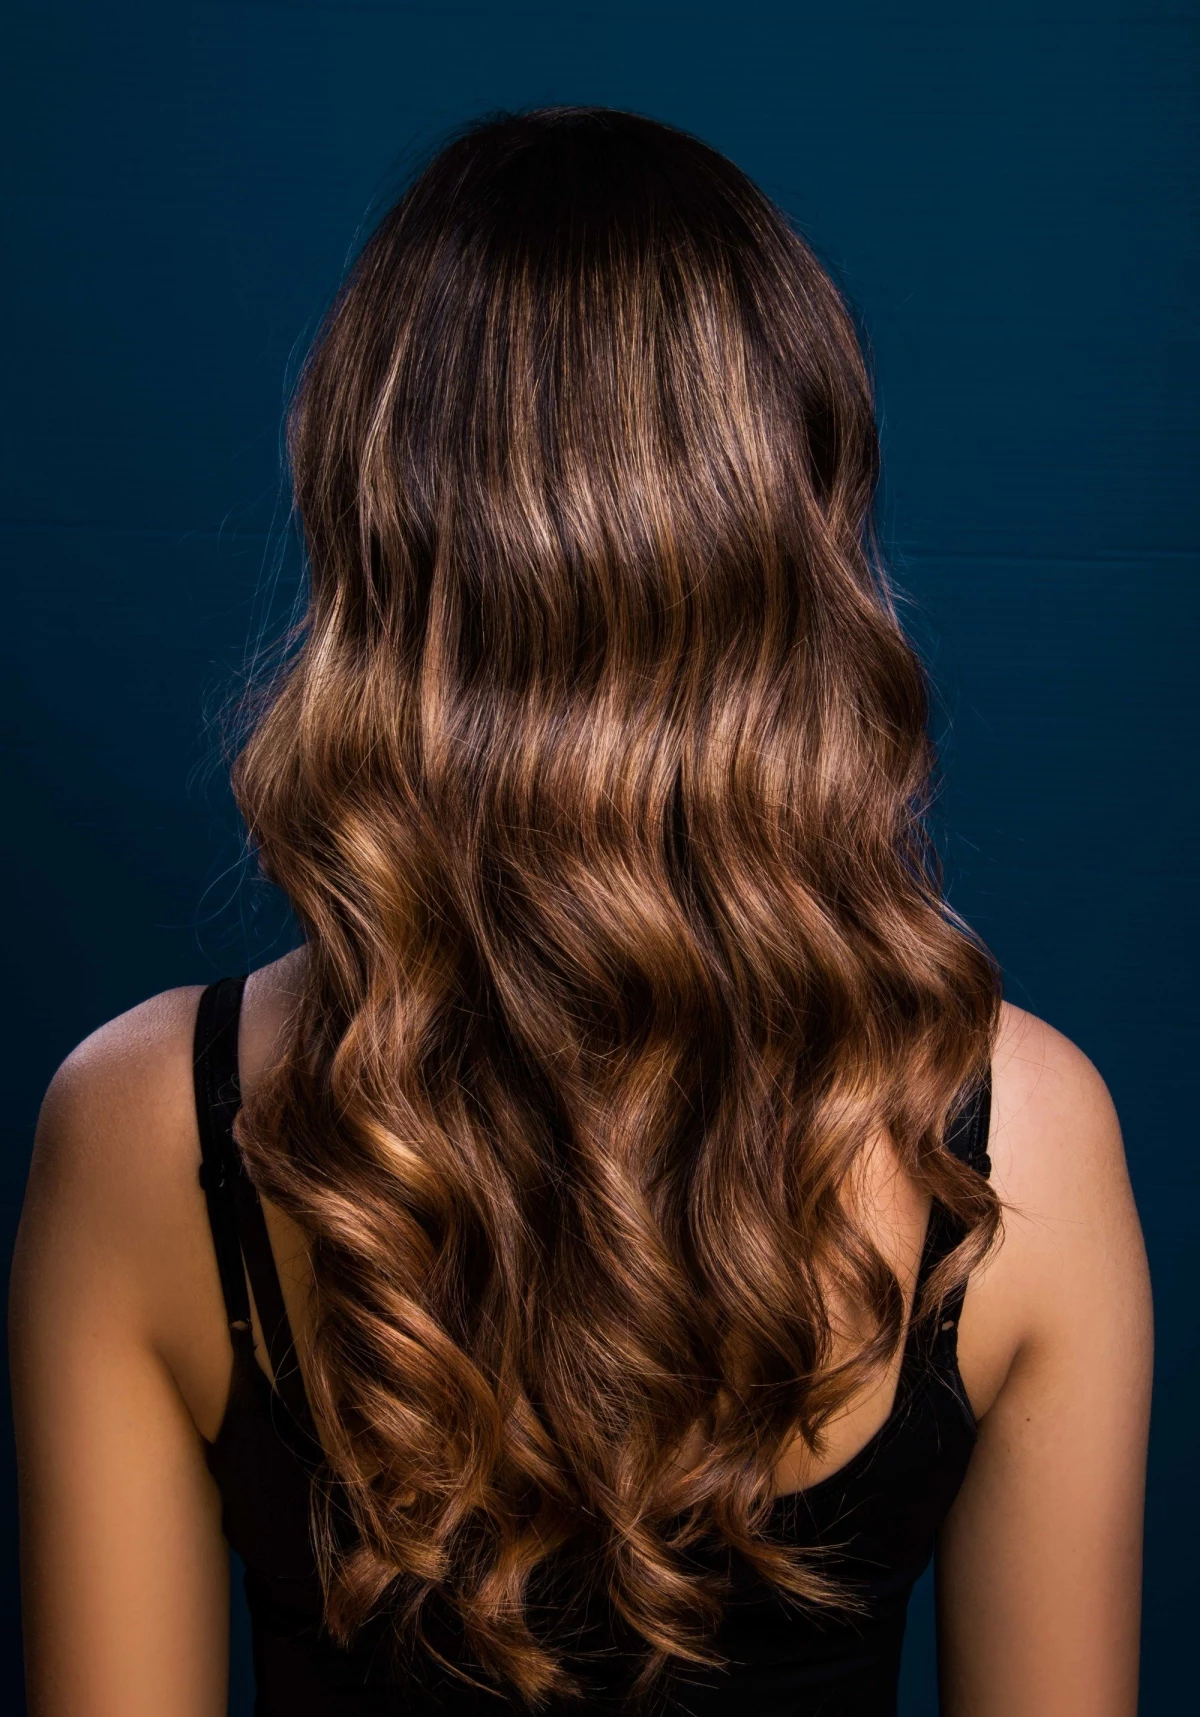
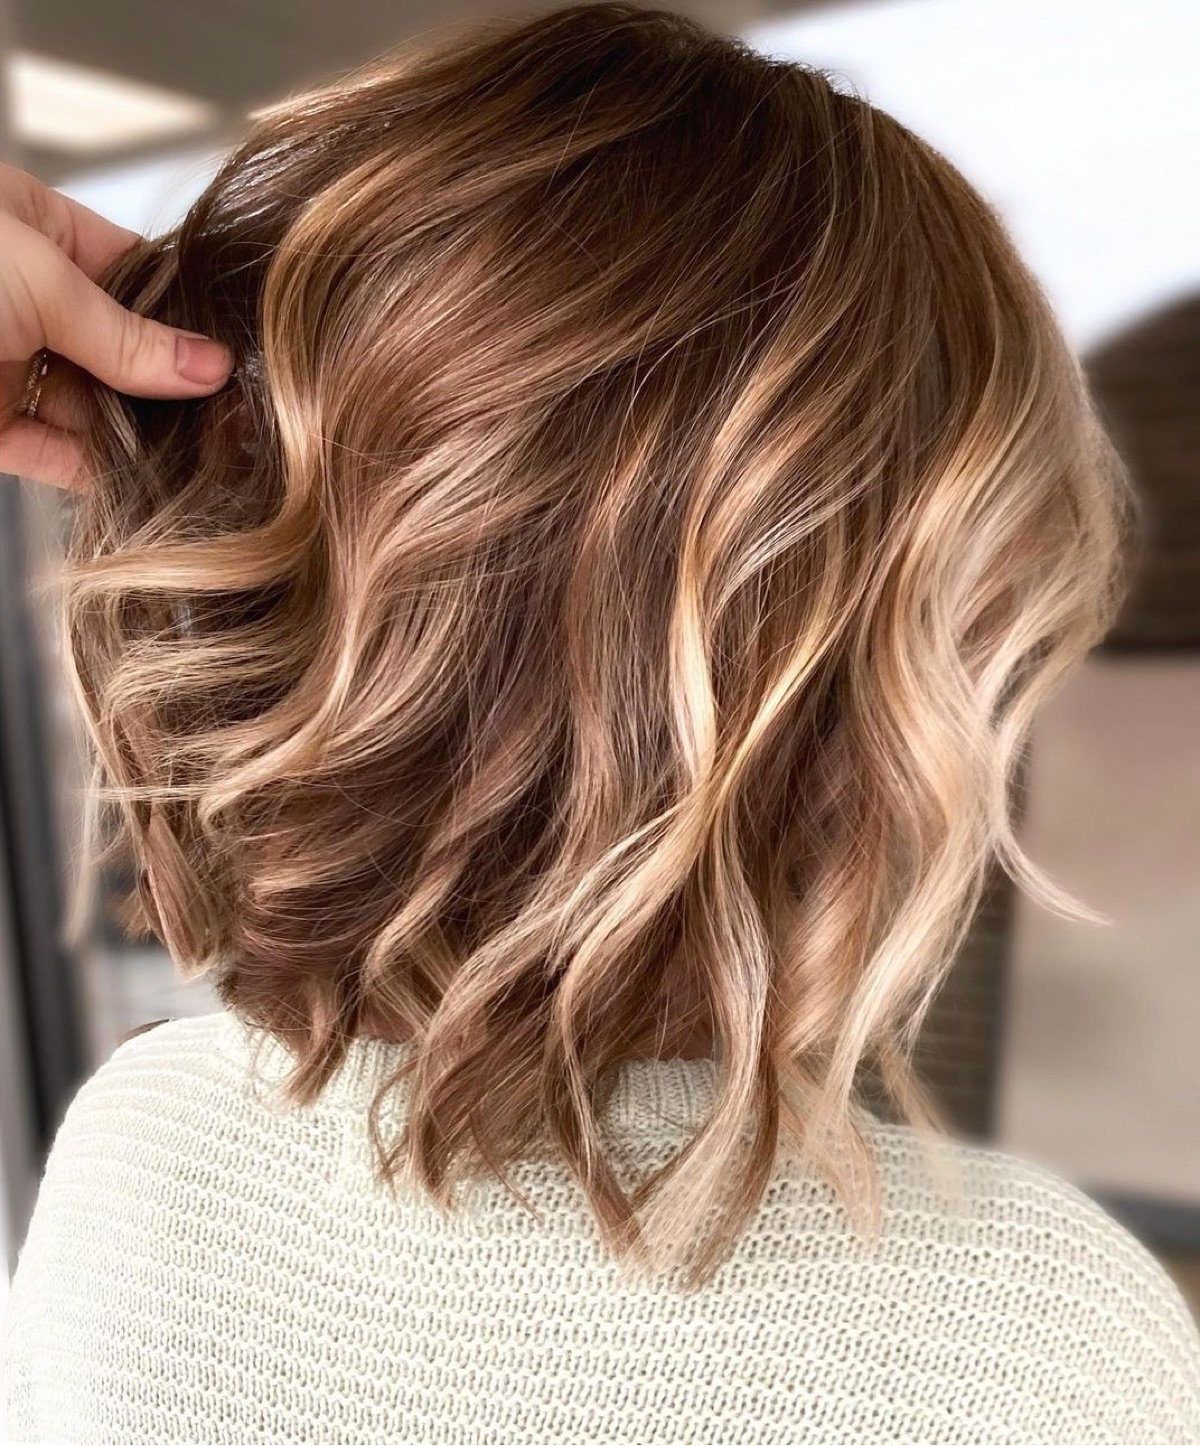
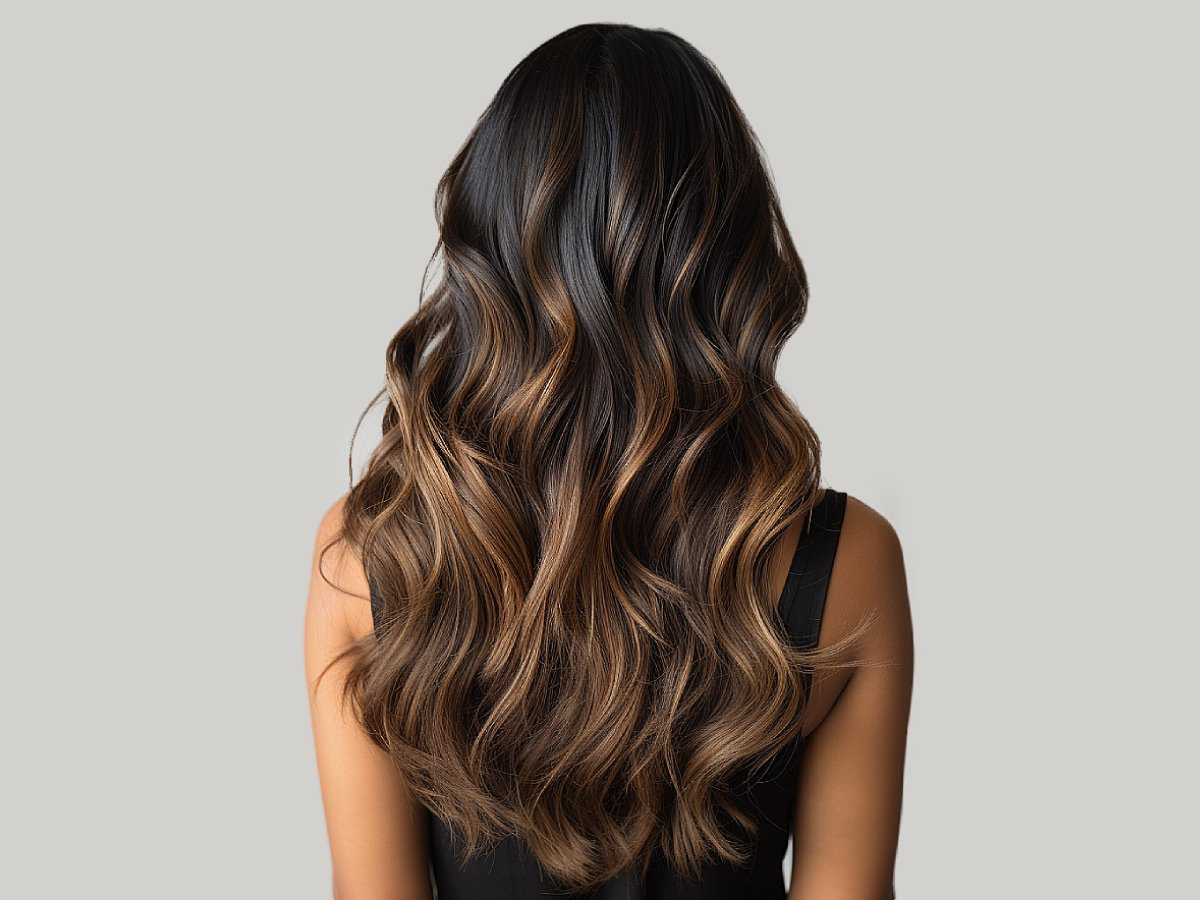
- Balayage is more like artistry. By painting the surface, we create a soft, diffused highlight that melts into your natural color. The grow-out is a game-changer; because there’s no hard line at the root, you can go months without a touch-up. It’s the definition of low-maintenance glamour.
The Science Behind the Color (The Not-Boring Version)
Okay, a little bit of chemistry is involved, but I’ll make it quick. We mix a powder lightener with a developer (a creamy peroxide) to create the magic paste. For balayage, we typically use a 20 or 30-volume developer—anything higher is too aggressive for this kind of open-air technique and can be rough on the hair.
When this mix is painted on, it gently opens the hair’s outer layer to lift out the natural color pigment. Here’s a pro-tip: hair doesn’t just lift to blonde. It goes through stages of warmth. For dark hair, that means lifting through red, orange, and then yellow. The goal for a perfect caramel is to lift it to just the right orange-yellow stage. If we don’t lift it enough, you get brassy red. Too much, and you lose that rich, warm base we need for a true caramel.
And this brings me to the most important step that many people don’t know about: the toner.
After we rinse the lightener, the hair is rarely the finished color. It’s usually a raw, brassy yellow or orange. A toner (or gloss) is a demi-permanent color we apply all over to neutralize those unwanted tones and deposit the beautiful shade you actually want. To get a rich caramel, I’m often toning a strand of hair that looks like a bright construction-cone orange. By adding a toner with a blue-violet base, I can cancel out the brassiness, leaving behind a perfectly balanced, warm caramel. It’s the secret sauce.
Finding a Great Stylist & Nailing the Consultation
Honestly, the success of your balayage depends almost entirely on the person applying it. So how do you find a good one?
Look for these green flags:
- Their Instagram page shows lots of balayage work, including photos and videos of the process. Even better if they show pictures of how the color looks grown-out after a few months.
- They require a consultation for new color clients. This is non-negotiable.
- They ask you a ton of questions about your hair history.
- They’re honest about what’s possible in one session.
A major red flag? Anyone who promises to take you from black box dye to light caramel in one 3-hour appointment. Run.
During your 15-minute consultation, it’s your time to be clear. Instead of just pointing to a photo, try saying something like: “I love the dimension in this picture, but I want a warm caramel that will complement my skin tone without looking red or brassy. With my dark hair, is this look realistic for one session?” This tells the stylist exactly what you’re thinking and opens the door for an honest conversation.
What to Expect During Your Appointment (The 3-5 Hour Journey)
Caramel balayage is a long service, so get comfortable! Here’s a typical play-by-play:
- The Chat (Again): We’ll start by confirming the plan we made during your consultation and doing a quick strand test if your hair has a complex history (like old box dye).
- The Painting: This is the artistic part. I’ll mix my lightener to a thick, yogurt-like consistency and start painting. I use different brushes for different areas—small ones for delicate face-framing pieces and wider ones for broader sections. This can take anywhere from 45 minutes to 1.5 hours.
- Processing Time: Now, you just sit and let the lightener do its thing. I’ll keep a close eye on your hair to see how it’s lifting. I almost always add a bond-building treatment (you’ve probably heard of Olaplex) into my formula to protect your hair’s integrity. It’s a must.
- The Rinse & Tone: Once your hair has lifted to the perfect level, we head to the shampoo bowl. We’ll rinse, shampoo, and then apply the toner. This sits for another 10-20 minutes.
- The Grand Finale: After a final rinse and conditioning treatment, we’ll give you a trim to get rid of any dry ends and style your hair so you can see the finished product. The whole process can take a while, so bring a book or some headphones!
A Little Prep Goes a Long Way: Before You Book
Want to get the best results possible? Show your hair some love before your appointment. A little prep can make a huge difference.
Your Pre-Appointment Checklist:
- Hydrate, Hydrate, Hydrate: For a week or two beforehand, treat your hair to a deep conditioning mask once a week. Healthy, moisturized hair always lifts more evenly.
- Clarify (But Not Right Before): A few days before your appointment, use a clarifying shampoo to remove any product buildup. But don’t wash your hair the day of—a little natural oil on your scalp can help prevent irritation.
- Gather Your Inspo: Find 3-5 photos of what you love, but here’s a pro-tip: also find 1-2 photos of what you don’t want. This is incredibly helpful for a stylist.
Keeping That Caramel Glow: At-Home Care
You just made an investment in your hair, so you’ll want to protect it! At-home care is easily 50% of the battle.
First, get yourself a quality, sulfate-free shampoo. Sulfates are harsh detergents that will strip your beautiful new color right out. For a budget-friendly option, you could grab something like L’Oréal EverPure, or if you feel like splurging, Pureology is a salon favorite. Wash your hair less—maybe 2-3 times a week—and use a good dry shampoo on the off days.
Heads up! Heat is your color’s worst enemy. Wash with lukewarm water and always use a heat protectant spray before blow-drying or using hot tools. And finally, plan to come back for a gloss or toner appointment every 6-8 weeks. It’s a quick, 30-minute service that revives your caramel tone and adds a ton of shine, making your color look brand new again.
When Balayage Goes Bad (And How a Pro Can Fix It)
I’ve definitely seen my share of balayage-gone-wrong from other salons. The most common issue is harsh, stripey lines or big, splotchy patches. I once had a new client come in with exactly that—it was a mess. The first thing I did was a “root smudge.” I used a color close to her natural shade and gently blended it down from the root, blurring out those awful lines and creating a seamless transition. It instantly saved the look.
The other common problem is brassiness. And I don’t mean a warm, rich caramel—I mean that unwanted, faded orange color that looks like a rusty penny instead of a shiny new one. If a toner can’t fix it, it means the hair wasn’t lifted light enough to begin with. The only real fix is to either re-lighten those sections or tone the hair to a darker, more flattering shade of brown.
The Bottom Line: Safety and Cost
Okay, let’s talk money. Caramel balayage is a premium, skill-based service. Be prepared for a price tag anywhere between $250 and $600, depending on your city, your hair’s length and thickness, and the stylist’s experience level. And always ask if the cost includes the toner, bond-builder, and a trim—sometimes those are add-ons.
And please, for the love of hair, don’t try this at home. Lightener is a serious chemical that requires a professional eye. A great balayage is a collaboration—it’s a beautiful, timeless look that comes from a knowledgeable stylist and an educated client. And it’s worth every penny.
Galerie d’inspiration
Your caramel balayage is an investment, and protecting it starts the moment you leave the salon. To keep those warm tones from turning brassy and dull, a few key products are non-negotiable.
- Sulfate-Free Shampoo: Sulfates strip color. Switch to a gentle formula like the Pureology Hydrate or Kérastase Chroma Absolu ranges to cleanse without fading your hue.
- Color-Depositing Conditioner: Once a week, use a conditioner with a subtle caramel pigment, such as the Moroccanoil Color Depositing Mask in ‘Copper’, to refresh your tone between visits.
- Heat Protectant: Heat is the enemy of vibrant color. Always use a high-quality protectant spray before blow-drying or styling.
Fact: UV radiation from the sun can degrade hair color molecules, causing vibrant caramel tones to fade and turn brassy up to 40% faster.
This is why a good UV protectant hair spray isn’t just for beach days. Think of it like sunscreen for your hair. A light mist of a product like Sun Bum’s Hair Tripper or Coola’s Scalp & Hair Mist before you head out can significantly extend the life and richness of your balayage, keeping it looking salon-fresh for weeks longer.
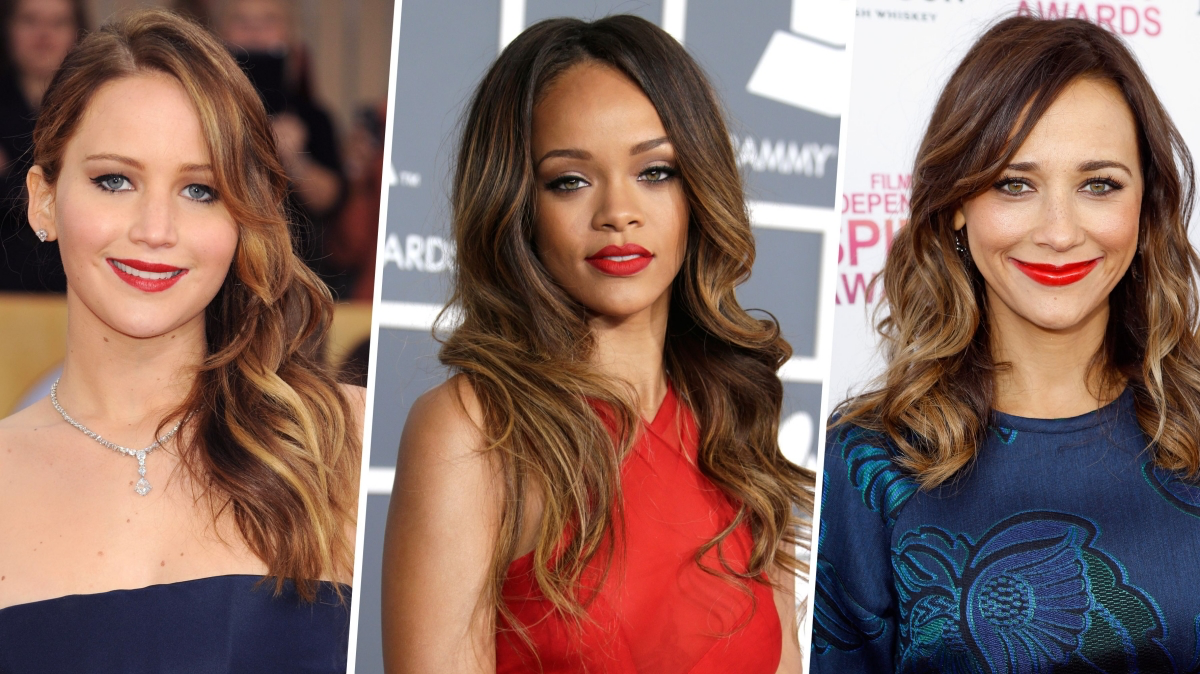
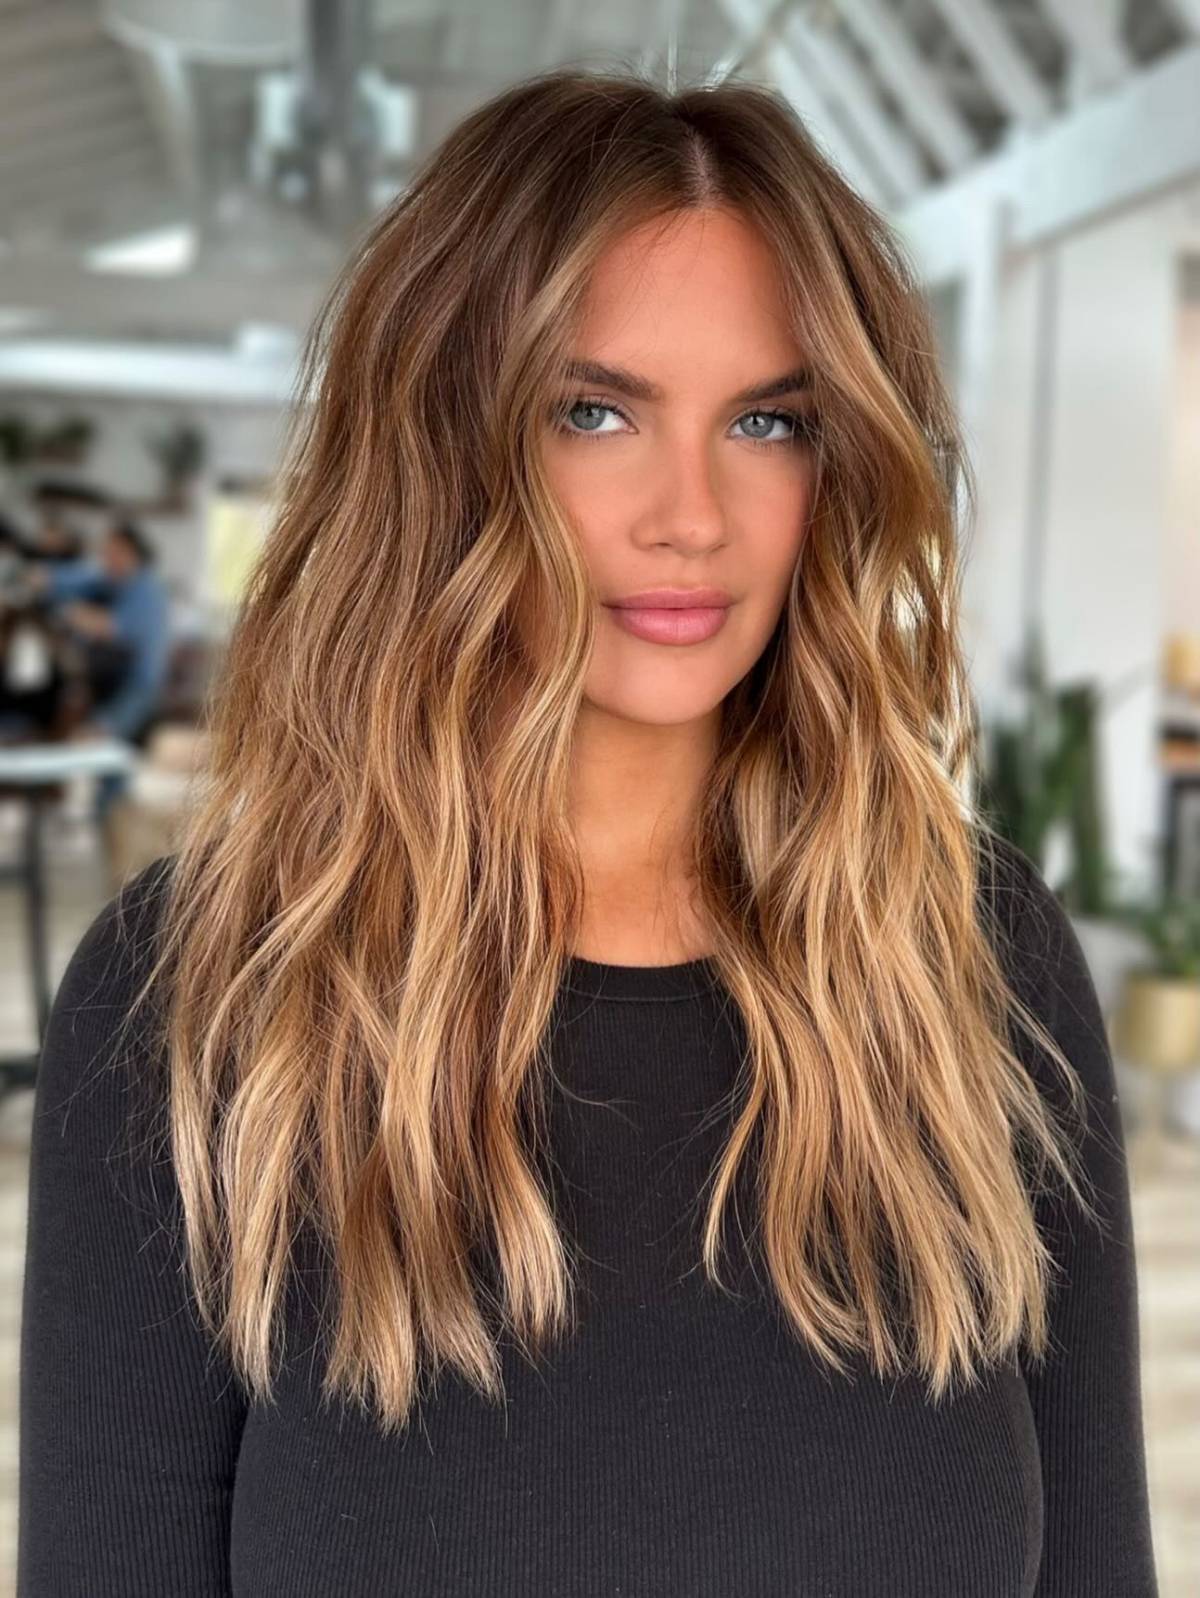
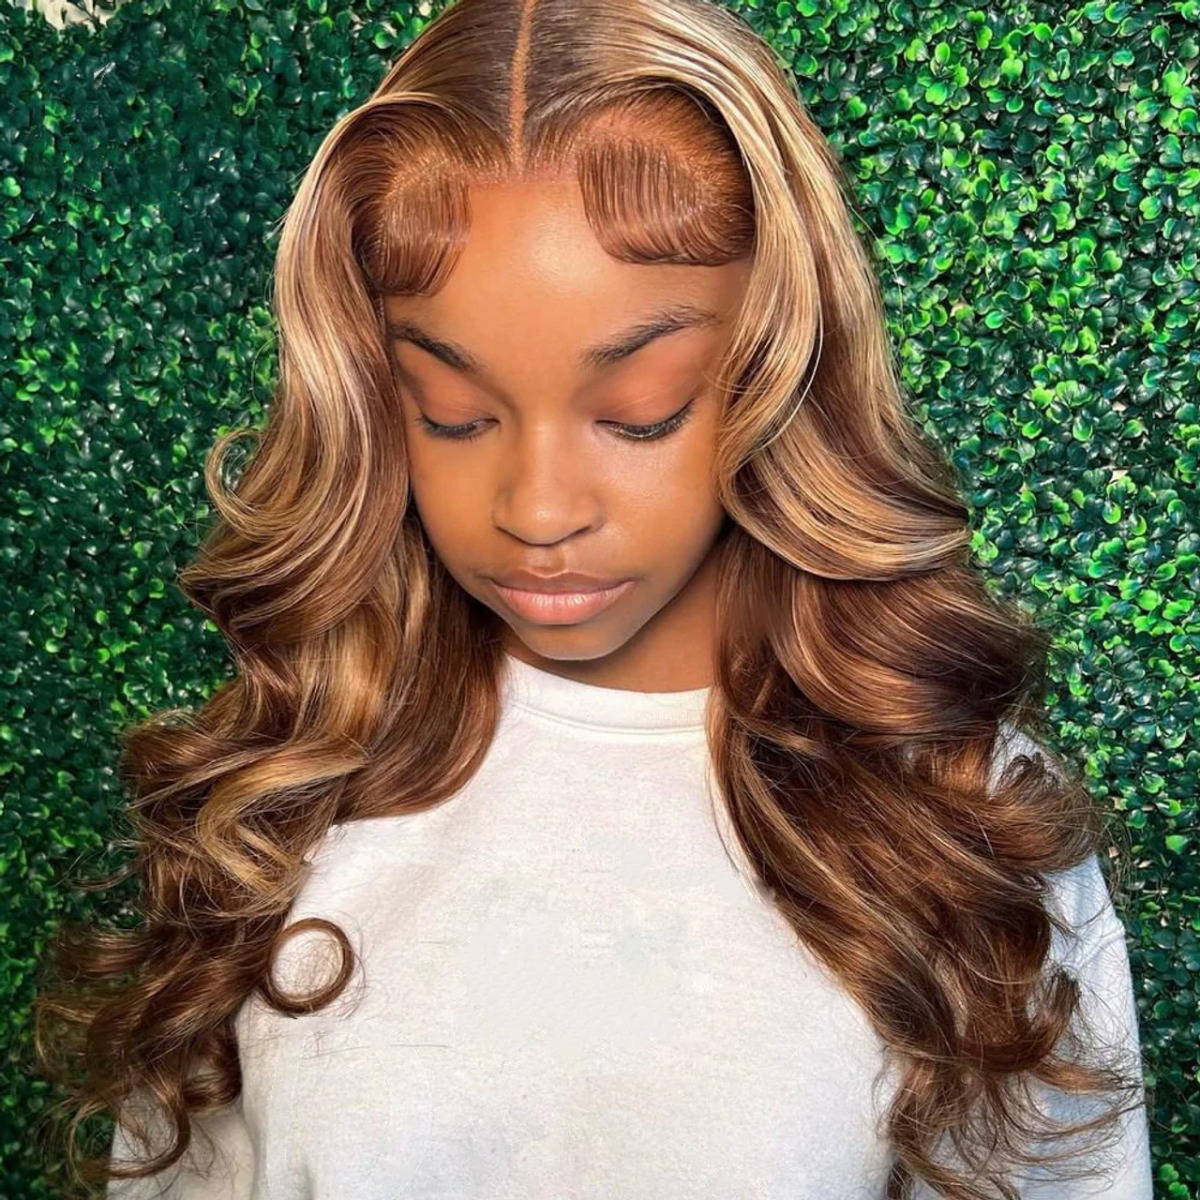
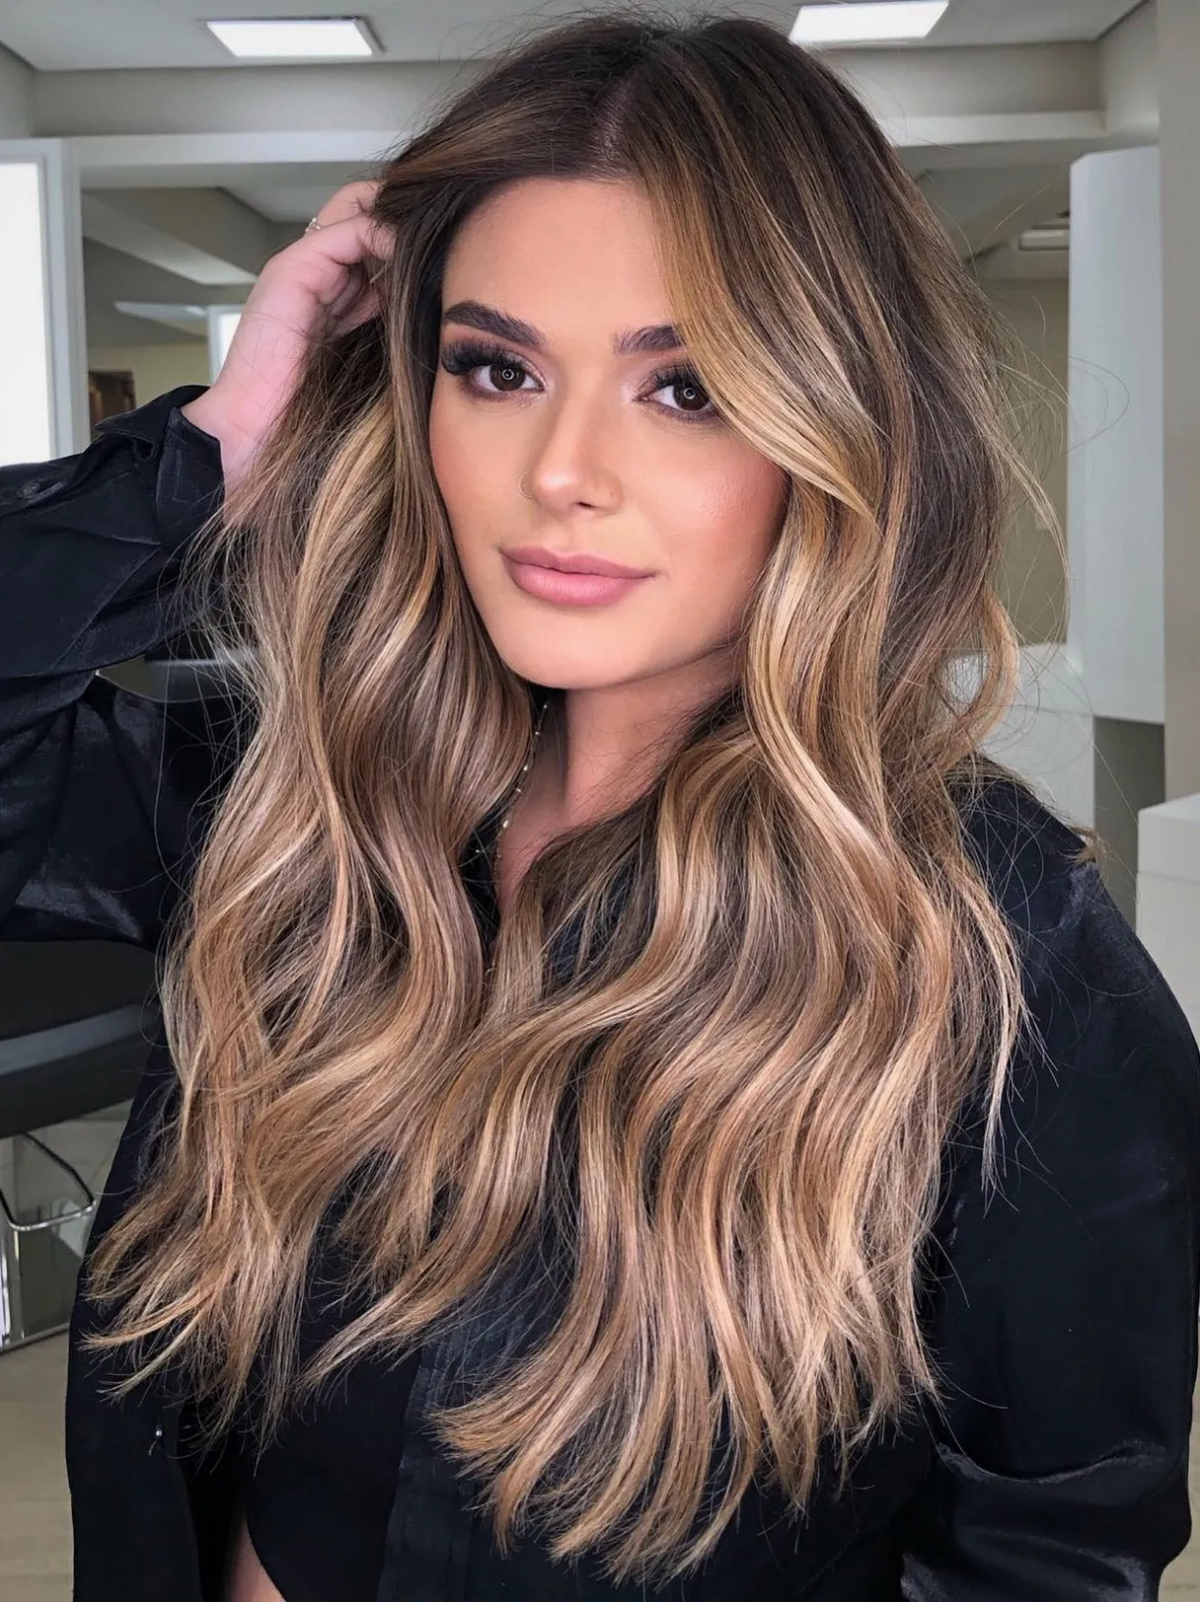
Wondering which caramel is for you? It’s all about complementing your skin tone.
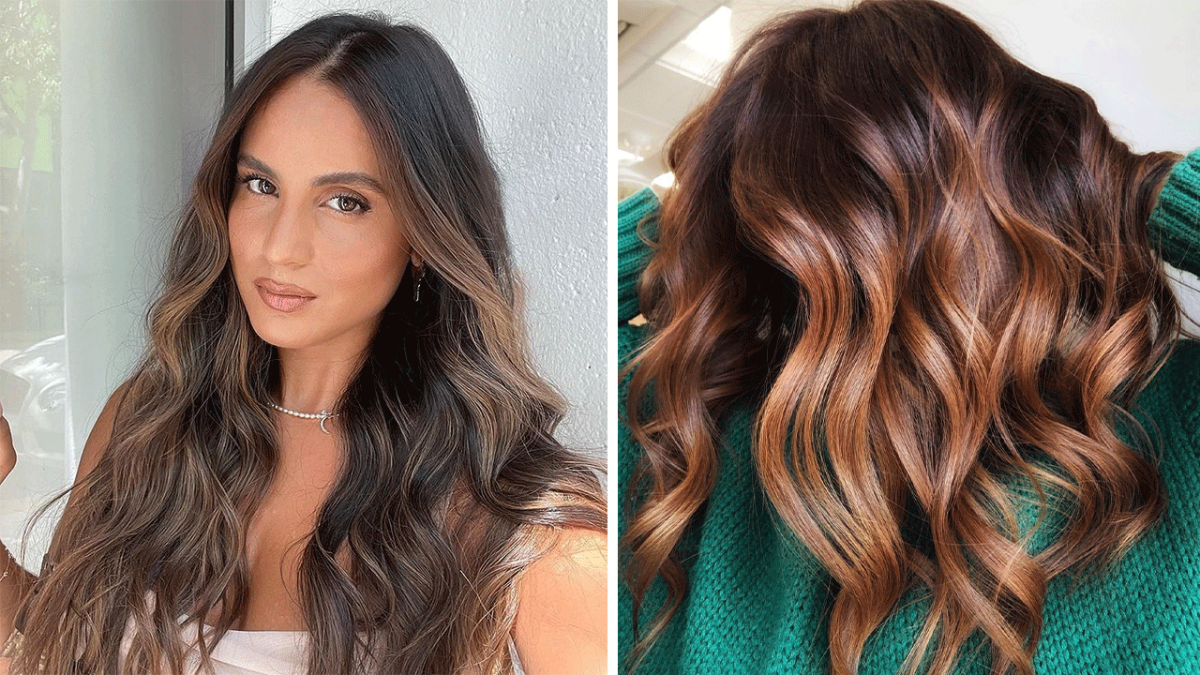
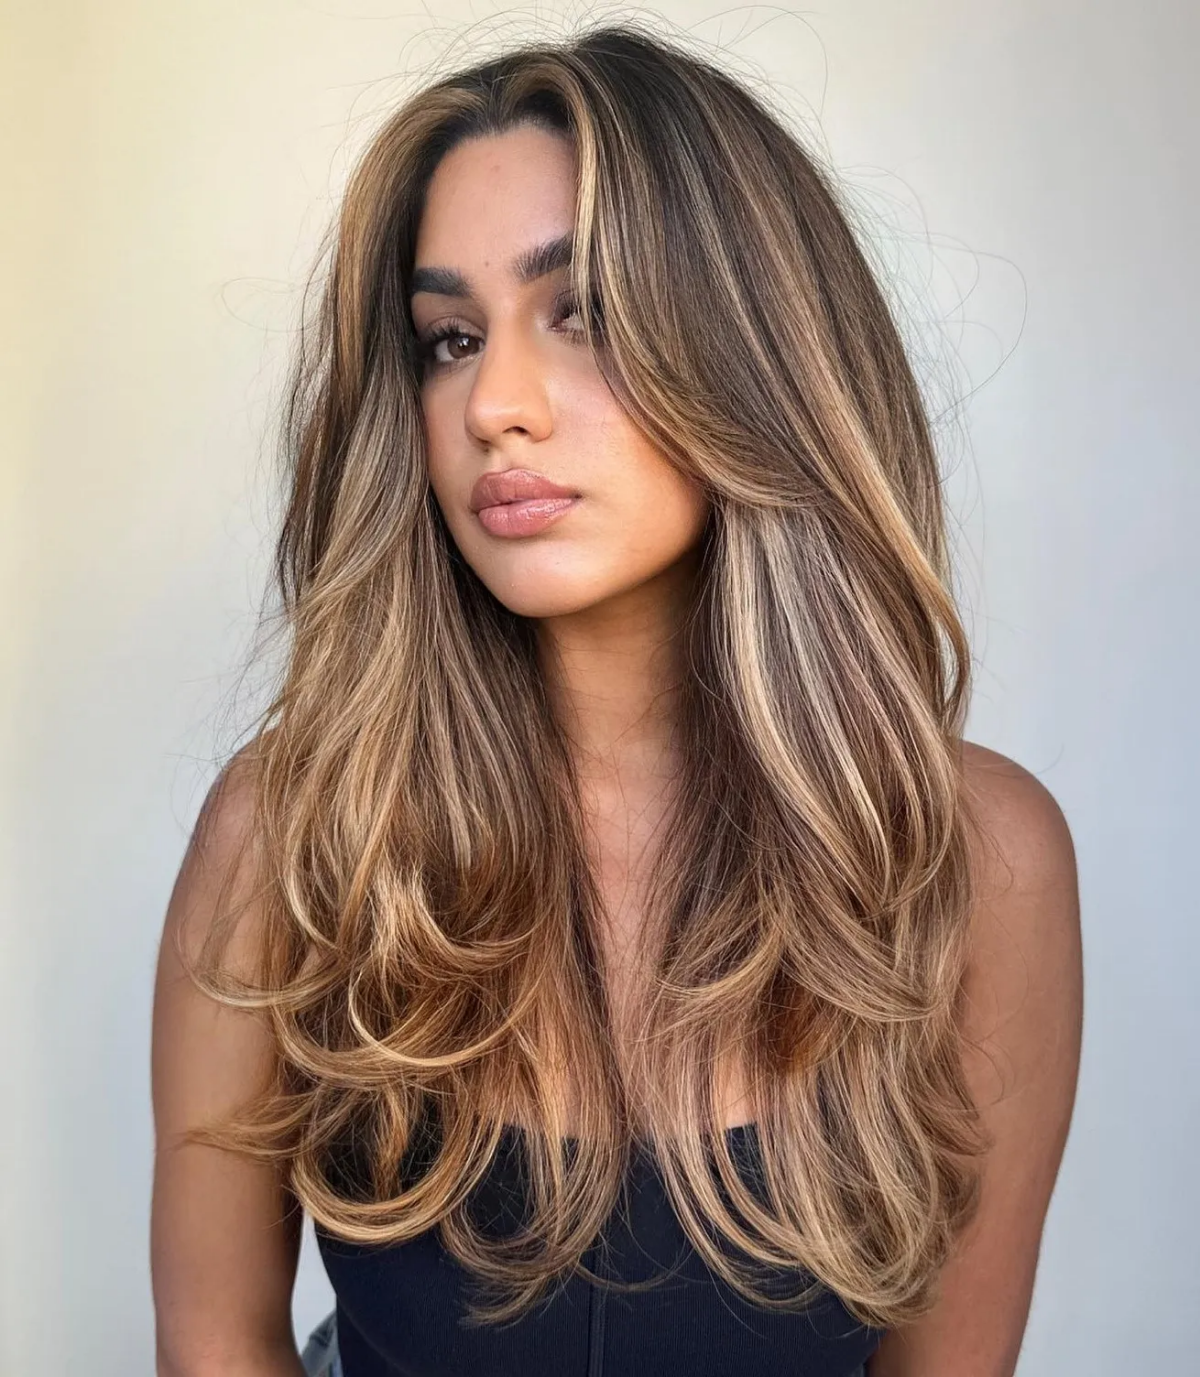
Honey Caramel: This shade is bright and golden, with sunny undertones. It’s perfect for lifting fairer complexions and adds a beautiful warmth to those with light to medium skin tones.
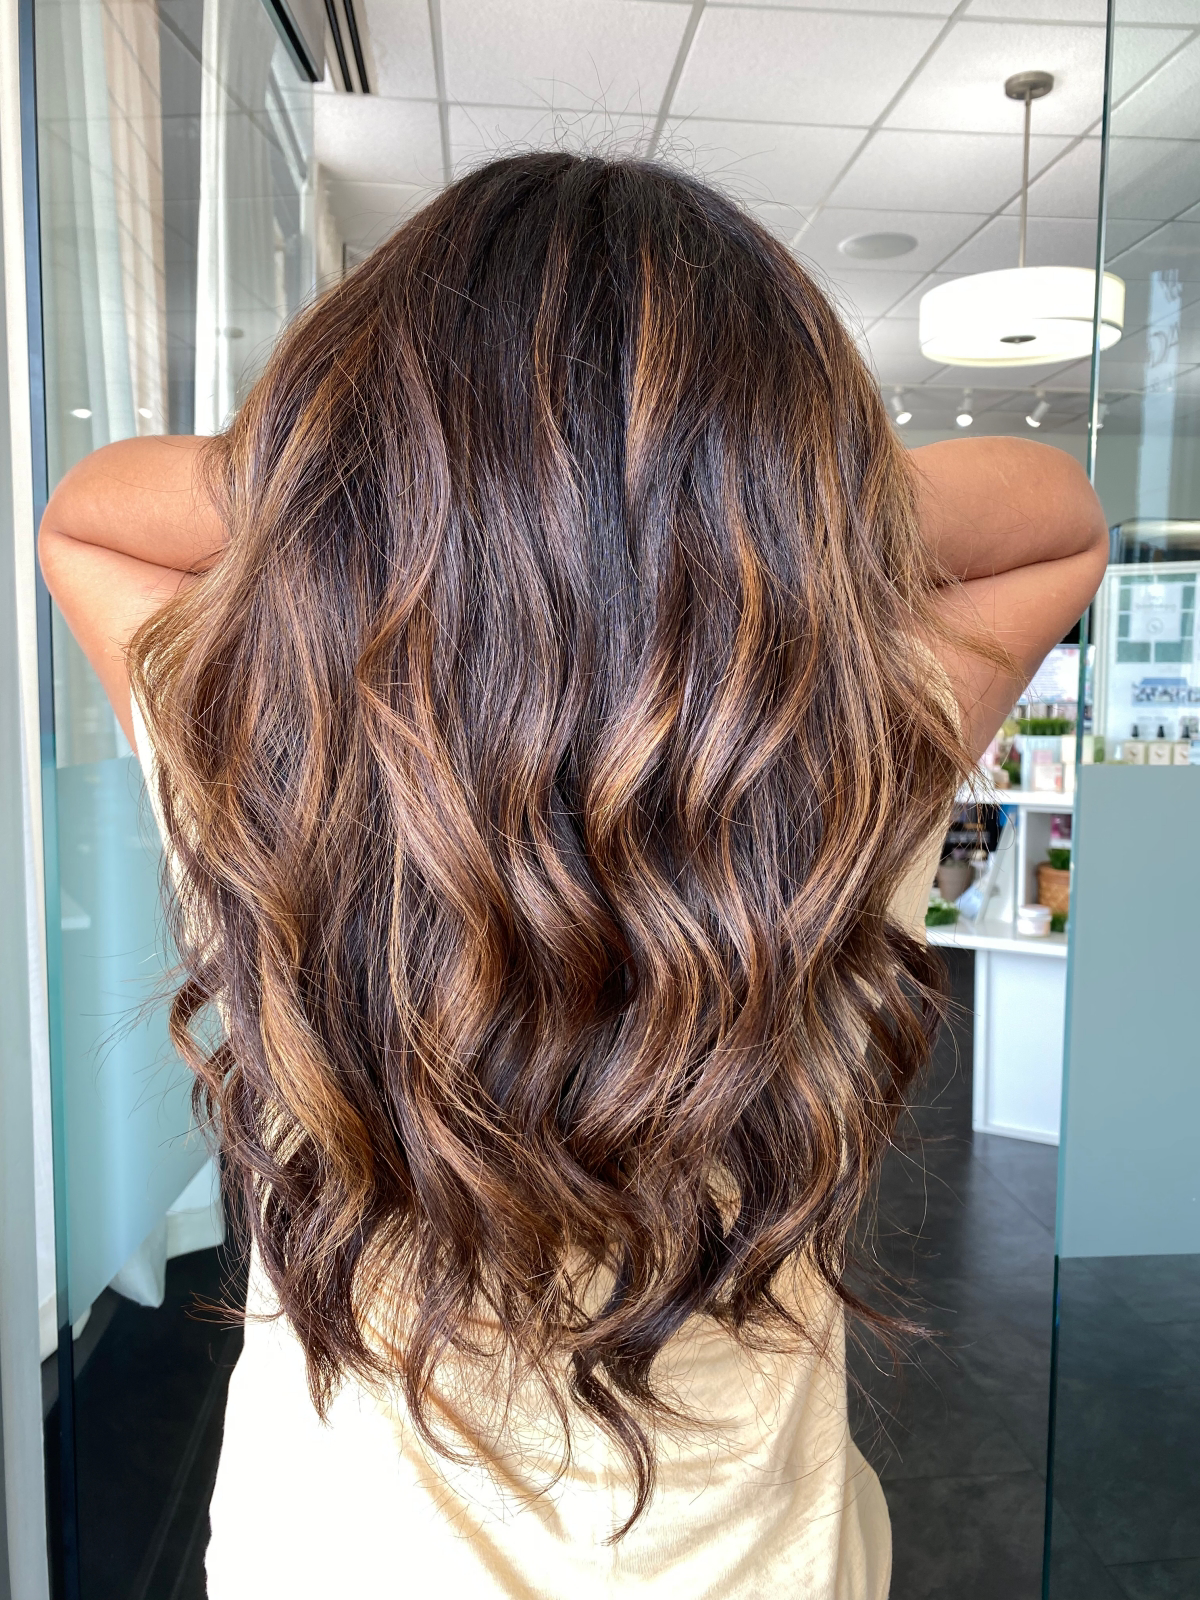
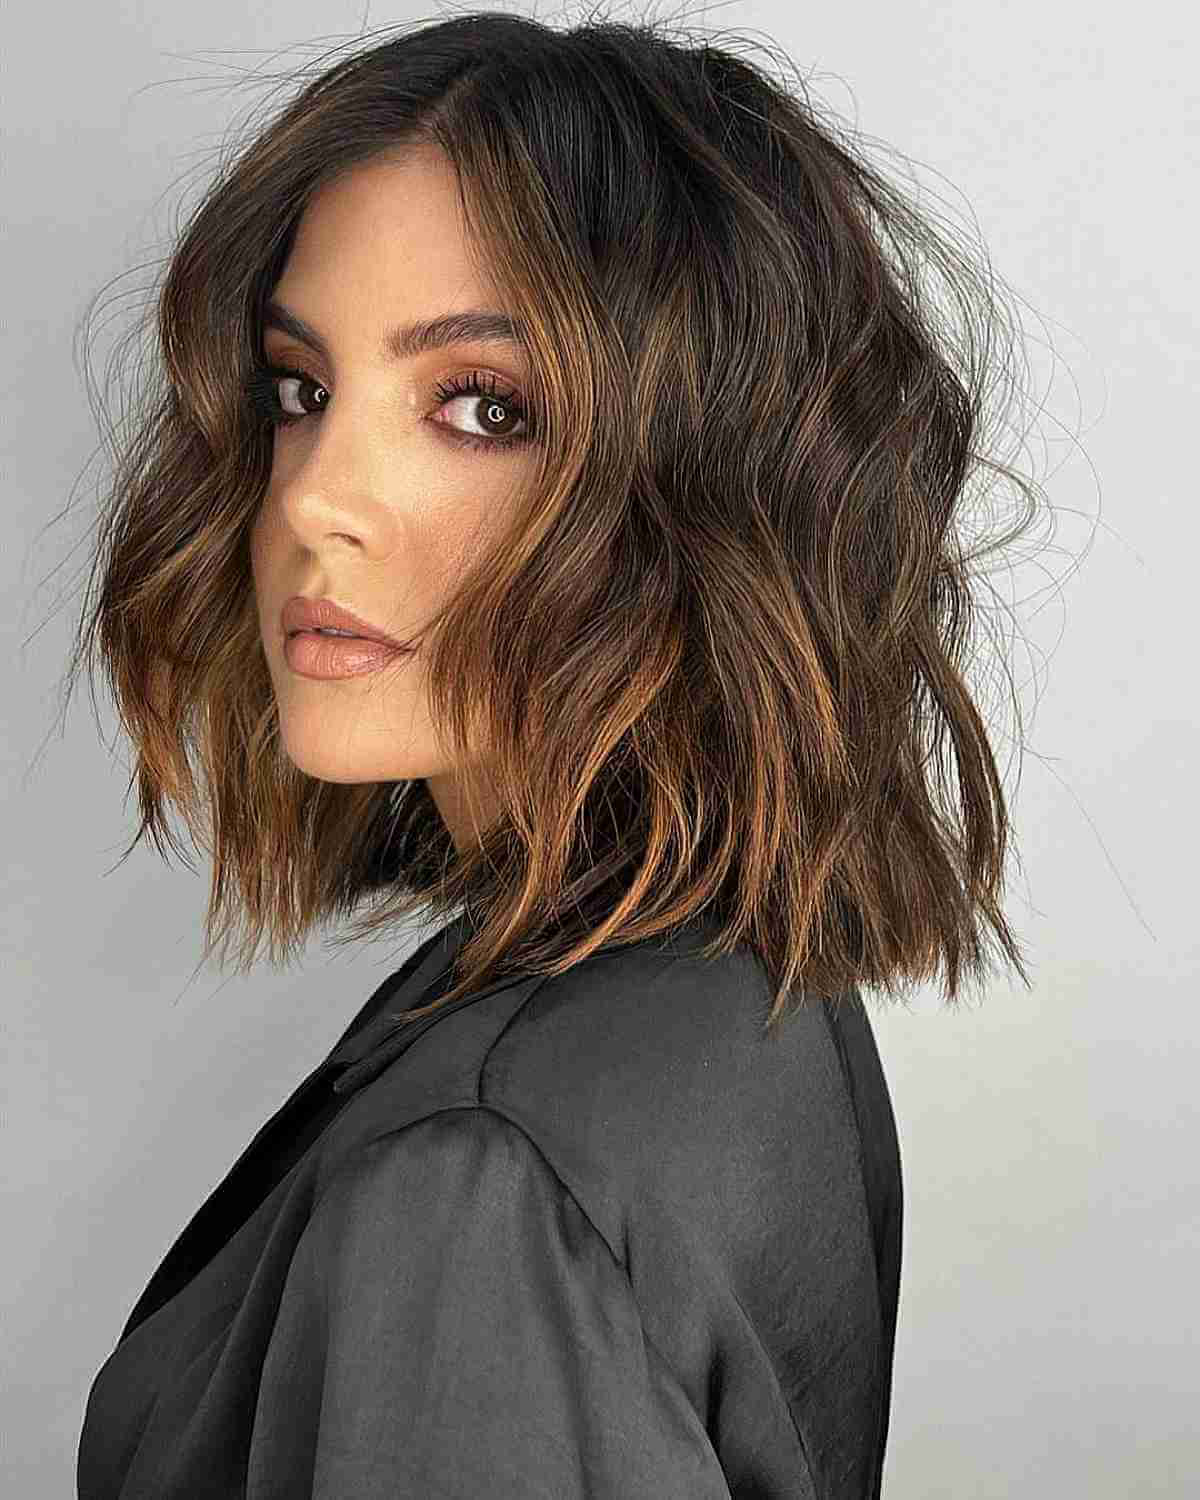
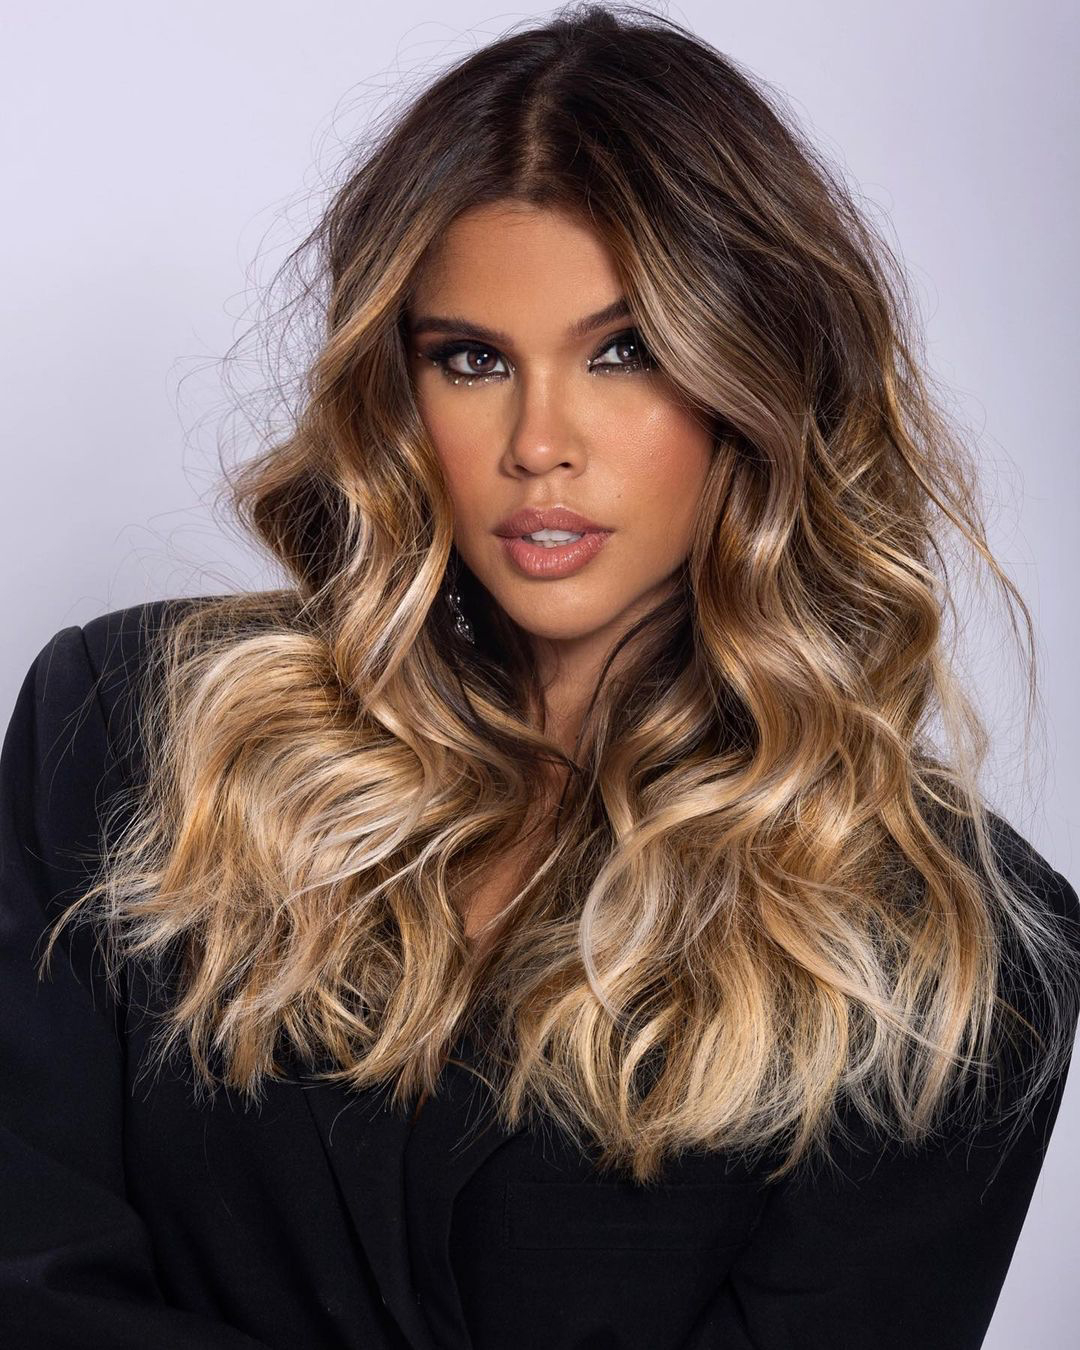
Chocolate Caramel: A deeper, richer option where caramel ribbons are woven through a dark brunette base. This creates a stunning, high-contrast look that beautifully complements olive and darker skin tones without looking harsh.
Ask your stylist to hold a few colored swatches against your cheek to see which one makes your features pop.
The single most important photo to bring to your consultation: A picture of a balayage you *dislike*. Showing your colorist what you want to avoid is just as crucial as showing them your inspiration. It helps clarify subjective terms like “too chunky,” “too stripey,” or “too warm,” and ensures you’re both perfectly aligned on the final vision.
- Your highlights look perfectly blended, with no harsh starting line.
- The color adds a radiant glow to your complexion.
- It grows out gracefully for months without needing a touch-up.
The secret behind this flawless finish? It’s often the ‘root melt’ or ‘root shadow’. After highlighting, your colorist applies a gloss or toner (like Redken Shades EQ) close to the scalp that is a shade between your natural color and the caramel highlights. This technique masterfully blurs any lines, creating that sought-after, natural-looking transition.
“The number one cause of a balayage disaster at home is using purple shampoo too aggressively. Caramel is a warm tone; overusing a purple shampoo designed to neutralize yellow in blondes will dull your beautiful warm highlights, leaving them looking muddy and flat.” – Expert Colorist Tip
Yes, a quality balayage is a splurge, often costing more upfront than a full head of foils. You’re not just paying for the color; you’re paying for artistry. The technique is far more intricate and requires a higher level of skill and more time in the chair. But consider the long-term value: the soft, seamless grow-out means you can stretch appointments to every 4-6 months, versus the 6-8 week schedule for root-heavy foils. It’s a true ‘invest now, save later’ service.


