Mocha Brown Hair: A Pro Colorist Spills the Secrets to Getting It Right
I’ve been a professional colorist for a long, long time—more than twenty years behind the chair. And in that time, I’ve seen hair color trends come and go. Some are just a flash in the pan, but others? Others have serious staying power. Mocha brown is definitely in that second group.
In this article
It’s not just a trendy shade for right now; it’s a timeless, sophisticated color that genuinely works for a huge range of people. Clients ask me for it all the time, but what they often mean by “mocha” can be a few different things. So, let’s clear that up.
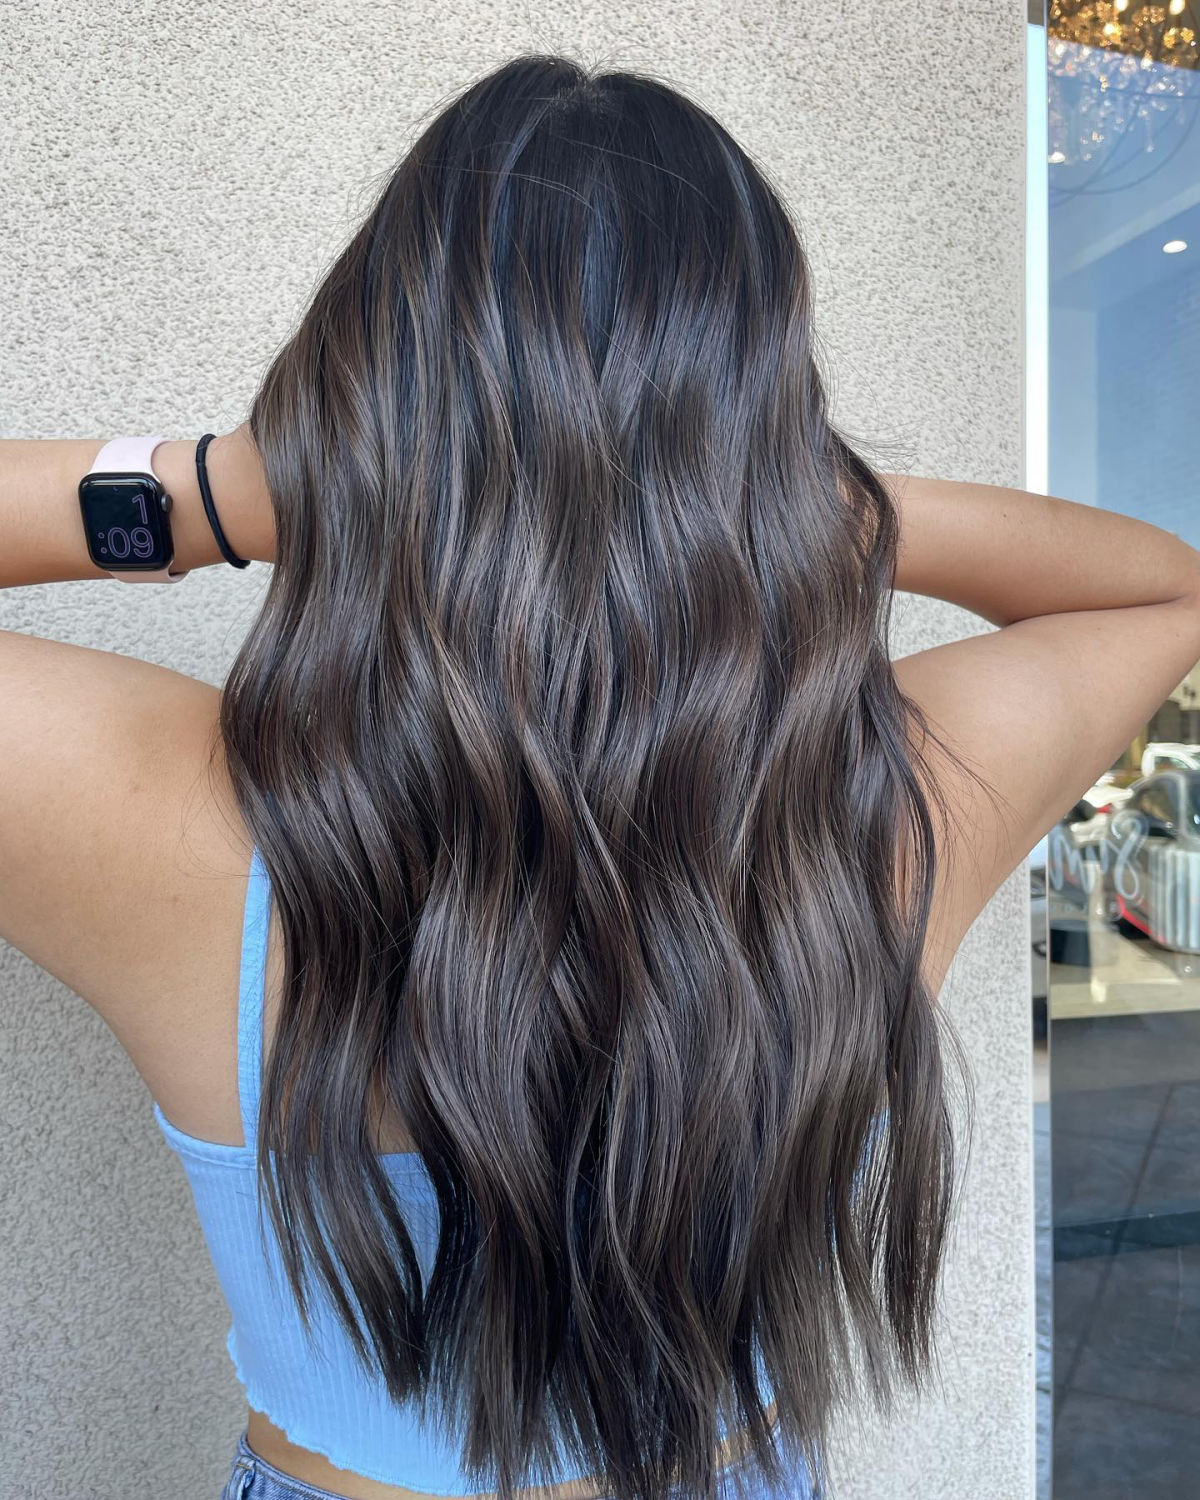
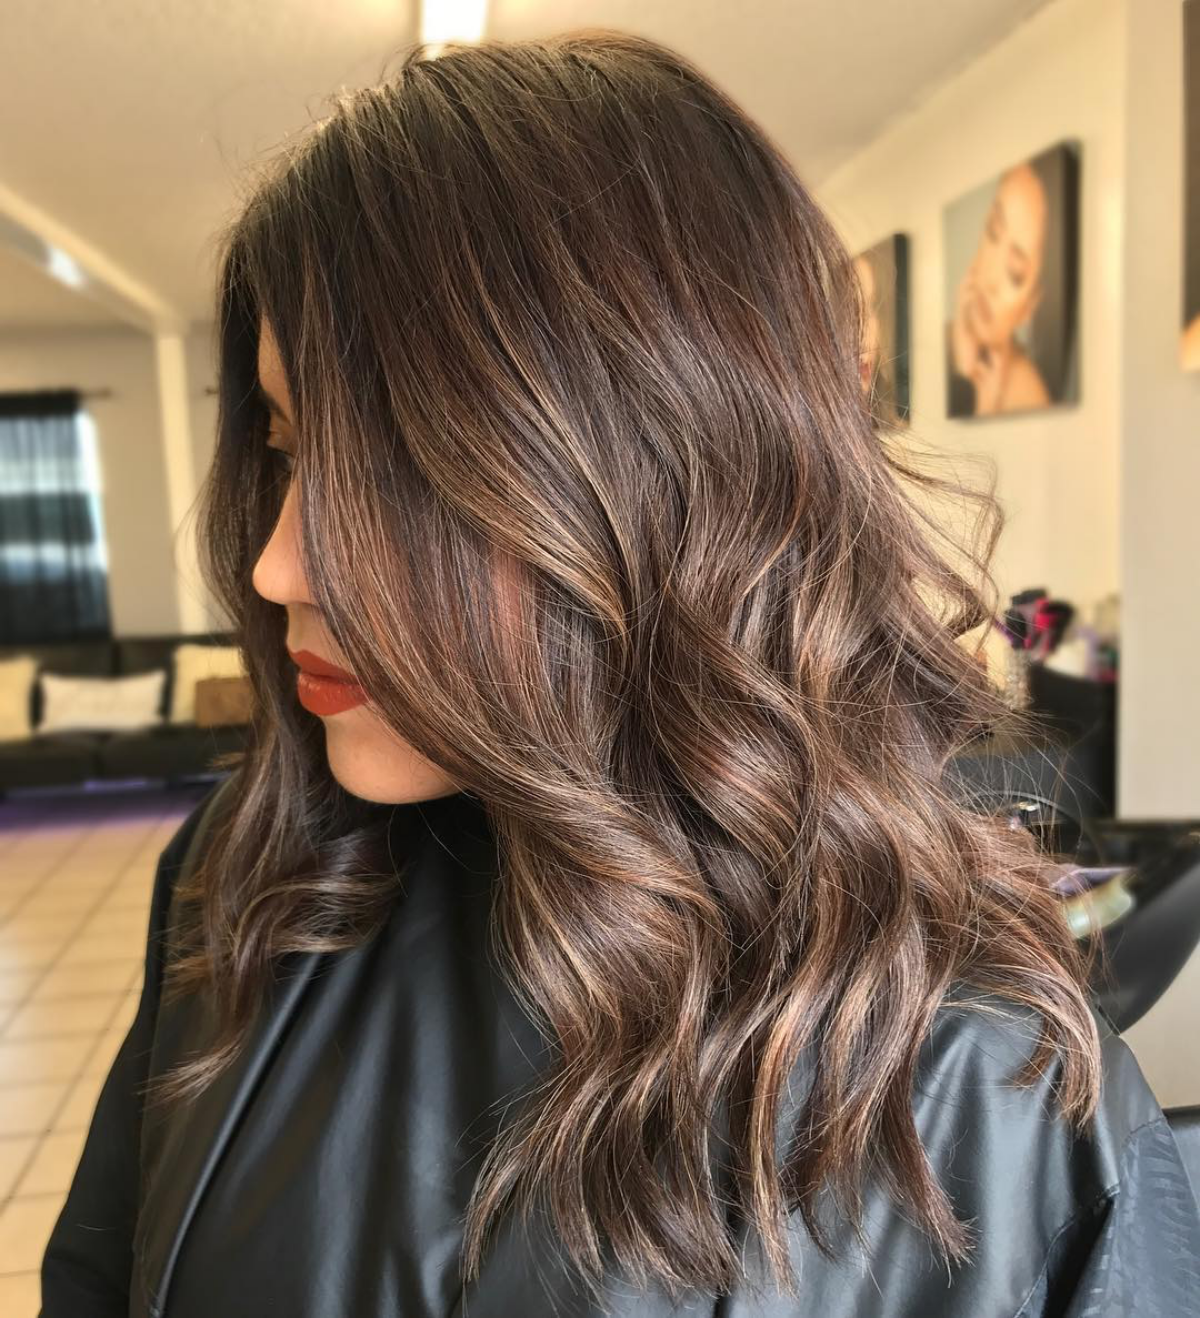
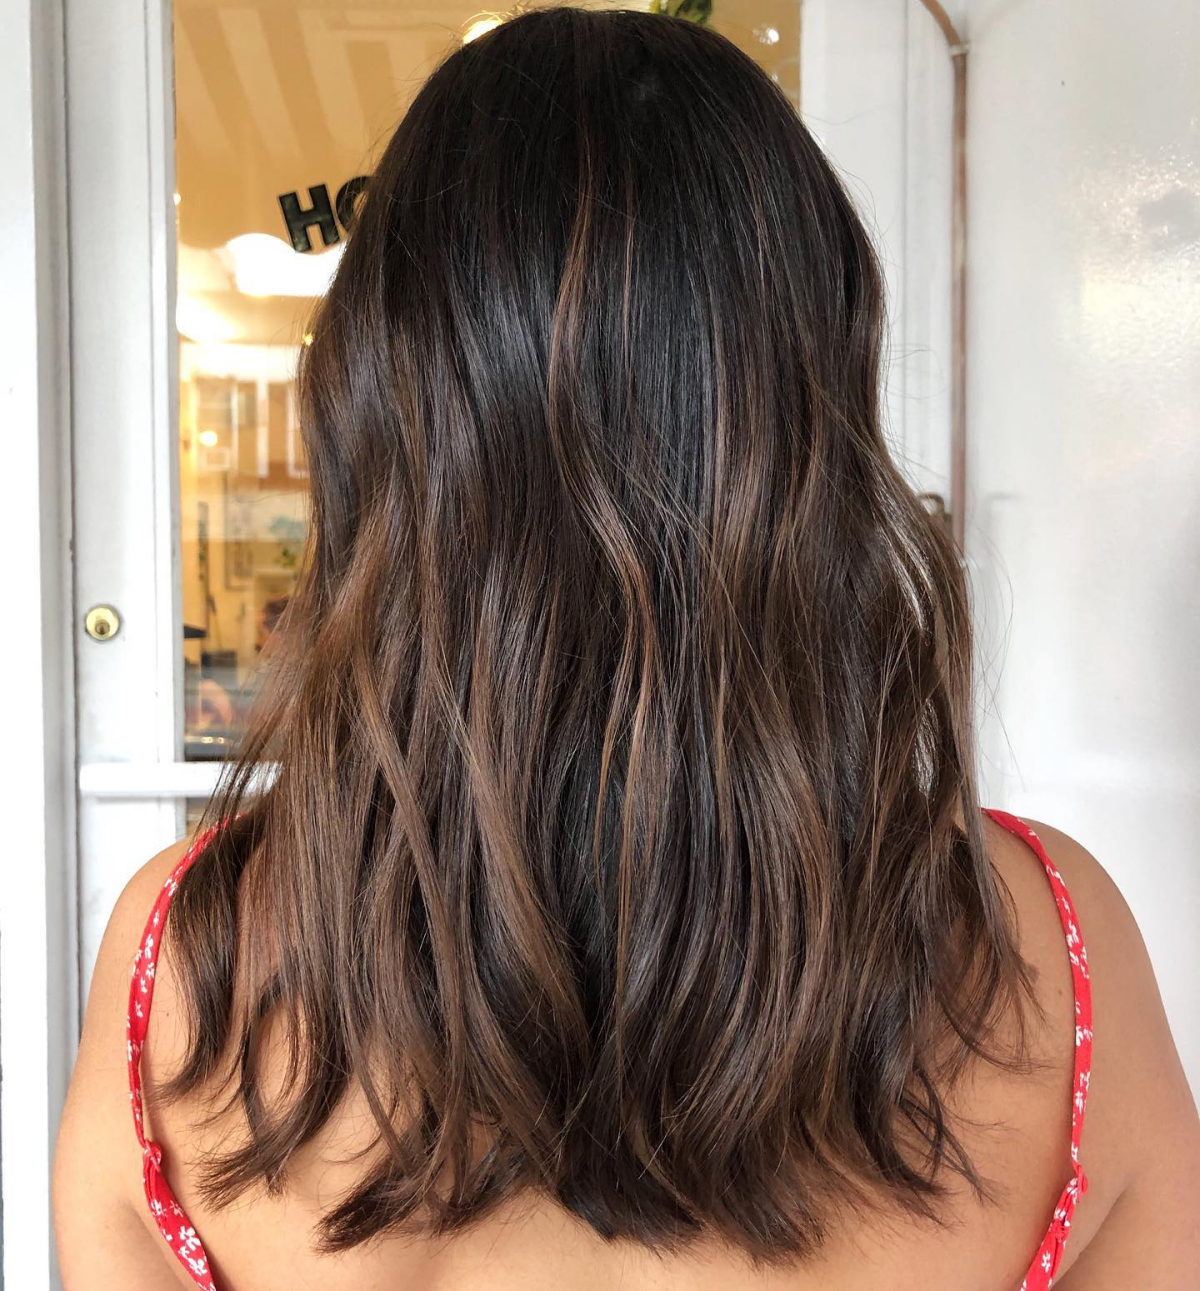
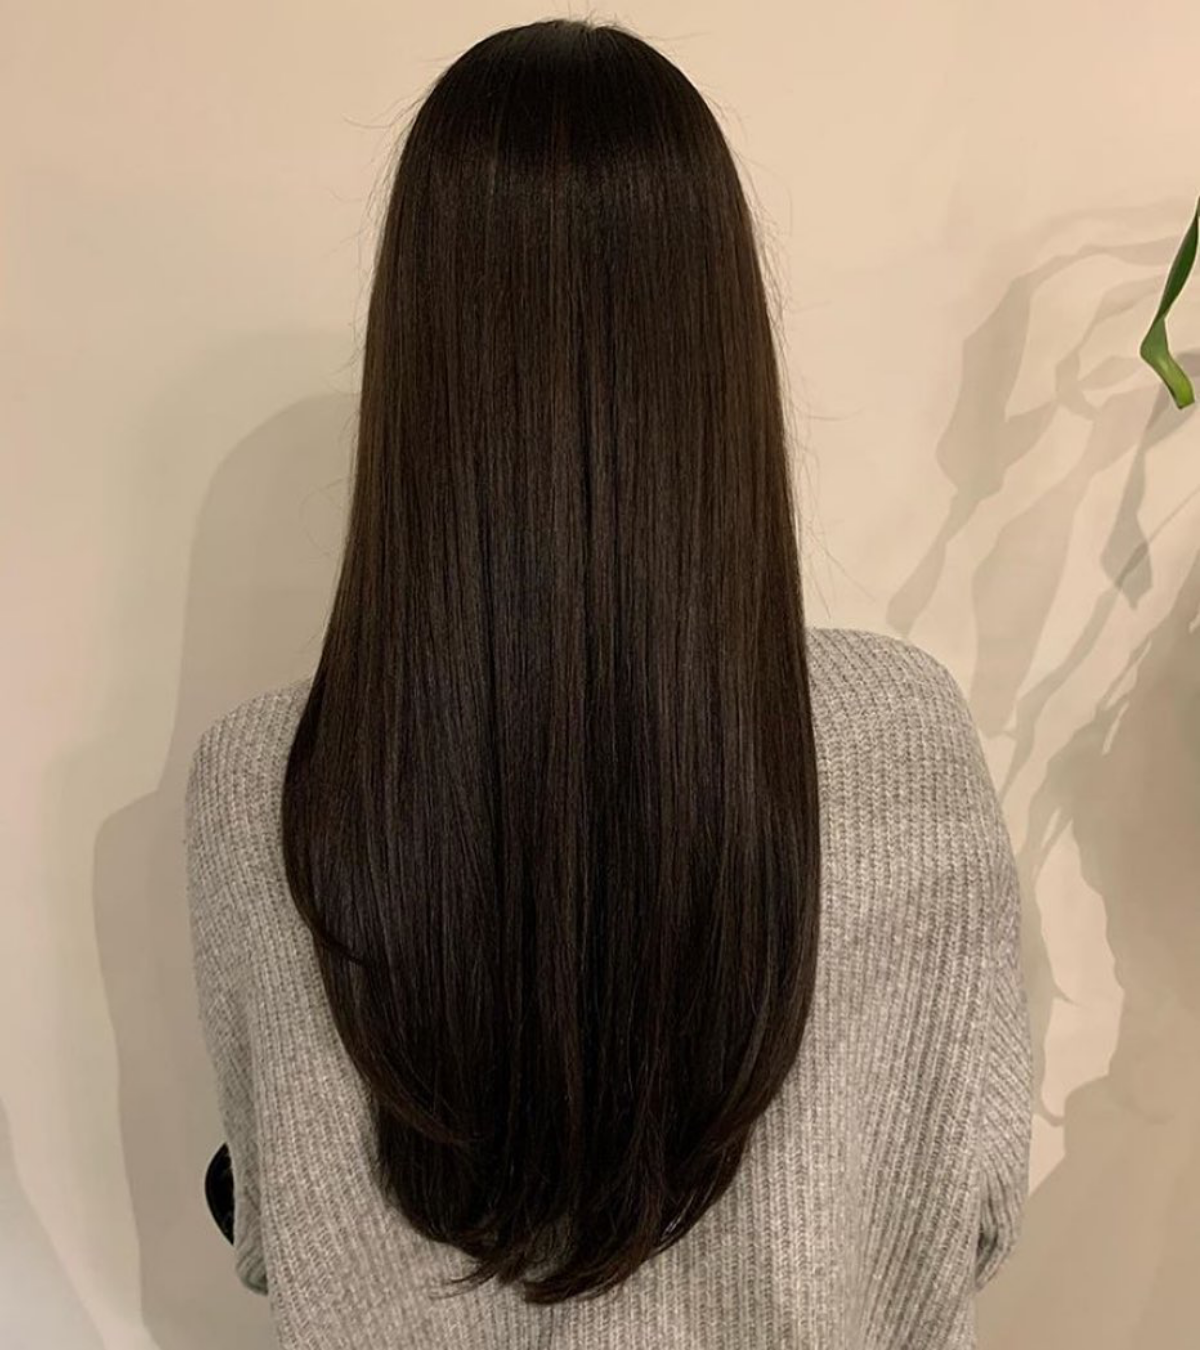
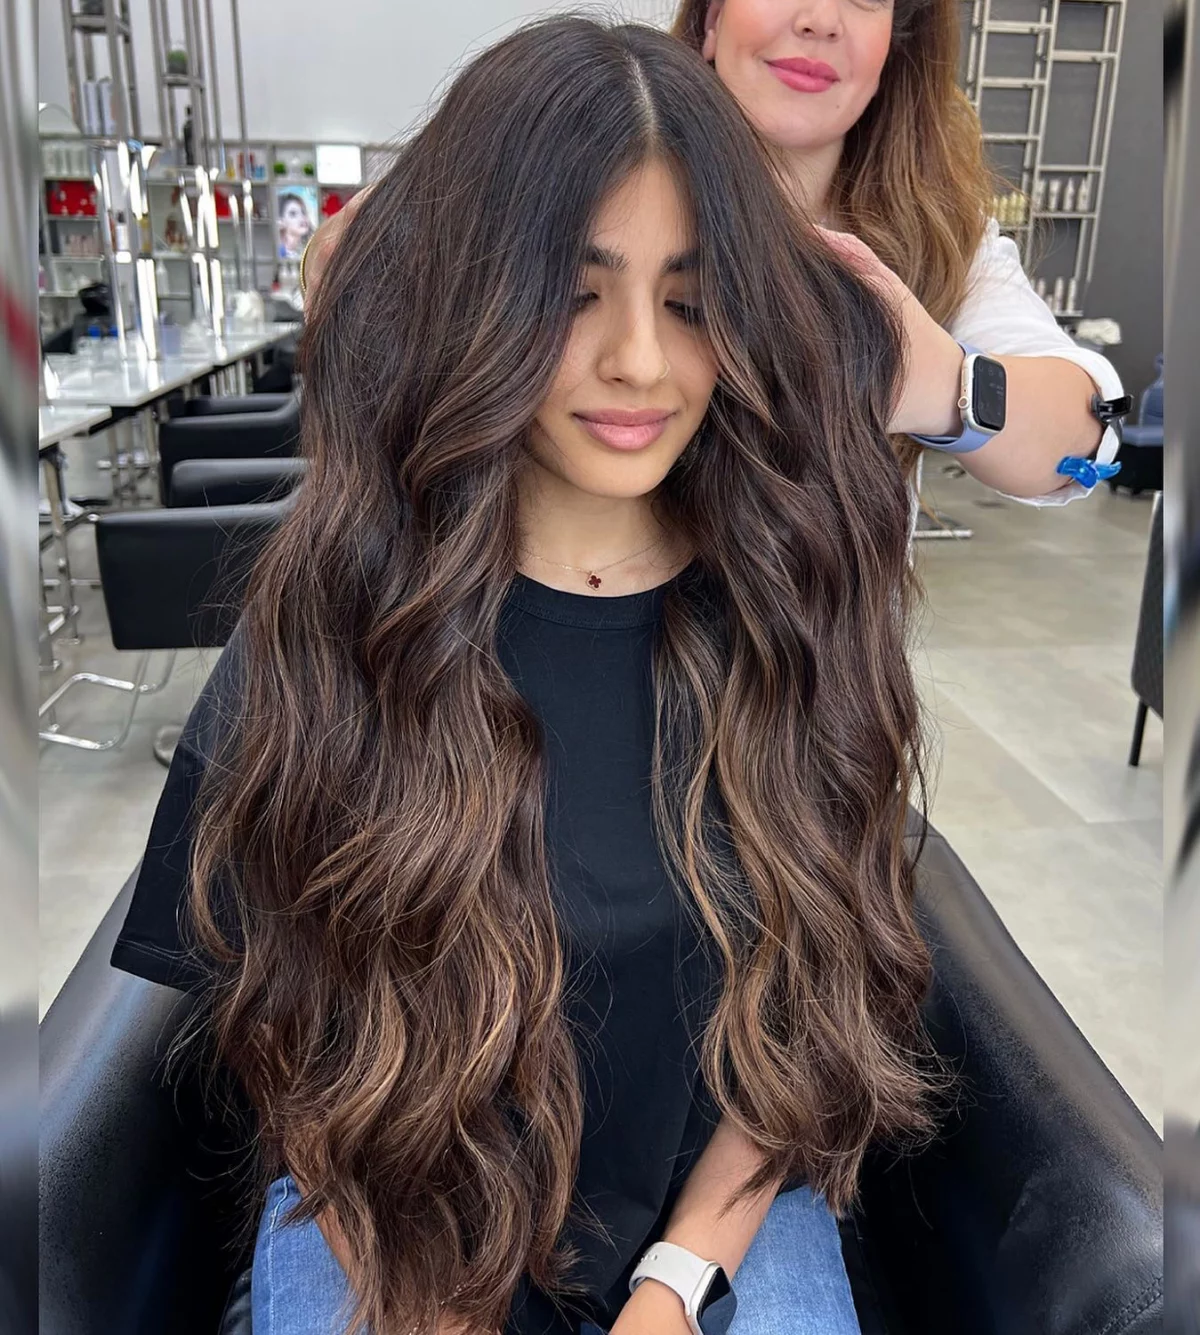
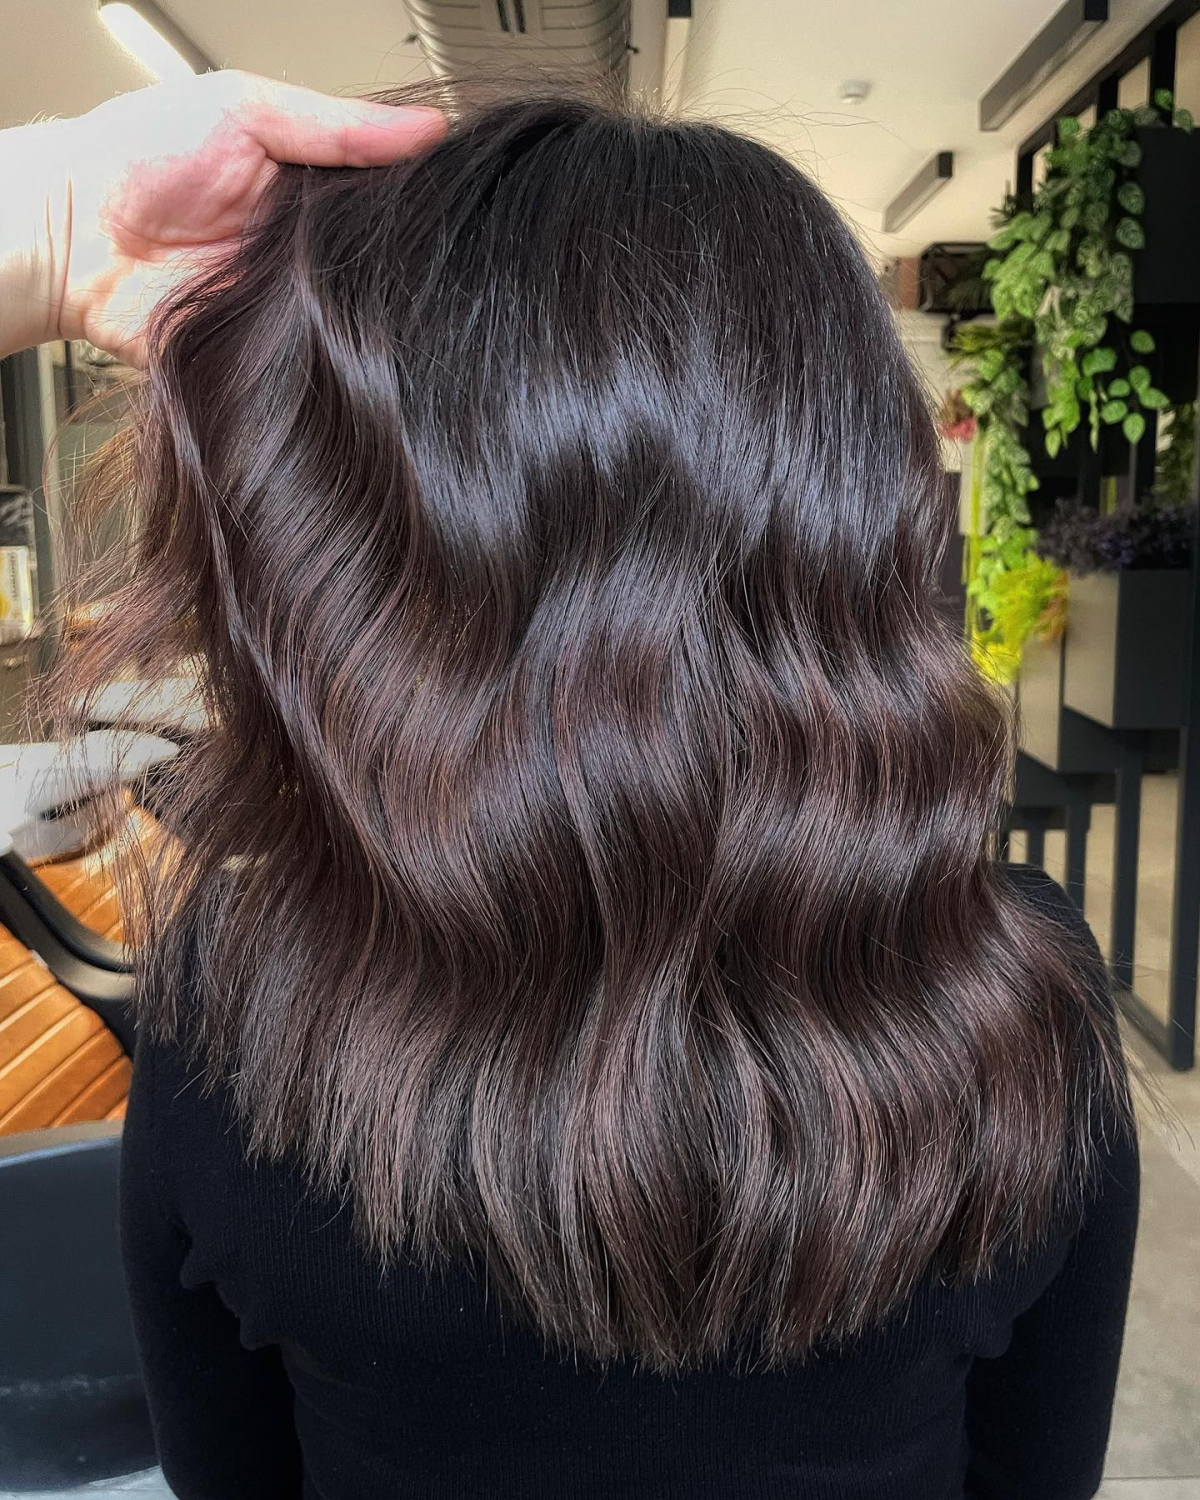
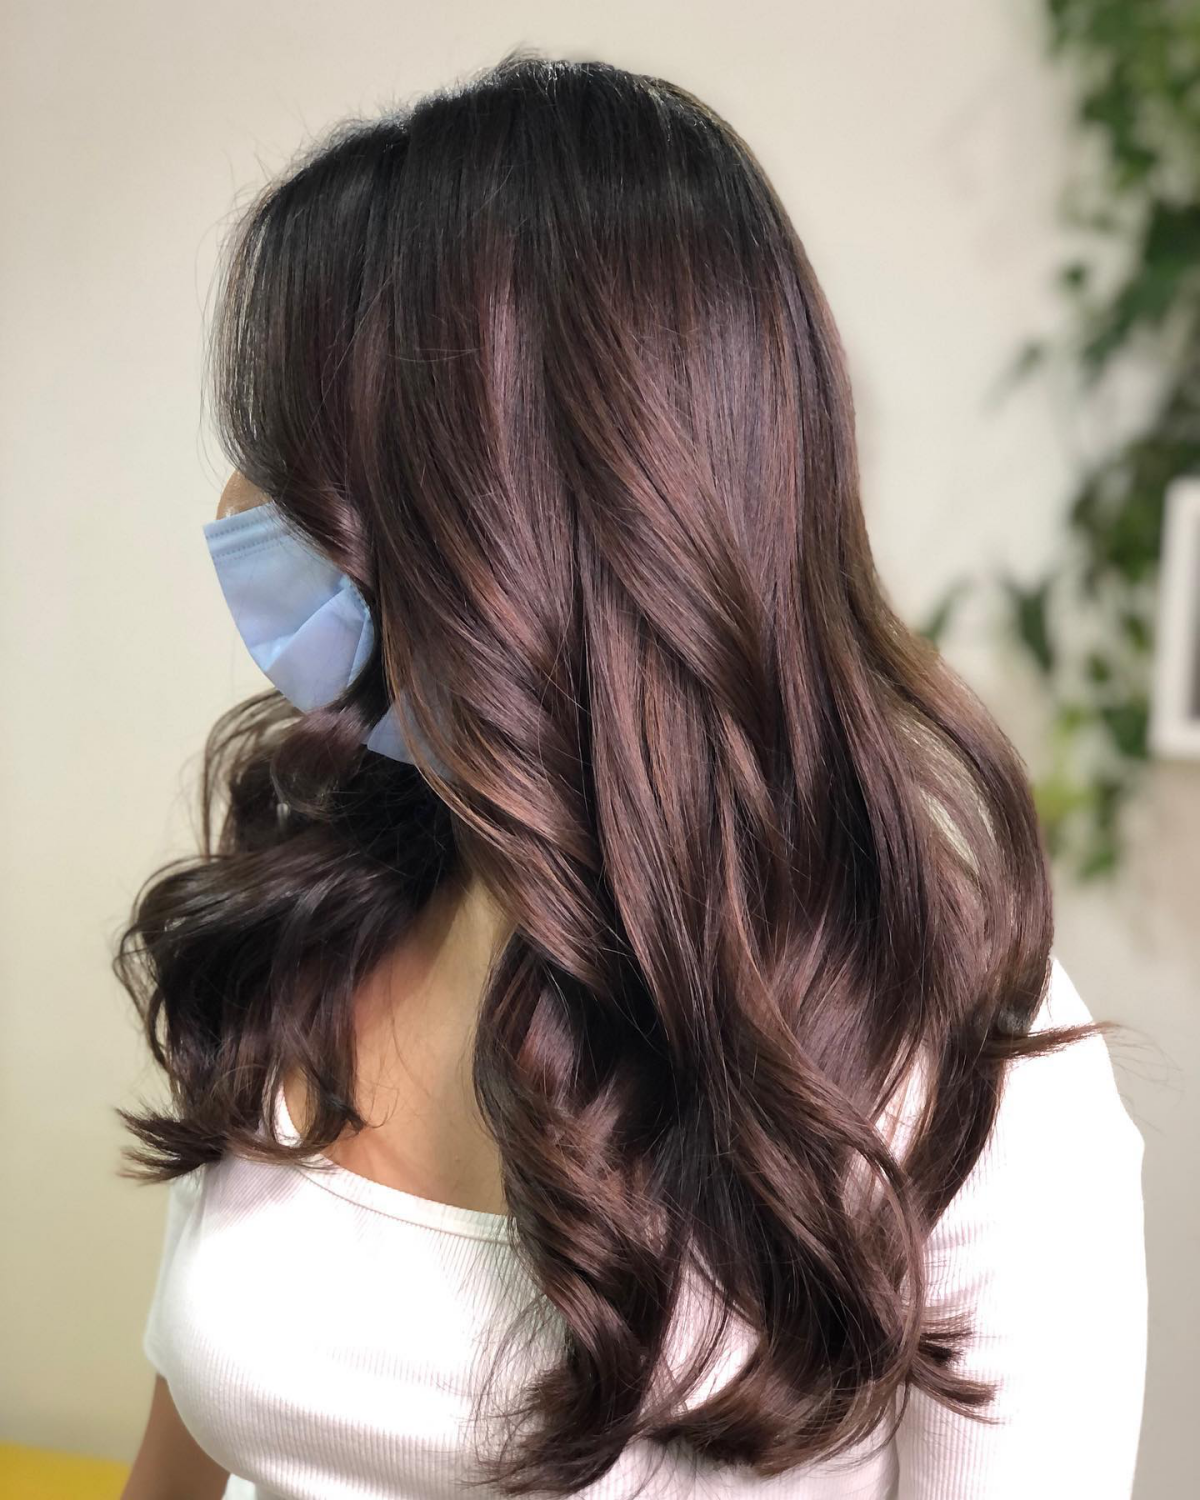
In the salon world, mocha isn’t one specific color you just squeeze out of a tube. It’s more of a concept. Think of it as a whole family of rich, neutral-to-cool brown tones. Imagine black coffee with just a splash of cream—it’s deep, but not harsh or flat. It has all the richness of brown without the strong red or orange warmth you’d find in something like a chestnut or auburn. Honestly, that perfect balance is what makes it so universally flattering. It’s like quiet confidence in a hair color.
This guide is basically me spilling all the secrets I’ve learned over the years. We’ll go way beyond just looking at inspiration photos and talk about how the color actually works, how we pros build a custom mocha shade from scratch, and—most importantly—how you can actually take care of it so it looks amazing for weeks.
The Language of Hair Color: What’s Really in the Tube?
To really get why mocha can be tricky, you have to understand a little bit about how professional hair color works. It all comes down to two things: the level (how dark it is) and the tone (the underlying hue). Every single professional color line uses this system.
First, The Level System
The level system is just a simple scale, usually from 1 to 10, that tells you how light or dark a color is. Level 1 is pure black, and Level 10 is the lightest, palest blonde you can imagine.
So where does mocha fit in? It typically hangs out right in the middle:
- Level 4: This is a classic dark brown.
- Level 5: We’d call this a medium brown.
- Level 6: Officially, this is a light brown, but to most people, it looks more like a dark, creamy blonde.
Most of the mocha shades people want are a solid Level 4 or 5. The level you and your stylist choose is the very first step, and it depends entirely on your natural hair color and how dark you want to go.
And Now for the Important Part: The Undertone
The level is only half the battle. The other half is the tone, or the undertone of the color. This is what makes two different Level 5 browns look completely different. One could be a warm, golden chestnut, while another is a cool, ashy mocha.
Mocha’s signature feature is its neutral or cool-leaning undertone. Here’s the secret: when we lighten hair, even just a little, the hair’s natural warmth comes out to play. A Level 5 brown has a lot of natural orange pigment hiding in it. If you just slap a generic brown dye on top, that orange is going to peek through in a few weeks, making your hair look brassy.
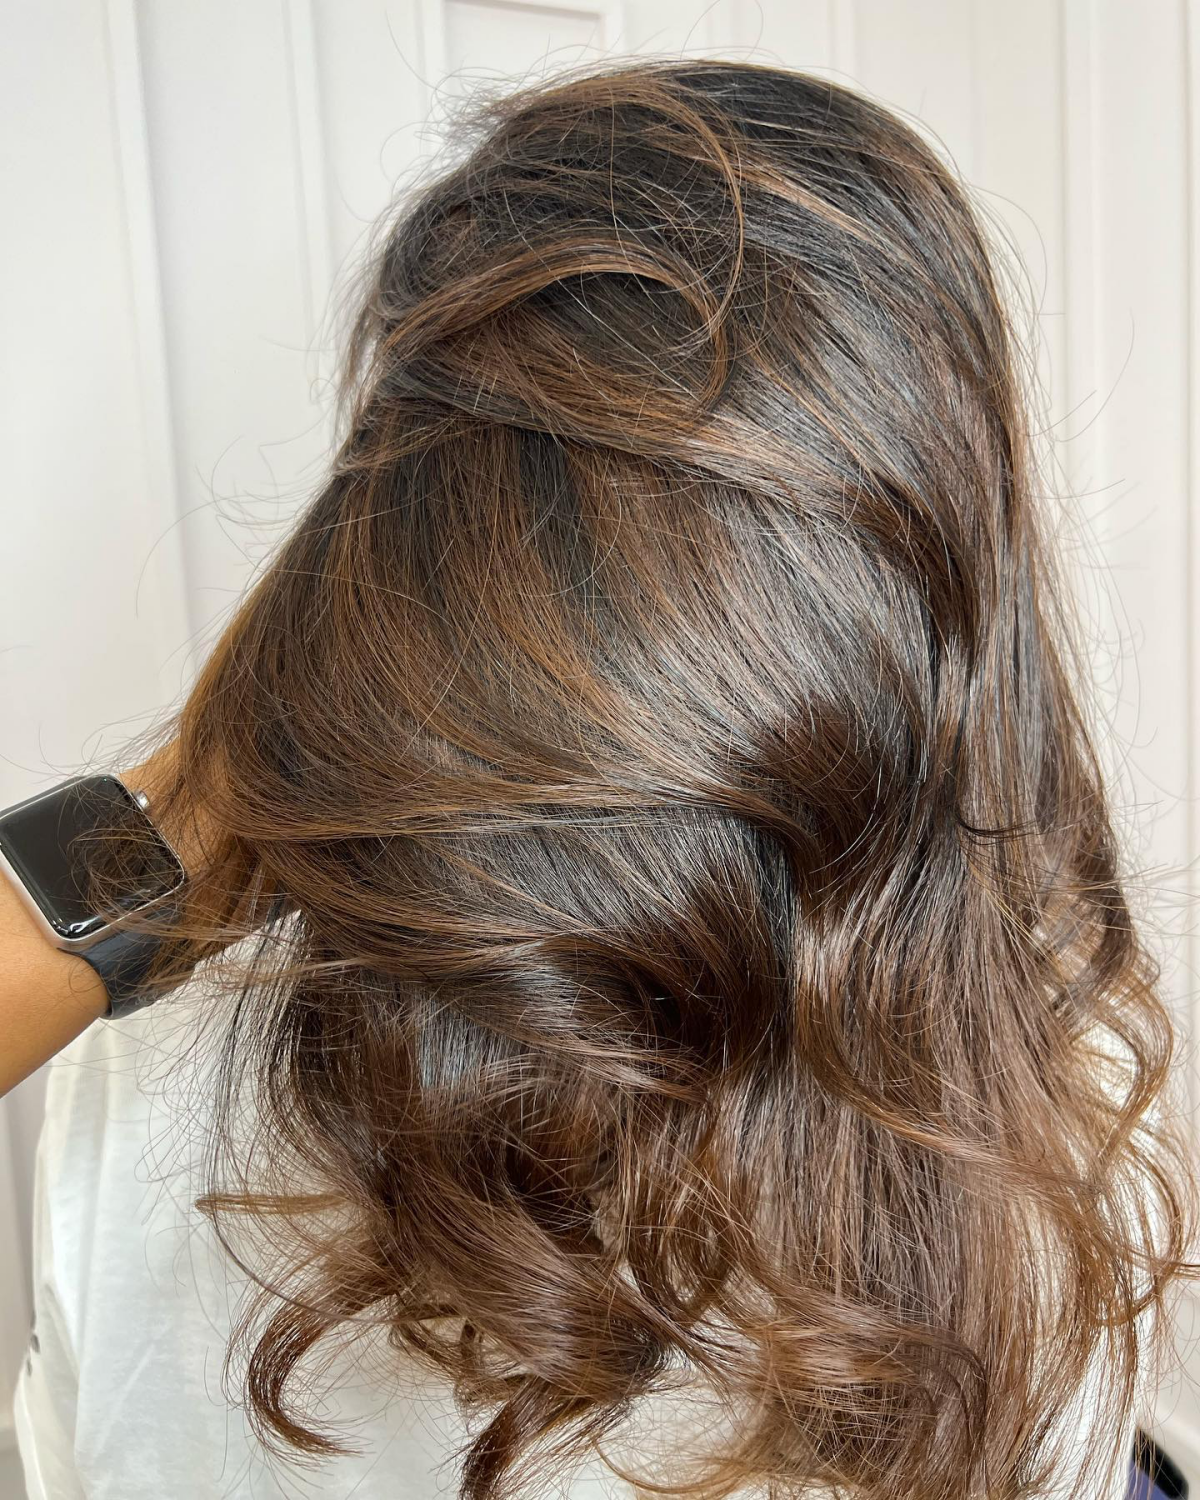
The entire job of a mocha formula is to control that warmth. We use colors with an Ash base (which has blue or green pigments) or sometimes a Violet base to actively neutralize those unwanted orange and yellow tones. This is why a professionally mixed mocha resists brassiness so much better than a standard box dye. We’re not just adding brown; we’re strategically canceling out other colors.
The X-Factor: Your Hair’s Porosity
Okay, the single biggest thing that can make or break a hair color application is porosity. It’s just a fancy word for how open or closed your hair’s outer layer is. Healthy, untouched hair is less porous, while hair that’s been colored, bleached, or heat-styled a lot is more porous.
Why does this matter so much? Because porous hair soaks up color like a sponge, especially cool tones. I once had a client who wanted an all-over Level 5 mocha. Her roots were healthy, but her ends were very porous from an old balayage. Her roots came out perfect, but her ends drank up all the cool pigments and turned a muddy, almost-black color. We had to do a gentle color-correcting service to fix it.
Heads up! This is a super common mistake. A good colorist will always check your hair’s porosity and might even mix a slightly lighter or warmer formula just for your ends to make sure everything comes out even.
Salon Mocha vs. Box Dye: What’s the Real Difference?
So, you might be wondering if you can just grab a “mocha” box dye from the drugstore. To be frank, the results are a gamble. A salon color is a completely different ballgame.
With a box dye, you get what you get. It’s a one-size-fits-all formula designed to work on everyone, which means it often doesn’t work perfectly on anyone. In the salon, we’re like chemists. For a client wanting a Level 5 neutral mocha, I wouldn’t just use one tube. I’d likely mix a Level 5 Neutral (5N) for a solid brown base with a Level 5 Ash (5A) to kill any brassiness. We measure this stuff on a digital scale—a few grams can completely shift the final result.

This level of customization is how you get that rich, seamless color that wears well over time. The trade-off, of course, is the cost. A custom color service like this can range from $150 to over $400, depending on your hair’s length, thickness, and what color you’re starting with. A box dye might only be $15, but you run a much higher risk of getting a result you hate (and paying a lot more to fix it).
How to Talk to Your Stylist to Get the Mocha You Actually Want
This is key. You can’t just say “I want mocha” and hope for the best. You need to be specific. Here’s a little script:
- Bring Photos: Find a few pictures of the color you love in different lighting (natural light is best!).
- Use the Magic Words: Tell your stylist, “I love the darkness of this color, but my main concern is avoiding brassiness. I want it to stay in the neutral-to-cool family, not warm or reddish.”
- Talk About Your Skin Tone: By the way, a quick tip on this: if you have cool or pink undertones in your skin, a true ashy mocha will look incredible. If your skin is warmer or more olive, you might ask for a neutral mocha that isn’t overly ashy, which will keep you from looking washed out.
Keeping Your Mocha Looking Fresh: Aftercare is Everything
Getting the perfect mocha is only the first step. Making it last is the next. You can expect to come in for a root touch-up every 6-8 weeks, which will typically run you between $80 and $150.
Here’s how to protect your investment between appointments:
- Sulfate-Free is a Must: Sulfates are harsh detergents that strip color. Switch to a gentle, sulfate-free shampoo for daily use. You can find great ones at the drugstore or at places like Target for around $10-$15.
- Blue Shampoo is Your Best Friend: To keep brassiness from ever showing up, use a blue-depositing shampoo once a week. Think of it like a toner you can use at home. Lather it up, let it sit for 3-5 minutes, and rinse. You can find excellent ones at any beauty supply store like Sally Beauty or Ulta.
- Turn Down the Heat: Hot water and excessive heat styling are color’s worst enemies. Rinse your hair with cool water and always, always use a heat protectant spray before picking up a flat iron or curling wand. Your color will thank you for it!
Galerie d’inspiration
Did you know? Up to 80% of hair color fade is caused by water alone. Unprotected, porous hair loses its vibrancy with every single wash, long before the sun or styling tools take their toll.
This is why the first week is so critical. Give your color 48-72 hours to settle before the first wash. This allows the hair cuticle to fully close and trap the new color molecules inside, significantly extending the life of your rich mocha shade.
The single biggest mistake: Using the wrong shampoo. A clarifying or dandruff shampoo on color-treated hair is like using a strong detergent on a silk blouse. It aggressively strips the delicate color pigments your colorist carefully deposited, leaving your perfect mocha looking dull and faded in just a few washes. Stick to formulas explicitly labeled
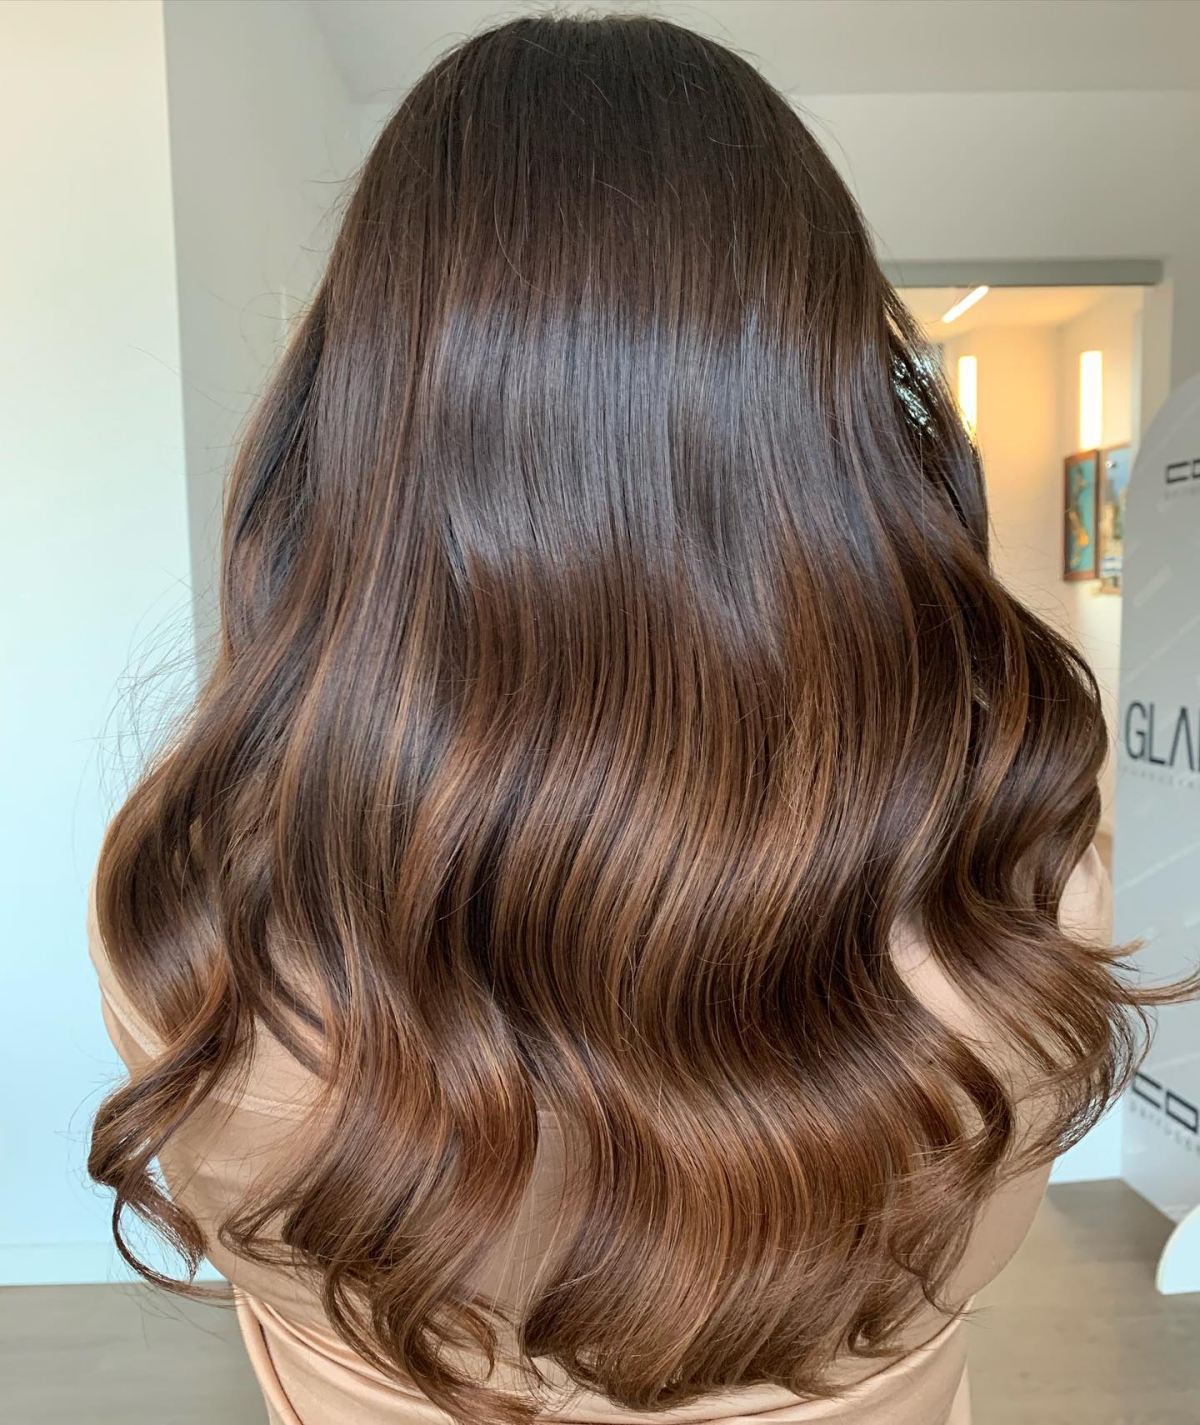
In-Salon Gloss: A professional service that adds tone and major shine, sealing the cuticle for a reflective finish. It’s custom-mixed and typically lasts 4 to 6 weeks.
At-Home Gloss: A temporary, color-depositing treatment like the dpHUE Gloss+ or Kristin Ess Signature Hair Gloss. It’s fantastic for a quick refresh to boost shine and tone down unwanted brassiness between salon visits.
For perfect tonal control, the salon wins. For a budget-friendly shine boost, at-home glosses are a brilliant tool.

- Boosts shine without altering the base color.
- Tames frizz by smoothing the hair’s outer layer.
- Deepens the richness of your existing brown.
The secret? A clear hair gloss. Unlike a colored gloss, a clear version acts like a top coat for your hair. It enhances the natural reflections of your mocha, delivering that ‘liquid hair’ look without depositing any pigment. It’s the ultimate low-commitment refresh.
To keep your mocha looking truly expensive, focus on the finish. After styling, a light mist of a shine spray can make all the difference. Look for weightless formulas that fight humidity. A quick spray of Oribe’s Shine Light Reflecting Spray or Color Wow’s Extra Mist-ical Shine Spray can instantly revive the deep, cool reflections that make mocha so captivating.


