The Disconnected Undercut: A Barber’s Unfiltered Guide to Getting It Right
I’ve been behind the barber’s chair for a long time, and I’ve seen countless styles come and go. But honestly, few haircuts make a statement quite like the disconnected undercut. This isn’t just a trim; it’s a choice. When a guy sits in my chair and asks for one, I know he’s looking for something bold, sharp, and intentional. He wants that high-contrast look that absolutely refuses to blend in.
In this article
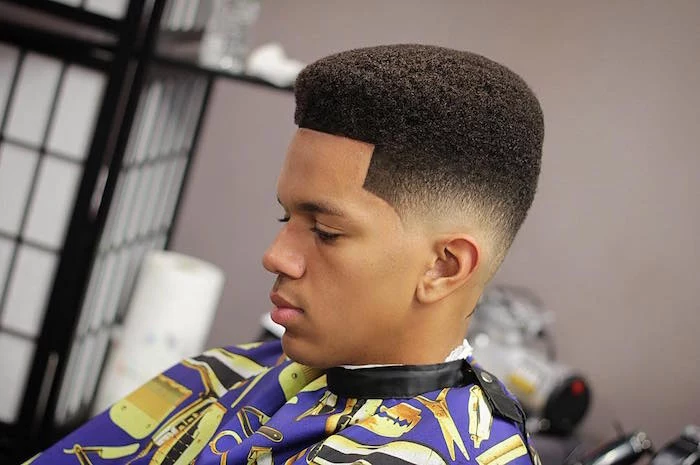
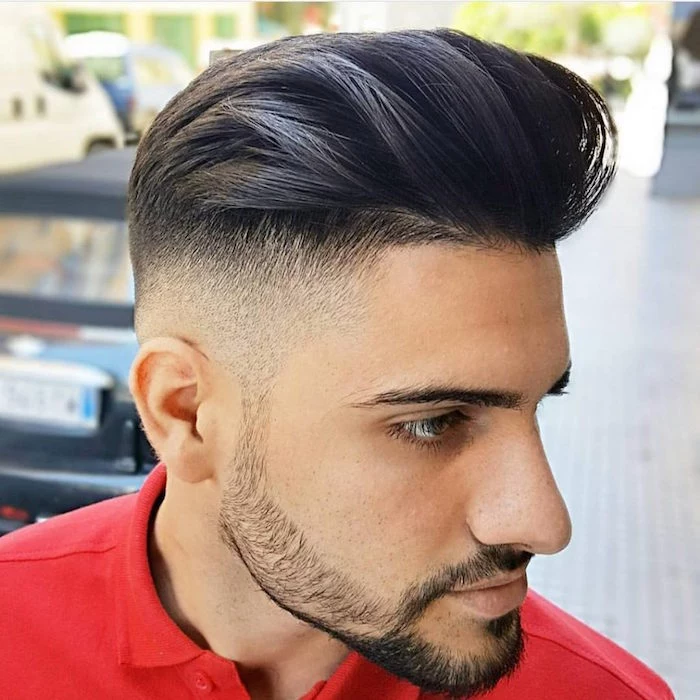
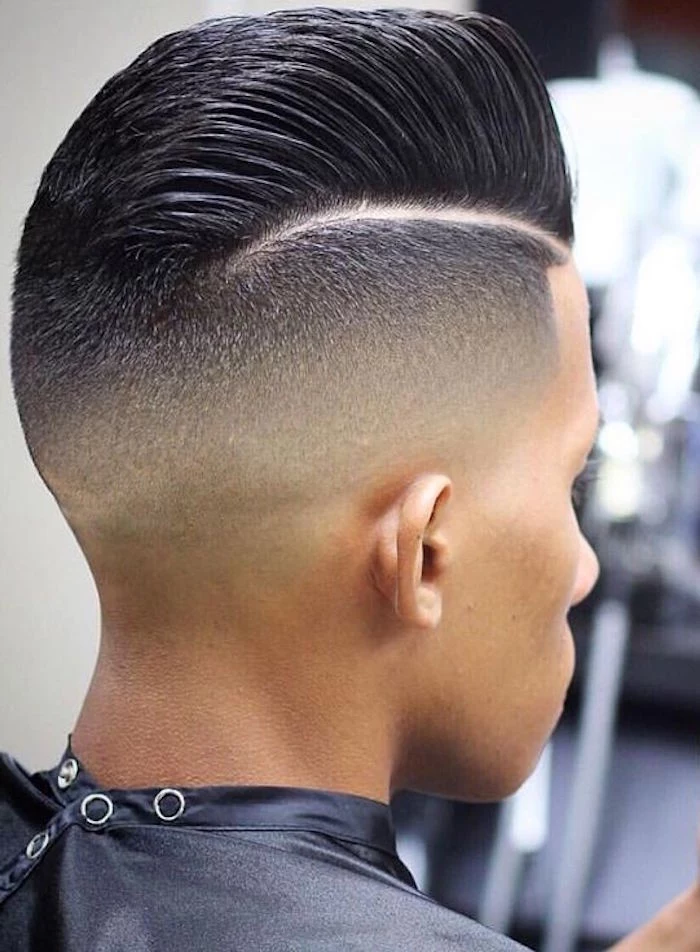
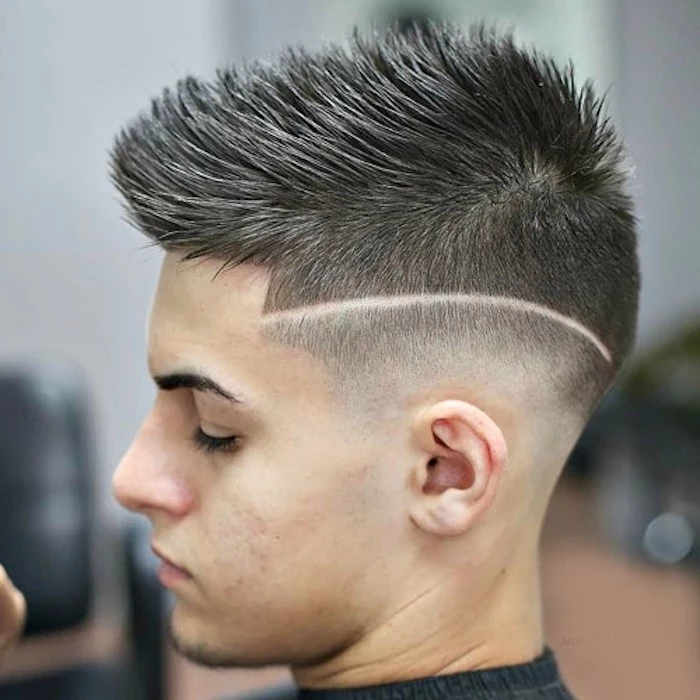
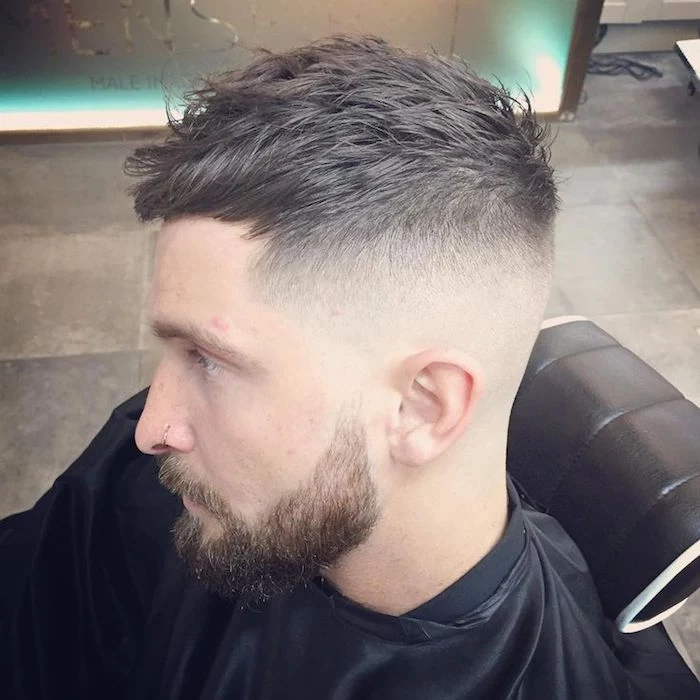
The name really says it all. The hair on top is completely “disconnected” from the sides. There’s no gentle fade, no soft taper. Instead, you get a very clear, defined line—almost a ledge—where the long hair on top meets the super-short hair on the sides. And no, that’s not a mistake. It’s the whole point of the cut.
Getting that line perfectly clean and making it look deliberate is what separates a powerful, head-turning style from a botched haircut. It’s a true test of a barber’s precision. So before we even think about plugging in the clippers, we need to have a serious chat to make sure this cut is really right for you.
First Things First: Your Head and Your Hair
A truly great haircut has to work with what you’ve got. It should complement the shape of your head and the natural texture of your hair. For a disconnected undercut, these factors are even more critical because there’s absolutely no blending to hide any awkward spots.
The Map of Your Head
Every good barber knows the basic geography of the human head, and for this cut, the most important landmark is the parietal ridge. You can feel it yourself—it’s that rounded curve on the side of your head where the skull starts to flatten out toward the top. This ridge is our natural guide for creating the disconnection line.
Where we place that line completely changes the vibe of the haircut:
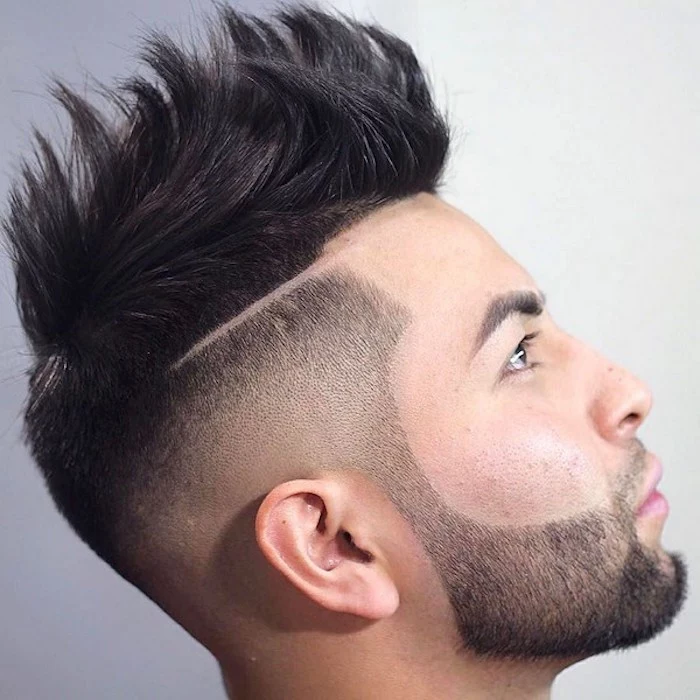
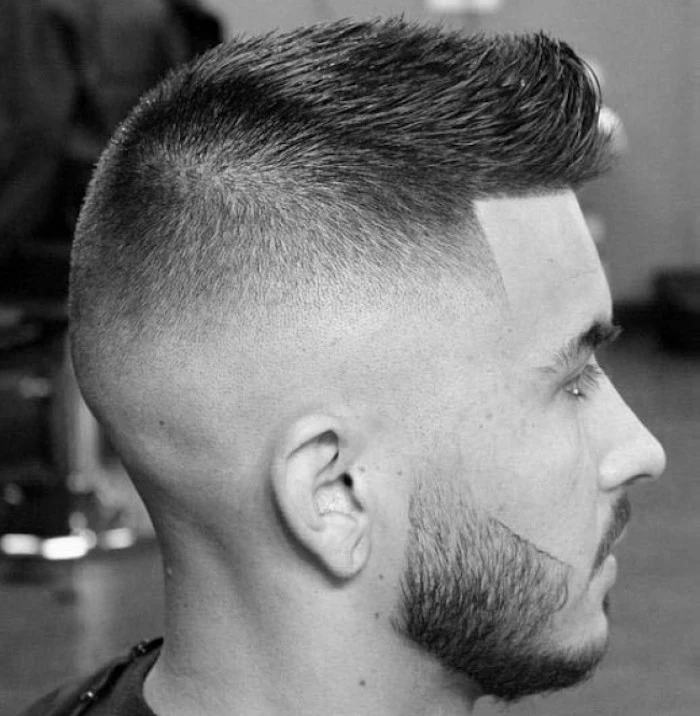
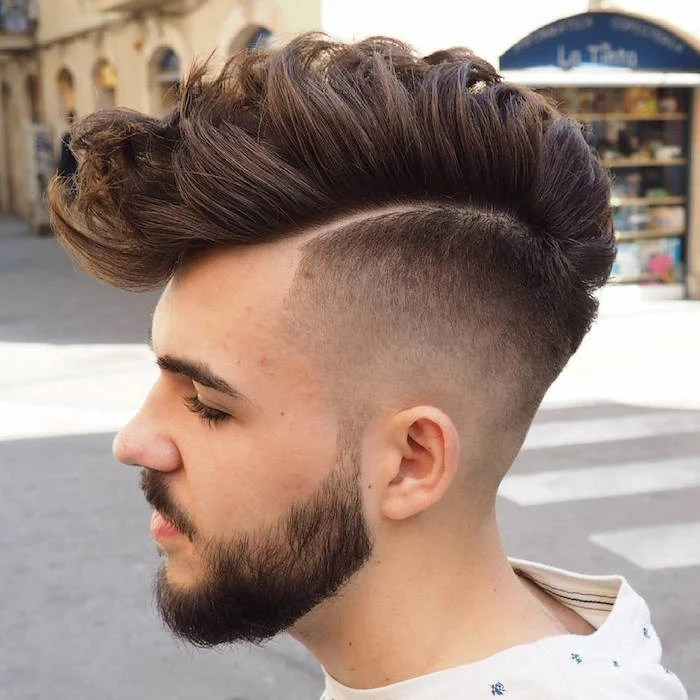
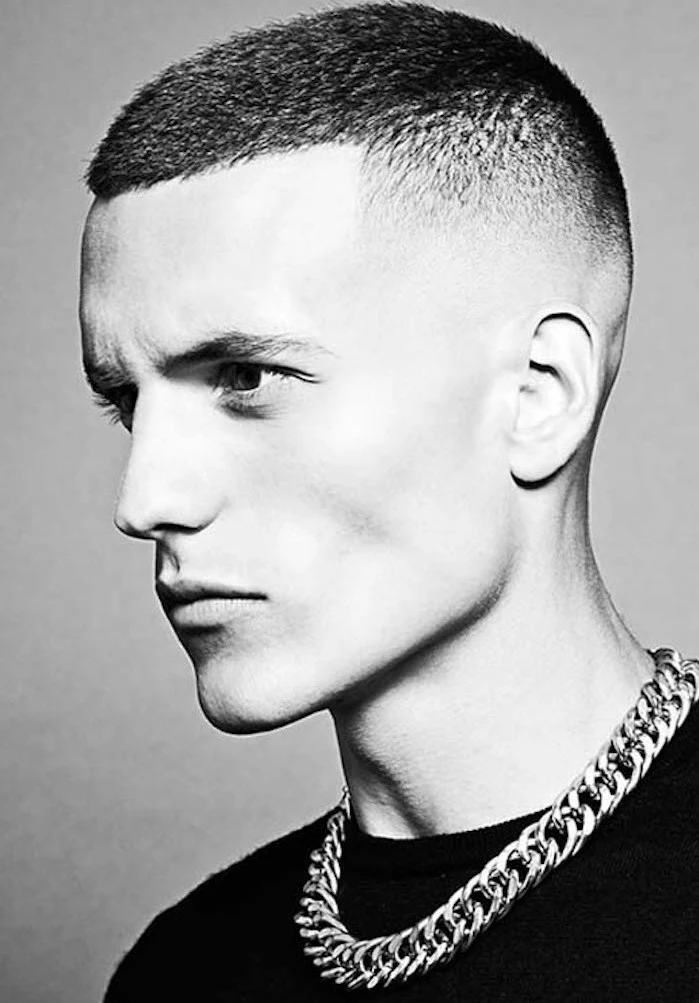
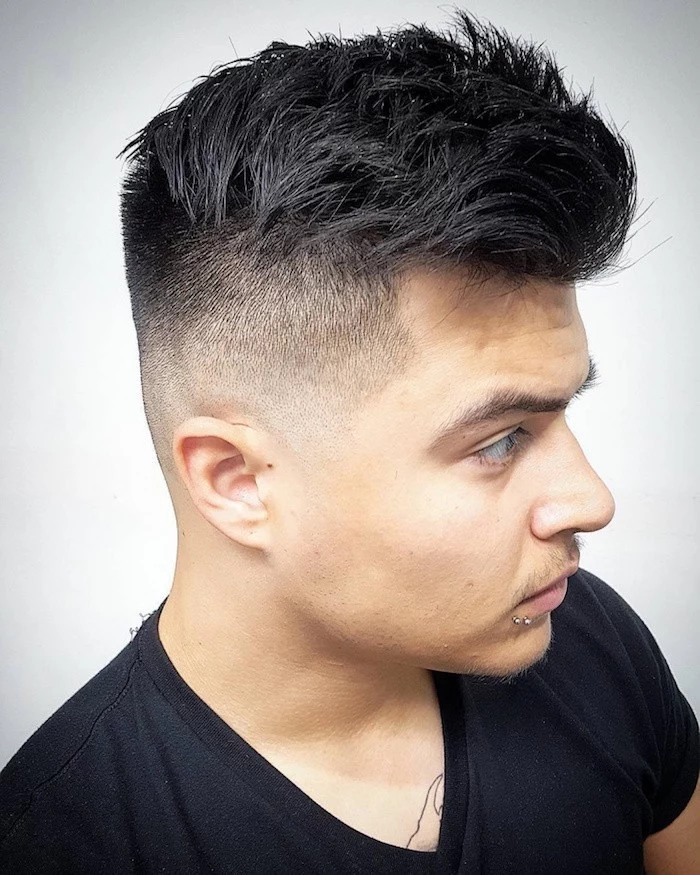
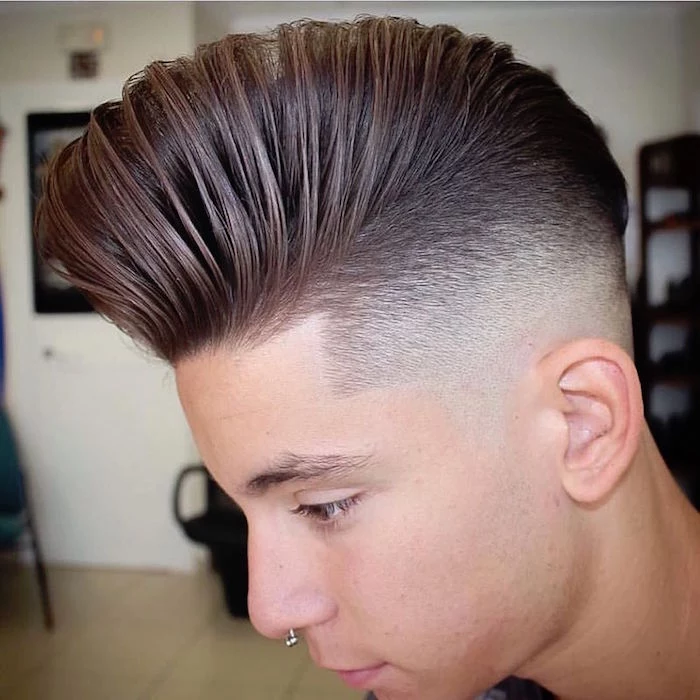
- A high line, placed above that ridge, creates a very dramatic, fashion-forward look. It tends to make the face appear longer and slimmer. Think that sharp, aggressive Peaky Blinders style.
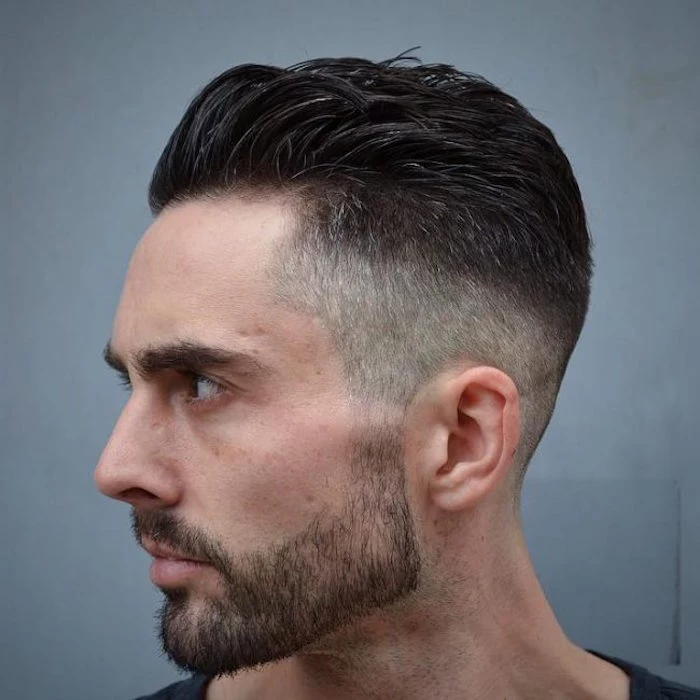
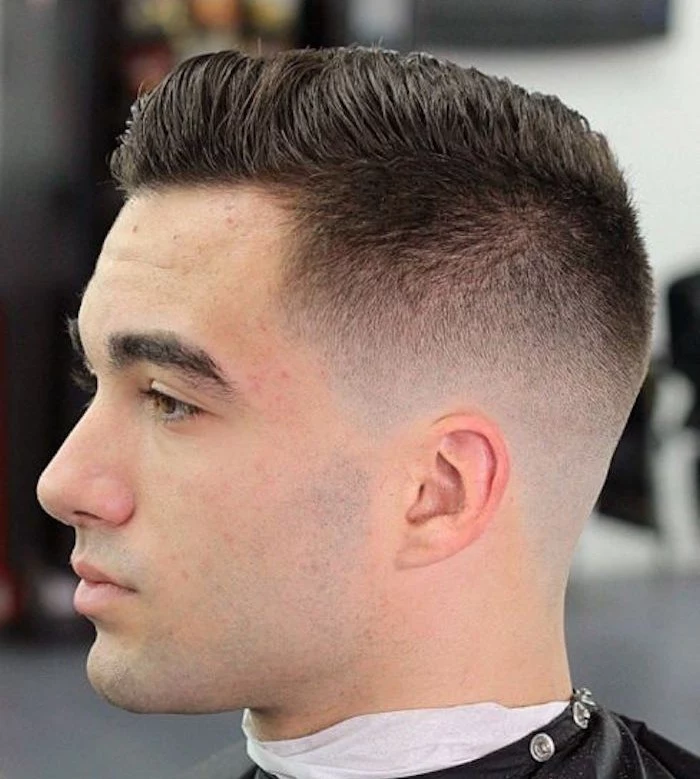
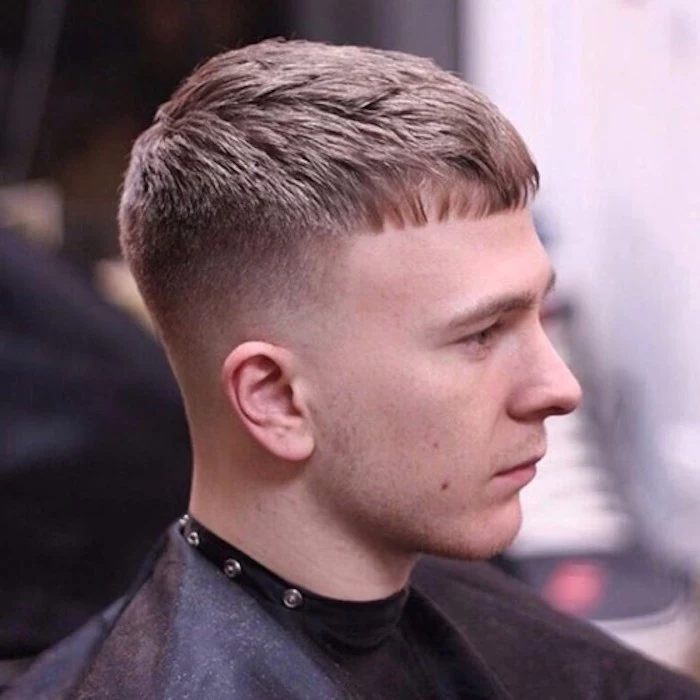
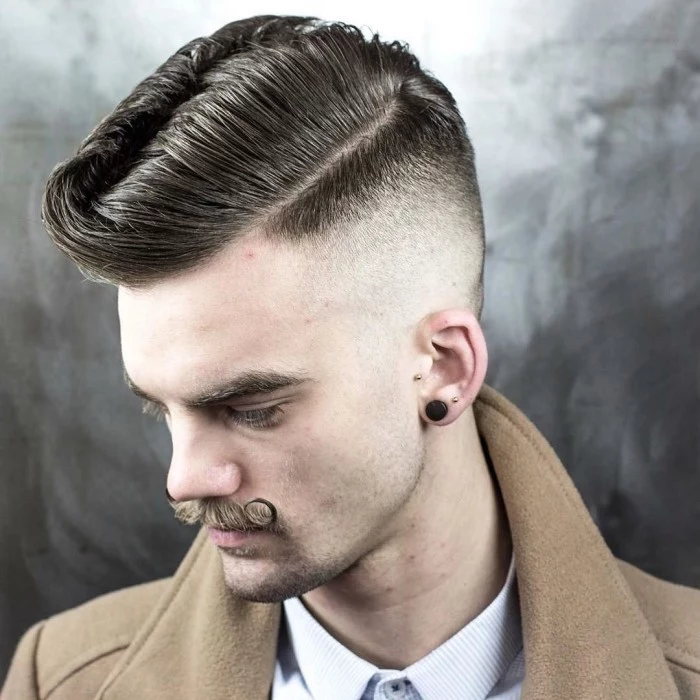
- A lower line, down closer to your temple, is a bit more conservative and, frankly, a safer choice for most guys. It keeps a little more darkness on the sides, making the overall look less severe.
I always, and I mean always, show my client in the mirror exactly where that line is going to sit before I make a single cut. We also have to consider the occipital bone—that bump on the back of your head. A rookie mistake is buzzing a straight line all the way around. A pro will usually drop the line slightly in the back to follow the natural curve of your head, which looks way more balanced and flattering.
How Hair Texture Changes the Game
Trust me, the same cut can look wildly different depending on your hair type. Here’s a quick rundown:
- Straight & Fine Hair: This hair shows every single detail, so the line will be incredibly crisp. The main challenge? Making sure the top looks full enough. If your hair is too thin, it can sometimes look a bit sparse against the buzzed sides.
- Straight & Thick Hair: This is pretty much the ideal canvas for a classic slicked-back undercut. The thickness gives you awesome volume, and the straight texture makes for a razor-sharp line. The key is just managing the bulk on top so it lays nicely.
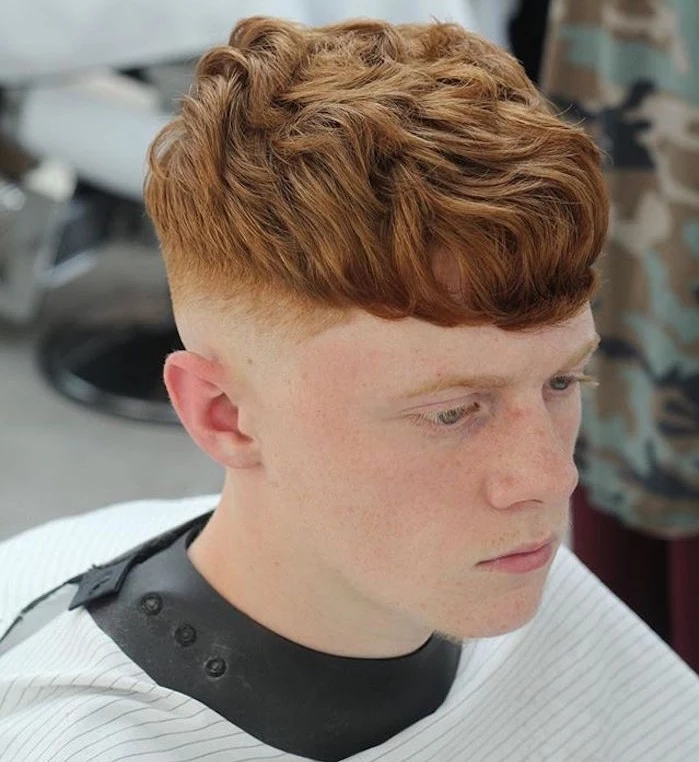
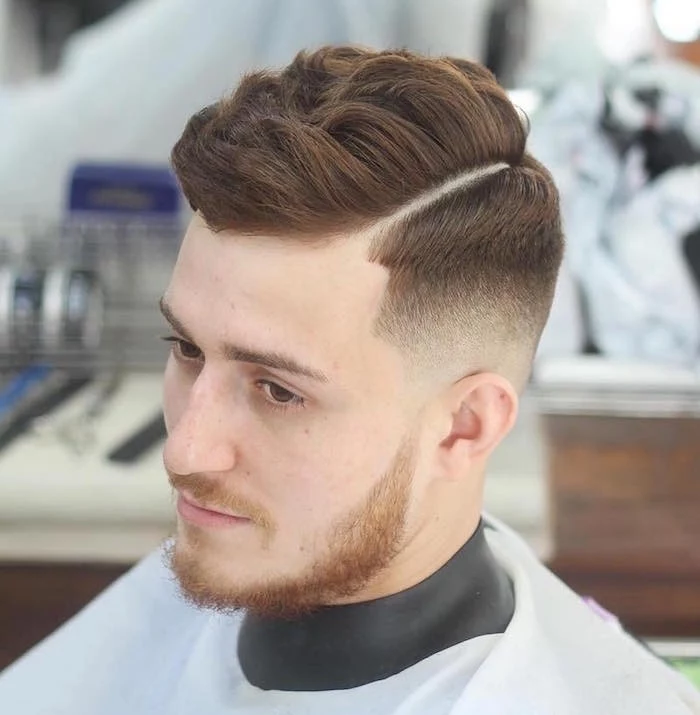
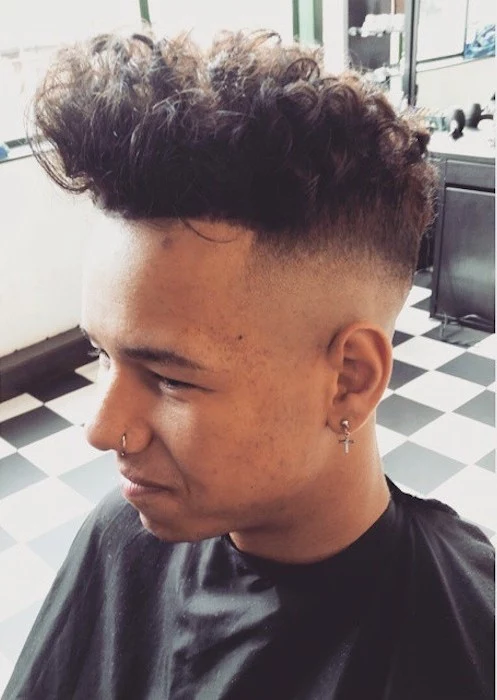
- Wavy Hair: I love this combo. The waves bring a soft, natural movement that creates a fantastic contrast with the structured, buzzed sides. You’ll just need the right product to keep frizz from taking over.
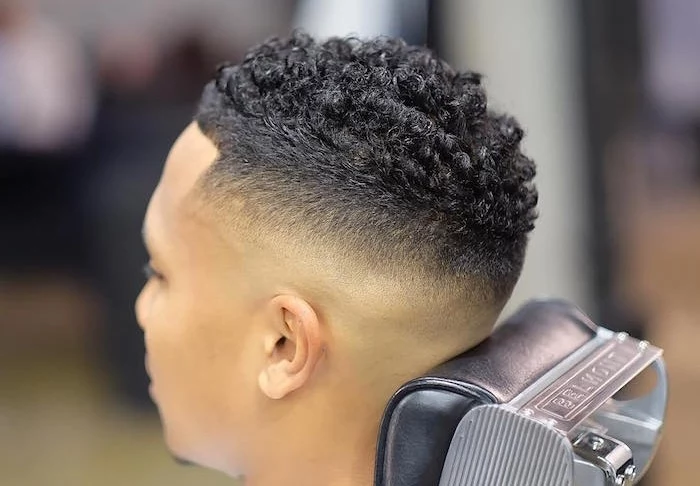
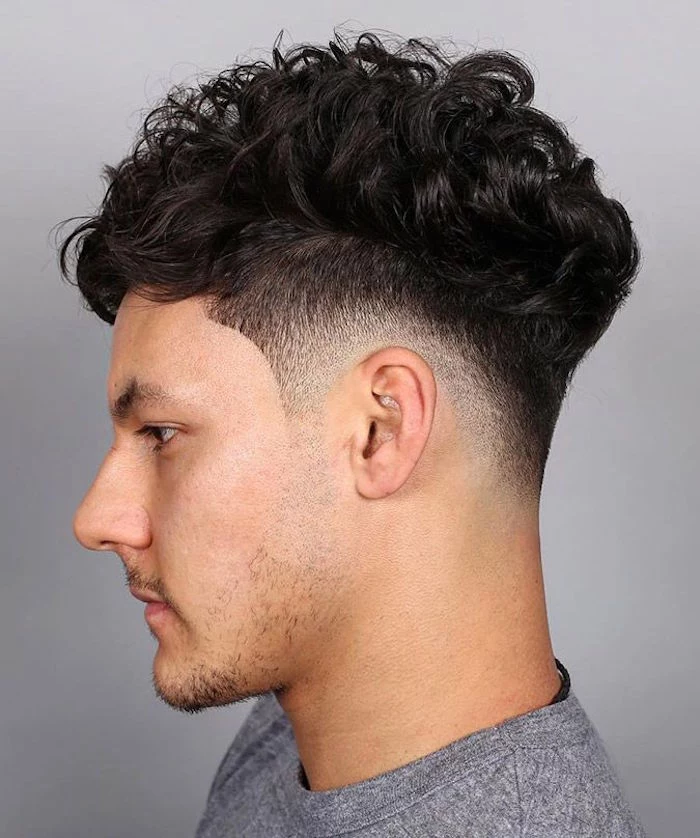
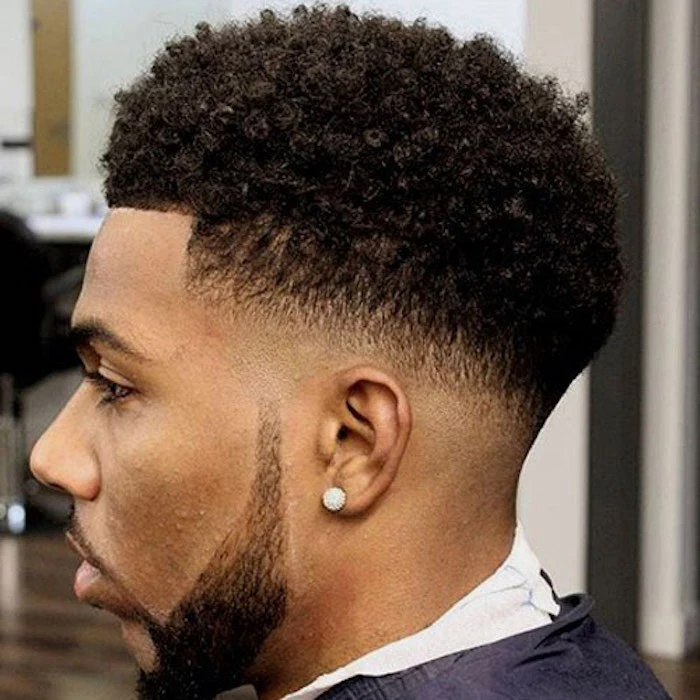
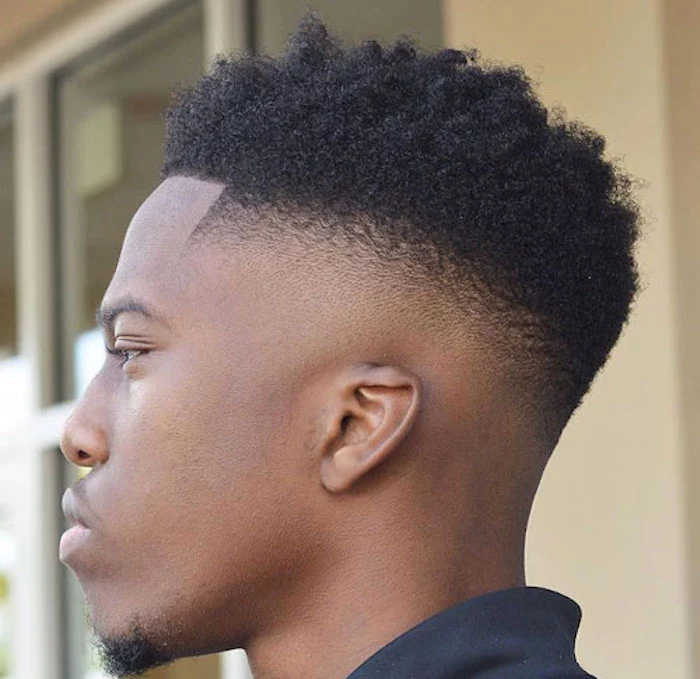
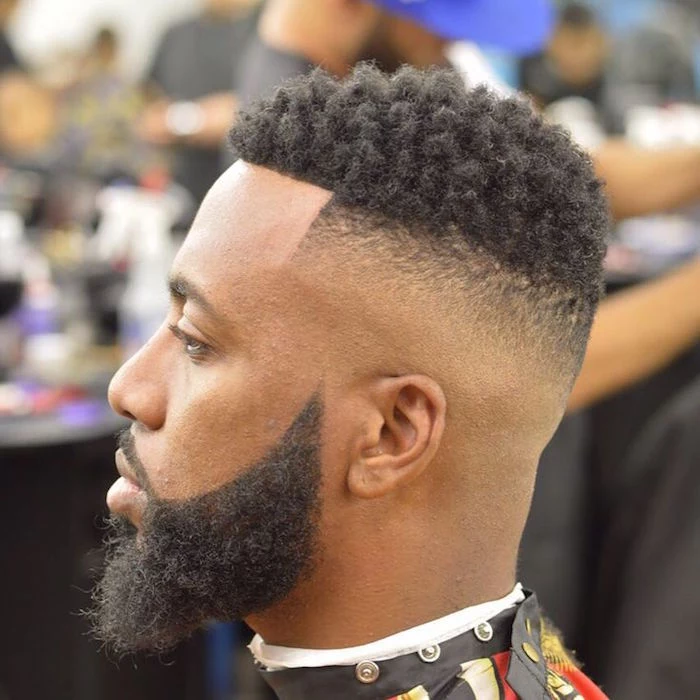
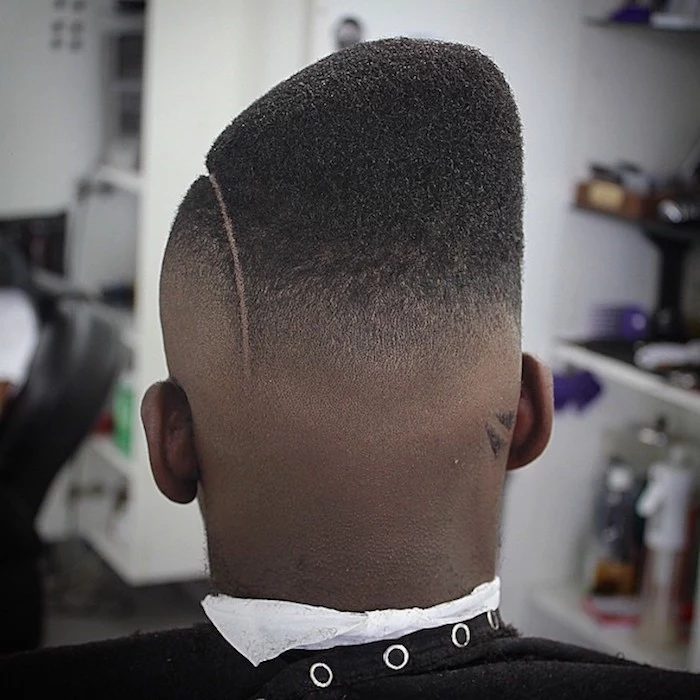
- Curly & Coily Hair: This is where a barber really earns their stripes. The cut creates a dramatic shelf of curls that can look amazing. You can’t just cut this hair wet like you would with straight hair; you have to account for shrinkage. I prefer to cut the top dry to see exactly how each curl will sit. Cutting it wet is a total gamble—you could end up with hair that’s inches shorter than you wanted.
How to Find a Barber Who Won’t Mess This Up
Before we go any further, let’s talk about finding the right person for the job. You can’t just walk into any old chop shop and expect perfection with this cut.
Here’s what to look for: Check out their Instagram or portfolio. Are you seeing lots of clean, sharp lines? Do they have pictures of this specific haircut? If all you see are standard fades and scissor cuts, they might not have the precision needed. Look for consistency. A good barber’s work will look clean and intentional across all their clients. Don’t be afraid to book a consultation first just to talk.
In the Chair: How It’s Done
When a client trusts me with their hair, I take it seriously. It’s all about a proven process and clear communication.
The 5-Minute Talk That Is NOT Optional
The first five minutes are everything. We just talk. I need to know a few things before I even touch my tools:
- How short do you really want the sides? Are we talking skin-close, or do you want to see some stubble?
- How much time are you willing to spend styling it every morning? Be honest.
- What kind of finish do you want? Shiny and slick, or matte and textured?
Quick tip: Have a picture on your phone. And please, learn how to ask for it! Don’t just say “short on the sides, long on top.” That’s how you end up with a generic tapered cut. Use the key words: “disconnected undercut with no fade.”
Before You Commit, Ask Yourself This…
This haircut is a relationship, not a one-night stand. So, a quick reality check:
- Is my wallet ready? A quality cut like this will likely run you between $40 and $70, depending on your city and the barber’s skill. The maintenance visits every 2-3 weeks will be another $25 to $40 a pop.
- Do I have 5-10 minutes every morning? This style doesn’t just happen. You will need to apply product and shape it.
- Can I handle the awkward phase? When you decide to grow it out, there will be a weird, shelflike stage. Are you prepared for that?
The Tools for Precision
For a cut this precise, you need the right gear. My go-to setup includes a pair of powerful clippers with a strong motor that can mow through bulk without pulling, which is key for a clean cut. For the edges, I use a set of sharp T-blade trimmers. I adjust the blades myself so they cut incredibly close—that’s how you get those razor-sharp lines. It’s a pro technique; if you set them too close, you can easily nick someone.
Oh yeah, and let’s talk about guard numbers. When a barber asks what number you want, here’s a simple translation:
- No Guard / 0: Leaves a very short stubble, almost skin-close.
1 Guard:
1/8th of an inch, or 3mm. Still very short, but with a bit of dark shadow.-
2 Guard:
1/4 of an inch, or 6mm. A longer, more conservative short look.
Styling, Upkeep, and the Inevitable Grow-Out
A great haircut can die a slow death at home if you don’t know how to handle it. I make sure every client leaves knowing exactly what to do.
Product is Your Best Friend
It’s not about using a ton of product; it’s about using the right one. Here’s a simple breakdown:
For a classic, shiny, slicked-back look, you need a pomade. Water-based ones, like Suavecito, have great hold and wash out easily. Oil-based pomades offer more shine but can be a pain to wash out.
If you’re after a modern, matte, textured style, grab a hair clay. It adds grit and volume with a strong hold that looks natural. A solid choice here would be something like Hanz de Fuko’s Claymation.
For more relaxed, natural looks, especially with waves or curls, a paste or cream is perfect. They give you light control without weighing your hair down.
Pro Tip: Always apply product from back to front. Rub a dime-sized amount between your palms until it’s warm, then work it through the back and crown first, finishing with the front. This prevents that greasy, weighed-down look at your hairline.
The Maintenance Grind
Let’s be real: this is a high-maintenance haircut. The sharp contrast is everything. To keep it looking crisp, you need a cleanup every 2 to 3 weeks, period. The initial cut will probably take 45-60 minutes, but these cleanups should be quick 20-30 minute appointments.
Troubleshooting & Common Mistakes
Clients often come to me to fix a bad undercut from another shop. The most common issue is a crooked line. Fixing it means I have to take the line higher, which is why it’s so important to get it right the first time.
Another thing I see is a “helmet head” top. That’s when the hair is just cut to one length with no texturizing, so it just sits there. The fix is to go back in and point-cut to remove some weight so the hair can actually move.
And please, don’t try to touch up the line yourself. I once had a guy come in after trying to “fix” a little fuzzy spot with his beard trimmer. Let’s just say we had to get very creative and take the line way higher than he ever intended to fix the divot he carved out.
A Final Word on Safety
This should go without saying, but a good haircut should never risk your health. Every single tool I use is disinfected between clients. My clippers get sprayed with a hospital-grade disinfectant, and my combs soak in that blue sanitizing liquid you see at every professional station. If you walk into a barber shop and see hair all over the tools and counters… just walk right back out. It’s not worth the risk of a nasty skin infection.
Inspiration Gallery
Pomade vs. Clay: For the classic, high-gloss finish seen in Peaky Blinders, a water-based pomade like Suavecito or Layrite is your best bet. It provides strong hold and shine. Matte Clay: If you prefer a modern, textured look with zero shine, reach for a product like Hanz de Fuko’s Claymation. It offers pliable hold for a more natural, messy style. Choose based on the finish you want to achieve.
- Keeps the line of disconnection incredibly sharp.
- Prevents the buzzed sides from looking fuzzy or overgrown.
- Maintains the high-contrast impact of the style.
The secret? A maintenance visit to your barber every 2 to 3 weeks. It’s not just a haircut; it’s a subscription to sharpness.
The term ‘undercut’ dates back to the early 20th century, associated with British street gangs and working-class rebels before being adopted by military personnel in the 1930s and ’40s.
Don’t neglect the skin you just revealed. The closely shaved sides are prone to dryness and irritation. After a shower, apply a lightweight, non-comedogenic moisturizer to the buzzed areas. This prevents flaky skin and keeps the scalp healthy, making for a cleaner look and a smoother canvas for your barber’s next visit.
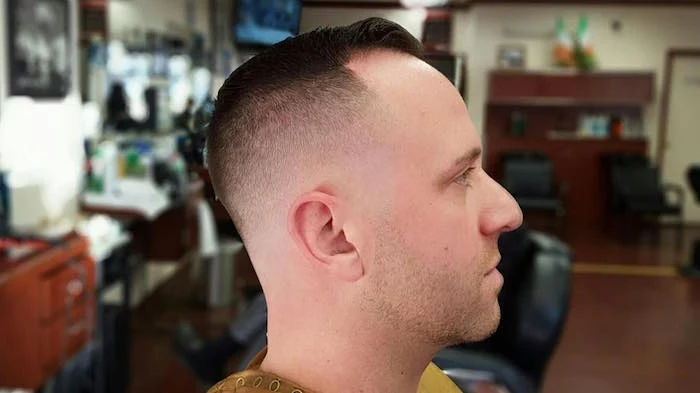
Will this cut work with thinning hair?
It can be a double-edged sword. A disconnected undercut can make the hair on top appear fuller by contrast. However, if your hair is thinning at the crown, the dramatic length on top might draw more attention to it. The key is strategic styling; using a texturizing powder like Slick Gorilla can add volume and create the illusion of density.

A word on the grow-out phase: Deciding to move on from a disconnected undercut requires a plan. The initial stage can be awkward as the sides grow in. The best strategy is to transition into a tapered style. Ask your barber to start blending the disconnect, gradually letting the sides catch up to the top. It’s a process, not an overnight fix.
On average, human hair grows about half an inch per month.
For an undercut, this means the clean, sharp line that defines the style begins to blur in as little as 10 to 14 days. This rapid change is why the financial and time commitment to regular barber visits is a crucial factor to consider before taking the plunge.
The right tools at home make all the difference for daily styling. You don’t need a professional arsenal, but these three are non-negotiable:
- A powerful hairdryer with a nozzle for directing airflow and building volume.
- A quality vent brush or comb for shaping and directing the hair.
- Your chosen styling product (pomade, clay, or wax) to lock it all in place.
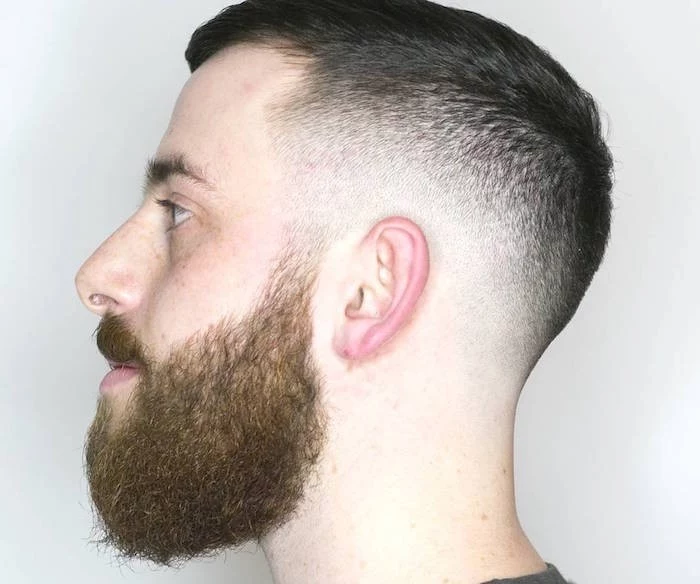
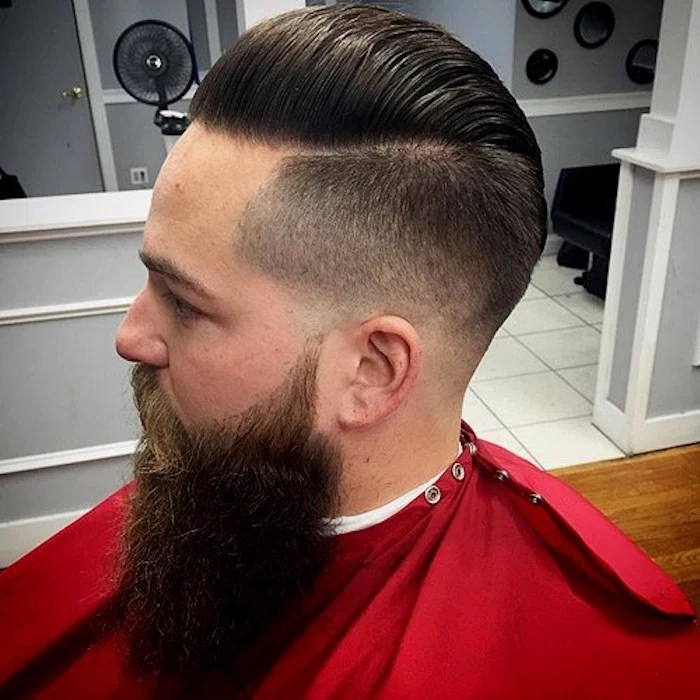
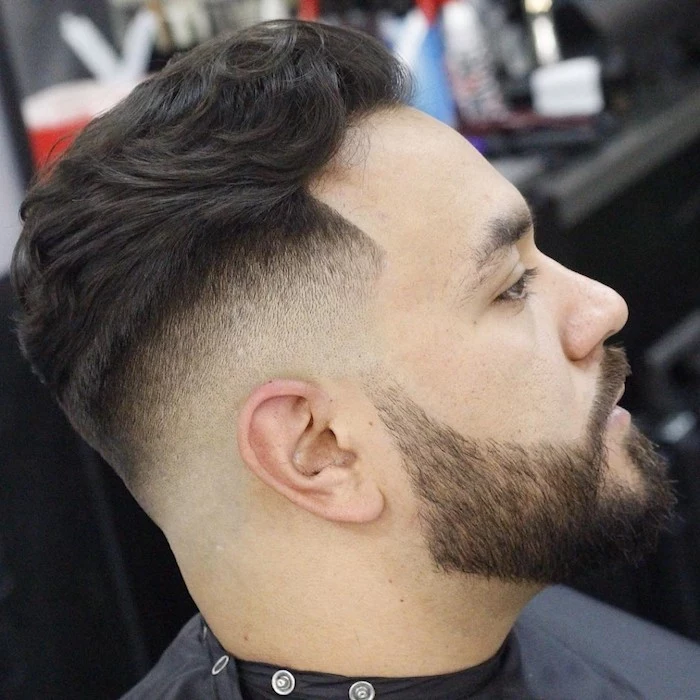
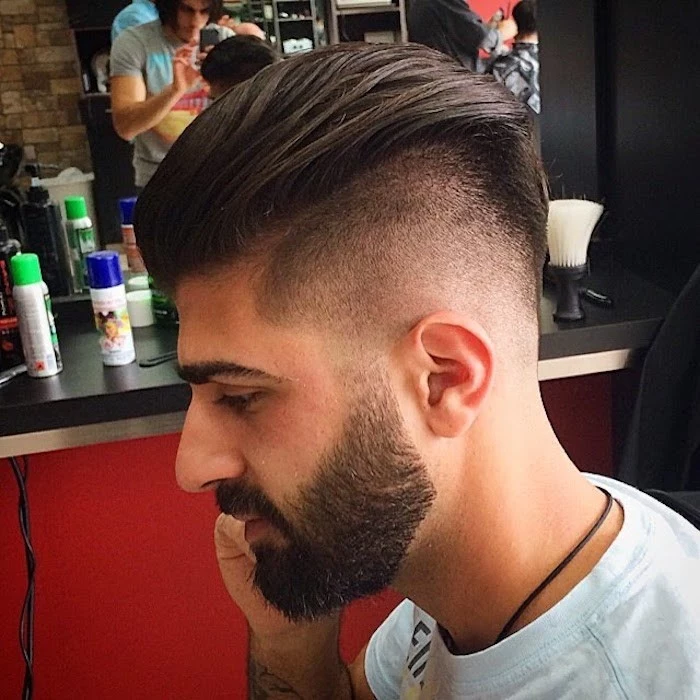
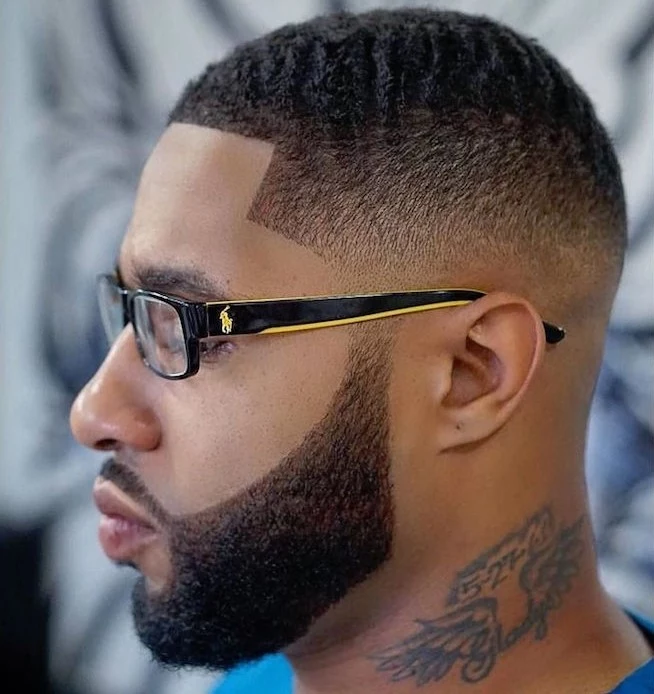
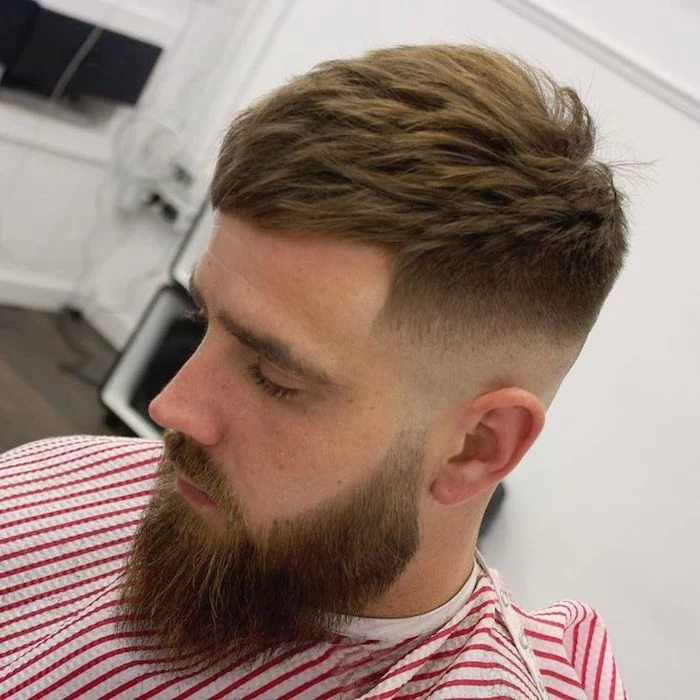
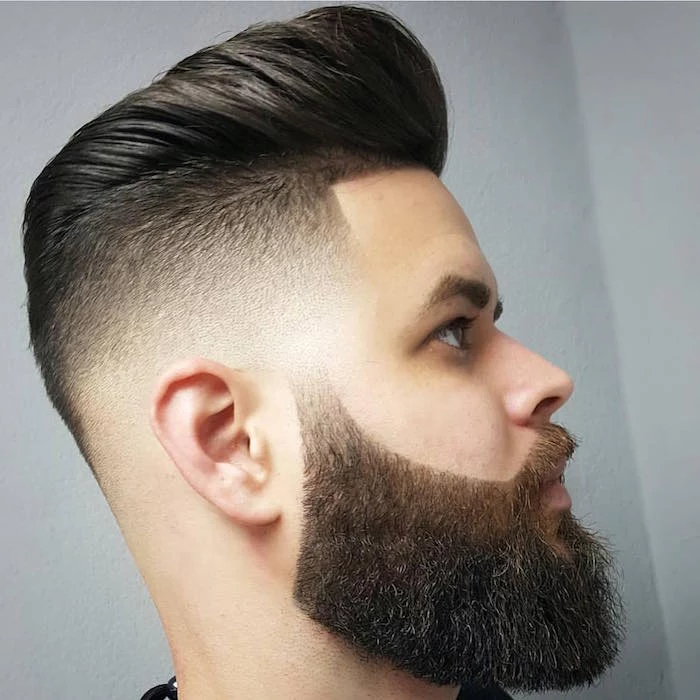
Pairing your undercut with facial hair is all about balance. A sharp, aggressive high-disconnect can be perfectly balanced by a well-maintained, full beard. For a more subtle, lower disconnect, a clean shave or disciplined stubble keeps the look intentional and modern. The rule is simple: if the hair on your head is sharp, the hair on your face must be too.
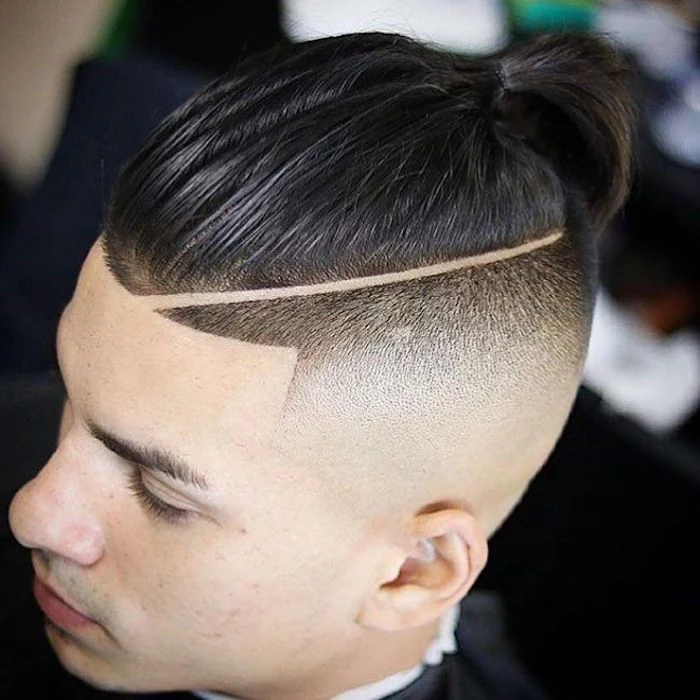
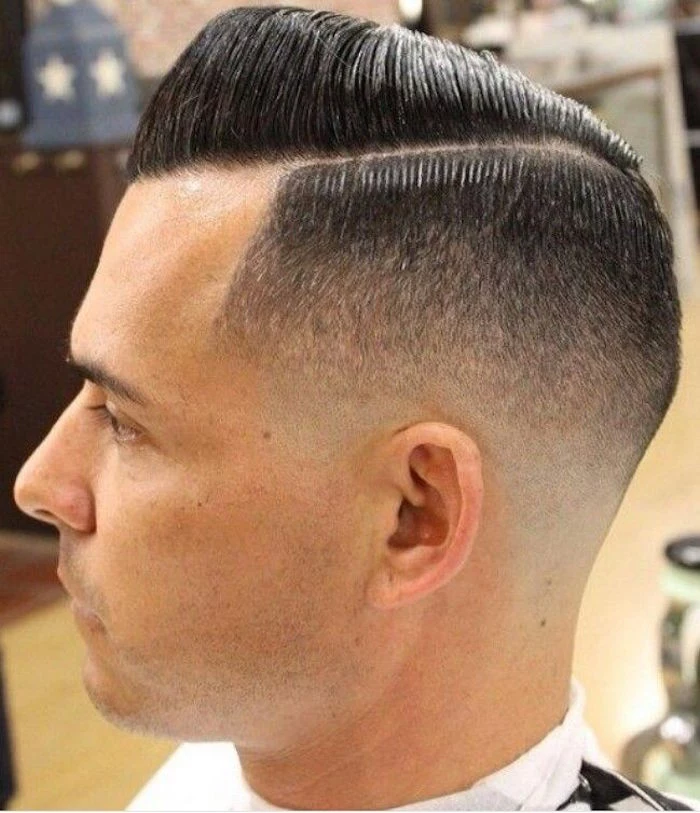
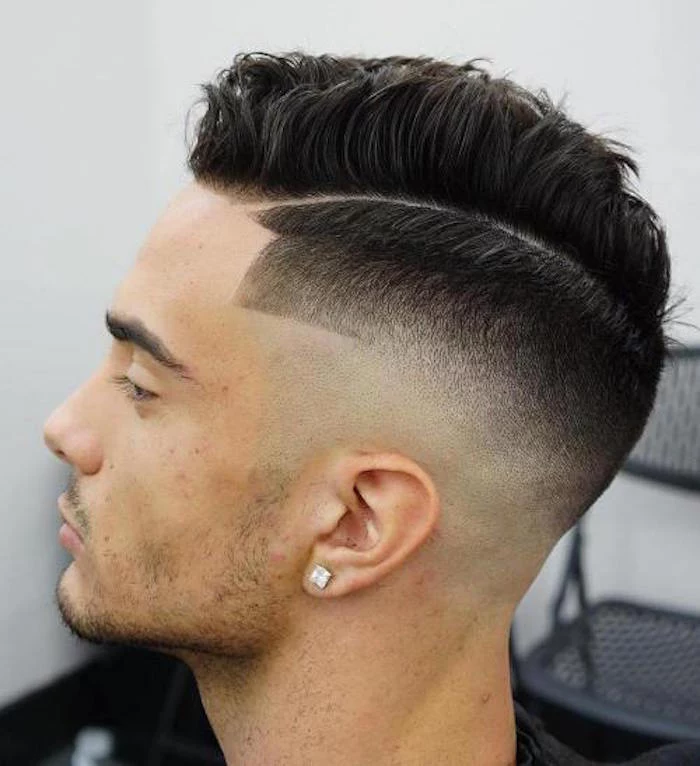
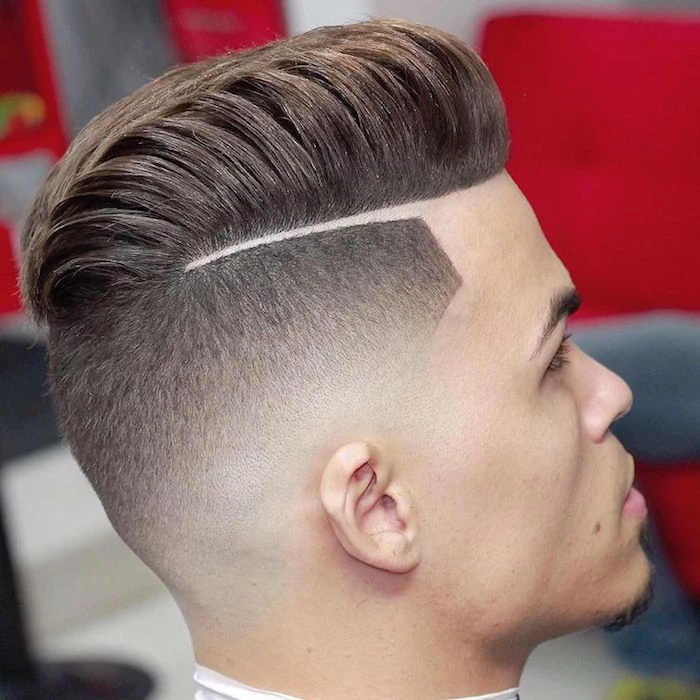
For an ultra-sharp look, ask your barber about a “hard part.” This involves using a trimmer or straight razor to shave a clean, defined line where you would normally part your hair. It elevates the disconnected style, adding another layer of geometric precision that is impossible to ignore.
- Maximum volume and a beachy, lived-in feel.
- Enhanced natural waves or curls.
- A perfect base for your finishing product to grip onto.
The trick? Pre-styling with a sea salt spray on damp hair before you even touch the blow dryer. Brands like Not Your Mother’s or Bumble and bumble offer excellent options.
Don’t get lost in translation: Bring photos. Saying
Brad Pitt’s portrayal of Don ‘Wardaddy’ Collier in the 2014 film ‘Fury’ is often credited with catapulting the slicked-back disconnected undercut into the modern mainstream.
Can you get a disconnected undercut with curly or coily hair?
Absolutely, and it’s one of the most striking variations. The stark contrast between the sharp, faded sides and a voluminous, free-flowing curly top creates a powerful silhouette. The key is moisture. Ensure you use leave-in conditioners and curl creams to keep the top healthy and defined, preventing frizz from stealing the show.
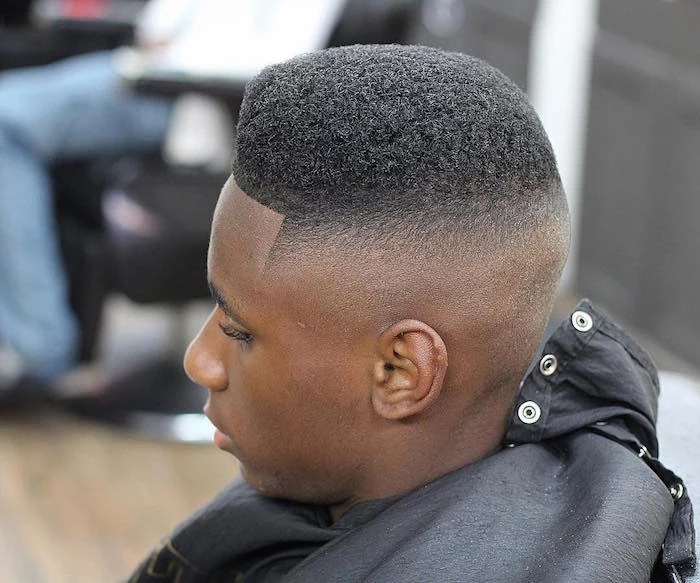
The power of this cut lies in its sharp geometry. It works exceptionally well to complement a strong jawline on square and rectangular face shapes. For rounder faces, a high disconnect can create the illusion of length and slimness, adding angles where there are none.
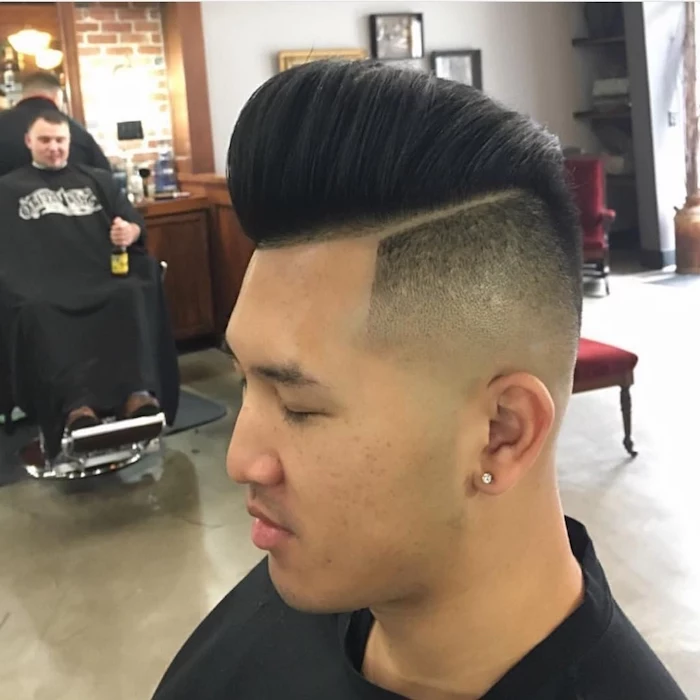
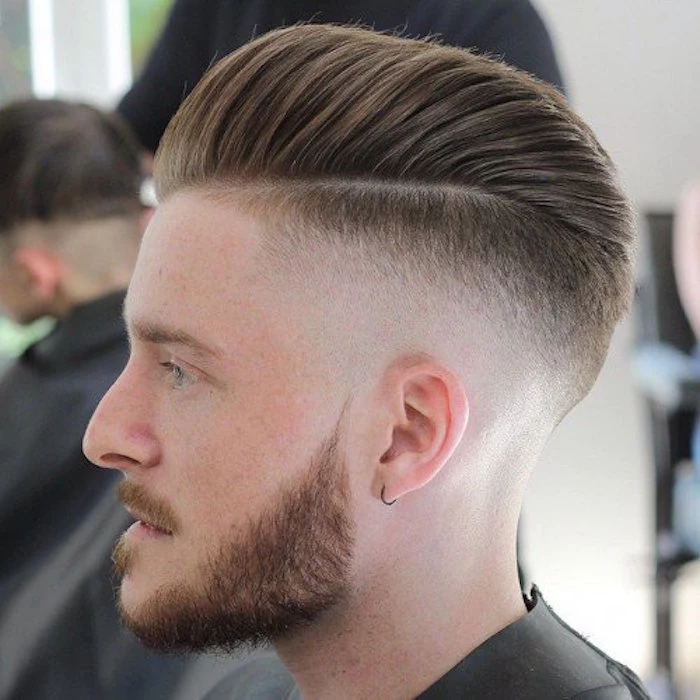
High Disconnect: The line is placed well above the parietal ridge, creating a severe, fashion-forward statement. This is the classic Peaky Blinders look. It’s bold but requires confidence to pull off.
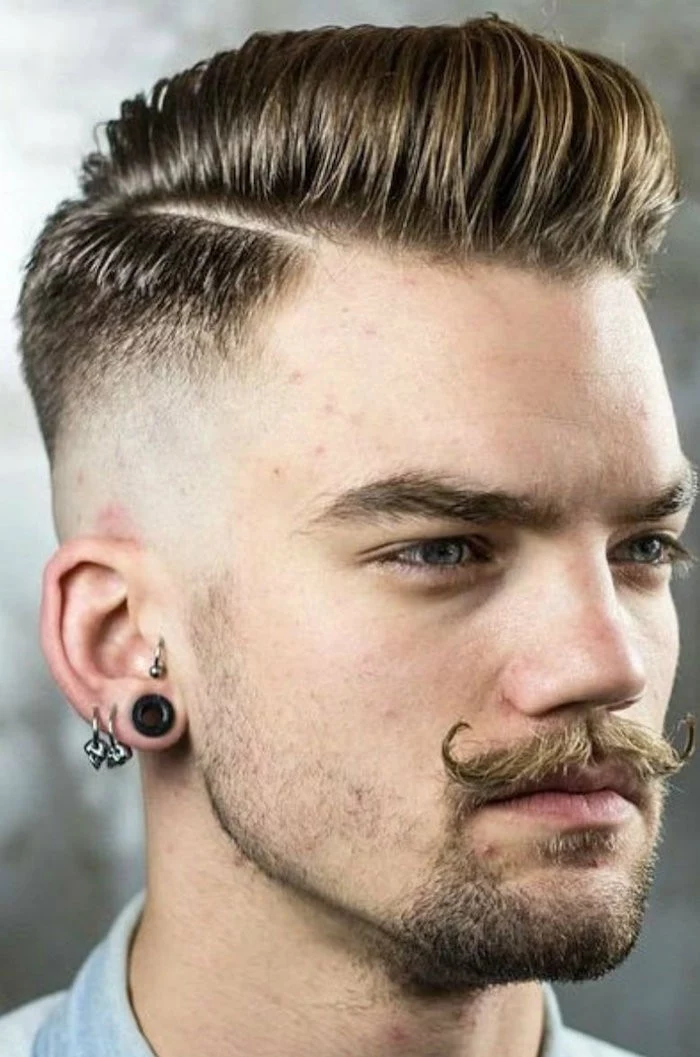
Low Disconnect: The line sits closer to the temples, leaving more dark hair on the sides. It’s a safer, more versatile version of the cut that’s easier to style and grow out.
For a first-timer, a lower disconnect is often the recommended starting point.
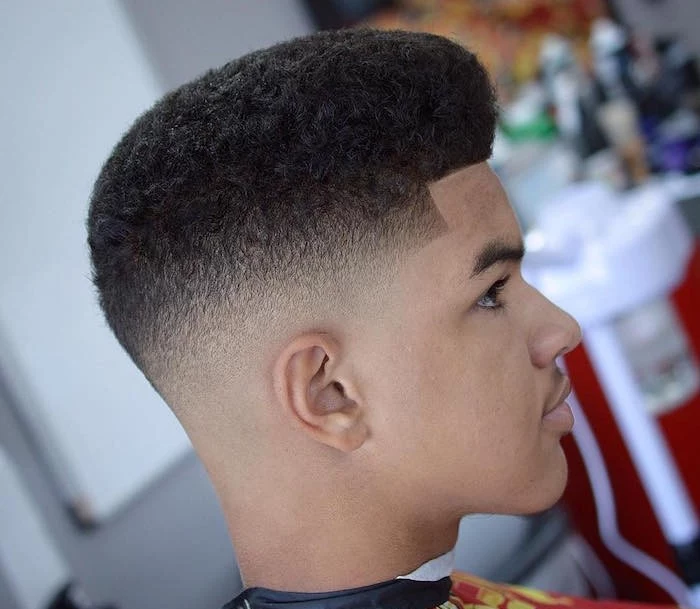
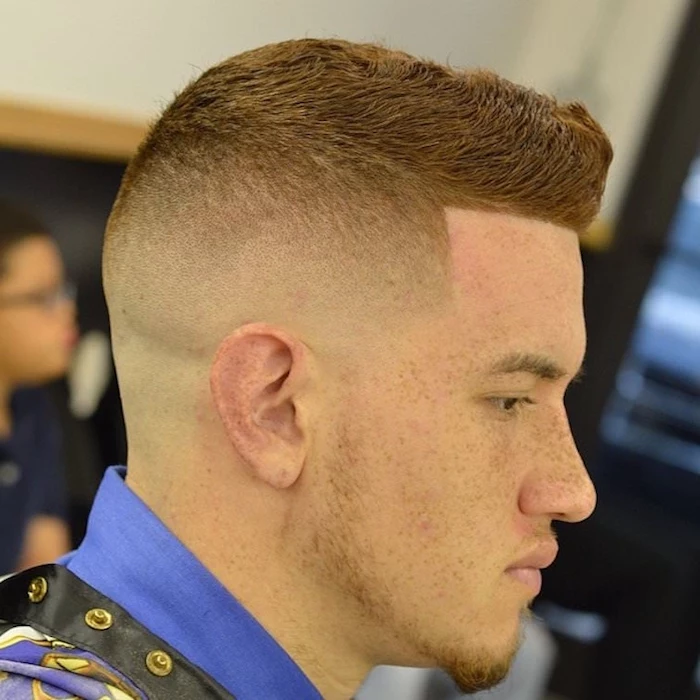
The clipper guards your barber uses are crucial. For a true, dramatic disconnect, the sides are often taken down to a #0 (1.5mm) or even a bladeless foil shaver for a skin-fade effect. The top, in contrast, might be left with 4-6 inches of length. This extreme difference is the entire point of the style.
Thinking about a home touch-up with your own clippers? Think again. The defining feature of this cut is the perfectly straight, intentional line of disconnection. Creating that line freehand on your own head is nearly impossible and is the fastest way to turn a sharp style into a home-cut disaster. Leave the clippers to the professionals.
A disconnected undercut isn’t a one-and-done deal. The cost of a professional cut every 2-3 weeks adds up. Expect to budget for 15-20 cuts a year to keep this style looking its best. It’s a grooming investment, not just a haircut.
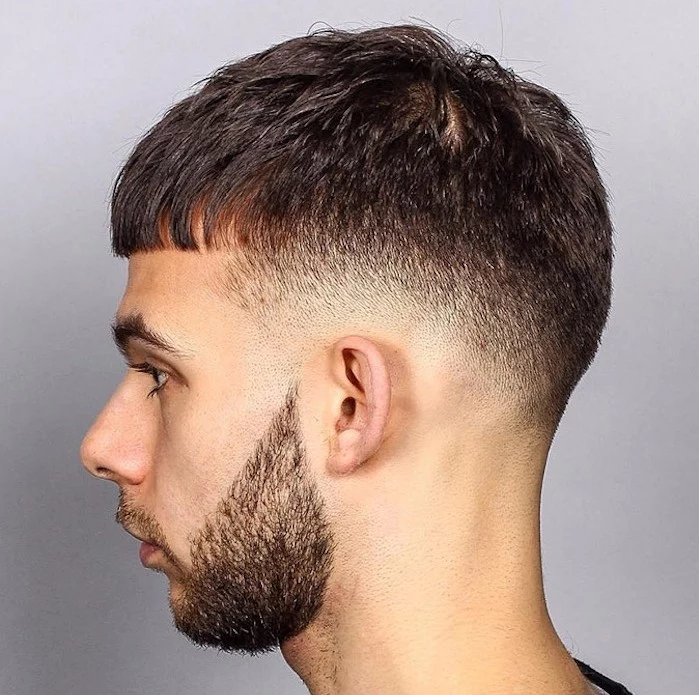
Not ready for the full commitment of a hard disconnect? Ask your barber for a high taper fade instead. It provides a similar high-contrast aesthetic with short sides and a long top, but with a gradual, soft blend instead of a hard line. It’s a great way to test the waters of a high-contrast style without the severe ‘ledge’ effect.
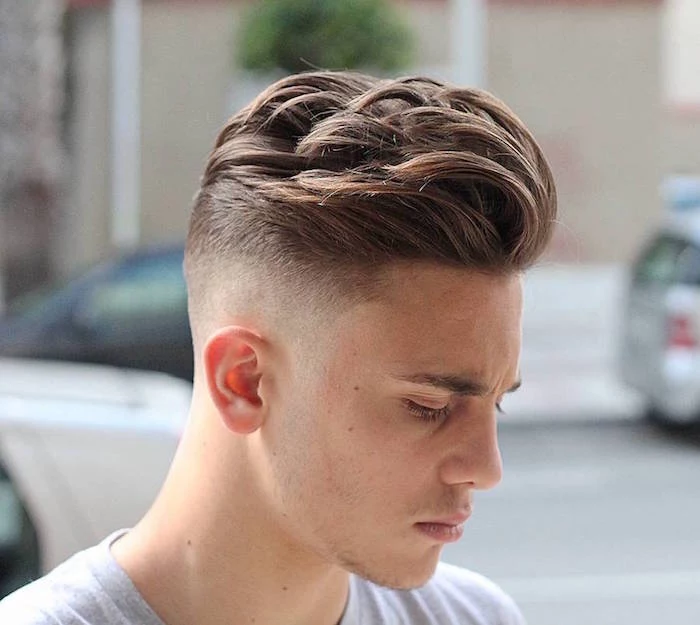
The ‘slick-back’ is the most iconic way to style a disconnected undercut. The trick is to blow-dry your hair from front to back to train it. Then, emulsify a dime-sized amount of high-hold pomade in your palms and work it through from root to tip. Finish by using a comb to create clean, uniform lines for that sharp, vintage look.
Don’t let product build-up ruin your style. A clarifying shampoo, used once a week, can strip away the residue from pomades, clays, and waxes. This restores your hair’s natural texture and volume, making daily styling much more effective and preventing your scalp from becoming irritated.
One style, multiple personalities. How you style the top completely changes the message.
- Slicked Back: Polished, formal, and commanding. Perfect for the office or a formal event.
- Messy Quiff: Textured, casual, and modern. Ideal for a weekend or a night out.
- Side Part: A timeless, gentlemanly take that blends classic and contemporary.
The feeling of the cool steel of the clippers buzzing up the side of your head, followed by the sight of that razor-sharp line in the mirror, is a confidence booster like no other. It’s a sensory signal of a deliberate, bold choice—a hairstyle that feels as sharp as it looks.


