I still remember the first time I used a crimping iron in a professional setting. A client came in with a picture from a magazine, pointing to that super sharp, zigzag texture. In cosmetology school, we learned all about thermal styling, but this was a whole different ballgame compared to soft curls or sleek looks. This was about building a bold, graphic shape into the hair.
And you know what? Even when it’s not all over the fashion magazines, crimping never really goes away for professional stylists. For us, it’s not just some retro fad; it’s a core technique for creating unbelievable volume and unique textures you just can’t get any other way.
So, this guide isn’t about chasing a fleeting trend. It’s about sharing the real craft of hair crimping as I’ve learned it over the years, from my early days in the salon to working on creative photoshoots. We’ll get into how it works, the tools you actually need, and the techniques that pros use to get it right every time. Think of this as a chapter from my personal stylist handbook, made to help you master this awesome skill safely.
Let’s Geek Out: What’s Happening to Your Hair?
Before you clamp down with a hot iron, it’s super helpful to know what’s going on at a microscopic level. Honestly, understanding the “why” is what separates someone just messing around from someone who gets great results every time. It’s the key to making smart choices about everything from heat settings to products.
Your hair’s shape is held in place by chemical bonds. The super strong ones can only be changed by chemical services like perms. The ones we’re playing with are the much weaker hydrogen bonds. When you wash your hair, these bonds break, letting you reshape your hair as it dries. A hot tool like a crimper just does the same thing, but way faster.
The heat breaks those hydrogen bonds, and as you press the hair between the plates, you’re physically molding it into a new zigzag pattern. As the hair cools, the bonds reform, locking that new shape in. This is why—and this is critical—you absolutely have to let your hair cool down completely before you touch it. If you brush it out while it’s still warm, the bonds won’t have set, and your hard work will just fall flat.
Heads Up: The Damage Risk is Real
Using heat that’s way too high or clamping down on damp hair is a recipe for disaster. When you heat wet hair, the water inside the strand turns to steam and expands like crazy. This can literally create bubbles inside your hair, leading to permanent damage and breakage. Yikes.
Excessive heat also fries the hair’s protective outer layer, the cuticle. A healthy cuticle is smooth and shiny, but heat damage causes it to lift and break apart, which is what gives you that frizzy, dull, and weak feeling. This is exactly why a good heat protectant isn’t just a suggestion; it’s a non-negotiable part of the process.
Your Toolkit: Choosing Your Crimping Method
You’ve basically got two main ways to get a crimped look: a heated crimping iron or a heat-free braiding method. Both have their pros and cons, and a true pro knows when to use which. The right choice really comes down to your hair type, the look you’re going for, and whether you prioritize hair health or speed.
How to Pick a Good Crimping Iron
A good crimping iron is a worthwhile investment. The cheap ones you find in the bargain bin for under $30 often have spotty heating and poor temperature control, which are the fast-track to fried hair. Here’s what I look for:
Plate Material: Ceramic plates are a solid all-around choice. They give you nice, even heat. Tourmaline is a step up, as it helps seal the cuticle for less frizz and more shine. Titanium heats up the fastest and gets super hot, so I usually only recommend titanium tools for very coarse, resistant hair, and even then, with a lot of caution. A quality ceramic iron from a brand like Conair or Revlon will typically run you between $40 and $70. Pro-grade titanium tools, like a BaBylissPRO, can be $100 or more, but you’re paying for precision and power.
Plate Size: The size of the zigzags in the plate completely changes the final look. A micro-crimper has tiny little grooves and is my secret weapon for creating hidden volume. A standard crimper gives you that classic, defined zigzag. A larger tool, often called a waver, creates a much looser, S-shaped pattern.
Adjustable Heat: Honestly, this is a deal-breaker. If an iron just has an on/off switch, walk away. You need to be able to control the temperature. Fine or fragile hair needs low heat (around 300-350°F), while coarse hair might need up to 400°F. Always, always start at the lowest temperature that works for your hair.
The No-Heat-Needed Braid Method
For anyone who wants to skip the heat, braiding is an amazing, time-tested technique. The result is a softer, more organic-looking texture instead of the sharp angles from an iron. It’s my go-to for clients with really fragile or over-processed hair.
The key here is getting the dampness just right. You want your hair to be about 70-80% dry—it should feel cool to the touch, but not be dripping wet. For a really defined, crimped look, you’ll want to create 15-20 small, tight three-strand braids. A few bigger, looser braids will give you softer waves. Just be prepared: this is an overnight commitment. You’ll need to let the braids dry completely while you sleep for the style to set.
A Quick Comparison: Iron vs. Braids
So, which one should you choose? Let’s break it down.
Using a crimping iron is all about speed and precision. You can do your whole head in about 30-90 minutes, depending on your hair’s thickness, and you get a very sharp, defined, and intentional texture. The obvious downside is the potential for heat damage if you aren’t careful.
The heatless braid method, on the other hand, is the champion of hair health. There is zero risk of heat damage. The texture you get is much softer, wavier, and more natural-looking. The trade-off is time. You have to plan ahead and let your hair dry in the braids overnight.
Your Beginner’s Shopping List
Feeling ready to give it a go? Here’s a simple shopping list to get you started. It makes the whole process feel way more achievable.
Ceramic Crimper: ($40 – $70) A solid investment for great results without breaking the bank.
Heat Protectant Spray: ($15 – $25) Don’t skip this! Look for trusted salon brands like Kenra or Chi for reliable protection.
Sectioning Clips: (~$5) You can find these at any beauty supply store. They are a game-changer for keeping your work clean.
Wide-tooth Comb: (~$5) Essential for the finishing touches without creating frizz.
Light-Hold Hairspray: ($10-$20) To lock in your look without that crunchy feel.
Step-by-Step to Salon-Worthy Crimping
Here’s the exact process I follow for consistent, beautiful results. Patience is your best friend here. Rushing is how you get uneven texture and make mistakes. Depending on how much hair you have, set aside 30 minutes to an hour and a half.
Step 1: Prep Your Hair Always, always start with 100% dry hair if you’re using an iron. I can’t stress this enough. Any moisture will boil and cause damage. If you’re not sure, give it a quick once-over with a blow dryer on the cool setting. Then, brush through to get rid of any tangles.
Step 2: Section, Don’t Just Grab! The difference between a pro job and an amateur one is sectioning. Don’t just grab random chunks of hair. I usually split the hair into four main sections and clip them up. Then, starting from the back at the nape of the neck, I take thin, horizontal sub-sections that are about one-inch wide. The thinner the section, the more defined your crimp will be.
Step 3: The Crimping Technique Take your first thin section. Lightly mist it with your heat protectant. Place the crimper near the root (but not touching your scalp!) and press down firmly for about 3-5 seconds. You shouldn’t hear a loud sizzle. Release the clamp and move the iron down the hair, carefully lining up the first groove of the iron with the last crimp you just made. This overlap is crucial for a continuous pattern. Keep going until you reach the ends.
Step 4: Cool Down and Finish This is where so many people mess up. Do not touch, brush, or mess with the hair until it has cooled down completely. This can take 10-15 minutes. Cooling is what locks the style in. Once it’s cool, you can gently rake your fingers through the sections to break them up and add fullness. For a softer look, use a wide-tooth comb—but never a brush, which will just create a frizzy mess. A little light-hold hairspray and you’re good to go.
Pro-Level Tricks for Using Your Crimper
In the salon, we often use crimping as a prep step to build a foundation for other styles. It gives us a texture that smooth hair just can’t compete with.
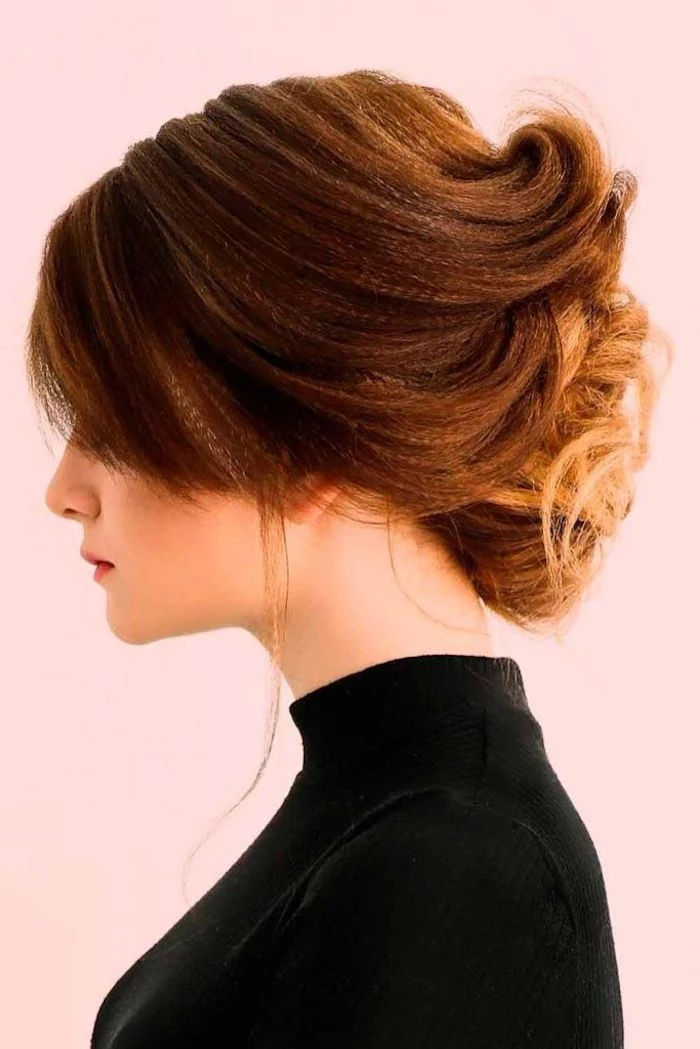
My All-Time Favorite Trick: Hidden Volume
This is a game-changer for anyone with fine or flat hair who wants a big, full ponytail or updo. It creates incredible, lasting volume without tons of teasing.
First, take the whole top section of your hair—the part people will see—and clip it up and out of the way.
Next, take the layers underneath and, using a micro-crimper, crimp only the first one or two inches of hair right at the root. You don’t need to do the whole strand, just the base.
Once you’re done, let the hair cool completely.
Finally, unclip that top section and let the smooth hair fall over your hidden, crimped foundation.
Boom. The zigzag texture of the hair underneath acts like a secret scaffold, lifting your hair off the scalp for amazing, airy volume that lasts all night.
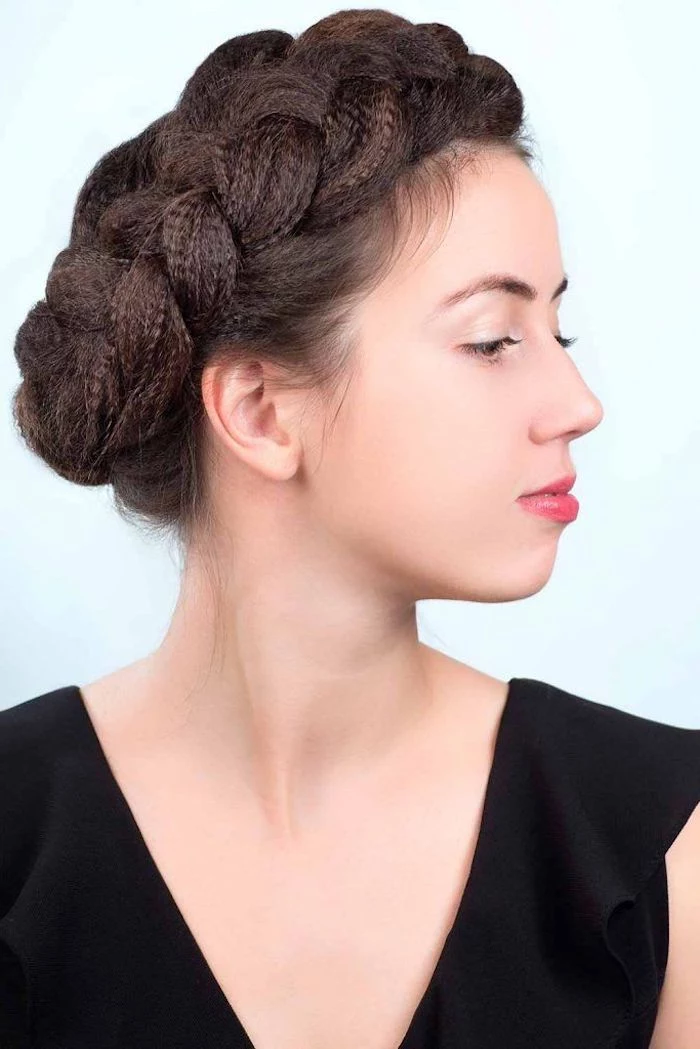
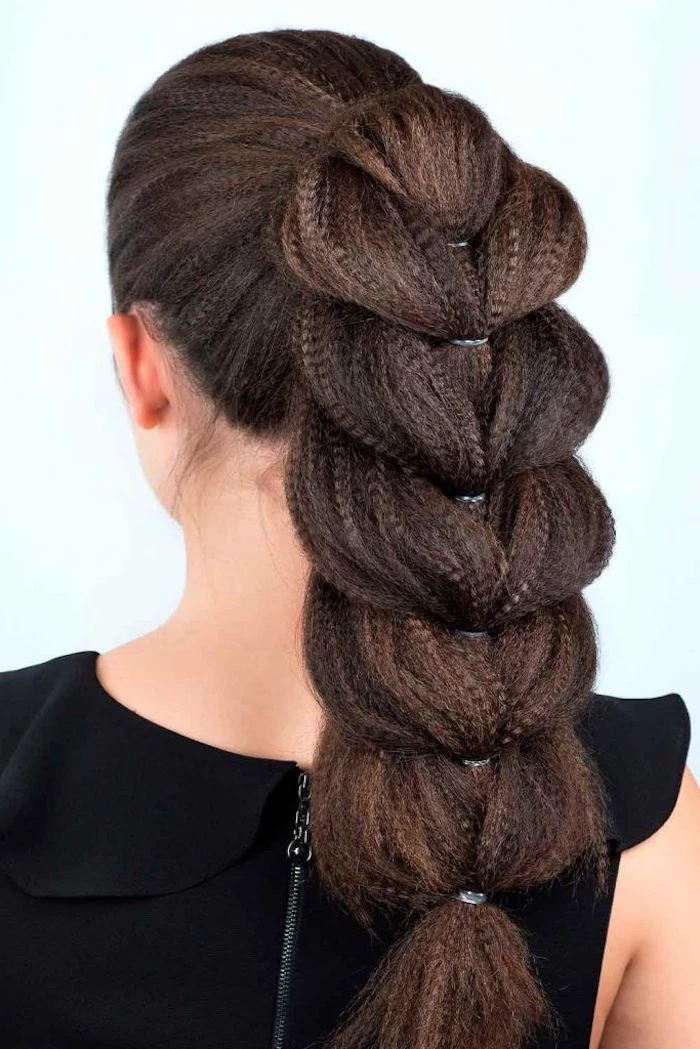
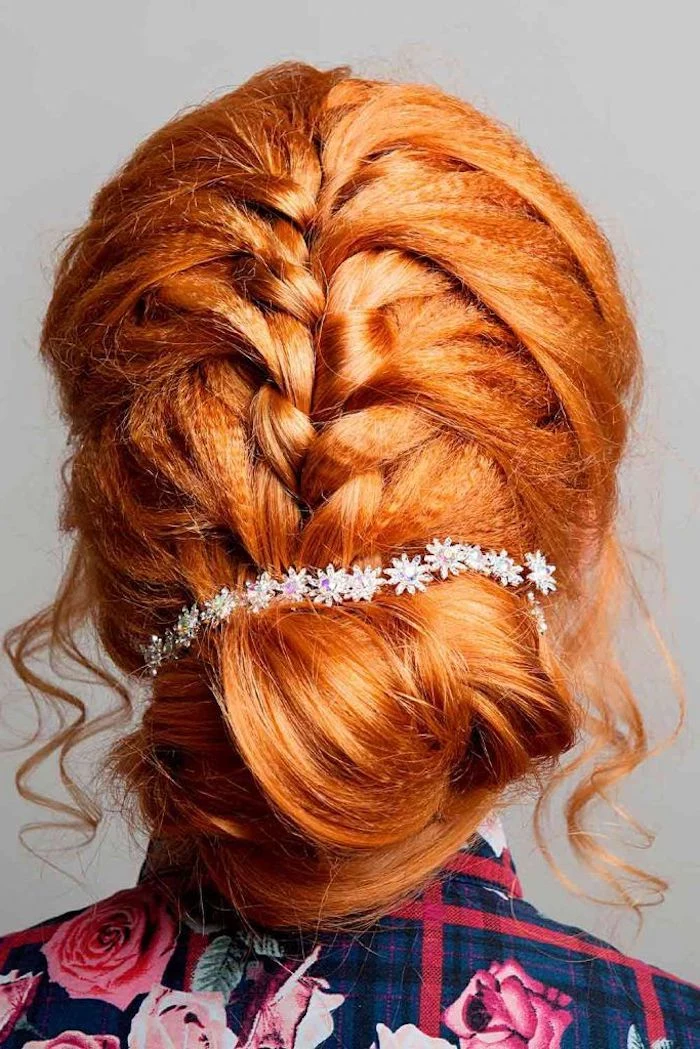
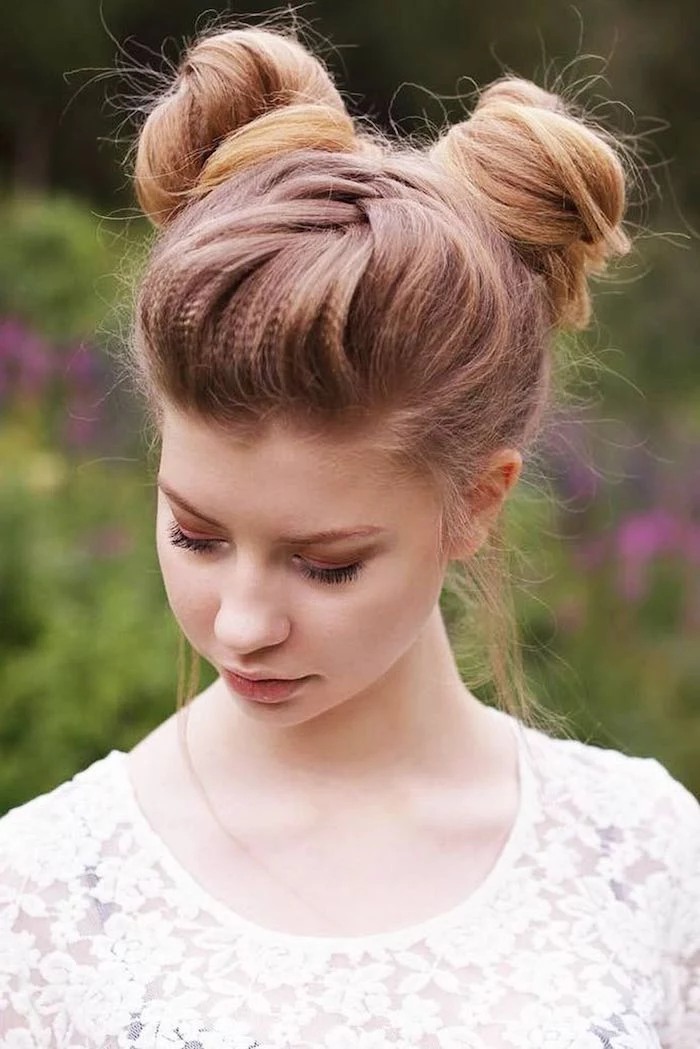
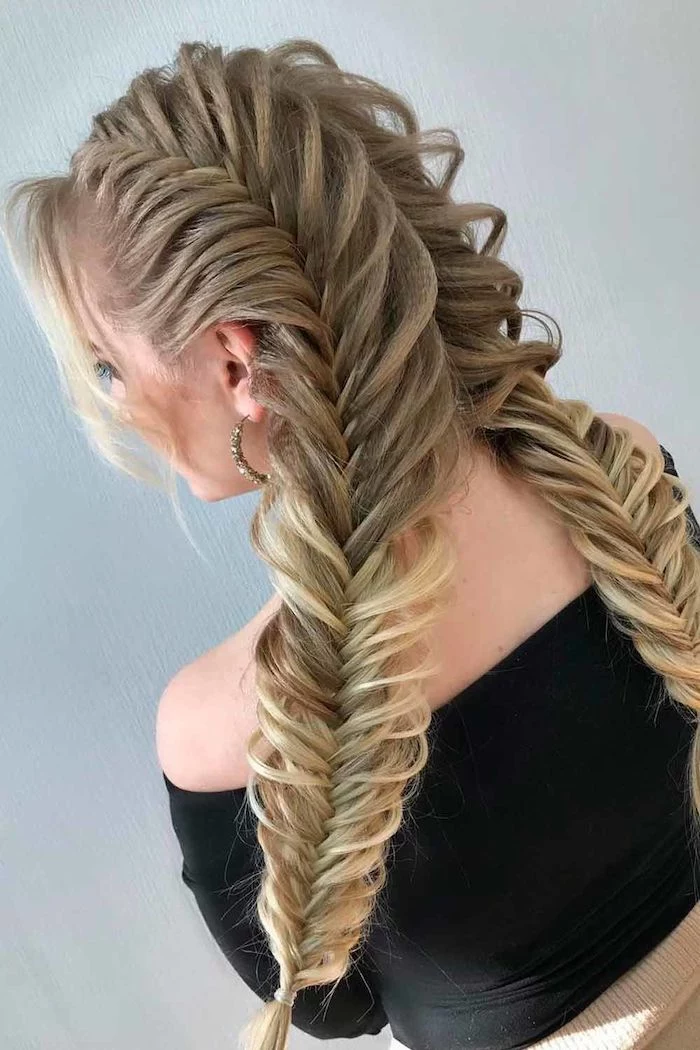
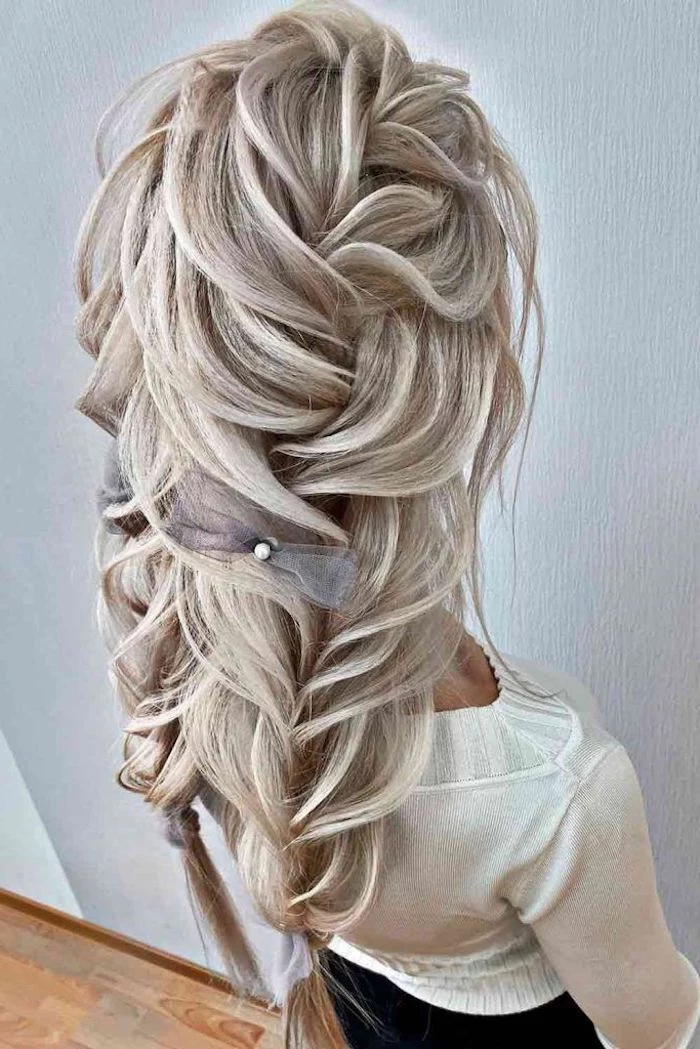
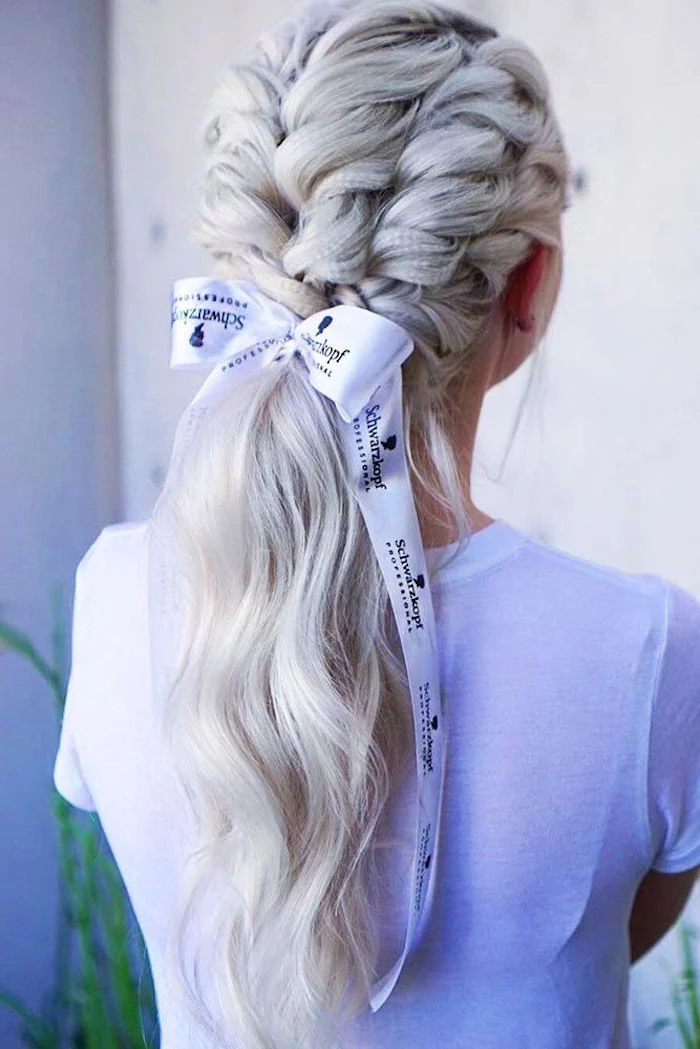
The Secret to Big, Fat Braids and Updos
Ever try to create one of those big, chunky, “pancaked” braids only to have it look stringy or slip out? Try crimping all of your hair first. It adds grit and plumps up every single strand, which makes the hair easier to grip and dramatically increases the volume of your final braid. The same goes for updos; crimped hair gives bobby pins something to anchor to and makes buns and twists look so much fuller.
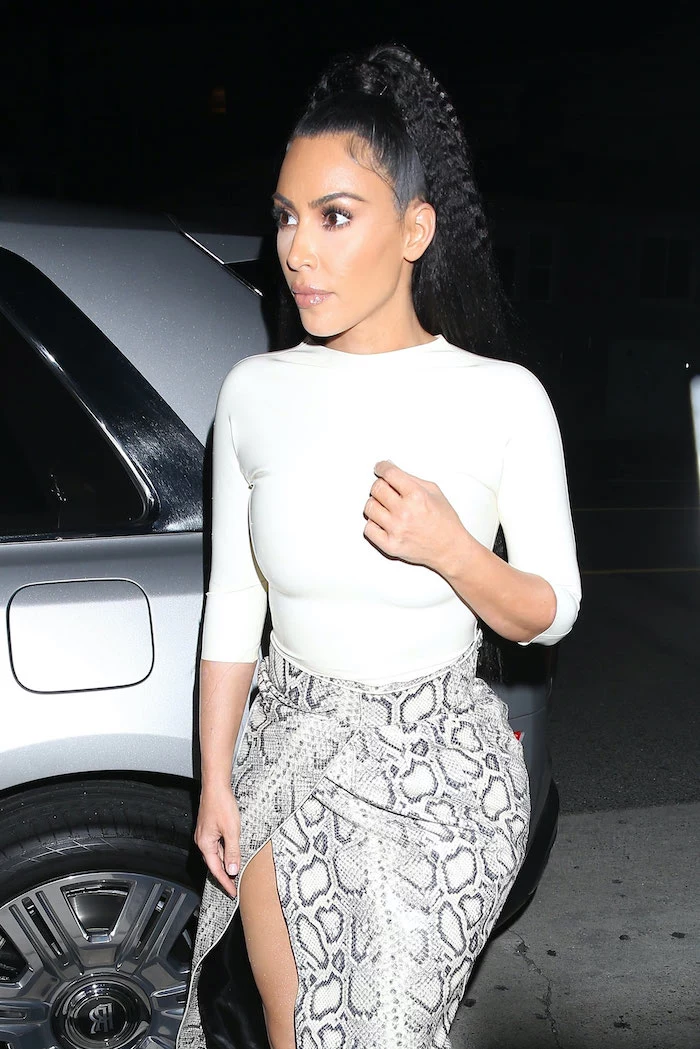
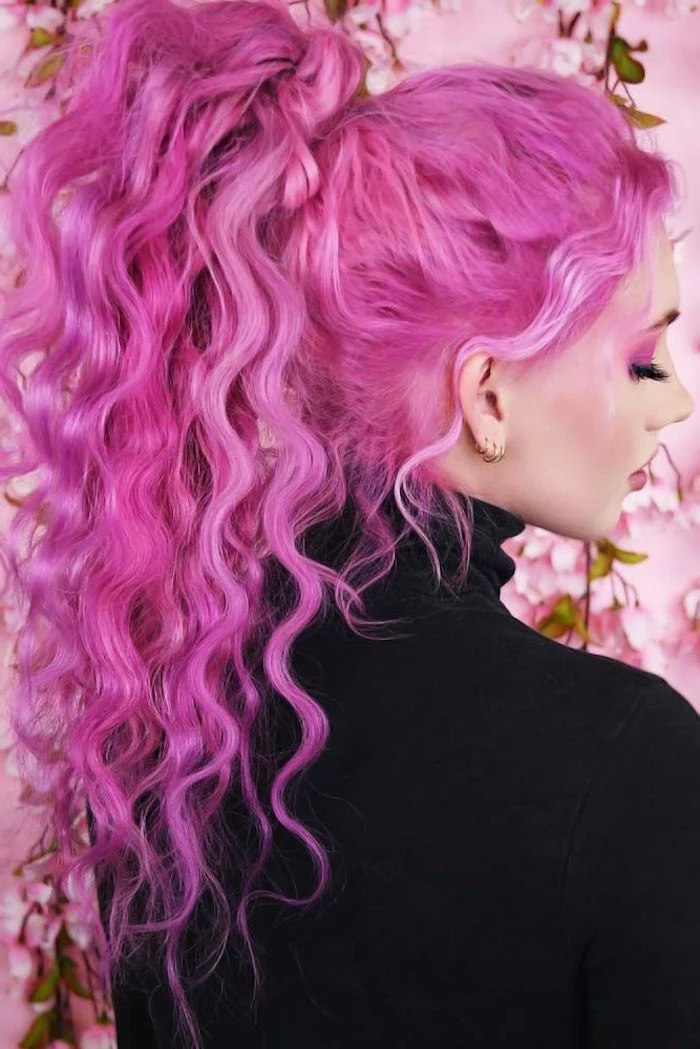
In a Rush? The 5-Minute Ponytail Upgrade
Don’t have time to do your whole head? No problem. Just pull your hair back into a simple ponytail. Then, take the ponytail itself and crimp a few random sections. It takes less than five minutes and gives a basic style a really cool, unexpected dose of texture and edge.
Troubleshooting Common Crimping Problems
I’ve seen it all. Here’s how to fix the most common issues I see people run into at home.
Problem: My crimp is weak and falls out in an hour. This usually means your sections were too thick, your heat was too low, or you didn’t let it cool down. Try again with thinner sections, maybe bump the heat up just a little, and be patient during the cool-down phase!
Problem: My hair turned into a giant frizz ball. Frizz means the cuticle is roughed up. This could be from not using a heat protectant or from using a brush to finish. Always use protection, and only use your fingers or a wide-tooth comb to style afterward. A drop of anti-frizz serum is your best friend here.
Problem: I have weird flat spots and lines in my hair. This is all about the technique. It means you aren’t overlapping the plates correctly as you move down the hair. Practice making sure the first row of teeth on your iron fits perfectly into the last indent you made. Consistent pressure and placement are everything.
Problem: My hair is a little greasy. Can I still do this? Yes! In fact, it’s one of my favorite ways to style second-day hair. Just spritz your roots with a little dry shampoo to absorb any oil and brush it through. The crimping will hide any greasiness and the dry shampoo will give you even more volume. It’s a win-win.
A Final Word on Keeping Your Hair Healthy
As a professional, my number one priority is always the health of the hair. Please, approach heat styling with that same care at home.
Serious heat damage is often permanent; the only fix is to cut it off. So always respect the heat and start with lower temperatures. Also, these tools get incredibly hot. Be so careful around your ears, neck, and scalp. A simple silicone heat mat and a heat-resistant glove can save you from a nasty burn. You can find a set online for under $15, and trust me, it’s worth every penny.
And by the way, if your hair is heavily bleached, chemically treated, or just really fragile, please see a professional before taking a hot iron to it. A stylist can tell you if your hair can handle it. Sometimes the safest answer is just to stick with the heatless methods for a while. Better safe than sorry!
Inspirational Gallery
For a truly professional result, your preparation is as important as the crimping itself. Make sure your hair is 100% dry and thoroughly detangled. Applying heat to even slightly damp hair can steam and damage the cuticle. A light misting of a quality heat protectant is your non-negotiable first step.
The right tool for the job: The size of your crimper’s plates dramatically changes the final look. A micro-crimper, like the popular one from Sam Villa, is a stylist’s secret weapon for creating invisible root volume and a perfect base for updos. Wider plates are what you need for those classic, bold 80s-style zigzag patterns.
A quality thermal protectant spray (like Kérastase Genesis Defense Thermique).
Large sectioning clips to keep your work clean and organized.
A wide-tooth comb for gentle post-cooling separation.
A light-hold finishing spray to lock in the style without stiffness.
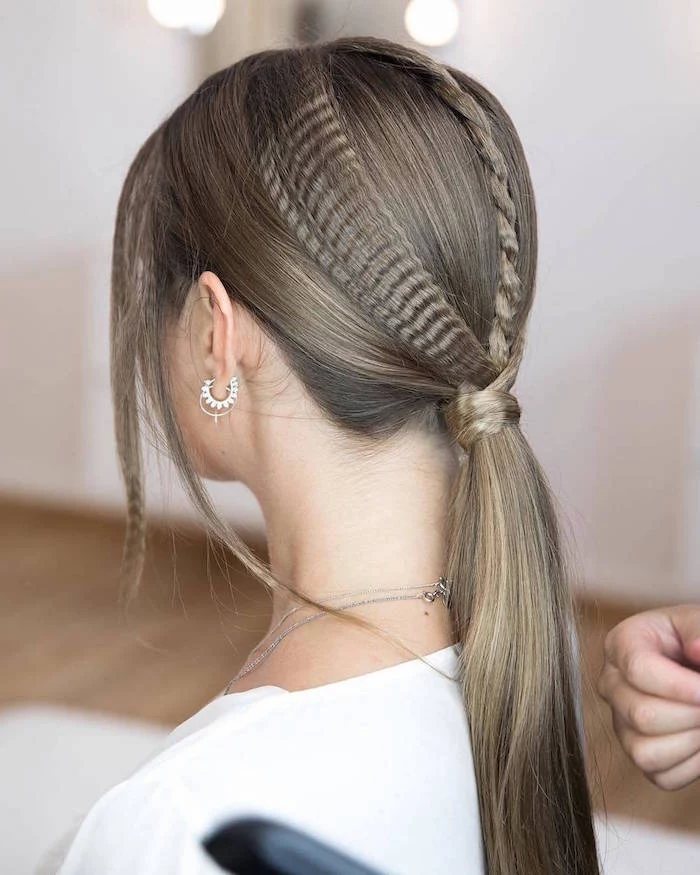
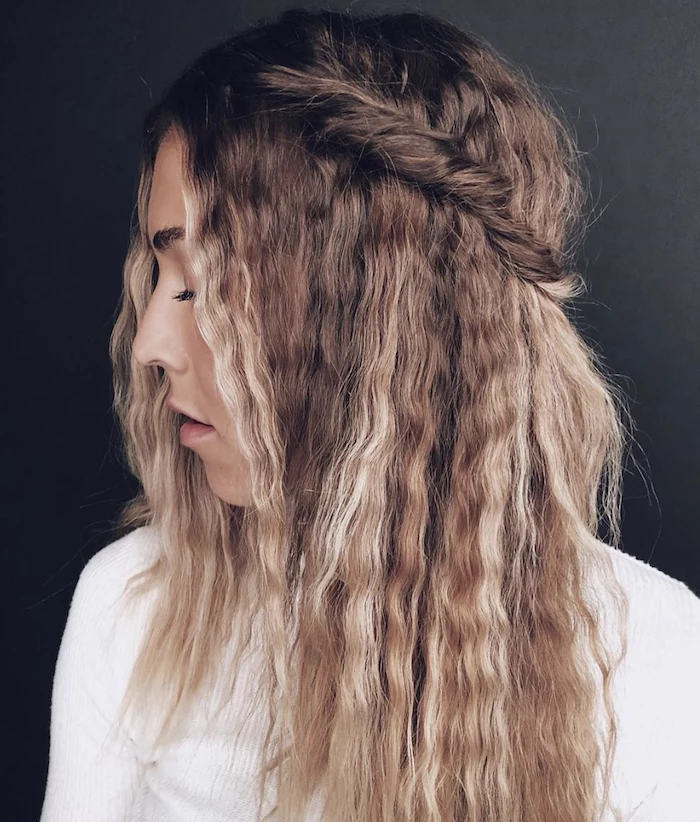
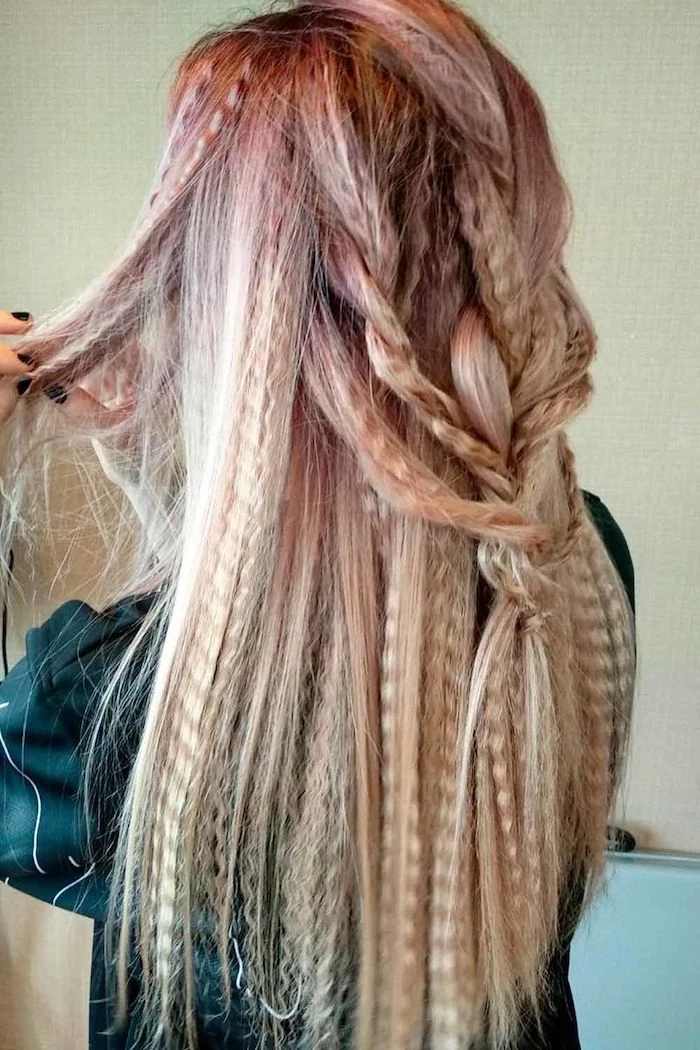
The all-over crimp is a major statement, but today’s texture is often more subtle. Try incorporating it in smaller doses for a modern twist that adds intrigue without screaming retro.
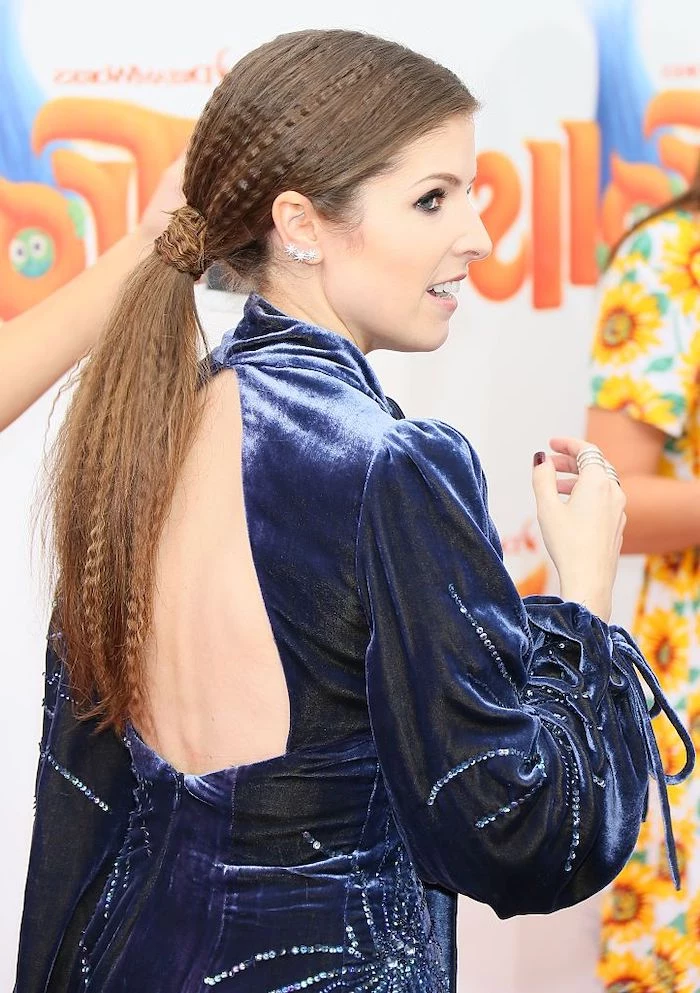
Crimp just a few random strands to peek through a sleek, straight style.
Texture the body of a ponytail, leaving the base and ends smooth for contrast.
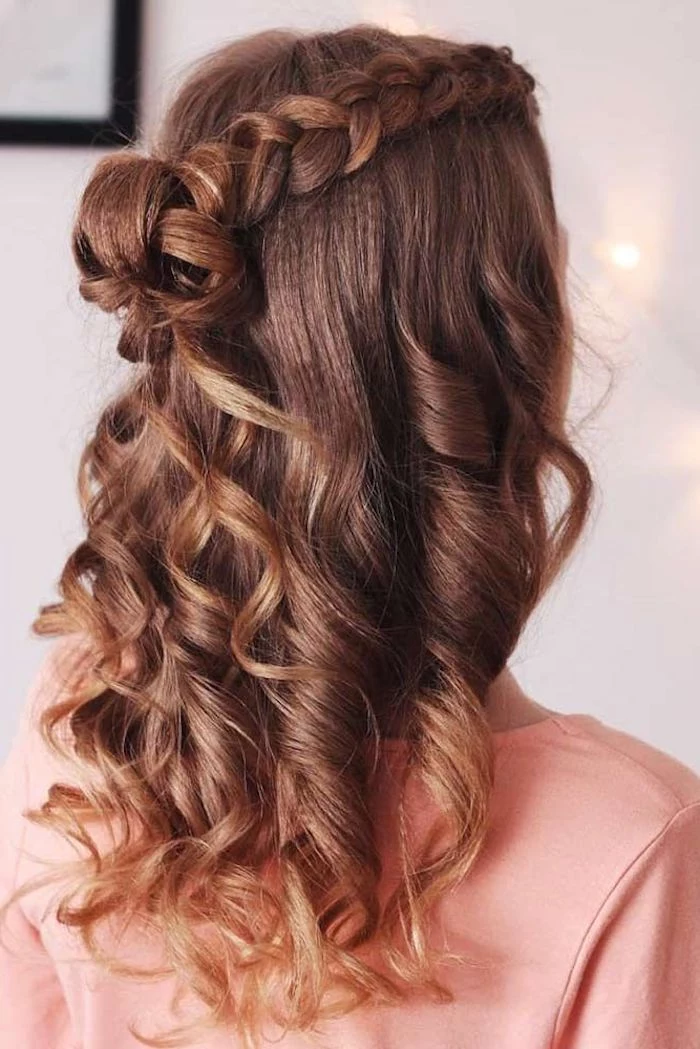
Crimp only the under-layers of your hair for a boost of hidden volume.
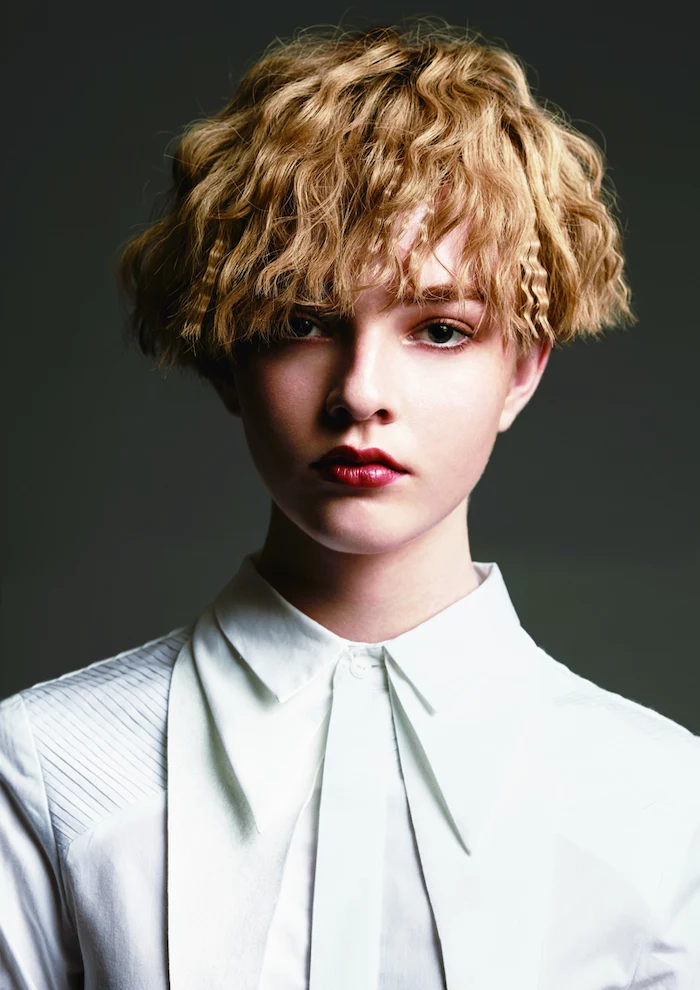
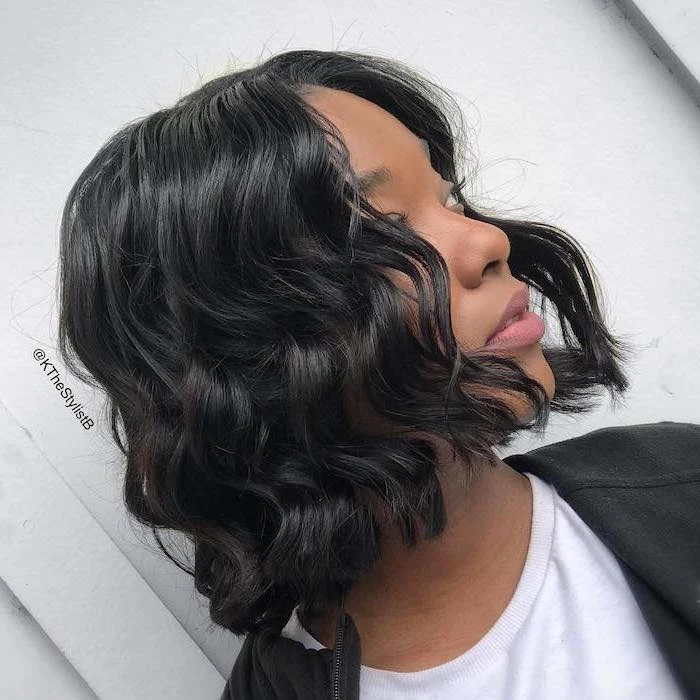
Can you really crimp short hair, like a pixie or a bob?
Absolutely! On a bob, crimping can add incredible width and a high-fashion, graphic shape, as seen on Gabrielle Union. For pixie cuts, a micro-crimper is perfect for adding lift at the roots or texturizing just the longer pieces on top. The key is using a tool with smaller plates for better control on shorter lengths.
Ceramic Plates: These heat up evenly and are gentler on the hair cuticle, making them an excellent choice for fine, damaged, or color-treated hair types.
Titanium Plates: These heat up faster and can reach higher temperatures. They’re a great match for coarse, thick, or stubborn hair, as they transfer heat more efficiently.
For most at-home users, a quality ceramic or ceramic-tourmaline crimper offers the best balance of performance and protection.
The original crimping iron was invented in 1972 for Barbra Streisand’s stylist, Geri Cusenza, who co-founded the Sebastian Professional brand. It was first marketed as the
Creates a ‘Velcro’ effect, giving bobby pins and clips something to grip onto.
Builds a stable, voluminous foundation for intricate updos and braids that won’t slip.
The secret? A professional technique called
Don’t let product build-up ruin your tool and your style. After your crimper has cooled completely, wipe the plates with a damp cloth or a cotton pad soaked in a bit of rubbing alcohol. This removes any sticky residue from hairsprays or serums, ensuring clean, even heat every time.
My crimps always seem to fall out by the end of the day. How do I get them to last?
Longevity starts with your prep. Skip the rinse-out conditioner on the day you plan to crimp, as it can make hair too soft and slippery. Instead, apply a texturizing mousse or salt spray to damp hair before blow-drying. After crimping and cooling, finish with a strong-hold but flexible hairspray, like L’Oréal’s Elnett Satin, to lock in the shape without making it crunchy.
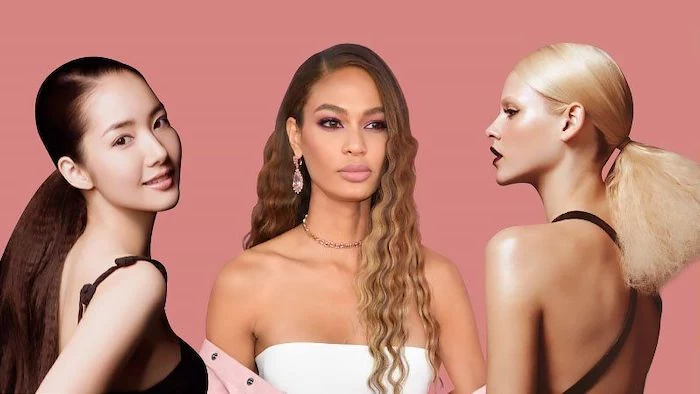
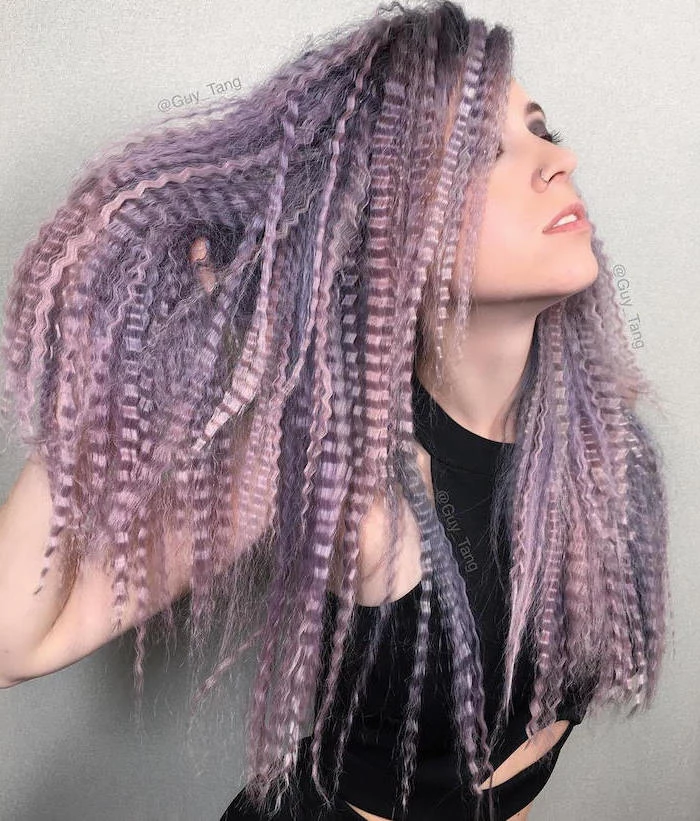
The 80s Crimp: Think sharp, defined zigzags, often backcombed at the roots and worn on the entire head for maximum impact. It’s graphic, rebellious, and unapologetically bold.
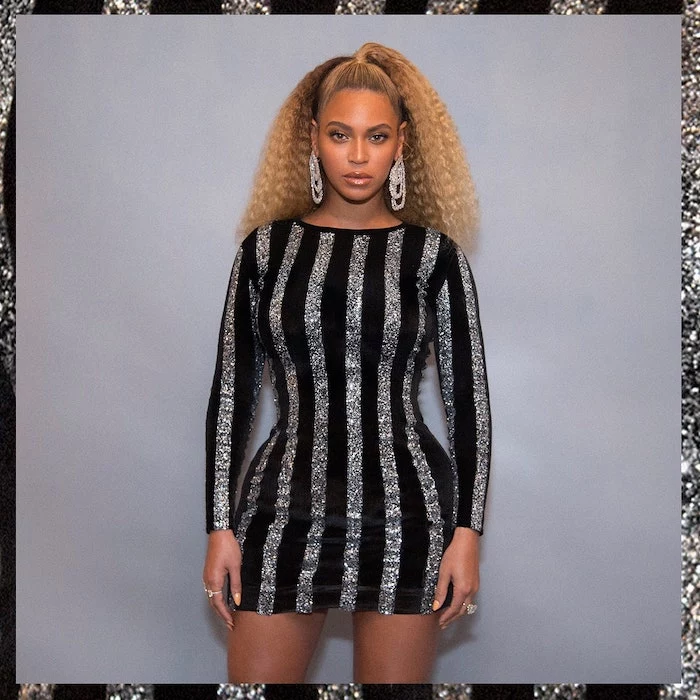
The Modern Mermaid Wave: This look uses a waver tool (a crimper’s cousin with larger, rounded barrels) or a wide-plate crimper. The result is softer, more uniform, and creates flowing,
Want volume that defies gravity? The crimper is your best friend. It’s a classic backstage secret for runway-worthy hair.
Crimp just the first 2-3 inches of your roots on the under-layers of your hair.
Let it cool, then gently brush over the top, smooth layer.
The hidden texture will prop up the top layers, creating lift that lasts all day without heavy teasing.
A single pass of a 450°F (232°C) iron on unprotected hair can cause irreversible damage to the hair’s cuticle.
This isn’t just a scare tactic. That damage leads to frizz, split ends, and dullness. A silicone-based heat protectant creates a barrier, distributing heat more evenly and slowing down heat transfer to the hair’s core. Think of it as oven mitts for your hair—not optional.
Warning for extension wearers: Never use a hot crimper on synthetic hair extensions unless they are explicitly labeled as
Clamping for too long: A quick press of 3-5 seconds per section is all you need. Holding it longer will fry the hair, not make the crimp stronger.
Using overly thick sections: For a clean, graphic pattern, use thin, well-defined sections of hair. Too much hair prevents the heat from penetrating evenly.
Starting too close to the scalp: Leave about a half-inch of space from the root to avoid a strange-looking lift and, more importantly, potential burns.
Achieves a soft, fluffy, cloud-like texture.
Gives the impression of naturally voluminous,
From 80s punk rock to 90s pop and modern high-fashion runways, crimped hair has always been a symbol of playful rebellion and self-expression. It’s a hairstyle that refuses to be boring. Embracing it is about more than just a look; it’s about choosing to be bold, graphic, and unforgettable.
Don’t be fooled by a sizzle. If you hear that sound when the iron touches your hair, it doesn’t mean it’s working overtime. It means your hair isn’t fully dry, and you’re essentially boiling the water right on the strand, causing major damage.
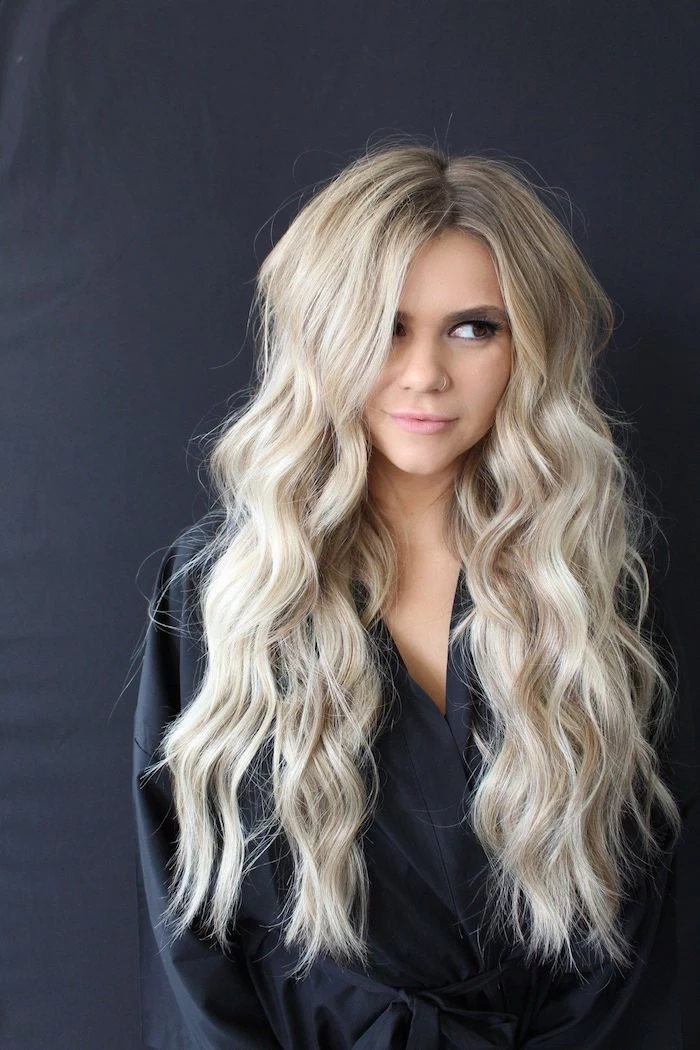
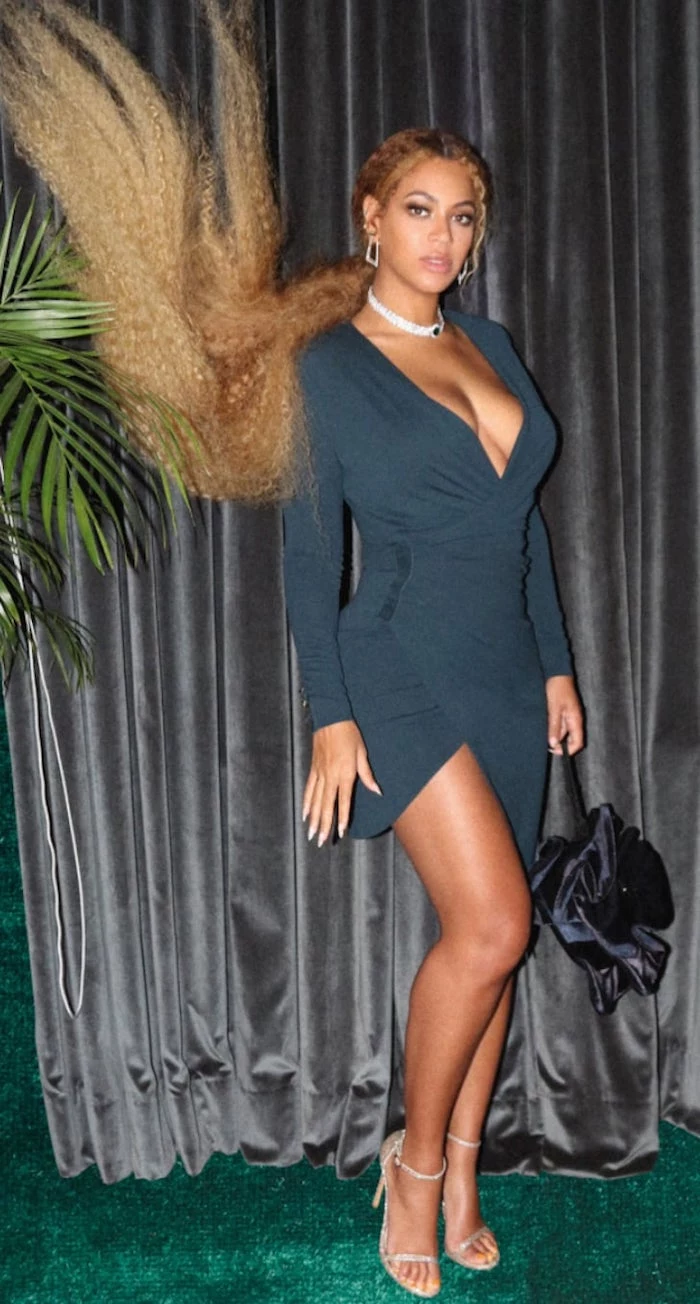
I’m scared of heat damage. Is there a no-heat way to get a similar look?
Yes! For a heat-free alternative, work a light mousse through clean, damp hair. Then, create numerous very small, tight three-strand braids all over your head. Let them air dry completely—or sleep on them overnight. When you take them out, you’ll have a gorgeous, wavy, crimp-like texture without any heat.
At recent Fashion Week shows, designers like Gucci and Miu Miu have sent models down the runway with
Finishing Hairspray: Its main job is to provide hold and fight humidity. Use a light mist from a distance to lock in your finished crimped style. A strong-hold formula like got2b Glued is for extreme, helmet-like hold.
Texture Spray: This adds grit, separation, and airy volume. Use it *after* you’ve crimped and styled to enhance a piecey, modern texture. Oribe’s Dry Texturizing Spray is a cult-favorite for this effect.
For professional stylists, a tool like the BaBylissPRO Nano Titanium Crimper is a kit essential. Its ability to create a fine, almost invisible texture at the roots is the secret to building updos and voluminous braids that have structure and stay put all day, proving the crimper is far more than just a retro novelty.
Cool down is critical. We can’t stress this enough. Once a section is crimped, release it and let it hang without touching. The hair sets into its new shape as it cools. If you brush or handle it while it’s still warm, the hydrogen bonds won’t have locked in, and your hard work will simply fall flat.
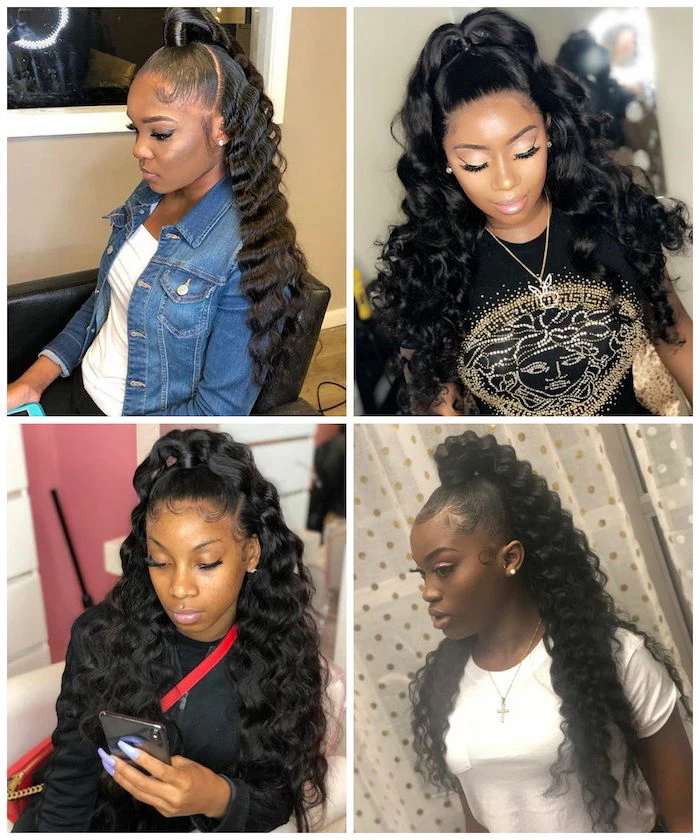
Faux-Braid Ponytail: Crimp sections of a low ponytail, then use clear elastics every few inches down the length to create the illusion of a complex, voluminous braid.
Color Pop: If you have peekaboo highlights or colored streaks, crimping just those sections will make the color stand out with added dimension.
Alternating Textures: Crimp one section, leave the next one straight. This creates a really cool, high-contrast look perfect for a night out.
Jessica has spent 14 years in the fashion industry, starting as a stylist assistant and working her way up to Fashion Editor. A graduate of Fashion Institute of Technology, she has styled celebrities, worked backstage at Fashion Week, and contributed to major fashion publications. Jessica believes fashion should be fun, accessible, and expressive.
To provide the best experiences, we use technologies like cookies to store and/or access device information. Consenting to these technologies will allow us to process data such as browsing behavior or unique IDs on this site. Not consenting or withdrawing consent, may adversely affect certain features and functions.
Functional
Always active
The technical storage or access is strictly necessary for the legitimate purpose of enabling the use of a specific service explicitly requested by the subscriber or user, or for the sole purpose of carrying out the transmission of a communication over an electronic communications network.
Preferences
The technical storage or access is necessary for the legitimate purpose of storing preferences that are not requested by the subscriber or user.
Statistics
The technical storage or access that is used exclusively for statistical purposes.The technical storage or access that is used exclusively for anonymous statistical purposes. Without a subpoena, voluntary compliance on the part of your Internet Service Provider, or additional records from a third party, information stored or retrieved for this purpose alone cannot usually be used to identify you.
Marketing
The technical storage or access is required to create user profiles to send advertising, or to track the user on a website or across several websites for similar marketing purposes.