The Real-Deal Guide to Men’s Braids (That Won’t Wreck Your Hair)
I’ve been doing this for a long time—braiding, specializing in natural hair, the whole nine yards. And while styles definitely come and go, braids are just… different. They’re not some fleeting trend; they’re a timeless art form with some seriously deep cultural roots. It’s awesome to see so many guys embracing braids these days. My chair is full of them!
In this article
But here’s the thing I need to be real about: I also see the damage that happens when braids are done wrong or without the right know-how. Getting a cool style is only half the battle. The other half is keeping your hair and scalp healthy for the long haul. This guide is basically the chat I have with every single new client who sits down. We’re going to skip the celebrity fads and get right into the craft. Think of this as the owner’s manual for your braids—getting it right from the jump will save you from breakage, potential hair loss, and a ton of frustration.

The Foundation: It All Starts with Healthy Hair
Before we even pick up a comb, we have to talk about the condition of your hair. Seriously. Trying to braid hair that’s weak, dry, or damaged is like building a house on a shaky foundation. It’s just not going to work out well. The style won’t last, and you’ll probably end up making things worse. The first thing any good braider should do is a consultation, and that starts with looking at your hair’s health.
Getting to Know Your Hair
You’ve gotta know what you’re working with. Three things really matter here:
- Density: This is just how many strands of hair you have packed into one area. Is your hair super thick, or is it on the finer side? This is important because it dictates what size braids will work for you. Putting heavy, jumbo braids on low-density hair can create way too much tension and lead to breakage.
- Porosity: In simple terms, this is about how well your hair absorbs and holds onto moisture. Low porosity hair has cuticles that are shut tight, making it tough for moisture to get in. High porosity hair, on the other hand, soaks up moisture like a sponge but can lose it just as fast. Knowing this helps you pick the right products. A little pro tip: If you have low porosity hair, try using a warm towel or a plastic cap during your deep conditioning treatment. The heat helps open up those cuticles to let the goodness in.
- Elasticity: This is your hair’s bounce-back. Can it stretch a bit without snapping? Healthy hair has good elasticity. If you gently pull a strand and it breaks right away, that’s a sign of weakness, and the tension from braids might be too much for it.
By the way, you can do a quick, non-scientific test at home. Take a clean hair that has already shed and drop it in a glass of water. If it sinks to the bottom pretty fast, you probably have high porosity. If it just hangs out at the top, you’re likely looking at low porosity. It’s a good starting point!
The Pre-Braid Game Plan
Your braids are only ever going to look as good as the hair underneath them. A clean, moisturized foundation is non-negotiable. Skipping these steps is a one-way ticket to an itchy scalp, flakes, and breakage down the line.
1. The Deep Cleanse: First, you need a clean slate. Product residue, sweat, and oils build up over time. A regular shampoo won’t cut it. You’ll want a clarifying shampoo—look for ones with ingredients like apple cider vinegar or tea tree oil. They get rid of all the gunk without totally stripping your hair. Just be sure to only use this right before a new install, not as your regular weekly wash.
2. The Moisture Bomb (Deep Conditioning): After clarifying, your hair is primed and ready to soak up moisture. This is when you hit it with a high-quality deep conditioner. I love products with shea butter, avocado oil, or glycerin. Slather it on, paying extra attention to your ends, and cover it with a plastic cap for at least 30 minutes. This is the step that keeps your hair from getting brittle and sad while it’s tucked away in braids.
3. The Stretch: To get those super clean parts and a smooth finish, your hair needs to be stretched out. This cuts down on tangles and makes the whole braiding process way easier (and less painful). A pro will likely use a blow dryer on a low or medium setting with a comb attachment. And listen, the goal isn’t to get it bone-straight, just to elongate your natural curl pattern. If you’re doing this at home, you MUST use a heat protectant spray. No exceptions. Alternatively, you can do a heatless stretch by putting your damp hair into large twists or braids and letting it air-dry.
How to Find a Braider Who Won’t Ruin Your Hair
Okay, this is huge. Finding the right person for the job can be the difference between a great experience and a hair horror story. It’s not just about finding someone who can do cool designs.
First, check their work. Ask to see a portfolio, and specifically look for pictures of hair that has a similar texture and density to yours. A good braider is versatile. During the consultation, they should ask you about your hair history and your goals. It should feel like a conversation, not a transaction.
Heads up! Here are some major red flags to watch out for:
- They braid too tight. Braids should be snug, not painful. If it hurts while you’re in the chair, speak up! A little discomfort from sitting is one thing, but sharp pain or a visible pulling of the skin is a sign they’re causing damage.
- They don’t prioritize hair health. If they seem willing to braid over clearly damaged hair or don’t have clean tools, walk away. A true professional cares about the health of your hair more than just getting the job done.
- They rush the consultation or skip it. This is the most important step for assessing your hair. If they just want to jump right in, it’s a bad sign.
Finding a good braider is like finding a good barber—once you find them, you stick with them. Expect to do a little research.
Choosing Your Style: Let’s Break It Down
So, you’re ready for braids. But what kind? The term covers a huge range of styles, each with its own vibe, installation time, and price tag. Let’s get into the most common ones.
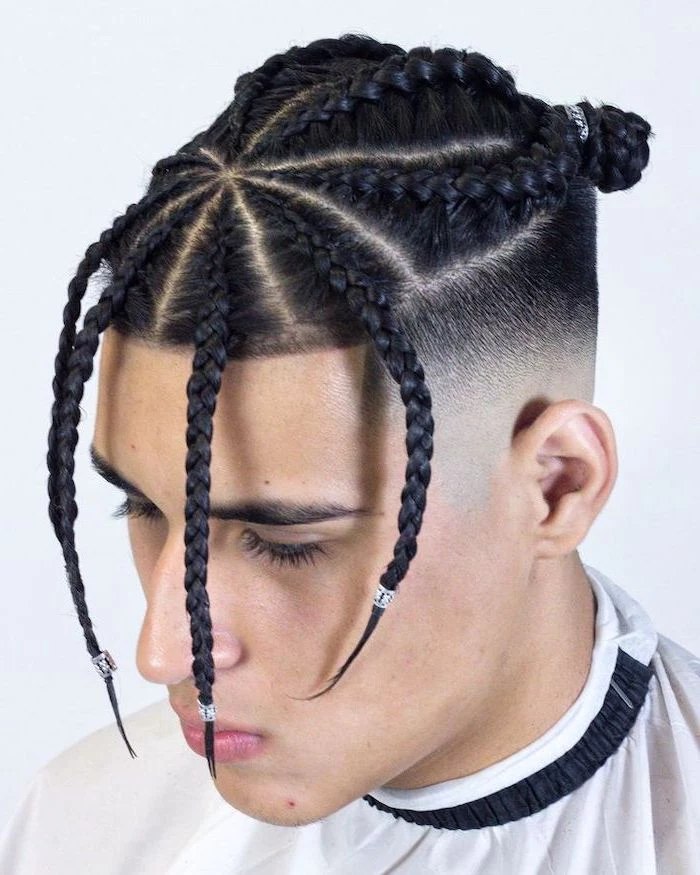
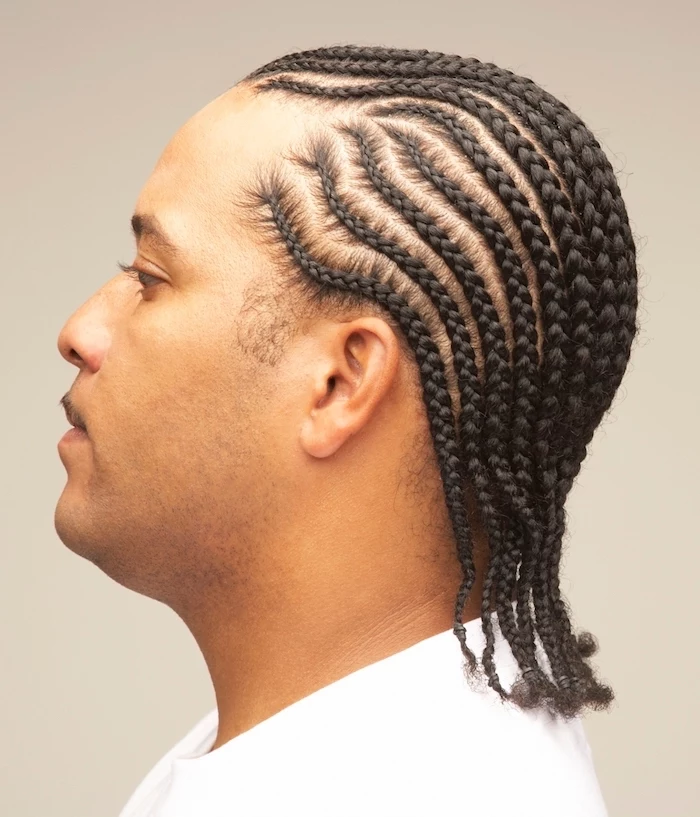
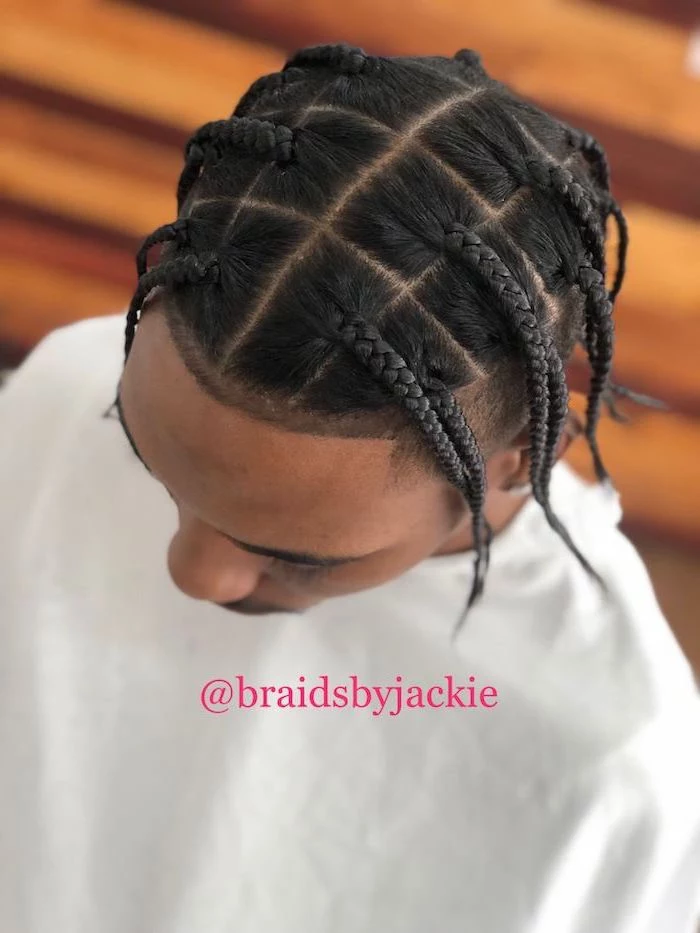
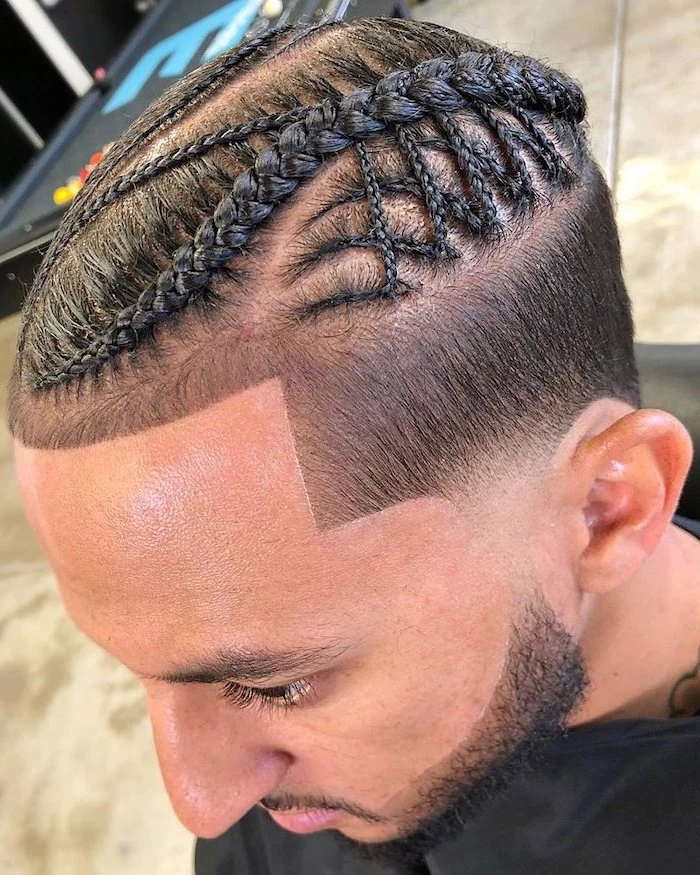
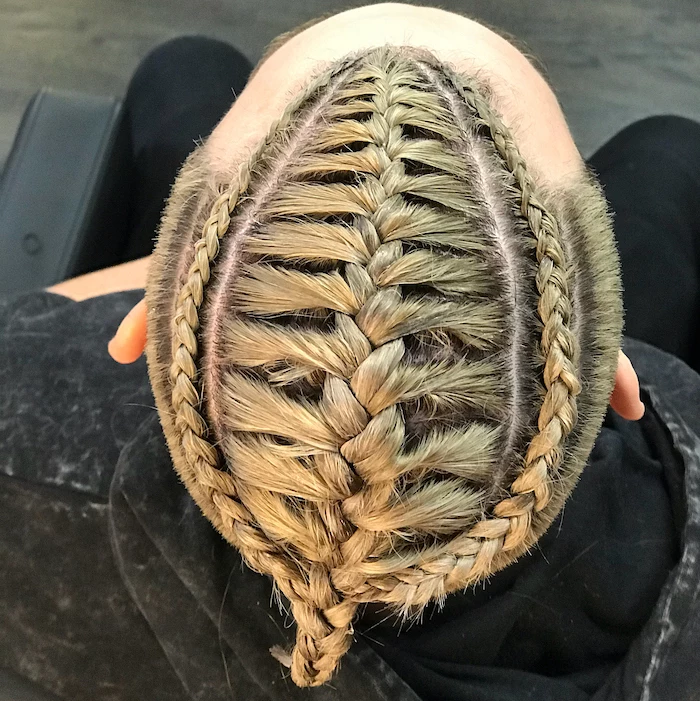
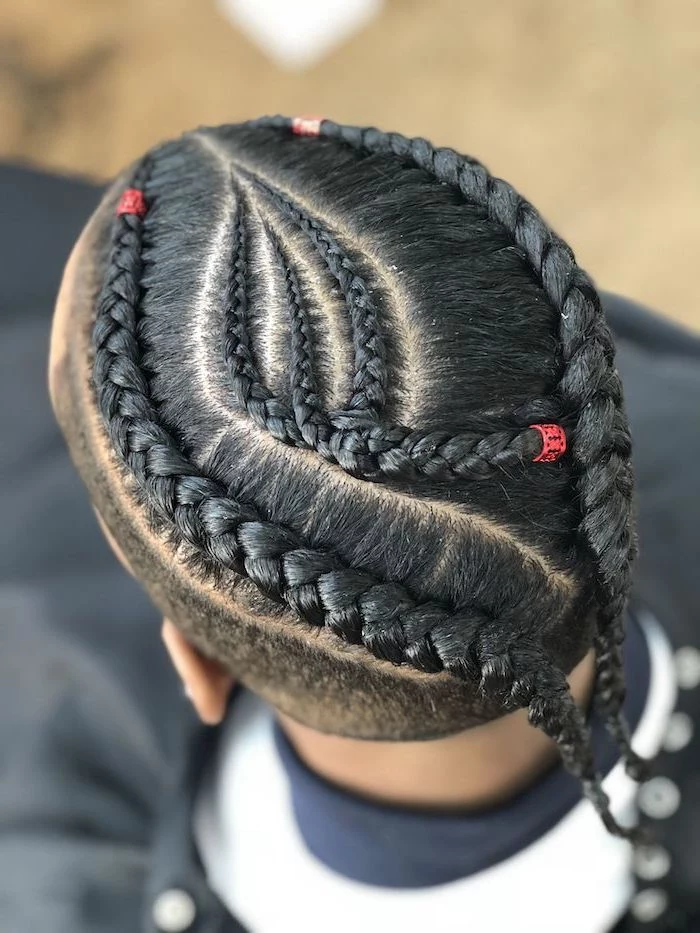
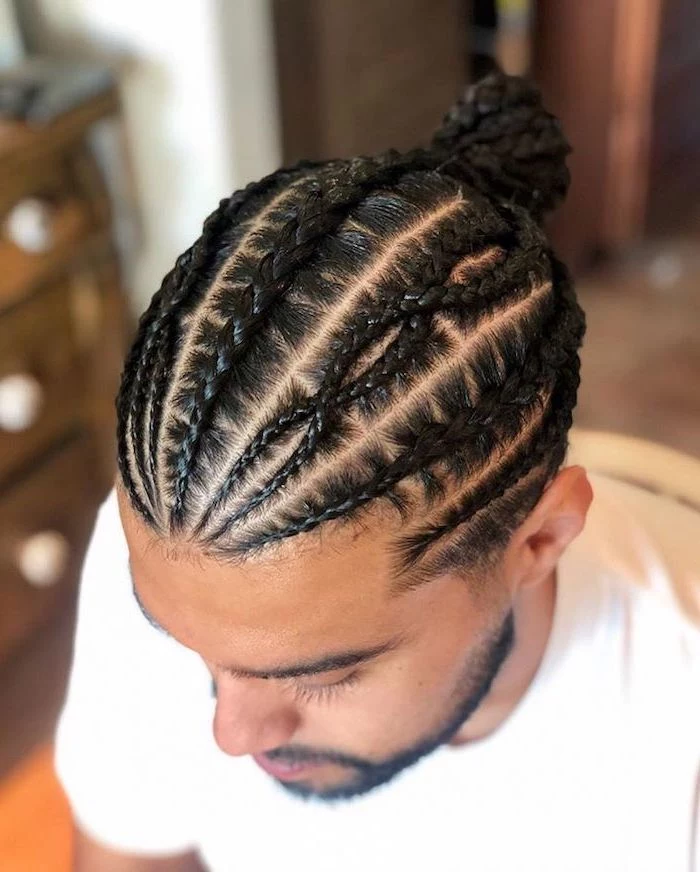
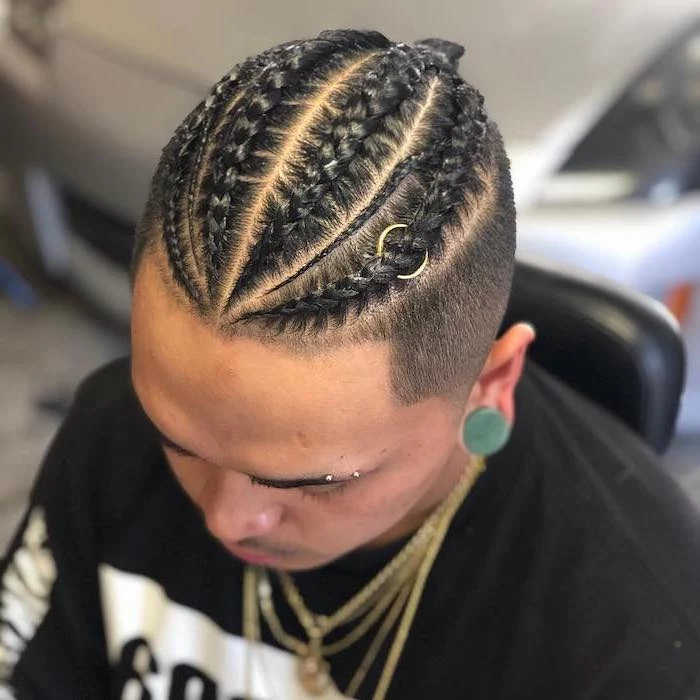
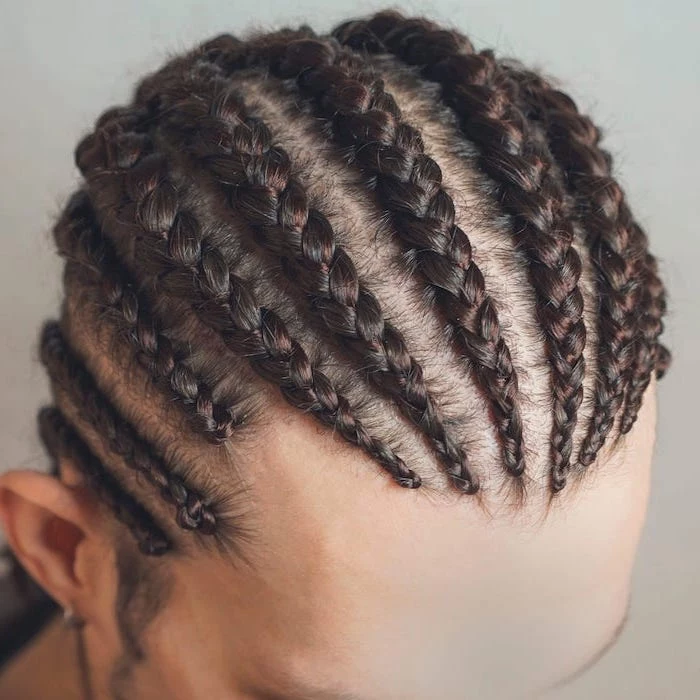
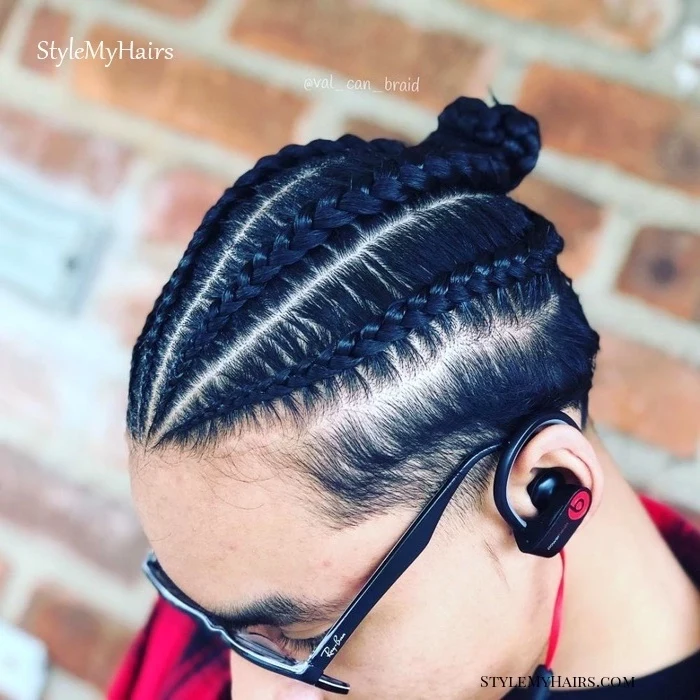
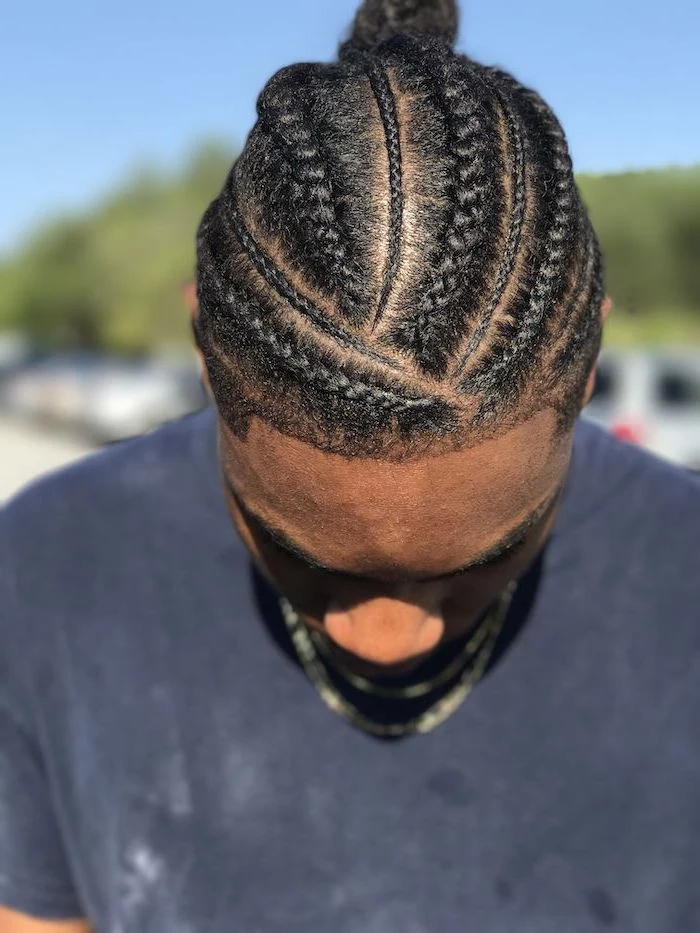
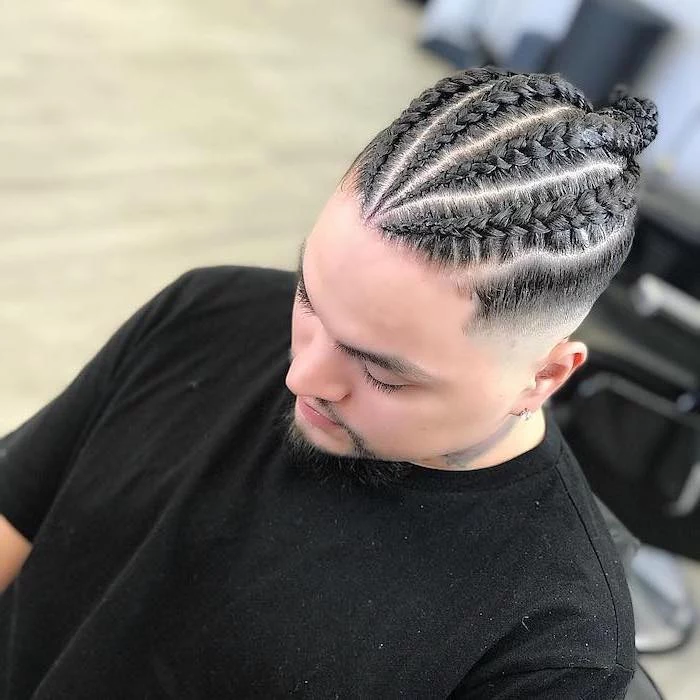
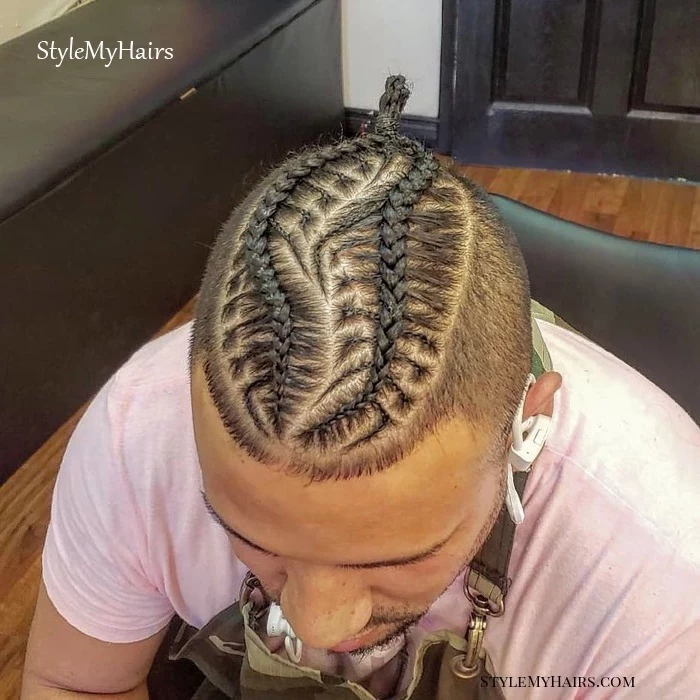
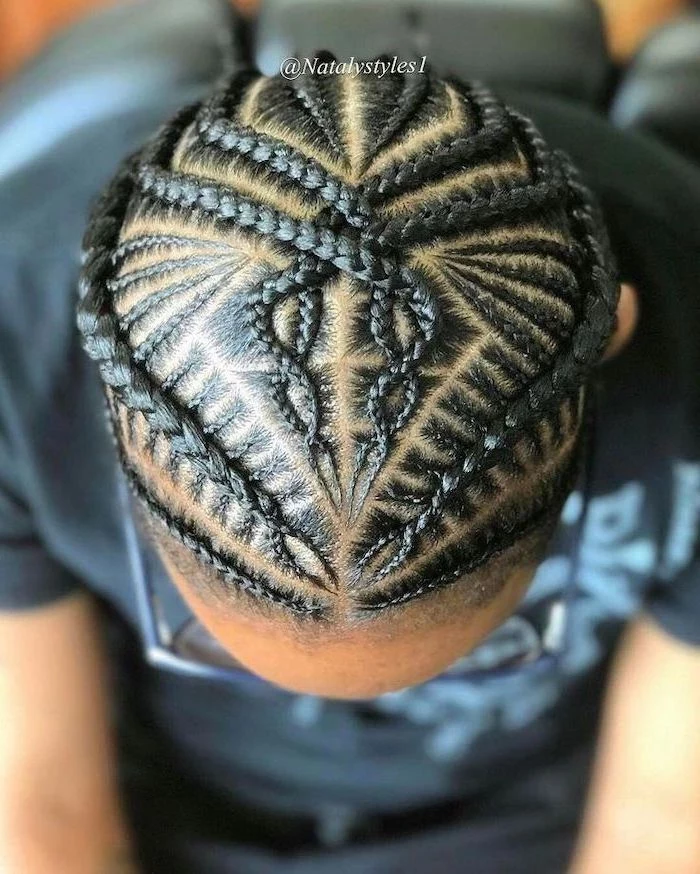
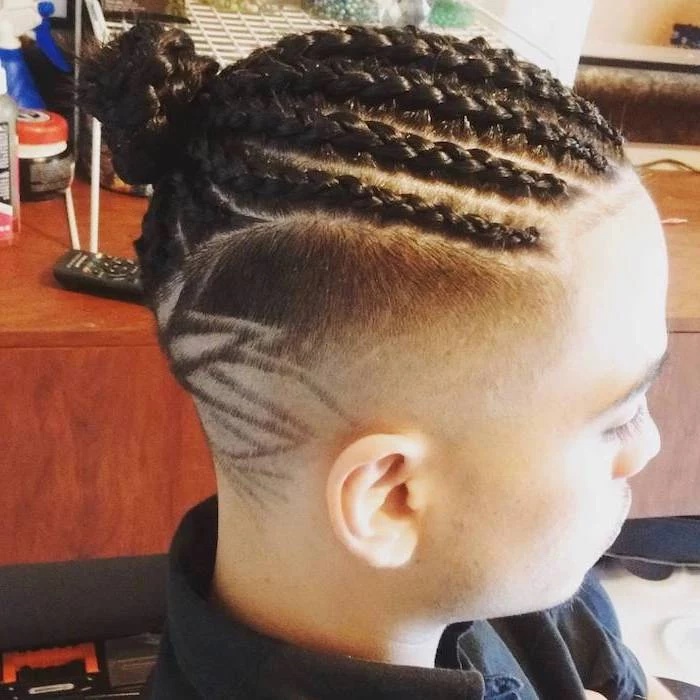
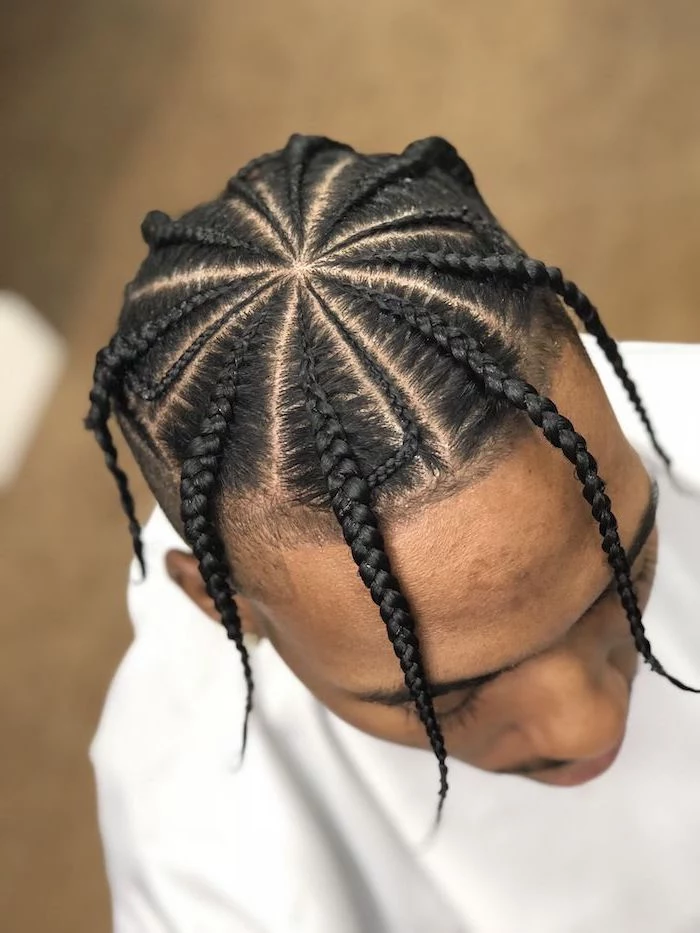
Cornrows
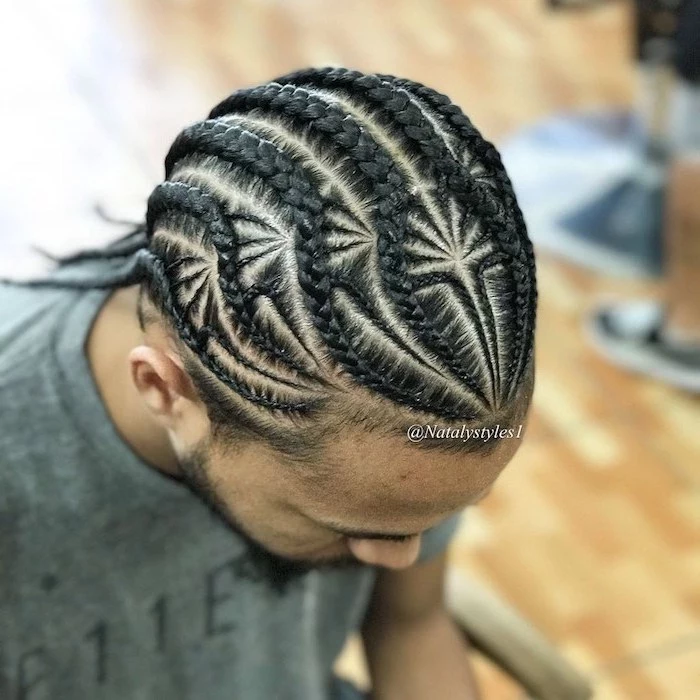
These are the classics. The hair is braided close to the scalp, creating those distinct raised rows. They’re called cornrows because the patterns can resemble rows of corn in a field. Super versatile and always a solid choice.
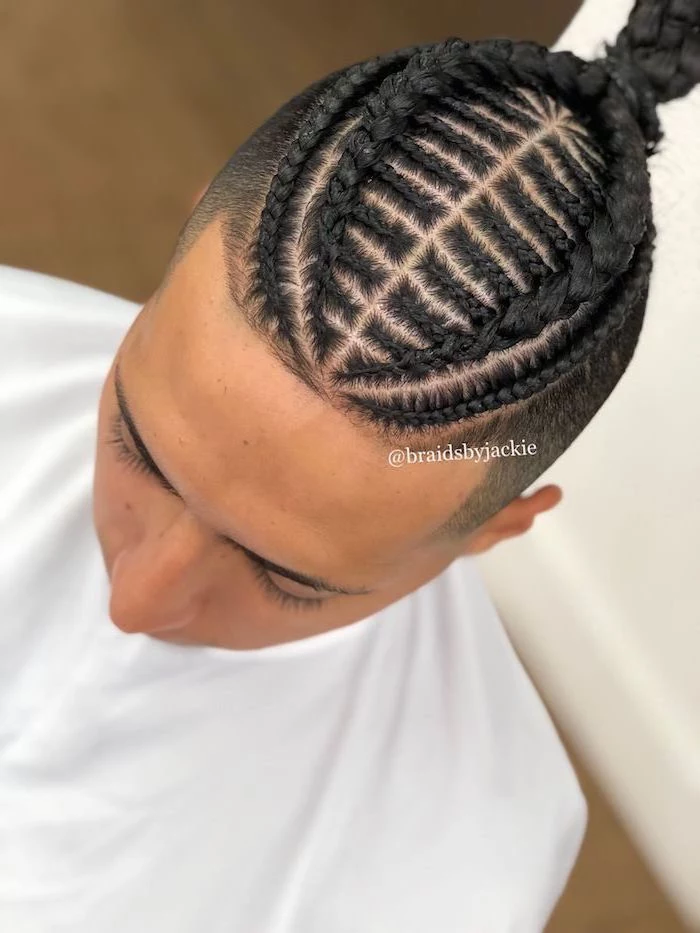
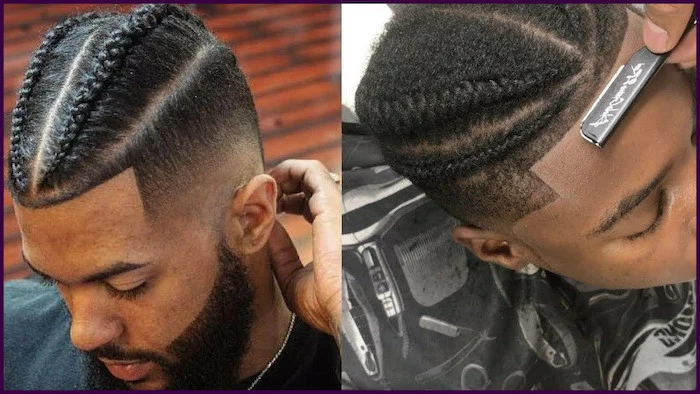
- The Look: From simple straight-backs to intricate, curved designs. A modern take you’ll see everywhere is “stitch braids,” where the braider uses a technique to create a thread-like, super-defined part.
- The Cost & Time: For simple designs, you’re probably looking at $75 to $150, and it’ll take about 1-2 hours. More complex patterns will cost more and take longer.
- The Lifespan: They look best for about 1 to 3 weeks. Any longer and you risk a lot of frizz and product buildup.

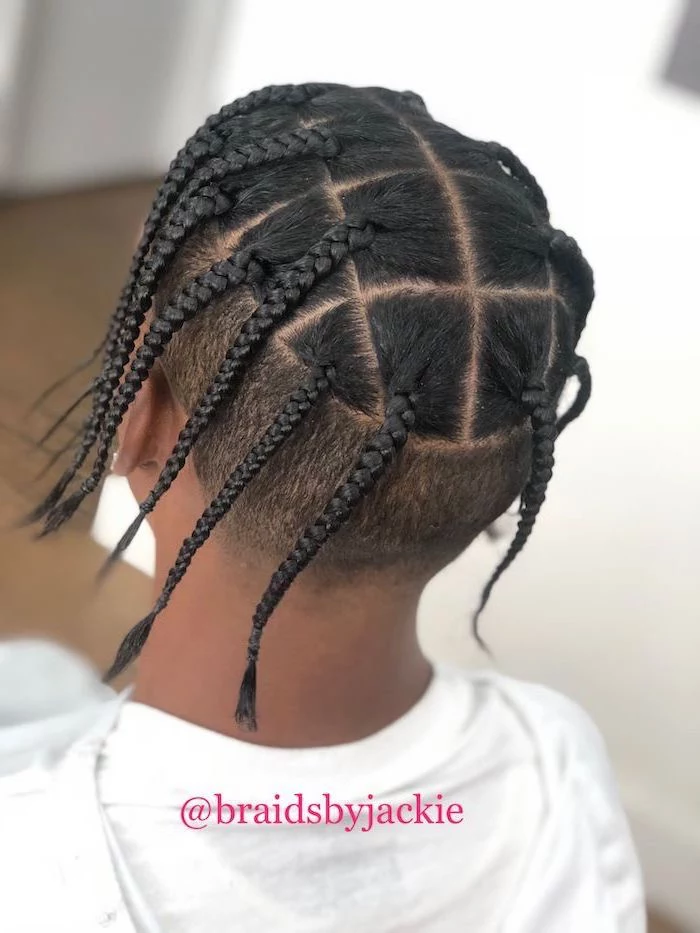
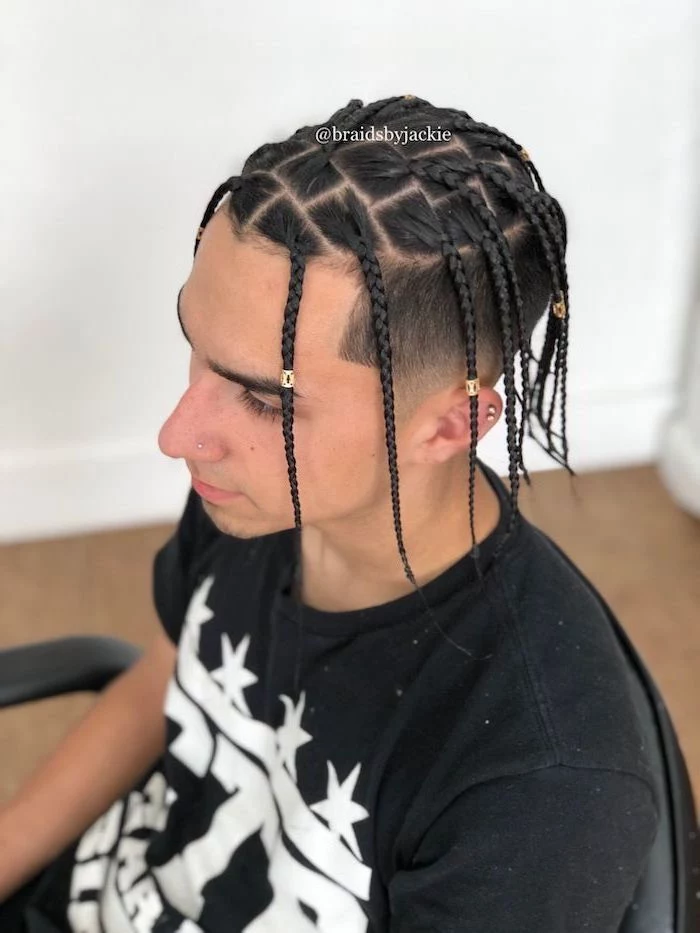
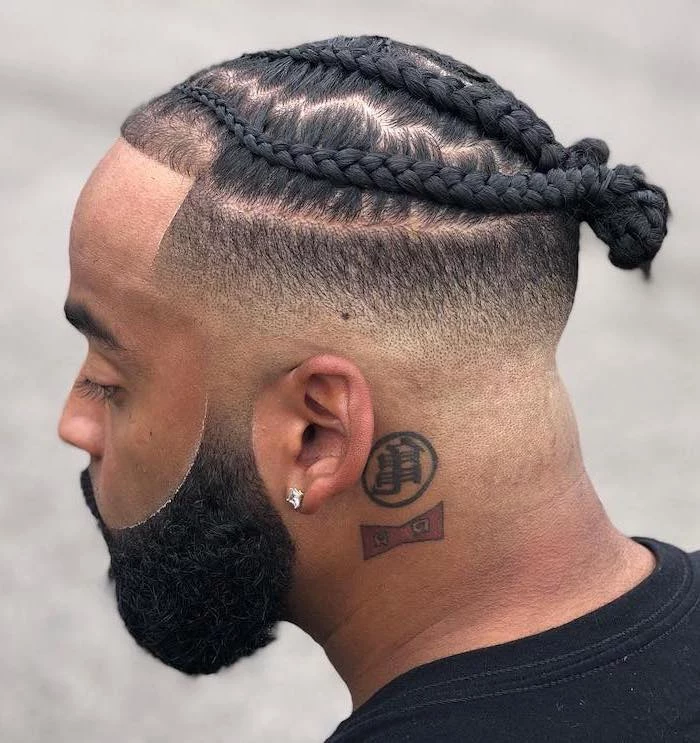
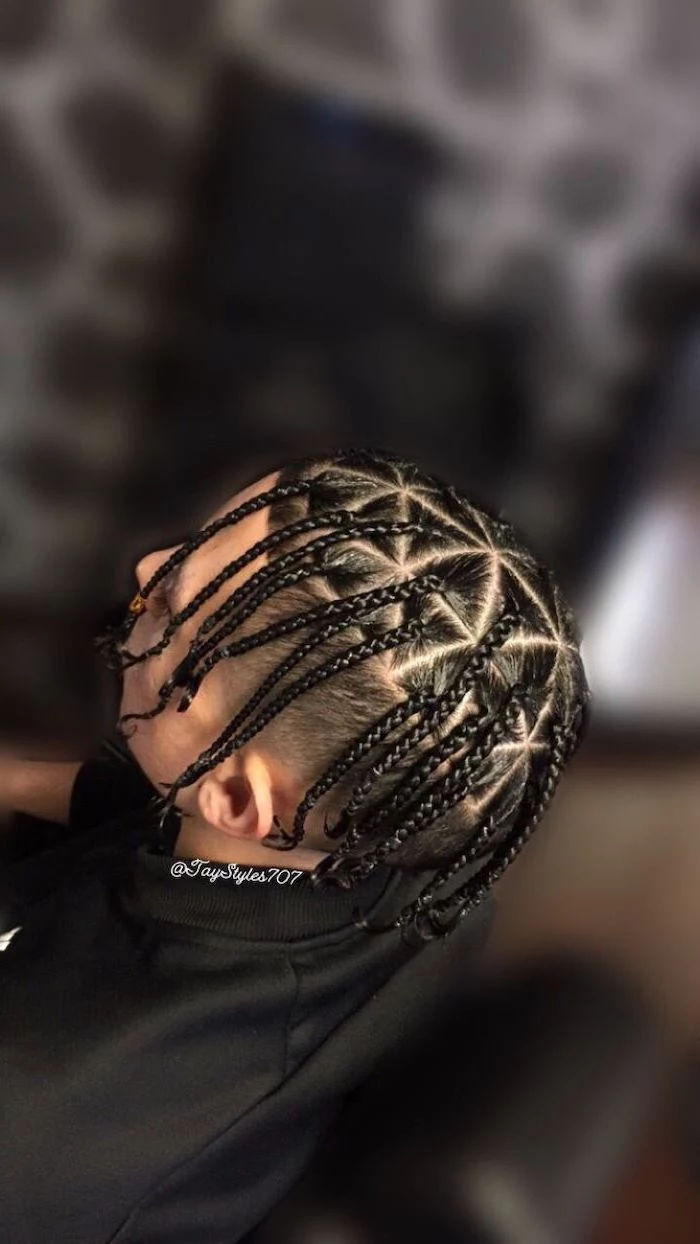
Box Braids
Box braids are individual plaits that hang freely. They get their name from the square-shaped or “boxed” parts at the root. These are great if you want styling versatility (ponytails, buns, you name it).
- The Look: The big thing here is “knotless” vs. traditional. I almost exclusively recommend knotless. This is where the braider starts with your natural hair and feeds in the braiding hair gradually. It lays flatter, looks more natural, and puts WAY less tension on your scalp.
- The Cost & Time: This is more of an investment. Depending on the size and length, expect to pay anywhere from $150 to over $300. Be prepared to sit for a while, too—medium-sized braids can easily take 4-8 hours. The braiding hair itself will probably cost you another $20 to $40, which you can find at any beauty supply store.
- The Lifespan: These are your long-haul style, lasting 4 to 8 weeks. And please, don’t push it past 8 weeks. Your hair needs a break.

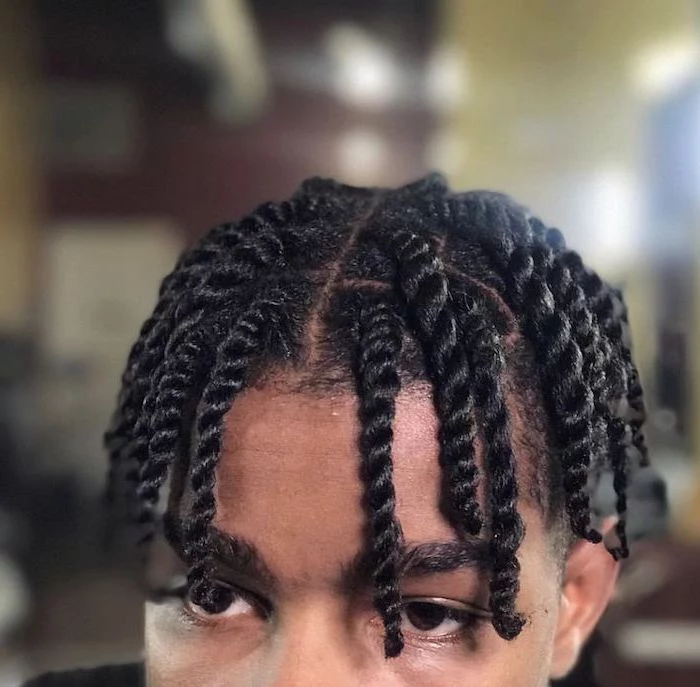
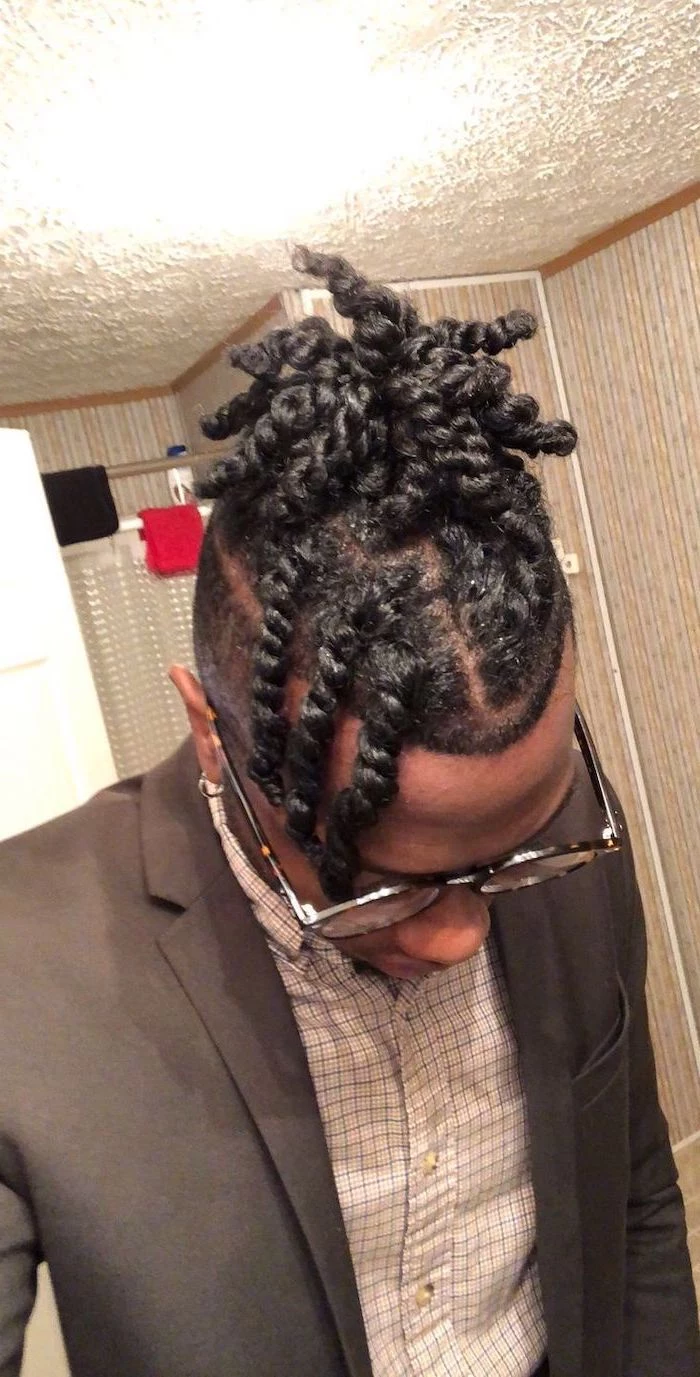
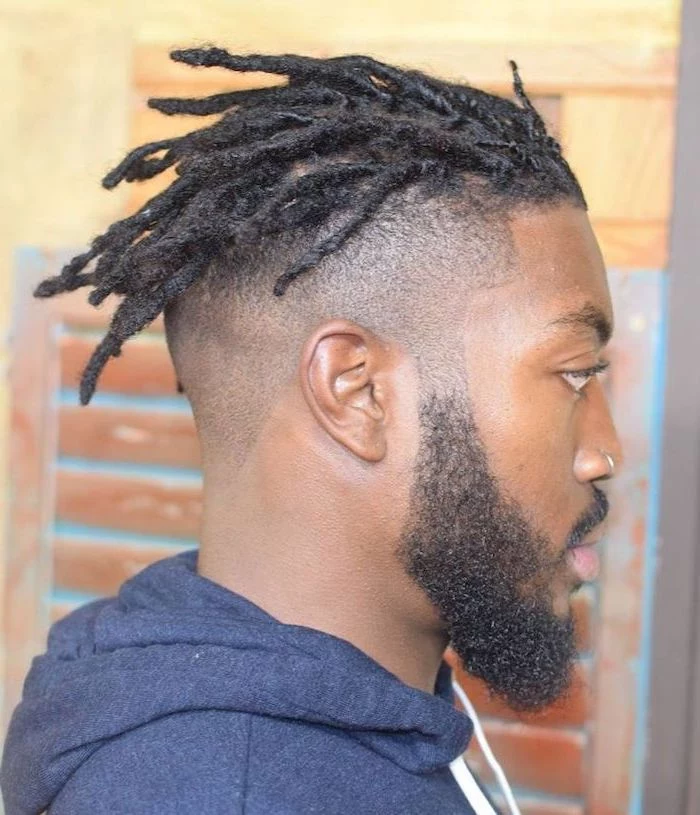
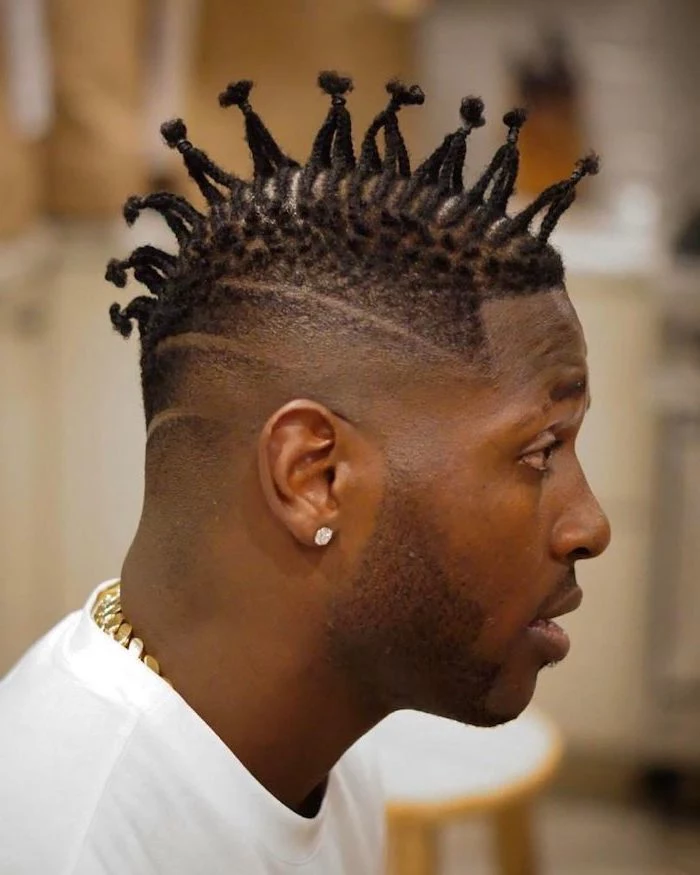
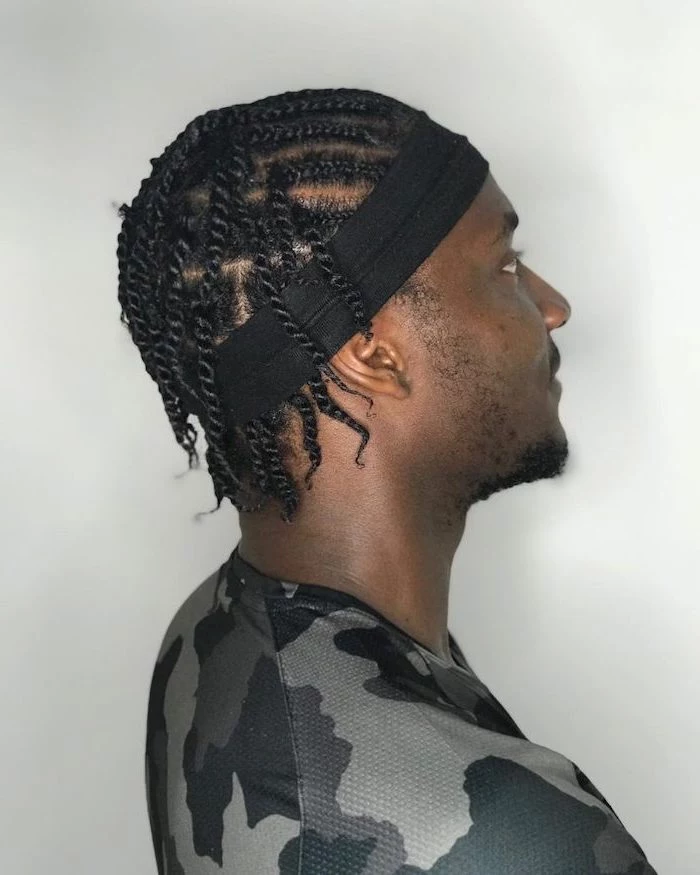
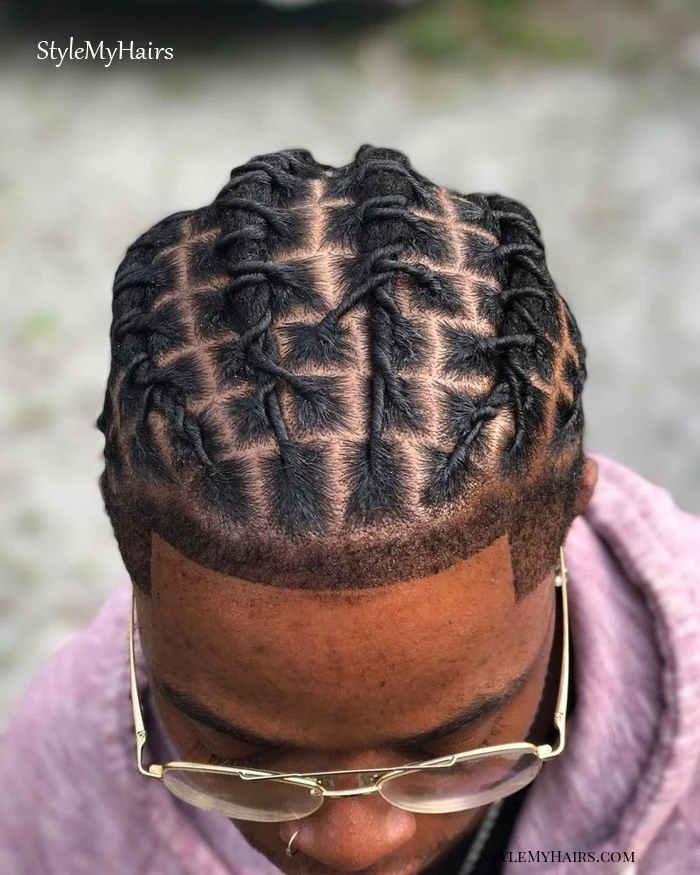
Twists
While not technically braids, two-strand twists are in the same family of protective styles. They’re made by wrapping two sections of hair around each other and tend to have a fuller, more voluminous look.
- The Look: You can do them with just your own hair or add extensions. Senegalese twists use sleek hair for a smooth finish, while Marley twists use a coarser texture that looks more like natural locs.
- The Cost & Time: The price is often similar to box braids, maybe slightly less, falling in the $150 to $250 range. They’re usually a bit quicker to install than braids of a similar size.
- The Lifespan: They generally last 3 to 6 weeks. Their main drawback is that they can get frizzy a bit faster than braids.
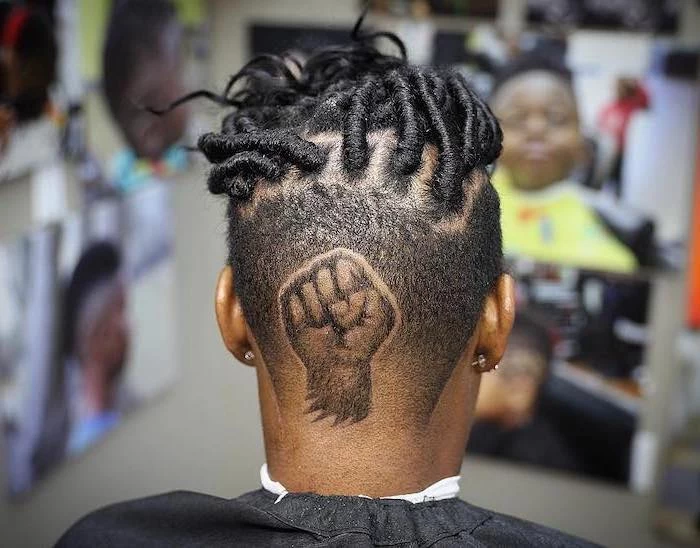
The Cultural Side of Things
It’s also really important to get that for a lot of people, braids aren’t just a hairstyle. They have an incredibly deep and rich history, especially within African cultures. For centuries, different braid patterns could tell you about a person’s tribe, their status, or if they were married. They were a beautiful art form passed down from one generation to the next.
Acknowledging this history is just about respect. It pushes back on the weird idea that men wearing braids is some “new trend.” The popularity we see today is just the latest chapter in a very, very long story. Honestly, when I’m braiding, I feel like I’m part of that long line of artisans. We’re not just doing hair; we’re practicing a meaningful craft.
Keeping Your Braids Fresh: The Maintenance Plan
Getting the braids is only step one. How you treat them for the next few weeks is what really counts. I’ve seen gorgeous, expensive braid jobs get completely ruined by bad aftercare.
Washing Your Braids (Yes, You Have To)
A clean scalp is a healthy scalp, period. You need to wash away the sweat, oil, and product buildup that can clog your hair follicles.
- How Often: Every 2 to 3 weeks is a good schedule.
- The Method: Don’t just stick your head under the shower—you’ll create a frizzy mess. Instead, get an applicator bottle and mix one part shampoo with about three parts water. Apply it directly to your scalp between the parts. Gently massage with the pads of your fingers (never your nails!), let the suds run down the braids, and rinse really, really well. Squeeze the excess water out gently. No rough towel rubbing!
Moisture is Key
Even in a protective style, your hair can get thirsty. You need to keep it moisturized.
- What to Use: Stay away from heavy greases or thick creams. They just sit on top and cause buildup. Go for light, liquid-based products. A leave-in conditioner spray or a dedicated braid spray is perfect. To seal that moisture in, use a light oil like jojoba or grapeseed oil.
- How to Apply: Lightly mist your scalp and braids every couple of days. A little goes a long way. If your scalp gets itchy, a spray with some tea tree oil can be a lifesaver.
Protect Your Investment at Night
This is probably the single most important tip for making your style last. The friction from your cotton pillowcase is the #1 enemy of neat braids.
- What to Use: You absolutely have to wear a durag, a bonnet, or a silk/satin scarf to bed. Cotton sucks the moisture out of your hair and creates frizz. Silk or satin lets your hair glide, keeping it neat and moisturized.
- Quick Tip: Don’t have a durag yet? The easiest thing you can do TONIGHT is to grab a satin pillowcase. You can find them online or at stores like Target for about $10-$15, and they make a huge difference.
The Takedown: Don’t Ruin Your Progress!
How you take your braids out is just as important as how they were put in. If you rush it, you can undo weeks of healthy hair growth in an hour. Seriously, set aside a few hours for this. Put on a movie. Don’t try to do it when you’re tired or in a hurry.
When It’s Time to Say Goodbye
This is non-negotiable. Protective styles have an expiration date. For cornrows, it’s 1-3 weeks. For box braids or twists, it’s 4-8 weeks. NEVER go past 8-10 weeks, no matter how good they might still look. Your new growth will start to tangle and mat with the braided hair, and you’ll be in for a world of pain and breakage.
Your Braid Takedown Kit
Before you start, get your tools ready. It makes life so much easier. You’ll need:
- A rat-tail comb (for unbraiding)
- A wide-tooth comb (for detangling)
- A spray bottle with water
- A cheap, slippery conditioner (think something simple like Suave or V05—the goal is slip, not fancy ingredients)
The Takedown Process
- Snip the Ends: First, cut the very end of each braid. Be conservative here! Cut well below where you think your own hair ends. It’s much better to cut too little than to accidentally give yourself a haircut.
- Add Some Slip: Lightly mist a section of braids with water and a bit of that slippery conditioner. This will help everything come apart smoothly.
- Unbraid and Detangle—One by One: Use your fingers or the tail of the comb to unravel a braid. As SOON as it’s out, you need to detangle that small section of hair. I’m serious, don’t just unbraid everything and then try to comb it. You’ll create one giant, matted knot. Unbraid one, detangle one. Start combing from the ends and gently work your way up to the root. Repeat this for your whole head. It’s tedious, but it’s the right way to do it.

About All That Shed Hair…
You’re going to see a ball of hair when you’re done. Don’t panic! On average, you shed about 50-100 hairs a day. When your hair is in braids, all that shed hair is trapped. So when you take them out, you’re seeing weeks’ worth of normal shedding all at once. It looks like a lot, but it’s usually totally fine.
A Final Word on Safety
A couple of last things to keep in mind. If your scalp is red, bumpy, or in pain after your install, the braids are too tight. A good stylist will listen if you speak up. Your hairline is fragile, so avoid pulling your braids into super-tight ponytails all the time.
Oh yeah, and some people have a sensitivity to the coating on synthetic braiding hair. It can make your scalp super itchy. Good to know: you can prevent this by doing a quick vinegar rinse on the hair before your appointment.
Here’s how: Fill a clean sink or basin with warm water and add about a cup of apple cider vinegar. Unpack the braiding hair and let it soak for 20-30 minutes. You might even see a white film come off in the water—that’s the stuff you’re removing. Rinse the hair thoroughly with plain water and hang it to air dry completely before taking it to your stylist.
Braids are a commitment, but when they’re done right, they’re an incredible way to protect your hair and express your style. Take this info, find a pro you trust, and enjoy the journey.
Inspiration Gallery

Your braids might be done, but the work isn’t over. A solid night routine is non-negotiable for making them last and protecting your hair.
- Wrap your hair in a silk or satin durag, scarf, or bonnet. This reduces friction that causes frizz and breakage.
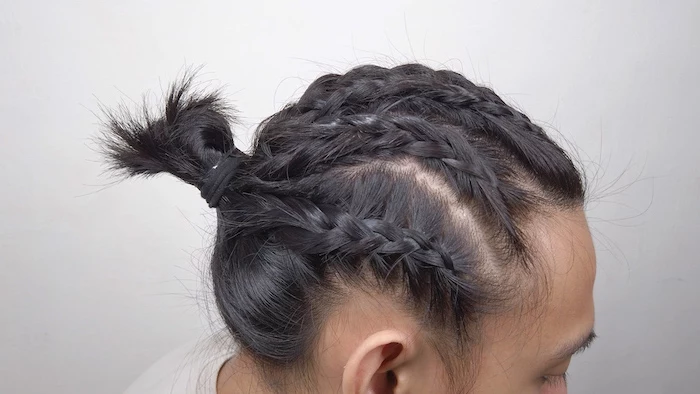
- If you have long braids, gather them into a loose, low ponytail or bun before wrapping.
- Invest in a satin pillowcase as a backup for nights when your durag slips off.


Traction alopecia, a form of hair loss caused by prolonged or repeated tension on the hair root, is a real risk. The first sign is often small bumps around the base of the braids.
This isn’t just an aesthetic issue; it’s a warning from your scalp. If you feel pain, headaches, or see redness after your appointment, the braids are too tight. A good stylist will prioritize the health of your follicles over a super-tight look.


How do I wash my braids without turning them into a frizzy mess?
Focus on your scalp, not the braids themselves. Dilute a sulfate-free shampoo (like SheaMoisture’s Jamaican Black Castor Oil Strengthen & Restore Shampoo) with water in an applicator bottle. Apply it directly to your scalp between the parts. Gently massage with the pads of your fingers, not your nails. When you rinse, let the suds run down the length of your braids—that’s enough to clean them. Squeeze, don’t rub, the braids to get excess water out.
Knotless Box Braids: The braider starts with your natural hair and gradually feeds in braiding hair. This creates a flatter, more natural-looking root with significantly less tension.
Traditional Box Braids: The braiding hair is added right at the root, forming a small knot. This gives a very distinct and classic look but can create more initial tension on the scalp.
For scalp sensitivity, knotless is the clear winner. For a classic, bold look, traditional still holds its own.
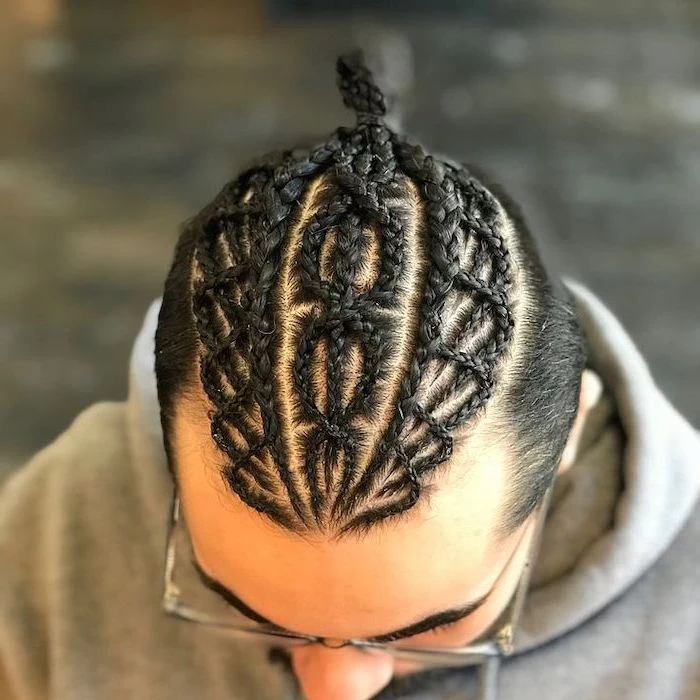
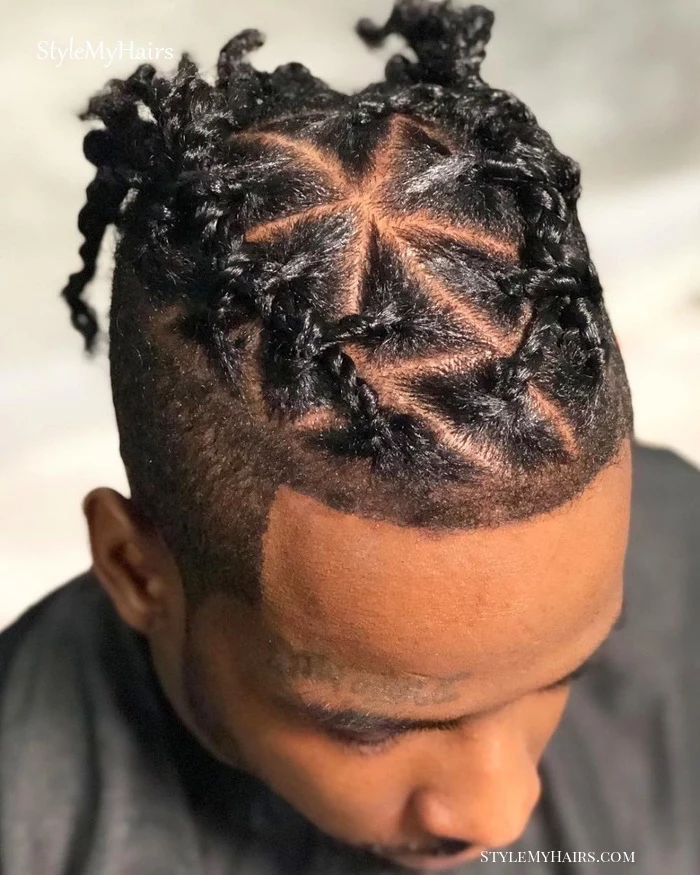
- Your parts are clean and well-defined.
- The style looks sharp and intentional.
- Your scalp can breathe and is easy to access for moisturizing and cleaning.
The secret? A quality parting comb and a steady hand. Don’t underestimate the impact of precise parting—it’s the architecture of the entire style, whether you’re getting triangles, boxes, or intricate curves.
Did you know? Some historians believe that in parts of South America, cornrow patterns were used by enslaved Africans as intricate maps to guide escape routes.
The itch is real, but scratching with your nails is a major no-no. It can cause flakes, break your hair at the root, and introduce bacteria. Instead, use a braid spray with tea tree oil, like African Pride Braid Sheen Spray, for its antiseptic and anti-inflammatory properties. You can also lightly tap the itchy spots to relieve the sensation without causing damage.
Don’t just walk in and sit down. A good consultation is a two-way conversation. Be ready to ask questions:
- What kind of parting do you think would suit my face and hair density?
- What brand of braiding hair do you use? (Kanekalon is a popular, high-quality synthetic).
- How do you recommend I maintain this specific style?
- Can we do a patch test if we’re using new products?
Important point: Let your hairline breathe. The fine hairs around your edges are the most fragile. Consistently pulling them into tight braids can lead to permanent damage. Ask your braider to be gentle on your edges, or even leave them out entirely and style them with an edge control like Shine ‘n Jam Magic Fingers.
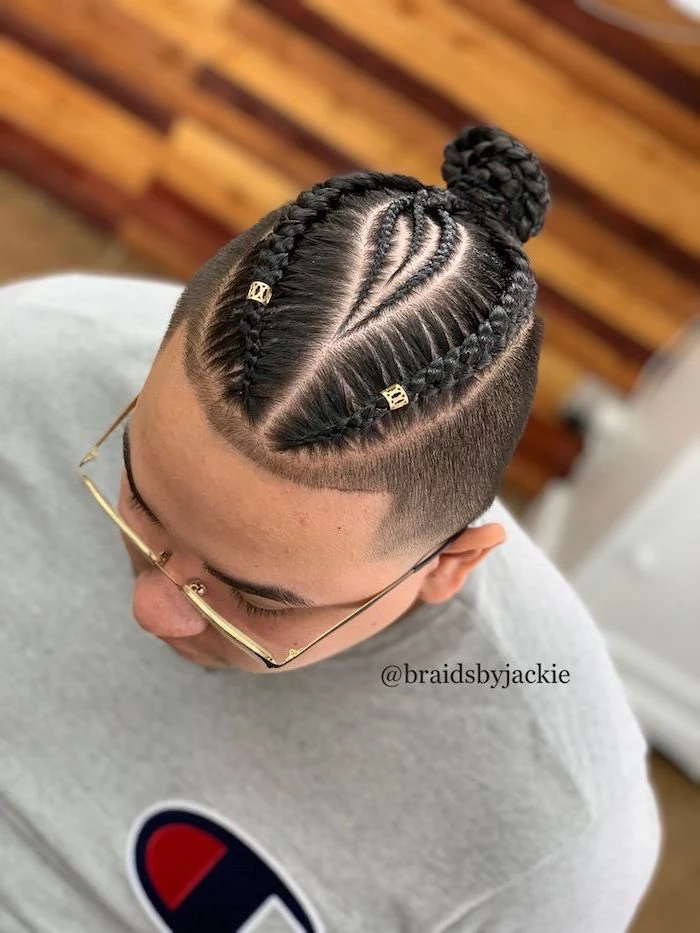
Think of your braids as a canvas. Small metal cuffs, wooden beads, or colorful string wrapped around a few individual braids can add a personal touch that elevates the entire look. It’s a low-commitment way to experiment with your style without changing the braids themselves. Just ensure the accessories aren’t too heavy or snag on the hair.


Can I get braids if my hair is thinning?
This requires careful consideration. Heavy, long braids are not advisable as the weight can exacerbate thinning. However, lighter, shorter styles with minimal tension might be possible. A professional braider might suggest larger, looser cornrows or knotless braids on a fuller section of your hair. The key is an honest consultation focusing on hair preservation, not just style.
Mousse: Ideal for setting fresh braids and taming flyaways. A setting mousse, like The Doux’s Mousse Def Texture Foam, helps ‘melt’ the braids, giving them a sleek, finished look without greasy buildup.
Oil Sheen Spray: Primarily for adding shine and some moisture. Use it sparingly a few times a week to refresh the look of your braids, but avoid over-spraying which can weigh hair down and attract dirt.
For daily care, a light leave-in spray is often better than a heavy oil sheen.

The foundation of long-lasting braids isn’t just the technique; it’s the prep. Arriving at your appointment with hair that is thoroughly washed, detangled, and blow-dried (or stretched) makes a world of difference. It allows the braider to create cleaner parts and ensures a smoother, more uniform result, reducing pulling and saving time.
According to a 2021 report by Mintel, 63% of Black consumers in the US wear their hair in a natural style, including braids, driving a multi-billion dollar industry for specialized products and services.
This isn’t just a trend; it’s a powerful movement. The demand for authentic, high-quality braid care reflects a broader cultural embrace of natural hair textures and styles.
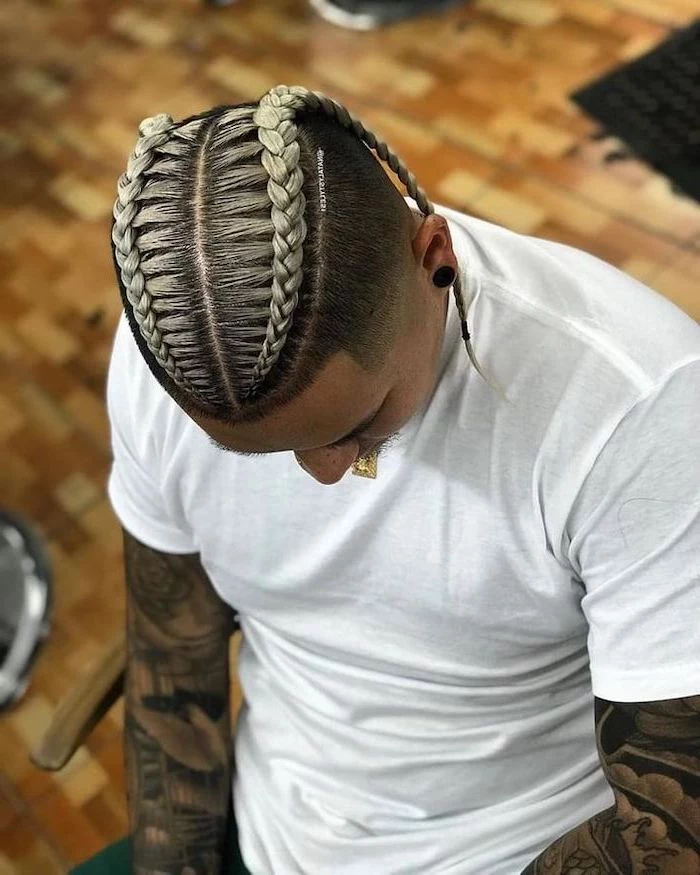
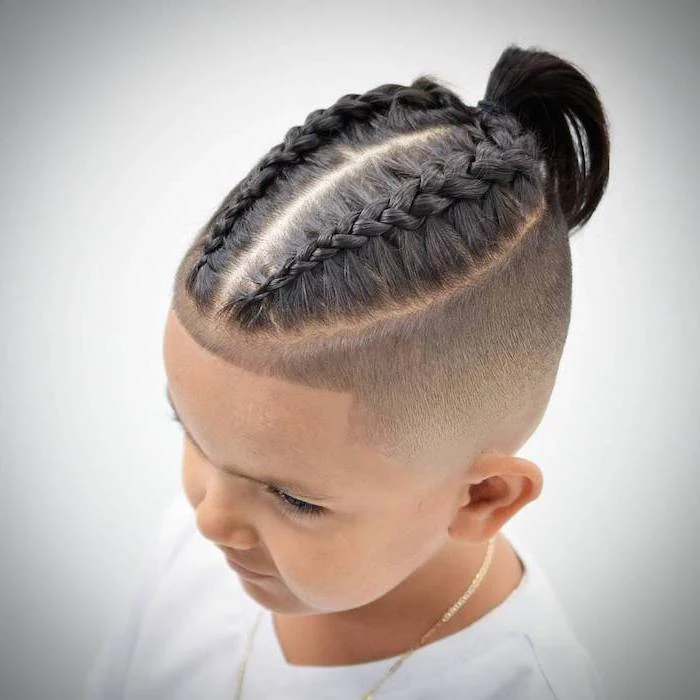
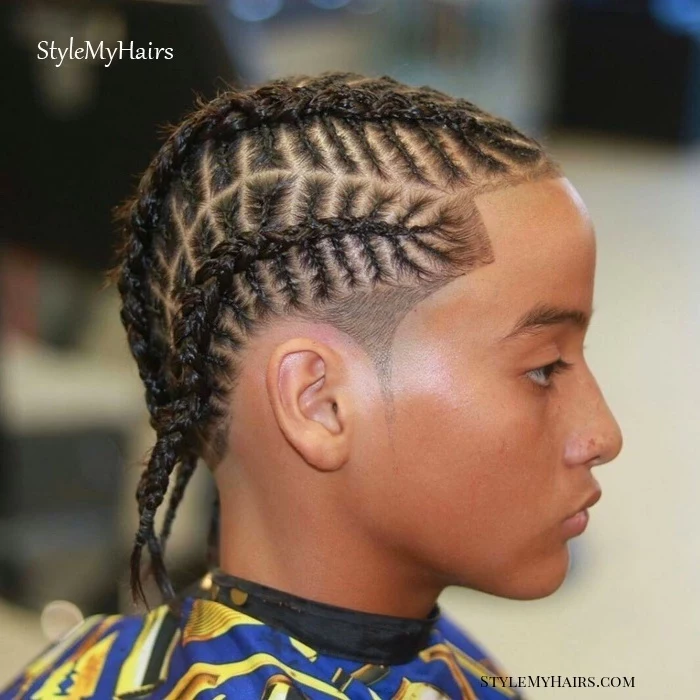
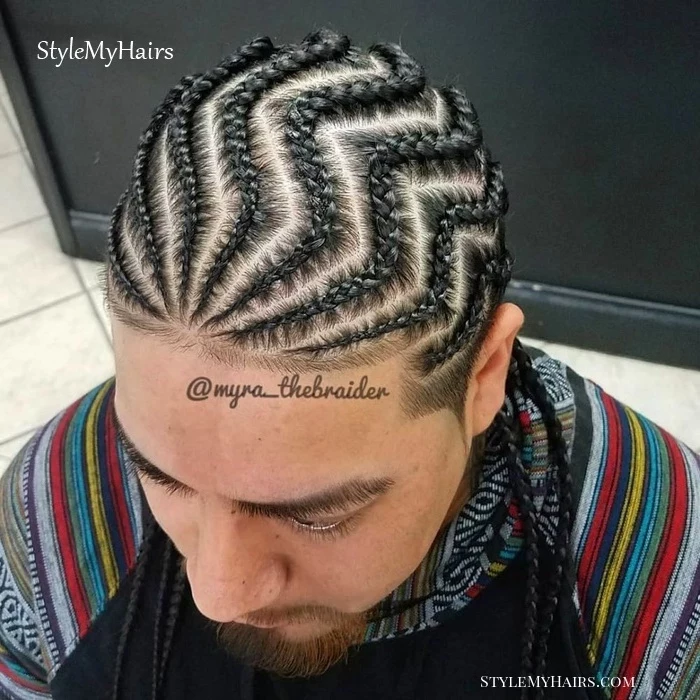
Looking for a modern, sharp take on cornrows? Ask for ‘stitch braids.’ This technique involves the braider creating a ‘stitch’ or ‘track’ effect by feeding in small pieces of hair as they braid down the scalp. It results in incredibly clean, pronounced lines that give a sleek and almost graphic quality to the style.
- Reduces breakage from friction against cotton pillowcases.
- Helps your style last longer by minimizing frizz and flyaways.
- Keeps your hair and scalp from drying out overnight.
The secret? A silk or satin durag. It’s the single most effective tool for preserving your braided style and protecting your hair while you sleep. Don’t skip it.
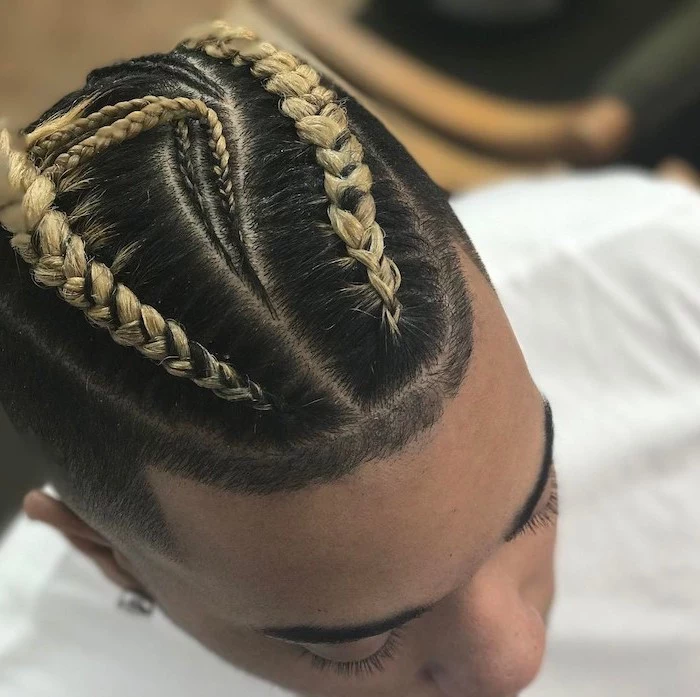
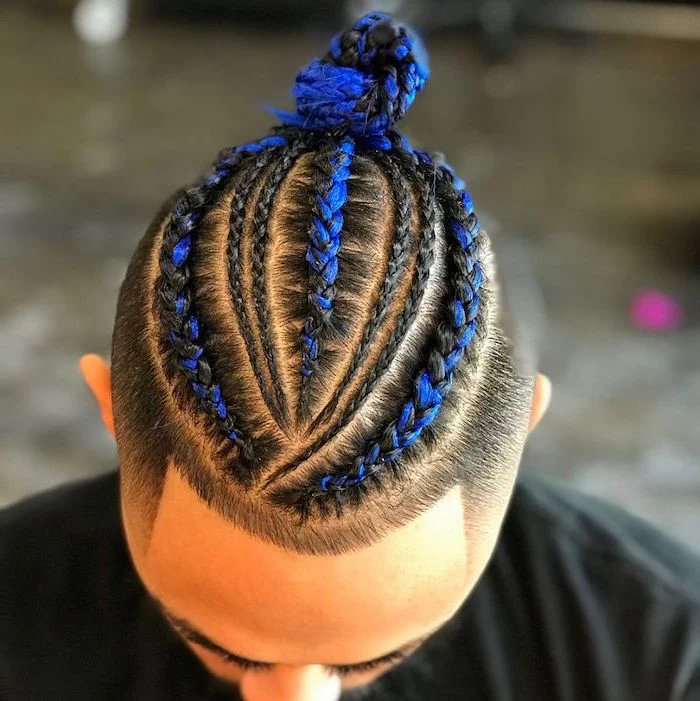
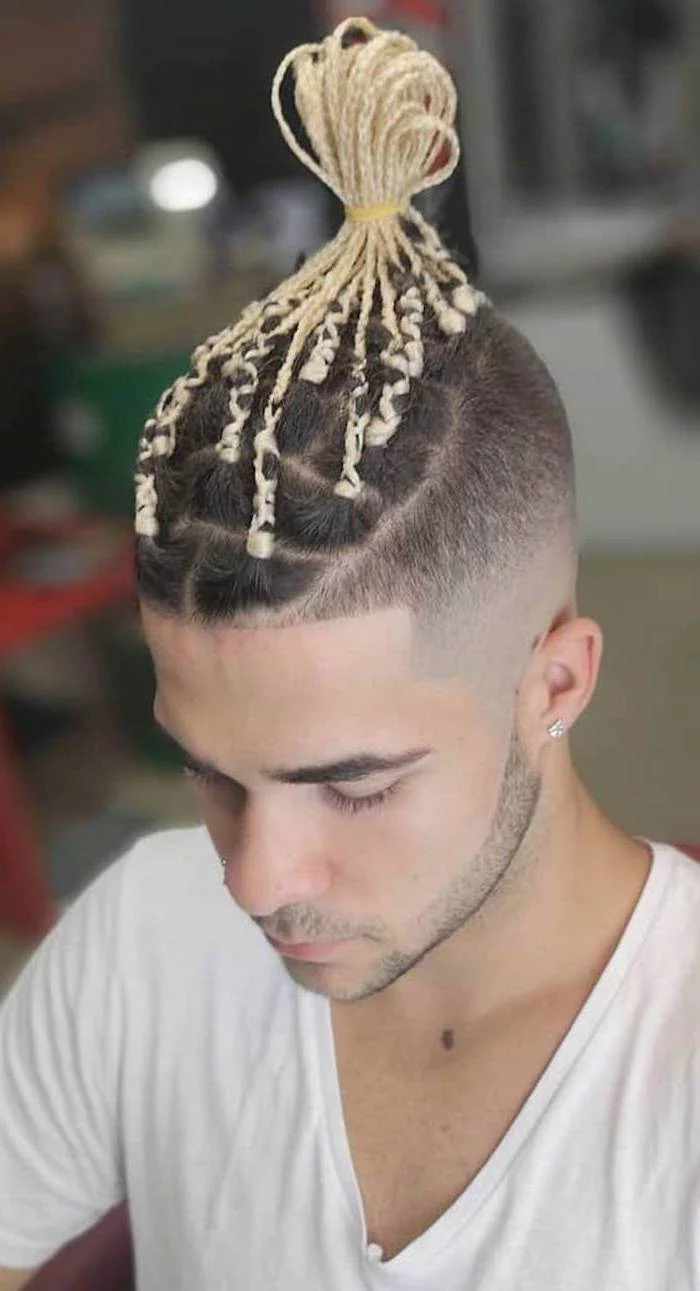
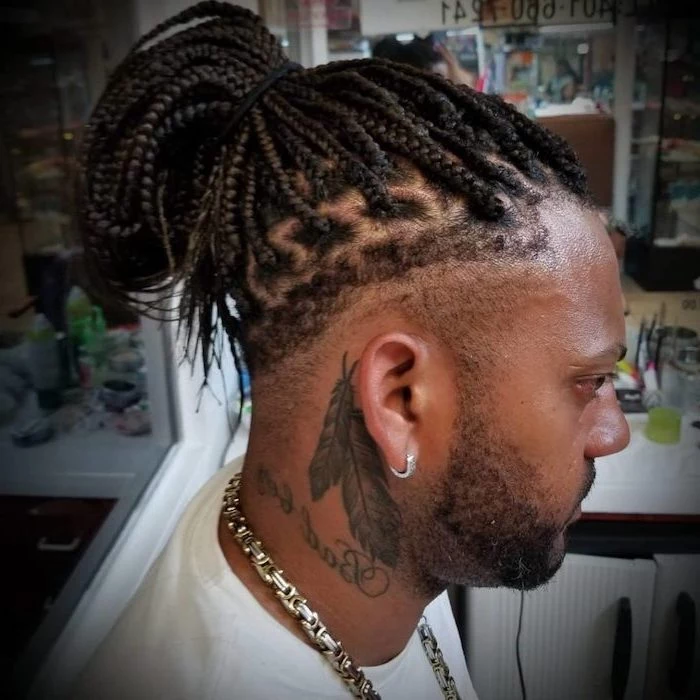
Adding a pop of color with extensions is a great way to experiment. You can go for a subtle look with a few strands of dark brown or burgundy mixed in, or go bold with platinum blonde, blue, or red. Your braider can blend the color in for a more integrated look or create a striking ombré effect. It’s all the impact without the commitment of hair dye.
Jamaican Black Castor Oil (JBCO): This is a thick, nutrient-rich oil often praised for promoting hair growth and thickness. It’s excellent for massaging into the scalp, especially in sparser areas. A little goes a long way.
Jojoba Oil: This oil is much lighter and its molecular structure is very similar to the natural sebum your scalp produces. It’s a fantastic moisturizer that absorbs easily without clogging pores, making it great for daily scalp hydration.
Use JBCO as a targeted treatment and Jojoba for overall, lightweight moisture.

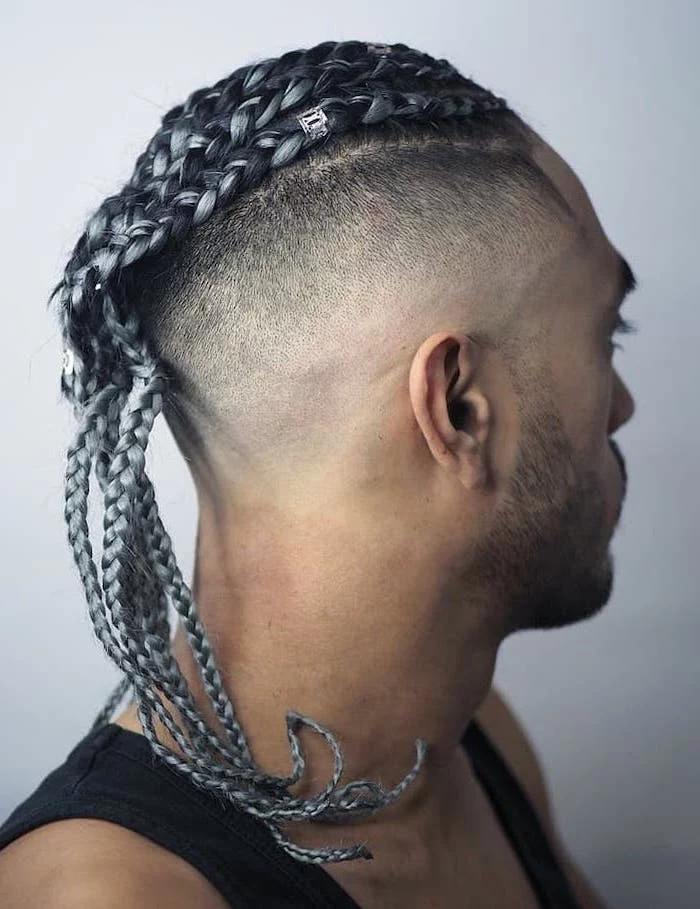
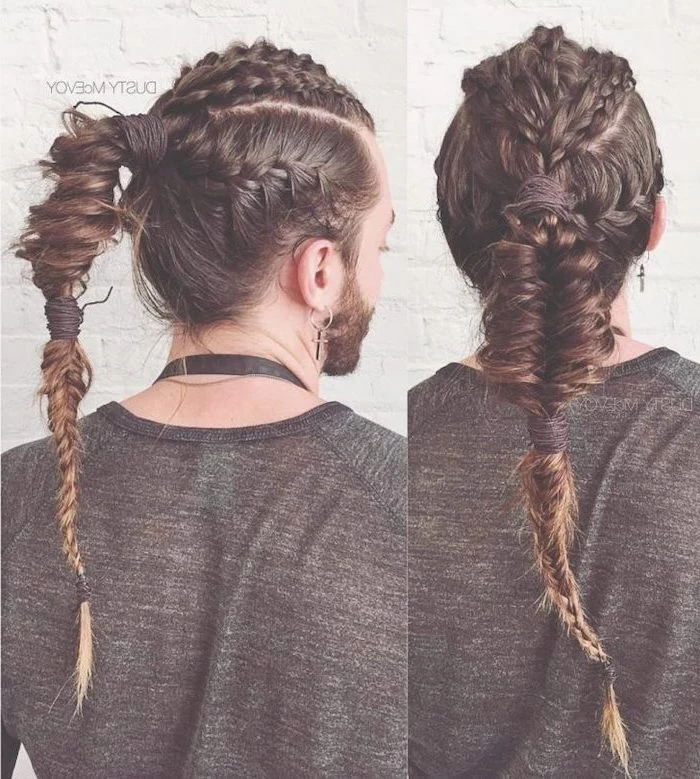
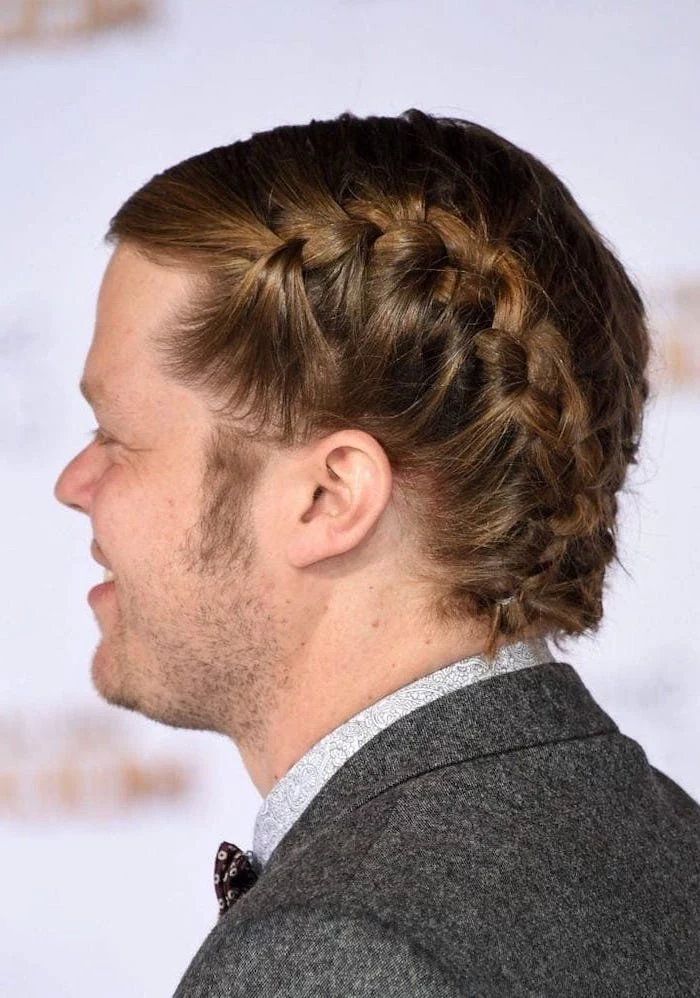
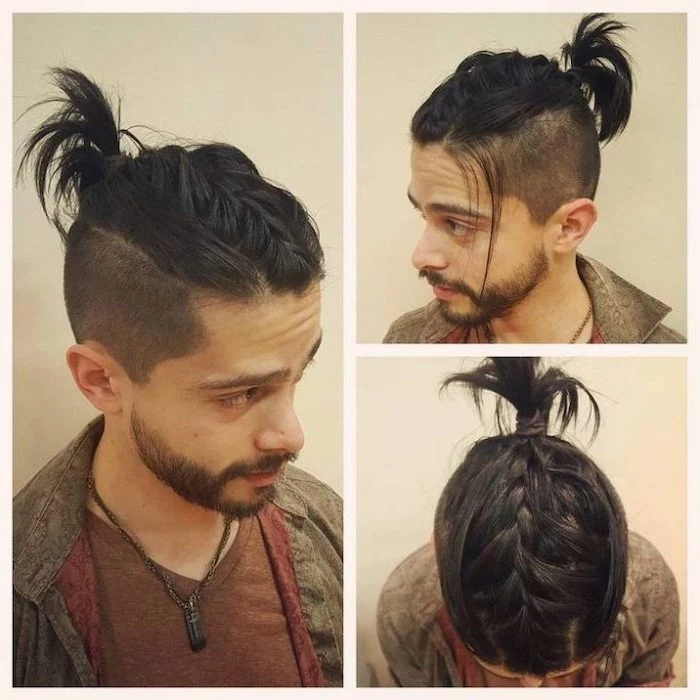
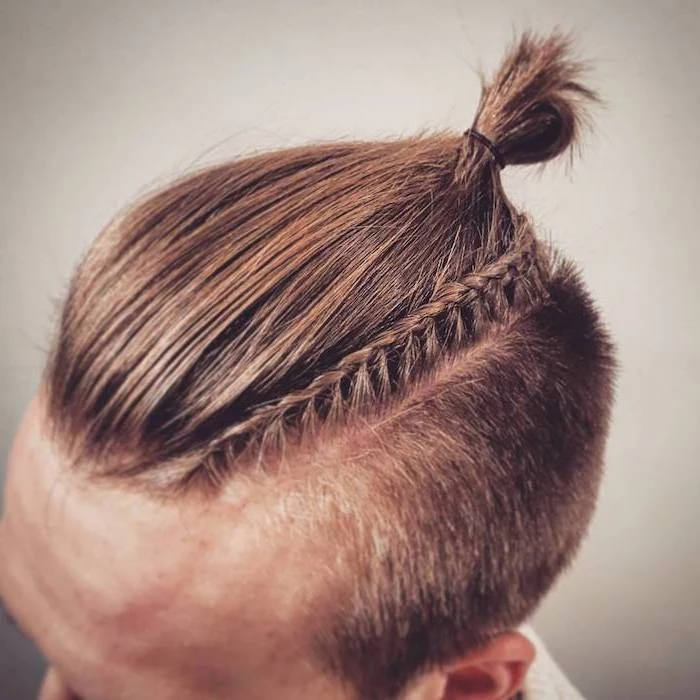
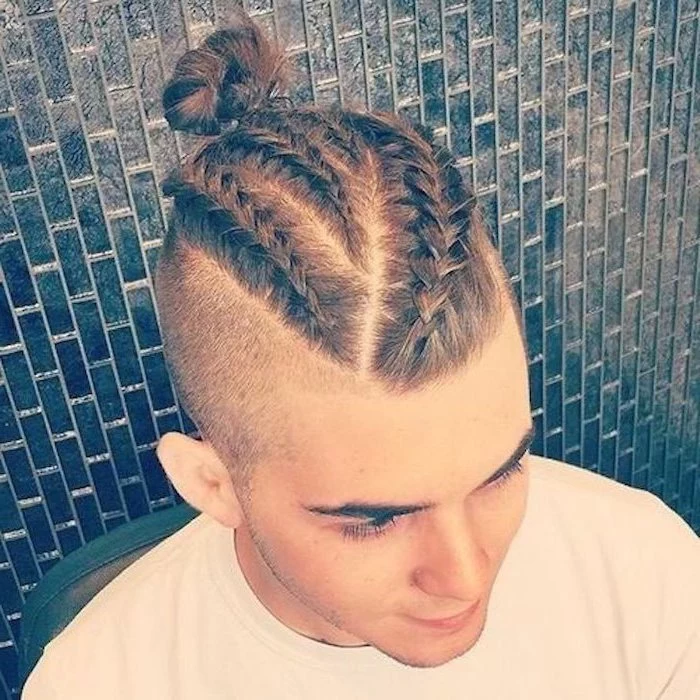
Are so-called ‘Viking braids’ historically accurate for Vikings?
While popular media depicts Viking men with intricate braids, historical evidence is scarce. Norse sagas mention long hair as a sign of status, but detailed descriptions of styling are rare. The popular side-shaved, long-on-top braided styles are more of a modern interpretation inspired by the aestehtic than a direct historical recreation. But hey, they still look cool.
- A scalp-focused applicator bottle for washing.
- A daily moisturizing spray like Carol’s Daughter Black Vanilla Leave-In Conditioner to prevent dryness.
- A quality edge control that doesn’t flake, such as Hick’s Edges Pomade.

The waiting game is crucial. Your hair needs a break between braided styles. A good rule of thumb is to wait at least one to two weeks after taking down your braids before installing a new set. Use this time to deep condition, treat your scalp, and trim any split ends. Rushing into the next style without this recovery period is a fast track to fatigue and breakage.
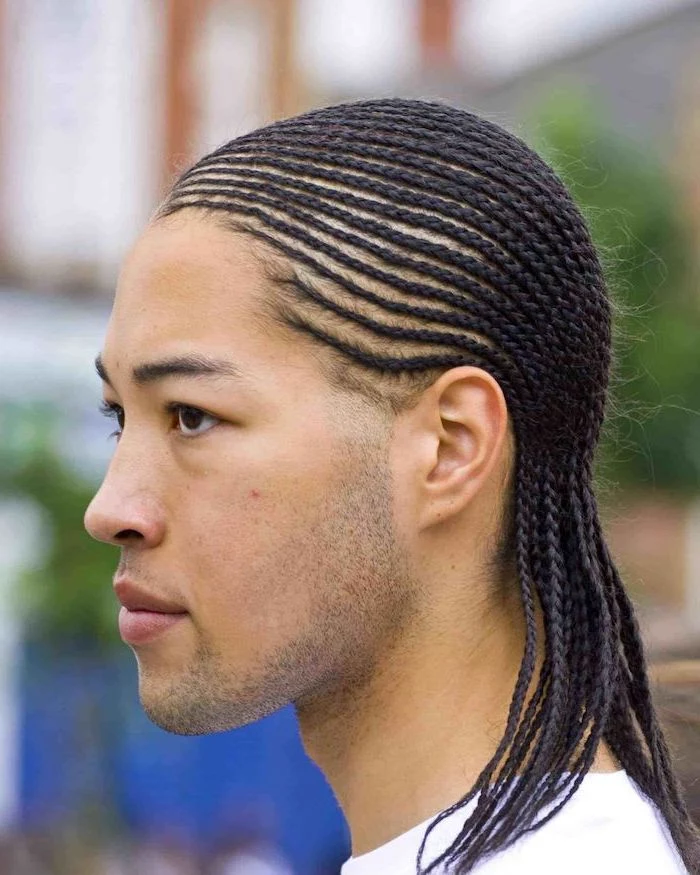
The direction of your cornrows can subtly change the shape of your face. Straight-backs elongate the face, making them a classic, streamlined choice. Braids that curve away from the face can soften features and add width, while angled or zigzag parts create a more dynamic, eye-catching effect. Talk to your braider about what might best complement your features.


Pay attention to the takedown process. It’s just as important as the installation. Be patient. Generously apply a conditioner or oil to each braid to add ‘slip,’ then use a rat-tail comb to gently unbraid from the bottom up. Ripping through them will cause massive breakage and undo all the hair health progress you’ve made.
Thinking about budget? While a cheaper, inexperienced braider might save you money upfront, the potential cost of hair damage from excessive tension or poor technique can be much higher in the long run. Investing in a skilled, professional braider is an investment in the long-term health of your hair.


