I still remember the first proper Mohawk I ever cut. It was for a young musician, and you could feel the nervous energy, but also this fierce determination. He wasn’t just after a new hairstyle; he wanted something that screamed ‘him.’ I’ll never forget the hum of the clippers and that focused silence as the shape emerged. When I handed him the mirror, his face just… lit up. It was more than happiness; it was like he was seeing himself for the first time. That’s the real magic of this cut.
Since then, I’ve probably shaped hundreds of them. I’ve coached new stylists on the geometry of it, fixed DIY jobs that went sideways, and walked clients through that dreaded growing-out phase. Because let’s be honest, a Mohawk is more than a nod to punk rock. It’s a technical cut that demands skill from the person with the clippers and serious commitment from the person wearing it. It’s basically living sculpture on your head.
Think of this as the honest conversation we’d have in my salon chair. We’re going to get into the nitty-gritty—the stuff beyond the cool inspiration photos. We’ll talk hair types, face shapes, and exactly what you need to do every single morning to make it work. If you’re on the fence, this is the practical info you need to jump off on the right side.
The Consultation: Is This Haircut Really for You?
Before any clippers even get plugged in, a good stylist is going to have a serious chat with you. The success of your Mohawk starts right here, with a frank discussion about your hair, your lifestyle, and what you’re willing to spend.
Face Shape and Head Shape
Honestly, confidence is what makes a Mohawk look good, but we can use the cut to balance your features. Oval faces are pretty versatile and can handle almost any width or height. If your face is more round or square, we can play with proportions. A taller, narrower hawk, for instance, can add some length to a round face. For a strong, square jawline, leaving the sides a bit softer—like a short fade instead of a total shave—can really soften the angles.
I always have a feel of a client’s head, too. Any bumps or flat spots can totally change how a shaved side looks. We talk about it openly so we can choose the best width for the hawk to create a silhouette that looks awesome, not awkward.
Let’s Talk Hair Type
This is where the science comes in, and it’s super important for predicting how your Mohawk will behave.
Density: This is just how many hairs you have packed into each square inch. If you have dense, thick hair, you’re in luck—it provides a strong base that stands up like a champ. For hair that’s a bit finer or less dense, we have to get creative. The trick is cutting internal layers to create texture, which helps the hairs lean on each other for support so the style doesn’t look sparse.
Texture: This is about the individual strands—fine, medium, or coarse. Coarse hair is stiff and holds a shape beautifully, making it perfect for those tall, dramatic spikes. Fine hair is softer and, frankly, struggles with gravity. If you have fine hair, product choice is everything. A light mousse or a texturizing powder will be your secret weapon.
Growth Patterns: Oh yeah, cowlicks. I always check for these troublemakers, especially at the hairline and crown. A strong cowlick at the front can make your hawk want to lean. We can cut into it to diffuse its power, but you’ll still have to win a daily battle with your blow dryer.
The Lifestyle and Money Commitment
This is where we get real. How much time are you actually willing to spend on your hair every morning? A good Mohawk takes a solid 10 to 15 minutes to style. It is absolutely not a wake-up-and-go haircut.
And then there’s the upkeep. To keep those lines sharp and the sides clean, you’ll be back in the salon chair every 3-4 weeks. Let’s talk numbers: you can expect to pay anywhere from $50 to $90 for the initial, detailed cut. After that, plan for maintenance visits costing between $25 and $45 a pop. It’s a recurring expense, so you need to factor it into your budget.
Finally, a quick reality check on your workplace. Things are more relaxed now, but some professional settings are still pretty conservative. It’s something to consider. A lower-profile version, like a Faux-Hawk, can sometimes be a great compromise.
How to Ask For What You Want
Walking into a salon and just saying “give me a Mohawk” can be a gamble. To get the cut you’re picturing, it helps to speak the language. Don’t be shy! Here’s a little script:
Walk in and say something like, “I’m looking to get a Mohawk. I want the main strip to be about two inches wide—from the outer corner of one eye to the other. For the sides, I’d like a
1 fade that’s blended up into the top.”
Using terms like the width in inches or the clipper guard number (
1,
2, etc.) shows you’ve done your research and helps your stylist know exactly what you’re looking for. It’s the best way to avoid unhappy surprises.
The Anatomy of the Cut: How It’s Done
Cutting a great Mohawk is a game of precision. Every line matters. It’s one part geometry, one part artistry.
Sectioning is Everything: The whole foundation is built on clean, straight parts. We start on damp hair, using the client’s eyes as a reference for the width. I use a comb to draw two perfectly symmetrical lines from the front hairline to the nape of the neck, then clip the center strip up and out of the way.
Tackling the Sides: This is the dramatic part. A classic buzz is done with a clipper using a very short guard (
1) or no guard at all (
0). The key is moving the clipper against the hair growth in smooth, even strokes. A more modern fade is trickier; it involves starting with a longer guard where the sides meet the hawk and using shorter and shorter guards as you move down toward the ears. Blending those lines seamlessly is a skill that takes pros years to perfect.
Shaping the Top: Once the sides are done, we unclip the main event. We can’t just cut it to one length; it’ll be too heavy to stand up. I use point cutting—snipping vertically into the ends—to remove weight and create texture. For super thick hair, I might use texturizing shears to strategically remove bulk from the base, making the whole thing lighter.
Heads up! Any good stylist will obsessively sanitize their tools. We use hospital-grade disinfectants on our blades between every single client. Dull or dirty blades can cause nasty skin irritation and infections, so we keep our gear in top shape.
Your Daily Job: The Home Maintenance Plan
Getting the cut is just step one. Now the ball is in your court. Here’s how you keep it looking sharp.
The Mohawk Starter Kit
To do this right, you need a few key tools. Your initial investment in products will probably be around $40-$50, but they’ll last you a while.
A Vent Brush: Helps with airflow for quick drying and lifting the roots.
A Blow Dryer with a Nozzle: This is non-negotiable. The nozzle focuses the air for precision styling.
Your Styling Product: A strong-hold pomade or clay. For a budget-friendly classic, ‘Got2b Glued’ is legendary. For a salon-quality matte finish, something like ‘American Crew Fiber’ is fantastic.
Finishing Hairspray: A light mist to lock it all in place.
The Styling Process (and Product Showdown)
First off, always apply a light, non-greasy moisturizer to your shaved sides after a shower—something simple like CeraVe or Cetaphil works perfectly to prevent dry, flaky skin. And please, wear sunscreen on your scalp!
Now for the hawk itself. Start with damp, towel-dried hair. The blow dryer is your most important tool. Using the nozzle, aim the airflow right at the roots, pulling the hair straight up with your brush or fingers. You need to dry the roots standing up.
Once it’s about 90% dry, it’s product time. But which one? It’s confusing, I know. Here’s the lowdown:
Gel: This is for a stiff, spiky, wet look with maximum hold. Think classic punk rock. It won’t move, but it’s not touchable.
Pomade/Wax: These are more modern. They offer strong, pliable hold. A matte-finish pomade is my go-to recommendation for a textured look that isn’t rock-hard.
Clay: This is the best for a textured, high-volume look with zero shine. It gives hair a gritty, matte feel that’s great for adding bulk to finer hair.
Mousse/Powder: These are your pre-stylers. Use a volumizing mousse on damp hair or a texturizing powder on dry hair before your main product to give it that initial lift and grit.
Work a small amount of your chosen styler through the hair, shape it with your hands, and then give it a quick, light mist of hairspray to lock it in for the day.
Variations on the Theme
The classic cut is just the start. You can get really creative.
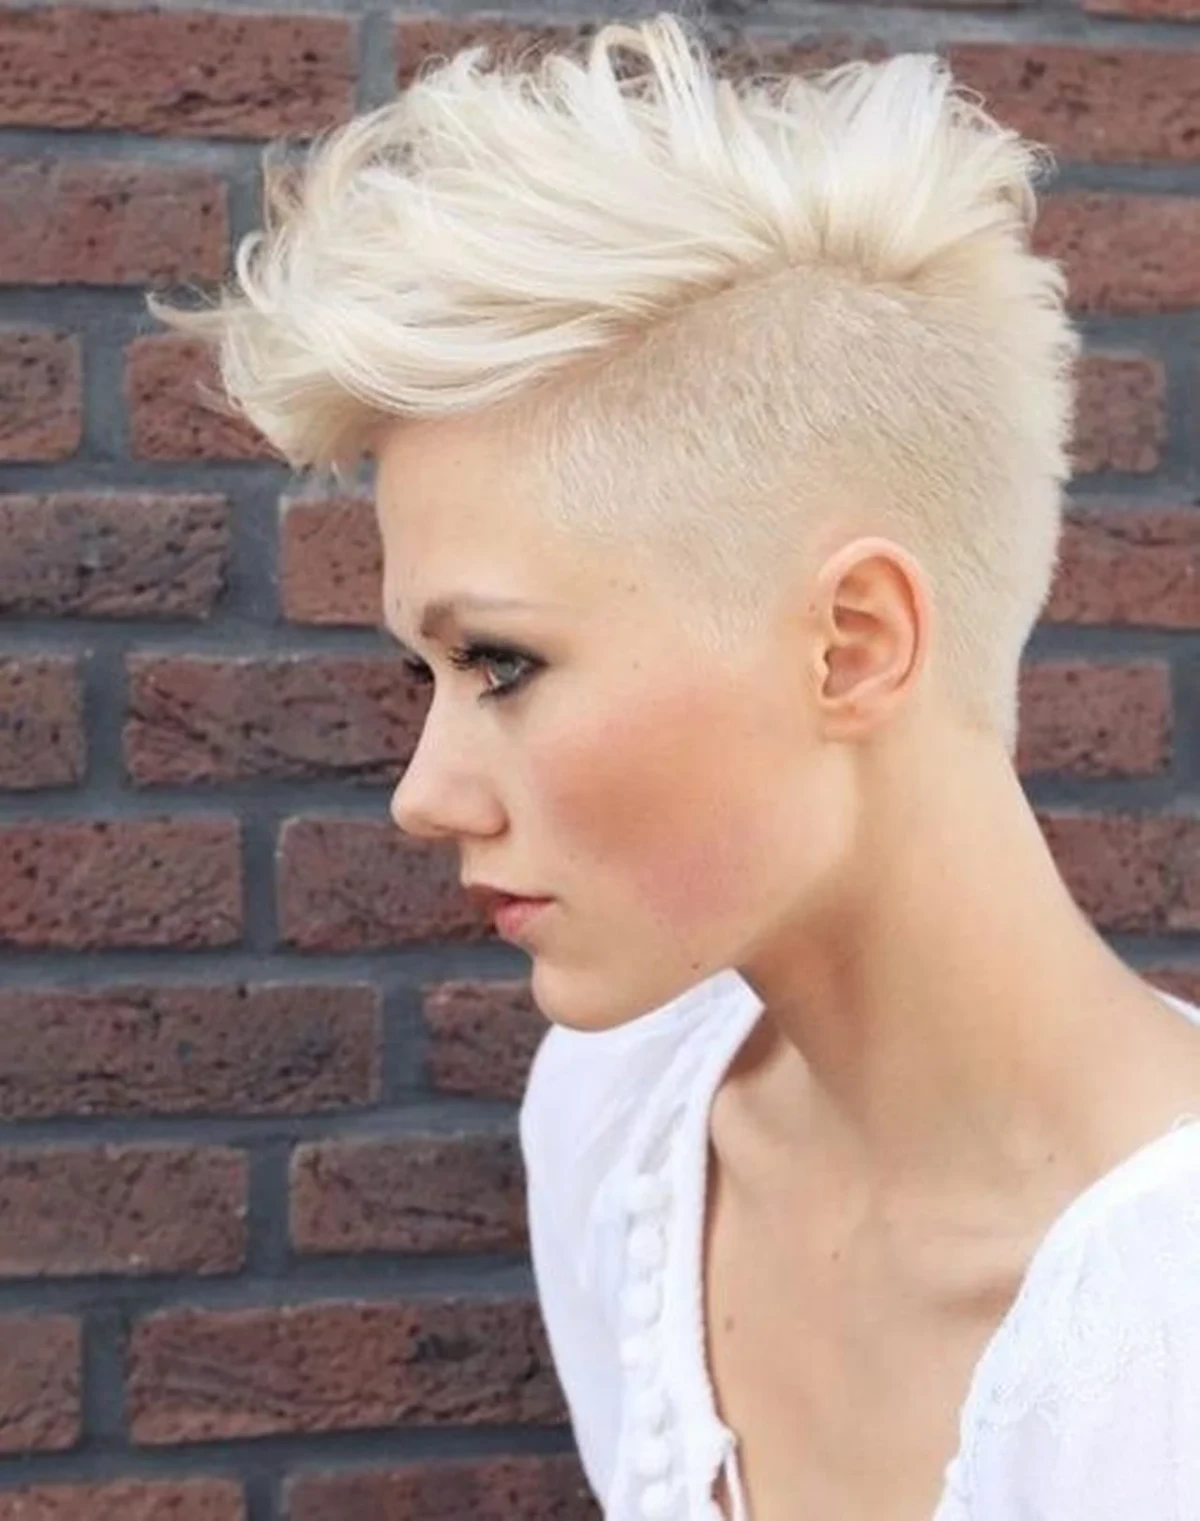
The Faux-Hawk (or ‘Fohawk’) is the most common variation—the sides are kept short but not shaved, and the longer top is styled up and towards the center. It’s a great entry-level option.
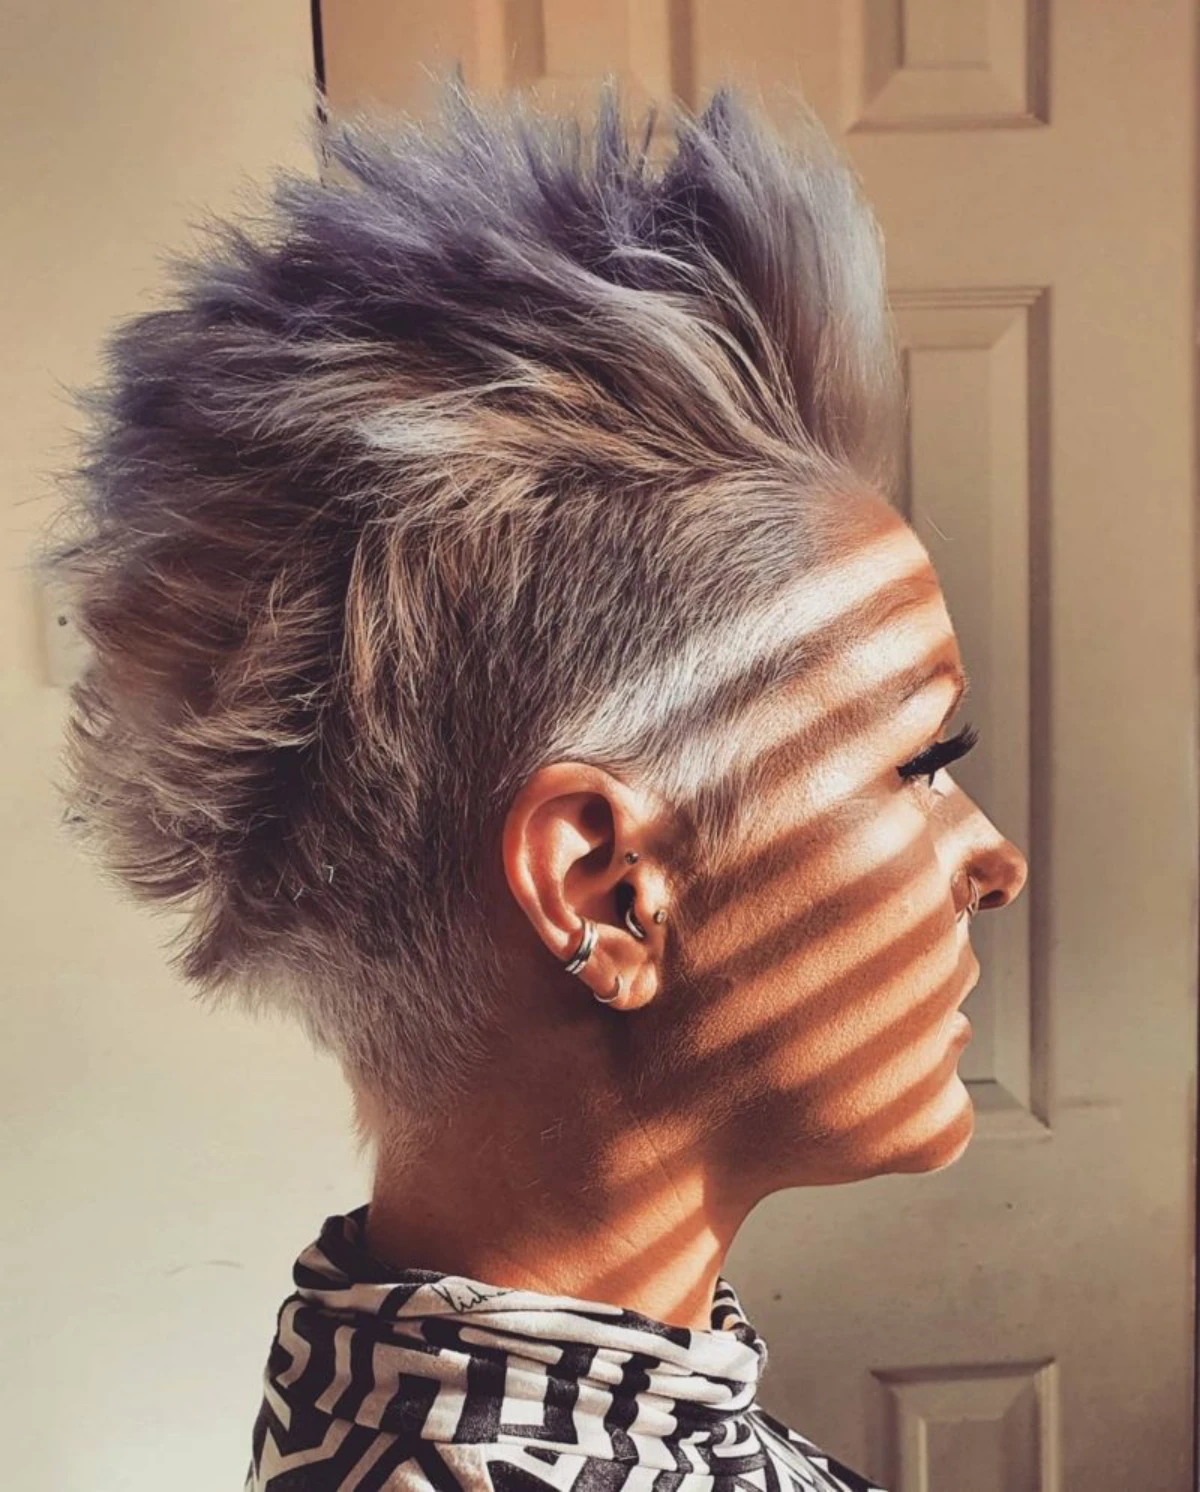
The Death-hawk is a wider, more dramatic style popular in Goth subcultures. It relies on intense backcombing (or teasing) to create massive volume before being smoothed over and shellacked with hairspray. It’s high-maintenance and can be tough on hair.
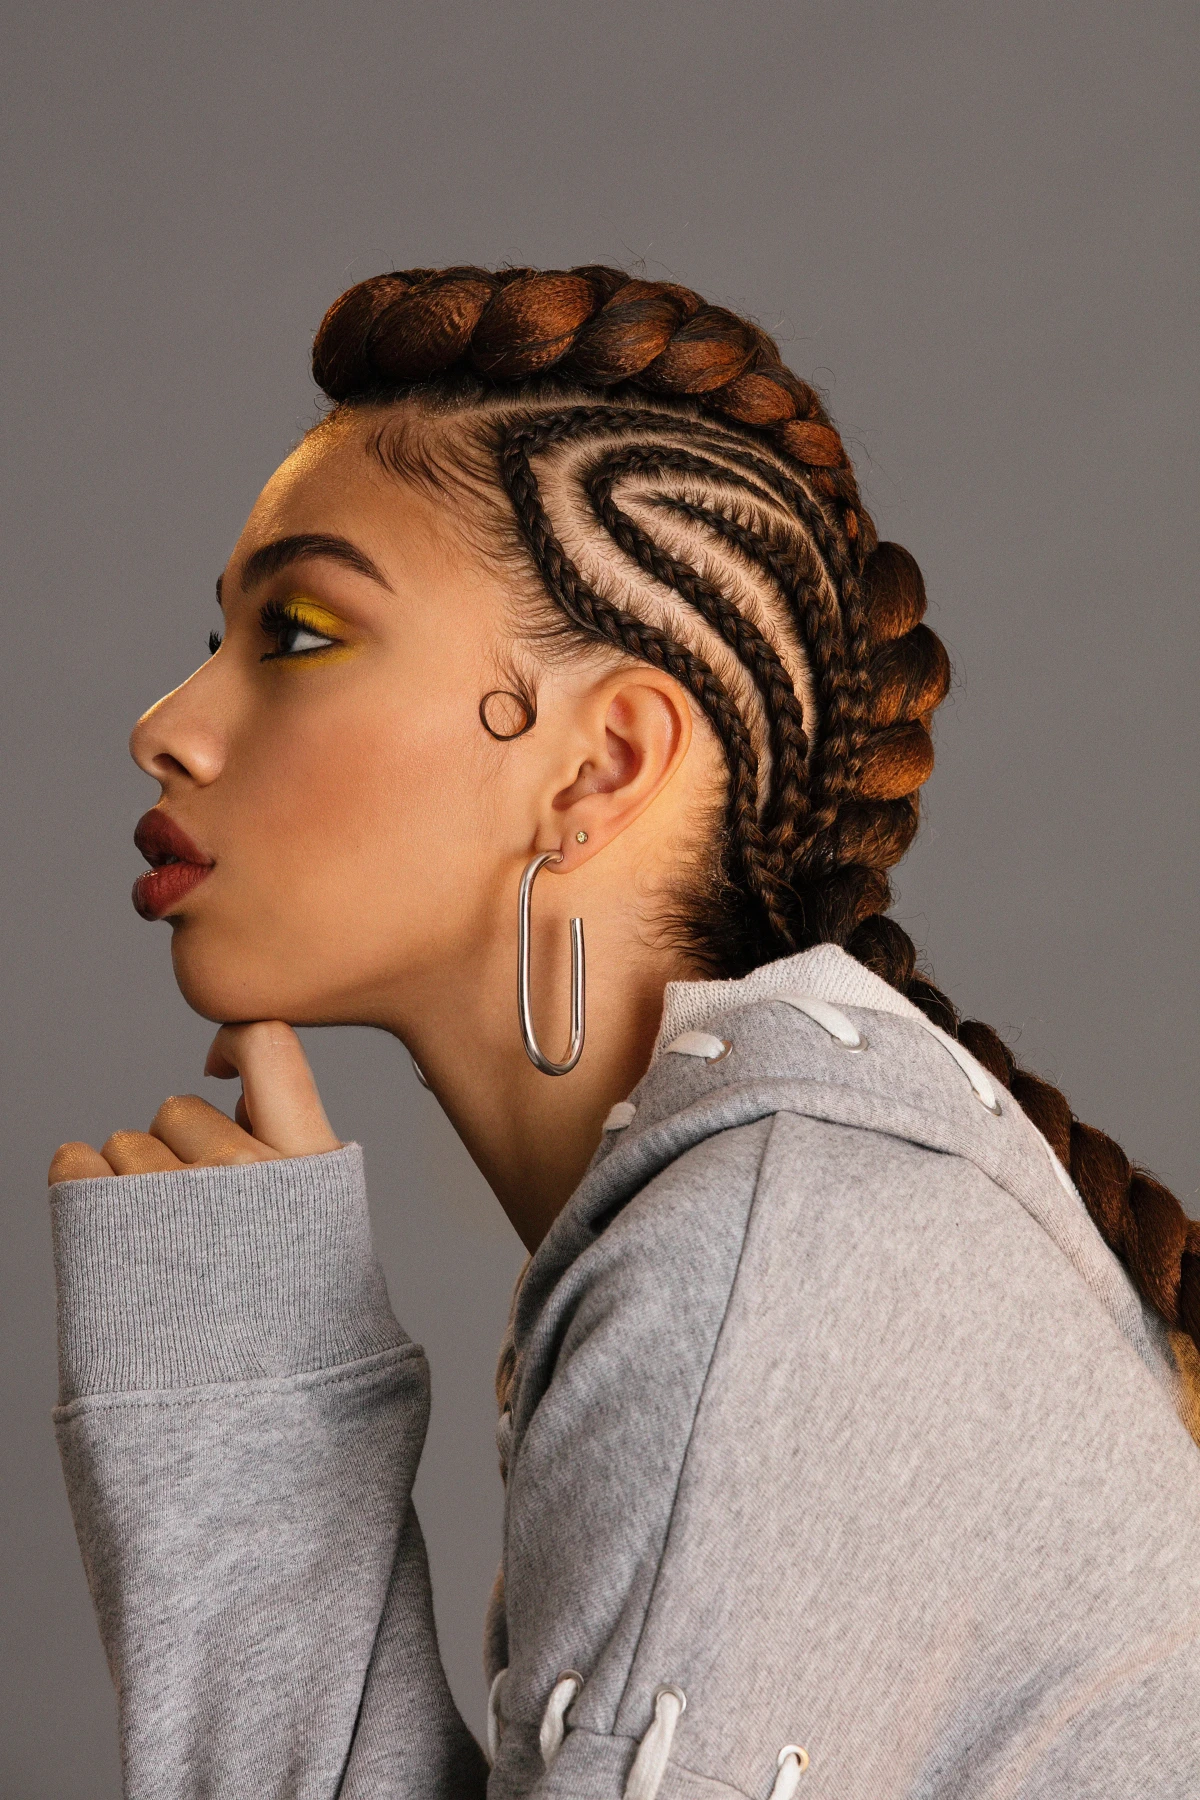
Braids and Color take it to another level. The center strip can be braided, or you can add bold, vivid colors. Just remember, bright colors require bleaching the hair first. This is a serious chemical process that should absolutely be done by a professional to avoid damage. It also adds significant cost and requires special color-safe shampoos to maintain.
Troubleshooting: Common Mohawk Problems and Fixes
“My hawk keeps falling over!” Usually, this means it’s either too long, you’re skipping the blow dryer, or your product isn’t strong enough. Always style on clean, damp hair for the best results.
“My shaved scalp is itchy and flaky.” This is almost always dryness. Moisturize daily! If it persists, let your stylist know; their clippers might need sharpening or a better cleaning.
“Quick Fix: I’m in a huge rush!” No time for the full 15-minute routine? Cheat. Focus the blow dryer only on the front two inches of your hairline, getting that part to stand up. It’s what people see first and can get you out the door in two minutes.
“Help! How do I grow this thing out?” Ah, the biggest challenge. There will be an awkward phase, but you can manage it. Here’s a survival guide: – Weeks 1-6 (The Fuzzy Stage): Just let it go. The sides will start to look fuzzy. It’s weird, but it’s temporary. Keep the top styled as usual. – Months 2-4 (The Disconnected Undercut): Keep getting the very bottom edge (around the ears and neckline) cleaned up, but let the rest of the sides grow. The top is now significantly longer, creating a cool, intentional-looking disconnected style. – Months 4-6+ (The Pixie/Short Bob Transition): Once the top is long enough to comb over and cover the sides, you can get it shaped into an edgy pixie cut or an asymmetrical short style. From there, you’re on your way to a more conventional cut. Patience is key!
A Final Word from the Chair
A Mohawk is so much more than a haircut. It’s a statement. It projects strength and confidence, and I’ve seen it make people feel more like themselves than anything else. That’s an amazing thing to be a part of.
But—and this is a big but—it’s not a casual style. It demands your time, your money, and your daily attention. Be honest with yourself about that commitment. Find a stylist who really listens and has the portfolio to back up their skills. Look for them on Instagram; search hashtags like
creativecut or #punkhair to find someone who specializes in more than just basic trims.
If you’re ready for all that, it can be one of the most powerful and liberating styles you’ll ever wear.
Galerie d’inspiration
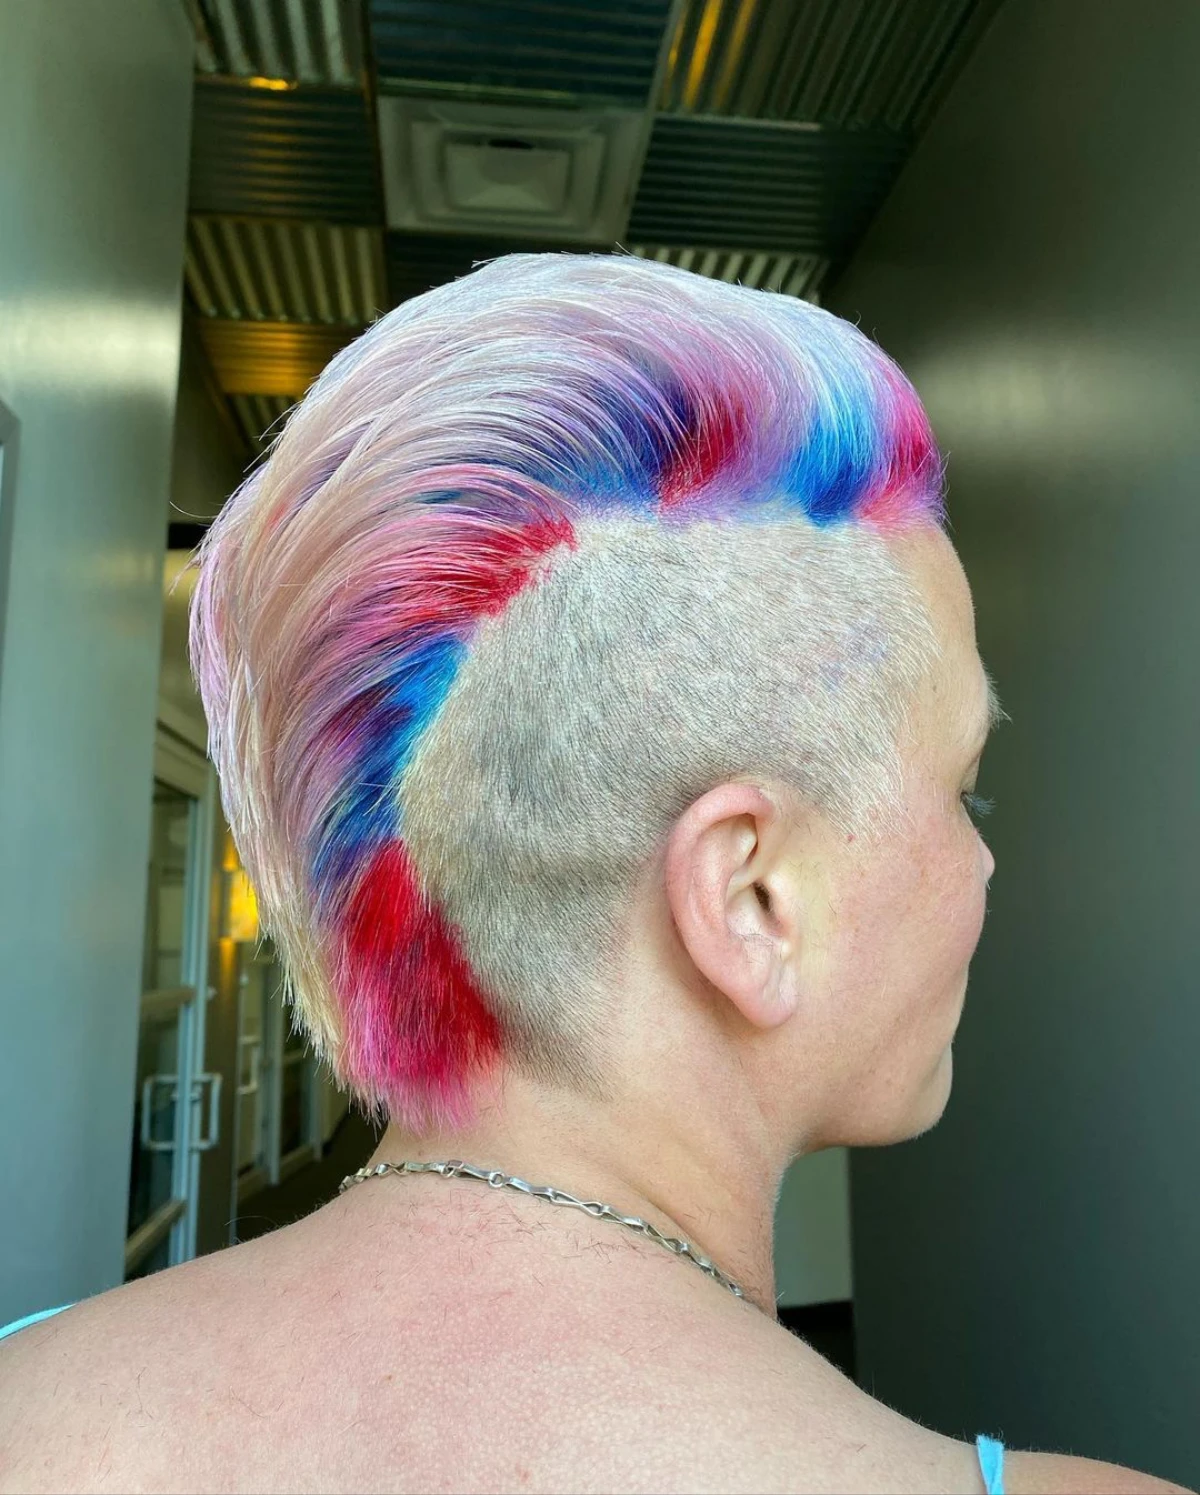
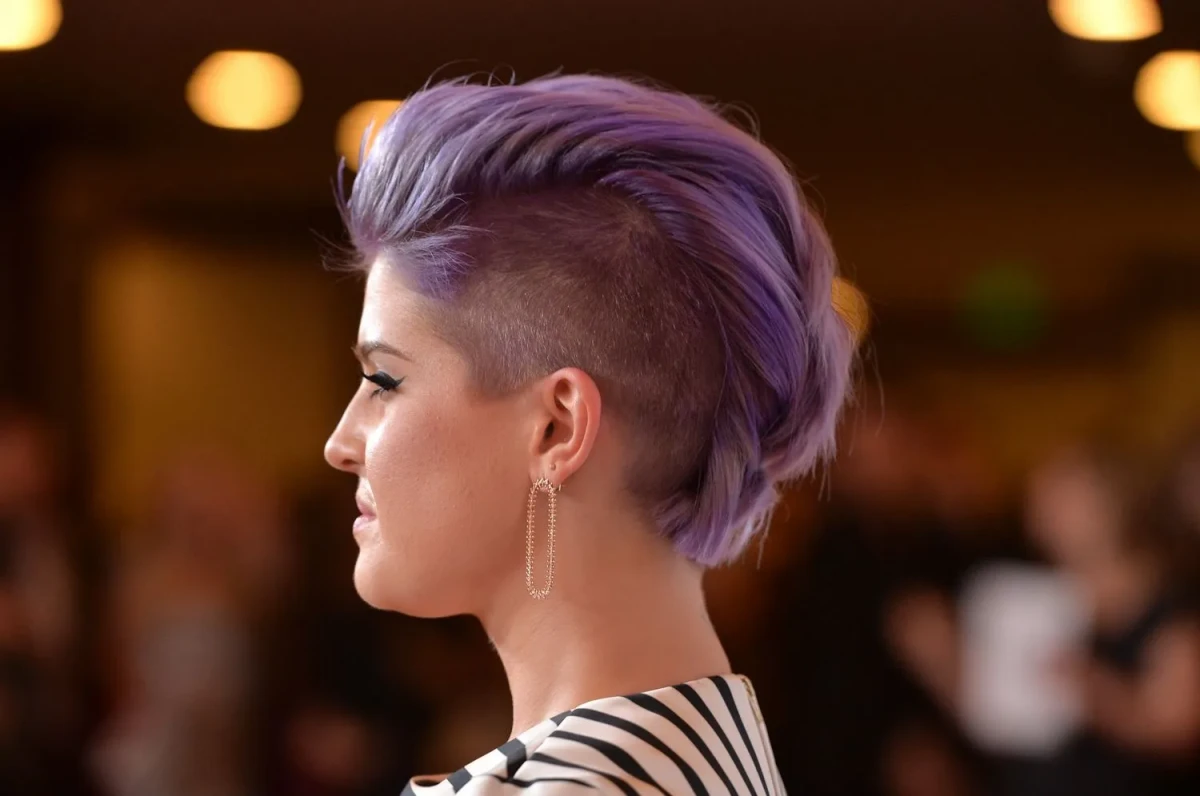
Thinking of adding a bold color like electric blue or neon pink to your hawk?
It’s a powerful move that takes your style to the next level. For those hyper-vibrant, unnatural shades to truly pop, your hair almost certainly needs to be bleached first. This is a chemical process that’s best left to a professional to avoid scalp burns or hair damage. Once you have that clean, blonde base, you can maintain the color at home with high-pigment semi-permanent dyes. Brands like Manic Panic’s
The hairstyle is named after the Mohawk (Kanien’kehá:ka) people, an Indigenous nation in North America. Historically, for their warriors, this hairstyle was not a fashion trend but a symbol of strength and defiance, prepared for battle.
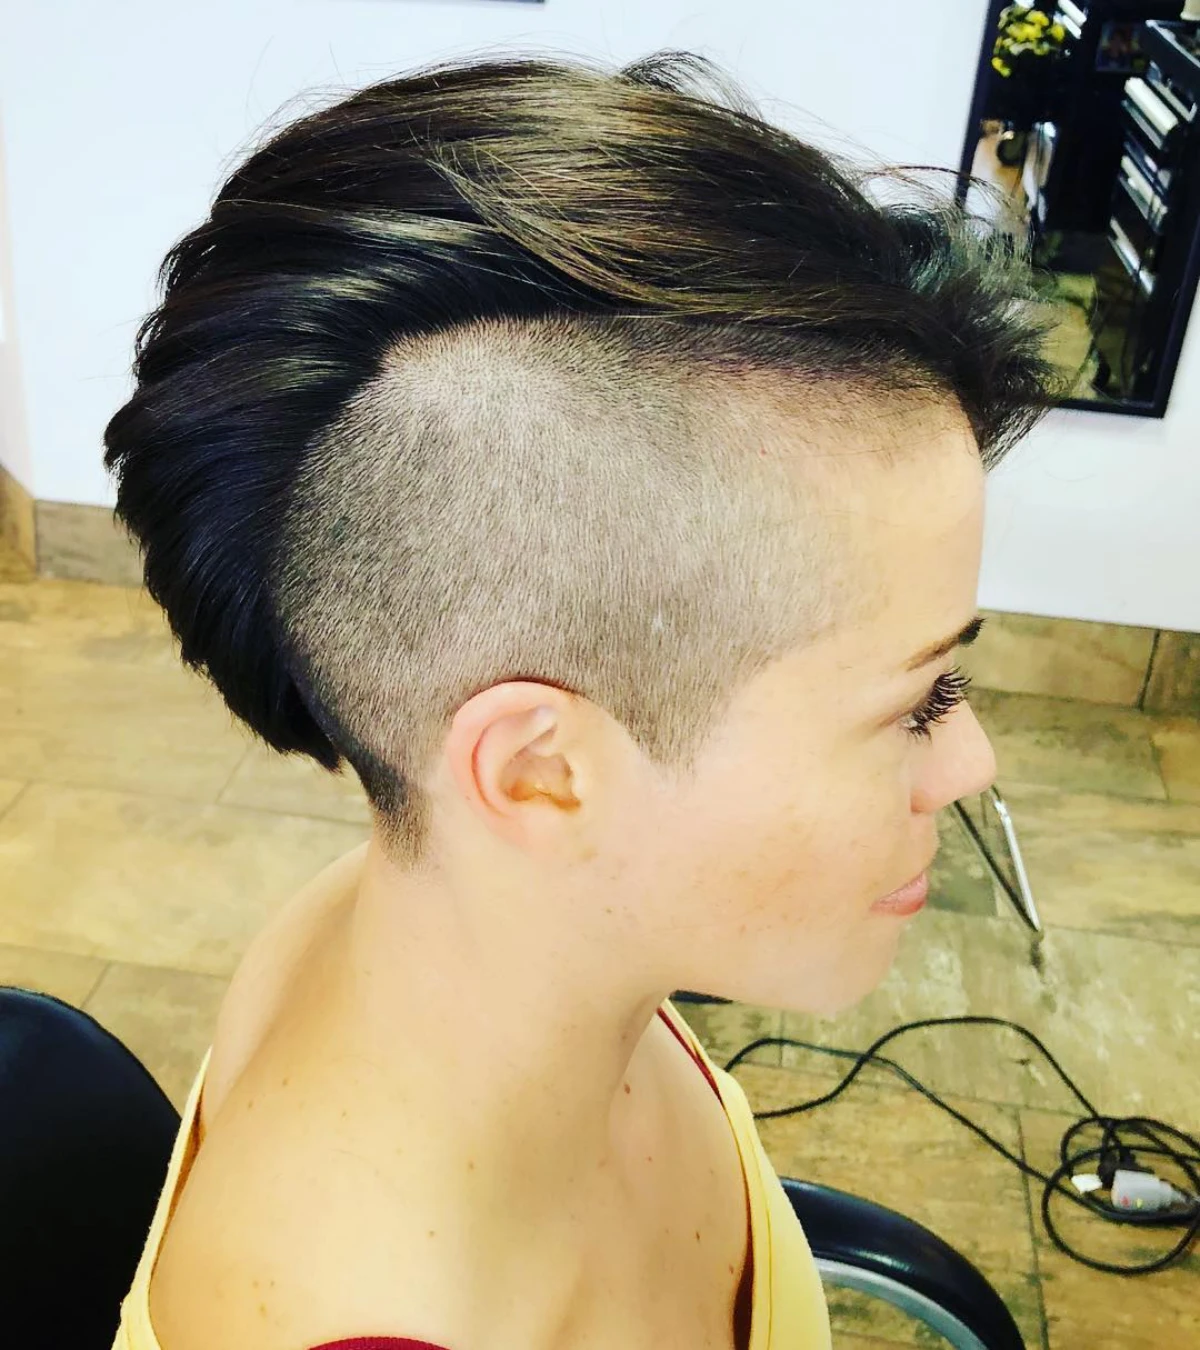
Keeping those shaved sides looking sharp is the secret to a great-looking Mohawk between professional cuts. A high-quality personal trimmer is your best friend here; the Wahl Peanut is a classic, powerful choice for clean lines. To avoid irritation and bumps:
Always start with a clean, dry scalp.
Move the trimmer against the direction of hair growth in slow, steady strokes.
Finish with a soothing, alcohol-free moisturizer or after-shave balm to calm the skin.
For sky-high spikes: Look for a product with cement-like hold. Got2b Glued Spiking Glue is legendary for a reason—it delivers waterproof, wind-tunnel-tested hold that won’t budge. It’s ideal for creating defined, sharp points.
For a textured, flexible hawk: If you prefer a softer, more piece-y look that you can restyle, a fiber paste is your go-to. American Crew’s Fiber gives a high-hold, low-shine finish that adds thickness and texture without the crunchy feel of a gel.
Jessica has spent 14 years in the fashion industry, starting as a stylist assistant and working her way up to Fashion Editor. A graduate of Fashion Institute of Technology, she has styled celebrities, worked backstage at Fashion Week, and contributed to major fashion publications. Jessica believes fashion should be fun, accessible, and expressive.
To provide the best experiences, we use technologies like cookies to store and/or access device information. Consenting to these technologies will allow us to process data such as browsing behavior or unique IDs on this site. Not consenting or withdrawing consent, may adversely affect certain features and functions.
Functional
Always active
The technical storage or access is strictly necessary for the legitimate purpose of enabling the use of a specific service explicitly requested by the subscriber or user, or for the sole purpose of carrying out the transmission of a communication over an electronic communications network.
Preferences
The technical storage or access is necessary for the legitimate purpose of storing preferences that are not requested by the subscriber or user.
Statistics
The technical storage or access that is used exclusively for statistical purposes.The technical storage or access that is used exclusively for anonymous statistical purposes. Without a subpoena, voluntary compliance on the part of your Internet Service Provider, or additional records from a third party, information stored or retrieved for this purpose alone cannot usually be used to identify you.
Marketing
The technical storage or access is required to create user profiles to send advertising, or to track the user on a website or across several websites for similar marketing purposes.