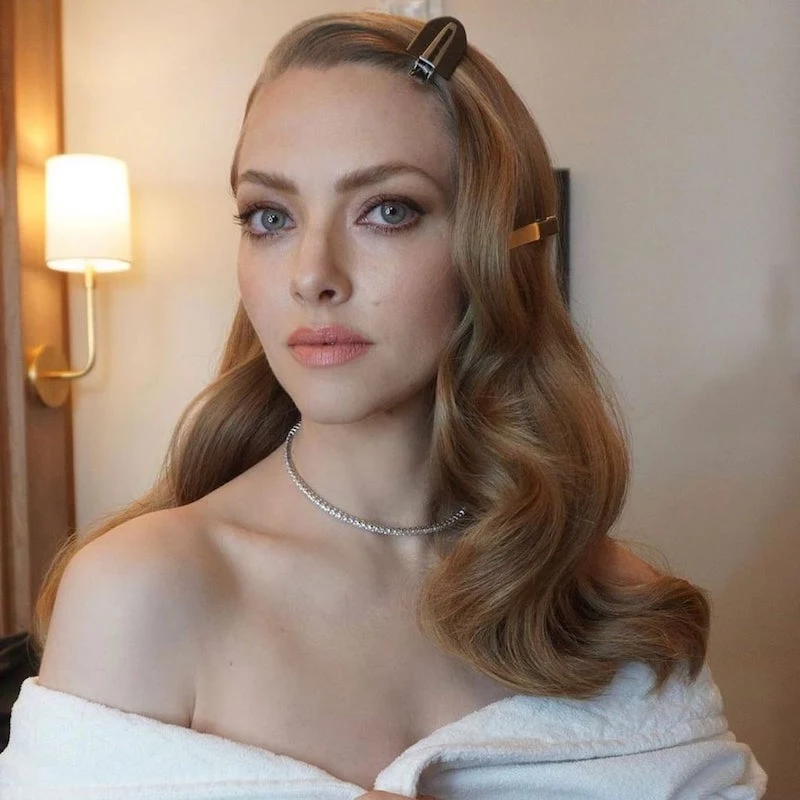
Forget the Curling Iron: How to Master the Classic Wet Set for Curls That Actually Last
I’ve spent more years than I can count with my hands in people’s hair, from the chaos of a busy salon to the precision of styling for photoshoots. My real passion, though, has always been vintage styles. There’s a structure to them, an art form that so many modern, quick-fix techniques just can’t replicate. I’ll never forget my first try at a true wet set as a rookie. I thought I knew how to curl hair, but my first brush-out was a frizzy, tragic mess. It taught me everything. Vintage hair isn’t about curling; it’s about setting.
In this article
So many people see those gorgeous, deep waves from Old Hollywood and immediately grab a curling wand. That’s mistake number one. Those soft, long-lasting styles weren’t born from a blast of direct heat. They were carefully built with a wet set, a process that reshapes the hair for a curl that can genuinely last for days. This isn’t a five-minute hack. This is a lesson in the craft, and honestly, it’s worth learning.

Why This Method Actually Works (The Simple Science)
To get those authentic, classic styles, you need to know what’s happening inside your hair. Your hair strands contain hydrogen bonds, which are basically the hair’s internal scaffolding. When hair gets wet, these bonds break down, making your hair super pliable and ready to be molded into a new shape. A wet set takes full advantage of this.
You’re simply shaping the damp hair around a roller or into a pin curl while those bonds are broken. As your hair dries, the bonds reform in that new curly shape. This creates a powerful, structured curl with incredible memory—far more durable than what you get from a hot tool. A curling iron just flash-fries your hair into a temporary shape. It’s faster, sure, but the results are weaker and tend to fall apart at the first sign of humidity.
By the way, the hair itself plays a big role. Porous hair, often from coloring, tends to grab onto setting lotion and hold a curl beautifully. Fine hair might need a stronger setting lotion to get some backbone, while coarse hair has a natural strength that helps it along. The classic layered haircuts you see in old photos were also designed specifically for this, removing weight so the curls could spring up into those bubbly poodle cuts or soft pageboys.

Your Toolkit: What’s Worth Buying
Having the right tools is the difference between a frustrating mess and a flawless finish. You don’t need a salon’s backroom, but a few key items are non-negotiable. I’ve learned the hard way what’s worth the money.
The Setting Essentials:
- Pin Curl Clips: Get the double-prong metal ones. Seriously. Single-prong clips slip and slide. I bought cheap ones when I started, and they left ugly dents in the hair. You can grab a box of 100 professional-grade clips for about $10 at Sally Beauty or online, and they will last a lifetime.
- Setting Lotion: This is liquid gold for a wet set. The classic choice is Lottabody concentrate, a little bottle that costs around $7 and lasts forever. You dilute it with water, which means you can customize the strength. A good starting point is mixing 1 part concentrate to about 7 parts water in a spray bottle. For fine hair that needs more guts, try a 1-to-5 ratio. If you prefer a modern alternative, a good quality styling mousse applied to damp hair works pretty well, too.
- Rat-Tail Comb: The skinny tail is a must-have for creating clean, precise sections. A decent one is only about $3. The fine teeth are also key for smoothing each strand before you roll it, which is your number one defense against frizz.
- A Hairnet or Silk Scarf: You’ve got to protect your set while it dries. A simple hairnet keeps the curls in place without squashing them. If you’re sleeping on your set (which most of us do), a silk or satin scarf or bonnet is essential. It prevents friction and stops the clips from digging into your scalp.
For the Brush-Out:

- Boar Bristle Brush: This is your magic wand. A brush with natural boar bristles is the key to transforming tight curls into soft, sculpted waves. It smooths the hair cuticle, fights frizz, and helps blend everything together. A cheap plastic brush will just create a static-filled mess. Expect to spend between $15 and $30 for a good one—it’s a worthy investment.
- Wide-Tooth Comb: Good for gently breaking up the curls right after you take the clips out, before you start the real brushing.
The Foundation: Nailing the Pin Curl Wet Set
The pin curl is the fundamental building block of most of these classic looks. It takes patience, so don’t get discouraged. Your first few attempts might be a little wobbly, but every stylist has rolled thousands of these to get the muscle memory down.
Step 1: Prep Your Hair
Start with clean, damp hair—about 70% dry is the sweet spot. If you squeeze a section, no water should drip out, but it should still feel cool and damp. Too wet, and it will take forever to dry. Too dry, and the set won’t take. Mist your hair with your setting lotion mix until it’s evenly coated but not dripping.

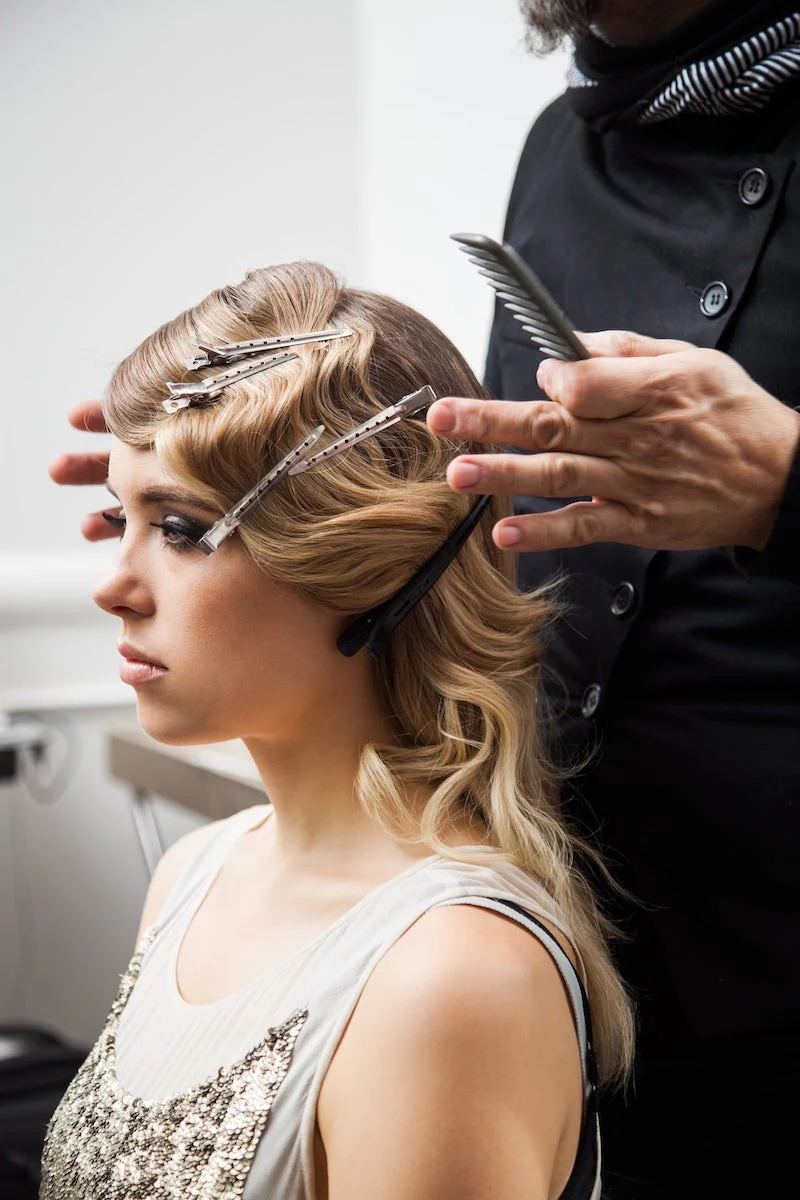
Step 2: Section Everything Off
Use your rat-tail comb to create your part. A deep side part is classic for those glam waves. Then, section your hair to keep things organized. I usually do two sections in the front, two at the crown, and two at the nape. Clip away the parts you aren’t working on. It makes the whole process so much cleaner.
Step 3: Roll the Perfect Pin Curl
Take a small section of hair, about one-inch square, and comb it perfectly smooth. Now, ribbon the hair by holding the strand taut and running it between your thumb and forefinger. This flattens the cuticle for a shinier result.
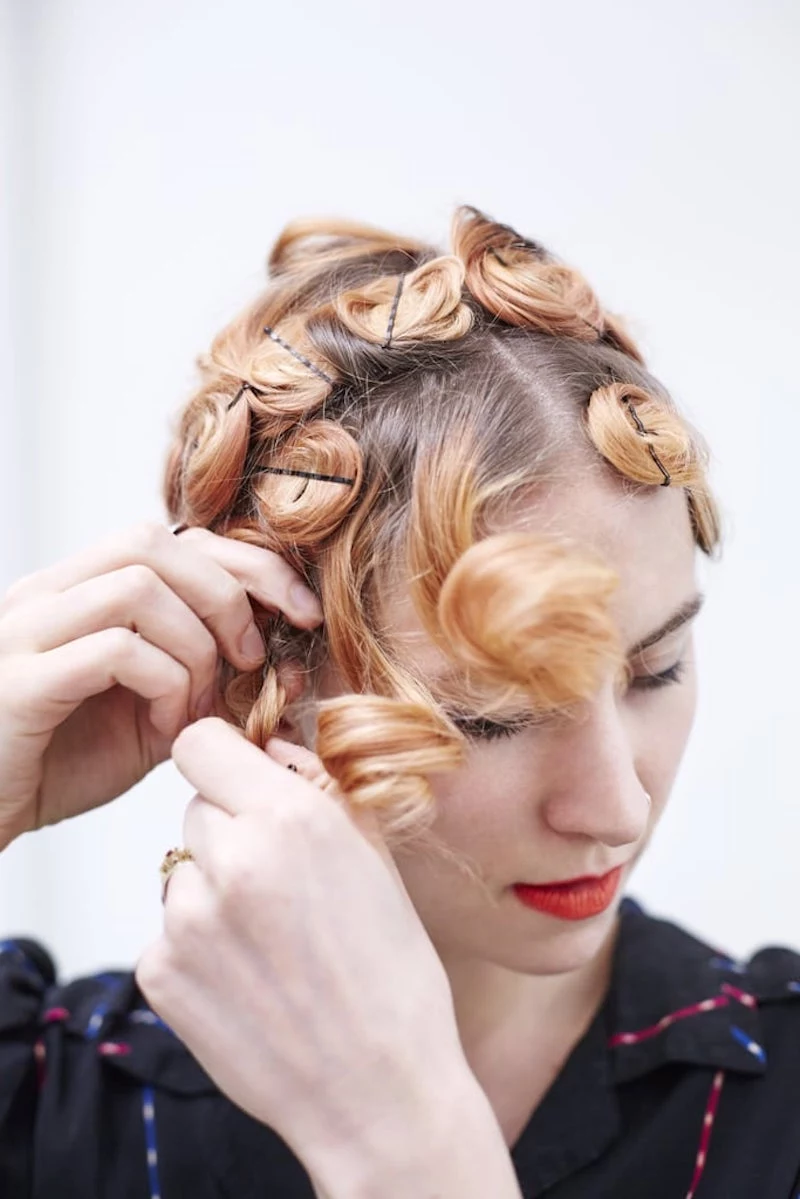
Place your index finger at the end of the hair and start rolling the flat ribbon of hair around it, moving toward your scalp. Think of it like a tiny, flat roll of tape. And a huge tip: do NOT twist the hair. Twisting creates a ropey curl that just won’t brush out into a soft, uniform wave. Once you reach the scalp, slide your finger out, and you should have a neat little circle of hair. Secure it flat against your head with a double-prong clip through the center.
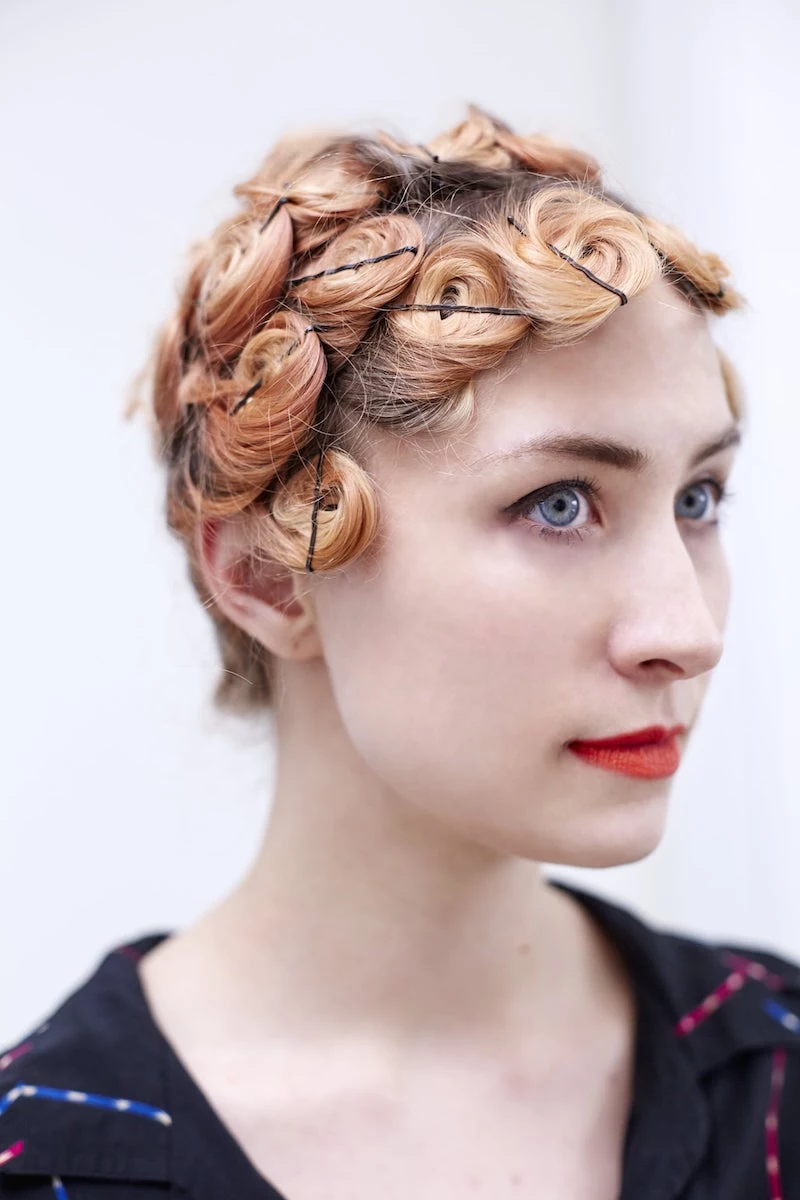
Good to know: The direction you roll matters! For soft waves that frame your face, roll the curls on the sides down and towards your face. For big, bouncy volume, place the curl directly on its base (the scalp section it came from). For less volume, place it slightly off-base.
Step 4: The Waiting Game (Drying)
The professional method is sitting under a hooded dryer, which gives you a perfectly dry set in about an hour. At home, you’re probably air-drying. Cover your set with a hairnet and let it dry completely. This can take 8-12 hours, which is why most people set their hair before bed.
Heads up! I can’t stress this enough. If you sleep on your set, protect your scalp. I once had a client come in with painful pressure spots from sleeping on bare metal clips. Always wear a thick satin turban or bonnet over your hairnet to cushion everything.
Quick Troubleshooting:
- Frizzy Curls? You probably didn’t smooth the section enough, or you accidentally twisted the hair while rolling.
- Weak Curls? Your hair was either too dry when you started, you didn’t use enough setting lotion, or—the most common culprit—you took the clips out before your hair was 100% bone dry.
- Dents in Your Curls? Your clips weren’t placed correctly. They should hold the curl flat without pinching or creating a ridge.
- Set Falls Out Instantly? If your hair just won’t hold a curl, it might not be porous enough. A lesser-known trick is to wash with a clarifying shampoo first (and skip the conditioner!) to give the hair shaft a bit more grip.
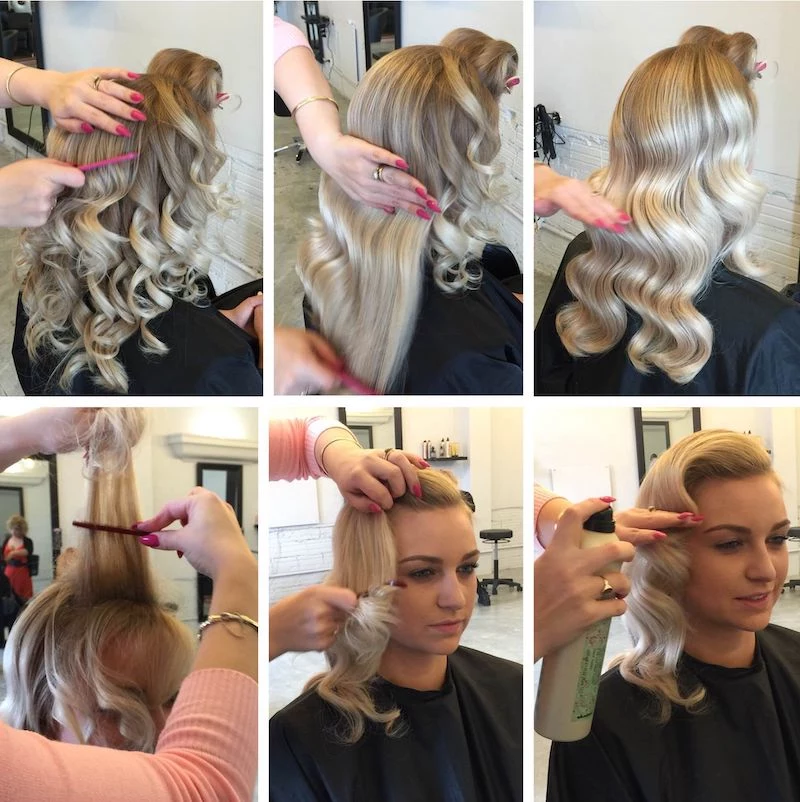
The Brush-Out: Where the Magic Happens
The brush-out is where the real artistry comes in, and it’s the part that scares everyone. You’ll take out the clips and see a head full of tight, separate curls. Don’t panic! This isn’t the final look.
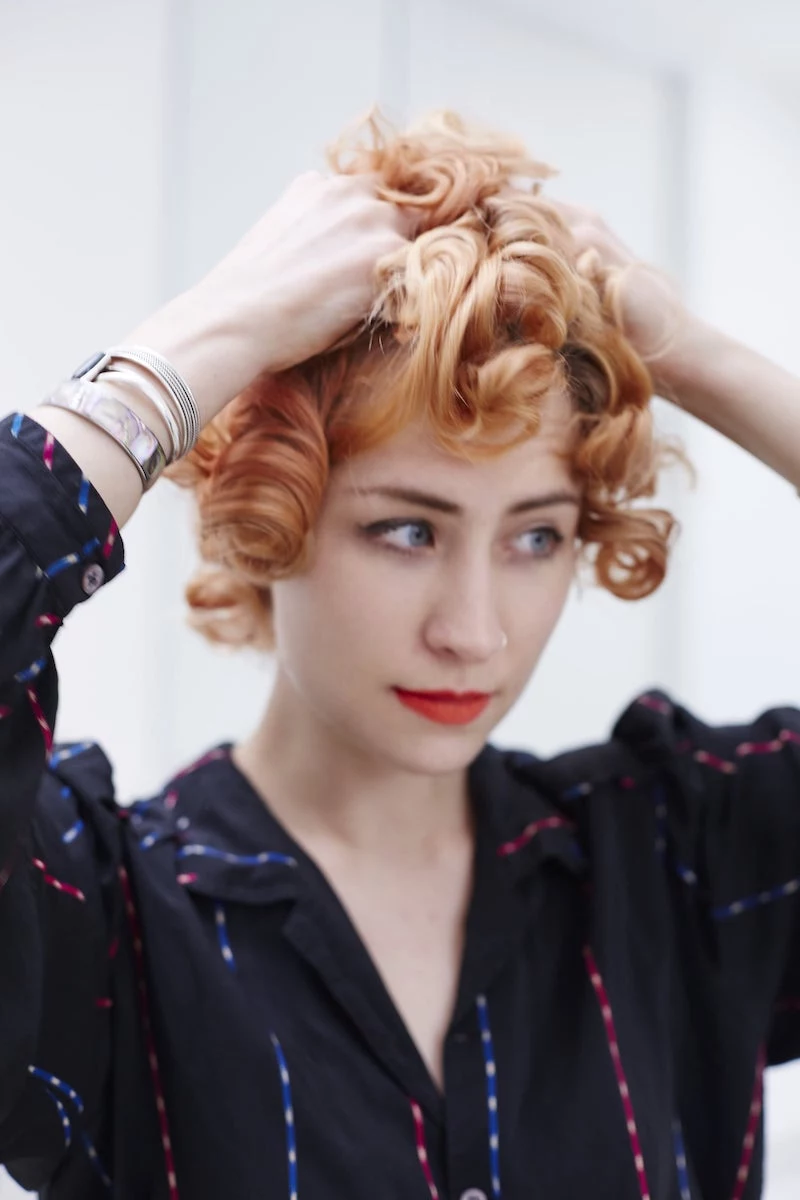
Step 1: The Gentle Break-Up
Once you’re positive every curl is dry, take out all the clips. Gently run your fingers or a wide-tooth comb through the curls to separate them. Your hair will look huge and a bit wild. This is totally normal.
Step 2: The Big Brush
Now, grab your boar bristle brush. This feels wrong, but you have to trust the process. You need to brush through your curls with intention. Start at the ends and work your way up, brushing continuously. Your hair will explode into a fluffy cloud. This is the exact moment everyone panics and thinks they’ve ruined it. DON’T STOP. This is the magic happening. Keep brushing, and you’ll see that fluff start to calm down and form a cohesive wave pattern.
I always tell my trainees:
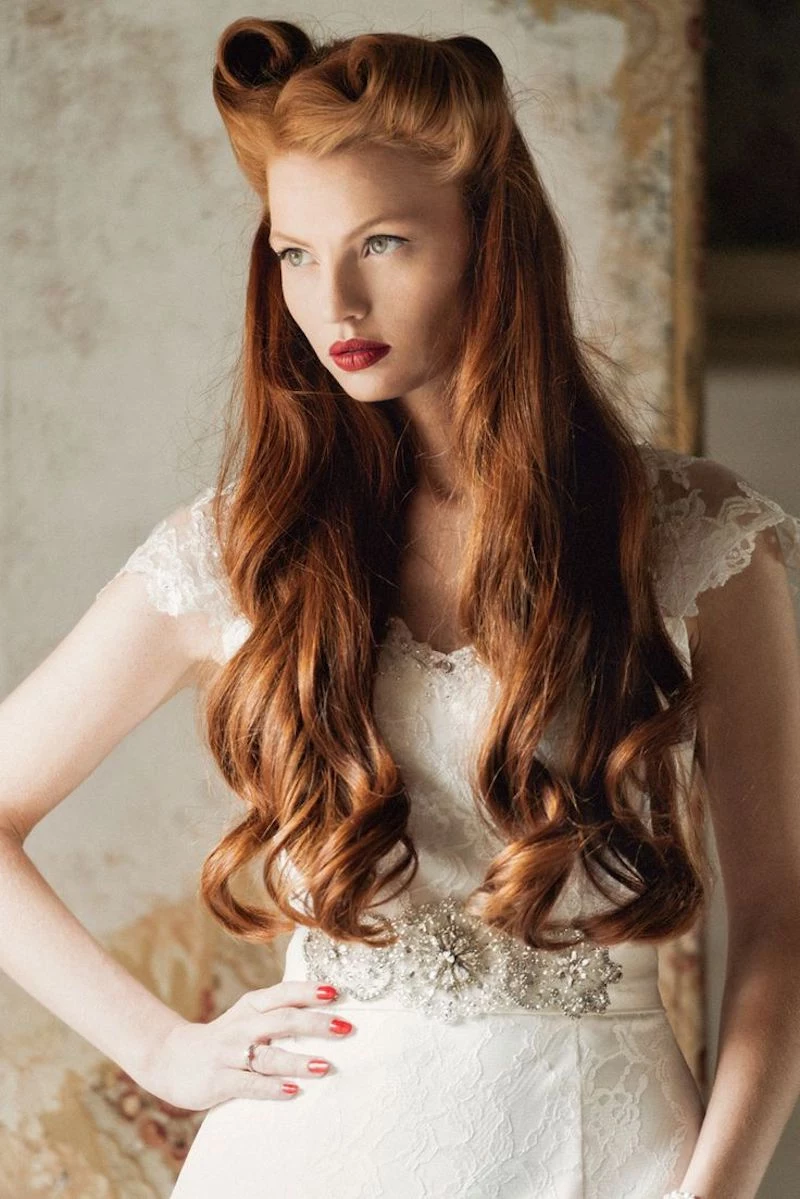
Inspirational Gallery
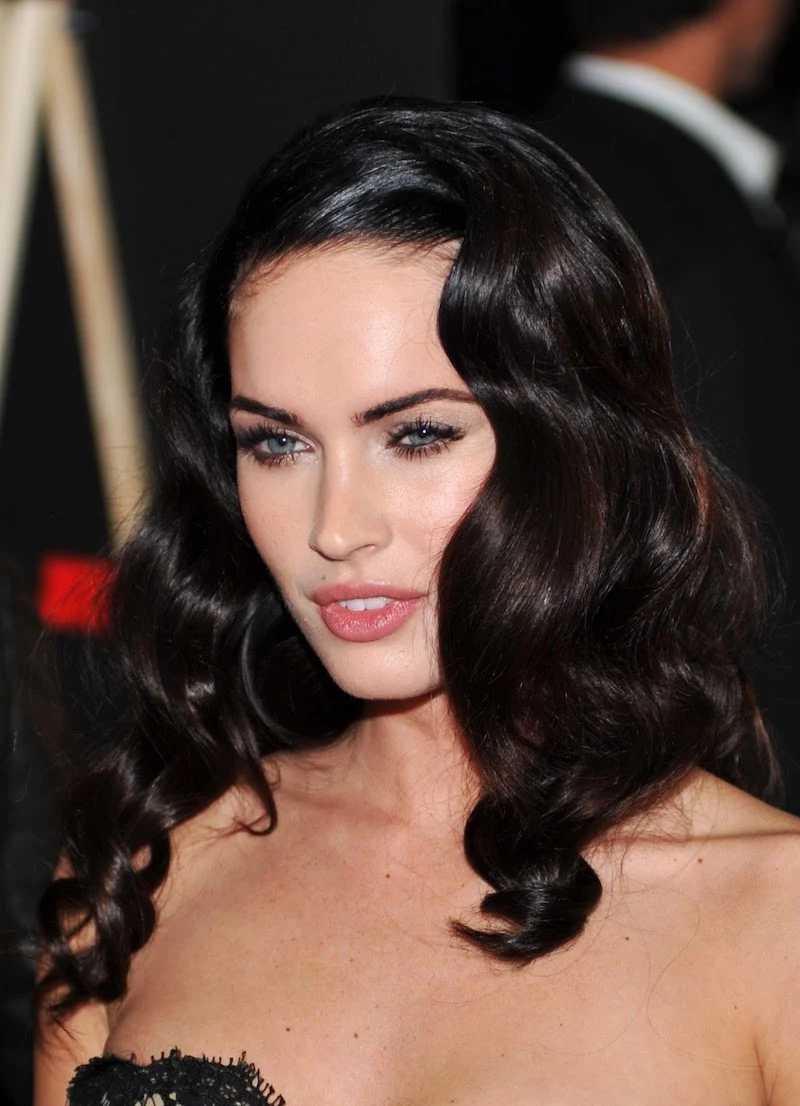
- Perfectly sculpted waves that flow together seamlessly.
- A continuous, defined ‘S’ shape from root to tip.
The secret? The direction of your pin curls. For a classic, unified wave pattern, ensure all the curls in one horizontal row are wound in the same direction. Then, alternate the direction for the row below it. This creates the iconic push and pull that defines a true vintage wave.
Magnetic Rollers: These smooth plastic cylinders create the sleekest, most polished curls. Because they are non-porous, the hair dries smoothly against the surface, resulting in high shine and a very defined, crisp curl ideal for glamorous Hollywood looks.
Foam Rollers: Softer and more forgiving, these are perfect for comfort if you plan to sleep on your set. They tend to absorb a little moisture, which can create a slightly softer, less-defined curl. They’re excellent for achieving bouncy, full-bodied pageboys or poodle styles.
For a pin-up perfect set, stick with magnetics; for everyday volume and comfort, foam is your friend.
Choosing the right setting lotion is as crucial as the technique itself. It provides the ‘memory’ and structure for your style. Don’t just douse your hair; apply it to sections as you work, ensuring even dampness for a consistent result.
- For classic, firm hold: Lottabody Setting Lotion is the gold standard. Dilute it with water in a spray bottle to find the perfect strength for your hair type.
- For a softer, flexible hold: Try a modern foam wrap lotion like Motions Foaming Wrap Lotion or Nairobi Wrapp-It Shine Foaming Lotion. They provide great hold with less crunch.
In the 1950s, a well-executed wet set was designed to last from one weekly salon visit to the next.
To give your modern set that same staying power, preservation is key. Sleeping on a cotton pillowcase creates friction that causes frizz and ruins the curl pattern. Protect your hard work by wrapping your hair in a silk or satin scarf, or by sleeping in a satin bonnet. This simple step dramatically reduces friction, allowing you to wake up with curls that just need a light brush to revive.

The ritual of the wet set is a moment of deliberate slowness in a fast-paced world. It’s the opposite of the 10-minute blast from a hot tool. It’s the tactile pleasure of sectioning the hair, the scent of the setting lotion, the neat rows of pins or rollers. Put on a vintage jazz record, listen to a podcast, and transform a hair routine into a restorative act of self-care that connects you to generations of women before.

My brush-out is a frizzy, separated mess instead of a smooth wave. What went wrong?
This is the most common pitfall, and it usually comes down to one thing: moisture. Your hair must be 100% bone dry before you even think about removing a single pin or roller. Even a hint of dampness will cause the hydrogen bonds to collapse improperly, resulting in frizz. If you’re air-drying, be patient. If you’re using a bonnet dryer, test a curl in an inconspicuous spot before taking everything down. The wait is always worth it.

The secret weapon: Don’t underestimate the power of a good rat-tail comb. Its fine-toothed body is perfect for creating clean, precise partings and smoothing each section of hair before you roll it. The metal or plastic tail is the ideal tool for sectioning off the next piece of hair with surgical precision, ensuring your setting pattern is clean and organized, which is the foundation of a flawless final look.
- A good quality boar bristle brush (like a Denman or Mason Pearson) for smoothing.
- A rat-tail comb for clean partings.
- Double-prong pin curl clips or smooth magnetic rollers in various sizes.
- A spray bottle for keeping hair evenly damp.
- Your chosen setting lotion or foam wrap.
- End papers to keep the tips of your hair from ‘fish-hooking’.


