The Ultimate Guide to Nailing the Perfect Women’s Pompadour
I’ve seen so many hairstyles come and go over the decades, but a few just stick around for a reason. The pompadour is one of them. It’s more than just a haircut; it’s a shot of pure confidence built on some seriously solid techniques. I’ll never forget a client, a musician, who came in wanting a big change from her long, lifeless hair. We went for a bold, disconnected pompadour, and the shift was immediate. It wasn’t just her hair that got a lift—her entire vibe changed. That’s the magic of this style.
In this article
To many, a pompadour looks like it’s just slicked-back hair. But honestly, for a stylist, it’s like a small feat of engineering. It’s all about defying gravity using a good cut, the right products, and a little bit of know-how. This style has a rich history, from traditional royal courts to mid-century rockabilly icons, and now it’s found a cool, modern edge in women’s styling. So, let’s get into how you can make it work for you, from the basic science to the final spritz of hairspray.
Why Your Hair Does (or Doesn’t) Cooperate
Before you even think about styling, you need to understand what you’re working with. A pompadour stands up, and to get that to happen, a little bit of hair science goes a long way. When you use a blow-dryer, the heat temporarily softens the bonds in your hair, making it moldable. As it cools, those bonds reset in the new shape. This is why the ‘cool shot’ button on your hairdryer is your best friend—it flash-cools the hair, locking in that precious volume before gravity takes over.
Your hair’s natural texture plays a huge role. Here’s the breakdown:
- Fine Hair: This type is lightweight, which sounds good, but it often lacks the guts to hold a shape. The secret here is product, product, product. You need something that adds grit and creates a sort of scaffolding. A volumizing mousse is perfect for this.
- Medium Hair: This is the sweet spot. It has enough natural body to hold its shape but isn’t so heavy that it immediately collapses. It’s the most versatile for a pompadour.
- Thick or Coarse Hair: This hair is strong, but its weight is the biggest challenge. A solid haircut is non-negotiable here. You’ll also need a strong-hold pomade or wax to keep it under control.
- Curly Hair: Oh, a curly pompadour is a thing of beauty! You can’t fight the curls, you have to work with them. It’s all about shaping the curls into that classic upward sweep, usually with a diffuser and curl-defining creams to keep frizz at bay.
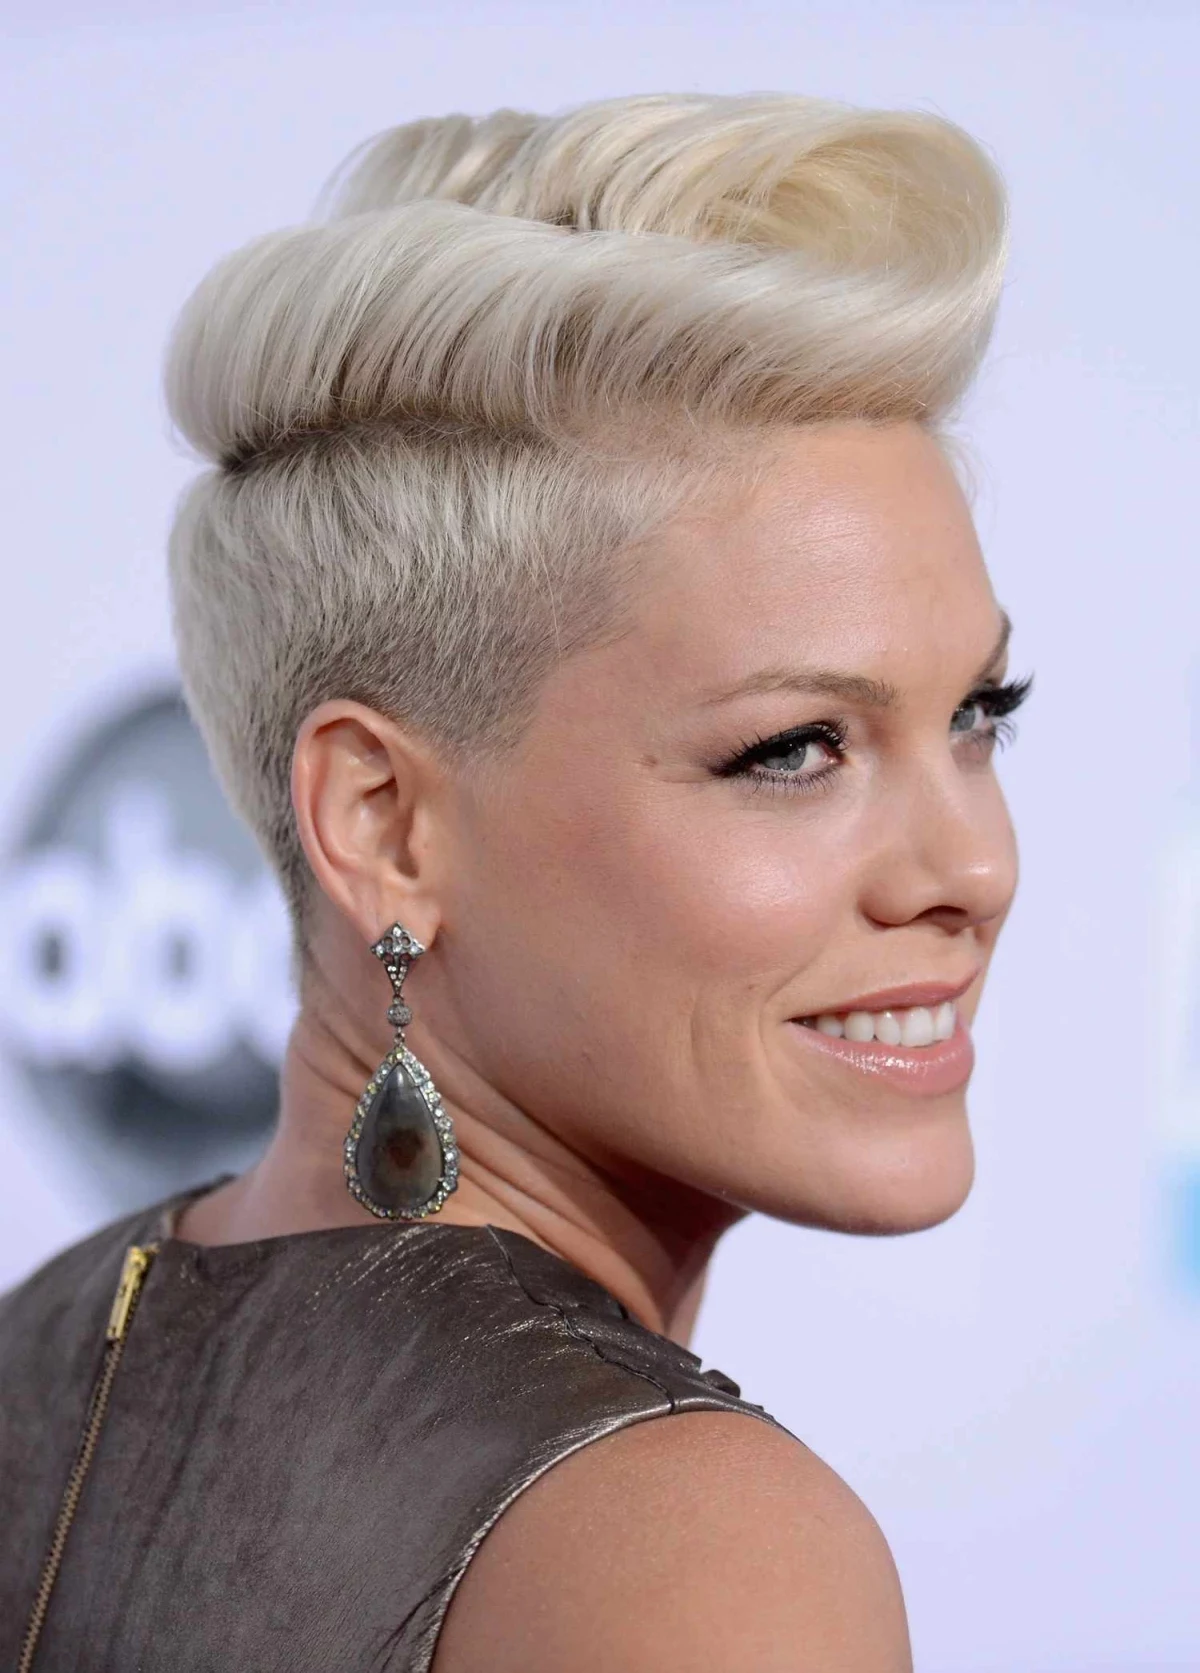
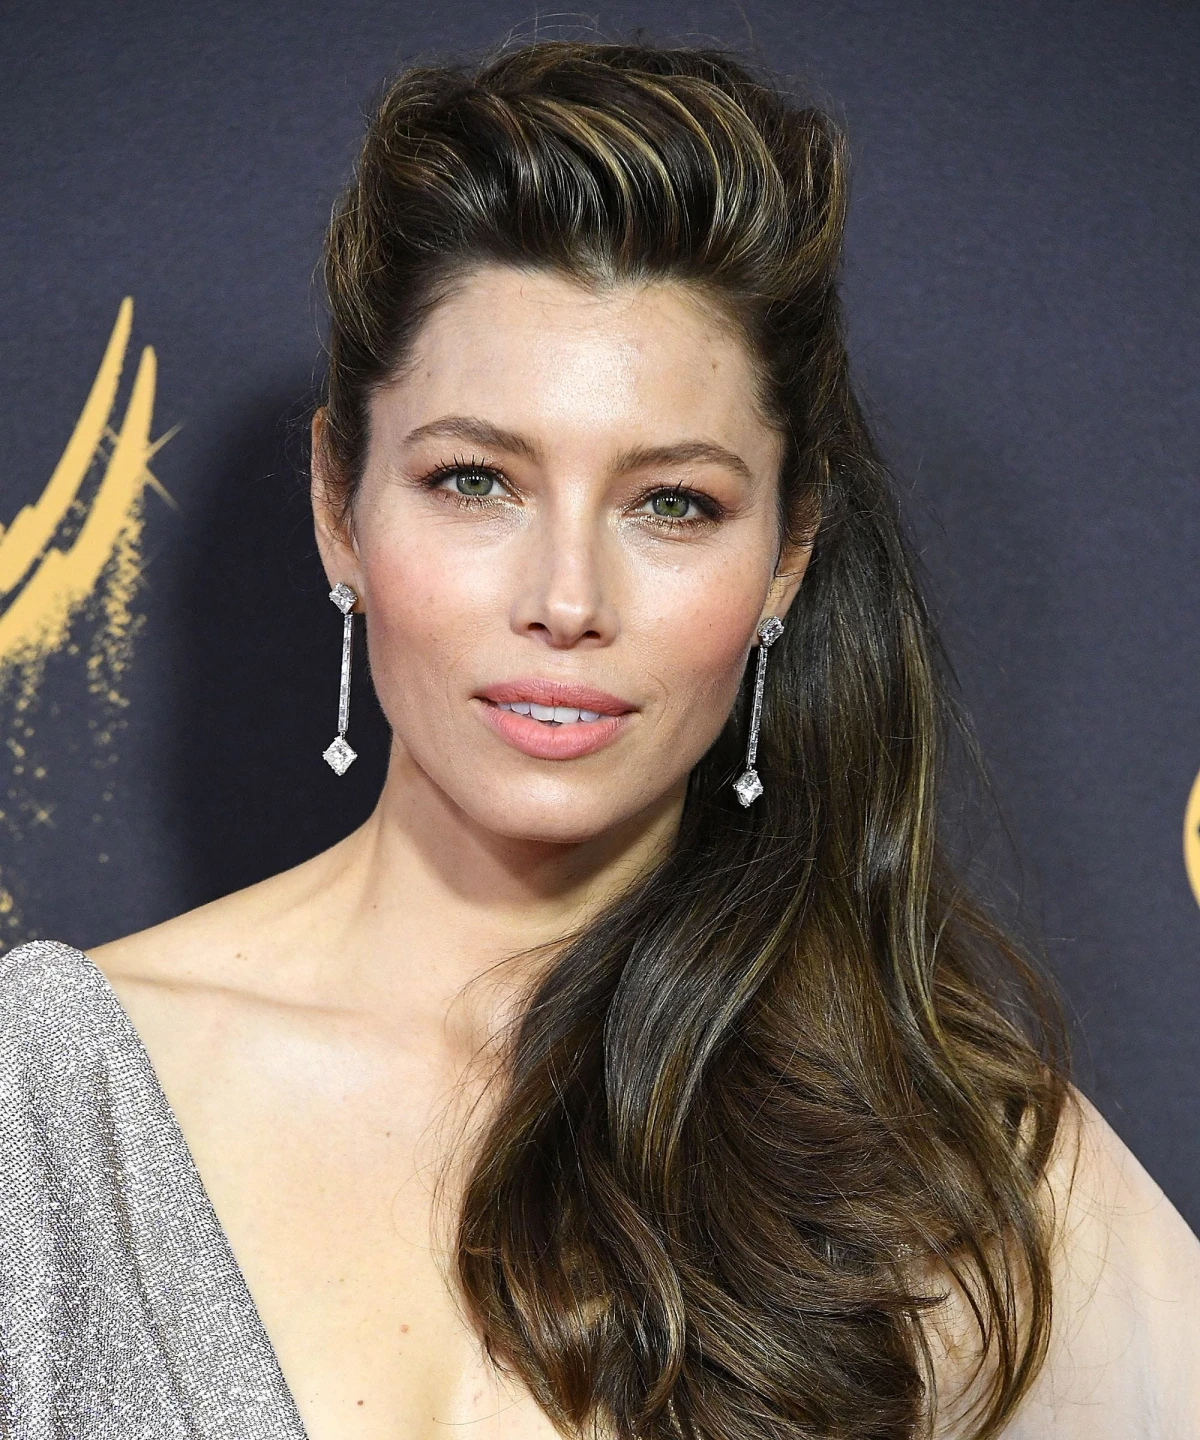
The Cut: Your Style’s Foundation
Let’s be real: you can’t style your way out of a bad haircut. A good pompadour cut is specifically designed to push the hair where you want it to go. If your cut is wrong, you’ll be fighting an uphill battle every single morning.
The Dedicated Pompadour Cut
This is for when you’re ready to commit. It’s a precision style, often called a ‘disconnected’ cut because the top is left much longer than the sides. When you go to the salon, knowing what to ask for is half the battle.
Quick Tip: What to Tell Your Stylist
Don’t be shy! To get the cut you want, say something like: “I’d like a disconnected pompadour. I want the top section left long, especially toward the front, with the sides and back faded. Let’s start with a #2 guard on the clippers for the sides and blend it up.” Being specific helps them see your vision.
The pros will section out the top in a horseshoe shape along your parietal ridge. (By the way, you can find yours by feeling for the corner of your head where it starts to curve down from the flat top part. That’s it!) Everything inside that horseshoe stays long, and everything outside gets cut short, either with clippers for a sharp fade or with scissors for a softer look. The top is then layered, keeping the front the longest, so it naturally wants to sweep back.
Heads up on maintenance: A sharp fade looks amazing but requires upkeep. You’ll likely need a touch-up every 3-4 weeks to keep the lines clean. Budget-wise, expect to pay between $40 and $70 for this kind of detailed maintenance, as it’s more involved than a standard trim.
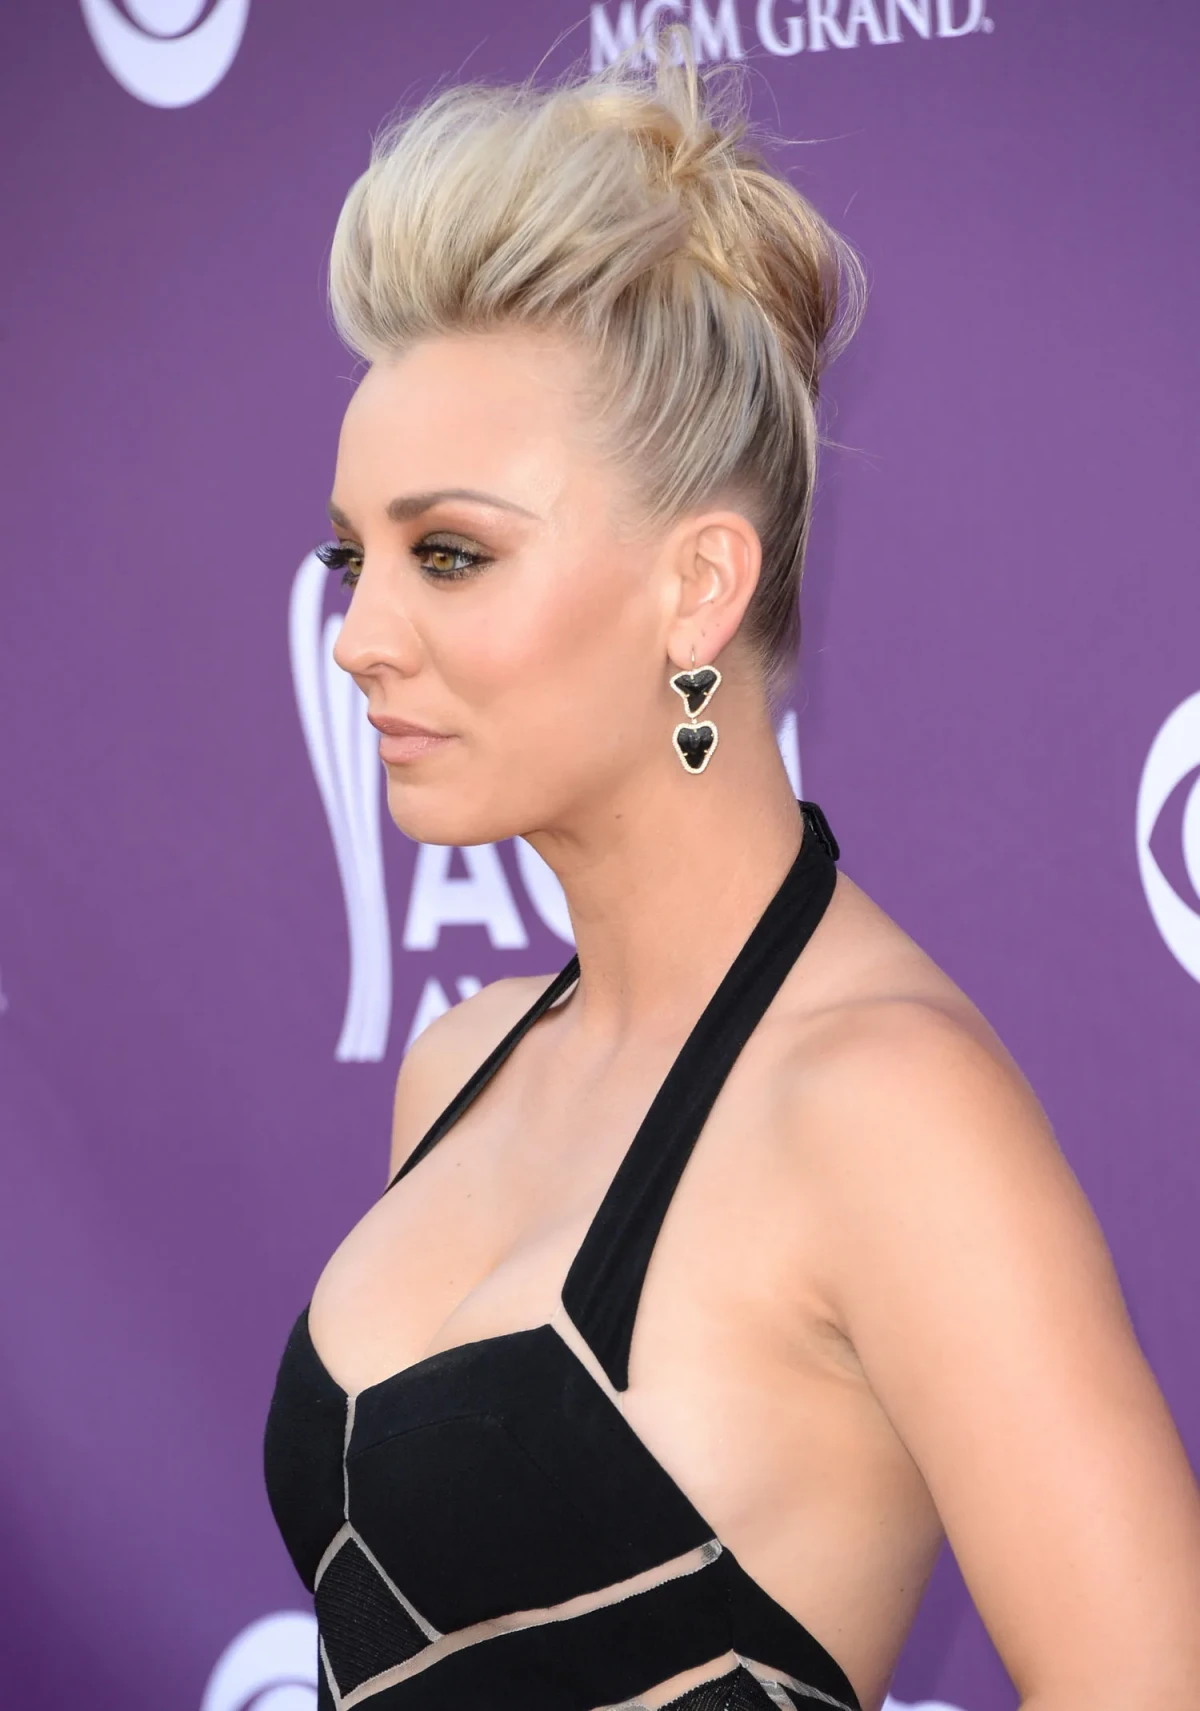
The Long-Hair “Faux” Pomp
Got long hair and just want to dip your toe in? No problem. You don’t need a special cut. You’re just styling the front section of your hair. You’ll isolate a triangular section at your front hairline, style it up, and then do whatever you want with the rest—a ponytail, a bun, or just leave it down. It’s all the style with none of the commitment.
The Ultimate Styling Routine
Alright, let’s get down to the nitty-gritty. With the right cut, styling is so much easier. But before you start, let’s talk about your toolkit.
Your Pompadour Starter Kit:
- Tools: You’ll need a blow-dryer with a nozzle, a vent brush, a medium-sized round brush (a 1.5 to 2-inch barrel is great for most hair lengths), and a fine-tooth comb for teasing.
- Prep Products: For a budget-friendly option, a mousse like Not Your Mother’s Plump for Joy ($7-9) is fantastic for fine hair. If you’re looking for a salon-quality choice, I love the Oribe Maximista Thickening Spray (around $39), but a little goes a long way.
- Finishing Products: For a water-based pomade that washes out easily, try Suavecito Pomade (about $13). For a stronger, shinier oil-based option, Reuzel Green Pomade (around $20) is a classic. You’ll find these at places like Target, Sally Beauty, or online.
Be patient with yourself! If you’re a beginner, plan for this to take about 20-30 minutes the first few times. Once you get the hang of it, you can probably knock it out in 15.

Step 1: Prep on Damp Hair
Start with towel-dried hair. It should be damp, not dripping wet. Work your chosen prep product (like a volumizing mousse) through your hair, making sure you get it right down to the roots. This is the biggest rookie mistake—applying product only to the ends. The lift comes from the base!
Step 2: The All-Important Blow-Dry
This is the step that makes or breaks your pompadour. Seriously. Use the nozzle on your dryer to direct the airflow. With your vent brush or fingers, pull the hair at your roots straight up and back, drying them in that direction. Once the roots are about 80% dry, switch to your round brush to smooth the rest of the hair, still directing it up and back. When a section is fully dry, hit it with the cool shot button for 10 seconds to lock it in place.
The No-Time Quick Win: If you’re in a rush, just focus on this step. Getting those roots blow-dried upwards will give you 80% of the look in just a few minutes.

Step 3: Build Your Foundation (Gentle Teasing!)
Proper backcombing isn’t about creating a bird’s nest. It’s about building a soft cushion for support. Take a one-inch section of hair behind your front hairline and hold it straight up. Take your fine-tooth comb, place it a couple of inches from your scalp, and give it two or three gentle pushes down toward the scalp. It’s a smooth, controlled push, not a frantic sawing motion. Repeat on another section or two behind that one. The very front section is left smooth to drape over the top.
Step 4: Shape and Finish
Now for the fun part. Gently comb that smooth front section back over your teased cushion. Take a pea-sized amount of your finishing pomade or wax and rub it between your palms until it’s warm and invisible. This is key—never put a cold clump of product in your hair. Lightly skim your hands over the surface to tame flyaways and define the shape. For pomades, it’s good to know the difference: Water-based pomades generally offer a medium-to-strong hold with a natural to medium shine, and the best part is they wash out with just water. Oil-based pomades, on the other hand, usually provide a much stronger hold and a higher shine, but they can be a pain to wash out, often requiring a special clarifying shampoo.

Once it looks perfect, set it with a light mist of hairspray held about a foot away from your head.
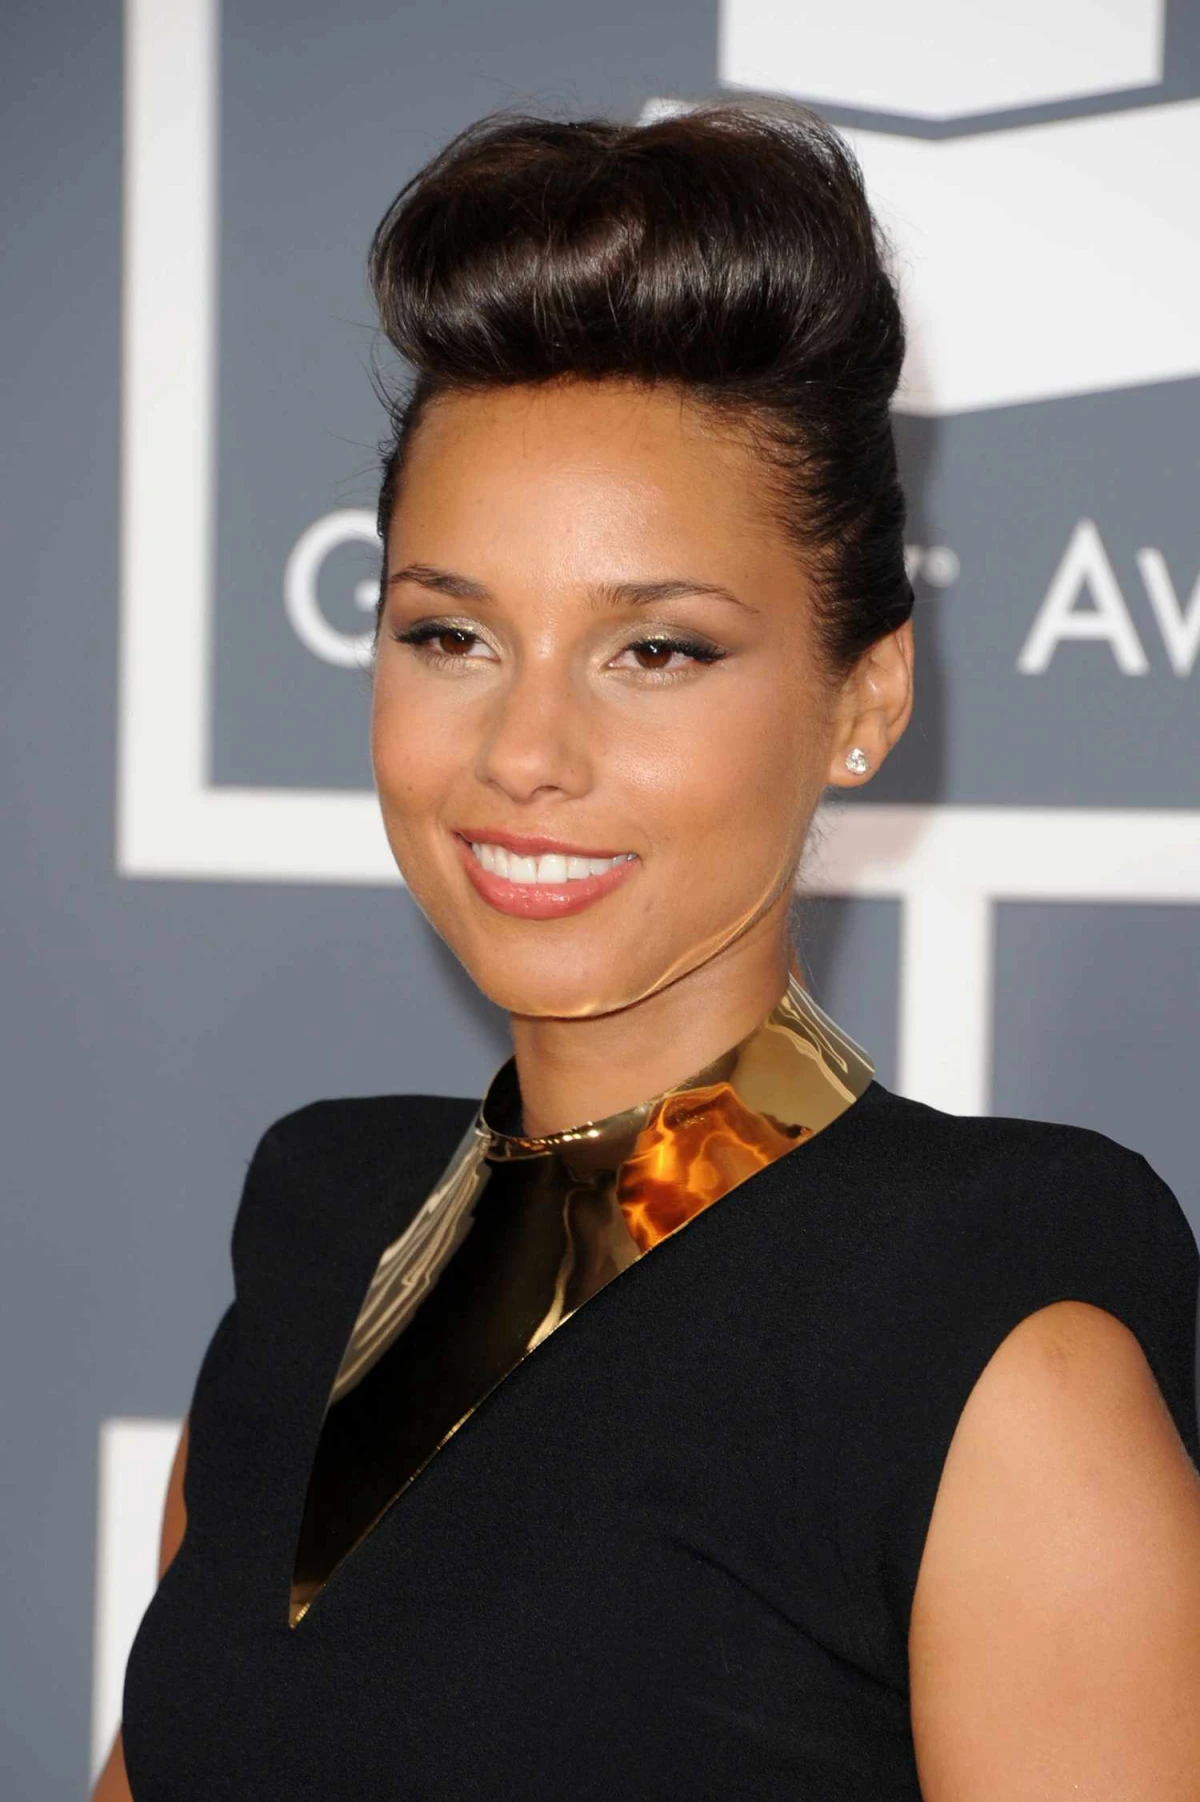
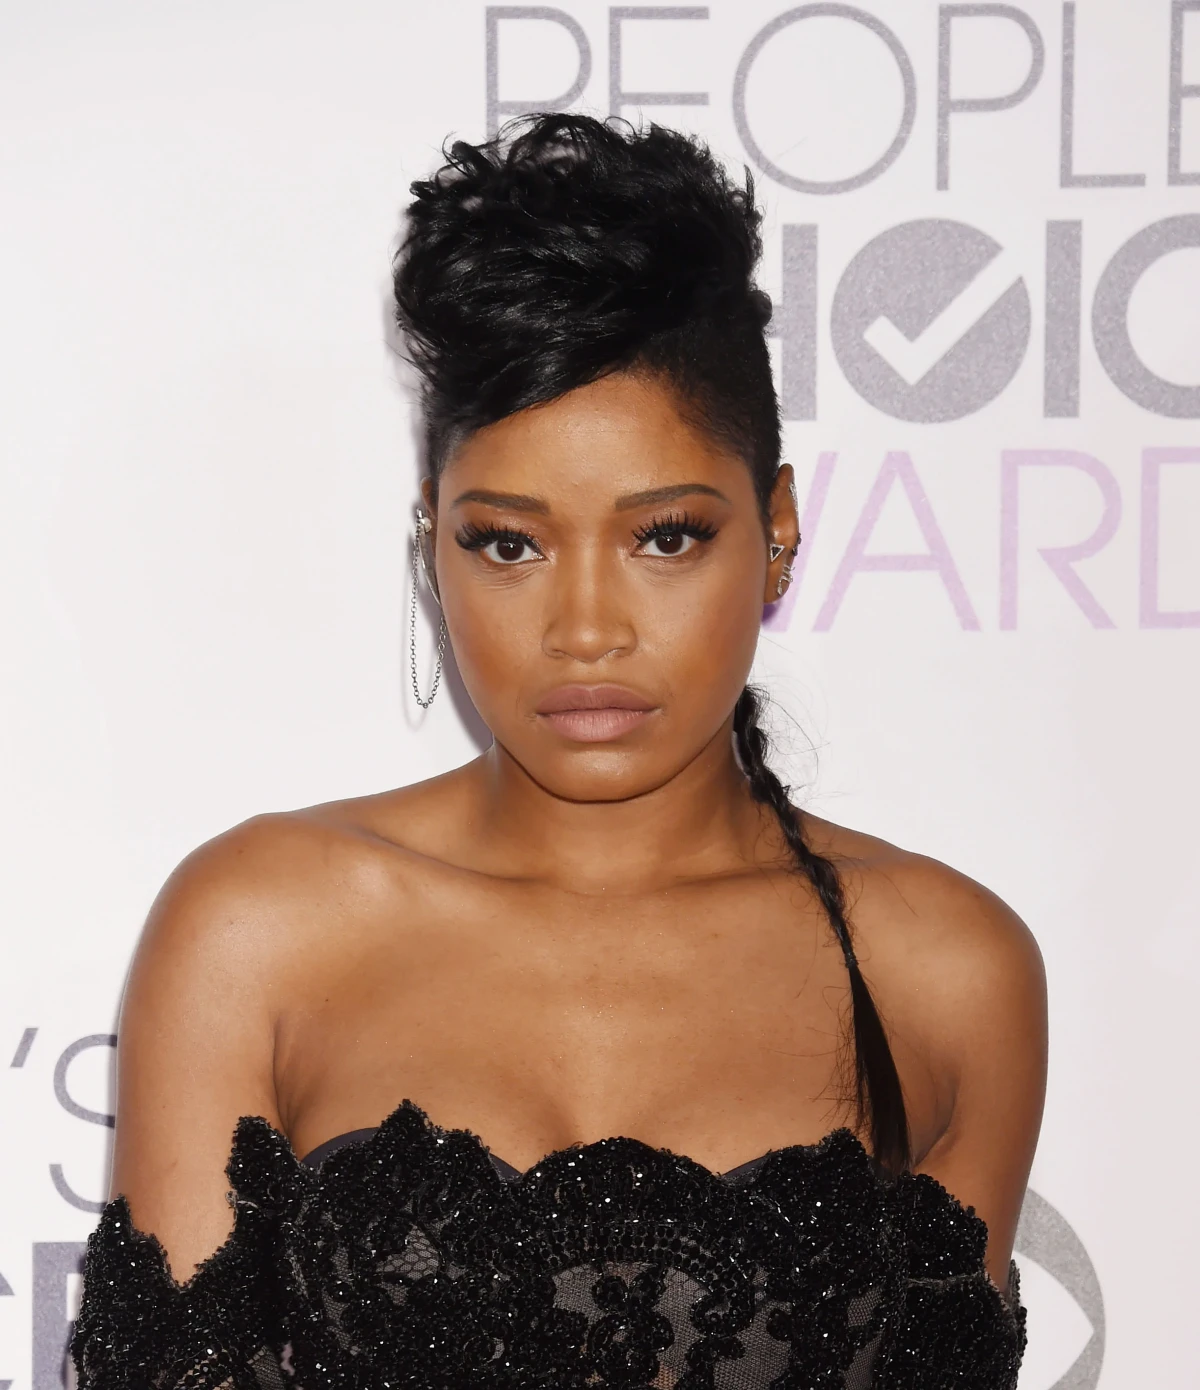
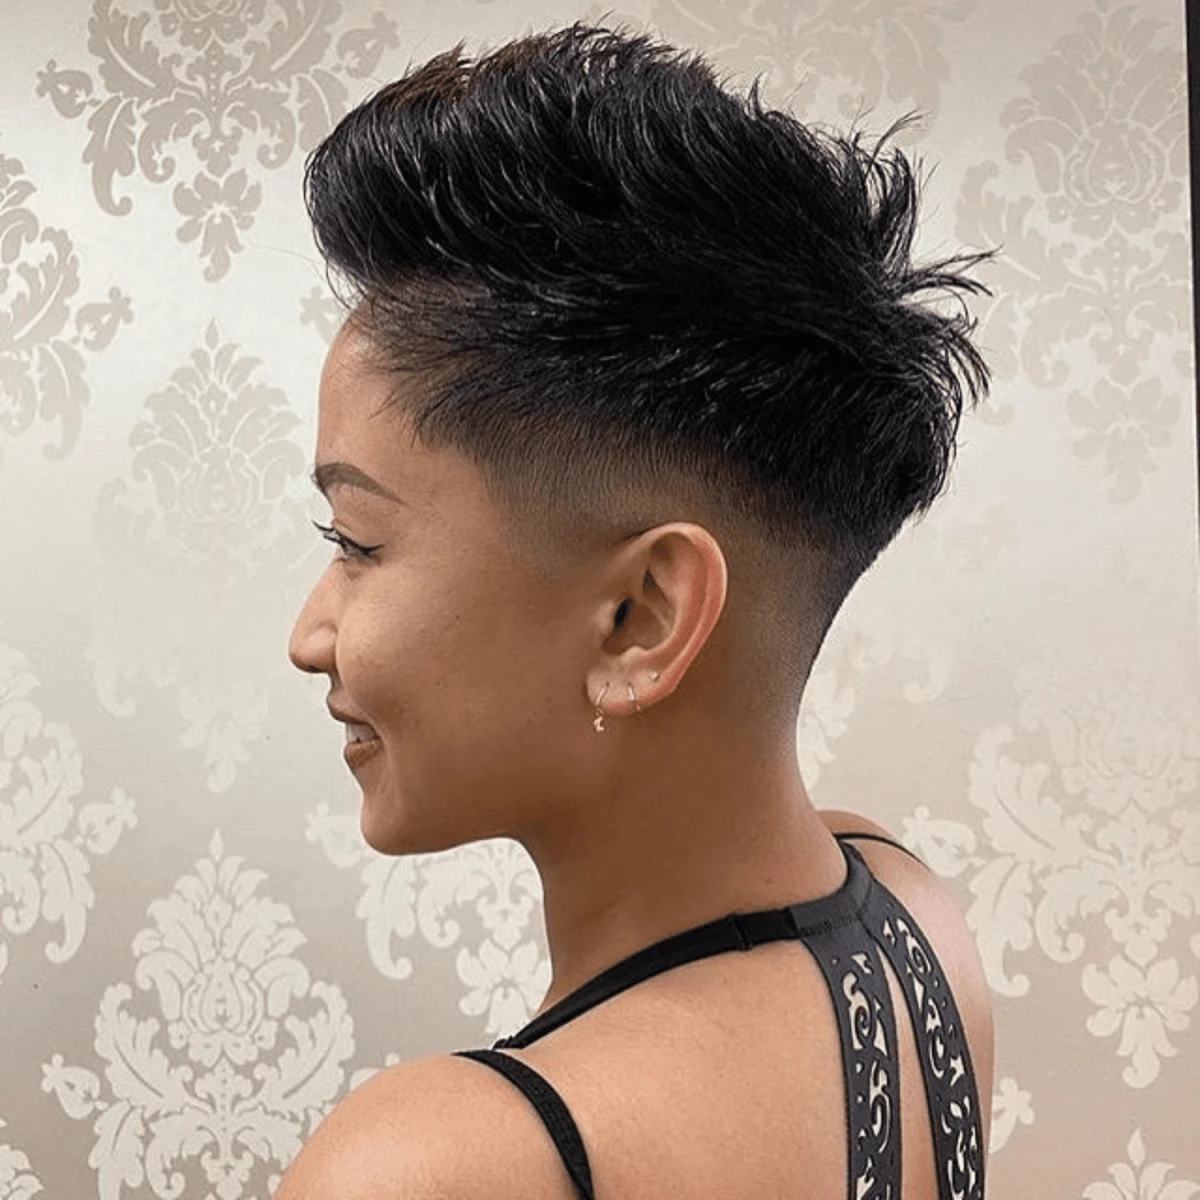
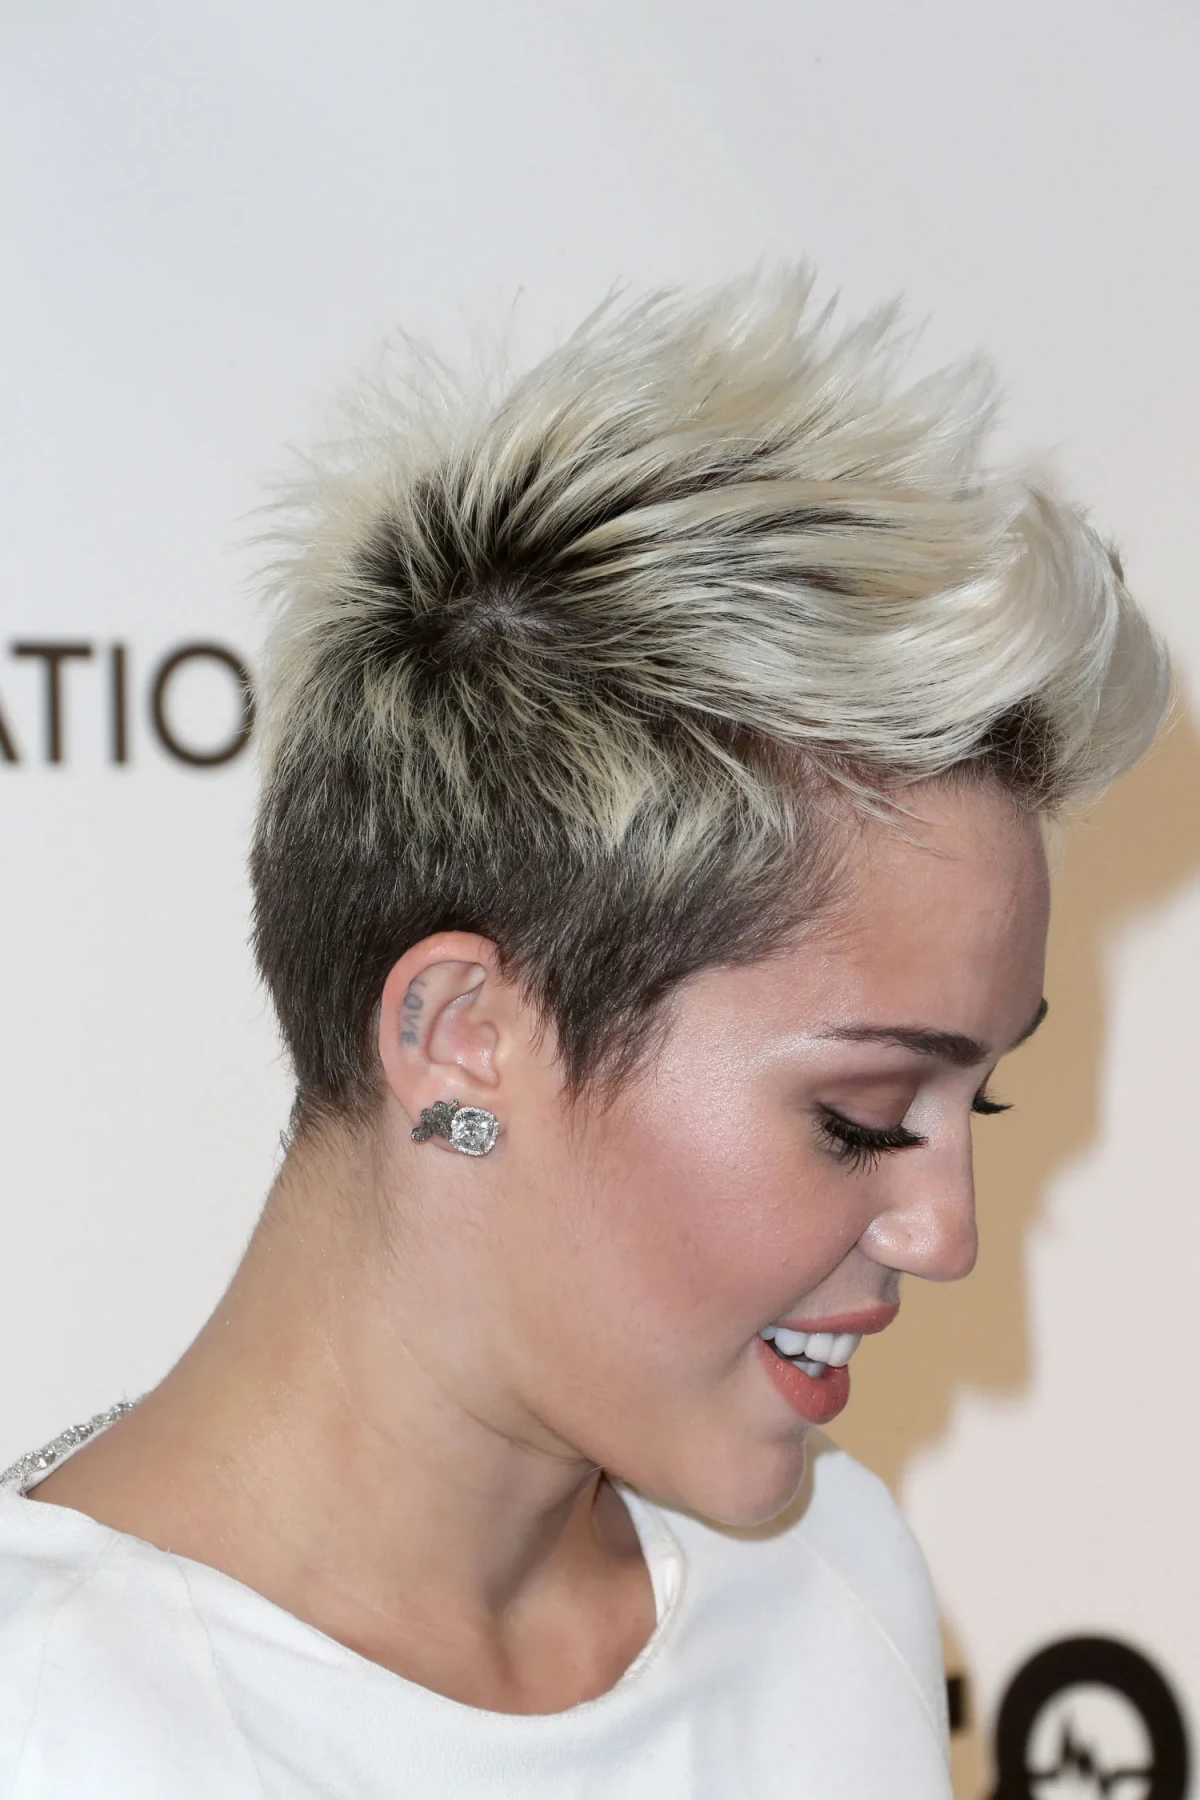
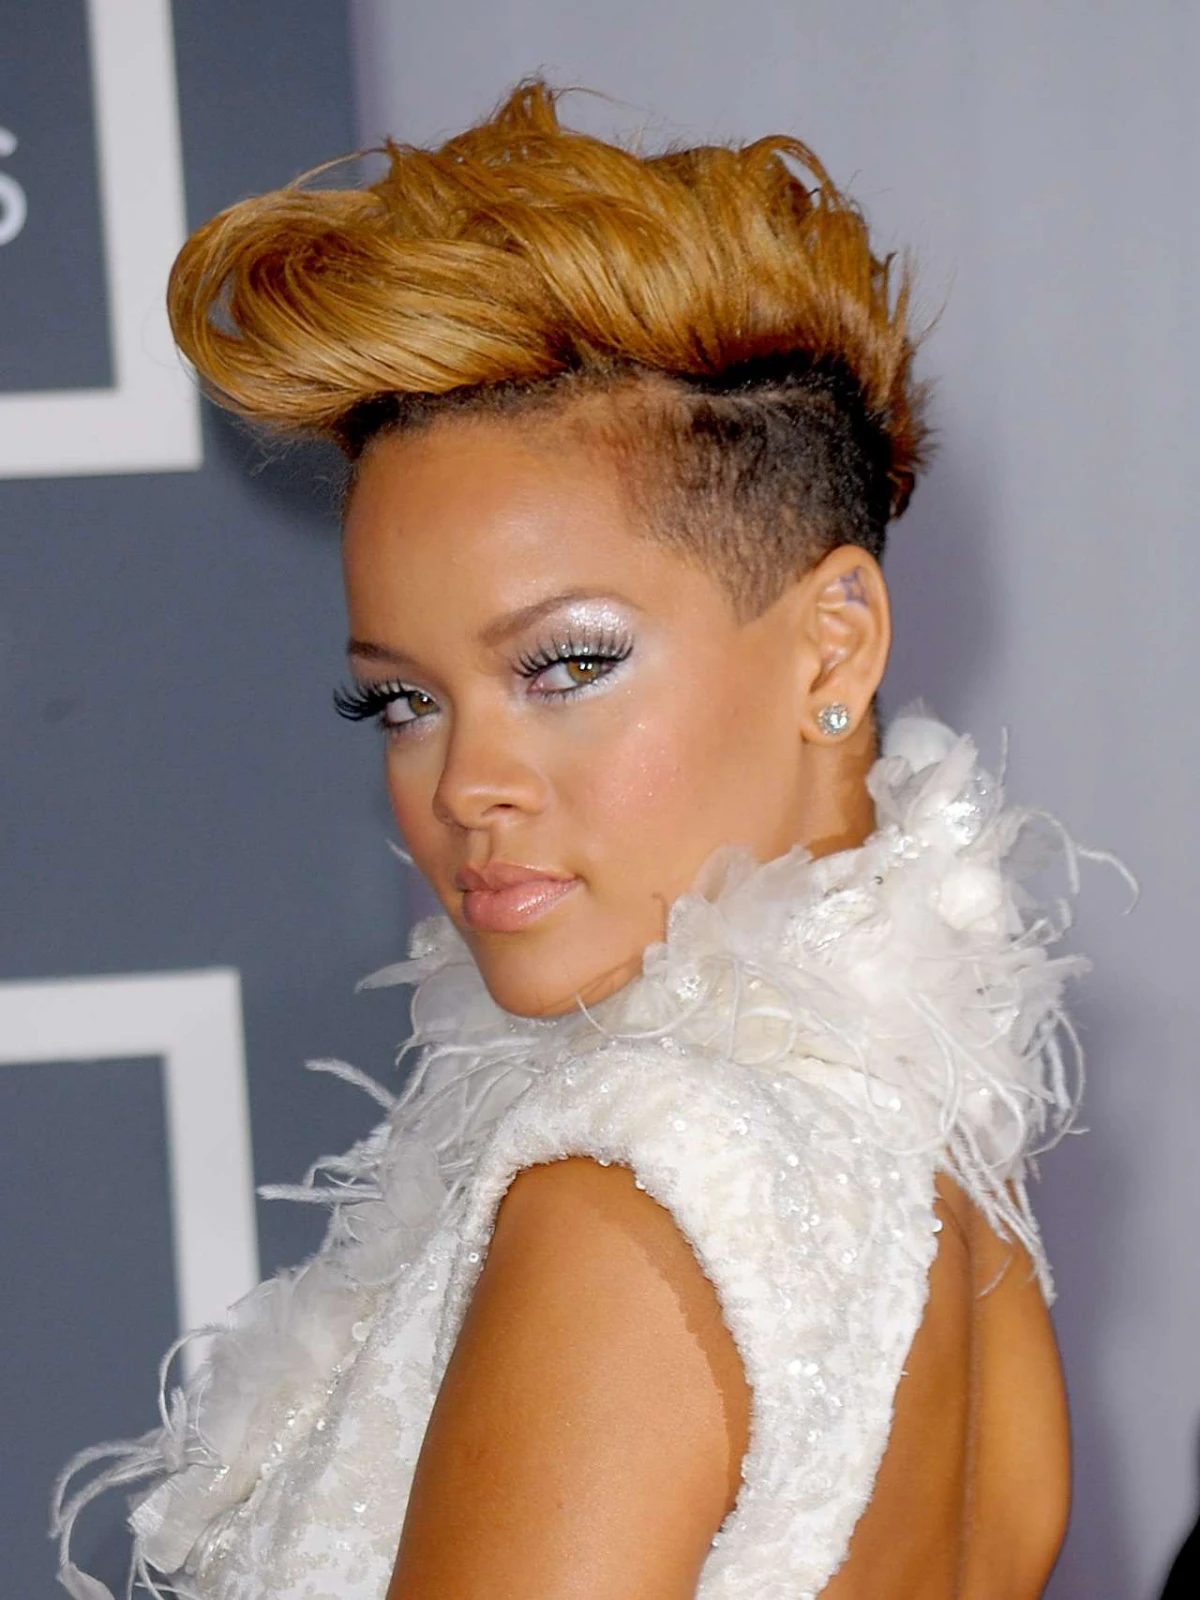
Creative Twists on the Pompadour
One of the best things about this style is how you can adapt it. A popular, edgy version is the undercut pompadour, with its dramatically short sides. For those with curly hair, the curly pomp is stunning—it embraces texture instead of fighting it. And for long-haired folks, the faux pomp can be taken to the next level for special events.
A lesser-known trick for massive, lasting volume in a long-hair pomp is to use a ‘hair rat’ or a ‘hair padding donut.’ It sounds weird, I know! It’s basically a small, lightweight mesh or foam form that you place under the hair to create a stable shape. You can buy them for under $10 at beauty supply stores like Sally Beauty or on Amazon. You just place it on your head where you want the volume, right behind your front hairline, and then gently comb your own hair over it, pinning it in place. It’s an old-school Hollywood secret that works every time.
Troubleshooting Common Problems
- Problem: It falls flat by noon.
Solution: Nine times out of ten, your hair wasn’t 100% dry when you styled it. Or, you skimped on the prep product at the roots. Be honest, did you? Go back and make sure your foundation is solid. - Problem: It looks greasy, not cool.
Solution: You’re using too much finishing product or an oil-based one on fine hair. A tiny, pea-sized amount is all you need. And remember to warm it up in your hands first! - Problem: It turns into a frizzy mess in the rain.
Solution: Humidity is the enemy of volume. On damp days, an anti-humidity finishing spray is your best defense. It creates a shield around the hair. You might also need a pomade with a slightly stronger hold.
A Final Word on Hair Health
Looking great shouldn’t come at the cost of your hair’s health. If you’re heat-styling every day, a heat protectant isn’t a suggestion—it’s a command. And if you’re using a lot of heavy pomades and sprays, use a clarifying shampoo once a week to hit the reset button and remove all that buildup. It will keep your hair and scalp happy.
While styling at home is totally achievable, the initial cut is a job for a pro. I’ve seen way too many DIY haircut corrections that cost more time and money than just getting it done right the first time. Find a stylist you trust, bring pictures, and be open to their advice. The pompadour is personal architecture, and when it’s built right, it’s an incredible way to show off your style and confidence.
Galerie d’inspiration

Water-Based Pomade: This is your modern, flexible option. Products like Layrite Superhold or Suavecito Firme Hold offer fantastic grip but rinse out effortlessly with just water. They’re perfect for those who want to restyle their pomp without a full wash or for finer hair that can be weighed down by heavier products.
Oil-Based Pomade: For a truly authentic, high-shine finish and relentless hold, this is the classic choice. Think of Reuzel’s Pink Pomade. It’s more resistant to washing, but it gives unparalleled control for thick, unruly hair, keeping its shape through humidity and a long day.
Wondering how to keep your pompadour from falling flat by midday?
The secret weapon is ‘pre-styling’. Before you even touch a pomade, apply a volumizing mousse or a sea salt spray like Bumble and bumble’s Surf Spray to damp hair. This creates a gritty, textured foundation. As you blow-dry your hair upwards and back, this base provides the ‘scaffolding’ needed to support the style for hours, making your finishing product more of a final touch than a structural necessity.
While associated with male rockabilly stars, the pompadour’s true origins are aristocratic and female. It was named after Madame de Pompadour, the official chief mistress of King Louis XV of France in the 18th century, who wore her hair swept up and back from her forehead.


