The Real Deal on Red and Pink Hair: A Stylist’s Unfiltered Guide
I’ve been a professional hairstylist for a long, long time, and I’ve seen countless color trends cycle through the salon. But you know what never, ever goes out of style? The pure, unapologetic confidence that comes with vibrant red or pink hair.
In this article
Honestly, it’s a special kind of magic. There’s nothing like seeing someone’s face light up when they see their dream color for the first time. It’s more than just hair—it’s a statement, a piece of their personality worn on the outside. But here’s the thing: getting those stunning, fiery reds and electric pinks isn’t as simple as grabbing a box off the shelf. It’s a technical game that mixes art with a little bit of chemistry, and it demands a serious commitment to keeping it looking good.
So, let’s pull back the curtain. I’m going to walk you through the whole process just like I would with a new stylist in my salon. We’ll get into the nitty-gritty, from the prep work to the upkeep, so you can walk into a salon with confidence or truly understand the beast you’re tackling at home.
First, We Have to Build the Perfect Canvas
Before we even dream of mixing up a gorgeous magenta, we have to talk about the hair itself. Think about it: you can’t draw with a bright pink marker on black paper and expect it to pop. It’s the exact same principle with hair. Getting this part right is the difference between a head-turning success and a very, very expensive mistake.
What’s Really Happening When We Bleach Hair?
Okay, so let’s get into the science just a bit. A single strand of hair has an outer protective layer, the cuticle, which looks kind of like shingles on a roof. Inside that is the cortex, where all your natural color pigment lives. To get a vibrant shade to show up, we have to kick that natural pigment out first. We call this “lifting,” but you probably know it as bleaching.
Lightener uses an alkaline ingredient to gently swell the hair and lift up those cuticle “shingles.” This lets the peroxide get into the cortex and break down the natural color. The “volume” of the peroxide (like 20 or 30 volume) just tells you how fast this will happen. A good way to think about it is that 20 volume is ‘low and slow’ for more control, while 40 volume is ‘fast and furious’—and honestly, super risky for at-home use. You have to watch this process like a hawk. If you don’t, you can end up with hair that feels gummy when wet. That’s a five-alarm fire of hair damage.
By the way, this is also why a good conditioner is non-negotiable. Lightener is highly alkaline, but your hair is naturally acidic. Using an acidic conditioner after lightening helps slam those cuticle shingles back down, which locks in moisture and, most importantly, your new color.
How Those Bright Colors Actually Work
Most of the reds and pinks you see are what we call “direct dyes.” Unlike permanent color that creates a chemical reaction inside the hair, direct dyes are way simpler. They’re basically just pre-made color molecules that stain the lightened, porous hair. Brands like Manic Panic, Arctic Fox, and professional lines like Pulp Riot are all fantastic examples of this.
This is also why they fade. Every time you wash your hair, especially with warm water, you lift those cuticles slightly, and a few of those color molecules sneak out. It’s the trade-off for having such incredible, vibrant shades.

The Consultation: The Most Important Part of the Process
I will not touch a client’s hair with color until we’ve had a thorough chat. This is where we get on the same page, set realistic goals, and avoid any nasty surprises later. Honesty is everything here.
Your Hair’s Secret History
The first thing I need to know is your hair’s entire five-year history. People always forget that one time they used a dark brown box dye a few years back, but I promise you, the hair remembers. Old color can show up as patchy spots or lift to a stubborn, brassy orange that’s a nightmare to correct. Be totally honest with your stylist—we’re not here to judge, we just need the facts to keep your hair healthy.
Patch and Strand Tests Are Not Optional
Heads up! A stylist who is willing to skip a patch test is a major red flag. This quick test, usually done behind the ear 48 hours before your appointment, checks for allergic reactions, which can be seriously dangerous. It’s rare, but not a risk worth taking.
A strand test is for your hair’s benefit. We take a tiny, hidden piece of your hair and do a trial run of the whole process. This tells me exactly how your hair will lift, what the final color will look like, and whether your hair can even handle the process. If that little strand gets fried, we know we need a new game plan.
Your Toolkit for Touch-Ups
If you’re planning on doing at-home touch-ups (just the color, not the bleach!), using the right gear is essential. Please, NEVER use metal bowls or tools with hair color or lightener! It can cause a nasty chemical reaction. Here’s a quick shopping list you can grab from a place like Sally Beauty Supply:
- Non-metallic mixing bowl: About $3, and absolutely necessary.
- A tint brush: Maybe $2-$4. Get a couple of different sizes for details.
- Protective gloves: A box of nitrile gloves is your best bet.
- Barrier cream: Good old Vaseline works perfectly. Slather it on your hairline and ears to prevent stains.
- Sectioning clips: A pack is usually under $10 and makes everything so much cleaner.
- A packet of good lightener and developer: For a root touch-up, this might run you about $15 total. Just be sure you know what you’re doing before you start.
Prepping the Hair: Lifting to the Right Level
The success of your color is 90% about the prep work. For reds and pinks, that means lifting your hair to the correct underlying level. Patience is key here.
What Level Do You Actually Need?
We use a scale from 1 (black) to 10 (pale yellow). The color you want determines the canvas you need.
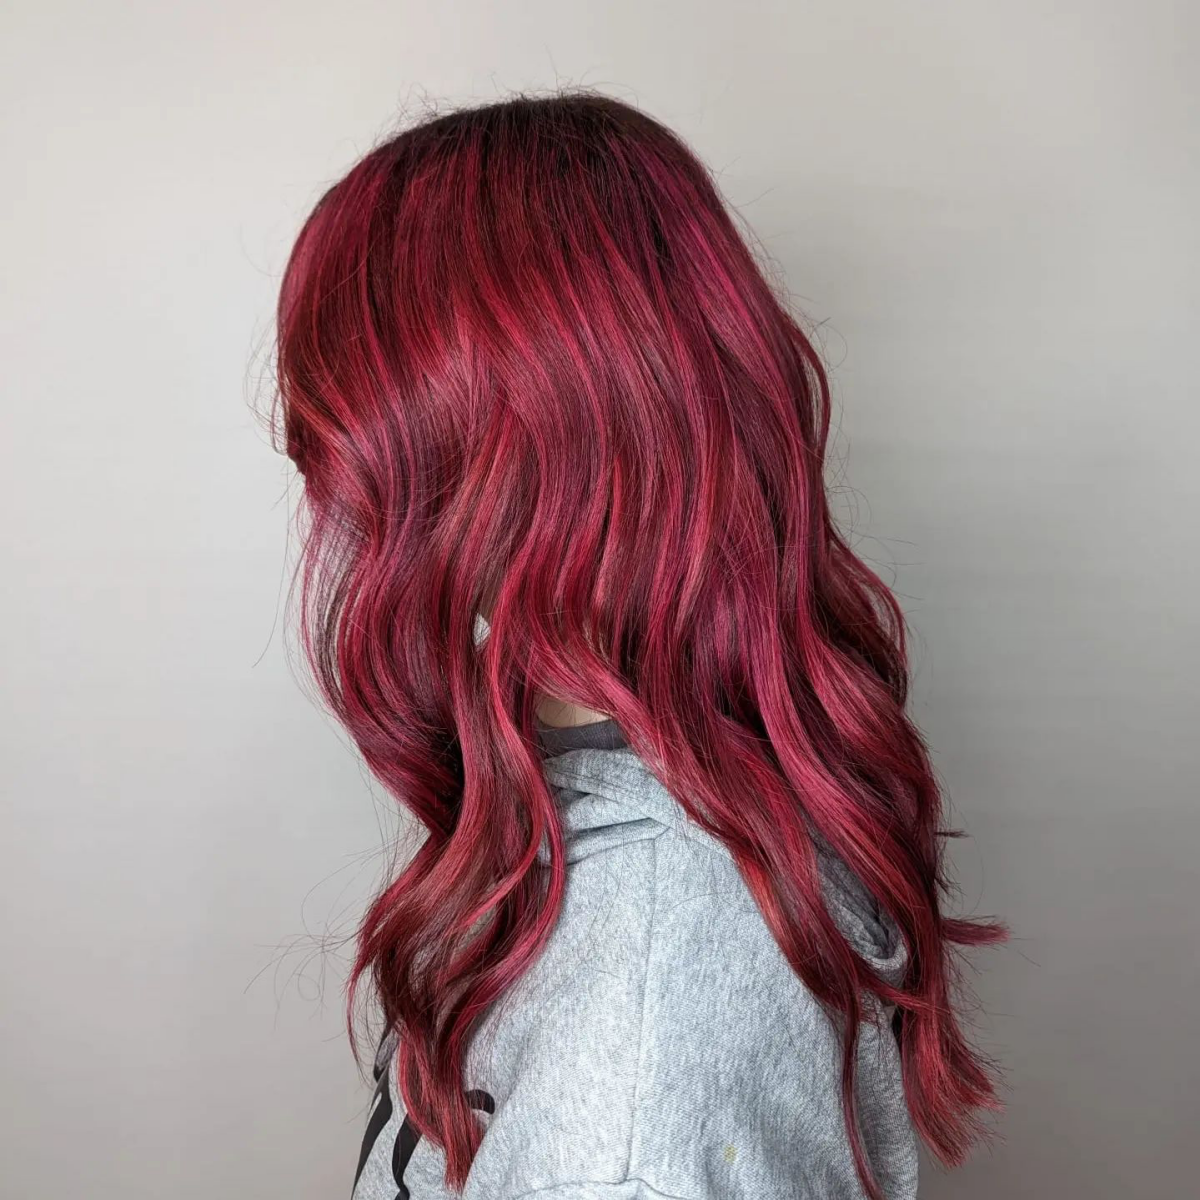
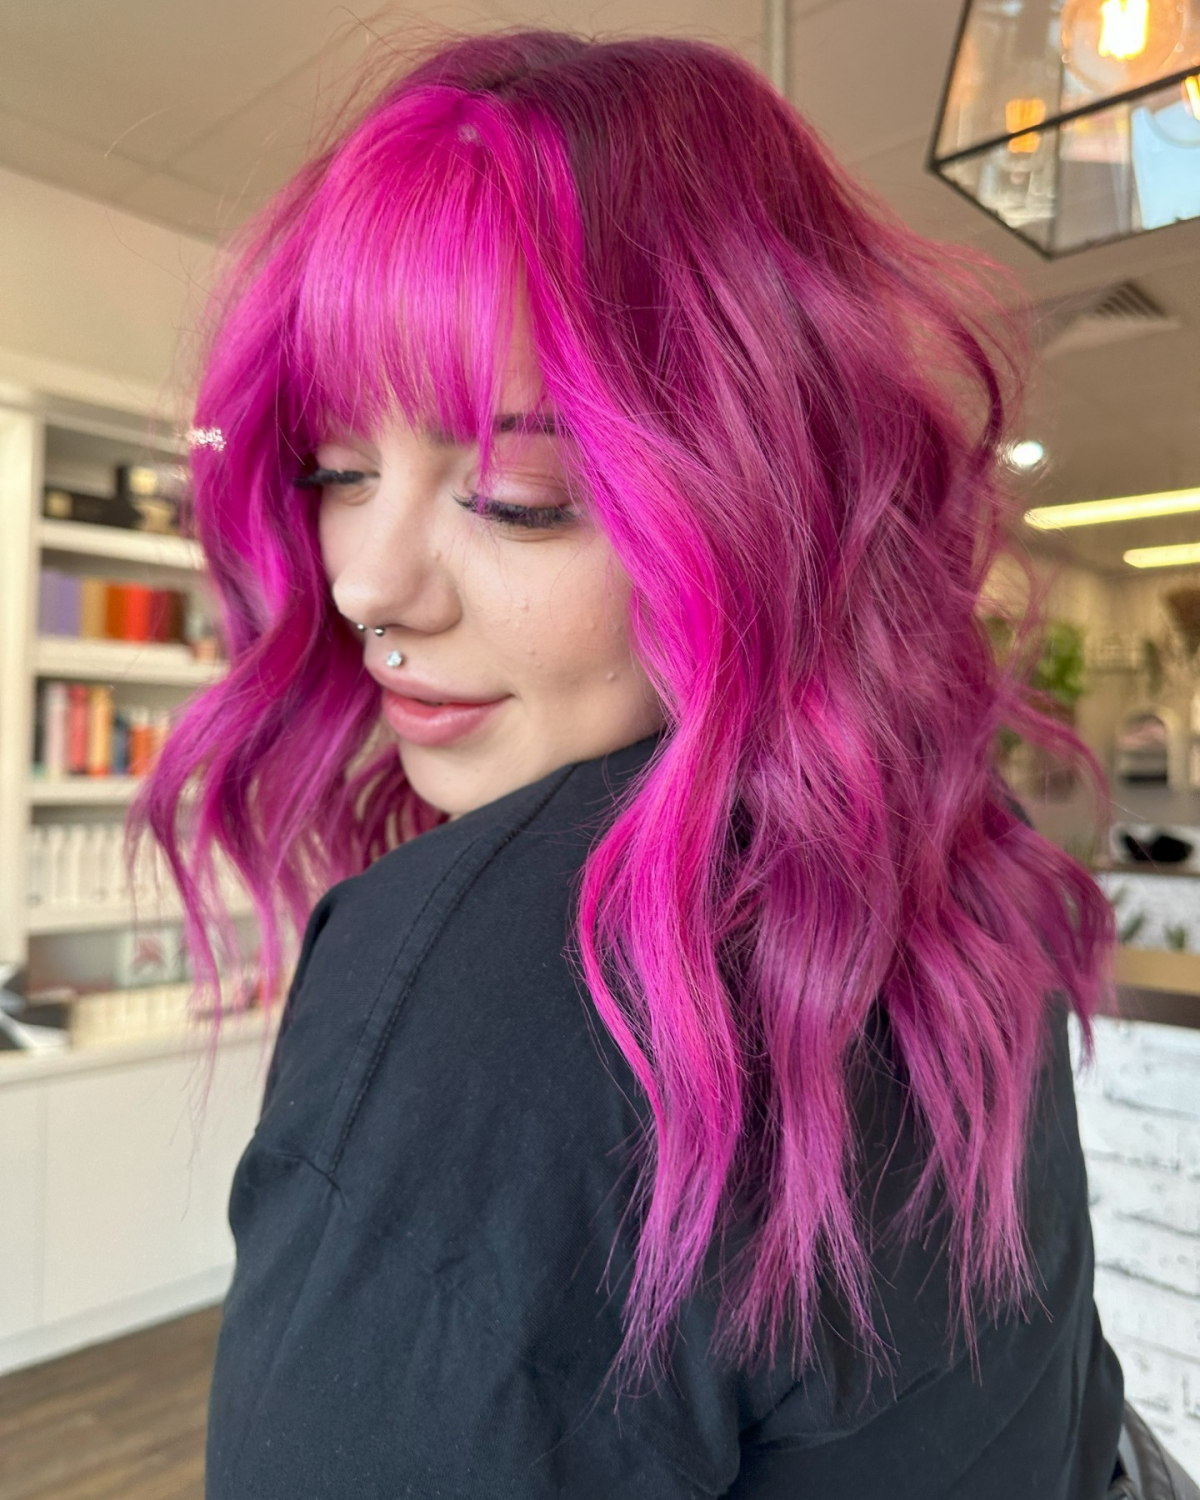
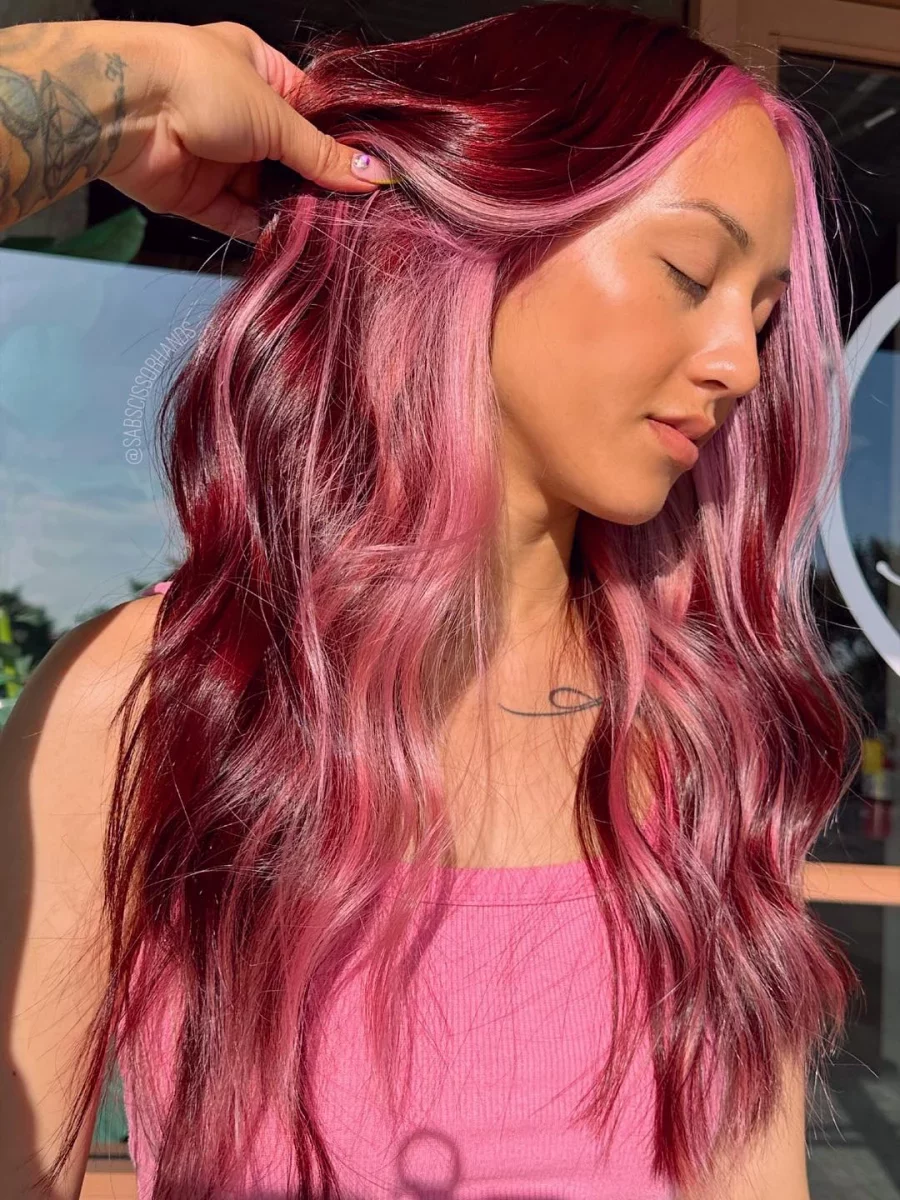
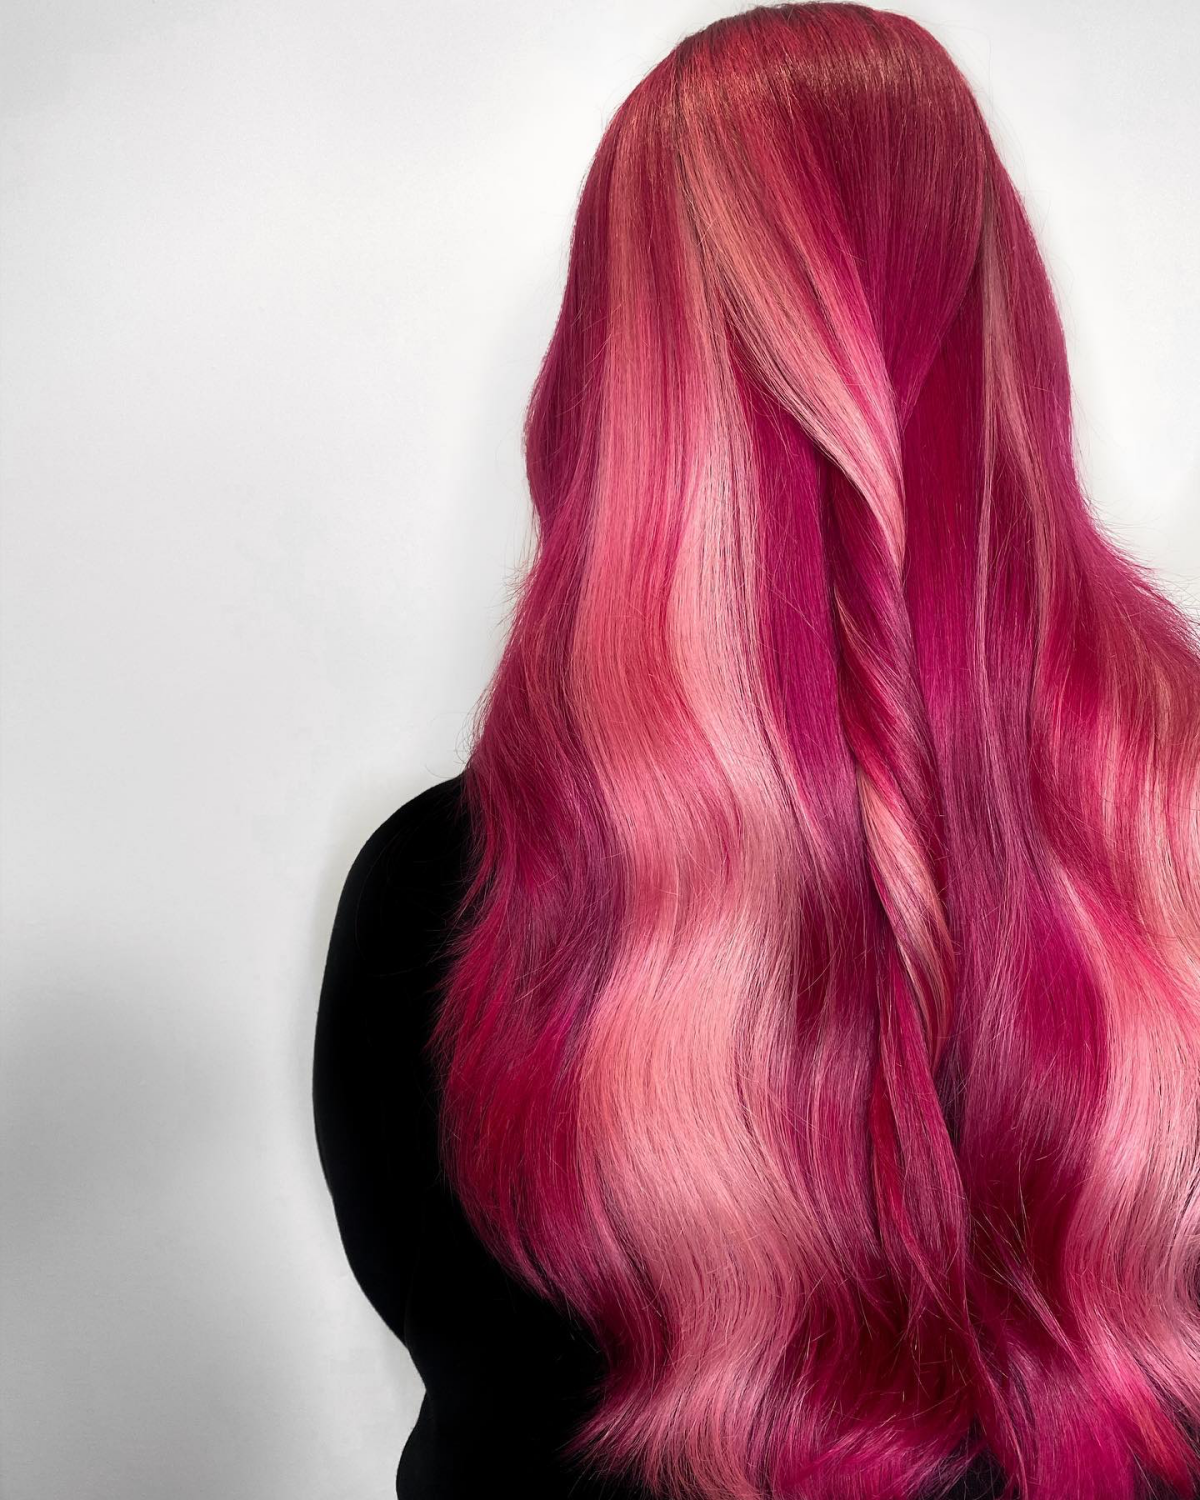
- Deep Reds & Magentas: These are more forgiving. You can often get a beautiful result over a Level 6 or 7 base, which looks like a coppery, construction-cone orange.
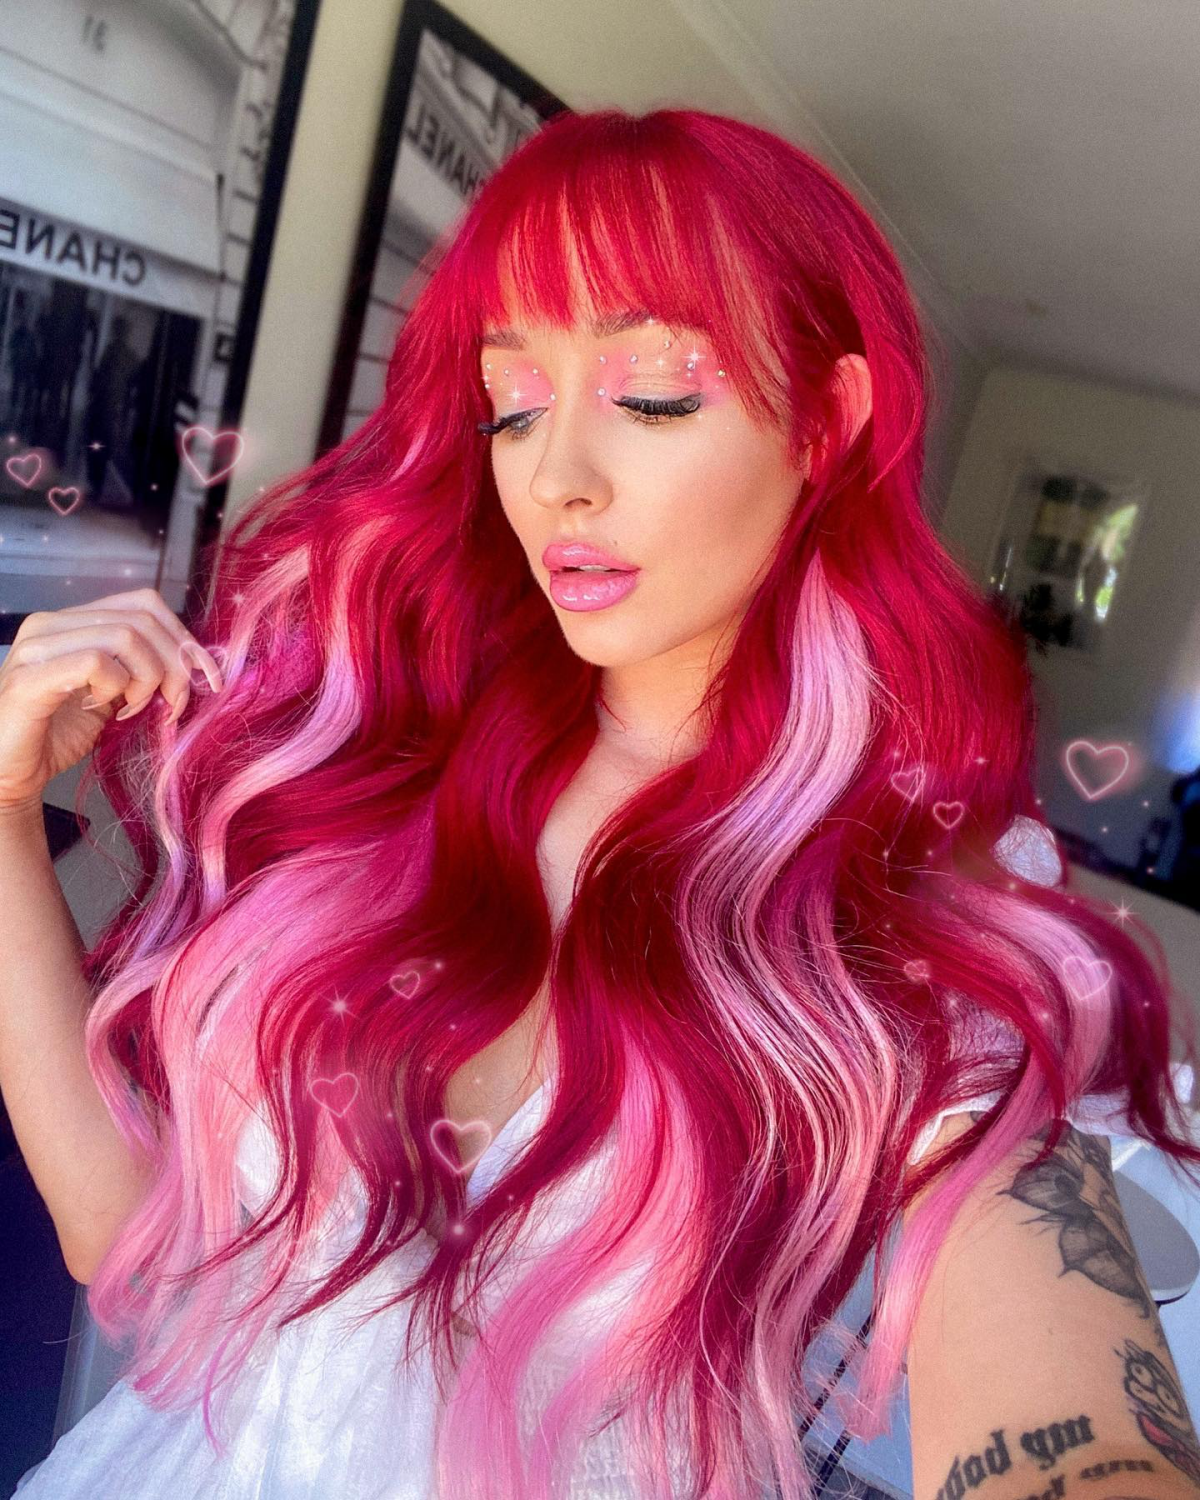
- Bright Reds & Hot Pinks: For these, you need a cleaner base. Think Level 8 or 9, which is the color of a stick of butter. Any orange left in the hair will make your pink look muddy or coral.
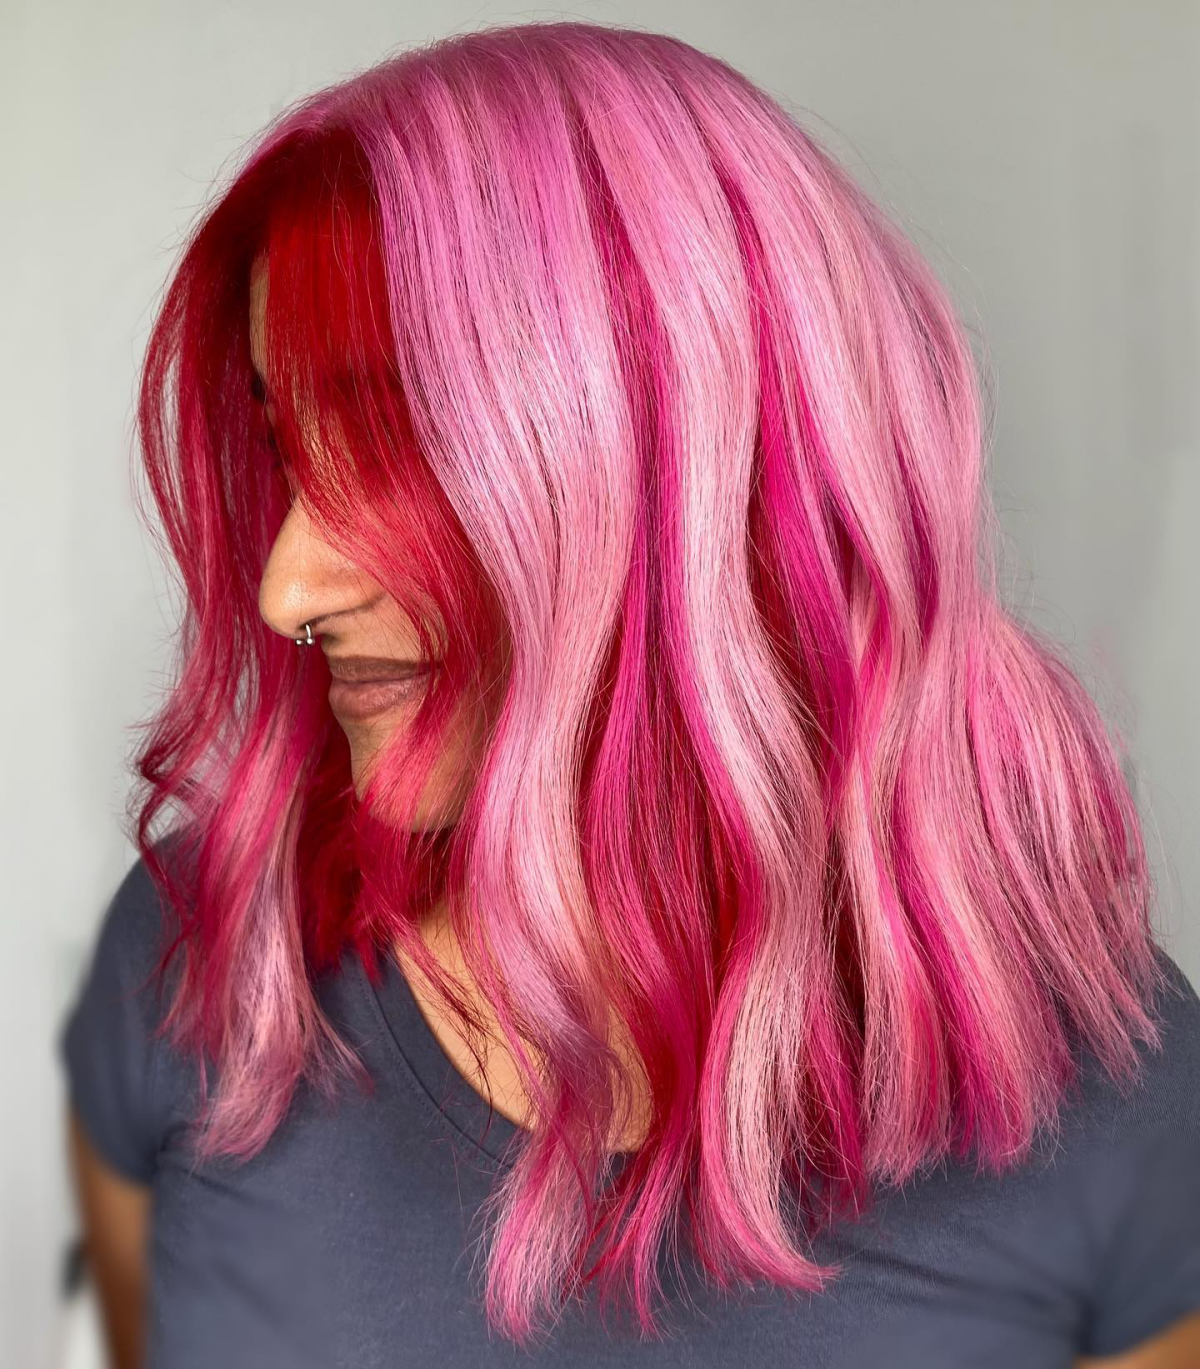
- Pastel & Neon Pinks: The most demanding of all. You need a Level 10, what we call “the color of the inside of a banana peel.” It has to be an even, pale yellow with almost no brassiness. If you put pastel pink on a yellow base, you will get peach. Every time.
Quick tip: After lifting, especially if you’re going for pink, you’ll likely need to tone the hair. A violet-based toner cancels out any remaining yellow, giving you a clean, white-ish canvas. Skipping this step is why so many at-home pinks go wrong.
Application: From Simple to Complex
Once the canvas is ready, it’s time for the fun part! How you apply the color completely changes the final look.
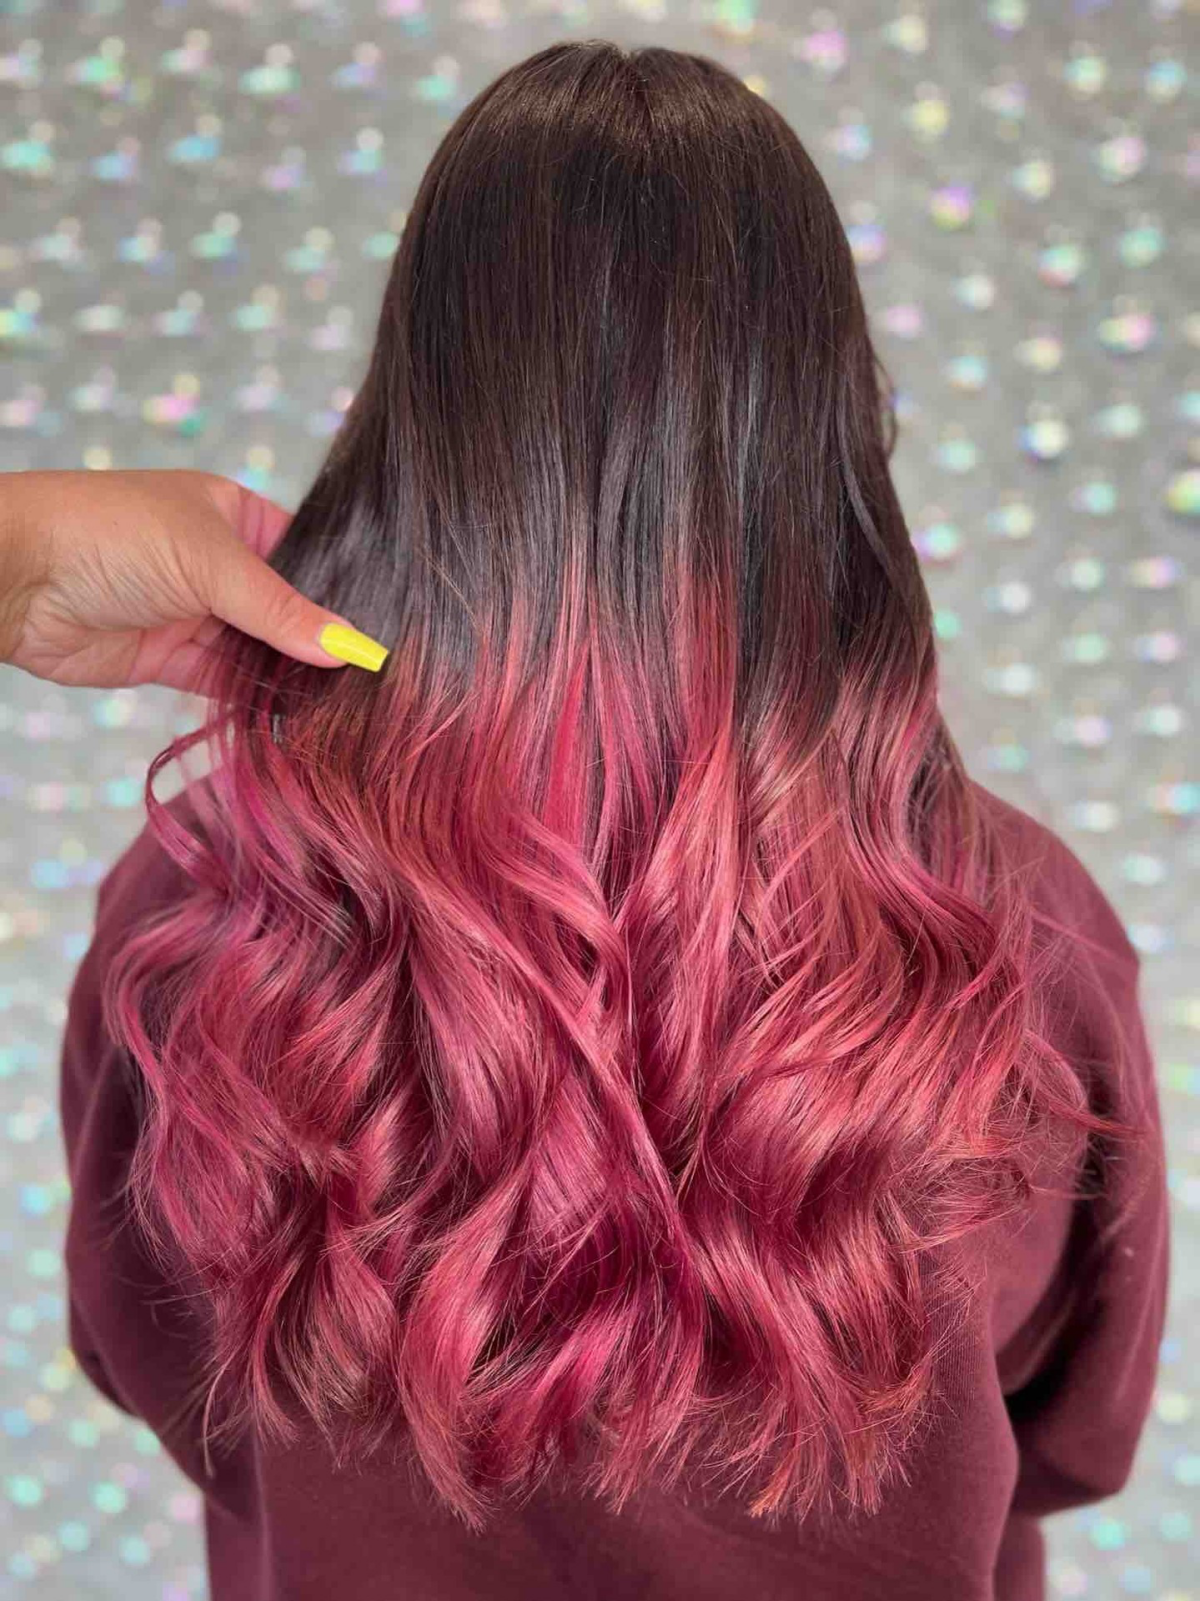
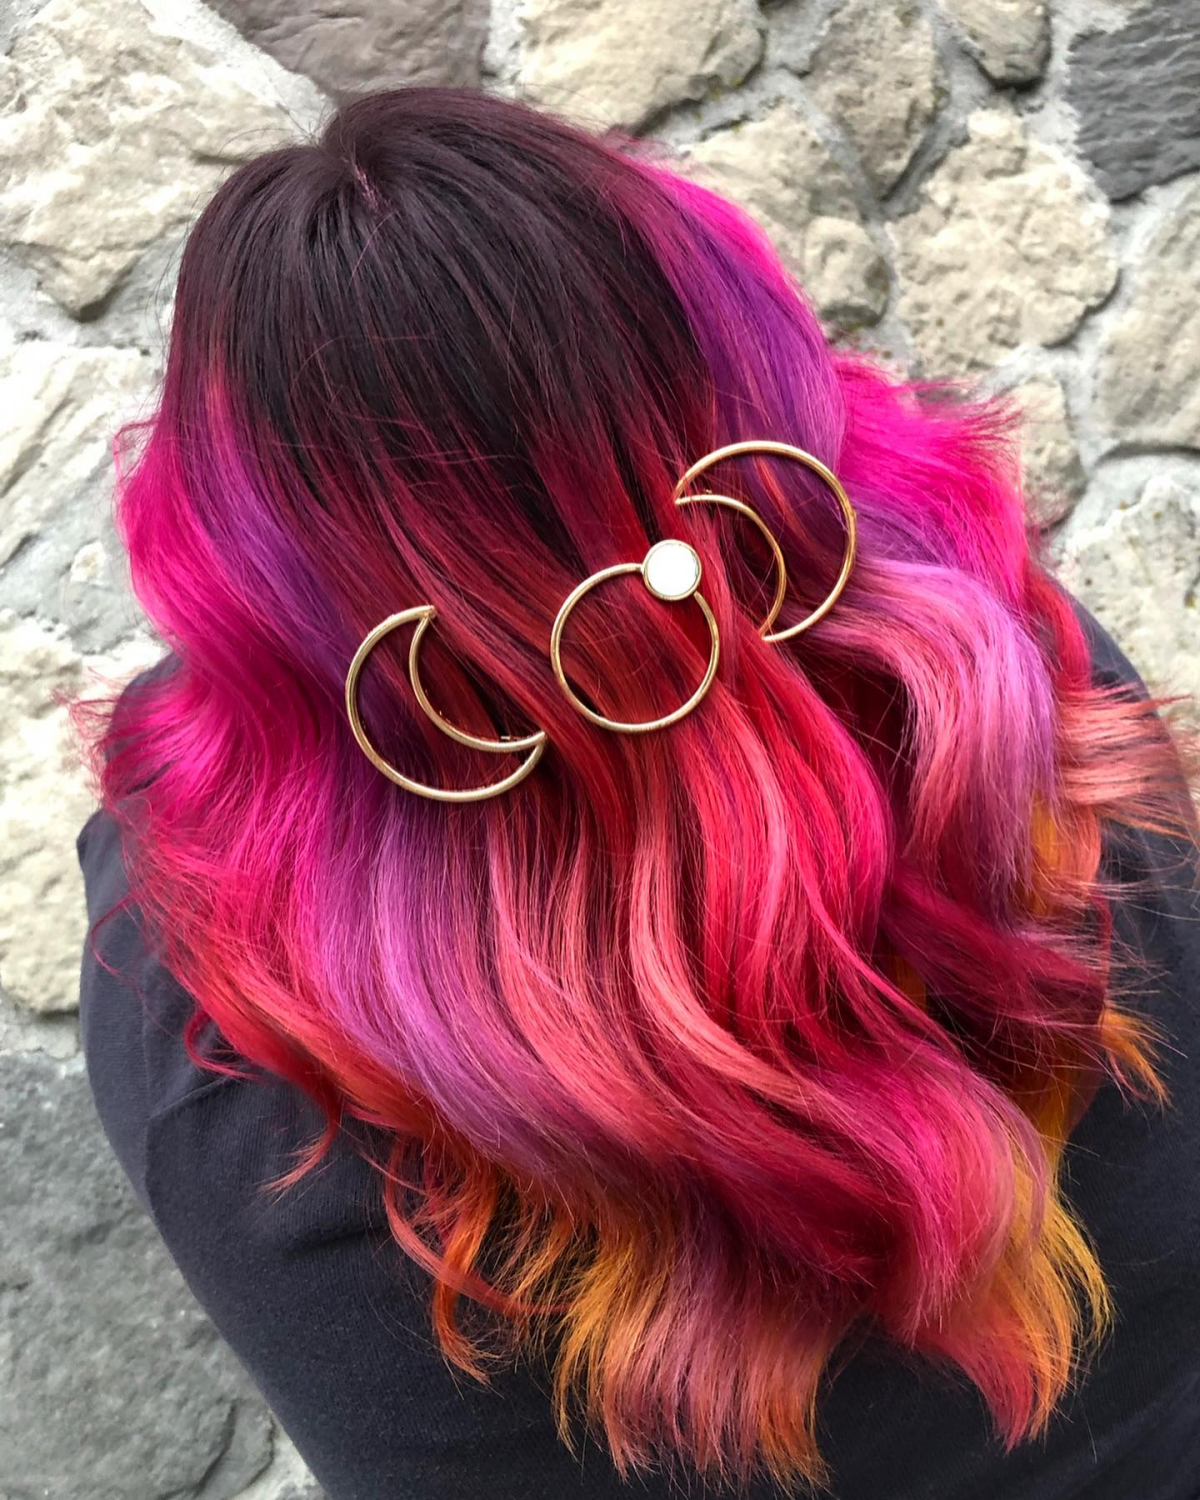
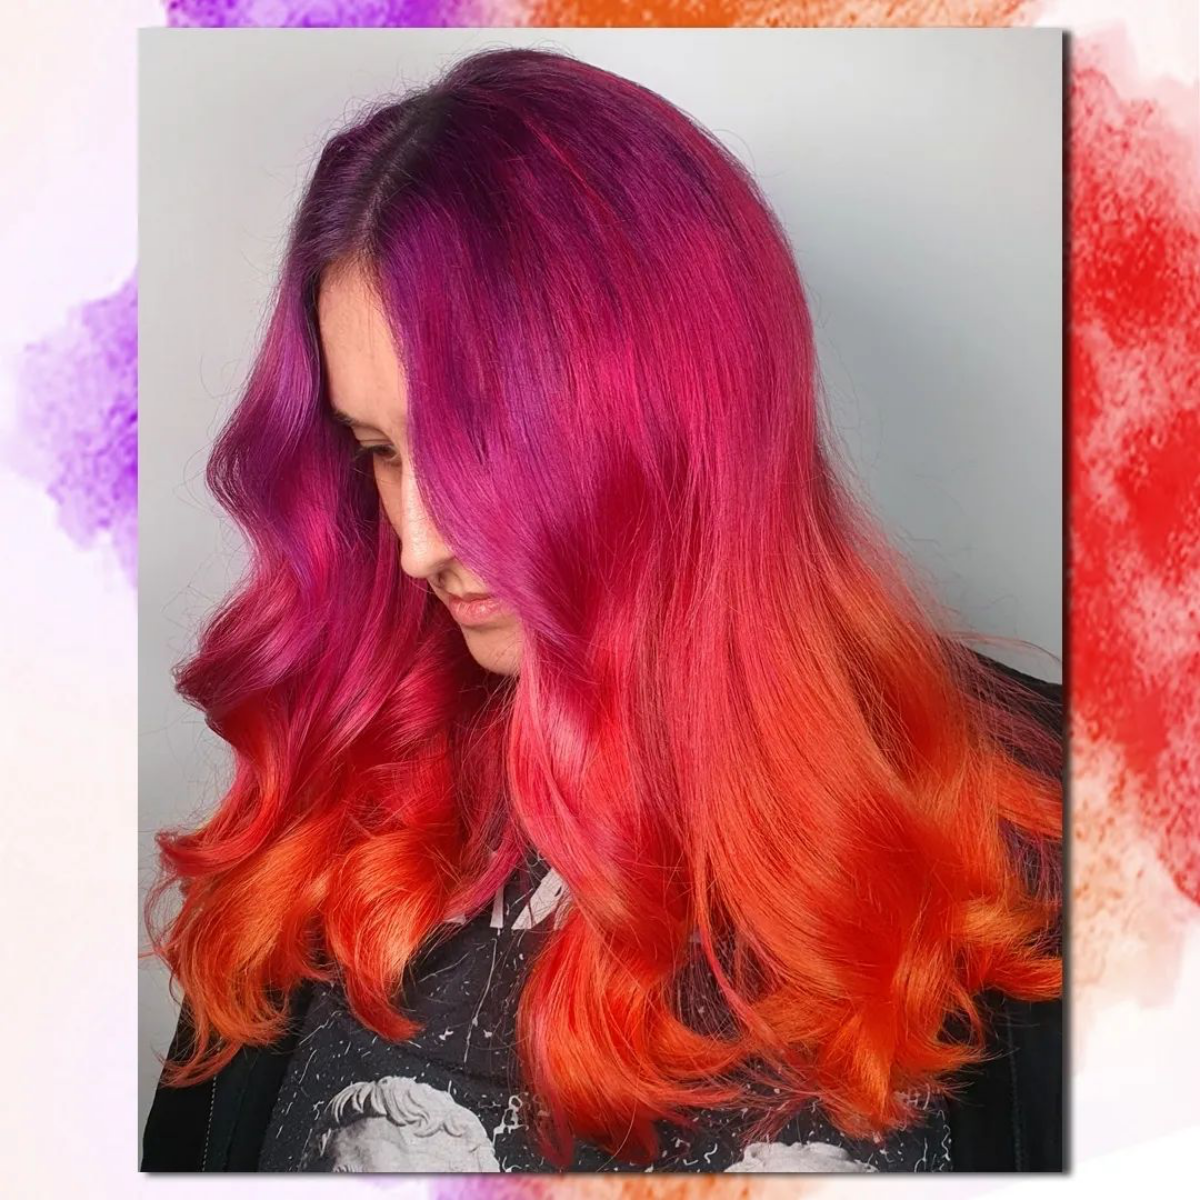
All-Over Color & Color Melts
Even a solid, all-over color requires careful work. You need to fully saturate every single strand on clean, dry hair. Don’t be shy with the product; patchiness comes from skimping.
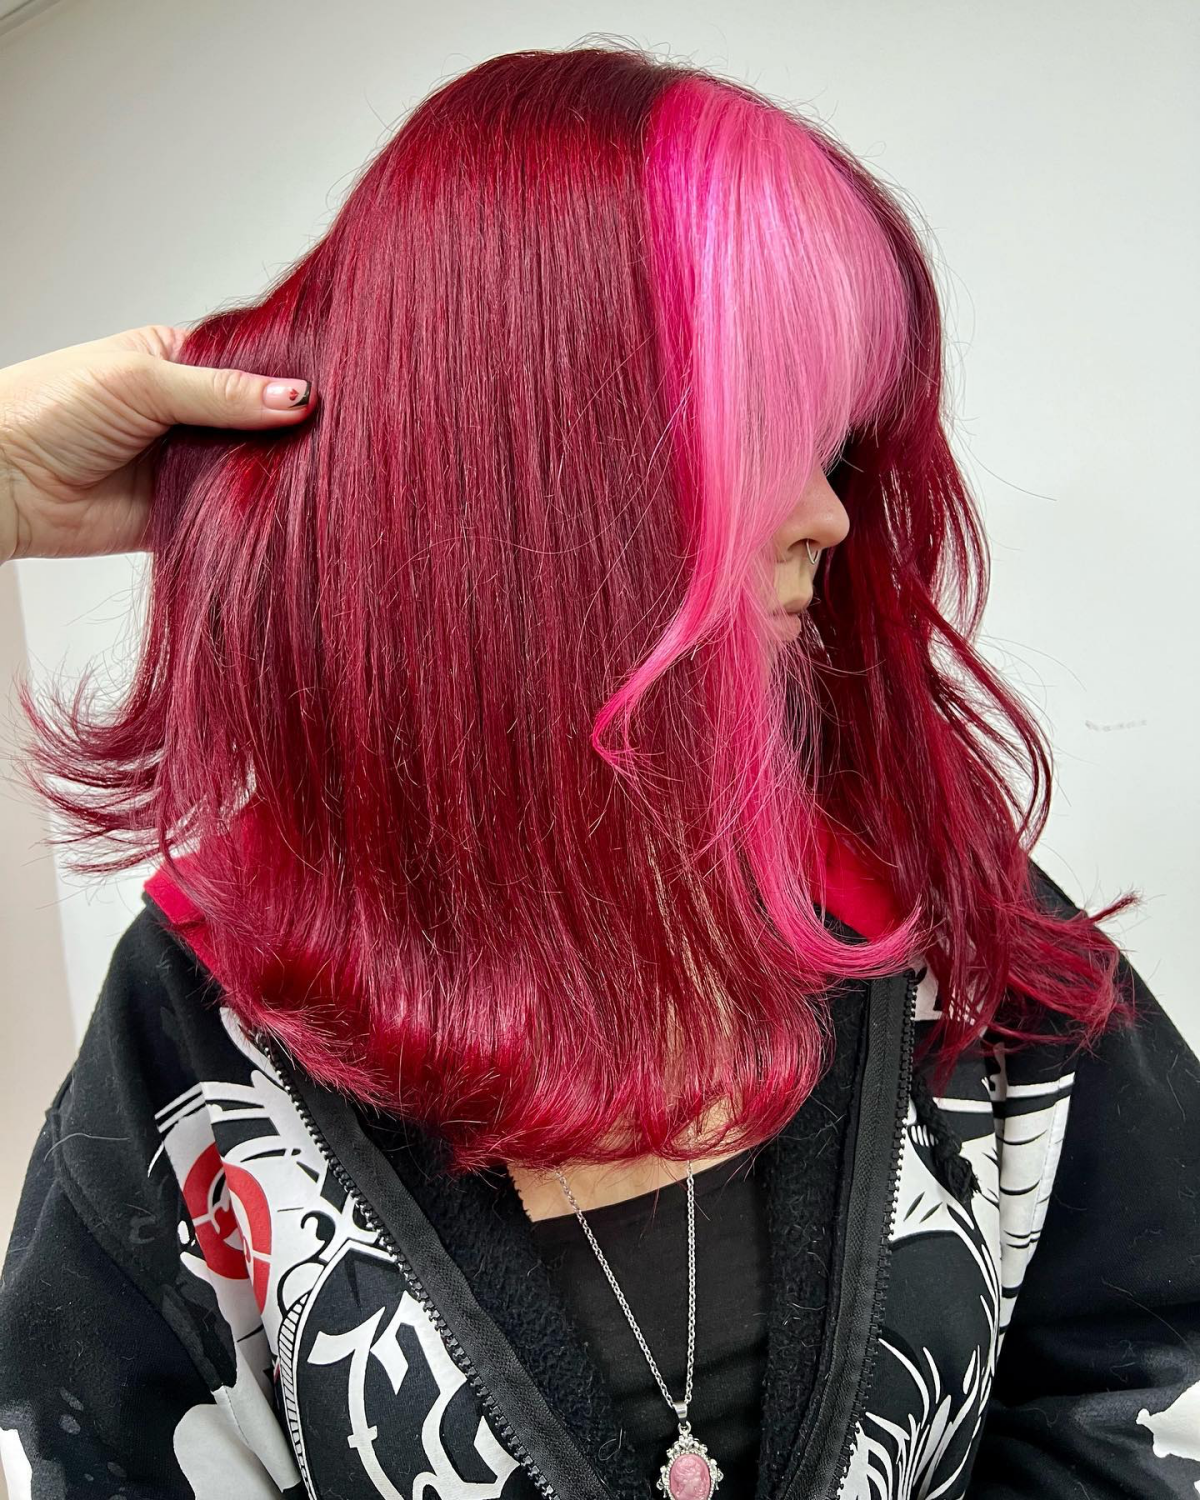
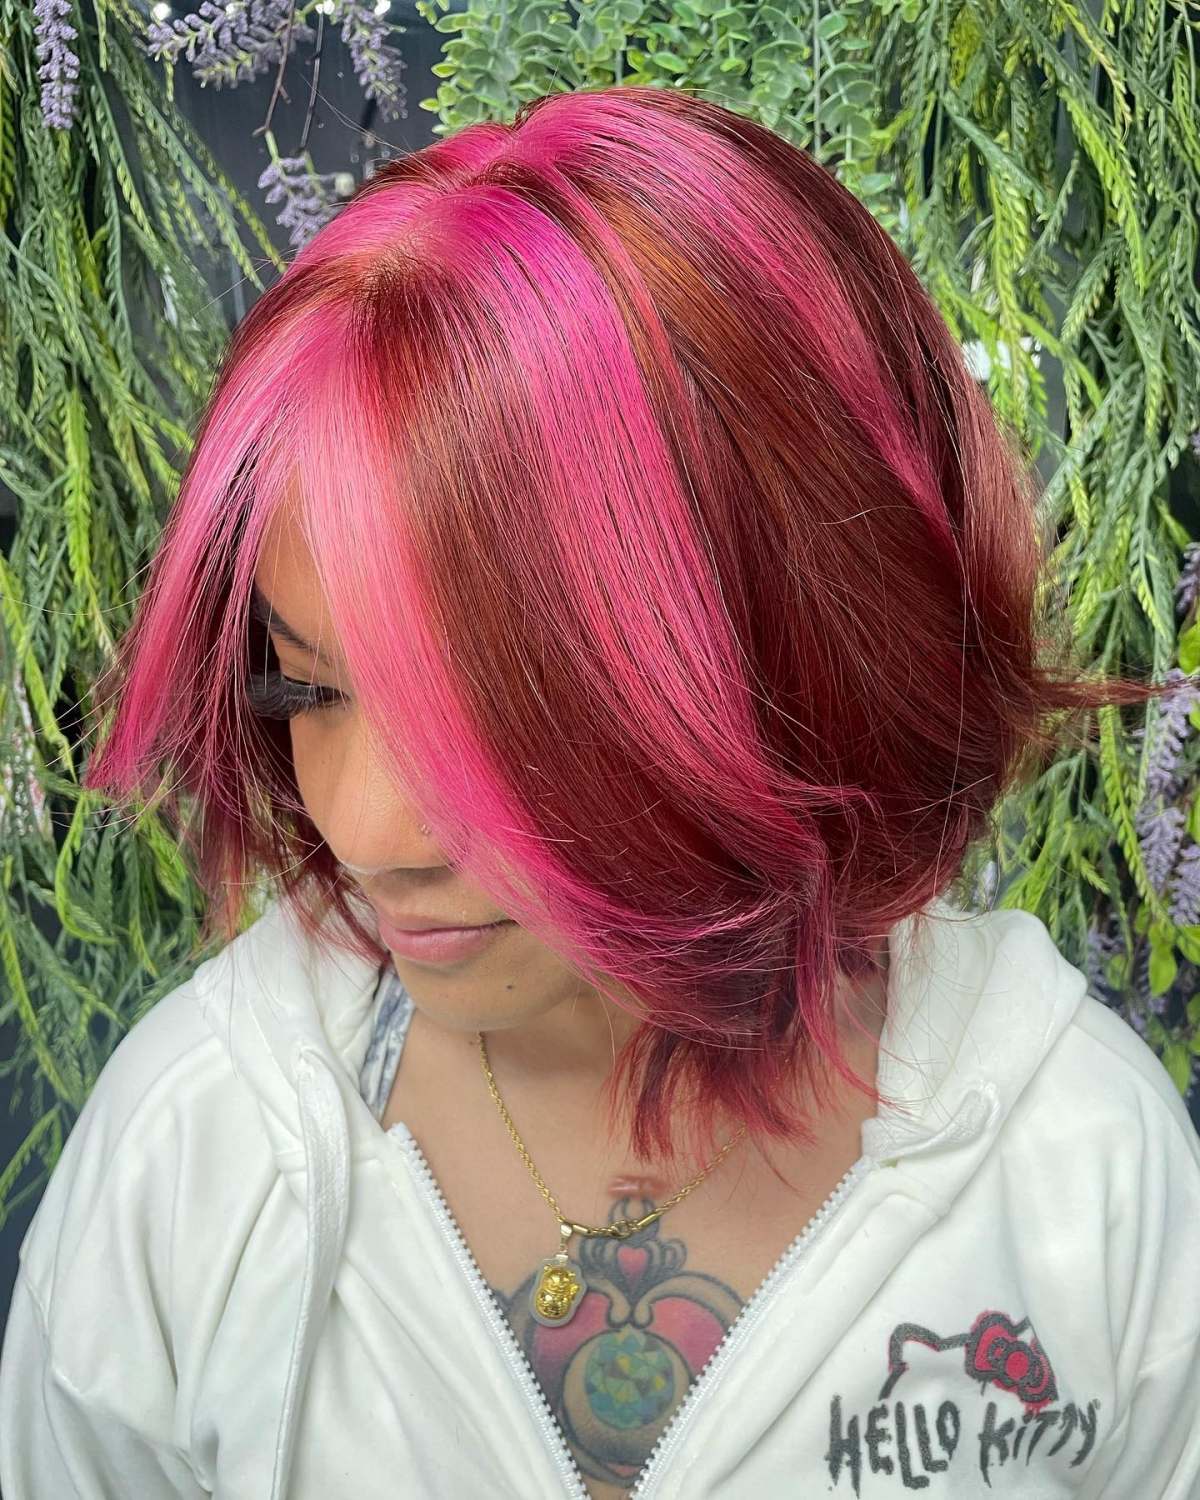
For a color melt, like a deep red fading into a bright pink, the magic is all in the blend. I apply the red to the roots and the pink to the ends, and then use my fingers to gently smudge the line where they meet. It feels a lot like finger painting, and a soft touch is key to making it look seamless.
Split Dyes and Money Pieces
These styles are all about sharp, clean lines. For a split dye, that center part has to be PERFECT. I use foils or cotton rolls as a barrier to prevent the two colors from bleeding into each other. And rinsing is a whole other challenge—you have to wash each side separately in cold water.
From my experience, this is where things can go wrong fast. I once had a client whose beautiful split dye bled after her first wash at home. She used warm water, and the colors ran together. We had to do a careful fix in the salon, and it taught me to be even more direct about aftercare. Which brings me to…
Keeping Your Color Alive: The Maintenance Rules
Getting the color is just step one. Vivids are incredibly high-maintenance, and your routine at home is what will make or break it. On average, you can expect a truly vibrant look to last for about 10-15 washes before it starts to soften into a pastel.
To make it last, here’s a quick rundown of what to do—and what to avoid.
What Kills Your Vivid Color:
- Hot Water: The number one enemy. It opens the hair cuticle and lets the color run right down the drain.
- Harsh Shampoos: Anything with sulfates will strip your color in a flash.
- The Sun & Pools: UV rays fade color, and chlorine will strip it out almost instantly.
- Frequent Washing: The more you wash, the faster you fade.
What Saves Your Vivid Color:

- Cold Water Rinses: It’s not fun, but it’s the single most effective thing you can do.
- Sulfate-Free Shampoo: A gentle, color-safe formula is a must-have.
- Dry Shampoo: This will be your absolute best friend, helping you go longer between washes.
- Color-Depositing Conditioners: These are a game-changer. A good one will cost you around $20-$40, but it deposits a little bit of color back into your hair every time you wash, dramatically extending the life of your shade.
A lesser-known trick: On your next wash, just try rinsing with lukewarm water and finish with a 30-second blast of the coldest water you can stand. It costs nothing and makes a noticeable difference.
The Realities: Cost, Safety, and When to Call a Pro
The DIY temptation is strong, but vivids are one area where professional help is often worth every penny. For a full transformation at a salon (especially on long or previously colored hair), you should realistically expect to be in the chair for 4 to 8 hours and pay anywhere from $300 to $800+. The price reflects the time, the sheer amount of product used (lightener, bond builders like Olaplex or K18, toners, multiple tubes of color), and the expertise needed to protect your hair’s health. A color correction to fix a DIY job gone wrong? That can easily top $1000.
Honestly, while refreshing a faded pink at home is pretty low-risk, any process involving lightener is best left to a professional. If you have any previous color on your hair, or if your hair is already feeling a bit fragile, please see a stylist. We have access to professional-grade color removers and bond-building treatments that can achieve your goals while keeping your hair on your head.
Sometimes, the most professional thing I can do is tell a client “not yet” and put them on a treatment plan to get their hair healthy enough for the service. It’s a journey, but it’s one that’s so worth it when you finally get that bold, beautiful color you’ve been dreaming of.
Galerie d’inspiration
- Wash with cool or lukewarm water to keep the hair cuticle sealed.
- Use a sulfate-free shampoo to prevent harsh detergents from stripping your color.
- Shampoo less often! Dry shampoo will be your new best friend.
- When you do wash, consider a color-depositing conditioner like Keracolor Clenditioner in Rose Gold or Red to refresh your shade with every wash.
The secret to longevity? Treat your vibrant hair like a delicate fabric. Less heat and gentle handling go a long way.
The one mistake you can’t afford to make: Skipping the strand test. Seriously. Before you cover your whole head in that perfect Peony Pink, snip a tiny, hidden piece of hair and test the bleach and color on it first. This tells you exactly how your hair will lift, what the final shade will look like, and most importantly, if your hair can even handle the process without turning to mush. It’s a 30-minute test that can save you from months of regret.
More than 70% of the vibrancy of a fashion color can be lost within the first two weeks if not cared for properly.
That shocking fade isn’t just your imagination. Red and pink molecules are larger than natural color molecules, so they can’t penetrate the hair shaft as deeply. This means they sit closer to the surface and wash out more easily. This is why post-color care, using products designed for color-treated hair, isn’t just a recommendation—it’s a necessity.

Want that edgy, lived-in pink look but scared of the commitment?
Ask your stylist for a
For DIY top-ups, Manic Panic Hot Hot Pink: A classic for a reason. This direct dye is vegan, conditioning, and delivers an intensely bright, fluorescent pink on pre-lightened hair. It’s easy to apply but fades relatively quickly, perfect for short-term fun.
For a longer-lasting salon gloss, Redken Shades EQ in Kicker Red: This is a demi-permanent gloss that a professional uses. It adds incredible shine and a translucent layer of color that can revive a fading red. It’s more durable but requires precise mixing and application.
Beyond trends, red is a primary color, evoking strong emotions. In color psychology, it’s associated with passion, energy, and confidence. Wearing it isn’t just a style choice; it’s a non-verbal statement.


