Finally! A No-Fail Guide to Gorgeous Updos for Medium-Length Hair
I can’t tell you how many times someone has sat in my salon chair, looked in the mirror, and sighed. They love the idea of a chic updo, but they’re convinced their shoulder-length hair is stuck in a weird, unworkable middle ground. It’s not long enough for those epic, flowing styles you see online, but it’s not short enough to just slick back and call it a day. Sound familiar?
In this article
Well, I’m here to let you in on a little professional secret: medium-length hair is an amazing canvas for an updo. It just requires a different mindset. Forget about fighting with length and start thinking like a hair engineer.
Seriously! An early mentor of mine used to say, “You’re not just styling hair; you’re building a structure.” It’s all about creating a solid foundation, distributing weight, and understanding the ‘why’ behind each step. This guide is a peek into my toolkit—the tried-and-true methods I use every day to create updos that look incredible and, more importantly, feel secure from the first photo to the last dance.

Before You Even Start: The All-Important Foundation
Before a single bobby pin comes out of the box, we have to talk about prep. This is non-negotiable. To be frank, great prep work is about 40% of the job, and it’s what separates a droopy, frustrating mess from a polished, lasting style. Clients often show up with freshly washed, silky hair, thinking they’re helping, but hair that’s too clean is the enemy of hold. It’s too slippery! We don’t need dirty hair, we just need hair with some grit.
First, get a feel for your hair. Is it fine and silky? Or is it coarse and thick? Fine hair needs a ton of help with volume and texture to keep pins from sliding right out. For thick, heavy hair, the challenge is all about control and managing the weight. The key is to divide and conquer with multiple anchor points instead of trying to force it all into one spot.

Your Updo Shopping List
You don’t need a million fancy tools, just the right ones. Here’s a quick rundown of what to get:
- Texturizing Spray or Volumizing Mousse: This is your grip-in-a-can. For a drugstore option, the Batiste Texturizing Spray is a solid choice at around $9. If you want to splurge, Oribe’s Dry Texturizing Spray is a cult favorite for about $49, but a little goes a long way.
- A Good Teasing Brush: Look for one with a mix of boar and nylon bristles. You can find excellent ones at Sally Beauty for under $10. The narrow shape is key for precision.
- Clear Elastics & Bungee Elastics: Clear elastics are for invisibly tying off ends. Bungee elastics (the ones with hooks on each end) are a pro secret for ponytails—they let you get a super tight, secure base without ripping your hair out. You can find both on Amazon for a few bucks.
- U-Pins and Bobby Pins: Yes, you need both! Bobby pins clamp hair down, which is great for securing loose ends. U-pins are better for pinning shapes (like a chignon) because they anchor the hair without flattening the volume. A pack of each is usually less than $5.
- A Decent Firm-Hold Hairspray: Look for something that offers strong hold but is still brushable. L’Oréal’s Elnett Satin Hairspray is a classic for about $15 and is beloved for a reason.
The Prep Routine That Guarantees Success
Starting with damp, towel-dried hair, work a good dollop of volumizing mousse or a generous amount of texturizing spray from roots to ends. Then, it’s time for the foundational blow-dry. Don’t just blast it dry; use a round brush to lift the roots, or even flip your head upside down to dry the root area for extra, lasting volume. The goal is 100% dry hair with some body.
Next, add some bend. Using a 1.25-inch curling iron, create a few loose, messy waves. This isn’t about perfect curls; it’s about giving the hair a ‘memory’ of a shape, which makes it way more cooperative. Oh yeah, and always use a heat protectant spray first!
Finally, a little strategic teasing. Take a thin section of hair, hold it straight up, and use your teasing brush to gently push down toward the scalp two or three times. This creates a little cushion at the base—your internal scaffolding. Only tease the sections that will form the base of your style, not the surface hair you want to keep smooth.
Core Updo Styles for Medium Hair (and How to Nail Them)
Okay, with the prep done, we can finally get to the fun part. Quick tip: If you’re doing this on yourself, set up two mirrors—your main bathroom mirror and a handheld one. Being able to see the back of your head is an absolute game-changer.
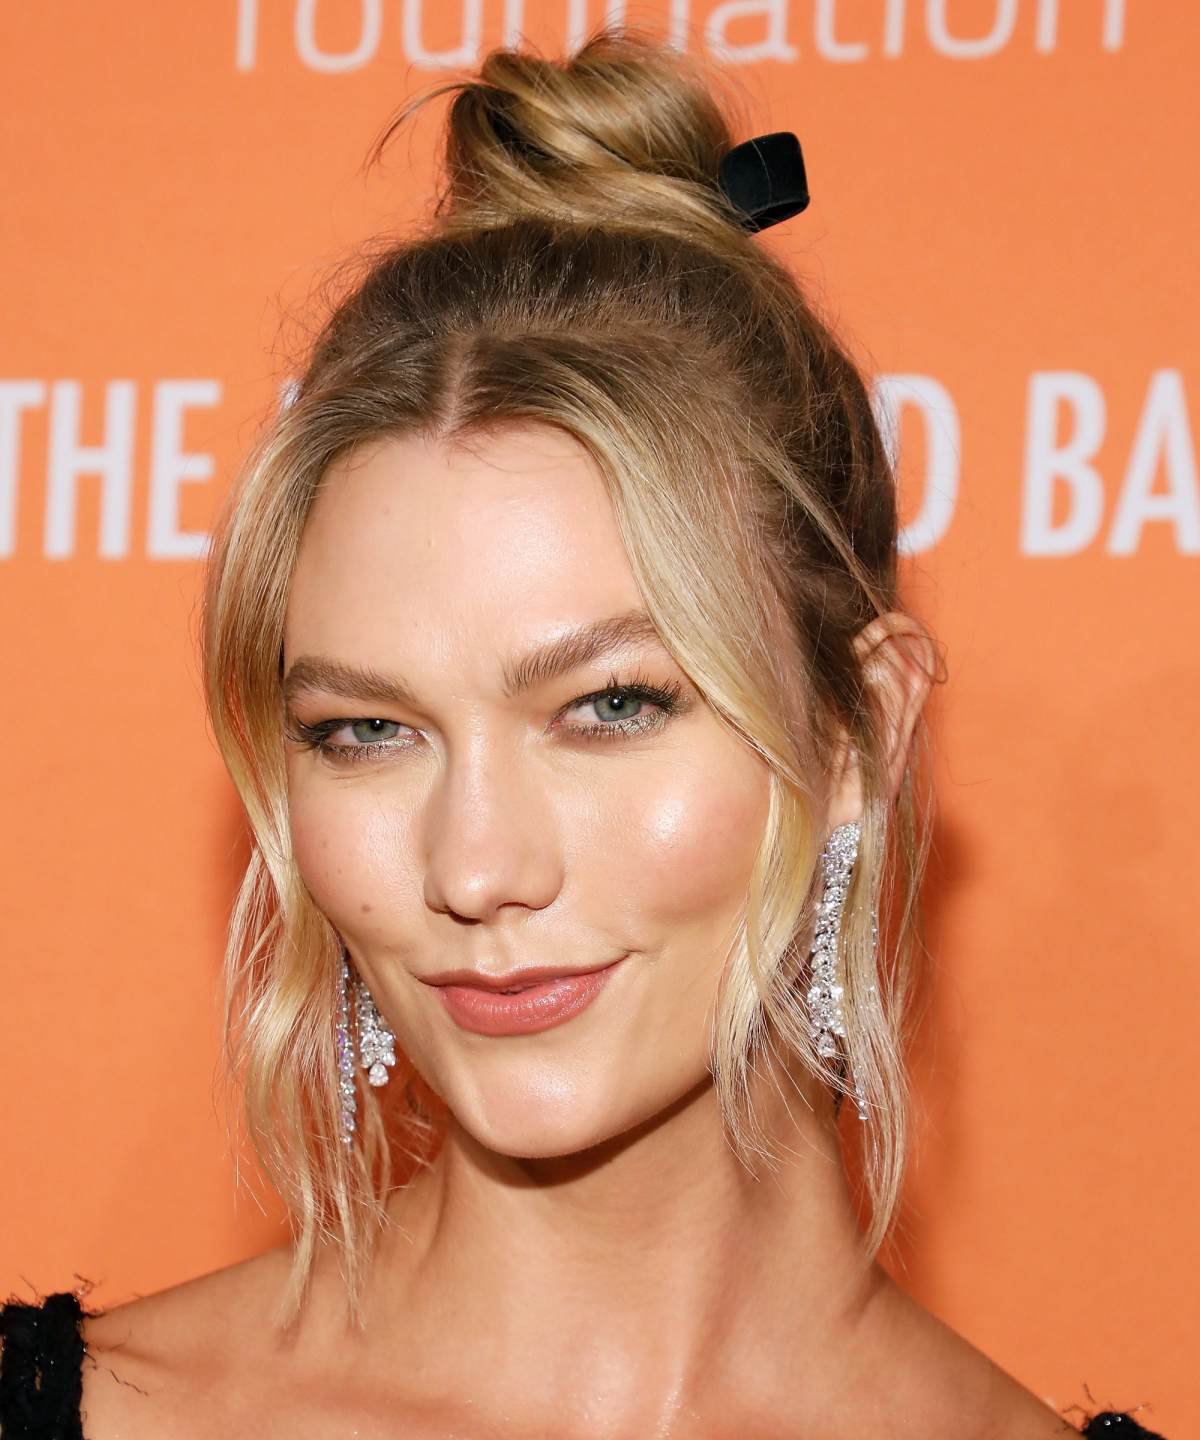
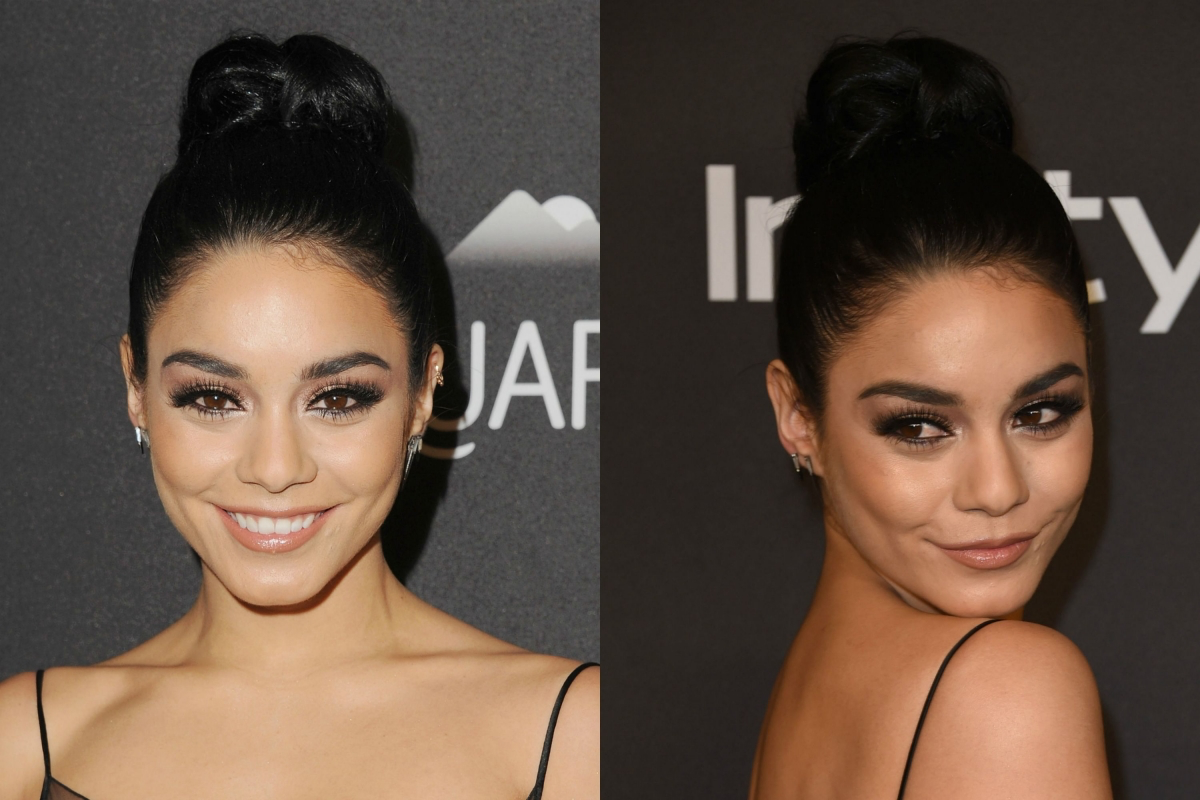
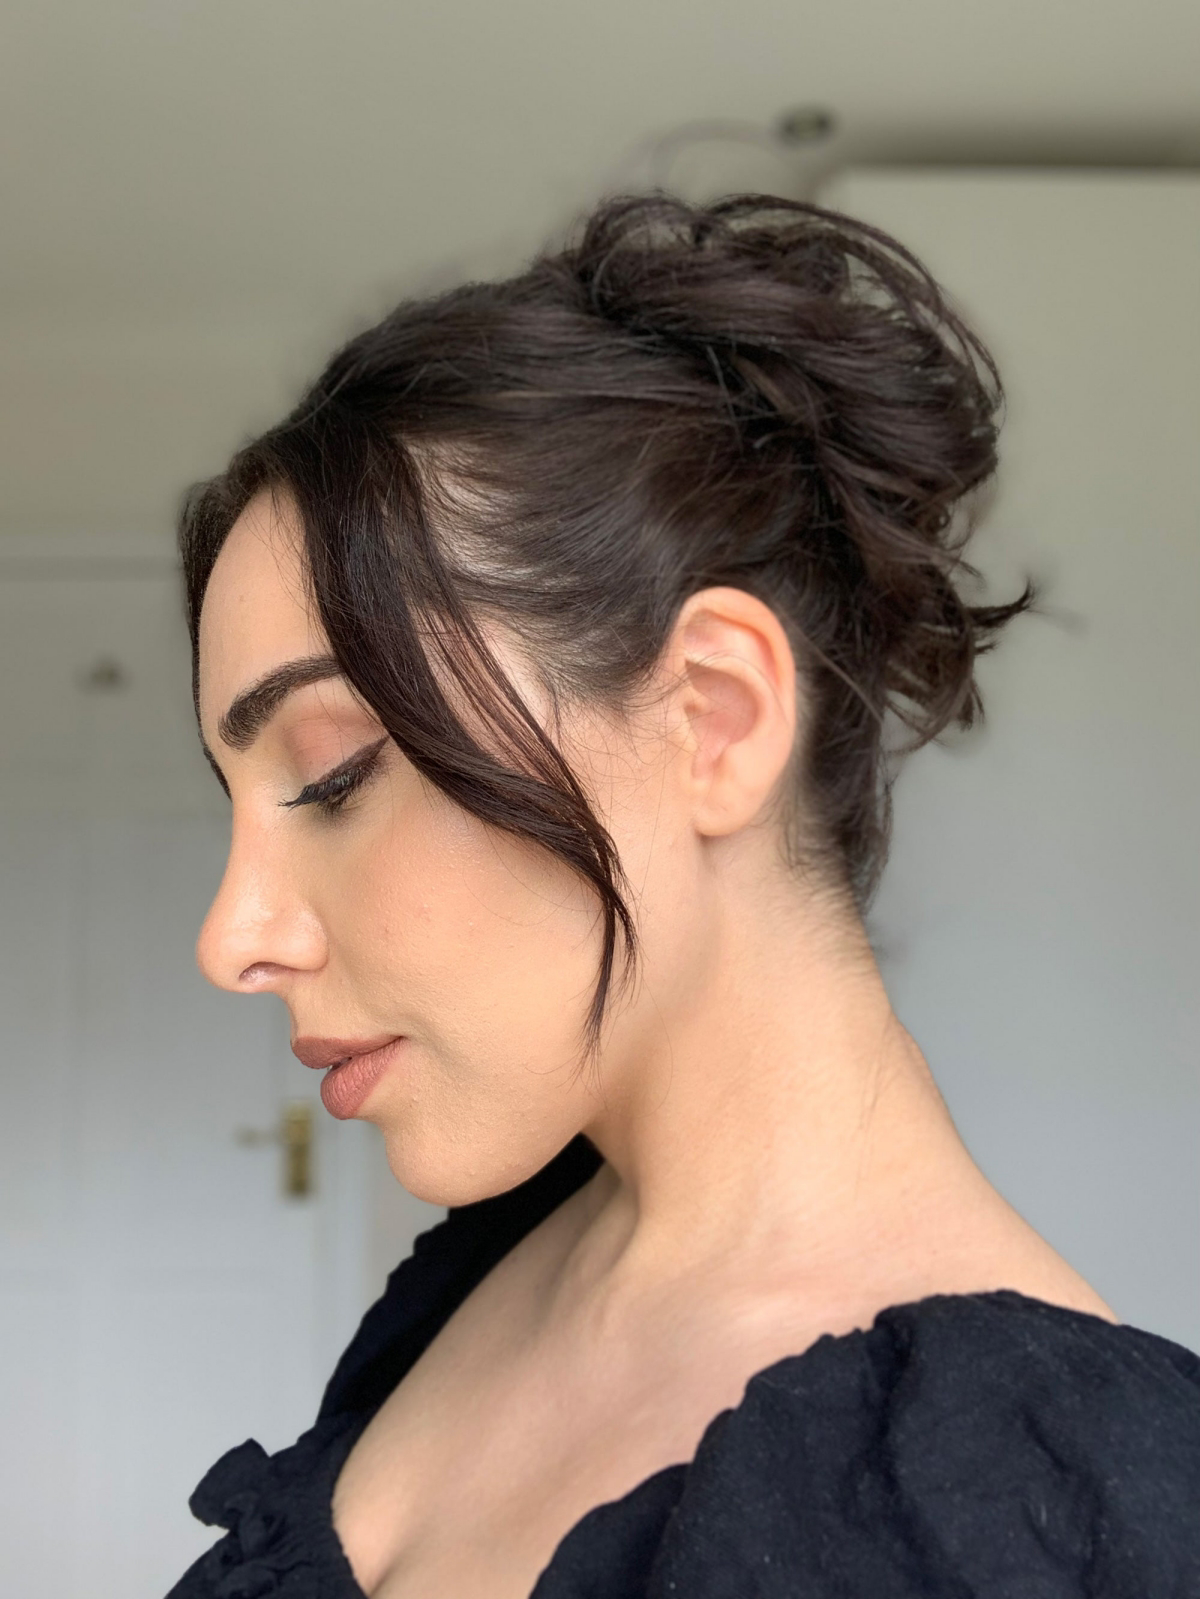
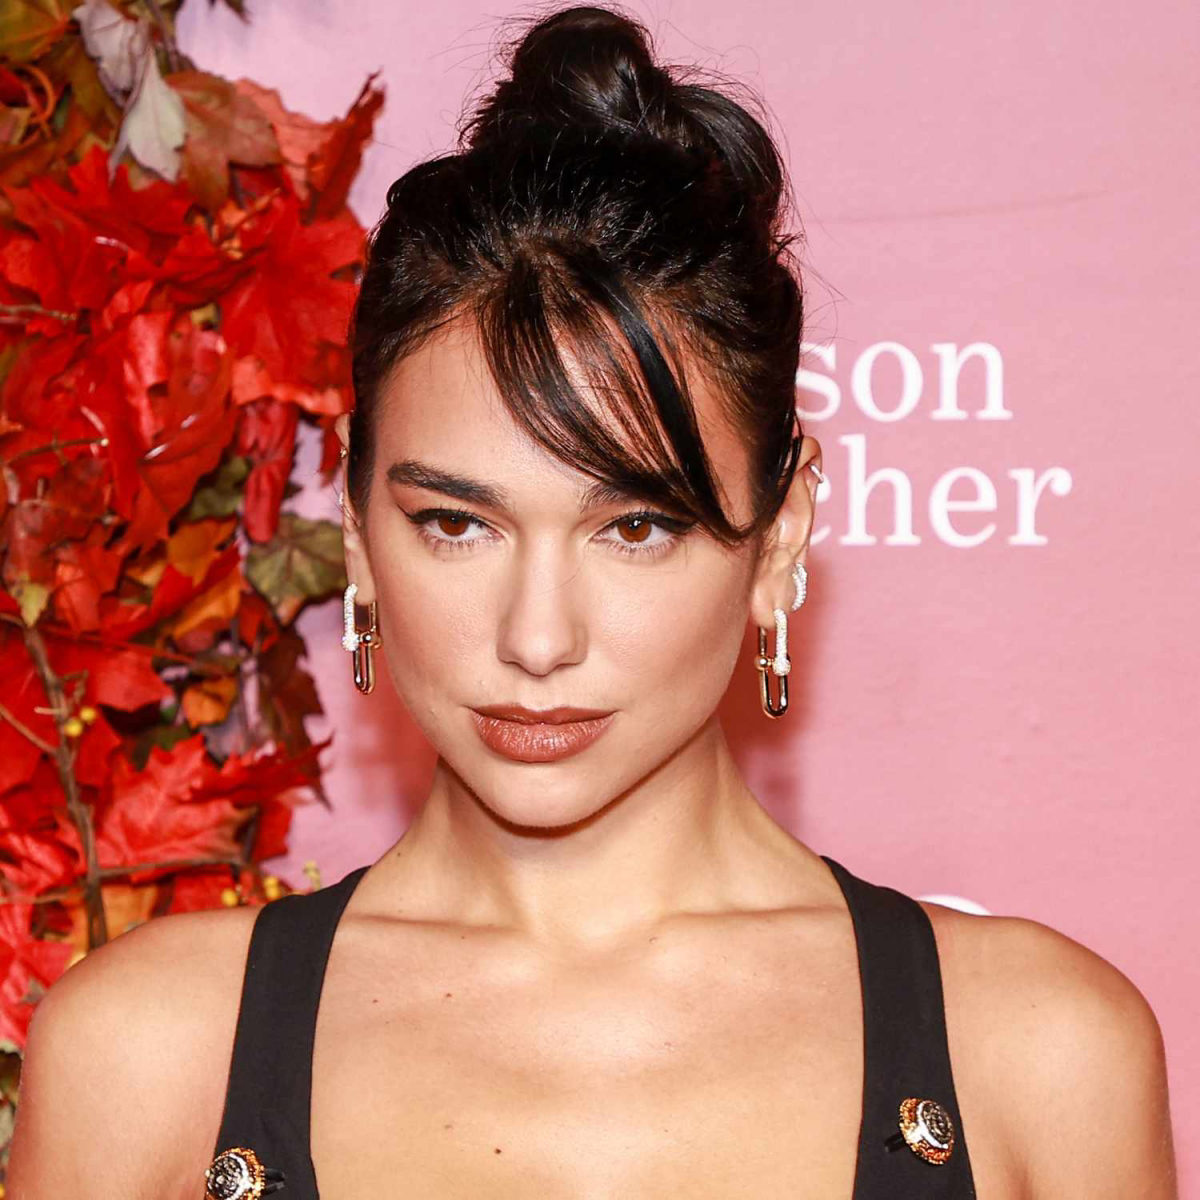
1. The Adapted Chignon
A classic chignon can feel impossible with medium hair because you don’t have a long ponytail to wrap. The trick is to build it in sections.
- The Anchor: Create a low, tight ponytail right at the nape of your neck. This is the single most important part of the style.
- Build the Shape: Split the ponytail into 2-3 sections. Take the first one, lightly tease it for fullness, smooth the top, and then loop it up and over the elastic. Pin it into the base with U-pins. Repeat with the other sections, layering and tucking them to build out a bun shape. Always tuck the ends under and pin them securely.
Heads up for layers! If you have shorter layers, they will try to pop out. Don’t fight it too much. After pinning the main shape, use a tiny bit of pomade or wax on your fingertips to smooth them down, or just embrace a slightly messier, more ‘undone’ look. You can also use a bobby pin to discreetly tuck any really rebellious pieces into the bun.
Common Mistake & Quick Fix: Your bun feels wobbly and is sagging. The problem is almost always a loose anchor ponytail. The entire style relies on that base, so don’t be afraid to take it out and re-do that ponytail as tight as you comfortably can!
(For beginners: Set aside a good 30-45 minutes for your first try. It takes a minute to get the hang of pinning.)
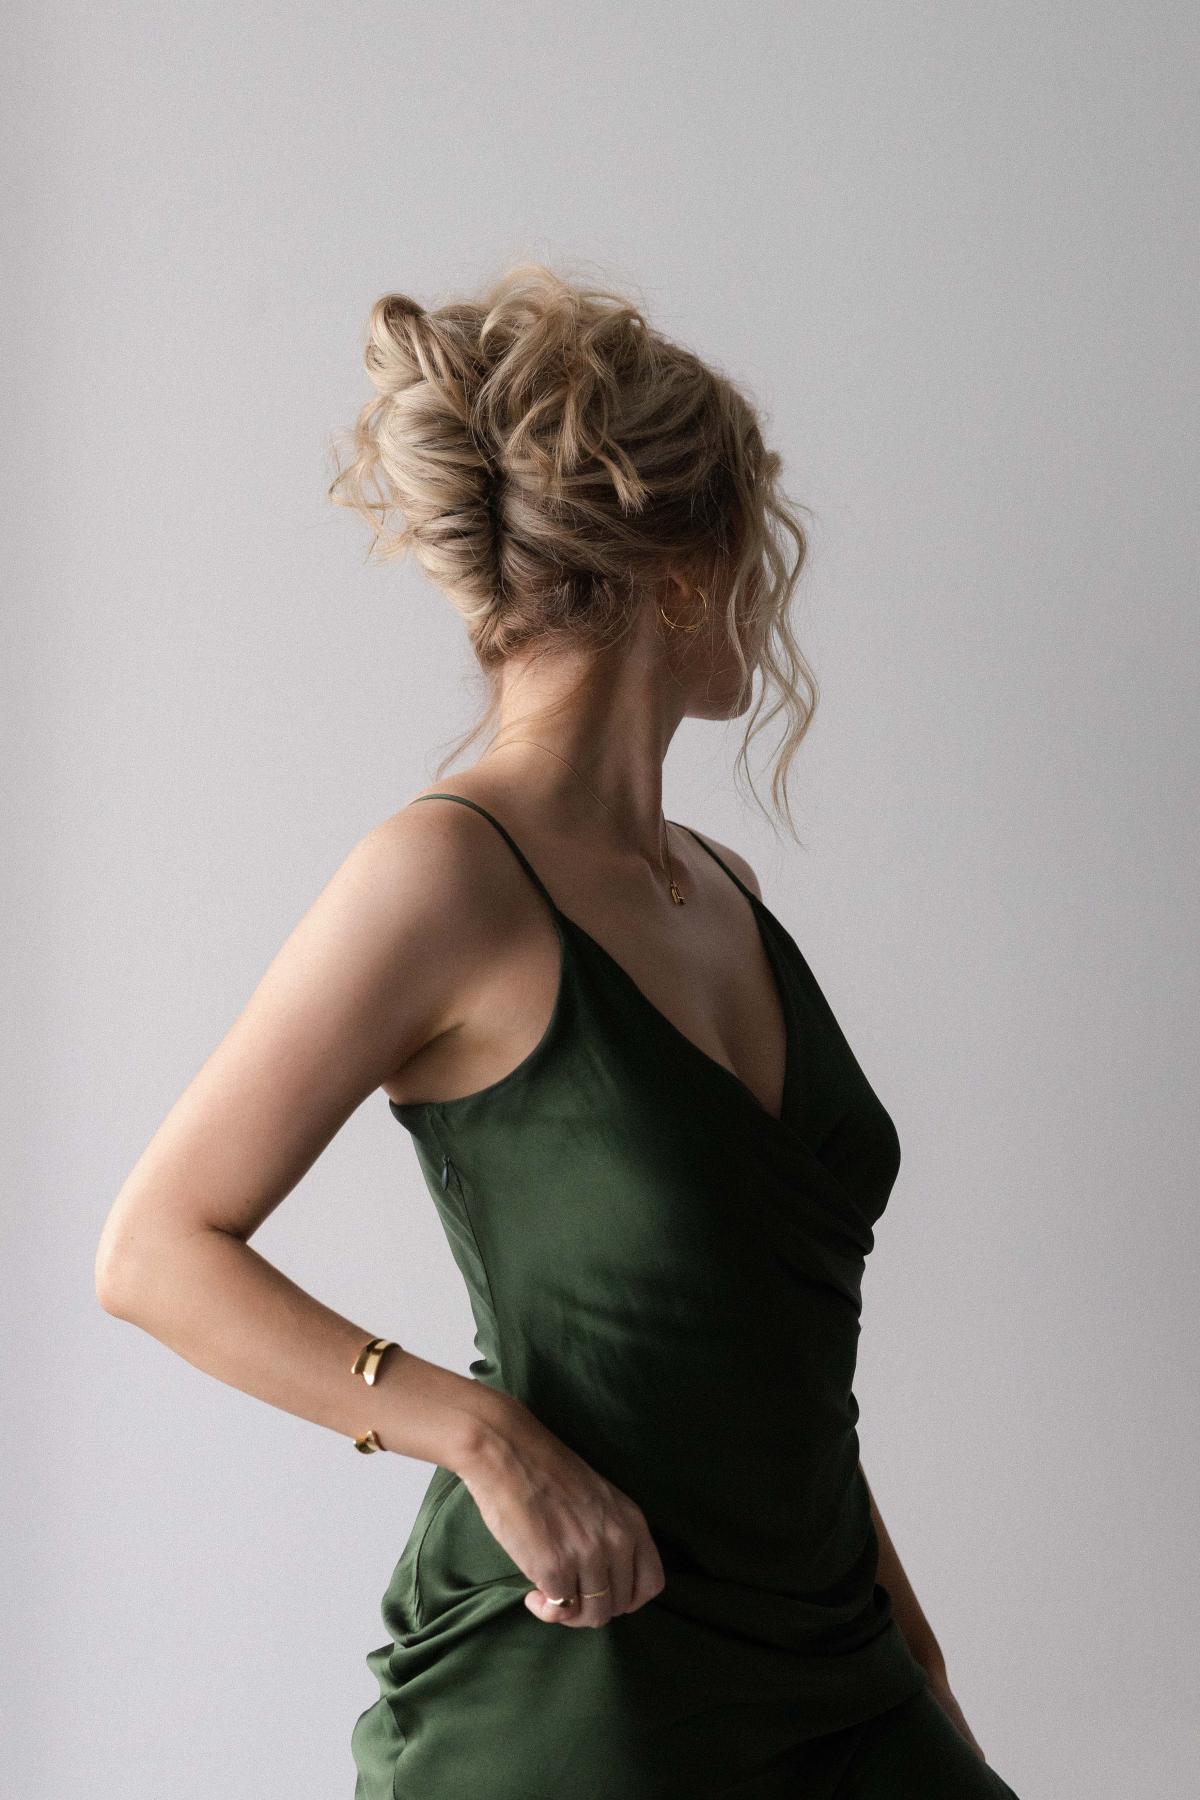
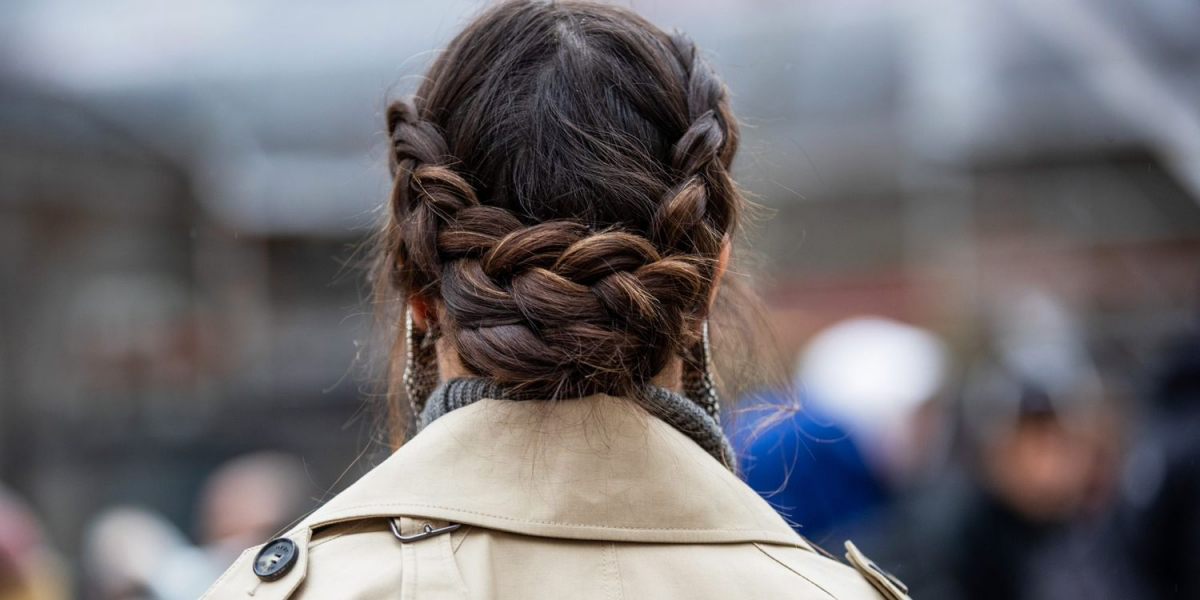
2. The Deconstructed Twist or Braid
Braids and twists add gorgeous texture, but a tight, severe braid isn’t always the goal. For that soft, romantic look, you have to ‘pancake’ it.
- Start Loose: Whether it’s a French twist or a simple braid, keep your initial tension fairly loose.
- Pancake Time: Once the braid is secured with a clear elastic, go back and gently pull on the outer edges of each braided section. This makes the braid look twice as full and instantly softer. Pull horizontally, not up, so you don’t yank the whole thing apart.
- Pin It: Lay your beautiful, full braid across the back of your head and pin it in place. The secret here is to slide bobby pins inside the folds of the braid so they’re completely hidden, anchoring them into the teased base you created earlier. A good rule of thumb is to keep adding pins until you can gently shake your head and nothing feels loose. For a braided style, this could be 10-15 pins!
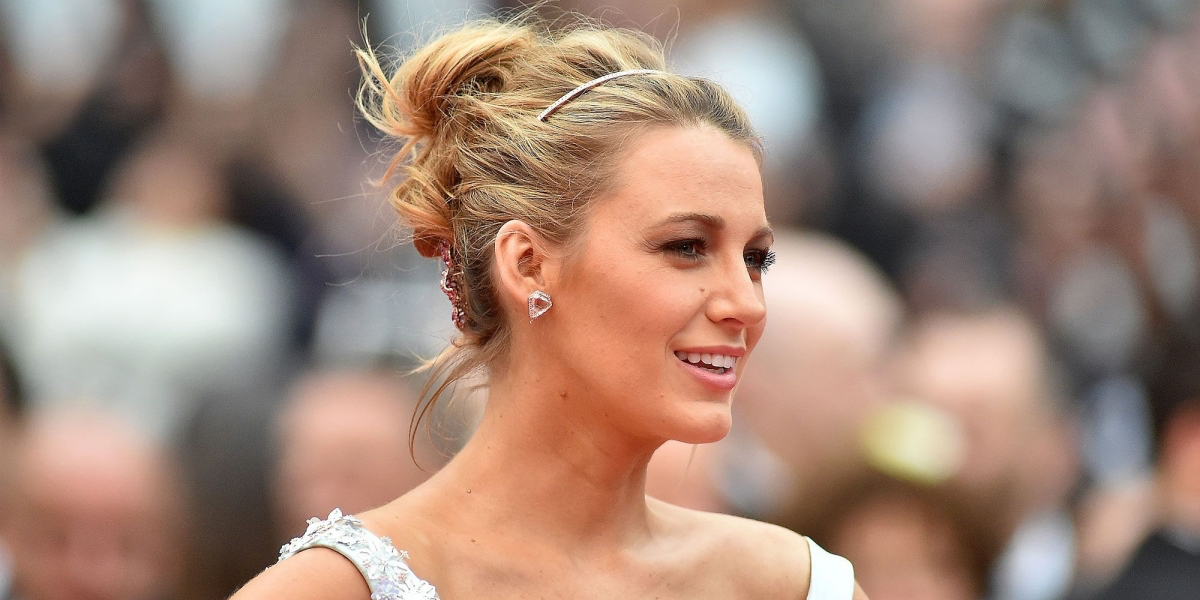
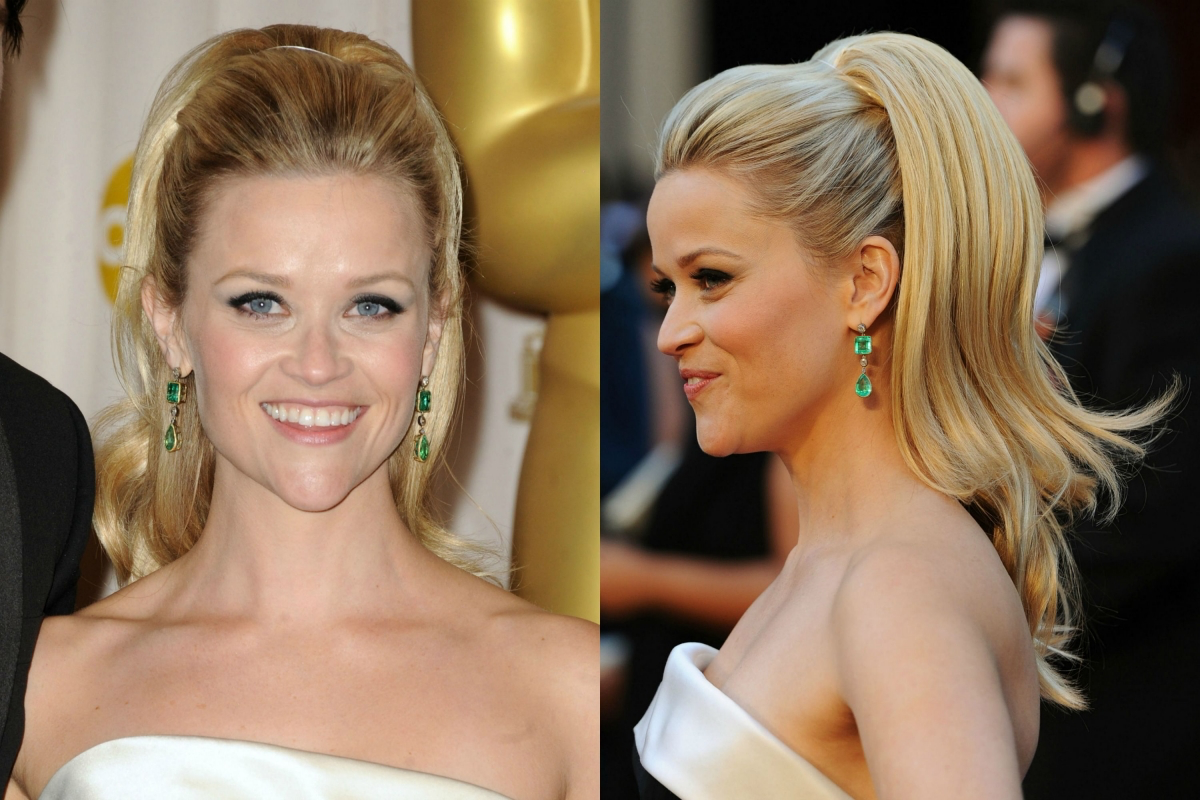
3. The Polished Ponytail
Don’t underestimate a good ponytail! It can be incredibly chic. The key is height and polish.
- Position is Everything: A high pony at the crown of your head feels modern and sharp. One right at the occipital bone (that bone that juts out at the back of your head) is timeless and elegant.
- Get a Secure Base: Use a bungee elastic for a super-secure hold. Before you pull it tight, use your free hand to gently push the hair at your crown forward a bit. This creates a soft, flattering lift instead of a severe, pulled-back look.
- Wrap It Up: This is the easiest trick to make a pony look expensive. Take a small, half-inch piece of hair from the underside of the ponytail, spray it with hairspray, and wrap it around the elastic to hide it. Secure the very end by pushing a bobby pin up into the base from underneath.
Your 5-Minute Challenge: Try just the hair-wrap trick this week on your everyday ponytail. It’s a tiny detail that takes seconds but makes you feel instantly more put-together.
Pro-Level Tips & When to Call for Backup
Once you’re comfortable with the basics, you can start thinking about the finer details. In a salon, we’re always considering things like the weather or using a little extra help to get the perfect result.
A huge one is humidity. If you’re in a humid climate, an anti-humectant finishing spray is your best friend. It creates a shield against moisture that causes styles to deflate. In dry climates, the enemy is static. A light mist of a shine spray or oil at the very end can tame flyaways without weighing your hair down.
And here’s a professional secret I use all the time, especially for fine or lower-density hair: a few well-placed clip-in extensions. I’m not talking about adding tons of length. I’m talking about adding volume. I’ll clip a single weft of human hair (matched perfectly to the client’s color) at the crown or nape before I even start the updo. It provides more hair to work with and makes a chignon or twist look so much fuller. It’s a total game-changer.

Finally, a word on safety. An updo should feel secure, not painfully tight. If you feel a sharp pulling sensation, it’s too tight and will give you a headache. The hold should come from the texture and the interlocking pins, not from scalp tension. And please, always use a heat protectant. No exceptions.
While you can absolutely create beautiful styles at home, for a really big event like a wedding, it’s often worth hiring a pro. We’re trained to adapt a style to your specific hair, face shape, and even the neckline of your dress. It’s an investment in peace of mind. But for everything else? With a little practice and the right prep, your medium-length hair is about to become your greatest styling asset.
Galerie d’inspiration

Don’t underestimate the power of the humble bobby pin. The difference between a style that holds and one that droops often comes down to technique.
- For maximum security, create an ‘X’ by interlocking two pins.
- If they slip in fine hair, spray them with a dry shampoo like Batiste’s or a texturizing spray before inserting them.
- Always place the wavy side against your scalp; it’s designed for better grip.
A single, healthy strand of hair can support up to 100 grams (about 3.5 ounces) of weight.
This incredible strength is why the ‘divide and conquer’ method works. By creating multiple, smaller anchor points for your updo instead of one large one, you distribute the weight evenly, relying on the collective power of your hair to hold the style securely all day.

Help! My updo is perfect but surrounded by a halo of frizz. What’s the trick?
Forget spraying directly from the can, which can create wet spots. The professional secret is an unused toothbrush. Lightly mist its bristles with a strong-hold hairspray, like the Kenra Volume Spray 25, and gently brush it over any flyaways. This technique tames stray hairs with precision, giving you a perfectly polished finish without compromising the softness of the rest of your style.
Working Hairspray: Think of this as a flexible tool. A product like L’Oréal’s Elnett Satin allows you to mist a section, style it, and even brush it out without sticky residue. It’s for building the shape.
Finishing Spray: This is your final armor. A spray like Moroccanoil’s Luminous Hairspray provides a strong, humidity-resistant lock once your updo is complete. You don’t style with it; you set with it.
For medium-length hair updos, using both is often the key to longevity.
Looking for inspiration beyond the classic bun? Explore the Gibson Tuck. This elegant, romantic style from the Edwardian era is surprisingly perfect for medium-length hair. It involves tucking the ends of your hair into a rolled section at the nape of your neck. It looks intricate but is deceptively simple and works beautifully with the amount of hair you have, creating a full-looking chignon without needing extreme length.
- It adds instant volume and lift at the crown.
- It creates a cushioned base for pins to grip into.
- It helps a simple ponytail or bun look fuller and more intentional.
The secret? The art of the tease. Using a fine-tooth comb on the underside of a section, gently push the hair towards the root. The resulting cushion is the structural foundation that makes so many chic updos possible.
A touch of metallic: Instantly elevate a simple twisted updo by strategically placing minimalist metallic accessories. Instead of a standard bobby pin, try a sleek gold or silver U-pin, like those from Kristin Ess Hair. Let it peek out from a chignon or use it to secure a French twist. It acts as both a tool and a piece of jewelry.


