Your Ultimate Guide to Nailing Flawless Side-Swept Bangs
I’ve spent years in the salon, and if there’s one style that never, ever goes away, it’s the side-swept bang. It’s a timeless classic for a reason. Done right, it can totally transform your look by softening your features, highlighting your eyes, and adding a bit of life to your haircut. But let’s be real for a second—the “effortless” celebrity fringe you see in photos? It’s rarely effortless. It comes down to a really smart cut, the right tools, and knowing a few simple tricks for daily styling.
In this article
Getting this cut right is more than just snipping hair at an angle. It’s about understanding how your hair grows, your face shape, and using the right techniques to make it all work together. A great side-swept bang looks like it belongs there, blending perfectly with the rest of your hair. A bad one… well, it can look like an accident you’re trying to push out of the way.
So, I’m going to walk you through everything you need to know, from the theory a pro uses to the practical tips I give my own clients for keeping their bangs looking amazing at home. This is the good stuff.
First Things First: Why Bangs Work (And For Whom)
Before any scissors come out, the most important step is the consultation. We have to look at your hair type, hairline, and face shape. Just jumping in without this info is like trying to build a house without a blueprint—it’s probably not going to end well.
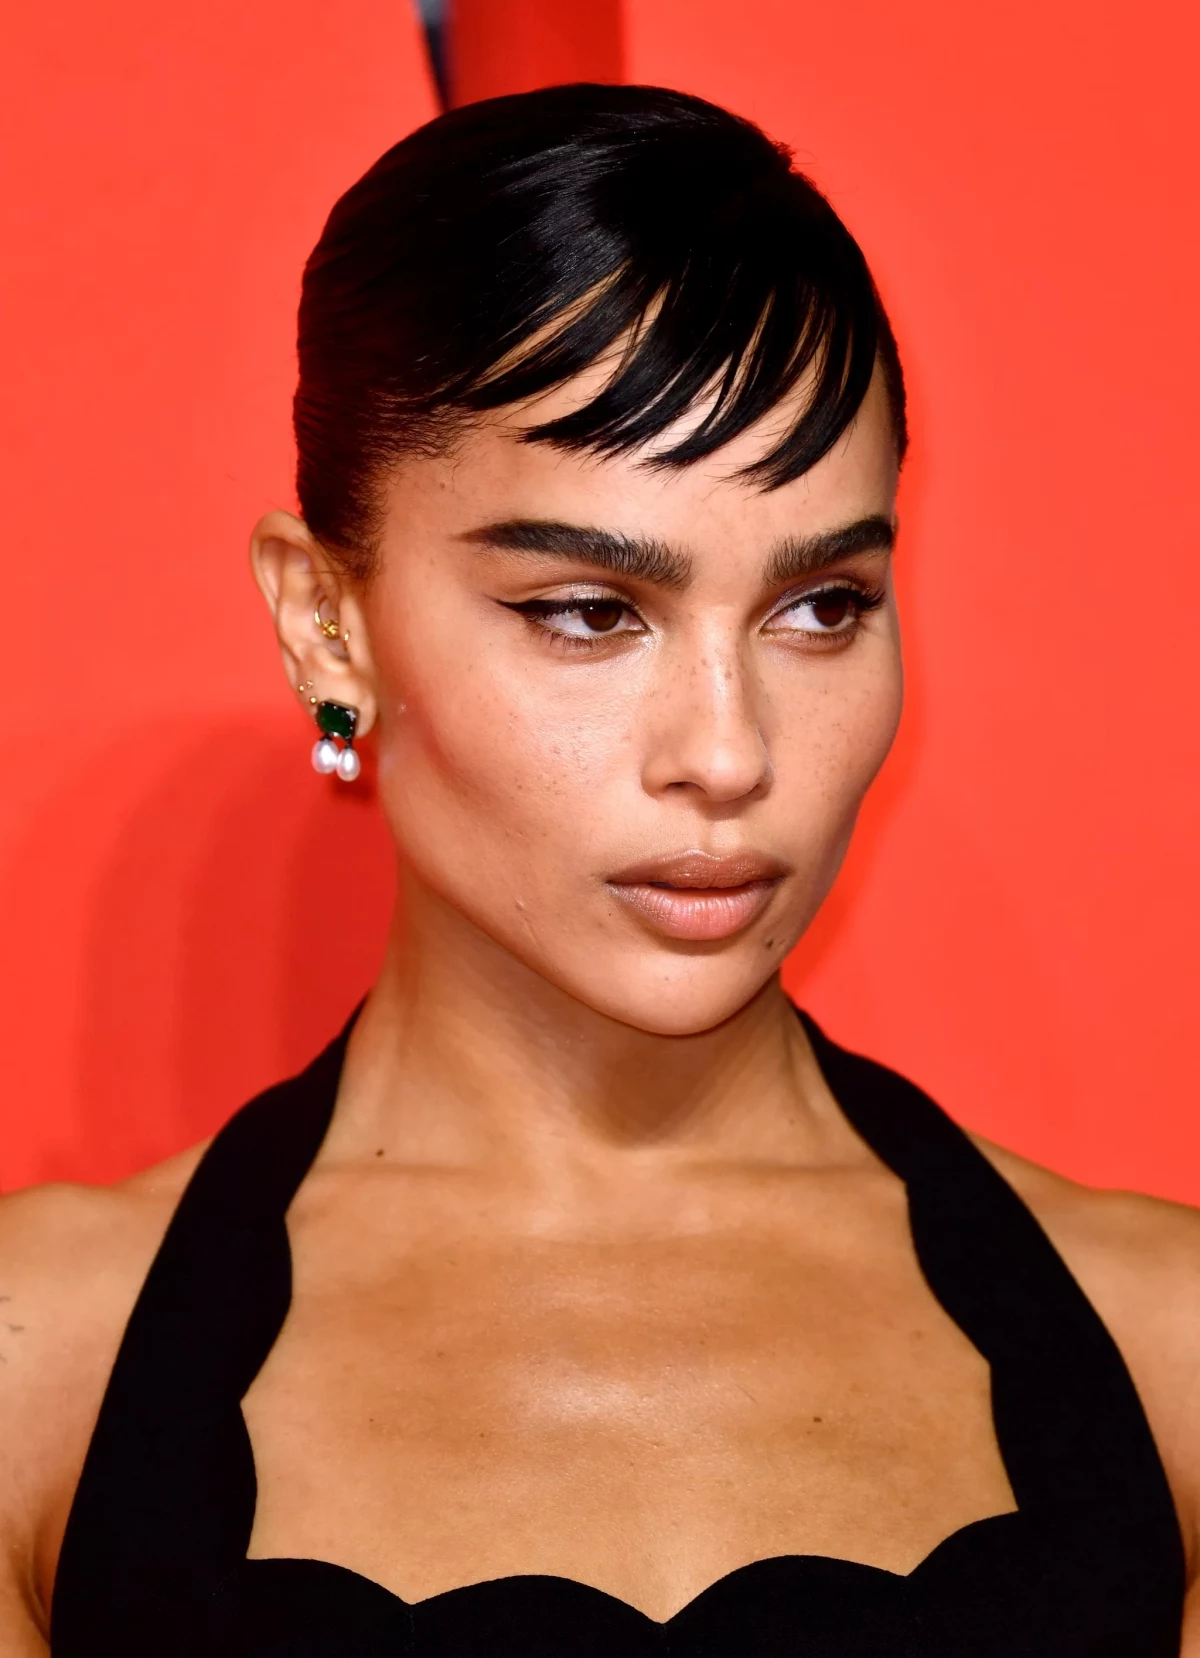
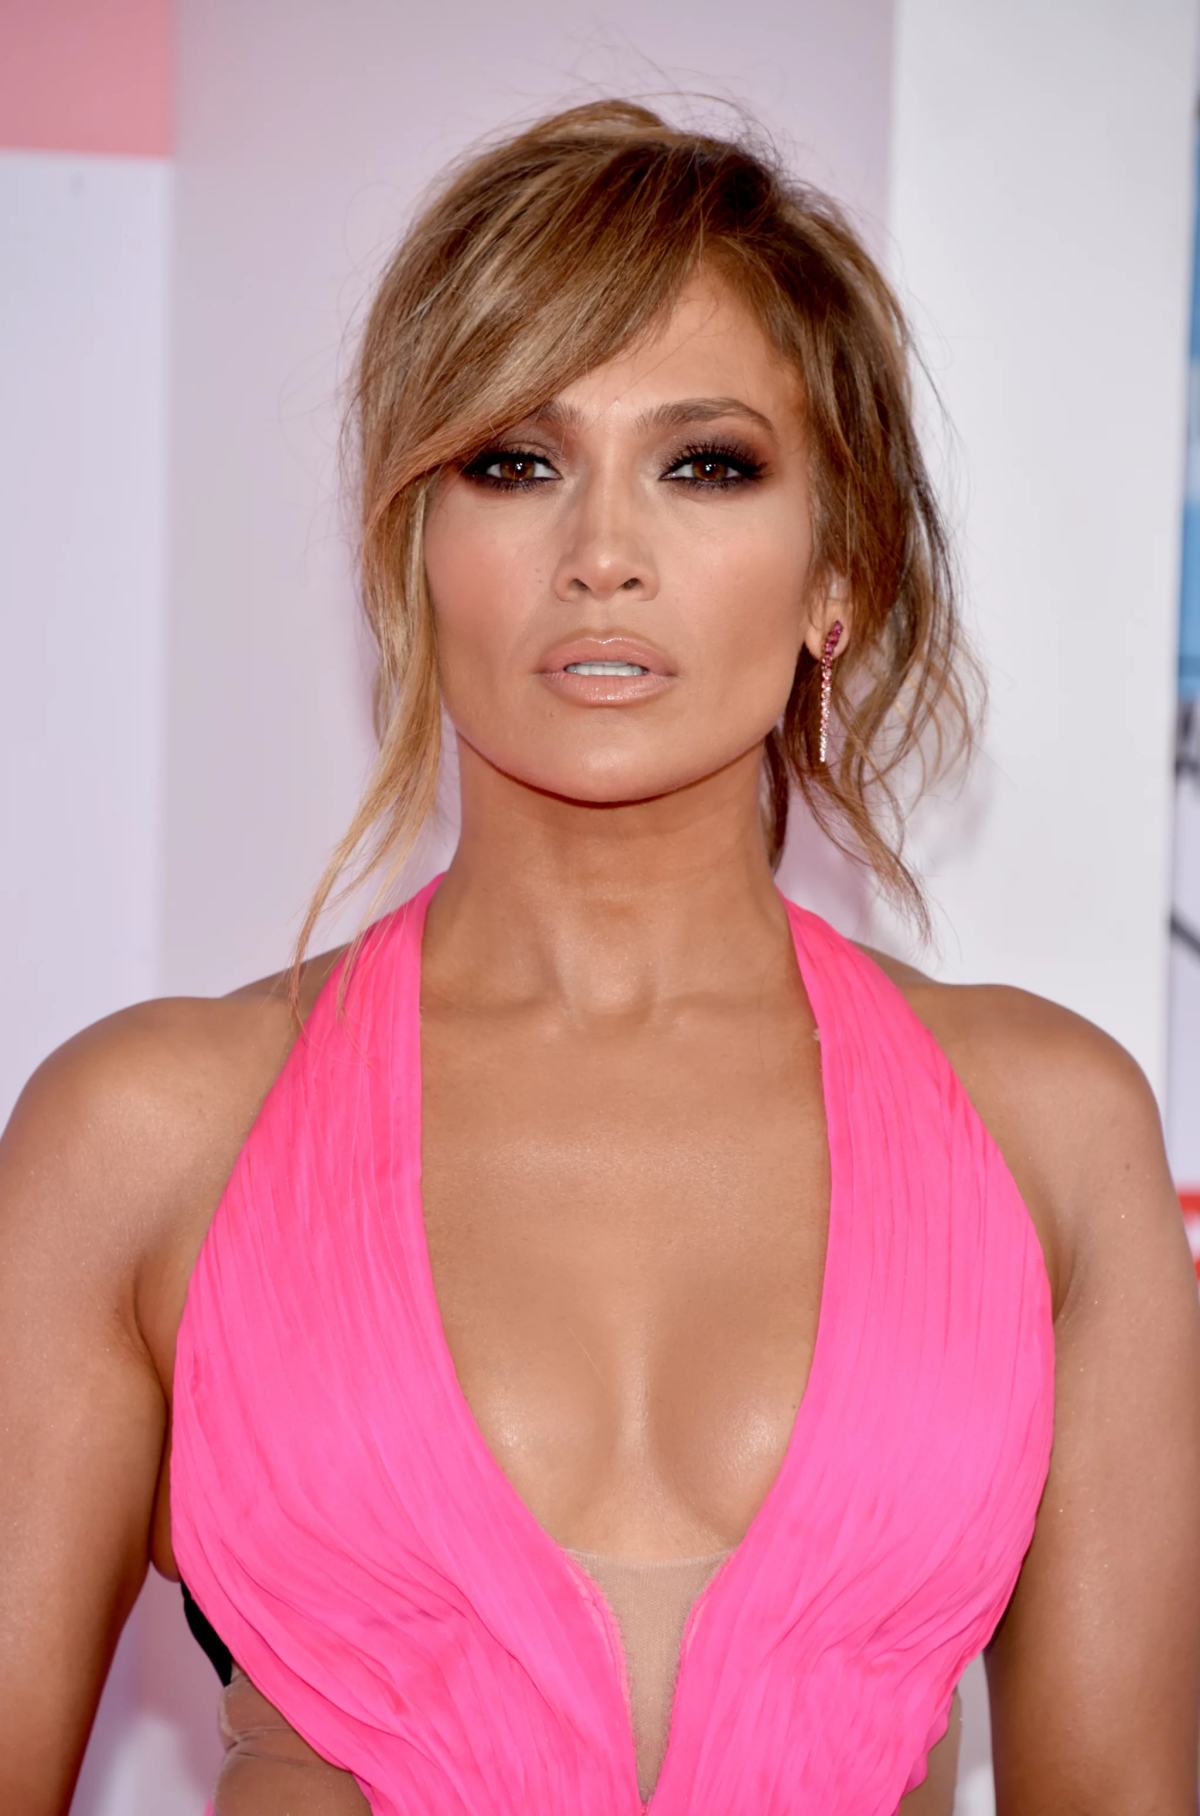
Let’s Talk Face Shape
A side-swept bang is all about creating a soft diagonal line across your forehead. This simple line is incredibly powerful because it breaks up your facial structure in a flattering way, drawing attention exactly where you want it.
Not sure your face shape? Quick tip: Pull all your hair back securely. Stand in front of a mirror and use a dry-erase marker or an old lipstick to trace the outline of your face directly onto the glass. Step back and look. Is it more square, round, or heart-shaped? This little trick makes it so much easier to see.
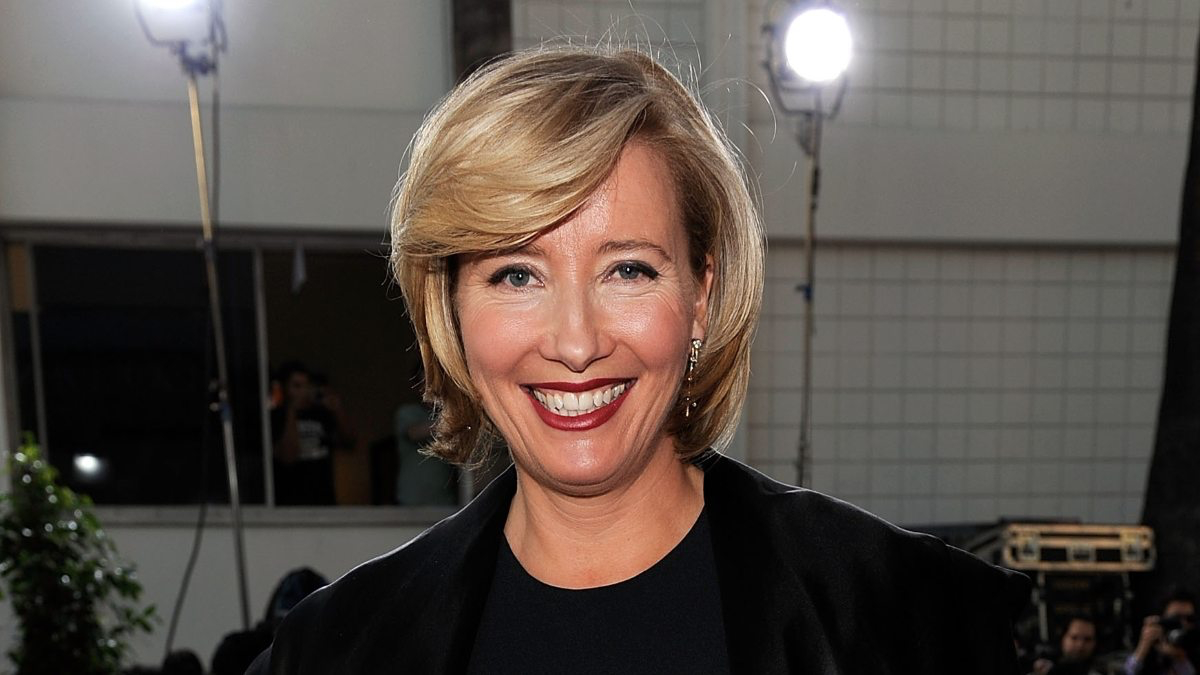
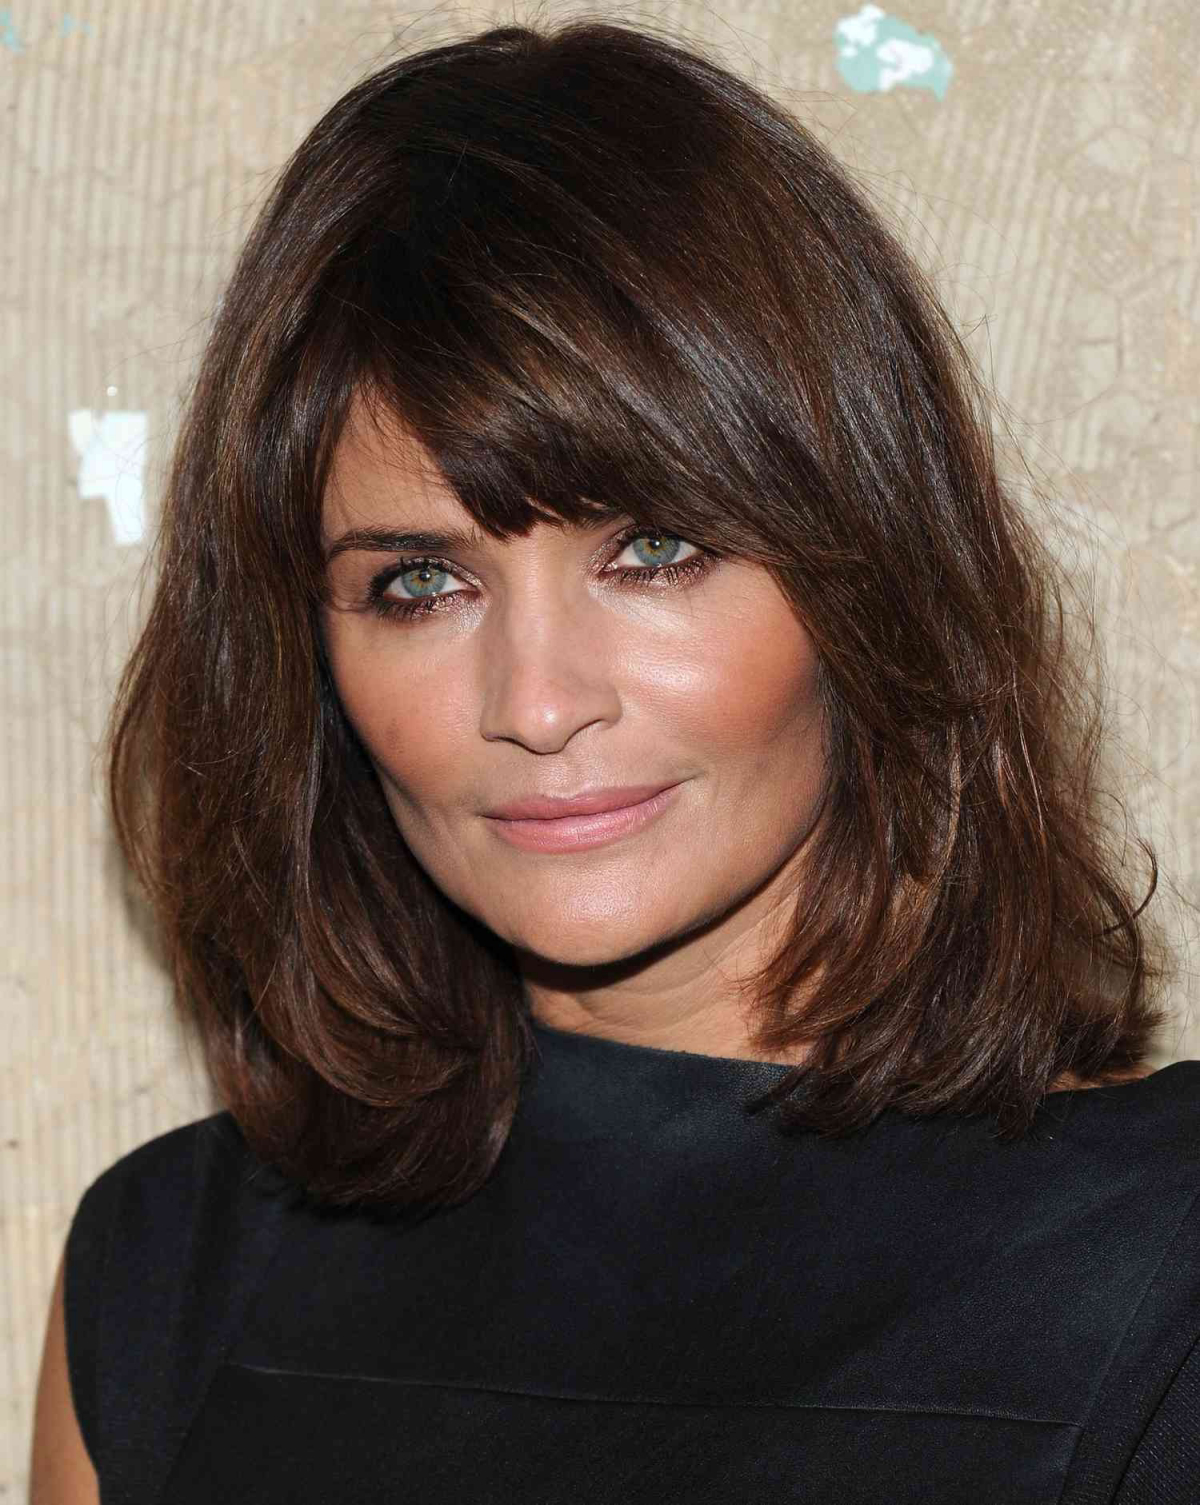
- For Square or Angular Faces: A soft, wispy side bang is your best friend. The gentle curve of the fringe works against the sharper angles of your jawline, creating a much softer overall look. I usually like the bang to end right around the cheekbone to really make that area pop.
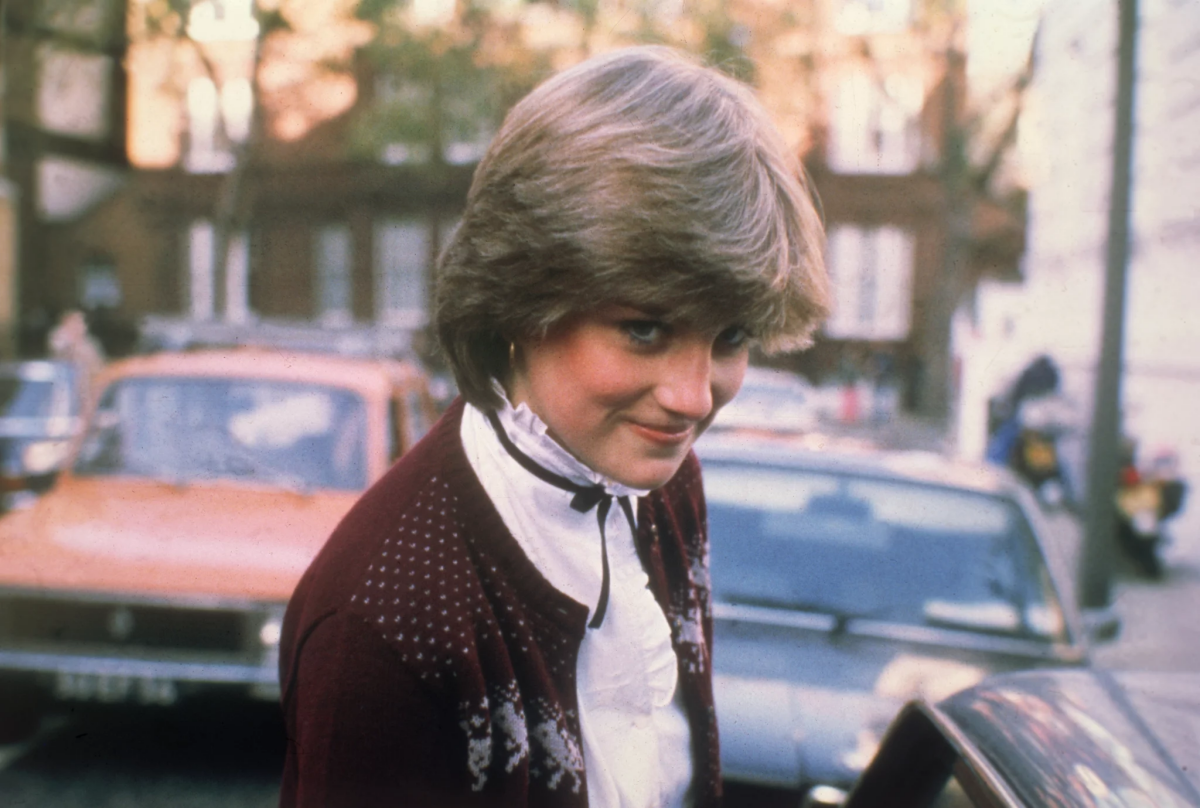
- For Round Faces: The main goal here is to create a bit of length. A deeper side part paired with a longer bang that sweeps past the eye creates a strong diagonal line. This visually slices across the roundness, making your face appear more oval. Short, rounded bangs are a no-go here, as they can make the face look wider.
- For Heart-Shaped Faces: These faces typically have a wider forehead and a narrower chin, and a side-swept bang is a perfect match. It drapes over one side of the forehead, bringing everything into beautiful balance. A length that ends near the eyebrow or cheekbone is usually the sweet spot.
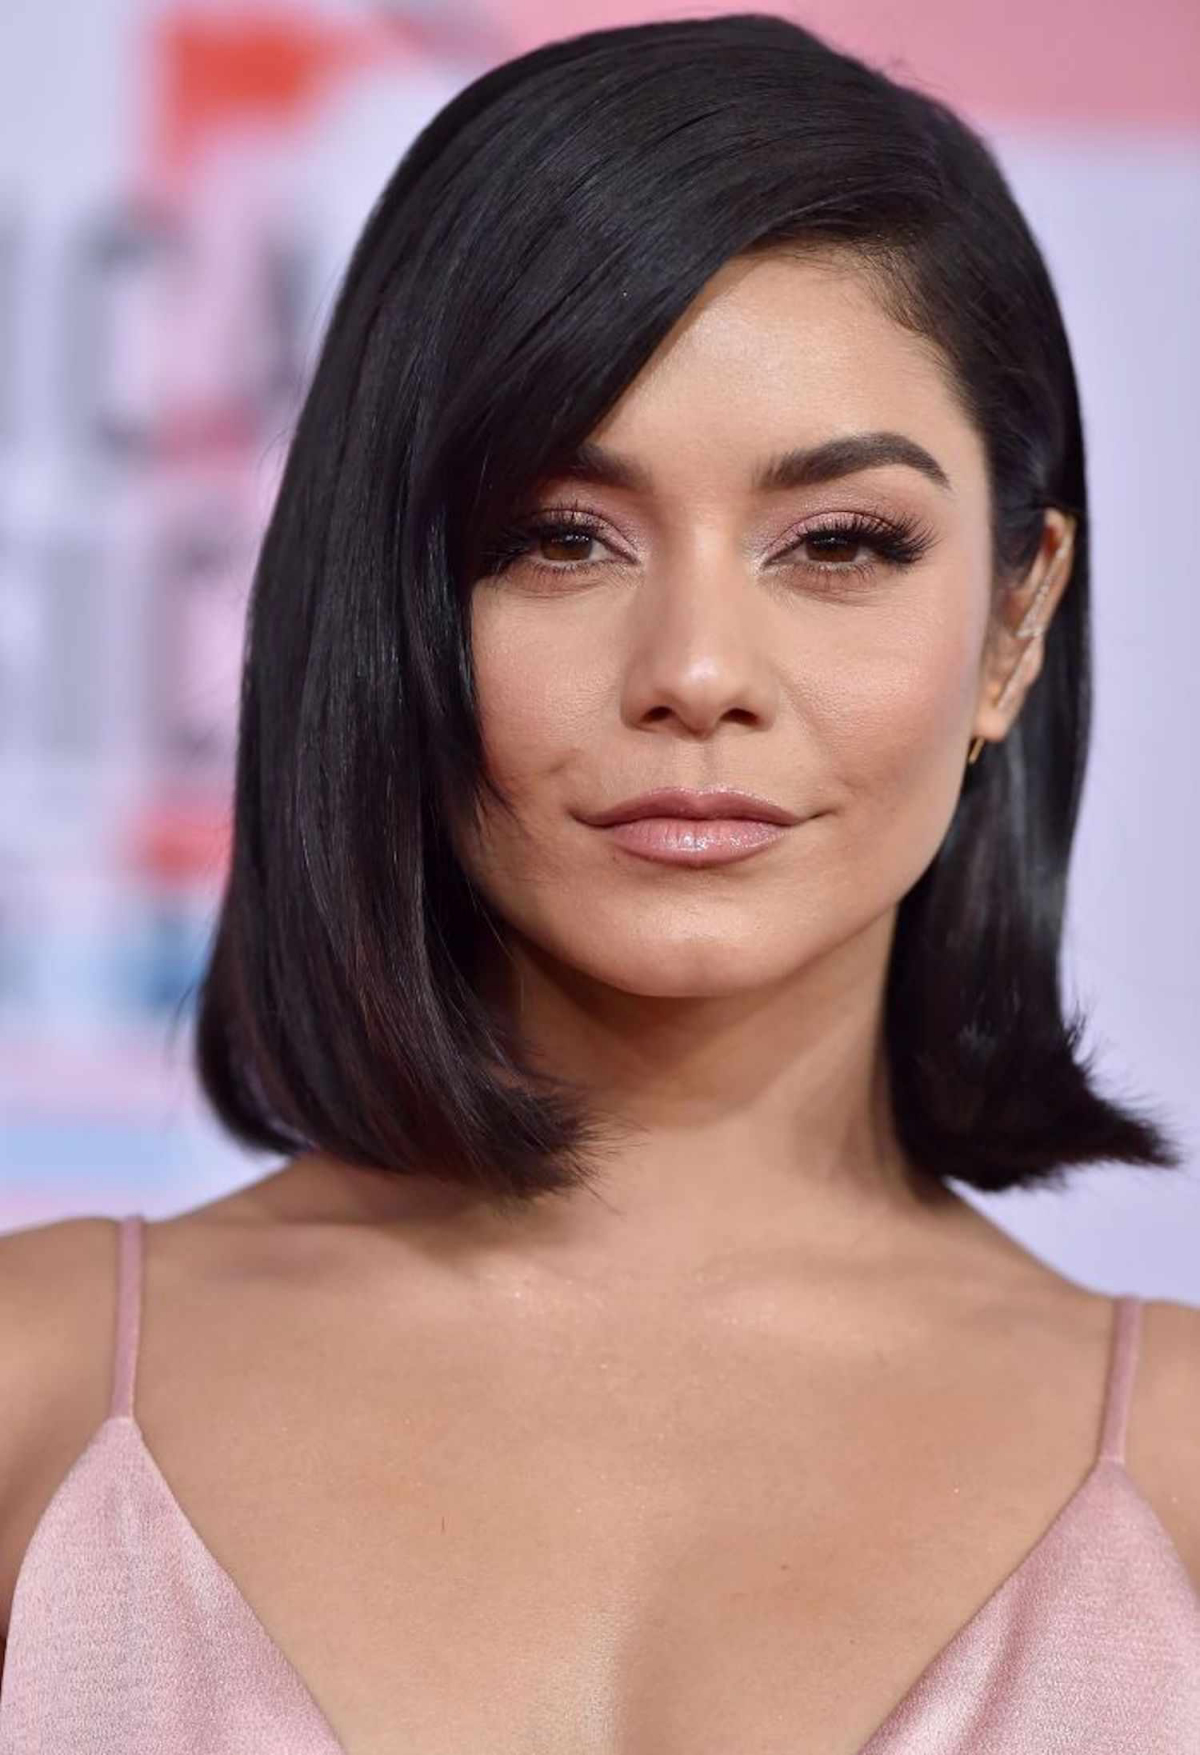
- For Oval Faces: Honestly, if you have an oval face, you can pull off almost anything. A side bang just adds a fun point of interest. Here, we can play with different lengths and thicknesses based purely on your personal style and how thick your hair is.

Working With Your Hair’s Personality
This is where a stylist’s experience really shines. You can’t fight a stubborn cowlick; you have to learn to work with it. I always check out the hair when it’s dry and in its natural state to see what it wants to do on its own.
- Cowlicks and Whorls: If you’ve got a strong cowlick right at your front hairline, side-swept bangs can be a challenge. They’ll constantly want to split or stand straight up. In these cases, the trick is to cut the bangs a bit longer and heavier. That extra weight helps to hold them in place. But you have to be realistic—you’ll be committing to styling them every single morning.
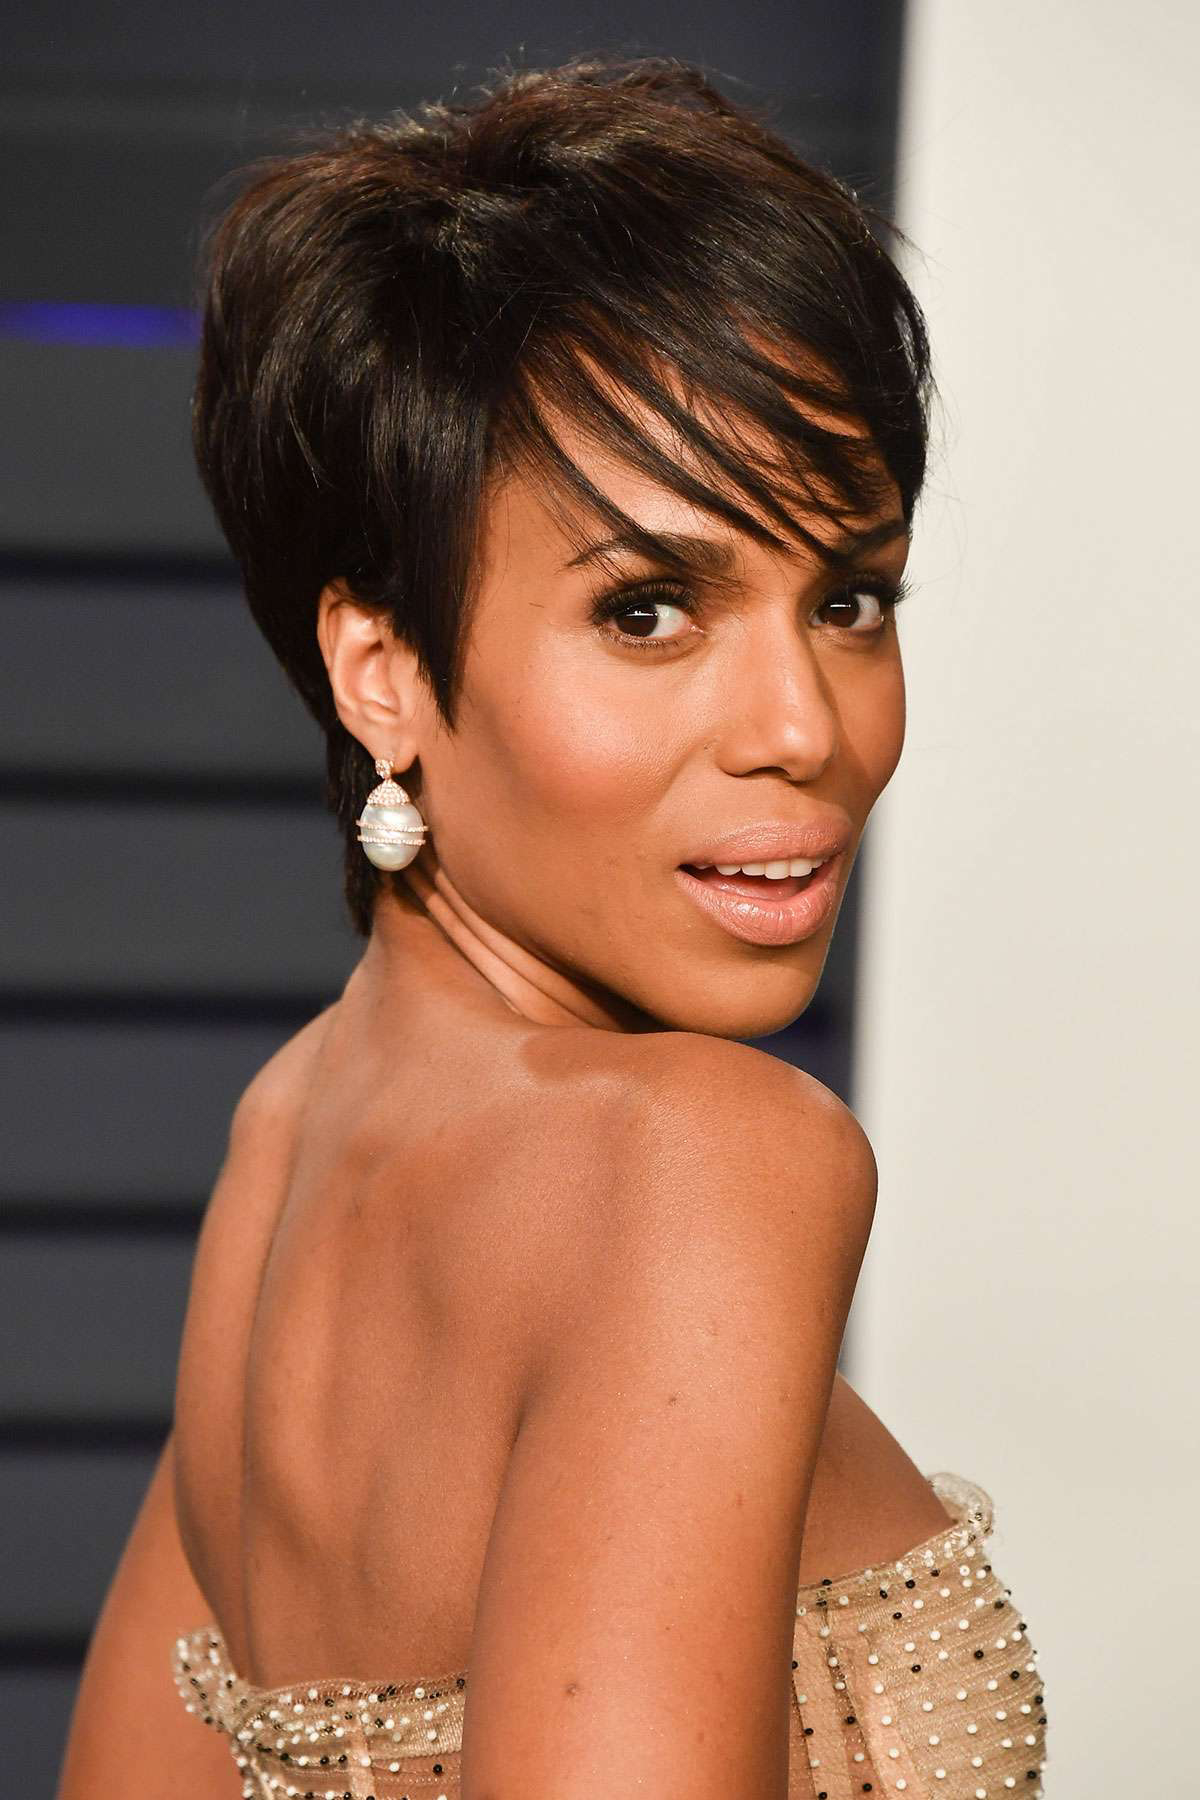
- Fine Hair: For finer hair, the goal is to create the illusion of thickness. I usually cut a blunter line and avoid over-texturizing, which can make the ends look weak and frayed.
- Thick or Coarse Hair: With thick hair, you risk the dreaded “shelf bang”—a heavy, solid chunk of hair that just sits there. To avoid this, we use techniques like point cutting and slide cutting to remove weight from the inside. This helps the hair fall softly instead of looking like a helmet.
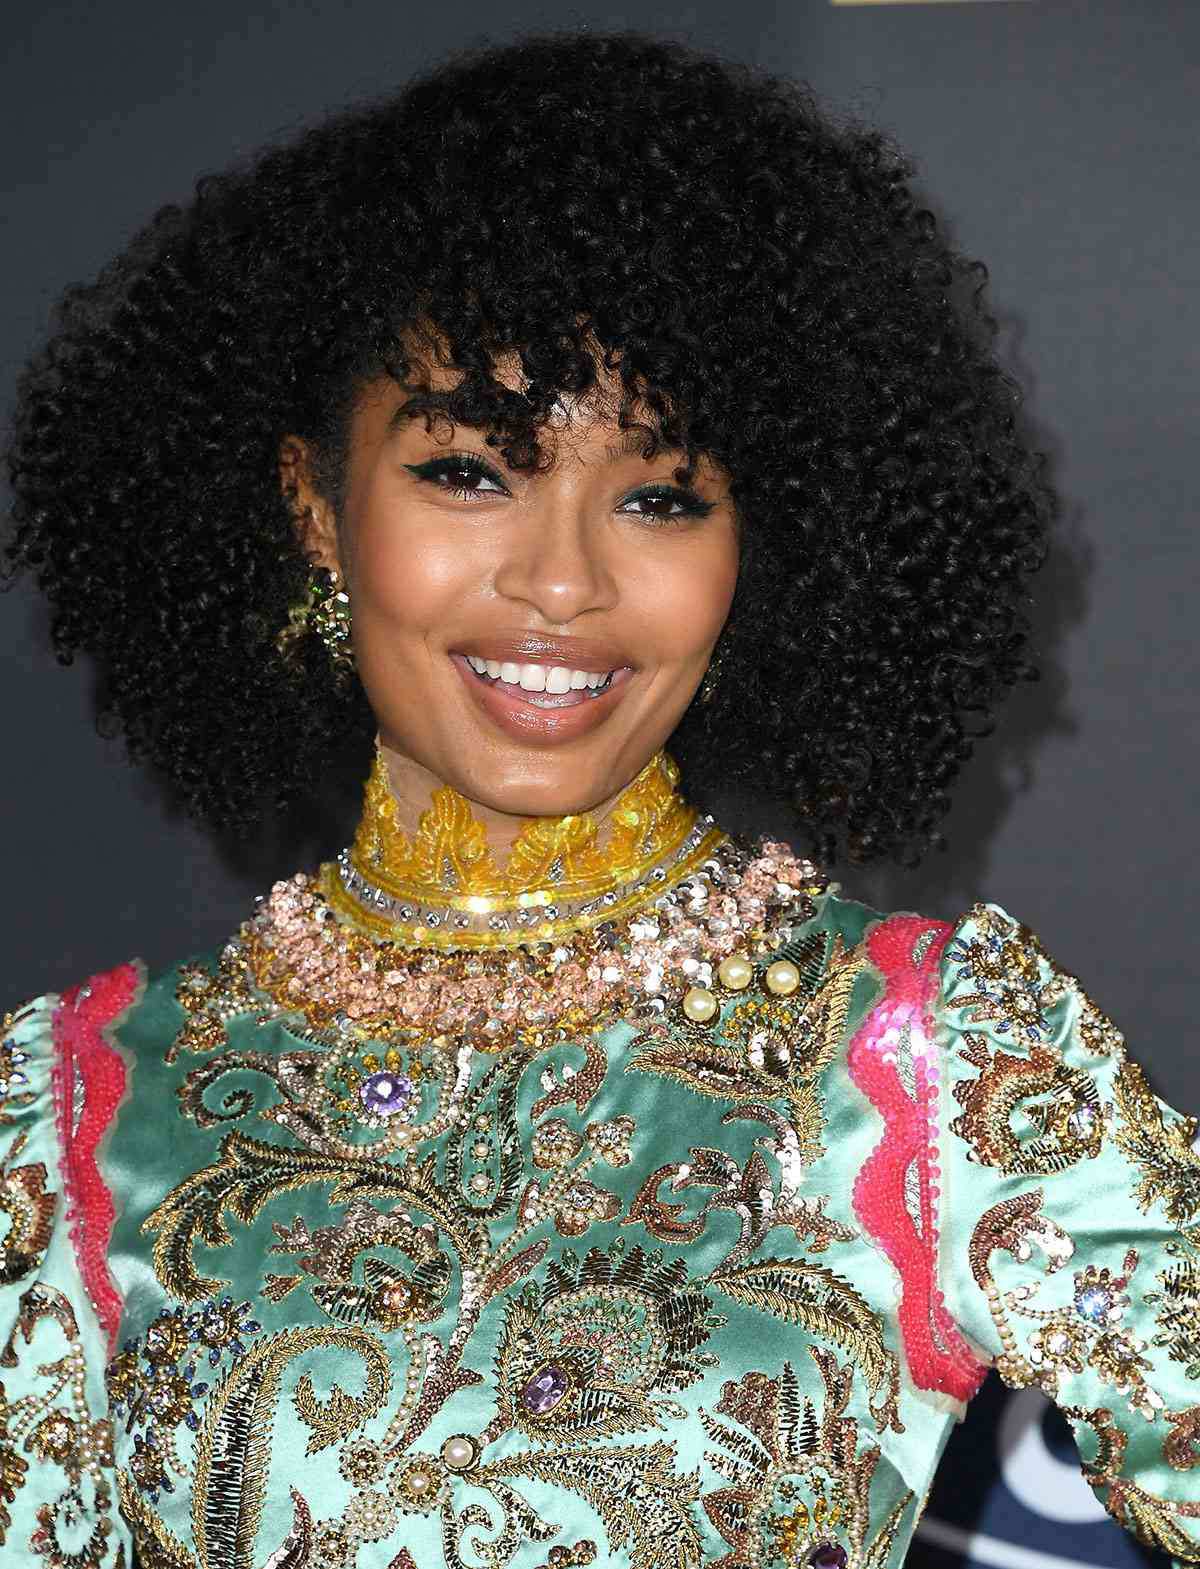
- Curly Hair: Oh yeah, cutting bangs on curly hair is a whole different ballgame. A hard-and-fast rule is to never cut curly bangs when they’re wet, as the hair can shrink up several inches as it dries. We always do a dry cut, shaping the fringe curl by curl. It’s a meticulous process, but it’s the only way to guarantee they won’t spring up into a poodle poof. If you have very tight curls, I’d suggest finding a stylist who specializes in your hair type.
The Secrets to a Salon-Quality Cut
Okay, so once we’ve got a plan, it’s time to actually cut. The difference between a pro-level fringe and a DIY disaster is all in the technique and the tools. Please, step away from the kitchen scissors—they crush the hair cuticle and will give you split ends and a choppy line.
Getting Ready to Cut
Sectioning is everything. First, we find the natural part. Then, we create a clean triangle section at the front. The top point of the triangle sits where you part your hair, and the two bottom points usually line up with the outer corners of your eyebrows. The size of this triangle determines how thick your bangs will be. A wider base means thicker bangs. Simple as that.
The Actual Cut
I always, always cut bangs longer than the target length at first. You can always take more off, but you can’t glue it back on. I also prefer to cut on dry or mostly dry hair to see exactly how it’s going to fall.
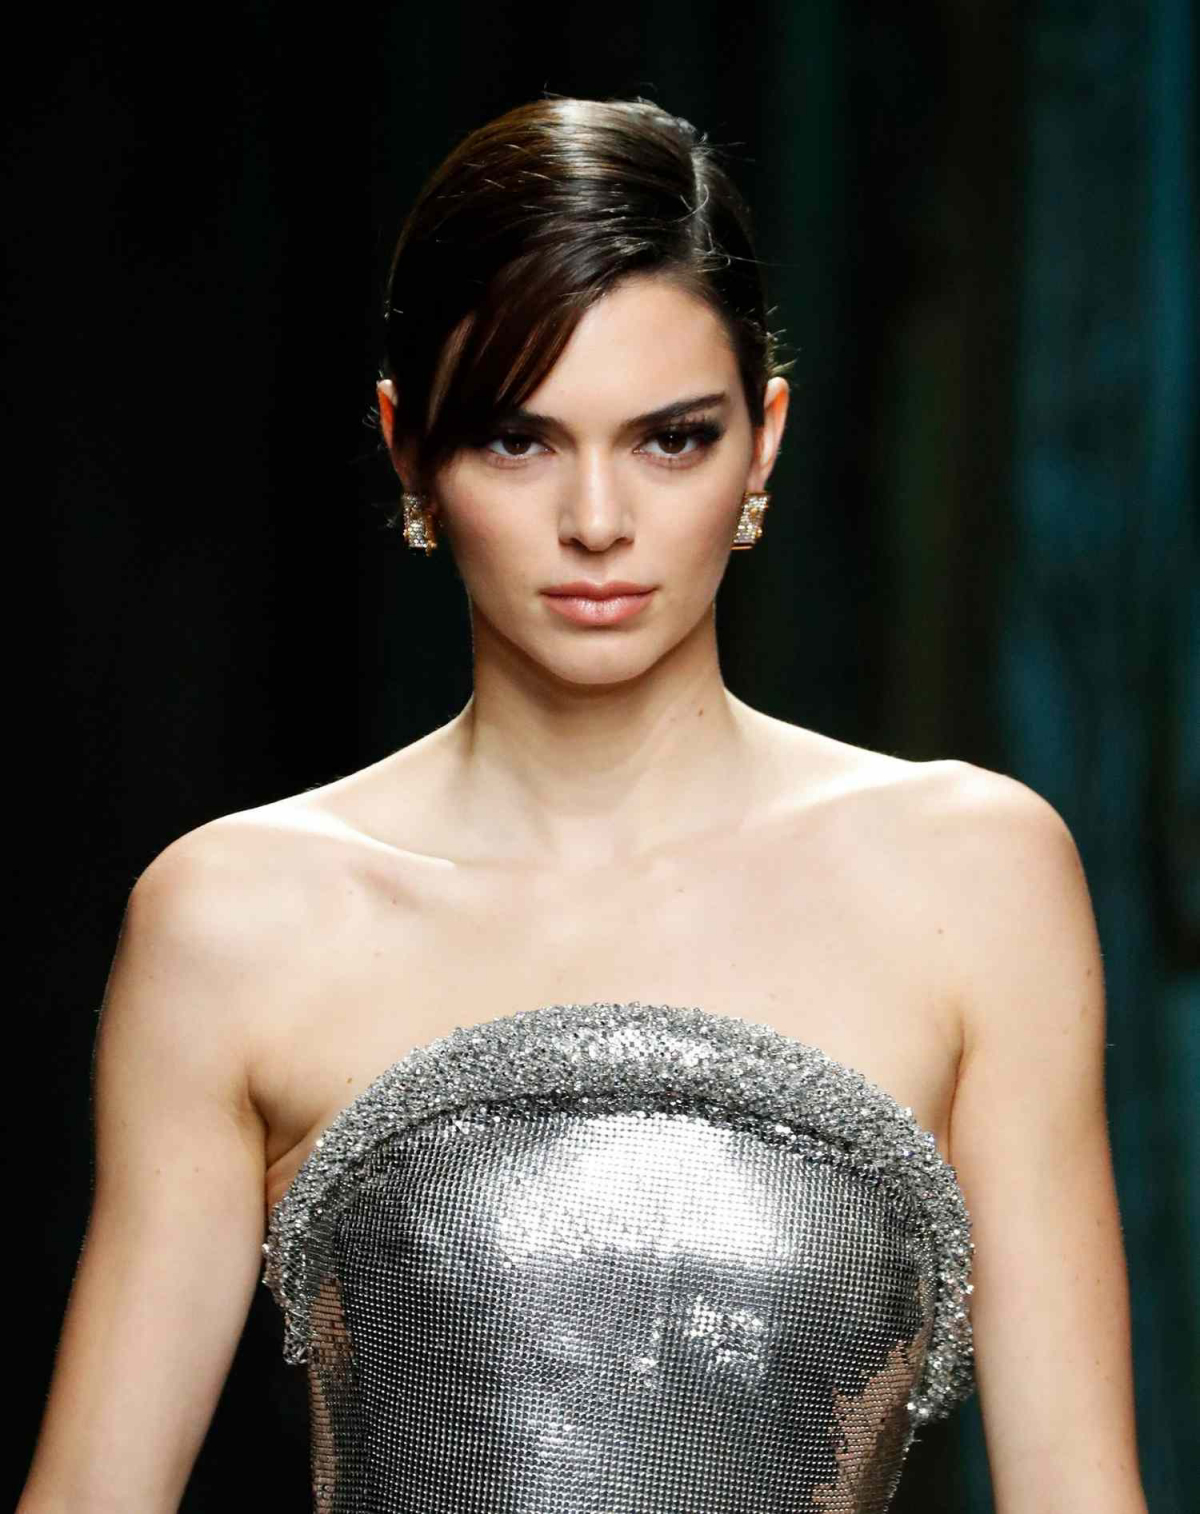
- Slide Cutting: This is the go-to technique for creating that gorgeous, soft sweep. You hold a section of hair with tension and then, with the shears partially open, you slide them down the hair shaft. It texturizes from the inside out, avoiding any harsh lines.
- Point Cutting: To get rid of that blunt, just-cut look on the ends, we use point cutting. This means holding the shears vertically and snipping straight up into the ends of the hair. It breaks up the solid line for a more feathered, piecey finish.
- Razor Cutting: On the right hair type (strong, straight hair), a straight-edge razor can create an amazing, diffused look. It’s a technique popular in many modern European styles. Heads up, though: a razor should never be used on fine, damaged, or curly hair because it can shred the cuticle and cause major frizz.
Your At-Home Styling Playbook
A great cut is only half the job. How you style your hair at home is what makes or breaks the look day-to-day. I always spend a few minutes showing my clients exactly how to get it right.
The At-Home Styling Shopping List
Before we get into technique, here’s what you’ll want to have on hand. No need to break the bank!
- Heat Protectant Spray: An absolute must. Expect to spend between $10 and $25.
- Dry Shampoo: Your new best friend for second-day hair. Usually runs about $8 to $20.
- A Small-to-Medium Boar Bristle Brush: Look for one that’s about 1 to 1.5 inches in diameter. They cost around $15 to $30 and are great for creating shine and tension.
- Light-Hold Hairspray: For a flexible hold that isn’t crunchy.
The 5-Minute Blow-Dry Cheat Sheet
Most people instinctively grab a round brush and try to curl their bangs under. This is a common mistake that can create a dated “bubble bang.” Try this pro method instead. The whole thing should only take you 3-5 minutes once you get the hang of it!
- Start with damp, protected hair. Always spritz on a heat protectant first.
- Use the nozzle on your dryer. That flat attachment isn’t just for decoration! It concentrates the airflow for a smoother finish.
- Confuse the root. This is the most important step. Before you touch a brush, use your fingers to push your bangs back and forth—all the way to the left, then all the way to the right—while aiming the blow dryer down at the roots. This neutralizes cowlicks and gives your roots lift and direction.
- Finish with the brush. Once the roots are about 80% dry, then you can use your boar bristle brush. Wrap the bangs around it and, with the dryer still pointing down, finish drying. For that final sweep, pull the brush down and to the side, following it with the dryer.
My Favorite Time-Saving Hack
Bangs sit on your forehead and can get oily fast. If you don’t have time for a full wash, you can just wash your bangs in the sink! It takes two minutes and completely refreshes your style.
Quick Fixes for Common Bang Problems
Even with the perfect cut, things can go a little sideways. Here are a few common frustrations and how to handle them.
- “Help! My bangs get greasy by noon!” Dry shampoo is your hero. A quick puff at the roots will absorb oil and add volume. In a pinch, those oil-blotting papers for your face also work wonders on a greasy fringe.
- “My bangs keep splitting in the middle!” This is usually a cowlick issue. The “confuse the root” blow-dry trick is the best way to combat this. For extra hold, you can work a teeny-tiny amount of texturizing pomade through the roots with your fingertips to force them to stay together.
- “I wear glasses… are bangs a mistake?” Not at all! You just need to be strategic. The key is getting the length right—either have them short enough to sit comfortably above your frames or long enough to be easily swept to the side. A light mist of hairspray can also help keep them from falling into your eyes and getting tangled in your glasses.
Maintaining Your Look
Bangs grow out surprisingly fast. To keep them at that perfect length, you’ll need a trim every 4 to 6 weeks. Many stylists offer complimentary bang trims for regular clients, but if not, you can expect to pay around $15-$25. It’s well worth it to keep your style looking sharp.
If you absolutely must do a tiny trim at home, please be careful. Invest in a pair of proper styling shears—a beginner’s pair will run you about $20-$40 at a beauty supply store like Sally Beauty. Always cut on dry, styled hair, and never cut a straight horizontal line. Instead, use the point-cutting technique by snipping vertically into the ends. It’s much more forgiving!
Ultimately, a side-swept bang is a small commitment with a huge payoff. It’s a partnership between you and your stylist. Find someone you trust, have an honest chat about what you want, and be realistic about the upkeep. When it’s done right, there’s nothing better for elevating your entire look.
Galerie d’inspiration
That stubborn cowlick making your bangs defy gravity?
Don’t fight it—outsmart it. The secret is to tackle it when your hair is wet. Take just the root of the unruly section and spritz it with water. Then, using your blow-dryer (with the nozzle attached for precision), brush the cowlick in the opposite direction of how you want it to lay. Once it’s mostly dry, flip it back to its final position and finish drying. This simple reset forces the root to lie flat, giving you control for the rest of the day.
A fringe is the fastest way to change your face without losing your length. It’s an instant confidence boost.
This insight from celebrity hairstylist Jen Atkin highlights the transformative power of bangs. Unlike a drastic chop, a well-cut side-swept fringe acts like a spotlight for your best features—primarily your eyes and cheekbones. It’s a high-impact, low-commitment update that adds personality and movement to any style, from a sleek bob to long, flowing layers.
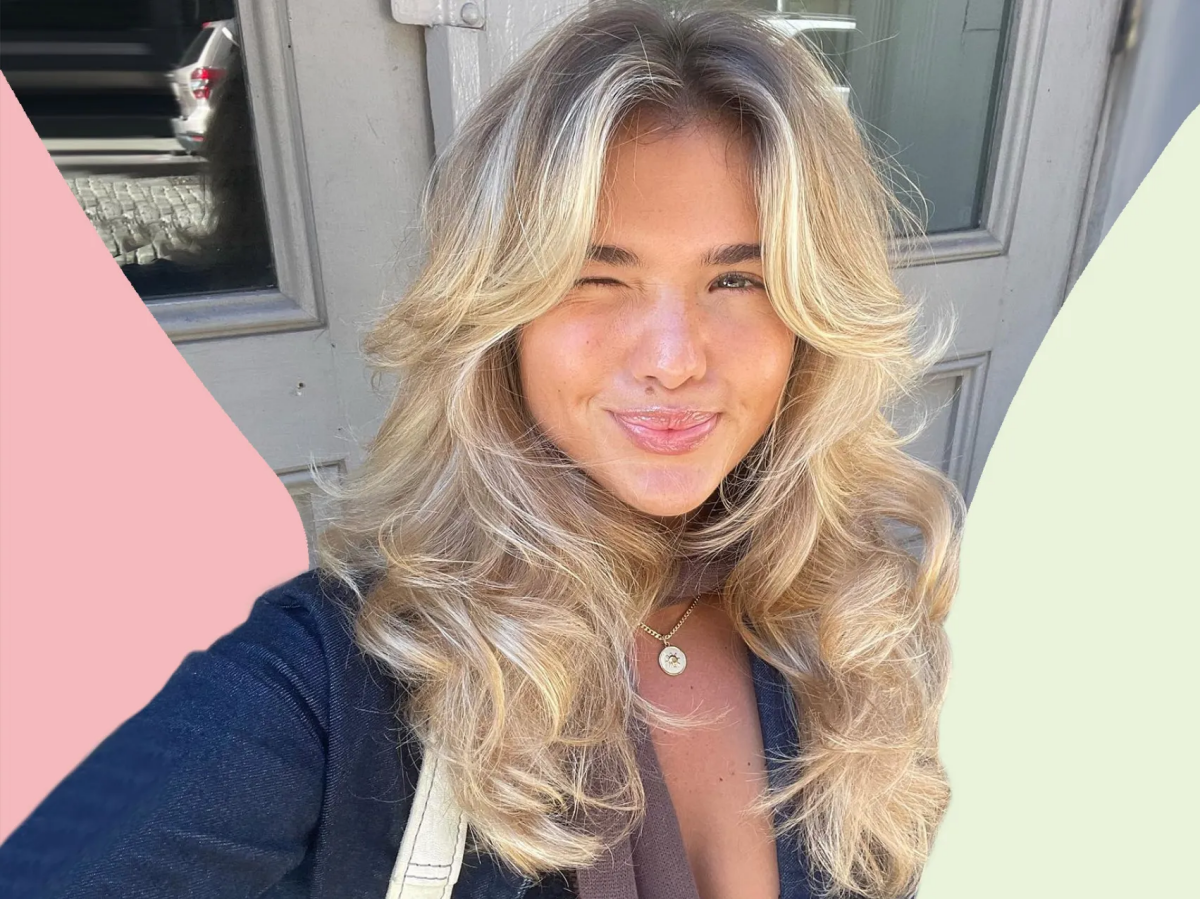
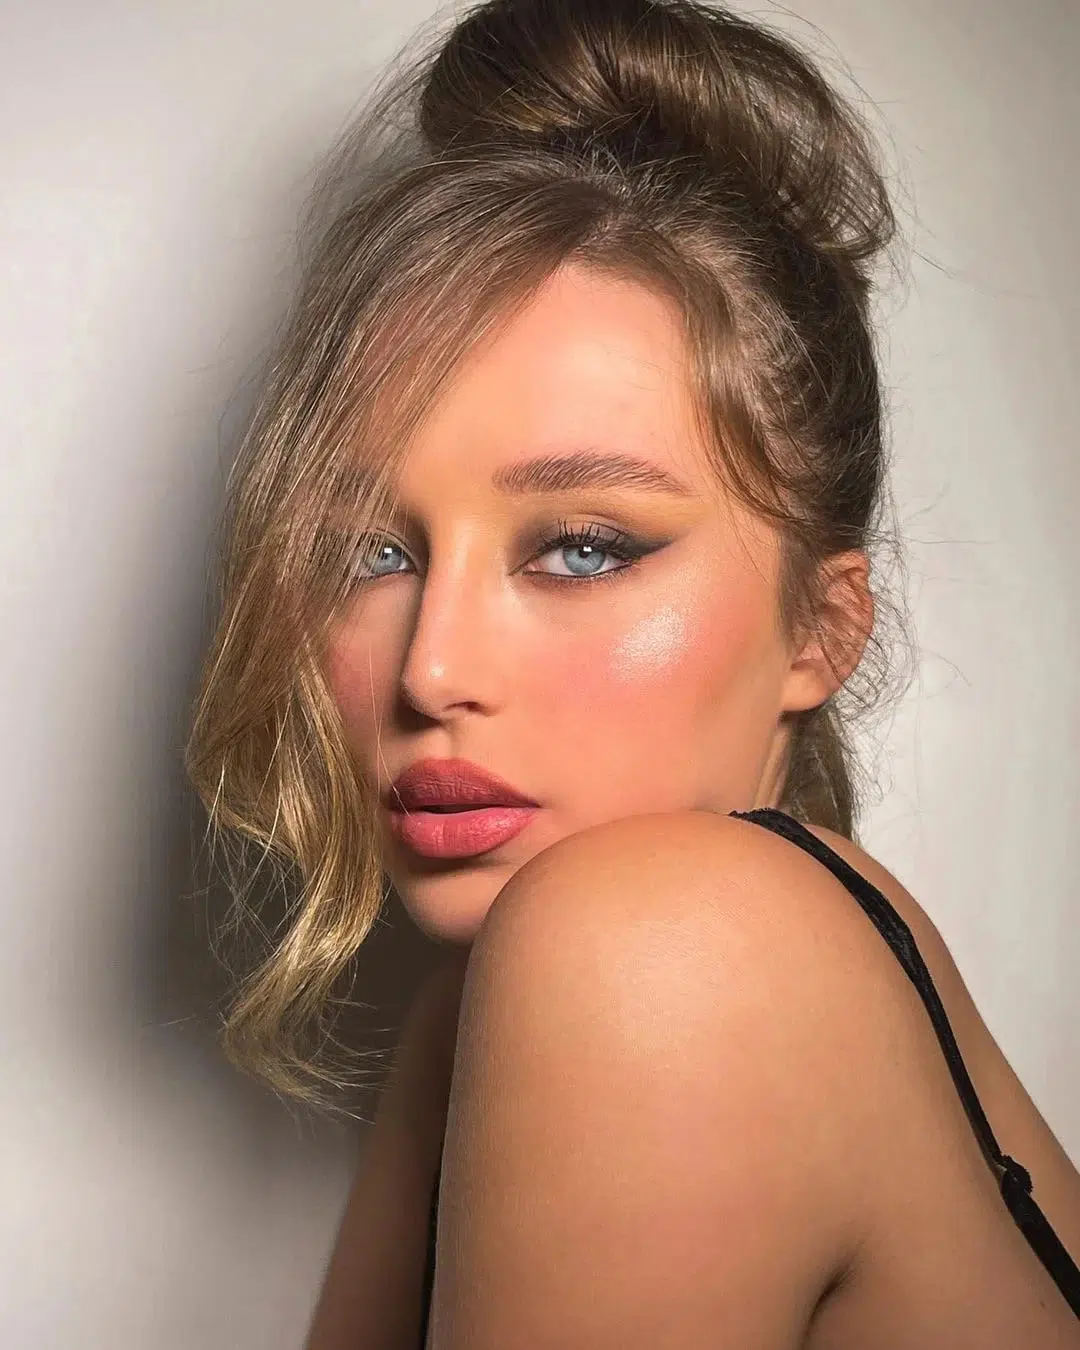
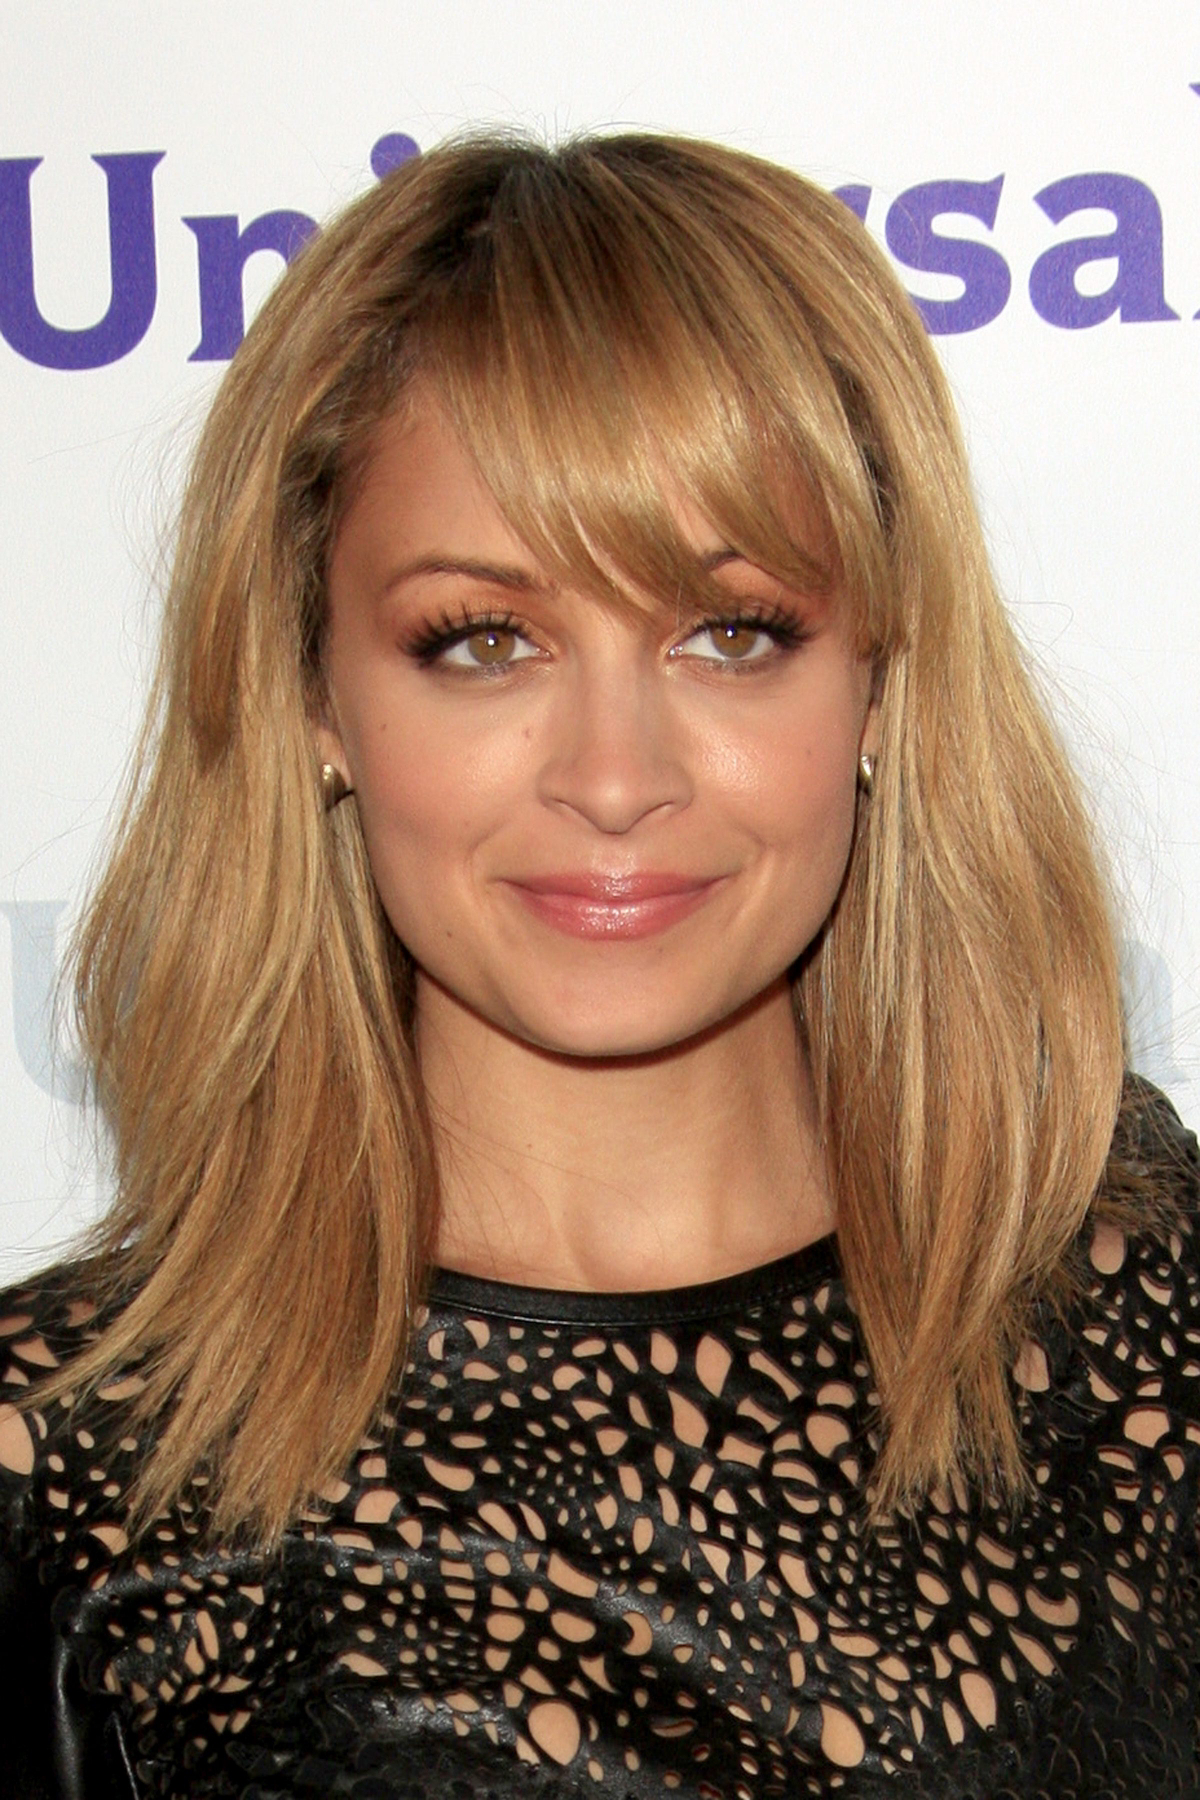
The Wispy Sweep: Ideal for fine hair or for a softer, more romantic look. It’s light, textured, and subtly blends into the rest of your hair, beautifully framing the face without feeling heavy.
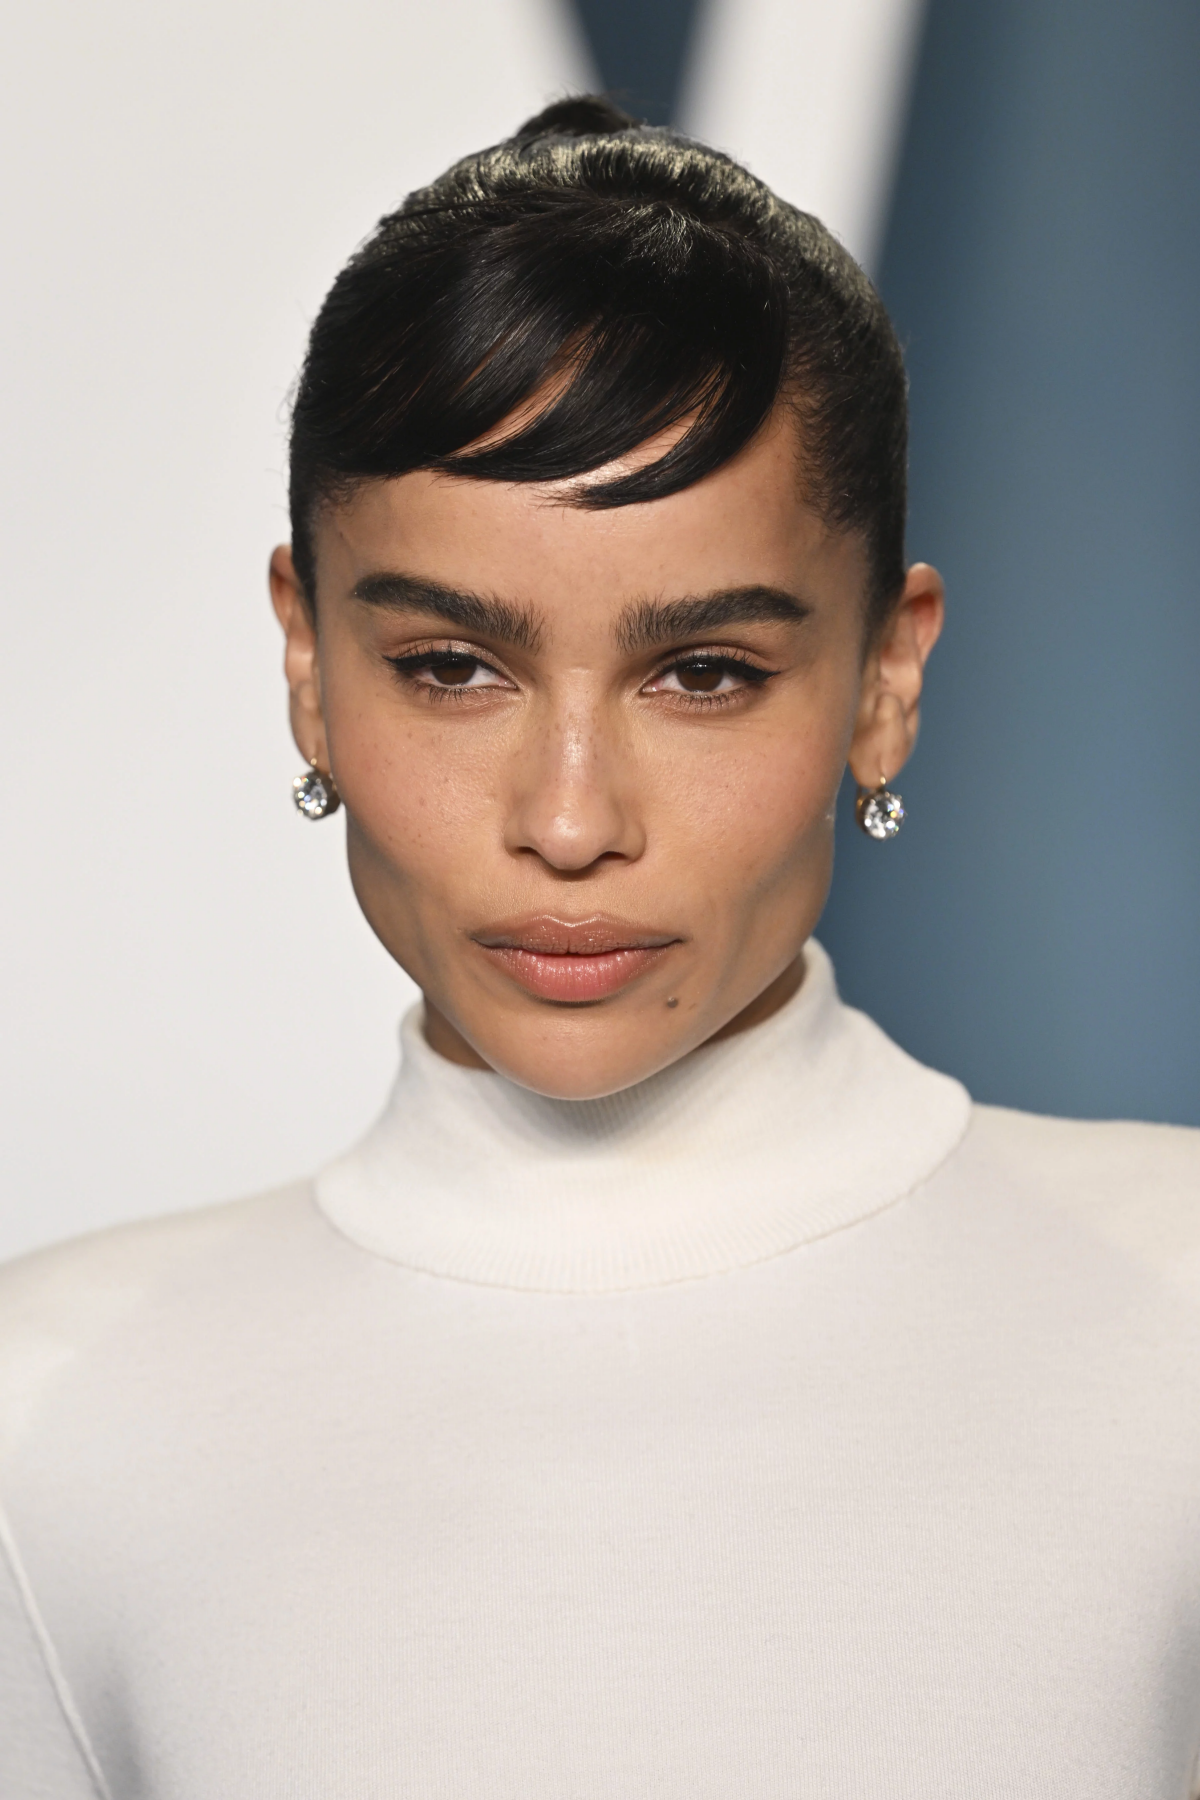
The Statement Sweep: A bolder, thicker bang that creates a more dramatic, high-fashion effect. This style works well on medium to thick hair and makes a strong statement, drawing all the attention to your eyes.
Your choice depends on both your hair density and the impact you want to make.
The secret weapon for keeping your side-swept bangs fresh and perfectly piecey isn’t hairspray—it’s the right dry shampoo. Because bangs rest on your forehead, they pick up oils much faster than the rest of your hair.
- Prevents the dreaded “greasy separation.”
- Adds a touch of airy volume at the roots.
- Provides light, matte texture for that effortless look.
Our go-to? A quick spray of Klorane’s Dry Shampoo with Oat Milk at the roots, massaged in with fingertips, revives bangs instantly.

Think beyond just your hair type and consider your lifestyle. Are you constantly at the gym? A longer, more versatile side bang that can be easily pinned back might be your best bet. If you work in a corporate environment, a sleek, polished fringe that stays perfectly in place exudes professionalism. Your bangs should complement not just your face, but your daily life.
The essential toolkit for perfect bangs is surprisingly minimal. A powerful hairdryer with a directional nozzle is non-negotiable for control. Pair it with a small, ceramic or natural boar bristle round brush—about 1 to 1.5 inches in diameter is perfect for grabbing the shorter hairs and creating a soft bend. Finish with a flexible-hold hairspray, like L’Oréal’s Elnett Satin, to tame flyaways without creating a stiff, helmet-like effect.


