Thinking About a Shaggy Pixie? Here’s the Brutally Honest Guide
I’ve been behind the chair for a long time—long enough to see haircut trends cycle through and fade away. But every now and then, a style comes along that just sticks. It’s more than a trend; it’s a whole vibe. The shaggy pixie is one of those.
In this article
I’ll never forget the first time a client brought me a photo of one, torn out of a magazine. She was so nervous, but you could see the excitement in her eyes. An hour later, she looked in the mirror, and everything about her changed. She literally stood up straighter. That’s the magic of a killer haircut—it’s not about losing hair, it’s about finding a piece of yourself that was waiting to show up.
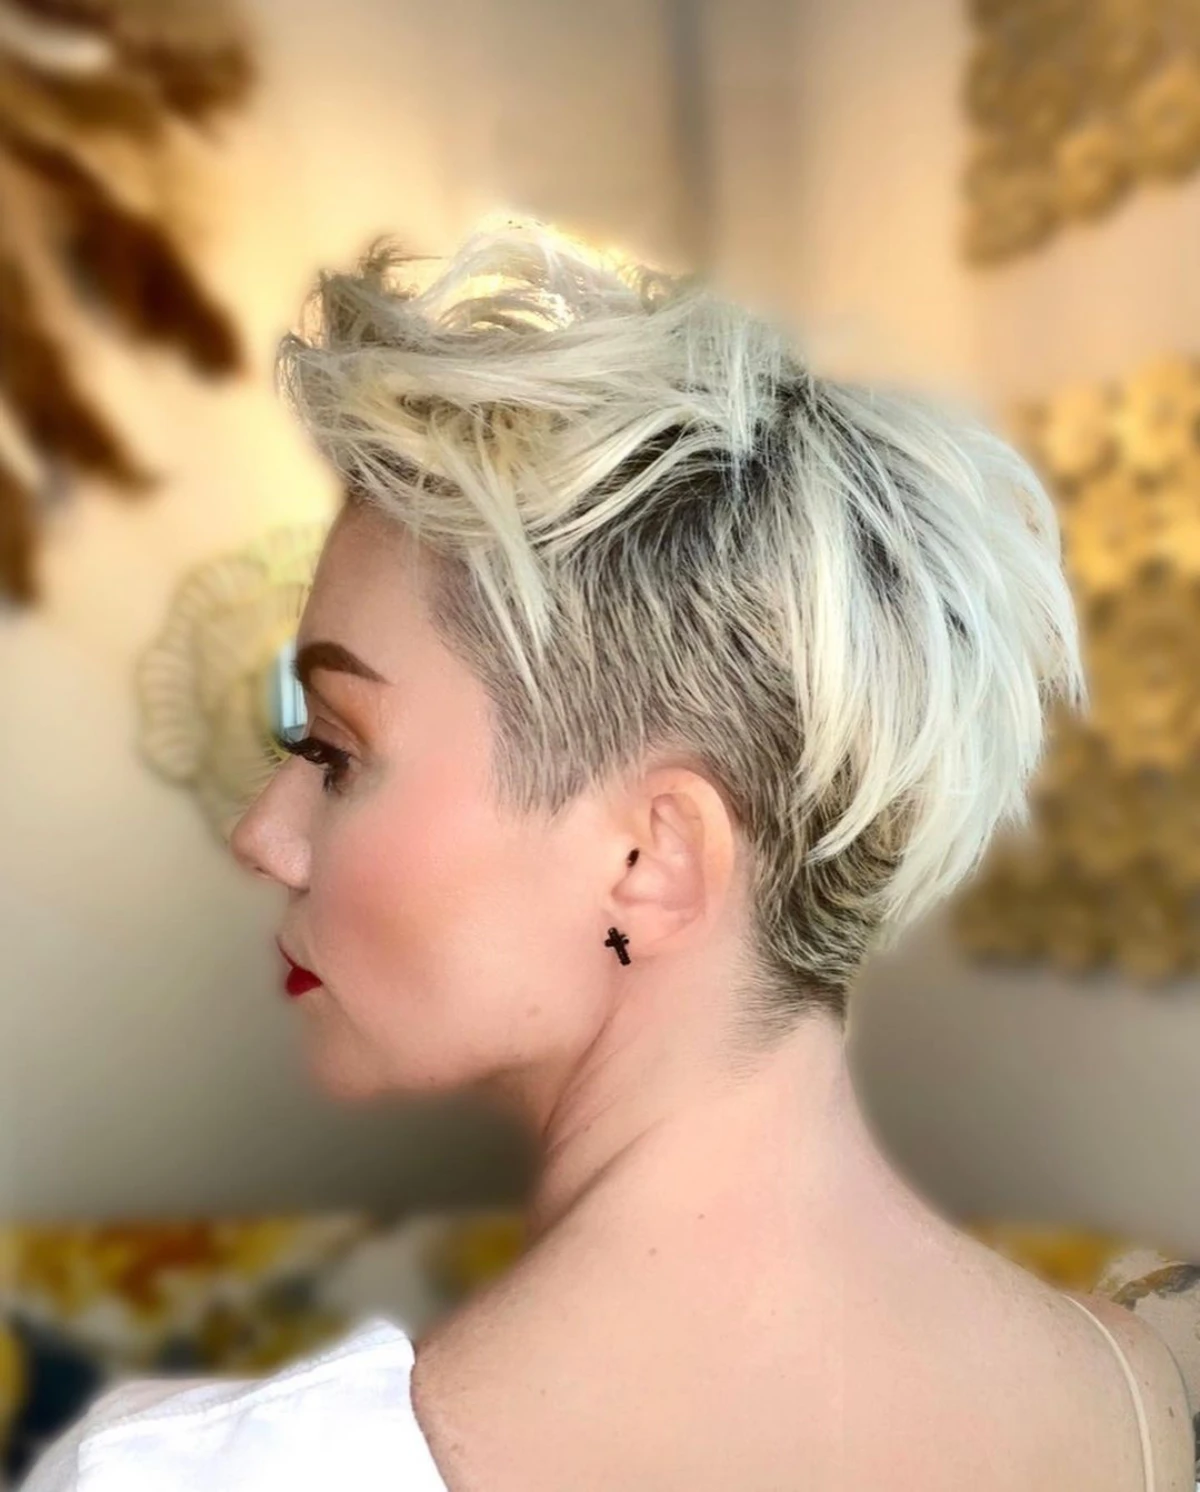
To an outsider, the shaggy pixie looks like a bit of beautiful, controlled chaos. Effortless, maybe even messy. But to a stylist, it’s pure architecture. It’s a delicate dance between the solid foundation of a classic pixie and the wild freedom of a shag. Honestly, it’s not for every head of hair, and it demands a stylist who really knows their way around both scissors and a razor. So, let’s walk through the exact same conversation I have with my clients, so you can decide if this look is truly for you.
The Real Talk: Is This Cut Actually Right for You?
The most crucial part of any great haircut happens before a single strand is cut. It’s the consultation. This is where we get honest about your hair, your lifestyle, and what you’re really hoping for. A picture is a fantastic starting point, but your hair has its own personality, and we need to listen to it.
By the way, here’s your homework before you even book an appointment: Hop on Pinterest and find three shaggy pixie photos you absolutely LOVE, and—this is just as important—one that you HATE. Knowing what you don’t want is sometimes more helpful than knowing what you do! It gives your stylist a super clear picture of your taste.
First Things First: Your Face Shape
You can talk about texture all day, but if the cut doesn’t flatter your face, what’s the point? The beauty of the shaggy pixie is that it can be tweaked for almost anyone.
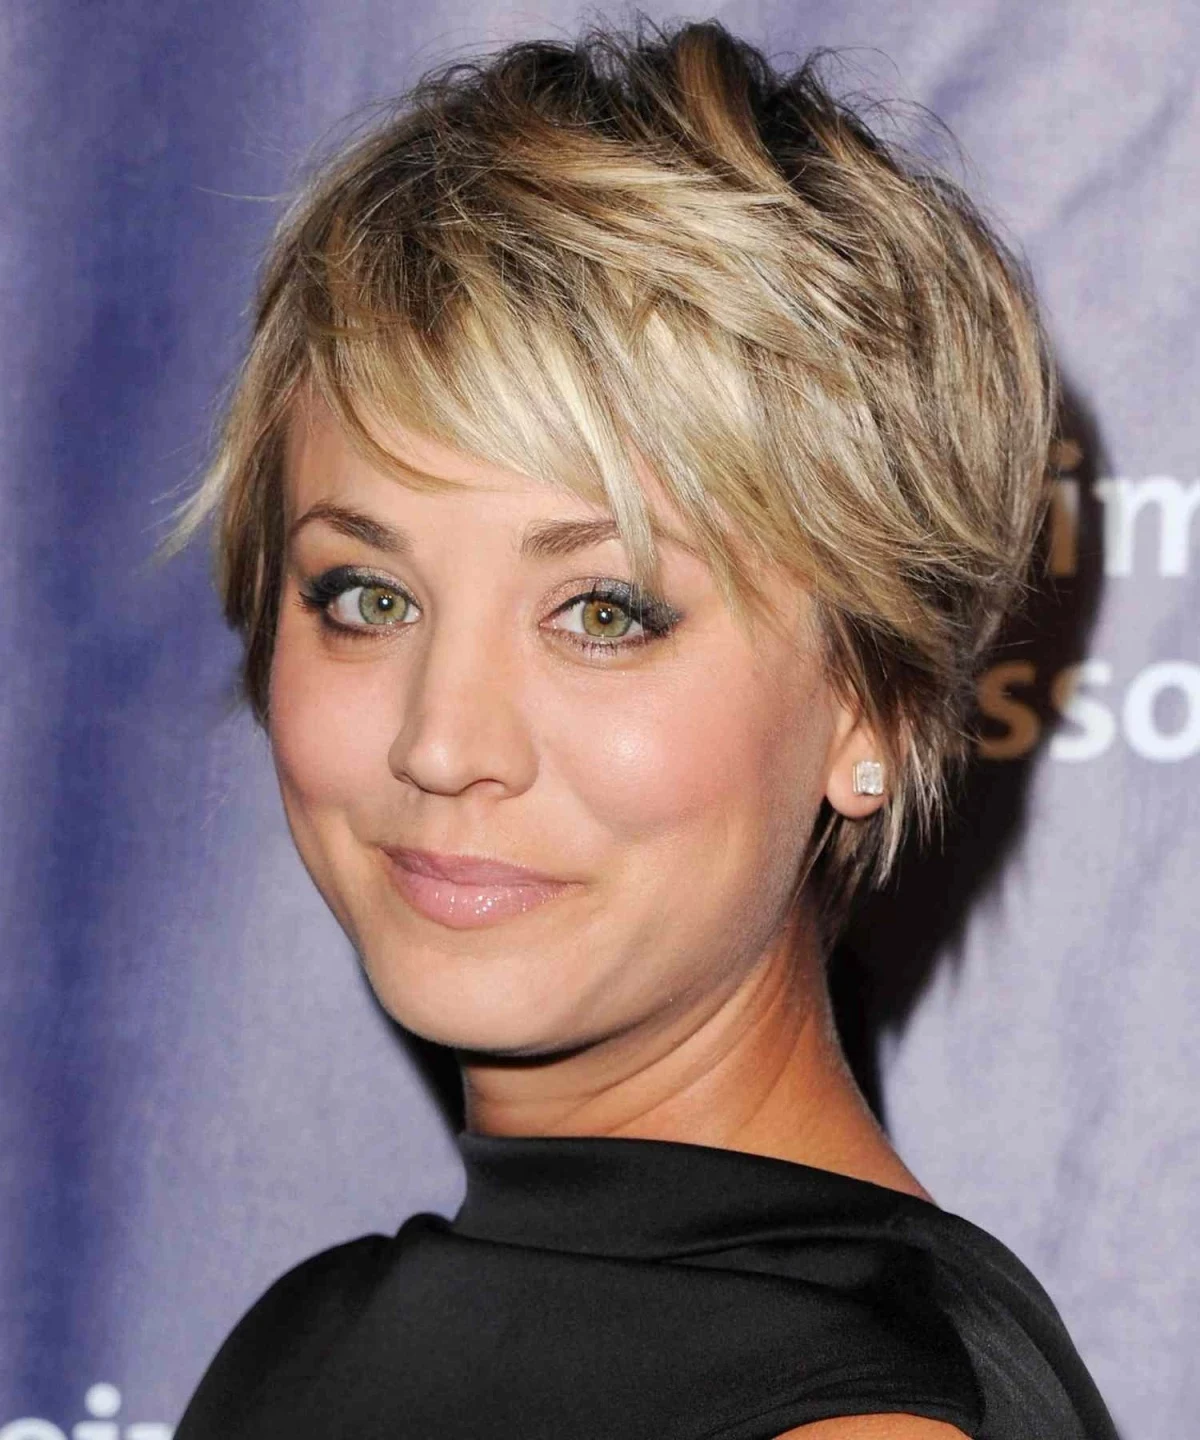
- Oval Face: Well, lucky you. You can pull off pretty much any version of the pixie, from super short and choppy to a bit longer and wispier.
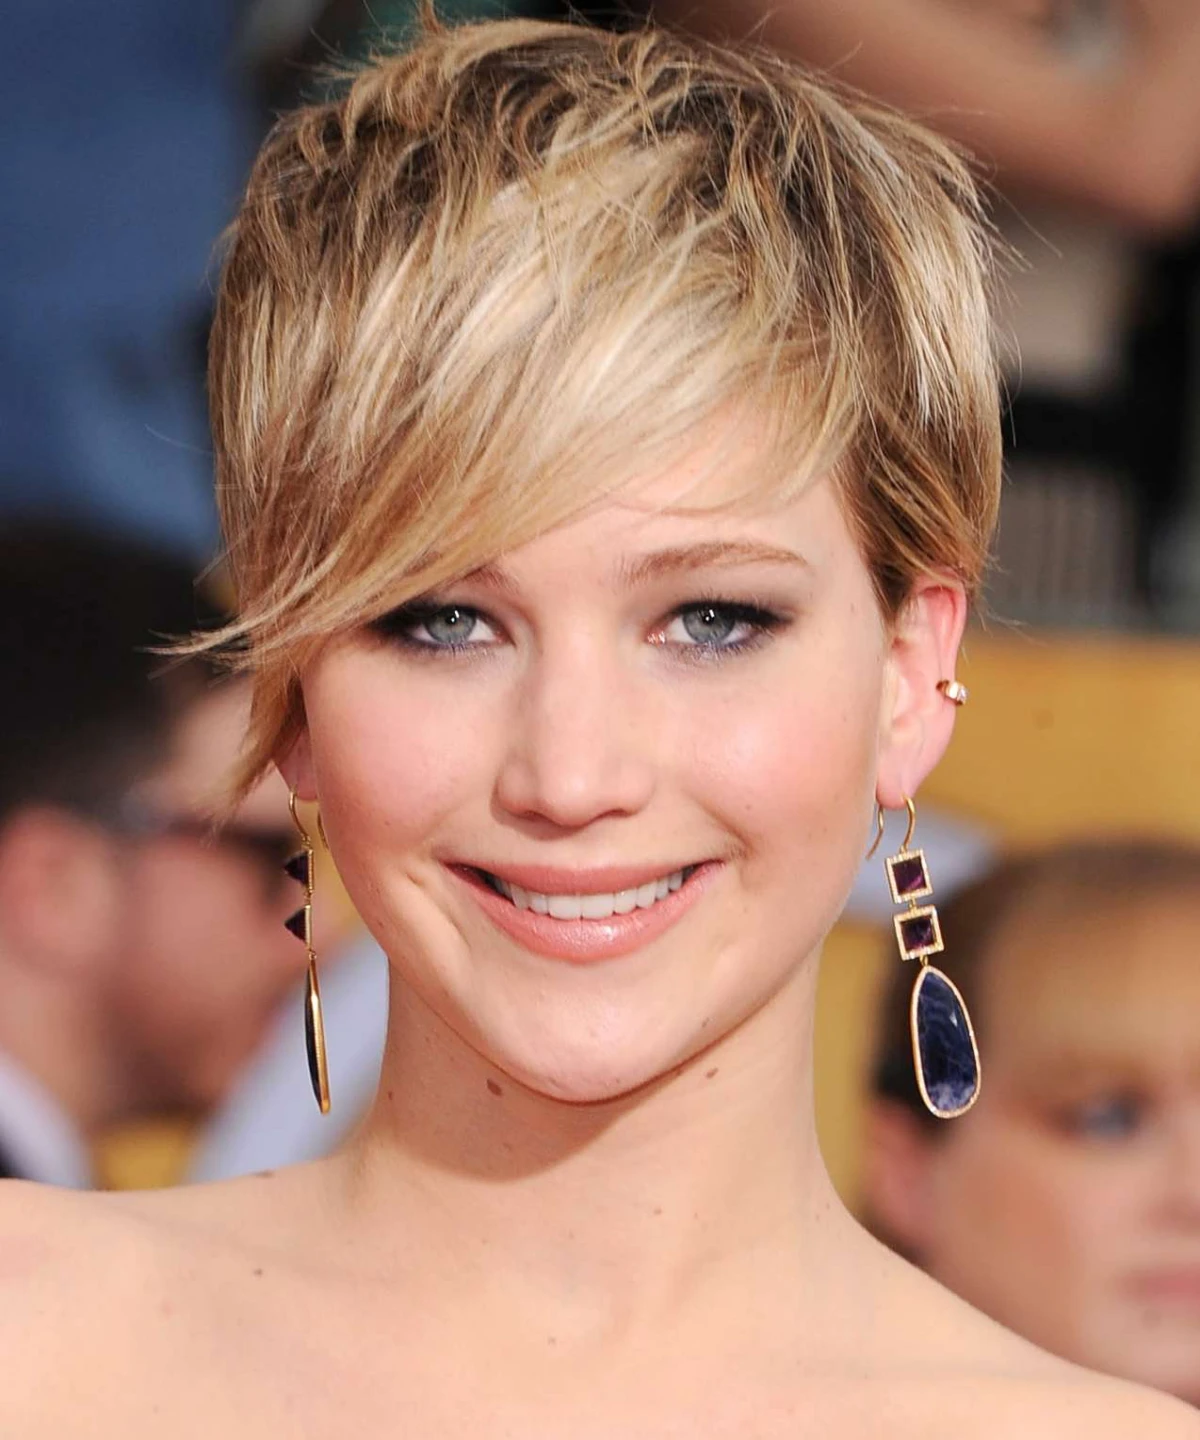
- Round Face: The goal here is to create some angles and height. You’ll want a pixie with more volume and lift on top and something tighter on the sides. A spiky texture or a side-swept fringe can work wonders to elongate the face. Avoid rounded, bob-like versions that can add to the roundness.
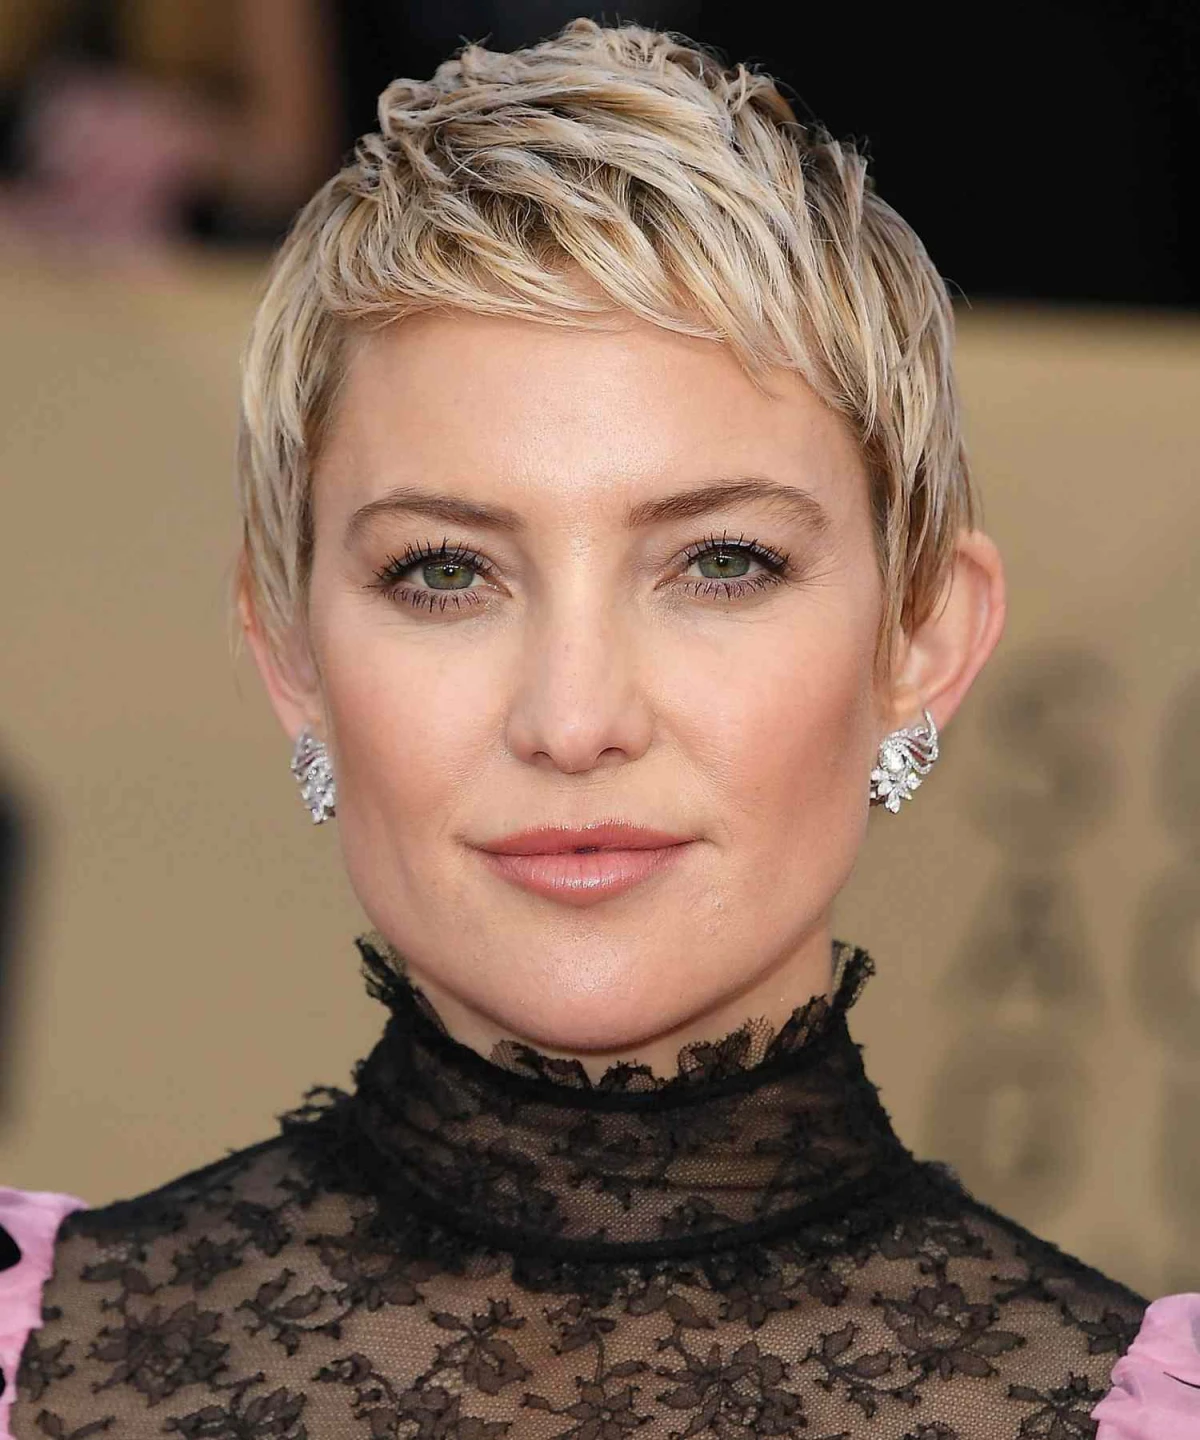
- Square Face: To soften a strong jawline, you’ll want a pixie with lots of soft, wispy layers and texture around the face. Think piecey, feminine, and maybe even a few longer bits around the ears. A heavy, blunt bang is probably not your friend here.
- Heart-Shaped Face: Since you have a wider forehead and a narrower chin, you can go one of two ways. A short, choppy fringe can look amazing, or you can opt for a longer, side-swept bang that brings the focus down to your eyes. Just be careful not to have too much volume on top with super-short sides, as it can over-emphasize the forehead.
Hair Texture and Density: The Raw Materials
People throw around words like ‘fine’ and ‘thin’ like they’re the same thing, but in our world, they’re totally different. And that difference is key for this cut.
Texture is about how thick each individual strand is. Is it fine, medium, or coarse?
- Fine Hair: Believe it or not, this texture is a fantastic candidate. All those layers build in volume and movement, making the hair look way fuller than it is. The catch? It needs a gentle hand. A stylist who gets too happy with thinning shears can make fine hair look frail. I personally prefer using a razor or deep point cutting to create soft ends without sacrificing precious body.
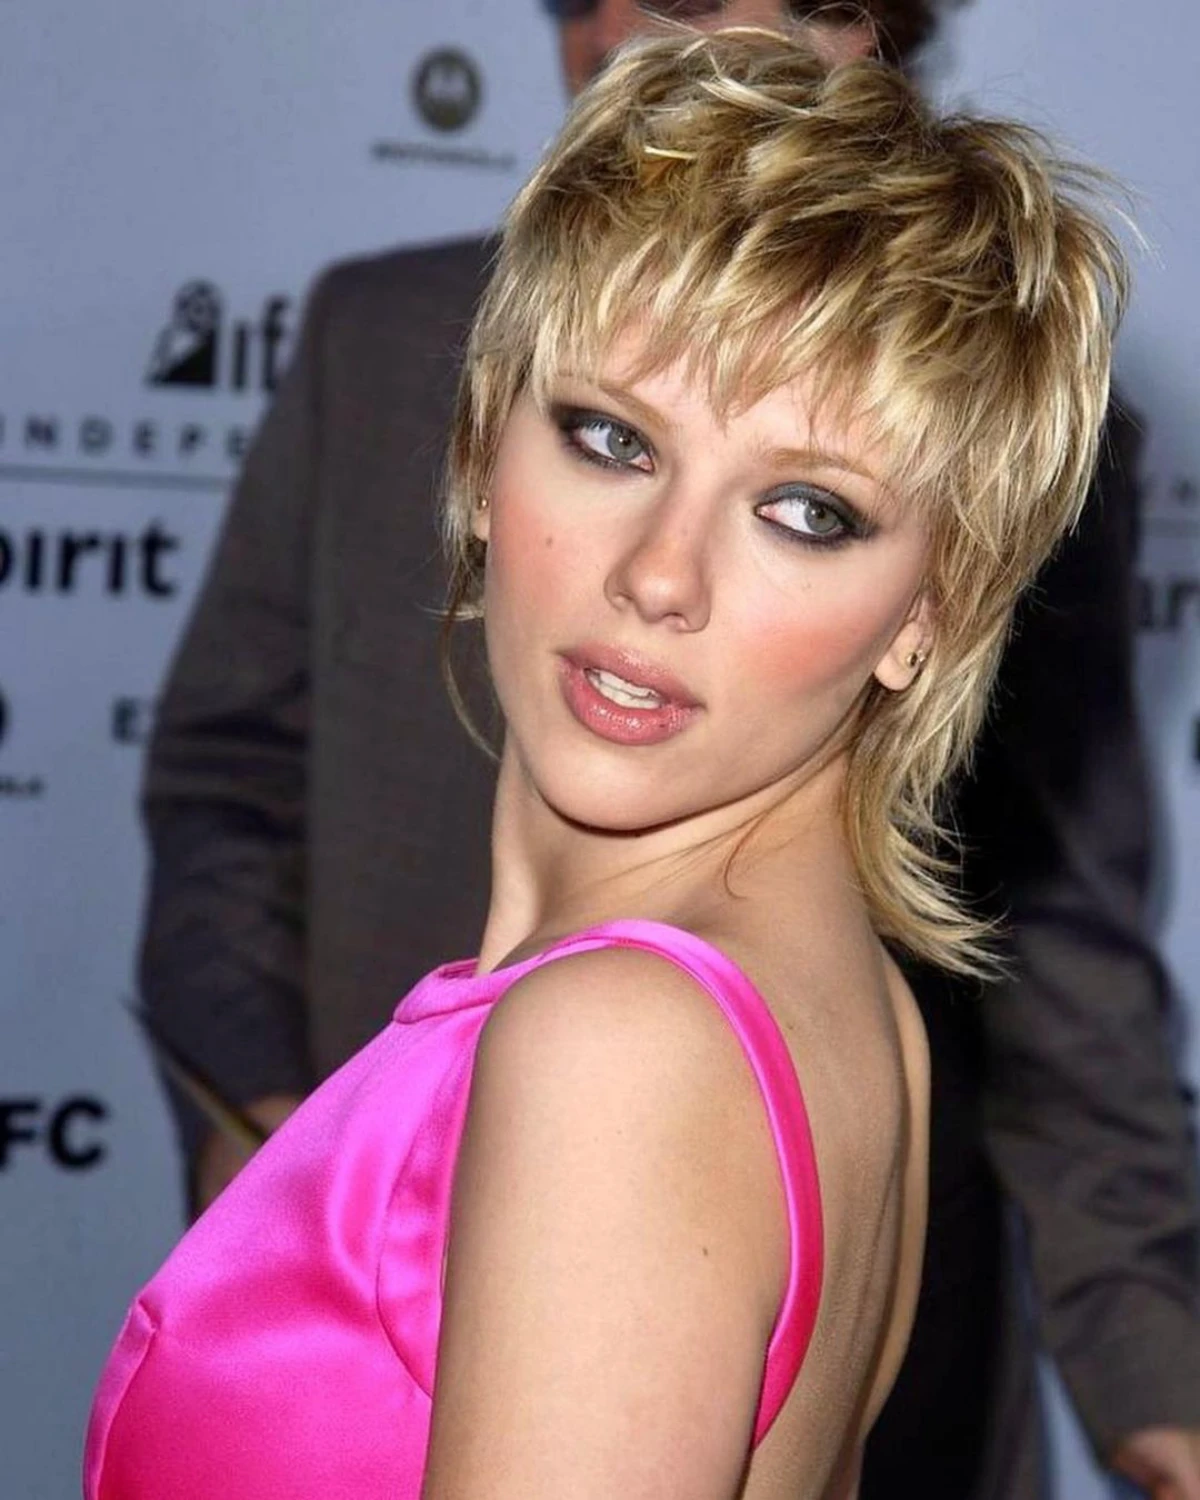
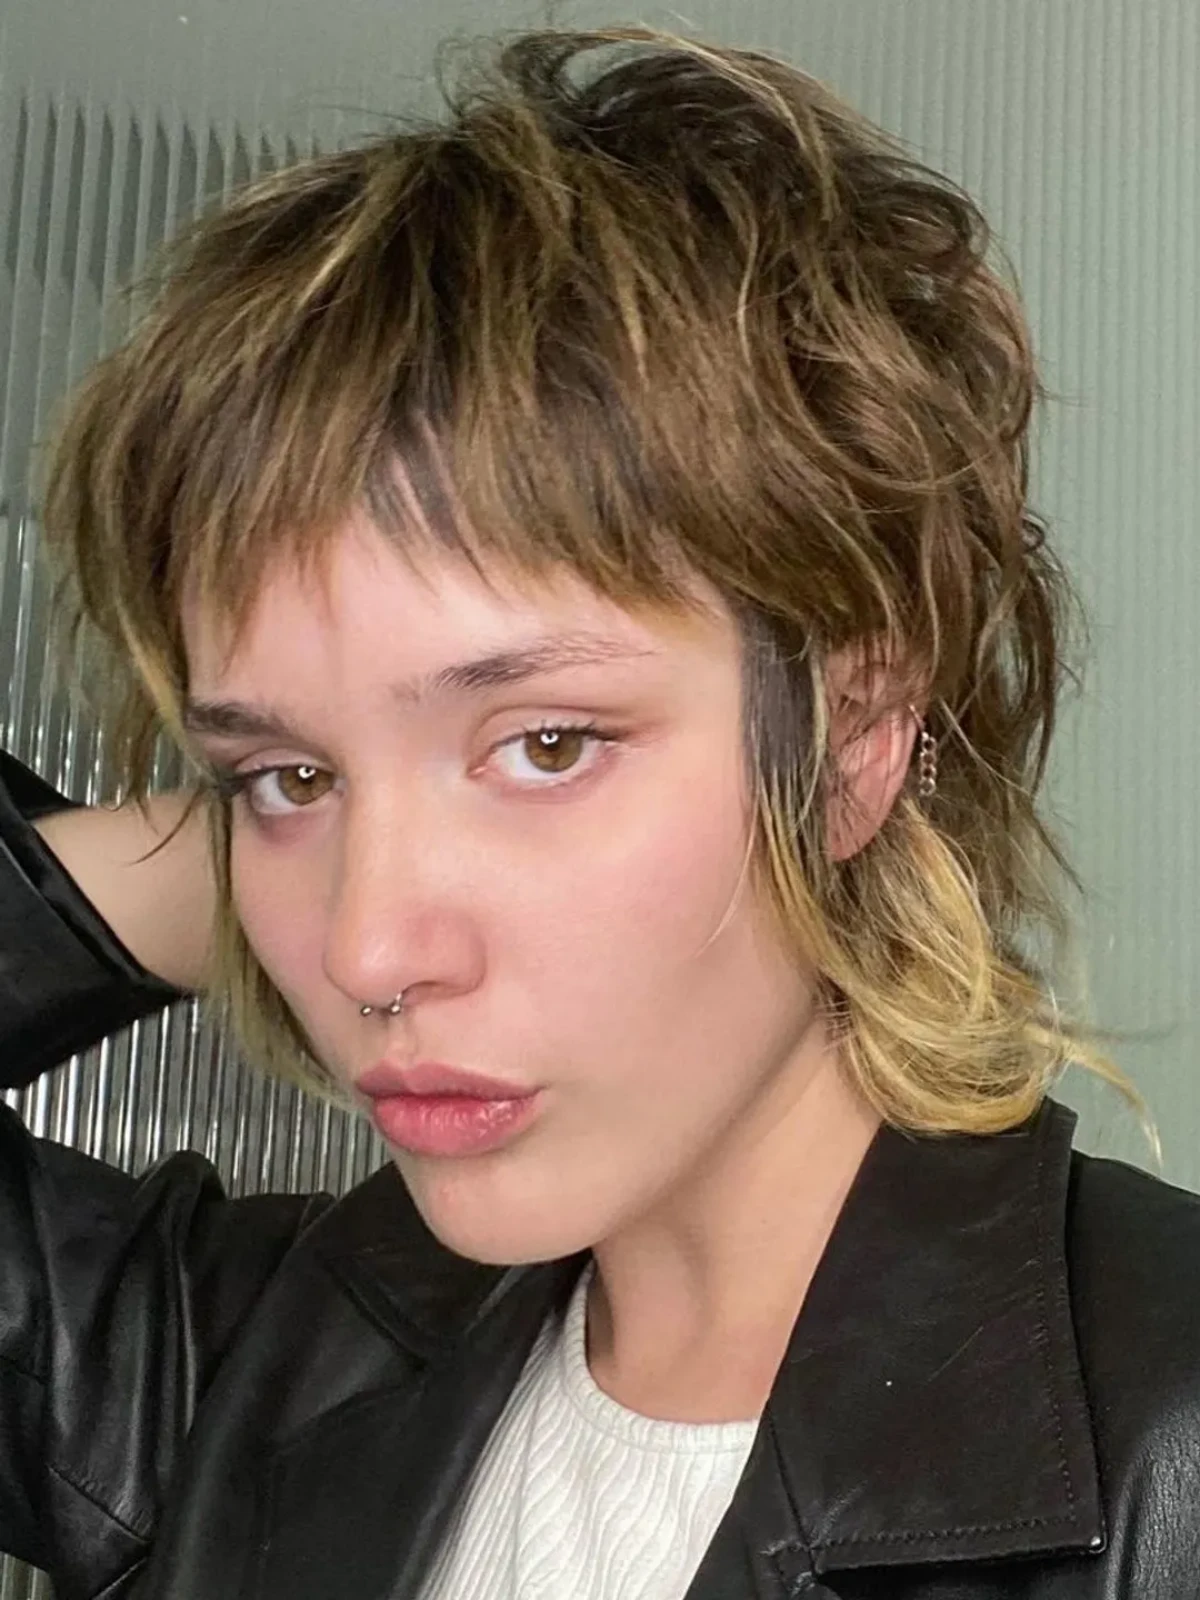
- Medium Hair: This is pretty much the dream texture for a shaggy pixie. It’s got enough guts to hold the shape and layers, but it’s still flexible enough to style easily. We can get pretty creative with texturizing to nail that perfect lived-in feel.
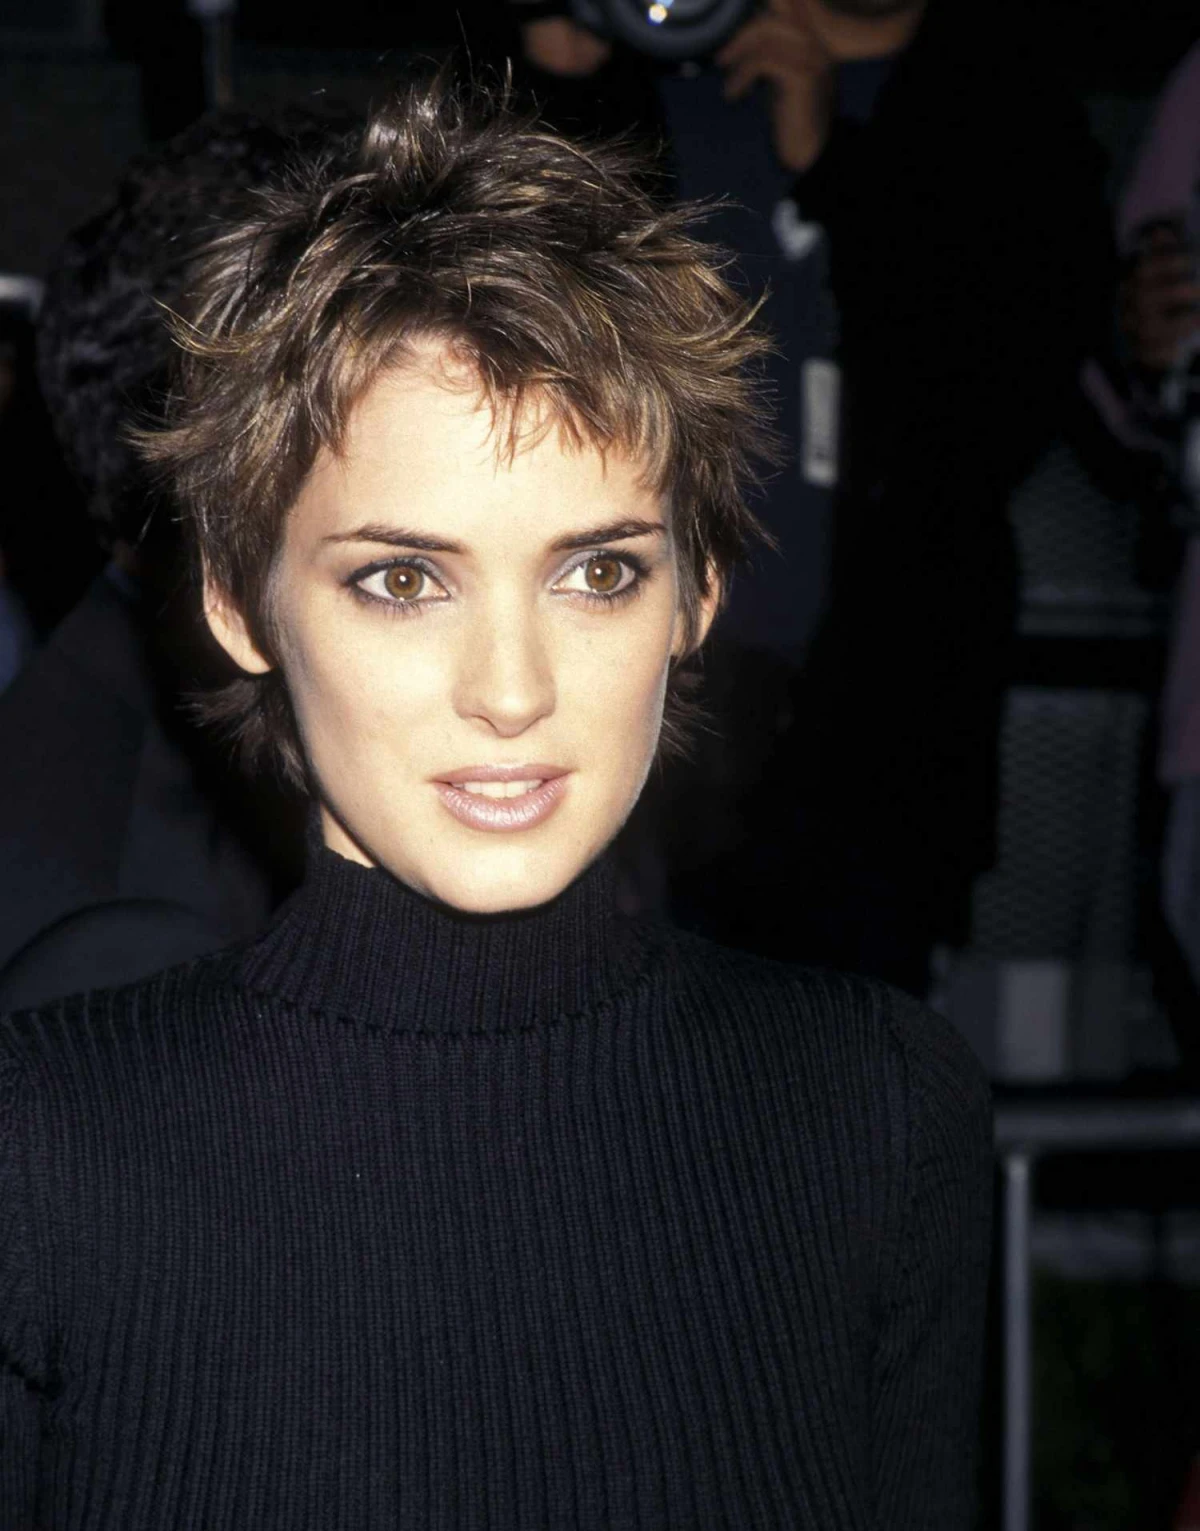
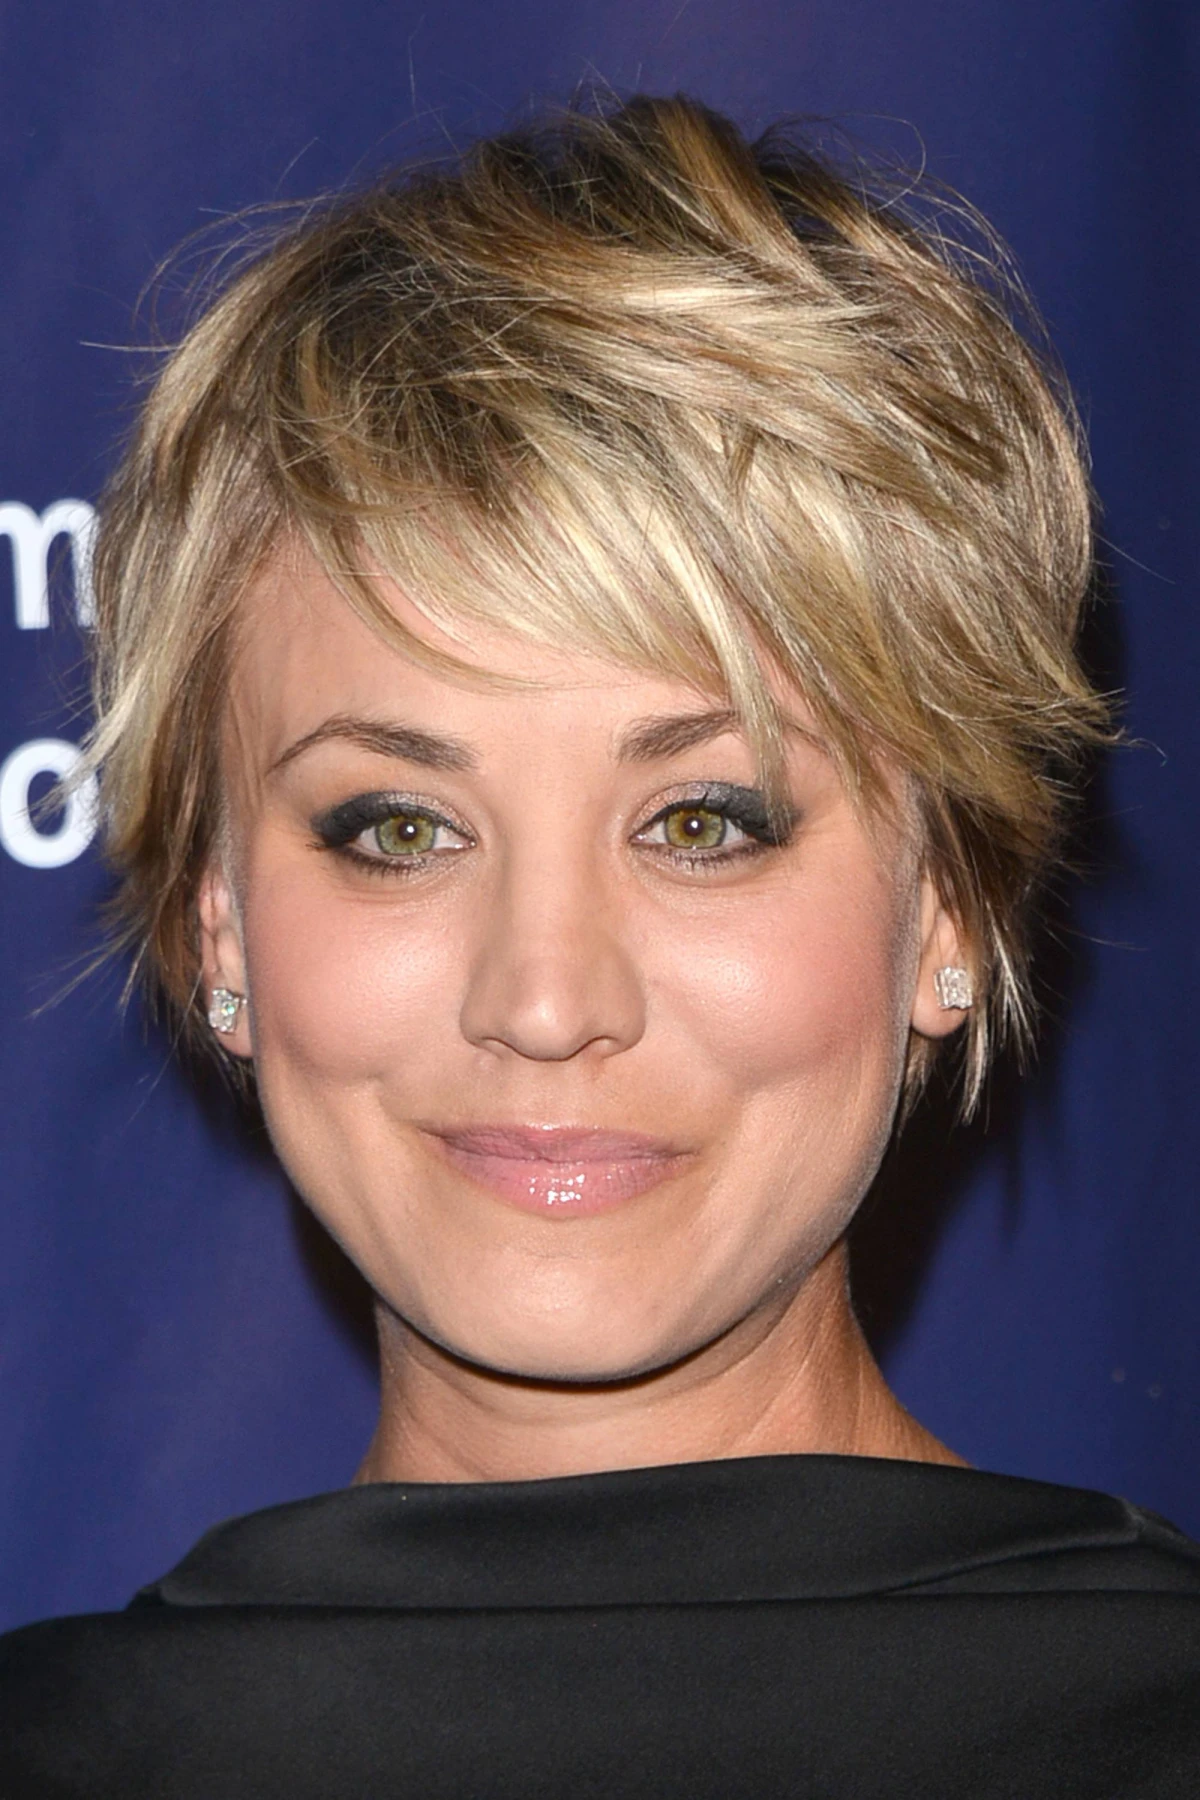
- Coarse Hair: You can absolutely rock a shaggy pixie with coarse hair, but it needs to be managed properly. Coarse hair can get bulky fast. The secret is all in the internal layering. We have to remove weight from the inside of the haircut, allowing the top layers to fall nicely. Without that, you risk the dreaded “helmet head.”
Density, on the other hand, is about how many hairs you have on your head. Is it thin (low density) or thick (high density)?

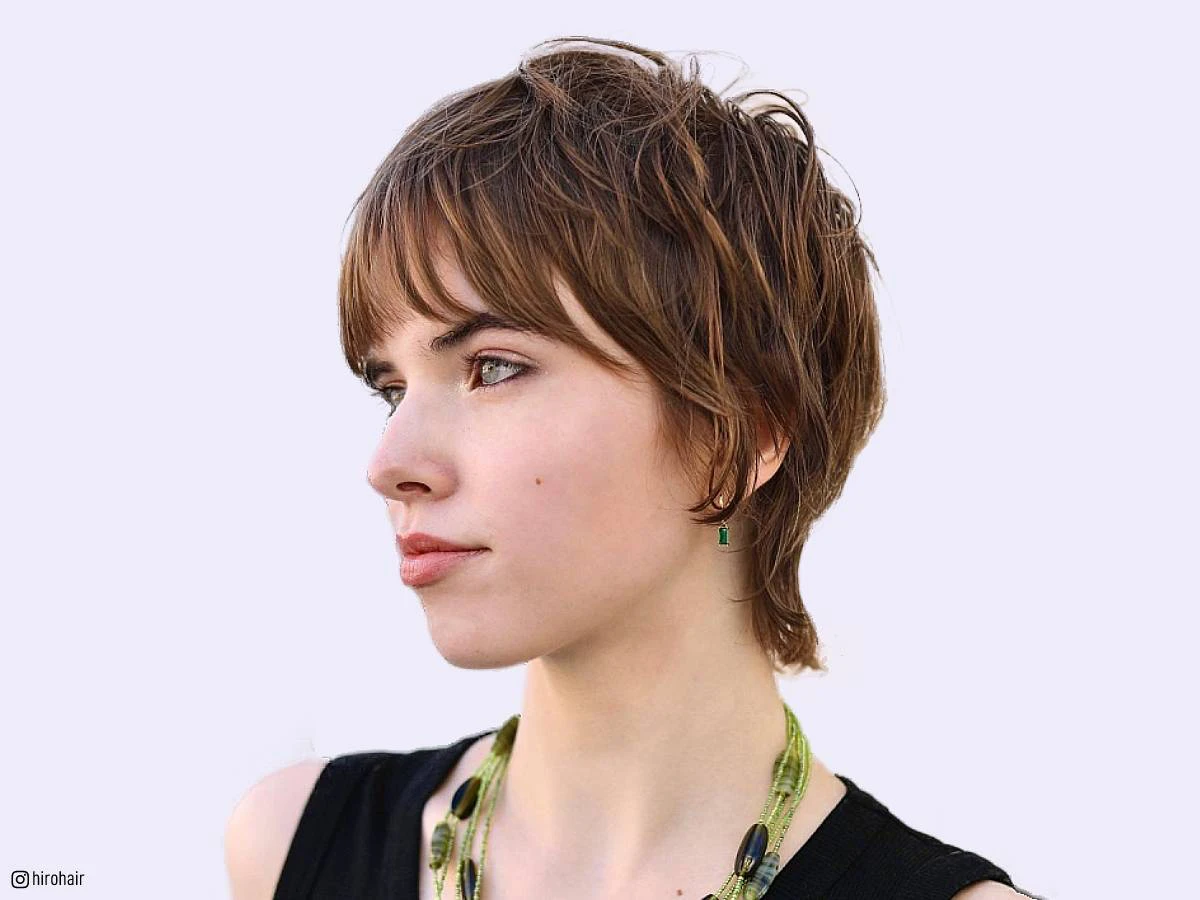
- Low Density (Thin) Hair: If your hair is both fine and thin, a shaggy pixie can be a little tricky. Chopping in too many short layers can expose the scalp and make it look even thinner. In this case, I usually recommend a modified pixie—maybe something closer to a “bixie” (a bob-pixie hybrid) with longer layers to keep that illusion of fullness.
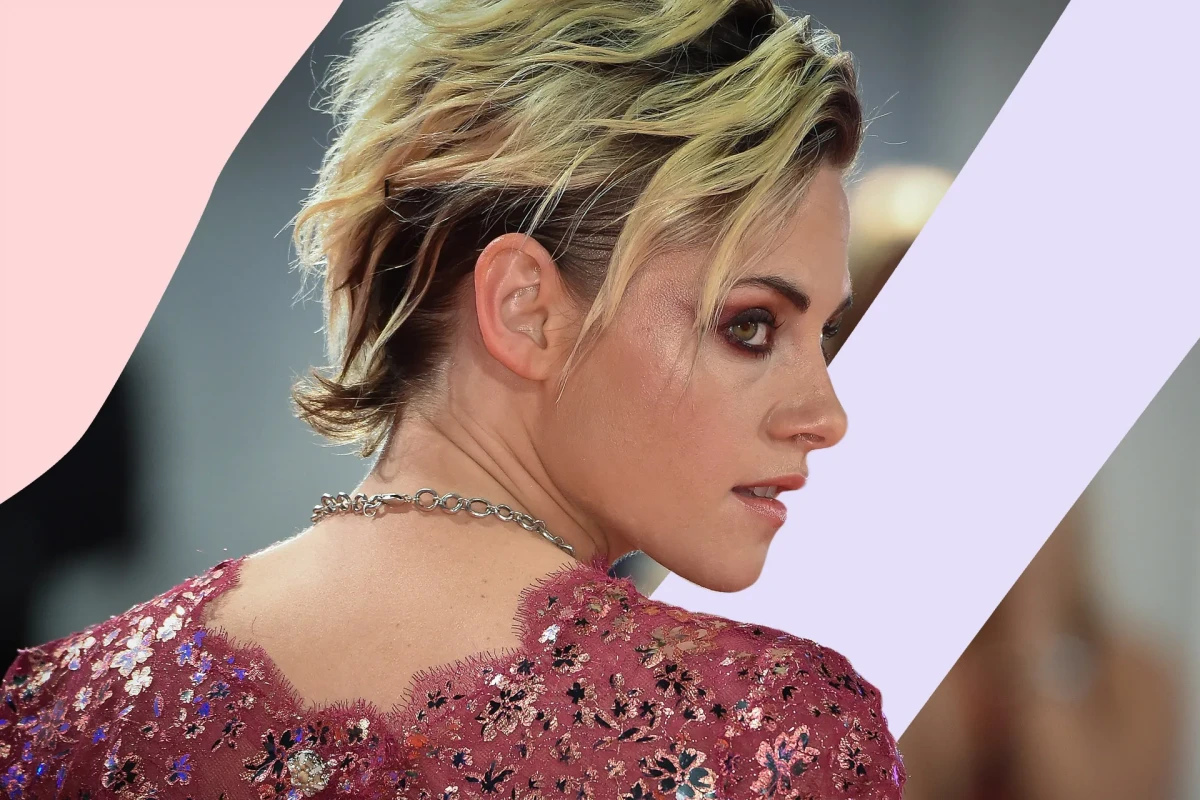
- High Density (Thick) Hair: This is a perfect canvas! With thick hair, we have so much to work with. We can carve out a really strong shape and texturize it like crazy for tons of movement. The best part for clients with thick hair? The weight removal. I’ve had so many people tell me it’s the first time their neck hasn’t hurt from the weight of their hair.
Your Hair’s Secret Language (aka Growth Patterns)
Cowlicks and whorls are the one thing we can’t change. We have to work with them, not against them. A short cut like a shaggy pixie can either brilliantly hide them or put them on full blast.
I once had a client with two very strong cowlicks right at her hairline who wanted a super short, spiky fringe. I had to explain that if we cut it that short, those pieces would do nothing but stand straight up. Instead, we designed a longer, side-swept fringe. The extra length gave the hair enough weight to control the cowlicks. It’s all about compromise.
The Cut Itself: Let’s Talk Money, Time, and Technique
Okay, let’s get down to the nitty-gritty. A precision cut like this is an investment in both time and money.
Heads up on pricing: This is not the time to bargain hunt. The success of this cut is 90% stylist skill. In a smaller town or suburb, you can expect to pay anywhere from $75 to $120 for a stylist who knows what they’re doing. In a major city at a high-end salon, that price could easily be $150 to $300+. Your first appointment, including a thorough consultation, will likely take around 60 to 90 minutes.
How to Talk to Your Stylist
Walking in with photos is great, but using the right words is even better. Here are a few phrases you can use:
- “I love the texture in this photo, but I’m worried about my hair looking too thin on the sides. Can we keep a little more softness there?”
- “I want that ‘lived-in,’ messy look, not a perfectly clean, round shape.”
- “I’m afraid of getting ‘helmet head.’ Can we make sure to remove enough bulk from the inside?”
Scissors vs. The Razor: What’s the Difference?
This isn’t about one tool being “better”—it’s about using the right tool for the job. They create totally different effects.
Think of it this way: Scissors give you clean, crisp lines. They’re perfect for building the strong, foundational shape of the cut. After the main shape is in, we use scissor techniques like point cutting (snipping vertically into the ends) to soften things up and create a separated, feathered look. It’s a very controlled way to add texture.
A razor, on the other hand, is all about creating that ultimate, effortless shag. The blade glides down the hair, creating a tapered, super-soft end. This is what gives a shaggy pixie its signature melt-into-each-other look. However, it’s not for everyone. For very fine or chemically treated hair, a razor can sometimes rough up the outer layer of the hair, leading to frizz. For curly hair? A razor is almost always a hard no—it can shred the curl pattern.
Your Daily Routine: Styling and Long-Term Care
A great cut should be low-maintenance, but it’s not no-maintenance. A few key products and a solid routine are all you need.
Your 3-Product Styling Kit
You don’t need a whole pharmacy on your counter. Honestly, these three will do the trick.
- A Foundation Product (for damp hair): For volume, a mousse or root lifter is your best bet. For smoothing and control, a light styling cream is perfect.
- A Texture Product (for dry hair): This is for creating that piecey, second-day look. My favorites are a good matte pomade or clay. A pea-sized amount warmed up in your hands is all you need. Good to know: a cheap and cheerful option is something like Got2b Glued Spiking Wax (around $6), while a salon-quality pick would be Kevin Murphy ROUGH.RIDER (around $35).
- A Dry Texturizing Spray/Powder: This is the secret weapon. It gives grit and lift at the root with a matte finish. For a budget buy, Batiste Dry Shampoo ($7-$9) works in a pinch. If you want to splurge, the Oribe Dry Texturizing Spray (around $49) is legendary for a reason.
The 5-Minute “Lived-In” Style
My go-to advice: work with what you’ve got. After washing, apply your foundation product. Then, using a blow dryer and just your fingers, start rough-drying your hair. Here’s a pro tip: to get amazing volume, dry all your hair from right to left, then flip it and dry it all from left to right. This confuses the roots and forces them to stand up. When it’s about 90% dry, stop. Let the rest air dry to avoid frizz. Once it’s totally dry, take that tiny bit of pomade, rub it between your palms until it practically disappears, and then scrunch and piece out the ends. Done.
The 60-Second Second-Day Revamp
Woke up and your pixie is looking a little wild or flat? Easy fix. Lightly mist your hair with a water bottle to get it just slightly damp. Then, take a tiny dab of your pomade, warm it in your hands, and scrunch it through to redefine the pieces. It reactivates the product from the day before and brings the style right back to life.
The Golden Rule: Trims Every 4-6 Weeks
I’m going to be blunt here: this is non-negotiable. After 6 weeks, a pixie isn’t a pixie anymore. It’s a shapeless, grown-out cut. If you wait 8 or 10 weeks, your stylist isn’t just giving you a trim; they’re doing a full-blown haircut all over again to find the shape. Think of regular trims as protecting your investment.
A Word of Warning…
Please, I’m begging you, do not try to cut this at home. The angles and techniques needed for a pixie are impossible to do on your own head. During the stay-at-home period a while back, I had to fix so many DIY haircuts, and the grow-out process is always long and awkward.
Finding the right stylist is everything. Look at their Instagram. Do they post lots of short, textured haircuts, or is it all long balayage? A stylist who loves cutting short hair will show it off. Don’t be afraid to book a consultation-only appointment first. Spending $25 or $50 to talk to them for 15 minutes is a small price to pay for peace of mind.
At the end of the day, a shaggy pixie is more than a hairstyle. It’s a statement. When it’s cut right for your hair and your face, it feels less like a choice you made and more like the hair you were always meant to have.
Galerie d’inspiration

Ever wonder why the best shaggy pixies look so perfectly piecey and never bulky?
Often, the secret is a razor. While scissors create a clean, distinct line, a feather razor glides down the hair shaft to remove weight and taper the ends. This technique is the key to achieving that signature soft, wispy texture and lived-in movement. It allows the stylist to literally carve into the shape, creating layers that melt into each other for that effortlessly cool, edgy finish.
For daily styling, it’s a battle of textures:
Dry Texture Spray: Your best friend for day-two grit and volume on day one. Spritz a product like R+Co’s ZIG ZAG Root Teasing + Texture Spray directly at the roots and through the mid-lengths. It gives the hair memory and that airy, separated quality.
Matte Pomade/Wax: This is for definition and control. Use a tiny, pea-sized amount of a pliable wax (like Kevin Murphy’s ROUGH.RIDER), warm it between your palms, and use your fingertips to twist and define the ends. This gives the ‘shag’ its intentional shape.


