Thinking About a New Haircut? A Stylist’s Real-Talk Guide to a Style You’ll Actually Love
I’ve been a stylist for over fifteen years, and trust me, I’ve seen it all. But one thing is as predictable as the seasons. The moment the air gets a little crisper, people start walking into the salon with that look in their eyes. The “I need a change” look. And honestly, I get it. A new season feels like a clean slate, and what’s a better reset button than a fantastic new haircut?
In this article
But hold on. A truly great haircut isn’t about just pointing to a photo and saying “give me that.” It’s a partnership. It’s a real conversation between you and your stylist about your hair’s texture, its quirks, and your actual life. A successful style should make your life easier, not add another chore to your morning.
So, my goal here isn’t to just throw a bunch of trendy cuts at you. It’s to arm you with the insider knowledge I share with my clients every single day. We’re going to figure out how to pick a cut that genuinely works for you, how to ask for it like a pro, and—most importantly—how to keep it looking amazing at home, long after you’ve left my chair.
The Foundation: What to Know Before the First Snip
Before we even dream about shags or bobs, we need to get real about your hair. This is, without a doubt, the most critical part of the whole process. In my experience, the happiest clients are the ones who understand what’s growing out of their own head. When you know your hair’s texture, density, and personality, you can choose a style that celebrates what you have instead of fighting it. Trying to force your hair into a shape it hates is just a recipe for daily frustration.
The Hair Science Trio: Texture, Density, and Porosity
In the salon, we’re basically detectives looking at three main clues. First up is hair texture, which is just how thick each individual strand of your hair is. We usually group this into fine, medium, or coarse.
You can get a feel for this yourself. Just roll a single strand between your fingertips. Can you barely feel it? You’ve probably got fine hair. If it feels more like a piece of thread, that’s coarse. Medium is, you guessed it, right in the middle. This matters because texture dictates how well hair holds a style. Fine hair can go limp in a heartbeat, while coarse hair can be stubborn and bulky.

Next is hair density. This is all about how many hairs are packed onto your scalp. It’s totally different from texture—you can have fine hair but a ton of it (high density), or coarse hair that’s a bit more sparse (low density). Density is all about your hair’s overall volume. A blunt bob on super-dense hair can look like a helmet if it isn’t texturized correctly, while the same cut on low-density hair might look a little see-through.
And finally, there’s porosity. This is a big one. It’s all about your hair’s ability to soak up and hold onto moisture. Low porosity hair has a very tight outer layer, making it tough for moisture to get in. High porosity hair, on the other hand, has a more open cuticle, so it drinks up moisture fast but can lose it just as quickly, which often leads to frizz. Knowing this helps you pick the right products. A shag on high-porosity hair, for example, will need some serious moisture to keep the layers from looking parched.
The Consultation: How to Find a Good Stylist and Talk to Them
Okay, let’s talk about finding “the one.” A great stylist is everything. The biggest hurdle for most people is finding a pro they can trust. Start by doing a little social media stalking! Look up salons in your area and browse the stylists’ Instagram pages. Don’t just look for pretty pictures—look for pictures of hair that looks like yours. Does that stylist have examples of killer cuts on fine hair, or do they specialize in thick, curly manes? A portfolio that matches your hair type is a huge green flag.
Once you’ve found someone promising, book a consultation. And come prepared! A good 15-minute chat is worth more than an hour of awkward cutting. Bring a few photos, but be strategic. Find examples on people with similar hair density and texture to yours. It’s also super helpful to point out what you like about each photo—maybe it’s the bangs from one and the length from another.
Then, be ready for the real talk. I always ask my clients: How much time will you actually spend on your hair each morning? Five minutes? Twenty? Be brutally honest. A high-maintenance cut is a terrible idea for a wash-and-go person. Do you work out a lot and need to tie it back? Do you own a blow dryer? These details are what help a stylist tailor a cut for your real life, not your fantasy life.
Heads up! A precision cut from an experienced stylist in a major city can run anywhere from $85 to $200+, so think of it as an investment. The good news? A quick bang trim between appointments is usually much cheaper, around $15 to $25. And for my regulars, I’ll often do it for free. It pays to be loyal!
A Pro’s Look at Modern Layered Haircuts
Layering is the secret sauce behind most modern styles, but “layers” can mean anything from soft and invisible to bold and choppy. The recent love for retro-inspired shapes has brought some seriously textured, layered looks back into the spotlight. Let’s break down the big ones.

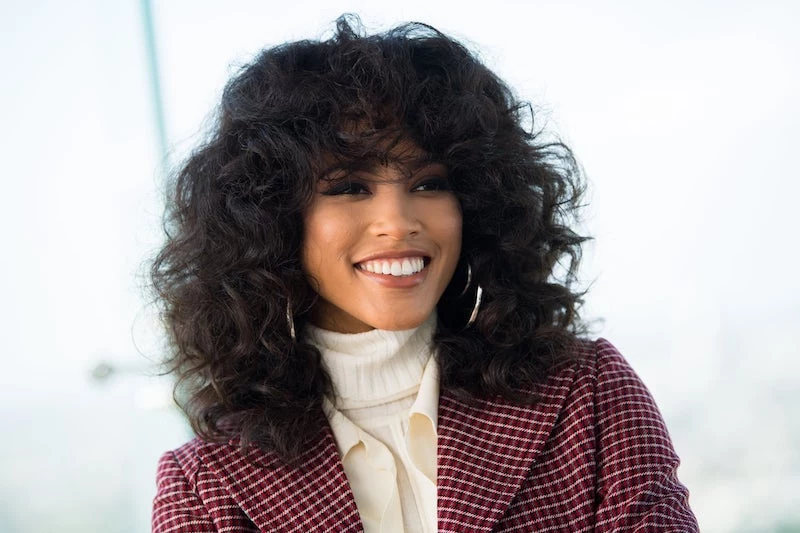
The Shag & The Wolf Cut: All About Lived-In Texture
While people use the names interchangeably, the shag and the wolf cut are kindred spirits. They’re both designed to remove a ton of weight to create movement and an effortlessly cool vibe. A mentor taught me that a great shag is all about “controlled chaos.” It looks like you just rolled out of bed looking amazing, but the technique to get there is incredibly precise.
These cuts are built on shorter layers around the crown that blend into longer, wispier lengths at the bottom. The key is often using a feather razor, which lets a stylist glide down the hair to create soft, tapered ends that move beautifully, unlike the blunt line you get from shears. For thicker hair, we might use scissors to point-cut or slide-cut, which removes bulk and adds that piecey separation.
Common Pitfall & The Fix: “My shag just looks flat and stringy!” This is a common one. The fix? You need more grit and root volume. Try blow-drying your hair upside down, and then, before you do anything else, blast your roots with a dry texture spray. This gives the layers a foundation to rest on so they don’t just hang there.
Stylist’s Toolkit for a Shag:
- Sea Salt or Texture Spray: This is non-negotiable. It gives the hair that essential grit. Expect to pay between $20 and $35 for a good one from a pro brand.
- Diffuser Attachment: If your hair isn’t naturally wavy, a diffuser ($15-$25 online or at beauty supply stores) will help you coax out texture without creating frizz.
- Styling Time: Plan for about 10-15 minutes of scrunching and diffusing.
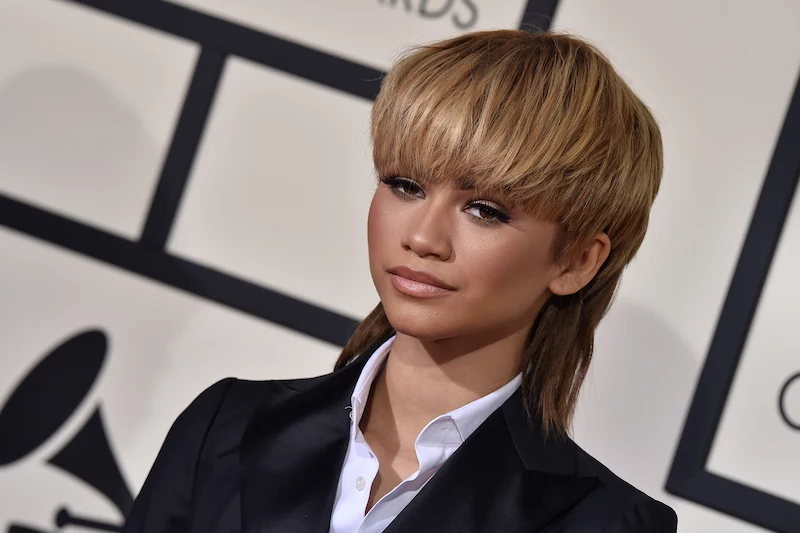
The Modern Mullet: Softer Than You Think
I know, I know. The mullet has a reputation. But today’s version is a much softer, more blended cousin of its infamous predecessor. It’s less about a dramatic “party in the back” and more about a custom-designed fringe and face-framing that connects smoothly to the longer lengths.
The magic is in the transition. We spend a lot of time softening the connection between the short front pieces and the long back pieces, often with a razor. It’s a cut for someone with confidence who wants to make a statement. By the way, it works best on hair that already has some natural wave or texture to play with; on dead-straight hair, it can look a bit severe without dedicated styling.
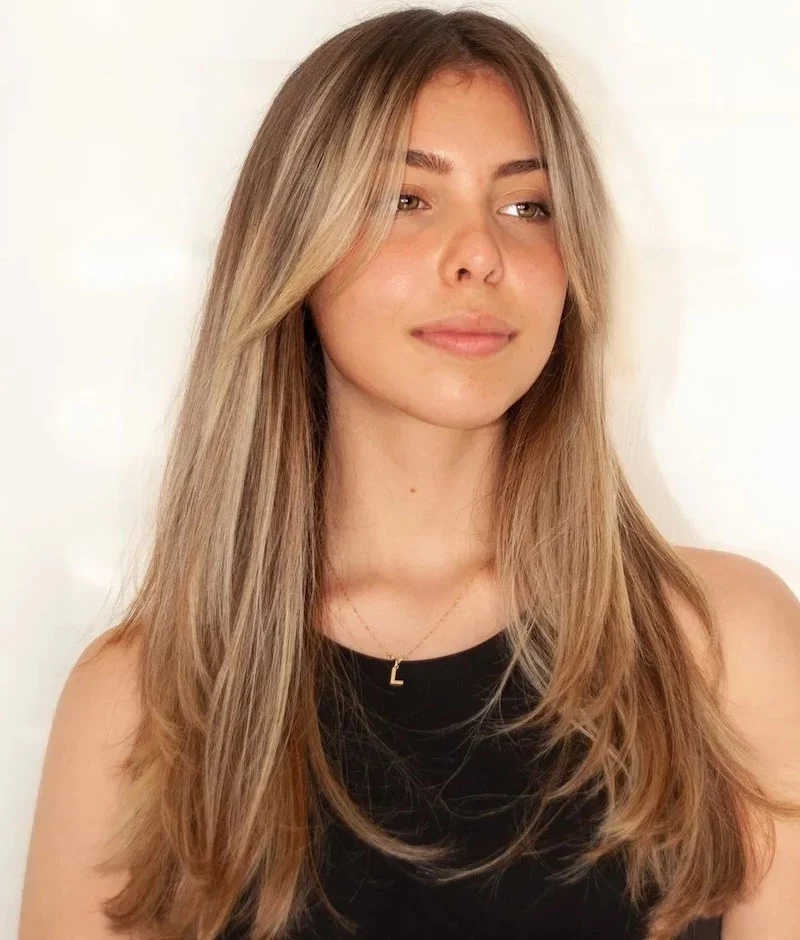
The Butterfly Cut: The New Bouncy, Layered Look
This is the style everyone is talking about—a modern spin on that classic, big, bouncy, feathered look. It’s like two cuts in one: a shorter, face-framing style that hits around the chin, combined with a system of long layers throughout the back. From the front, it gives the illusion of shorter hair, but you get to keep all your glorious length.
The signature “flick” of this style does not happen by magic. I have to be really clear with my clients about this. It requires styling.
Common Pitfall & The Fix: “My layers won’t sweep back; they just hang in my face.” The secret is in the blow-dry. You have to lift the hair up and wrap it away from your face with a round brush. The direction is everything.
Stylist’s Toolkit for a Butterfly Cut:
- A Large Round Brush: Go for a 2-inch barrel or larger to get that sweeping curve.
- Heat Protectant Spray: You’re going to be using heat, so don’t even think about skipping this. A good one costs about $20-$30 and will save your hair from frying.
- Styling Time: To get the full bouncy effect, you’re looking at a real commitment. Be prepared to spend 20-30 minutes with your blow dryer. This is NOT a wash-and-go style.
The Classics, Reinvented: Bobs and Bangs
Some styles just never quit, and for good reason. Bobs and bangs can be tweaked to suit almost any face shape or hair type. They’re foundational cuts, but mastering all their modern variations takes years of practice.
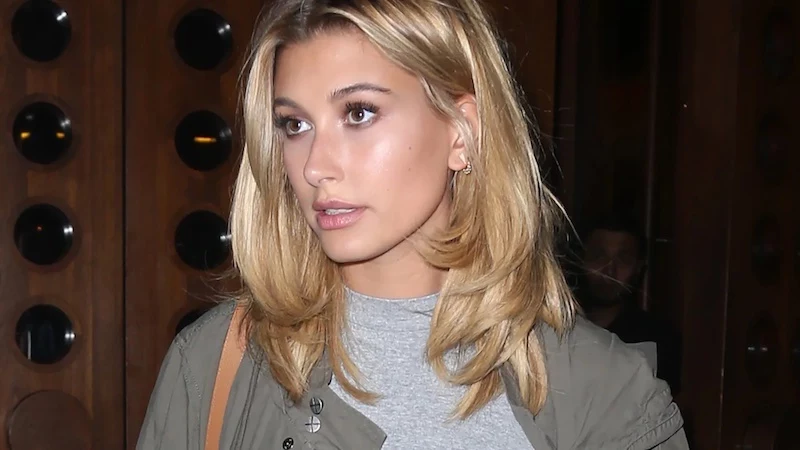
Curtain Bangs: The Friendly Fringe
Curtain bangs have exploded in popularity because they give you that soft, face-framing effect without the scary commitment of a full, blunt bang. Plus, they grow out so much more gracefully.
I almost always cut these on dry hair so I can see exactly how the hair wants to fall and spot any tricky cowlicks. The biggest complaint I hear is, “My bangs just won’t swoop!” Here’s the trick, step-by-step: On about 80% dry hair, use a medium round brush. Lift the bang section up and roll it back, away from your face. Hit it with the blow dryer for about 10 seconds, and then—this is key—use the cool shot button for another 5 seconds to lock it in place. Let it sit on the brush for a moment before you release it. That’s the secret!
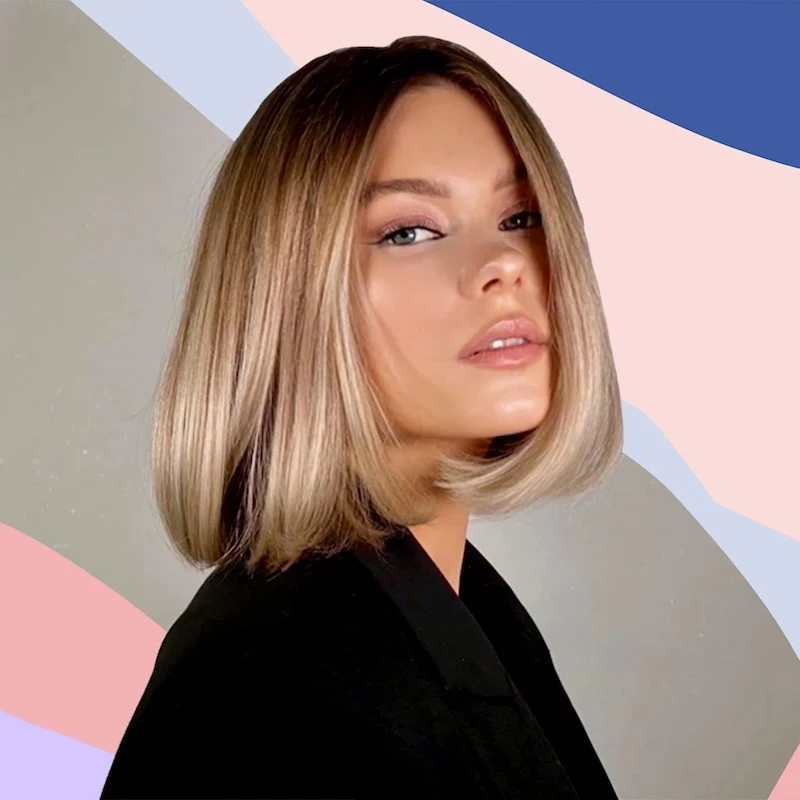
The Bob: A Universe of Possibilities
The bob isn’t one haircut; it’s a whole family. From a razor-sharp, jaw-length classic to a longer, textured “lob,” there’s a bob out there for you. It’s a cut that absolutely demands precision.
- The Blunt Bob: This is all about that clean, crisp line. To stop it from looking too heavy, especially on thick hair, we often do “invisible” texturizing underneath. We remove bulk without adding any visible layers.
- The Layered Bob: For my clients with finer hair, a layered bob can create amazing volume. These are usually soft, internal layers that build a nice, beveled shape at the nape of the neck.
- The French Bob: Oh yeah, this one’s a personal favorite. It’s shorter, usually hitting around the lip or chin, and often paired with a fringe. It’s meant to look chic and a bit undone. We cut this with less tension and shatter the ends a bit to give it a soft, lived-in feel. It’s perfect for showing off your natural wave.
Good to know: Your climate can affect what bob is best! In a really humid place, a super-precise blunt bob can be a nightmare. The moisture makes the hair swell and blurs that sharp line. In those cases, I usually suggest a softer, more textured bob that’s designed to look good with a little bit of fluff and movement.
Keeping Your Cut Fresh: The Real Work
A killer haircut can fall apart fast without the right care. The work I do in the salon is only half the story. The other half happens in your bathroom.
The Perils of the DIY Trim
I get it. The temptation to just snip that one piece of bang that’s poking you in the eye is strong. But please, I’m begging you, be careful. I once had a client come in for an emergency fix after she tried to trim her own curtain bangs while watching a video. Let’s just say one side ended up looking more like a baby bang, and we had a good laugh, but it took months to get it back to normal. Your kitchen scissors crush the hair cuticle, causing split ends. It’s almost always better to book a quick trim. It’s a small price to pay to avoid a major haircut disaster.
Product Isn’t an Upsell, It’s Part of the Cut
Think of products as tools, just like your blow dryer. They are not optional extras. That $25 texture spray isn’t just me trying to sell you something; it’s the literal ingredient that will make your shag look like a cool rock-and-roll cut instead of just messy layers. A sleek bob needs a smoothing cream or a lightweight oil to fight frizz and look polished. Investing in the right products is an investment in your haircut’s lifespan.
Your Trim Schedule is Everything
Finally, you have to stick to a trim schedule. A haircut is a shape, and that shape grows out. If you wait too long between appointments, I’m not just trimming anymore; I’m basically re-cutting the whole style, which takes longer and costs more. For short, precise cuts like a pixie or a sharp bob, that’s every 4-6 weeks. For longer, layered styles, you can push it to 8-12 weeks. The best pro tip I can give you? Pre-book your next appointment before you even leave the salon. It keeps your hair looking amazing and takes one more thing off your to-do list.
Inspirational Gallery
Texturizing Spray: This is your secret for airy, piecey volume and a matte finish. It works by coating strands with polymers to create space between them. Think of it as dry shampoo meets hairspray. Oribe’s Dry Texturizing Spray is iconic for a reason—it gives incredible grit and lift without stickiness.
Sea Salt Spray: This mimics that fresh-from-the-ocean look, encouraging natural waves and a slightly tousled texture. It often contains salt and minerals that absorb oil and add grit. Bumble and bumble’s Surf Spray is a classic for achieving that perfectly imperfect beachy vibe.
For a modern shag or wolf cut, a texturizing spray is key. For soft, natural waves, reach for sea salt.
- Show up for your appointment with your hair styled as you normally wear it.
- Bring photos of what you like, but also what you don’t like.
- Be brutally honest about your morning routine. Do you have 5 minutes or 25?
- Don’t wash your hair right before you go, especially for color. Day-old hair is often better.
A 2013 study found that the average woman changes her hairstyle around 104 times in her lifetime. This includes significant cuts, color changes, and major style shifts.
It’s more than just boredom; a new haircut often marks a new chapter—a new job, a breakup, or simply a desire for a fresh perspective. Your hair is one of the easiest ways to signal to yourself, and the world, that a change has occurred.
Wondering if you can truly pull off bangs or a super-short bob?
Before you commit to a drastic change, do a digital test run. Apps like YouCam Makeup use augmented reality to let you ‘try on’ different hairstyles and colors with surprising accuracy. It’s a fun, no-risk way to explore options and bring a more confident vision to your stylist.
The ultimate accessory for your face is your hair. That’s why face-framing layers or a well-placed ‘money piece’ can be so transformative. They’re not just for ’90s nostalgia; these carefully cut sections draw light to the face, soften features, and can even create the illusion of sharper cheekbones. Ask your stylist for soft, blended layers that start around your chin or cheekbone for a subtle but high-impact effect.
- Bounce and movement without sacrificing length.
- A soft, face-framing effect that grows out beautifully.
- The illusion of thicker, fuller hair.
The secret? Ask for the “C-Cut” or “Curve Cut.” This technique involves cutting the hair in a gentle ‘C’ shape, with layers that cup inwards towards the face, creating a lush, rounded silhouette made popular by TikTok and celebs alike.
Forget overly blunt bobs for a moment and consider the ‘Bixie’. A chic hybrid of a bob and a pixie, this cut has the texture and layering of a pixie cut but with the slightly longer length of a short bob. It’s incredibly versatile, works on most hair textures, and is perfect for anyone wanting a bold change that remains undeniably feminine and easy to style.
A great cut deserves to look its best for as long as possible. Here’s how to stretch the time between salon visits:
- Book a ‘fringe trim’ or ‘neck trim’. Many salons offer this as a quick, low-cost service to clean up the details that grow out fastest.
- Invest in a professional-grade heat protectant. Kérastase’s Ciment Thermique is a stylist favorite for shielding hair from blow-dryer and iron damage, which is a primary cause of split ends.
- Master a simple updo for the final week before your next appointment. It’s the most stylish way to hide ends that have seen better days.


