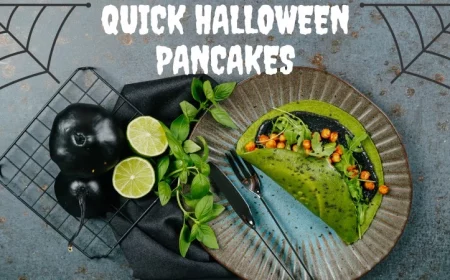
Group Costume Goals: How to Actually Pull It Off Without a Meltdown
I’ve been in the trenches with fabric, foam, and hot glue for a long, long time. My journey started in scrappy community theaters where our biggest asset was a wild imagination, not a big budget. Since then, I’ve helped countless groups go from a frantic group chat idea to a show-stopping entrance on Halloween night. I’ve seen what works, what falls apart an hour in, and what makes a group costume legendary. And trust me, it’s about so much more than just picking a theme.
In this article
- The Big Idea: Choosing a Theme That Won’t Fail
- The Game Plan: Your 4-Week Timeline & Budget
- The Building Blocks: Choosing Your Materials Wisely
- Getting It Done: Pro-Level Building Techniques
- The Final Stretch: That Pro-Level Finish
- The Day-Of Survival Kit (Don’t Leave Home Without It)
- Safety First, Fun Second (Seriously)
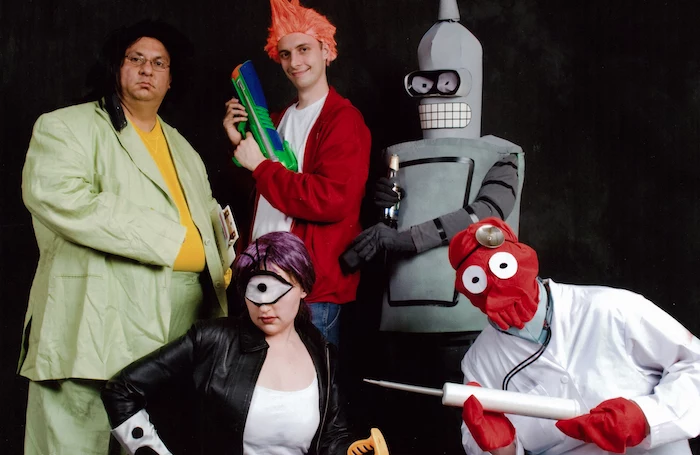
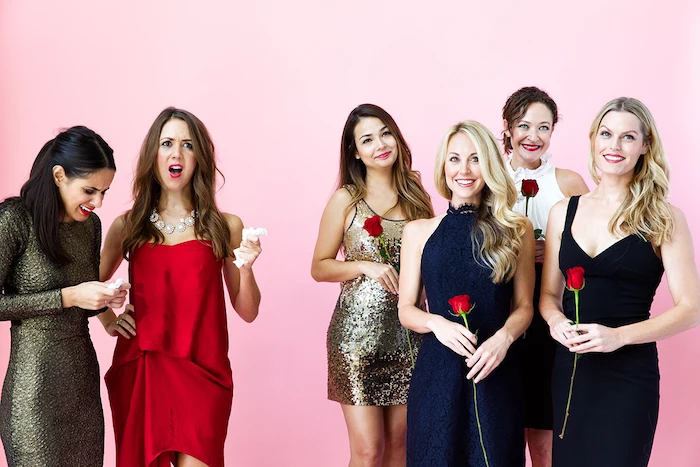
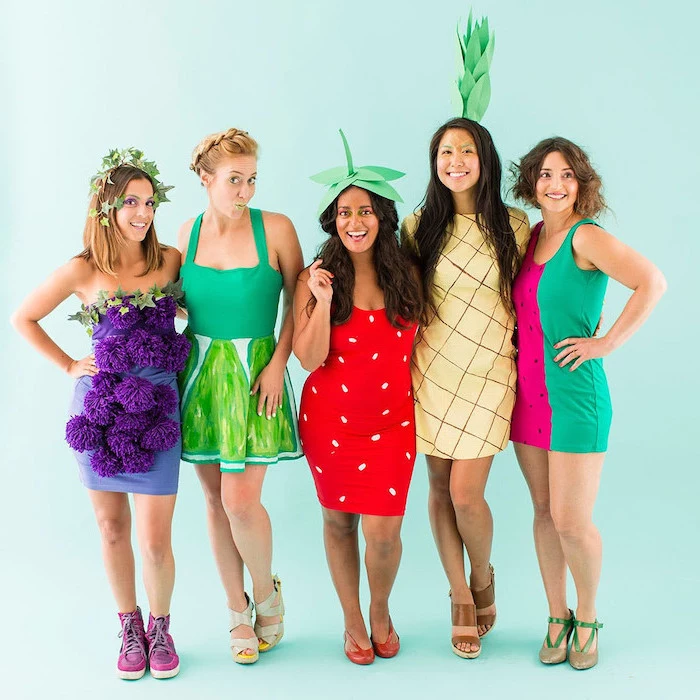
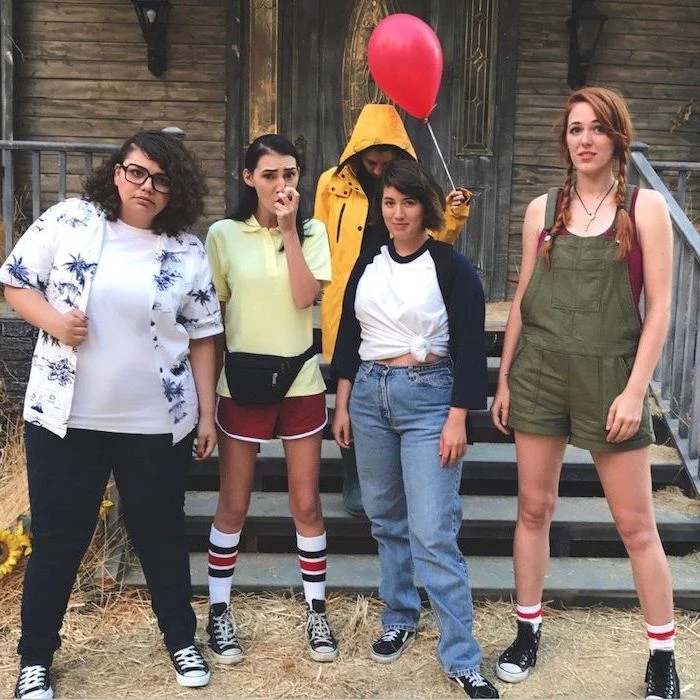
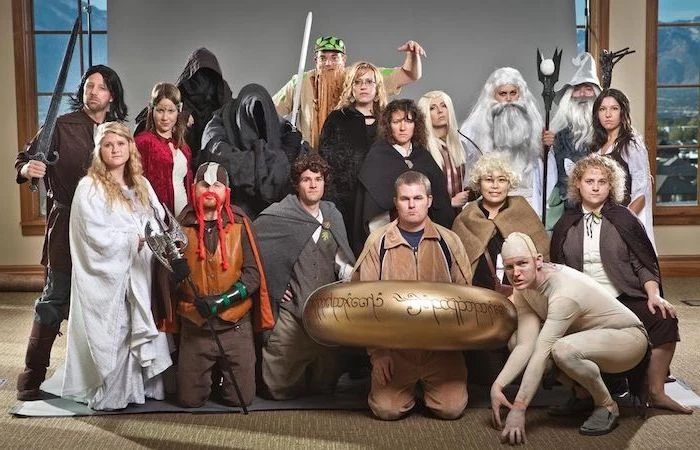
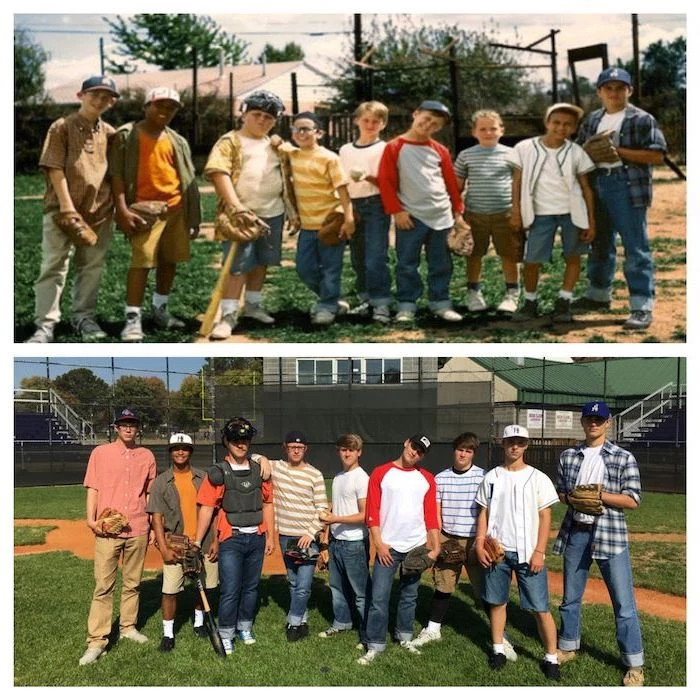
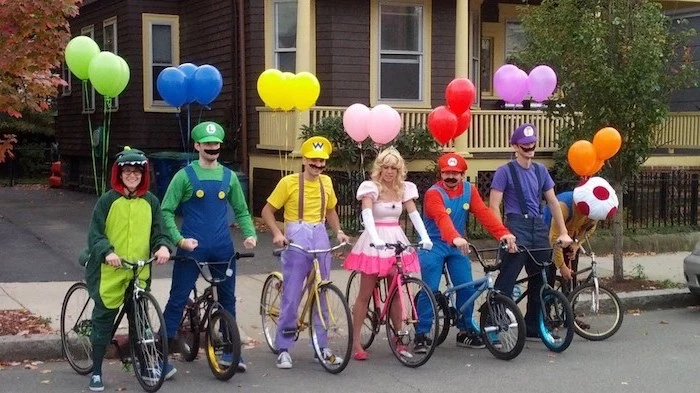
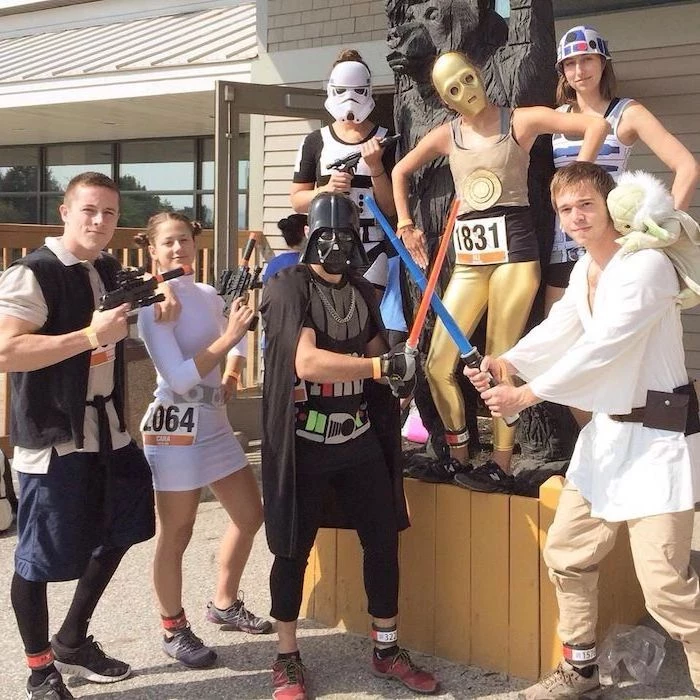
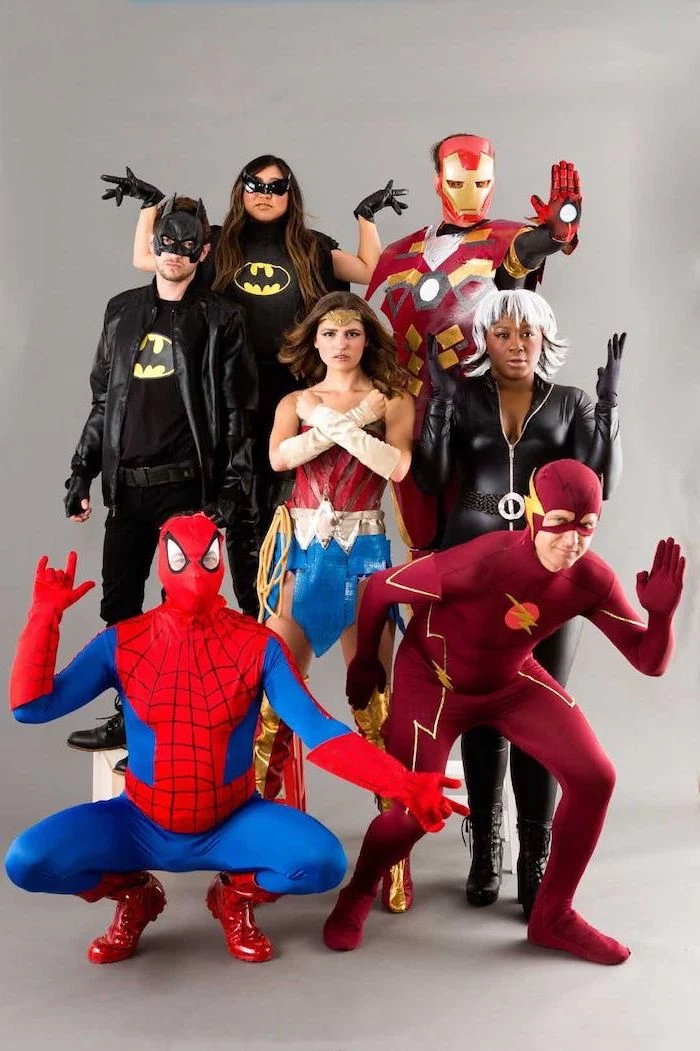
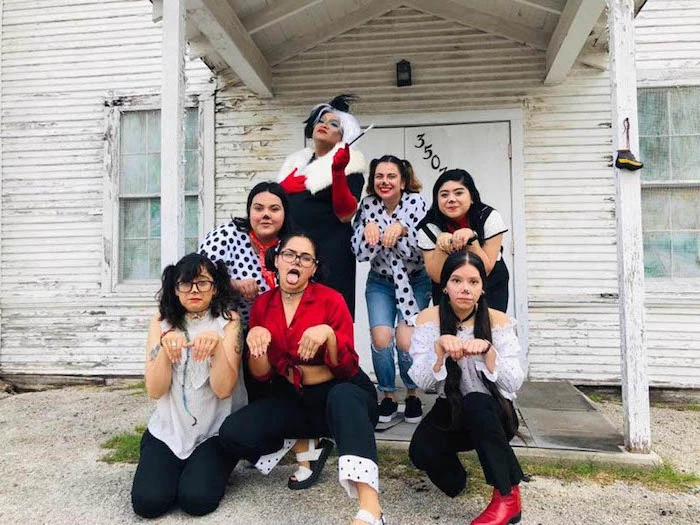
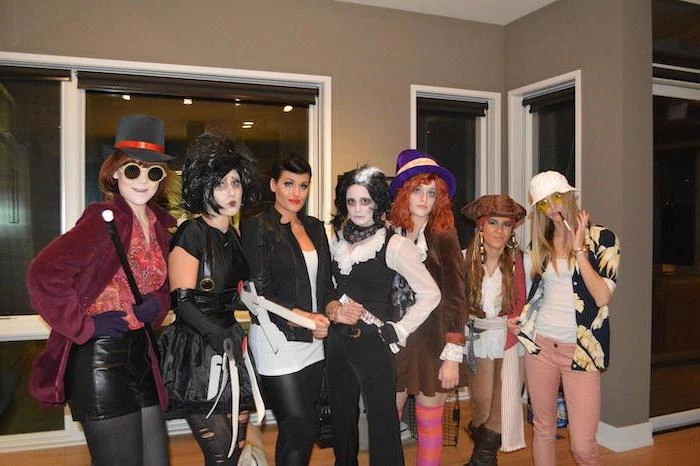
- Inspirational Gallery
A killer group costume is a vibe. It’s a story. When you and your crew walk into a room, the goal is for people to get it instantly, without you needing to explain a thing. But getting there? That takes a real plan. I’ve seen amazing ideas completely fall apart from bad communication or a last-minute scramble. I’ve also seen simple concepts executed so perfectly they became the talk of the night.
So, this is the guide I wish I’d had. It’s all the advice I give my students, distilled into a practical, no-fluff game plan. We’ll go from brainstorming to building, and I’ll even give you the list for the emergency repair kit you absolutely need to have on hand.
The Big Idea: Choosing a Theme That Won’t Fail
Okay, let’s be real. The brainstorming phase is the most fun and the most dangerous. A bad concept can sink your project before you even buy a single spool of thread. When a group comes to me for help, I always have them filter their ideas through three critical questions: Can it scale? Will people recognize it? And does everyone actually like their part?
By the way, if you’re totally stuck, here are a few foolproof ideas that almost always work:
- Classic Monsters: You can have a vampire, a werewolf, a mummy… and if more friends join, add a witch, a ghost, or a mad scientist. The crew can grow or shrink, and it still works.
- Video Game Racers: A core group of iconic characters with their karts, and you can easily add more racers or even characters who throw things from the sidelines.
- A Circus Troupe: This one is amazing for individual expression. You can have a ringmaster, a strongman, a clown, an acrobat, a fortune teller… the possibilities are endless.
- Weather Patterns: A super creative and scalable idea! One person is a storm cloud (with LED lightning!), one is a rainbow, one is a sun, another is a snowflake. Visually stunning and easy to adapt.
- Decades Party: Each person picks a decade and goes all out. A flapper from the ’20s, a hippie from the ’70s, grunge from the ’90s. It’s cohesive but allows for total individual freedom.
Is Your Idea Scalable?
This is probably the most important question. A scalable theme works for three people just as well as it does for ten. Think about themes with a main cast and a flexible number of supporting roles. A spooky, gothic family is a perfect example. You have the core family members, but if more friends want in, you can easily add a disembodied hand, a hairy cousin, or a kooky grandma. The theme holds up.
In contrast, a theme based on a specific group of, say, five high school archetypes from a classic movie is totally fixed. If you have four or six people, the whole concept falls flat. So, when you’re brainstorming, always ask, “Who can we add or remove without breaking the theme?” If the answer is “nobody,” you need a rock-solid commitment from everyone involved.
Will People Even Get It?
Inside jokes are fun for your group chat, but they make for terrible costumes at a bigger party. You’ll spend the entire night uncomfortably explaining your outfit to confused onlookers. A strong group costume is instantly recognizable to a general audience. This doesn’t mean it has to be the most popular thing from this year; it just means the visual language—the shapes, colors, and props—should be undeniable.
I once saw a group spend a fortune on super-detailed outfits from a niche video game. They looked amazing! The problem? Everyone at the party just thought they were generic space soldiers. They were so disappointed. A better approach is to lean into iconic silhouettes and color palettes. Think of the bold, simple colors of a team of heroes or the unmistakable beige jumpsuits and custom backpacks of a ghost-hunting crew.
Does Everyone Have a Role They’re Excited About?
This is a classic rookie mistake. One person gets really jazzed about an idea but steamrolls everyone else into roles they hate. A great group costume allows for individual flair within the theme. The circus idea is great for this—everyone gets to be a star in their own way, but together, they create a whole show.
Before you lock in an idea, make sure every single person has a say and is genuinely excited about their character. If someone feels stuck with a costume they dislike, their low energy can bring down the entire group’s vibe. And nobody wants that.
The Game Plan: Your 4-Week Timeline & Budget
Okay, let’s get tactical. A great idea needs a great plan. Most people wildly underestimate how long this stuff takes. To avoid the last-minute panic, here’s a rough timeline you can follow.
A Sample 4-Week Plan:
- Week 1: Brainstorm & The Pact. This is the week to finalize your theme and who is playing what role. The most important part? Everyone agrees to the plan and the budget.
- Week 2: The Great Material Hunt. Figure out what you need to buy versus what you can build. Make a master shopping list. This is the week to hit up thrift stores, craft stores, and order anything you need online.
- Week 3: The Big Build. Put on some music, order a pizza, and have a build day! This is where you cut, sew, glue, and paint. Working together makes it fun and keeps everyone accountable.
- Week 4: Details, Fittings & Finishing Touches. This final week is for finishing painting, adding details, doing a final fitting, and making any last-minute adjustments. Don’t leave this until the night before!
And what about the money?
Let’s talk budget, because this is where friendships can get tested. The cost can vary wildly. A simple, thrift-store-based costume might run you $30 to $50 per person. But if you’re building custom props and using higher-quality materials, you could easily be looking at $100 to $200 per person, or even more.
Be transparent about costs from day one. Create a shared spreadsheet to track expenses. One person can buy all the shared materials (like paint or glue) and everyone else can pay them back. It just keeps things fair and avoids awkwardness later.
The Building Blocks: Choosing Your Materials Wisely
The materials you choose literally make or break your costume. This isn’t just about what’s cheap; it’s about what works.
Fabric Choice is Everything
Please, I’m begging you, step away from that cheap, shiny satin. It looks chintzy, and it reflects camera flashes horribly, turning you into a washed-out blur in every photo. Instead, look for materials with a matte finish like cottons, felts, and twills. They absorb light better and just look more authentic.

Quick tip: Felt is a beginner’s best friend. It doesn’t fray, which means you don’t have to hem the edges. It’s fantastic for cutting out logos, emblems, and other add-ons.
For structured pieces like armor, a lot of people grab cardboard. Don’t do it. It gets soggy, creases easily, and just looks… like cardboard. The go-to material for costumers is craft foam, also known as EVA foam. You can find thin sheets at any big-box craft store like Michaels or Jo-Ann for a few bucks. For bigger, thicker, higher-quality sheets perfect for armor, check out specialty online cosplay supply shops. It’s lightweight, cuts easily with a box cutter, and you can shape it with a heat gun (with good ventilation, of course!).
Picking Your Poison: Glues & Adhesives
Using the right glue for the job is critical. Let’s break down the main players:
- Hot Glue: This is your friend for quick, temporary bonds and tacking down lightweight decorations. It’s fast and cheap. However, it’s not super strong and can become brittle when cool, so don’t rely on it to hold major structural parts of your costume together.
- Contact Cement: This is the industry-standard for foam. It’s a bit more work but creates an incredibly strong, flexible bond. You apply a thin layer to both surfaces, let it dry until it’s just tacky (usually 10-15 minutes), and then press the pieces together. The bond is instant and permanent, so line it up carefully! Heads up: The fumes are potent. You MUST use this in a well-ventilated area—outdoors is best.
- Fabric Glue & Tape: A total lifesaver if you can’t sew or are in a hurry. Use fabric glue for permanent bonds like attaching patches. For day-of emergencies, double-sided fabric tape is pure magic for fixing a fallen hem or a shifting collar.

Getting It Done: Pro-Level Building Techniques
Now for the fun part: making the thing. You don’t need a fancy workshop, just the right approach.
Patterning and a Custom Fit
For a truly custom fit, especially for armor or a fitted bodice, you should make a duct tape dummy. It sounds weird, but it’s a game-changer. You put on an old t-shirt you don’t care about, and then have a friend wrap your torso in layers of duct tape. Once you’re fully encased, have them carefully cut you out of it up the back. Pro-tip: Make sure your friend uses blunt-nosed scissors and cuts slowly! No one wants a trip to the ER for a costume. Once it’s off, tape up the cut seam, stuff the form with newspaper, and you have a perfect replica of your body to build on.
The Buy vs. Build Decision
Be honest with yourself about your time, skills, and budget. There is zero shame in buying parts of your costume. In fact, it’s usually the smartest move. For example, if your group is doing the ghost-hunting crew, don’t try to sew four identical jumpsuits. Just buy some khaki work coveralls for $30-$40 from a hardware store or online. Spend your time and creative energy building the awesome proton packs instead. That’s what people will remember!
DO THIS TODAY: Start a group chat for your costume crew right now. Name it something fun, like “Project Halloween Domination.” Then, create a shared Pinterest board and have everyone start dropping in inspiration photos. It takes five minutes and gets the ball rolling.
The Final Stretch: That Pro-Level Finish
A great paint job is what separates good costumes from great ones. The secret isn’t fancy paint; it’s layering.
If you’re painting foam, you have to seal it first. A few coats of a flexible craft glue or a rubberized spray sealant will create a smooth, non-porous surface. If you skip this, the foam will just drink up your paint and look splotchy.
After sealing, apply a base coat. For a realistic metallic look, I always start with a black or dark brown base. Then, it’s time for a technique called dry brushing. Dip your brush in your metallic paint (like silver or gold), then wipe almost all of it off on a paper towel. Lightly dust the brush over the raised surfaces of your prop. The metallic paint catches on the high points, leaving the dark base coat in the crevices. This instantly creates the look of weathered, aged metal. It’s so easy, but the effect is incredible.

The Day-Of Survival Kit (Don’t Leave Home Without It)
Costumes break. It’s a law of nature. After years of watching things go wrong, I never go to an event without a small repair kit. You will be a hero, I promise.
- Safety pins in various sizes (the MVP).
- A small roll of duct tape.
- Double-sided fabric tape.
- A small tube of super glue for prop repairs.
- Extra batteries if your costume has lights.
- A tiny sewing kit with a few pre-threaded needles.
Keep this in a small bag or pocket. When a strap snaps or a piece of armor comes loose, you’ll be ready.
Safety First, Fun Second (Seriously)
This is the most important part of the guide. A cool costume is never worth an injury. These warnings are based on real—and sometimes scary—experiences.
Ventilation Is NOT Optional: I cannot stress this enough. When you’re using spray paint, sealants, or contact cement, you must be in a well-ventilated space. Outdoors is best. If you have to be inside, open every window and use fans. Wear a proper respirator mask designed for chemical vapors, not a flimsy dust mask. Your lungs will thank you.
Visibility and Mobility: Before you head out, do a full dress rehearsal. Can you see clearly out of your mask? Can you walk up and down stairs? Can you sit down? Can you fit through a doorway? A costume that makes you helpless isn’t fun to wear. Be mindful of your surroundings, especially if you have big, bulky pieces.
Fire Safety: So many costume materials are flammable—foam, synthetic fabrics, spray paint, you name it. Be incredibly careful around open flames like candles, jack-o’-lanterns, and fireplaces. I had a friend whose cape brushed against a candle, and it went up in flames in an instant. He was fine, but it was a terrifying reminder to always be aware.
Creating a group costume is an adventure. It’s a chance to learn new things, be creative, and make something awesome with your friends. With a little planning and a big focus on safety, your crew will have a blast and create memories you’ll be talking about for years.

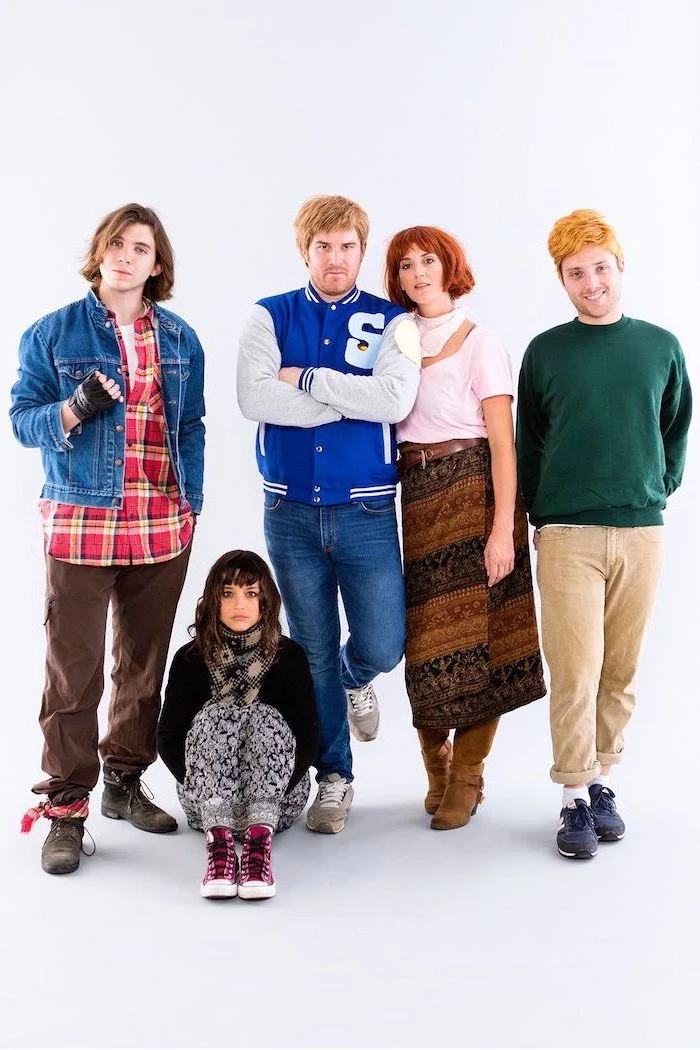
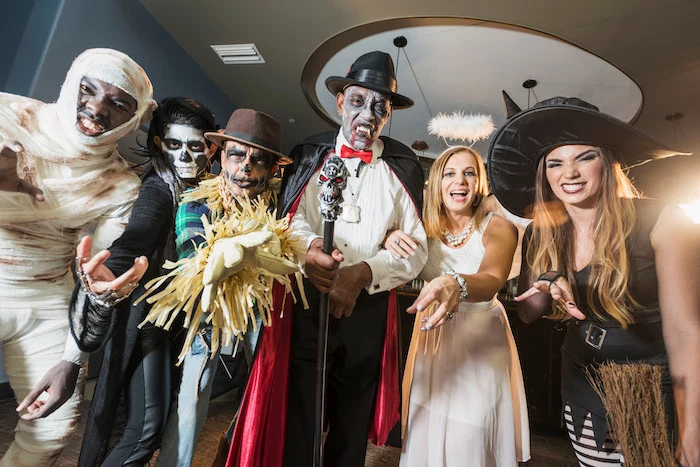
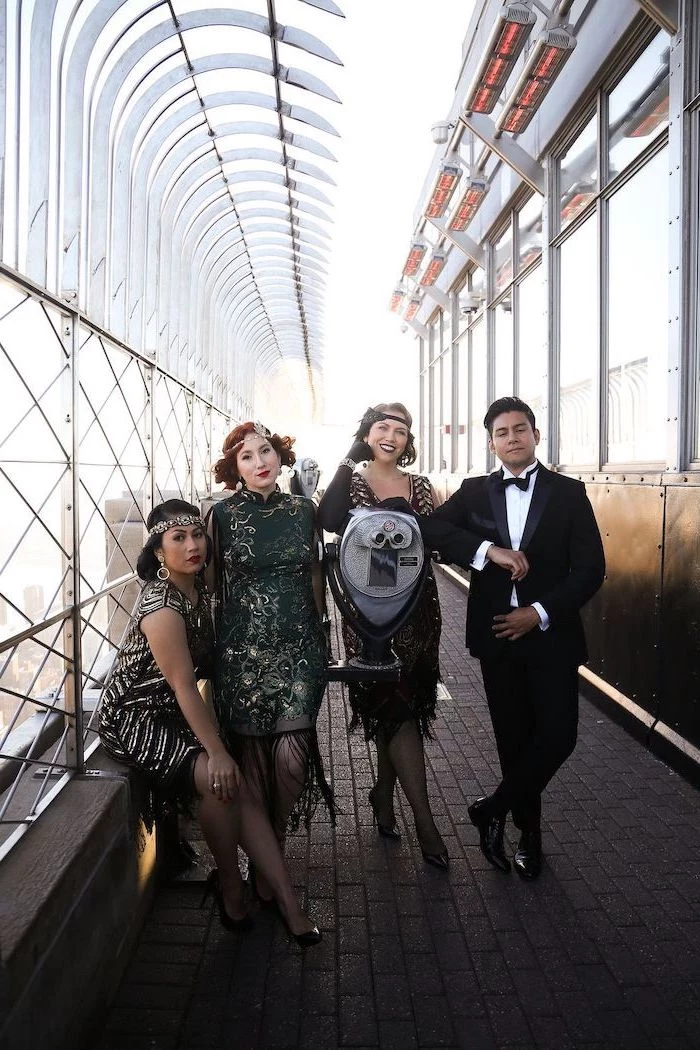
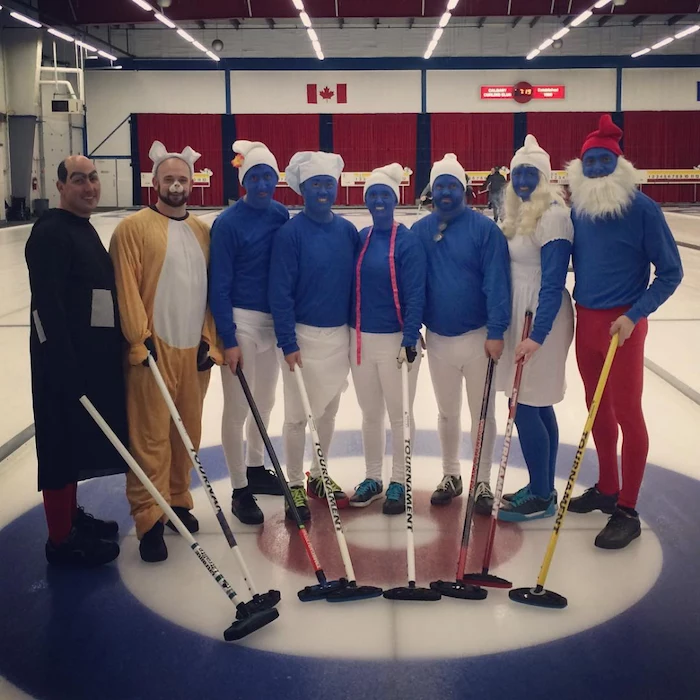
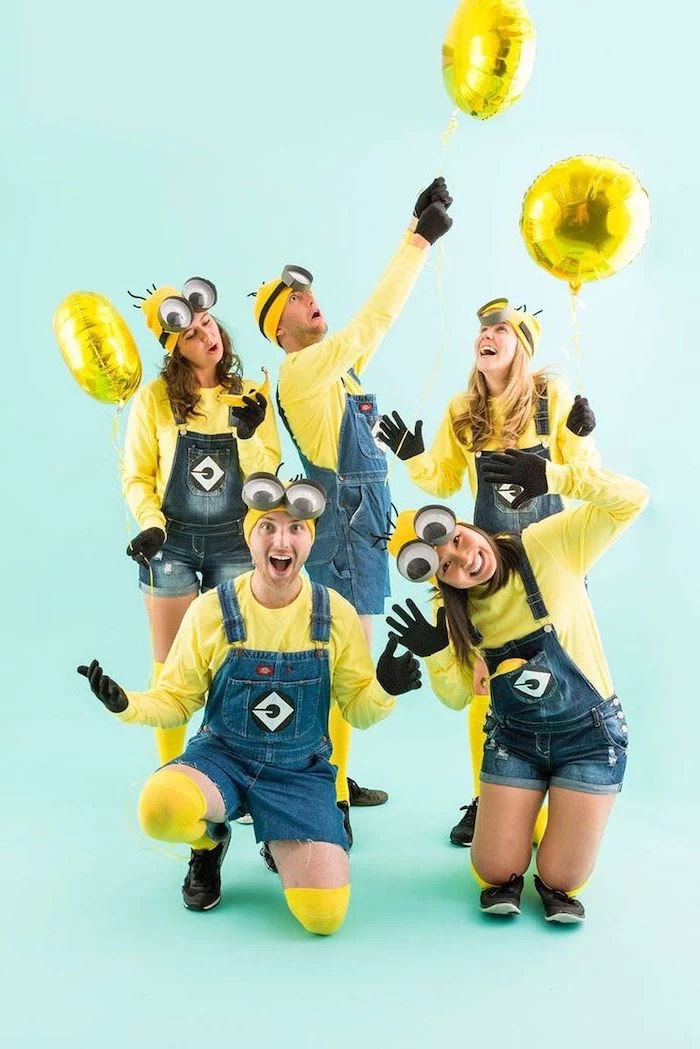
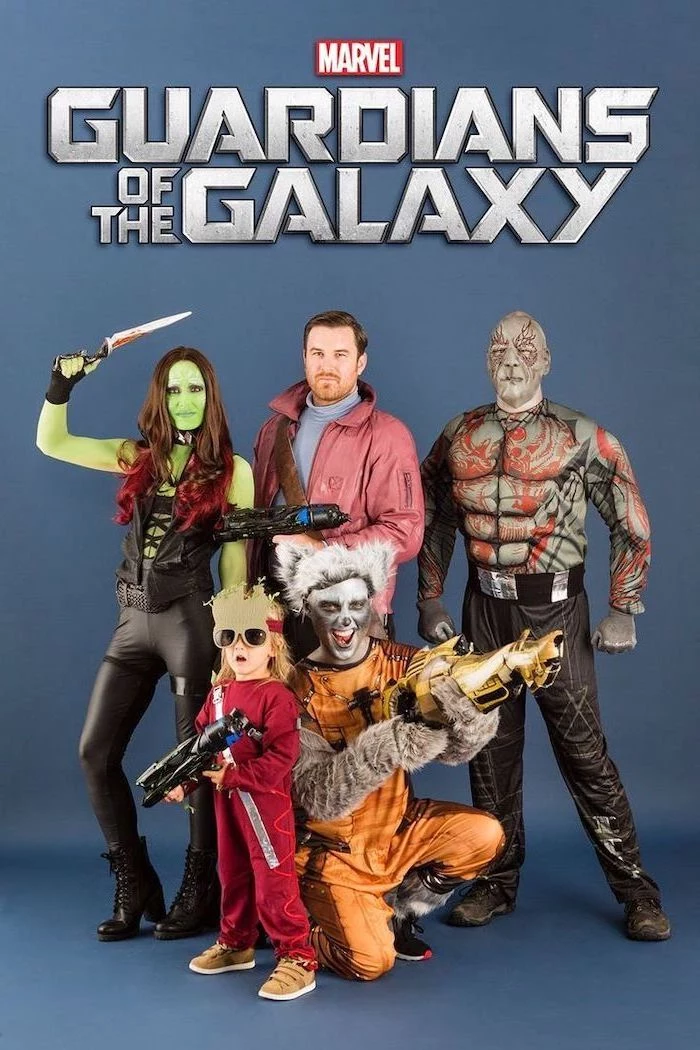
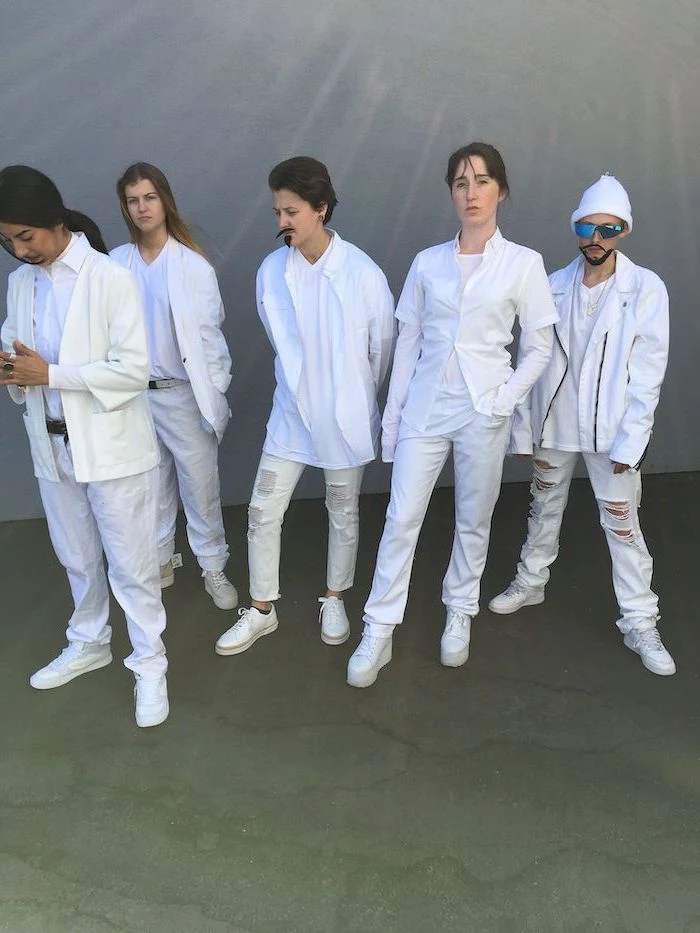
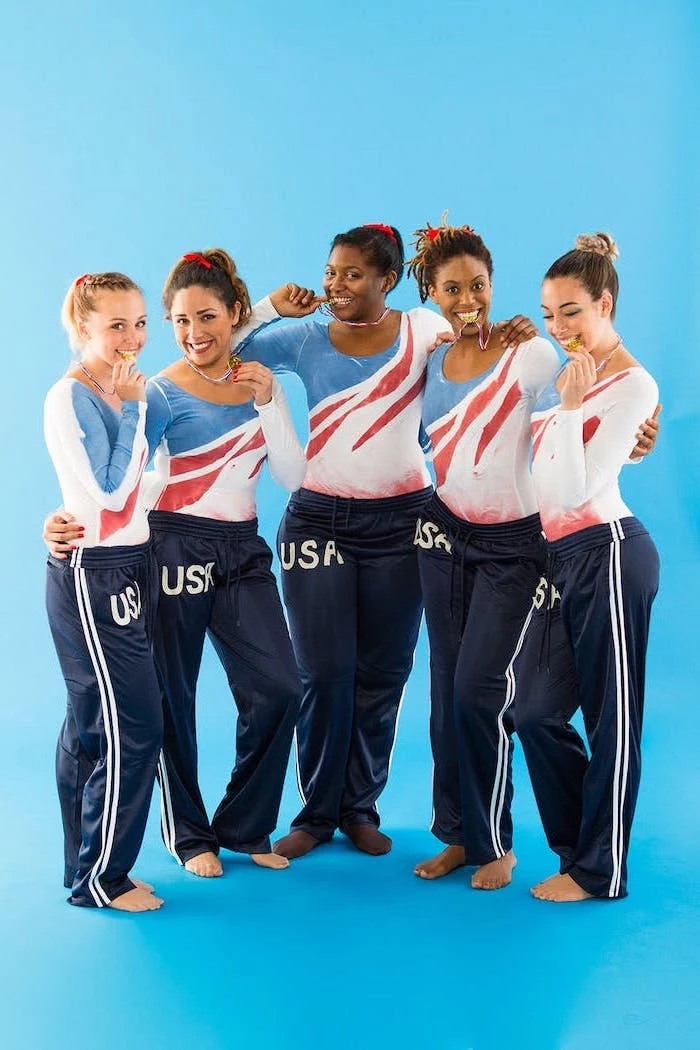
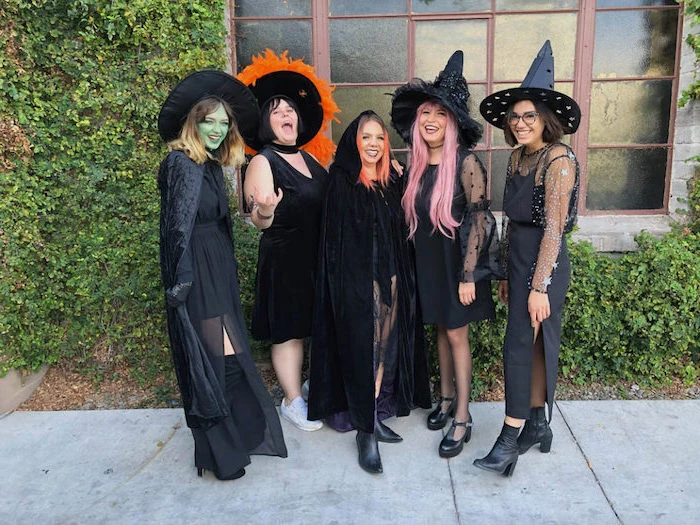
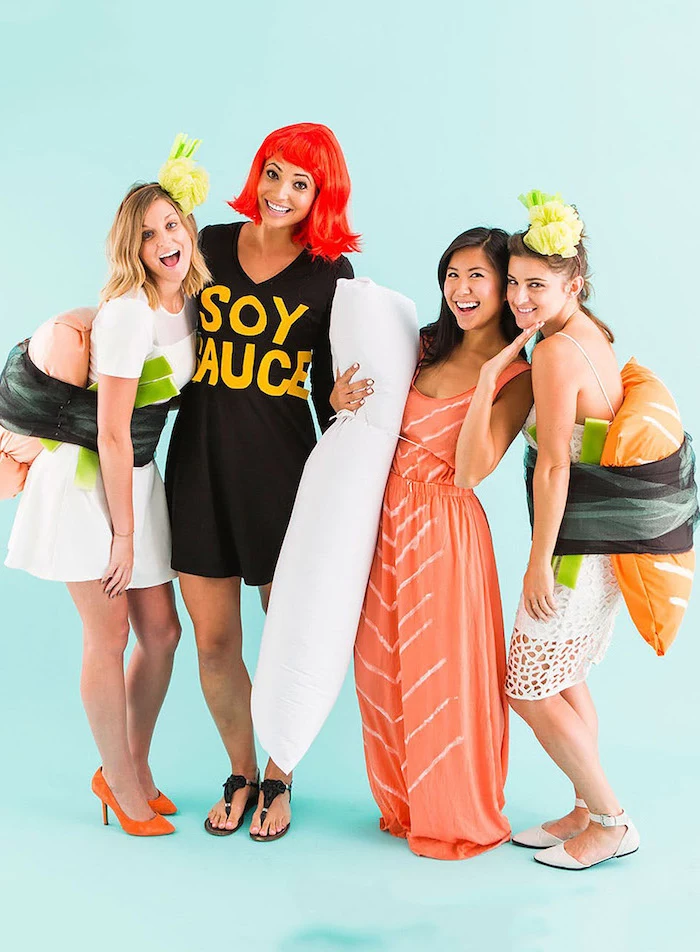
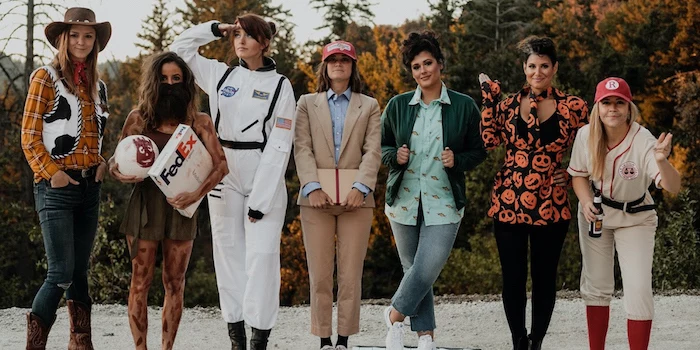
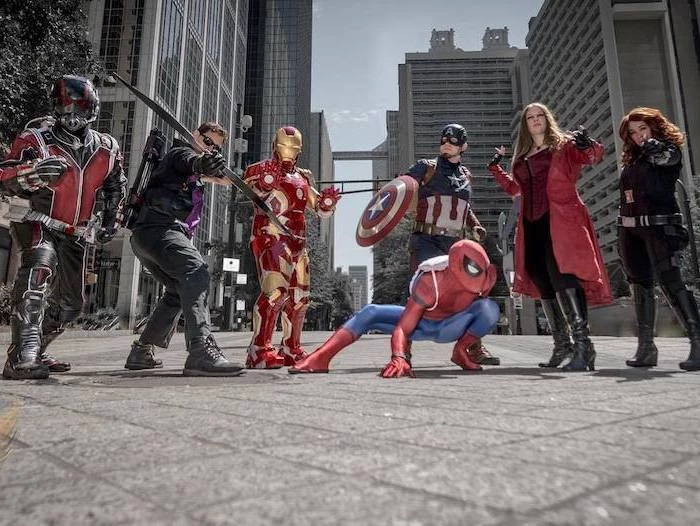
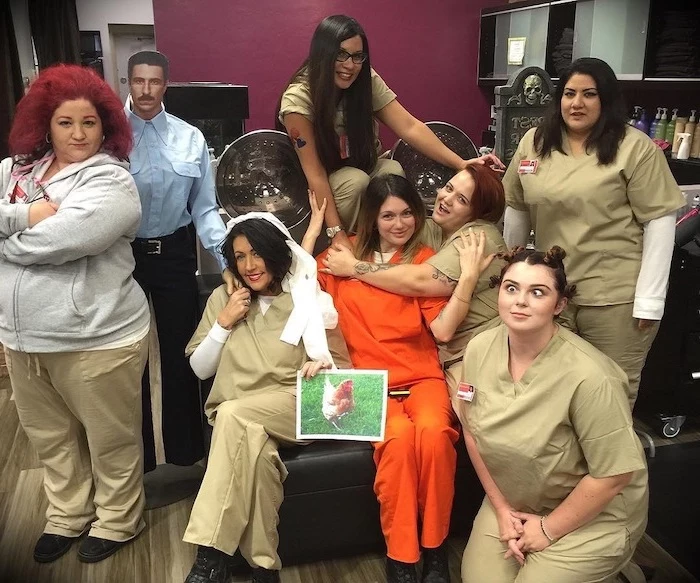
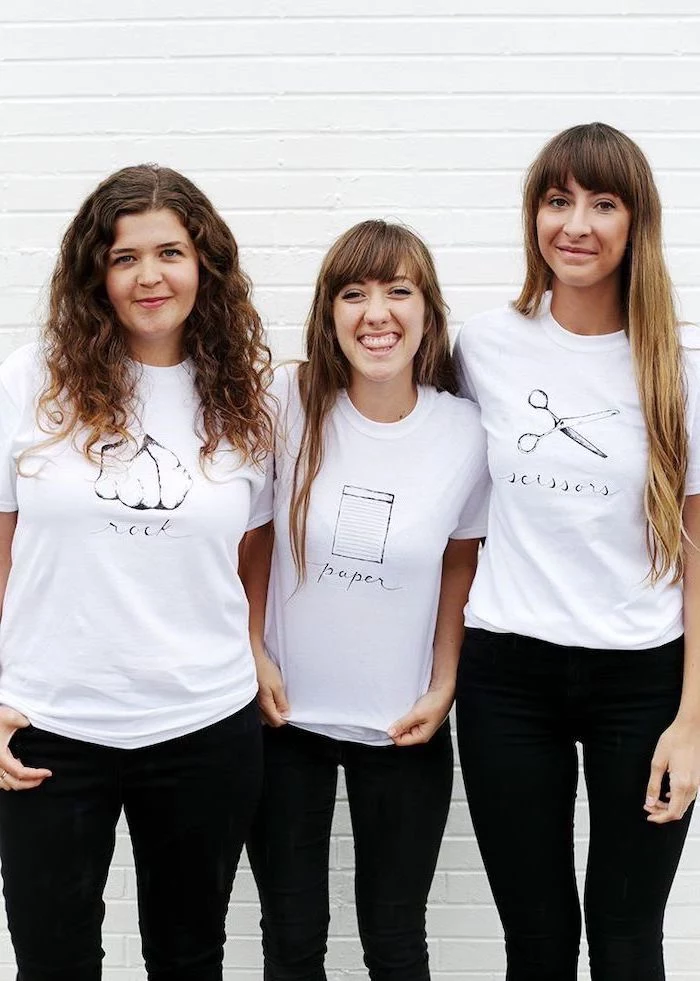
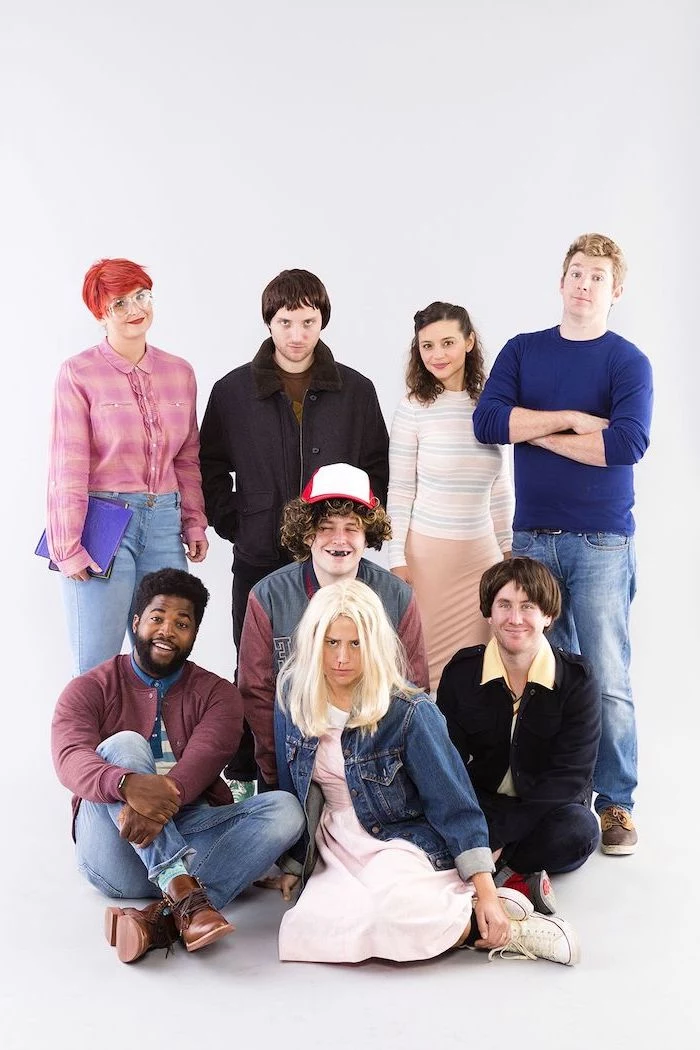
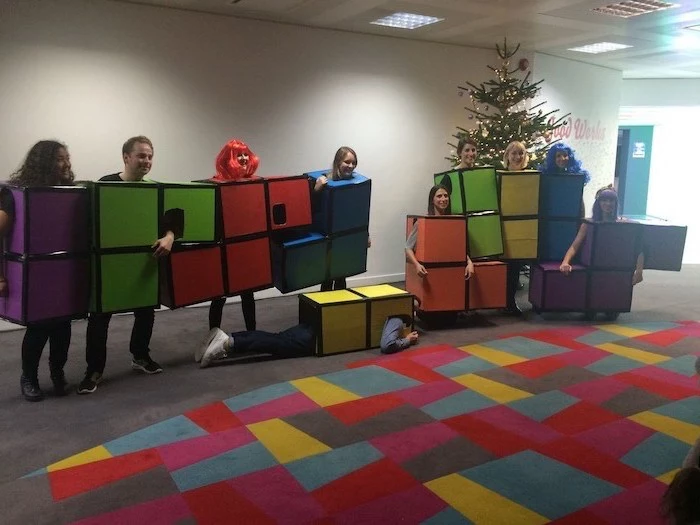
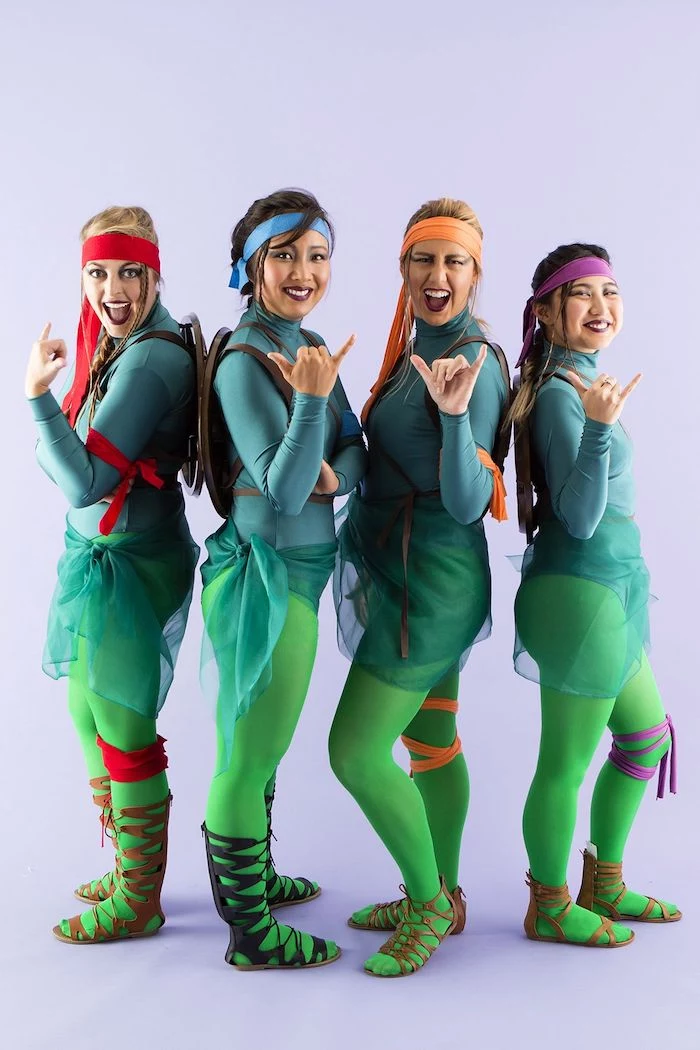
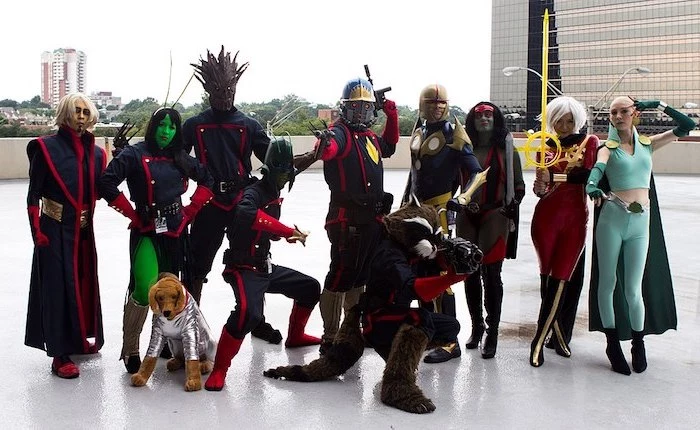
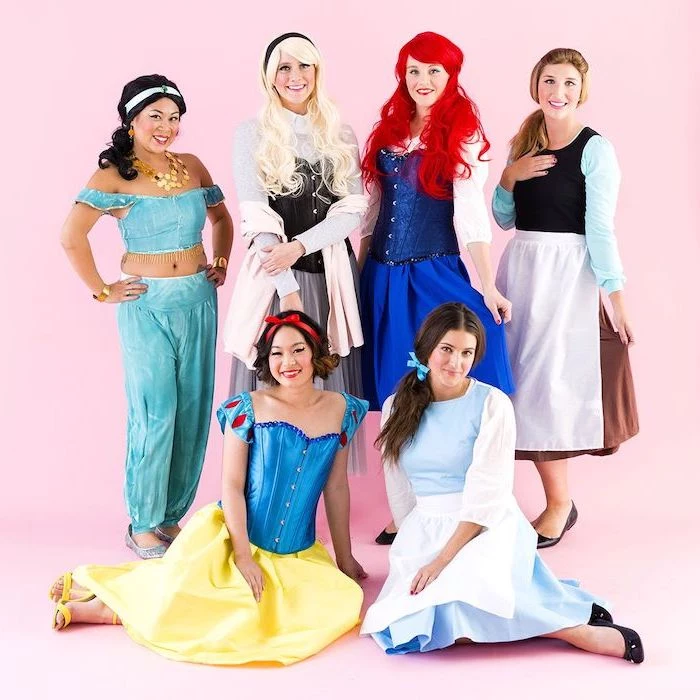
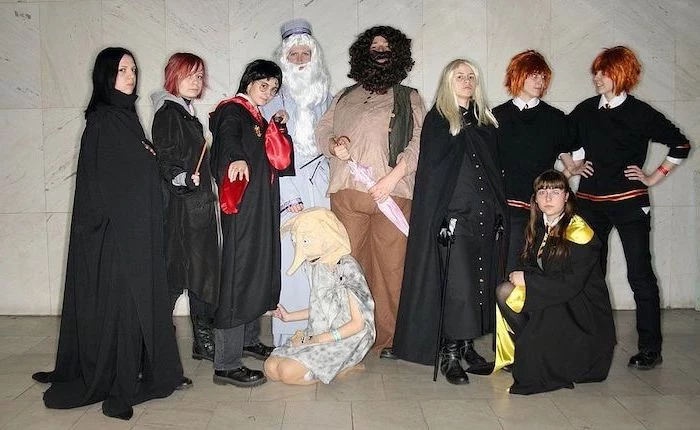
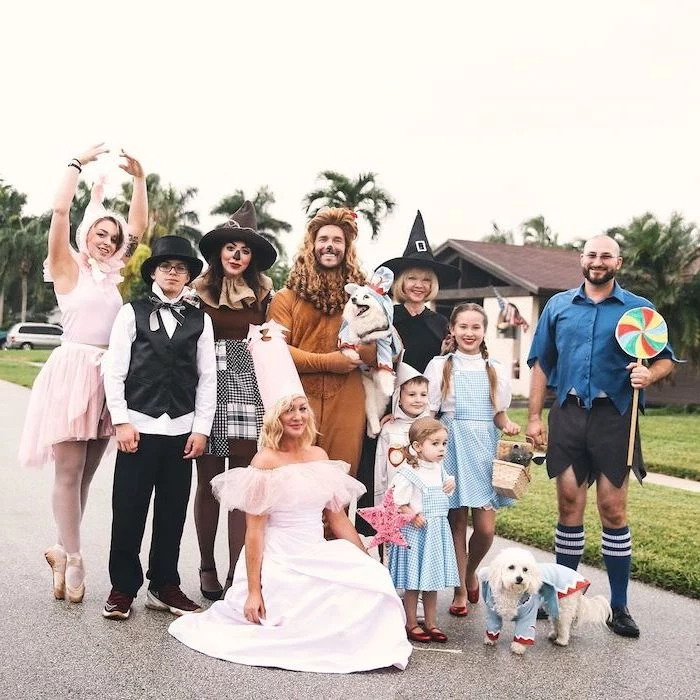
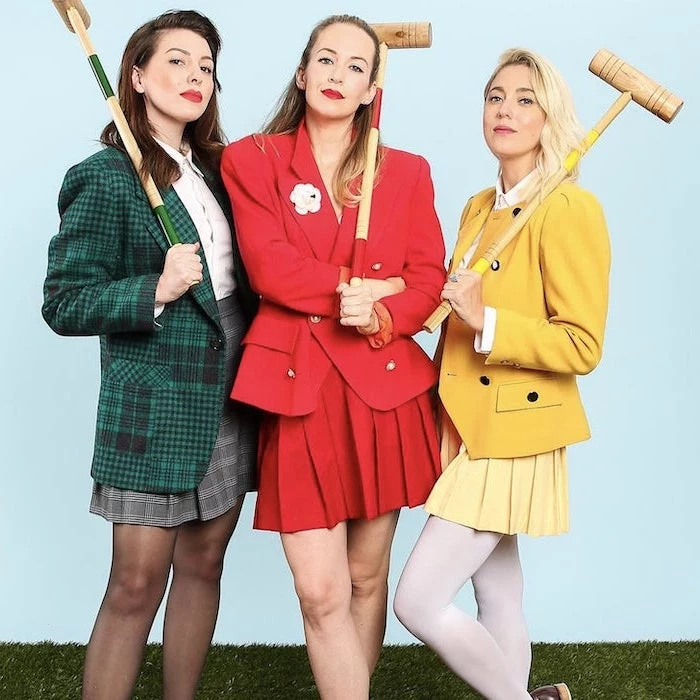
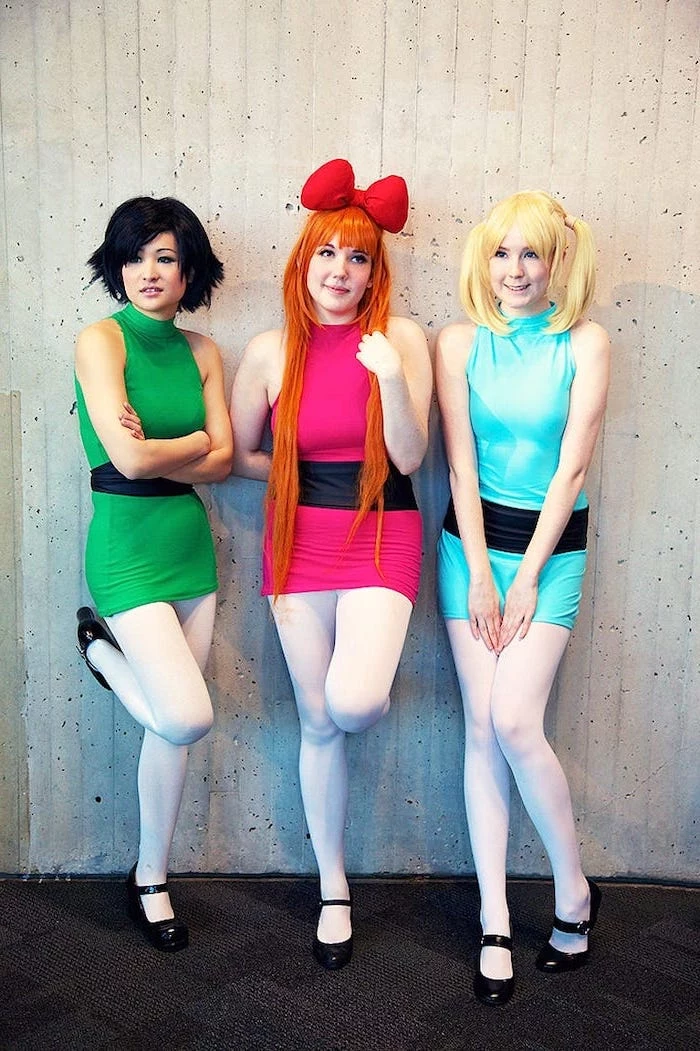
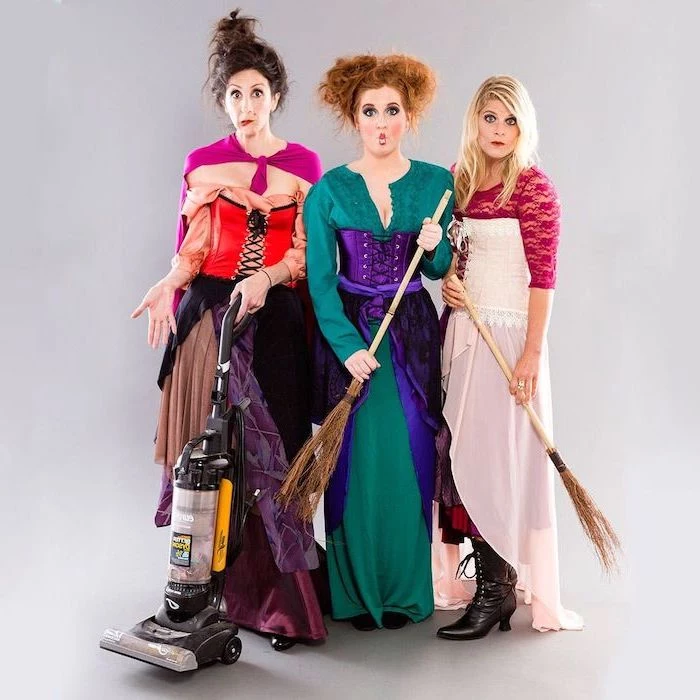
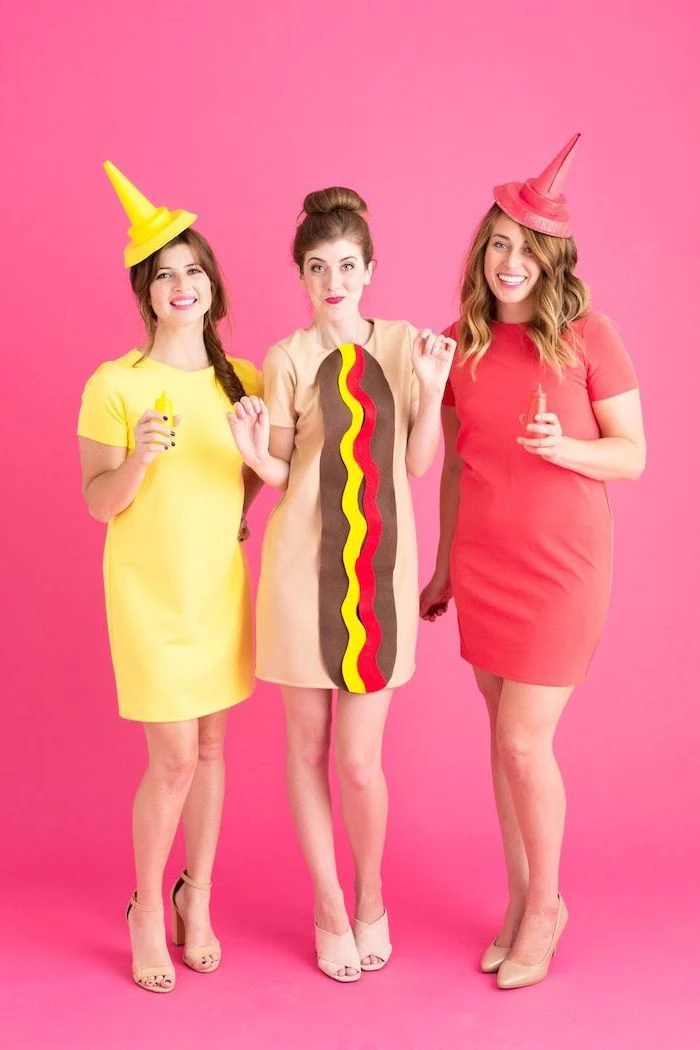
Inspirational Gallery

The Unspoken Rule: Appoint a Project Manager. Amidst the creative chaos, designate one person as the point-of-contact. This isn’t about being bossy; it’s about efficiency. They track the budget, send reminder texts, and make final decisions on shades of green. This single step can be the difference between a cohesive group and five people wearing slightly different, uncoordinated versions of the same idea.
- A unified color palette makes you look like a team, even if your characters are wildly different.
- Consistent makeup application across the group elevates the entire look from ‘costume’ to ‘production’.
- Shared accessories, even something as simple as matching belts or shoes, tie everything together visually.
The secret? A pre-party group meeting to finalize these small but crucial details.
Nearly 70% of Halloween participants plan to buy their costumes. This means a well-executed DIY group costume will automatically stand out in a sea of store-bought outfits.
Leverage this by focusing your DIY efforts on one key element that can’t be bought off the shelf. For a ‘Guardians of the Galaxy’ group, maybe that’s a handcrafted Baby Groot pot or a hyper-detailed Walkman for Star-Lord. It adds a layer of authenticity that money can’t buy.

How do we transport our bulky costumes without ruining them?
Think in reverse. If possible, get dressed at the destination. For delicate props or headpieces, use a hard-sided suitcase or a plastic storage bin lined with bubble wrap. For costumes that must be worn in the car, have the most encumbered person sit in the front passenger seat. And always, always do a practice run of getting into the vehicle before the night of the party.
EVA Foam: The go-to for armor and structured props. It’s lightweight, easy to cut, and can be heat-shaped with a simple heat gun. Brands like Poly-Props or TNT Cosplay Supply offer a variety of thicknesses for different needs.
Worbla: A thermoplastic sheet that becomes pliable when heated. It’s perfect for covering foam for a hard, durable shell or for creating intricate details. It’s more expensive but offers a professional finish.
For beginners, starting with EVA foam is more forgiving and budget-friendly.
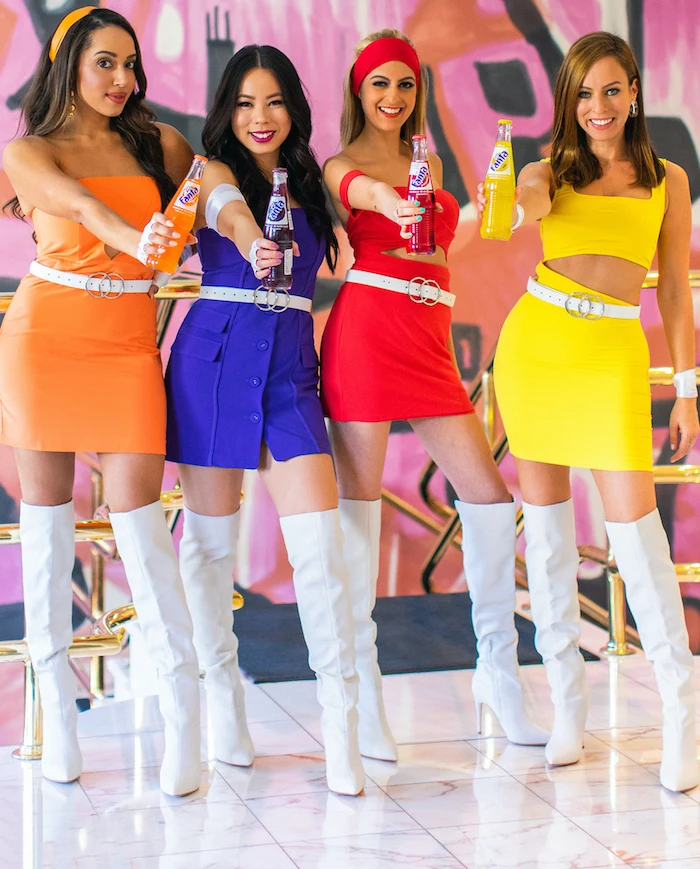
Don’t underestimate the power of a shared soundtrack. Create a group playlist for your crafting sessions and for getting ready on the big night. If you’re going as the Spice Girls, the playlist is obvious. But if you’re the cast of ‘Star Trek’, a mix of the show’s score and some spacey synth-pop can get everyone into the right mindset. It’s a small detail that builds major group energy.
“The first rule of group cosplay is comfort. If you can’t walk, sit, or use the restroom, your costume has failed, no matter how good it looks.” – A wise convention-goer
Important: The Emergency Repair Kit. Don’t leave home without a small bag containing these lifesavers:
- Safety Pins: For instant fabric fixes.
- Hot Glue Gun (cordless if possible): For reattaching foam, gems, or any non-fabric element. A high-temp mini version is ideal.
- E6000 or similar industrial glue: For more permanent, heavy-duty repairs.
- Double-Sided Fashion Tape: To keep everything perfectly in place.
- Makeup for Touch-Ups: Especially body paint or lipstick.
For groups with mixed crafting skills, play to everyone’s strengths. The person who’s great at painting can handle all the detail work. The one who’s a whiz with a sewing machine tackles the fabric. Someone who’s just good at organization can manage the supply runs and keep the workspace tidy. Distributing tasks based on talent, not just by character, ensures a higher-quality result and less stress for everyone.
To achieve a consistent makeup look, have one person watch a specific YouTube tutorial and become the ‘expert’ for that element. For example, one person masters the perfect zombie bite mark using Mehron’s Bruise Wheel, then helps the others replicate it. This prevents five people from interpreting ‘sunken eyes’ in five different ways.
- Thrift a plain white dress and splatter it with red fabric paint from Tulip for an instant ‘Carrie’ costume.
- Grab an old briefcase and fill it with yellow glowing paper (or a battery-powered puck light) to recreate the mystery box from ‘Pulp Fiction’.
- A handful of plastic snakes from a dollar store hot-glued to a headband makes for a simple but effective Medusa headpiece.
The Weather Test: A common and miserable mistake is ignoring the forecast. That amazing cardboard ‘LEGO’ group costume is brilliant… until it rains. If there’s a chance of precipitation, waterproof your work with a clear sealant spray like Mod Podge Ultra or Rust-Oleum NeverWet. If it’s cold, subtly build layers into your design from the start.
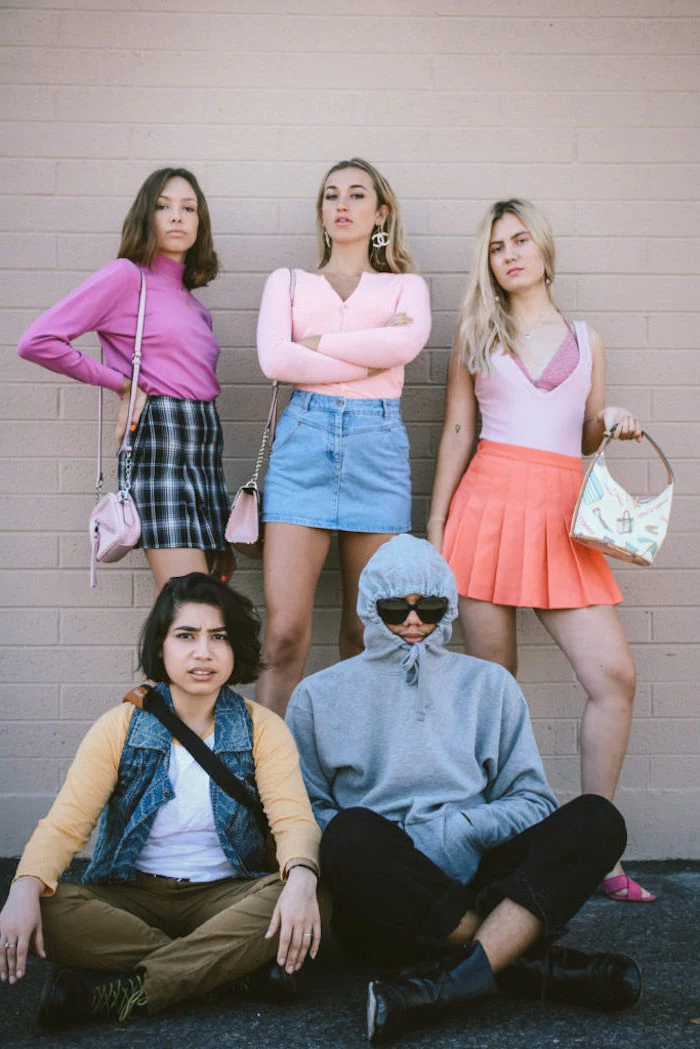
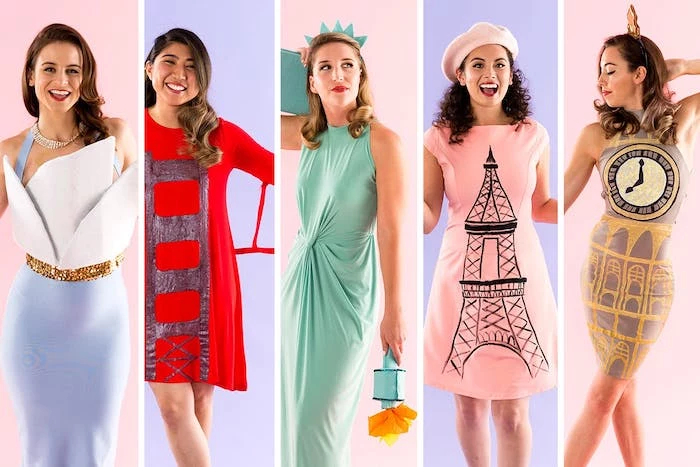
Looking for an idea beyond the latest TV show? Try personifying concepts. We’ve seen groups dress as ‘Social Media Apps’ (each in the brand’s colors), ‘Board Games’ (a Clue or Monopoly group), or even ‘Classic Paintings’ (a walking, talking version of ‘American Gothic’).
A simple way to add depth and realism to any costume is ‘weathering’. This technique makes items look used and authentic. For fabrics, a light misting of watered-down black and brown acrylic paint can simulate grime. For props or armor, dry-brushing silver paint along edges creates the look of worn metal. It’s the detail that separates good from great.
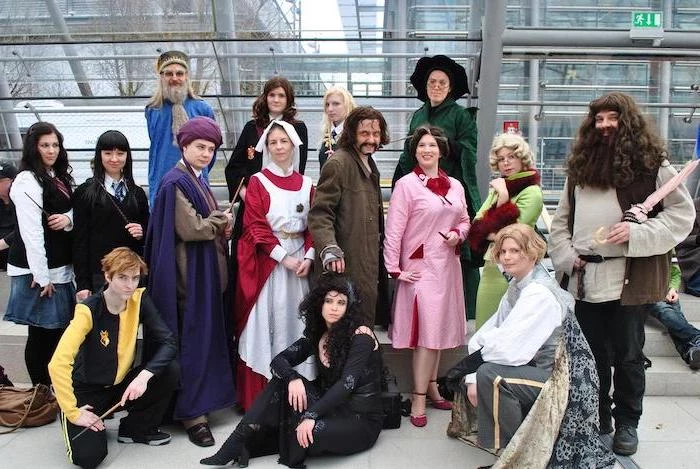
The 3-Foot, 10-Foot Rule. Your group costume should be impressive from a distance (the 10-foot view) but also have delightful details up close (the 3-foot view). For a ‘Harry Potter’ group, the silhouette of robes is the 10-foot view. The hand-painted wands, a ‘prefect’ badge, or a copy of ‘The Quibbler’ are the 3-foot details that true fans will appreciate.
Can we do a cool group costume on a tiny budget?
Absolutely. The trick is to choose concepts based on silhouettes and color rather than complex details. A ‘Reservoir Dogs’ group just needs black suits (easily thrifted), white shirts, and sunglasses. A ‘Troop Beverly Hills’ group needs khaki, green, and stylish scarves. Focus on widely available, low-cost core items and let your group’s attitude sell the theme.
The Prop Size Check: Before you spend hours building that 8-foot-long Buster Sword, think about the party environment. Will you be able to move through a crowded room? Can you put it down? A good rule of thumb: if you can’t hold your prop in one hand and a drink in the other, it might be too big for a casual party. Scale down for practicality.
Give your group a test run. Before the main event, wear the full costume at home for at least an hour. Walk around, sit down, raise your arms, and practice your key poses. This is where you’ll discover that a headpiece is too heavy, the shoes are impossible to walk in, or a key part of the costume needs more adhesive. It’s a dress rehearsal for success.
- Your costume has pockets for your phone and keys.
- Everyone can eat and drink without assistance.
- You can comfortably stay at the party all night long.
The secret? Integrating practicality from the very first sketch. Plan for hidden pouches, design masks that can be easily lifted, and always, always prioritize comfortable shoes.
Lighting is your secret weapon. A string of battery-powered fairy lights (the kind with thin copper wire) can be woven into almost anything. Use them to make a wizard’s staff glow, create a ‘starry night’ effect on a cape, or outline a futuristic costume. For a bigger impact, flexible LED strips from brands like Govee can be programmed with different colors and patterns, turning a simple costume into a light show.

Don’t just dress the part—act the part. The most memorable groups commit to the bit. Spend five minutes before you go out deciding on a few simple mannerisms or catchphrases for each character. It’s free and elevates the experience for everyone.
For an ‘Inside Out’ group, for example, don’t just wear the right colors. The person as ‘Anger’ should have stiff, sharp movements. ‘Joy’ should be bouncy and expressive. ‘Sadness’ can drag their feet. This synchronized body language is what makes a group costume feel truly alive and cohesive, creating an unforgettable spectacle.
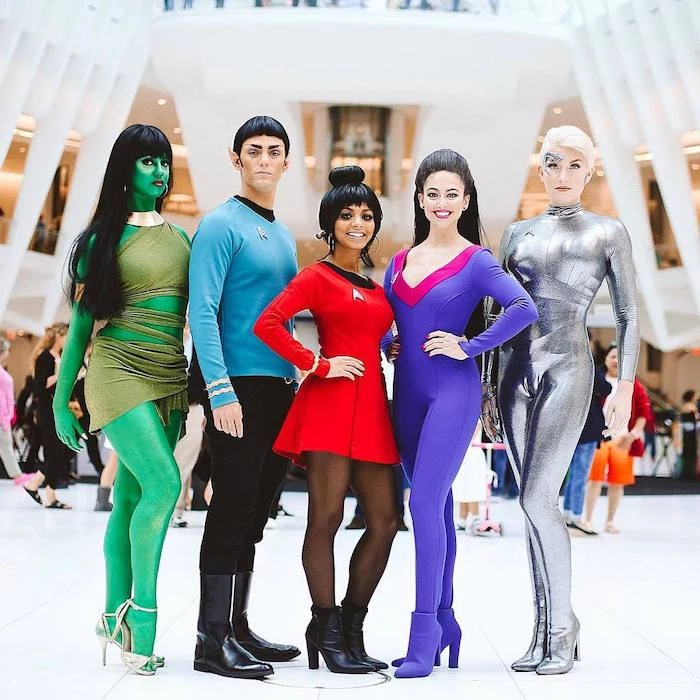
Store-Bought Base: A quick and easy foundation. Perfect for characters with a standard uniform like ‘Star Trek’ or ‘Minions’.
Customized Base: The best of both worlds. Buy a simple dress, suit, or jumpsuit and add all the unique details yourself—painting, adding armor, or creating accessories.
This hybrid approach saves time on basic sewing while allowing your group’s creativity to shine in the details.

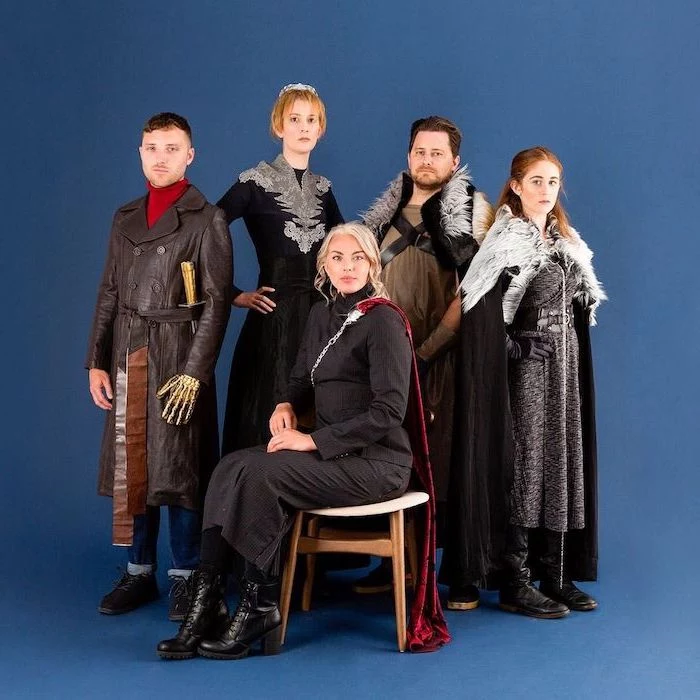
Thinking about a ‘Game of Thrones’ or ‘Lord of the Rings’ group? Pay attention to textures. Burlap, faux fur, rough-spun linen, and faux leather add an immediate layer of authenticity. You can find these fabrics at stores like JOANN, but don’t forget to check the upholstery and home decor sections for heavier, more interesting materials that costume sections might not have.
Plan your poses! Before you leave the house, agree on two or three group poses. This avoids that awkward ‘What do we do?’ moment when someone wants a photo. Have a serious pose, a fun/action pose, and a character-driven one. It takes 30 seconds to plan and guarantees you’ll get great pictures all night.