Your Closet Doesn’t Have to Suck: A Pro’s Guide to Getting It Right
I’ve spent more years than I can count with sawdust in my hair and a tape measure in my hand, building storage solutions for people. And let me tell you, I have seen some things. I once walked into a client’s home to find a walk-in closet where the main hanging rod, a cheap metal tube, had bowed so much it looked like a grin. All his suits were slumped together in the middle, and the whole setup was one heavy coat away from total collapse.
In this article
That’s what happens when a closet is just an afterthought. But it’s not just a box for your stuff. A good closet is a system, a thoughtful piece of engineering that genuinely makes your day-to-day life a little easier. It should be built with a real understanding of materials, weight, and, most importantly, how you actually live.
Over the years, I’ve tried to pass on the core difference between something that just looks good and something that’s built to last. It all comes down to the choices you make long before you even think about grabbing a drill. It’s about knowing why you’d pick a premium plywood for a drawer box but maybe not for a huge door. It’s about respecting the simple physics of a loaded shelf. In this guide, I want to pull back the curtain and share some of that practical, on-the-ground knowledge. We’re going to get past the glossy photos and talk about what makes a closet work.
The Unseen Forces Inside Your Closet
Before we dive into styles and layouts, we need to talk about weight. It’s wild, but a closet holds a surprising amount of it. Just a single foot of hanging clothes can easily weigh 15 to 20 pounds. A stack of sweaters? Even denser. If you don’t plan for this, you end up with those sagging shelves and failing hardware that everyone dreads. It’s probably the number one point of failure I see in mass-produced and poorly planned closets.
Load, Span, and Why Shelves Sag
The key principle here is something called “shelf span,” which is just the distance between the shelf supports. The longer that distance, the more a shelf will want to sag, or “deflect,” under weight. The material you choose makes all the difference.
Here’s a practical breakdown to keep in mind:
- Basic Particleboard (3/4-inch): You really don’t want to go much further than 28 inches between supports. Any more than that, and you’re asking for that dreaded sag, especially with heavy items like sweaters or jeans.
- Plywood or Solid Wood (3/4-inch): These are much stronger. You can comfortably span up to 36 inches, sometimes even a bit more if the load is light, like just linens.
This is precisely why so many builder-grade closets fail. They often feature one long, unsupported particleboard shelf, and it’s just not up to the job. When I’m designing a system, I always ask what’s going on each shelf. Books? We need more support. T-shirts? We have more wiggle room.
A quick pro tip: The easiest fix is to add a reinforcing cleat. This is just a strip of wood (a 1×2 works great) that you screw into the front or back edge of the shelf. This simple addition dramatically increases its stiffness. It’s a five-dollar trick that adds years to a closet’s life.
Let’s Talk Materials: What Are You Actually Buying?
The word “wood” gets thrown around a lot, but it can mean wildly different things. Understanding this is key to knowing what you’re paying for and how long it’ll last.
- Solid Wood: This is the real deal—oak, maple, pine. It’s strong, gorgeous, and you can sand and refinish it. But it has one big personality quirk: it moves. Wood expands and contracts with humidity. That’s why high-quality solid wood doors are built with a frame-and-panel design; the center panel “floats” in the frame, allowing it to swell and shrink without breaking the door. It’s a big deal in humid climates.
- Plywood: Honestly, this is my go-to for closet structures (the main boxes). It’s made from thin layers of wood veneer glued together, with the grain of each layer running at a right angle to the next. This makes it incredibly stable and strong—it won’t warp like solid wood, and it’s way stronger than particleboard. For drawers, I almost exclusively use Baltic birch plywood. It’s a premium version with more layers and no voids, making it tough enough for daily use for decades.
- MDF (Medium-Density Fiberboard): MDF is made of fine wood dust and resin, pressed into a sheet. Its main superpower is its perfectly smooth surface, which is fantastic for painting. The downside? It’s incredibly heavy and acts like a sponge if it gets wet. A single leak can make it swell up and crumble. I’ll use it for paint-grade door panels, but almost never for anything structural.
- Particleboard: This is the cheapest option out there, made from glued-together wood chips and often covered with a thin plastic laminate (called melamine). While it’s stable, it has very little structural strength and chips easily. Screws can pull right out if you stress them. This was the material used for the supports in that smiling closet I mentioned—the screws were just slowly tearing out of the particleboard over time.

Ventilation: Your Closet’s Secret Weapon
A closet is basically a sealed box. Without some airflow, moisture from your clothes or just the air can get trapped, leading to that musty smell or even mildew on your favorite leather jacket. Good design accounts for this. This can be as simple as leaving a half-inch gap under the closet door or using louvered doors. For a high-end walk-in I built for a collector, we even installed a tiny, silent ventilation fan on a timer to keep the air moving. A few cedar blocks or hanging sachets can also work wonders for a fresh scent.
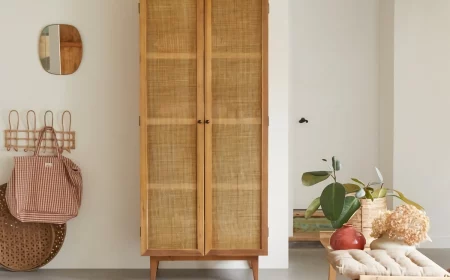
Breaking Down the Main Closet Types
Every closet style has its place. The trick is to match the design to your space and your needs. Let’s look at them from a builder’s point of view.
1. The Standard Reach-In Closet
This is the classic closet, usually about 24-30 inches deep with a door. The typical builder setup—one rod, one shelf—wastes about 60% of the space. It’s a starting point, not a finished solution.
How to Maximize a Reach-In:
- Go Vertical with Double Hanging: This is the first and best move. Most shirts and folded pants fit within a 40-inch vertical space. By putting one rod at about 82-84 inches high and another at 41-42 inches, you instantly double your hanging space. Want to test it out before you commit? Grab a $15 tension rod from Target or Walmart and pop it in below your existing rod. Boom—instant upgrade.
- Use the Ends for a Tower: The sides are perfect for a narrow stack of shelves or drawers. This becomes home for folded items like sweaters and jeans. I always push for drawers over deep shelves; you can pull a drawer out and see everything, while things on a shelf get lost in the back.
- Doors Make a Difference: Bifold doors are common, but their hardware often fails. Sliding doors are great for saving floor space, but you can only ever see half your closet at once. To be frank, a pair of standard hinged doors is the most functional. You get full access and can even add storage racks to the back of them. A little-known tip: if you’re stuck with bifolds, upgrade the hardware. Ditch the cheap track it came with and get a heavy-duty system from a brand like Johnson Hardware. It costs maybe $40-$60, but it’s a game-changer for reliability.
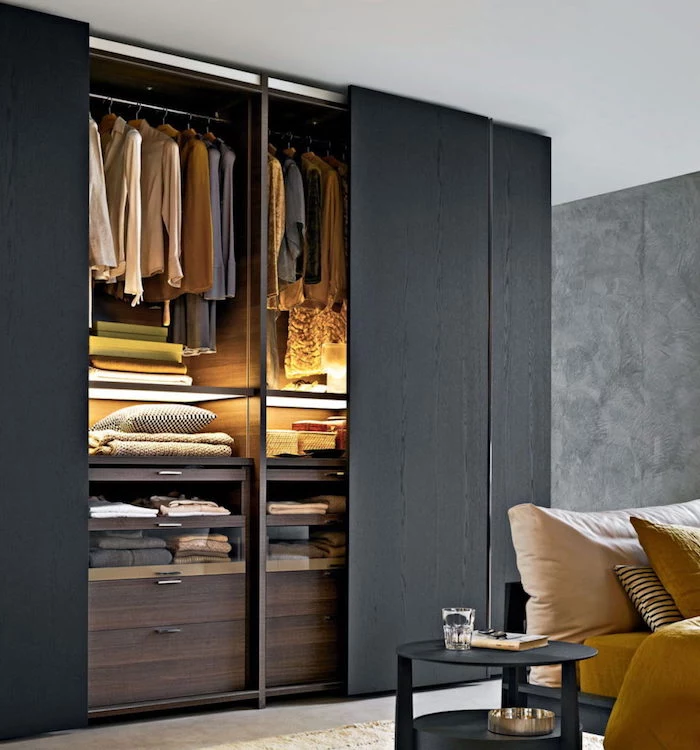
2. The Walk-In Closet
A walk-in is a small room for your wardrobe. When it’s done right, it’s a dream. When it’s done wrong, it’s just a big, frustrating hallway.
Walk-In Design Basics:
- Key Dimensions: For a walk-in to have storage on both sides, it needs to be at least 6 feet wide. That gives you 24 inches of storage depth on each side and a 24-inch walkway. Anything less feels tight. If you dream of having an island in the middle, you’ll need a width of at least 10 to 12 feet.
- Common Layouts: You’ll typically see a galley style (storage on two parallel walls), an L-shape (two adjacent walls), or a U-shape (three walls). The U-shape is the most efficient but requires the most room.
- Cool Features: This is where you can have fun. We often add things like a central island for folding, valet rods (small pull-out rods for staging an outfit), and integrated LED lighting that turns on when you open the door. Shoe walls with angled shelves are also a huge favorite.
One of my favorite projects was a walk-in for a lawyer. He wanted a dedicated spot for his ties, belts, and watches. We built a shallow cabinet with custom drawers lined with velvet and fitted with dividers. It was a small detail in a huge closet, but it was the part he loved most because it solved a specific, daily annoyance.

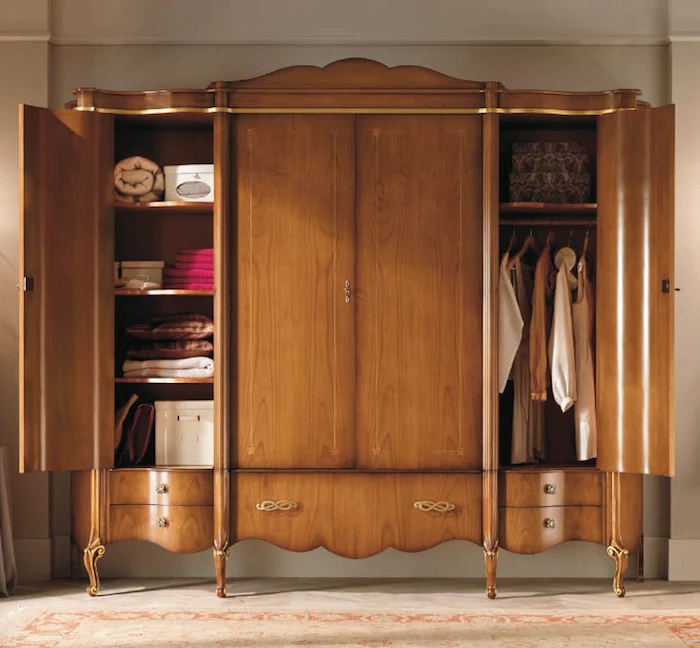
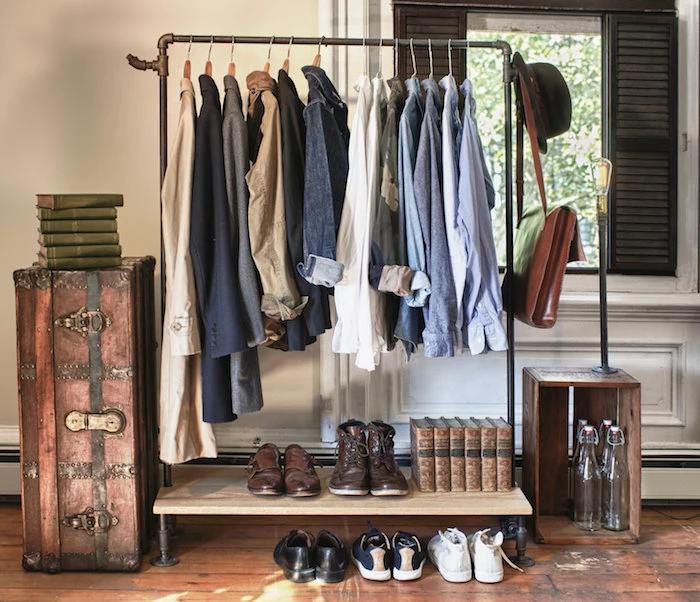
3. The Freestanding Wardrobe or Armoire
Before built-in closets were a thing, the wardrobe was king. They can be beautiful pieces of furniture, but they have their own set of quirks.
What to Know Before You Buy:
- Some traditional European-style armoires were cleverly designed to be taken apart for moving. Many older American ones, however, are built as one massive, heavy piece. I’ve seen people buy a gorgeous antique they couldn’t get up their stairs. So, always measure your doorways, stairwells, and corners first!
- Modern wardrobes are often made from MDF or particleboard to keep costs down, which can be a great option for renters. Just check the construction quality before you buy.
A CRITICAL Safety Warning: Any tall, heavy piece of furniture like a wardrobe or armoire must be anchored to the wall. This is not a suggestion. I was once at a friend’s house when their toddler tried to climb the open door of their armoire. I was close enough to catch it as it tipped. It was a terrifying reminder. You can get furniture anti-tip straps for under $10 at any hardware store or online. It takes one screwdriver, one wall stud, and five minutes to prevent a potential tragedy. Please, just do it.
The Little Things That Matter Most: Hardware
You touch your closet’s hardware every single day. This is not the place to cheap out. Good hardware is the difference between a closet that feels solid and one that feels flimsy.
Drawer Slides
- Roller Slides: These are the basic, cheap white slides with a plastic wheel. They only let the drawer open 3/4 of the way and have low weight ratings. Avoid them if you can.
- Ball-Bearing Slides: A huge step up. They let the drawer pull out all the way, are super smooth, and can handle a lot of weight (often 100 lbs or more). A solid, reliable choice.
- Undermount Slides: This is the high-end option. The hardware is hidden beneath the drawer, so it’s invisible. They offer the cleanest look and usually come with a soft-close mechanism that prevents slamming.
Good to know: You can find basic slides at big-box stores like Home Depot or Lowe’s. For the premium stuff, like undermounts from top-tier brands like Blum or Grass, you’ll probably need to visit a specialty woodworking store like Rockler or Woodcraft, or just order them online. The extra effort is absolutely worth it.
Lighting Done Right
Closet lighting isn’t as simple as screwing in a bulb. To prevent fire risk, electrical codes require any light fixture in a closet to be fully enclosed. An exposed bulb near flammable clothing is a major no-go.
Here are two technical details that make a huge difference:
- Color Temperature (Kelvin): You want a neutral light that shows colors accurately. Look for bulbs between 3000K (a soft, warm white) and 4000K (a clean, neutral white).
- Color Rendering Index (CRI): This is a scale from 0-100 measuring how true colors look under the light. For a closet, you want a CRI of 90 or higher. A low CRI is why your navy blue socks suddenly look black.
LED strip lighting is perfect for closets. It’s low-profile, cool to the touch, and lasts forever. We install it vertically inside the closet frame or under shelves to light up the clothes, not blast you in the eyes.
Your Game Plan: Measure Twice, Build Once
A great closet is 90% planning. Before you spend a dime, you need a solid plan.
- Take a Brutally Honest Inventory. This is the most crucial step. Take everything out of your closet. Don’t guess! Lay a tape measure on the floor and put your short-hanging clothes on it, bunched up just like they are on the rod. That number is your linear feet. Do the same for long-hanging clothes. Count your shoes. This data tells you exactly what you need to build.
- Measure Your Space. Measure the width, height, and depth in at least three different spots. Walls are never perfectly square. Use the smallest measurement for your design. And grab a stud finder! Any heavy components must be anchored to studs, not just drywall.
- Sketch a Layout. You can use graph paper or a free online planning tool from a place like IKEA or the Container Store. Place your storage types based on your inventory. The things you use every day should be the easiest to reach.
- Set a Realistic Budget. Let’s talk real numbers for a standard 8-foot reach-in. A DIY wire system from a home center might cost around $150-$250. A more robust DIY melamine or laminate kit could run you $400-$800. A full custom build from a local carpenter using quality plywood will likely start around $2,000 and go up from there. My advice? Always invest in the structural parts and hardware first. You can always upgrade the door fronts later.
DIY or Call a Pro?
For a handy person, a DIY reach-in overhaul using a kit is a great weekend project—plan for 8-10 hours of work. But if you need electrical work for lighting, always call a licensed electrician. And for a truly seamless, high-end result, a professional carpenter has the tools and tricks to scribe cabinets to crooked walls for that perfect built-in look. A pro can typically get a full system installed in a day or two.
Ultimately, a closet is a deeply personal space. The best one isn’t found in a catalog; it’s designed around your life and your habits. Take the time to plan it well. Choose materials that will last. And whether you build it yourself or hire it out, create a space that brings you a little bit of calm and order every single day. That’s a real win.