Thinking About Green Hair? Here’s the Unfiltered Guide
So, you’re thinking about going green. I love that. For as long as I’ve been a professional colorist, I’ve seen trends come and go, but green… green is different. It’s not just a color, it’s a whole vibe. It can be a deep, earthy forest green or a look-at-me electric lime. Honestly, when someone sits in my chair and says they want green hair, my mind immediately jumps to the process and the upkeep. This isn’t a one-and-done kind of deal.
In this article
Getting a gorgeous, stable green shade comes down to understanding the hair itself, respecting the chemicals you’re using, and having a solid game plan for maintenance. I’ve seen some absolutely stunning results, but I’ve also been the one called in to fix at-home jobs that ended in swampy, damaged messes. My goal here is to walk you through this just like I would with a client, sharing the science, the pro techniques, and the real talk about what it’s like to live with green hair.
First Things First: The Science of Your Hair
Before you even dream of that perfect emerald, we have to talk about your starting point. You can’t just slap green dye on dark hair and expect anything to happen. It won’t work. To get any kind of vibrant color to pop, you have to lighten your hair first, which means removing its natural pigment. This is where the real work begins.
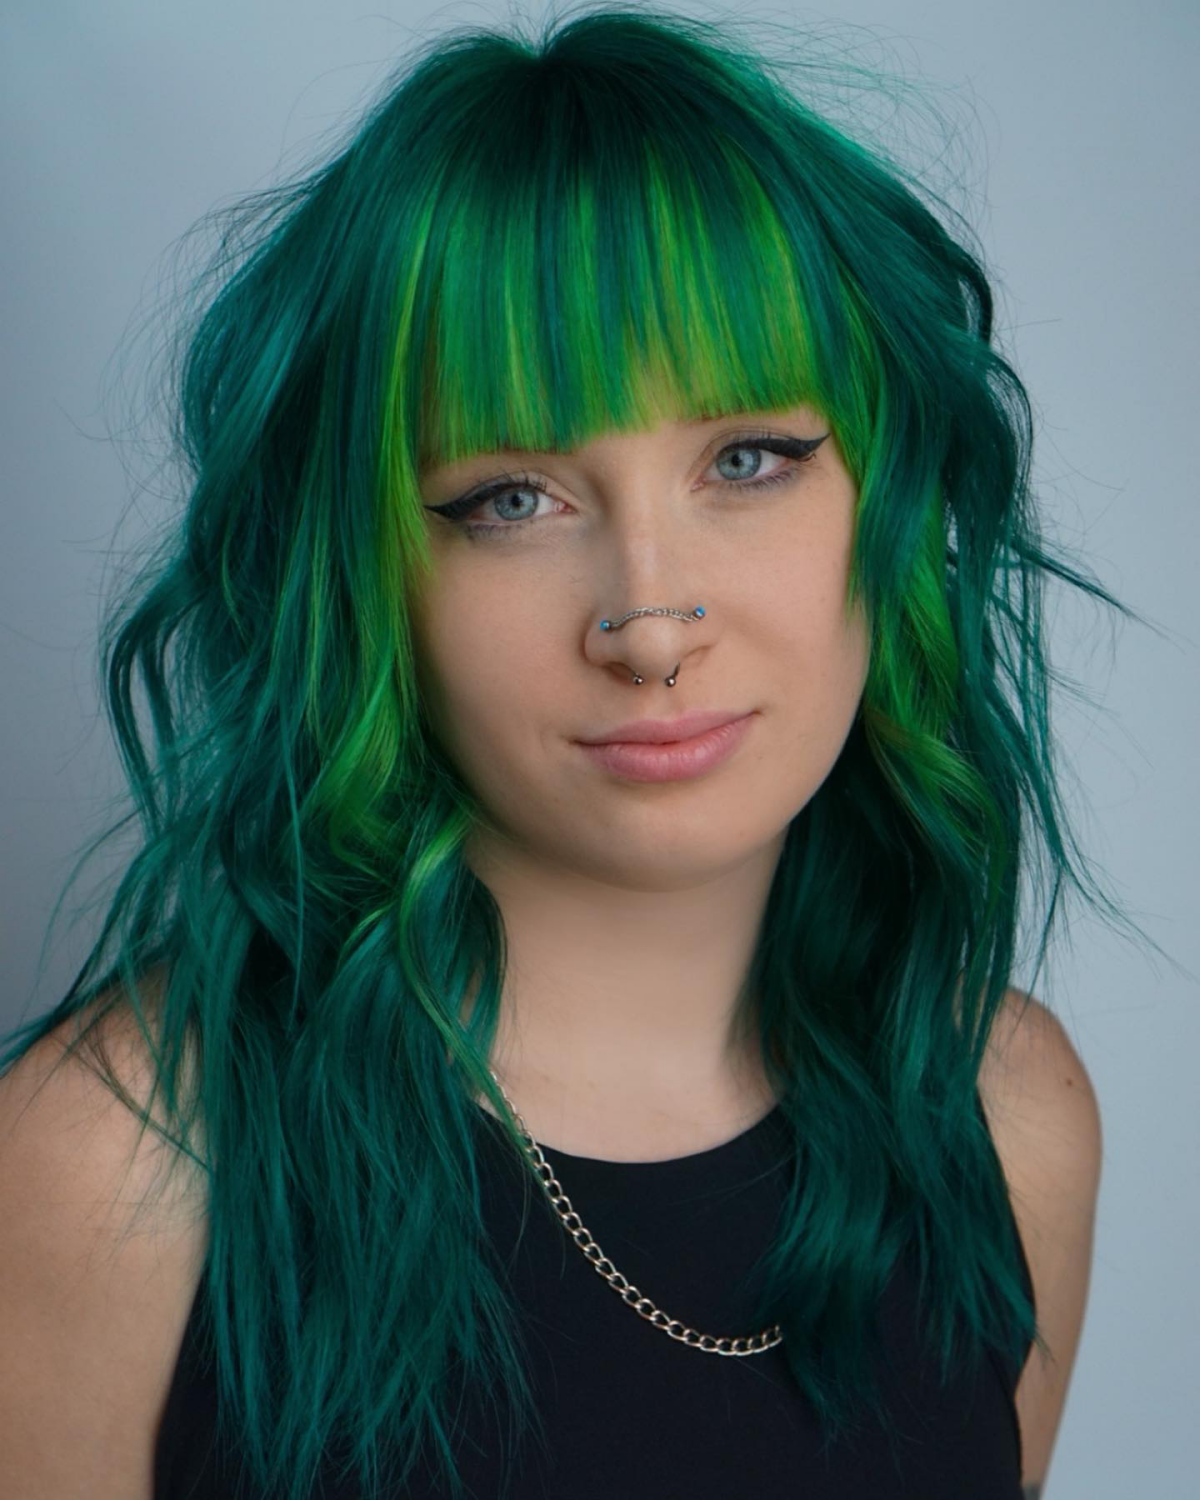
In the salon world, we use a level system from 1 (jet black) to 10 (lightest blonde) to map out hair color. To get a specific green, we have to lift your hair to a certain level. For example, a deep forest green might only need the hair lifted to a level 7, which looks like a medium blonde. But if you’re dreaming of a bright neon green or a delicate mint, you’ll need to lift all the way to a level 9 or 10—a pale, pale yellow blonde.
And here’s the most important part, the thing that trips everyone up. When you lighten hair, you reveal its underlying tones. Dark hair lifts through stages of red, then orange, and finally yellow. Think back to elementary school art class: what happens when you mix green and red? You get a gross, muddy brown. If you put green dye on hair that’s still orangey, your results will be murky. But if you put it over a clean, pale yellow base? That’s when you get that true, brilliant green. The whole goal of the lightening process is to create the perfect blank canvas.
How Bleach Actually Gets the Job Done
Hair lightener (aka bleach) is a powerful tool. It’s usually a mix of an alkaline agent that swells up the hair’s protective outer layer (the cuticle) and an oxidizing agent from the developer. This lets the product get inside to the hair’s core and break down your natural color pigment. It’s a controlled chemical reaction we have to watch very, very carefully.
Developer comes in different strengths, or “volumes.” 10 volume is a gentle, slow lift. 20 volume is the industry standard for most on-scalp work. 30 volume gives a much faster lift and is best left for off-scalp techniques. Heads up! I almost never recommend using 40 volume on the scalp. The heat from your head can make it process way too fast, leading to scalp irritation or even chemical burns if you don’t know what you’re doing. Choosing the right developer is a skill that comes with a ton of practice.
Pro Techniques for That Perfect Canvas
A flawless green starts with a flawless lightening job. This is where patience and experience really pay off. Rushing this stage is a one-way ticket to patchiness and damage.
The Non-Negotiable Strand Test (Seriously, Don’t Skip This)
Before I ever commit to a full head of bleach on a client, I do a strand test. This is not optional. It’s a crucial safety step that tells me everything I need to know about your hair. It reveals how high it can safely lift, what the condition will be like afterward, and if you have any sensitivities.
You can (and should!) do this at home. Just follow these steps:
- Mix a tiny amount of the bleach and developer you plan to use—like a teaspoon of each.
- Snip a small, hidden piece of hair from the back of your head.
- Coat the strand completely in the bleach mixture and wrap it in a piece of foil.
- Set a timer and check it every 10-15 minutes to see how it’s lightening.
- Once it reaches the desired paleness or the maximum processing time is up, rinse it, shampoo, and dry it. This little test can save you from a total disaster.
Applying the Color Like a Pro
Once the hair is properly lightened and dried, it’s time for the fun part. Most fashion colors like green are direct dyes, meaning they don’t need a developer. They just stain the pre-lightened hair. For this reason, saturation is EVERYTHING. I tell my apprentices to apply color like they’re frosting a cake—every single strand needs to be generously coated.
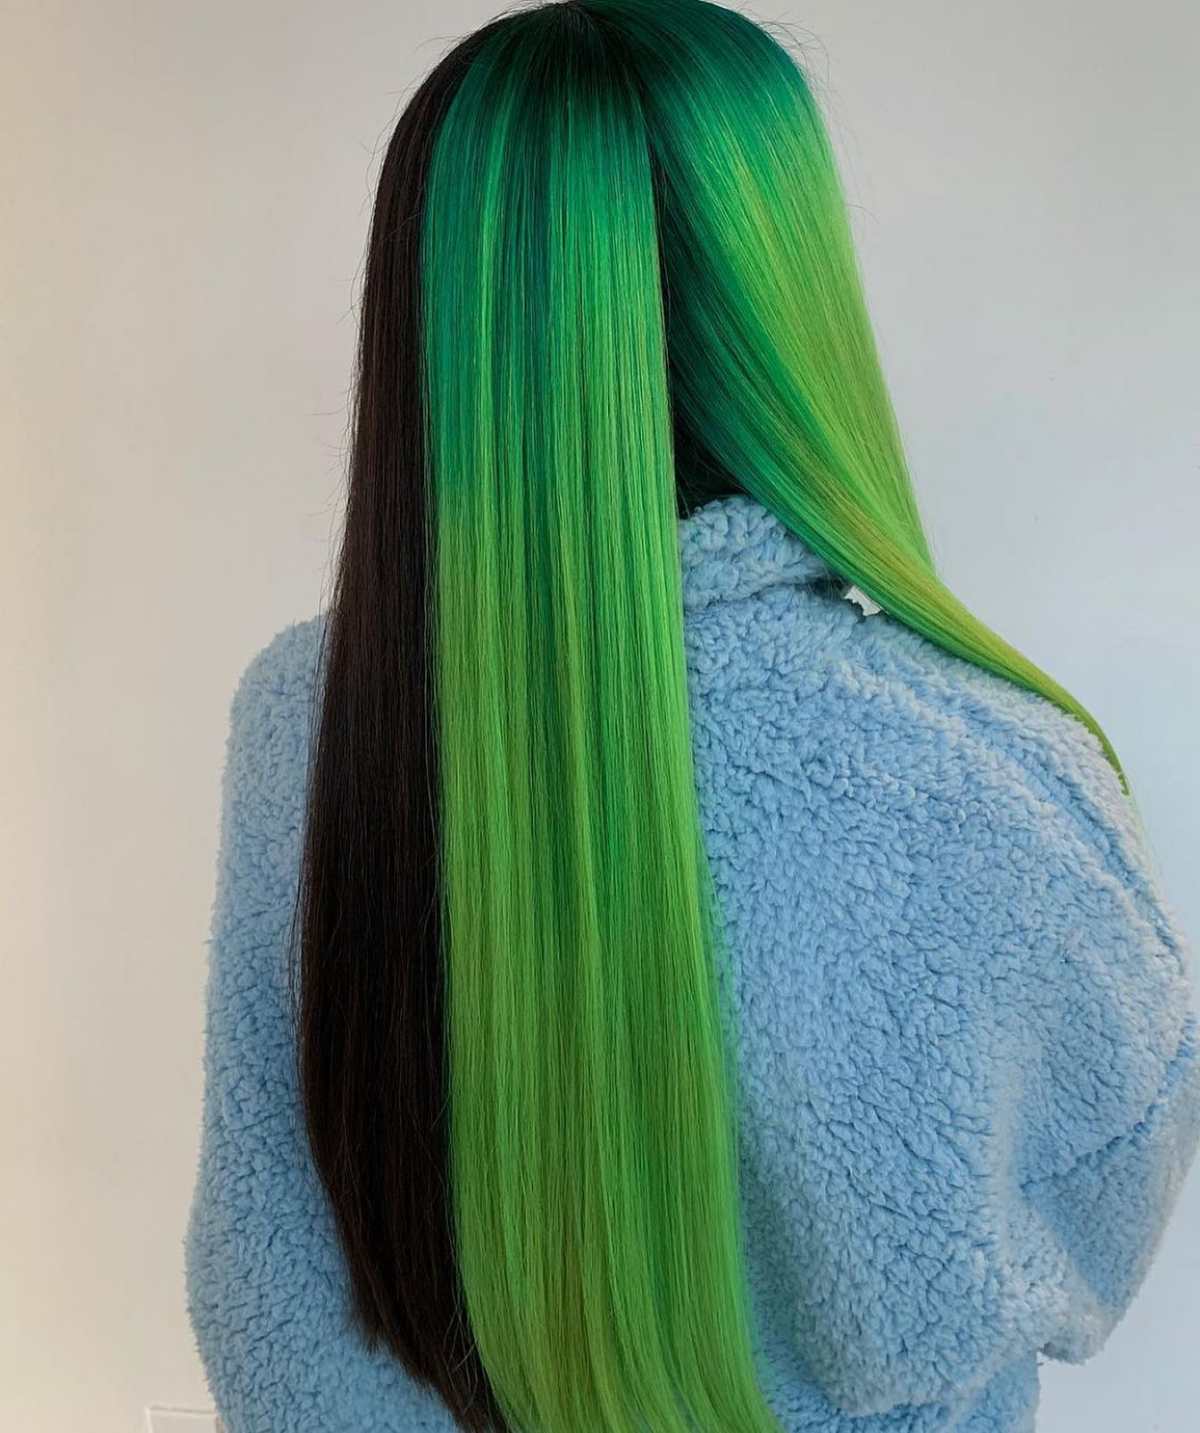
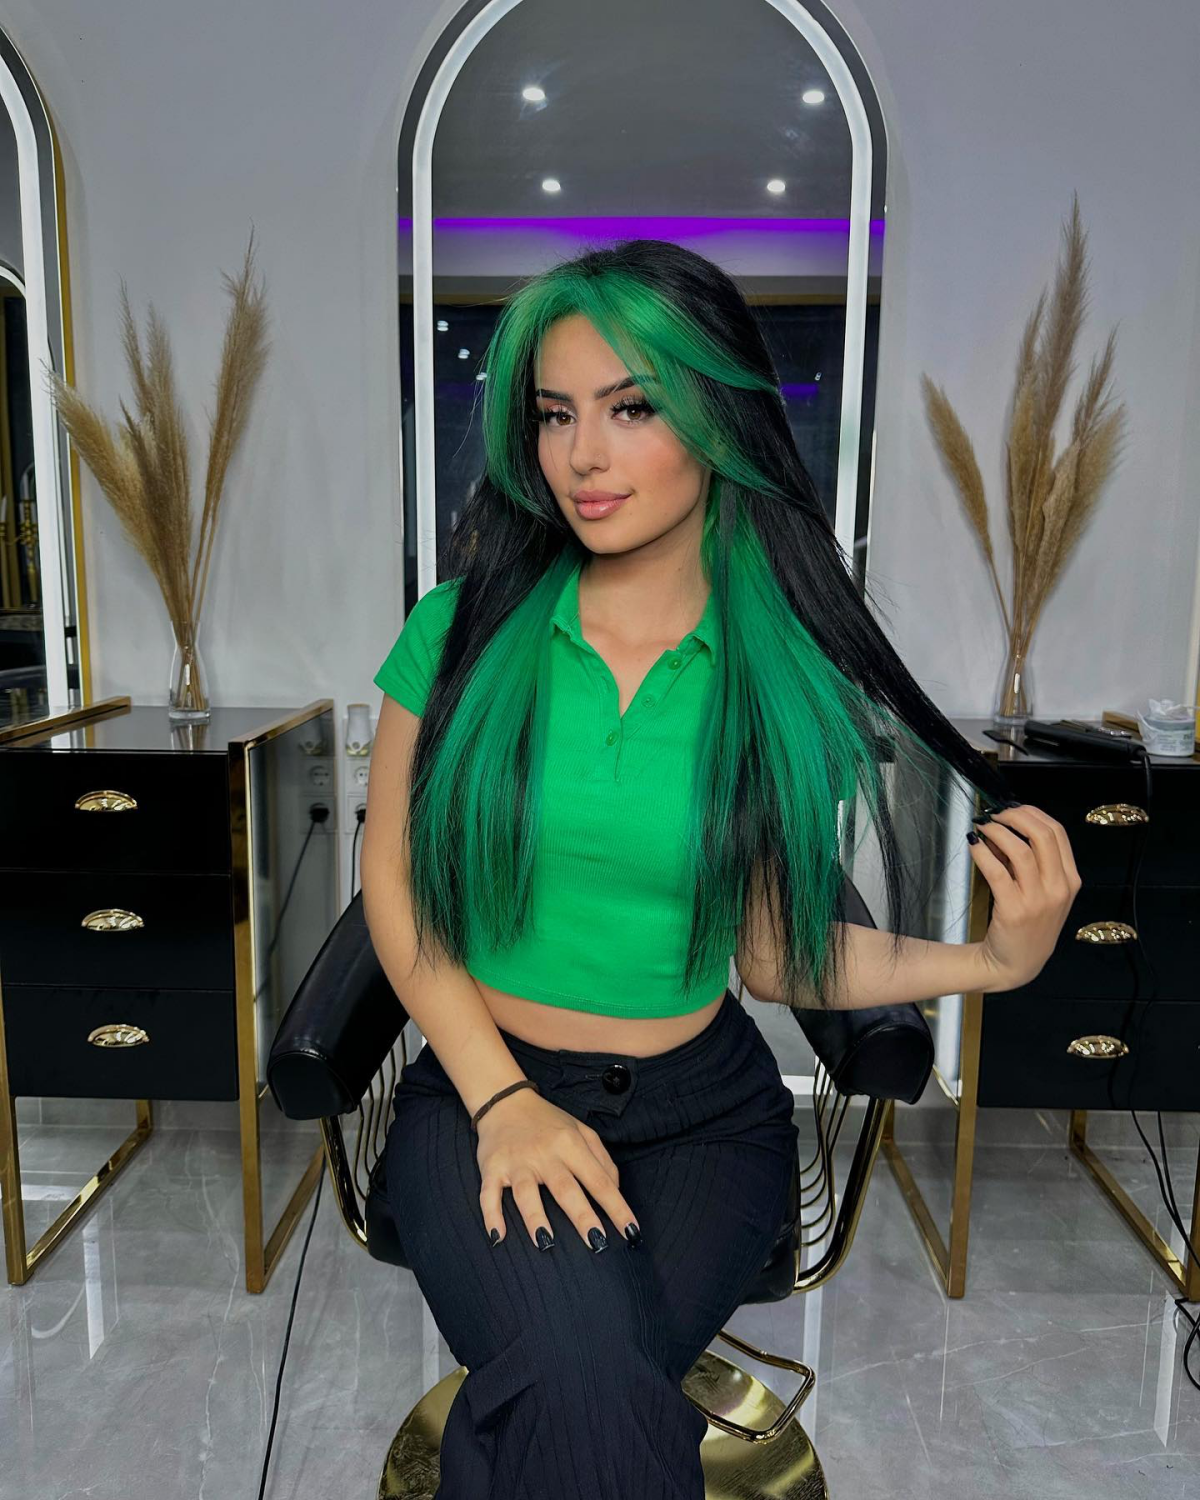
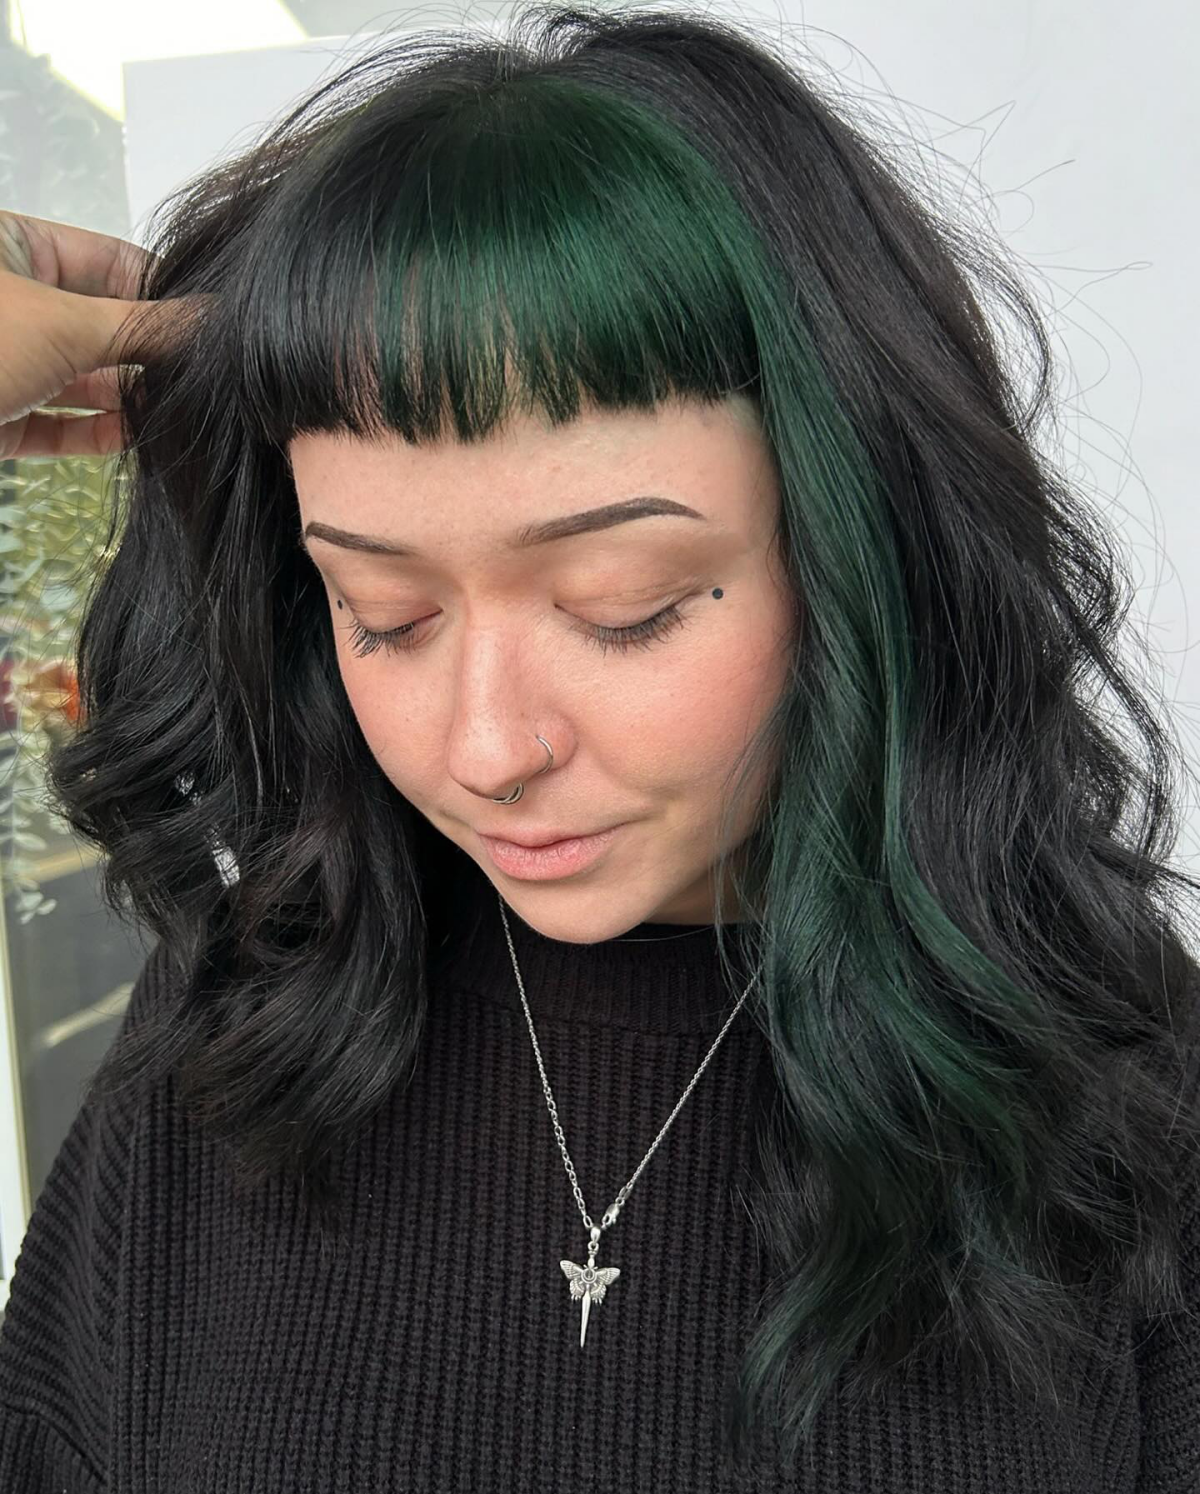
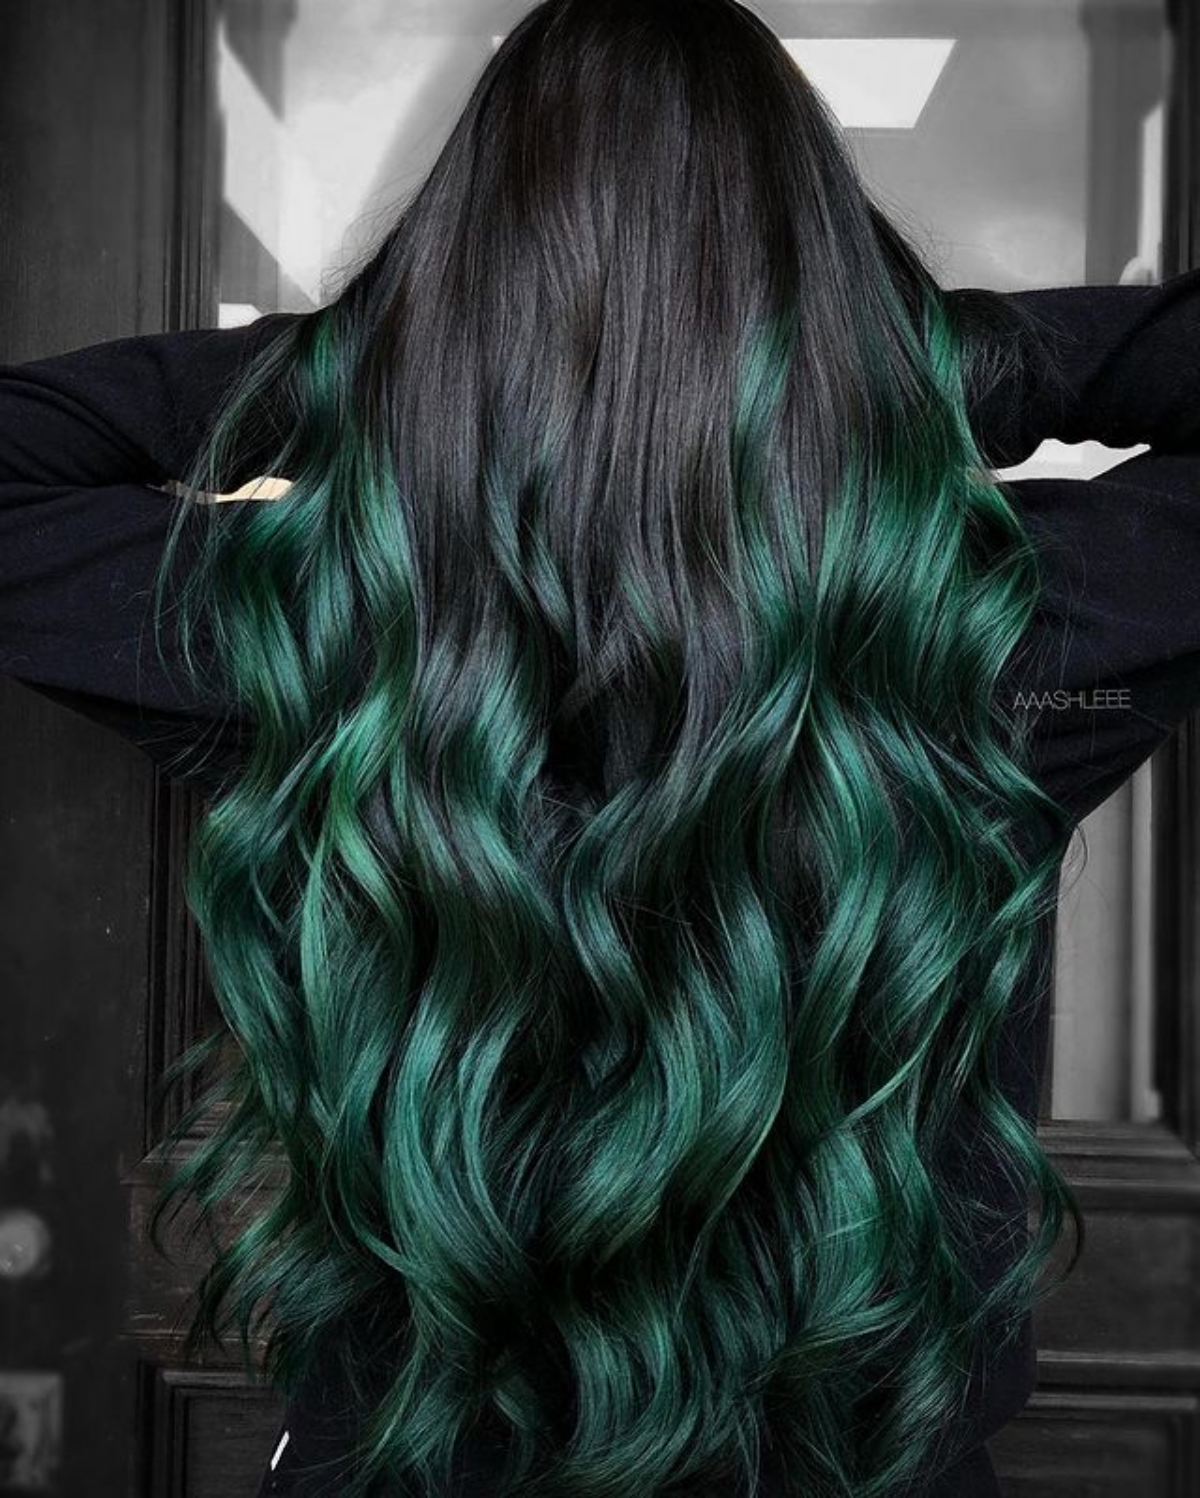
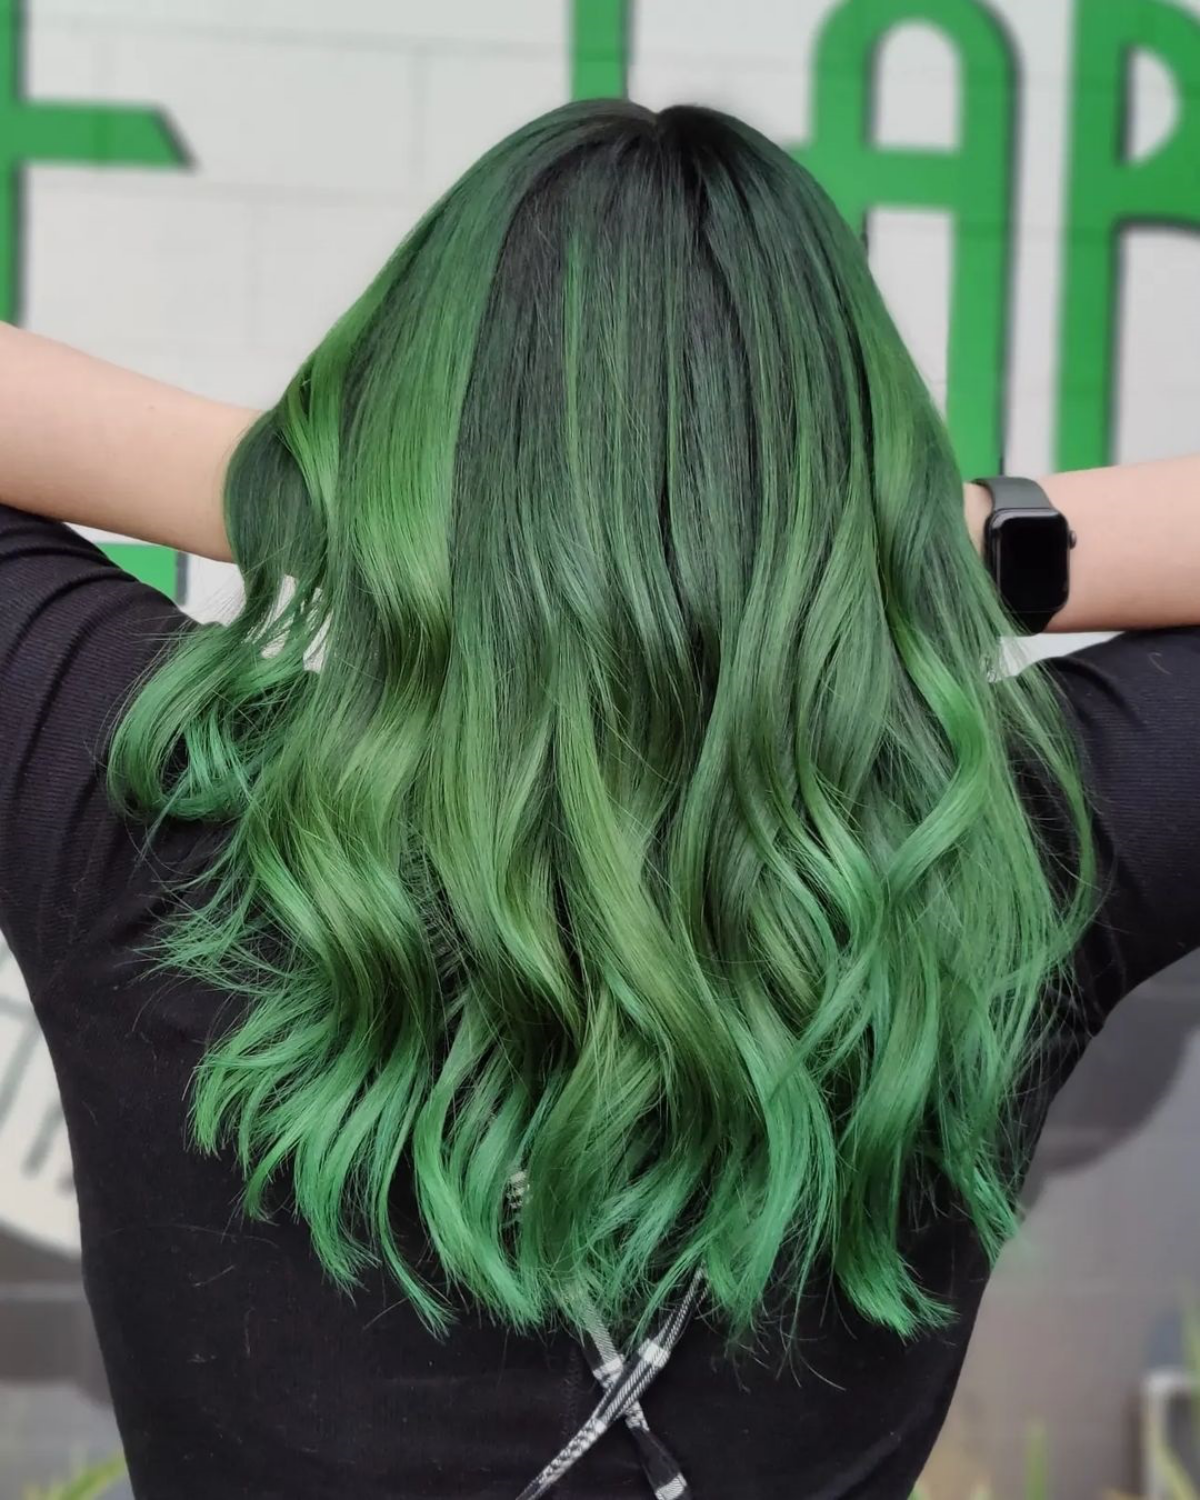
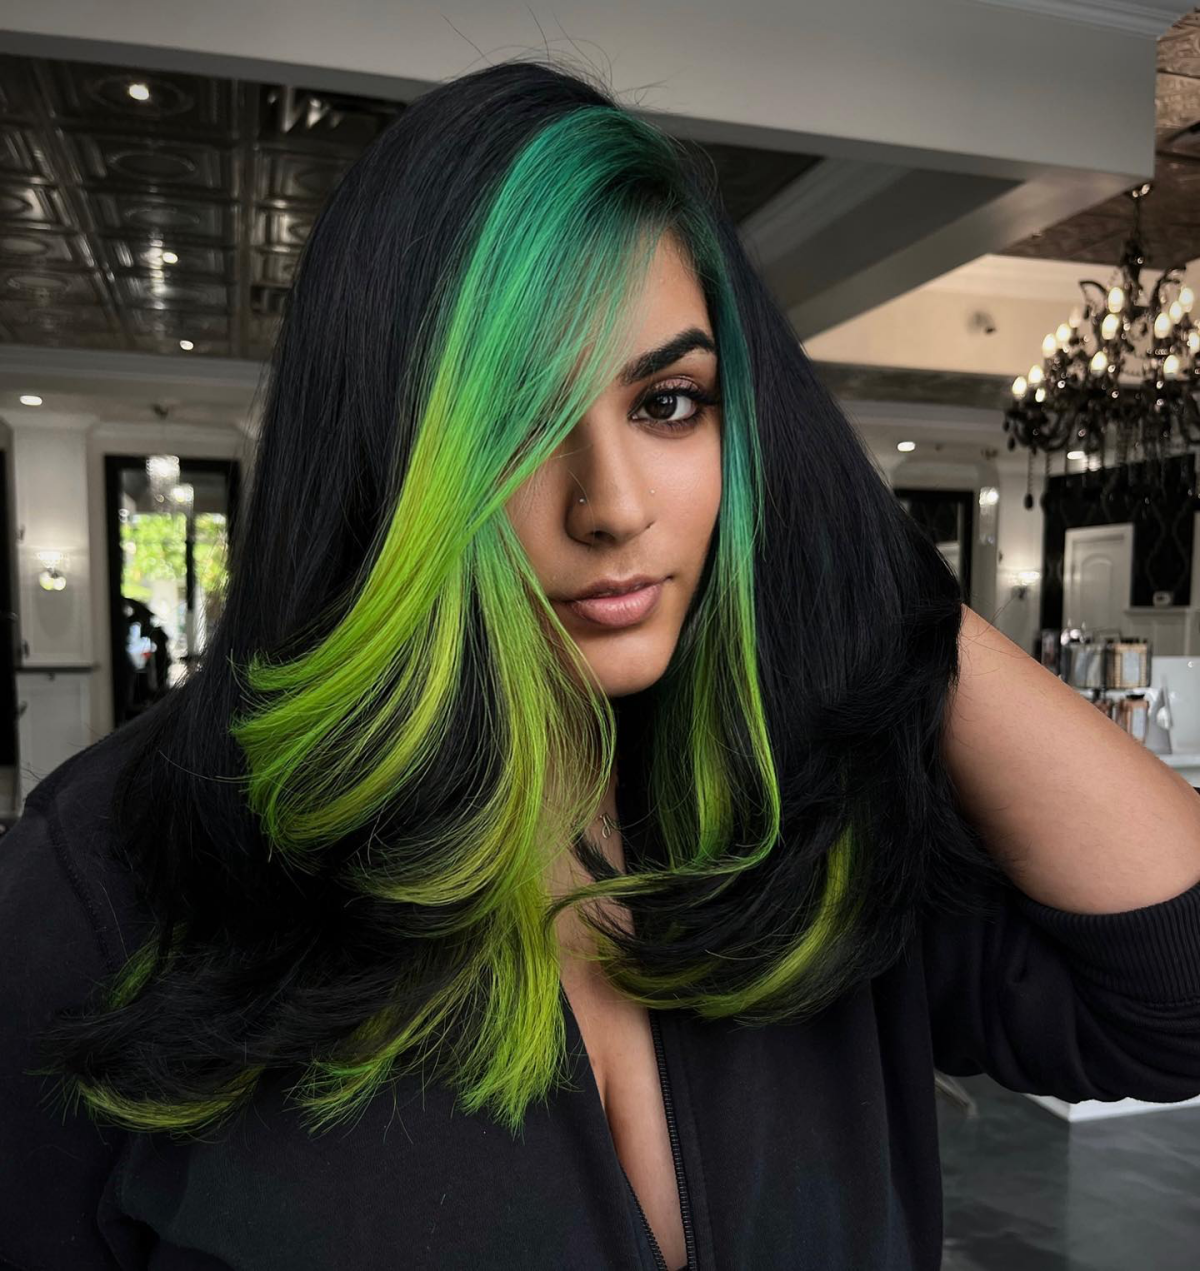
You can get creative here, too. A full-head application is classic, but you could also do peekaboo highlights underneath, a dramatic split dye, or a beautiful ombré that melts from your natural root into a vibrant green.
Let’s Talk Shades and Real-World Costs
Okay, let’s have a frank conversation about those inspiration photos you’ve saved. Different shades of green require very different levels of work and commitment.
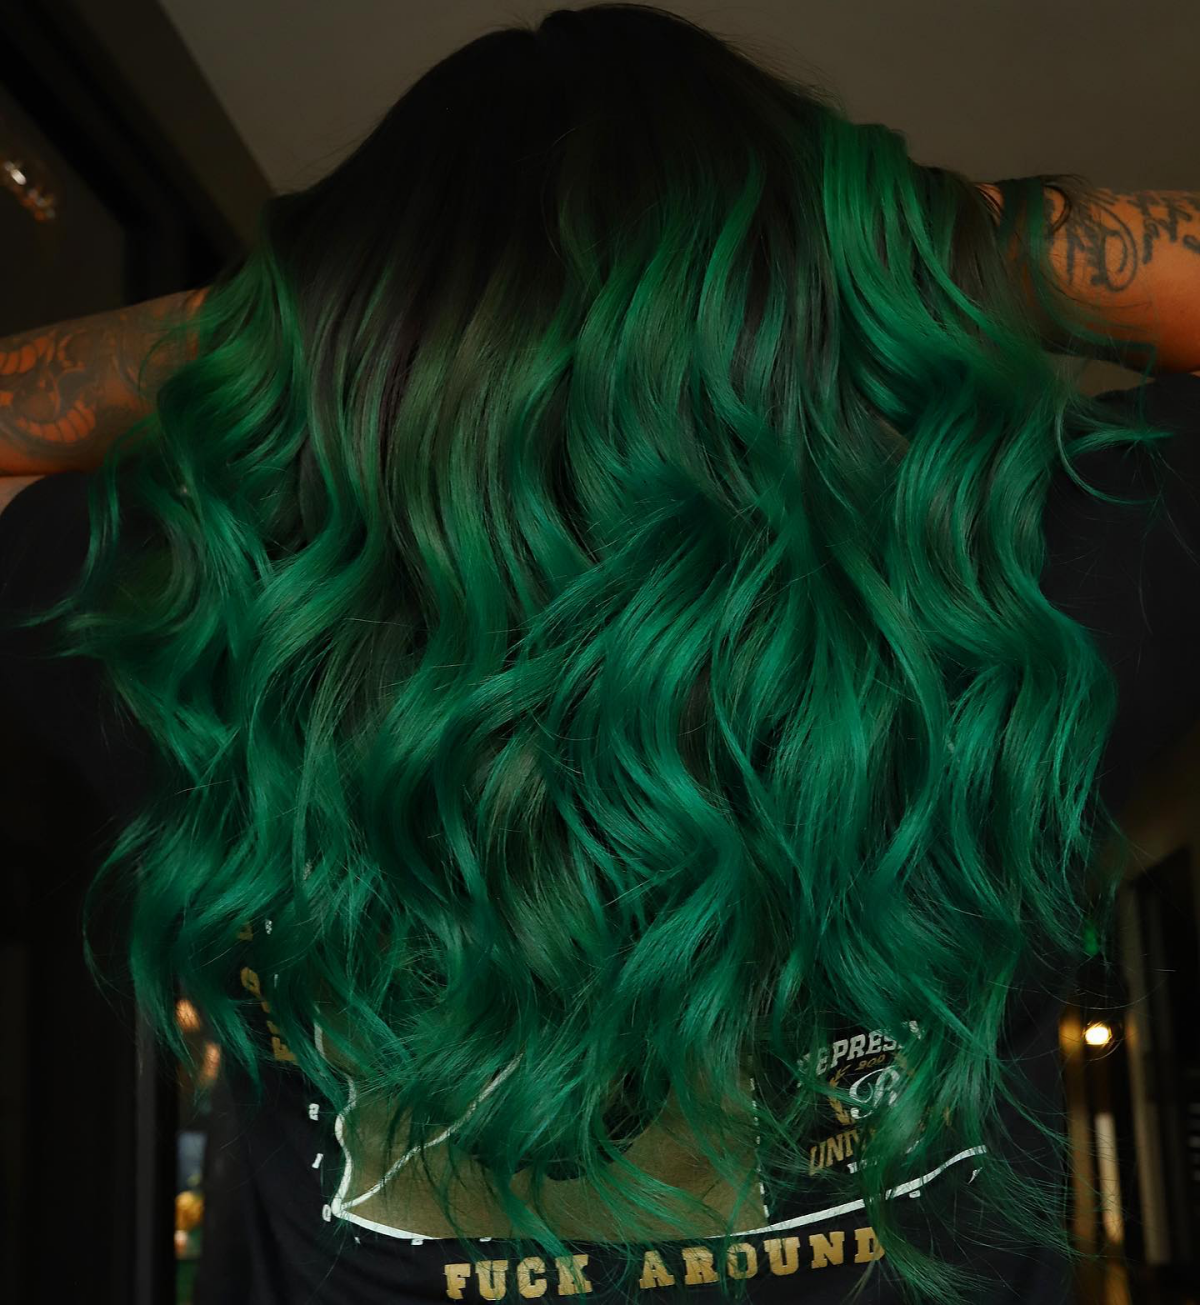
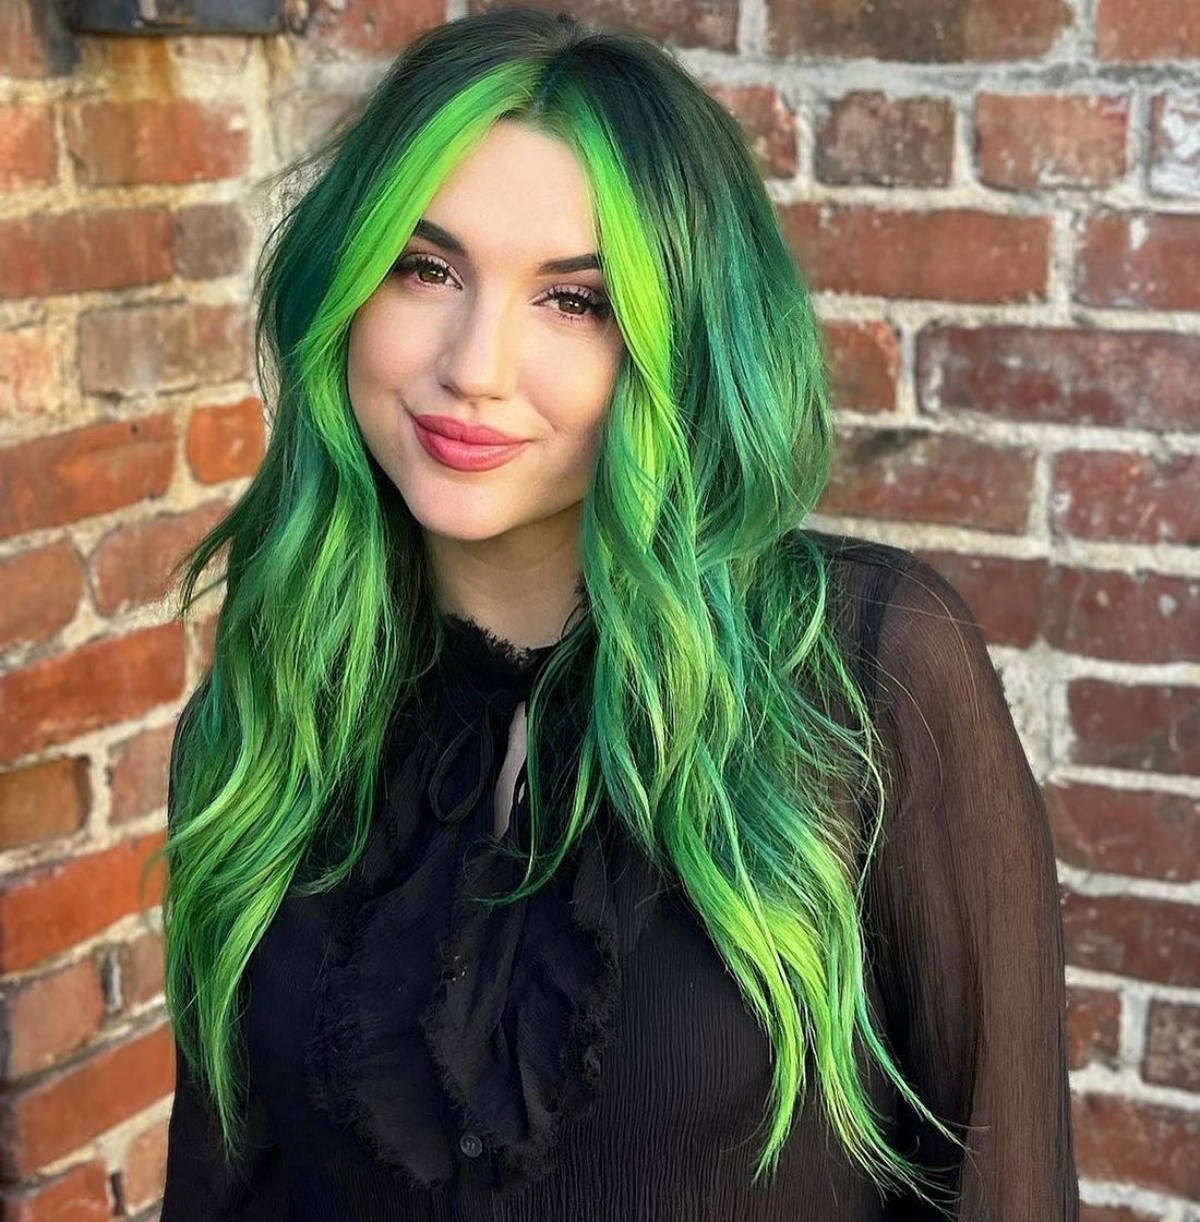
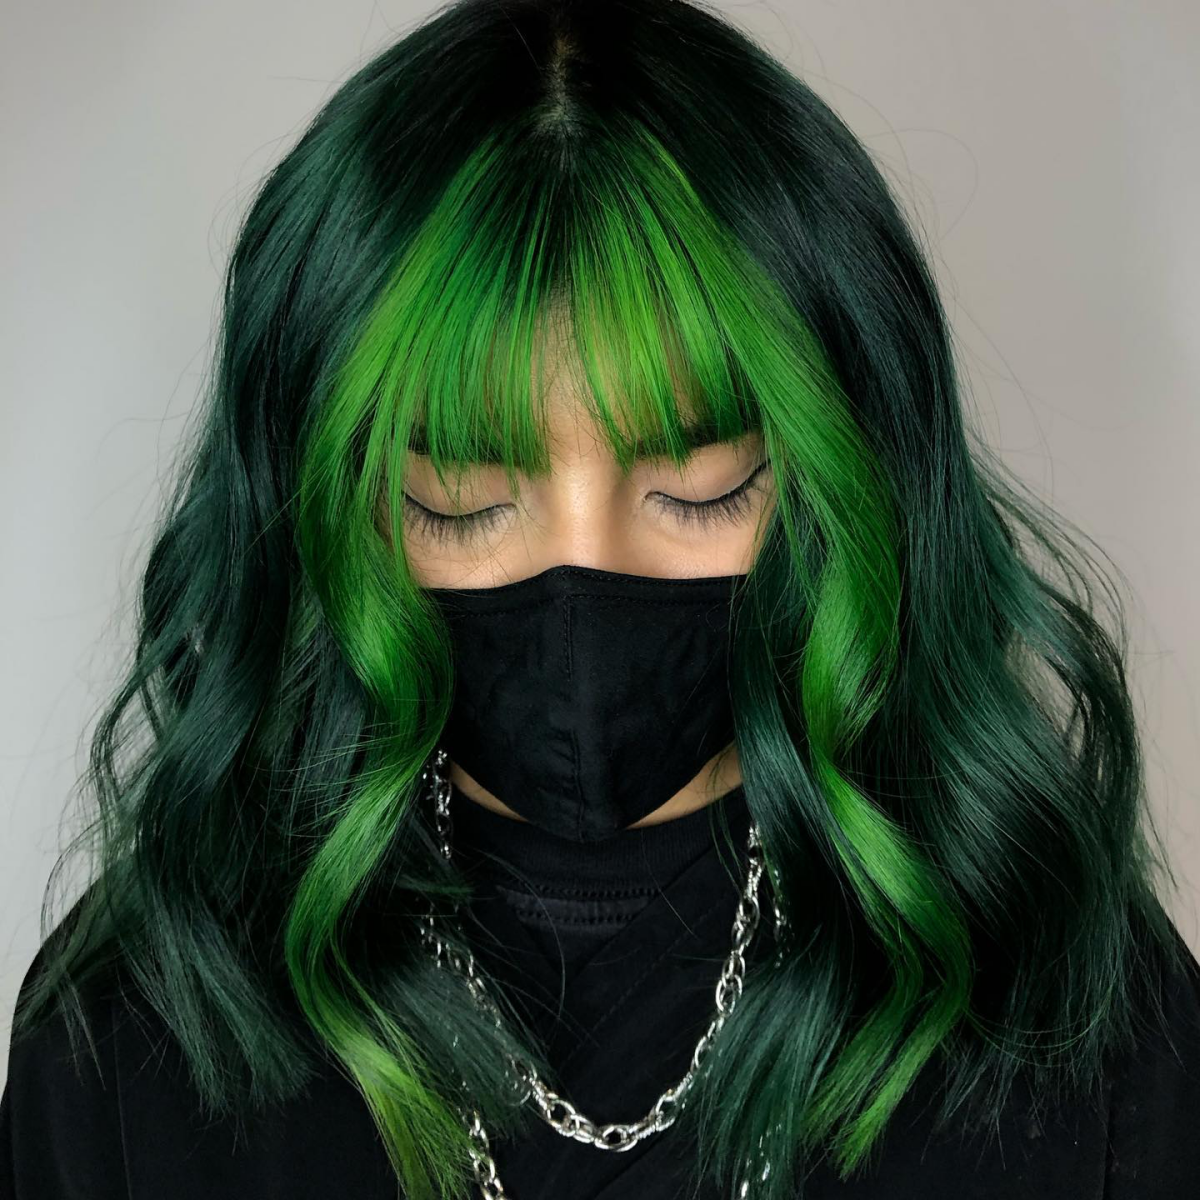
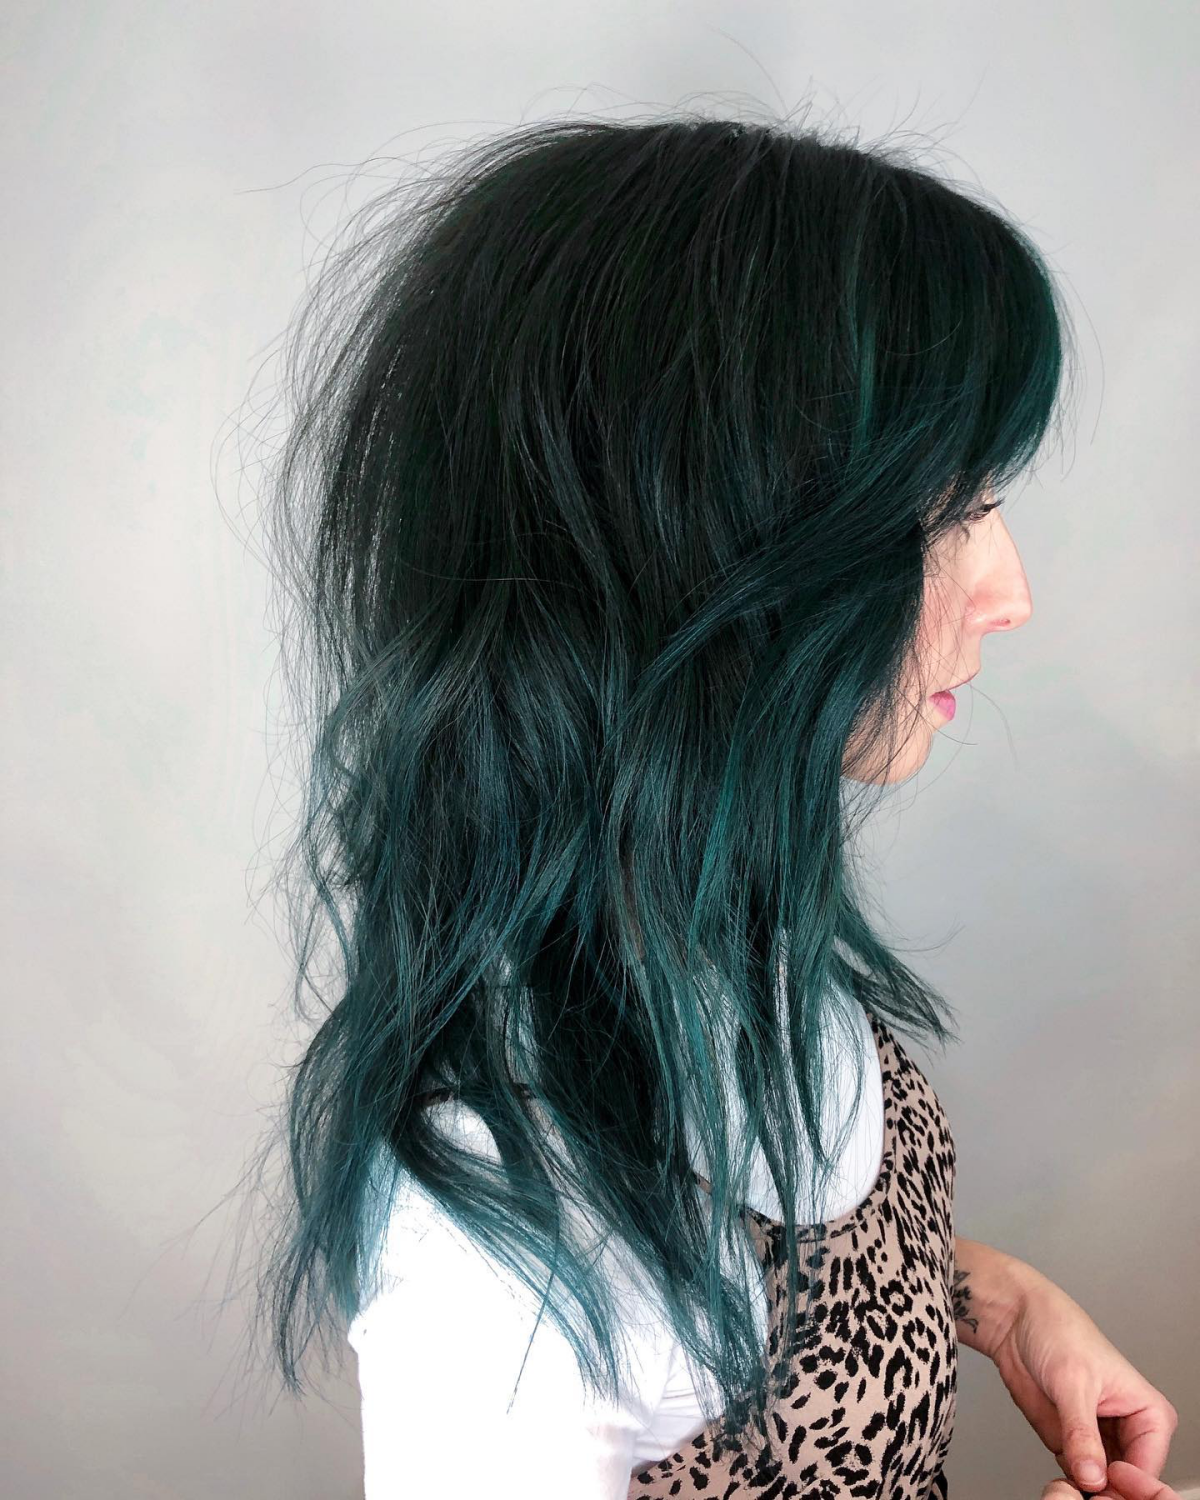
- Emerald or Forest Green: These deeper, richer greens are a bit more forgiving. They can be applied over a medium blonde base (around a level 7 or 8), which means less lightening and less stress on the hair. They also tend to fade out more gracefully, often into a pretty teal. The upkeep is moderate.
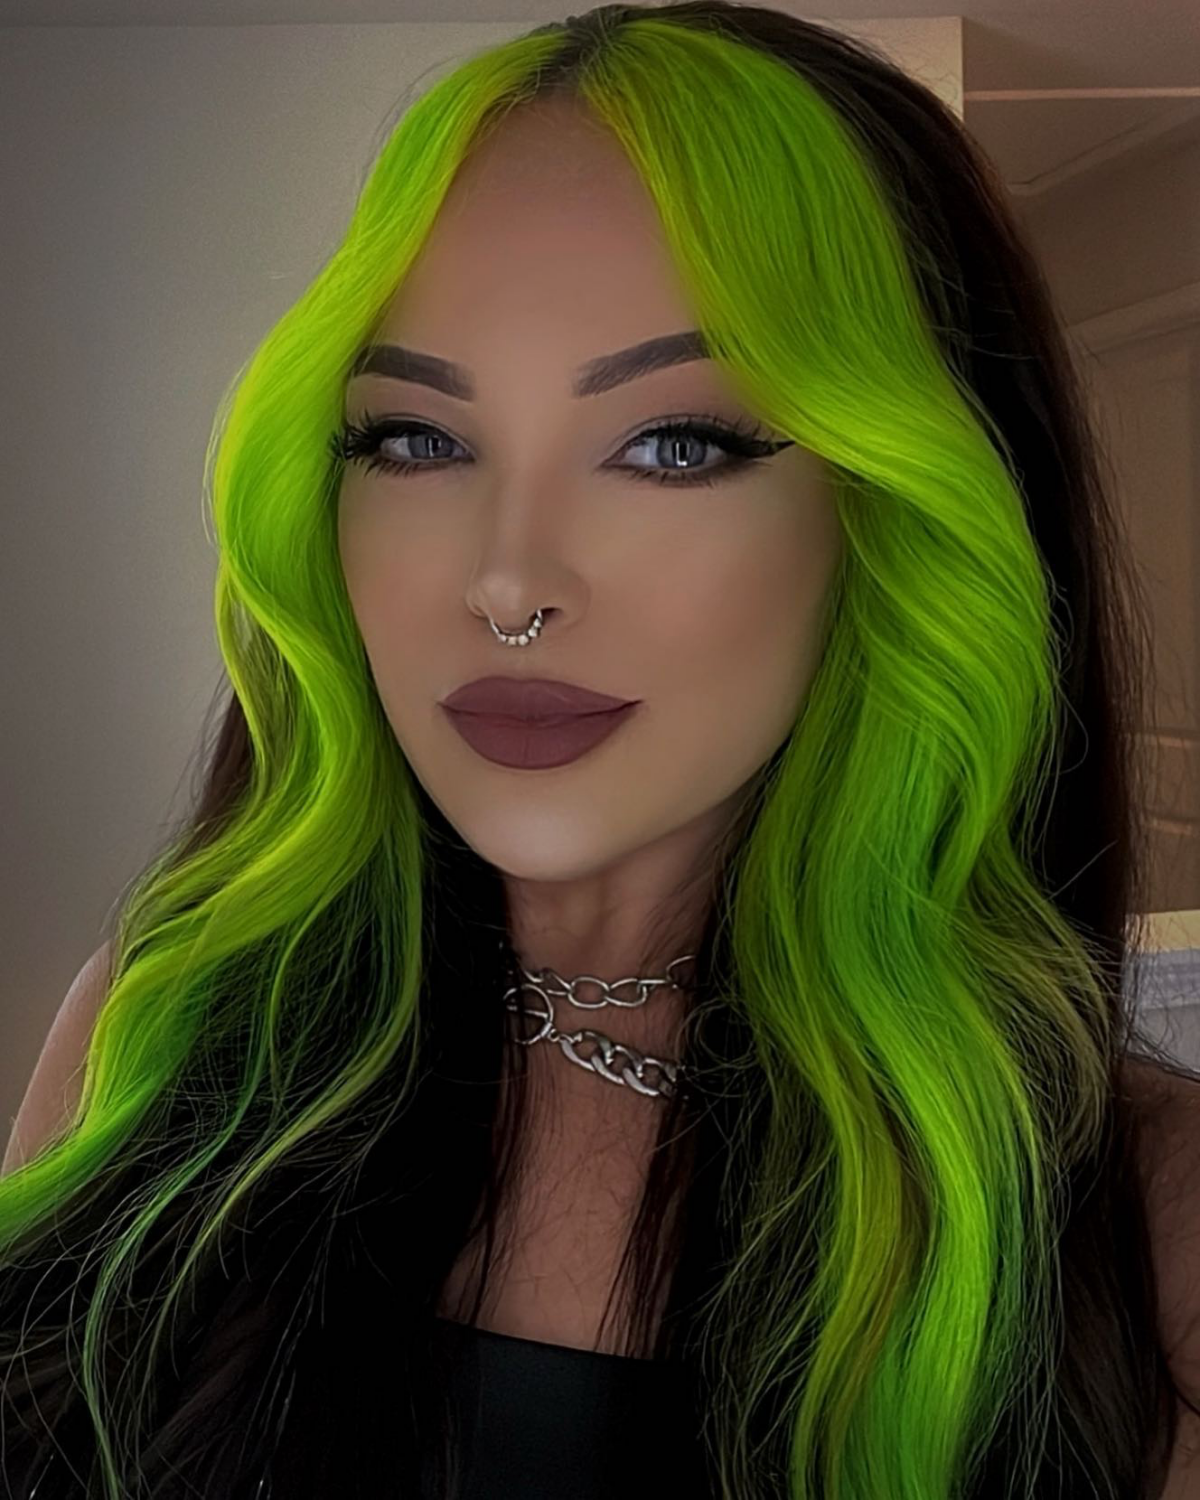
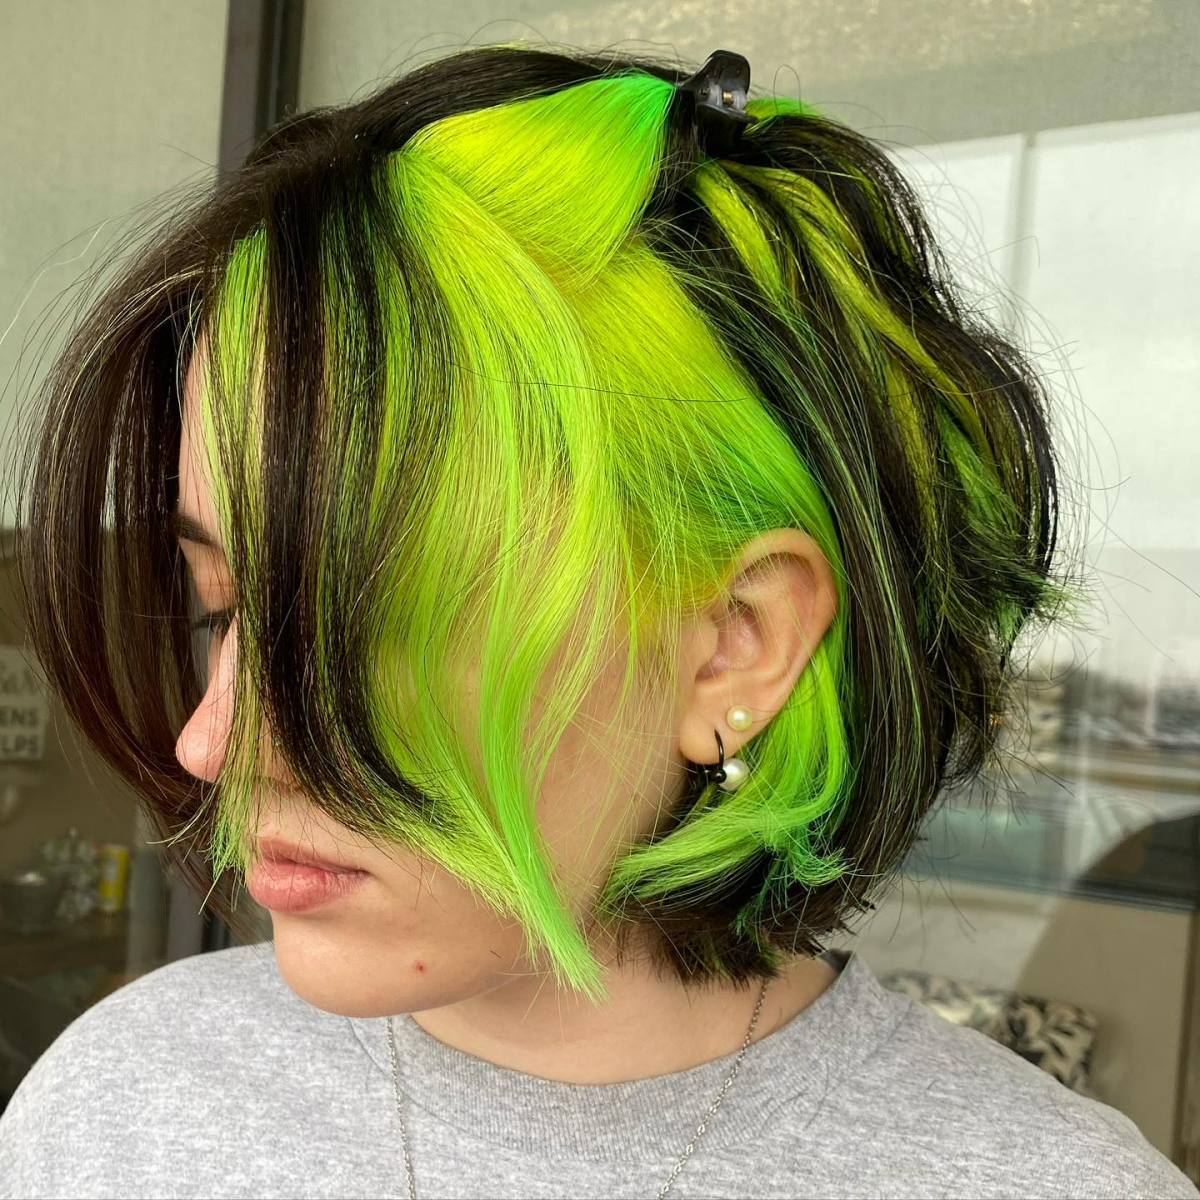
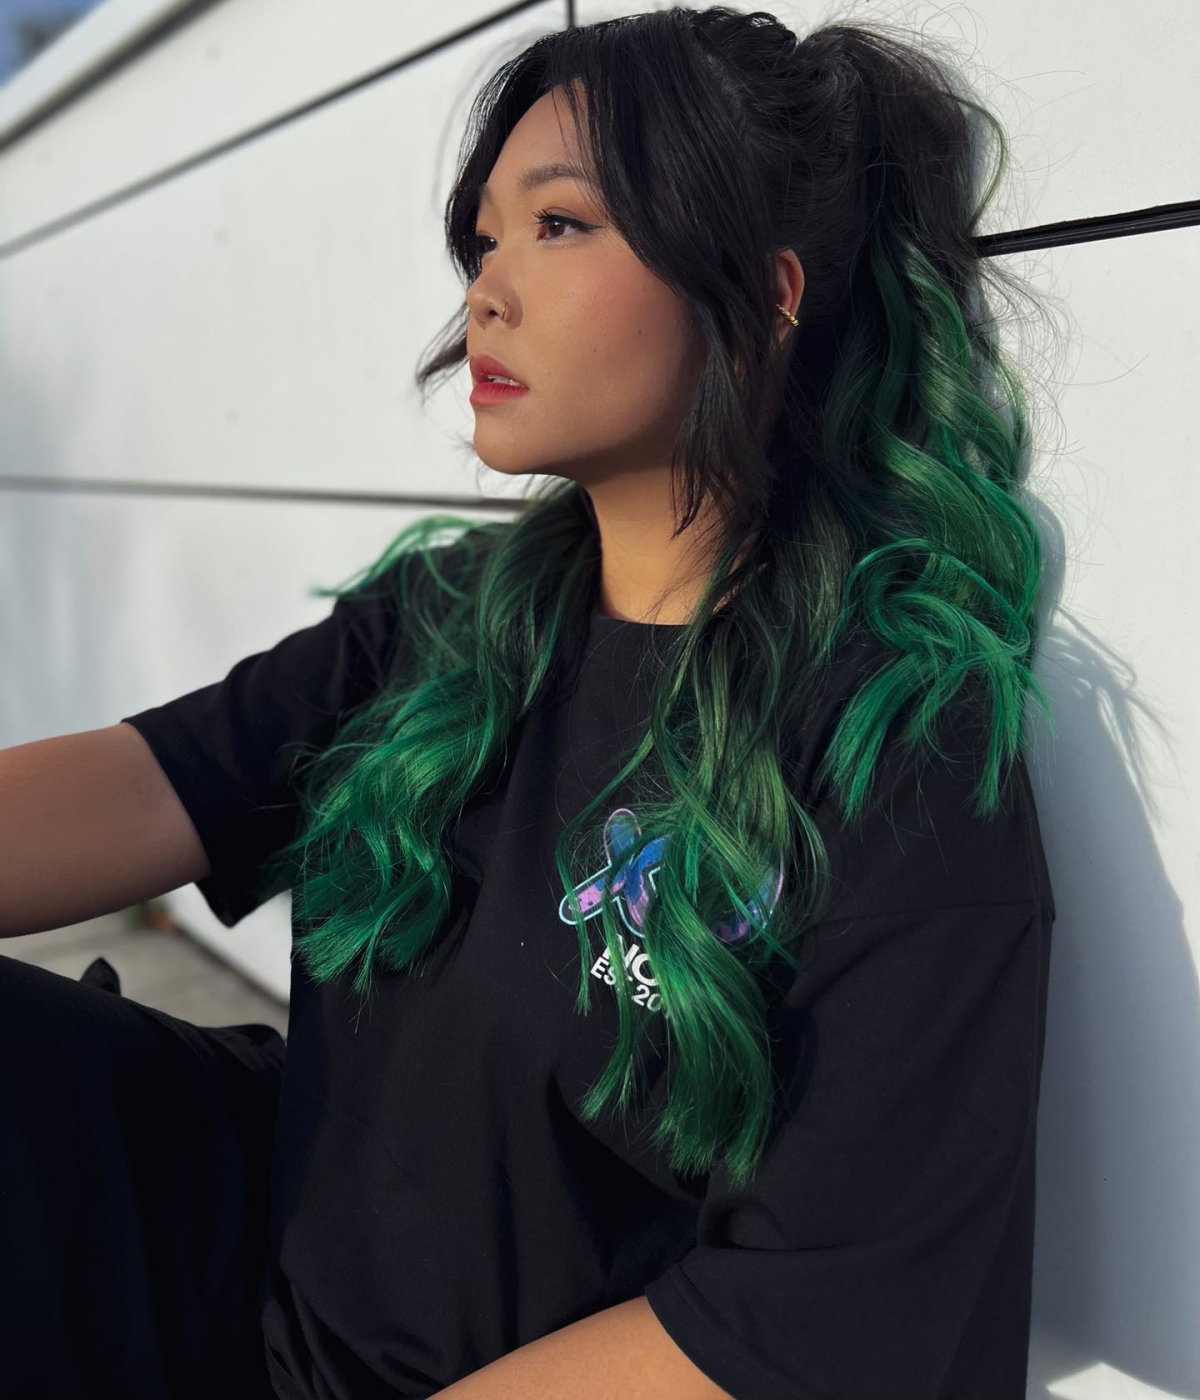
- Neon or Lime Green: These electric shades demand attention! To get this result, your hair must be lifted to a very light, even level 9 or 10—think the color of the inside of a banana peel. Any leftover yellow will make your lime look more chartreuse. The impact is huge, but so is the maintenance.
- Mint or Pastel Green: This is the most demanding of all. You need a perfect, clean, platinum blonde base (level 10+). Even a tiny bit of yellow left in the hair will turn a beautiful mint into a swampy, murky mess. It’s a gorgeous look, but the initial lightening process is intense and might take a couple of appointments to do safely. Upkeep is very high.
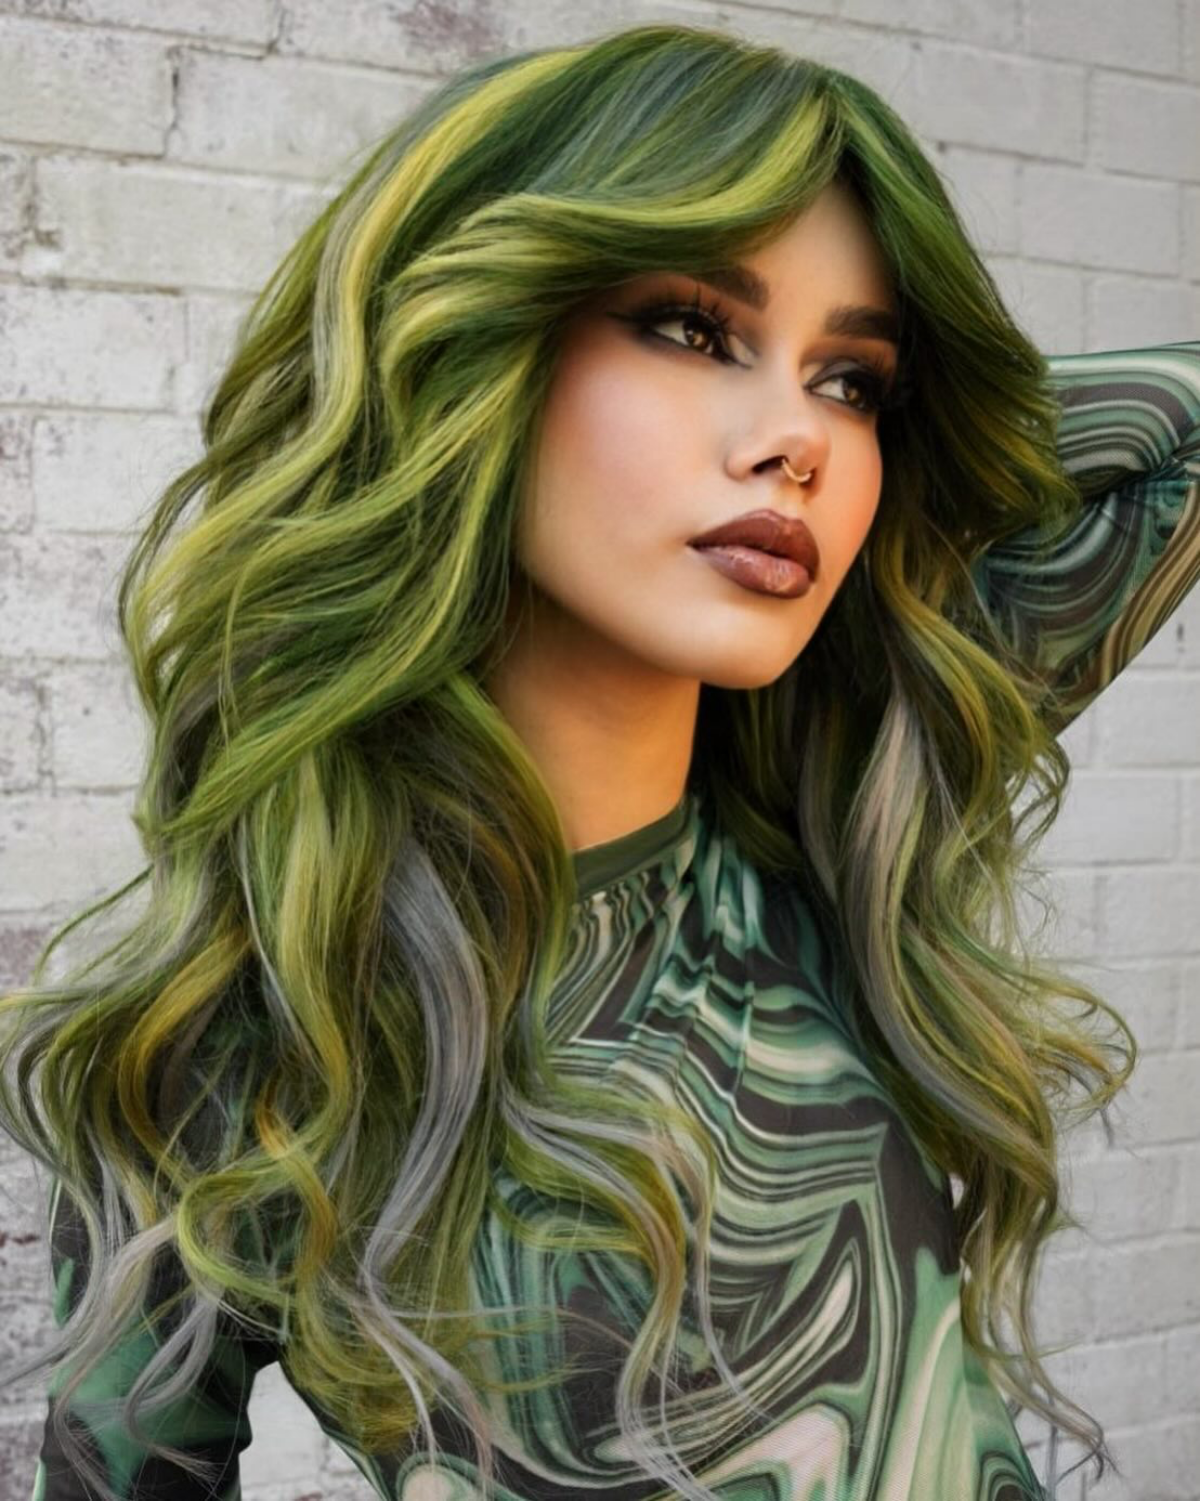
- Moss or Olive Green: These are some of my favorite custom tones. To get that muted, earthy green, a colorist often mixes a true green with a tiny drop of a warm color to counteract the brightness. By the way, if you’re trying this at home with a pot of neon green, literally just dip a toothpick in an orange or red dye and stir that minuscule amount in. You need way less than you think to get that cool, muddy effect!
We also have to talk money. A full-head transformation is not a quick, two-hour appointment. For someone with dark, long hair, it could easily be a 5 to 8-hour process. And the price will reflect that. Be prepared; a first-time full bleach and color session is a serious investment. Depending on the salon and your city, you could be looking at anywhere from $300 to $800+. It’s a big deal!
The Long Game: Keeping Your Green Looking Great
Getting the color is just step one. Now you have to live with it. Green dye molecules are large and tend to just sit on the outside of your hair, meaning they can wash out easily if you’re not careful. This is what you need to do.
First, wash your hair as little as possible. When you do wash, use cold water only. Hot water opens up the hair cuticle and lets that expensive color run right down the drain. Second, you absolutely must use a sulfate-free, color-safe shampoo. Sulfates are harsh detergents that will strip your color faster than anything.
Your quick win for today: Go look at your current shampoo bottle. Does it say “sulfate-free”? If not, swapping it out is the single best and easiest thing you can do to protect your color, starting right now.
Your Maintenance Shopping List
A color-depositing conditioner is going to be your new best friend. It adds a little bit of pigment back into your hair every time you wash, which can massively extend the life of your color. Here’s a realistic look at what you’ll need to budget for:
- Sulfate-Free Shampoo: $10 – $30
- Color-Depositing Conditioner (like Overtone or Keracolor Clenditioner): $25 – $40
- A Good Heat Protectant Spray: $15 – $25 (Heat is an enemy of vibrant color!)
Oh yeah, and something most people don’t think about is their water. If you live in an area with hard water, those minerals can build up on your hair and make your color look dull. Using a good clarifying or chelating shampoo, like the Malibu C Un-Do-Goo Shampoo, once every few weeks can remove that buildup and keep your green bright. Just don’t use it for daily washing!
Expect to need a root touch-up every 6-8 weeks. Bleaching new growth is a job for a professional—overlapping bleach on already lightened hair is the #1 cause of breakage. Between those major appointments, you can pop into the salon for a quick “gloss” or “toner” service to refresh the green all over without any more damage.
When to Call a Professional (Please Read This)
My number one priority is always the health of the hair. And let’s be real, chemical services have risks.
When lightener is on your scalp, a little tingling is normal. Burning is NOT. If you feel a burning sensation, rinse it out immediately. It could be an allergic reaction.
The biggest risk of a DIY bleach job is what we call a “chemical haircut.” This is when over-processed hair loses its structure, turns mushy when wet, and just snaps right off. It’s devastating and it’s why professional expertise is so important.
I totally support self-expression, but there are times when DIY is just not the answer:
- If you have dark box dye on your hair. Box dyes often contain metallic salts that can have a catastrophic reaction with professional lightener, causing the hair to smoke, swell, and literally break off.
- If your hair is already damaged. If it’s brittle or has a ton of split ends, it simply can’t handle a major lightening service.
- If you want a huge transformation, like from black to pastel green. This is a complex color correction that requires a deep understanding of hair chemistry.
In these cases, please, please consult a professional. We aren’t trying to gatekeep; we are trying to save you from irreversible damage. A good colorist will always put the health of your hair first. Green hair is an awesome choice, but it’s a serious one. Armed with the right info and a commitment to aftercare, it can be an amazing and rewarding journey.
Galerie d’inspiration

- Wash your hair in the coldest water you can stand. Hot water opens the hair cuticle and lets the color molecules escape.
- Switch to a sulfate-free shampoo or, even better, a co-wash to preserve your color’s intensity.
- Invest in a color-depositing conditioner. Brands like oVertone and Keracolor have green shades that refresh your color with every wash.
Emerald Jewel-Tone: Think deep, mysterious forest. This is for you if you love rich, sophisticated color. It’s often more forgiving as it fades, sometimes turning into a pleasant seafoam green. Manic Panic’s

The eternal question: will my new green hair stain everything I own?
For the first few washes, absolutely. Expect your towels, pillowcases (invest in a dark-colored one!), and shirt collars to pick up some green tint, especially if your hair is wet. This process, called ‘bleeding,’ is normal for semi-permanent dyes. Rinsing thoroughly with cold water after coloring helps, but be prepared for a little green in your life for the first week or two.
The green pigment molecule is one of the quickest to fade from hair. Unlike smaller red molecules that anchor deep within the hair cortex, green sits more on the surface, making it susceptible to washing out with every shampoo.

Finding the perfect green is like finding the right lipstick—it’s all about your skin’s undertones. A quick check of the veins on your wrist can guide you:
- Cool Undertones (blue/purple veins): Opt for blue-based greens. Rich emeralds, deep teals, and jewel-toned forest greens will beautifully complement your complexion.
- Warm Undertones (green/olive veins): Yellow-based greens are your friend. Think vibrant lime, electric neons, warm olive, and chartreuse.
A crucial detail: Not all greens are created equal. Pay attention to the dye’s undertone. A yellow-based green (like lime) will look vibrant over a pale yellow bleached base. A blue-based green (like teal) has more forgiving power and can neutralize minor brassiness, but putting it on a very yellow base might result in a more muted, earthy green than you intended.
- Achieve that soft, dreamy pastel mint.
- Create a trendy, muted sage or olive tone.
- Get more value and longevity from a single tube of dye.
The secret? Diluting your pigment. Mix a vibrant green dye, like Arctic Fox’s

Using a color-depositing conditioner can extend the life of your vibrant green by up to 50% between full dye jobs.
Think of it as micro-dosing your hair color. Products like Keracolor Clenditioner or Good Dye Young’s
From Billie Eilish’s iconic neon roots to Dua Lipa’s brief but brilliant seafoam bob, green hair has cemented its place in pop culture. It’s a color that signifies a break from the norm, an artistic edge often seen on musicians, artists, and characters who walk their own path. Wearing it connects you to a tribe of bold individuals.
Not ready to take the full plunge? Test the waters first. L’Oréal’s Colorista Hair Makeup or other colored hairsprays offer a one-day commitment that washes out instantly. For a more realistic effect without the bleach, try high-quality green clip-in extensions. It’s all the fun with none of the fear.


