Thinking About a Tattoo Sleeve? Here’s What You *Really* Need to Know
I’ve been on the business end of a tattoo machine for a long, long time. I’ve seen styles come and go, worked on every part of the body, but honestly, nothing compares to the sheer commitment and artistry of a full sleeve. A sleeve isn’t just a random collection of tattoos you cram onto an arm. It’s a single, flowing piece of art, designed to move with the body’s natural lines. It’s a project, and it builds a pretty unique bond between the person in the chair and the artist.
In this article
- The Consultation: The Most Important Hour of the Entire Project
- Let’s Talk About the Investment
- Understanding Design, Not Just Pictures
- The Process: It’s a Marathon, Not a Sprint
- Healing: Your Job Starts When You Leave the Studio
- Long-Term Care and Covering Old Tattoos
- How to Find the Right Artist and Studio
- Inspiration Gallery
But let’s be real: getting a sleeve is a massive decision. It’s a huge investment of time, money, and your own personal pain tolerance. I’ve seen people jump in too fast and end up with something they regret. I’ve also seen people plan it out thoughtfully and walk away with a masterpiece they’ll love forever. My goal here is to give you the inside scoop from my side of the needle. I want to walk you through the whole process, from that first spark of an idea to the final, fully healed artwork.
The Consultation: The Most Important Hour of the Entire Project
Everything, and I mean everything, starts with a good conversation. The consultation is the foundation for your sleeve. This is where we figure out if we’re a good fit. It’s not just about you picking me; it’s also about me being honest about whether I’m the right artist for your vision. My work is deeply rooted in Japanese and American traditional styles, so if someone comes in wanting a photorealistic portrait, I’m going to happily refer them to an artist who specializes in that. A good artist knows their strengths and weaknesses.
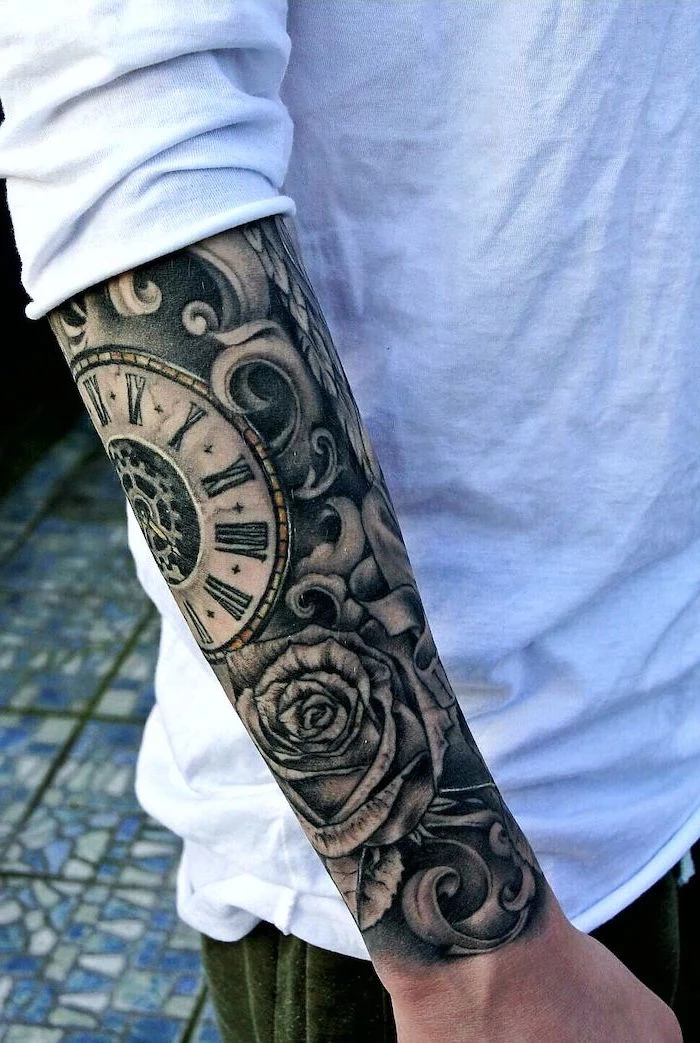
When you come in for a chat, come prepared. Bring some reference images, but please don’t expect a carbon copy. The best references are the ones that show a mood, a subject, or a color palette that speaks to you. I once had a client bring in a photo of some ancient pottery, a cloud formation from an old painting, and a picture of his grandfather’s watch. He didn’t want a tattoo of a watch; he wanted to capture the feeling of history, movement, and personal meaning. Now that is a fantastic starting point.
During the consult, I’m going to ask a lot of questions. What do you do for work? How much sun does your arm get? These things really matter. The arm of a construction worker who’s outside all day has different needs than the arm of an office worker. We have to plan for the long haul. I’ll also take measurements and photos of your arm from all angles. A sleeve has to look good from the front, back, and sides. It needs to “flow” from the shoulder down to the wrist, moving with your muscles. It’s that flow that separates a world-class sleeve from a page of stickers.
Heads up: be very wary of any artist who rushes this step. If they aren’t listening or they immediately agree to a concept that sounds jumbled or technically messy, that’s a red flag. A sleeve with ten different main subjects is going to look like chaos. My job is to guide you toward a design that’s powerful and clear. A single, strong theme is always better than a dozen weak ones.
Let’s Talk About the Investment
Okay, let’s get right to the question everyone has but is sometimes afraid to ask: How much is this going to cost? A sleeve is a major financial commitment, so you need to budget for it realistically.
Most experienced, reputable artists work at an hourly rate, which can range anywhere from $150 to over $300 per hour, depending on their skill, demand, and location. A typical full sleeve can take anywhere from 20 to 60 hours of actual tattoo time. So, do the math: a 30-hour sleeve could easily run you between $4,500 and $9,000, and that’s before tipping.
Some other financial points to remember:
- The Deposit: Expect to pay a non-refundable deposit to book your first session. This can be anywhere from $100 to the artist’s full hourly rate. This covers their drawing time and secures your spot in their calendar.
- Tipping: Yes, you should tip your tattoo artist! If you’re happy with the work and the experience, a tip of 15-25% of the session cost is a standard and much-appreciated gesture.
- Pacing: Remember, you don’t pay for it all at once. You pay per session, which can help spread the cost out over several months or even a year.
The old saying is 100% true: “Good tattoos aren’t cheap, and cheap tattoos aren’t good.” You are paying for years of experience, safety, and artistry. I’ve spent countless hours fixing cheap tattoos, and trust me, it’s always more expensive in the long run.
Understanding Design, Not Just Pictures
When you say you want a “dragon sleeve” or a “floral sleeve,” a good artist is thinking about more than just the picture. We’re thinking about the compositional rules and the style that will make it work on a human arm.
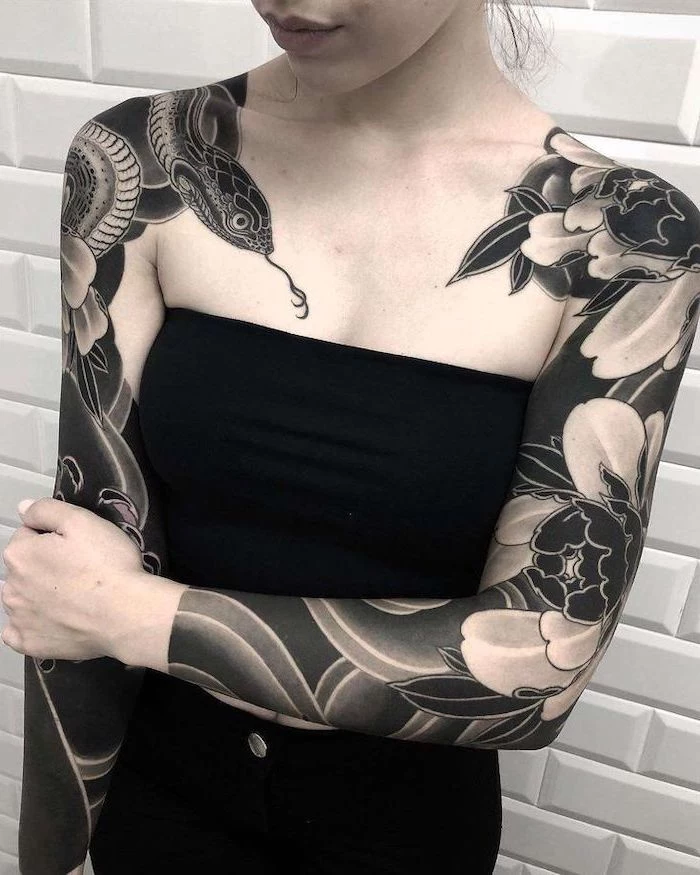
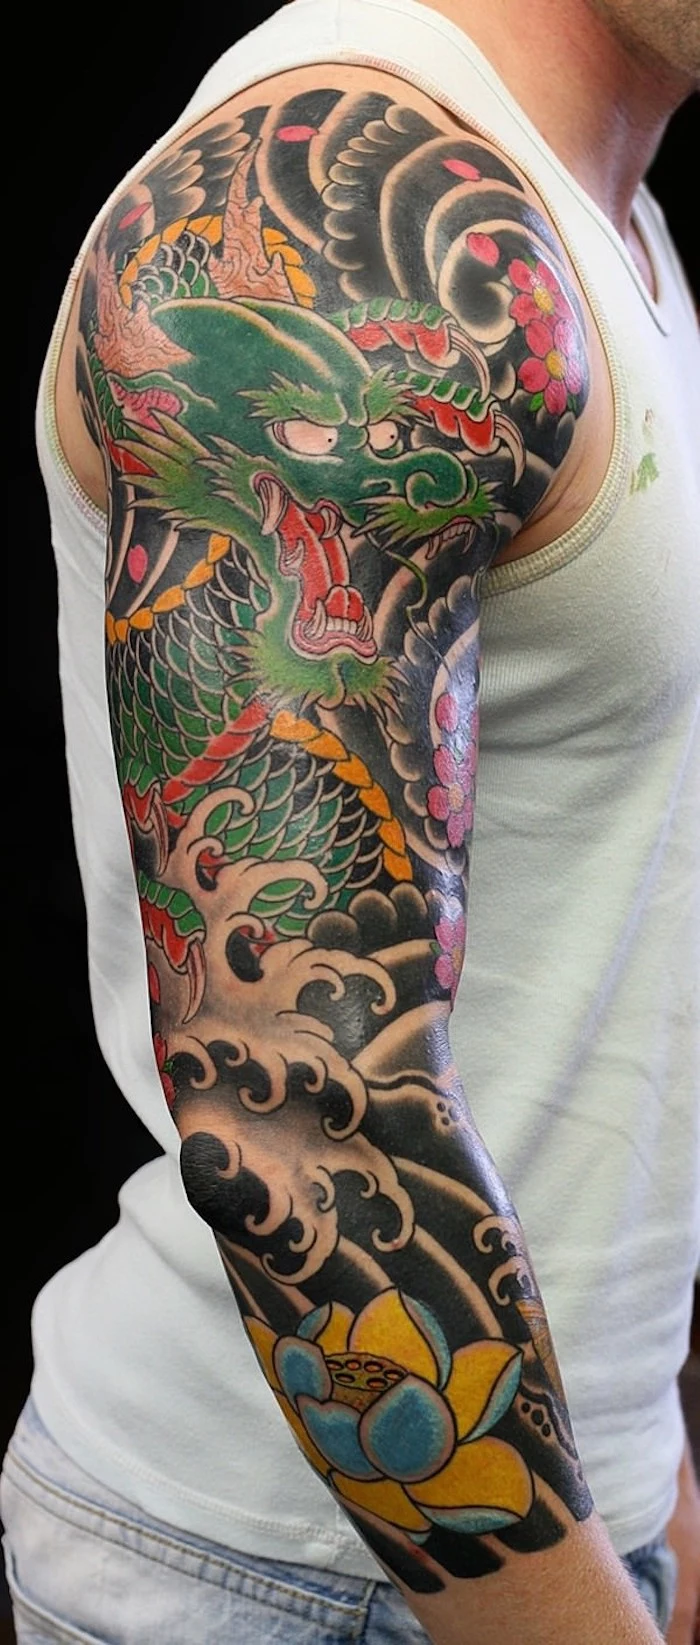
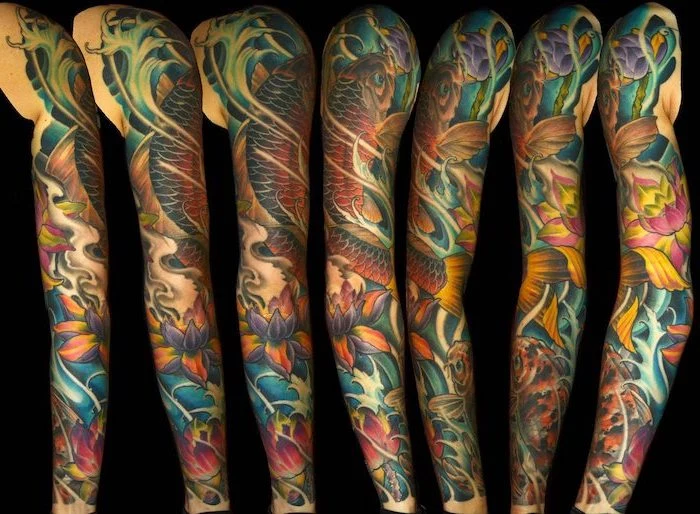
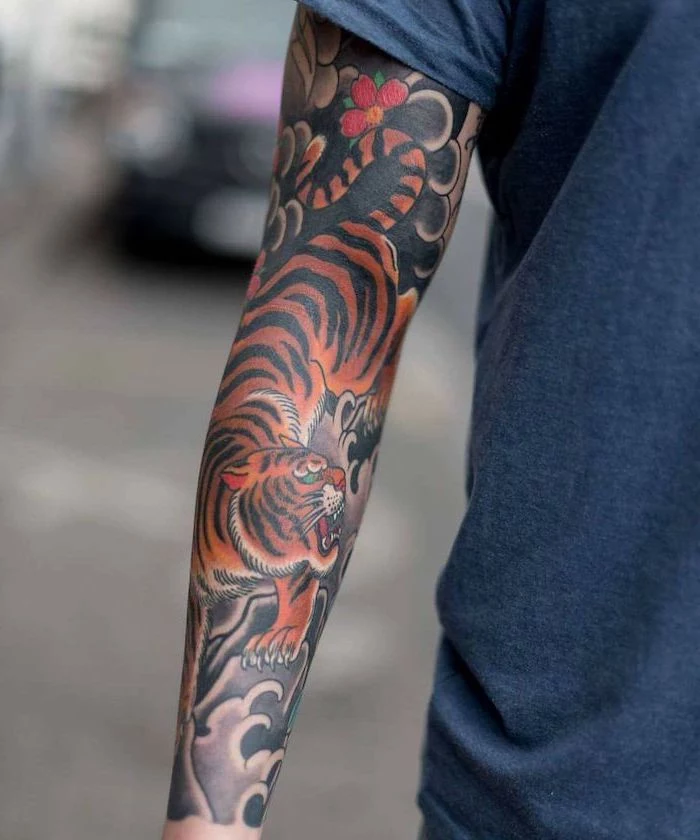
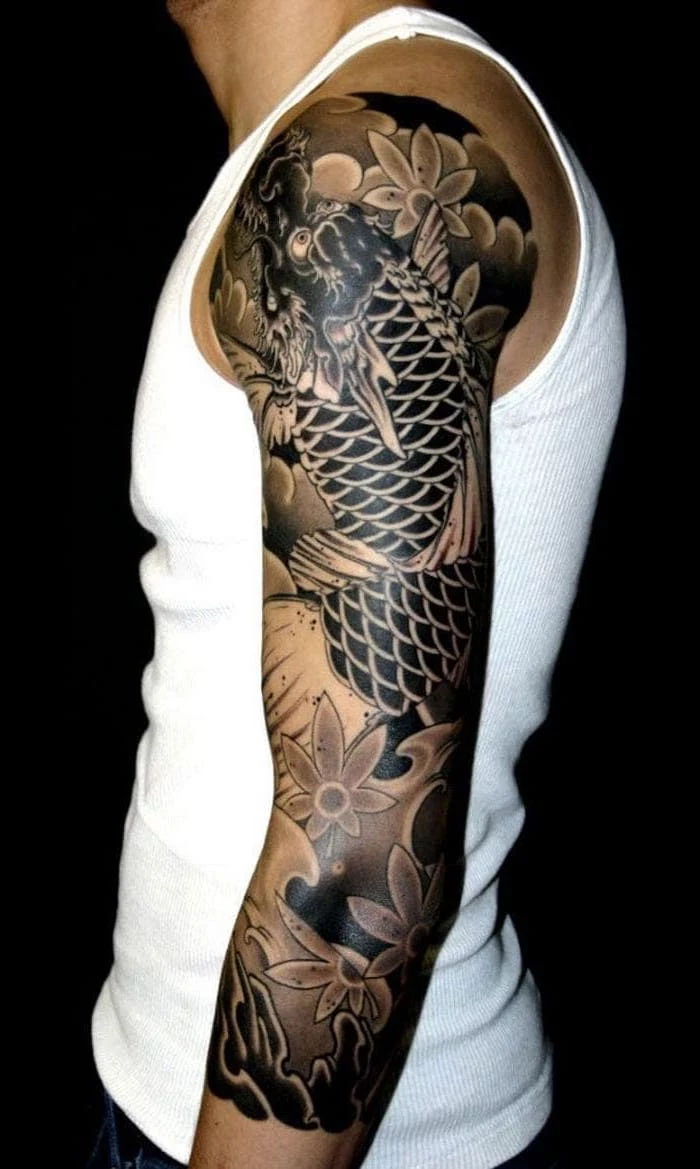
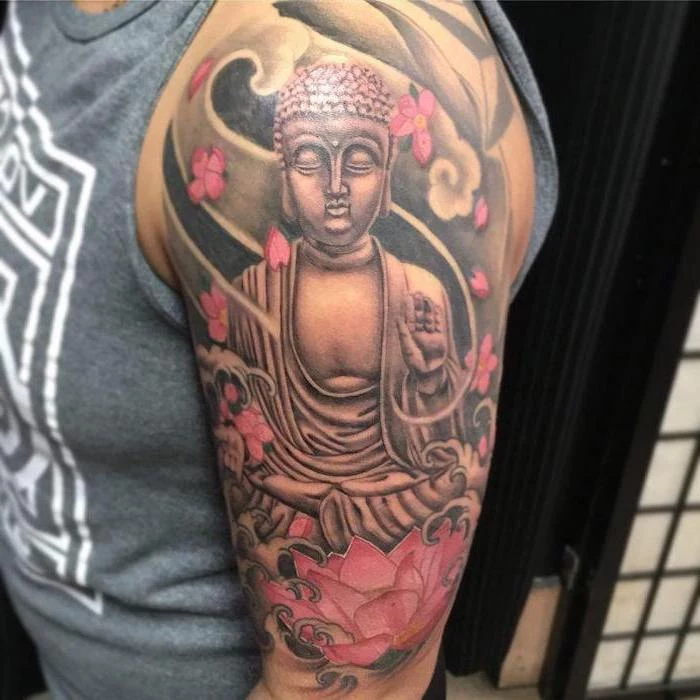
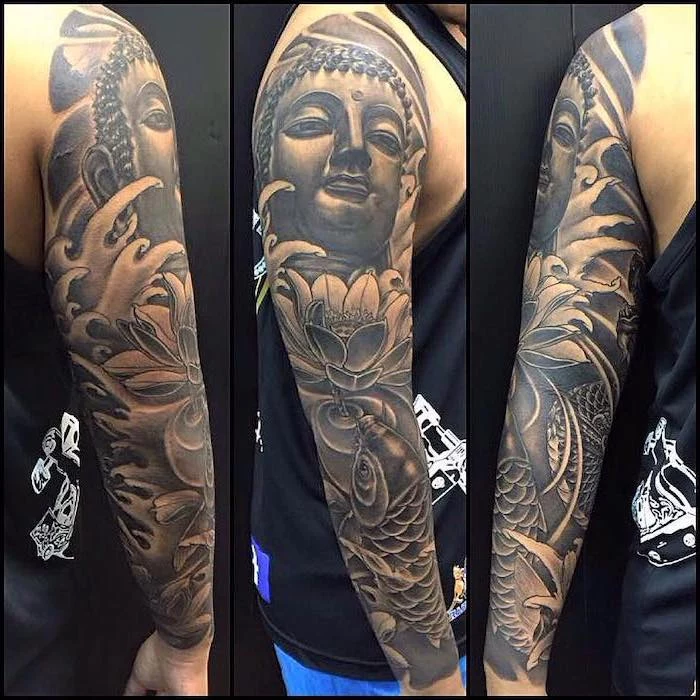
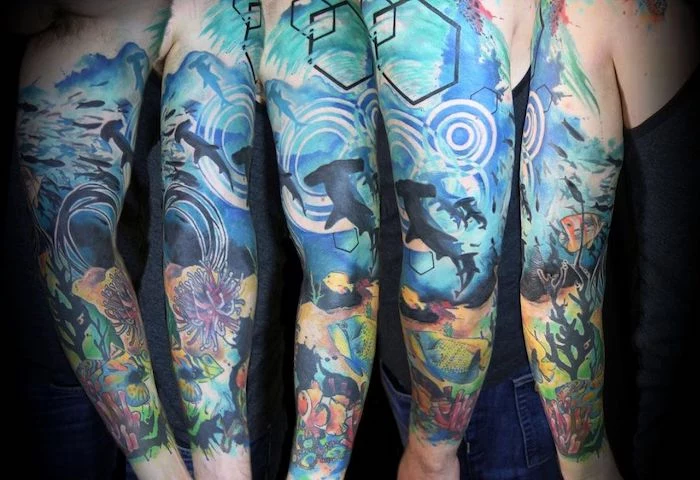
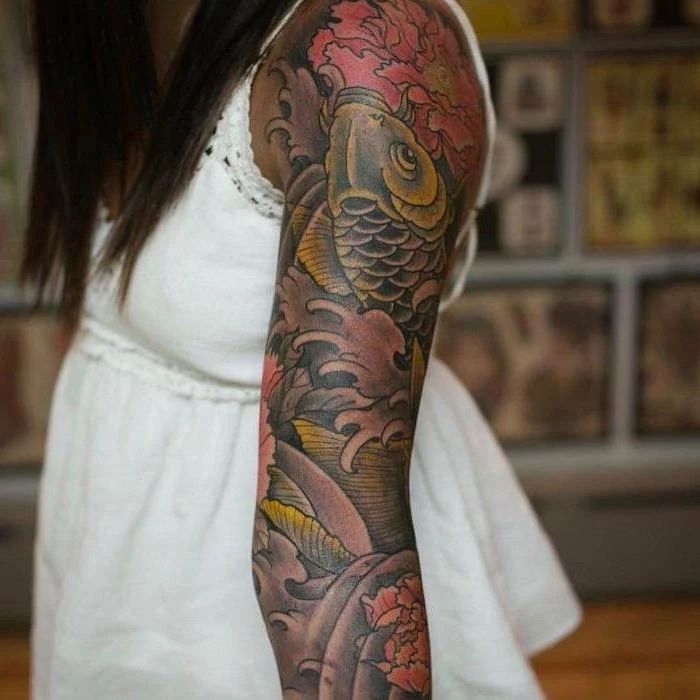
Japanese Style (Irezumi): This is a classic style with a deep history and some pretty strict design rules. A traditional Japanese sleeve features a main subject (like a dragon, koi, or tiger) set against a consistent background of wind, water, or clouds. And you don’t mix them! The background is just as crucial as the main image, creating a unified piece that wraps the arm perfectly. Even the flowers have to match the season of the theme. It’s that level of detail that gives the style its timeless power.
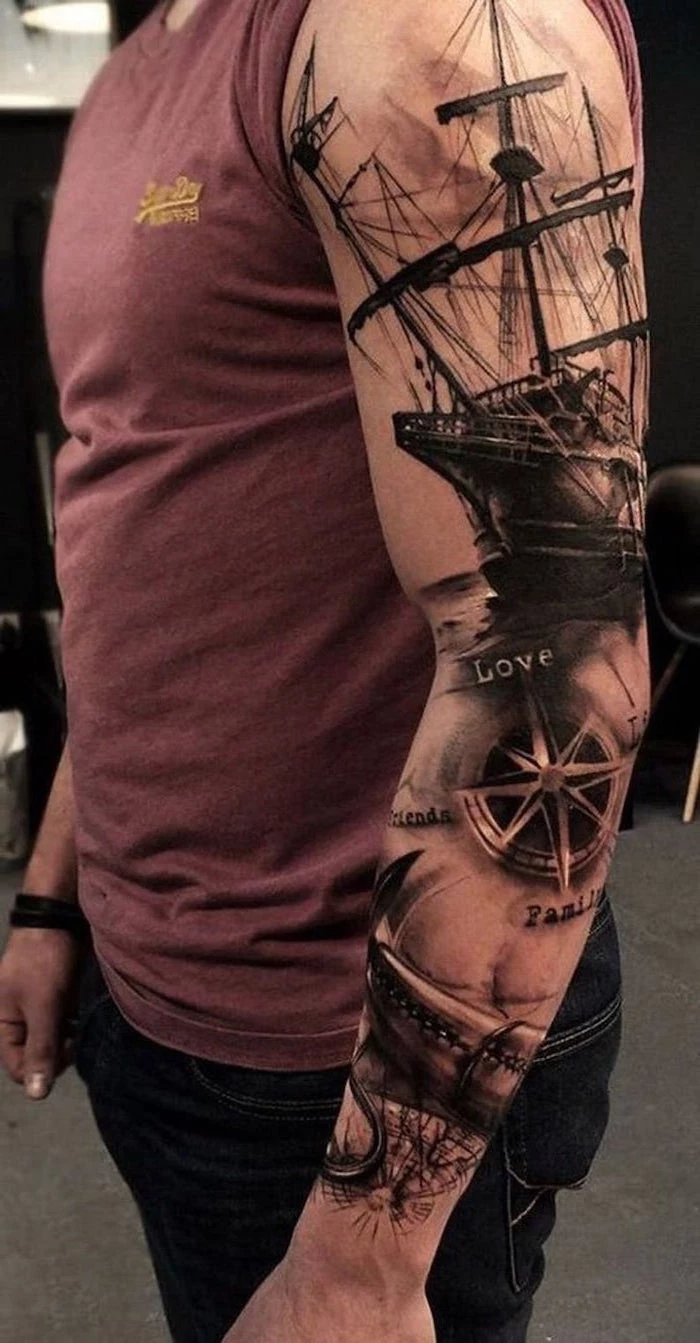
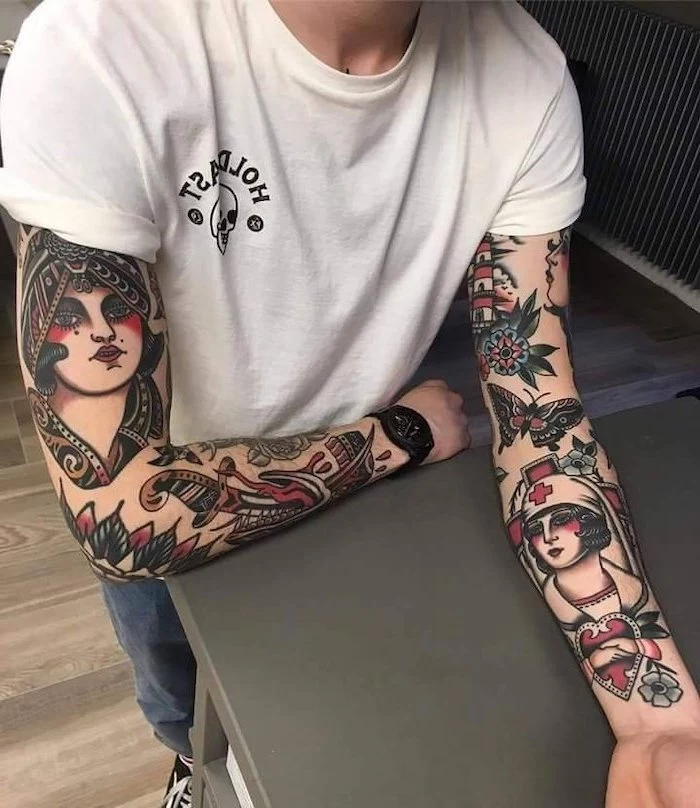
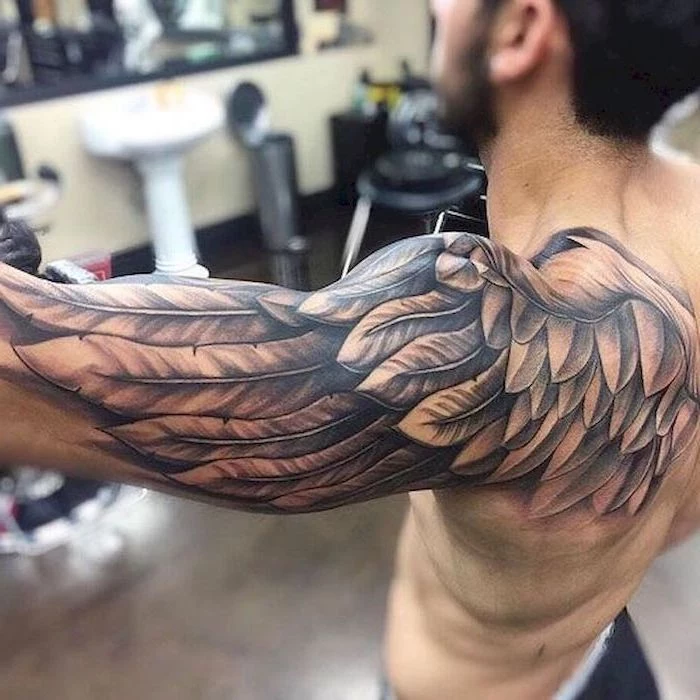
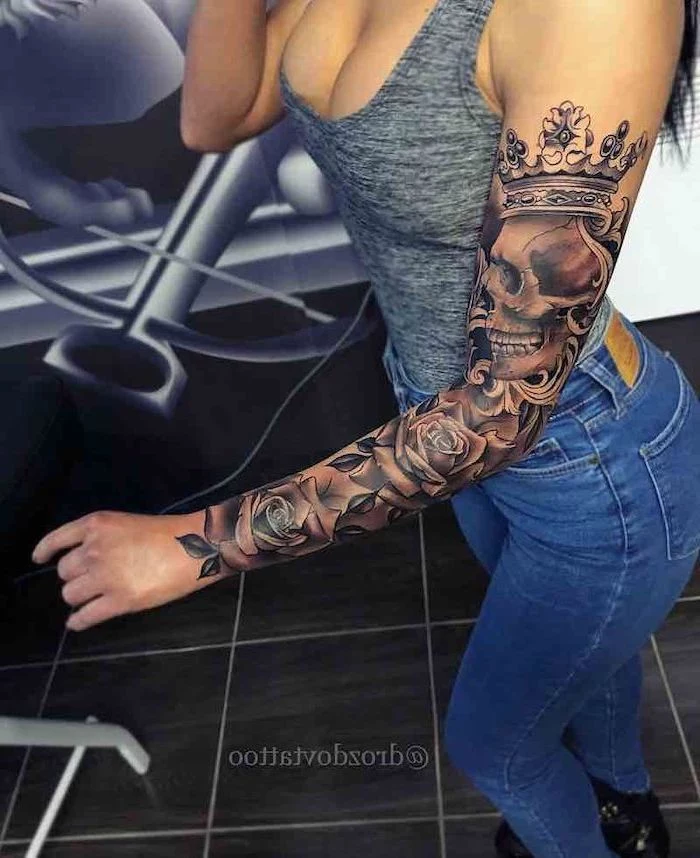
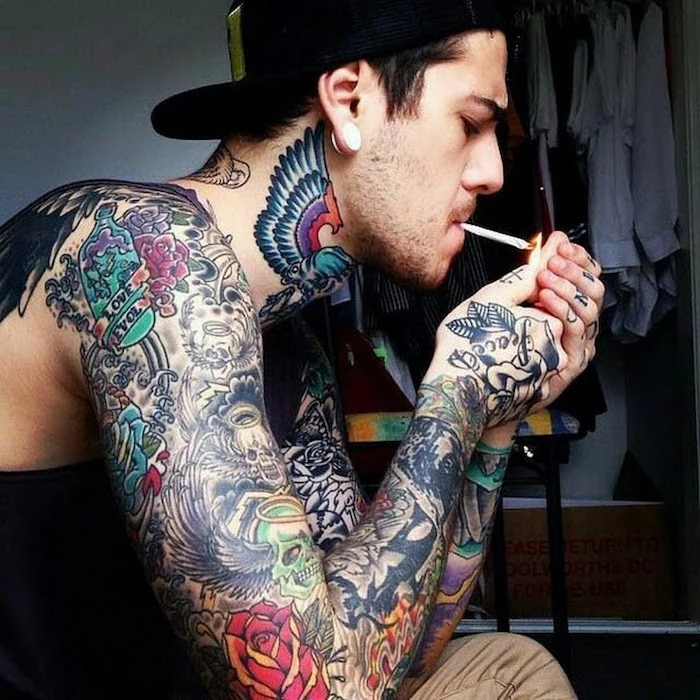
American Traditional: This style was born to be bold and to last forever. It’s all about heavy black outlines and a limited, punchy color palette—think bold reds, greens, yellows, and solid black. Those heavy outlines are the secret sauce; they create a powerful barrier that prevents colors from bleeding into each other as the skin ages. An eagle or a ship done in this style will still look like an eagle or a ship in 40 years. It’s honest, direct, and incredibly durable.
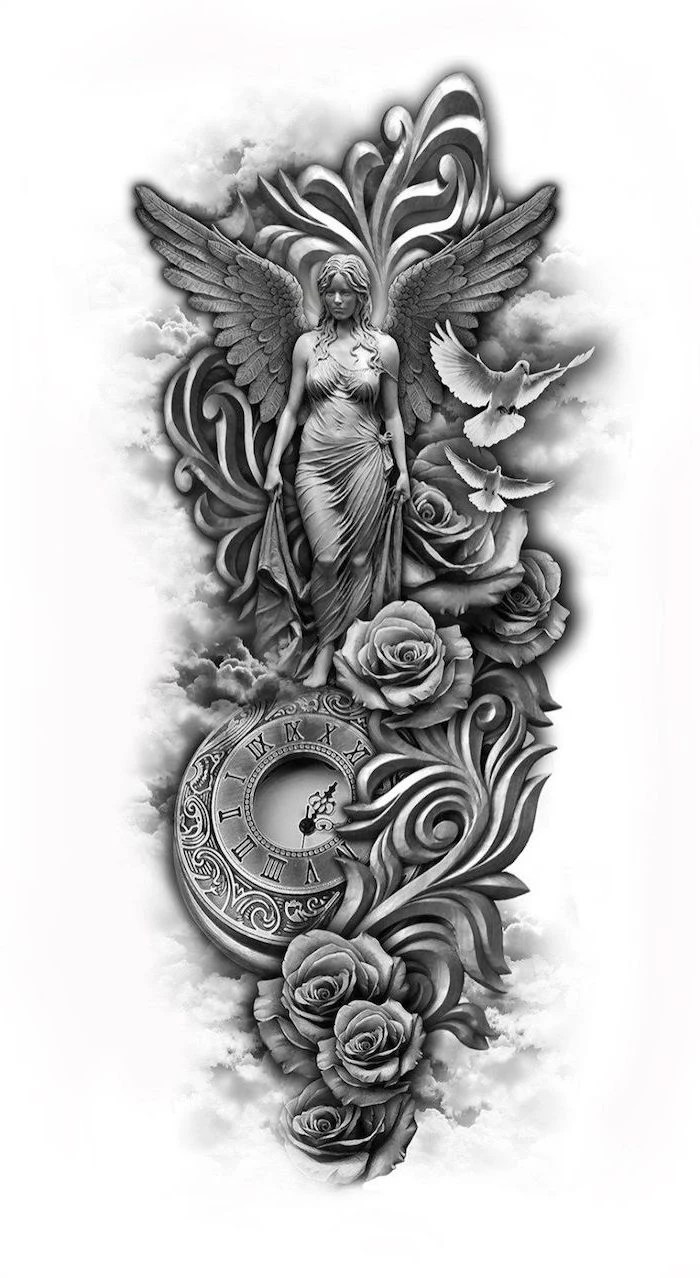
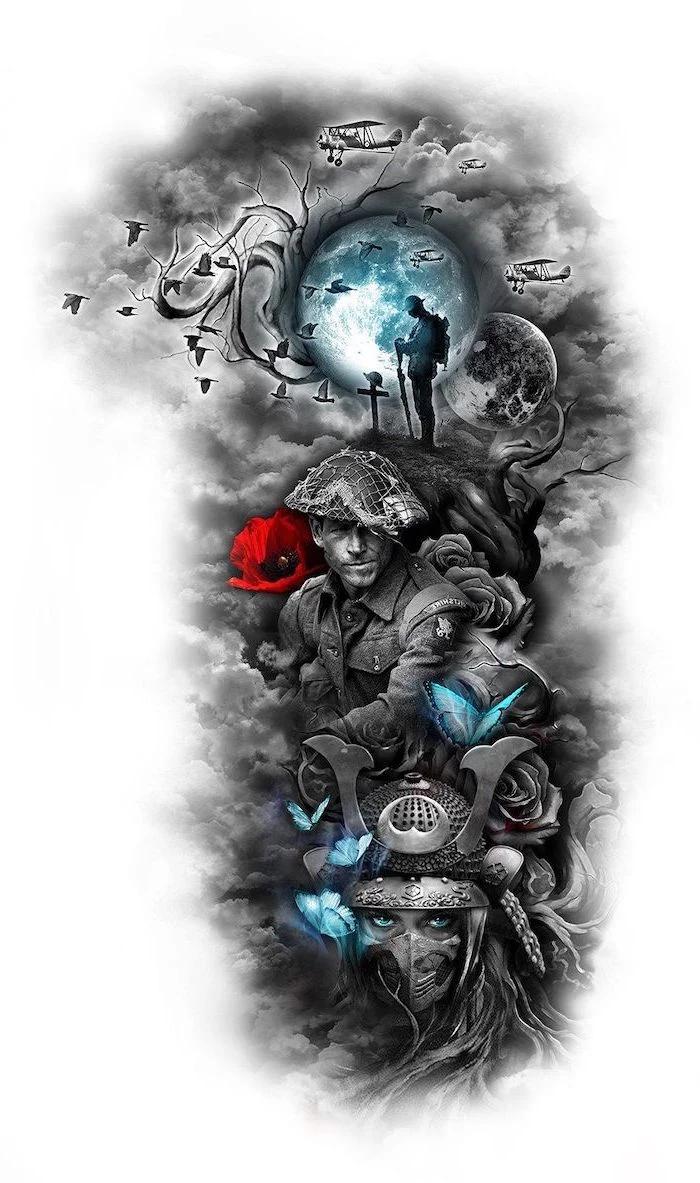
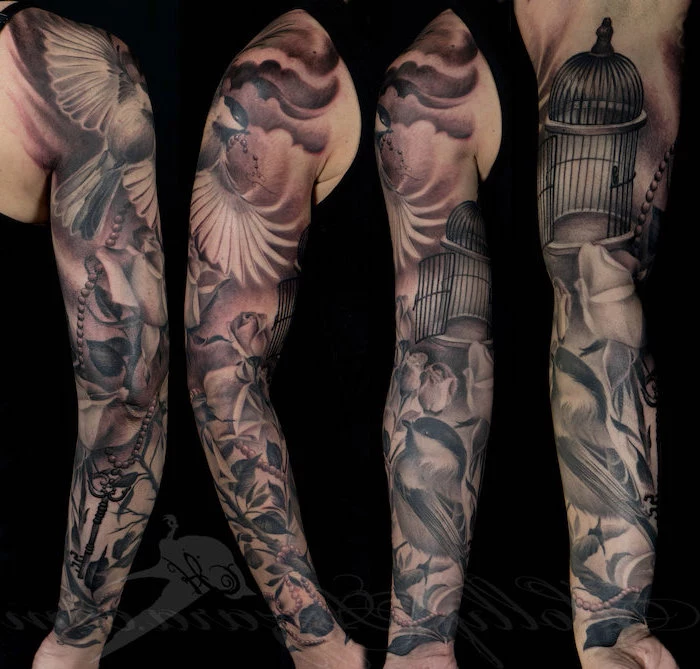
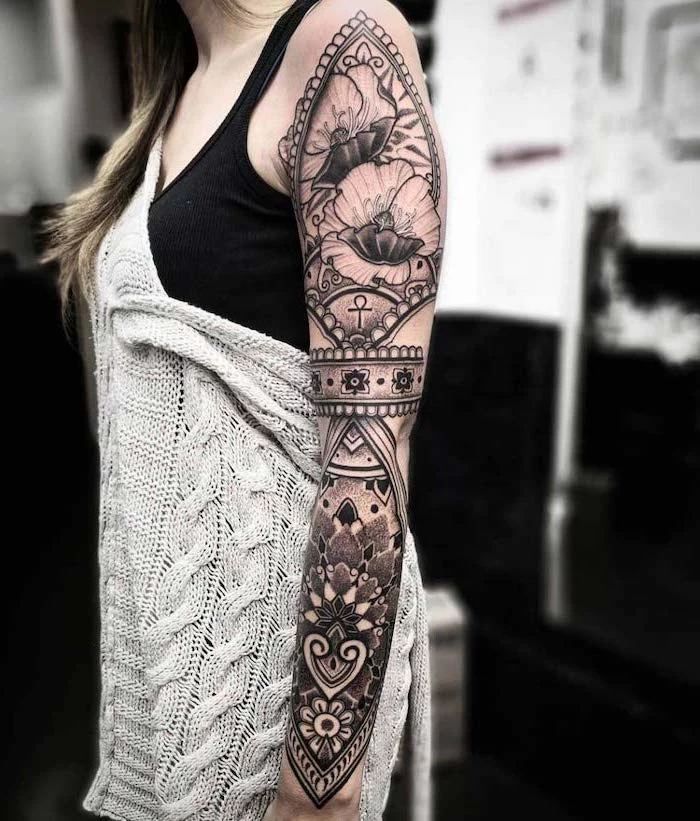
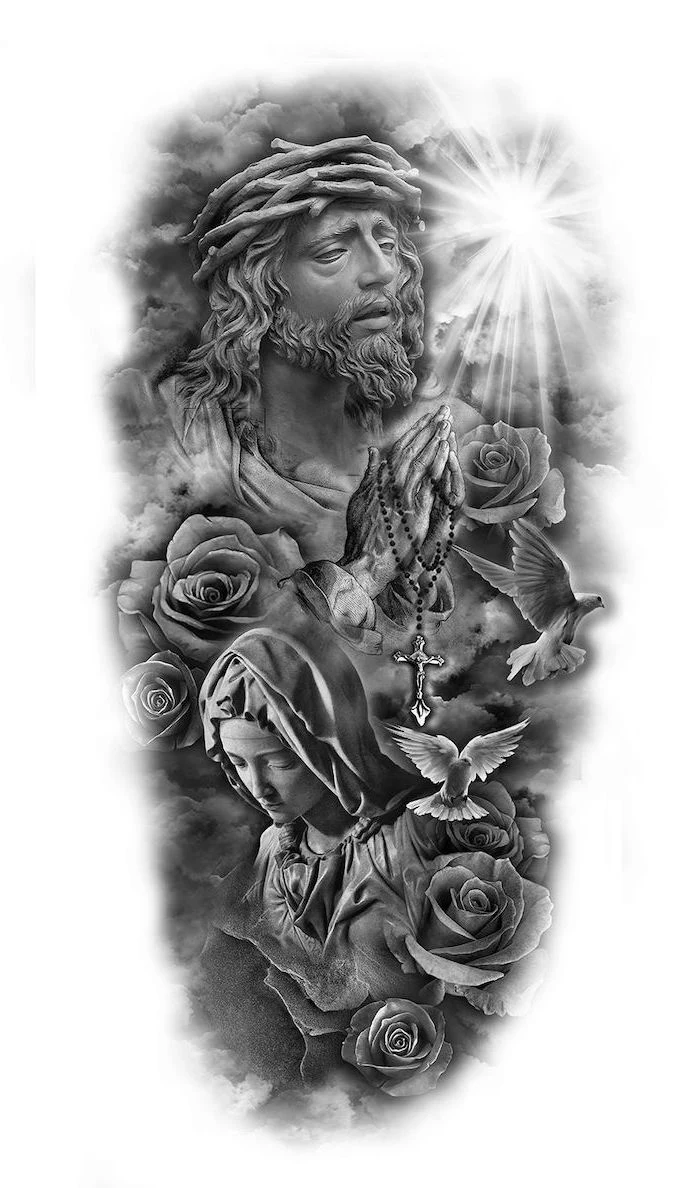
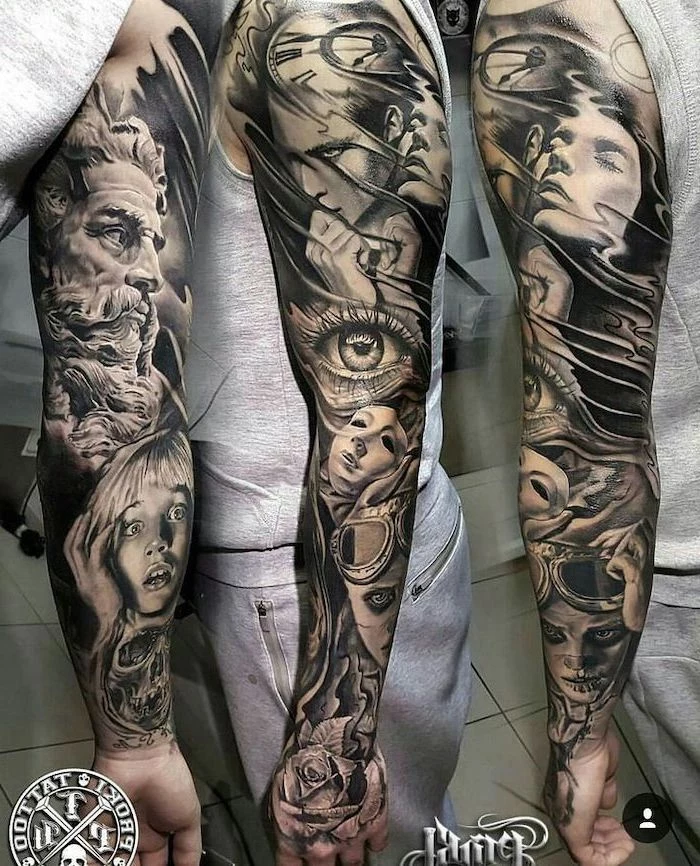
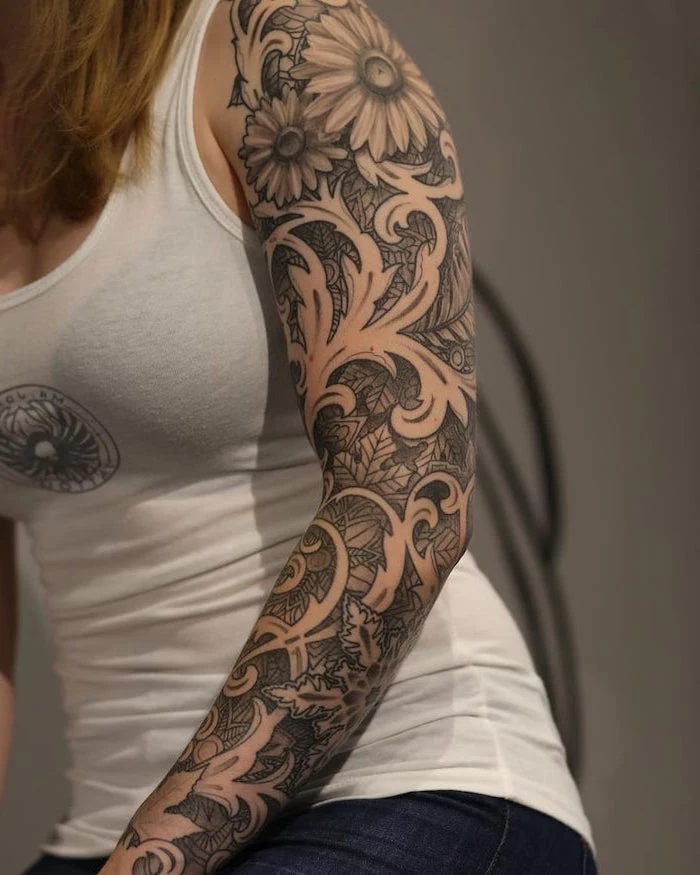
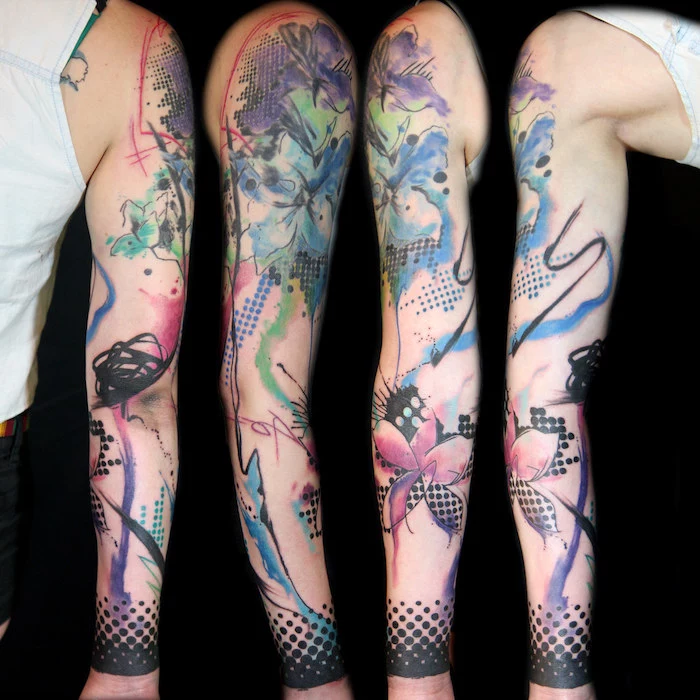
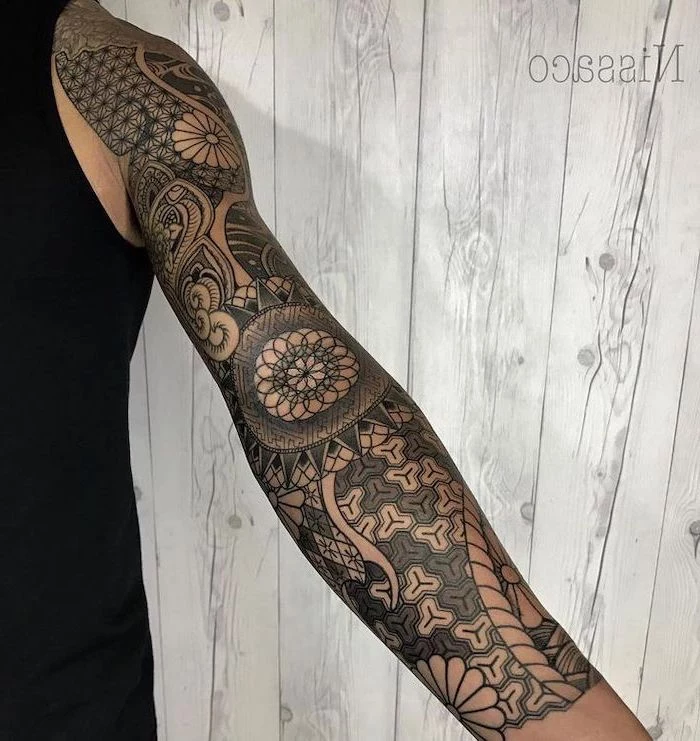
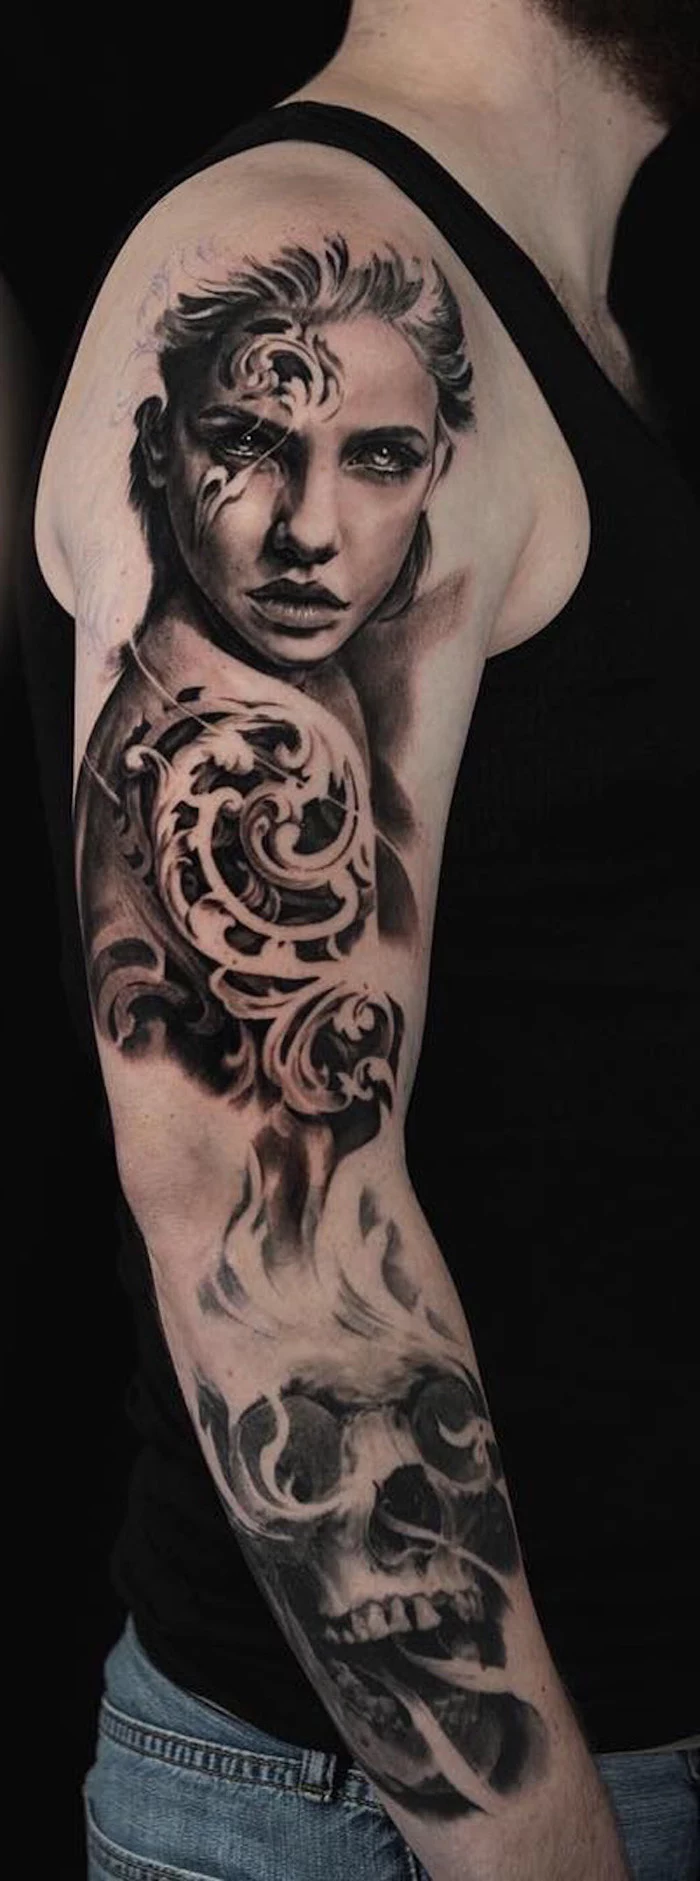
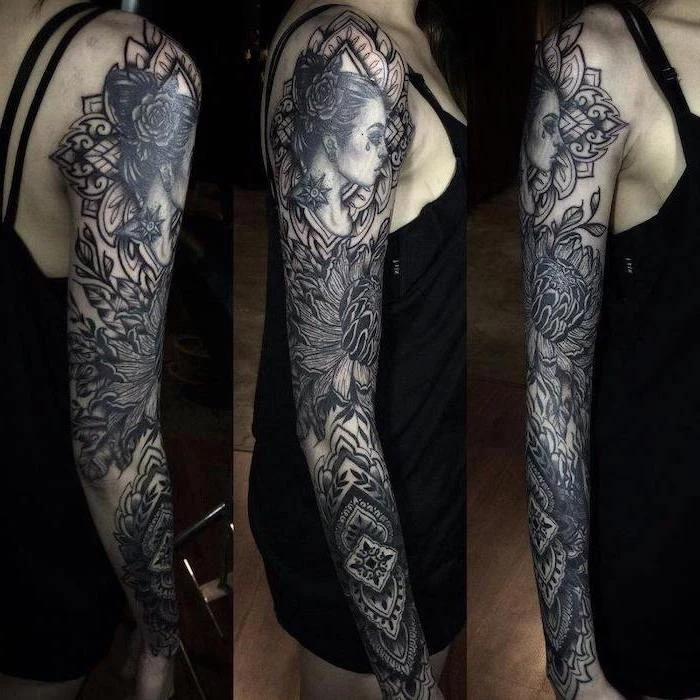
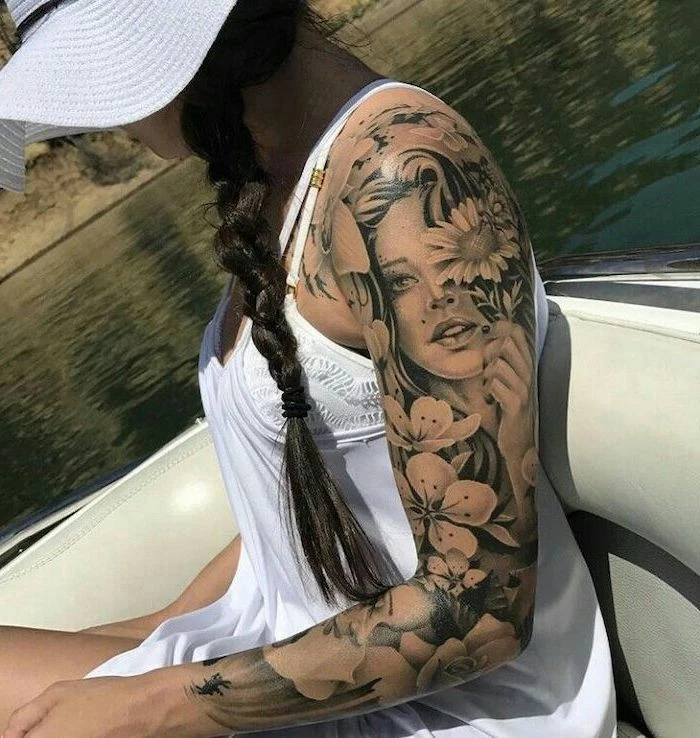
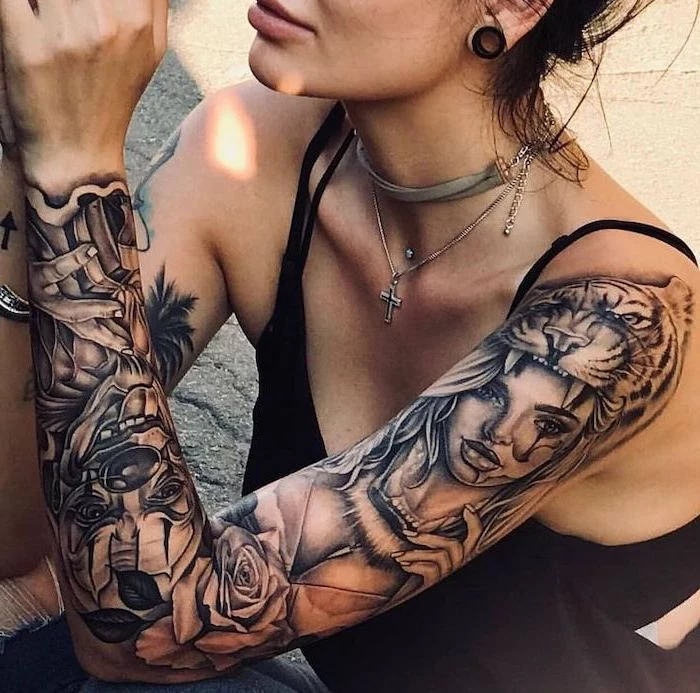
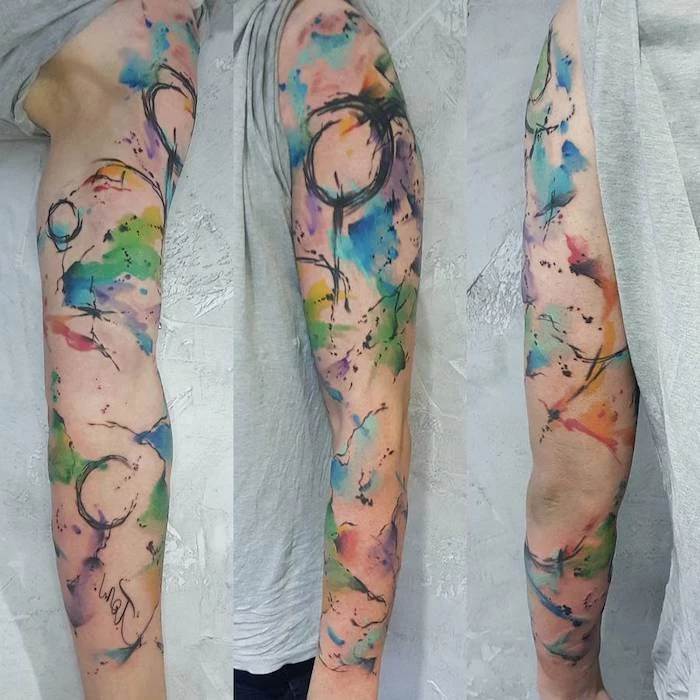
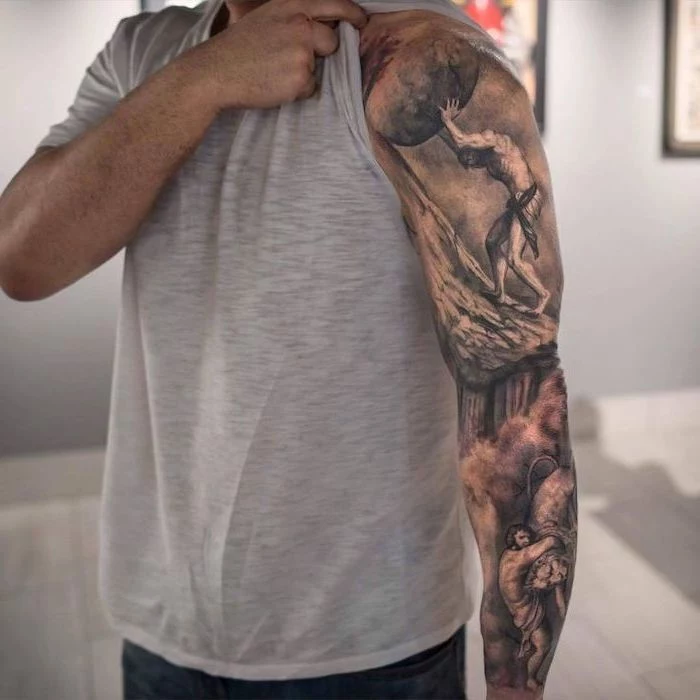
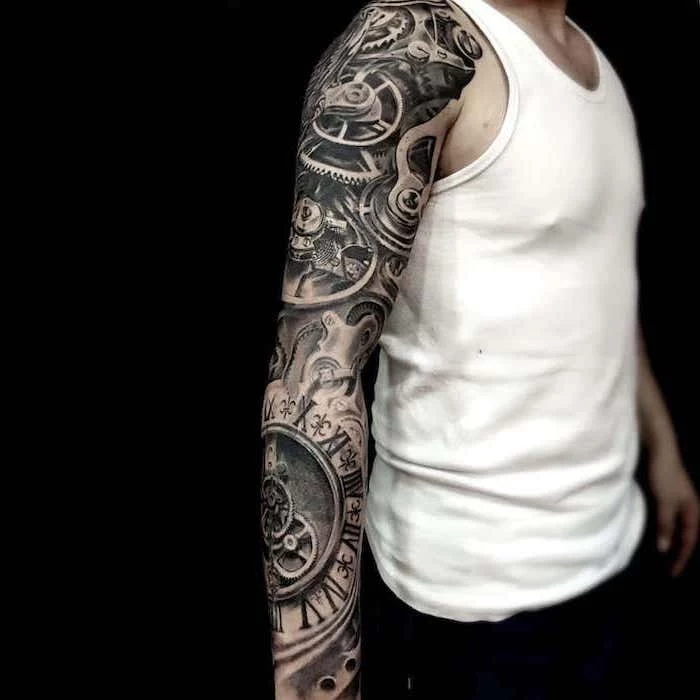
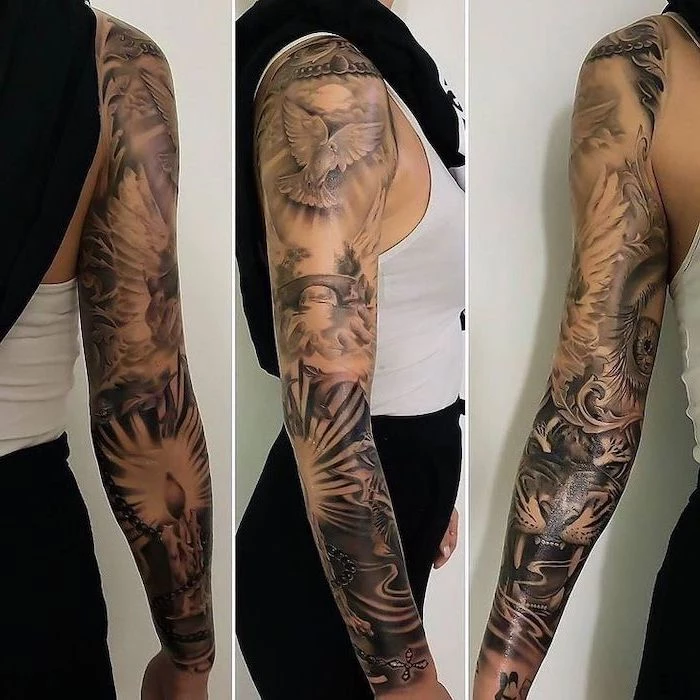
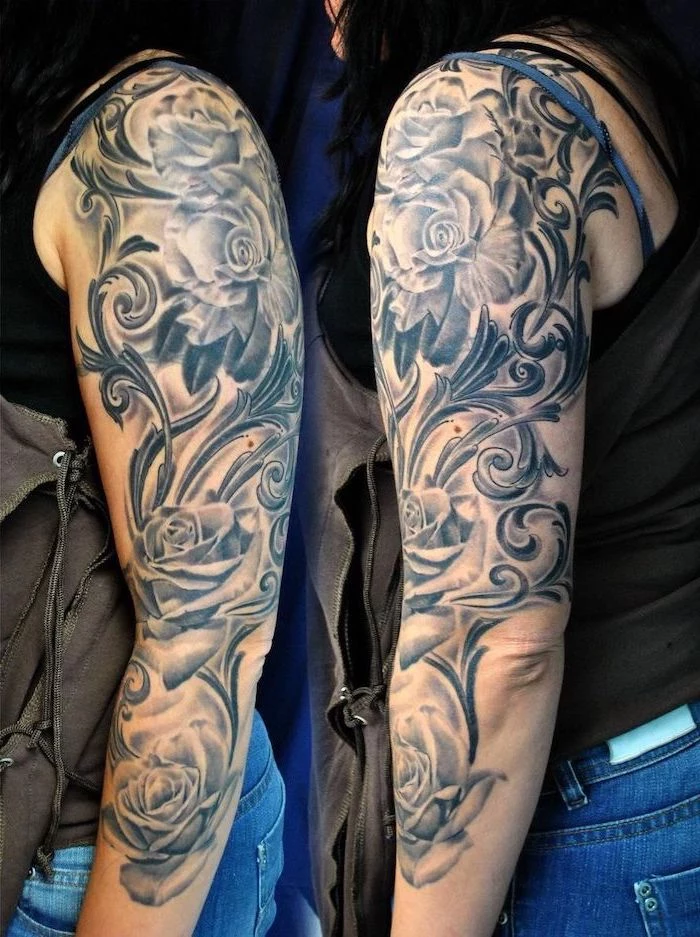
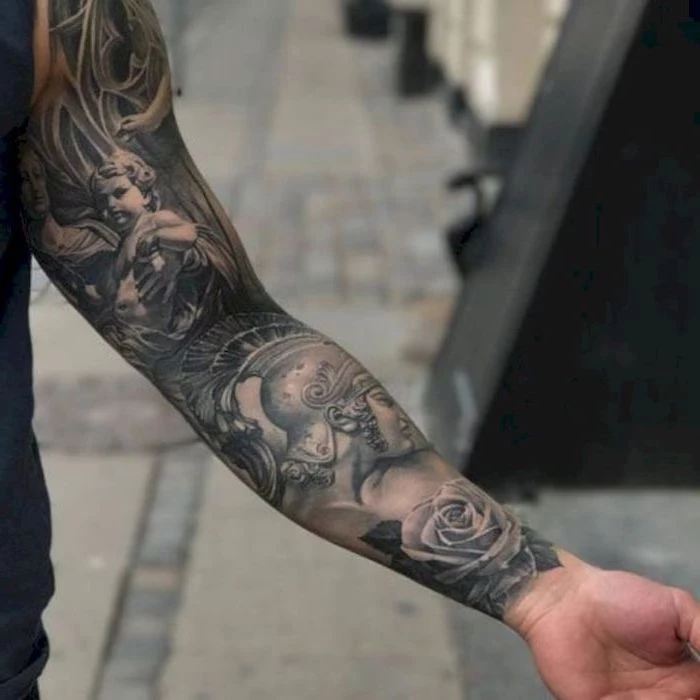
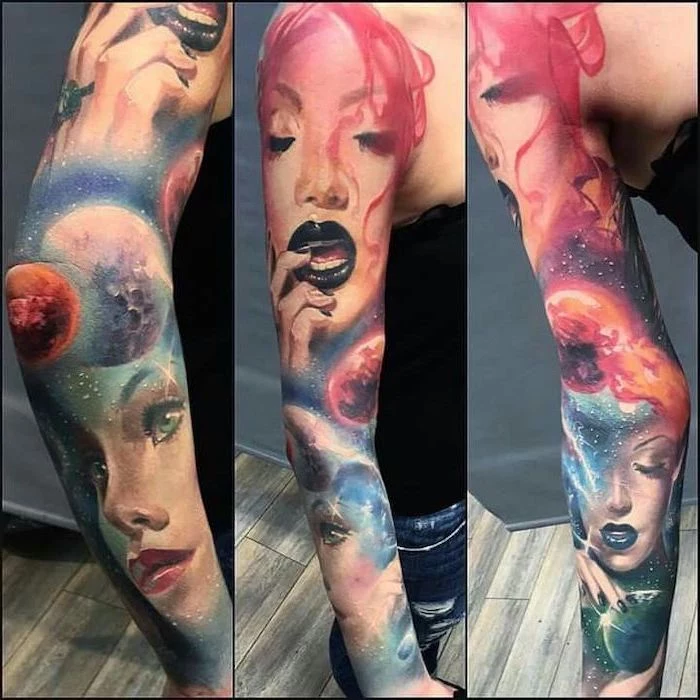
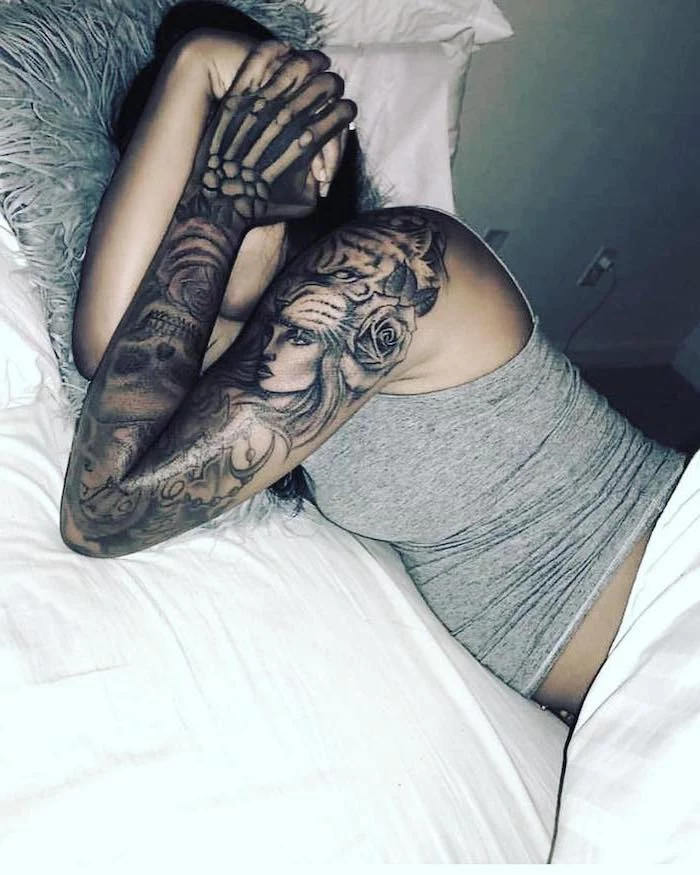
Black and Grey Realism: This is a whole different ballgame. It’s less about lines and more about creating tones, textures, and depth using diluted black ink, or “grey washes.” The biggest challenge here is getting enough contrast. A design can look amazing when it’s fresh, but if the artist doesn’t pack in enough solid black for structure, it can heal into a soft, blurry grey mess in a few years. Your skin tone is also a huge factor here, and a good artist will know how to adjust for it.
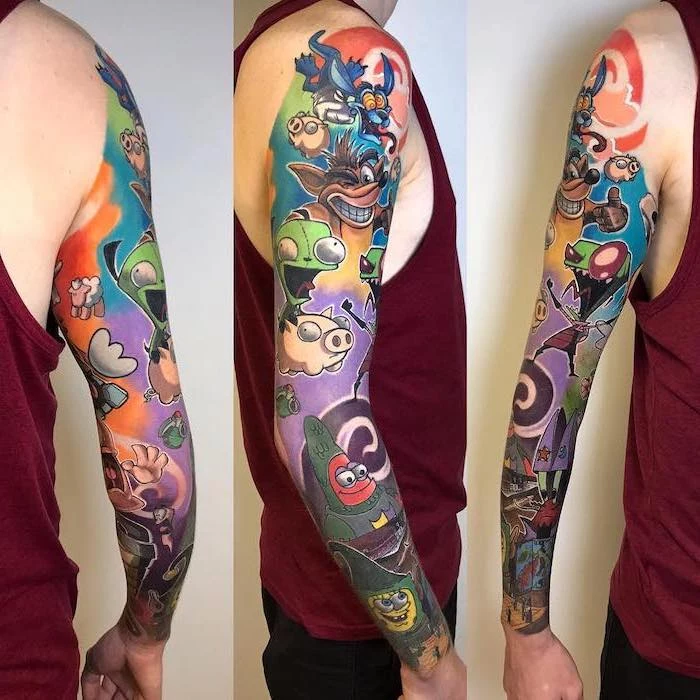
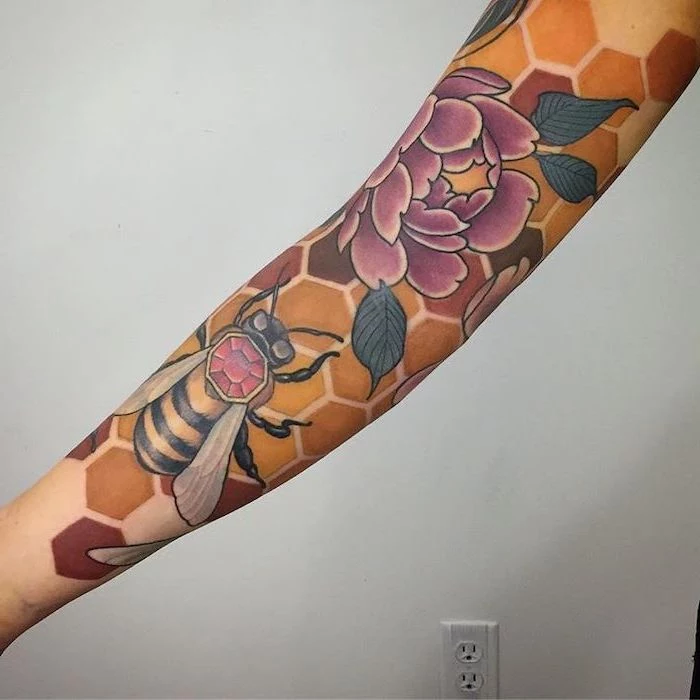
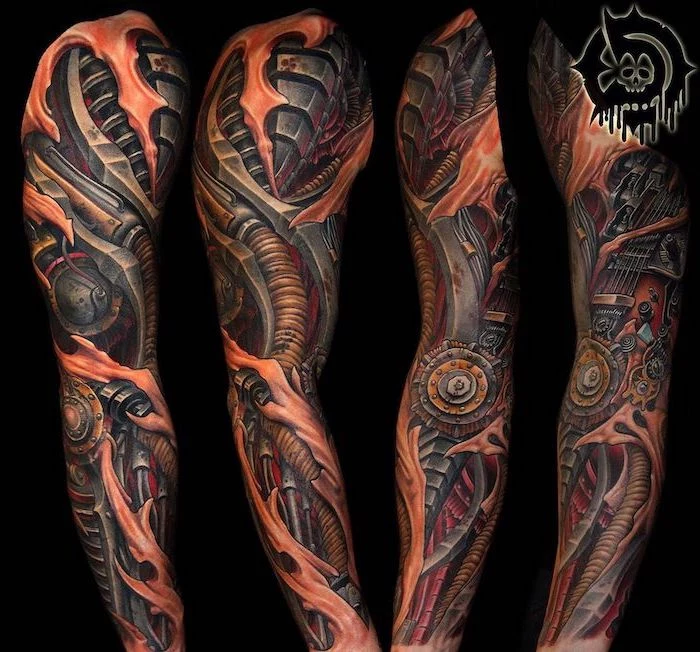
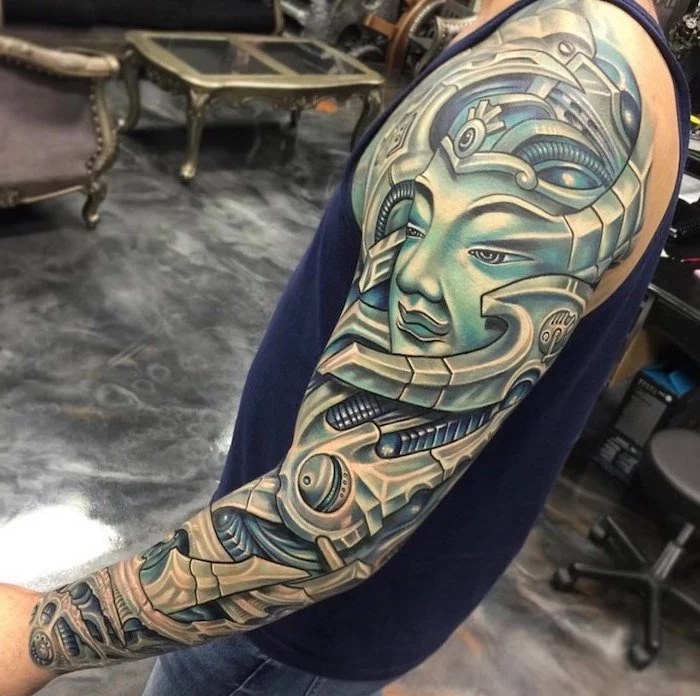
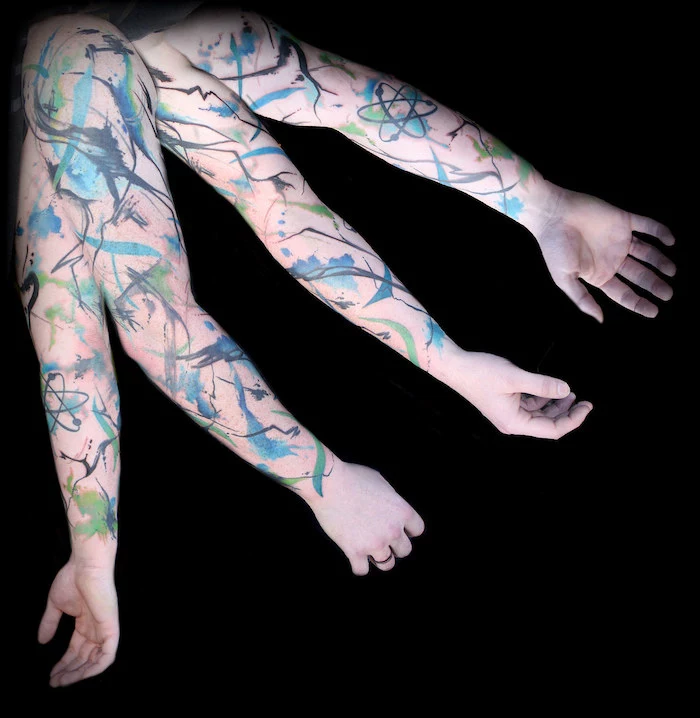
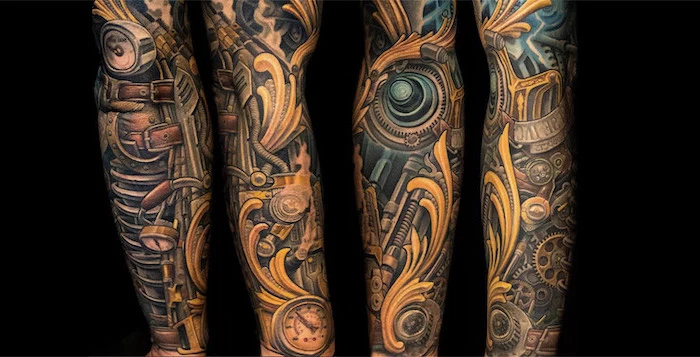
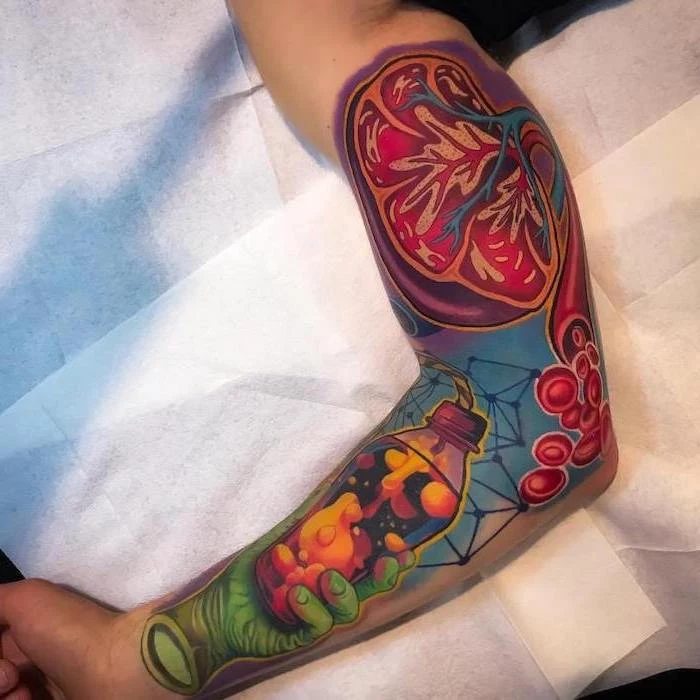
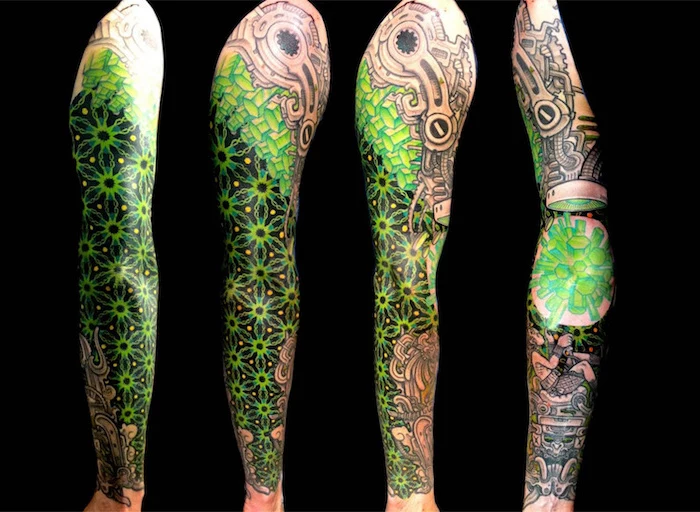
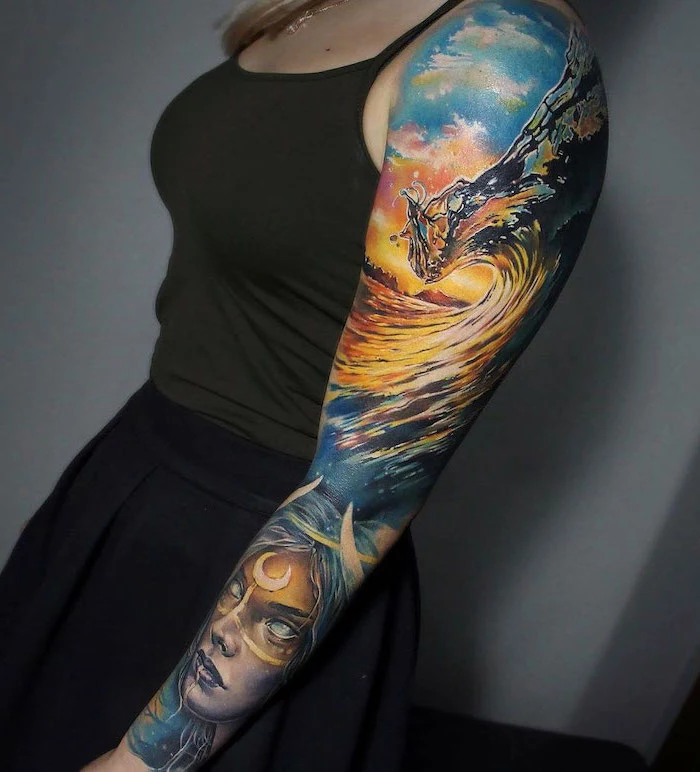
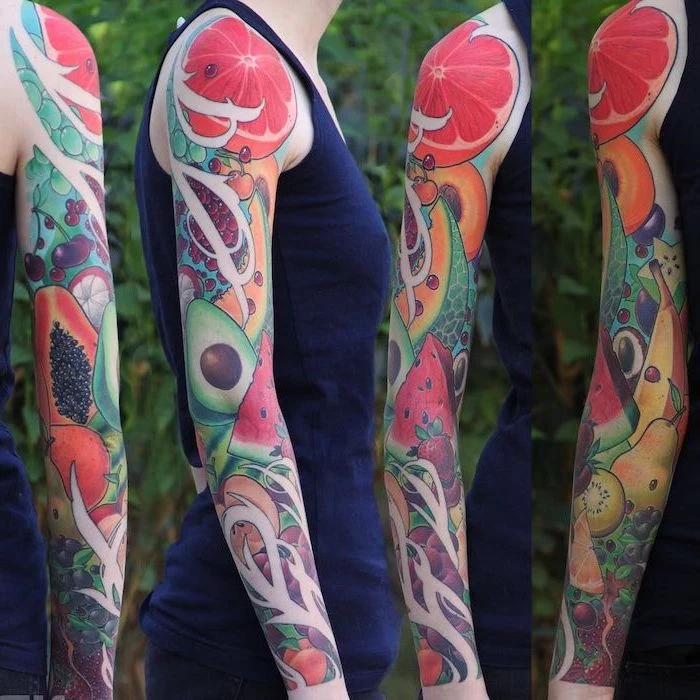
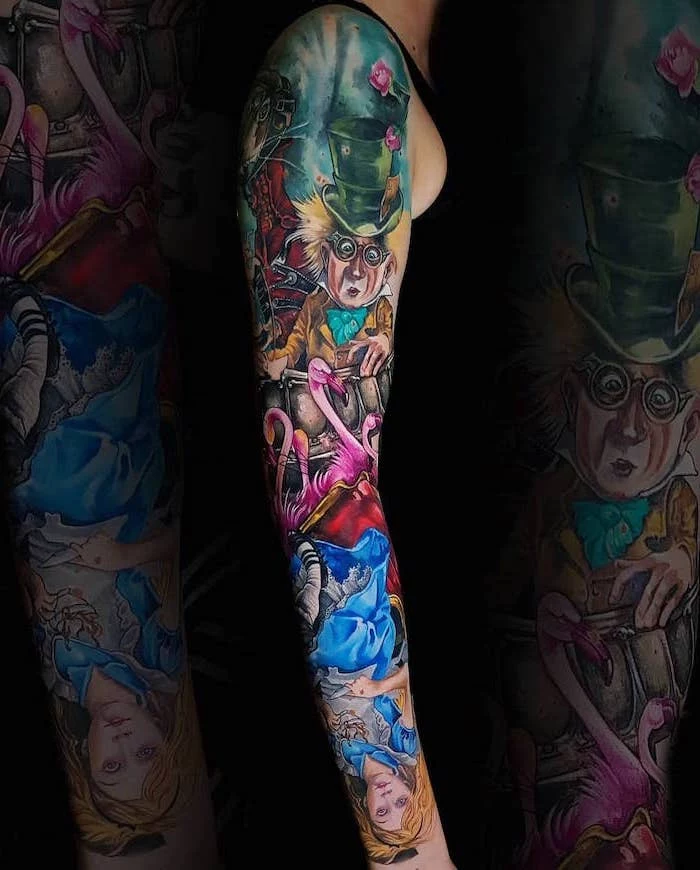
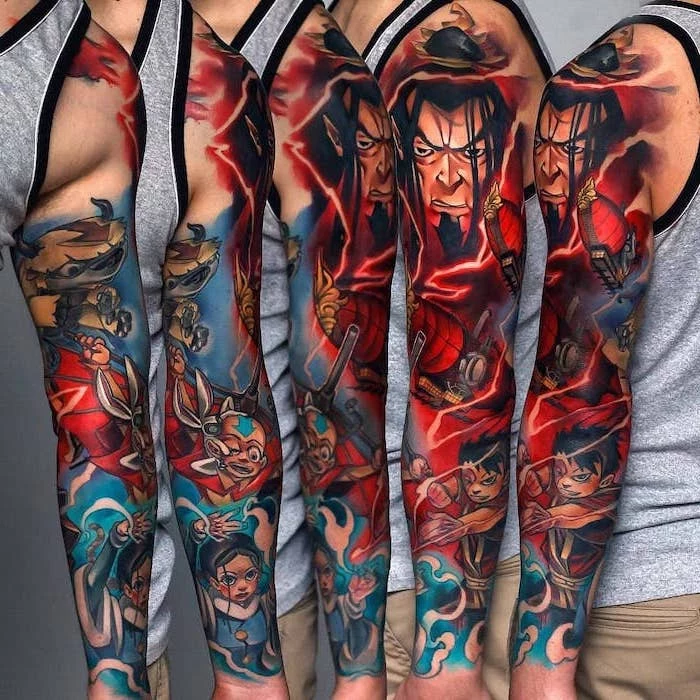
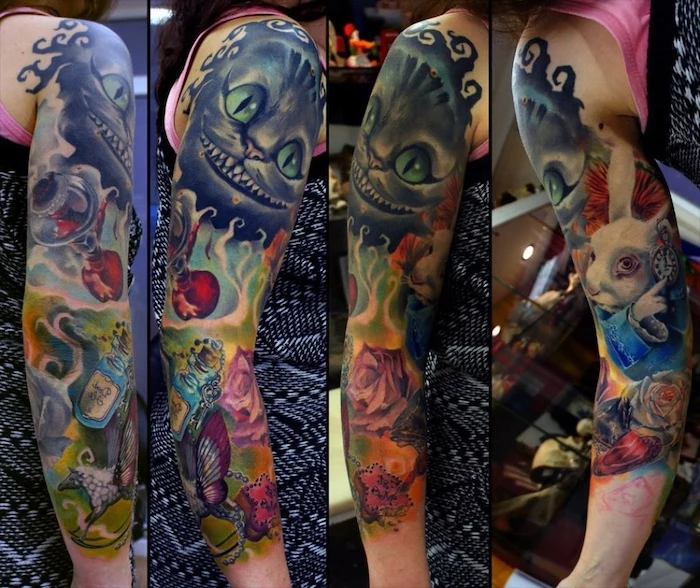
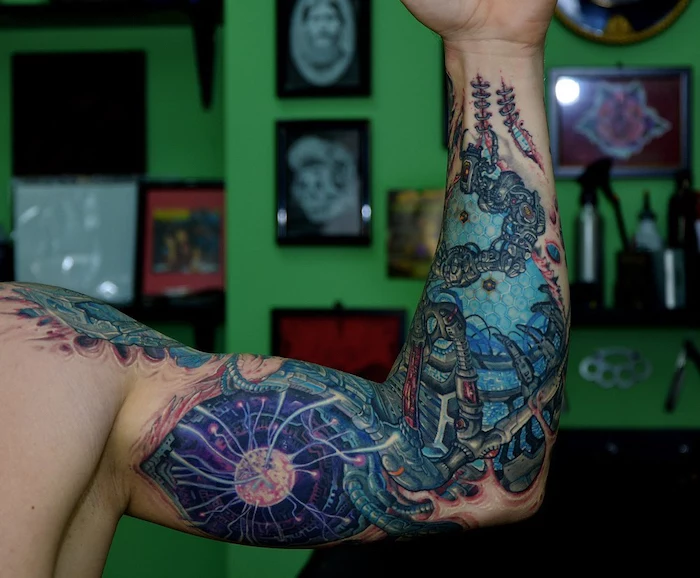
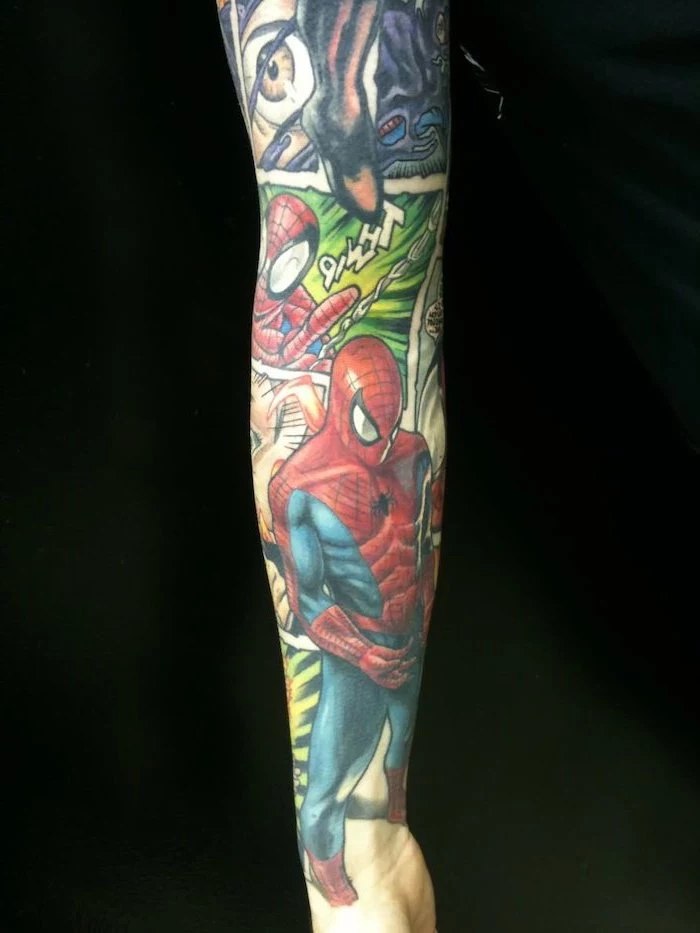
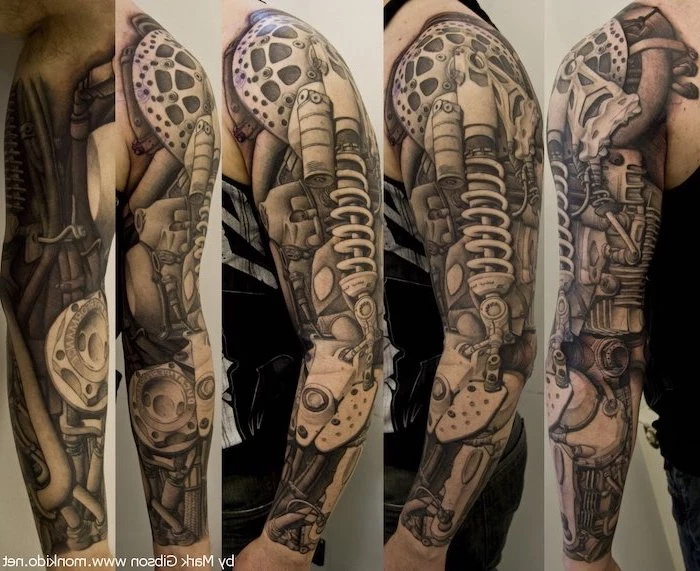
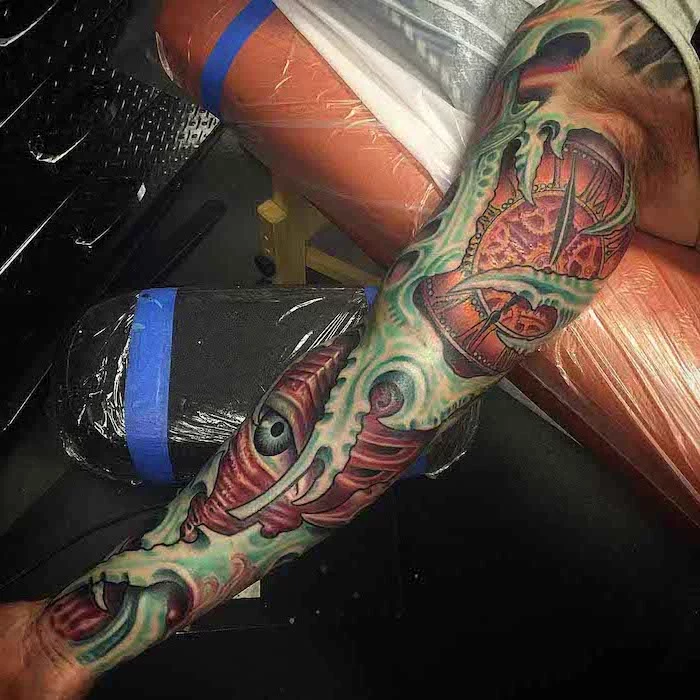
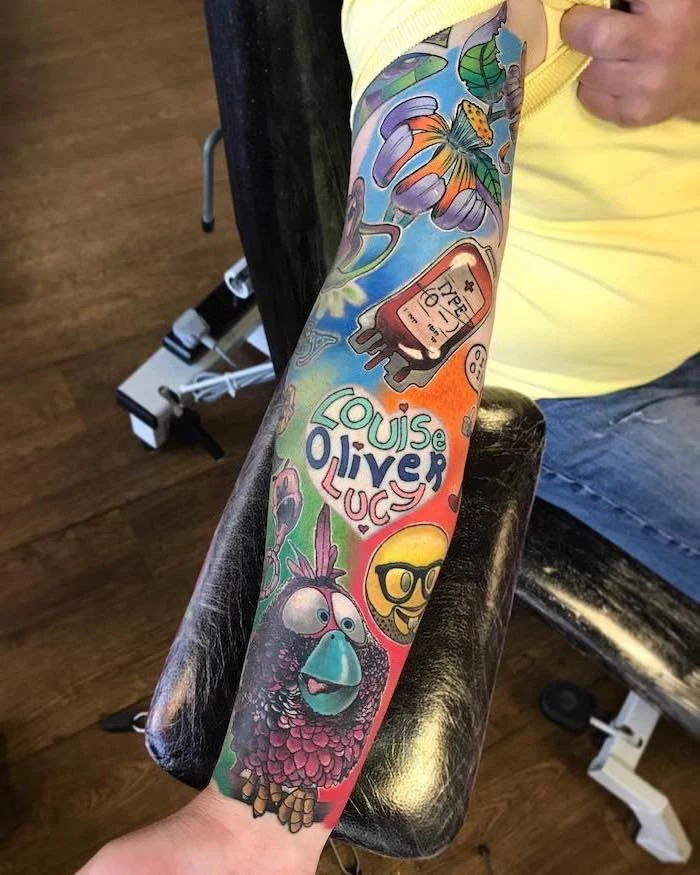
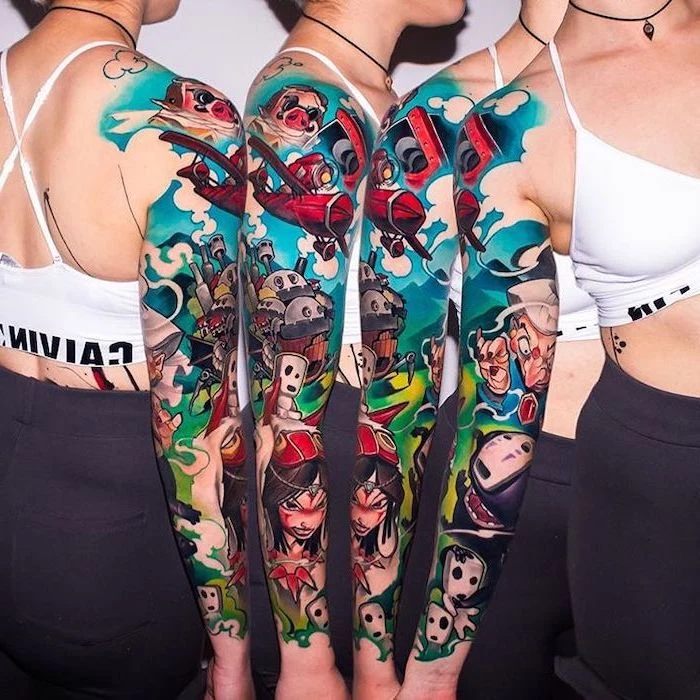
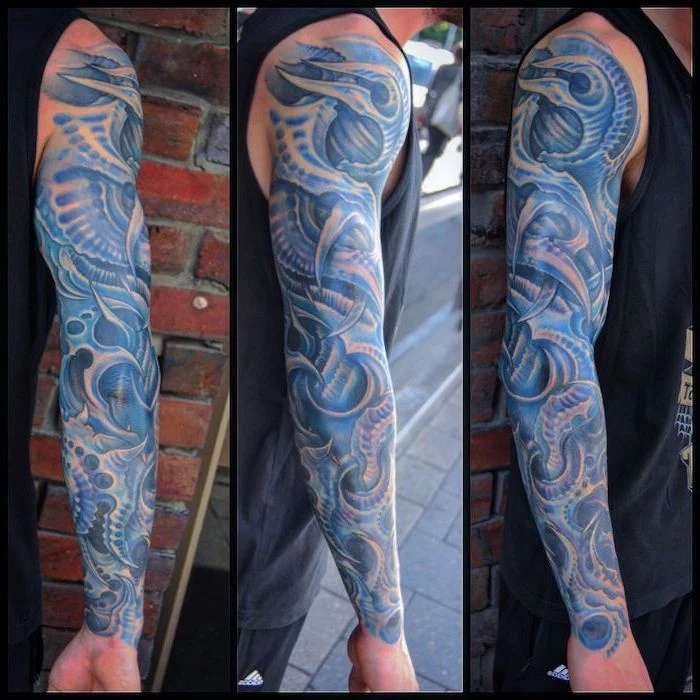
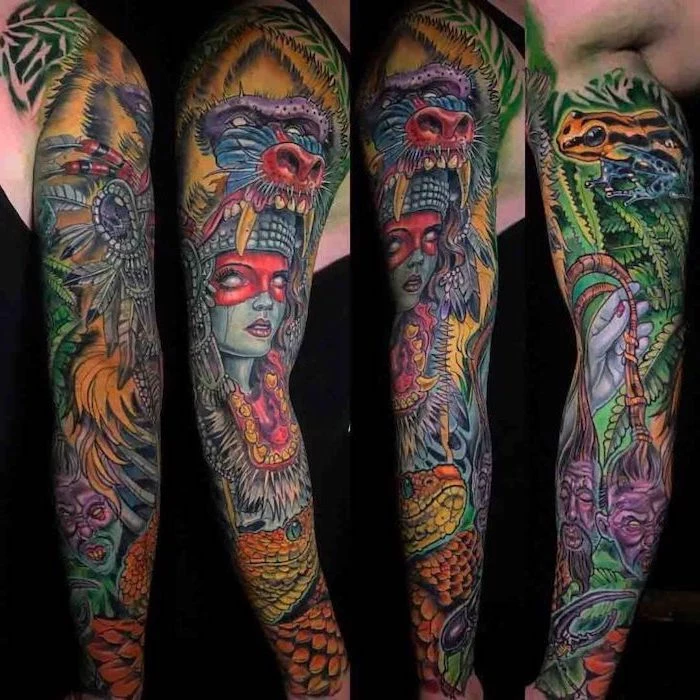
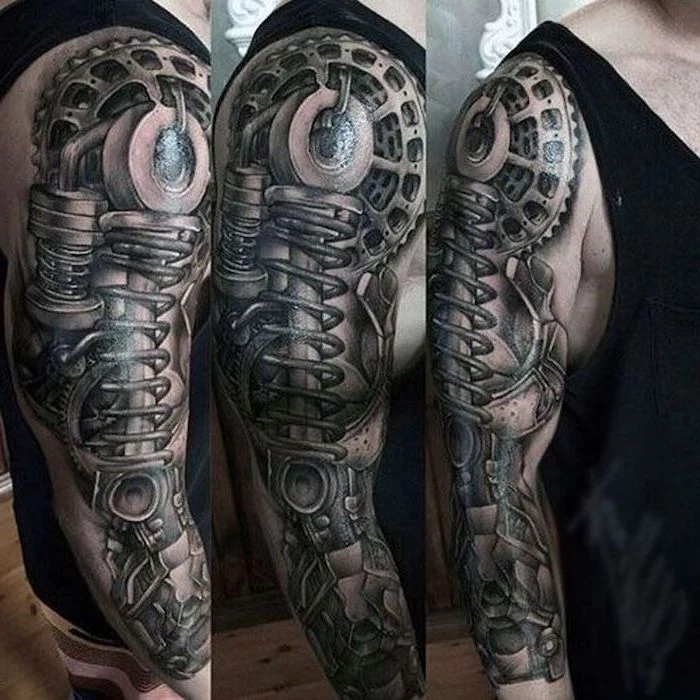
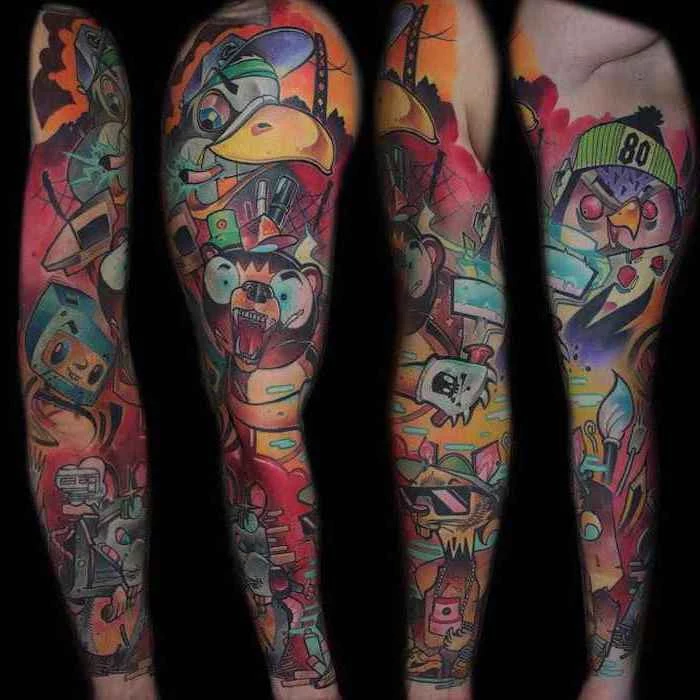
Biomechanical & Illustrative: Biomechanical art is all about making it look like your arm is made of pistons, wires, and organic machinery under the skin. To pull this off, an artist needs a serious understanding of anatomy so the design can follow the muscle groups convincingly. On the other hand, Illustrative (or “New School”) styles are known for bright, vibrant colors and exaggerated features. Modern inks are incredible and can hold amazing vibrancy, but even these wild designs rely on a solid outline to keep them looking sharp for years to come.
The Process: It’s a Marathon, Not a Sprint
Let’s be clear: no full sleeve gets done in one shot. It’s a journey. Each session is usually a 3-4 hour block, which is a manageable sweet spot for both your pain tolerance and my ability to stay focused.
Session 1 is almost always the linework. We’ll place the stencil on your arm, moving it around until the placement is absolutely perfect. Once you give the thumbs up, we begin. The outline is the skeleton of the entire piece, and it has to be clean and solid.
After that first session heals (usually 2-3 weeks), we move on to shading and color. For black and grey, this means building up the tones. For Japanese work, it’s all about laying in that background. Color is almost always the very last thing we do, as it involves fully saturating the skin with pigment.
How to Prepare for Your Tattoo Session
How you show up for your appointment makes a huge difference. Seriously.

- Eat a solid meal. Never, ever get tattooed on an empty stomach. Your blood sugar will thank you.
- Hydrate. Drink plenty of water the day before and the day of. Well-hydrated skin accepts ink much more readily.
- Get a good night’s sleep. Your body handles pain better when it’s rested.
- No alcohol for 24 hours beforehand. Alcohol thins your blood, which means more bleeding. This can literally push the ink out of your skin, leading to a faded result.
- Wear the right clothes. For an arm sleeve, a tank top or loose-fitting shirt is perfect. And don’t wear your favorite white shirt!
- Quick tip: Before you leave the studio, book your next appointment. Good artists are often booked for months, and you want to keep the momentum going on your project!
By the way, what about numbing cream? I get this question a lot. Here’s the deal: some artists are fine with it, but many aren’t. It can change the texture of the skin, making it feel rubbery and harder to work on. The biggest issue, though, is that when it wears off mid-session, the pain can come back with a vengeance. The golden rule: ALWAYS ask your artist before you show up with numbing cream on. Don’t just assume it’s okay.
Healing: Your Job Starts When You Leave the Studio
An artist can do technically perfect work, but if you botch the aftercare, you can ruin it. I’ve seen it happen. I once finished a beautiful koi fish, and the client went to a hot tub party two days later. The tattoo got a nasty infection, and we had to spend hours fixing the scarred mess. My instructions are designed to prevent exactly that.
Every artist has their own preferred method, but the core principles are the same. Protect, clean, and moisturize.
For the first couple of weeks, you need to avoid sun exposure, swimming pools, hot tubs, and soaking in a bath. Showers are fine, of course, just don’t let the water beat down on your fresh tattoo.
To make it easy, here’s a simple shopping list for your healing kit:
- Unscented Antibacterial Soap: Something simple like Dial Gold works great. You can find it anywhere for about $3.
- Recommended Ointment: A thin layer of a product like Aquaphor or a specialized tattoo balm is perfect for the first few days. A small tube costs around $5.
- Unscented Lotion: After a few days, when it starts to peel, you’ll switch to a gentle, unscented lotion. Brands like Lubriderm or Aveeno are great choices (around $8).
The peeling and itching phase is the worst. Whatever you do, do not pick or scratch it. Slapping it lightly can help with the itch. If you pull off a scab, you’re pulling ink out with it.
Long-Term Care and Covering Old Tattoos
Your sleeve is an investment that should last a lifetime. The number one enemy of your tattoo? The sun. UV rays break down ink pigments, causing vibrant colors to fade and black to turn into a blurry, sad grey. Sunscreen is not optional. If your arm is going to be in the sun, slather it with a high-SPF sunscreen. This is the single most important thing you can do.
A quick word on cover-ups and scars. Working over an old tattoo is possible, but it has limits. The new design has to be bigger and darker than the old one. For example, imagine you have a blurry, 20-year-old tribal armband. You can’t cover that solid black with a yellow sunflower. To hide it, we’d need something with a lot of dark, complex details, like a big black and grey dragon or a dense patch of dark floral work.
Working over scars is also a specialized skill. Scar tissue is unpredictable; sometimes it takes ink well, other times it doesn’t. If you have significant scarring, a good artist might ask you to get clearance from a dermatologist first. That’s for your safety, not to be difficult.
How to Find the Right Artist and Studio
So, how do you find one of these pros? It’s easier than you think.
Start on social media, especially Instagram. Here’s a simple game plan:
- Search with hashtags. Look for
[stylename]tattoo (e.g.,
japanesetattoo,
americantraditionaltattoo) and
[yourcity]tattooartist (e.g., #nyctattooartist).
- Scrutinize their portfolio. Don’t just look at the fresh, glossy photos taken right after a session. A great artist will proudly show off their HEALED WORK. That’s the true test of their skill. How does it look after a month? A year?
- Check out the studio. When you go for a consultation, look around. Is it clean? Do they open fresh needles in front of you? Do they wear gloves and use plastic barriers on their equipment? These are non-negotiable safety standards.
A sleeve is a serious journey, but it’s one of the most rewarding. It’s a collaboration that becomes a permanent part of your story. So take your time, do your research, save your money, and trust the process. I promise you, the result will be worth every second.
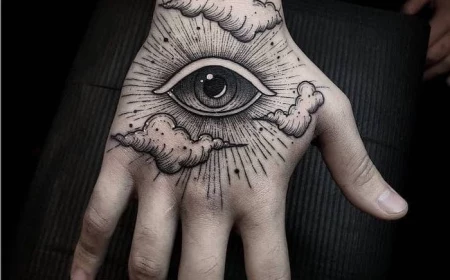
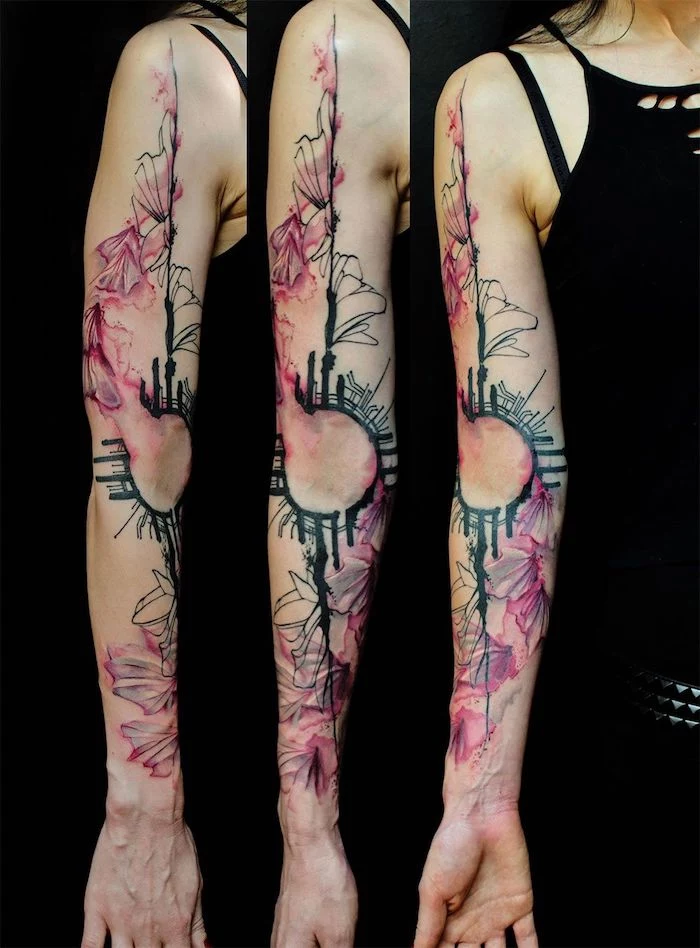
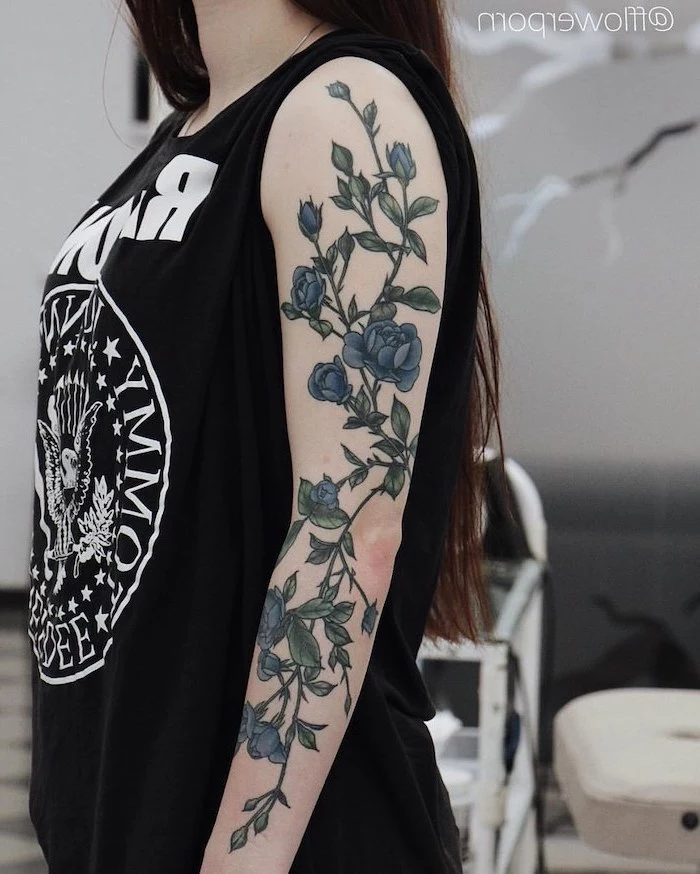
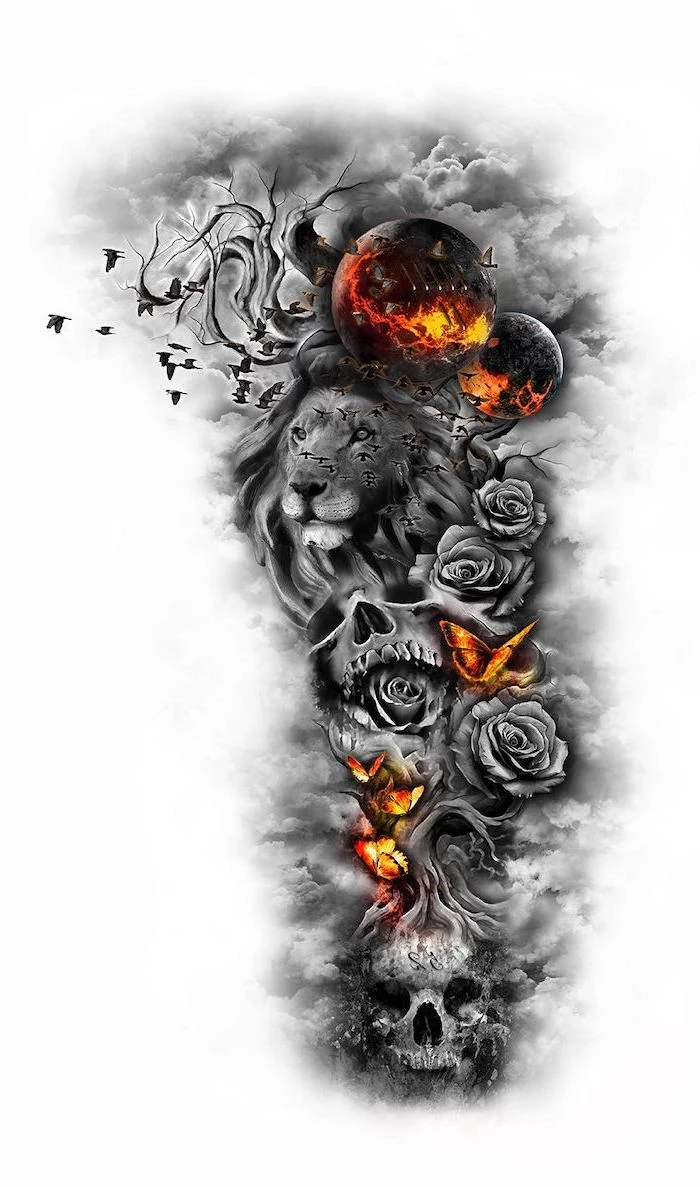
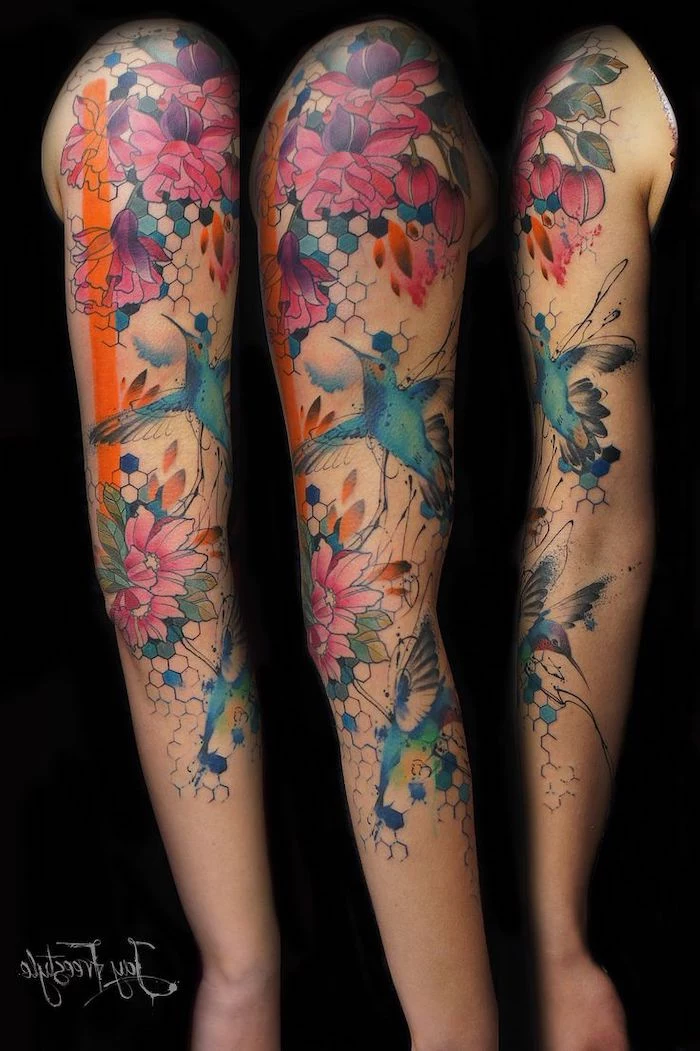
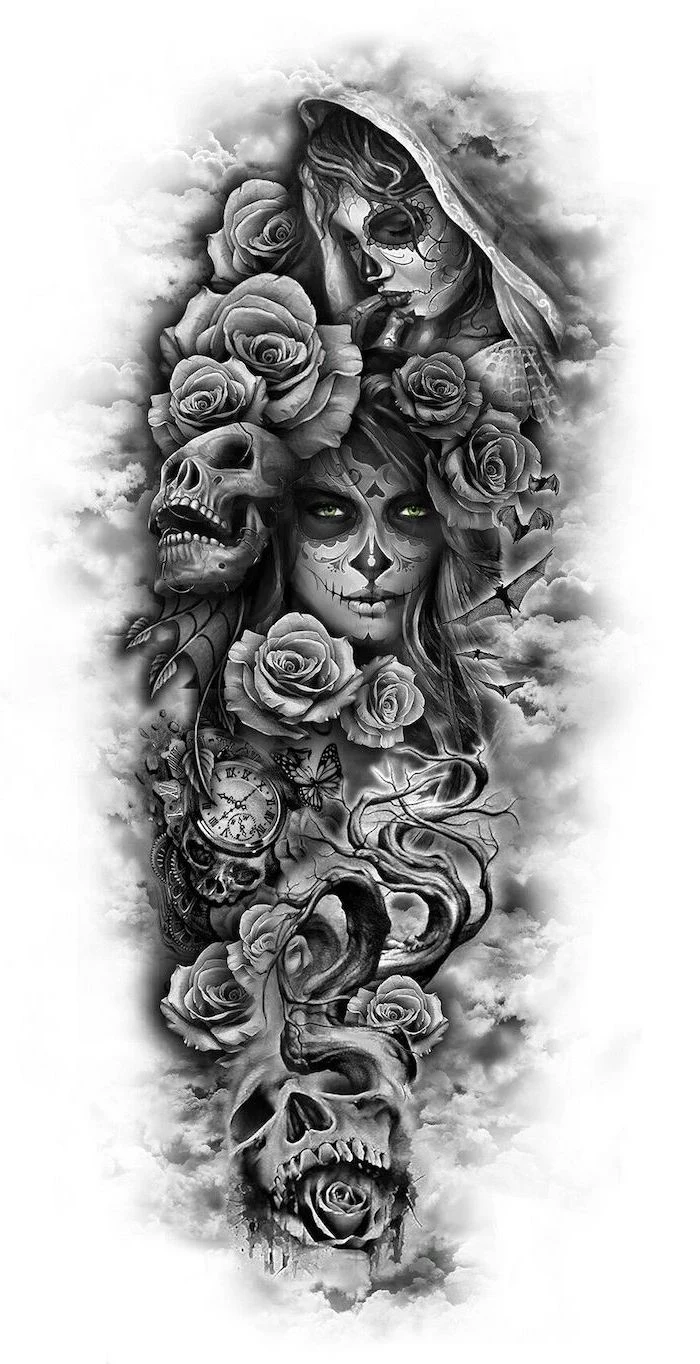
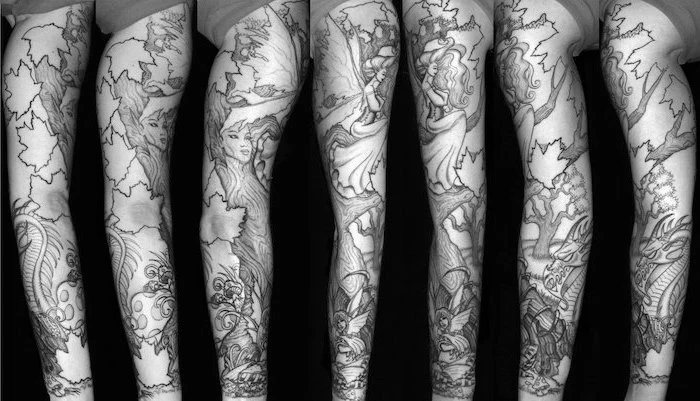
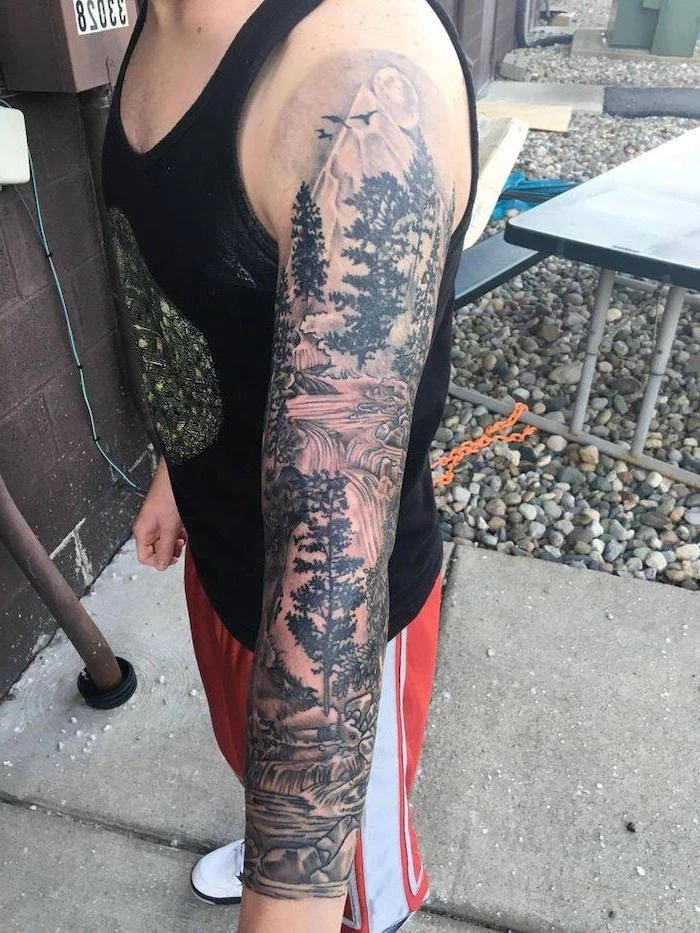
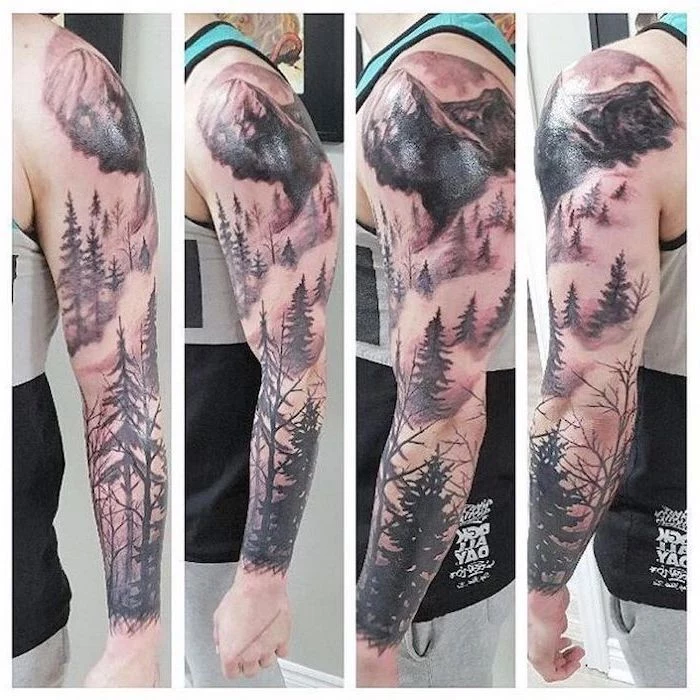
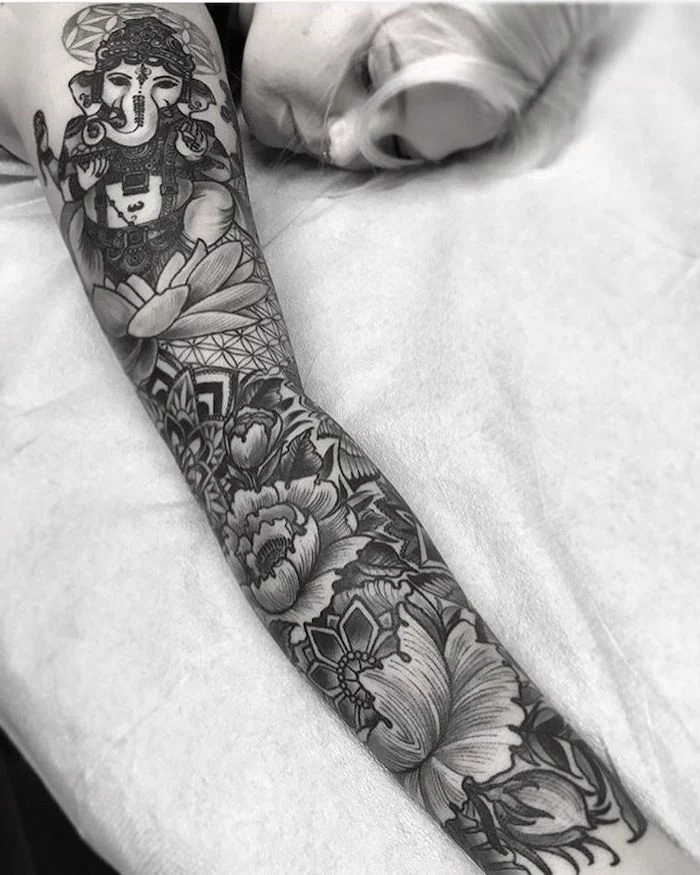
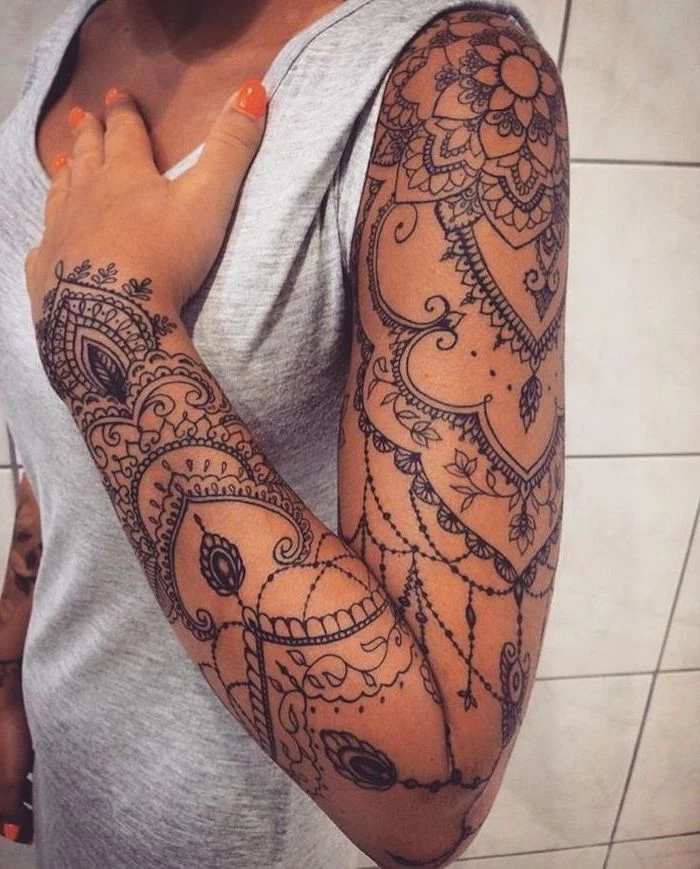
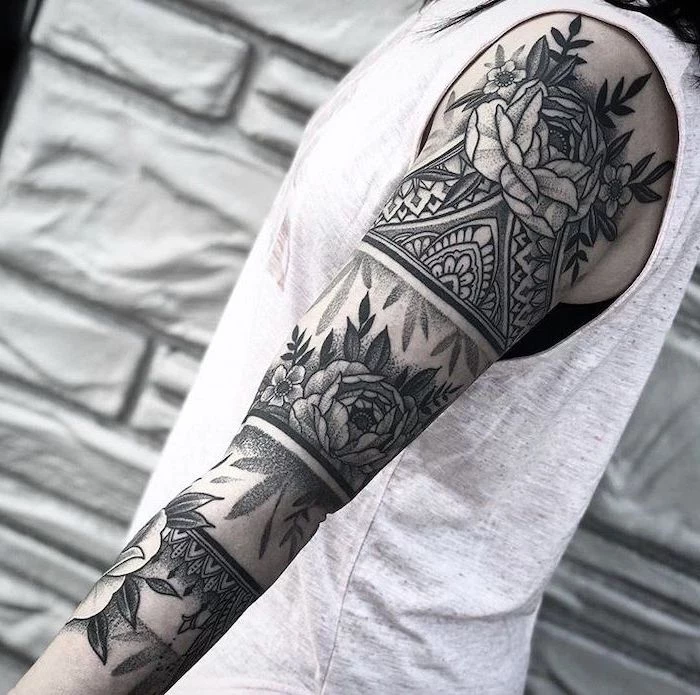
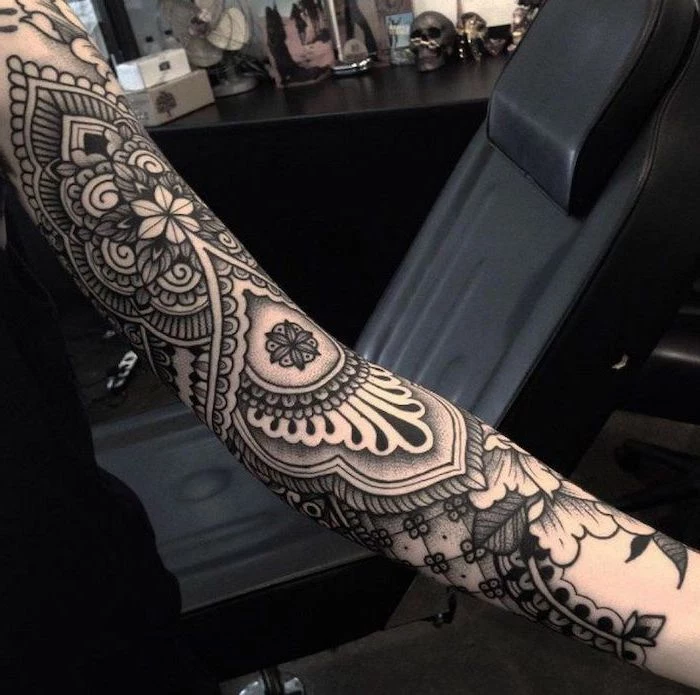
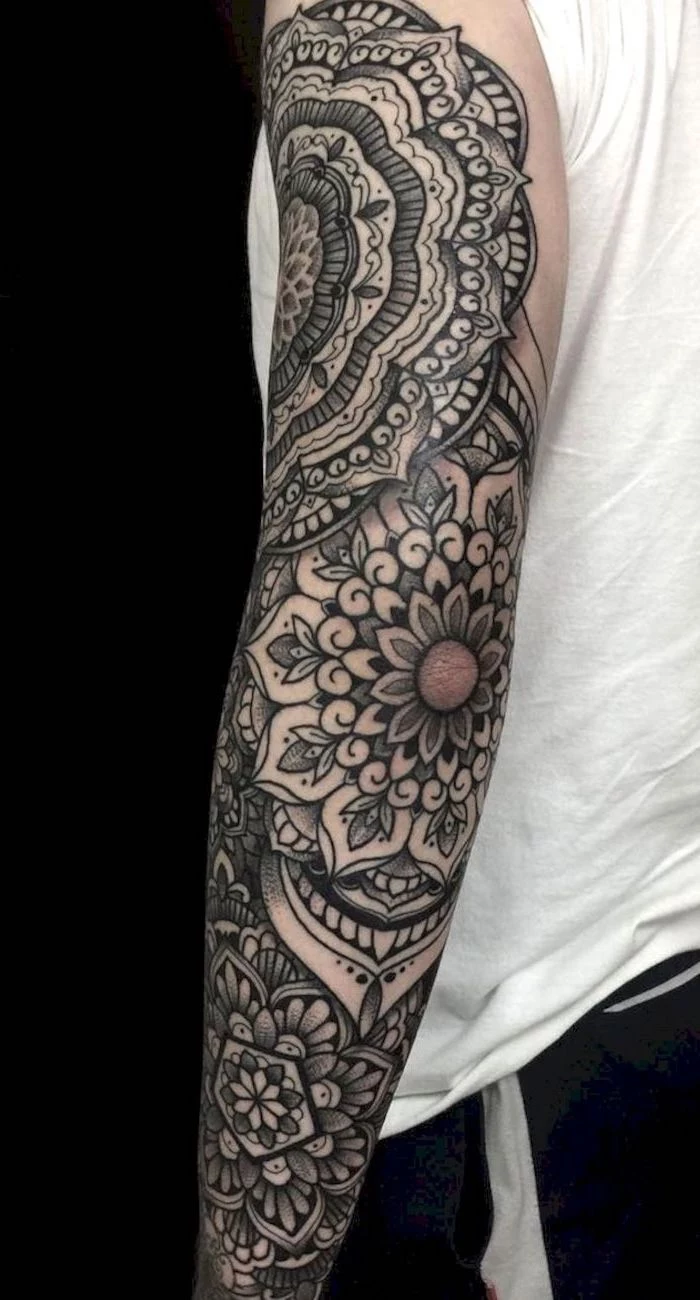
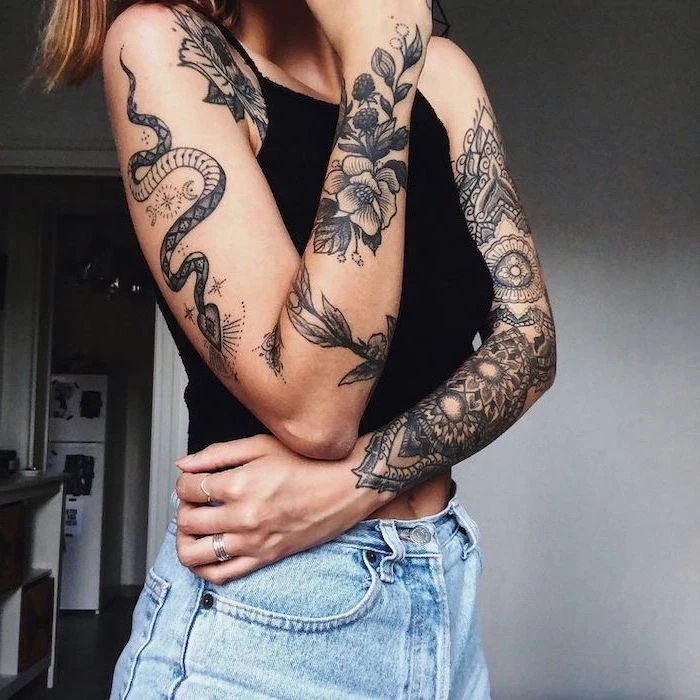
Inspiration Gallery
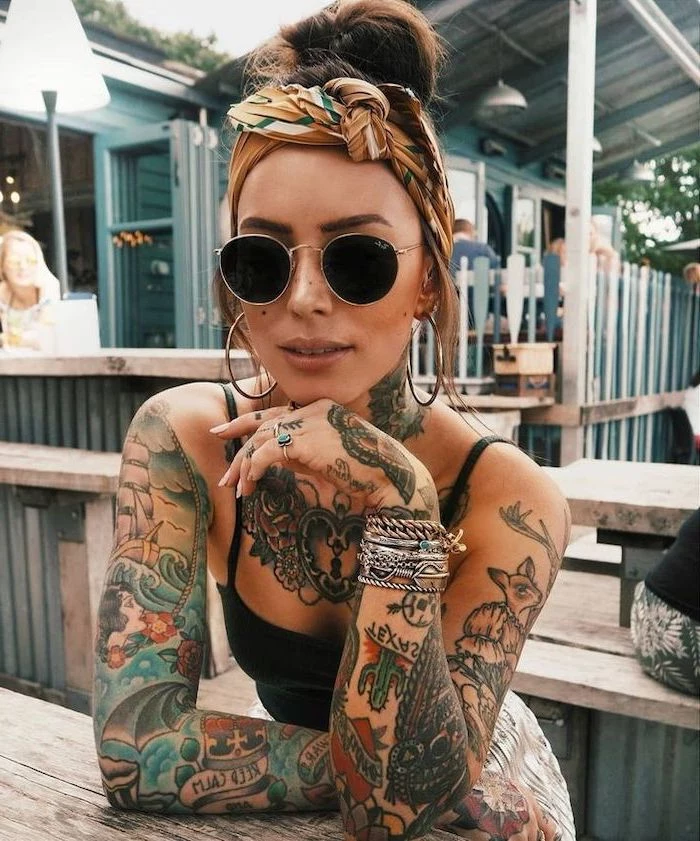
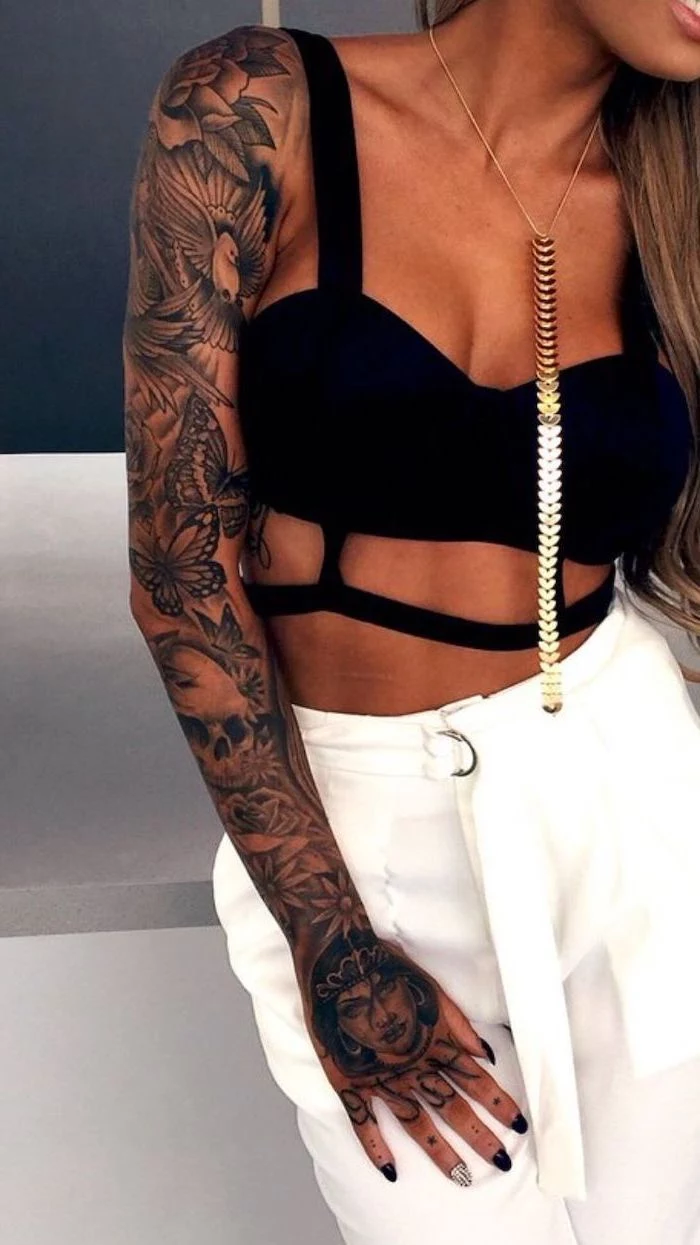
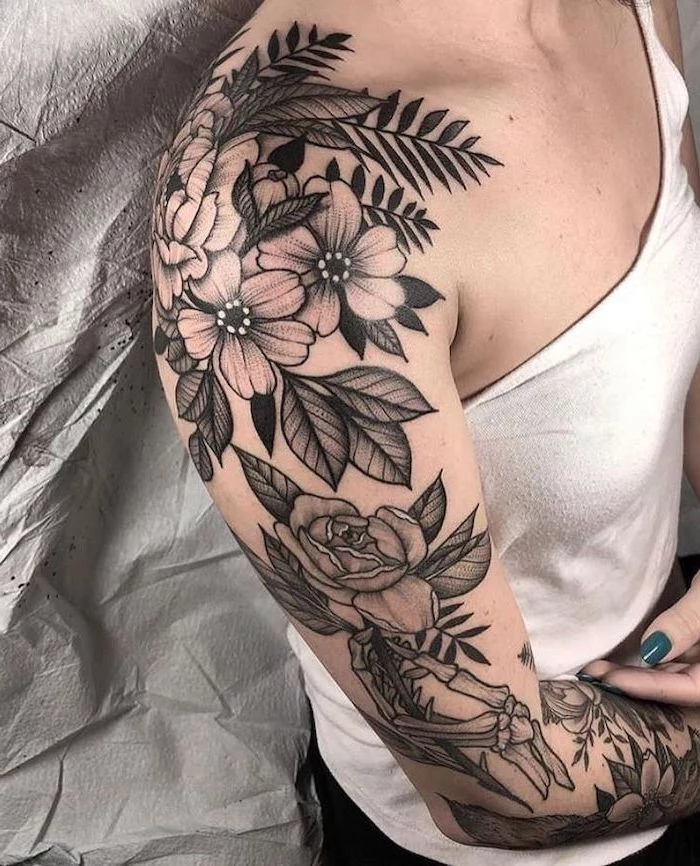
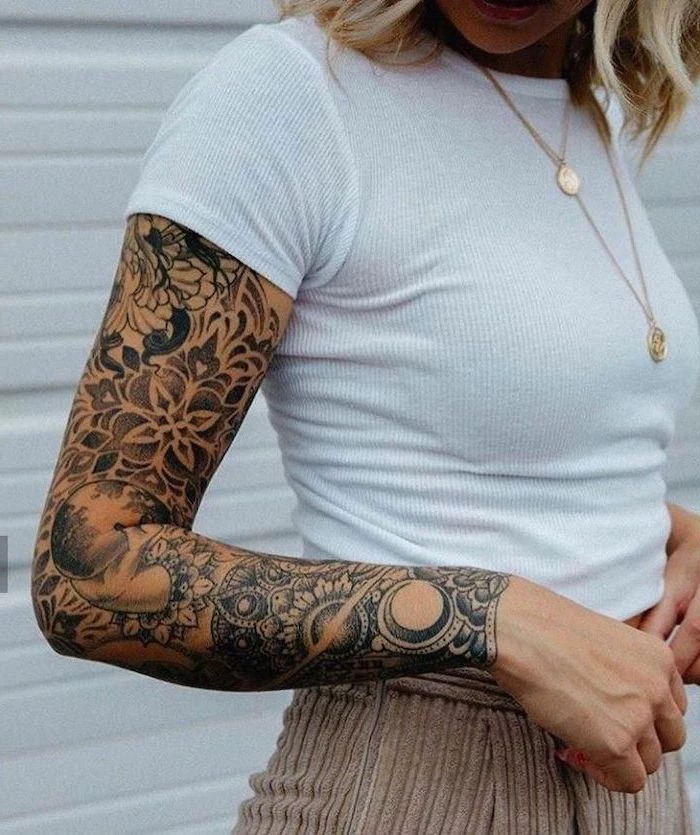
- Cohesive flow from shoulder to wrist.
- Bold lines that will hold for decades.
- A balanced mix of detailed areas and “rest spots” for the eye.
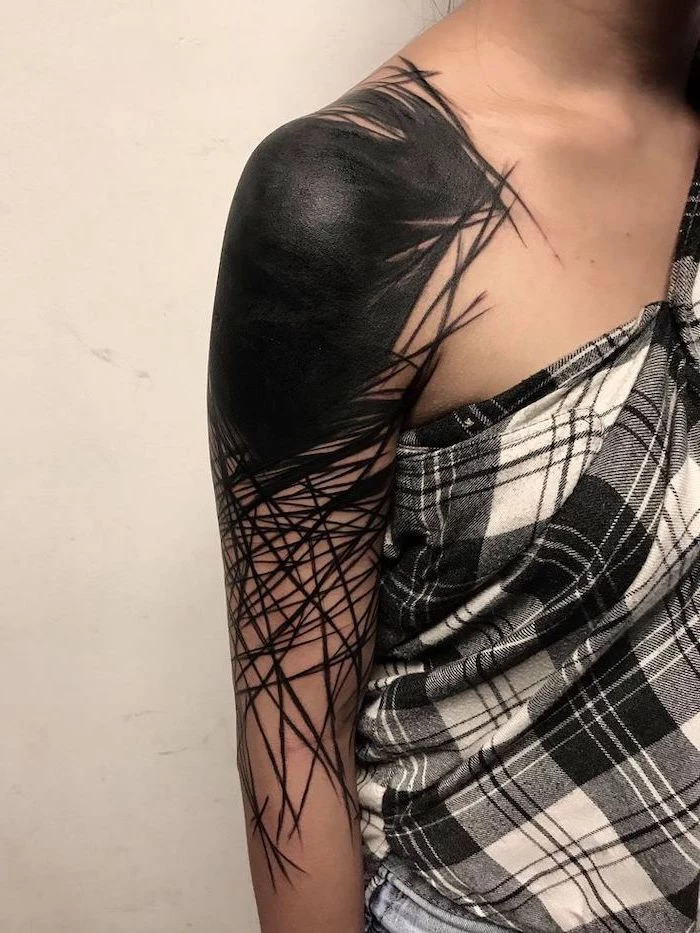
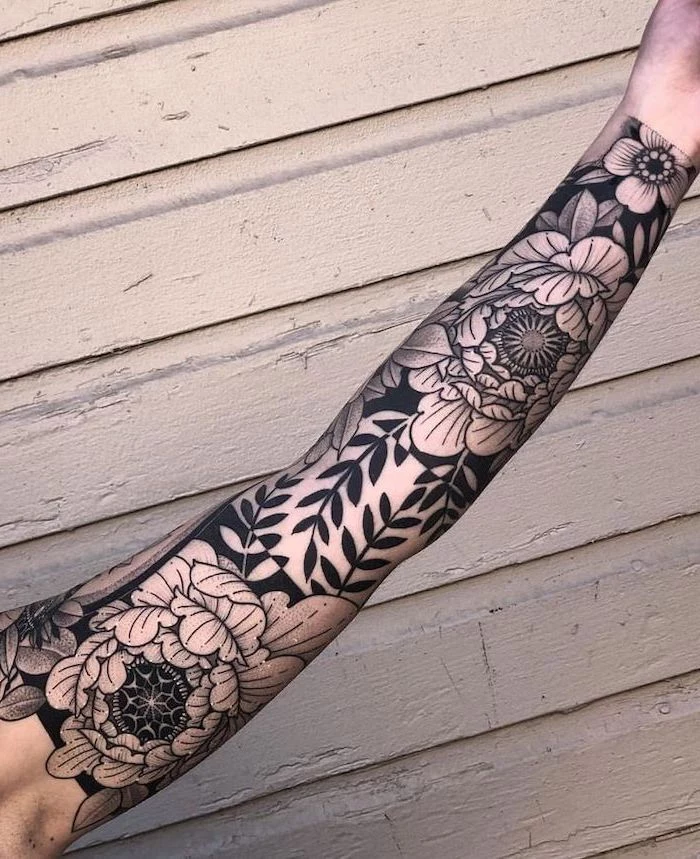
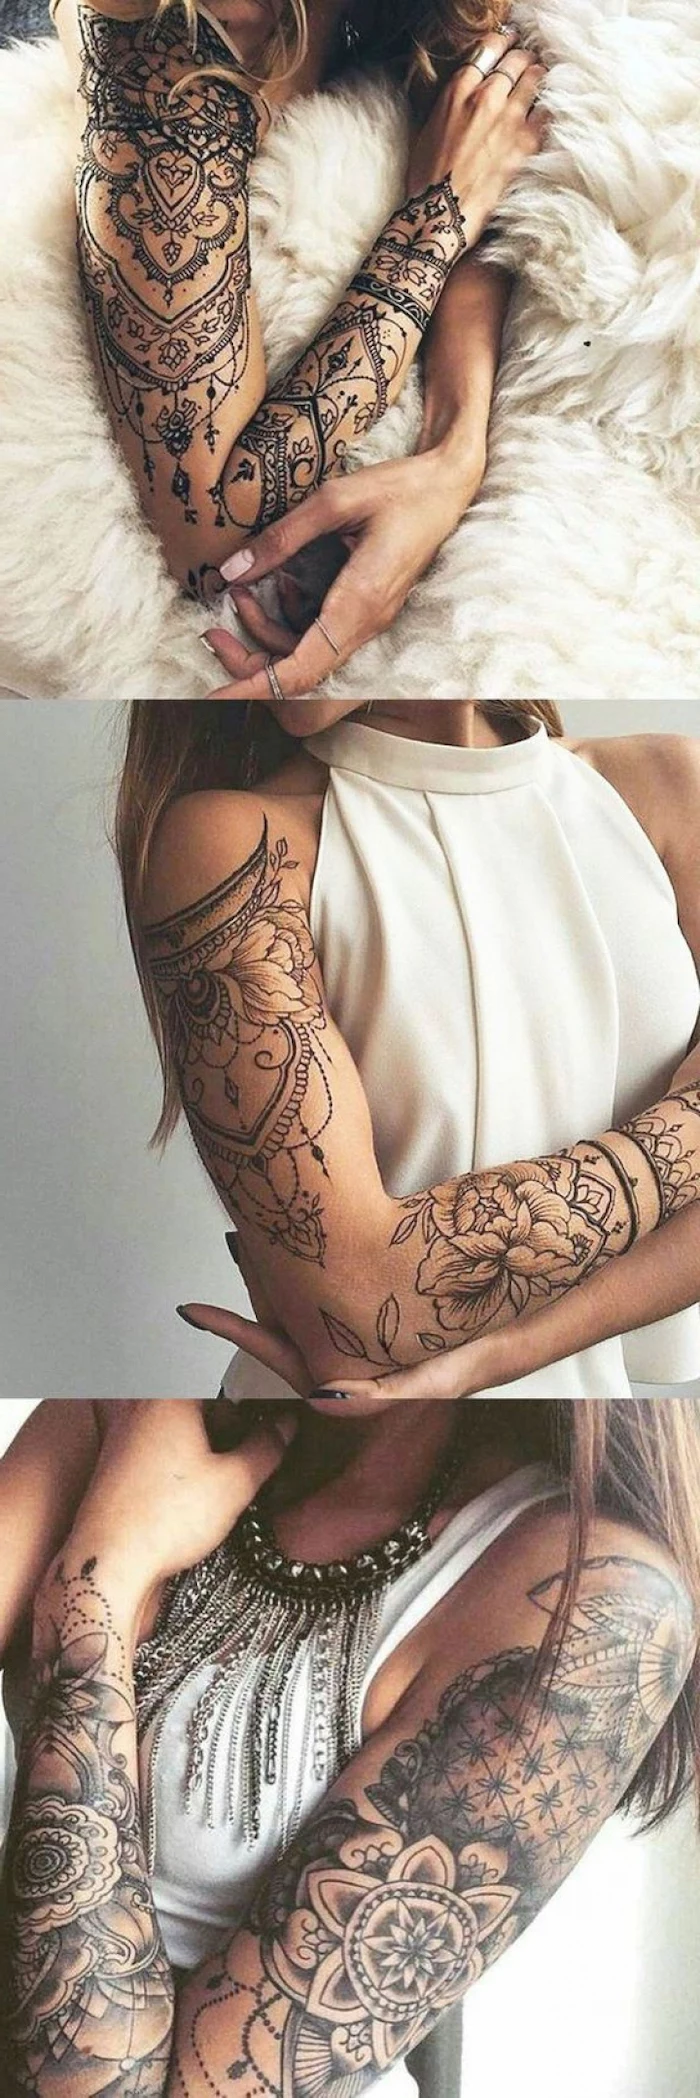
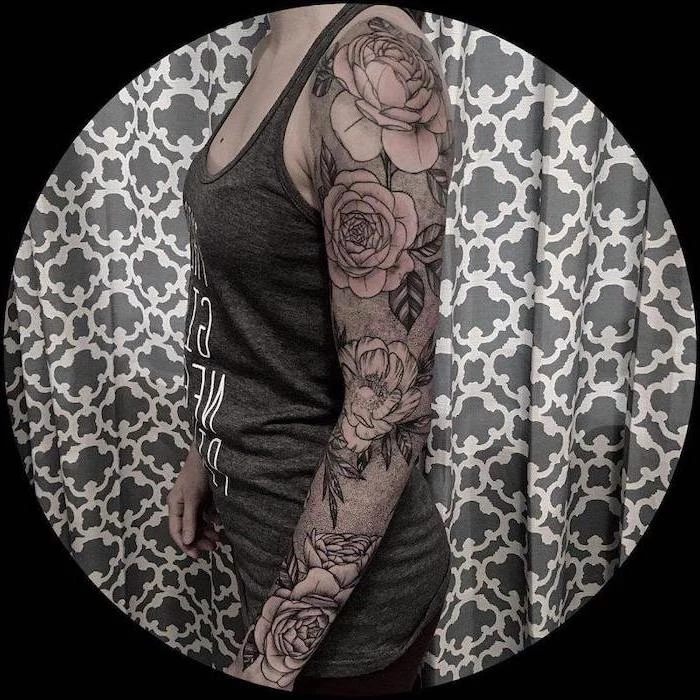
The secret? It’s not about cramming in every idea you have. A truly masterful sleeve is as much about the skin left untouched—the negative space—as it is about the ink. This space guides the eye and gives the main elements room to breathe, ensuring your art looks like it belongs on your body, not just stuck on top of it.
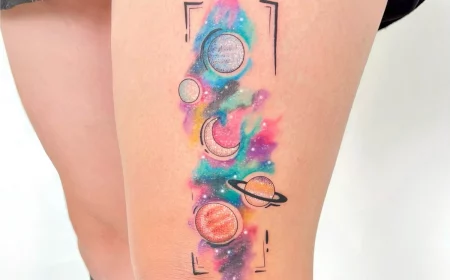
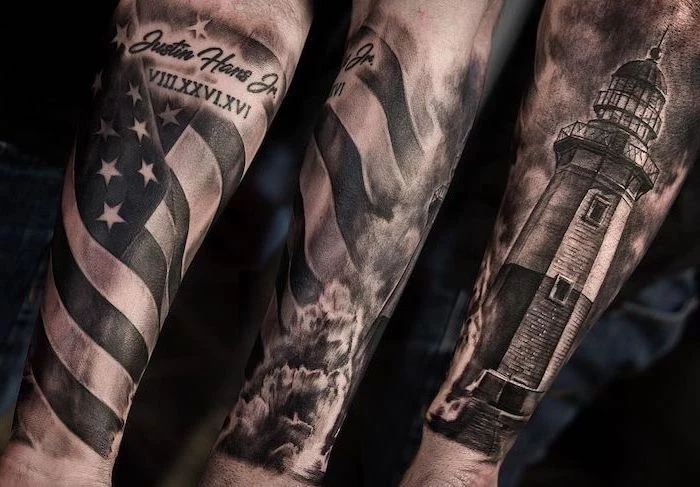
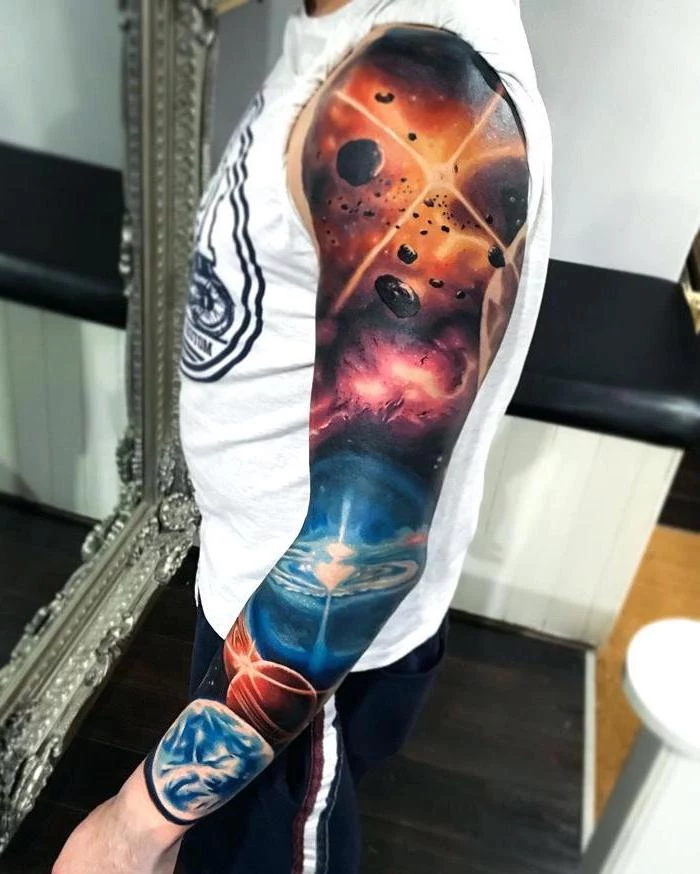
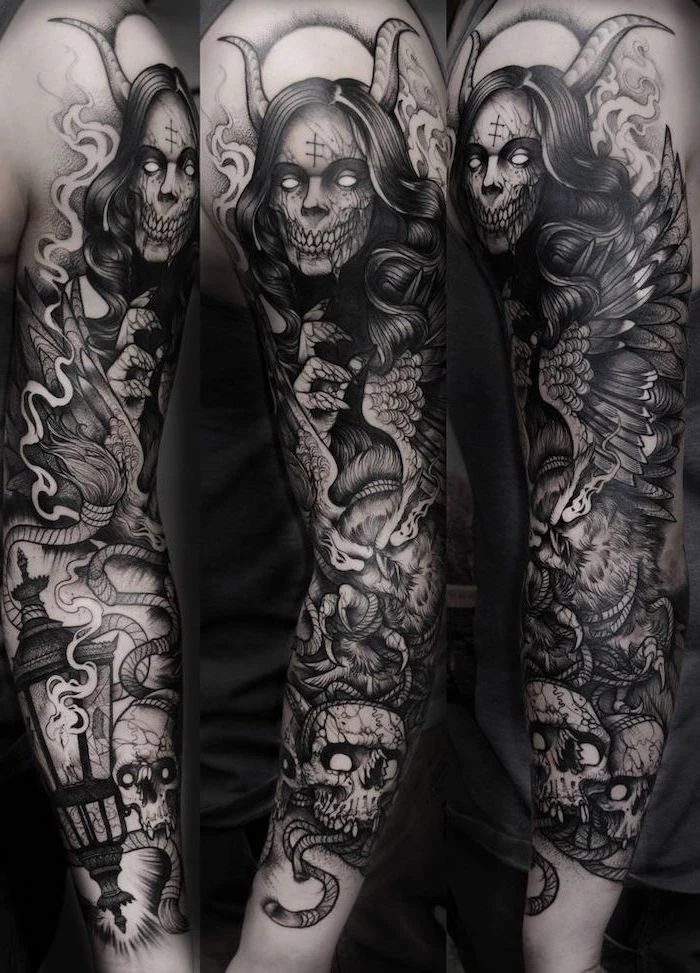
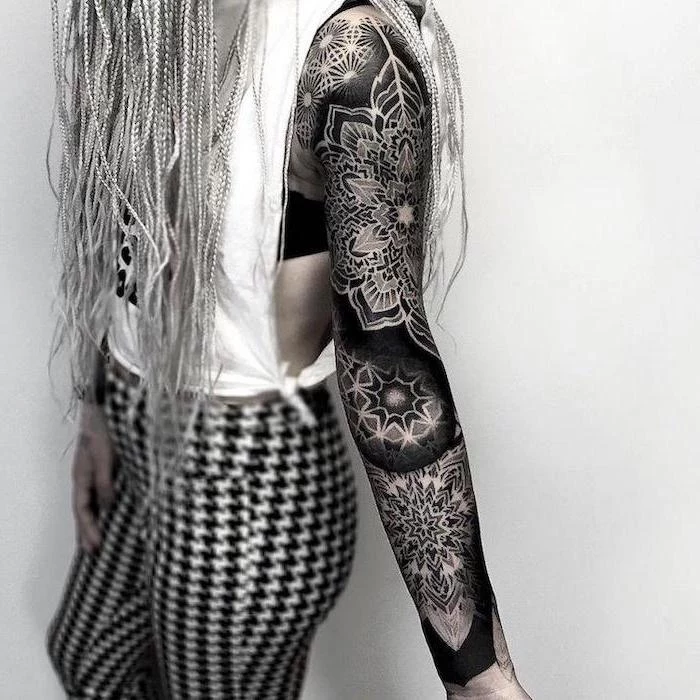
Color vs. Black & Grey: The Longevity Question.
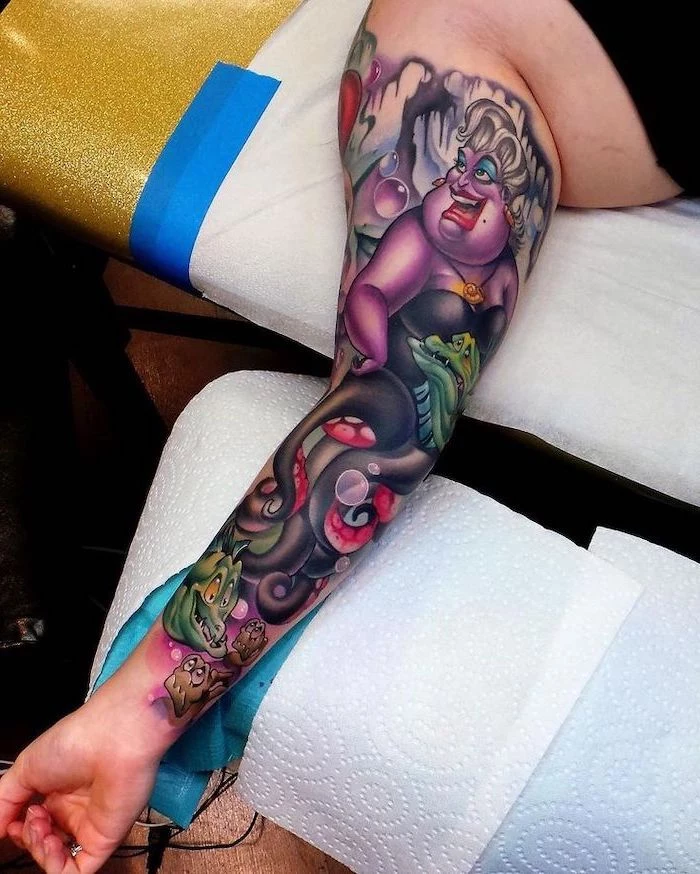
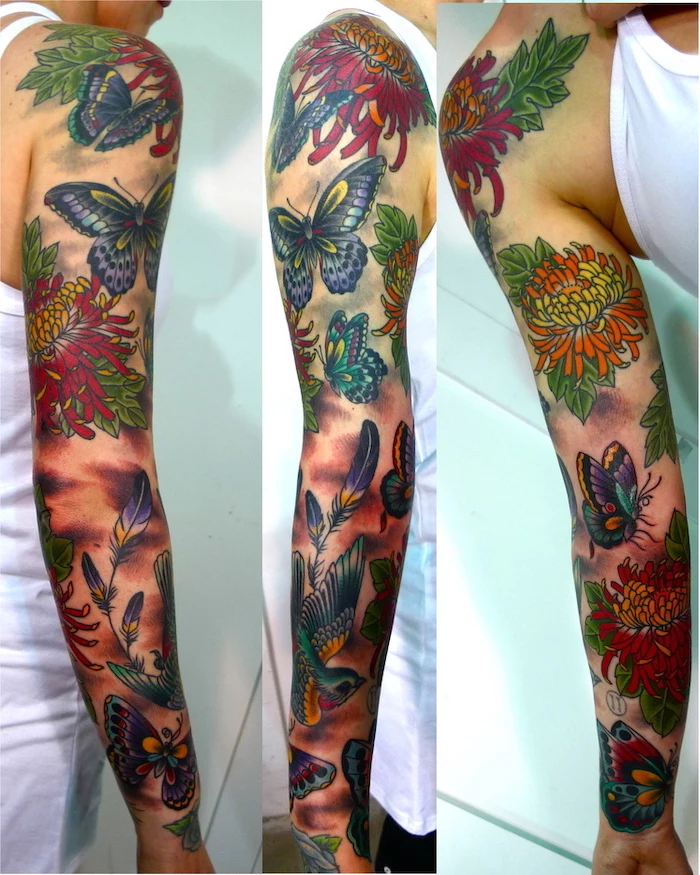
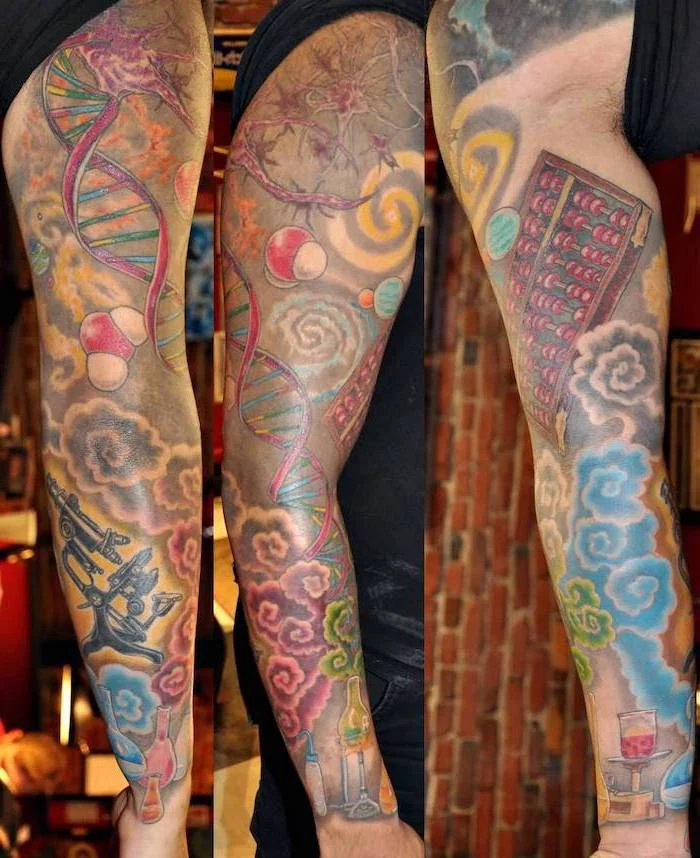
Color Sleeves: Offer vibrant, eye-catching results but are more susceptible to sun-fading. Yellows, whites, and light blues tend to fade fastest. They often require more meticulous long-term care and potential color boosts every 10-15 years to stay brilliant.
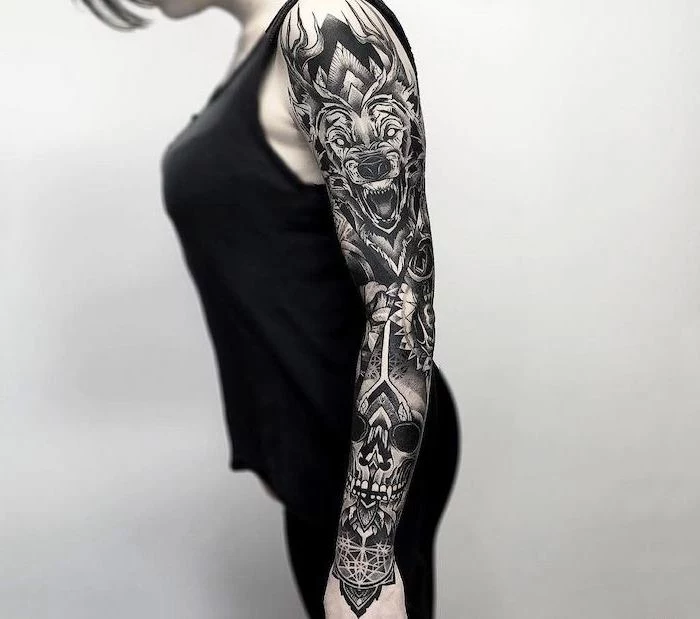
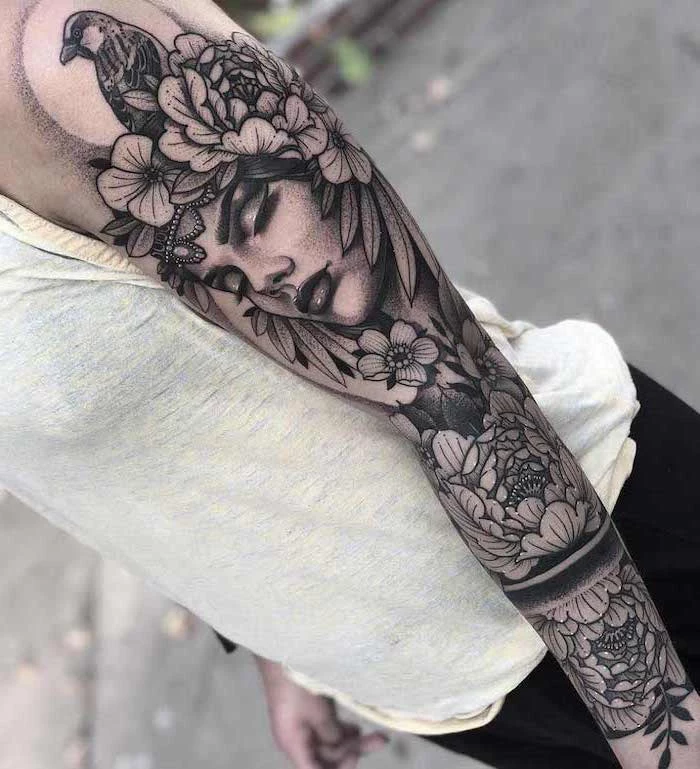
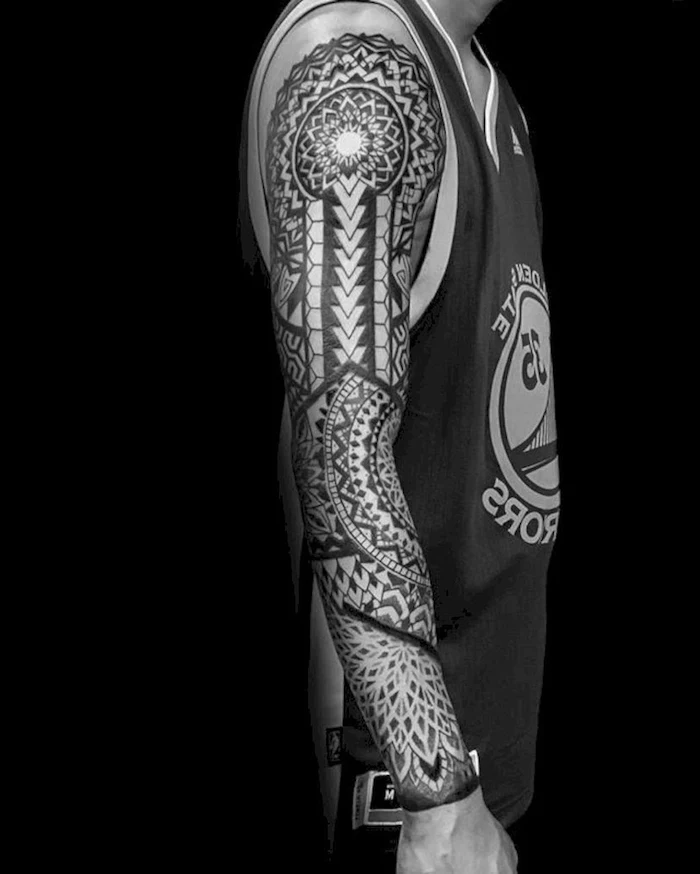
Black & Grey Sleeves: A classic for a reason. They tend to age more gracefully, with the contrast mellowing over time into a sophisticated, settled look. Shading is key, and a skilled artist can create incredible depth and realism that lasts a lifetime with basic sun protection.
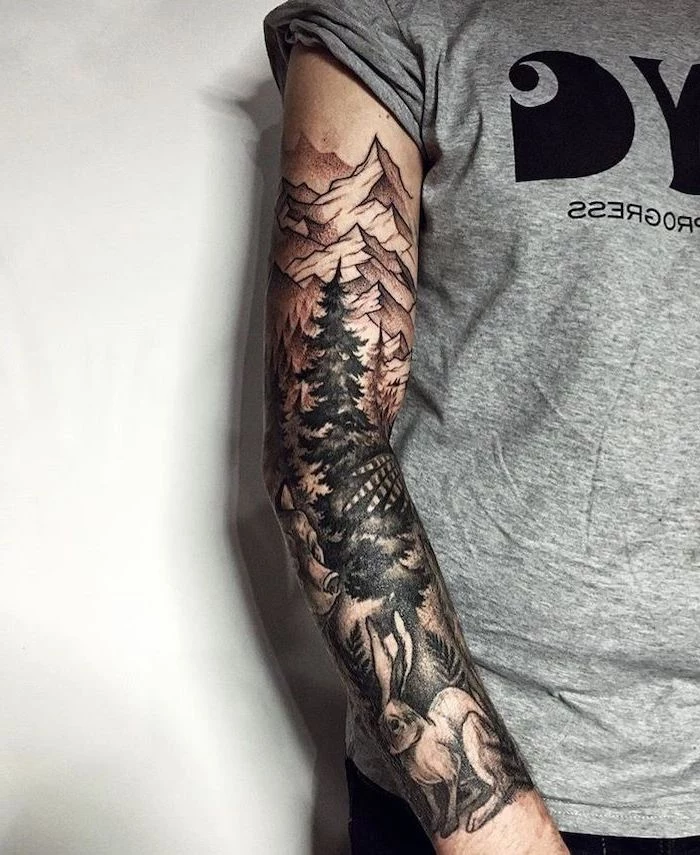
The average full sleeve tattoo takes between 20 to 40 hours of needle time, sometimes more for hyper-realistic or intensely detailed designs.
This isn’t a weekend project. That time is typically broken down into multiple 4-6 hour sessions, spaced 3-4 weeks apart to allow for proper healing. Mentally and financially, preparing for a marathon, not a sprint, is the key to a successful and enjoyable sleeve journey.

What about the dreaded “tattoo flu”?
It’s real, and it’s your body’s normal reaction to the stress of a long tattoo session. Your immune system goes into overdrive to begin healing the thousands of tiny puncture wounds. Symptoms can include mild fever, fatigue, and chills, usually appearing a few hours after your session and lasting for a day or two. The best remedies are simple: rest, hydrate, and eat a nourishing meal.
The Most Painful Spots on the Arm: Be Prepared! While everyone’s tolerance is different, most agree on the ‘spicy’ zones:
- The Ditch (Inner Elbow): Thin skin, lots of nerve endings. Deep breaths are your friend here.
- The Armpit/Inner Bicep: Extremely sensitive, not for the faint of heart.
- The Elbow: The bony point and surrounding ‘loose’ skin can be intensely uncomfortable due to vibration and thinness.
- The Wrist: Close to the bone with plenty of nerves, resulting in a sharp, stinging sensation.
A 2017 study in the journal *Contact Dermatitis* found that while black ink remains the most common, red ink is associated with the highest frequency of allergic reactions.
Don’t be alarmed, as reactions are still relatively rare. However, if you have sensitive skin or known allergies, always request a ‘patch test’ from your artist. They can tattoo a tiny, hidden dot of the intended ink weeks before your main session to see how your skin reacts.
Once your sleeve is complete, your most important long-term aftercare product is sunscreen. Seriously. Nothing destroys a beautiful tattoo faster than UV radiation. Think of it as an investment protector. A high-SPF, broad-spectrum sunscreen (like Neutrogena Ultra Sheer or a mineral-based one) should be applied every single time your arm is exposed to the sun. This simple habit can mean the difference between a vibrant masterpiece and a faded blur in ten years.
Can I get a sleeve to cover up old tattoos?
Yes, but it’s a whole different ball game. A cover-up sleeve requires an artist who is an expert in the craft. They must use darker pigments and clever designs to camouflage the old piece, not just put something new over it. Be prepared for less creative freedom—the design will be dictated by what’s needed to hide the old ink. Often, a few sessions of laser lightening beforehand can dramatically open up your options for the new design.
Your Session Day Survival Kit:
- Hydration and Snacks: A water bottle is non-negotiable. Bring sugary snacks (gummy bears, juice) to keep your blood sugar stable and prevent feeling faint.
- Entertainment: Fully charged phone with headphones for music or podcasts. A downloaded movie on a tablet can be a lifesaver during a 6-hour sit.
- Comfortable, Dark Clothing: Wear something loose that gives the artist easy access. Black is best to avoid visible ink or blood stains.
- A Pillow: A small travel pillow can make a huge difference for neck and back support when you’re in an awkward position for hours.
The conversation around aftercare has evolved. Many top artists now swear by transparent adhesive bandages like Saniderm or Tegaderm. Applied right after the session, this ‘second skin’ protects the fresh tattoo from bacteria while allowing it to breathe. It stays on for 3-5 days, and when you remove it, the tattoo is already well into the healing process, minimizing scabbing and simplifying your aftercare routine.
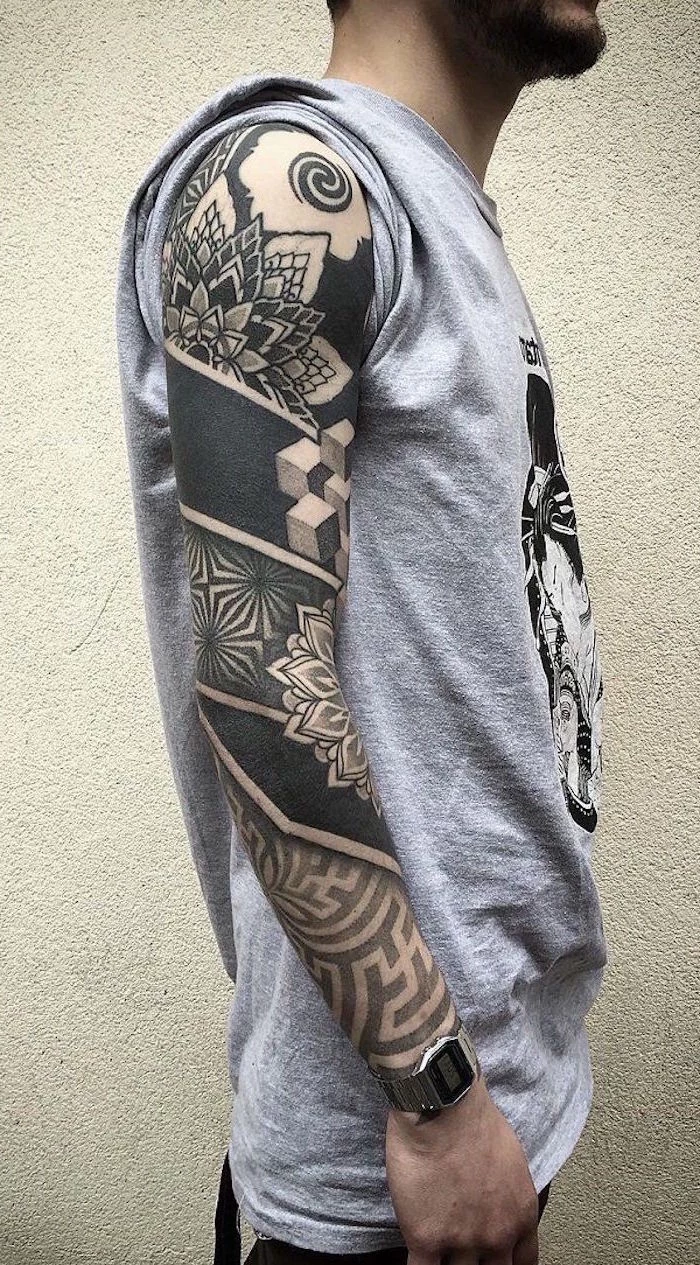
The Japanese tradition of *Irezumi* is arguably the origin of the full-body tattoo suit. Historically, these elaborate designs, often featuring mythological creatures and natural elements, were a mark of status and spiritual protection.

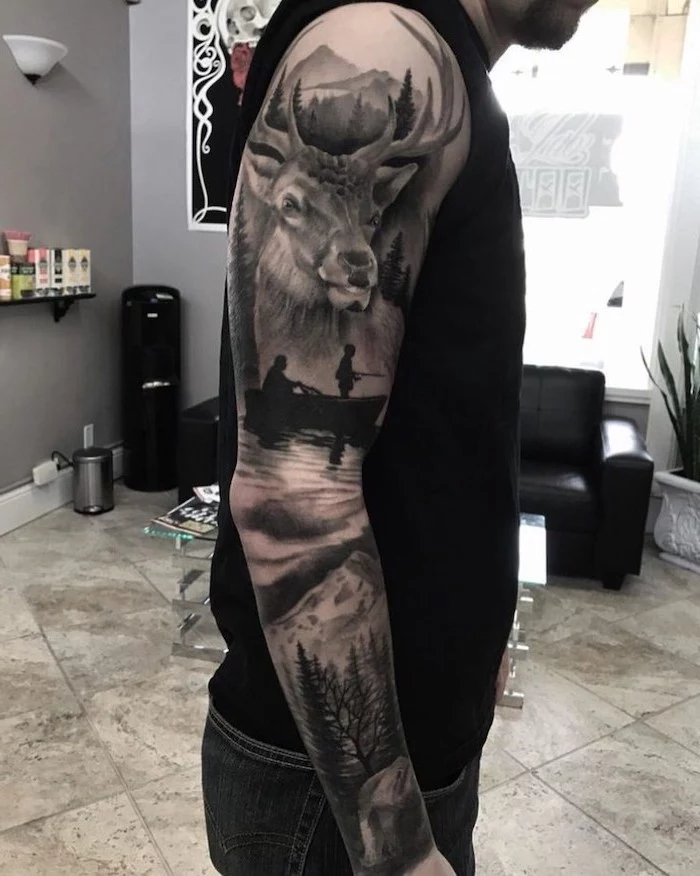
Think in 360 degrees. A great sleeve looks amazing from every angle. During the design phase, your artist will likely use software like Procreate on an iPad to map the design onto a 3D model of an arm, or they’ll freehand the main flow directly onto your skin with sharpies. This ensures the key elements are visible from the front and back, and that the design doesn’t awkwardly warp or cut off when you move your arm.
How much will my sleeve really cost?
This is the big one. Pricing is usually by the hour, and rates can range from $150 to over $400/hour depending on the artist’s skill and location. A 30-hour sleeve at $200/hour is $6,000, not including tips. Don’t price-shop for a sleeve. You are commissioning a permanent piece of art from a skilled craftsperson. Saving up and paying for the right artist is infinitely better than paying for a cheap tattoo and then paying even more for laser removal later.
The Consultation Red Flag: If an artist agrees to start your sleeve next week without a thorough consultation about theme, flow, and your personal story, walk away. A true sleeve artist is booking months, sometimes a year, in advance. They are invested in the project’s integrity, not just filling a calendar slot.
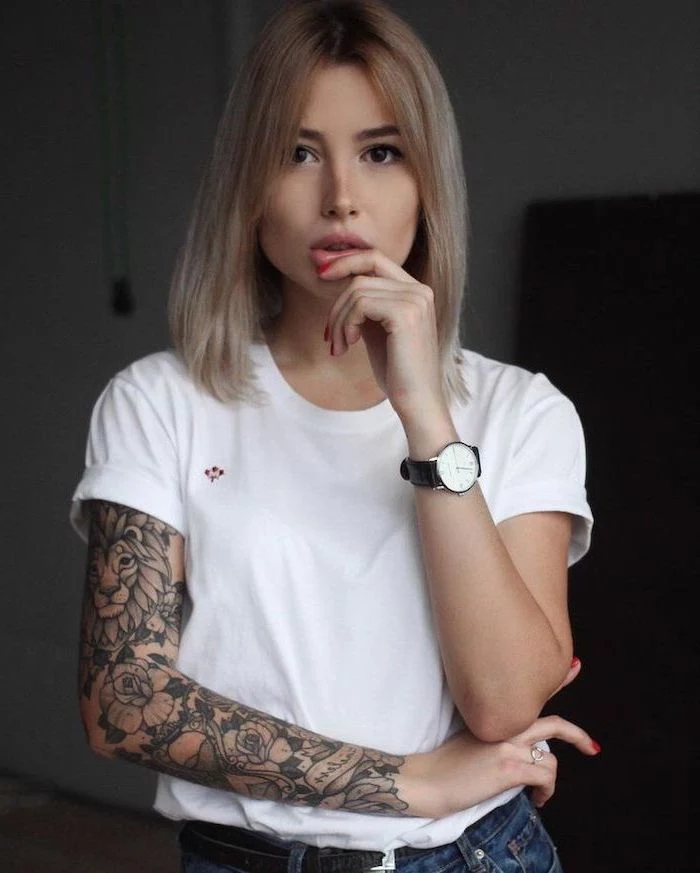
- Less initial financial commitment.
- A shorter time in the tattoo chair.
- The ability to test your pain tolerance and the healing process.
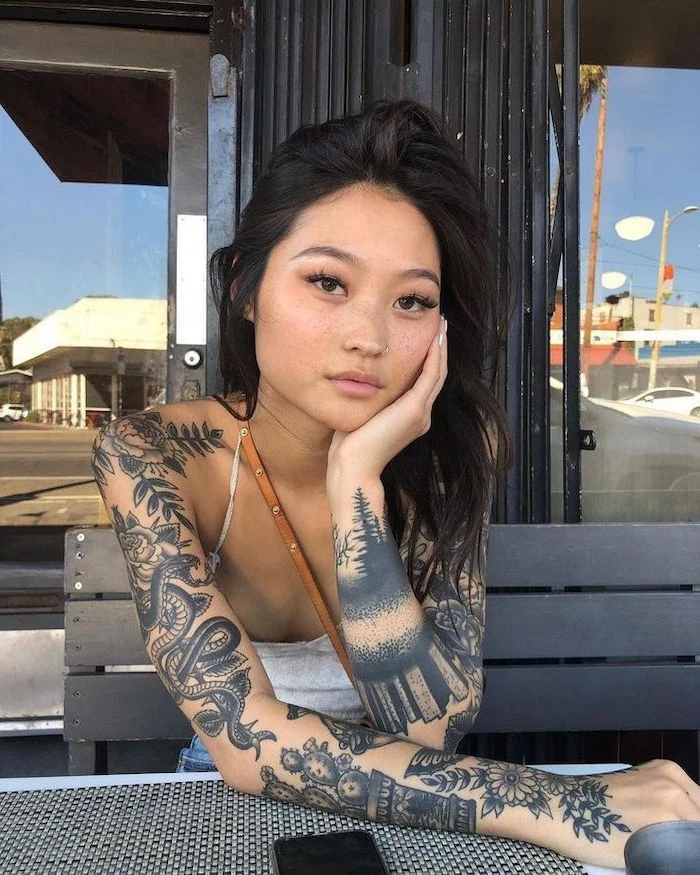
The secret? Starting with a half-sleeve. A well-planned half-sleeve (either upper arm or forearm) can be a stunning, complete piece on its own, while always leaving the door open to extend it into a full sleeve later if you choose.

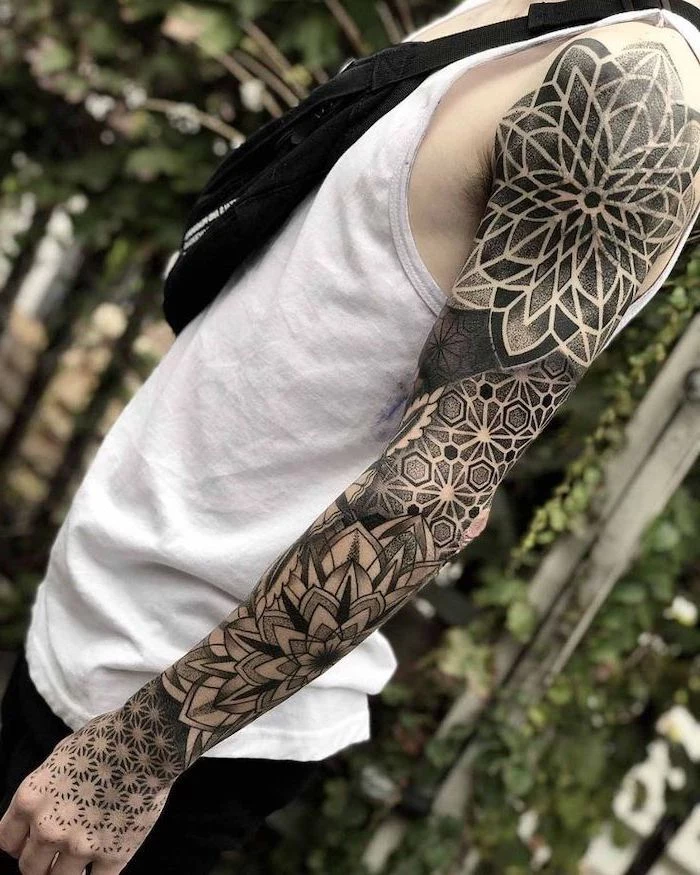
Don’t underestimate the power of ‘filler’. What goes between the main subjects of your sleeve is crucial for cohesion. Forget simple stars and dots. Modern sleeves use dynamic fillers like geometric patterns, smoke, clouds, water, or intricate floral latticework to tie the entire piece together into a seamless work of art.
There is a psychological component to getting a sleeve. It’s a journey of endurance and transformation. Many people report a significant boost in confidence and a deeper connection to their own body after completing their project.
What happens if I build muscle or lose weight after getting my sleeve?
For the most part, you’ll be fine. Slow, gradual changes in body mass won’t noticeably distort a well-designed tattoo. The skin’s elasticity handles it well. Extreme, rapid changes (e.g., from competitive bodybuilding or significant weight loss) might cause some minor stretching or sagging, but it’s rarely as dramatic as people fear. The most important factor is the quality of the initial application—a solid tattoo will move with you.
Top-tier aftercare is a must for healing a large-scale piece. After the initial bandage phase, you’ll need a quality, fragrance-free ointment. Forget petroleum jelly. Look for products specifically designed for tattoos.
- Hustle Butter Deluxe: A popular vegan option, it’s 100% natural and petroleum-free, keeping the skin moisturized without clogging pores.
- After Inked Tattoo Moisturizer: A water-based lotion that’s non-greasy and enriched with grape seed oil. Great for the final stages of healing.
- Aquaphor Healing Ointment: A classic recommendation from many artists, but use it sparingly to avoid suffocating the new tattoo.


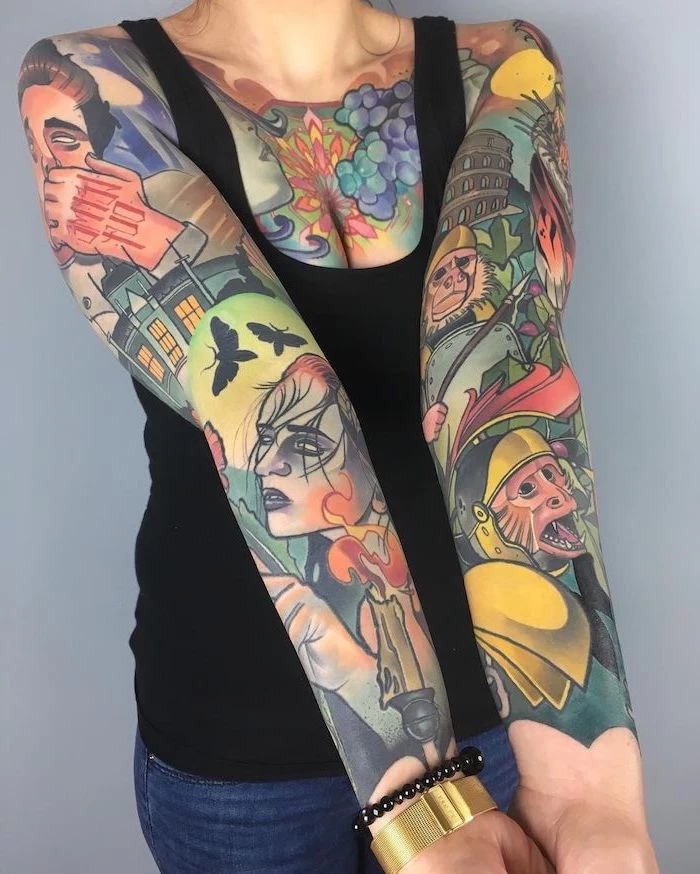
The Collector’s Sleeve: A cohesive, single-piece sleeve isn’t the only way. A ‘patchwork’ or ‘collector’s’ sleeve is built over time with individual tattoos from various artists. It tells a story of your life, travels, and evolving tastes. The challenge is achieving a sense of balance rather than chaos, often by sticking to a consistent color palette (like all black and grey) or by using a skilled artist to add a filler background later on.
A 2012 scientific paper estimated that the needle of a modern tattoo machine penetrates the skin between 50 and 3,000 times per minute. For a sleeve, that adds up to millions of individual punctures.
This is why proper healing is so crucial. Your body is marshalling a massive immune response. Good nutrition, hydration, and avoiding alcohol in the days surrounding your session can make a significant difference in your healing time and comfort levels.

Trust the Process: The ‘Ugly’ Healing Stage. Around day 4 or 5, your beautiful new sleeve will start to peel and flake like a bad sunburn. The colors might look cloudy or milky. This is completely normal! It’s the top layer of dead skin sloughing off to reveal the healed tattoo underneath. Whatever you do, DO NOT pick or scratch it. Let it flake off naturally while continuing to apply a thin layer of moisturizer.
Your artist’s vision is paramount. You bring the ‘what’ (the theme, the feeling, the subjects), but you must trust them with the ‘how’ (the composition, the flow, the execution). The best sleeves are born from collaboration, not dictation. If you’ve chosen your artist wisely based on their portfolio, let their expertise shine. Micromanaging an artist stifles creativity and can lead to a stiff, lifeless design.
How long do I need to wait between sessions?
Patience is a virtue in the sleeve game. The standard recommendation is a minimum of 2-3 weeks between sessions on the same arm, even if you are working on a different section. This gives your body ample time to heal, reduces overall swelling and trauma to the area, and ensures the artist is working on calm, settled skin for the best possible ink saturation.
Future-Proof Your Design. A sleeve is for life. Trends, on the other hand, are not. That ultra-specific pop culture reference or meme might seem brilliant now, but how will it feel in 20 years? Timeless themes—nature, mythology, geometry, traditional motifs—tend to age best. If you do opt for something trendy, consider making it a smaller element within a larger, more classic composition.