The Real Deal on Henna: A Pro’s Guide to Mixing, Styles, and Safety
I’ll never forget the first time I tried to use a henna cone. It felt so awkward, and my hand was anything but steady. My lines wobbled, my circles weren’t very circular, and the earthy smell of the paste was totally new to me. That was a long, long time ago. Now, those cones feel like they’re a part of me, and I’ve spent countless hours mixing pastes and creating designs for all kinds of celebrations.
In this article
This is an art form I learned through doing, through mentorship, and by developing a huge respect for its cultural roots. It’s so much more than a ‘temporary tattoo.’ It’s a living ritual, a science, and a celebration all rolled into one. Honestly, getting a great final design has very little to do with luck. It’s all about the quality of your powder, the chemistry of your mix, and the care you take after the paste comes off. I want to walk you through everything I’ve learned to help you get a beautiful, dark, and safe stain every single time.

First Things First: Understanding the Henna Plant
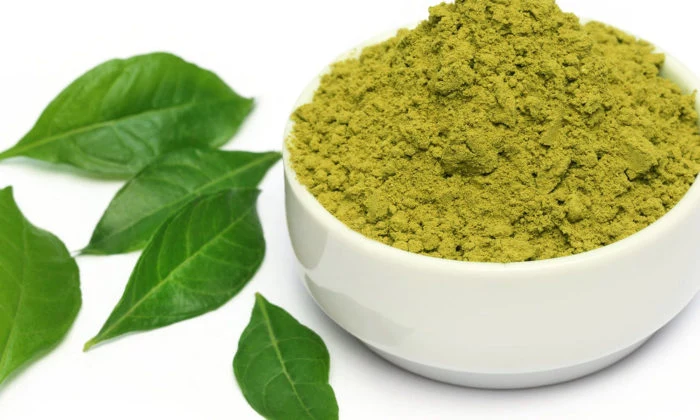
Before you can make great art, you have to know your materials. For us, that means getting to know a plant called Lawsonia inermis. It’s a shrub that absolutely loves hot, dry climates, and the real magic is hidden in its leaves. They contain a dye molecule, lawsone, which is the only thing in natural henna that colors the skin.
When we grind the dried leaves into a powder, our goal is to release that lawsone molecule. It works by binding to the keratin in your skin—the same protein that makes up your hair and nails. The lawsone moves from the paste into the very top layer of your skin (the epidermis) and hangs on tight. This is exactly why henna is temporary! As your skin naturally exfoliates over one to three weeks, those stained skin cells flake away, and your design gradually fades.
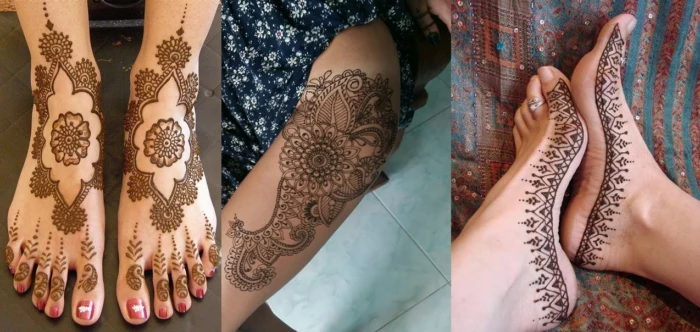
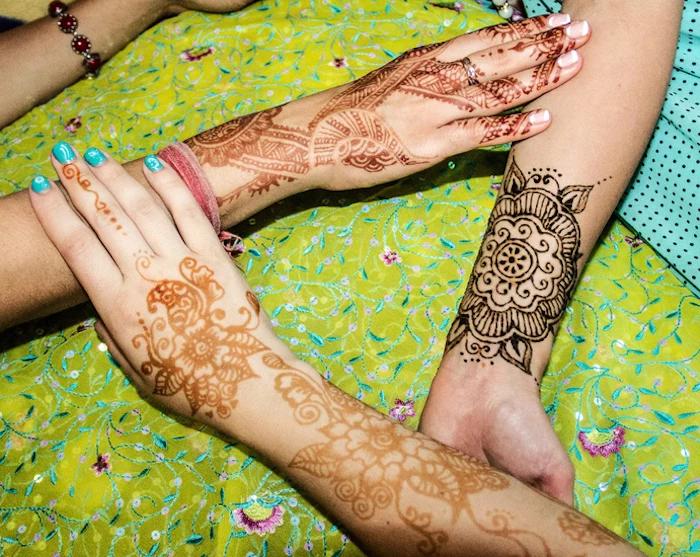
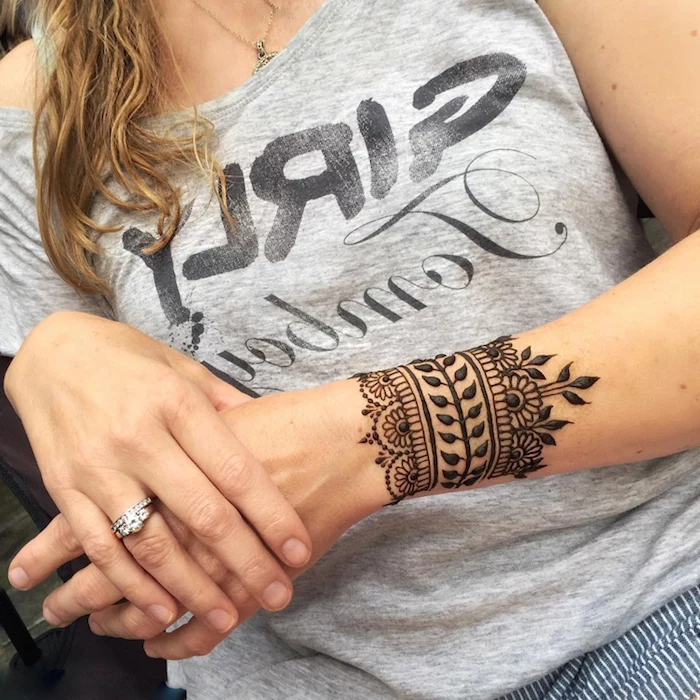
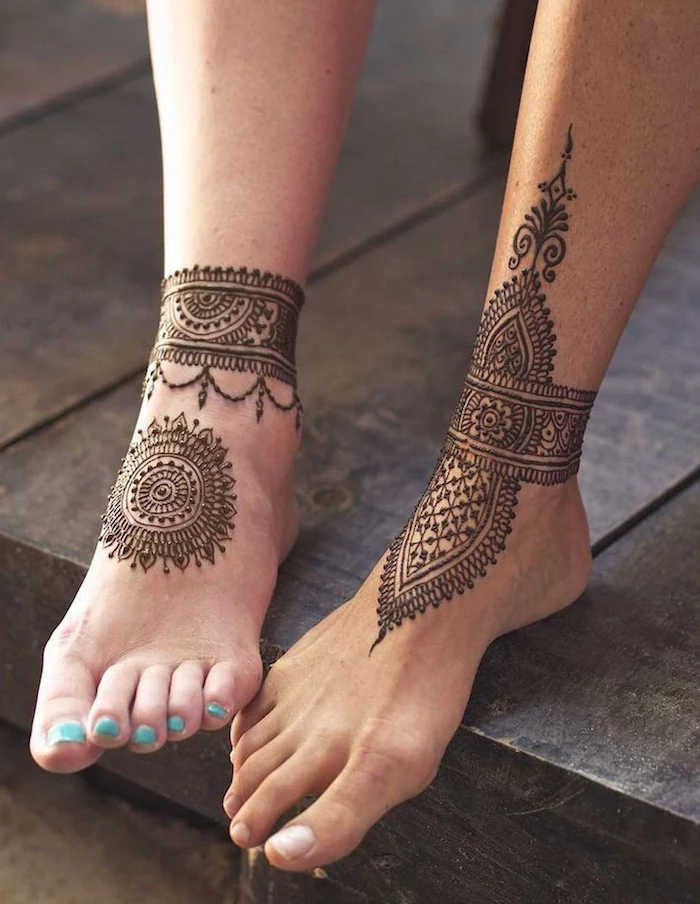
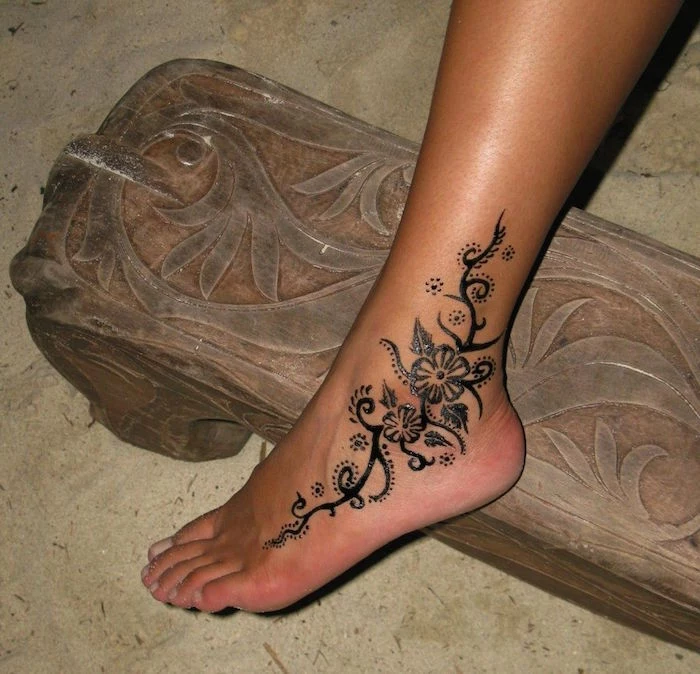
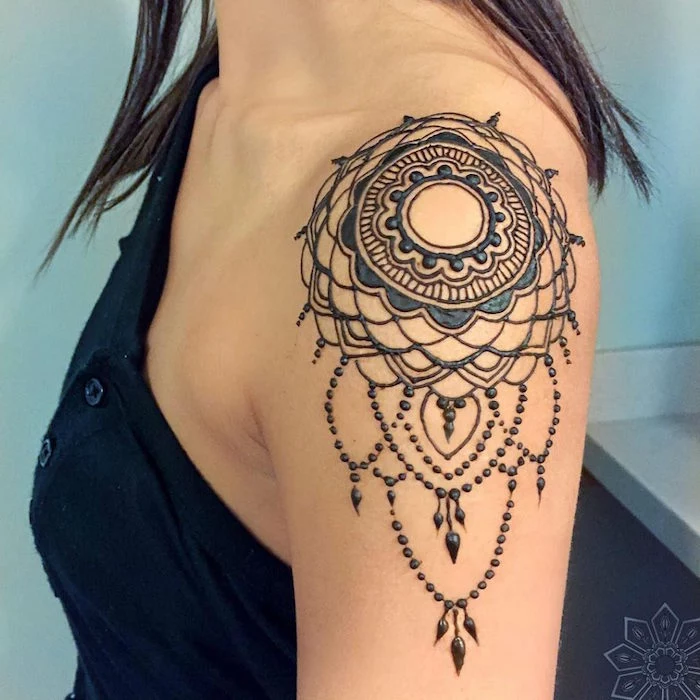
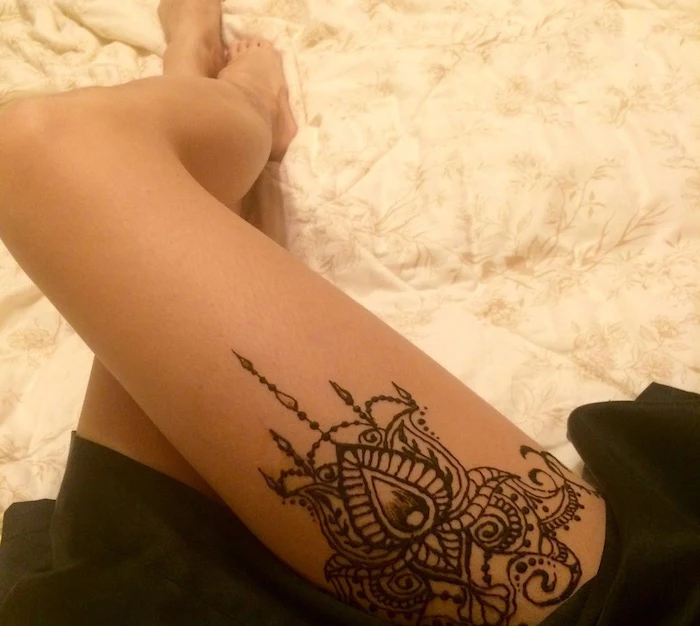
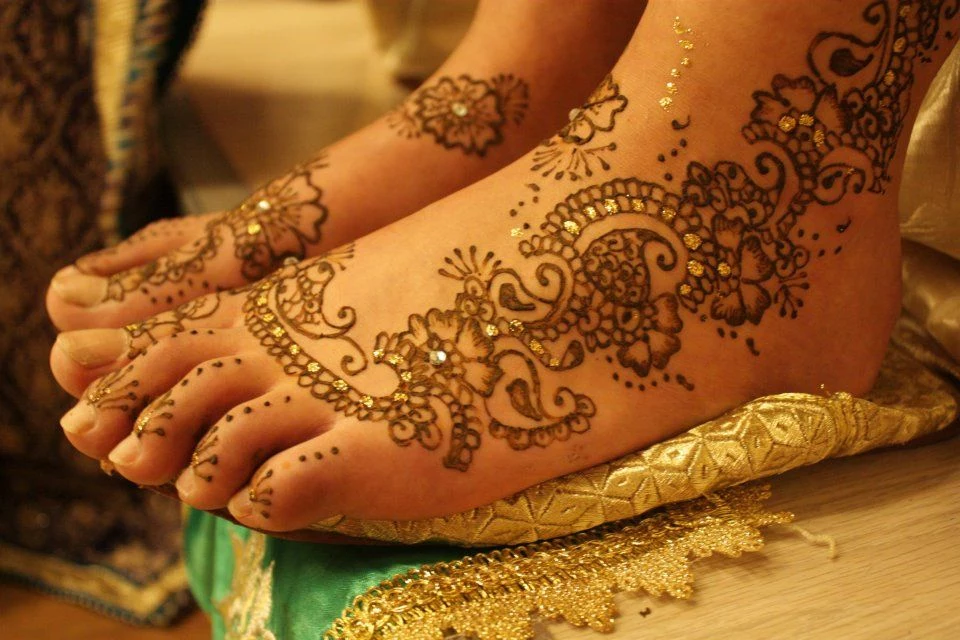
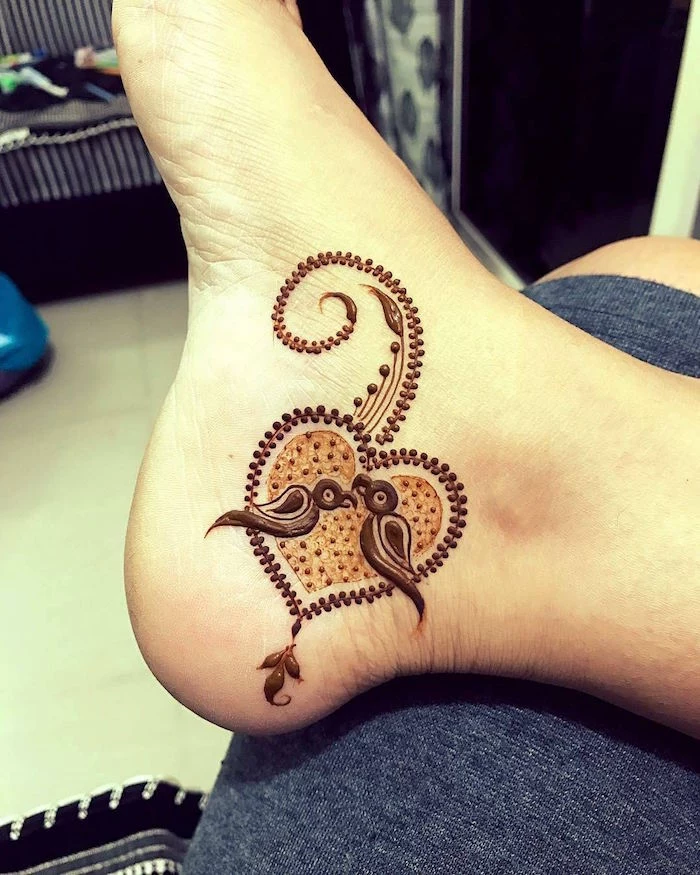
This also explains why you get darker stains on certain parts of your body. The palms of your hands and the soles of your feet have the thickest skin, meaning more keratin for the dye to grab onto. This gives you those deep, rich, long-lasting stains. By contrast, areas with thinner skin, like your back or arms, will produce a lighter, more brownish color that fades faster. It’s good to know this so you can set realistic expectations.
How to Spot High-Quality Henna Powder
Let’s be clear: not all henna powder is the same. The success of your stain starts right here. You’re looking for what artists call Body Art Quality (BAQ) henna. This just means it’s 100% pure leaf powder that’s been finely sifted and is nice and fresh.
- Color Check: Good henna powder should be a khaki or greenish-brown color. If it looks bright green, it might have added dye. If it’s a dull, lifeless brown, it’s probably old and won’t give you a good stain.
- The Feel Test: It should feel incredibly fine and soft, almost like powdered sugar. If it feels gritty or sandy, it hasn’t been sifted properly and will absolutely clog your cone.
- Where to Buy: You won’t find BAQ henna at the local grocery store. Your best bet is to search online for specialty suppliers who focus on henna for body art. A quick search for “BAQ henna powder” or “professional henna supplier” will point you in the right direction. A 100-gram bag of high-quality powder usually costs between $8 and $15.
Quick tip: Always buy henna intended for body art, not for hair. Hair henna is often a coarser grind and can sometimes contain metallic salts you definitely don’t want sitting on your skin.
My Guide to Mixing the Perfect Henna Paste
Every artist develops their own little tweaks, but the basic chemistry is universal. We’re simply trying to release the dye molecule from the plant matter in the most effective way. My recipe always comes down to three things: great powder, an acidic liquid, and terpene-rich essential oils.
Just Starting Out? Try a Tiny Batch!
A big 100g batch can be intimidating (and wasteful!) if you’re just practicing. Let’s start small.
Beginner’s Batch Ingredients:
- 25 grams (about 3-4 tablespoons) of BAQ henna powder
- 1.5 teaspoons of sugar (white sugar works great)
- 1.5 teaspoons of a safe essential oil (like tea tree or lavender)
- Roughly ¼ to ⅓ cup of strained lemon juice
Mix your dry powder and sugar together first. Then, slowly stir in the lemon juice until it feels like thick yogurt. Finally, mix in your essential oil. Cover the paste with plastic wrap, pressing it right onto the surface, and let it sit in a warm spot for about 12-24 hours. Do a spot test on your palm—if a 5-minute dab leaves a bright orange mark, you’re good to go!
The Pro’s Go-To Recipe (Makes a 100g Batch)
Ready to make a bigger batch? This will give you enough paste for about 15-20 medium designs.
Here’s what you’ll need:
- 100 grams of fresh, BAQ henna powder
- 30 ml (or 1 fluid ounce) of a safe essential oil (cajeput, tea tree, or high-quality lavender are my favorites)
- Strained lemon juice (no pulp!)
- 2-3 tablespoons of sugar
The Mixing Process:
- Sift, Sift, Sift: Even if the package says it’s triple-sifted, I do it one more time. My secret weapon? A nylon stocking. Stretch it over a bowl and push the powder through. This is a non-negotiable step for me. It guarantees an ultra-smooth paste and prevents clogging.
- Add Sugar & Acid: Mix your sugar into the dry powder. Then, slowly add your lemon juice while stirring. You’re aiming for the consistency of thick mashed potatoes. Don’t dump the liquid in all at once, or you’ll get lumps.
- Bring in the Oils: Once you have a thick paste, stir in your essential oils. By the way, we aren’t adding these for a nice smell. They contain natural solvents (‘terps’) that help the lawsone molecule escape from the plant material, which means a much darker stain for you.
- Let it Rest: Cover the bowl with plastic wrap, pressing it onto the paste’s surface. Let it sit in a warm spot (around 75°F or 24°C is perfect) for dye release. This usually takes about 12 hours, but can take up to 24 if your room is cooler. Check it with the 5-minute spot test.
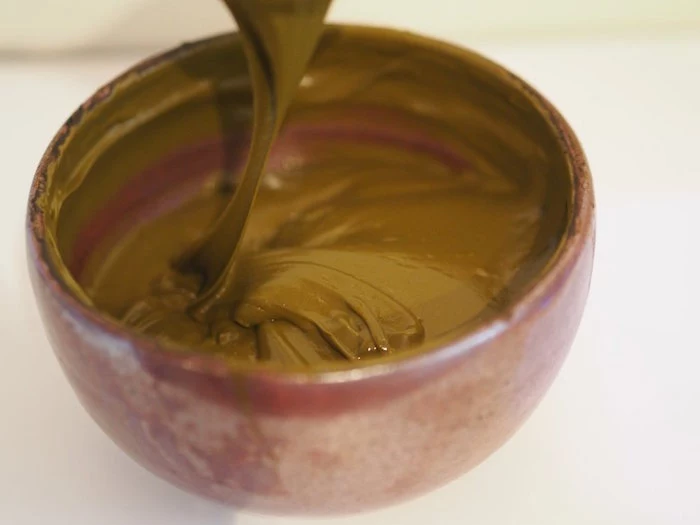
- Final Thinning: After dye release, the paste is still too thick. Slowly add more lemon juice, a teaspoon at a time, until it has the consistency of thick yogurt. When you lift your spoon, it should fall off in a slow, steady ribbon.
Good to know: Henna paste freezes perfectly! I make big batches and freeze it in cone-sized portions. It will last up to six months in the freezer. To use it, just pull it out and let it thaw on the counter for an hour or two. Never, EVER microwave it—you’ll cook the dye and ruin it.
Application Techniques and Classic Styles
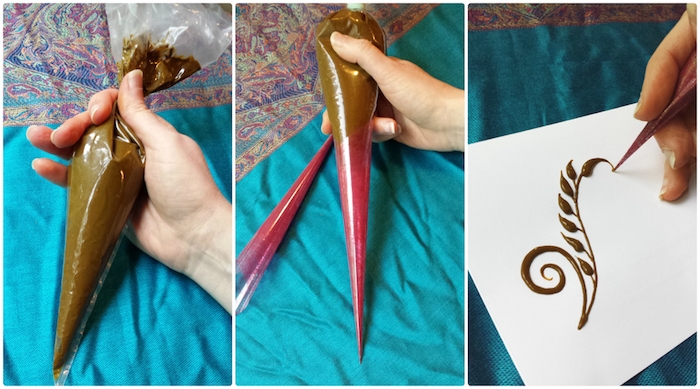
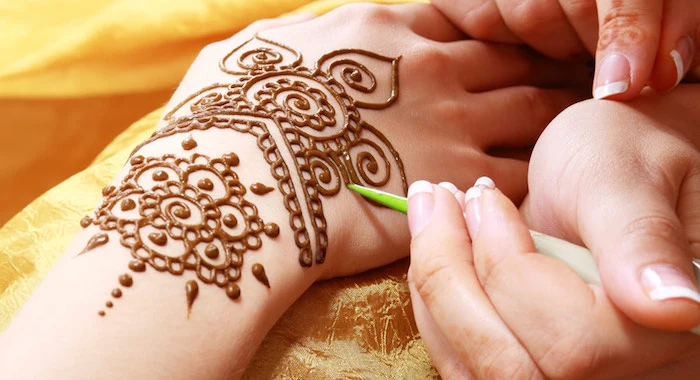
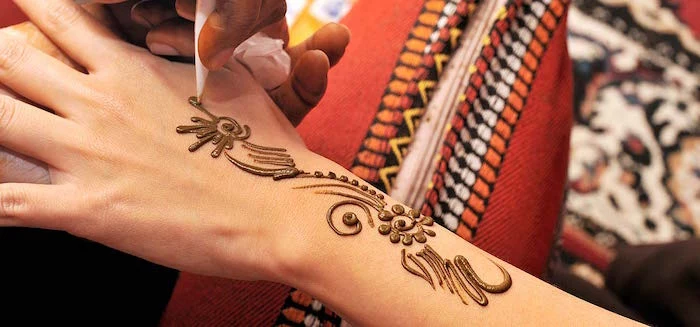
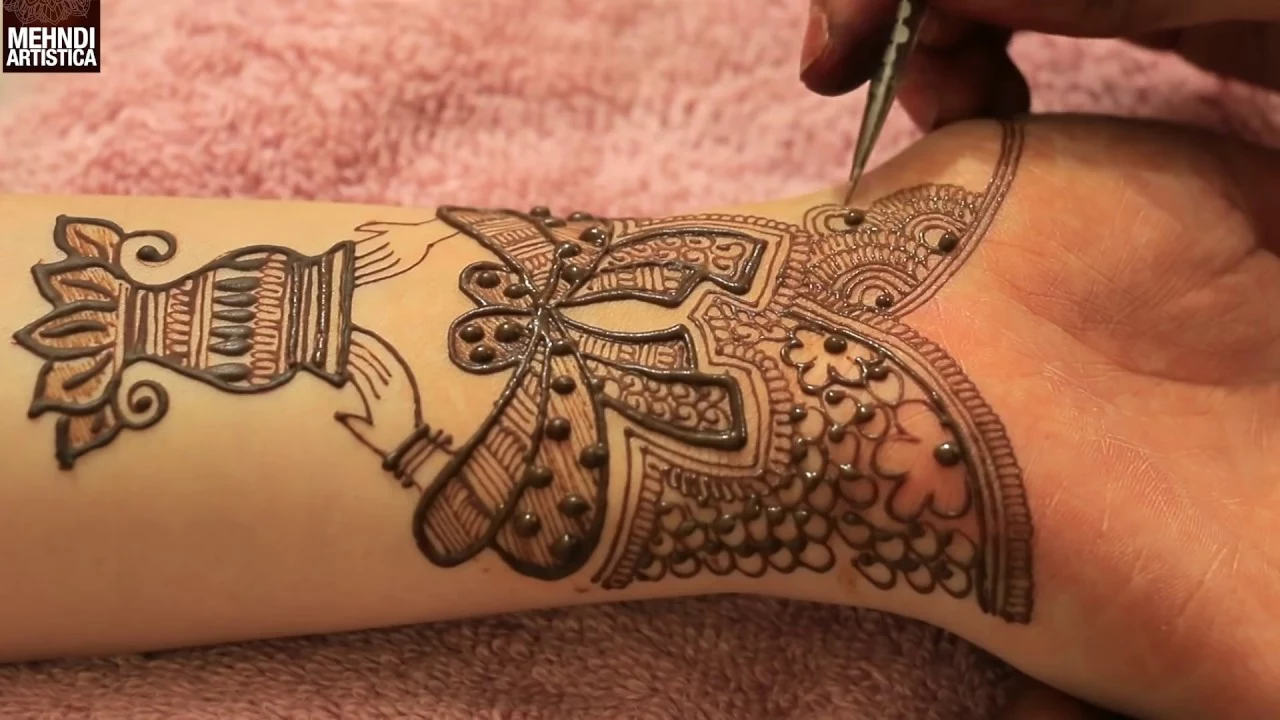
Rolling your own cellophane cones is a skill that takes practice, but it’s worth it for the control it gives you. For beginners, a great shortcut is to buy empty, pre-rolled cones from your henna supplier. You can just fill them up and get straight to practicing your lines.
As for the designs themselves, different regions of the world have developed beautifully distinct traditions. While modern artists love to blend them, knowing the foundations is key.
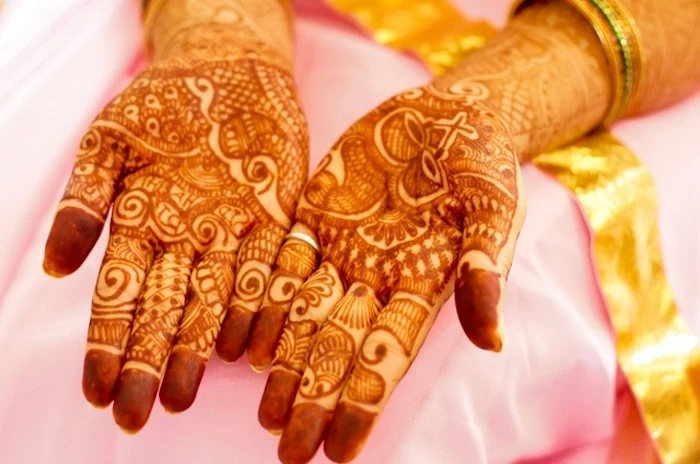
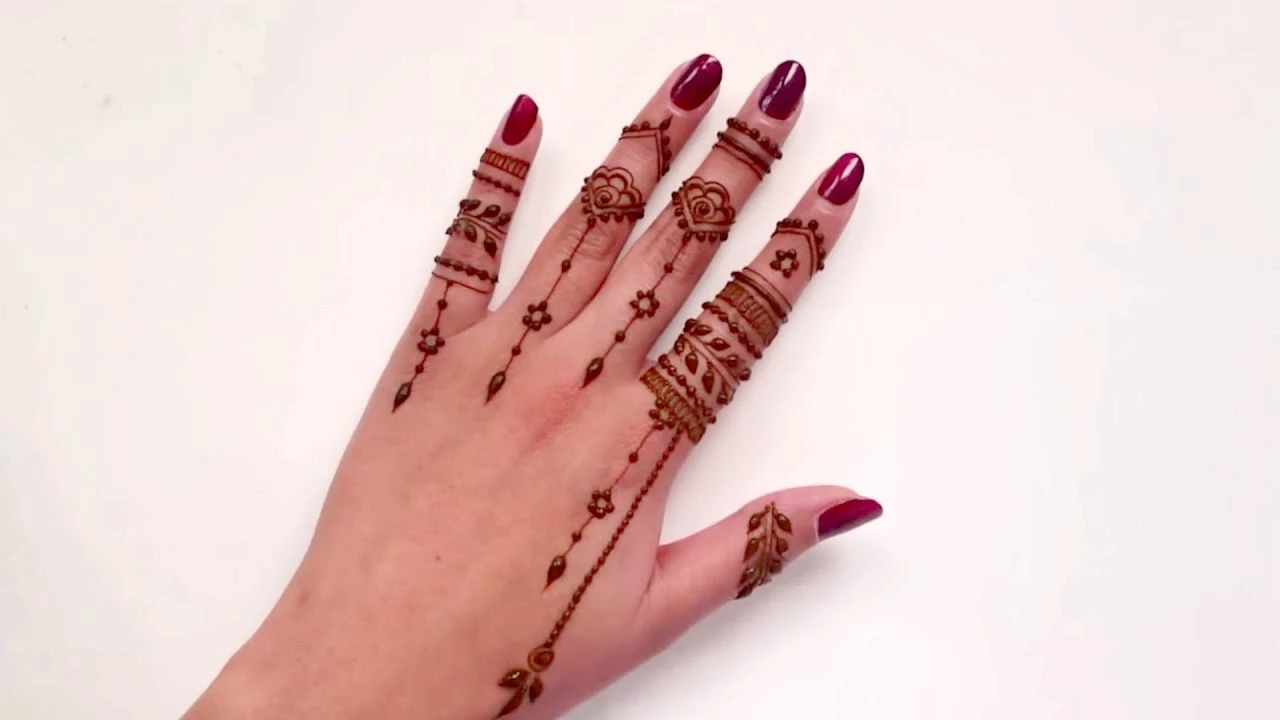
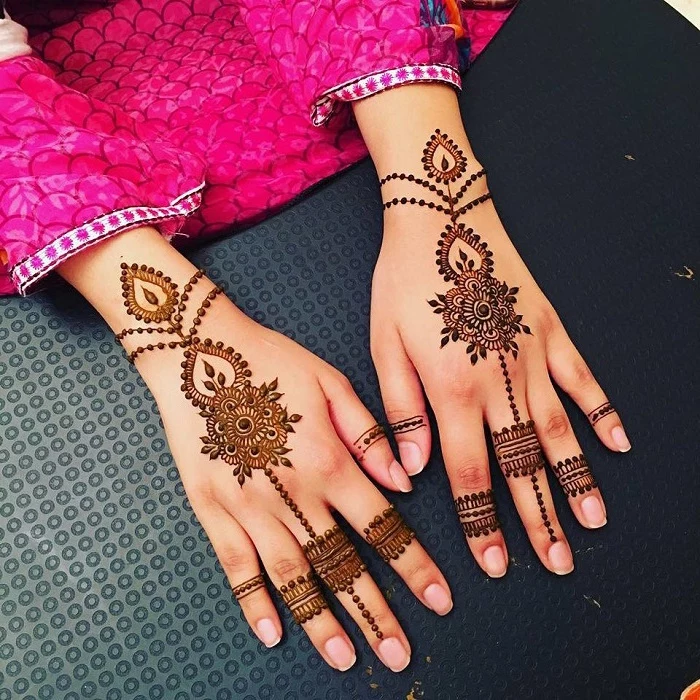
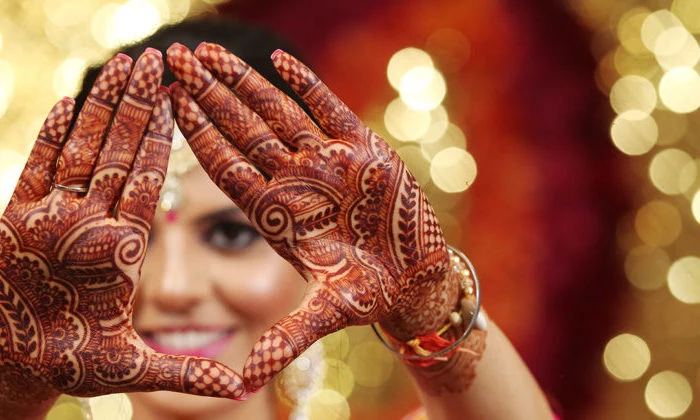
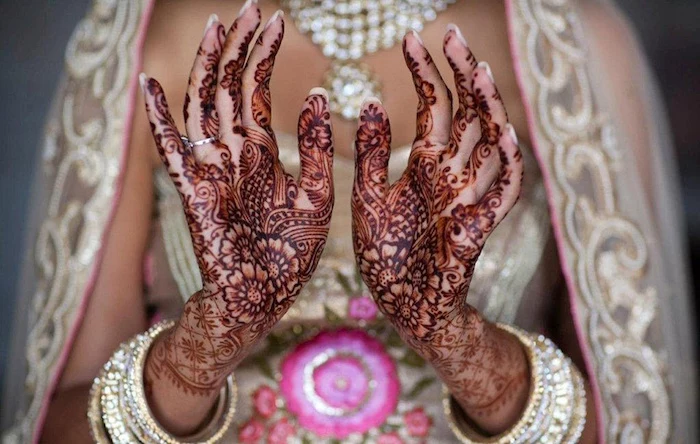
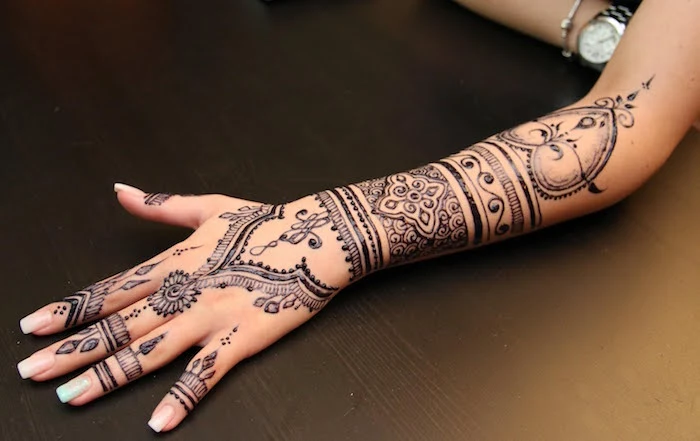
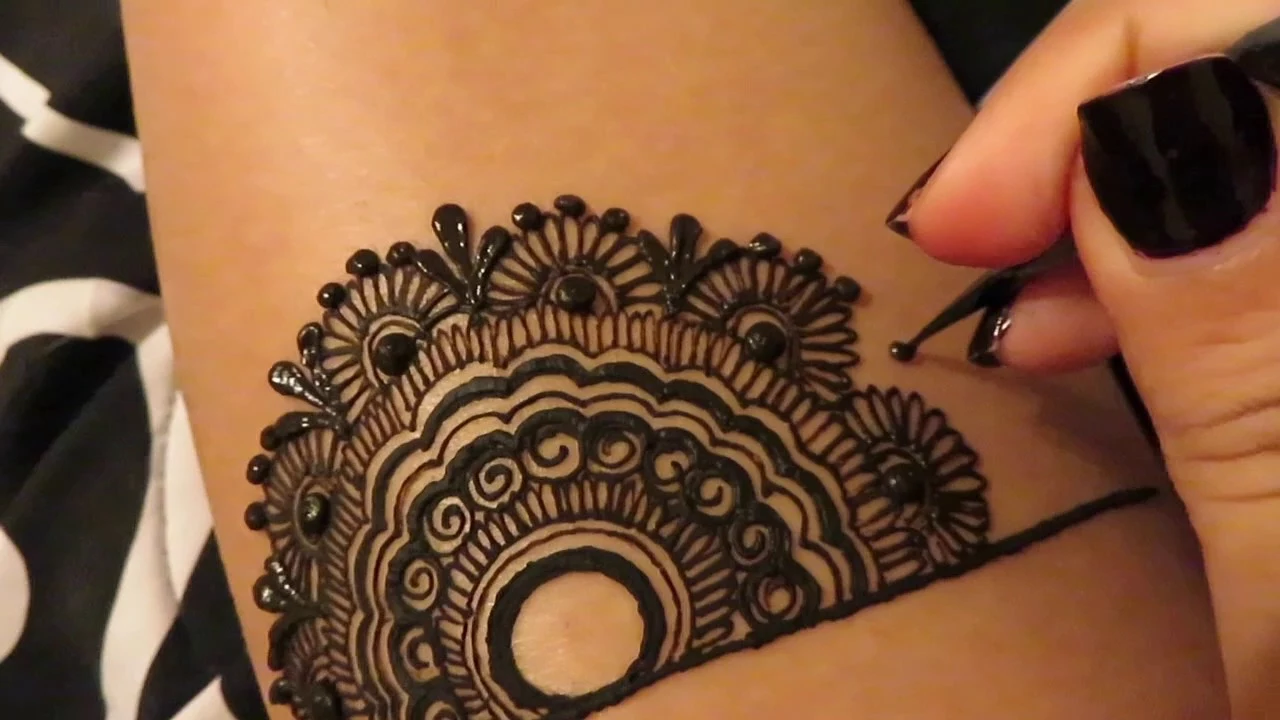
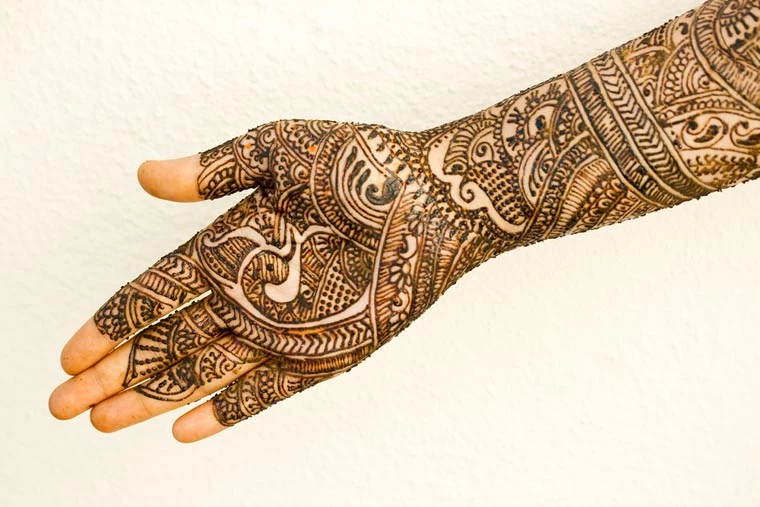
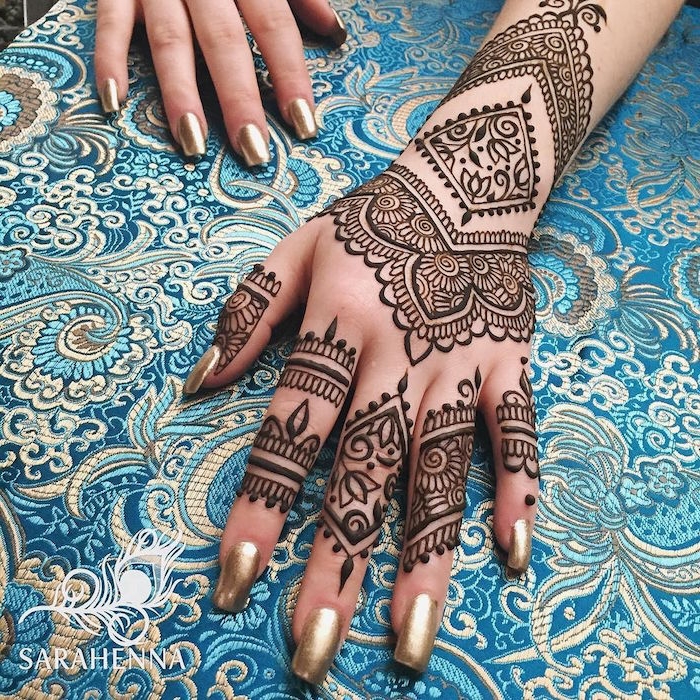
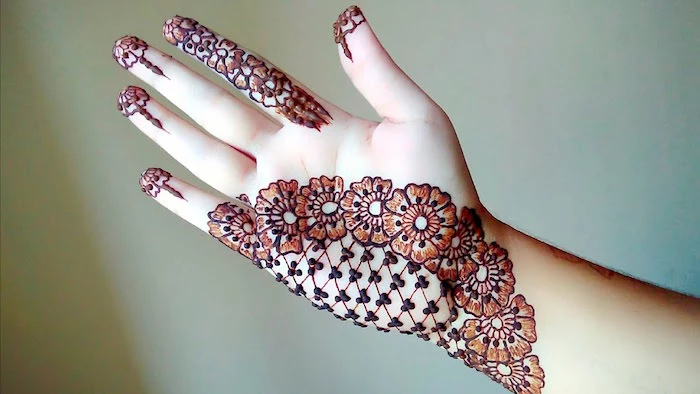
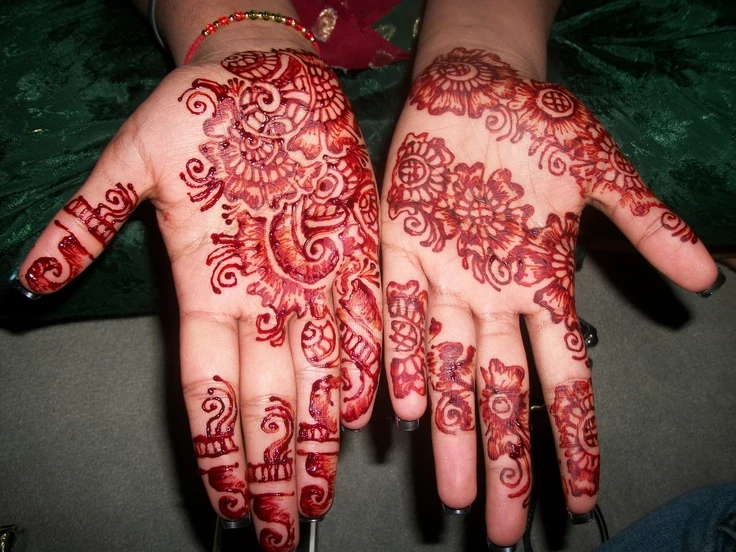
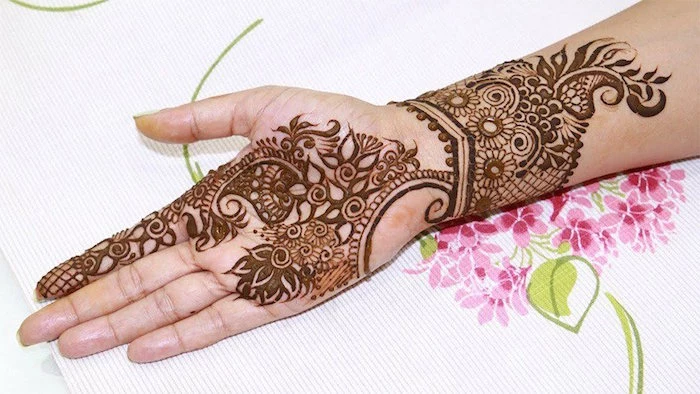
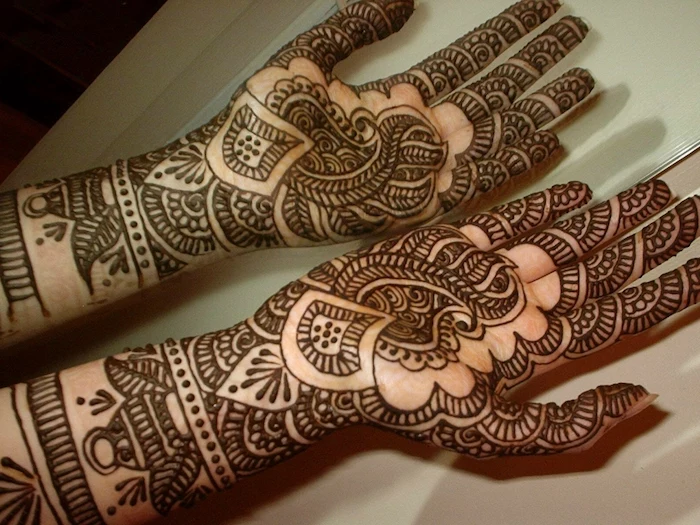
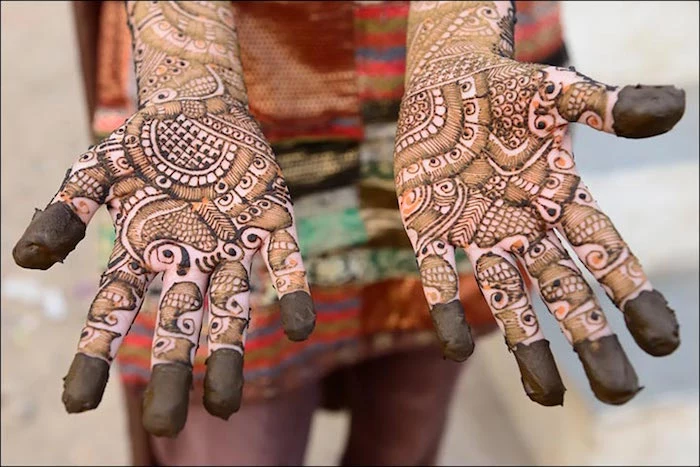
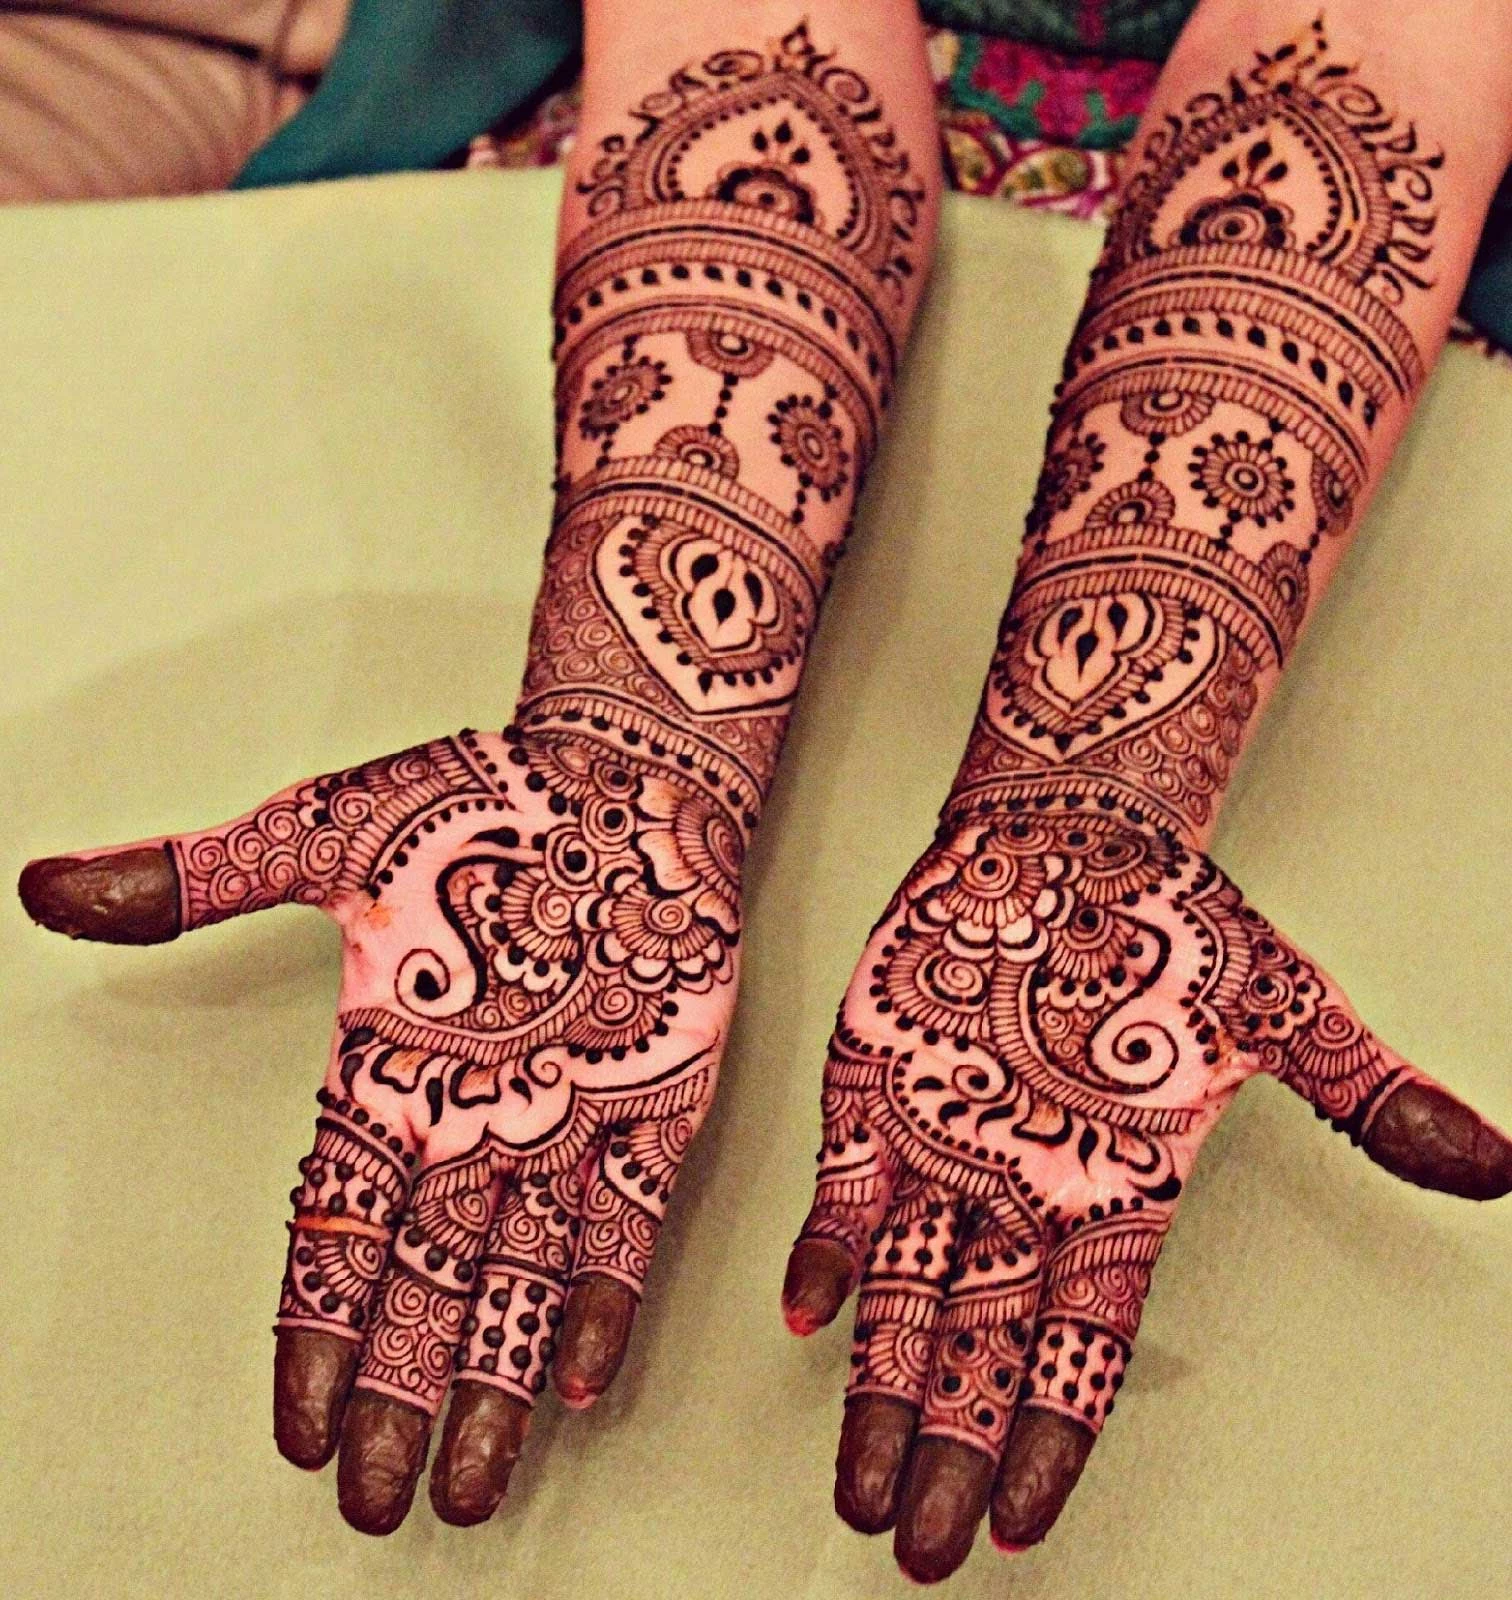
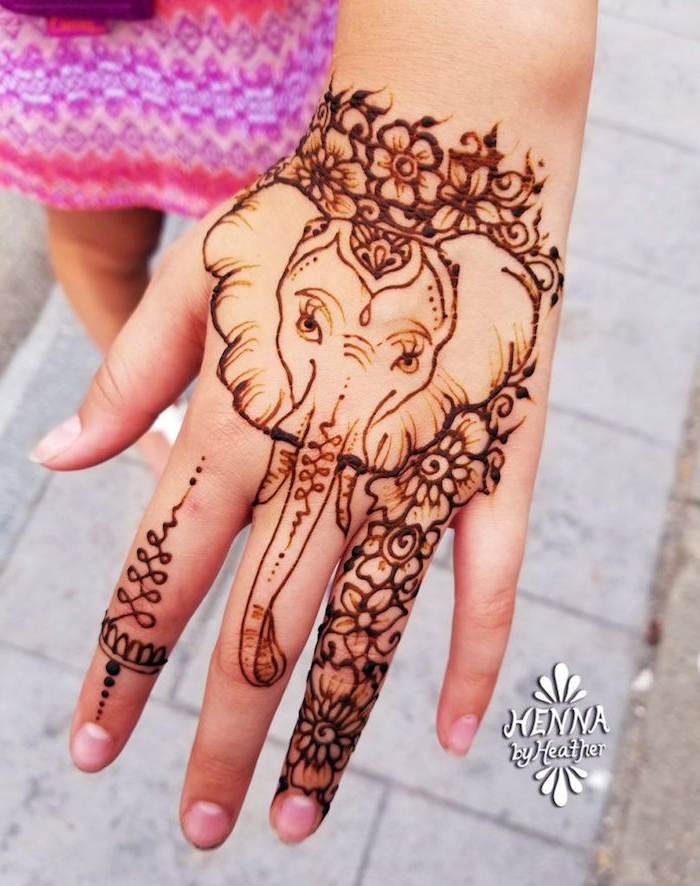
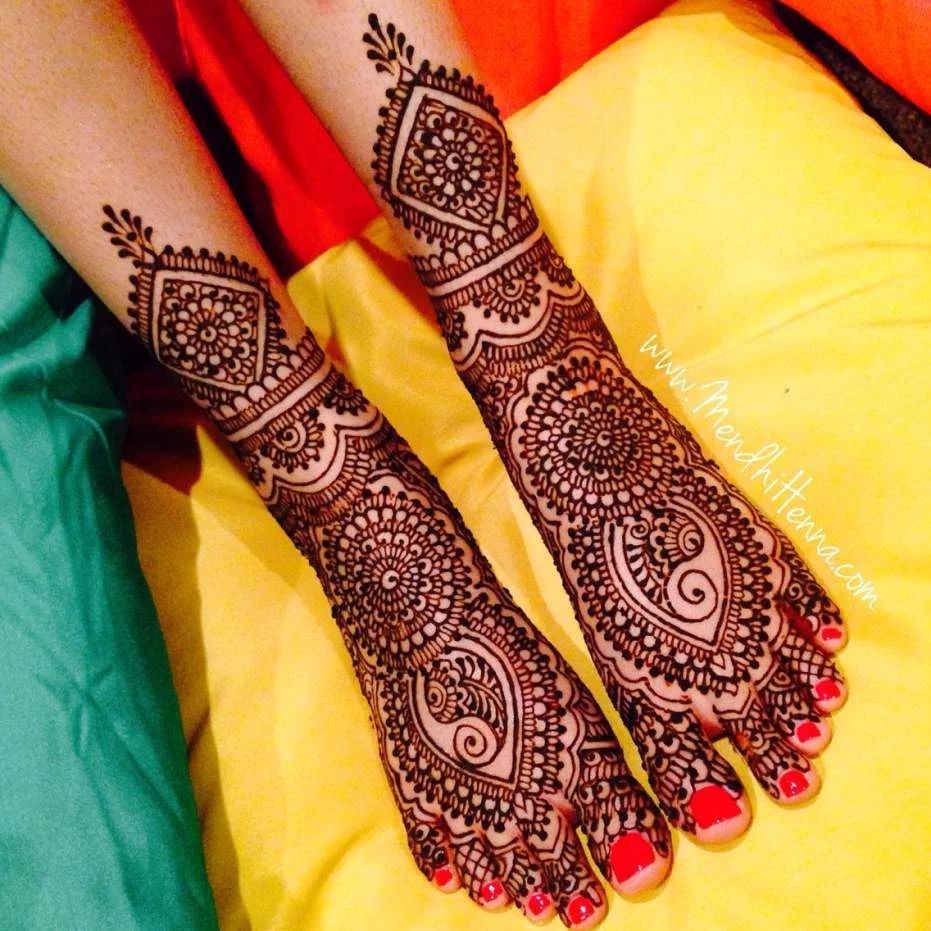
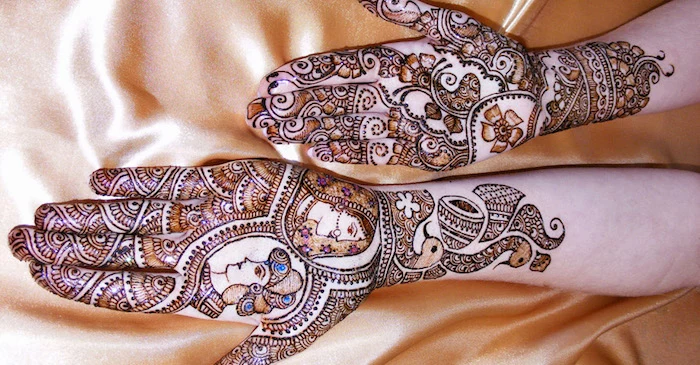
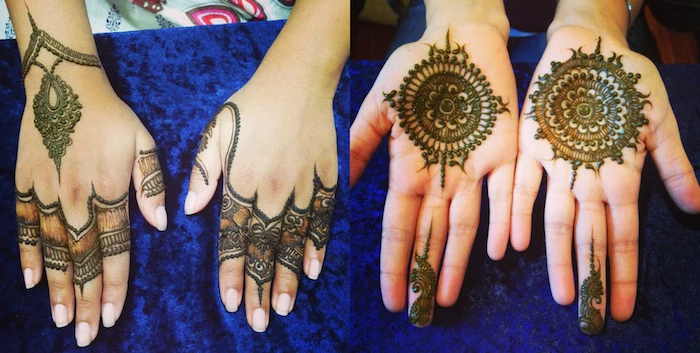
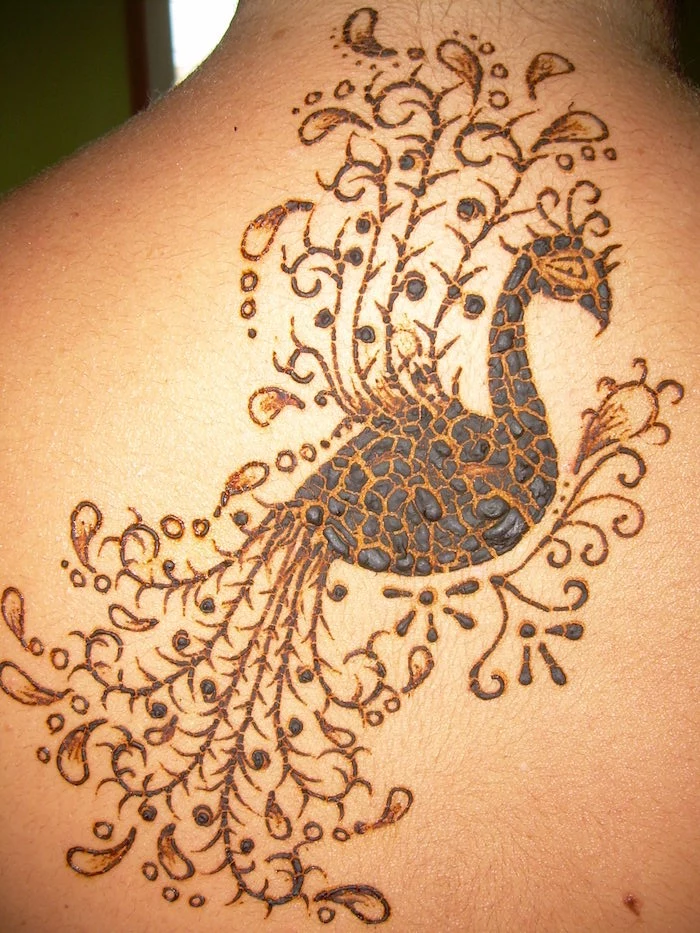
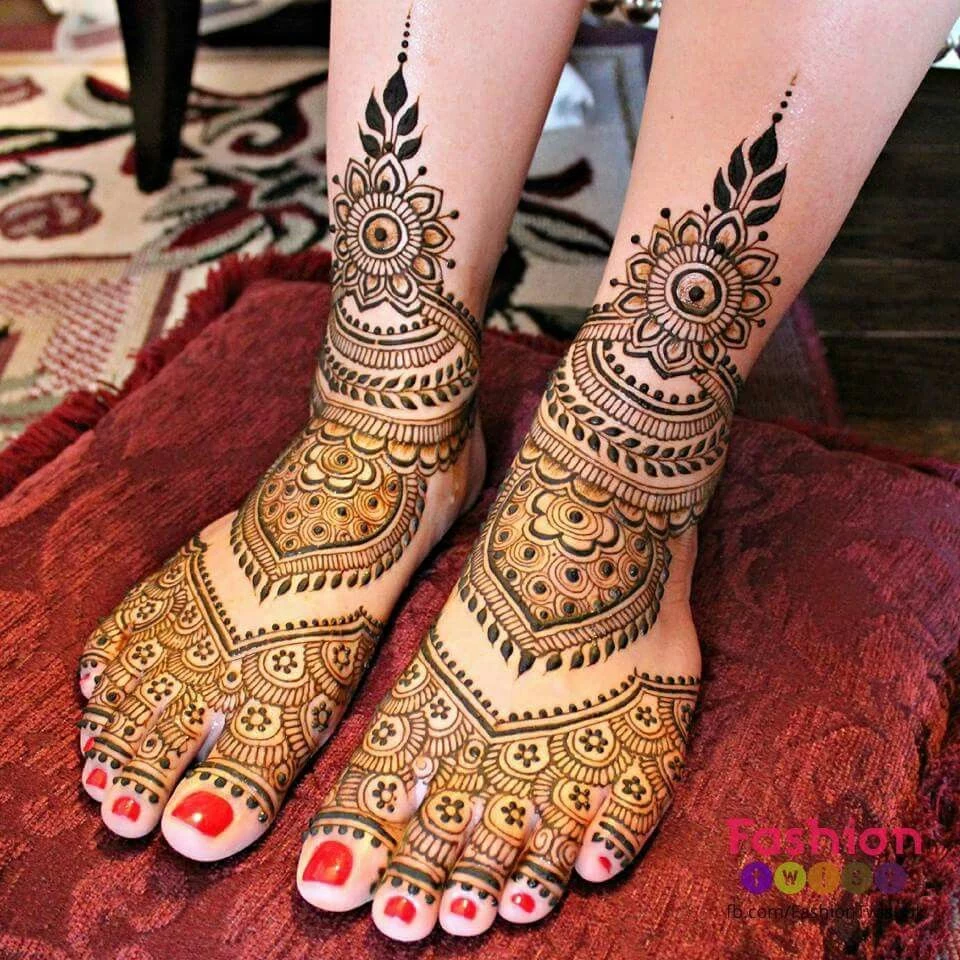
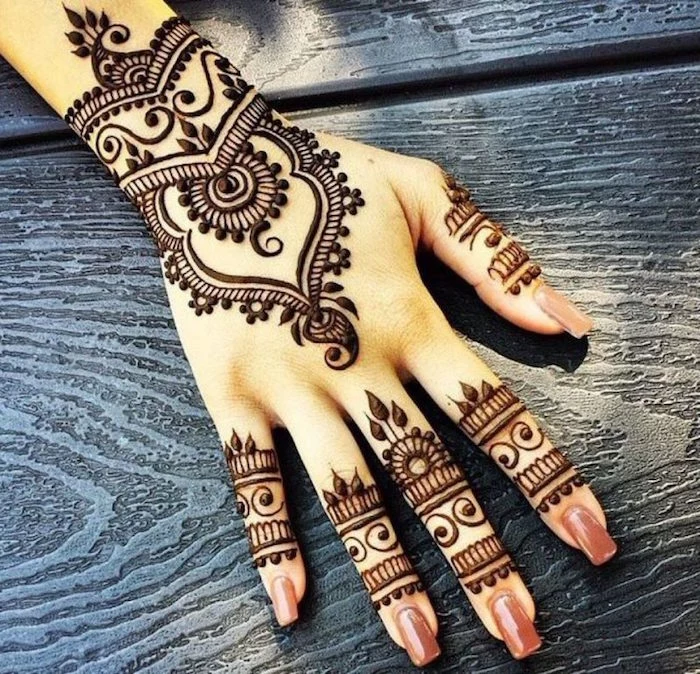
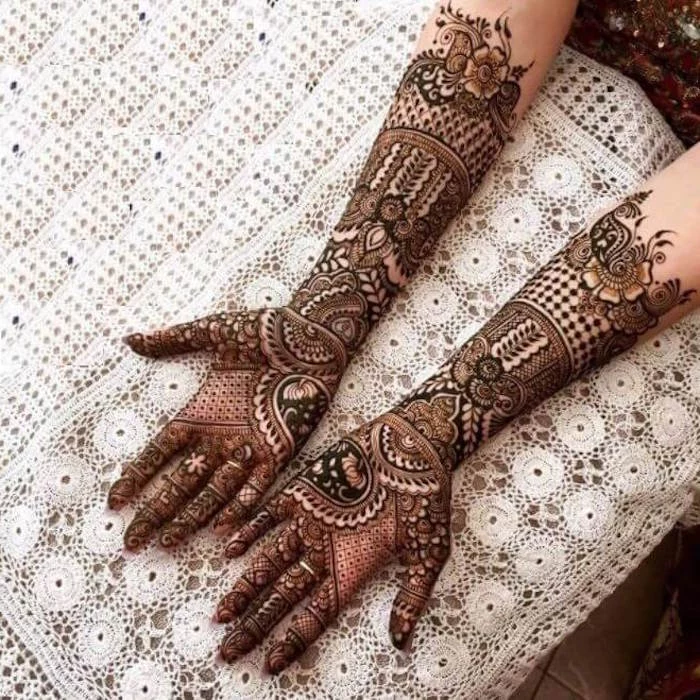
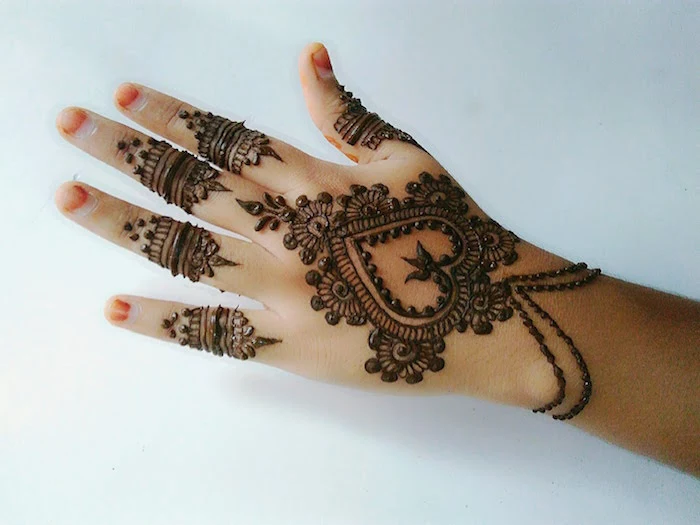
- Indian & Rajasthani Styles: This is the look many people associate with intricate bridal henna. It involves incredibly fine, detailed work that often covers the entire hand and foot. You’ll see lots of paisleys, peacocks, and floral patterns with very little empty skin showing. The goal is full, breathtaking coverage.
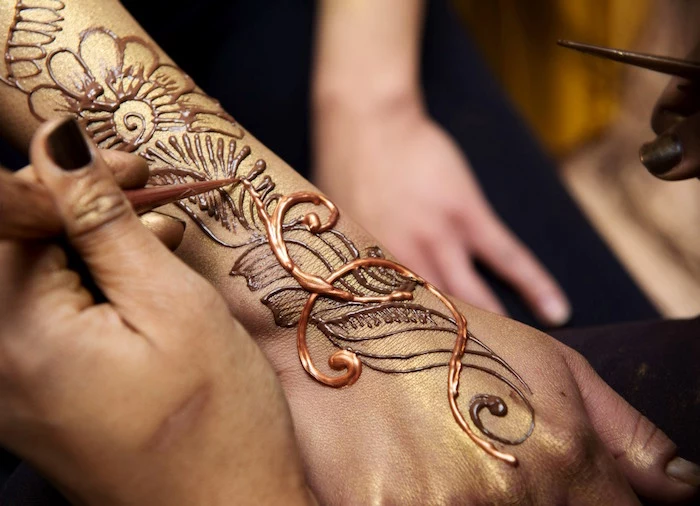
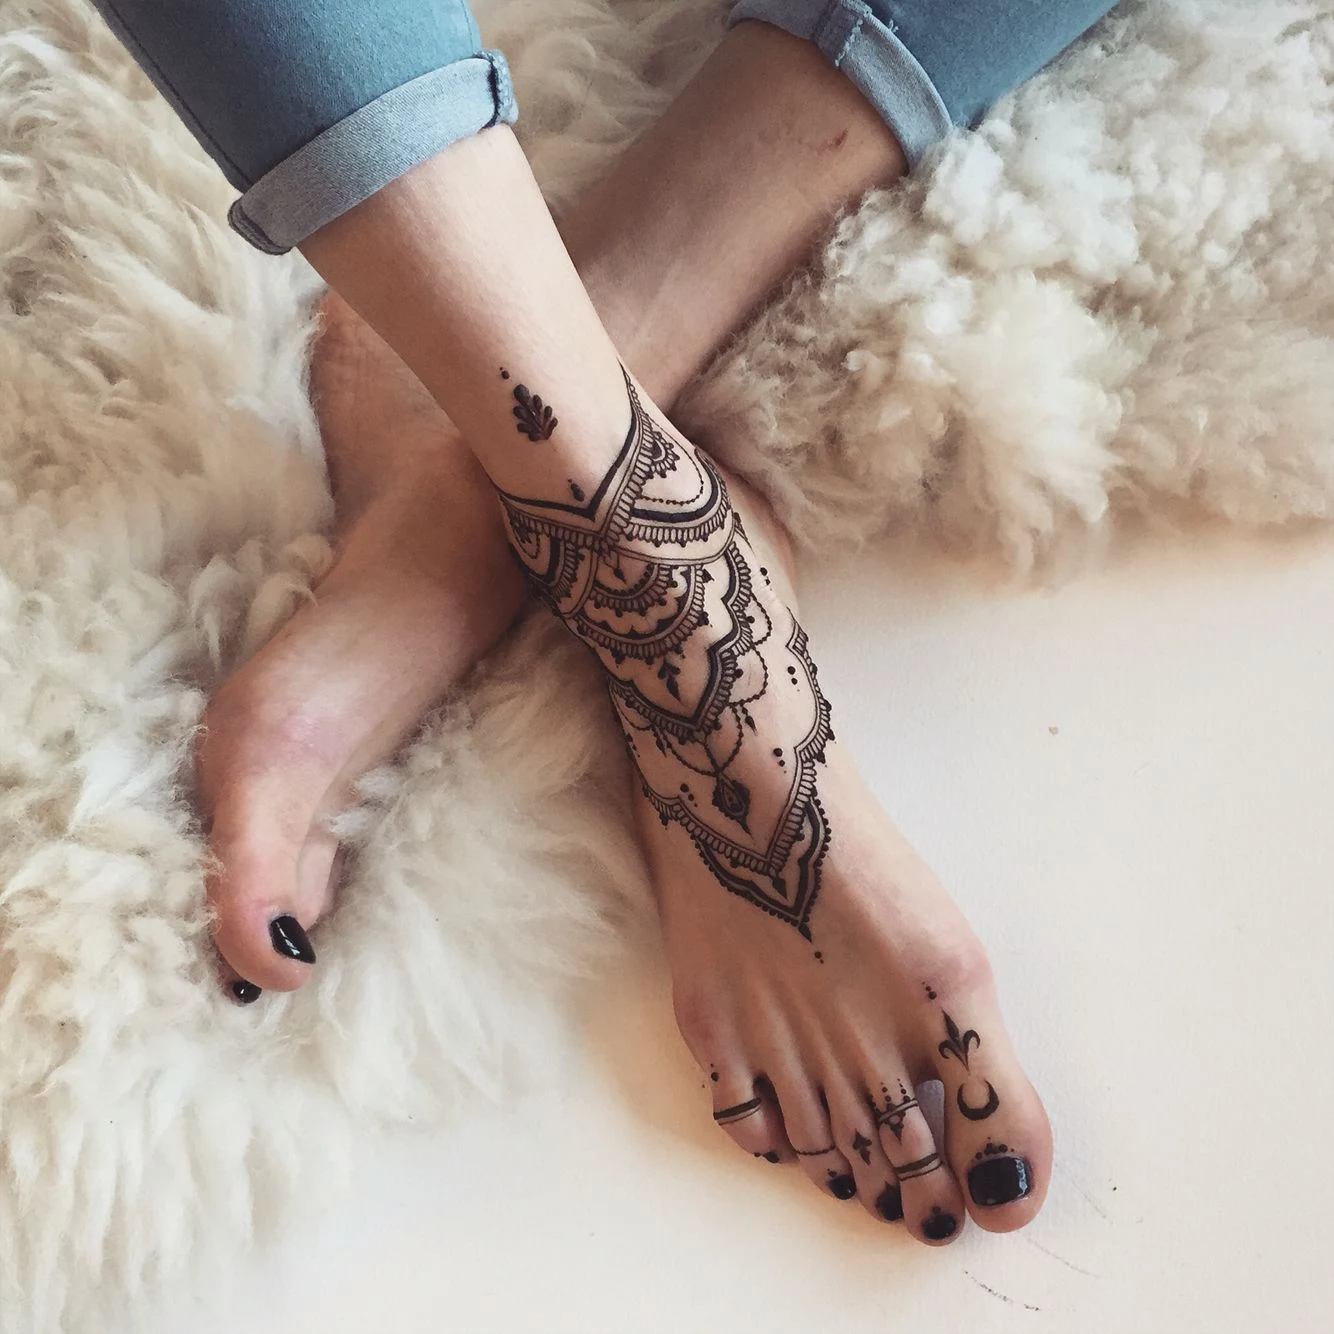
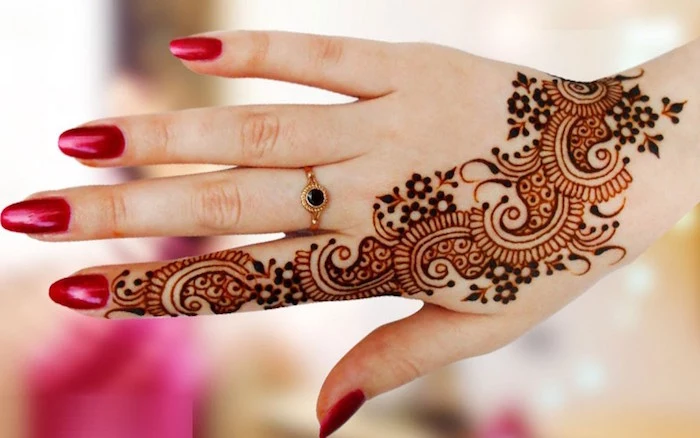
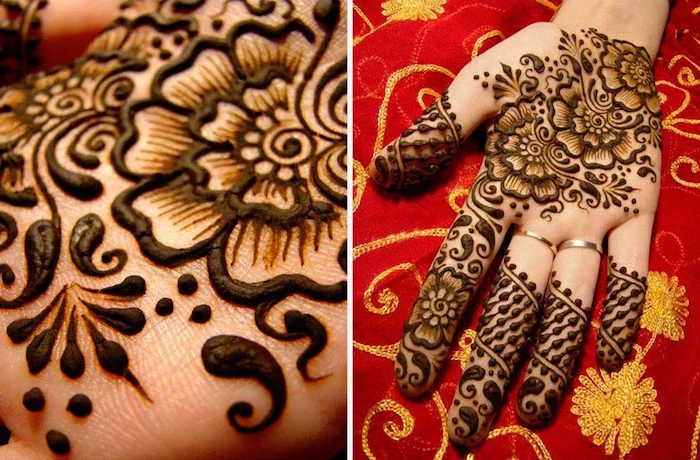
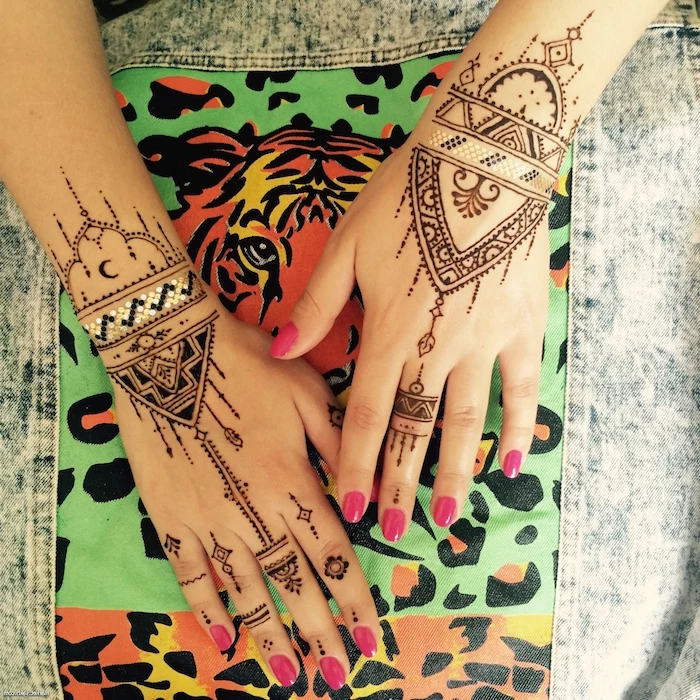
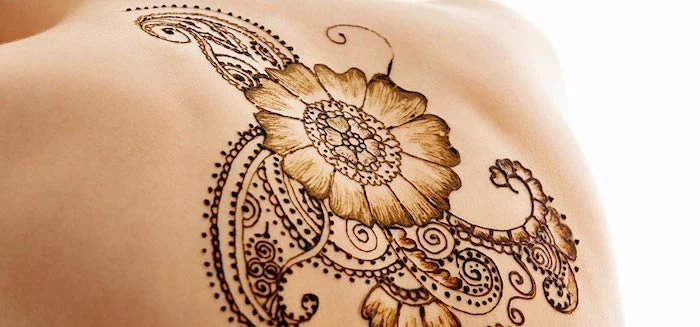
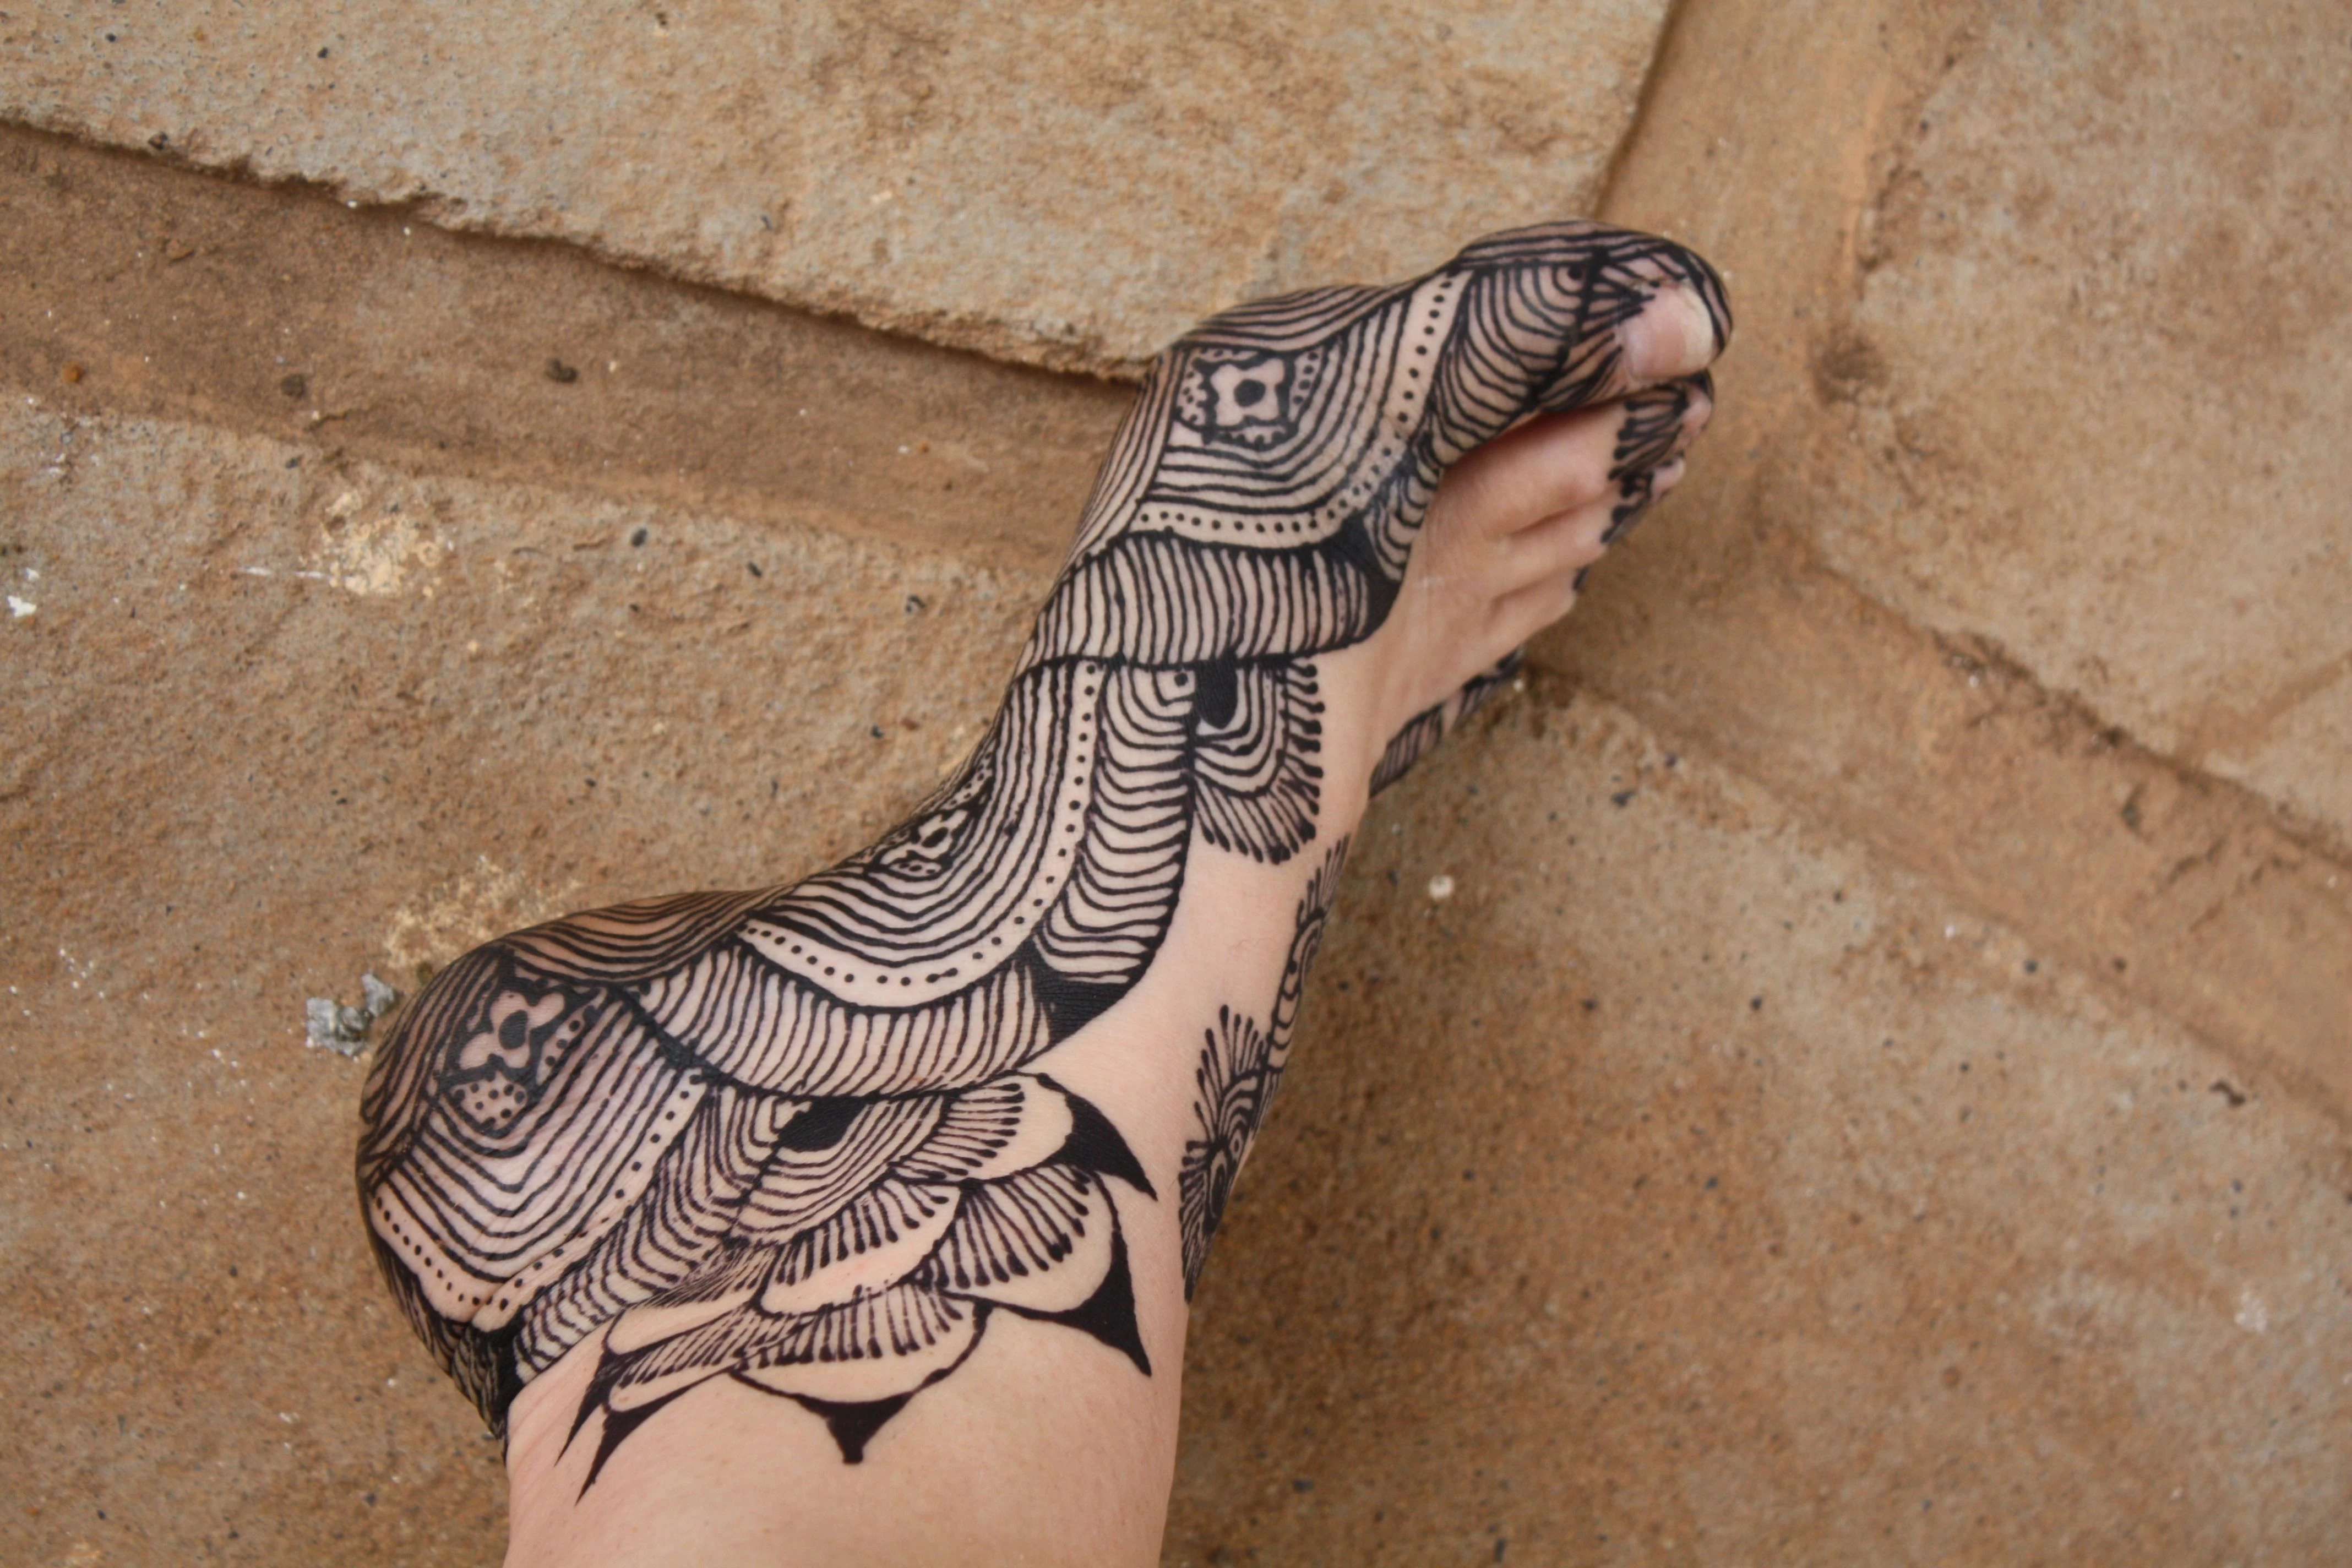
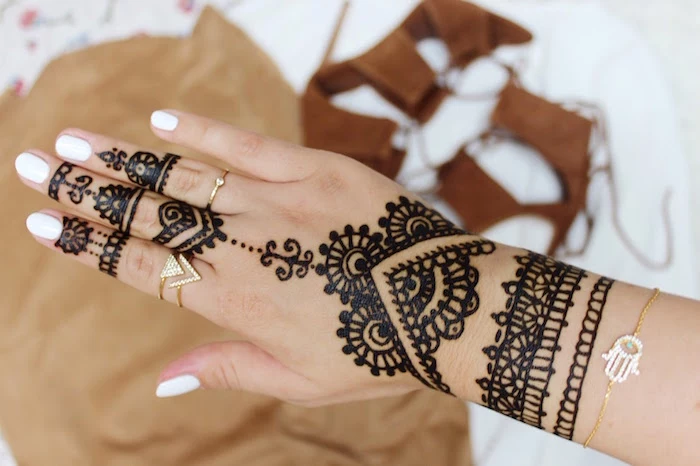
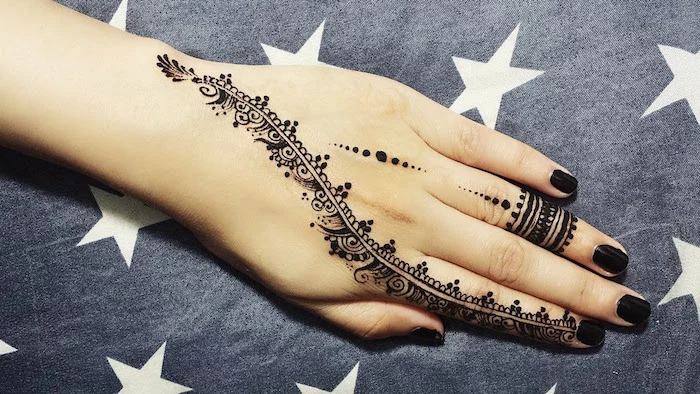
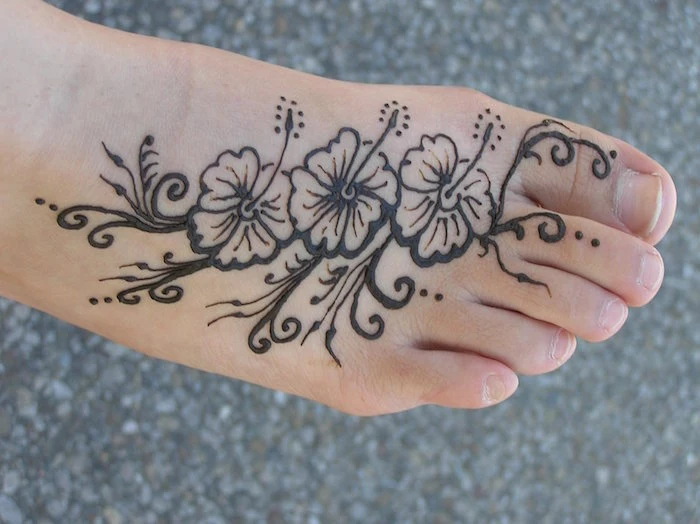
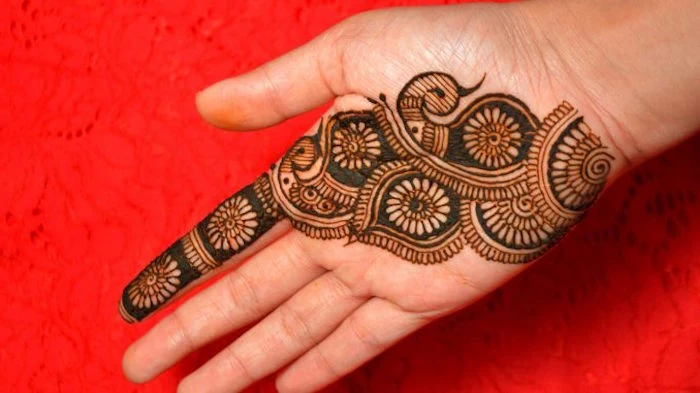
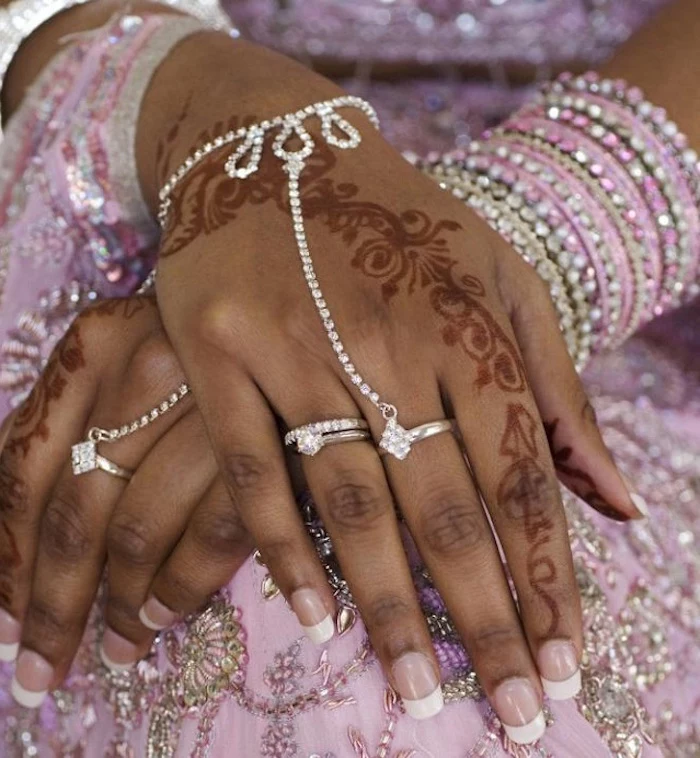
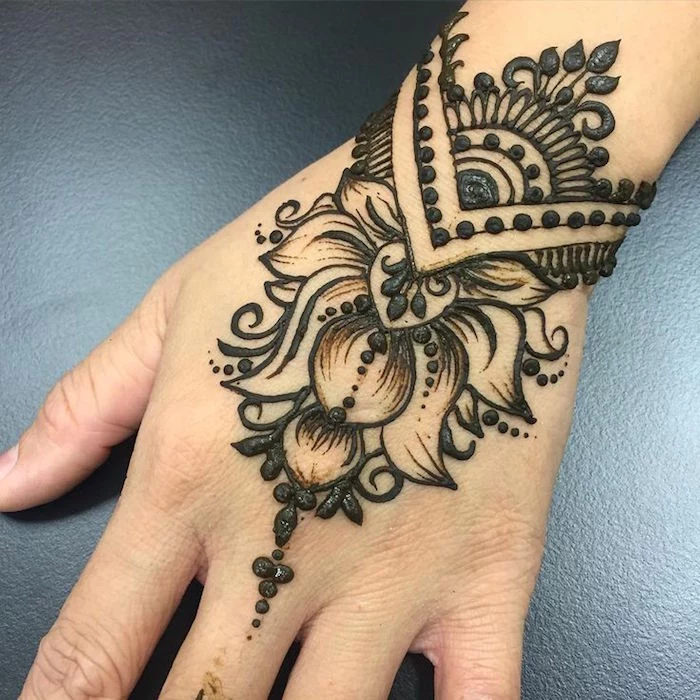
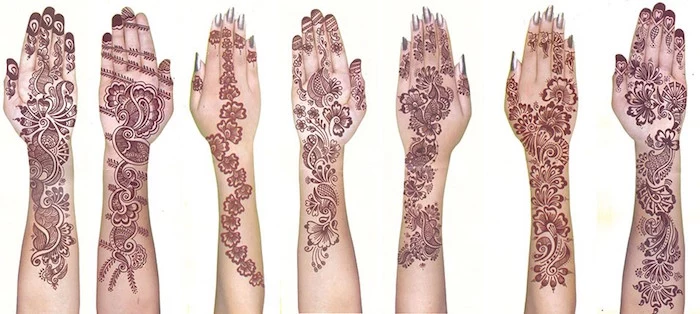
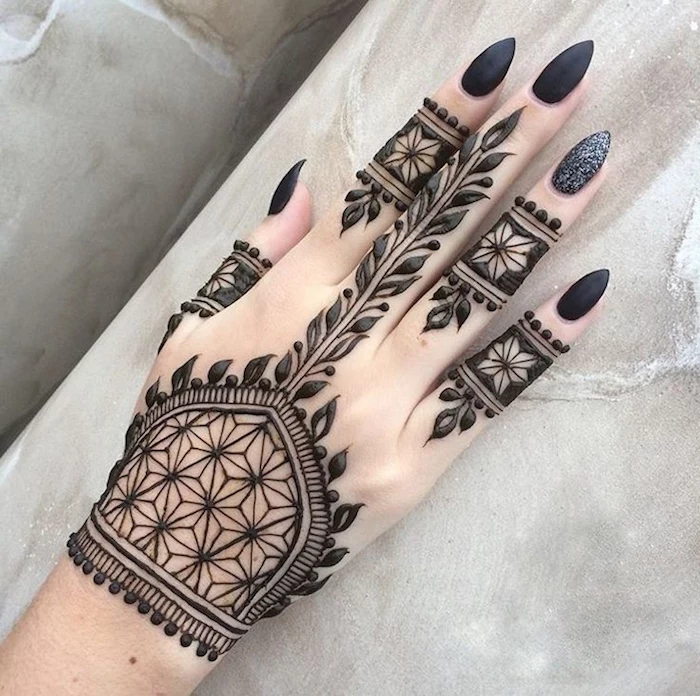
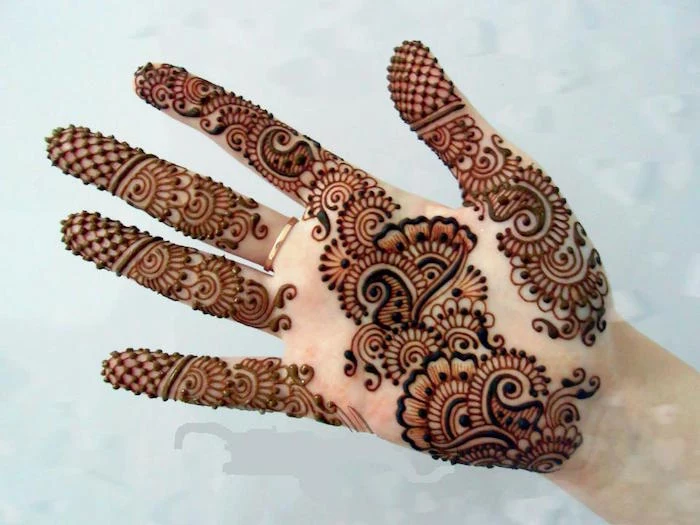
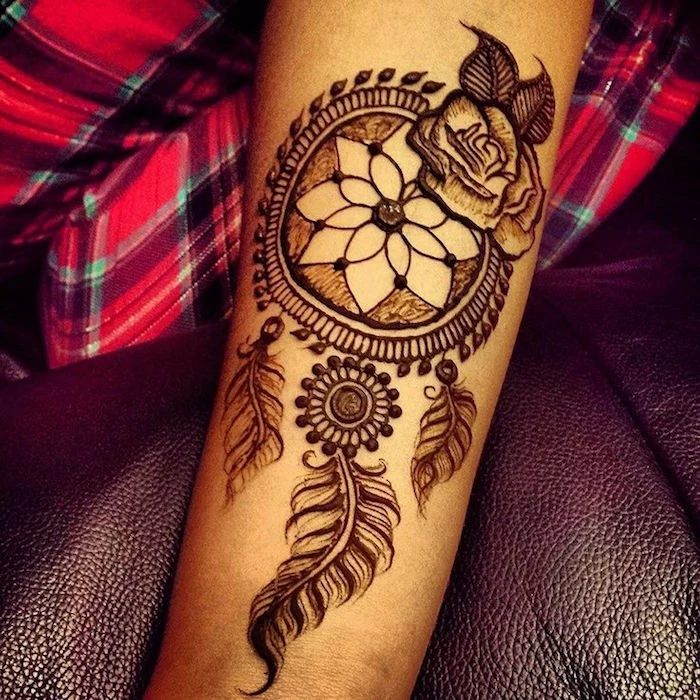
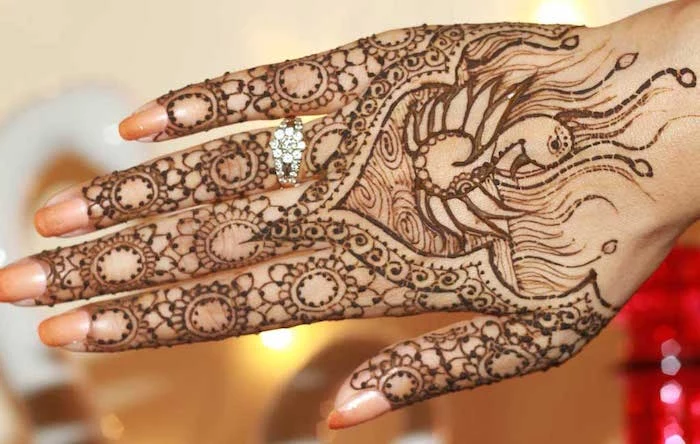
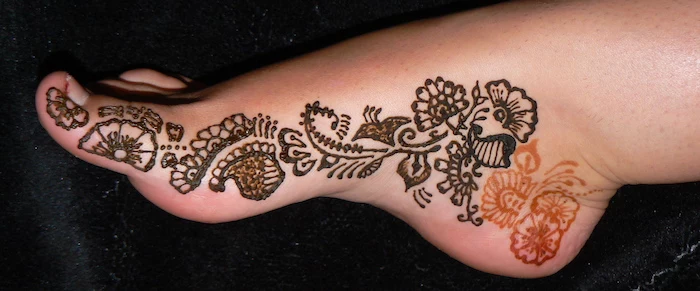
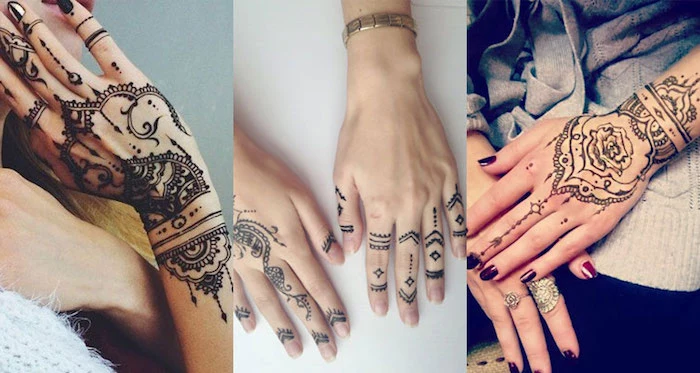
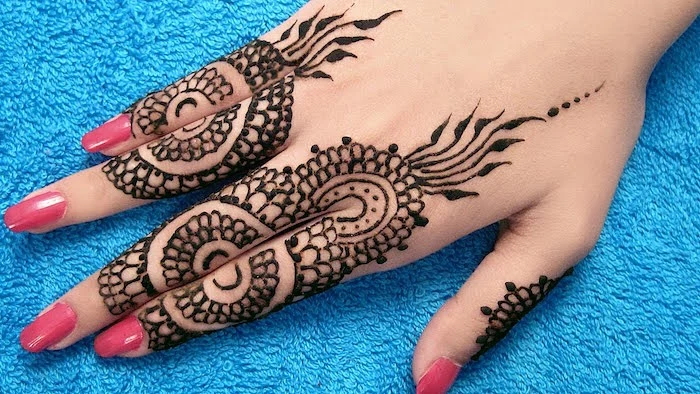
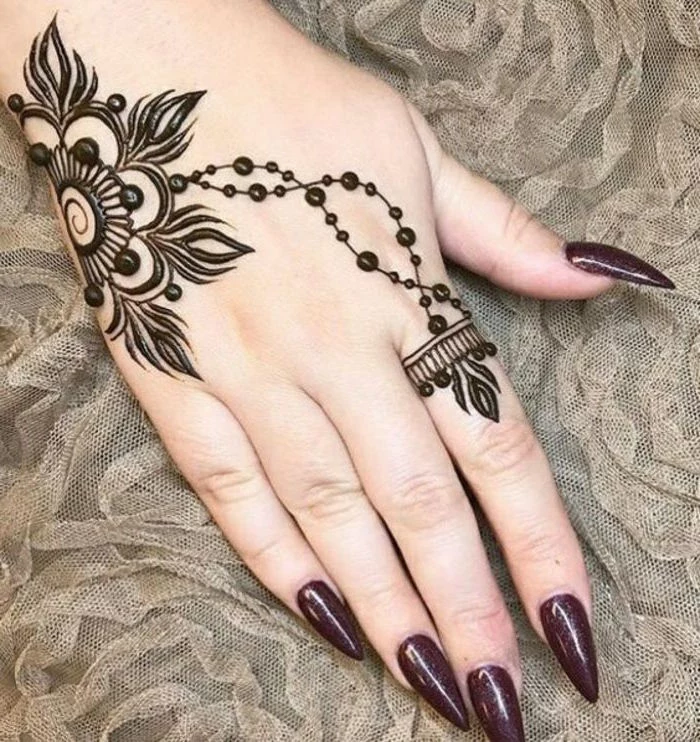
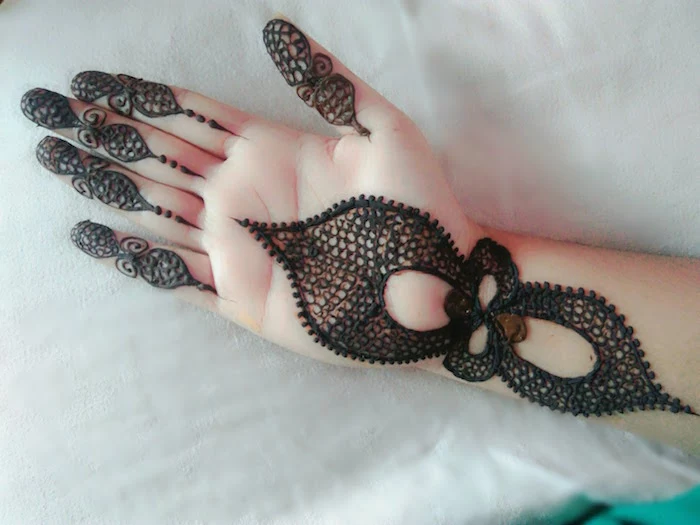
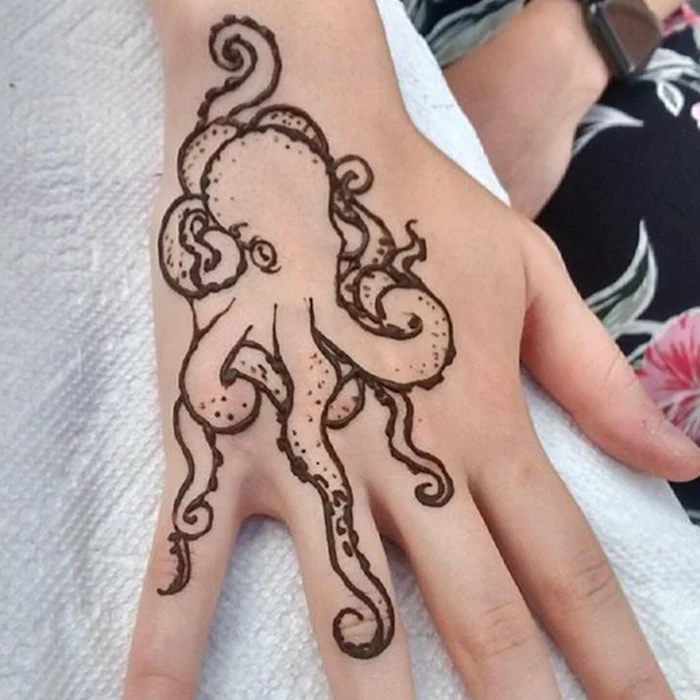
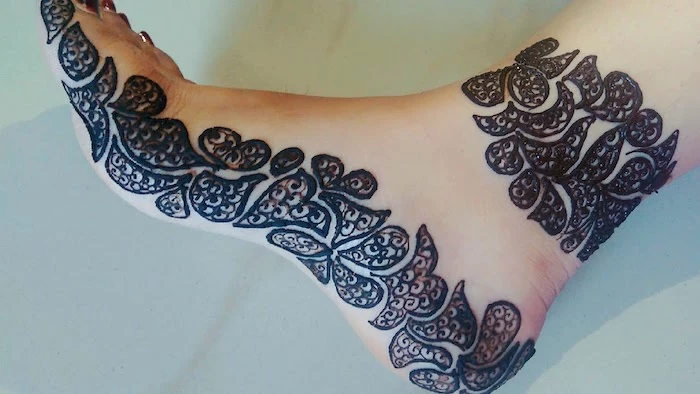
- Arabic Styles: This tradition often features bolder, larger patterns, usually with floral and vine motifs. The designs tend to flow across the skin, frequently in a diagonal line up the hand or foot. A key feature here is the use of negative space, which really makes the bold patterns stand out.
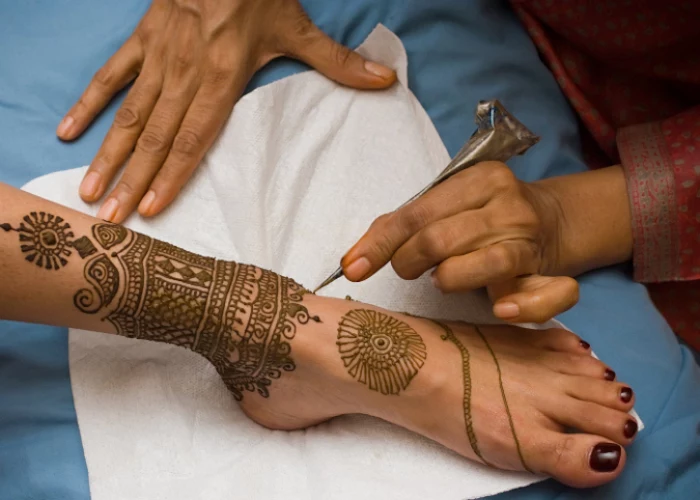
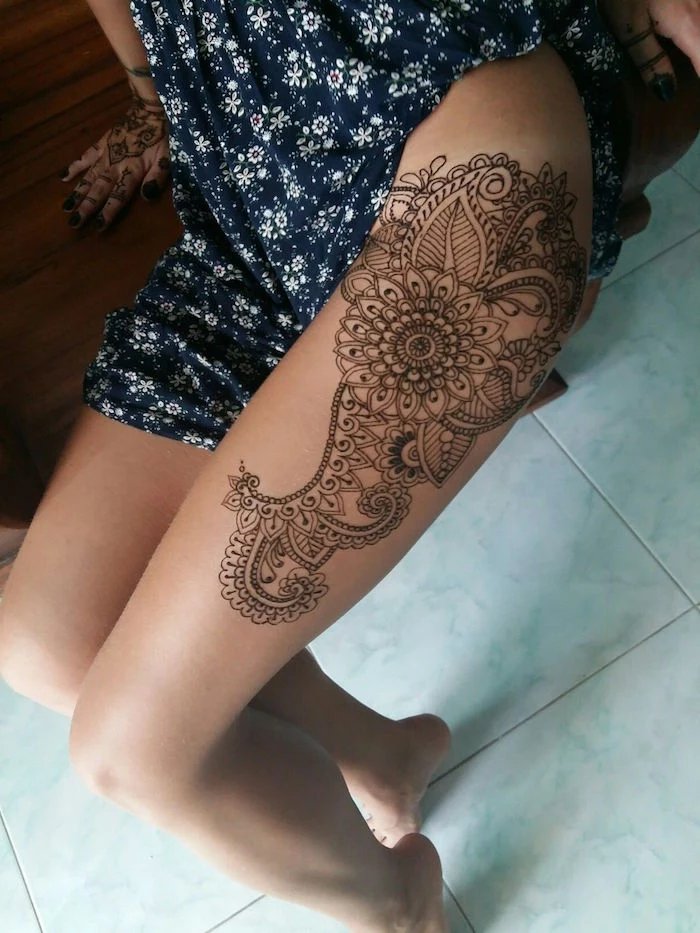
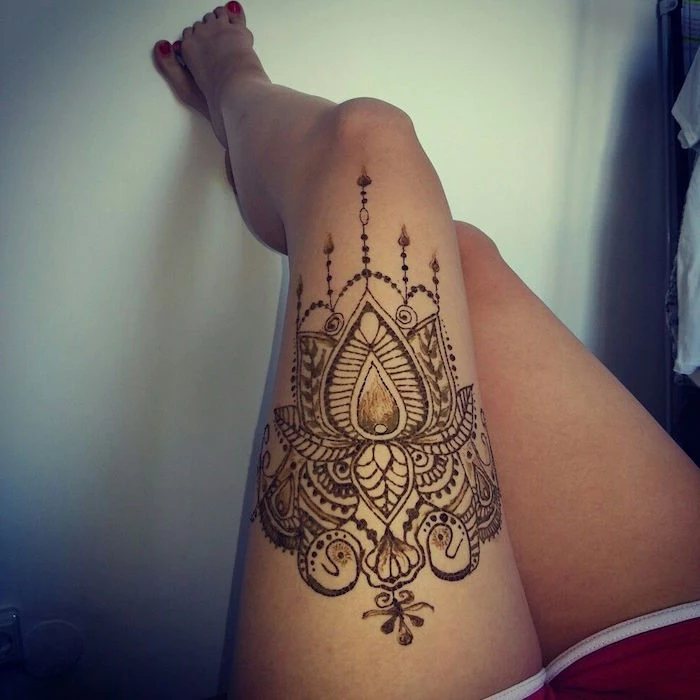
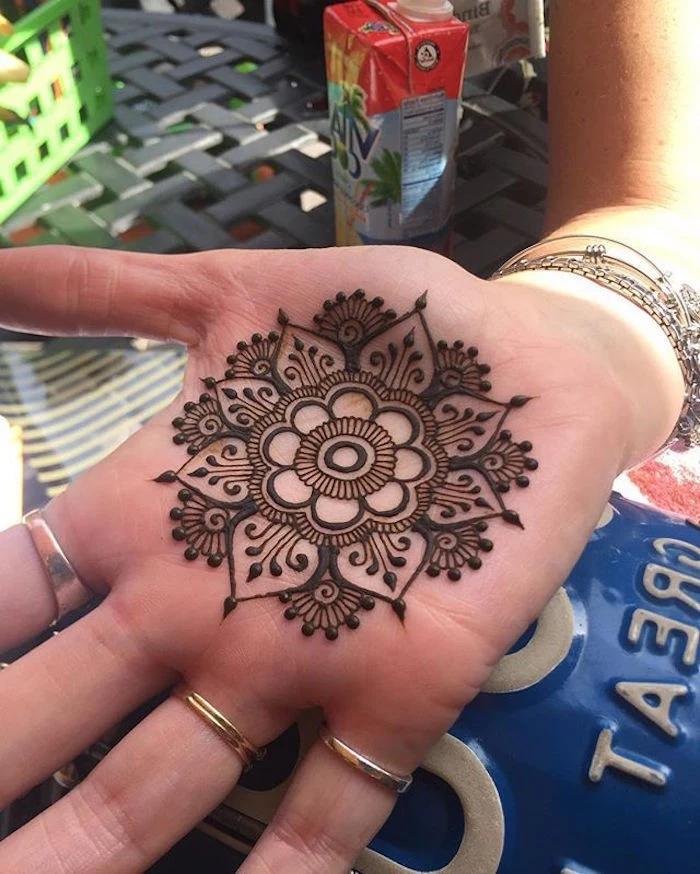
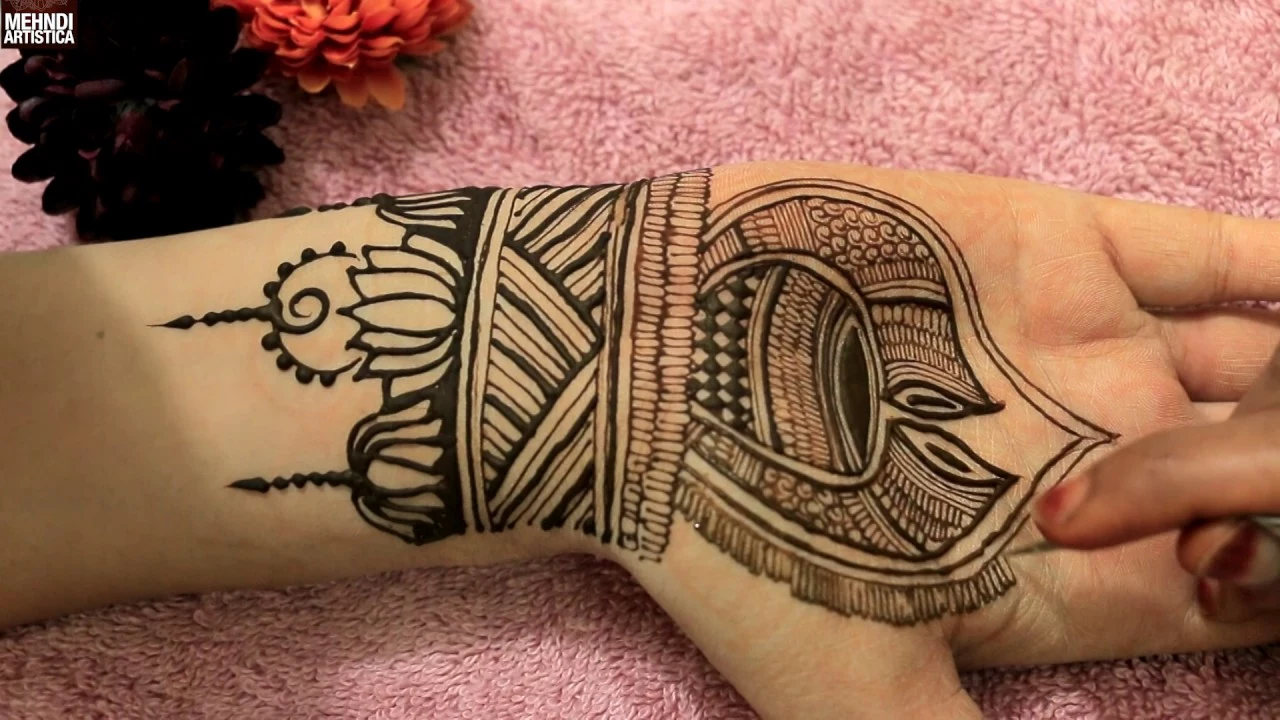
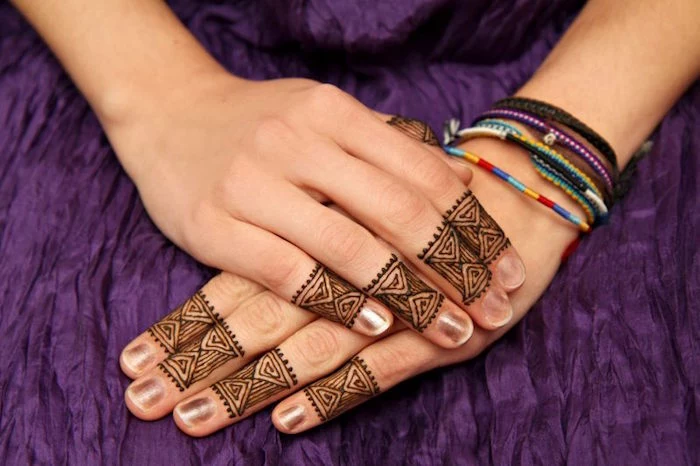
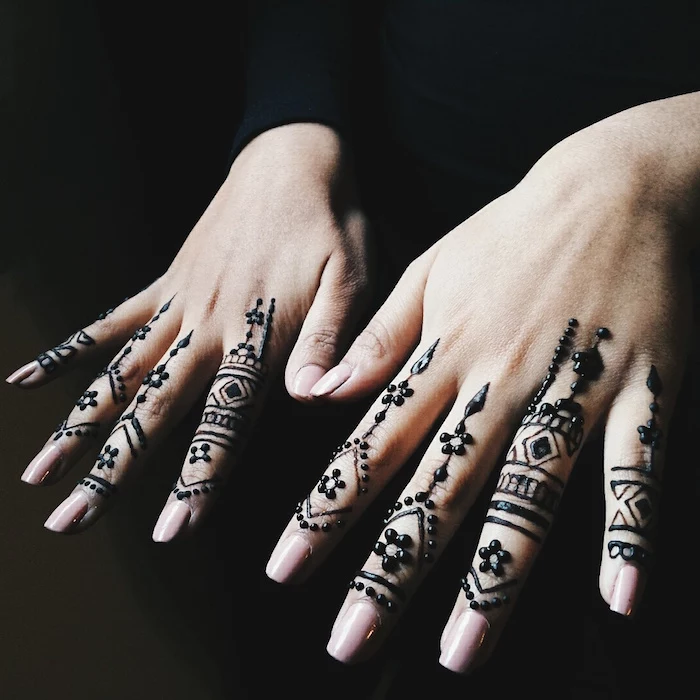
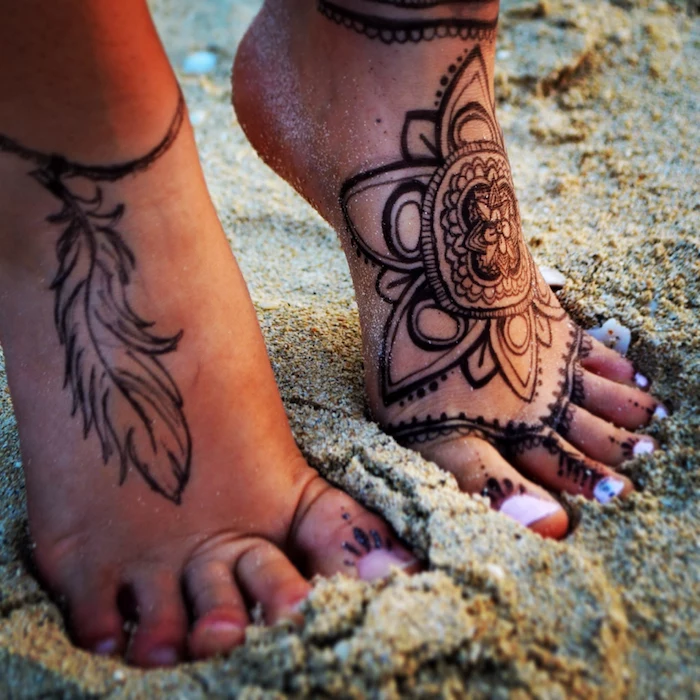
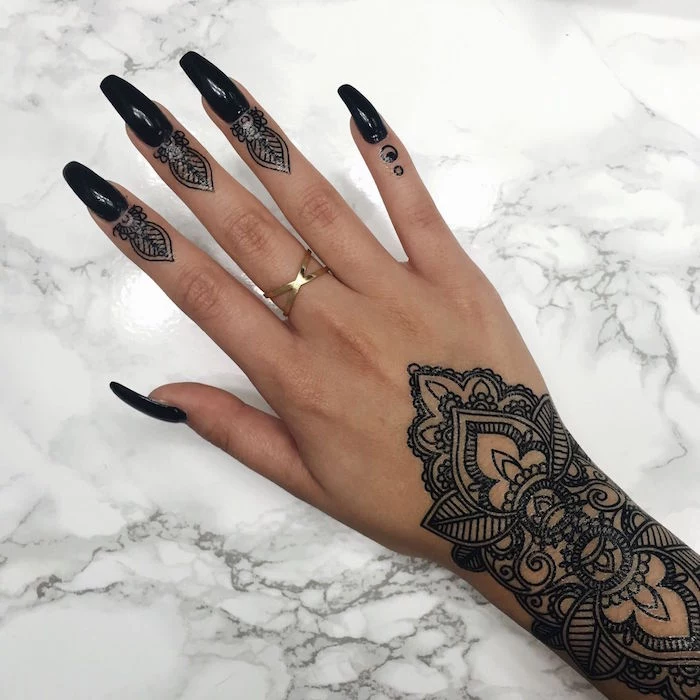
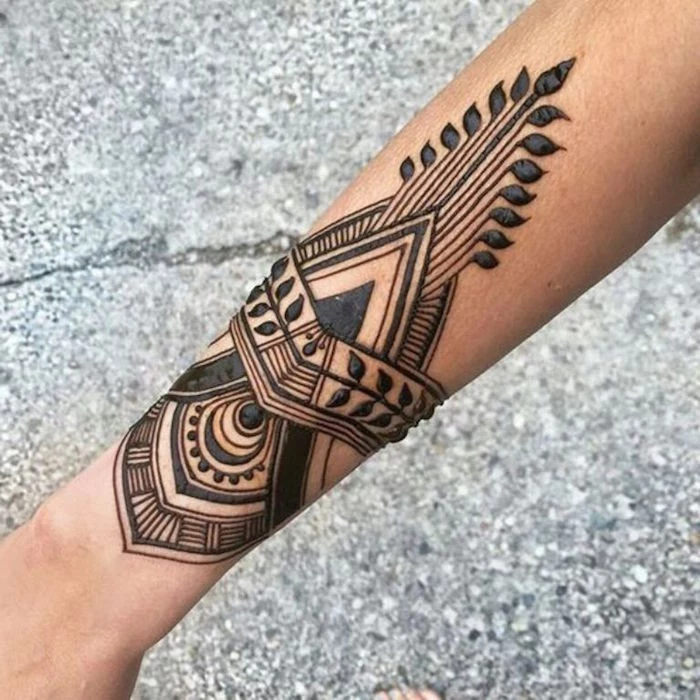
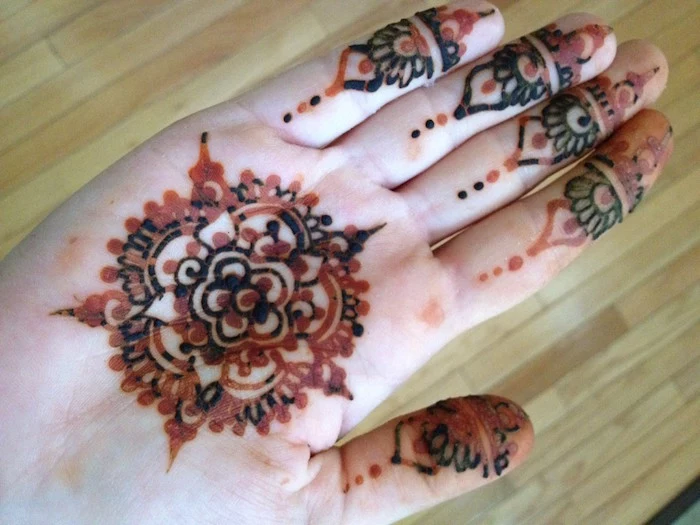
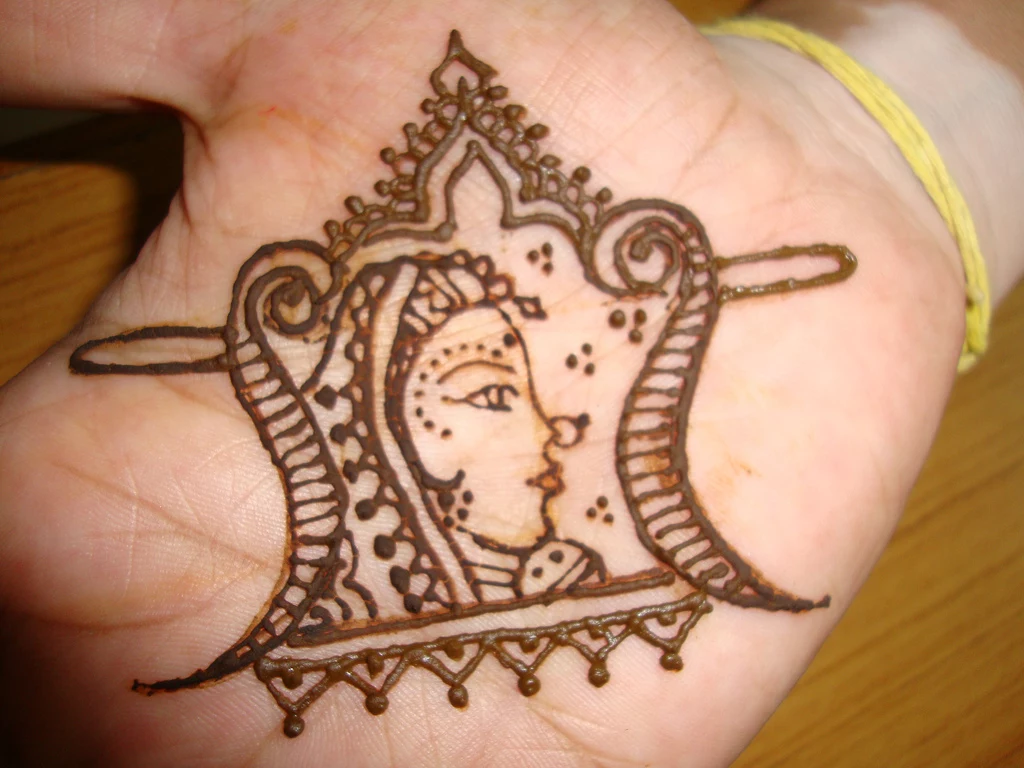
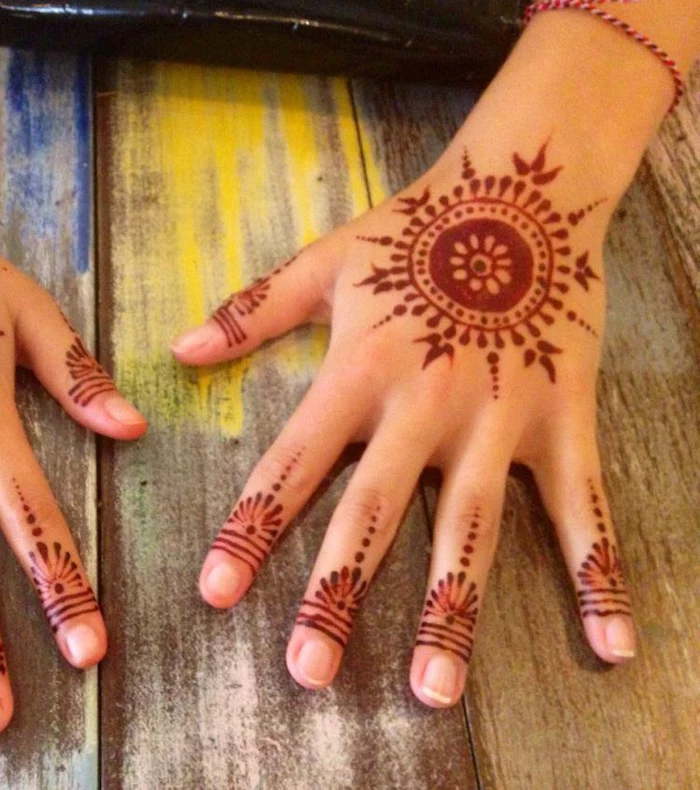
- North African & Moroccan Styles: Deeply symbolic and distinct, this style is very geometric. It uses a powerful vocabulary of dots, lines, diamonds, and abstract shapes. You’ll often see a large, central design on the palm or sole of the foot, meant as a talisman for blessings and protection.
Aftercare: Your Secret Weapon for a Dark Stain
My work is only half the battle. What you do in the 48 hours after application is what truly makes or breaks the final color. I always give my clients this list.
- Leave It On: The paste needs to stay on your skin for at least 6 to 8 hours. If you can manage overnight, even better. The longer the paste is on, the deeper the stain will be.
- Keep It Warm: Heat helps the dye develop. If you get cold while the paste is on, try to warm up a bit. You can also gently steam the design. Hold your hand a safe 12 inches away from the steam of a kettle for about 30 seconds—just enough to warm it, not to make it wet!
- Seal It Up: As henna dries, it can crack off. We prevent this by sealing it. My favorite method for overnight care is to wrap the dry design with a gentle, breathable medical tape. Another option is a lemon-sugar sealant. Just mix lemon juice and sugar in roughly a 1:1 ratio until it forms a thin syrup. Gently dab it onto your fully dry paste with a cotton ball to keep it sticky and in place.
- The Big Reveal: This part is critical. Do not wash the paste off with water. Scrape it off with a credit card edge or your fingernail. It will be bright, pumpkin orange. Don’t panic! This is what you want to see.
- The 48-Hour Rule: Over the next 24 to 48 hours, the orange will oxidize and darken into a beautiful, rich reddish-brown. During this time, avoid water on the area as much as you can. Applying a bit of coconut oil or shea butter before a shower can help create a protective barrier.
A Serious Warning: The Dangers of ‘Black Henna’
If you only remember one thing from this guide, let it be this: natural henna is NEVER black. The stain it leaves is always in the family of orange, red, burgundy, and brown. If an artist offers you an ‘instant black’ stain, you need to walk away immediately. It is not worth the risk.
‘Black henna’ is a dangerous concoction containing a chemical called paraphenylenediamine (PPD). This is a harsh black dye that is illegal and incredibly unsafe for direct skin application. I once had a client come to me in tears, seeking to cover up the permanent, raised scars she got from a PPD cone she used on vacation. The design had turned into a painful, blistering chemical burn.
A PPD reaction can cause weeping sores, permanent scarring, and lifelong sensitization. This means a future exposure, even from regular hair dye, could trigger a severe allergic reaction. Always ask your artist what’s in their paste. A true pro will happily tell you: henna powder, lemon juice, sugar, and essential oils. If they’re cagey or say it’s a ‘secret,’ that’s a huge red flag.
Safe Ways to Get a Darker Look
- Jagua: If you want a temporary design that looks black, Jagua is the only safe option. It’s a gel made from a South American fruit that stains the skin a beautiful blue-black color for one to two weeks. It’s totally different from henna, but a fantastic natural alternative.
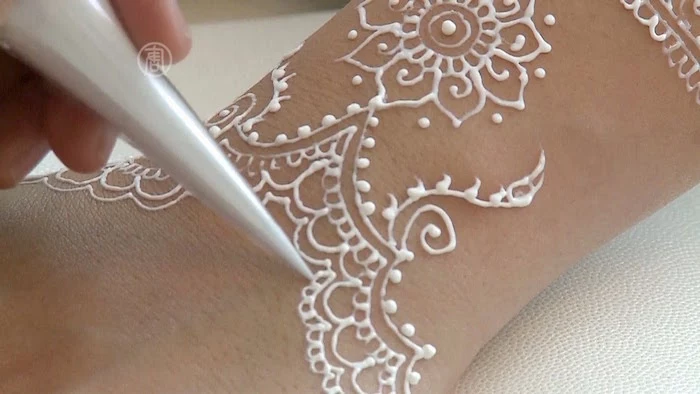
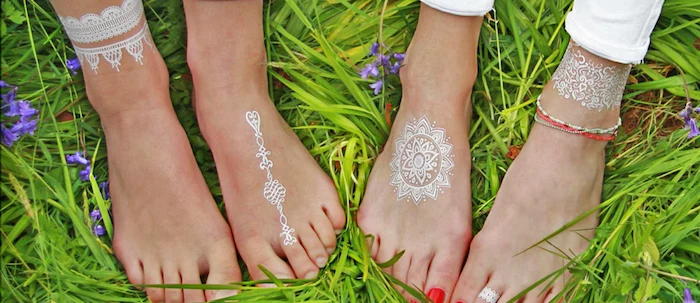
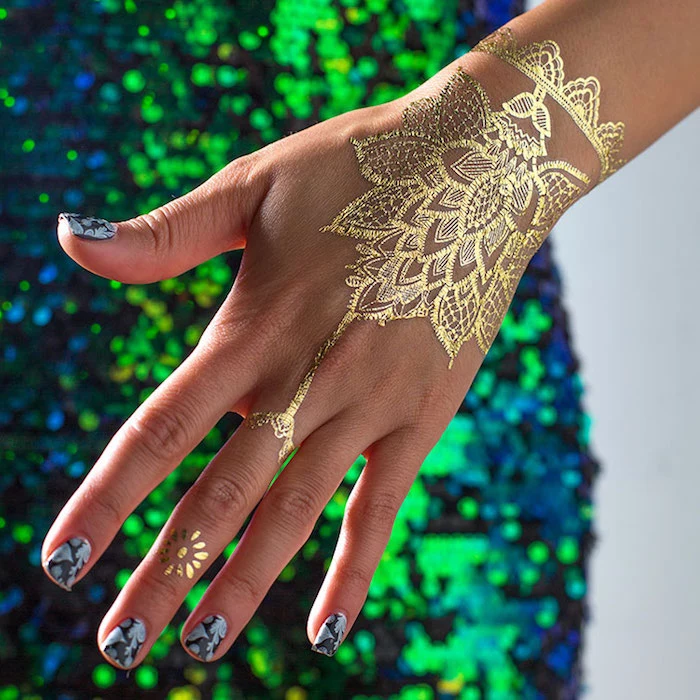
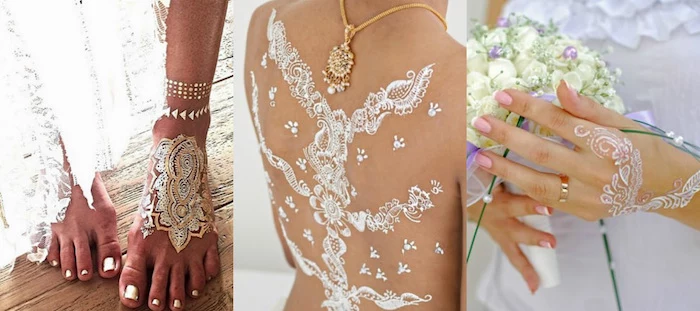
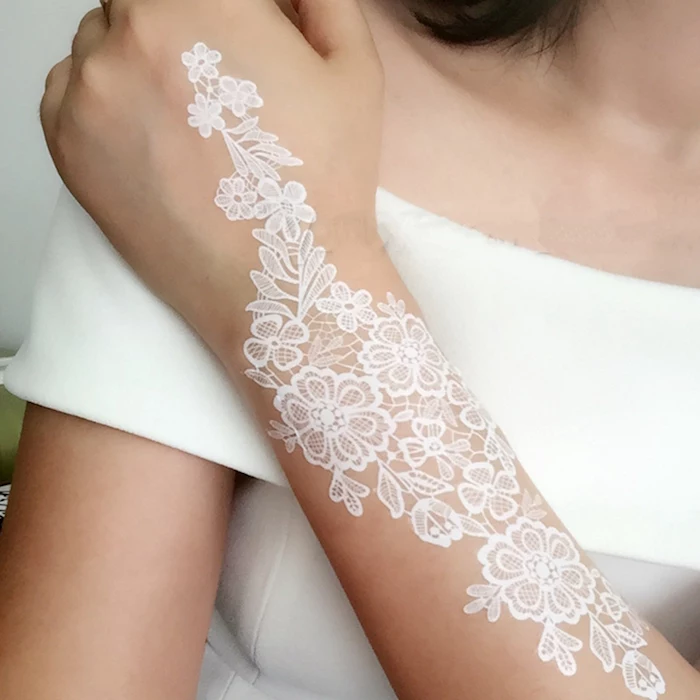
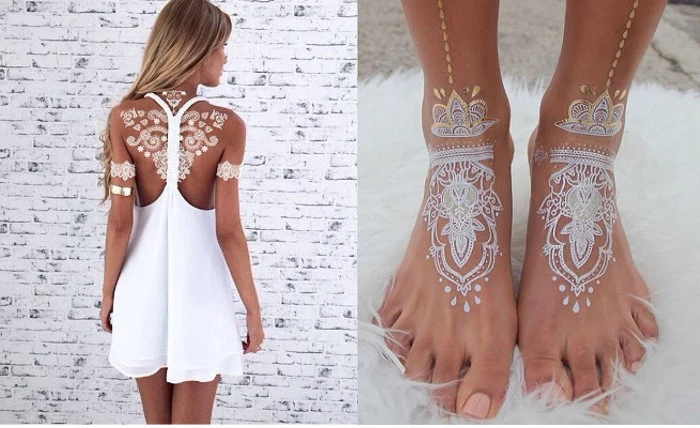
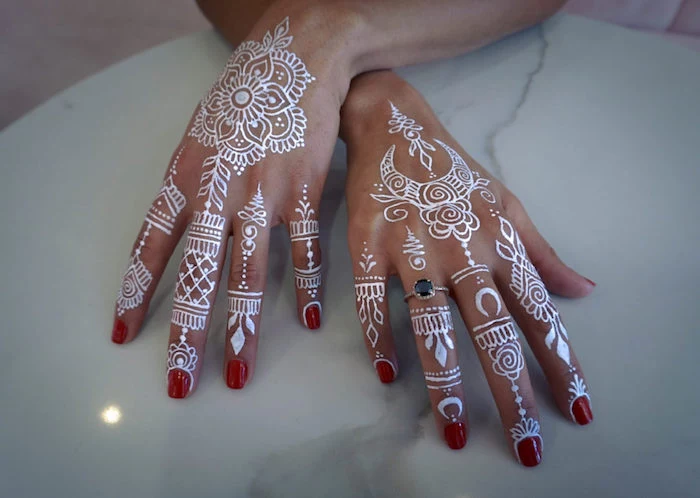
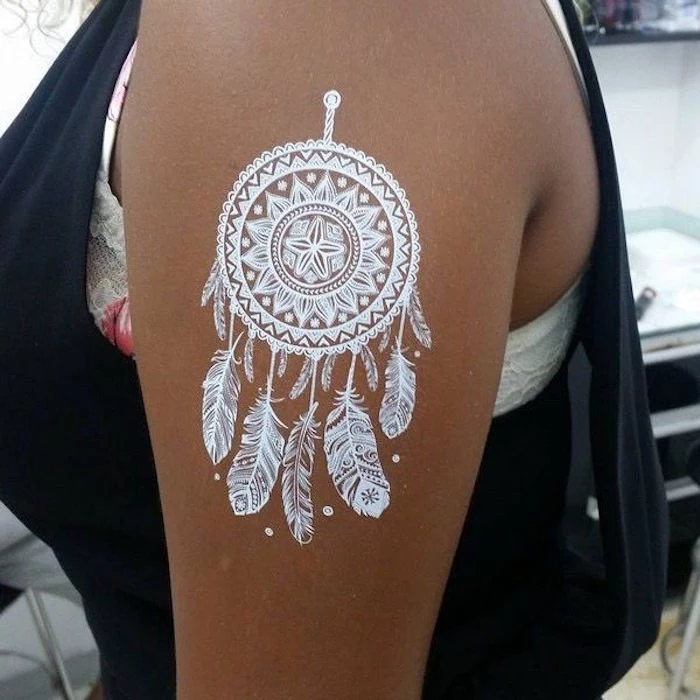
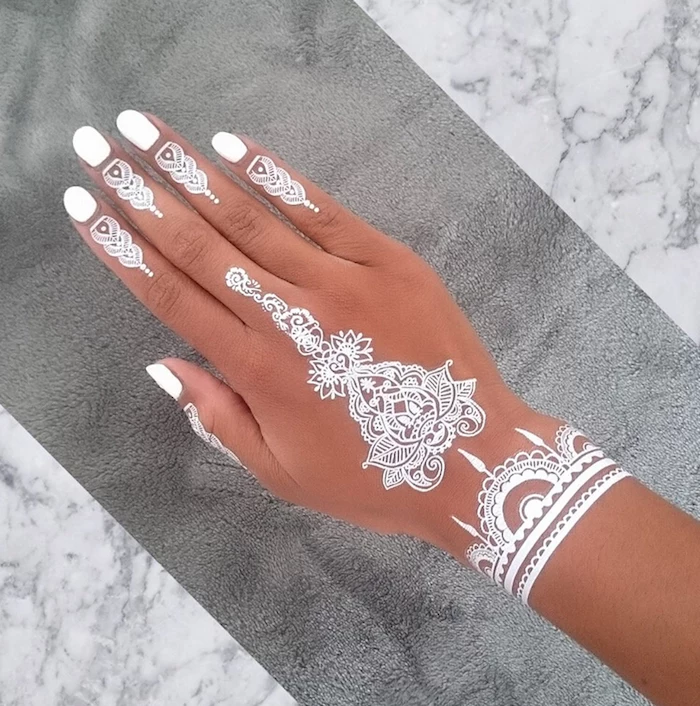
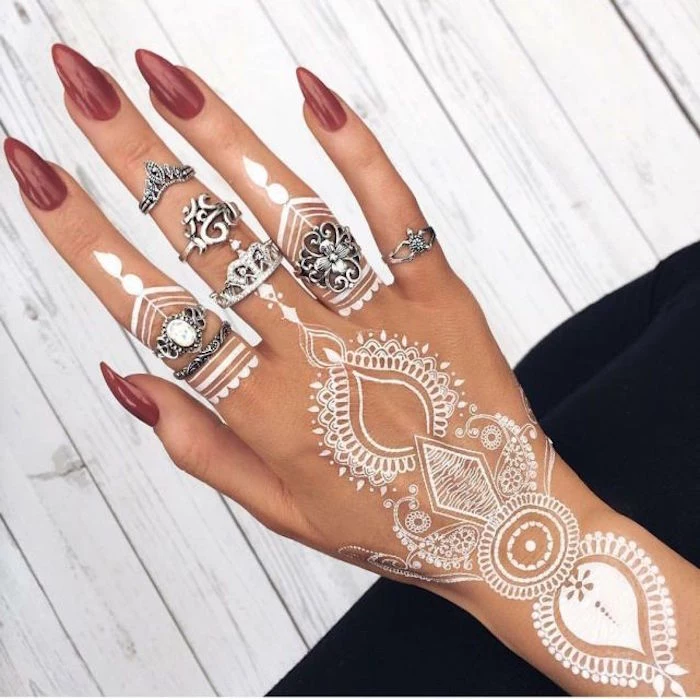
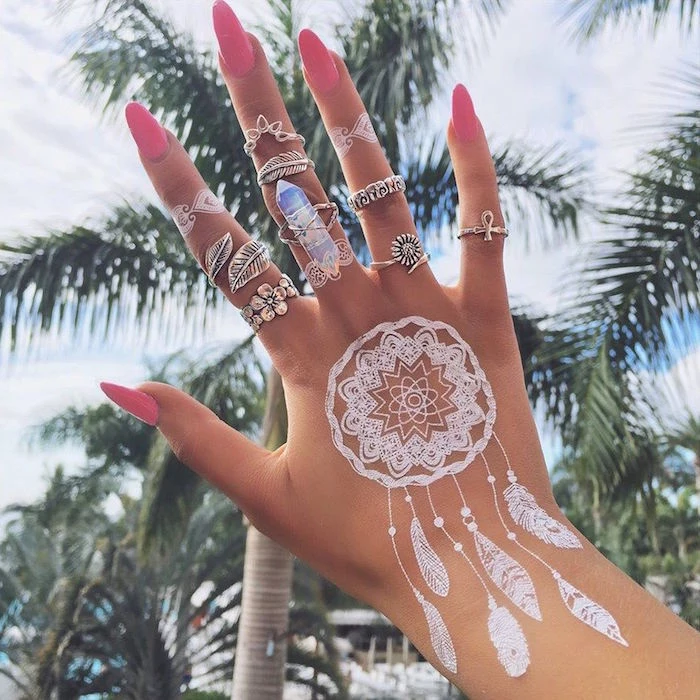
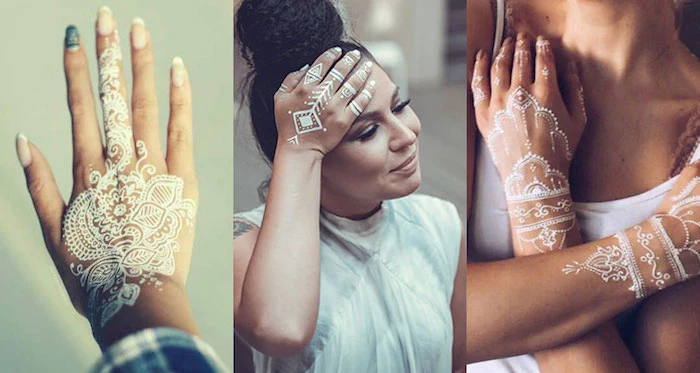
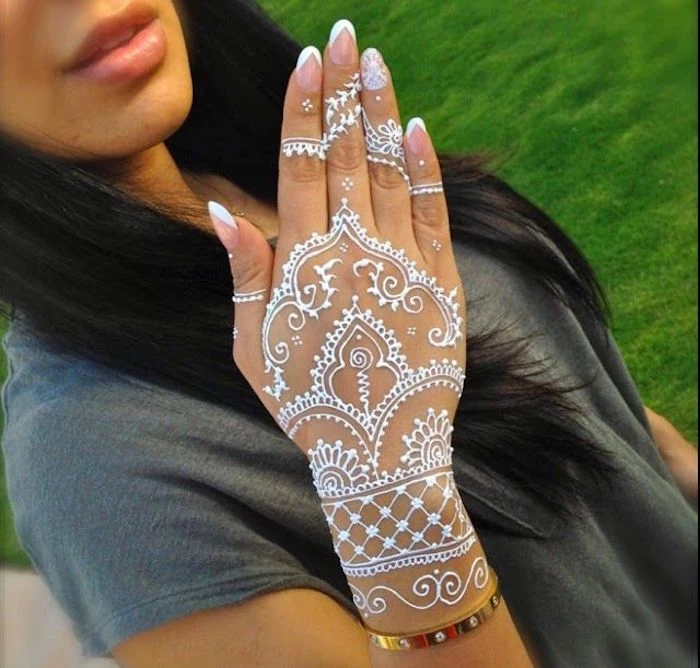
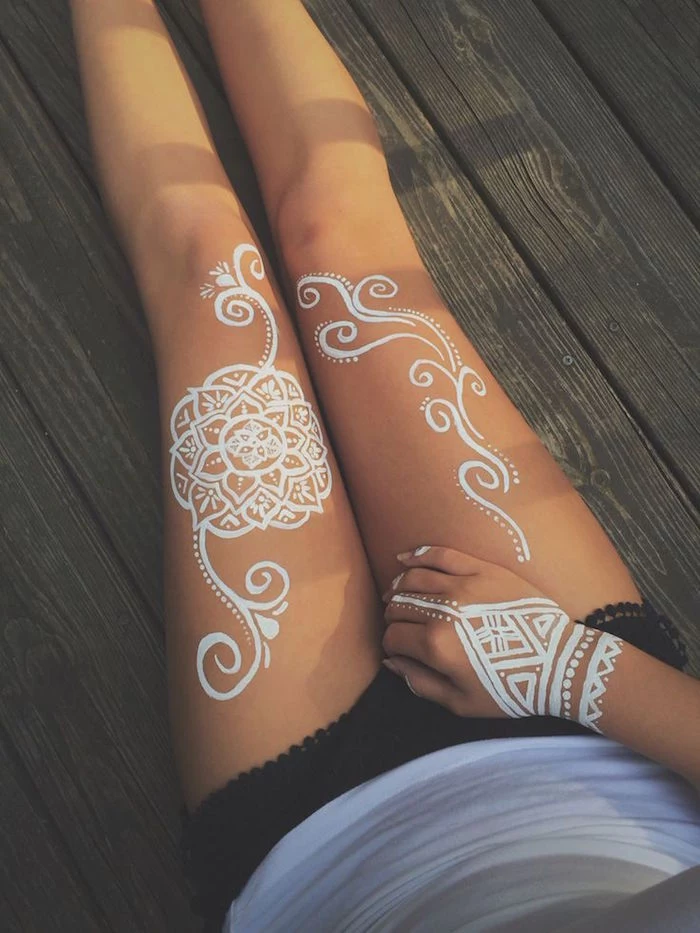
- ‘White Henna’: This is another one that isn’t actually henna. It’s a body-safe cosmetic adhesive that sits on top of the skin, often decorated with cosmetic glitter. It creates a gorgeous 3D effect that lasts for a few days and removes easily.
Taking Your Craft to the Next Level
Going from a hobbyist to a pro means focusing on your business as much as your art. I’m always attending workshops and learning from other master artists to keep my skills sharp and stay current on the best safety practices.
For big events like weddings, a consultation is key. We discuss their vision, I show them my portfolio, and we do a small patch test 48 hours beforehand. Pricing is something you should be upfront about. Many artists charge an hourly rate (often from $75 to $150/hour depending on experience and location), while bridal packages are usually quoted per project. Providing clear aftercare instructions builds trust and ensures your beautiful work gets the dark stain it deserves.

Honestly, teaching this art has become one of my greatest joys. I teach my students to respect the medium, to always put safety first, and to remember that every line they draw is a mark of celebration and trust. That’s the real craft.
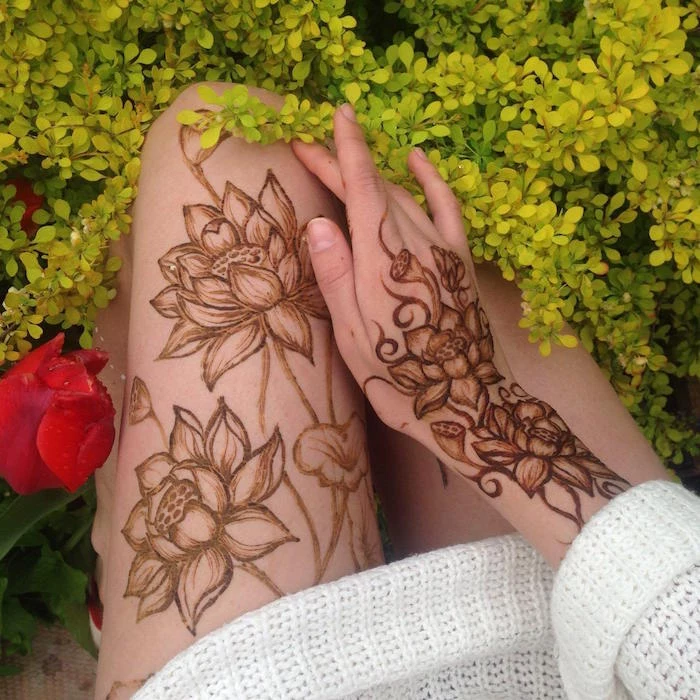
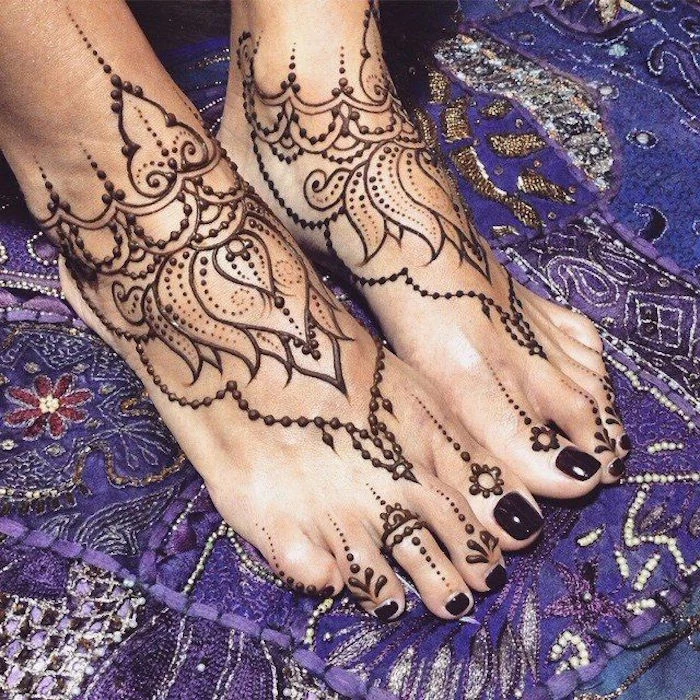
Inspiration Gallery
Crucial Safety Warning: Never use “black henna.” True henna is never black. Products marketed as such often contain a dangerous chemical dye called paraphenylenediamine (PPD), a black hair dye ingredient that can cause severe blistering, permanent scarring, and lifelong sensitization. Always ask your artist what’s in their paste; if they say “black henna,” walk away.
- Deeper, richer stains that last longer.
- A smoother, silkier paste consistency.
- A longer shelf-life when frozen.
The secret? Letting your mixed paste rest. After mixing your henna powder with liquid, cover it and let it sit at room temperature for 6-12 hours. This dye-release process is essential for the lawsone molecules to become fully available for staining your skin.
Why did my stain turn out orange and faint?
This is a common issue! The most likely culprit is not leaving the paste on long enough. For a deep, rich burgundy stain, henna paste needs to be in contact with your skin for a minimum of 6-8 hours, or even overnight. The initial color after removing the paste will always be a bright pumpkin orange. The color deepens over the next 48 hours as it oxidizes, so be patient!

The word “mehndi” is derived from the Sanskrit word “mendhikā,” which refers to the henna plant itself. Its use for body art is documented in ancient India, Africa, and the Middle East, dating back over 5,000 years.
To achieve that coveted dark stain, your choice of essential oil is key. The magic lies in monoterpene alcohols, which help the lawsone dye penetrate the skin more effectively. Here are the top choices for your mix:
- Cajeput: A powerful choice with a strong, medicinal scent, great for professionals.
- Tea Tree: Readily available and very effective.
- Lavender (Population): The safest choice for children, pregnant women, or sensitive skin, yet still highly effective.

Indian Bridal (Mehndi): Characterized by its density. Designs are intricate, fine-lined, and often cover the entire hands and feet, featuring paisleys, peacocks, and floral patterns, leaving very little skin showing.
Arabic Henna: Bolder and more spacious. It typically features large, flowing floral and vine patterns that trail up the hands, fingers, and feet, with more negative space creating a striking contrast.
Both are beautiful, but your choice depends on whether you prefer delicate full coverage or a bold, graphic look.

Did you know? The temperature of your skin significantly affects the final stain. Warm skin absorbs the henna dye more effectively.
This is why you might notice your henna develops darker in summer or if you have naturally warm hands. Before an application, try drinking a warm cup of tea to slightly raise your body temperature. Avoid applying henna if you’re feeling cold or in a chilly room.

The delightful, earthy smell of real henna is part of the experience. It’s a mix of dried leaves, lemon, and the specific essential oils used, often reminiscent of a field after rain. This natural scent is a good sign—it means your artist is using fresh, authentic ingredients, not a pre-mixed cone full of chemicals which often has a harsh, inky odor.
Once your henna paste is dry and crumbly, resist the urge to wash it off with water! Water will halt the oxidation process and ruin the potential darkness of your stain. Instead, gently scrape off the dried paste with a dull edge (like a credit card or a butter knife) or flake it off with your fingers. Apply a natural oil like coconut or olive oil afterward to protect the new stain.
Want to get that dark, long-lasting stain? A lemon-sugar sealant is your best friend. After the paste has dried to the touch (about 30 minutes), gently dab this mixture on top.
- It re-moistens the paste, allowing more dye to penetrate your skin.
- The sugar helps the paste stick to your skin longer, preventing flaking.
- It protects the design as it develops.
Just mix a little lemon juice and sugar, and apply with a cotton ball. Don’t oversaturate it!
What about those beautiful white or metallic “henna” designs I see online?
These are stunning but are not henna at all! “White henna” is typically a skin-safe body adhesive (like the kind used for medical prosthetics) paired with white mica powder or cosmetic glitter. Metallic designs use a similar adhesive with cosmetic-grade foils. They are a form of body art that sits on top of the skin, lasts only a few days, and does not stain. Always confirm with the artist what product they are using.
Making your own henna cones gives you total control over your art. The best material is clear cellophane, which you can find in craft stores or as gift basket wrapping. Cut it into small rectangles (around 5×7 inches is a good start) and roll them tightly into a cone, securing the seam with tape. The trick is to ensure the tip is perfectly sharp and closed, which you’ll snip open to your desired thickness just before use.

Don’t waste your paste: Natural henna is perishable, but it freezes beautifully! If you’ve mixed a large batch, portion the leftover paste into small carrot-bag cones, seal them tightly, and store them in the freezer for up to six months. Just thaw at room temperature for an hour or two before you need it. Never freeze pre-made cones from a store, as their chemical content is unknown.
- Applying on oily or lotioned skin.
- Not leaving the paste on long enough.
- Exposing the fresh stain to water too soon.
These are the top three mistakes that lead to a disappointing result. For a great stain, start with clean, dry skin, commit to keeping the paste on for 6+ hours, and avoid water for the first 24 hours after removal.

Jagua Gel: Derived from the Genipa americana fruit from the Amazon, Jagua is a natural, skin-safe gel that yields a realistic, temporary tattoo stain in a deep blue-black color. It’s a fantastic and safe alternative for those wanting a darker look without the risks of PPD.
Henna Paste: As we know, it’s from the Lawsonia inermis plant and creates a reddish-brown stain.
Both are natural and temporary, but offer completely different color results.
A popular tradition in Indian and Pakistani weddings is for the artist to hide the groom’s initials or name within the intricate patterns of the bride’s mehndi. The wedding night doesn’t begin until the groom can find them!

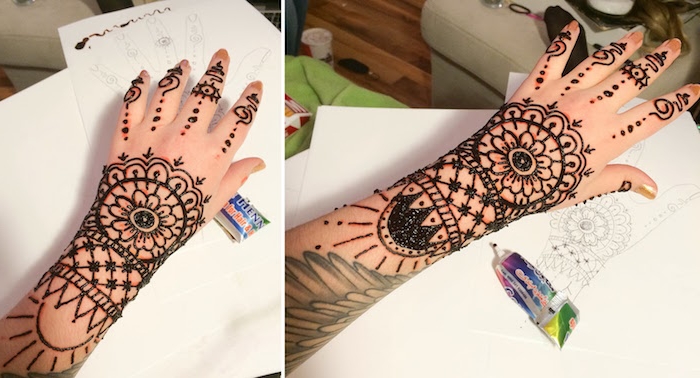
Feeling creative? Don’t be afraid to practice on paper first. Use a pencil to sketch a design, then trace over it with a henna cone. This helps you develop muscle memory for holding the cone, controlling your pressure, and mastering basic shapes like lines, dots, and humps before you ever touch skin. It’s how many artists build their confidence and skill.
Rajasthani Powder: Known for producing a deep, stringy, and elastic paste. Powders like ‘Sojat’ are famous for their high lawsone content, resulting in very dark, reddish-brown stains. It’s a favorite among professional artists.
Jamila Powder: A Pakistani brand known for its incredibly fine sift and creamy texture. While its initial dye release can be slower, it’s very consistent and yields a reliable, beautiful stain, making it great for beginners.

Can I get henna on my face or torso?
While you can, it’s important to manage expectations. Henna stains darkest on skin with the thickest top layer (keratin), which is why designs on the palms and soles of the feet are so vibrant. Areas with thinner skin like the face, neck, stomach, and back will yield a much lighter, more temporary stain, often a light tan or orange that fades within a week.

- You are supporting a skilled artisan and their craft.
- You are guaranteed safe, natural, and fresh ingredients.
- The design will be cleaner, more intricate, and tailored to you.
Why pay for a professional artist? While cheap, pre-made cones are tempting, they often contain harmful preservatives and dyes for shelf stability. Investing in a professional artist ensures a safe, beautiful, and authentic henna experience.
A key to pro-level design: Varying your line weight. All great henna artists master pressure control. A light, consistent pressure creates fine, delicate detail lines. A firm, steady squeeze produces bold, dramatic lines that make the design pop. Practice creating thick and thin lines in one continuous motion to give your designs depth and visual interest.
Henna isn’t just for weddings anymore! A growing trend is belly henna, or a ‘belly blessing,’ for mothers-to-be. A beautiful design is applied to the baby bump during the third trimester as a celebration of life, femininity, and the journey into motherhood. Just be sure to use a paste made with only pure henna and lavender essential oil, which is pregnancy-safe.
According to the American Academy of Dermatology, the PPD found in “black henna” is one of the most common causes of tattoo-related allergic contact dermatitis. Reactions can appear from days to weeks after application.
This reinforces why it’s so critical to avoid chemical-laced cones. Natural henna, a plant dye, is incredibly safe for most people. The danger comes from additives used to make it black, cheap, and shelf-stable. Always choose brown, natural henna.

For an extra touch of glamour, especially for festivals or parties, consider adding cosmetic-grade glitter or body gilding paste on top of your finished henna stain. Brands like Mehron offer metallic powders that can be mixed with a liquid sealer and painted over parts of your brown henna design, creating a stunning temporary gold or silver accent that complements the underlying stain.
The Final Rule: Moisturize, moisturize, moisturize! Once you have flaked off the henna paste and the stain has oxidized for a day, the key to longevity is keeping the skin hydrated. Applying a natural oil like coconut oil, shea butter, or a beeswax-based balm daily will slow down your skin’s exfoliation process, helping your beautiful design last as long as possible.