Point Clouds Unpacked: A Real-World Guide to Digital Twins
I’ve been kicking around the architecture and construction world for a long time, and I can tell you, things have changed. My early days were a blur of tape measures, chalk lines, and squinting at total stations. We’d spend weeks—literally weeks—crawling over buildings to get measurements. It was painfully slow, and if you missed one dimension? Disaster.
In this article
I’ll never forget one renovation where an entire floor of new steel had to be sent back to the fabricator. The original hand-drawn plans we were working from were off by a mere six inches. That tiny error cost the client a fortune and pushed the project back by a whole month. It was a brutal lesson in the importance of accuracy.
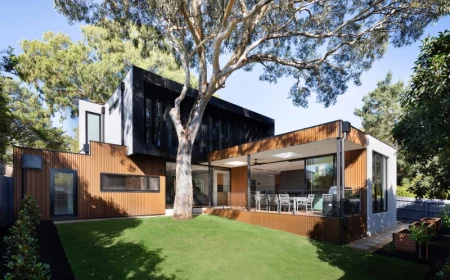
Today, we have something called reality capture. It’s a fancy term for technology that creates a super-precise digital copy of a real-world space. The result is usually a “point cloud.” Just imagine a digital ghost of a building, made up of millions, sometimes billions, of tiny measurement points, each with its own exact coordinate in 3D space. This isn’t just a pretty model; it’s the raw truth of what’s actually there, imperfections and all.

This isn’t a sales pitch for a specific brand. It’s the opposite. It’s a brain dump of all the practical, hard-won lessons from the field. I want to show you how this tech works, how we use it on a job site, and how you can sidestep the common traps that burn time and money.
The Science Behind the Dots: Lasers vs. Photos
To really get the most out of point clouds, you have to understand where they come from. It’s not magic, it’s just cool physics. The two main ways to create them are LiDAR and photogrammetry, and each has its place.
LiDAR: Measuring with Light Pulses
LiDAR is short for Light Detection and Ranging. The concept is actually pretty straightforward. A terrestrial laser scanner—the kind we use for buildings—sits on a tripod and spins around, shooting out thousands of laser pulses every second. When a pulse hits a surface, like a wall or a ceiling pipe, it bounces back to the scanner’s sensor.
The scanner has an internal clock that times how long it took for that pulse to make the round trip. Since the speed of light is a constant, the machine can calculate the distance with incredible precision. By also tracking the exact angle of each pulse, it builds a massive 3D map of everything it can see. Most professional scanners also have a built-in camera that snaps photos, which allows the software to color each point. This makes the final cloud so much easier to understand visually.
So, what’s the catch? LiDAR is king for accuracy and scale, making it the go-to for serious architectural work. But it can struggle with certain materials. A dark, matte surface might absorb too much light, leading to a noisy or sparse patch of data. On the flip side, something super reflective like a mirror or polished chrome can scatter the laser, creating digital “noise” that you have to clean up later.
Photogrammetry: Building from Pictures
Photogrammetry takes a different approach. Instead of a laser, it just uses a good digital camera. The process involves taking a huge number of overlapping photos of an object or space, making sure you capture every surface from multiple angles.
Specialized software then chews on these photos, identifying common points—like the corner of a window or a specific brick—across different images. Using a process called triangulation, it calculates the 3D position of millions of these points to build the cloud. The huge advantage here is texture. Photogrammetry is fantastic for creating visually stunning, photo-realistic models of things like ornate statues or complex machinery where the look is as important as the shape.
Its main weakness, though, is reliable scale. Without known reference points, it’s tough to get the overall size of a photogrammetric model spot-on, so it’s generally less accurate than LiDAR for large buildings. Honestly, we often use both: LiDAR to capture the overall building geometry and photogrammetry to get high-detail shots of specific, important elements.
On the Job Site: The Pro Workflow
A great point cloud is born from careful work in the field. Rushing the on-site capture is probably the number one rookie mistake. It’s a classic case of “garbage in, garbage out.”
Step 1: The Scan Plan
You never, ever just show up and start blasting away with the laser. Before the equipment even comes out of the case, I’m looking at floor plans and walking the site. I create a “scan plan,” which is just a simple drawing marked up with where I intend to set up the scanner. The goal is to get complete coverage with plenty of overlap between scan locations.
The scanner can only capture what it can see, so a column or even an open door will create a “data shadow.” You have to plan your spots to see around obstacles. And each scan position needs to overlap with its neighbors by at least 30-40%. This is non-negotiable, as it’s how the software stitches everything together later.
Quick Tip: Your First Room Scan
If you’re just starting, here’s a foolproof way to capture a simple rectangular room:
- Place your first scan in one corner of the room.
- Put the second scan in the opposite diagonal corner. This forces a massive amount of overlap and captures most of the space.
- Add a third scan in the doorway, looking back into the room. Boom. You’ve just captured a room with solid, connectable data.
Step 2: Setup and Targets
On site, the first order of business is finding a rock-solid spot for the tripod. I once saw a junior tech set up on soft dirt near a construction entrance. A heavy truck rumbled by, the tripod sank a fraction of an inch during the scan, and the entire file was warped and useless. We had to do it all over again. Always, always check that your tripod is stable and level.
For high-accuracy jobs, we also place physical targets—usually black-and-white checkerboards or special spheres—that can be seen from multiple scan positions. The software can lock onto the center of these with sub-millimeter precision, creating a super-reliable network for tying the scans together. You can get away with “cloud-to-cloud” registration, where the software just matches the geometry, but targets are the gold standard for accuracy.
Step 3: The Capture Dance
With the scanner running, it’s a game of patience and planning. A single scan can take anywhere from two minutes to fifteen, depending on the resolution and color settings. While one scan is running, I’m already figuring out my next two moves to keep things efficient.
And I always keep a detailed field log. It can be a simple notebook or a tablet app. For every scan, I note the file number, location (“Living Room, NW corner”), and any important details like “captured the ductwork behind the furnace.” Trust me, when you’re looking at a folder with 150 scans, you will not remember which one has that critical view you need.
A quick heads up on safety: Most modern building scanners use a Class 1 laser, which is considered eye-safe. But it’s still just common sense not to stare directly into the spinning aperture. It’s a simple but critical piece of on-site discipline.
Back in the Office: Assembling the Digital Puzzle
Getting the data is only half the job. Now you have to turn those individual scans into something useful. A typical project can easily take twice as much time in the office as it did in the field. So, if we spend 8 hours on-site, I plan for at least 16 hours of computer time.
Registration and Cleaning
First, you have to “register” the scans, which means aligning them all into one big, cohesive point cloud. We use specialized software for this, and it uses the overlap or the targets to figure out where everything goes. The process is mostly automatic, but it always needs a human to check the work. A good registration should have an average error of only a few millimeters. If I see a big error, it’s a red flag that one scan was probably misaligned.
Raw point clouds are also messy. They’re full of digital noise—people walking through the shot, reflections from windows, even dust in the air. We spend a good amount of time with digital clipping tools to manually remove all this junk. It makes the data cleaner and dramatically reduces the final file size.
The Beastly Computer You’ll Need
This brings us to a major hurdle: data management. A finished point cloud for a single building can be anywhere from 50 to 500 gigabytes. A whole campus? We’re talking terabytes. Your standard laptop will just curl up and die.
To be frank, you need a serious workstation to handle this stuff. We’re talking a minimum of 64GB of RAM, though 128GB is better. A powerful, professional-grade graphics card (like an NVIDIA RTX or Quadro series) is essential. And for storage, you absolutely need fast NVMe solid-state drives. The good news is that the software is smart; it doesn’t try to load all 500GB into your RAM at once. It uses structured file formats (like .rcp or .lgs) that load a lower-resolution proxy, only pulling in the high-detail data for the area you’re zoomed into. Even so, a powerful machine is non-negotiable.
From Raw Data to Powerful Insights
A point cloud’s real value is in how you use it. We use them for a few critical tasks.
- As-Built Verification: This is the most common use. We overlay the point cloud on the design model. It immediately shows every single difference between the plan and reality. I’ve found everything from misplaced columns to improperly sloped pipes this way. Finding these things with a scan is infinitely cheaper than discovering them during construction.
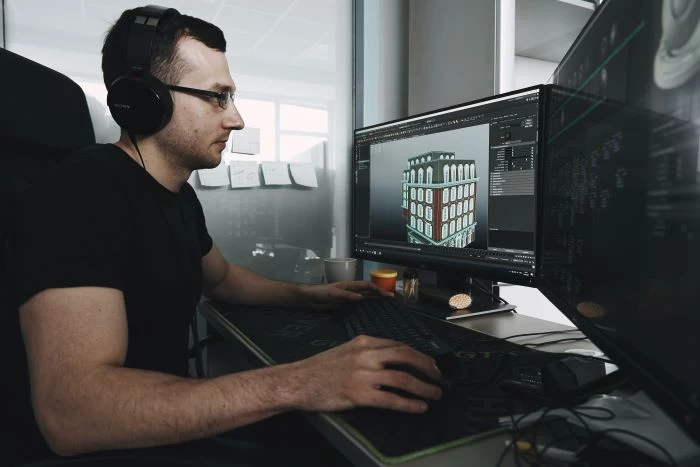
- Scan-to-BIM: This is the craft of building an intelligent 3D model (BIM) using the point cloud as a guide. It’s a highly skilled job, not an automatic process. The modeler has to make smart decisions. Real walls aren’t perfectly straight and floors aren’t perfectly flat. Do you model the slight bow in the wall? Or model a straight wall that represents the average? An experienced pro knows how to interpret the cloud to create a clean, useful model.
- Quality Control: This is a powerful one. After a concrete floor is poured, we can scan it. The software then compares the scan to the design elevation and generates a color-coded “heat map.” Green areas are within tolerance, while red and blue show high and low spots. It’s a crystal-clear report for the contractor.
DIY vs. Hiring a Specialist: The Big Question
The cost of gear is coming down, and it’s tempting to think about bringing this in-house. So, should you?
For small, simple jobs, maybe! You can now use the LiDAR sensor on a modern iPhone with an app like Polycam or Matterport. These are incredible for getting a quick layout of a single room or modeling a piece of furniture. They’re not accurate enough for professional construction documents, but for initial planning or visualization, they’re a great tool to have in your pocket.
However, for any project that needs high accuracy—structural steel, facade work, large commercial buildings—you really need to hire a professional reality capture service. You’re not just paying for their fancy equipment; you’re paying for their deep expertise in capturing and processing the data. A bad scan is honestly worse than no scan at all because it gives you a false sense of confidence.
So what does it cost? Here are some ballpark figures:
- Hiring a Pro Crew: For a dedicated team with high-end equipment, expect to pay somewhere in the range of $2,500 to $5,000 per day, depending on the project complexity and location.
- Buying a ‘Prosumer’ Scanner: An entry-level professional scanner, great for architects or engineers who do this often, will run you between $20,000 and $30,000.
- DIY Photogrammetry Software: The software to process photos into a 3D model can range from a $50 monthly subscription to a one-time purchase of around $500 for a solid package.
A Final Word on Trust
At the end of the day, this job is about two things: safety and trust. On-site, it means wearing all the proper protective gear and making sure your work area is safe for everyone. No excuses.
And it also means delivering data that people can rely on. A point cloud is a detailed map of a building, and it needs to be handled securely. We always use encrypted drives and secure transfer methods. The point cloud removes guesswork from the building process. It’s a record of the truth. But like any tool, it’s only as good as the skill and integrity of the person using it.
Inspirational Gallery
Autodesk ReCap: The go-to for many, especially if you’re already in the Autodesk ecosystem. It’s user-friendly and excels at cleaning and preparing raw scan data for use in software like Revit or AutoCAD. Think of it as the essential bridge from the field to the design desk.
Trimble RealWorks: This is more of a powerhouse for deep analysis. If you need to perform advanced measurements, create inspections, or model complex steel structures directly from the cloud, RealWorks offers a more robust, engineering-focused toolset. It’s less about simple preparation and more about advanced data extraction.
A single, full-color scan position can easily consume 1 to 2 gigabytes of storage. A medium-sized building project can quickly balloon to over 500 GB of raw data.
This isn’t something you can just handle on a standard laptop. Before you even start a project, plan your data strategy. This means investing in high-speed external SSDs for fieldwork (like the Samsung T7 Shield), a powerful workstation with at least 64GB of RAM for processing, and a clear plan for long-term archival, whether on a local server or a cloud service.
What about tricky surfaces like glass, mirrors, or polished chrome?
A laser scanner’s biggest enemies are transparency and high reflectivity. The laser pulse will either pass straight through glass or scatter unpredictably off a mirrored surface, creating noise or a data ‘hole’ in your point cloud. The field trick is simple: use removable masking tape or a light dusting of matte spray (like developer spray for penetrant testing) to give the laser a temporary, opaque surface to hit. Just remember to clean it off afterwards!
- Reduced project rework by up to 70% in renovation projects.
- Faster and more comprehensive data capture for large, complex sites.
The secret? Ditching the tripod with mobile mapping. Systems like the NavVis VLX or the Leica BLK2GO use SLAM (Simultaneous Localization and Mapping) technology, allowing you to capture dense point cloud data simply by walking through a space. It’s a game-changer for large floor plans and rapid as-built documentation.
Don’t skip the site prep: A successful scan day starts before the scanner is even out of its case. Your goal is to give the laser the best possible ‘view’ of the environment. A quick pre-scan checklist can save hours of frustration later.
- Inform building occupants about the scanning schedule to minimize movement.
- Open all interior doors to connect spaces in a single scan series.
- Temporarily remove non-essential clutter like rolling chairs or trash cans.
- Ensure you have clear, stable locations for the tripod with overlapping lines of sight.
“Thanks to the point cloud data captured in 2015, we have the digital blueprint that is indispensable for the restoration of Notre-Dame de Paris.” – Rémi Fromont, Chief Architect of Historic Monuments
The first time you navigate a high-density point cloud is a surreal experience. You’re not looking at a traditional 3D model; you’re floating through a digital ghost of reality itself. Every speck of dust, every slight sag in a ceiling, every uneven patch on a concrete floor is there. It’s this unfiltered, hyper-realistic truth that makes the technology so powerful for renovation and verification work. It’s as close as you can get to being there, without actually being there.
Think beyond the building shell. While incredible for architecture, reality capture is revolutionizing industrial and MEP (Mechanical, Electrical, Plumbing) coordination. Scanning a complex plant room captures the exact 3D location of every pipe, conduit, and valve. When you overlay the new design, any potential clashes become glaringly obvious in the digital model, allowing for rerouting before a single pipe is ordered. This alone prevents costly on-site fabrication errors and project delays.
The cost of a high-end terrestrial scanner like a Faro Focus or Leica RTC360 can be daunting. But you don’t always need top-tier gear. For smaller projects or quick visualizations, the LiDAR sensor in recent iPhone Pro models, combined with apps like Polycam or SiteScape, can produce surprisingly useful results. It won’t match the accuracy for survey-grade work, but for a preliminary layout or a visualization model, it’s an incredibly accessible and low-cost entry point into the world of 3D capture.
Important point: A point cloud is not a 3D model. It’s the raw ingredient. The process of converting this dense collection of points into usable, intelligent objects (like walls, pipes, or beams) is called “scan-to-BIM.” This step requires specialized software and a skilled technician to interpret the points and build the model. Underestimating the time and expertise required for this conversion is one of the most common budget mistakes in a reality capture project.