A Siding Pro’s Guide: What Salespeople Won’t Tell You
I’ve been installing siding on homes for over two decades, from the salty, damp air of the coast to the dry, baking heat of the desert. In all that time, I’ve seen what really works and what flat-out fails. Siding is so much more than your home’s outer skin; it’s a whole system that protects your structure, handles moisture, and sets the look of your house for a generation. A lot of people just see it as a cosmetic choice, but honestly, the material you pick and how it’s installed can be the difference between a healthy home and a slow, expensive disaster.
In this article
- So, What’s the Bottom Line on Siding Choices?
- The Real Job of Siding: More Than Just a Pretty Face
- A Walk Through the Materials: An Installer’s Honest Opinion
- DIY vs. Hiring a Pro: A Reality Check
- The Tear-Off: Your Home’s Health Check-Up
- Making the Final Call and Finding the Right Crew
- Inspirational Gallery
Sales brochures always tell one story, focusing on curb appeal and promising zero maintenance. My goal here is totally different. I want to share what I’ve actually learned on the job site, looking at how common materials perform in the real world. We’ll get into the trade-offs that those glossy pamphlets conveniently leave out. This isn’t about selling you on one material over another. It’s about giving you the knowledge to ask the right questions and make a choice you’ll be happy with for years to come.
So, What’s the Bottom Line on Siding Choices?
Before we dive deep, let’s get the big picture on the main contenders. People always want to know about cost and upkeep, so here’s my quick-and-dirty breakdown based on a typical professional installation.
Vinyl siding is the undisputed budget champion. You’re generally looking at $4 to $8 per square foot, installed. It’s a low-maintenance choice that you’ll never have to paint. Its lifespan is decent, but it’s the most likely to look a bit worn or dated over time. My take? It’s a practical solution, but the installation details are EVERYTHING.
Fiber cement siding is the premium, durable workhorse. Expect to pay in the range of $8 to $15 per square foot installed. It’s incredibly tough, holds paint forever, and gives you a high-end wood look without the rot. It’s a material I really respect, but it’s heavy and requires special handling.
Engineered wood siding strikes a great balance. It lands somewhere between $7 to $13 per square foot installed. It offers the aesthetic of real wood but with much better stability and resistance to pests and rot. It’s a fantastic modern alternative, as long as your installer is meticulous about one critical step we’ll cover later.
And then there’s classic Natural Wood. The cost can be all over the map, from $9 to over $20 per square foot depending on the species and grade. Its beauty is unmatched, but you have to be ready to commit to a serious maintenance relationship of regular painting or staining. It’s a choice for the purists.
The Real Job of Siding: More Than Just a Pretty Face
Okay, before we get into the materials, you have to understand what siding actually does. Most people think it’s the primary waterproof layer for their house. It’s not. The real protection happens in the layers underneath. Siding is the first line of defense—a shield against sun, wind, and the occasional stray baseball. The secret to a long-lasting job is managing the water that will always, inevitably, get behind it.
The Magic of a Rainscreen System
In any quality construction project, we always install siding as part of a rainscreen system. For my crew, this is completely non-negotiable. A rainscreen creates a small, intentional air gap, usually about 3/8 of an inch, between the back of the siding and the house wrap (what we call the water-resistive barrier, or WRB). To create this gap, we typically use thin strips of treated plywood or a special-made drainage mat, nailed directly into the wall studs.
Why does this little gap matter so much? It’s a game-changer. It gives any water that sneaks past the siding a clear path to drain down and away. Even better, it creates an air channel for constant ventilation that helps the entire wall assembly dry out completely. Trapped moisture is the absolute enemy of a house. It feeds mold and causes the wood sheathing and framing to rot from the inside out. I’ve torn off five-year-old siding jobs that looked perfectly fine from the street, only to find black mold and plywood with the texture of wet cardboard. A simple rainscreen would have prevented tens of thousands of dollars in structural repairs.
Breaking the ‘Thermal Bridge’ for a Cozier Home
Another pro concept is tackling the ‘thermal bridge.’ Your wall studs, whether they’re wood or metal, conduct heat and cold way more easily than your insulation. In winter, your expensive indoor heat escapes right through them. In summer, outdoor heat comes pouring in. Siding replacement is the perfect time to fix this. By installing a layer of rigid foam insulation over the sheathing and under the new siding, we create a ‘thermal break.’ This can dramatically improve your wall’s R-value (its resistance to heat flow). It’s an optional step, sure, but it’s one that often pays for itself. Adding an inch of rigid foam insulation might add $1.50 to $3.00 per square foot to the project cost, but I’ve seen it cut heating and cooling bills by 10-15% in some homes.
A Walk Through the Materials: An Installer’s Honest Opinion
Let’s get into the nitty-gritty of the materials themselves. This is all about balancing cost, looks, durability, and the maintenance you’re willing to live with.
Vinyl Siding
Vinyl is probably the most common siding you’ll see, mainly because of its low upfront cost. It’s a product I have a… complicated relationship with. The biggest plus is the low maintenance—you’ll never paint it. A yearly wash-down is all it needs. It’s also lightweight, making for a quick installation.
The Hard Truth: Vinyl expands and contracts a TON with temperature changes. A single 12-foot panel can grow by over half an inch from winter to summer. This is where amateurs get into serious trouble. You can’t nail vinyl tight; you have to hang each panel loosely so it can slide back and forth. Nail it tight, and it will warp and buckle on the first hot day. Cheaper, thinner vinyl (anything under .040 inches thick) can also get brittle in the cold and crack easily. Oh, and repairing a single damaged panel in the middle of a wall is a real pain.
A Pro’s Tip: I always teach apprentices the 1/4-inch rule: leave a gap of that size wherever a panel meets trim to give it room to grow. And a quick tip on what a pro crew brings: we’ll have a snap-lock punch to create tabs for a secure finish under windows and a zip tool that’s essential for making repairs without wrecking the whole wall.
Fiber Cement Siding
Fiber cement, from brands that have become household names, is a material I truly respect. It’s a composite of cement, sand, and cellulose fibers that offers an amazing balance of durability and good looks. It’s fire-resistant, rot-proof, and holds paint for 10-15 years easily. It delivers a high-end look that really boosts a home’s value.
The Hard Truth: Fiber cement has two big challenges: its weight and its dust. A 12-foot board is heavy and brittle, requiring two people to handle it safely. But the bigger issue is the dust. Cutting it releases fine silica dust, which is a serious health hazard. Heads up! My crew and I ALWAYS wear NIOSH-approved N95 respirators when cutting this stuff. This is not optional.
A Pro’s Tip: The details matter immensely here. The manufacturers specify clearances, like a 2-inch gap from roofing and a 6-inch clearance from the ground. Ignoring these voids the warranty and is just asking for moisture problems. To do this job right, a pro crew brings specialized geared siding shears (which minimize dust), proper respirators, and sturdy scaffolding. And for the best look, we use blind nailing, so the fasteners are hidden.
Natural Wood Siding
There’s a reason wood has been around forever—it has a timeless, natural beauty that other materials can only imitate. It’s also a renewable resource and surprisingly easy to repair one board at a time.
The Hard Truth: Maintenance. Wood demands your attention. It needs to be painted or stained every 3-7 years, depending on your climate. If you let it go, it will start to rot. It’s also a target for pests like carpenter bees and woodpeckers. Good, clear-grade wood (the kind without knots) can also be quite expensive.
A Pro’s Tip: The single most important step with wood siding is to back-prime every single board. That means we paint the front, back, and all cut ends with primer before it goes on the wall. Amateurs skip this to save time, and it’s a huge mistake. It’s the key to preventing warping and premature paint failure.
Engineered Wood Siding
This is a popular modern option made from wood strands bonded with resins and treated to resist rot and bugs. It’s designed to give you the look of wood with better performance. It’s more stable than natural wood, comes in long 16-foot lengths (which means fewer ugly seams), and it’s lighter and easier to handle than fiber cement.
The Hard Truth: Even though it’s super durable, it’s still a wood product. Its Achilles’ heel is any cut edge. The factory finish is great, but every single cut made on-site MUST be sealed with the manufacturer’s approved touch-up paint. I’ve seen jobs fail in just a few years because the installer made perfect cuts but never sealed the edges. Water wicked into the core, and the siding just swelled and fell apart.
A Pro’s Tip: We take edge-sealing seriously. At our cutting station, we have a can of the specific sealer ready to go. Every cut gets a dab of paint before the board goes up. It adds maybe 10 seconds per board, but it’s the most critical step for a long-lasting job.
DIY vs. Hiring a Pro: A Reality Check
I get this question all the time: “Can I just do this myself?” To be frank, while I admire the ambition, siding is one of those jobs where a lack of experience can lead to catastrophic failure. Here’s why:
It’s a Masterclass in Water Management: The most critical work is the flashing around windows, doors, and rooflines. This has to be layered perfectly to direct water out, not in. Get this wrong, and you’re channeling water directly into your walls. This is where 90% of DIY jobs fail.
You Need Specialized Gear: For fiber cement, you need special shears or a saw with a dust-collecting vacuum. For vinyl, you need a snap-lock punch and a zip tool. For any of it, you need extensive scaffolding or multiple ladders, which can be expensive to rent and dangerous to use without experience.
Materials are Awkward and Heavy: Trying to wrestle a 12-foot, brittle plank of fiber cement up a ladder by yourself is a recipe for broken material and a potential injury. Professional crews are a well-oiled machine for a reason.
So, while you might be able to tackle a small shed, siding your whole house is a job best left to the pros who do it every single day.
The Tear-Off: Your Home’s Health Check-Up
Tempted to save a few bucks by having a contractor install new siding right over the old stuff? Please don’t. Unless it’s a very specific circumstance, it’s a terrible idea. It entombs any existing rot, making it impossible to install the new weather barrier and flashing correctly.
The tear-off is our chance to give the house a health check. We look for water stains, tap the sheathing to find soft spots that indicate rot, and check for signs of insects. If we find problems, we stop. Covering up rot isn’t an option—it will only spread and destroy your brand-new siding from behind.
Quick Win: Inspect Your Own Siding in 5 Minutes
Go outside right now and take a look. Seriously. Here’s what to check:
- Wavy Panels: Look down the length of your vinyl siding. If it looks wavy or buckled, it was probably nailed on too tight.
- Soft Spots: Gently press on the bottom boards, especially under windows and near the ground. If they feel spongy or soft, you’ve likely got a moisture problem.
- Failing Caulk: Check the sealant around your windows and corner trim. If it’s cracked or pulling away, that’s a major entry point for water.
This little inspection can give you a clue about the health of your current siding job.
Making the Final Call and Finding the Right Crew
Choosing the right siding is a big deal. There’s no single ‘best’ material—it depends on your budget, climate, and how much maintenance you can tolerate. By the way, how long does this all take? For a standard 2,000 sq ft house, a pro crew can often knock out a vinyl job in 4-7 days. Fiber cement or wood, which require more cutting and care, might take 8-14 days, depending on the complexity of your home.
My final piece of advice is this: prioritize the quality of the installer over the price of the material. A great install of a budget-friendly siding will always outperform a poor install of a premium product. When you’re getting quotes, ask these killer questions:
- “Can you explain your flashing detail for my windows and where the roof meets the wall?” If they can’t give you a confident, detailed answer, run.
- “What is your policy if you find rot during the tear-off?” A pro will have a clear plan and pricing structure for dealing with repairs.
- “Do you typically install with a rainscreen system?” Their answer will tell you a lot about their commitment to modern, durable building practices.
A true craftsperson is proudest of the work that gets covered up, because they know that’s what makes a job last a lifetime.
Inspirational Gallery
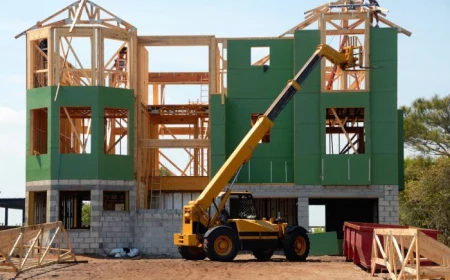
The Unsung Hero Behind the Siding: Your siding is only as good as the weather-resistant barrier (WRB) or ‘house wrap’ behind it. A salesperson might gloss over this, but insist on a quality product like Tyvek® HomeWrap® or a similar integrated sheathing system. It’s your home’s last line of defense against moisture intrusion, preventing rot and mold from the inside out. A cheap-out here is a costly mistake down the line.
Over 98% of steel siding is recyclable at the end of its life, and it often contains significant pre- and post-consumer recycled content.
While vinyl and fiber cement are more common, steel siding offers a compelling sustainability story. Its extreme durability means less frequent replacement, and its high recyclability prevents it from ending up in a landfill. For an eco-conscious build, it’s a material worth investigating, especially in regions prone to hail or extreme weather.
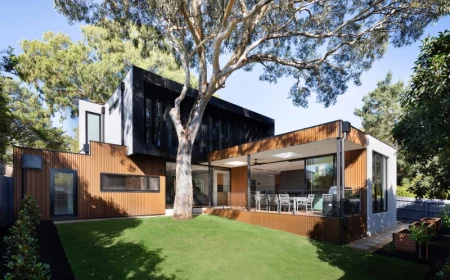
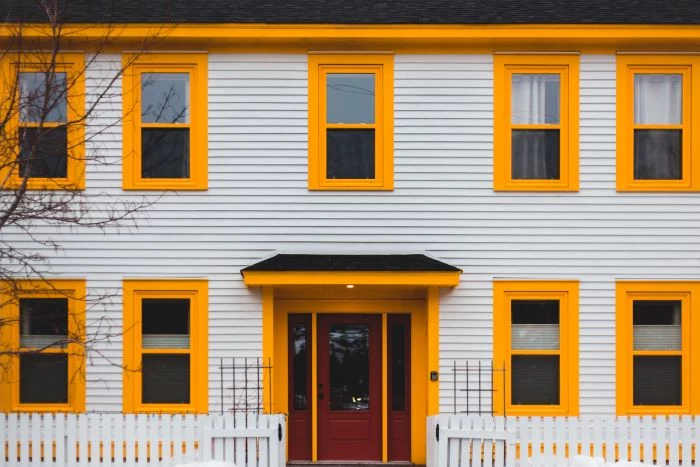
Forget beige. The biggest trend in exterior design is the move toward dark, dramatic siding colors. Think deep charcoal grays, bold navy blues, and even near-blacks. These shades create a sophisticated, modern look that makes architectural details and landscaping pop. Brands like James Hardie now offer pre-finished siding in stunning dark hues like
So the new siding is up, but something feels… unfinished?
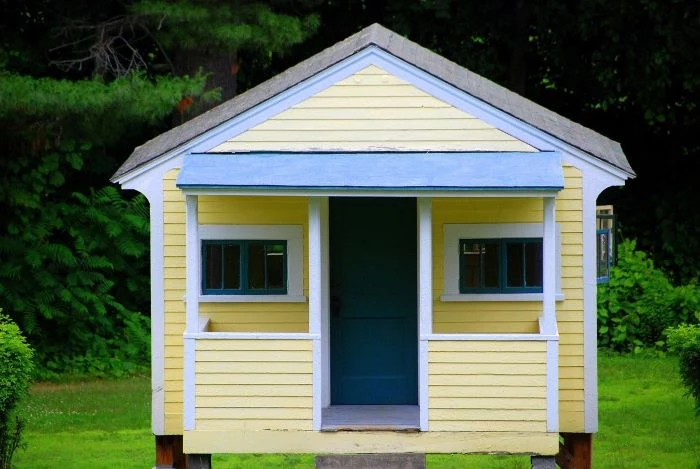
Don’t underestimate the power of contrast. The single most impactful DIY project after new siding is installed is painting your front door. A high-gloss black door against crisp white siding is timeless. A vibrant yellow or aqua door against a modern gray siding, like Benjamin Moore’s
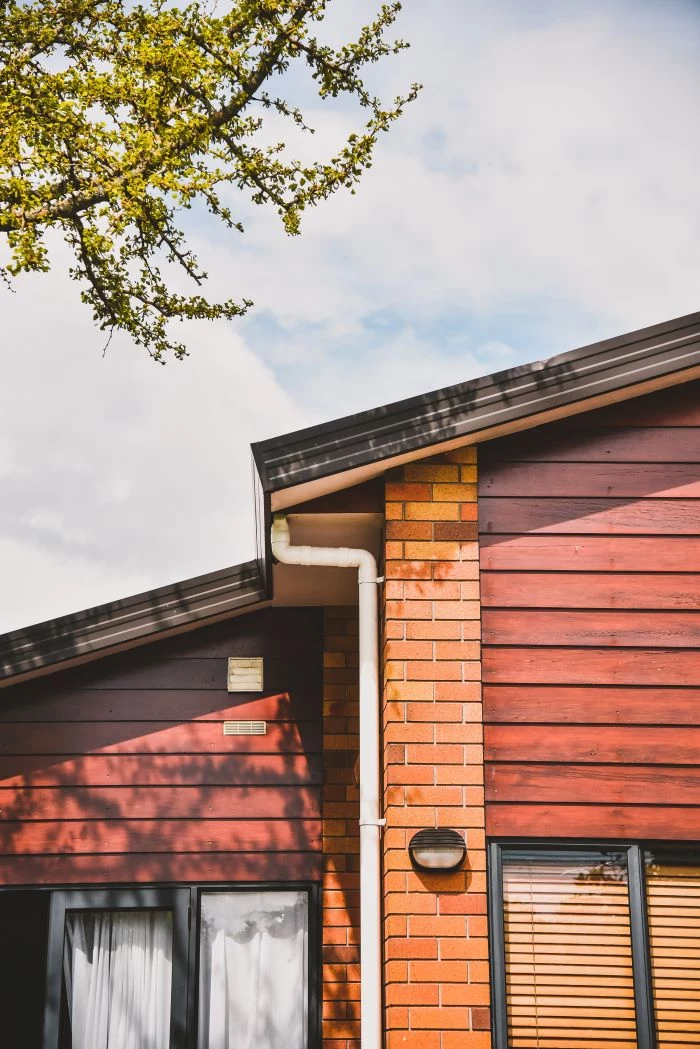
One of the costliest siding failures isn’t the material itself, but the flashing. This thin, impervious material—usually aluminum—is crucial for directing water away from openings like windows, doors, and roof intersections. When installers cut corners on flashing, water gets behind the siding and rots the sheathing and framing. Always ask your contractor to detail their flashing methods; it’s a sign of a true pro.
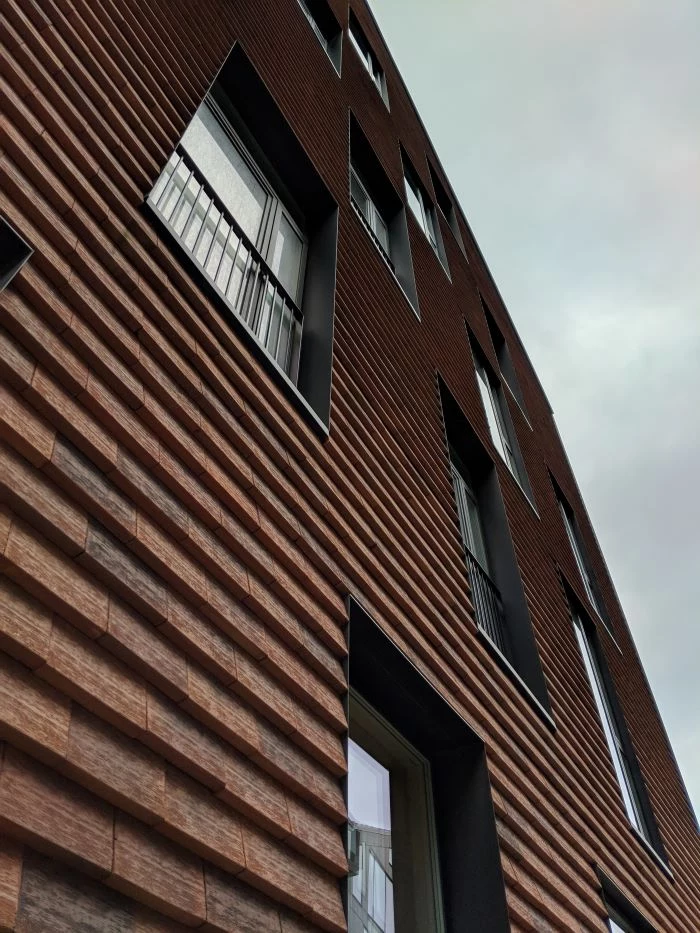
Looking for texture and dimension? The board and batten style is making a huge comeback, especially for Modern Farmhouse and transitional homes. It involves:
- Wide vertical planks (the boards)
- Narrower vertical strips (the battens) installed over the seams
This creates a distinctive shadowy-lined effect that adds instant character. It’s often used as an accent on gables or entryways to break up long runs of horizontal lap siding.
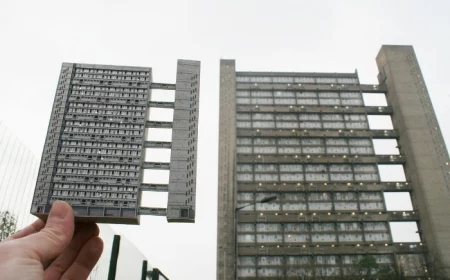
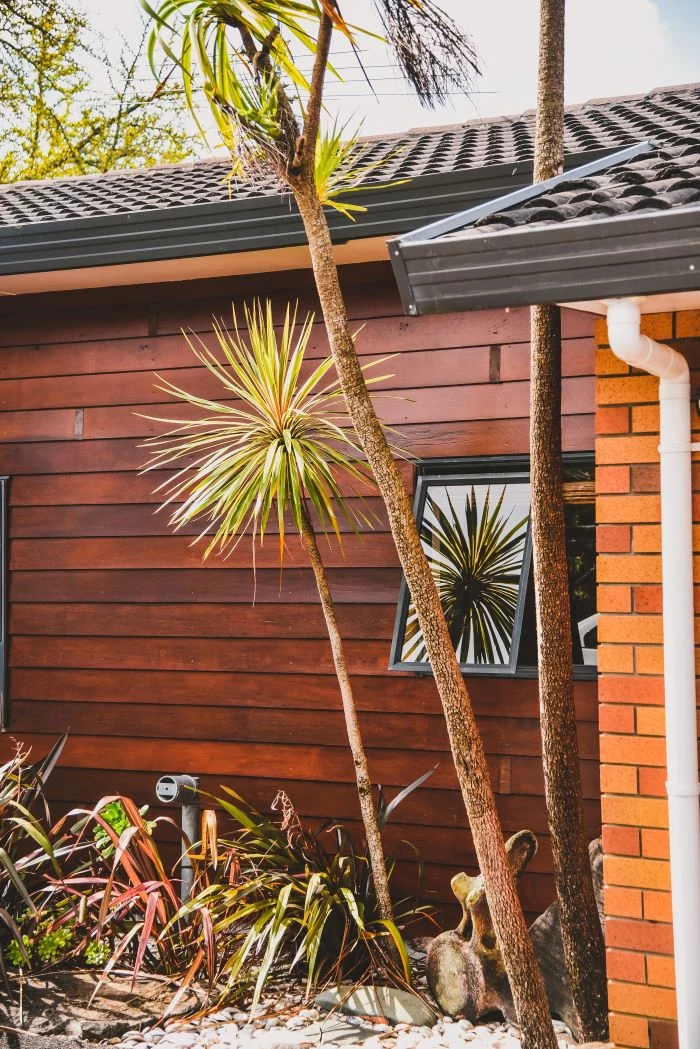
Fiber Cement vs. Engineered Wood: While both mimic wood, they handle abuse differently. James Hardie fiber cement is non-combustible and impervious to rot and pests. It’s a rock-solid, stable choice. LP SmartSide engineered wood: It’s treated with a zinc borate compound to resist termites and fungal decay. Its key advantage is superior impact resistance—it’s far less likely to crack or chip from a stray baseball or hailstorm than fiber cement. Your climate and lifestyle might make one a clear winner.
- Use a soft-bristled brush and a mix of mild soap and water for most dirt.
- If using a pressure washer, keep it on the lowest setting (below 1500 PSI).
- Always spray at a downward angle to avoid forcing water up behind the panels.
- Keep the nozzle at least 30 cm away from the surface to prevent gouging or damage.
- Get that high-end, textured look on the most visible part of your home.
- Dramatically boost your curb appeal without breaking the bank.
- Create architectural interest and avoid a monotonous
Water intrusion is a factor in over 70% of construction litigation, with a significant portion related to failures in the building envelope, including siding and window installations.