So You Want to Build Your Own Home? A Builder’s No-Nonsense Guide
For decades, I’ve had dirt on my boots and a set of plans in my hand. I’ve framed houses in freezing rain and poured concrete on scorching summer days. I’ve seen the incredible pride in an owner’s eyes when they finally get the keys. But I’ve also seen the costly mistakes that turn a dream project into a financial nightmare.
In this article
- First Things First: Don’t Even Touch a Shovel Yet
- Choosing Land is Way More Than a Pretty View
- Your Budget Isn’t a Suggestion—It’s Your Lifeline
- The Foundation: Getting It Right from the Start
- Going Vertical: Framing the Skeleton
- The Envelope: Your Home’s Armor Against the Elements
- The Guts: Plumbing, Electrical, and HVAC
- The Finish Line: Making a House a Home
- A Final Word from the Job Site
- Inspirational Gallery
Building your own home is an amazing goal. But let’s be real: it’s so much more than picking out kitchen cabinets and paint colors. It’s a serious construction project that demands respect, planning, and a deep understanding of the whole process. This isn’t meant to scare you off. It’s meant to get you ready. I want to walk you through how it really works, from the ground up, with no jargon—just the stuff that truly matters.
First Things First: Don’t Even Touch a Shovel Yet
Honestly, the most critical work happens long before you break ground. The decisions you make right now will set the tone for your budget, timeline, and stress level for the next year or more. Rushing this stage is the number one mistake I see people make.
So, who do you even call first? It feels like a chicken-and-egg problem, right? Here’s the sequence the pros follow:
- Talk to a Lender: Before you fall in love with a piece of land or a house plan, figure out what you can realistically afford. Get pre-approved for a construction loan. This is different from a regular mortgage and it’s a huge expense people forget to budget for—the loan fees and interest payments during the build are significant.
- Find Your Designer/Architect: With a budget in hand, you can work with a pro to create a set of plans. Good plans aren’t an expense; they’re your single most important investment. A great set of plans can run you anywhere from $5,000 to $25,000+, depending on complexity and your location.
- Land Shopping: Now you know how much you can spend and the type of house you want to build, so you can look for a suitable lot.
Choosing Land is Way More Than a Pretty View
That beautiful, cheap piece of land way out in the country can quickly become the most expensive part of your entire build. I once consulted on a project where the owner snagged a sloped, wooded lot for a steal. They had no idea that building an access road, clearing trees, and blasting rock for the foundation would torch their entire contingency fund before a single wall was up. It was a tough lesson.
Here’s what you need to investigate before you sign anything:
- Utilities: Is city water and sewer available? If not, you’re looking at a well and a septic system. Good to know: Drilling a well can cost anywhere from $30 to $80 per foot, and you might need to go down hundreds of feet. A septic system requires a “perc test” to see if the soil drains properly. This can run you $500 to $2,000. If the land fails the test, it might be completely unbuildable. Never take a seller’s word for it; make the sale contingent on passing these tests.
- Topography: A flat lot is the cheapest and easiest to build on. A slope means more excavation, a more complex foundation, and retaining walls, all of which add thousands to the cost. Walk the property and see where water flows. You do not want to accidentally build your basement in a natural pond.
- Access: Can a giant concrete truck or a semi loaded with lumber actually get to your build site? If not, building a long driveway with proper grading and gravel is another major expense.
- Zoning & Covenants: Pop down to the local planning department. What are the rules? There are setback requirements (how close you can build to property lines), and there might even be rules about the size or style of home you can build.
Your Budget Isn’t a Suggestion—It’s Your Lifeline
Your budget is the true foundation of your project. It needs to be painfully realistic. A solid rule of thumb is to create your detailed budget, then add a 15-20% contingency fund on top. And no, that’s not for upgrading the countertops. It’s for the surprises. It’s for the price of lumber that doubles overnight, the subcontractor who ghosts you, or the giant boulder buried right where your septic tank needs to go.
A real budget goes way beyond just materials and labor. You have to account for:
- Land acquisition costs
- Permit and impact fees from the city or county
- Architectural and engineering fees
- Utility hookup fees (this can be surprisingly expensive!)
- Construction loan costs and interest
- Tool and equipment rentals (scaffolding, excavators, etc.)
- Landscaping, driveway, and final grading
Don’t trust generic online cost calculators. Get real quotes from local suppliers. Be brutally honest with yourself.
The Foundation: Getting It Right from the Start
No part of your house is more important than its foundation. A mistake here compromises everything that sits on top of it. Period. If the foundation is wrong, the house will always be wrong. The whole point is to transfer the massive weight of your house to the ground in a way the soil can handle. An engineer specifies your footings—the wide parts at the base—to do just that, like snowshoes spreading out your weight.
So, which type of foundation is for you? It really depends on your climate and land.
- A full basement is the go-to in colder climates. The footings have to be dug deep to get below the frost line anyway, so going a bit deeper to create a basement is a cost-effective way to add a ton of space. The downside? It’s the most expensive option, and you have to manage moisture carefully.
- A slab-on-grade foundation is basically a single, thick concrete pad. It’s common in warmer climates because it’s fast and relatively cheap. The huge catch is that all your plumbing and electrical conduits have to be placed perfectly before the pour. There are no do-overs once that concrete is down.
- A crawl space is a happy medium you see a lot in the Southeast. The house is raised a few feet off the ground, which gives easy access for plumbing and electrical work later. The trade-off is that you have to be vigilant about ventilation or encapsulation to prevent moisture, mold, and critters from making a home under your home.
Heads up! A crucial part of the process is the inspection. You absolutely cannot pour concrete until a building inspector has come out to check your formwork, rebar placement, and plumbing rough-in. This is the first of many “stop and wait” moments in a build.
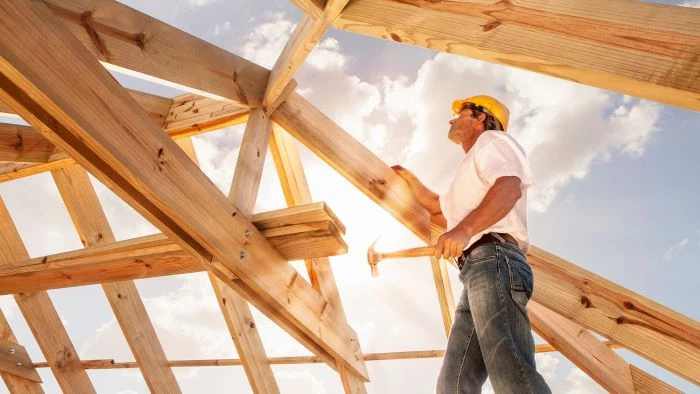
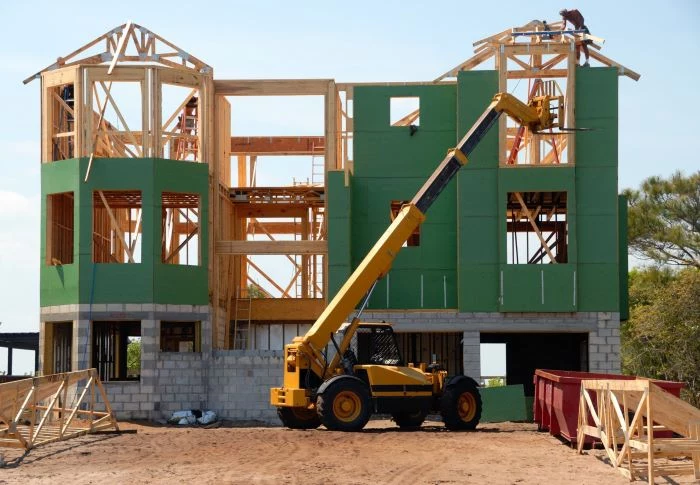
Going Vertical: Framing the Skeleton
Framing is the fun part—it’s when your blueprints finally start to look like a house! This phase is all about precision and usually takes a good crew about 2 to 4 weeks for an average-sized home. Every single piece of wood has a job. A pro tip we teach apprentices is to “crown” the floor joists. Lumber is never perfectly straight, so it has a slight upward bow or “crown.” We install them all crown-up, so when the weight of the house settles on them, they flatten out into a perfectly level floor instead of sagging.
Once the frame is up, we cover it in sheathing (usually OSB or plywood). This isn’t just a skin; it’s what gives the house its shear strength, turning all those individual sticks into a rigid box that can stand up to high winds. The nailing pattern for this is super specific and dictated by local code for a reason.
A common mistake to avoid: Waiting too long to order windows and exterior doors. The moment your plans are final, place that order! Lead times can be 12 to 16 weeks or even longer. Nothing will kill your schedule and budget faster than having a fully framed house sitting open to the weather for months, just waiting for windows to arrive.
The Envelope: Your Home’s Armor Against the Elements
The building envelope is everything that separates the inside from the outside: roof, walls, windows, and insulation. A tiny leak or draft can lead to massive problems like rot, mold, and crazy high energy bills. The most important detail here is the flashing—the metal bits that go where the roof meets a wall, chimney, or valley. A perfect roofing job with bad flashing is a failed roof.
And let’s talk insulation. Everyone gets obsessed with R-value, but that’s only half the story. Air sealing is actually more important. You can have the thickest insulation in the world, but if there are gaps around your outlets and windows, air will just blow right through, taking your heating and cooling with it. It’s like wearing a thick wool sweater without a windbreaker. We spend a ton of time with foam and caulk sealing every little crack before the insulation ever goes in.
The Guts: Plumbing, Electrical, and HVAC
Once the house is weather-tight, it’s time for the MEP (Mechanical, Electrical, Plumbing) rough-in. This is when all the wires, pipes, and ducts get stuffed into the walls. For most people building their own home, this is where you absolutely MUST hire licensed professionals. It’s complex, heavily regulated, and requires a series of inspections.
A quick warning on electrical: A bad plumbing joint gives you a leak. A bad electrical connection can burn your house down. Don’t touch it unless you are a licensed electrician. To find good pros, ask for recommendations at your local lumberyard or building supply store—they know who the reliable crews are. And always, always check their license on the state licensing board’s website to make sure it’s active and in good standing.
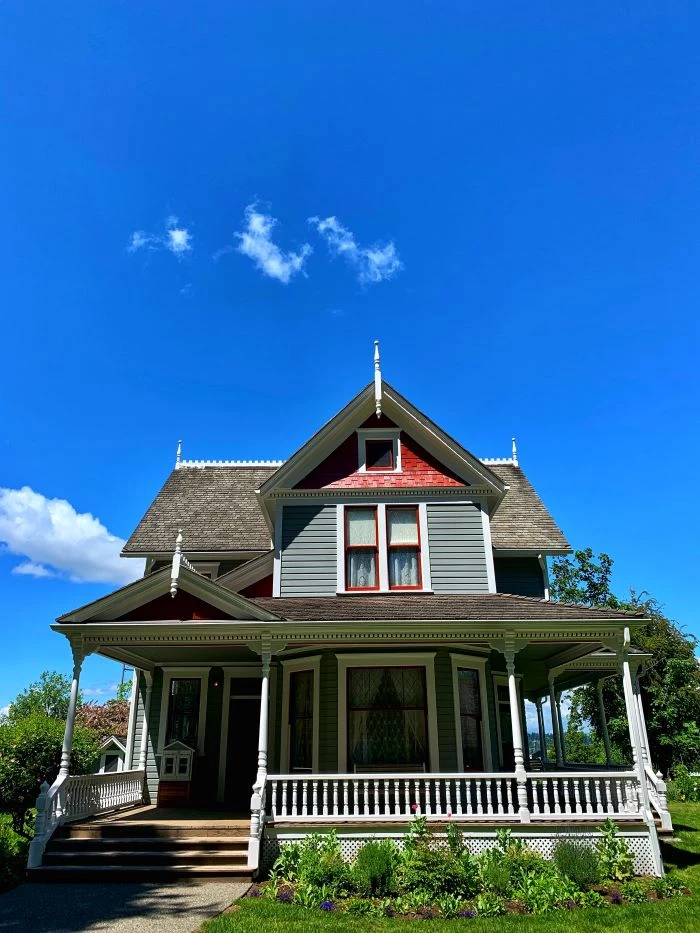
The Finish Line: Making a House a Home
This is the stage everyone daydreams about. It’s also where you can put in some serious “sweat equity” if you’re patient.
Take drywall, for instance. Hanging the sheets is just manual labor. Finishing it, however, is a true art form. My rule for apprentices is this: if you can feel the seam with your fingers, you will see it on the wall after you paint. Do another thin skim coat. Don’t rush it.
So where should you save money and where should you splurge?
- Save on the cosmetics. Light fixtures, faucets, and cabinet hardware are easy to upgrade down the road. You can also save a bundle by doing all the painting yourself.
- Splurge on what’s built-in. Don’t cheap out on the things that are a pain to change later. Invest in good quality flooring, solid cabinet boxes (you can always paint or replace the doors later), and excellent tile work in the bathrooms. You want the bones of your finish work to be top-notch.
A Final Word from the Job Site
Building your own home is one of the most challenging and rewarding things you will ever do. It will test you. Be ready for setbacks, because no project ever goes perfectly. Humility and a willingness to learn are your best tools.
This guide is built from years of experience, but it’s no substitute for professional guidance tailored to your project. Hire licensed architects, engineers, electricians, and plumbers. Their expertise is the best insurance policy you can buy.
Oh, and one last thing. Here’s your first homework assignment: Go to your county’s website right now and find their building permit fee schedule. It’ll give you a real, tangible taste of the process you’re about to begin. Good luck!
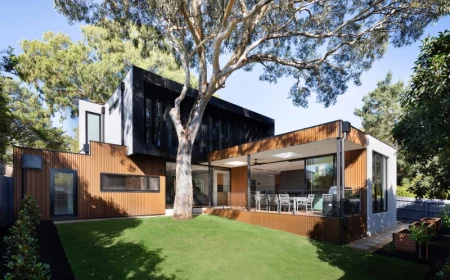
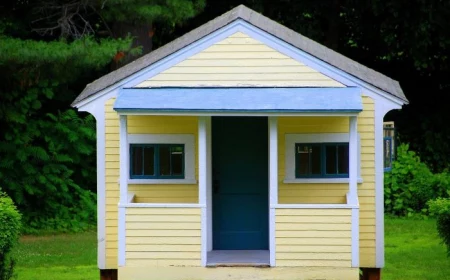
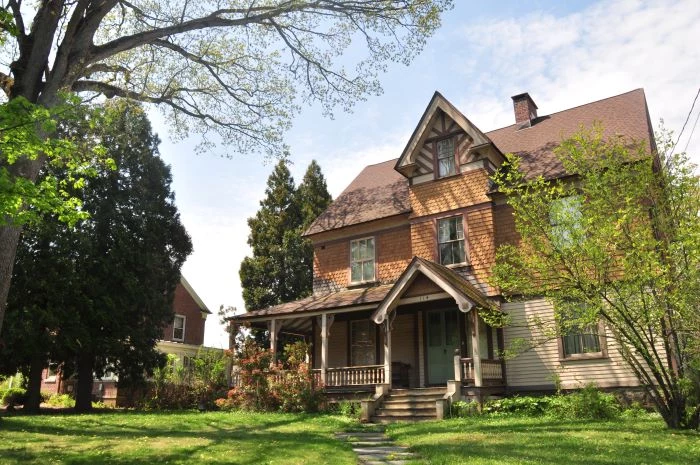
Inspirational Gallery
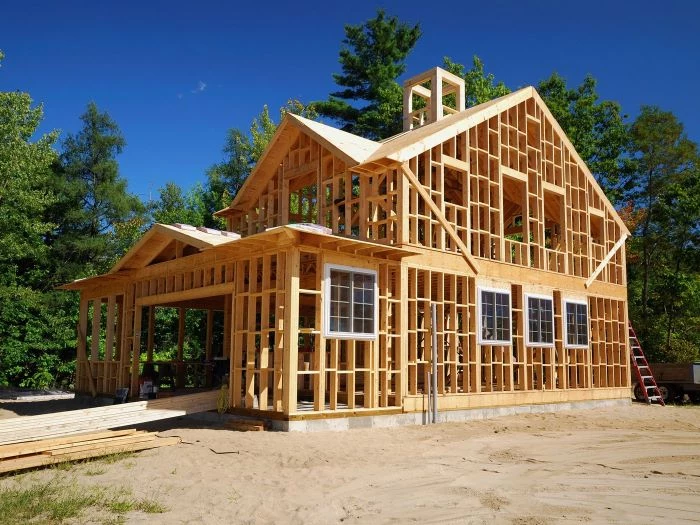
ICF vs. Traditional Wood Frame: Insulated Concrete Forms (ICFs) like those from Nudura or Logix involve stacking hollow foam blocks, reinforcing them with steel rebar, and filling them with concrete. The result is a highly insulated, strong, and quiet structure. Wood framing is the classic, often more affordable method, offering design flexibility.
The bottom line? ICFs cost more upfront but can significantly reduce long-term energy bills. Wood framing is faster for most crews and has a lower initial material cost.
A study by the National Association of Home Builders (NAHB) often highlights that the final cost of a custom-built home can easily exceed the initial budget by 10-20%, even with careful planning.
This isn’t just about picking a pricier tile. This buffer accounts for unforeseen site conditions, material price fluctuations, and small ‘while-we’re-at-it’ upgrades that invariably come up. Building this contingency into your loan from day one is the single best way to protect your project from stalling.
When the walls are open, think about the next 30 years. It’s the cheapest time to ‘future-proof’ your home for comfort and efficiency.
- Superior Insulation: Consider closed-cell spray foam insulation, like Icynene, in the roof deck and exterior walls. It creates an airtight seal that drastically cuts down on heating and cooling costs.
- EV Charger Rough-In: Run a 240-volt circuit to the garage. Even if you don’t have an electric car now, the next owner will thank you.
- Smart Home Wiring: Run ethernet cables to key locations (office, living room) for reliable connectivity that Wi-Fi can’t match.
What’s the big deal about a soil test? Can’t you just dig a foundation?
Absolutely not. A geotechnical report, or soil test, is your foundation’s insurance policy. It tells your structural engineer exactly what they’re dealing with—expansive clay, unstable fill, or solid bedrock. This information dictates the design of your footings and foundation walls. Skipping it can lead to catastrophic failures like cracking, sinking, or water intrusion years down the line. It’s a few thousand dollars that could save you a hundred thousand in repairs.
One of the most magical moments isn’t when the house is finished, but the ‘framing walk-through.’ Standing inside the wooden skeleton, you can finally feel the volume of the rooms. This is the first time your 2D floor plan becomes a 3D reality. You can see the view from the kitchen window, feel the ceiling height in the great room, and understand the flow from one space to another. It’s the moment the dream starts to feel truly solid.
- Reduced heating and cooling costs for decades.
- A quieter home, buffered from outside noise.
- A stronger structure more resistant to high winds.
The secret? A continuous, unbroken thermal envelope. This means paying fanatical attention to how insulation, air sealing, and high-performance windows (like triple-pane models from Andersen or Pella) all connect without gaps. It’s a system, not just a collection of materials.
Don’t skimp on the ‘unseens’: The most critical investments in your home are the ones you’ll never see again. Prioritize your budget on robust foundation waterproofing, a high-efficiency HVAC system from a brand like Carrier or Trane, and proper exterior flashing. A beautiful kitchen means nothing if the basement is damp or the air quality is poor. These are the systems that ensure your home’s health, comfort, and long-term value.
For an ultra-efficient and fast build, look into Structural Insulated Panels (SIPs). These are like giant construction sandwiches, with a rigid foam core laminated between two sheets of oriented strand board (OSB). An entire wall or roof section can be craned into place at once, combining framing, sheathing, and insulation in a single step. The result is a remarkably airtight and strong structure assembled in a fraction of the time of traditional framing.
Fact: The average new-build home has over 22 windows.
While large windows flood a home with natural light, they are also thermal holes in your walls. This is where budget allocation is key. Opting for high-performance, low-E, argon-filled windows from a reputable manufacturer is a must. Furthermore, your architect must account for them structurally; a wide expanse of glass requires a substantial header (a load-bearing beam) to be engineered and hidden within the wall above it, adding to the framing cost.