Tired of Flimsy Decor? Here’s How to Make Wall Art That Actually Lasts
I’ve spent a lot of my life working with my hands, and my workshop—with its constant smell of cut pine and linseed oil—is my happy place. Over the years, so many clients have asked me to create something special for a blank wall. They’re just plain tired of mass-produced prints and flimsy decorations that look cheap and, honestly, fall apart way too easily. They want something with a bit of soul, something with substance.
In this article
I get it. It’s tempting to search for a quick five-minute project. But quick often means temporary, and a piece made with the wrong materials or shoddy techniques just ends up being a source of frustration, not joy. This guide isn’t about fast crafts. It’s about learning the real-deal skills to create beautiful, high-quality wall decor that you’ll be proud to hang for years. We’ll dive into three of my favorite materials: wood, botanicals, and fiber. Once you understand the materials and use pro-level techniques, you can make pieces that feel genuinely authentic.
First Things First: Get to Know Your Materials
Before you even think about cutting, gluing, or weaving, you’ve got to understand what you’re working with. A true craftsperson knows their materials inside and out. Their properties dictate everything—how you work with them, how they’ll age, and whether your project will last a season or a lifetime. Rushing this step is, without a doubt, the most common mistake I see. It’s what leads to warped wood, sad, droopy florals, and projects that just fail.
Working with Wood (Without the Warping)
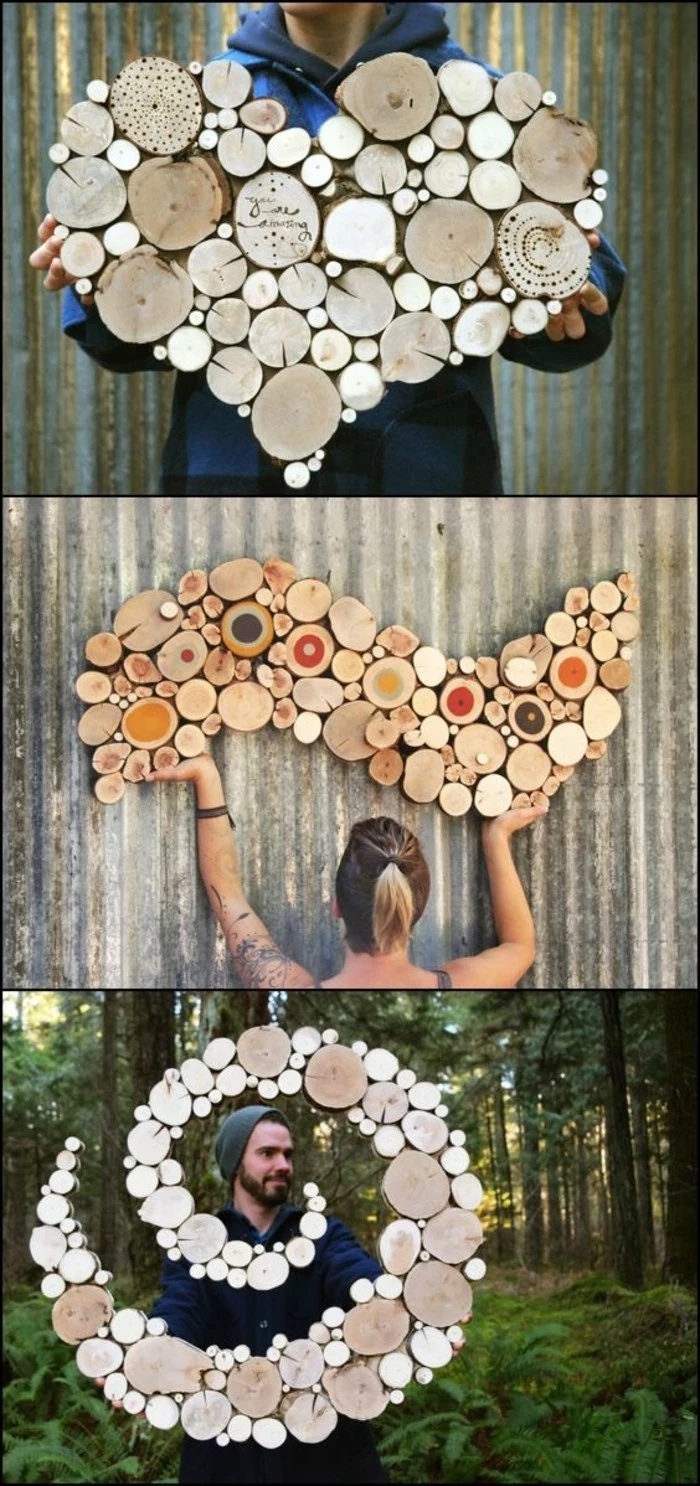
Believe it or not, wood is still a living material long after it’s been cut. It breathes, expanding and contracting with humidity. This movement is the number one reason wood projects warp or crack. For wall decor, I generally steer beginners toward two types of wood.
First up is clear pine. It’s affordable (usually around $8 for a good 1×2 board), lightweight, and you can find it at any big-box hardware store. Just be sure to look for boards with a straight grain and as few knots as possible—knots can sometimes bleed sap, even through paint. Your other great option is poplar. It’s a bit harder, has a lovely fine grain, and takes paint like a dream. It costs a little more, maybe closer to $15 for a similar board, but it’s perfect for those clean, painted geometric pieces.
Heads up! Try to avoid standard construction lumber, like 2x4s, unless you’re specifically going for a super-rustic, chunky vibe. That wood often has a high moisture content and is practically guaranteed to twist as it dries out in your home. Plywood is another solid choice, especially for larger backer boards. I swear by Baltic birch plywood. It has more layers (or plies) than the cheap stuff and is free of voids, giving you a beautiful, clean edge when you cut it.
The Sticky Situation: Choosing the Right Glue
Choosing your adhesive isn’t a small detail; it’s a structural decision. Using the wrong one is like building a house on a foundation of sand. It’s just not going to hold. Here’s a simple breakdown of what I keep in my shop:
- For Wood-on-Wood: Your go-to is always PVA wood glue, like the common stuff from brands like Titebond. It’s inexpensive and creates a bond that’s literally stronger than the wood itself. The key is clamping. You have to clamp the pieces together for at least 30-60 minutes for the bond to set. Don’t rush it!
- For Mixed Materials: When you need to glue wood to metal or fill a larger gap, you need epoxy. It comes in two parts that you mix, starting a chemical reaction that creates a ridiculously strong, waterproof bond. It costs more—maybe $10 to $15 for a small kit—but it’s the right tool for the job. Just pay attention to the “open time” on the package, which is the short window you have to work before it hardens.
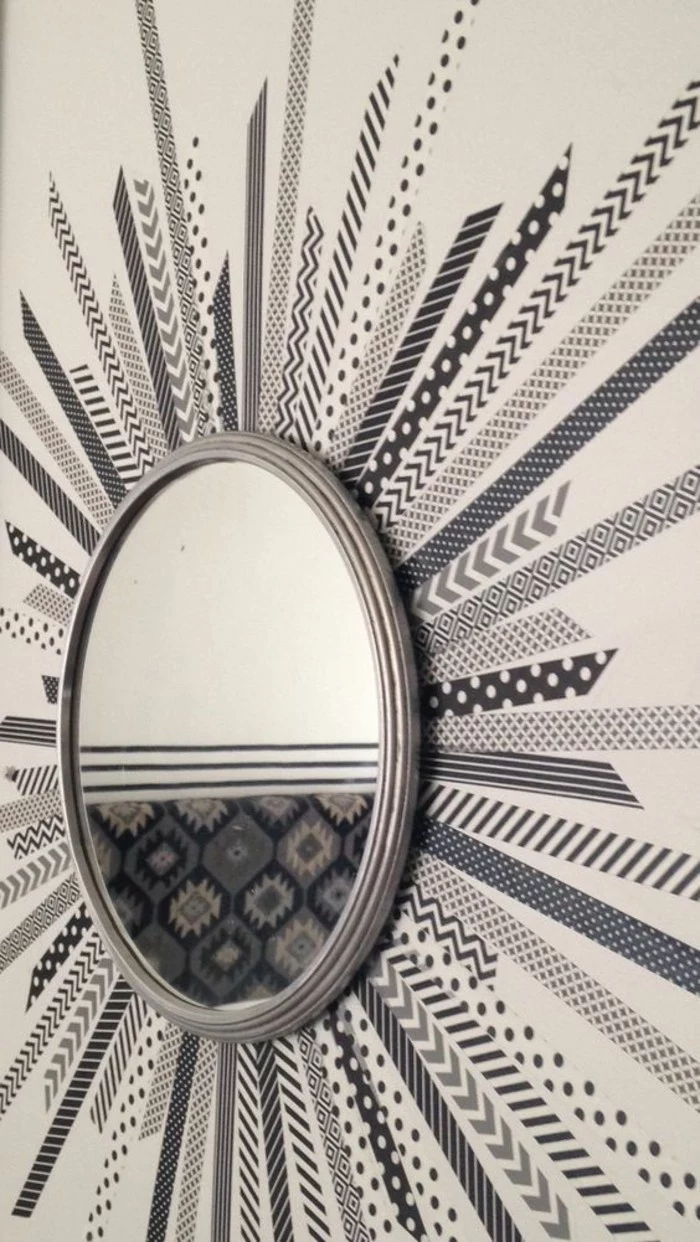
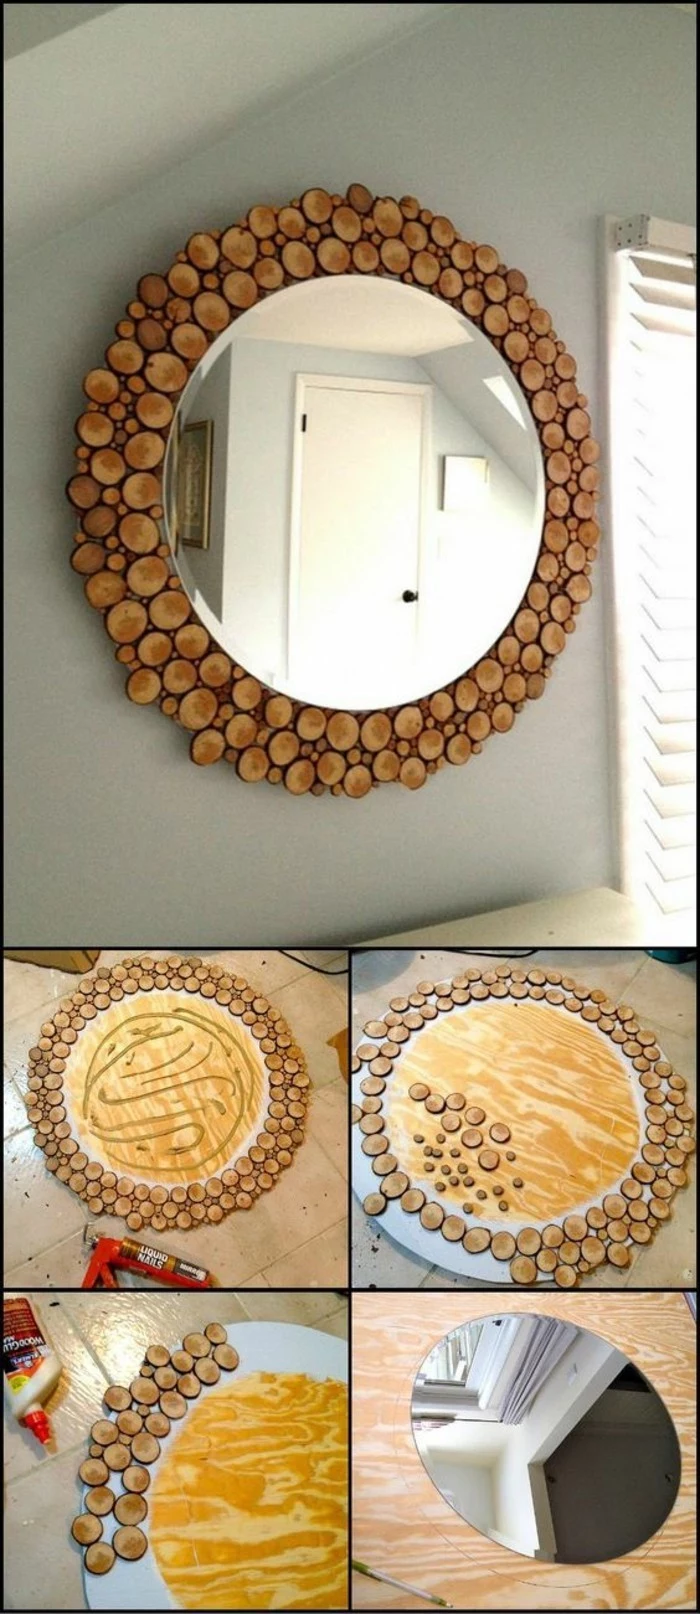
- For Temporary & Lightweight Stuff: And then there’s hot glue. Oh, the hot glue gun… I see it recommended for everything online, and it makes me so nervous. To be frank, hot glue is for temporary holds or attaching ultra-lightweight things like fake flowers. It is NOT structural. It can and will fail in the heat or under any real weight. I once had a client bring me a large, shattered mirror because the frame, attached only with hot glue, had just given up and fallen off the wall. It’s a lesson you only need to learn once.
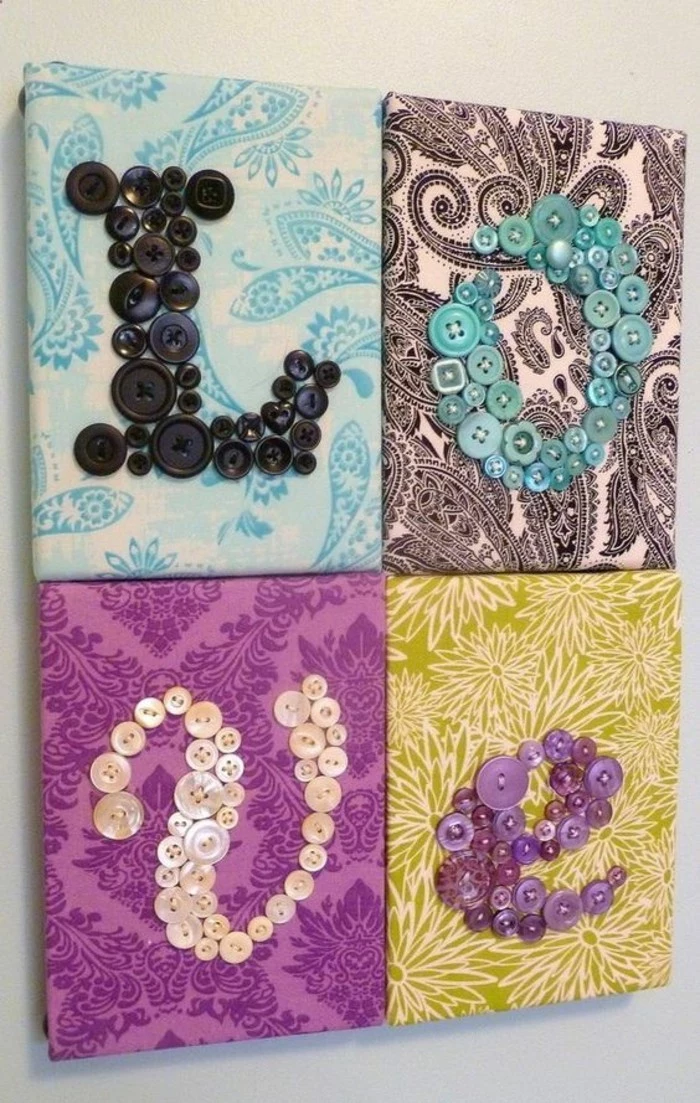
Fibers and Florals: Texture & Longevity
For fiber art like macrame, the rope you choose is everything. Natural cotton rope is a classic for a reason—it’s soft on the hands and creates a beautiful drape. For weavings, soft wool roving is perfect for creating those fluffy, textured clouds. If you want an earthy, rustic feel, jute or sisal are great, but they can be a bit rough to work with.
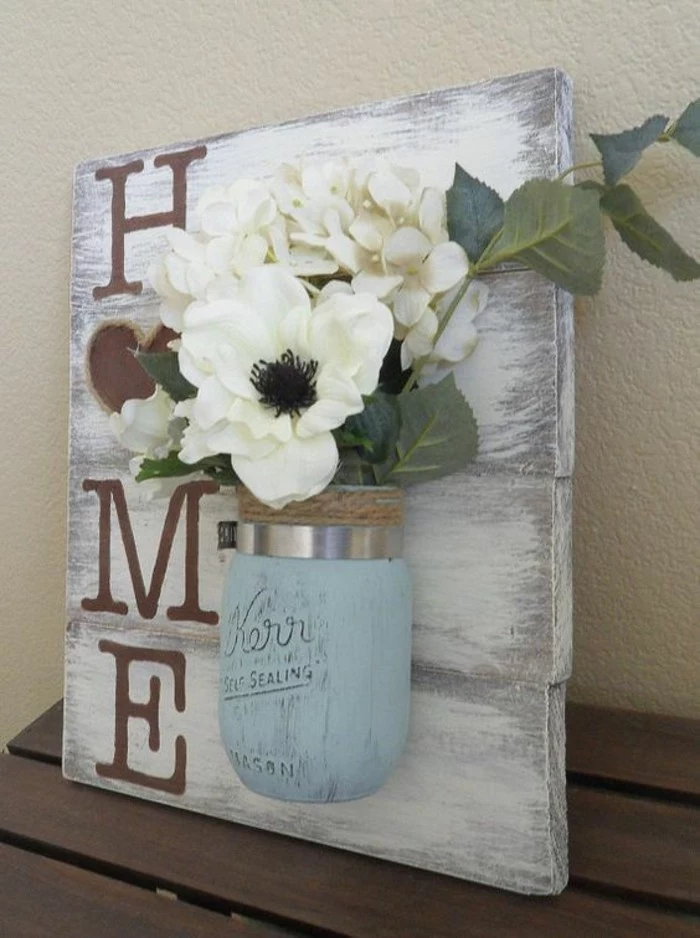
When it comes to botanicals, you’ve got choices. Dried flowers are gorgeous but incredibly fragile. Preserved florals, on the other hand, have been treated with glycerin to keep them soft and much less brittle. They are more expensive—a good bunch of preserved eucalyptus might run you $20-$25 online or at a florist—but they won’t crumble on you. The most durable option? High-quality silk (or faux) flowers. I source mine from professional floral suppliers online; the quality is worlds apart from what you find in most craft store aisles.
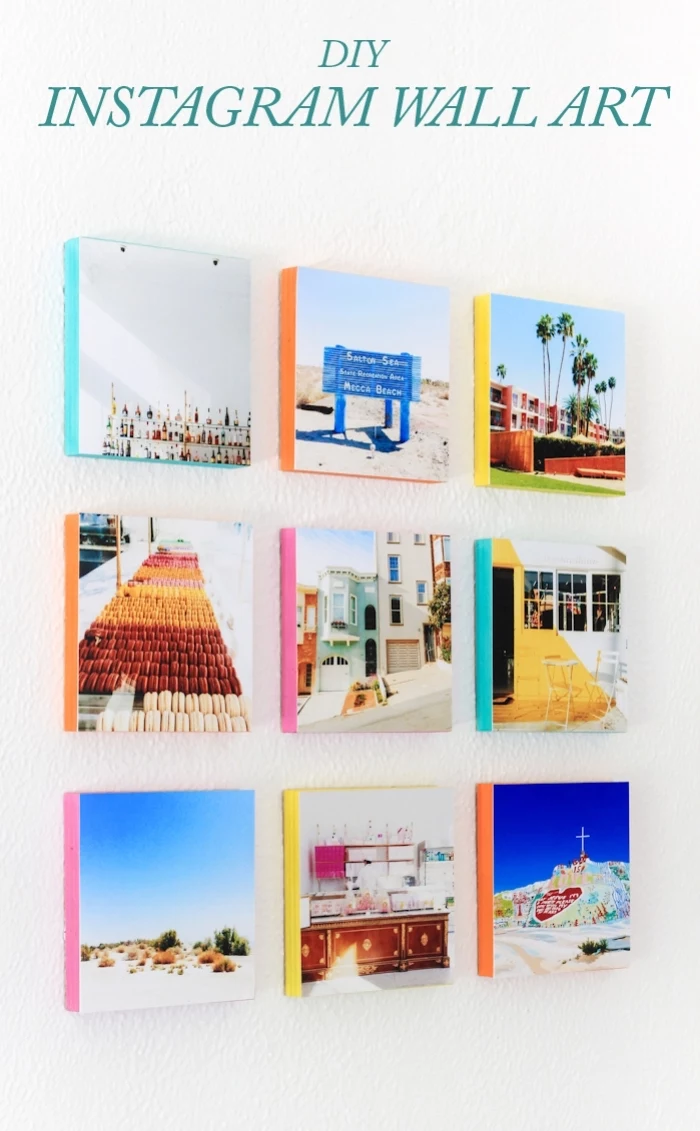
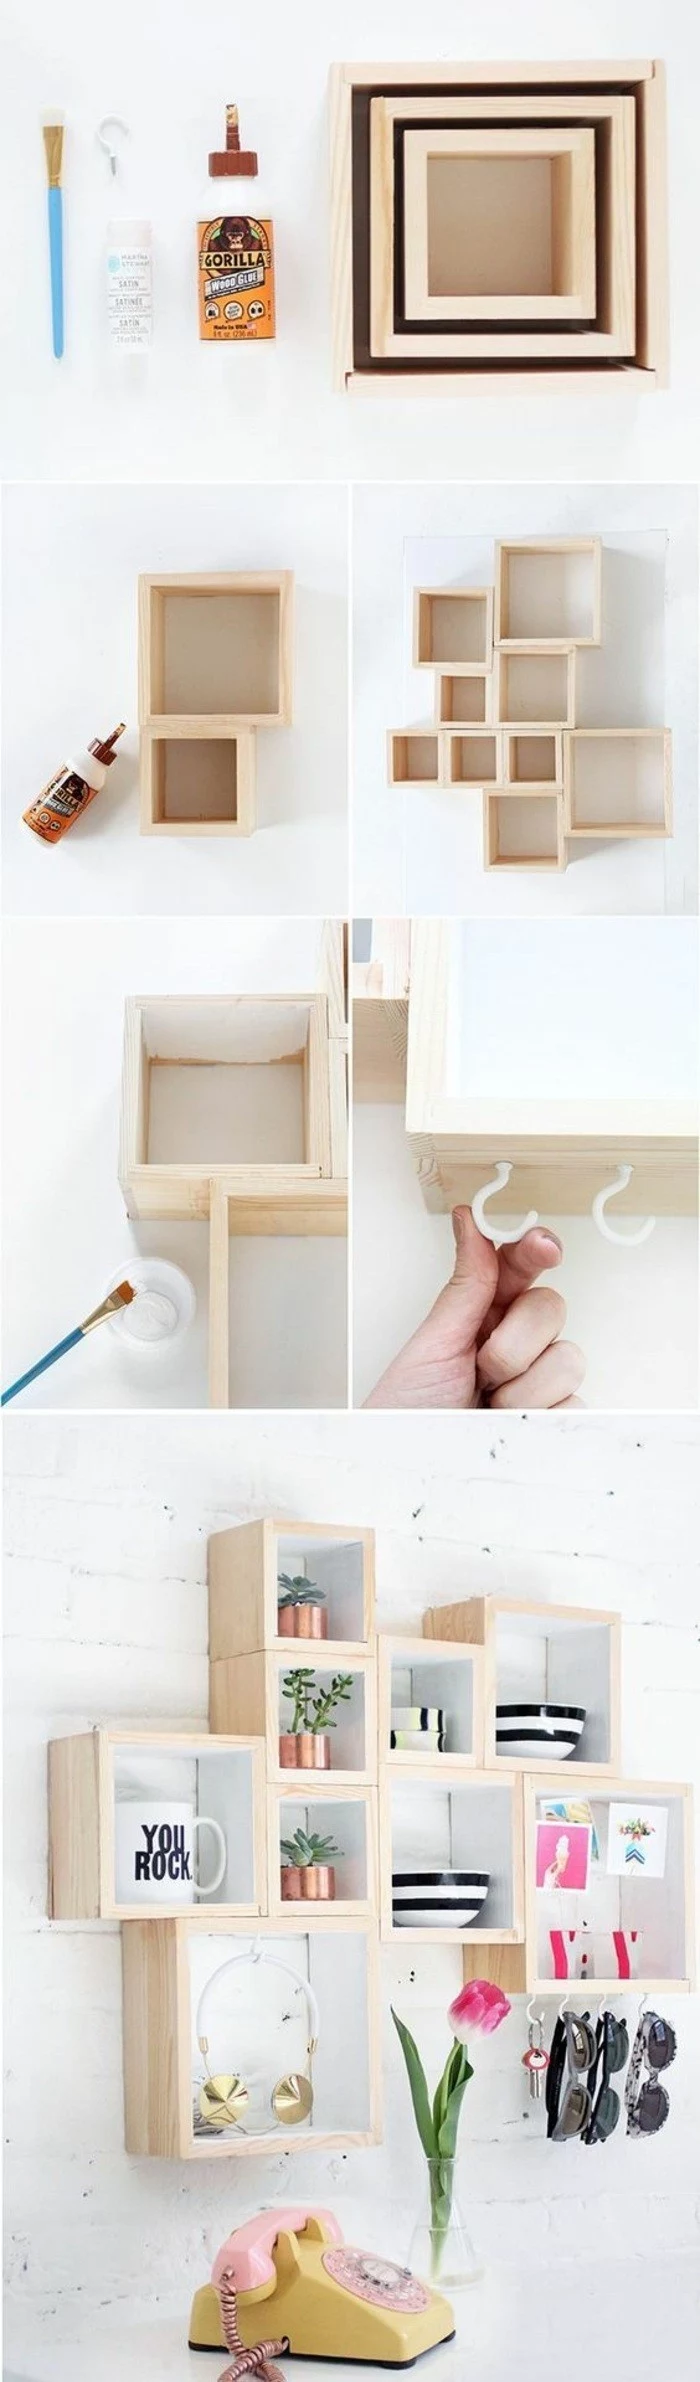
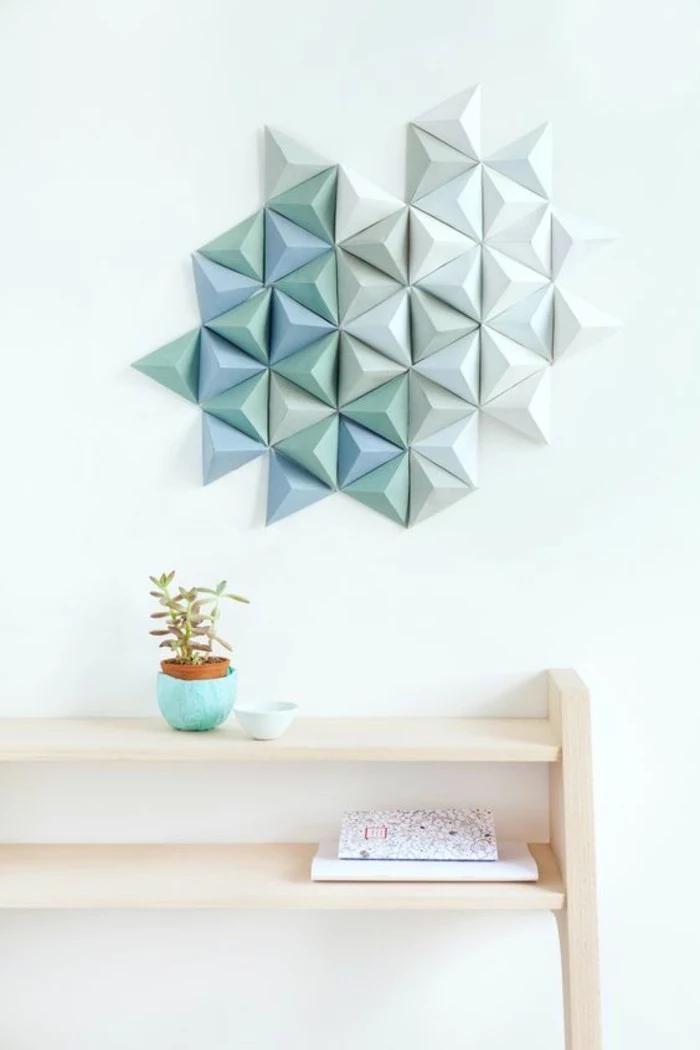
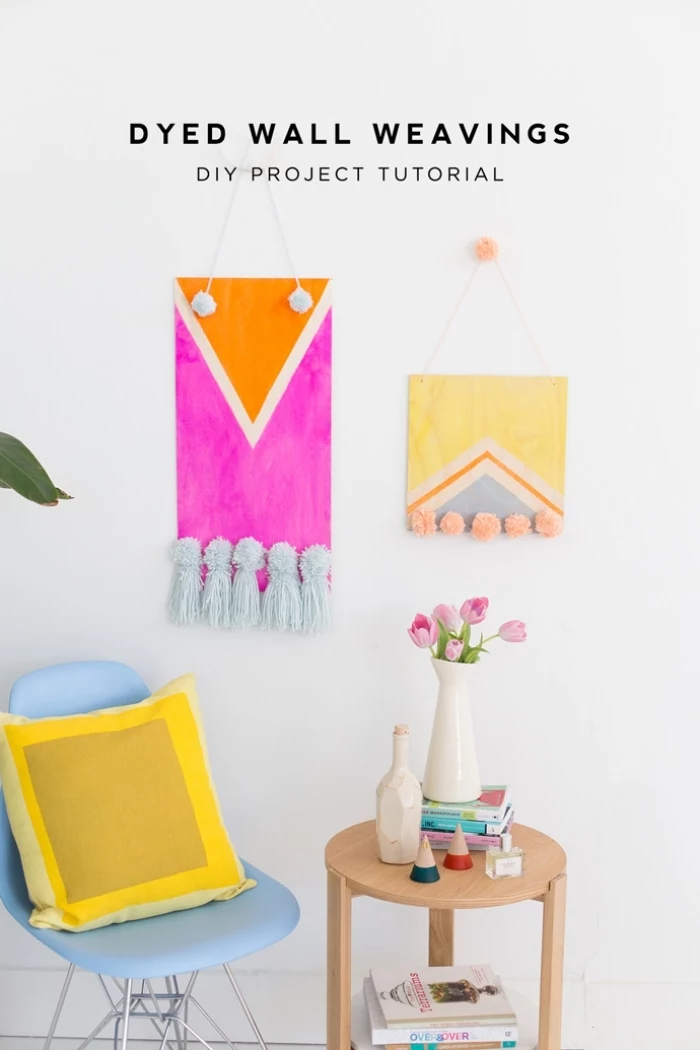
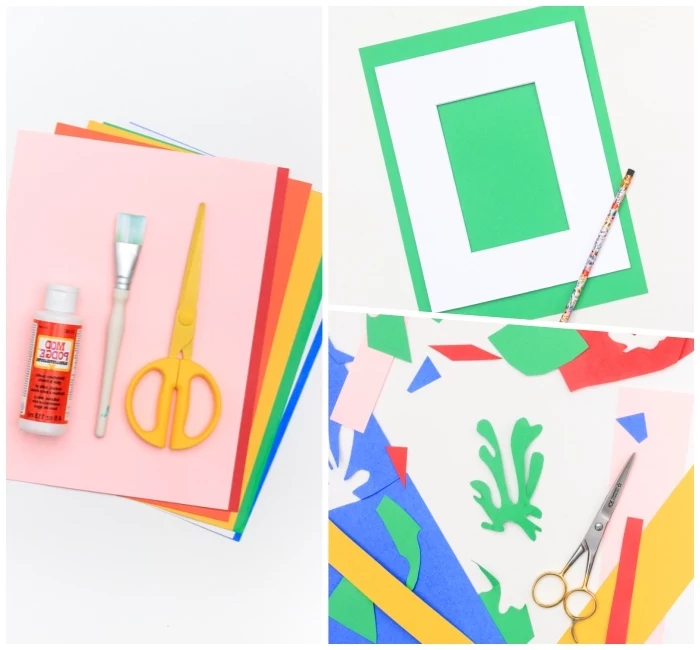
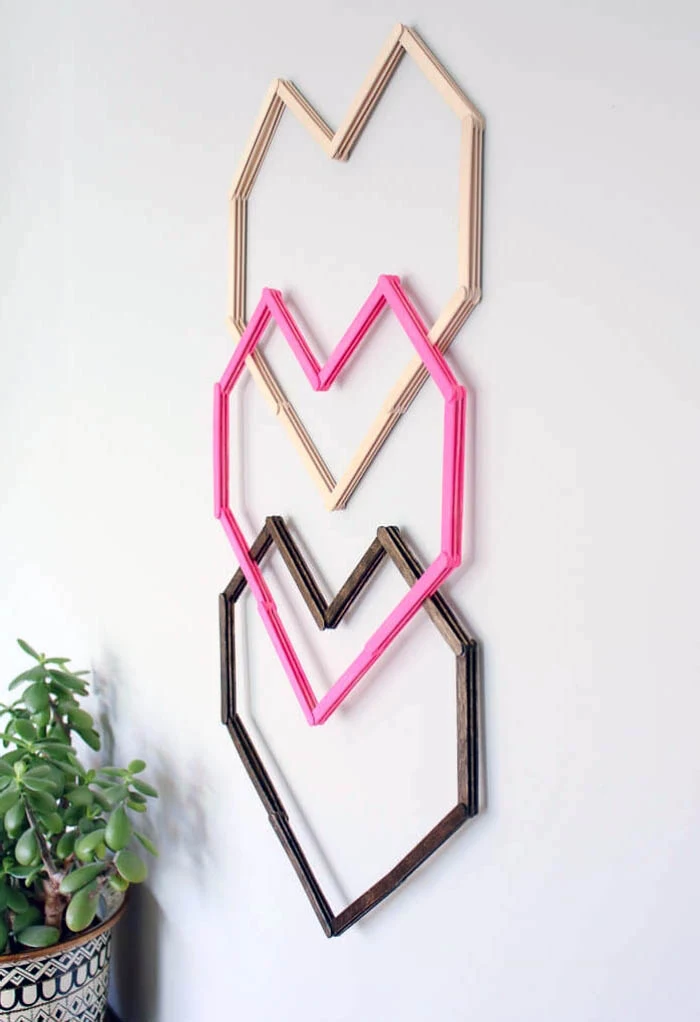
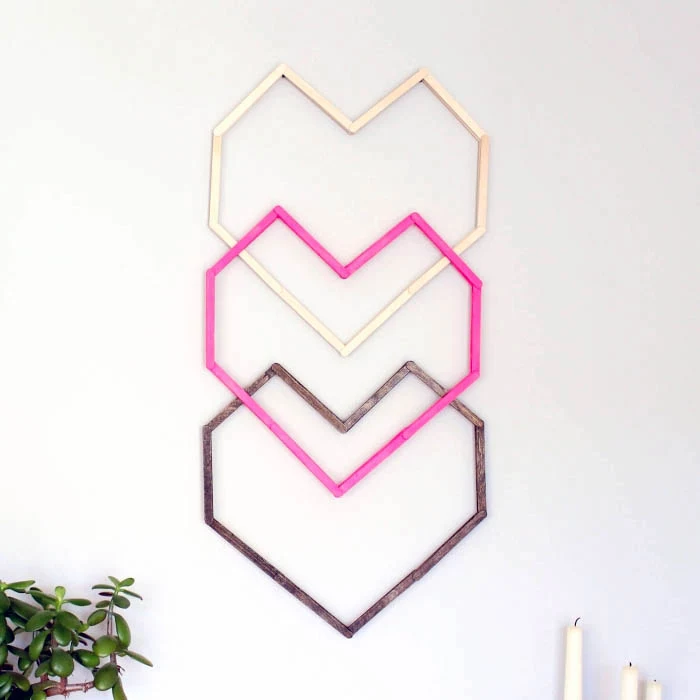
Let’s Make Something: A Simple Geometric Wood Panel
Professional-looking wood decor is all in the prep and finishing. These are the steps that take a project from “homemade” to “handcrafted.” Let’s walk through making a simple 12×12 inch geometric art piece. It’s a fantastic starter project!
Your Shopping List & Tools
You don’t need a massive workshop for this. For years, I worked out of a tiny garage. Here’s what you’ll need, which should cost under $30 total:
- One 12×12 inch piece of ¼-inch Baltic birch plywood for the backer board.
- One 1×2 pine board (it’s usually 8 feet long, which is plenty).
- Wood glue.
- Sandpaper (120 and 220-grit).
- Primer and a couple of small craft paint colors.
- Painter’s tape.
- Key Tool: A miter box and a hand saw. This simple tool is a game-changer for getting clean, 45-degree angle cuts without a power saw.
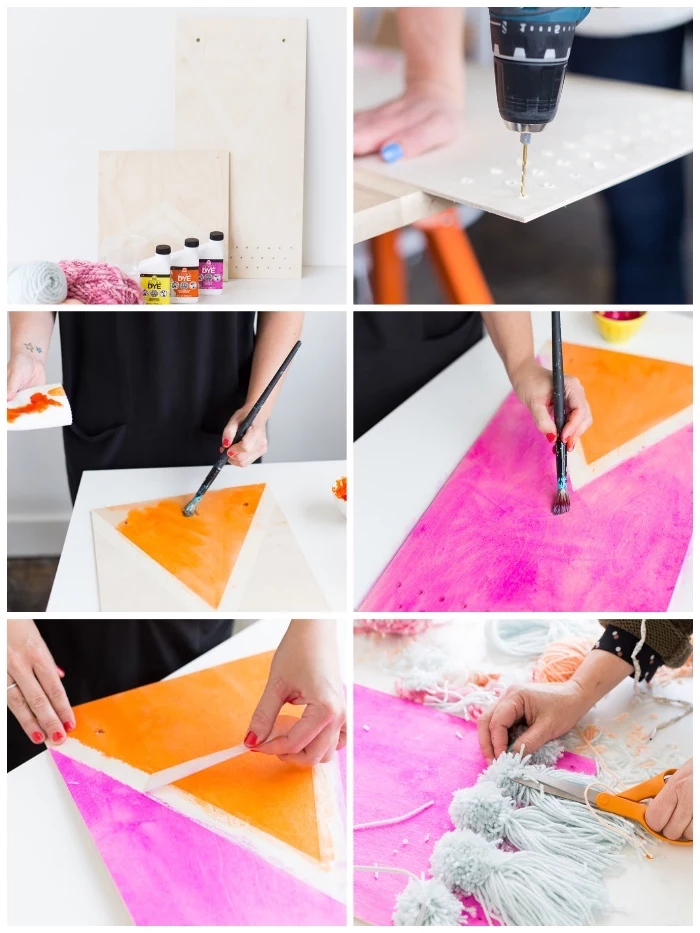
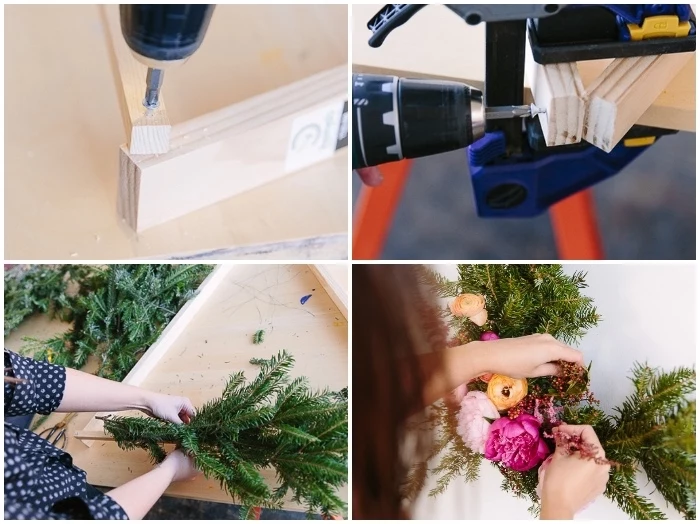
Step-by-Step to a Crisp Design
Plan on this taking a weekend afternoon, mostly to allow for drying time.
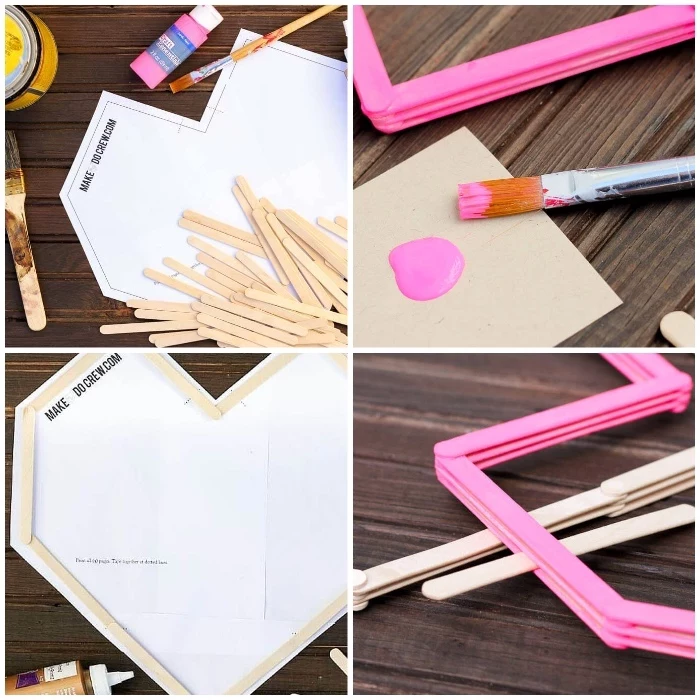
- Cut Your Pieces: Set your miter box to a 45-degree angle. Start cutting small pieces from your pine board to create your pattern on the plywood backer. Lay them out as you go. Don’t glue anything yet!
- Sand Everything: This is the tedious part, but it’s not optional. Sand all your cut pieces and your backer board. Start with 120-grit paper to remove saw marks, then finish with 220-grit to make it smooth. Quick tip: always sand with the direction of the wood grain to avoid scratches.
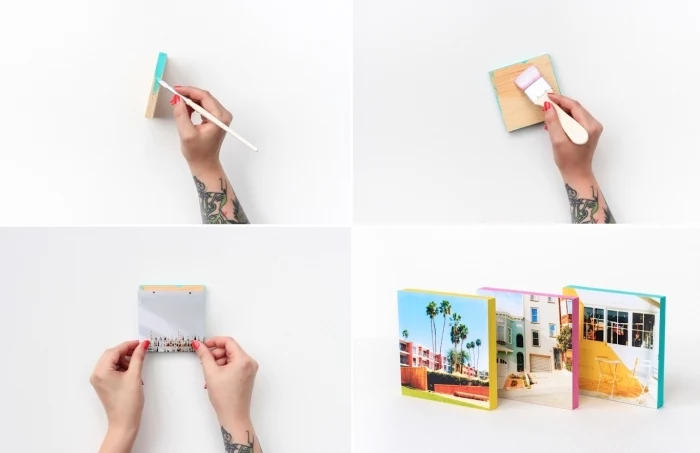
- Prime and Paint: Once everything is sanded and wiped clean of dust, apply a coat of primer. After it dries, paint your pieces. Two thin coats of paint are always better than one thick, drippy one.
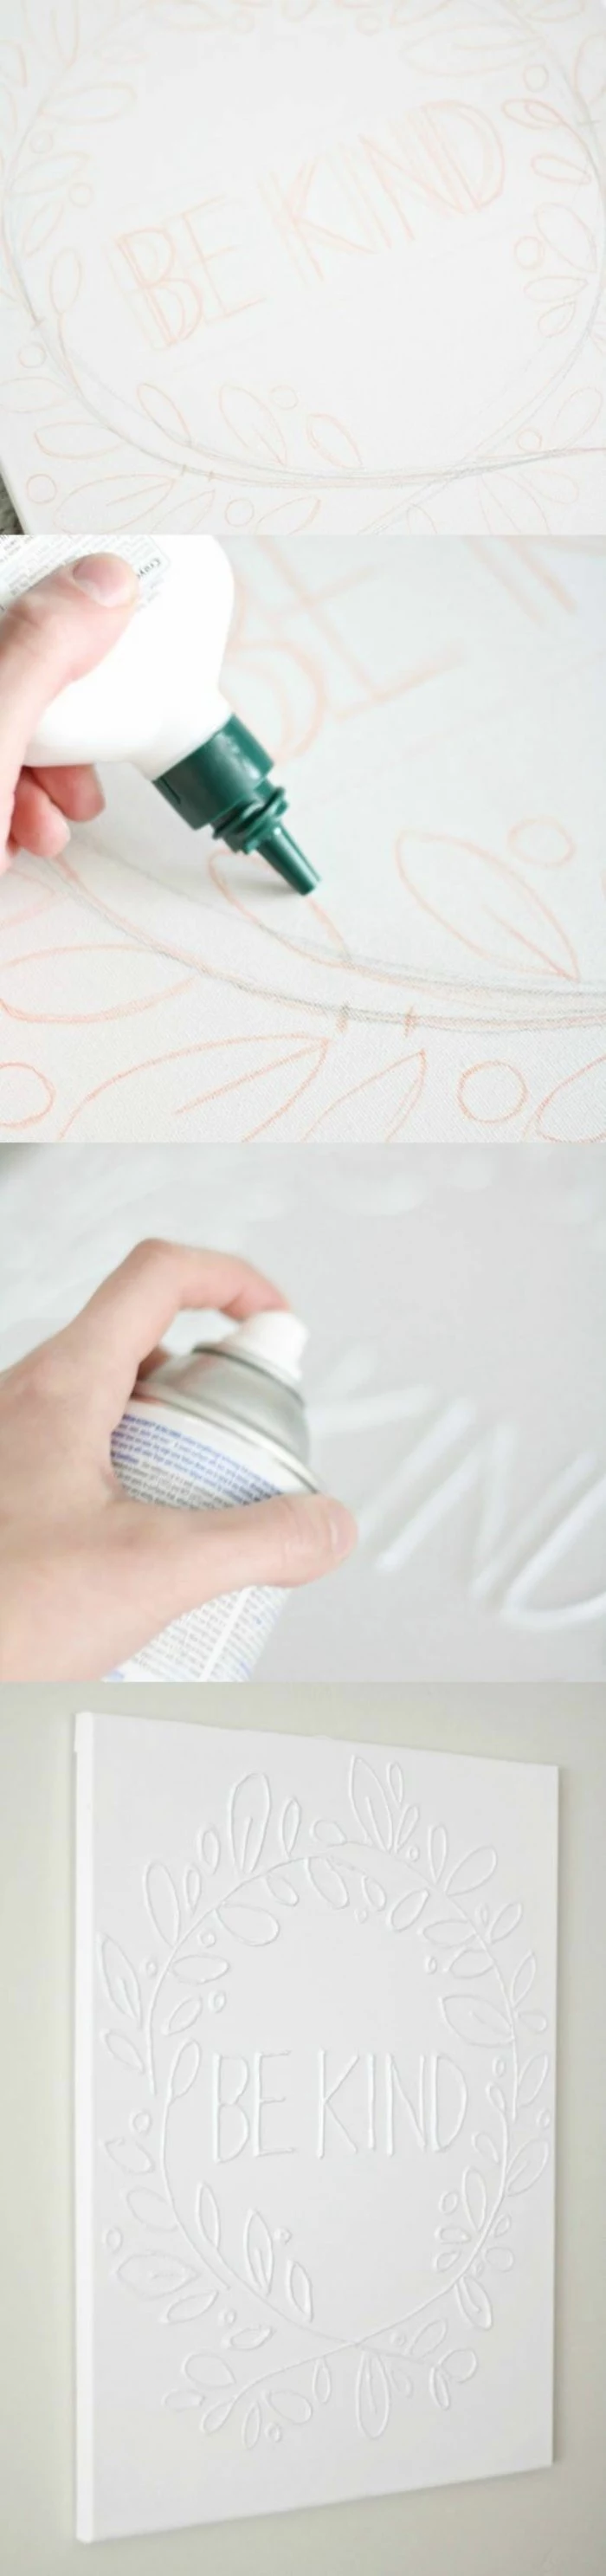
- The Pro-Level Tape Trick: For super crisp lines, here’s a secret I learned from an old-school sign painter. Apply your painter’s tape. Then, paint over the edge of the tape with your base color (or a clear coat) and let it dry. This seals the edge so your new color can’t bleed underneath. When you paint your accent color and peel the tape, the line will be perfect. It has never failed me.
- Glue-Up: Arrange your finished pieces on the backer board and glue them down with wood glue. Use a damp cloth to wipe away any excess that squeezes out. Let it dry for 24 hours.
- Finishing Touch: Protect your work with a clear topcoat. A water-based polyurethane is easy to work with, low-odor, and dries fast.

How to Hang It Securely
Please, never hang a piece of wood art from a single nail in drywall. It’s just not safe. Your best bet is to use a stud finder to locate a wood beam in your wall and drive a screw directly into that. If a stud isn’t in the right spot, use a proper drywall anchor rated for at least double the weight of your piece. For anything really big or heavy, I use a French cleat system—it’s what galleries use, and it’s rock solid.
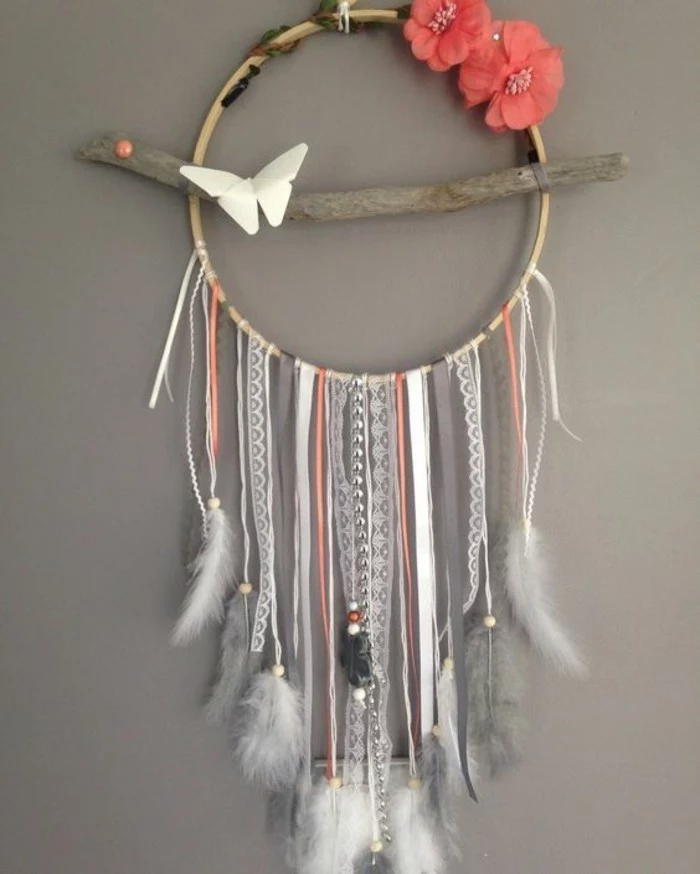
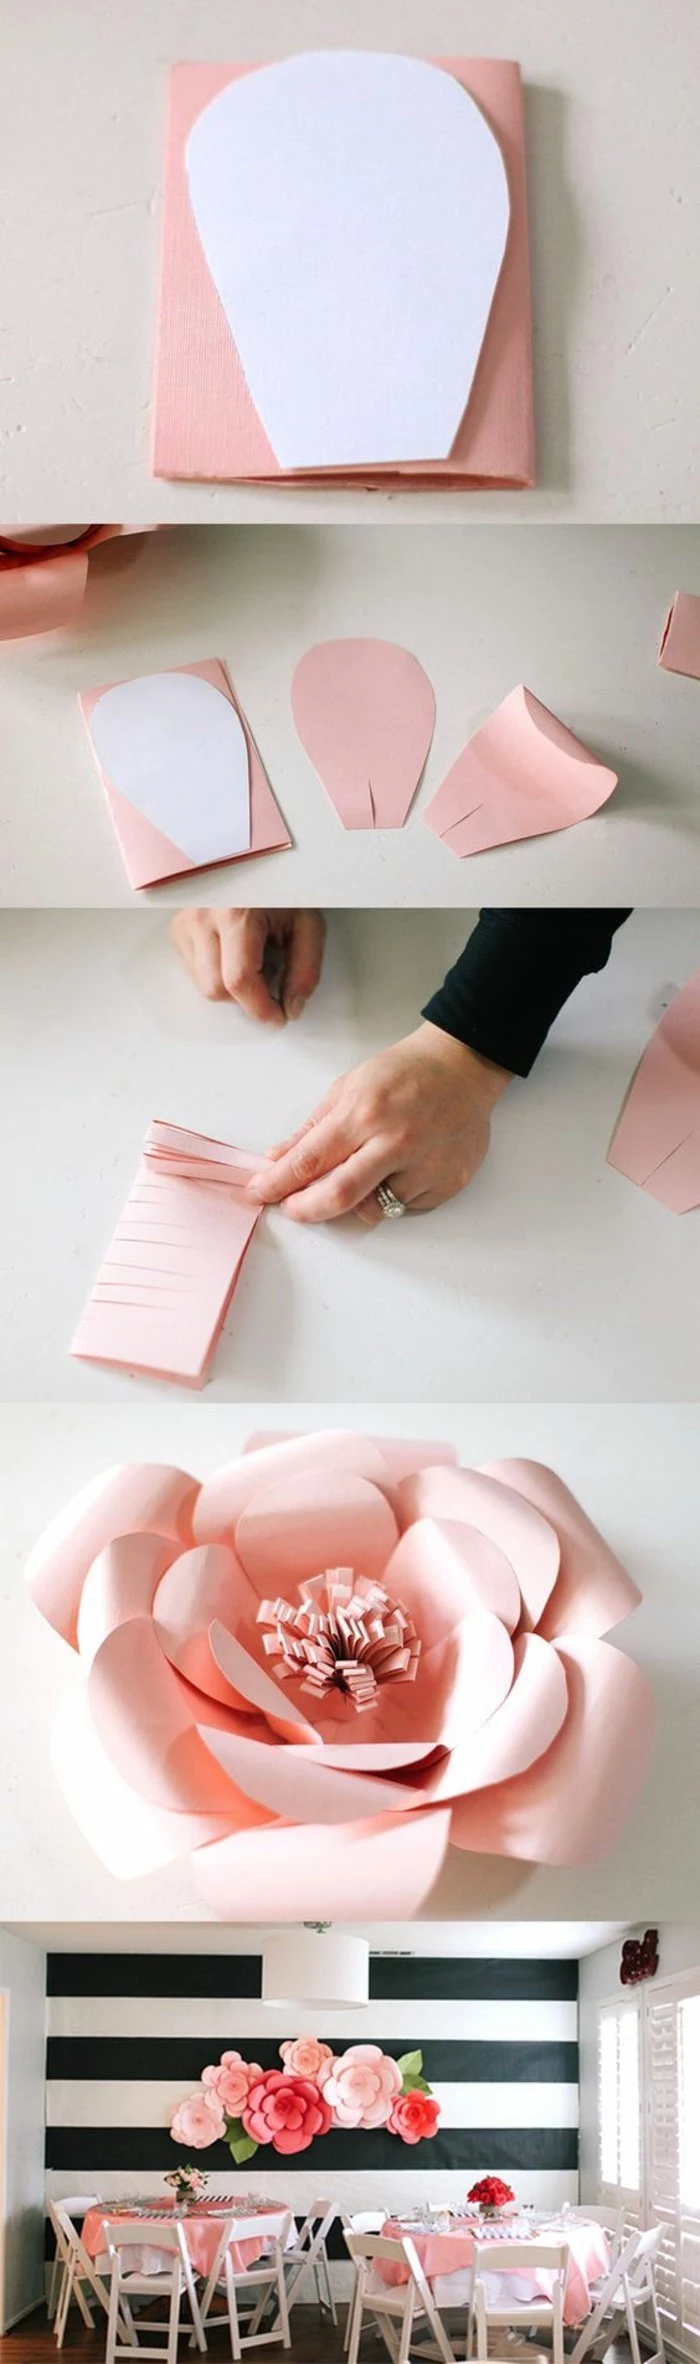
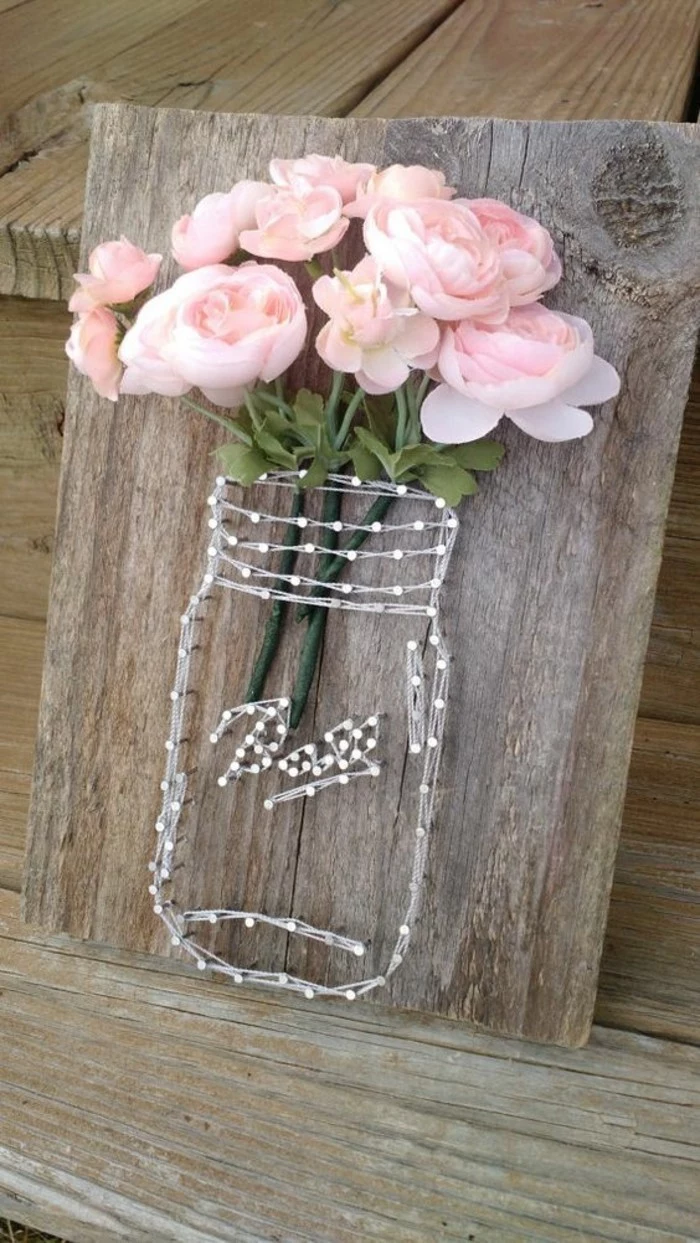
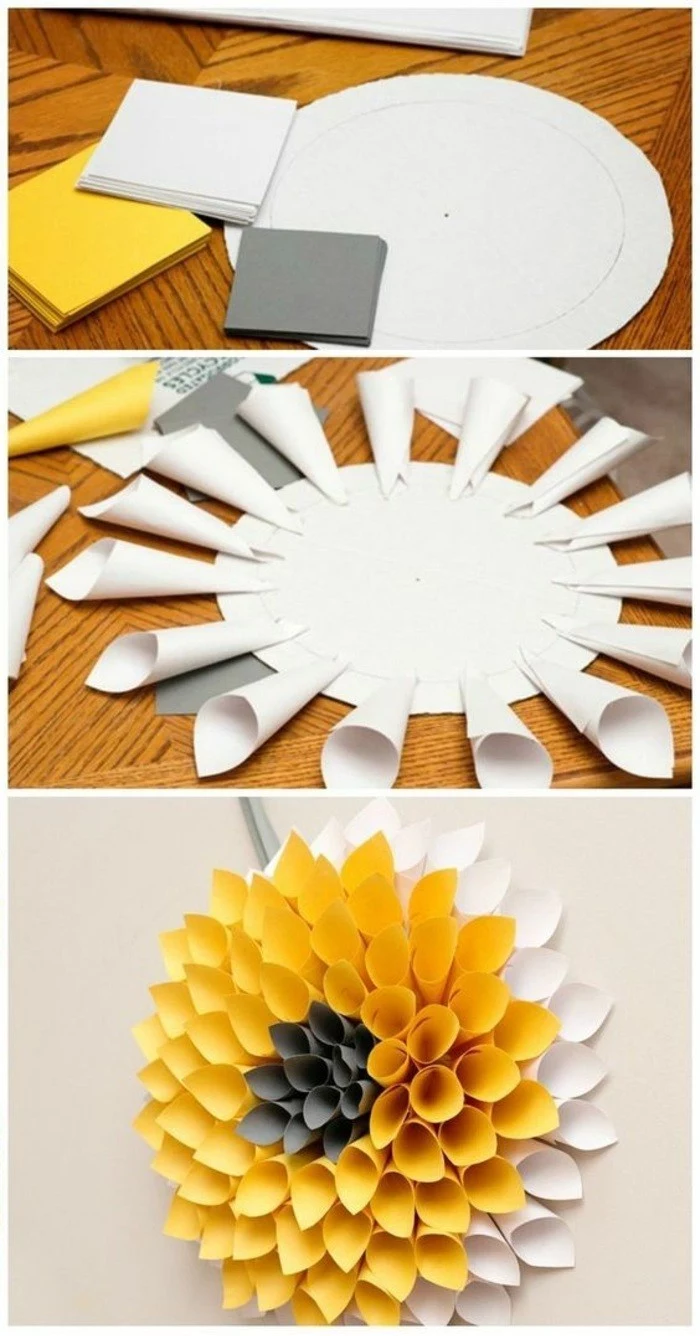
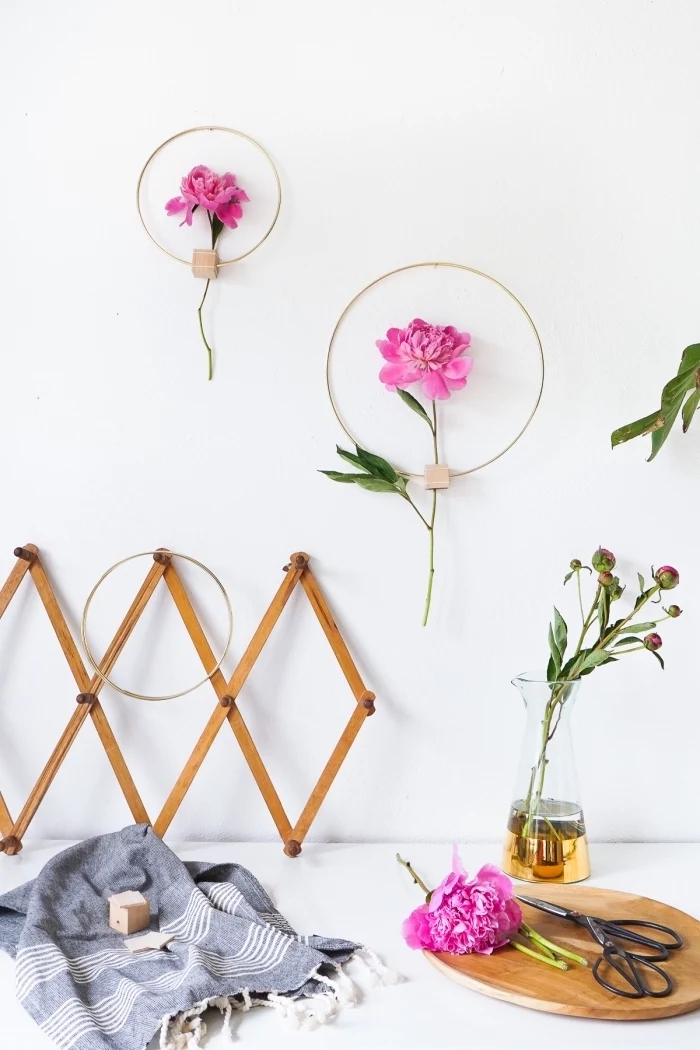
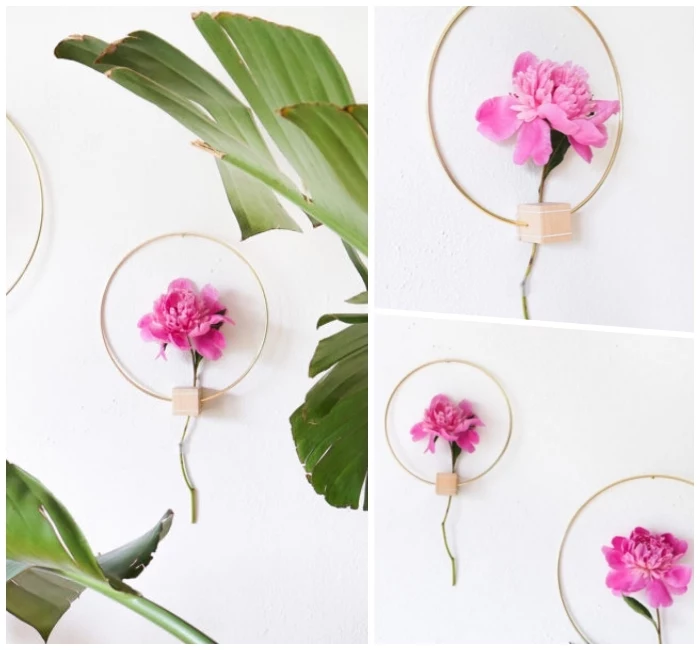
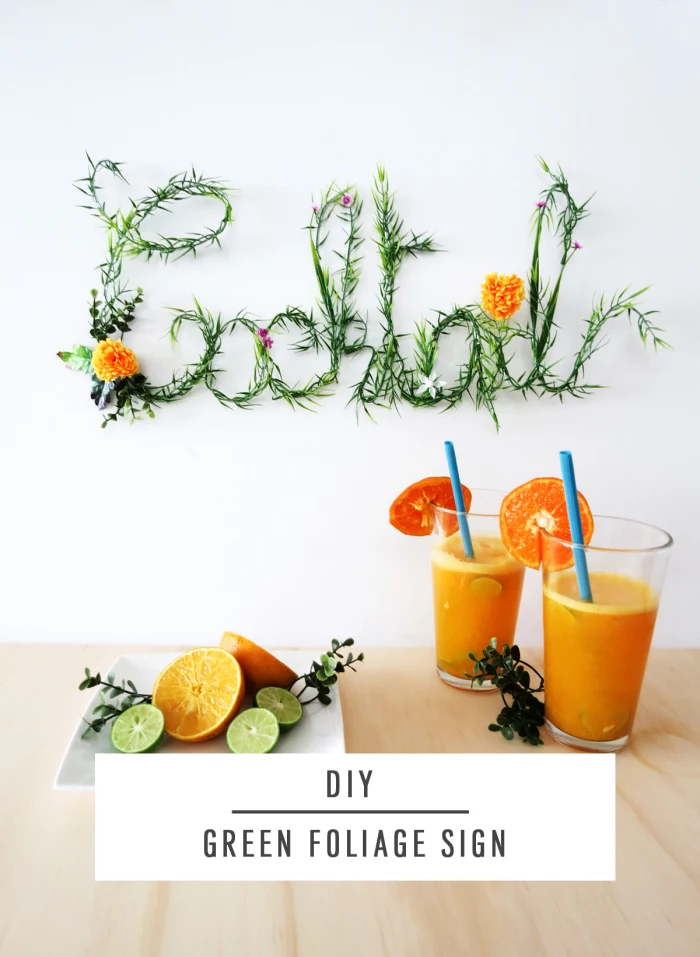
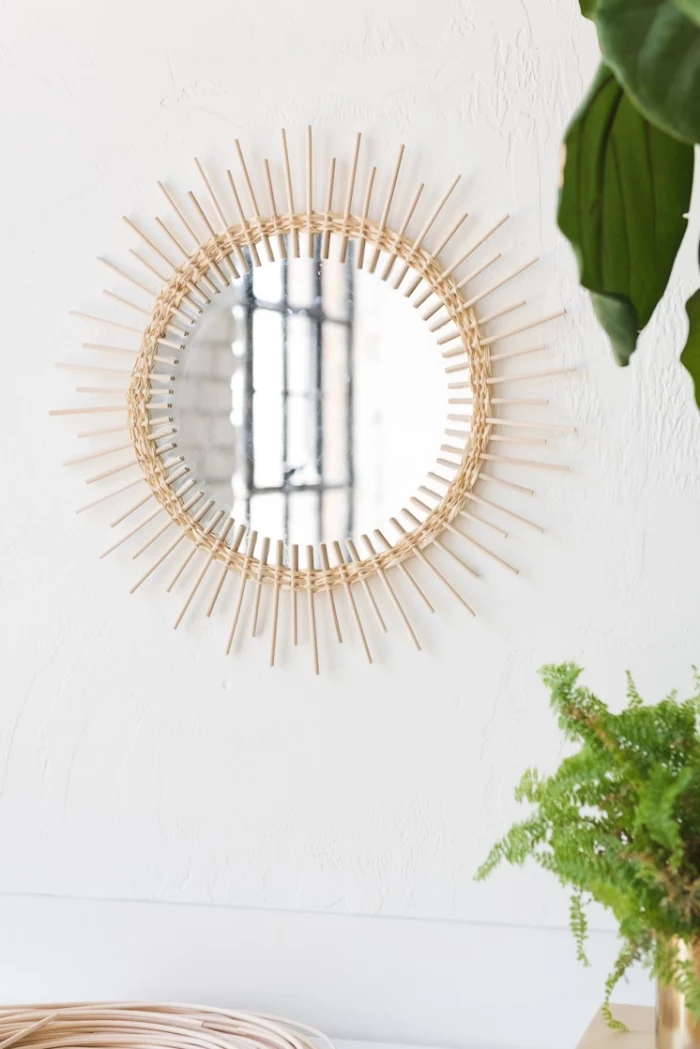
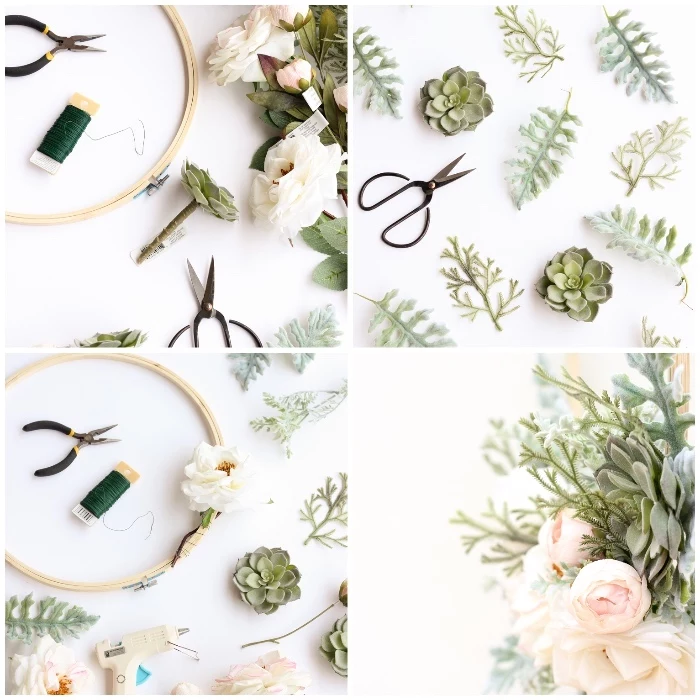
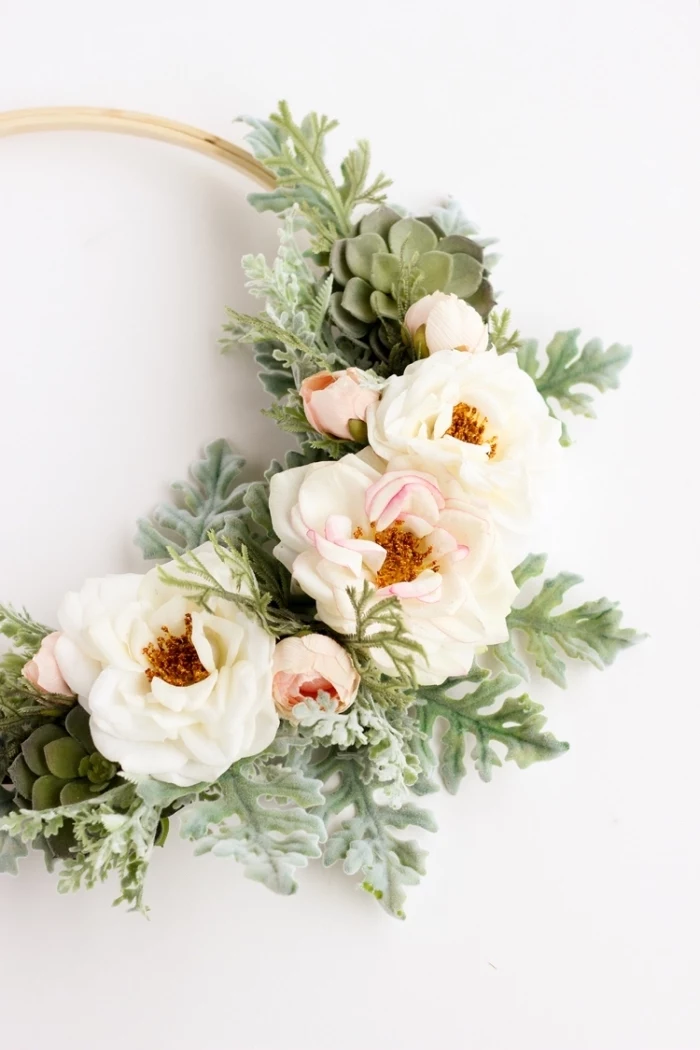
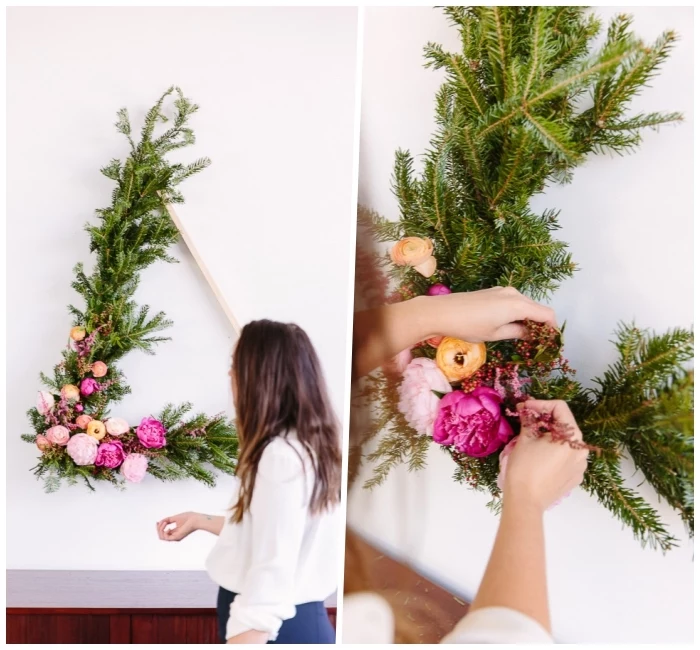
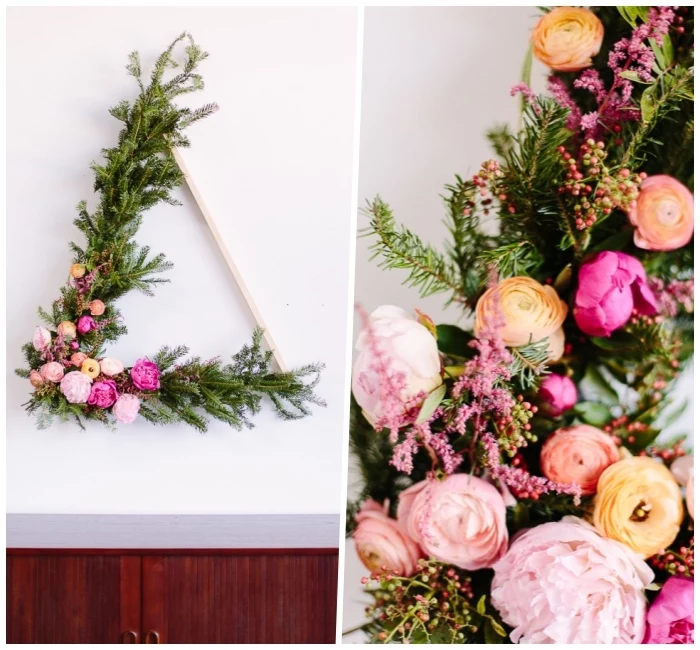
Creating a Lasting Botanical Hoop Wreath
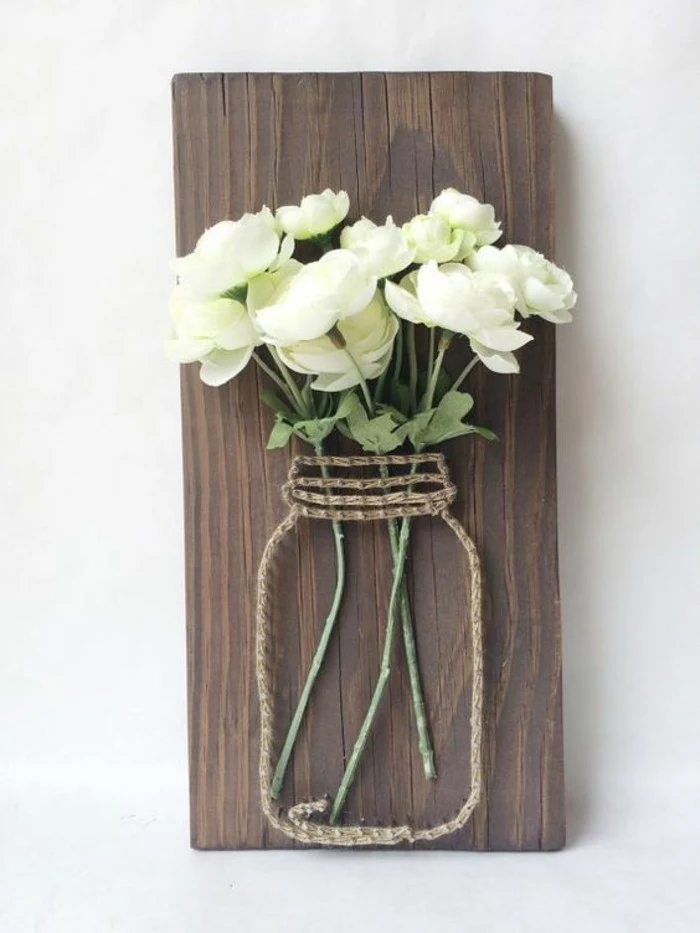
Floral wall art can be stunning, but it can also look cheap and sad if it’s not put together well. The secret is in the mechanics—the invisible work that holds it all together.
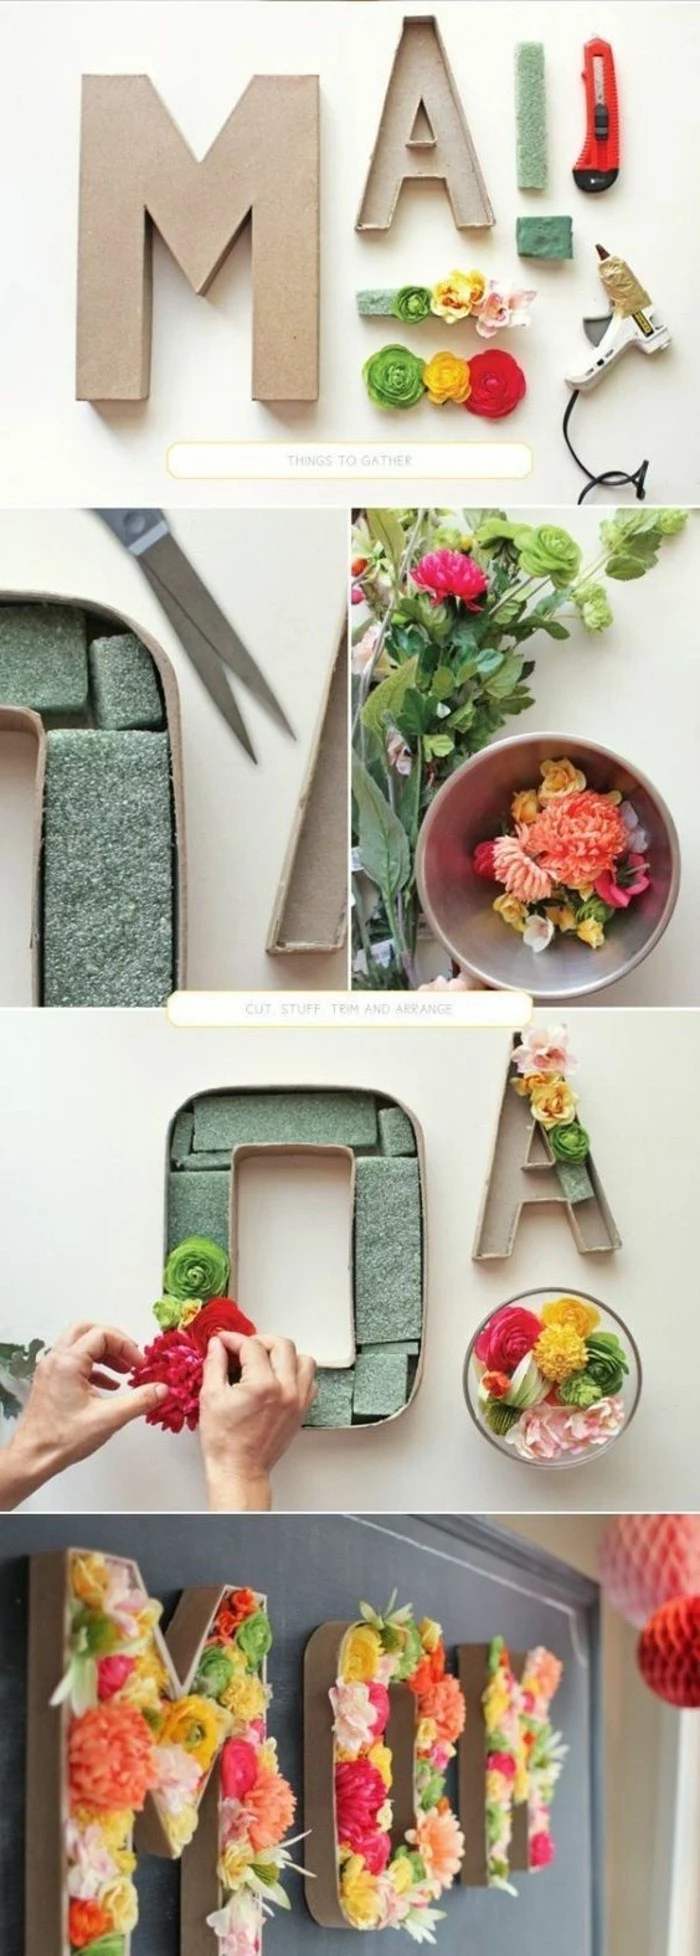
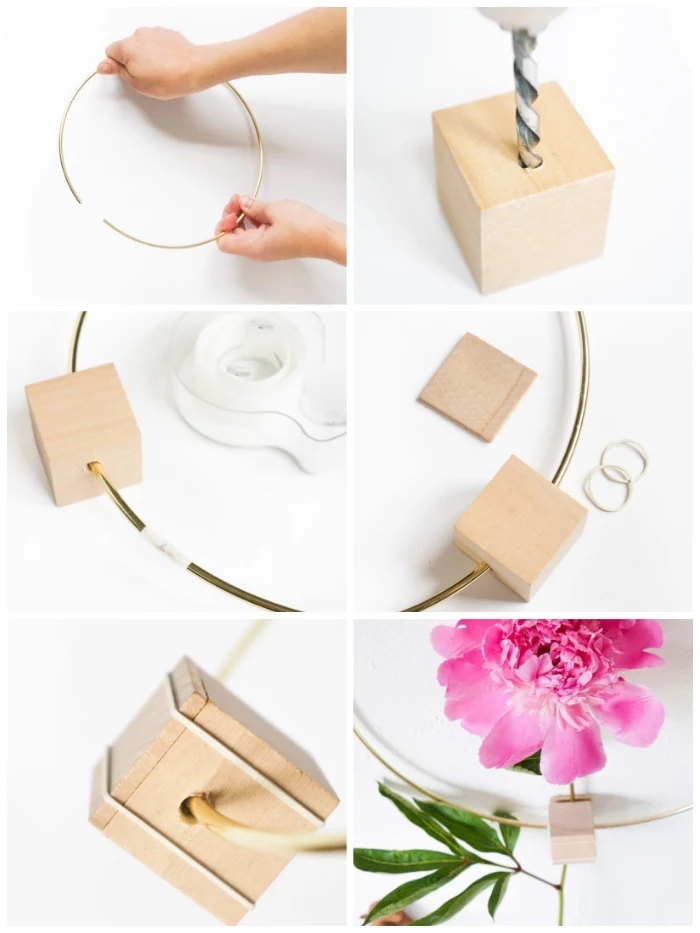
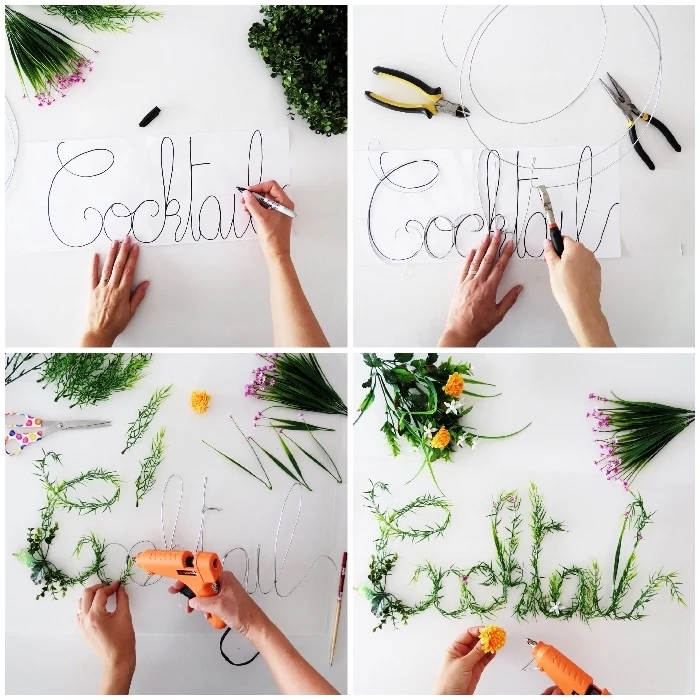
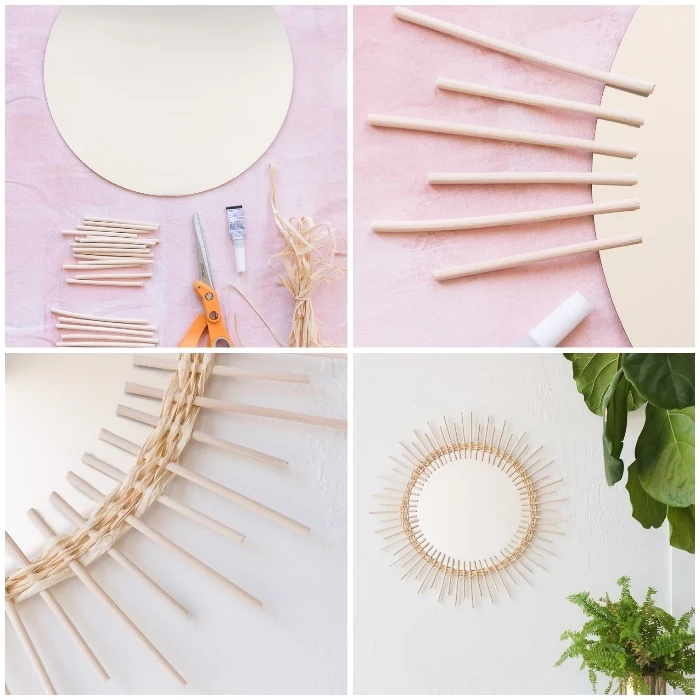
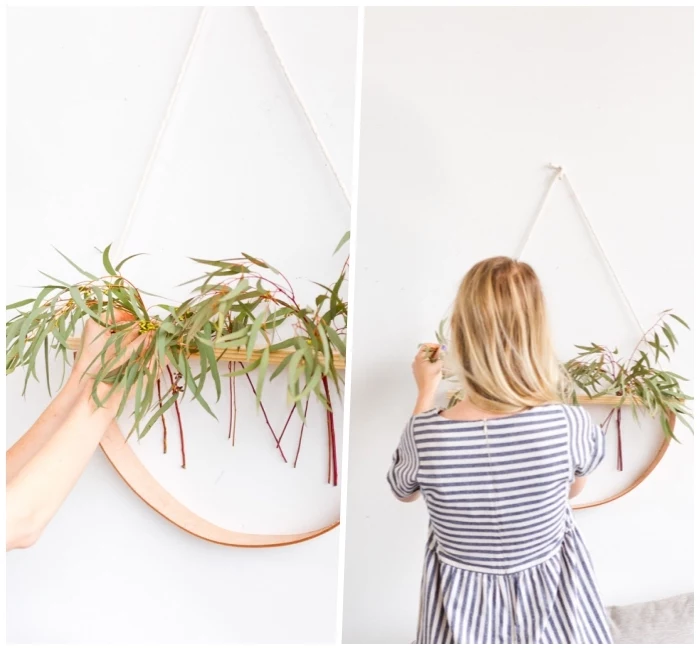
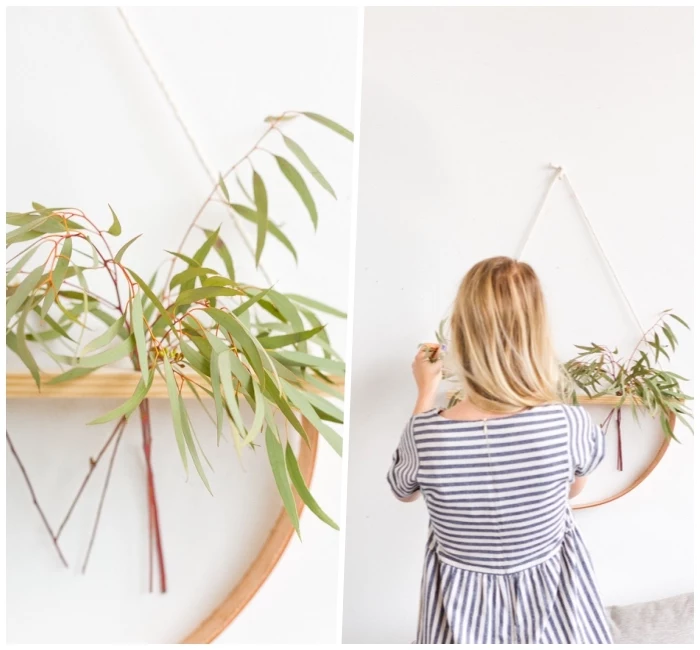
First, get yourself a metal or grapevine hoop. The beginner mistake is to just start hot-gluing flowers directly onto the hoop. Instead, build in layers. Create a base of greenery first (like that preserved eucalyptus). Use thin floral wire (24 or 26-gauge works great) to attach small bunches of the greens to the hoop, overlapping them to hide the wire and the hoop itself. This base layer adds fullness and a professional feel.
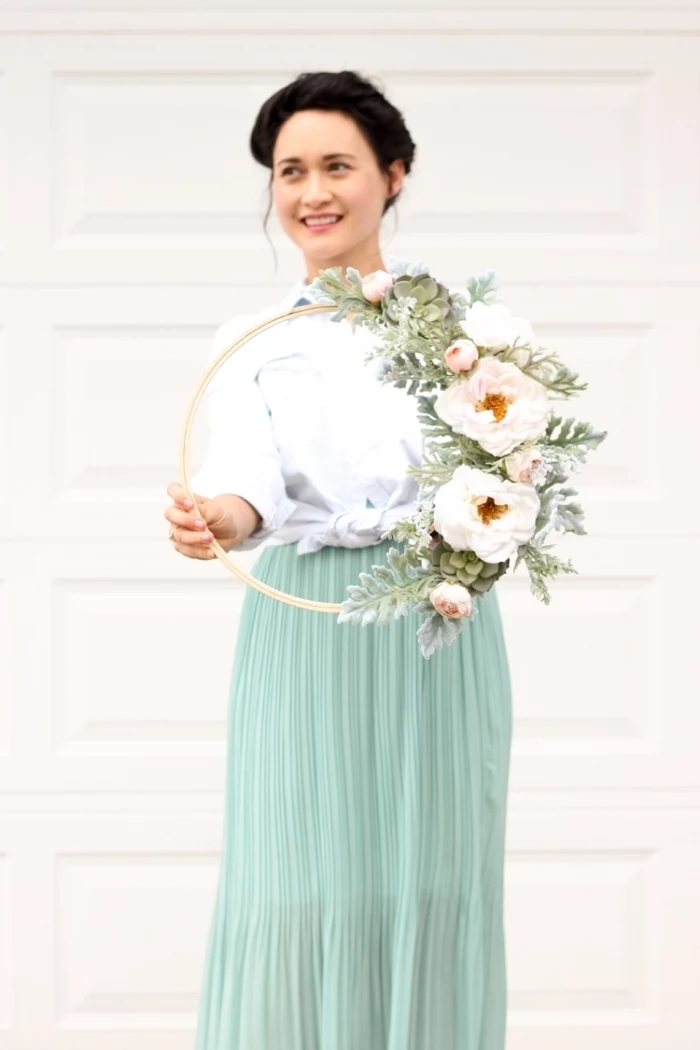
Now for your main flowers. For heavier dried or preserved flowers, you should wire them. Cut the stem to about two inches, then carefully push a piece of 22-gauge floral wire through the thick base of the flower. Fold the wire down and wrap it and the stem together with green floral tape. This creates a new, flexible stem you can use to securely wire the flower onto your wreath. This technique gives you total control and ensures nothing falls off. You can use a dab of hot glue for extra security, but the wire should be doing the real work.
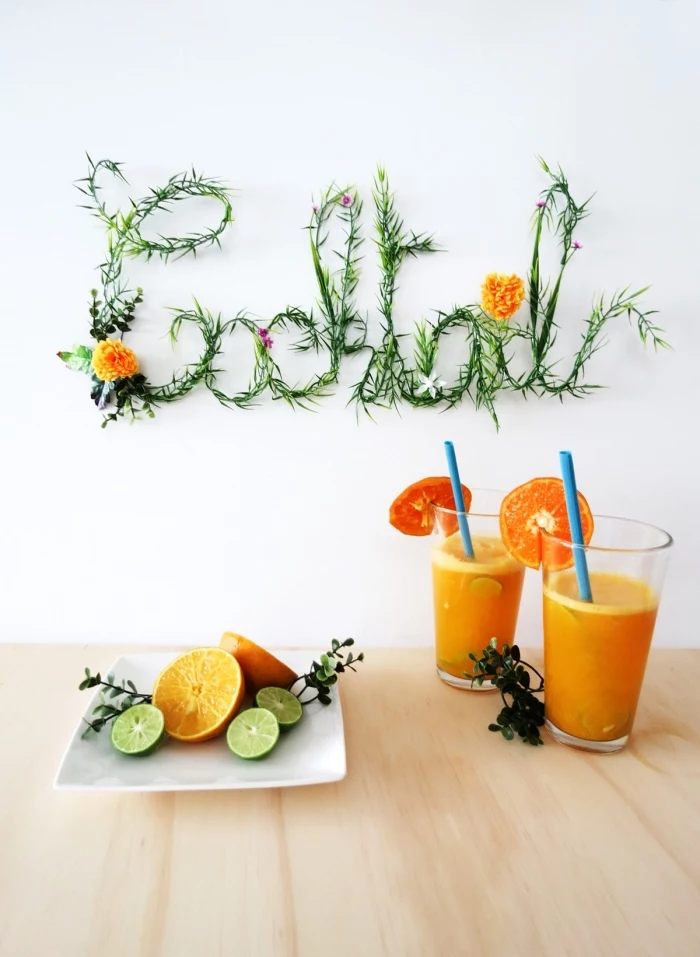
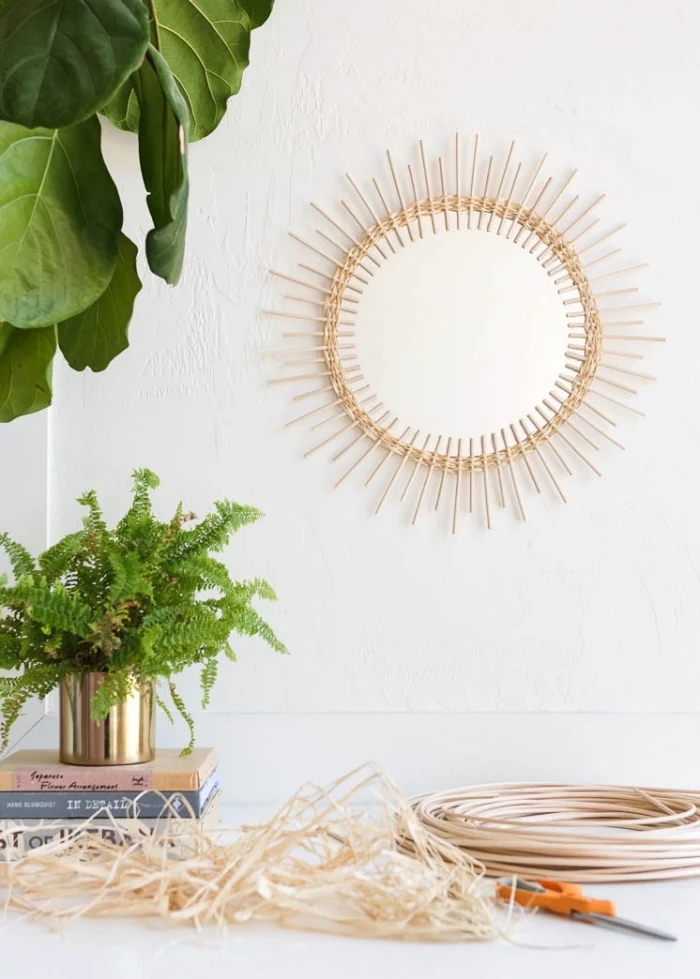
Finally, think about composition. Instead of covering the whole hoop, try creating a crescent shape. This feels more modern and balanced. A bit of negative space is a good thing—it lets the arrangement breathe.
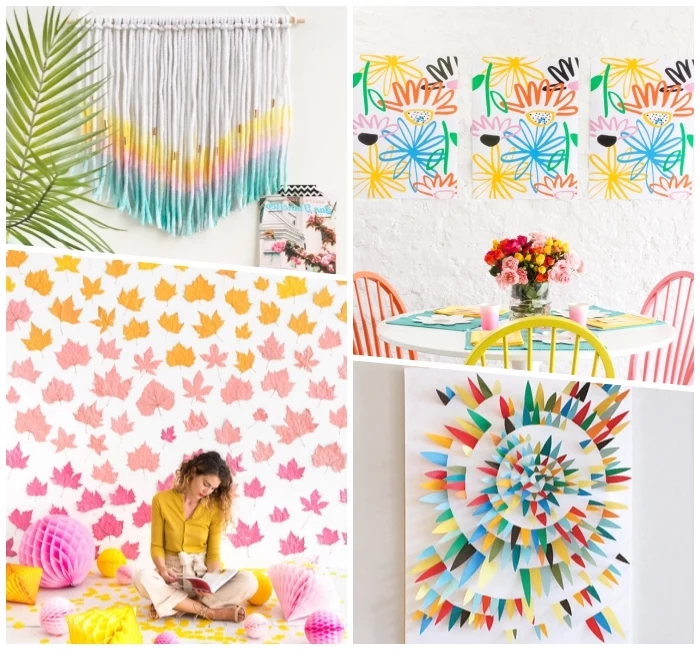
Exploring the Warmth of Fiber Art
Macrame and weaving add incredible warmth and texture to a room. They have rich histories around the world, from the clean lines of Scandinavian weaving to the bold patterns of South American traditions.
Macrame: It’s All About the Knots
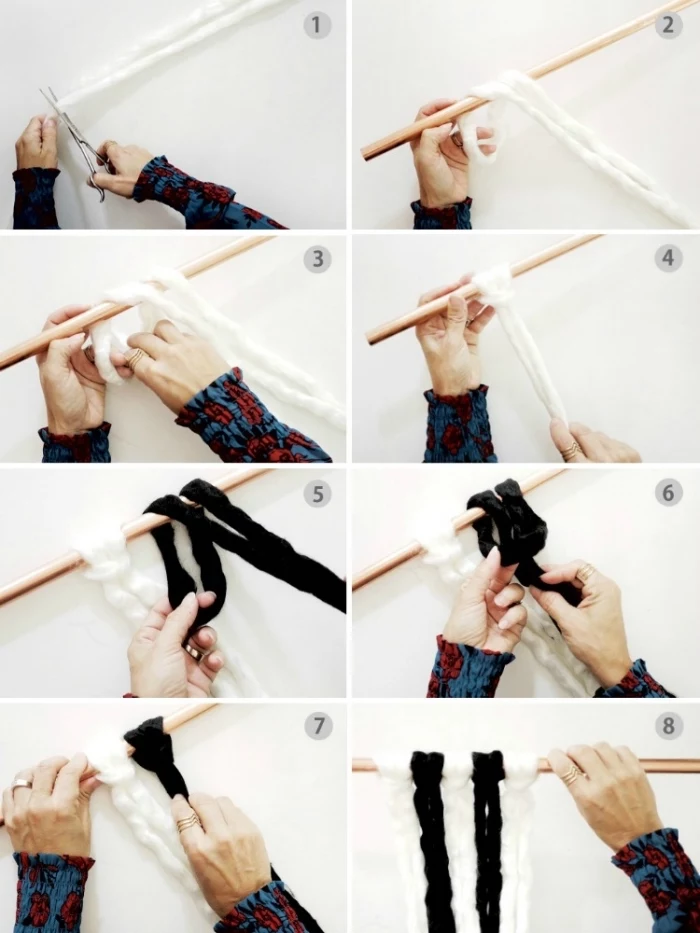
You can create mind-blowing macrame with just three basic knots: the Lark’s Head Knot (to attach cords to the dowel), the Square Knot (the workhorse for creating panels), and the Half-Hitch Knot (for creating lines and angles). I promise! You can find tons of amazing videos online that show you exactly how to tie these.
Quick Challenge: Before you start a big project, grab some scrap cord and practice making 20 perfect square knots in a row. It’s the best 15 minutes you can spend. The biggest beginner struggle is inconsistent tension, which makes the work pucker. Practicing helps your hands build the muscle memory for even pressure.
Oh yeah, the number one question: how much rope do you need? A good rule of thumb for macrame is to measure the desired final length of your piece and multiply that by four. That’s the length you should cut each individual cord. If you’re doing a lot of dense knotting, multiply by five or even six. It’s always better to have too much than too little!
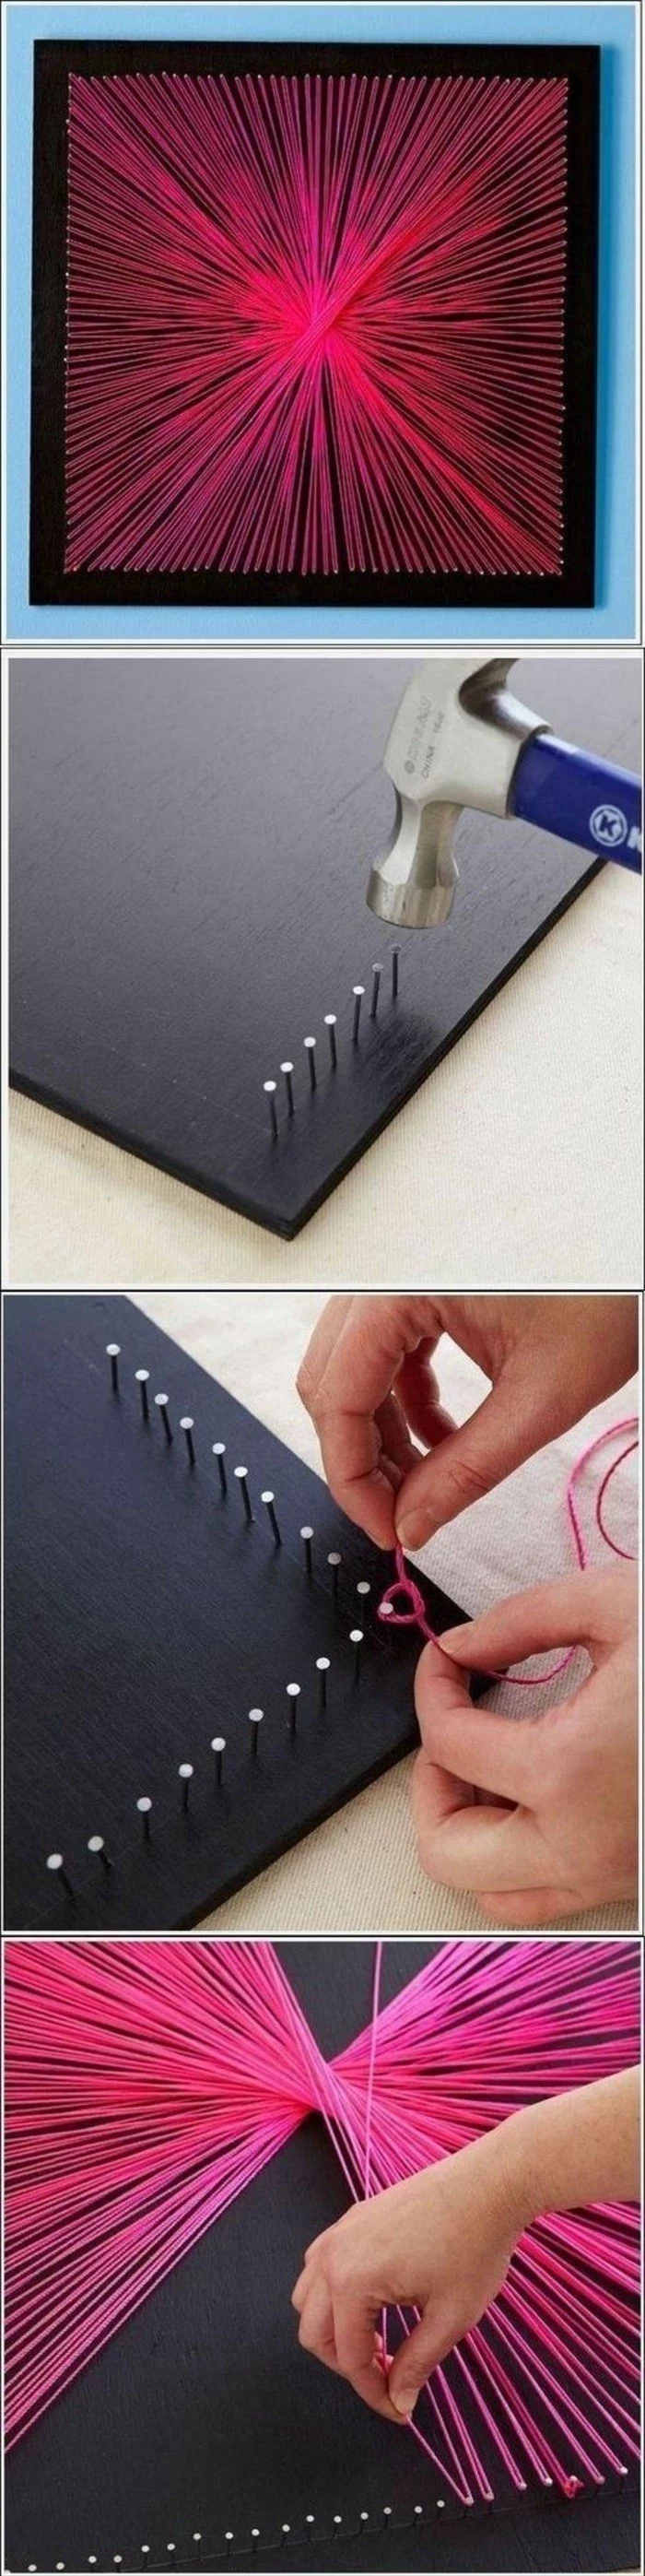
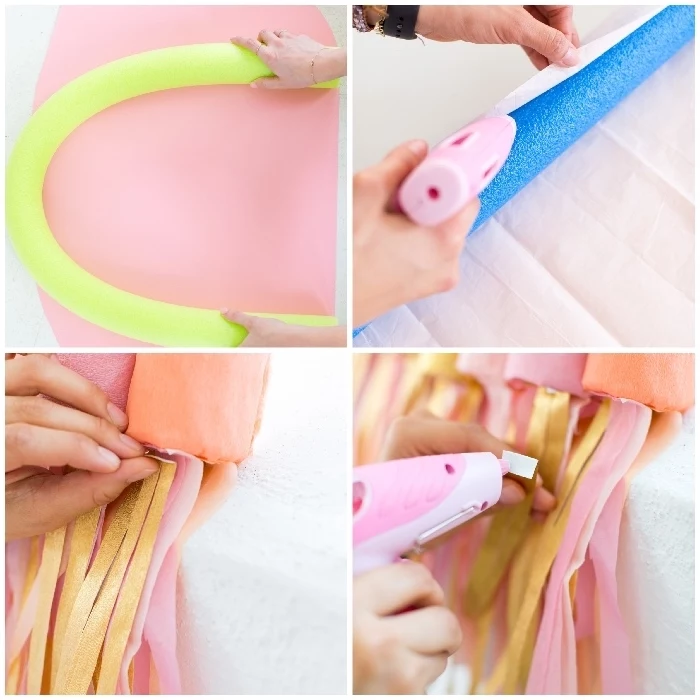
Weaving on a DIY Loom
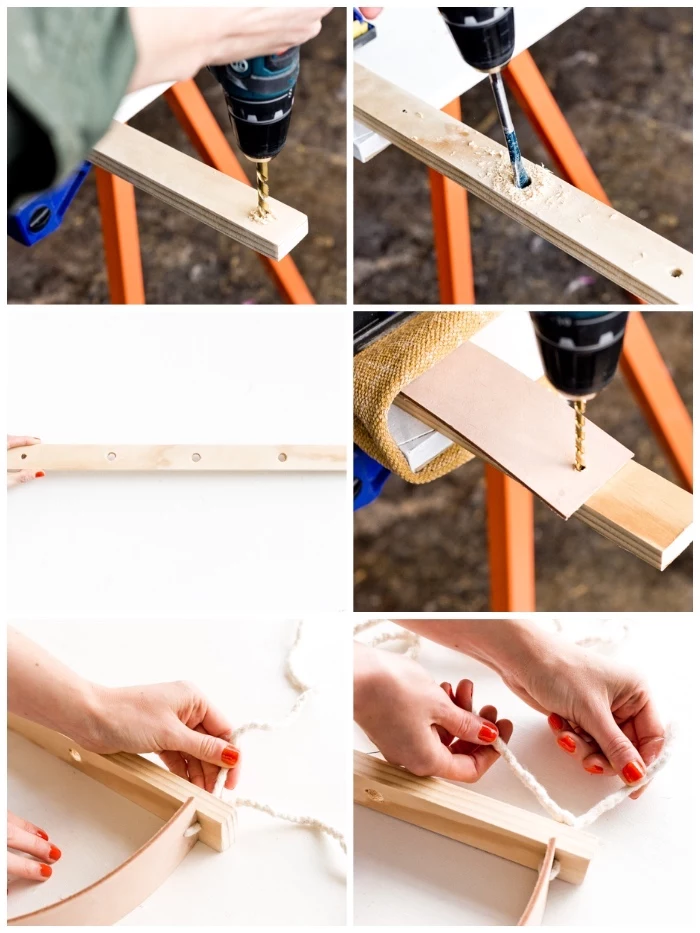
You don’t need a giant floor loom to get started with weaving. You can make a simple lap loom from a sturdy picture frame! Just grab a frame (without the glass), and hammer in small, evenly spaced nails—about a half-inch apart—across the top and bottom. Then you just wind your vertical (warp) threads around the nails. That’s it! You’ve got a loom.
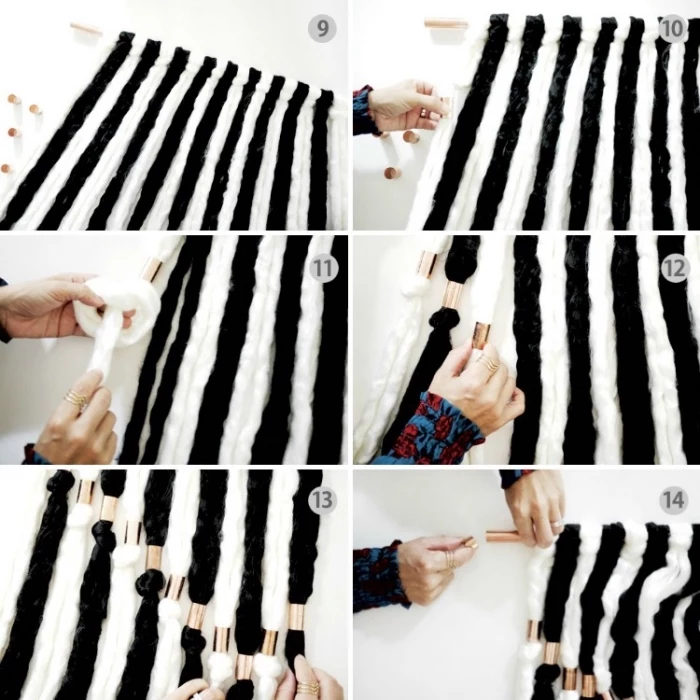
The real fun is in choosing a variety of yarns with different textures. Mix thick wool roving with thin cotton yarn. The beauty of this kind of weaving is in its organic, handmade quality, so don’t stress about perfection.
A Final Word on Safety & Planning
Creating things should be fun, not a trip to the ER. Always wear safety glasses when cutting or sanding. A tiny sliver of wood in your eye is a really bad day. And if you’re painting, staining, or using epoxy, please make sure you have good ventilation. Work outside, or open the garage door and use a fan. Those fumes are no joke.
And before you start any project, make a simple sketch and measure your wall space. A piece that’s too big or too small will always look a little off. A little planning goes a long, long way.
Building something for your home with your own hands is one of the most rewarding feelings there is. It connects you to your space in a way that buying something never can. So forget about factory-perfect results. Embrace the little imperfections that show it was made by a human. If you focus on using good materials and patient techniques, the pride you’ll feel when you hang that final piece on the wall is what really lasts.
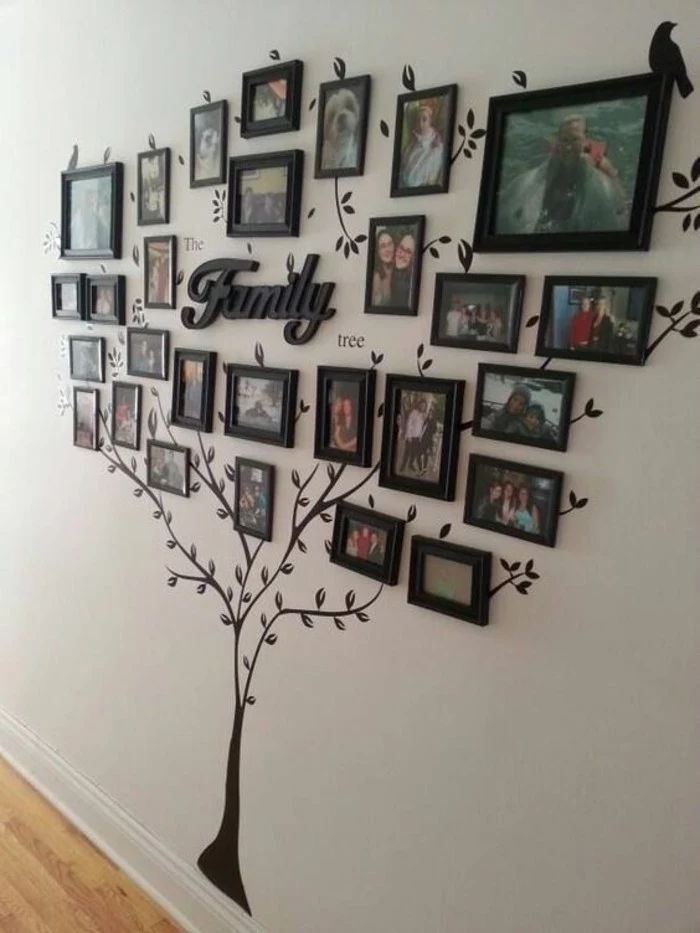
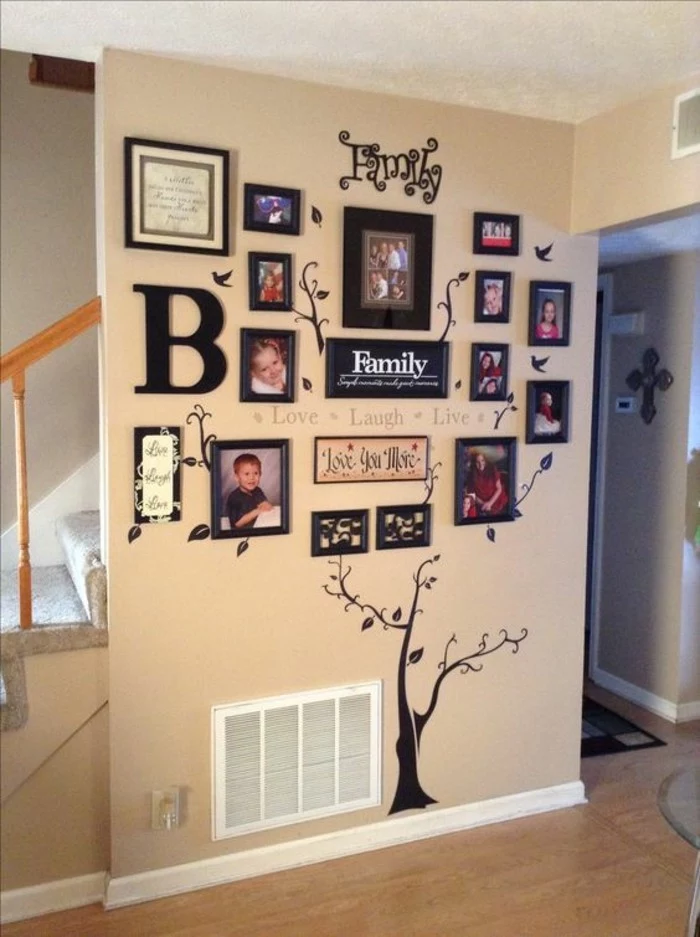
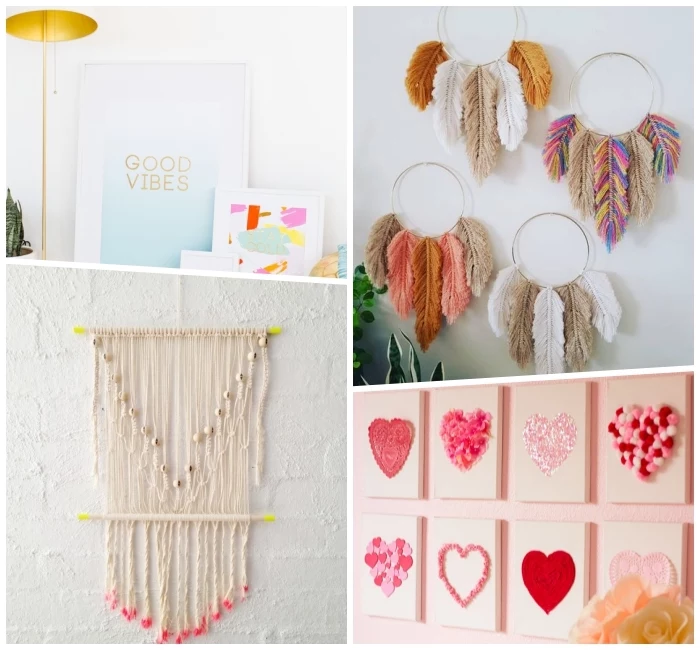
Inspiration Gallery
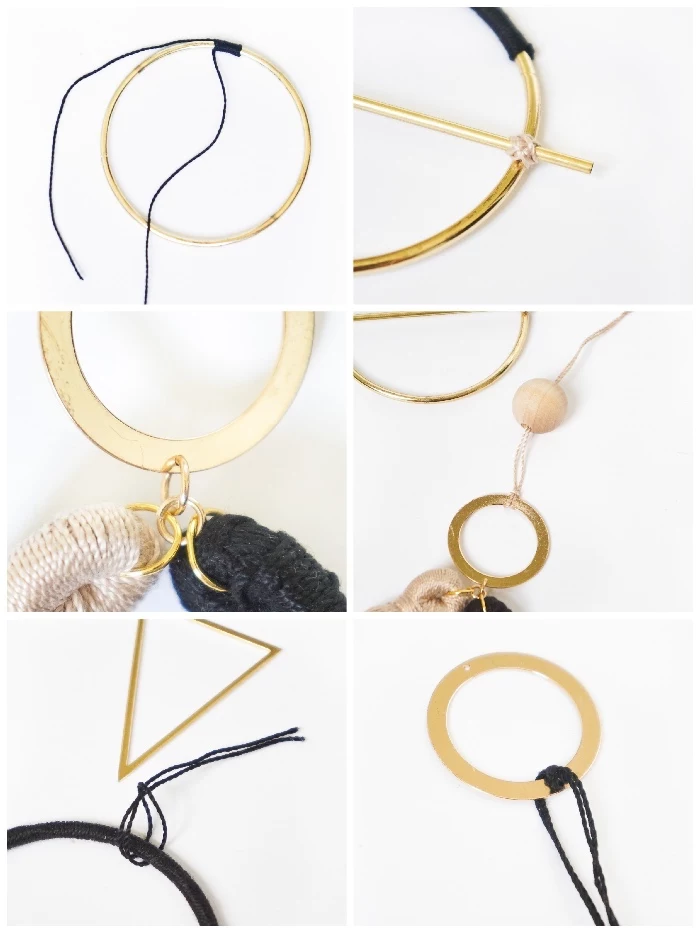
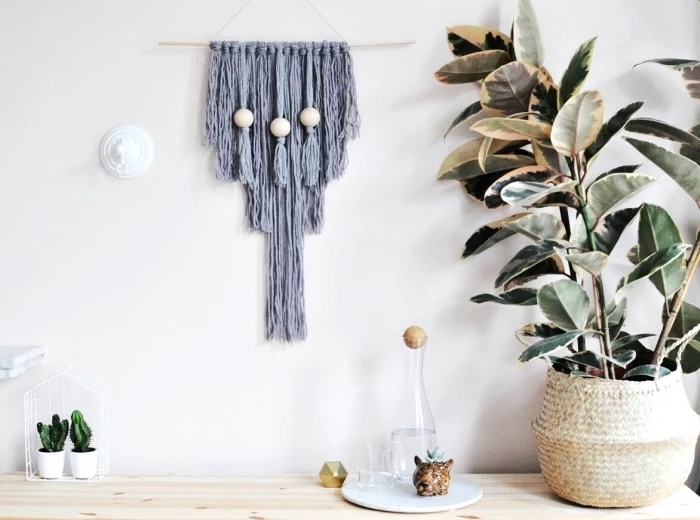
When venturing into fiber art, the cord you choose is your foundation. For structured macrame pieces, a single-strand cotton cord (like the ones from Ganxxet or Bobbiny) gives you clean, defined knots and a beautiful fringe. For softer, more voluminous woven wall hangings, consider roving wool or a multi-ply cotton rope. The material directly influences the final drape and texture.

- A perfectly crisp, straight edge on your wood projects.
- Smooth, professional-looking curves.
- Flawless joints that fit together without gaps.
The secret? A high-quality Japanese pull saw. Unlike traditional Western saws that cut on the push stroke, these saws cut on the pull, offering far more control and a cleaner finish with less effort. It’s a game-changer for handmade precision.
Your essential starter toolkit for quality crafting:
- High-Temp Glue Gun: The Surebonder PRO2-100 is a workshop staple for a reason. High heat means a stronger, more permanent bond than flimsy craft-store models.
- Self-Healing Cutting Mat: Protects your surfaces and keeps your blades sharp. Fiskars makes excellent ones in various sizes.
- Metal Ruler with Cork Backing: For straight cuts that don’t slip.
- A Quality Set of Clamps: Essential for holding wood pieces together while glue dries for a strong, lasting bond.

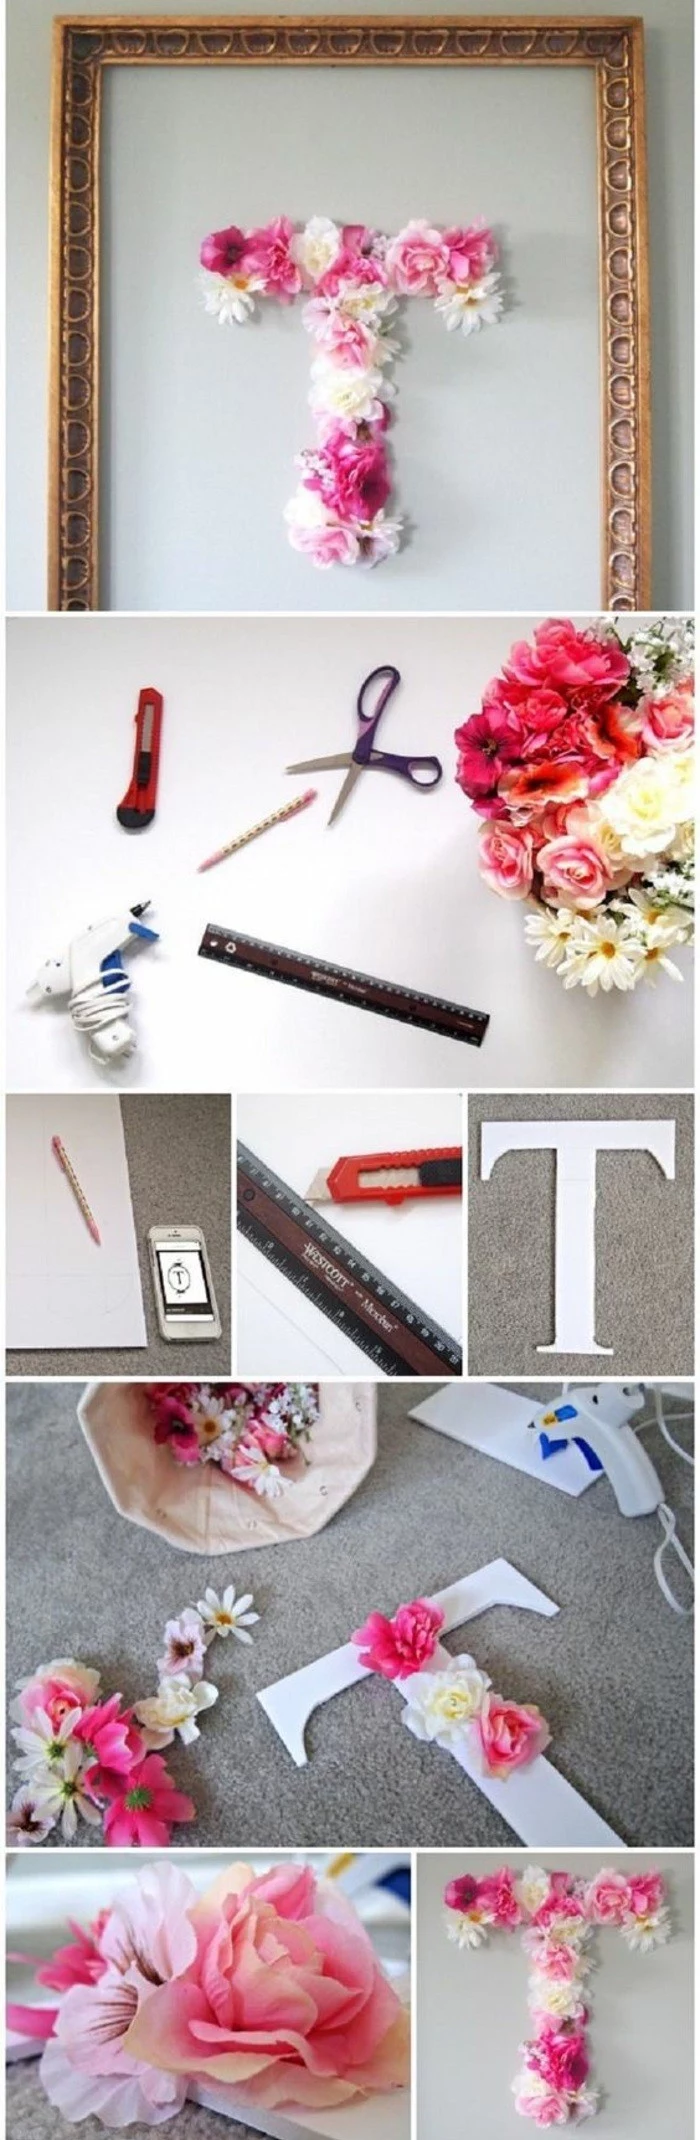
My pressed flower art always turns brown and brittle. What am I doing wrong?
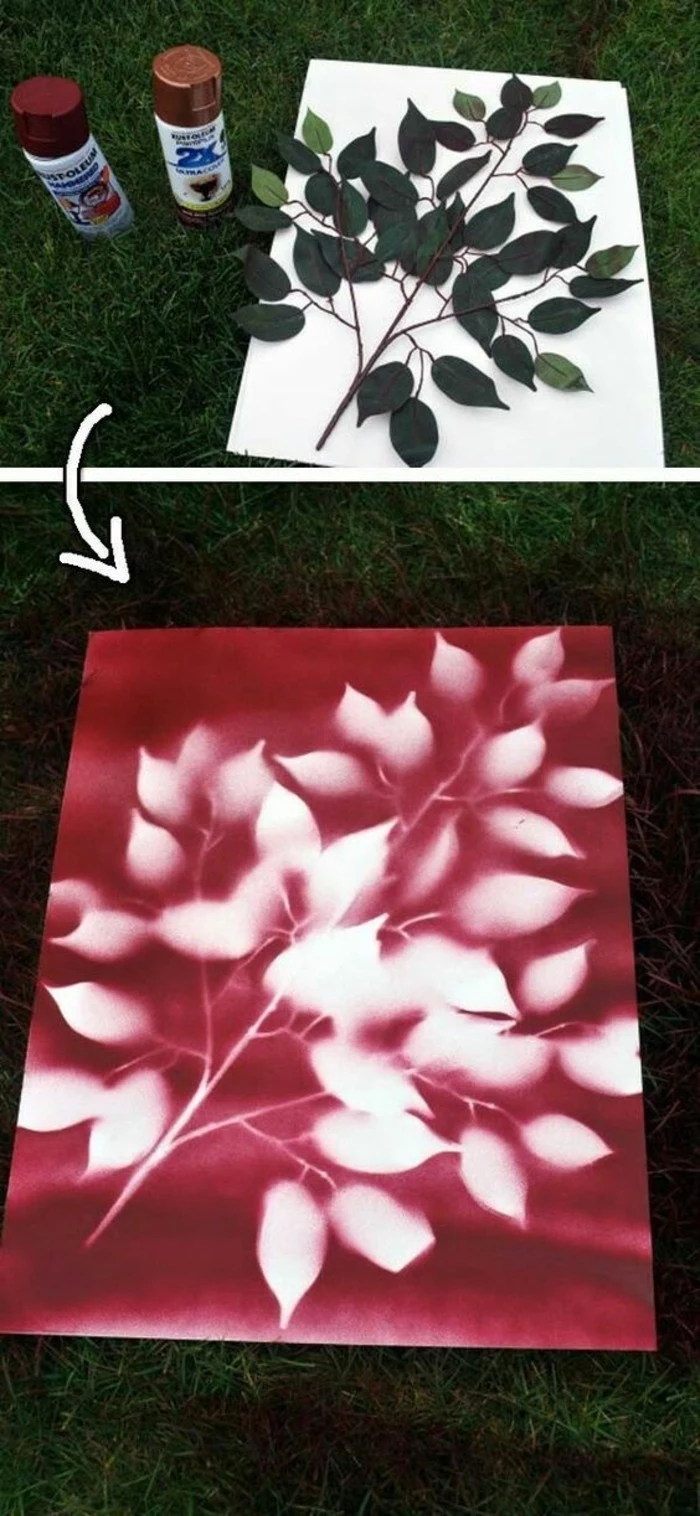
The enemy of preserved botanicals is a combination of light and moisture. To ensure longevity, press your flowers and foliage in a dark, dry place until they are completely free of moisture. When framing, use UV-protective glass or acrylic and an archival-quality acid-free mat board. For an extra layer of protection, you can lightly spray the dried botanicals with a matte sealant like Krylon’s UV-Resistant Clear Coating before framing.

Wood Glue: Titebond II is the go-to for wood-to-wood bonds. It creates a connection that is literally stronger than the wood itself, seeping into the fibers. It requires clamping and about 30-60 minutes of drying time.
Epoxy: For joining dissimilar materials, like wood to metal or plastic, a two-part epoxy (like J-B Weld) is unbeatable. It creates a powerful, waterproof bond that fills gaps effectively.
Choose based on the materials, not just convenience, for a piece that won’t fall apart.
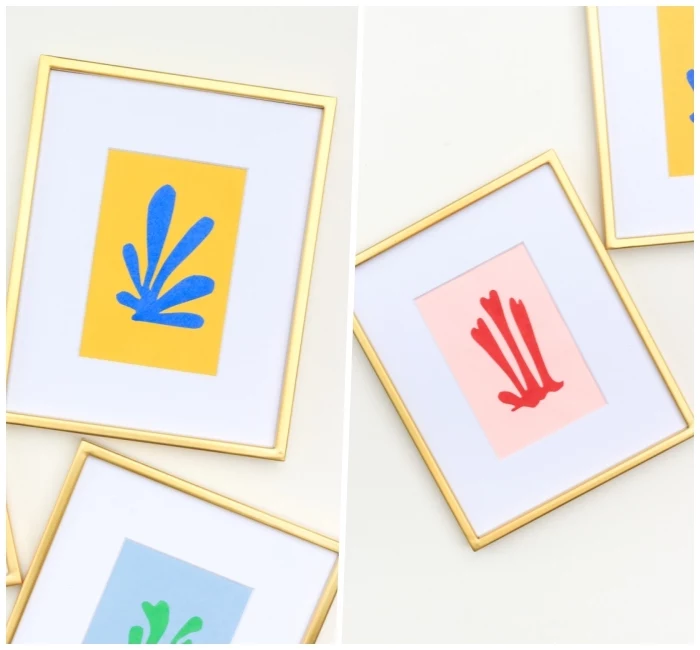
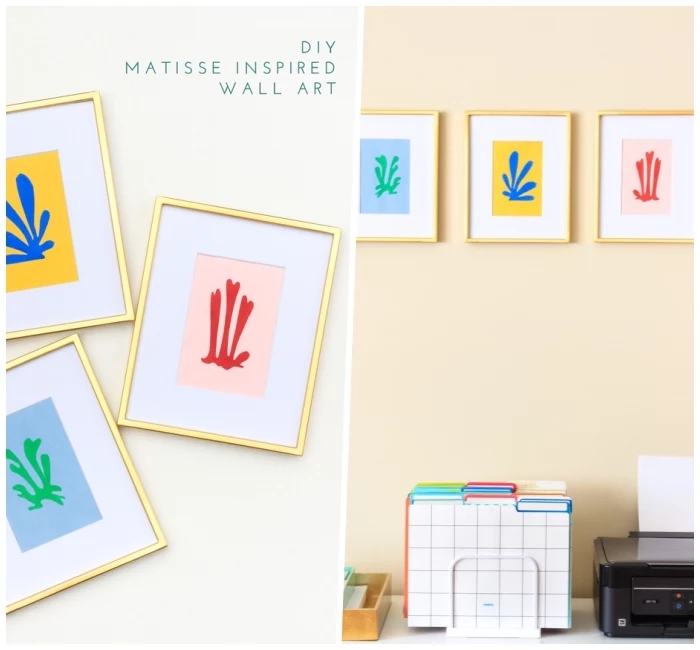
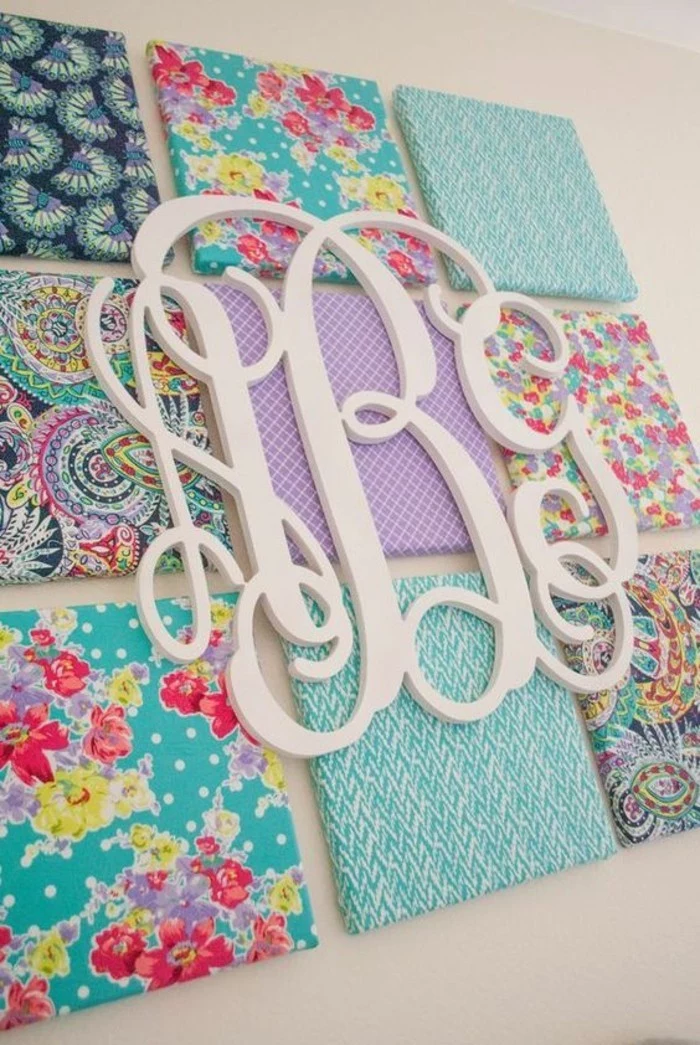
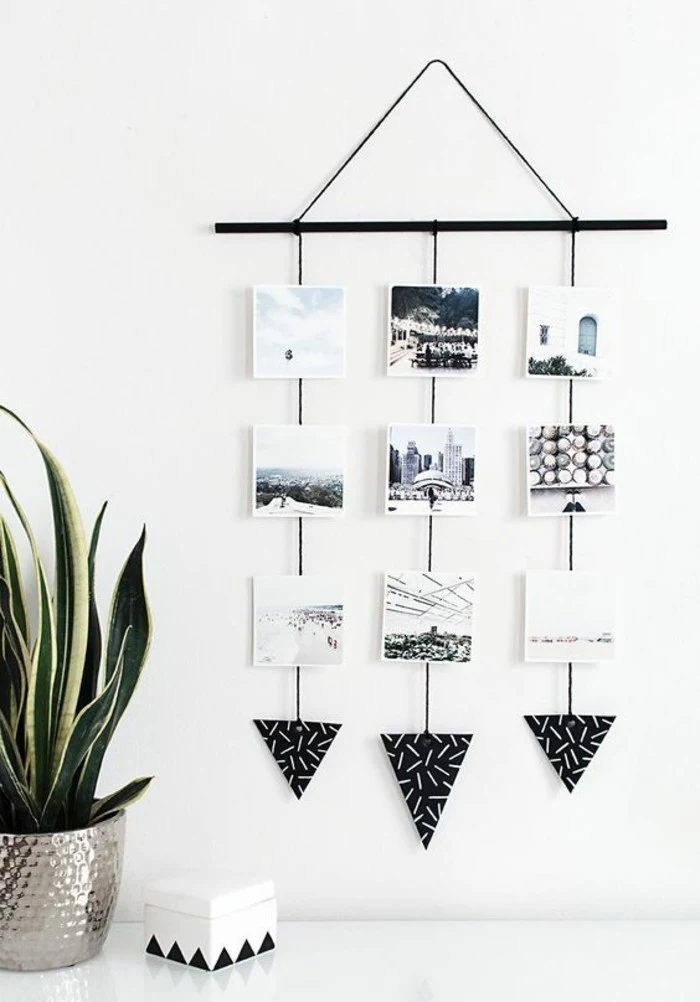
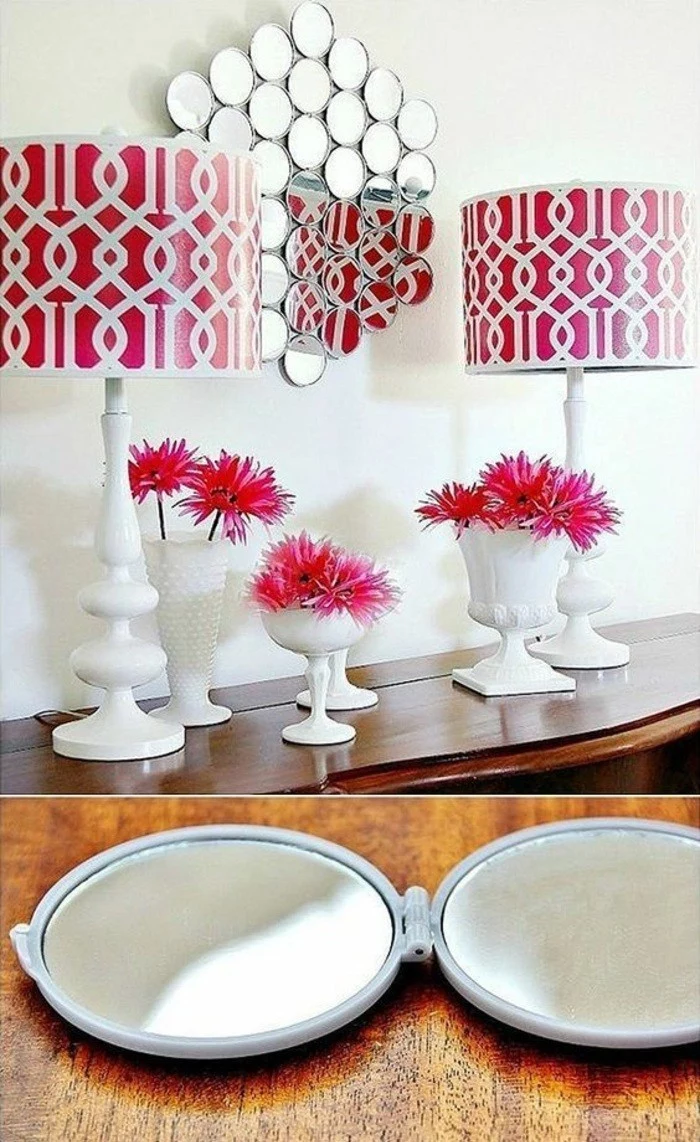
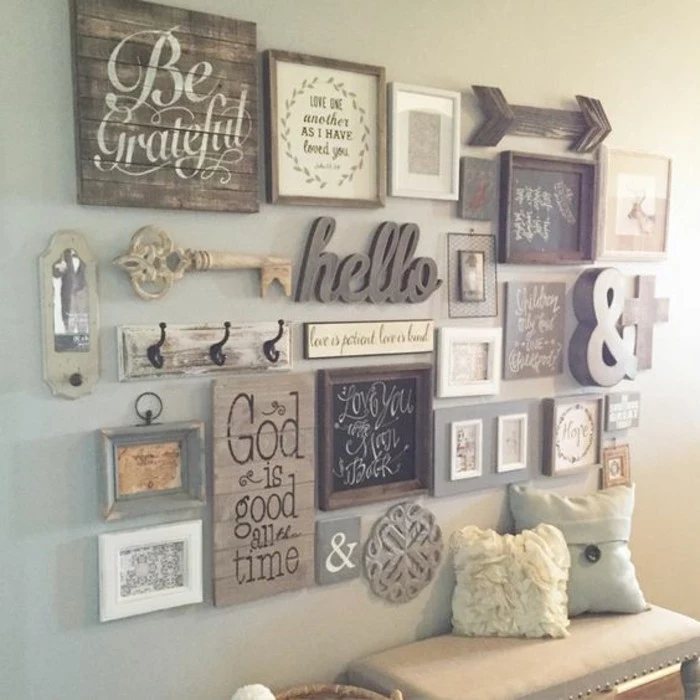
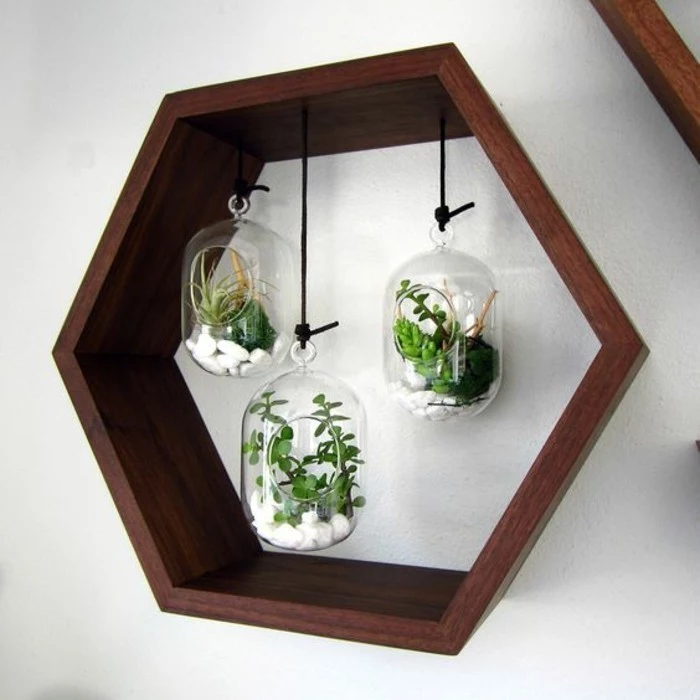
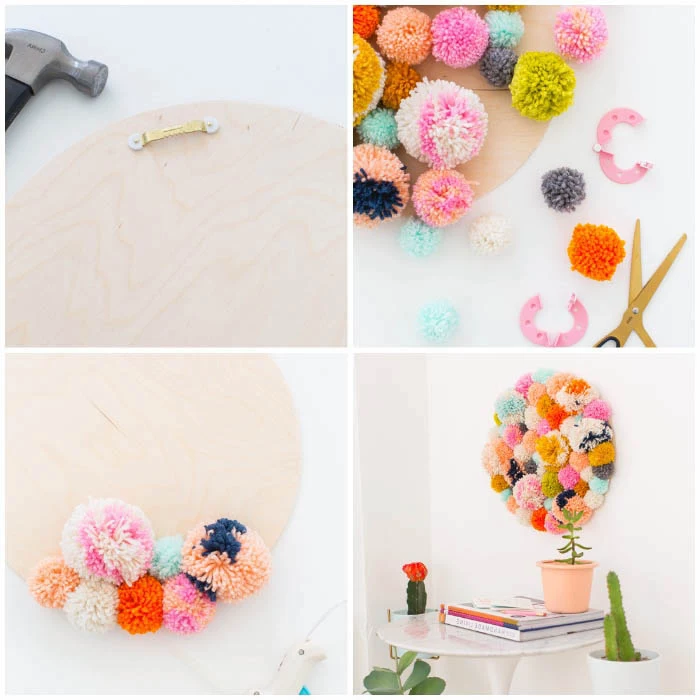
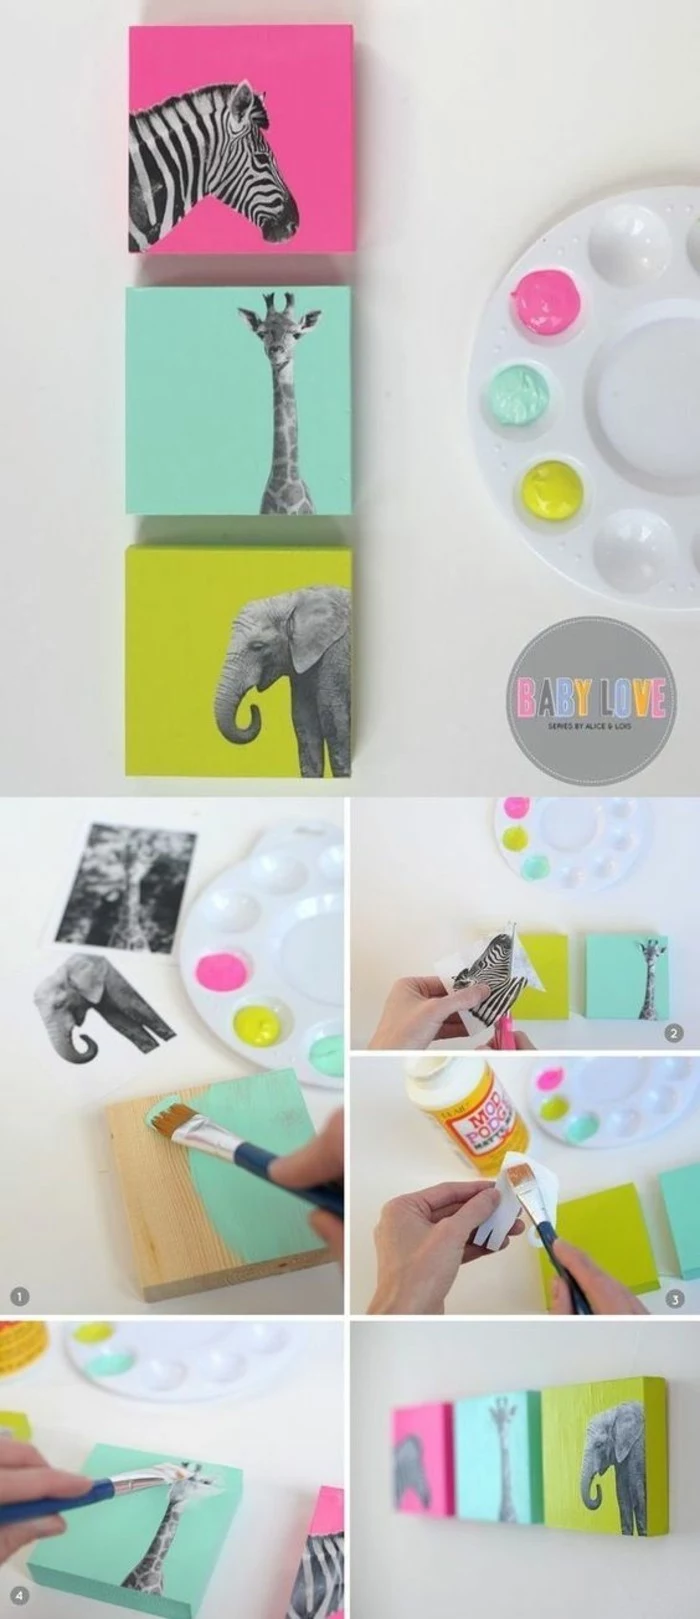
A simple way to elevate your piece is by considering the power of three. Grouping three related items, whether they are small framed weavings or a trio of painted wood blocks, creates a sense of harmony and visual rhythm that is more engaging than a single object or an evenly numbered group.

A 2017 study found that simply viewing natural textures, like wood grain and woven fibers, can measurably reduce stress.
Incorporating these materials into your home isn’t just an aesthetic choice; it’s a way to create a calmer, more restorative environment. The tactile, imperfect nature of handmade wooden or fiber art connects us to the natural world on a subconscious level.
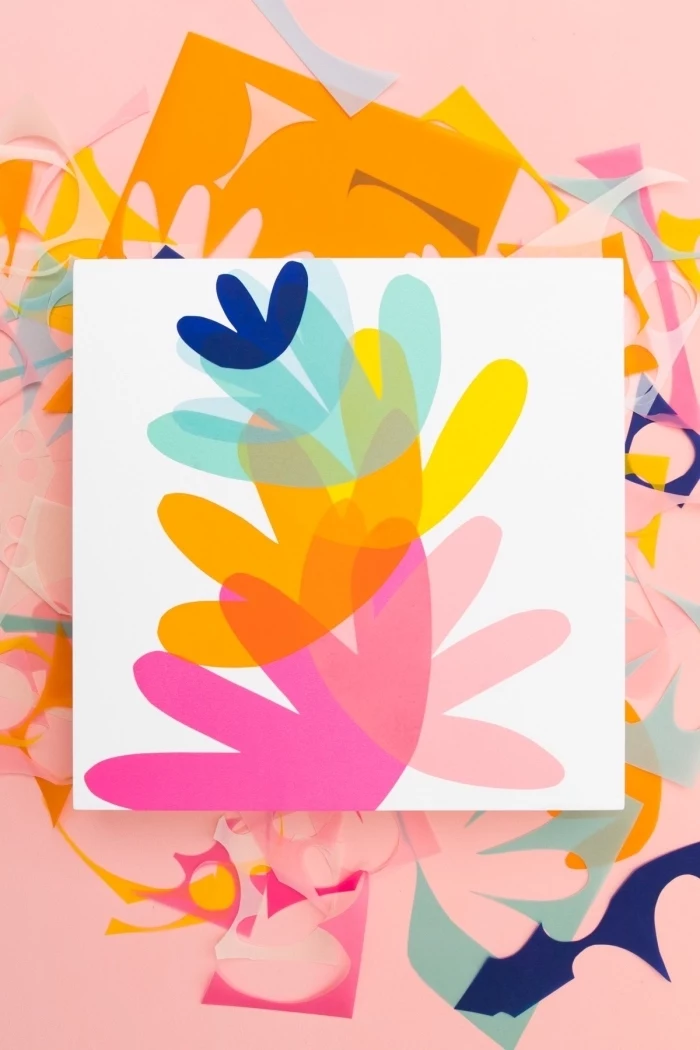
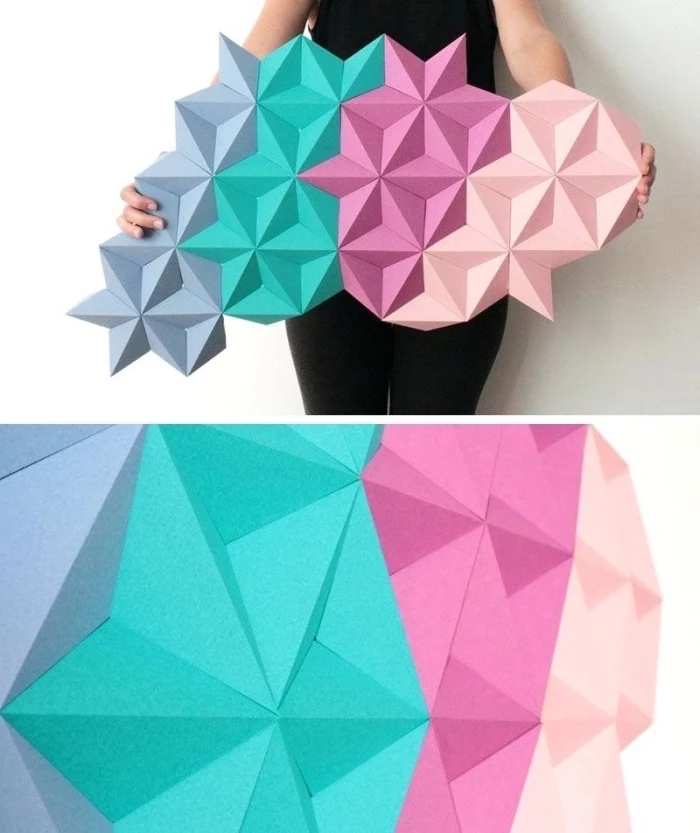
The inspiration for bold, geometric wood art often traces back to the Bauhaus movement of the 1920s. This school of design championed clean lines, primary colors, and a harmonious blend of form and function. Look at the works of Wassily Kandinsky or Paul Klee to spark ideas for your own compositions of intersecting shapes and balanced colors.
Don’t fear the flaw. In Japanese aesthetics, the concept of Wabi-sabi celebrates the beauty of imperfection, transience, and authenticity. A slightly uneven edge on a hand-sanded board or a minor variation in your weaving isn’t a mistake—it’s the signature of the human hand. It’s what gives your art a soul that a factory-printed canvas can never replicate.
- Reclaimed Pallet Wood: Often free from local businesses, but be sure to look for the


I’ve finished my piece, but how do I hang it securely, especially if it’s heavy?
Forget simple nails. For substantial pieces made of wood or large fiber art, a French cleat system is the professional’s choice. It consists of two interlocking 45-degree beveled boards—one on the wall, one on your art. It distributes weight evenly across the wall, is incredibly secure, and ensures your art hangs perfectly level every time.


The end grain of a wood board can absorb up to 10 times more finish than the face grain.
This is why the cut ends of your stained projects often look much darker. To get an even finish, apply a pre-stain wood conditioner before staining. It partially seals the porous end grain, allowing for a much more uniform and professional-looking color application.


Ready to add intricate detail to your wood projects? Pyrography, or wood-burning, is an incredibly satisfying skill. A starter kit like the Walnut Hollow Versa-Tool comes with multiple tips for creating different effects.
- Start on a scrap piece of the same wood to get a feel for the heat and pressure required.
- Lightly sketch your design in pencil first.
- Keep the tool moving at a steady pace to avoid dark burn spots.


A key to sophisticated design: Don’t forget the power of negative space. The empty areas of your composition are just as important as the elements themselves. Whether it’s the wall color showing through a geometric wood frame or the space between macrame knots, allowing for ‘breathing room’ prevents a piece from feeling cluttered and draws the eye to your focal points.


Tung Oil: This natural, food-safe oil penetrates the wood to create a warm, matte, water-resistant finish that enhances the grain’s natural beauty. It’s perfect for giving woods like poplar or oak a rich, deep glow. Application requires more patience, often with multiple coats and light sanding in between.
Polyurethane: This is a film finish that sits on top of the wood, creating a highly durable, plastic-like shell. It’s available in various sheens and is ideal for pieces that need maximum protection. However, it can sometimes look less natural than an oil finish.


- A final piece that perfectly complements its intended space.
- The confidence to tackle a larger, more complex project.
- A chance to solve design problems on a small, low-risk scale.
The secret? Create a miniature mock-up first. Use cardboard cutouts for wood shapes or a small bundle of yarn to test color combinations. This five-minute step can save hours of frustration later.


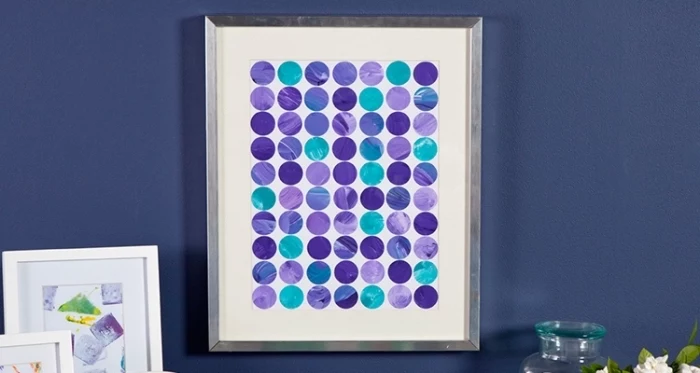
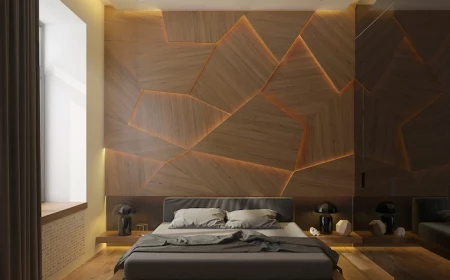
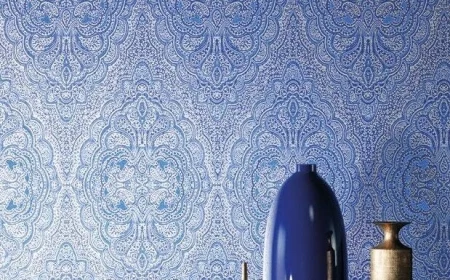
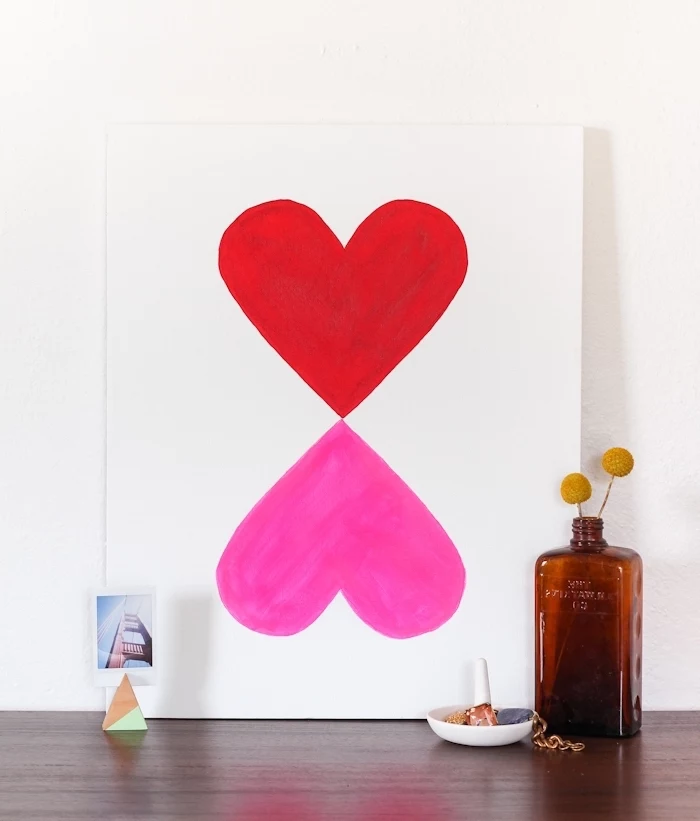
Before you start painting, consider the emotional impact of color. Cool tones like blues and greens tend to create a sense of calm and spaciousness, ideal for a bedroom or reading nook. Warm tones like terracotta, mustard yellow, and reds are energizing and intimate, perfect for making a statement in a living area or entryway. Use a color wheel to find complementary or analogous colors for a guaranteed harmonious result.


Many paints and finishes release Volatile Organic Compounds (VOCs), which can compromise indoor air quality.
When creating decor for your home, especially for a nursery or bedroom, opt for No-VOC or Low-VOC paints. Brands like ECOS Paints and The Real Milk Paint Co. offer beautiful, durable options that are much healthier for your indoor environment without sacrificing quality.


My weaving is starting to curve inwards like an hourglass! What’s wrong?
This common beginner’s problem is almost always caused by pulling the weft thread (the horizontal one) too tight at the edges. This ‘draw-in’ chokes the warp threads, ruining your nice rectangular shape. As you pass the weft from one side to the other, place it at a gentle diagonal angle or ‘bubble’ it up before beating it down. This ensures there’s enough slack to keep your edges straight and parallel.


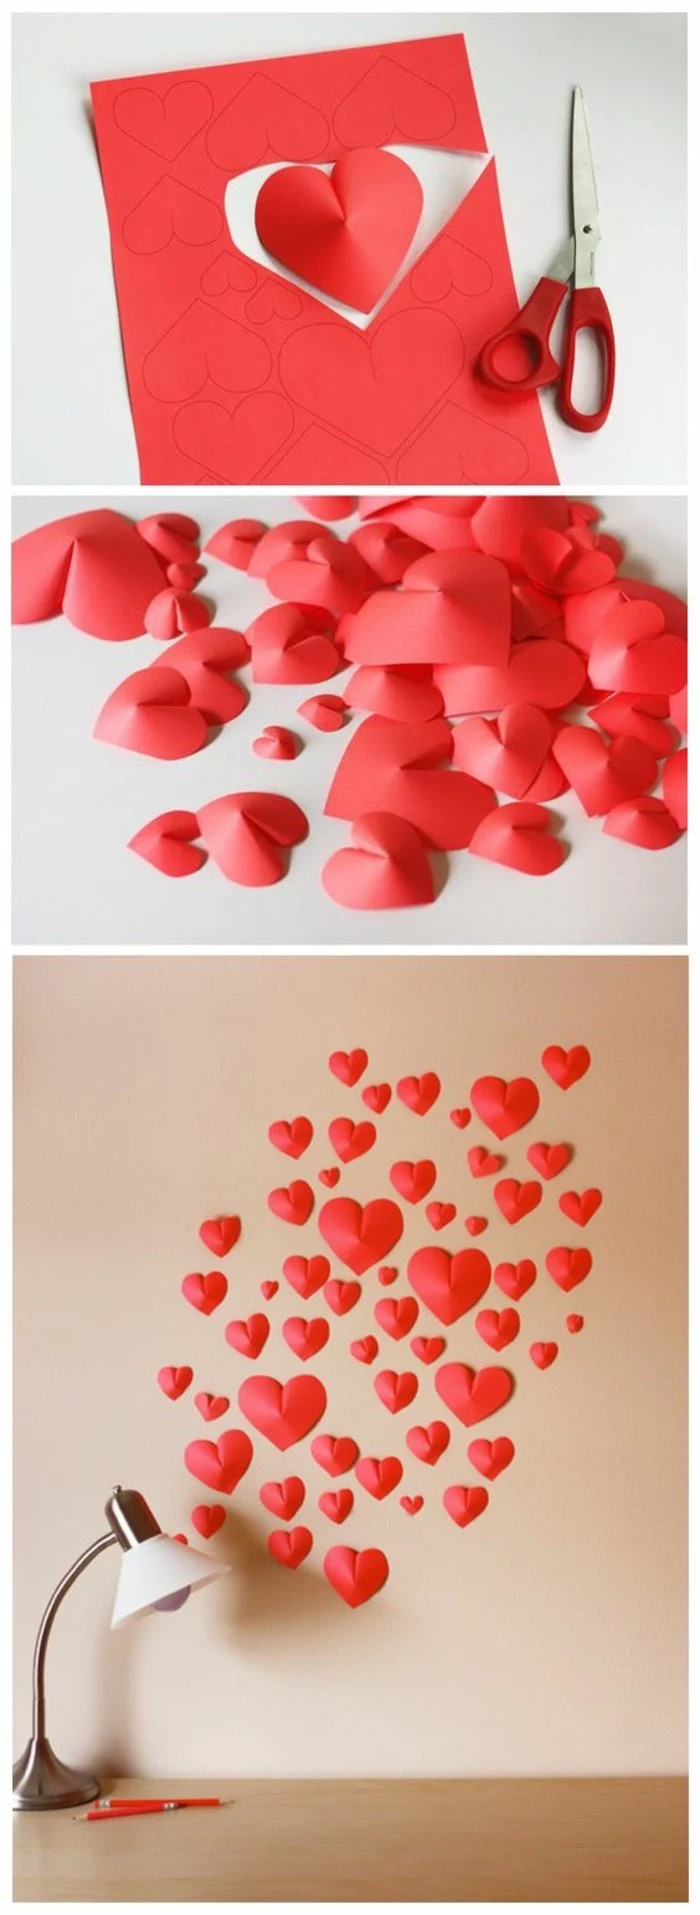
To create your own pressed flower art, you don’t need fancy equipment. Place fresh, dry blossoms between two sheets of parchment paper inside a heavy book. Add more books on top for weight and leave it for 2-4 weeks.
- Choose flowers with naturally flat faces, like pansies, violets, and cosmos, for the best results.
- Once fully dried, arrange them on high-quality paper using a tiny dab of acid-free PVA glue applied with a toothpick.


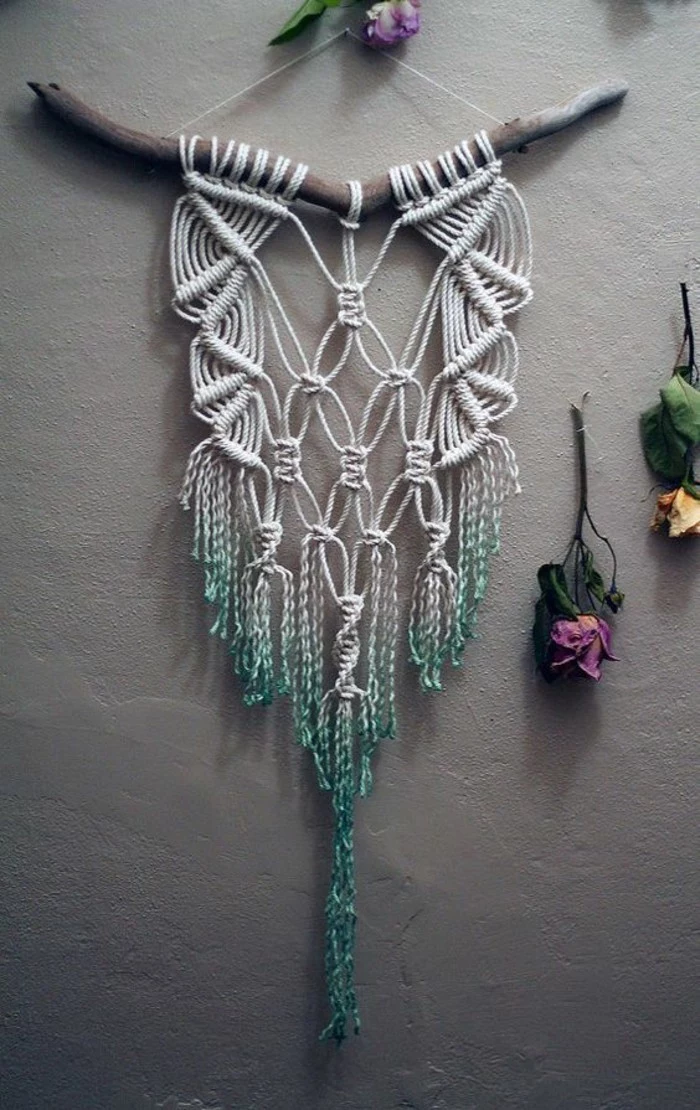
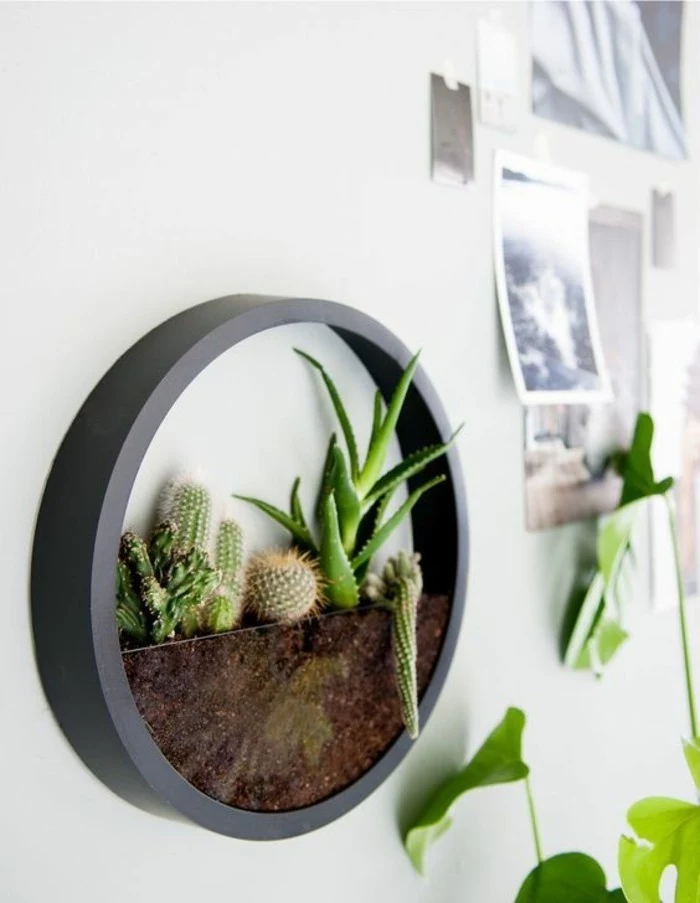
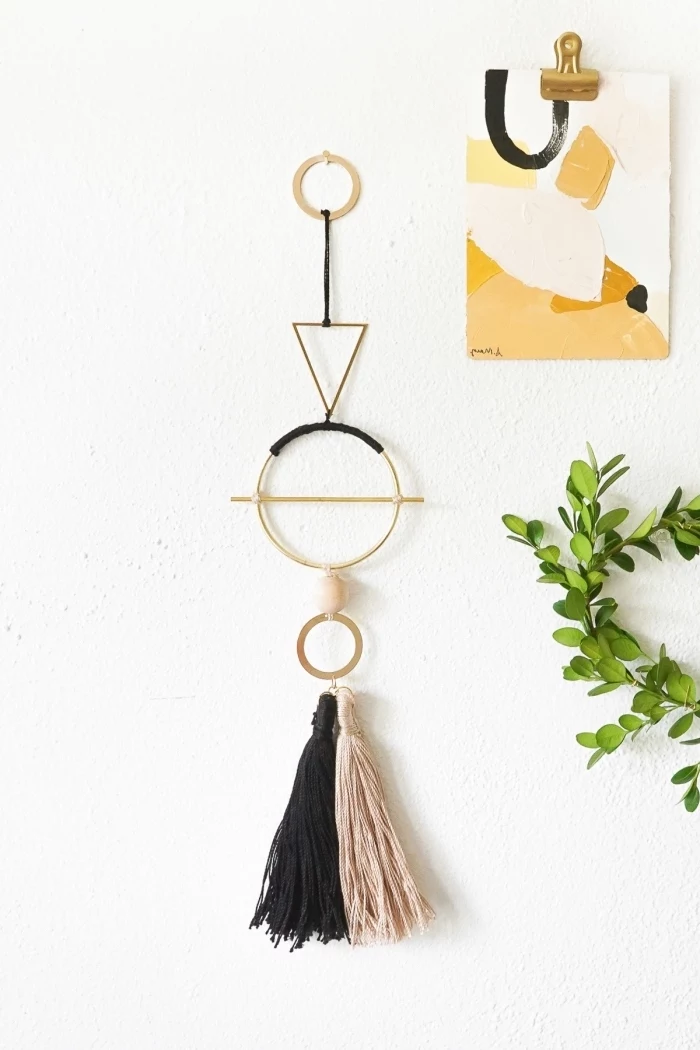
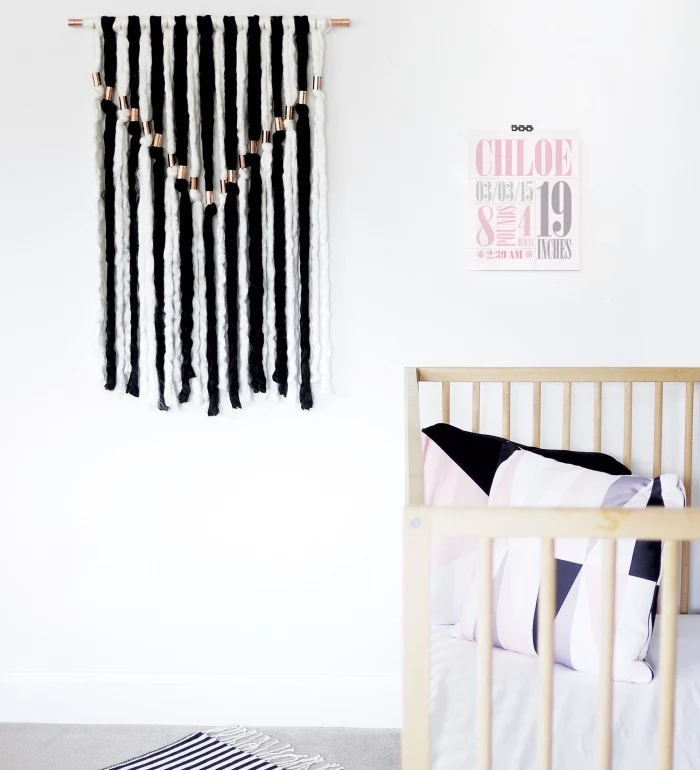
Important consideration: The hardware you choose is not just functional; it’s a design element. For a modern, clean look, consider brass or black stand-off mounts to make your wood art ‘float’ off the wall. For a rustic fiber piece, a unique, weathered branch found on a walk can serve as a more organic and personal dowel than anything you could buy in a store.


- Wool Roving: Thick, soft, and luxurious. Ideal for creating cloud-like textures and bold statements in weaving, but too delicate for structured macrame.
- Jute or Hemp Twine: Rustic, sturdy, and inexpensive. Perfect for creating boho-style plant hangers or wall art with a very natural, earthy feel.
- Cotton Cord: The all-rounder. It comes in various plys and sizes, making it suitable for both detailed macrame knots and soft woven textures.


The scent of freshly worked cotton cord is subtle, clean, and slightly sweet, a world away from the chemical smell of plastic packaging.


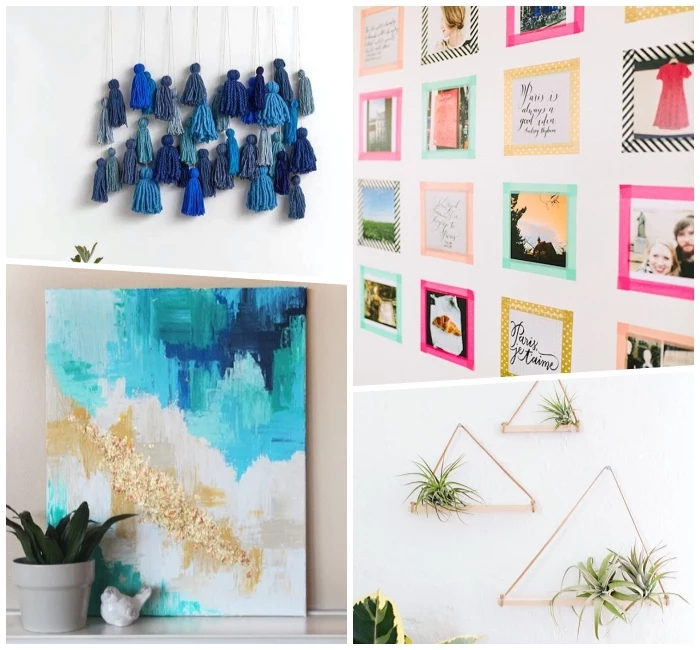
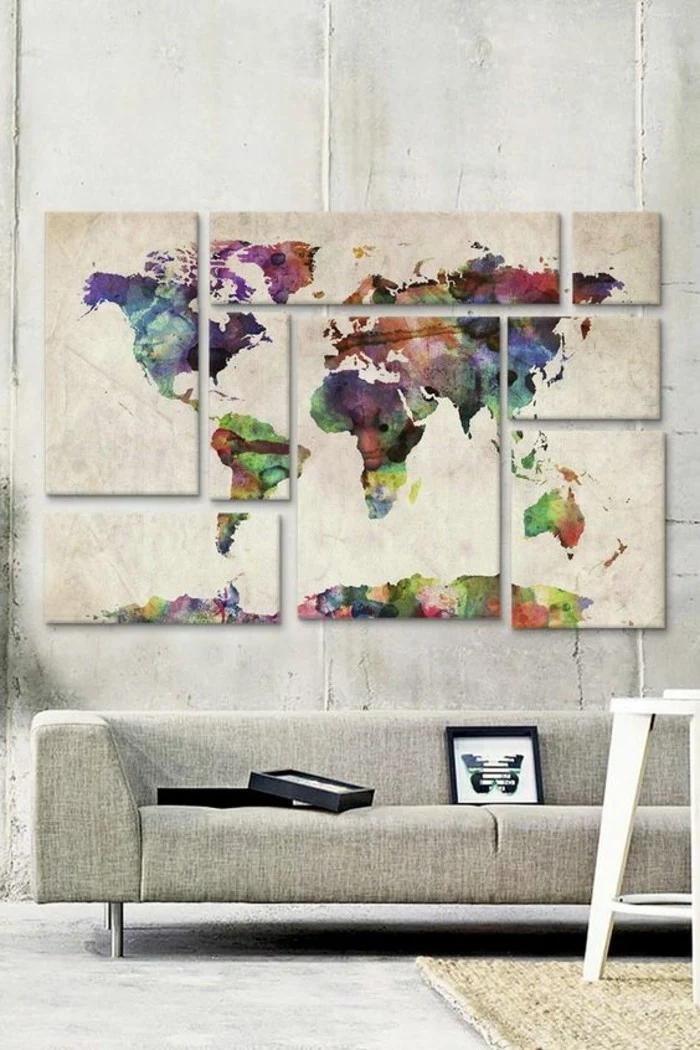
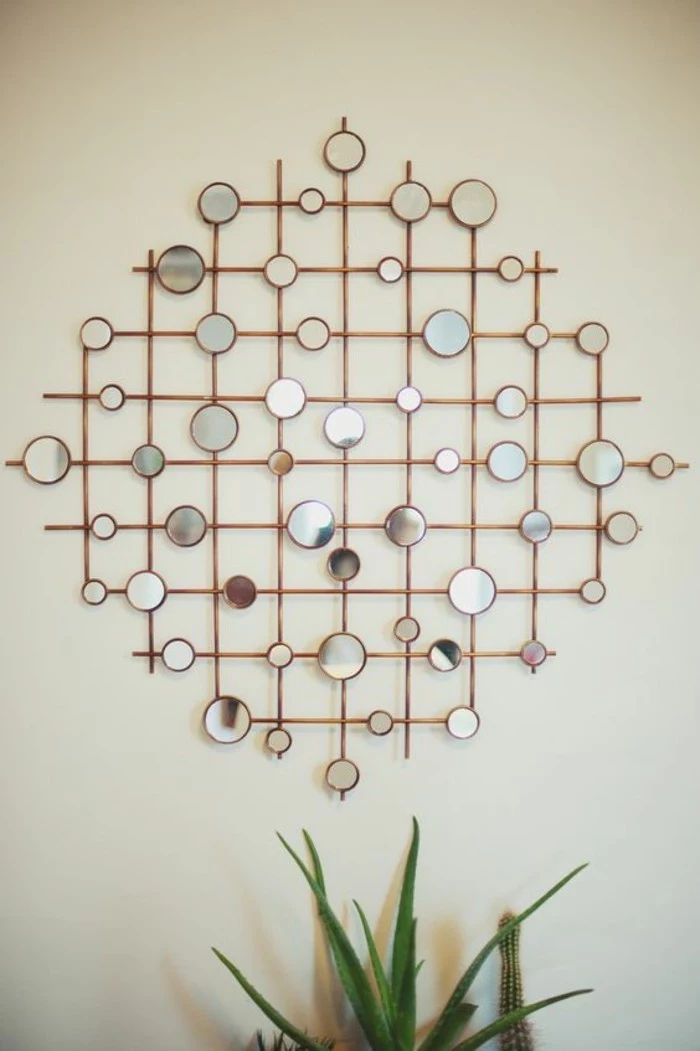
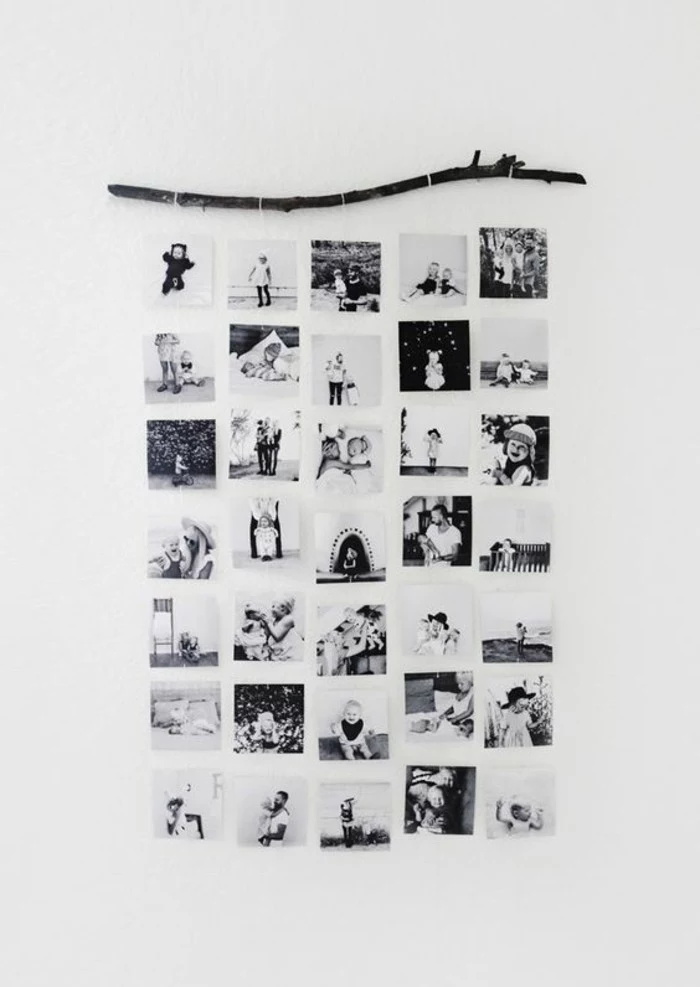
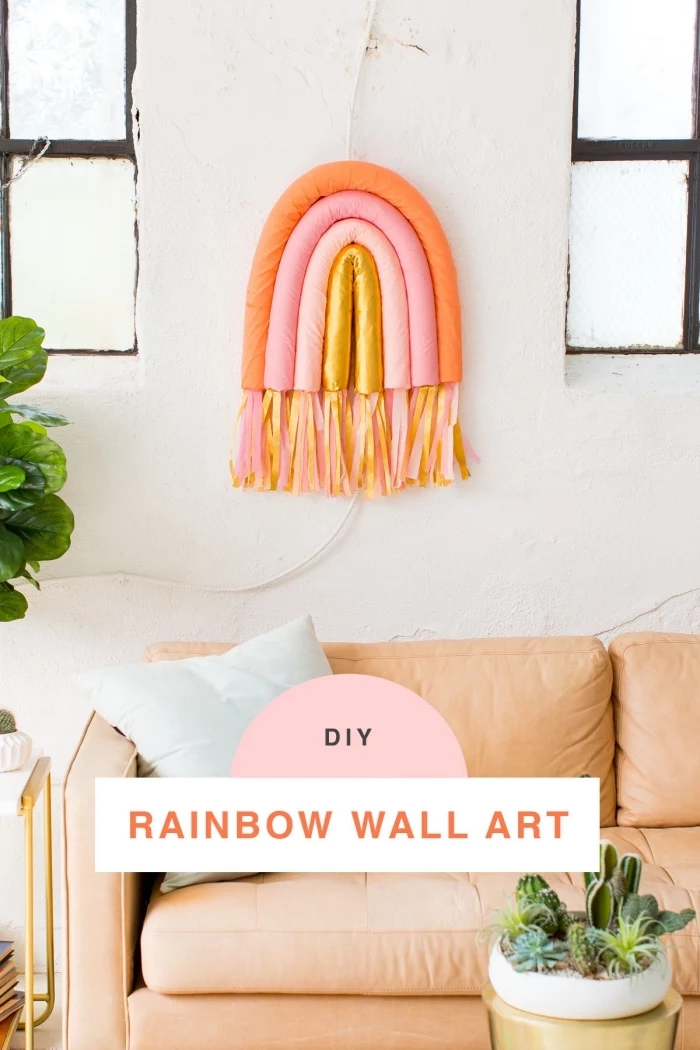
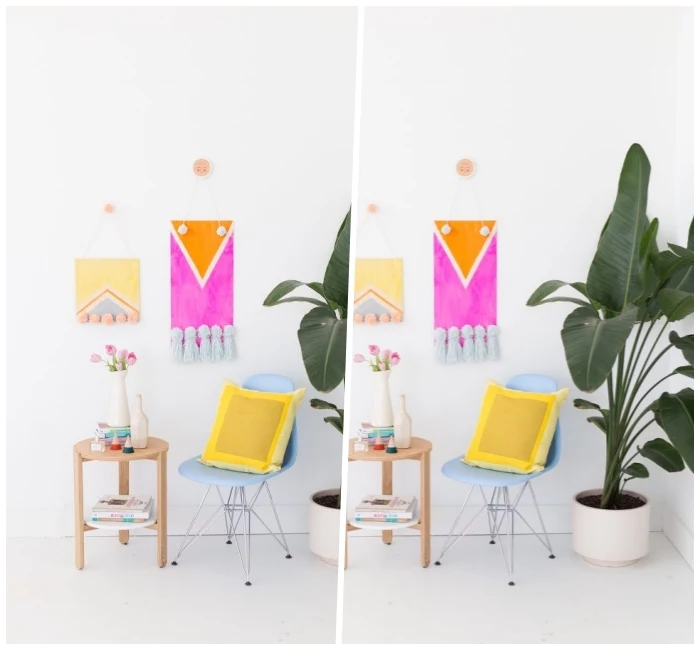
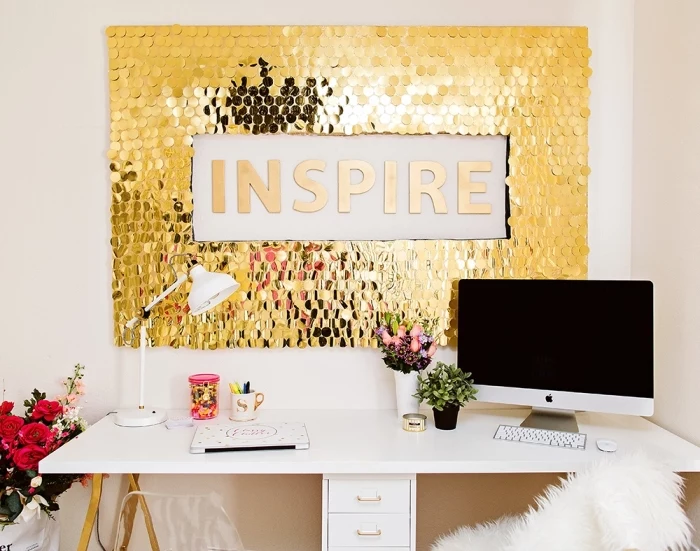
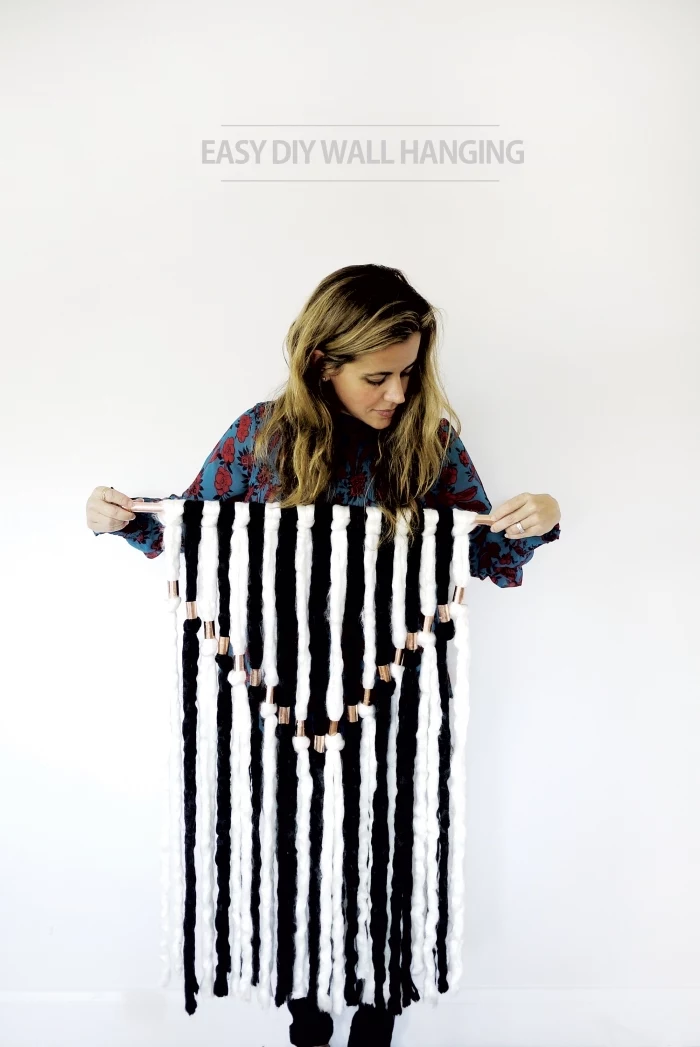
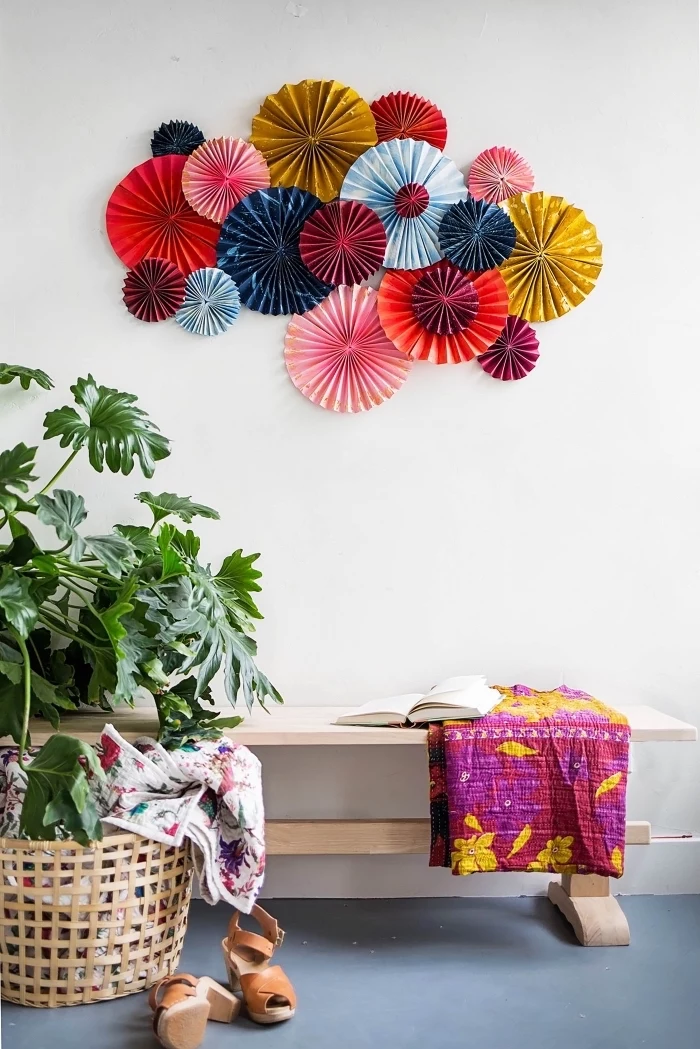
A recent trend taking over from the classic gallery wall is the single, oversized statement piece. Think of a massive woven hanging that covers a significant portion of the wall above a sofa, or a large-scale geometric wood installation. This approach creates a powerful, confident focal point and can actually make a small room feel larger by drawing the eye and reducing visual clutter.