Your Ultimate Guide to Dyeing Eggs That Actually Look Amazing
Look, we’ve all been there. You start with one of those fizzy tablet kits from the grocery store, and you end up with a bunch of pale, vaguely pastel-colored eggs sitting in murky water. It’s a classic holiday ritual, but I’m here to tell you it can be so much more. Dyeing eggs is a real craft, a perfect blend of kitchen chemistry and art. It’s not about buying expensive stuff; it’s about understanding the simple secrets behind getting those deep, stunning colors.
In this article
This isn’t just a list of cute ideas. It’s a full guide to the proven techniques that give you professional-looking results. We’ll cover everything from prepping the perfect egg to creating incredible patterns that will make people ask, “How did you DO that?” My goal is to help you create eggs that are genuine keepsakes.
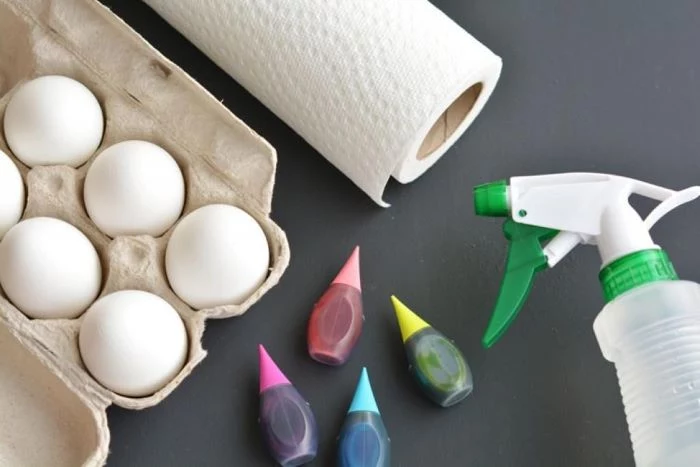
First Things First: Your Shopping List
Before you dive in, it’s always a good idea to have everything ready to go. Nothing kills the creative vibe like having to run to the store mid-project.

The Absolute Basics (For Any Project):
- Eggs: Obvious, I know! Pro tip: White eggs will give you the brightest, most vibrant colors. Brown eggs lend a wonderful, earthy depth to your dyes, which is a beautiful look on its own.
- White Vinegar: Don’t splurge here; the cheapest bottle at the grocery store works perfectly. This is the magic ingredient for getting color to stick.
- Glass Jars or Cups: Wide-mouth mason jars are my go-to. They’re heavy, so they don’t tip easily, and you can see the color developing.
- Slotted Spoon & Tongs: For getting eggs in and out of the dye without dropping them.
- Paper Towels & Newspaper: To protect your workspace. Dyes, especially turmeric and beet, will stain countertops permanently. I learned that one the hard way.
If You’re Using Commercial Dyes:
- Food Coloring Kit: The liquid drops or gel colors from the baking aisle are fantastic. Gels are more concentrated and give you bolder results. A standard kit costs around $5-$8.
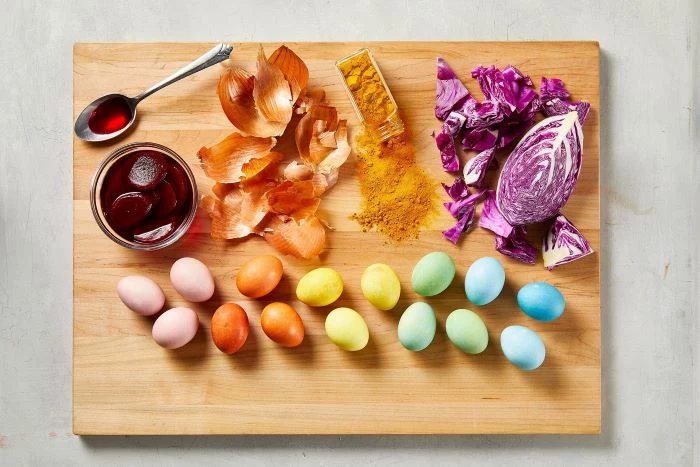
If You’re Going Natural:
- Your Color Source: Think red cabbage, yellow onion skins (the dry, papery parts), turmeric powder, or beets. Most of this you might already have!
- A Stockpot: For simmering your ingredients to create the dye bath.
For the Fancy Designs:
- For Resists: Rubber bands, fun stickers, or a simple white crayon.
- For Marbling: A can of cheap shaving cream (NOT gel) or a tub of whipped cream, plus some vegetable oil.
The Foundation: Prepping the Perfect Egg
Your success starts with your canvas. An eggshell seems solid, but it’s actually covered in thousands of tiny pores. To get a deep, even color, the dye needs to get into those pores, and that’s where a little science comes in. When you add vinegar (an acid) to your dye, it ever-so-slightly roughens the surface of the calcium carbonate shell, opening up those pores so they can grab onto the color. Without acid, your dye will just sit on the surface, looking pale and splotchy.
For Hard-Boiled Eggs You Can Eat
The mission here is simple: a perfectly cooked egg with no cracks and absolutely no gross green ring around the yolk. That green stuff is just a harmless reaction from overcooking, but it looks sad. This method has never failed me.
- Place your eggs in a single layer in a saucepan. Don’t stack ’em!
- Cover them with cold water by at least an inch. Starting cold helps prevent the shells from cracking due to sudden temperature changes.
- Bring the water to a full, rolling boil.
- The second it starts boiling, kill the heat, slap a lid on the pan, and let the eggs just sit in the hot water. I find 10-12 minutes is the sweet spot for large eggs.
- When the time’s up, immediately move them to a bowl of ice water. This stops the cooking instantly and saves the yolks from turning green.
- Let them cool completely before you even think about dyeing. A warm egg can sweat, which messes with the dye.
For Blown-Out Eggs That Last Forever
If you want to keep your art, you have to get the raw egg out. Trust me on this. A raw egg left inside will eventually rot and can actually explode from the pressure. The smell is something you will never, ever forget.
Heads up! Raw eggs can carry salmonella, so always wash your hands and the eggs with warm, soapy water before you start.
- I find the single-hole method is cleanest. Use a simple thumbtack to make a small hole at the wider end of the egg. To make it a bit bigger without cracking the shell, just gently twist the thumbtack in the hole or carefully use the tip of a small metal nail file. Aim for about 1/8 of an inch wide.
- Now, poke a long needle or an unbent paperclip inside and scramble everything up. You have to break that yolk membrane. This is the key to getting it all out easily.
- To empty it, you can use a special egg blower, but honestly, a baby nasal aspirator works perfectly. You can find one at any pharmacy for a few dollars. Just place the tip against the hole and gently squeeze air in. The egg goo will be forced out the same hole.
- Rinse the inside by submerging the shell in soapy water, letting some in, and then blowing it out. Repeat with clean water. A final rinse with a mix of one part vinegar to ten parts water will help sanitize it. Let the shells dry for a full day before decorating. Patience is your friend here.
Commercial vs. Natural Dyes: Which Is Right for You?
Okay, time for the fun part: color! You’ve got two main roads to take—the quick and vibrant path of commercial dyes or the slower, more organic route of natural dyes. Neither is better; they just offer totally different experiences and results.
So, how do you choose? Think about it this way. Commercial dyes are for you if you want bright, predictable, kid-friendly colors in minutes. We’re talking neon pinks and electric blues. They’re cheap (a few bucks for a whole set) and fast. Natural dyes are more of a slow craft. They’re perfect if you love earthy, subtle, and complex colors—think dusty rose, deep indigo, and rich sienna. The process takes longer, sometimes overnight, but the results are incredibly unique and satisfying. The cost can be next to nothing if you use kitchen scraps!
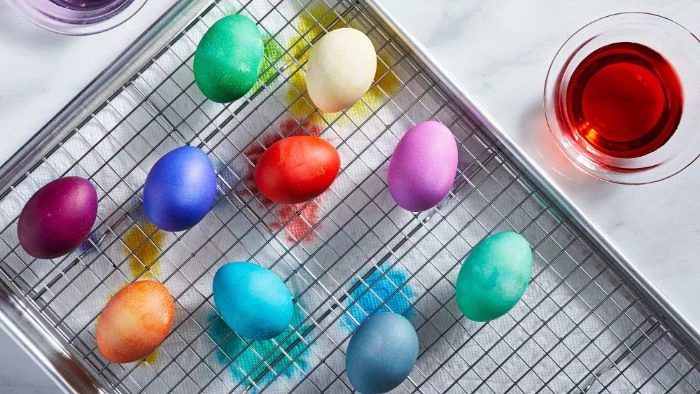
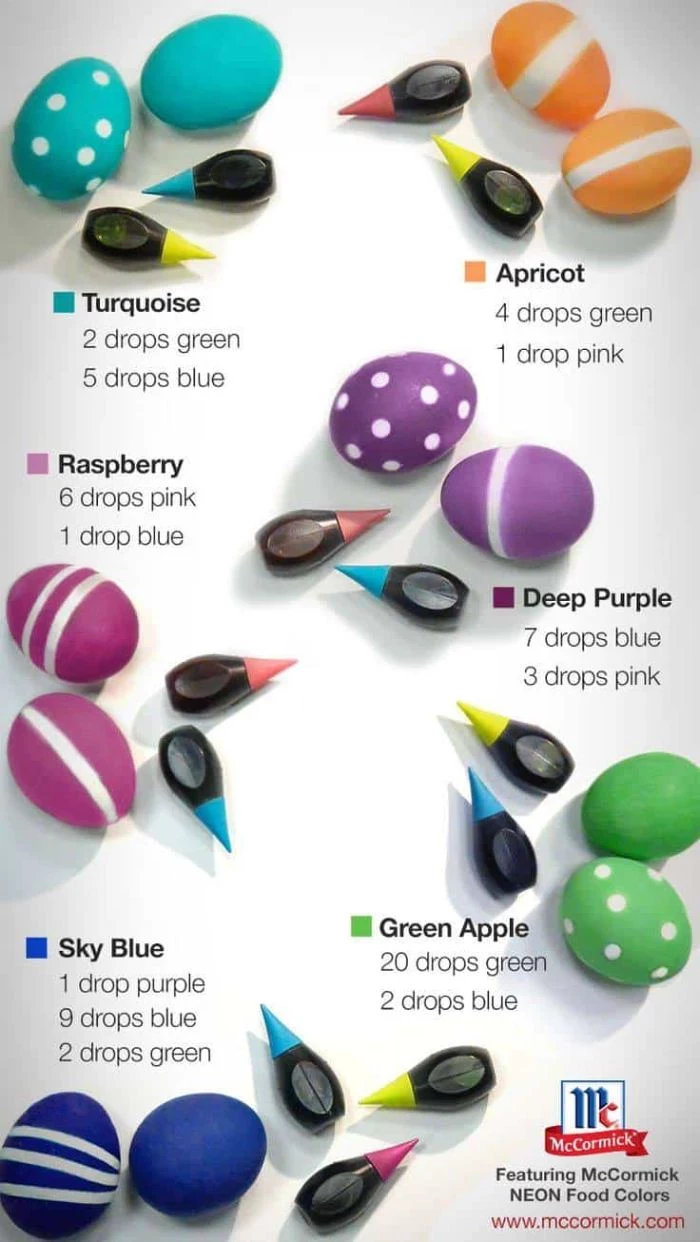
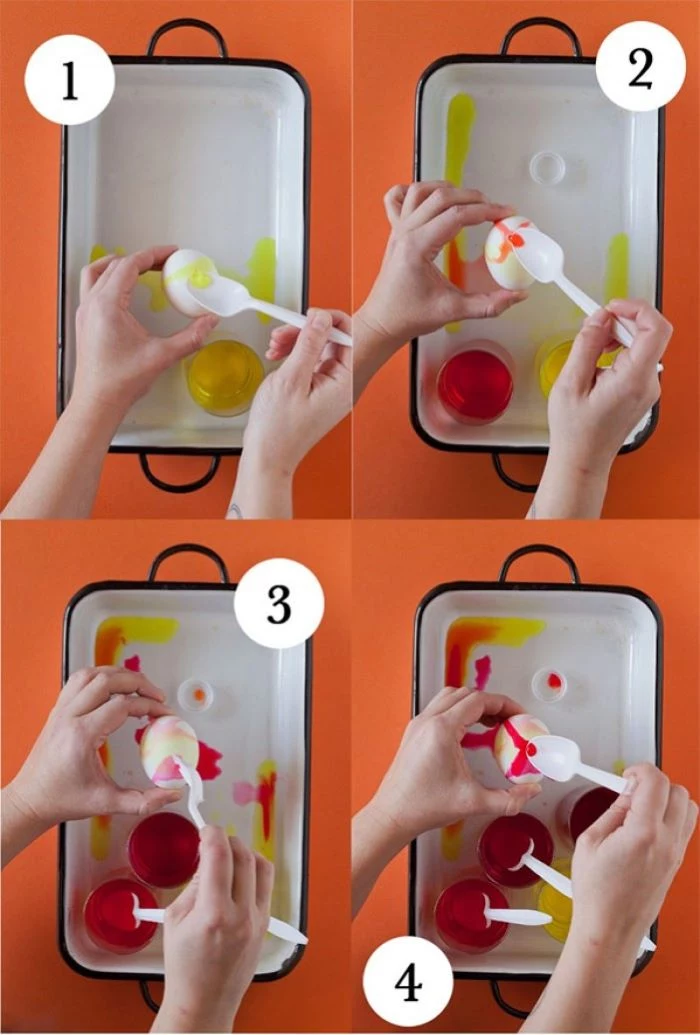
Working with Commercial Dyes
Those little bottles of food coloring are designed to be fast and foolproof. For the most intense colors, I mix my dyes with boiling water to dissolve the color completely, then let it cool to warm before I drop the egg in. A dye bath that’s too hot can make the egg white rubbery.
- The Perfect Ratio: A good starting point is 1/2 cup of warm water, 1 teaspoon of vinegar, and about 20 drops of liquid coloring. But for deeper colors, don’t just add more dye—let the egg soak longer. Time is your best tool for controlling saturation.
- Quick Tip: You can totally reuse a dye bath for a few more eggs! Just know that the color will get a little weaker with each one.
- Help! My color is blotchy! This is a super common problem. It usually happens when the egg rests against the side or bottom of your cup, or if there were greasy fingerprints on the shell. To avoid it, use a wide-mouth jar and gently turn the egg every minute or two.
The Magic of Natural Dyes
Making your own dyes from things like cabbage and onion skins feels like a little bit of ancient magic. The colors have a depth and complexity you just can’t get from a bottle.

A quick note on food safety: Because natural dyeing can take hours at room temp, there’s a risk of bacterial growth. To be safe, any eggs dyed this way should be treated as decorative only, unless you keep them refrigerated through the entire process.
Here are my tried-and-true recipes:
- Robin’s Egg Blue from Red Cabbage: This is my favorite bit of kitchen chemistry. The pigments in red cabbage turn a gorgeous blue on the eggshell. Just chop about half a head of red cabbage, simmer it in 4-5 cups of water for 30 minutes, strain out the solids, and add 2 tablespoons of vinegar. Let an egg soak for a few hours for a light blue, or overnight in the fridge for a deep navy.
- Rich Gold from Turmeric: For a stunning, vibrant gold. But be warned: turmeric stains EVERYTHING. Wear gloves. Mix 3 tablespoons of turmeric powder into 2 cups of boiling water, then add 2 tablespoons of vinegar. This one is fast—you’ll get a bright yellow in under 30 minutes.
- Earthy Red from Onion Skins: This is an old-world classic. Use the papery skins from 6-8 yellow onions for a beautiful sienna-orange, or red onion skins for a deeper reddish-brown. Simmer the skins in 3 cups of water for 30 minutes, strain, and add 3 tablespoons of vinegar.
- Soft Pink from Beets: For a delicate pink, canned beet juice is the easiest way to go. Just mix 1 cup of the juice with 1 tablespoon of vinegar. By the way, if you’ve ever wondered why your beet dye turned brownish, it’s likely because you used fresh boiled beets. The brightest pinks come from canned or pickled beet juice, which is processed differently and already contains acid!
Want a 5-Minute Masterpiece?
In a hurry? I got you. Grab a plain, hard-boiled egg and a white crayon. Draw a secret pattern or write a name on it, pressing firmly. Now, just dip it in any color dye for 5 minutes. Pull it out and… boom! You just made your first wax-resist egg. It’s an instant win.
Level Up: Creating Incredible Patterns
Once you’ve got solid colors down, you can start playing with patterns. These methods are surprisingly simple and give you really impressive results.
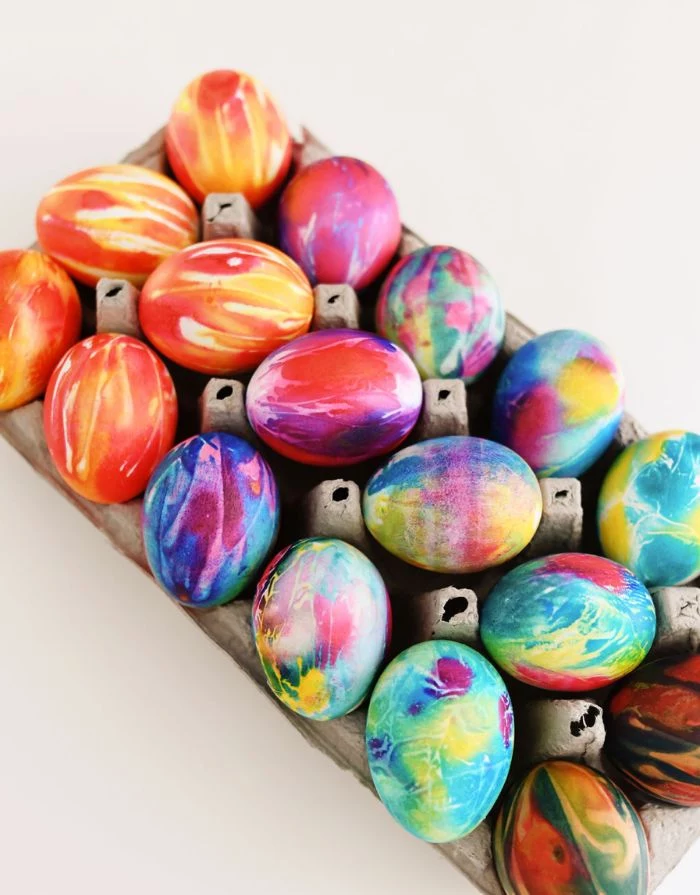
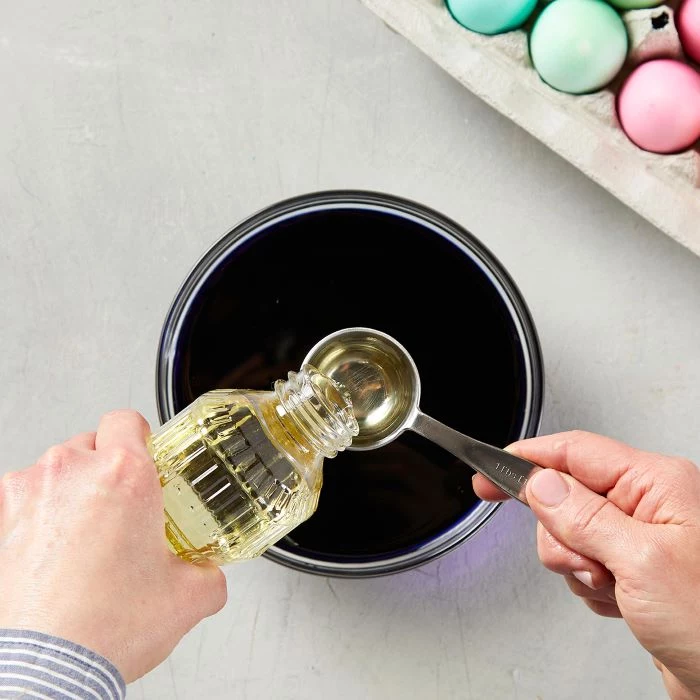
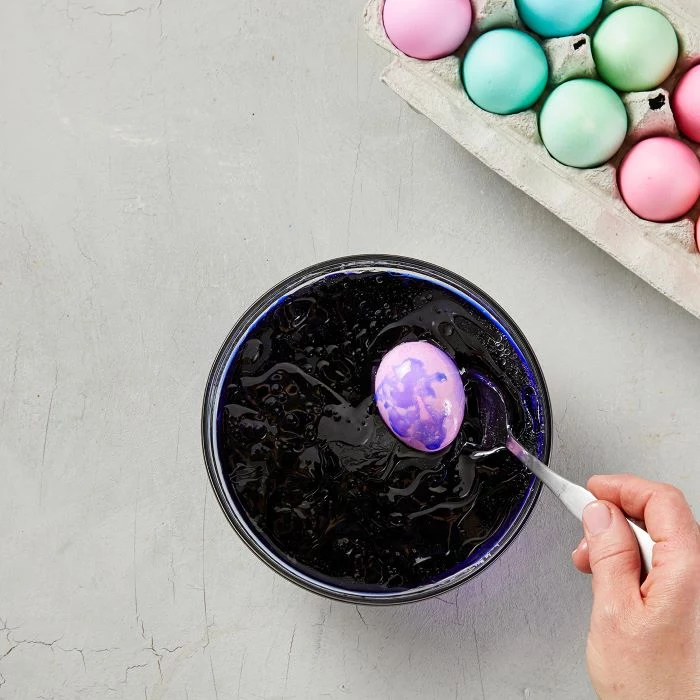
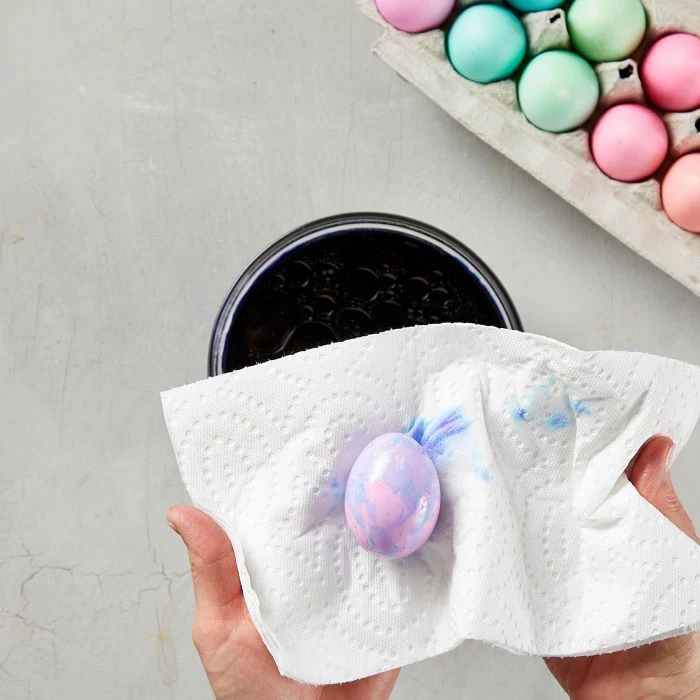
Marbling with Oil
This creates an elegant, swirling pattern that looks like polished stone. First, dye your egg a solid, light base color and let it dry. Then, in a separate bowl, mix up a darker dye and add 1 tablespoon of vegetable oil. The oil will float on top. Gently roll your light-colored egg through the oily dye—just one quick roll. The oil blocks the dark dye in random spots, creating that beautiful marbled look. Pull it out immediately and pat it dry.
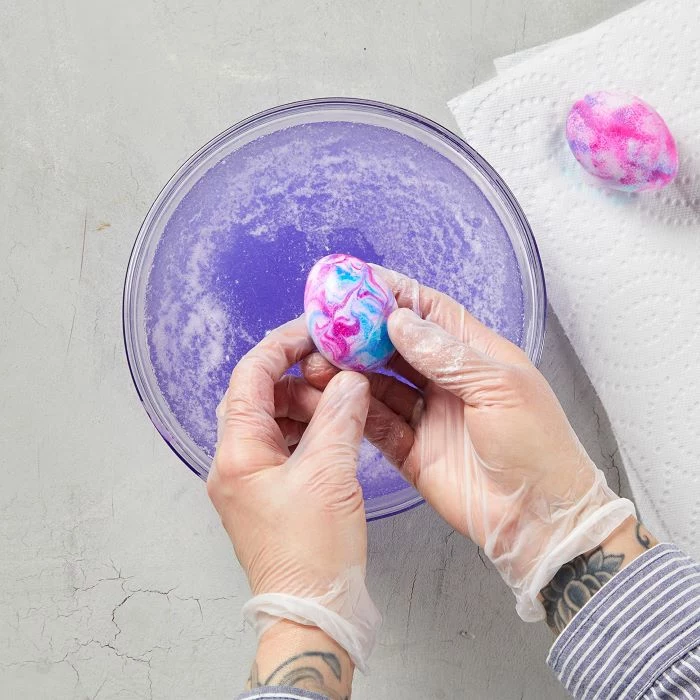
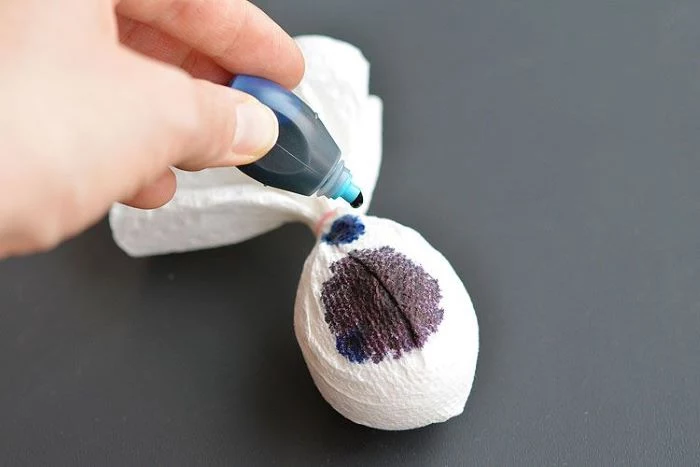
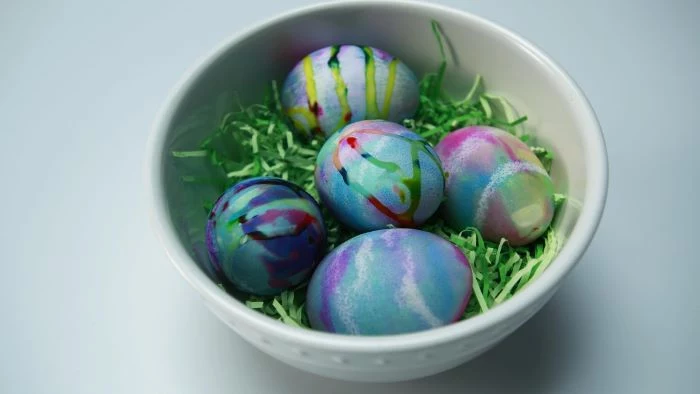
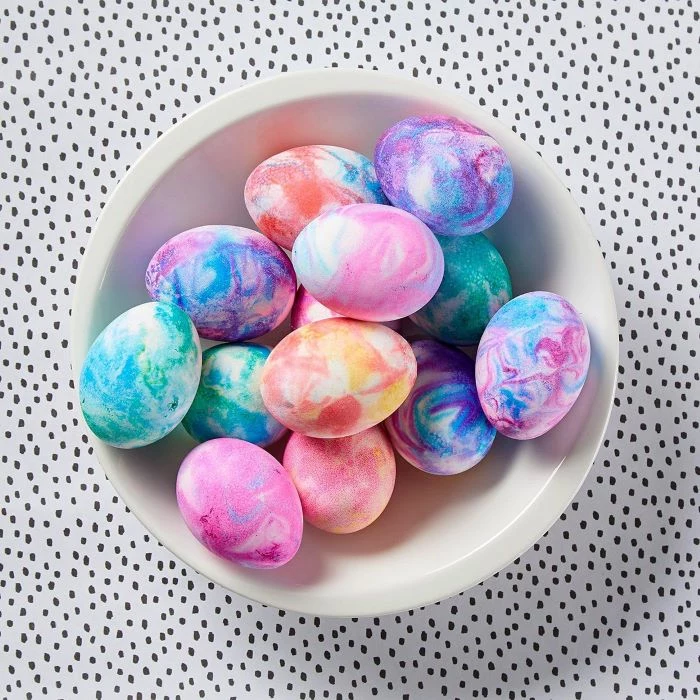
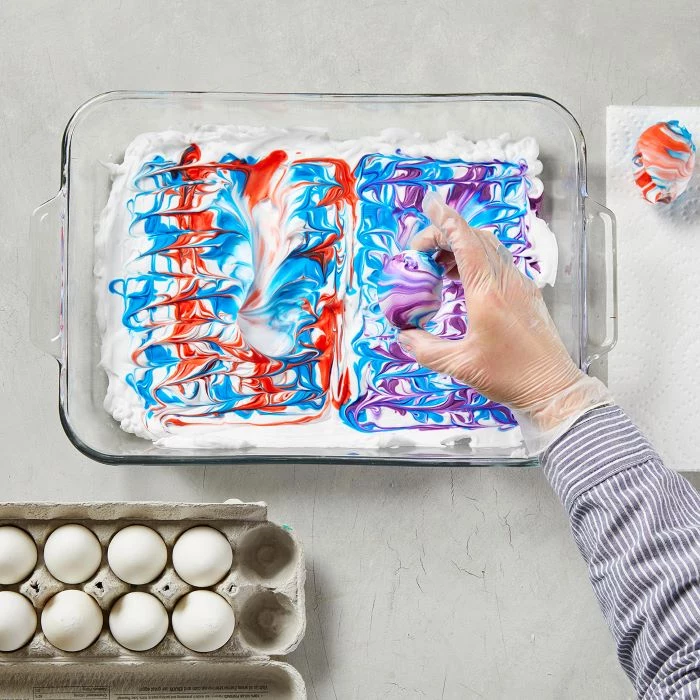
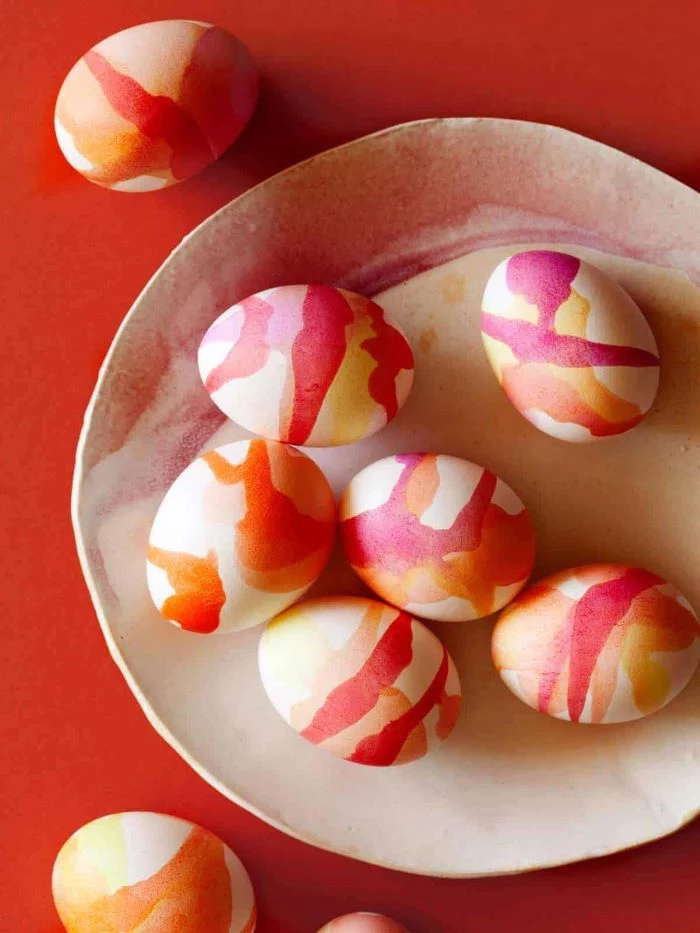
The Shaving Cream Method
This is a super fun one that creates a tie-dye effect. CRITICAL WARNING: If you plan to eat the eggs, you MUST use real whipped cream. Shaving cream is for decorative eggs only!
Spread a thick layer of shaving cream (the cheap white foam kind) or whipped cream in a baking dish. Drip a few drops of 2-3 different colors of food coloring on top (gel colors are best for this). Use a toothpick to gently swirl the colors—don’t mix them into mud! Roll a dry, hard-boiled egg over the top until it’s coated. Let it rest on wax paper for at least 20 minutes for the dye to transfer, then rinse it gently under cool water. The reveal is so cool.
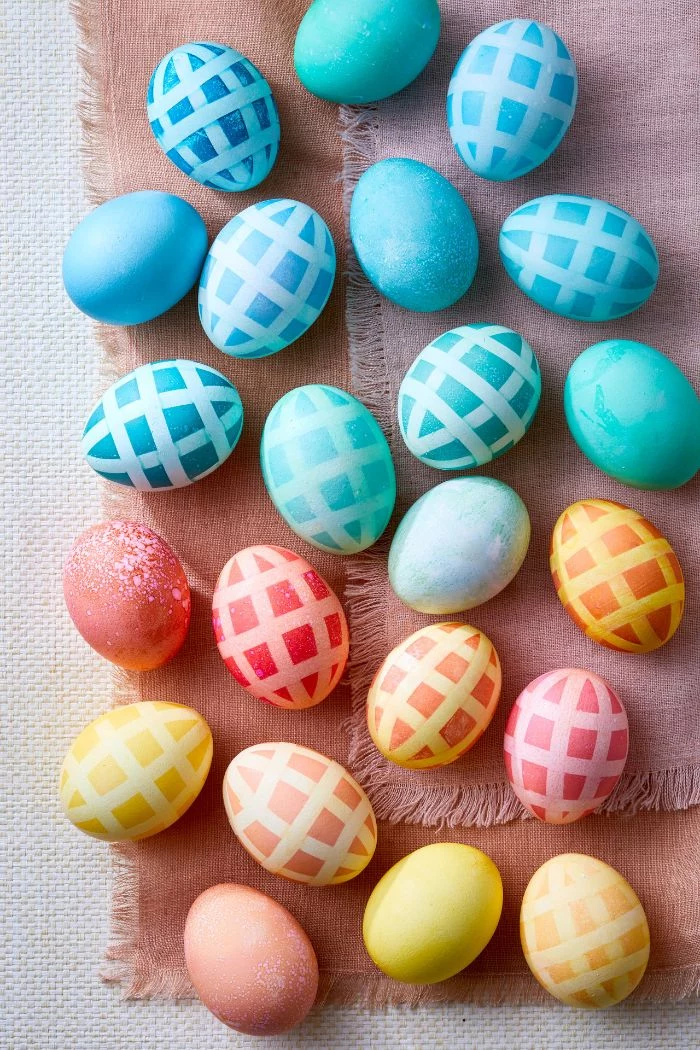
The Art of Resist Dyeing
A “resist” is just anything that blocks the dye. It’s how you get sharp lines and detailed designs.
- Easy Resists: Tightly wrap rubber bands around an egg to create stripes. Or, use small office-supply stickers (like dots or stars). Apply them firmly, dye the egg, let it dry completely, then peel them off.
- Wax Resist (Pysanky-Style): This is the advanced, traditional method. Artists use a special tool called a kistka, which is like a tiny funnel on a stick that draws with melted beeswax. You can find a starter kistka kit on sites like Etsy or at specialty Eastern European craft shops, usually for around $15-$20. You work in layers from light to dark, covering the parts you want to save with wax before dipping in the next color. At the end, you gently melt the wax off near a candle flame to reveal the stunning, multi-colored design. Serious Safety Warning: This method involves an open flame and should only be done by adults in a well-ventilated area, with extreme caution.
Finishing, Storing, and Showing Off Your Work
You did it! Now, let’s make sure your creations last.
For any eggs you plan to eat, follow food safety rules. Hard-boiled eggs shouldn’t be out of the fridge for more than two hours. They’re good for up to a week in the refrigerator. If a shell is cracked, toss it.
For your decorative blown eggs, a coat of varnish will protect the color and give it a nice sheen. A clear acrylic spray sealer from a craft store is the easiest option. For storage, keep them out of direct sunlight, which will fade the colors incredibly fast. I store mine in an egg carton, padded with tissue paper, in a cool, dark closet. To show them off, you can buy tiny wire egg stands online, or just hot glue a small loop of ribbon to the top and hang them from a decorative branch.
Honestly, the best part of this craft is the freedom to experiment. Some of my favorite designs were happy accidents. So don’t worry about perfection. Just have fun, embrace the process, and create something beautiful.
Inspirational Gallery

For intensely saturated colors, skip the liquid food coloring and reach for gel-based options. Brands like Wilton’s Icing Colors or AmeriColor Soft Gel Paste are highly concentrated. A tiny dab on a toothpick is enough to create a deep, jewel-toned dye bath that regular drops just can’t match. Perfect for achieving those stunning sapphire blues and ruby reds.
- Wrap eggs tightly with rubber bands of various widths before dyeing for a modern, striped effect.
- Use a white wax crayon to draw

The #1 mistake? Not using enough vinegar. Vinegar’s acetic acid gently etches the eggshell, allowing the dye to bond chemically. Without it, your colors will be pale and wash away easily. A good rule of thumb is at least one tablespoon of white vinegar per cup of hot water.
The oldest decorated eggs, 60,000-year-old engraved ostrich eggs, were found in Africa. The tradition of dyeing eggs for spring festivals is ancient, predating Christianity and symbolizing rebirth and new life.

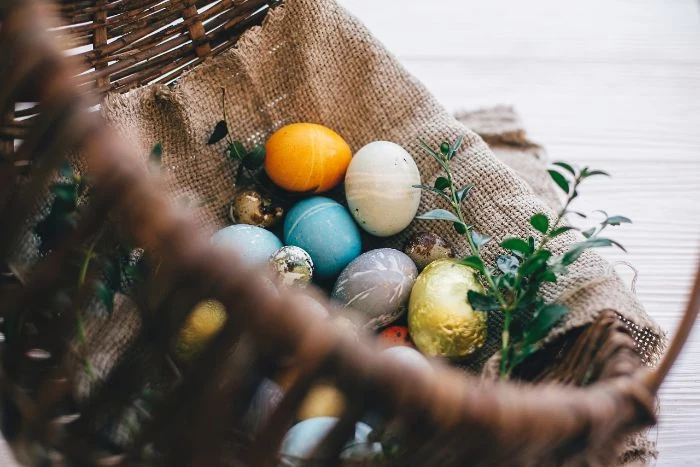
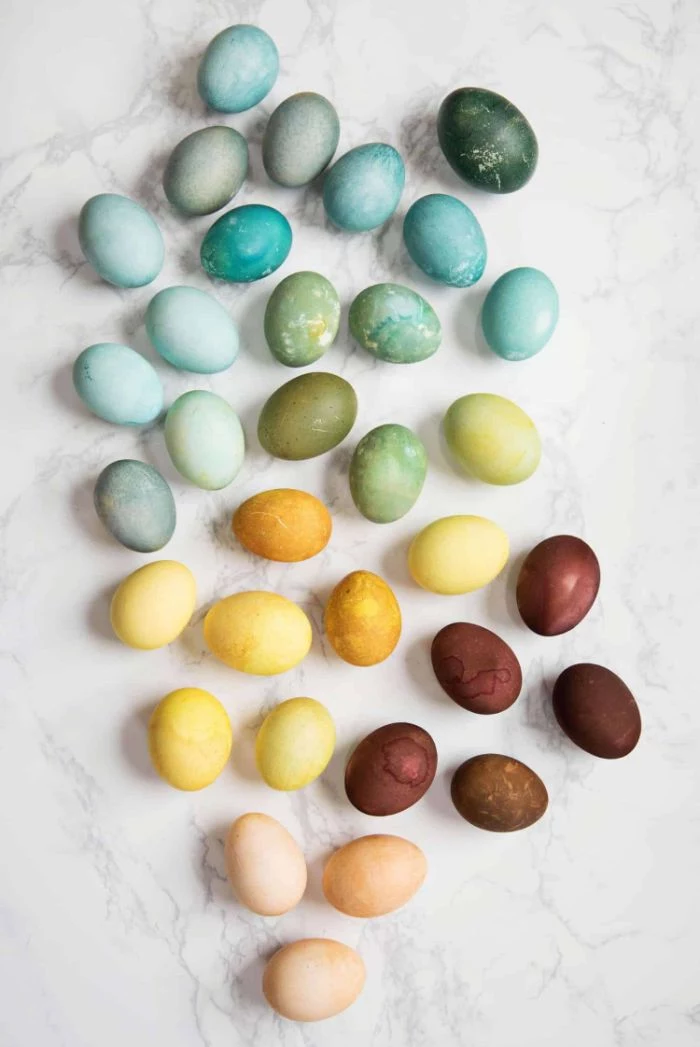
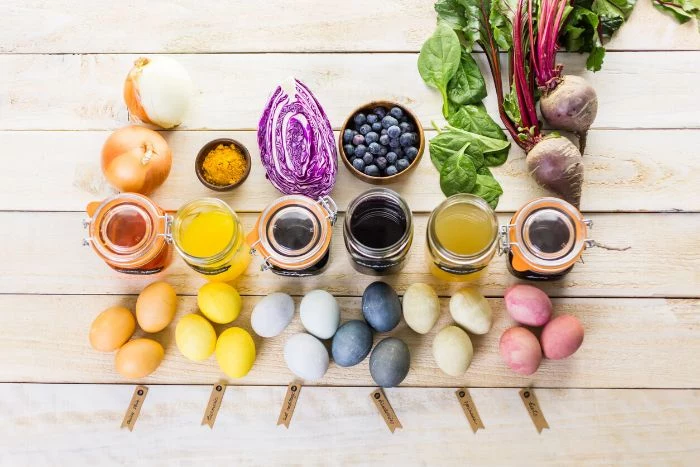
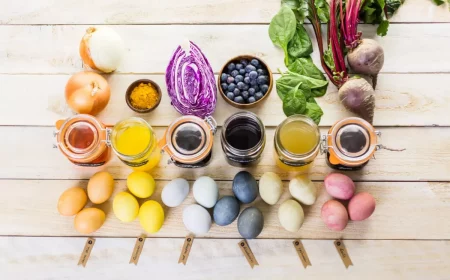
Unlock a palette of earthy, sophisticated colors using kitchen scraps. It’s a beautiful way to reduce waste and create a unique look.
- Yellow Onion Skins: Yields a deep, rustic orange or terracotta.
- Red Cabbage: Magically creates a stunning robin’s egg blue.
- Turmeric Powder: Produces a vibrant, sunshine yellow.
- Used Coffee Grounds: Gives a rich, earthy brown.

My colors are coming out blotchy and uneven. What am I doing wrong?
This is usually caused by natural oils from your hands on the eggshell, which repel the dye. Before dyeing, give your boiled eggs a quick wipe with a paper towel dipped in white vinegar. This cleans the shell and primes it for a perfectly even color application.

Matte Finish: Achieved by letting the egg air-dry completely. This gives a soft, natural, and modern look, especially beautiful with natural dyes.
Glossy Finish: After the dye is dry, gently rub the egg with a drop of neutral oil (like vegetable or coconut oil) on a paper towel. This makes the colors pop and gives a classic, polished shine.
The choice depends entirely on your desired aesthetic!

According to the USDA, hard-boiled eggs are safe to eat for up to one week if they’ve been refrigerated.
This means your beautiful creations can also be part of your Easter brunch! However, only eat eggs dyed with food-grade materials (like food coloring or natural vegetable dyes). If you’ve used non-toxic craft paint, glitter, or other decorative materials, they should be for display only.

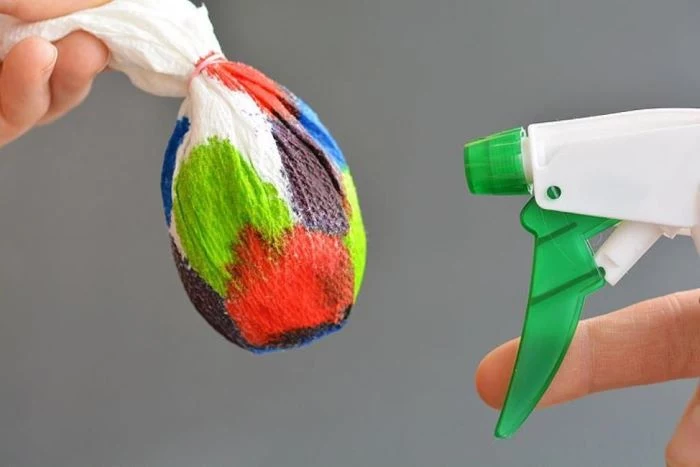
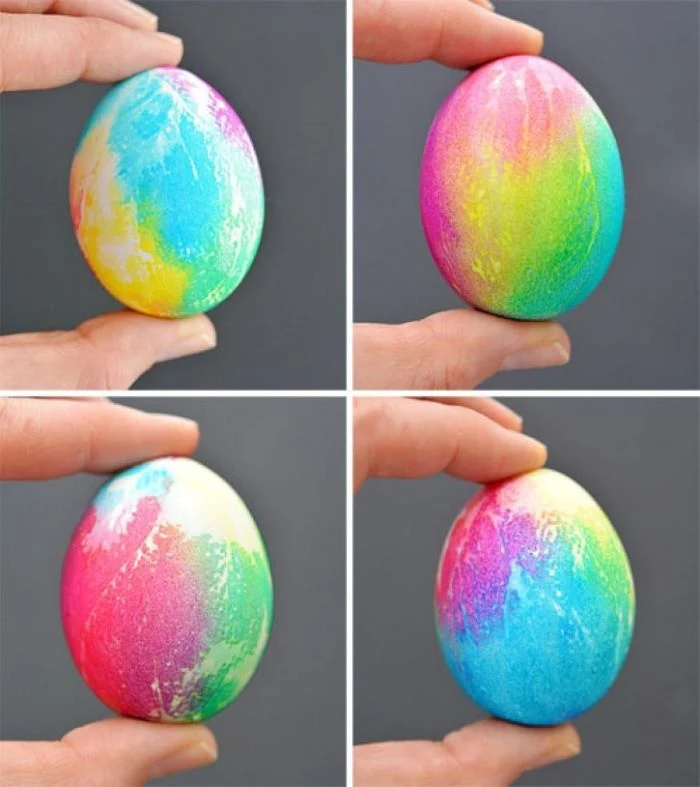
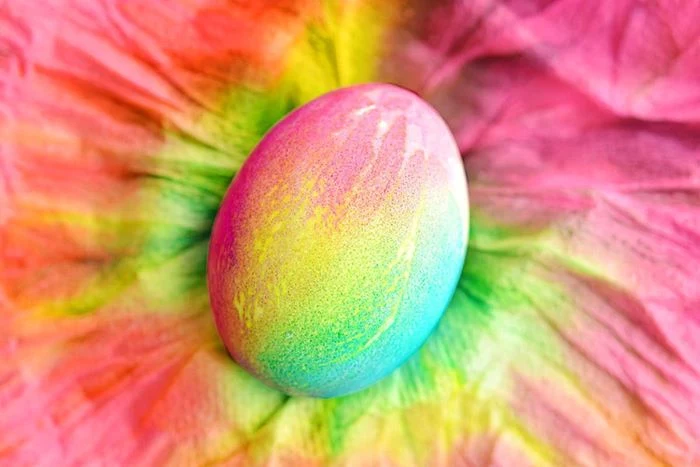
- Creates stunning, one-of-a-kind marbled patterns.
- Is a fun, sensory activity, especially for kids.
- Uses basic materials you already have.
The secret? The shaving cream marbling technique! Simply spread a layer of foam shaving cream (not gel) in a tray, dot with food coloring, swirl with a toothpick, and roll your egg through it. Let it sit for 10-15 minutes, then wipe clean.


For a trendy, naturalistic
Can I use brown eggs?
Absolutely! While white eggs give you true, bright colors, brown eggs provide a beautiful, deep, and earthy base. They won’t produce pastels, but they are perfect for creating rich jewel tones. A dark blue dye on a brown egg results in a gorgeous forest green, while red dye can yield a stunning deep burgundy.
- Insert toothpicks into the holes of a cardboard box to create a custom drying rack.
- Use an old wire cooling rack from the kitchen.
- For a professional touch, use a
Important reminder: To prevent cracking, let your boiled eggs cool to room temperature before placing them in a cool dye bath. Extreme temperature changes are the primary cause of cracks, which can let dye seep into the egg white.
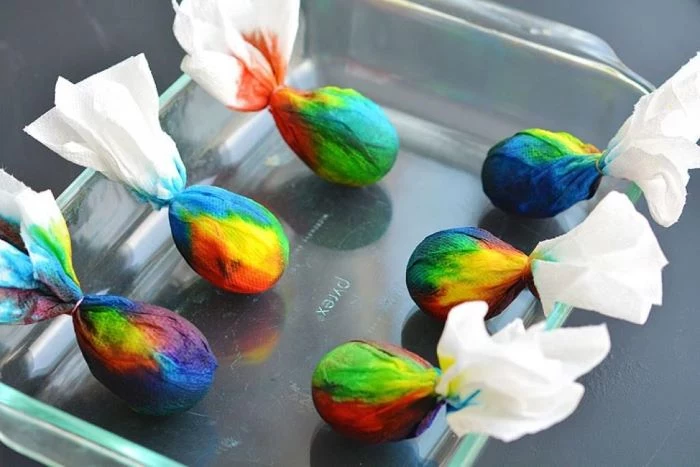
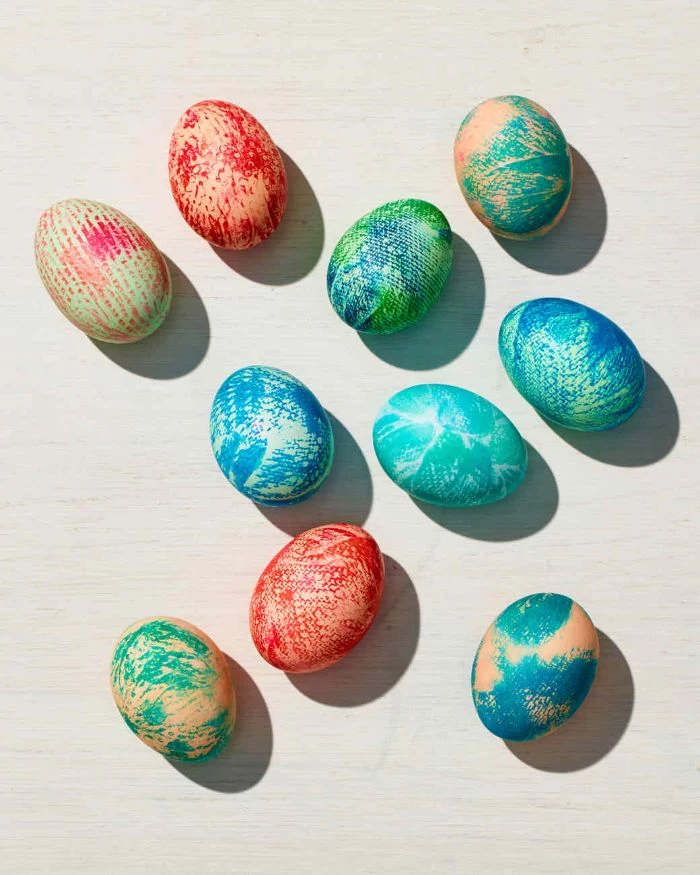
For an unbelievably intricate pattern, try the silk-dyeing method. This technique transfers the pattern from 100% silk fabric directly onto your eggshell.
- Cut a piece of a 100% silk tie or scarf large enough to cover an egg.
- Wrap the raw egg tightly, with the patterned side of the silk against the shell.
- Wrap a piece of white cotton fabric over the silk to hold it in place.
- Simmer in a pot of water with 1/4 cup of vinegar for 20 minutes. Let cool and unwrap to reveal the magic!
The Ukrainian art of Pysanky involves a wax-resist (batik) method, where intricate designs are drawn onto an egg with beeswax. The egg is dyed in stages, from lightest to darkest color, with wax applied after each stage to preserve that color.

Apple Cider Vinegar: Works just as well as white vinegar for setting dye. It can sometimes impart a slightly warmer, more muted tone to the colors, which can be a lovely effect.
White Vinegar: Your go-to for the cleanest, brightest, and most predictable color results. It’s chemically straightforward and doesn’t alter the hue of your dye.
For pure color, stick with white. For a slightly rustic touch, try apple cider.

Red Cabbage contains a pigment called anthocyanin, which is a natural pH indicator.
This is why it creates different colors! In an acidic solution (like your vinegar dye bath), it appears reddish, but as it reacts with the calcium carbonate of the eggshell (which is alkaline), it slowly shifts to a brilliant blue. It’s a live chemistry lesson right in your kitchen!

Create a beautiful speckled texture with uncooked rice. Place a cup of rice in a plastic container with a lid, add a few drops of food coloring, and shake to distribute. Add a hard-boiled egg, put the lid on, and gently shake until the egg is covered in a lovely, textured pattern. Repeat with different colors for a layered look.

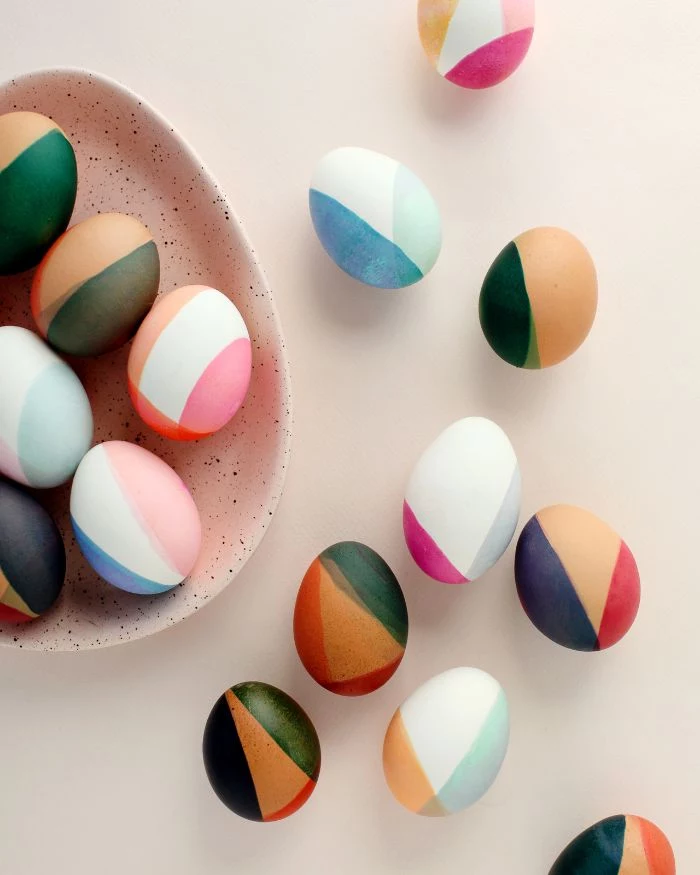
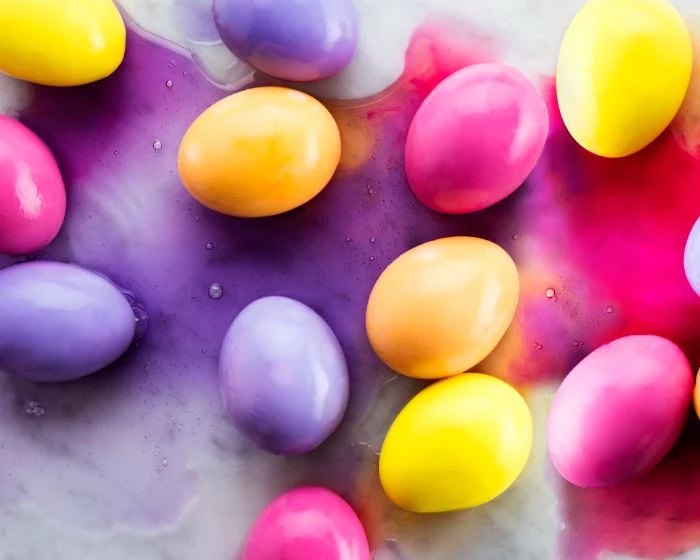
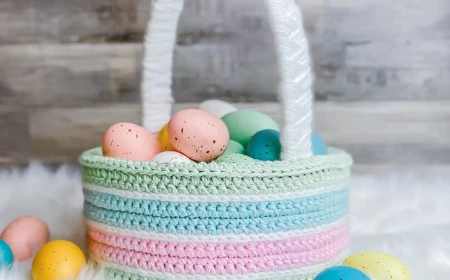
- Gives a soft, gradual color transition.
- Looks incredibly chic and modern.
- Is surprisingly easy to achieve.
The secret? The Ombré effect. Place your egg in a deep, concentrated dye bath. Every 5-10 minutes, add a tablespoon of plain water to the bath, diluting the color. This creates a beautiful gradient from dark to light on the eggshell.

- Overcrowding the Dye Bath: Dyeing too many eggs at once leads to uneven color and white spots where they touch.
- Forgetting to Stir: Gently stir the dye bath before adding your egg to ensure the color is evenly distributed and not settled at the bottom.
- Rushing the Drying: Wiping a wet egg will smudge the color. Patience is key; let them air dry completely for a flawless finish.
Go for Gold: To add a touch of glamour, use edible metallic luster dust, like those made by Roxy & Rich or Bakell. After your egg is dyed and dried, mix the dust with a few drops of clear alcohol (like vodka, which evaporates quickly) to form a paint. Use a fine brush to add gilded lines, speckles, or to paint a whole egg gold.

How do I get a perfect, jammy yolk inside my dyeable eggs?
For eggs that are as good to eat as they are to look at, try the
In the 19th century, Victorians exchanged intricately decorated cardboard and satin eggs filled with gifts, popularizing the egg as a central symbol of the Easter holiday celebration beyond its religious and pagan roots.
Turn your egg dyeing into a cherished annual tradition. Put on a spring-themed playlist, lay out all the colorful materials, and let everyone—kids and adults alike—express their creativity. The focus isn’t on perfection, but on the shared time and the joy of making something beautiful together. The resulting collection of mismatched, unique eggs will tell a story for years to come.
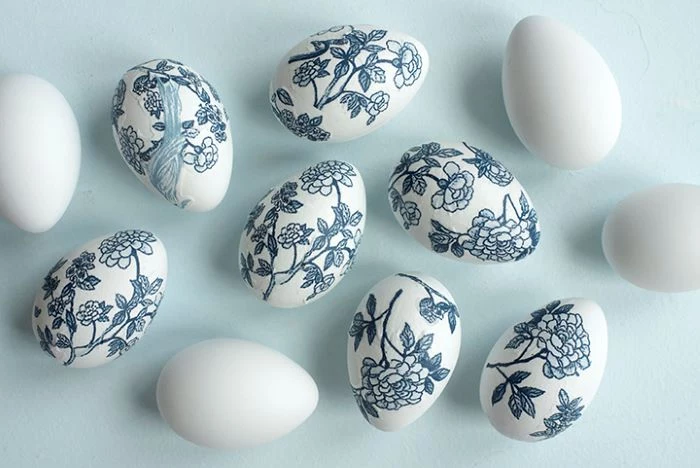
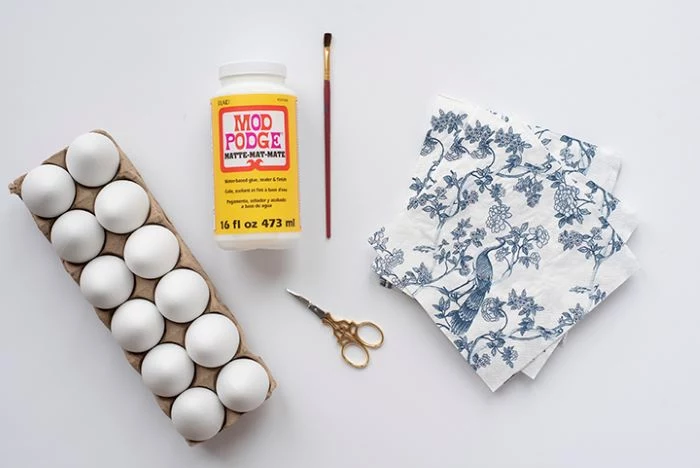
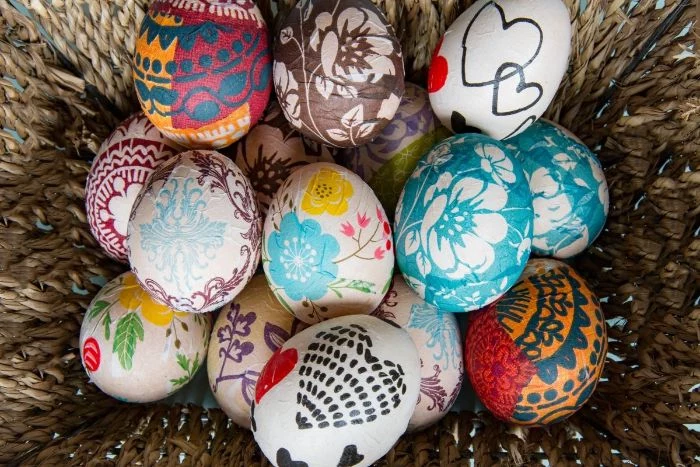
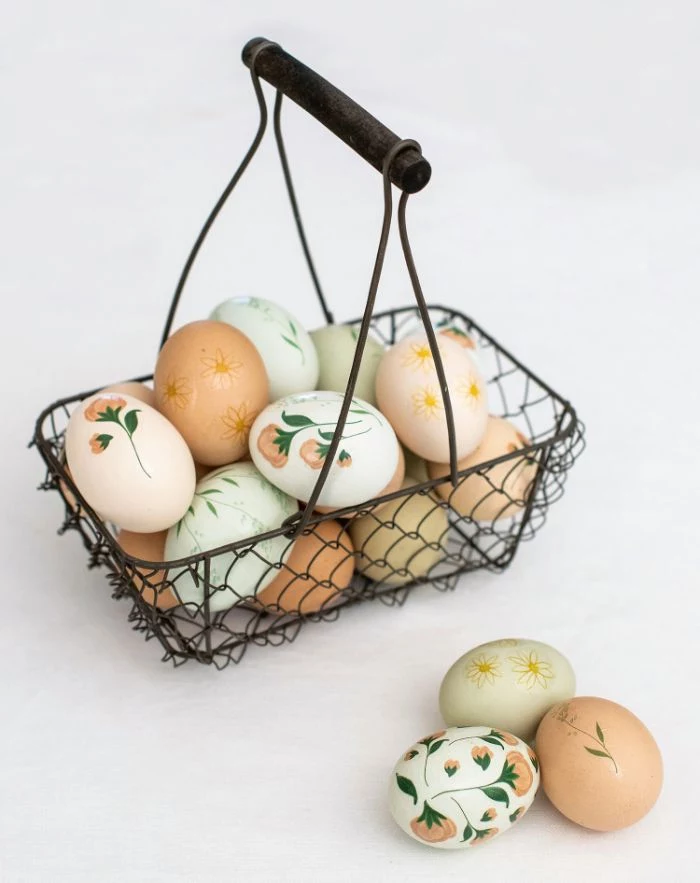
The decoupage technique seen in the gallery is a fantastic no-dye alternative that produces stunning, detailed results. It works best with thin, decorative paper napkins.
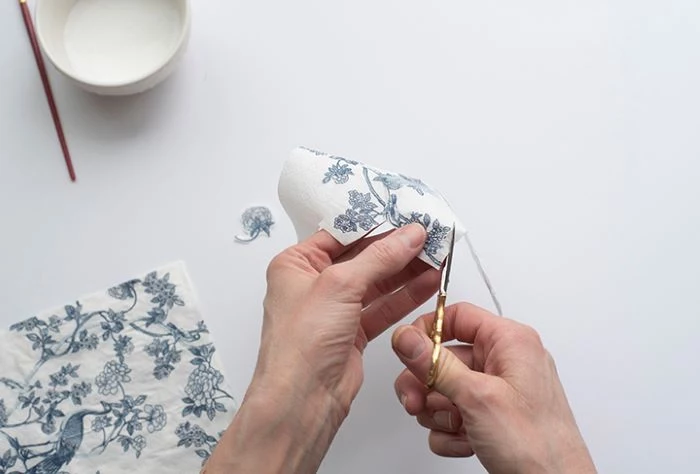
- Separate the printed top layer of the napkin from the plain white layers underneath.
- Cut out your desired small motifs (like flowers or patterns).
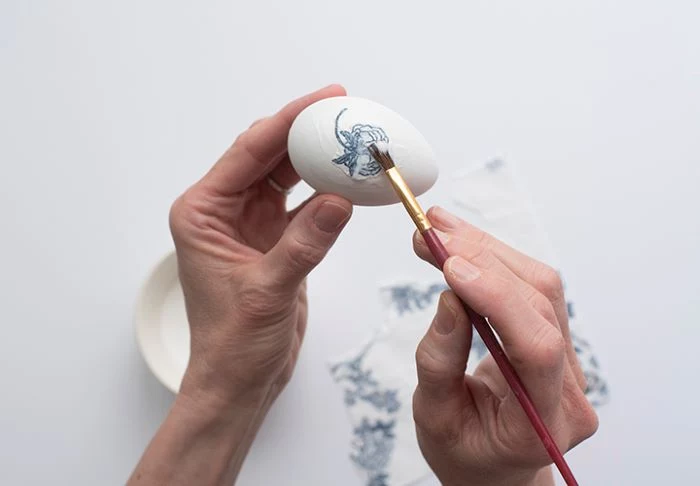
- Brush a thin layer of Mod Podge (matte or gloss) onto a section of your boiled egg.
- Gently press the napkin cutout onto the glued area, smoothing from the center outwards.
- Seal with a final top coat of Mod Podge.