Tired of Sloppy Garden Beds? Here’s How to Edge Like a Pro
I’ve seen it a hundred times: gorgeous plants and rich soil crammed into a garden bed with no real border. It looks great for about a month. Then the grass starts creeping in, the mulch washes all over the lawn after a big rain, and those once-crisp lines become a blurry, high-maintenance mess.
In this article
A solid garden edge isn’t just for looks. It’s the unsung hero of a clean, tidy landscape, a physical barrier that saves you from hours of weeding and re-defining edges year after year. The secret? It’s about 10% the material you choose and 90% the prep work you do beforehand. Honestly, the first time I built an edge for myself, I skimped on the base to save an hour. After one winter, the whole thing looked like a crooked smile. I had to redo it all. Don’t be me!
This guide will walk you through doing it right the first time, focusing on building something that will last for years, not just a season.
First Things First: Your Toolkit and Shopping List
Before you get started, let’s make sure you have everything you need. Nothing’s worse than being halfway through a project and having to make a frantic trip to the hardware store. Here’s a general checklist:
- Tools: A flat-bladed spade (for clean cuts), a shovel or trowel for digging, a wheelbarrow (your back will thank you), a good carpenter’s level, a rubber mallet, a hand tamper (or a solid 4×4 post scrap), heavy-duty gloves, and safety glasses.
- Layout: A flexible garden hose for curves or stakes and string for straight lines. Oh, and a can of spray marking paint—an absolute game-changer.
- Materials: Your edging material (bricks, pavers, stone, etc.), a crushed aggregate base (often sold as “paver base” or “crusher run”), and coarse sand.
Why All This Prep Work Actually Matters
So, why can’t you just stick some bricks in the dirt and call it a day? Because your edging is fighting a constant battle against two powerful forces: water and ice.
Wet garden soil is incredibly heavy and expands, pushing relentlessly against your edge. A flimsy border will just get toppled over in a year or two. And if you live where it freezes, you’re dealing with frost heave. Water in the soil freezes, expands with immense force, and pushes everything upward. It’s what destroys roads, and it will make a mess of your hard work by springtime.
The solution to both problems is a proper foundation. A deep, compacted gravel base gives that water somewhere to drain and creates a stable footing that resists pressure and frost. It’s the key to an edge that stays put. Even if digging super deep isn’t feasible, a thick, well-compacted gravel base is your best defense.
The Step-by-Step to a Lasting Edge
Ready to get your hands dirty? Take your time with these steps. Rushing the prep is the #1 mistake people make.
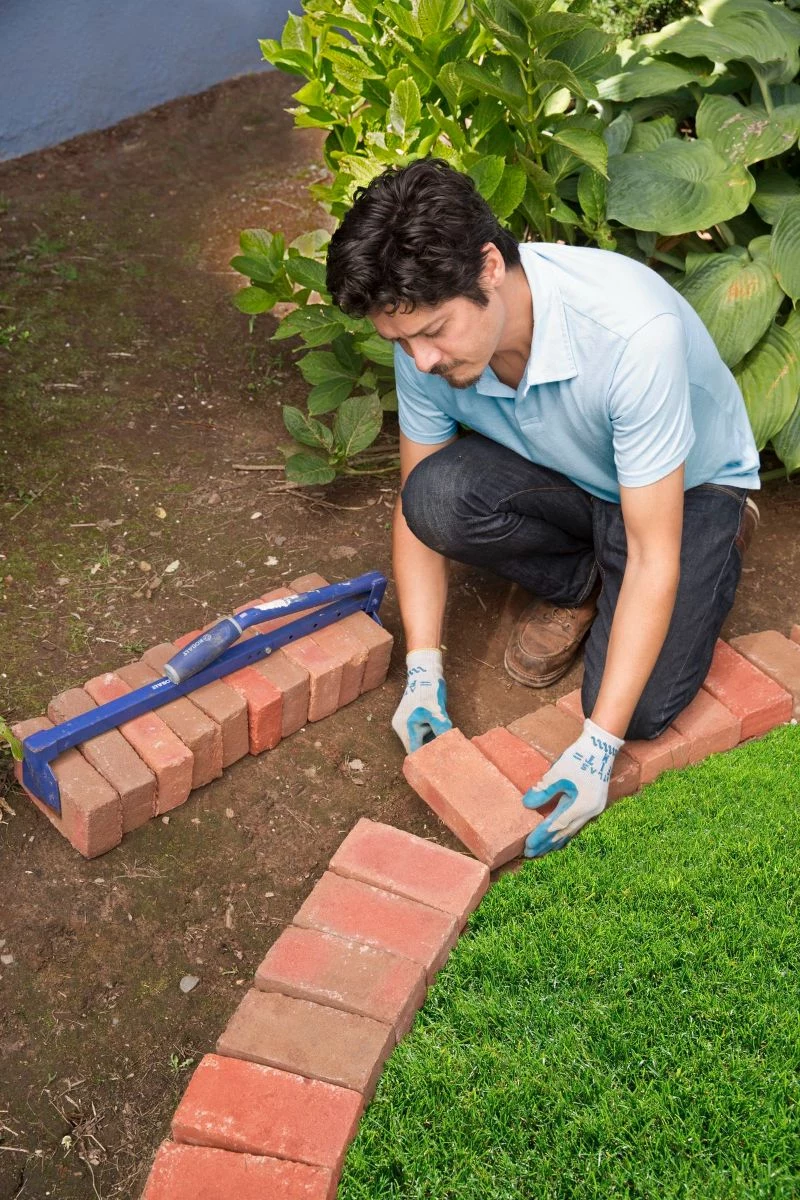
Step 1: Get Your Shape Just Right
Lay out your garden hose or string line to define the shape. Now, live with it for a day. Look at it from your kitchen window, your patio, and the street. Once you’re 100% happy with the curve, grab that can of marking paint. Trace the line on the grass. The hose will wiggle and move as you work, but the paint line is your foolproof guide for digging.
Step 2: Dig a Purposeful Trench
Using your flat spade, cut straight down along the paint line. The goal is a clean, vertical trench. The size depends on what you’re installing. For a single row of standard pavers, a trench 4-5 inches deep and about 6 inches wide is a good start. This leaves room for a solid 2-inch base plus the paver itself. For larger stones, you’ll need to go wider and deeper to accommodate a 4-inch base. A quick tip: lay a tarp down and put the grass sod in one pile and the garden soil in another. It makes backfilling so much cleaner.
Step 3: The All-Important Base Layer
This is the step you absolutely cannot skip. Pour about 2-3 inches of your crushed stone base into the trench. And no, you can’t just use pea gravel! It rolls around like marbles and offers no stability. You need the angular, crushed stuff with dust and small particles—that’s what locks together when compacted.
Use your hand tamper to pack it down firmly, adding the material in 1-inch layers and tamping each one. When you press on it with your fingers, it should feel solid. Use your level to check that the base is level both along its length and across its width.
Good to know: Wondering how much base material to buy? Here’s a simple trick. Multiply the length of your trench (in feet) by the width (in feet) by the depth of your base (in feet). For example, a 20-foot long, 0.5-foot wide (6 inches), and 0.25-foot deep (3 inches) trench needs 2.5 cubic feet of material (20 x 0.5 x 0.25). This little calculation is a lifesaver at the landscape supply yard!
Step 4: The Final Setting Bed
On top of your solid base, spread about a 1-inch layer of coarse sand. Don’t compact this layer. Just use a small piece of wood to screed it smooth. This is your adjustment layer, allowing you to wiggle each brick or paver into its final, perfectly level position.
Choosing Your Material: A Realistic Breakdown
The material you choose affects the look, cost, and difficulty of your project. Here’s a no-nonsense look at the most common options.
- Bricks & Concrete Pavers: The Reliable Workhorse. These are popular for a reason. They’re uniform, easy to work with, and built to last. Be sure to buy pavers or bricks specifically rated for ground contact; regular house bricks can absorb water and crumble after a few freeze-thaw cycles.
Cost: Usually $5 to $10 per linear foot for materials.
DIY Difficulty: Easy to Moderate.
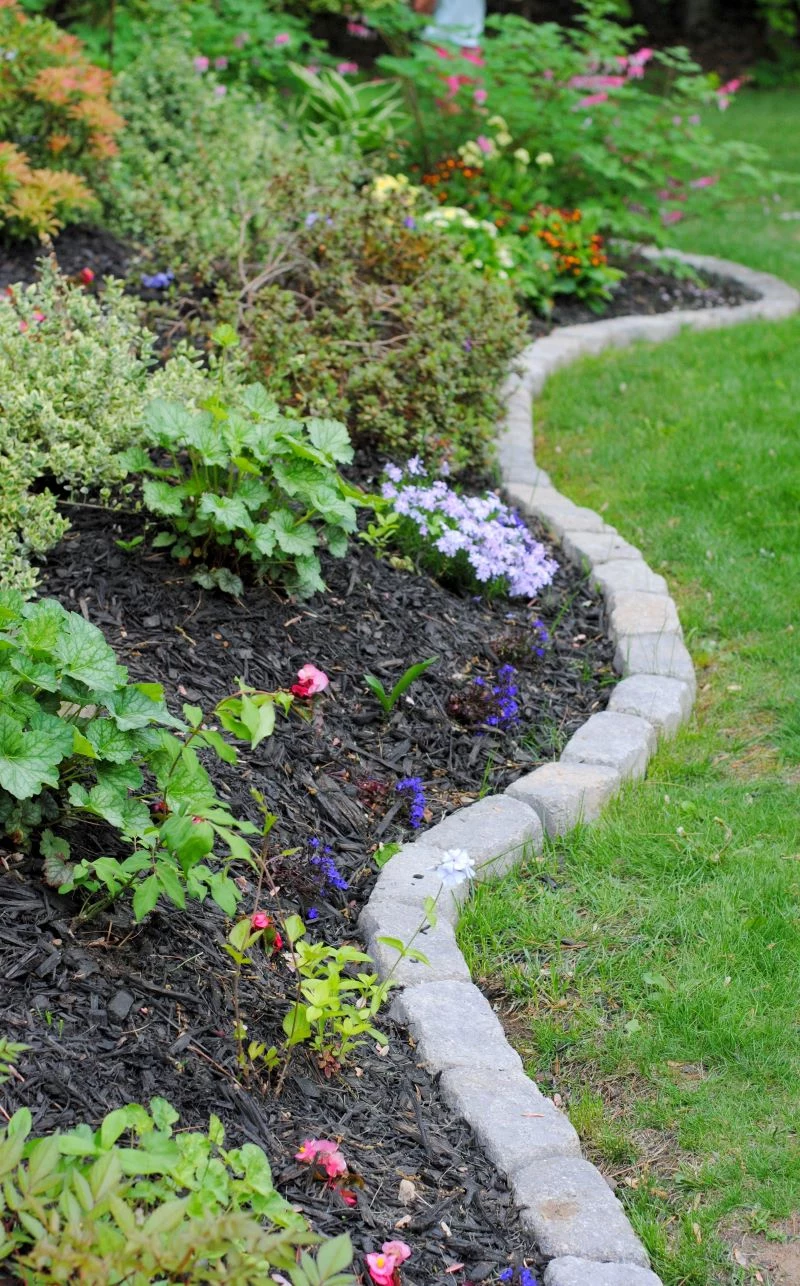
Lifespan: 20+ years when installed correctly. - Natural Stone: The Timeless Classic. A dry-stacked stone edge looks incredible, like it’s been there forever. But it’s more like putting together a heavy, complicated puzzle. The key is to always span the joints below (the “one over two, two over one” rule).
Cost: Highly variable, from $10 to over $25 per foot, depending on local stone availability.
DIY Difficulty: Hard. Requires patience and a good eye.
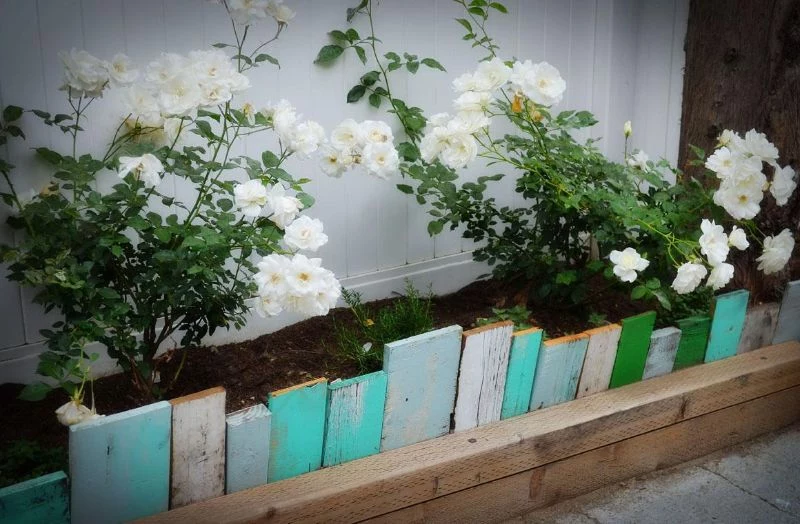
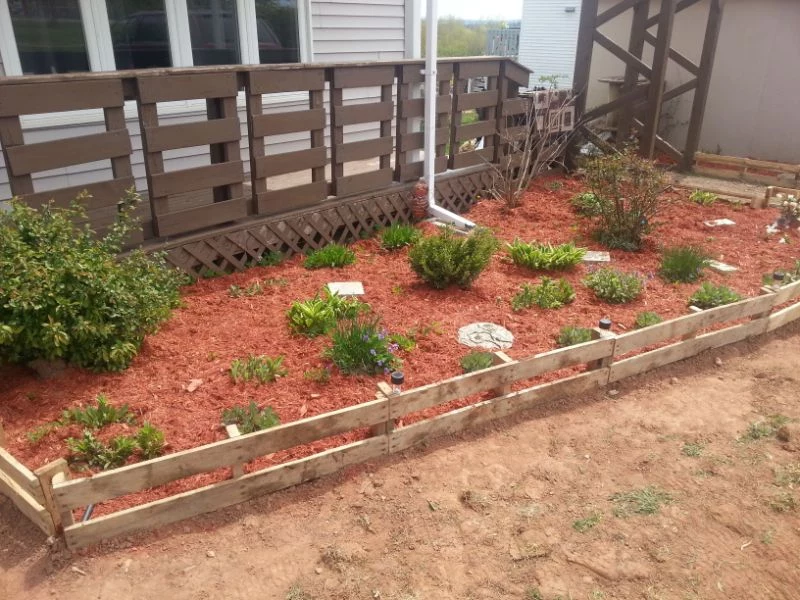
Lifespan: Potentially a lifetime. - Wood Timbers: The Rustic Choice. Wood can look fantastic, but any wood touching damp soil will eventually rot. For the best results, use naturally rot-resistant species like cedar or black locust. Set them on a gravel bed to promote drainage.
Cost: Around $8 to $15 per foot for rot-resistant wood.
DIY Difficulty: Easy to Moderate.
Lifespan: 10-15 years for good quality, rot-resistant wood.
A Very Important Safety Warning on Wood: Please, NEVER use old railroad ties or older types of pressure-treated wood for edging, especially around vegetable gardens. Railroad ties are soaked in creosote, a nasty chemical. Similarly, some older pressure-treated lumber contains arsenic, which you don’t want anywhere near your food. Regulations have since changed for residential use due to these health concerns. If you use pressure-treated wood, make sure it’s a modern, safer-rated product (like ACQ).
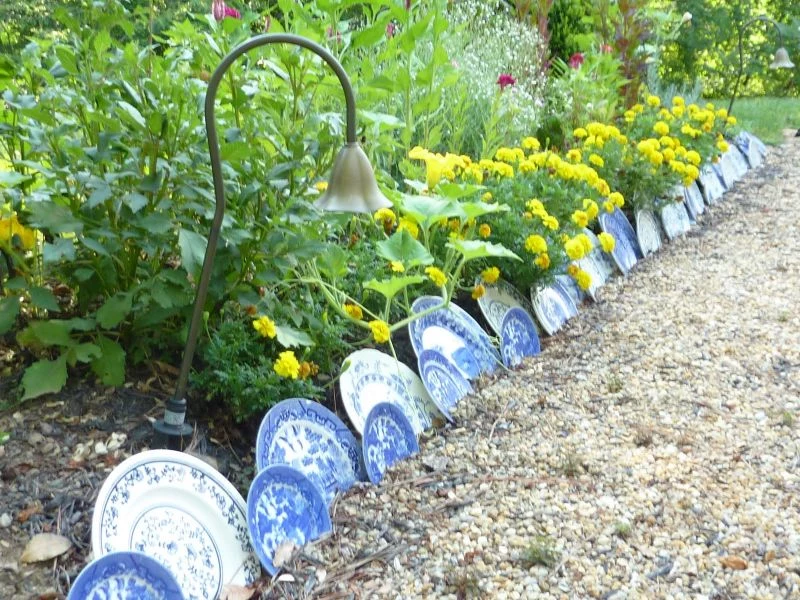
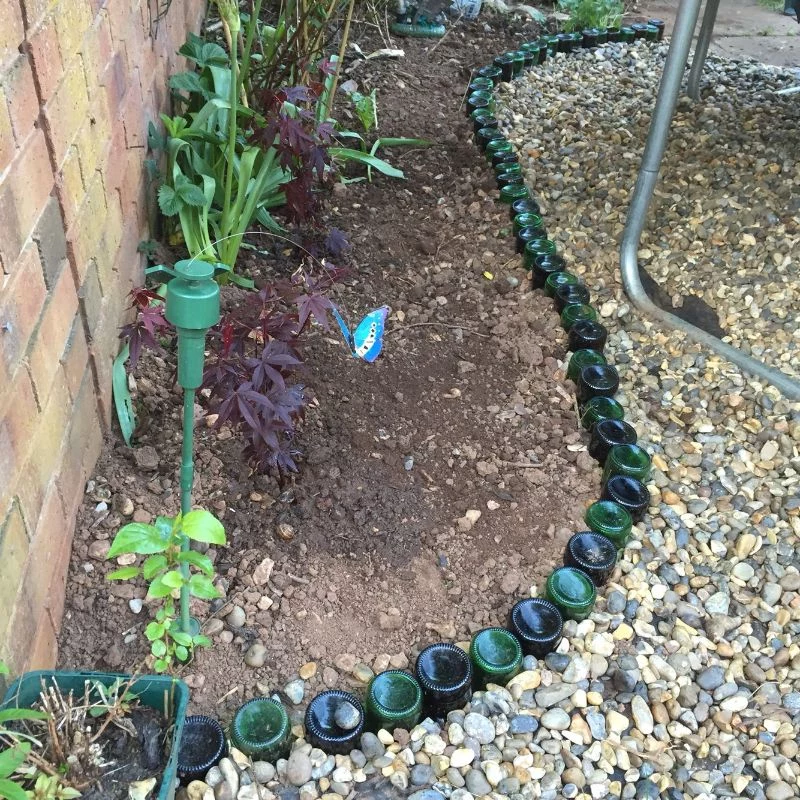
And what about… glass bottles or old plates? I’ve seen these artsy ideas online, and while they can be charming, I have to be frank: they are not functional, long-term edging. Glass shatters, creating a serious safety hazard for bare feet and hands. The sharp edges of broken ceramics are even worse. Think of these as temporary, decorative accents for a small, protected area, not as the primary workhorse between your lawn and garden.
Pro-Level Touches and Quick Fixes
Want to take your project to the next level? Here are a couple of tricks the pros use.
Install a Mowing Strip: This is my favorite time-saving trick. It’s a flat row of pavers laid flush with the lawn on the outside of your main, raised edge. Your lawnmower wheel rides right on top of it, cutting the grass perfectly along the border. It completely eliminates the need for string trimming. It’s more work upfront but pays you back every single week.
Edging on a Slope: If you’re on a hill, don’t run your edging parallel to the slope—mulch will just wash right over it. The solution is to create level terraces. Build a short, level section, then step it down to create the next level section. This holds back the soil effectively.
Troubleshooting Weeds and Wobbles: If your edge gets heaved and uneven after a winter, the cause is almost always an inadequate base. The only real fix is to pull it up and redo the base properly. If weeds are growing in the joints of your paver edge, clean them out with a stiff brush, let it dry, and sweep in new sand. For a more permanent fix, look for polymeric sand. It hardens up when wetted, locking out weeds for good.
The Final Word: Time, Safety, and When to Call for Help
So, how long will this take? For a motivated beginner tackling a 20-foot straight paver edge, I’d set aside a full weekend. If you’re doing curves or working with irregular stone, plan for it to take longer. This is a project where patience pays off.
Before you dig a single scoop of dirt, call 811 (in the US/Canada). It’s a free service that marks underground utility lines. Hitting a gas or electric line is incredibly dangerous, and I know someone who hit a fiber optic cable and got stuck with a five-figure repair bill. It’s not worth the risk. Just make the call.
And of course, wear gloves and safety glasses, and lift heavy pavers and stones with your legs, not your back.
Finally, know your limits. A determined DIYer can absolutely build a fantastic garden edge. But if your project involves a retaining wall over two or three feet high or deals with serious slope or drainage issues, it’s wise to call in a professional. A structural retaining wall failure is a disaster, and a pro can prevent you from accidentally creating a water problem for your foundation. But for most garden beds, this is a deeply rewarding project that adds major curb appeal and makes your life easier for years to come.
Inspirational Gallery
Steel Edging: Think brands like EverEdge or even raw Corten steel. It provides a razor-thin, almost invisible line that’s perfect for modern or minimalist gardens. It’s flexible for creating sweeping curves but requires precise installation to look its best.
Stone Pavers: Classic materials, like those from Belgard or Techo-Bloc, offer a substantial, traditional look. They are ideal for creating a functional
Did you know? Frost heave can exert pressures of up to 20,000 pounds per square foot, easily lifting buildings, roads, and, yes, your improperly installed garden edging.
That’s why the compacted gravel base mentioned in the guide is non-negotiable in colder climates. It allows water to drain away from beneath the edging, giving ice less moisture to grab onto and expand, thus protecting your hard work from being pushed upward every winter.
But what if a large tree root is right where my trench should be?
Never cut a major structural root (thicker than 2 inches in diameter) as it can destabilize and harm the tree. Instead, adapt your design. You can gently curve your edging line around the root, making it a feature. For smaller feeder roots, a sharp pruning saw or loppers will make a clean cut that heals quickly. If the root is immovable and central, consider transitioning to a flexible ‘no-dig’ edging product, like those from Dimex, just for that section.
The secret to easier lawn care: When installing your edging, create a
- Check for stability: Avoid bricks that are crumbling or flaking (spalling).
- Clean them thoroughly with a stiff brush and water to remove old mortar and grime.
- Expect character: The beauty of reclaimed material is its imperfection, so embrace slight differences in color and size.
- Get extras: Plan on a 15-20% surplus to account for breakage and unusable pieces.
The secret? You’re using reclaimed bricks, which offer instant history and sustainable charm.
For a look that is both rustic and strikingly modern, consider Corten steel. This special alloy is designed to develop a stable, rust-like patina over its first few years of exposure to the weather. This protective layer then halts further corrosion. The result is a deep, earthy orange-brown border that beautifully complements green foliage and natural stone, evolving with your garden through the seasons.
Elevate your garden’s atmosphere by integrating lighting directly into your edging. It’s a high-impact feature that defines the space after dark and enhances safety.
- Under-Cap Lights: LED strips or hardscape lights from brands like Volt Lighting can be hidden under the lip of a block or stone edge, casting a warm, downward glow.
- Inset Fixtures: Small, durable puck lights can be set flush into thicker stone or paver edging for a professional finish that highlights the pathway.
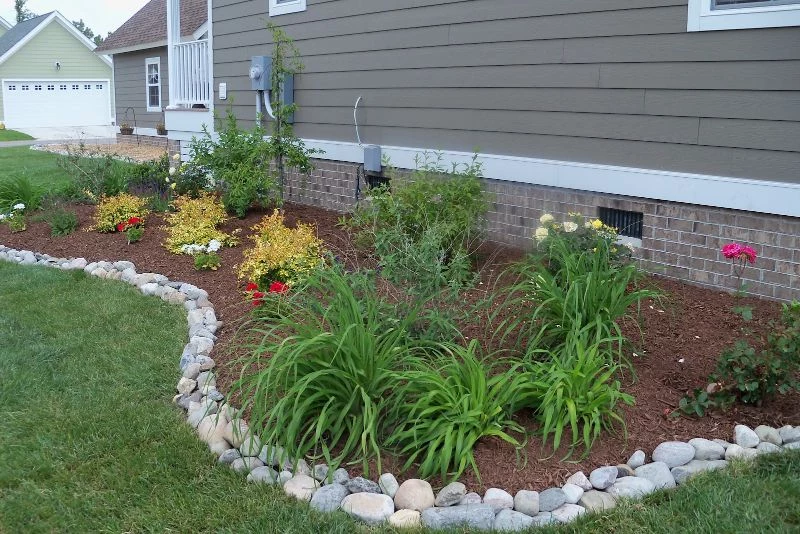
The human eye is naturally drawn to strong, clean lines; it’s a fundamental principle of aesthetics.
In the garden, edging serves as that essential line. It’s the frame for your horticultural masterpiece. A crisp edge tells the brain that the space is intentional and cared for, creating visual order that makes your plant compositions pop and the entire landscape feel more cohesive and polished.
Don’t underestimate the power of a simple spade-cut edge. For informal or cottage-style gardens, this no-cost option is often the most visually appropriate. Using a sharp, flat-bladed spade, cut a clean 4-inch deep V-shaped trench between the lawn and bed. It creates a beautiful, natural definition that just needs re-cutting in spring and mid-summer to stay pristine.
- Provides a durable, long-lasting barrier against invasive grass.
- Won’t rot, crack, or become brittle in the sun.
- Made almost entirely from recycled materials like tires and plastic containers.
The secret? High-quality composite edging. Brands like EcoBorder offer a flexible, easy-to-install alternative to traditional materials that is both tough and environmentally friendly.


