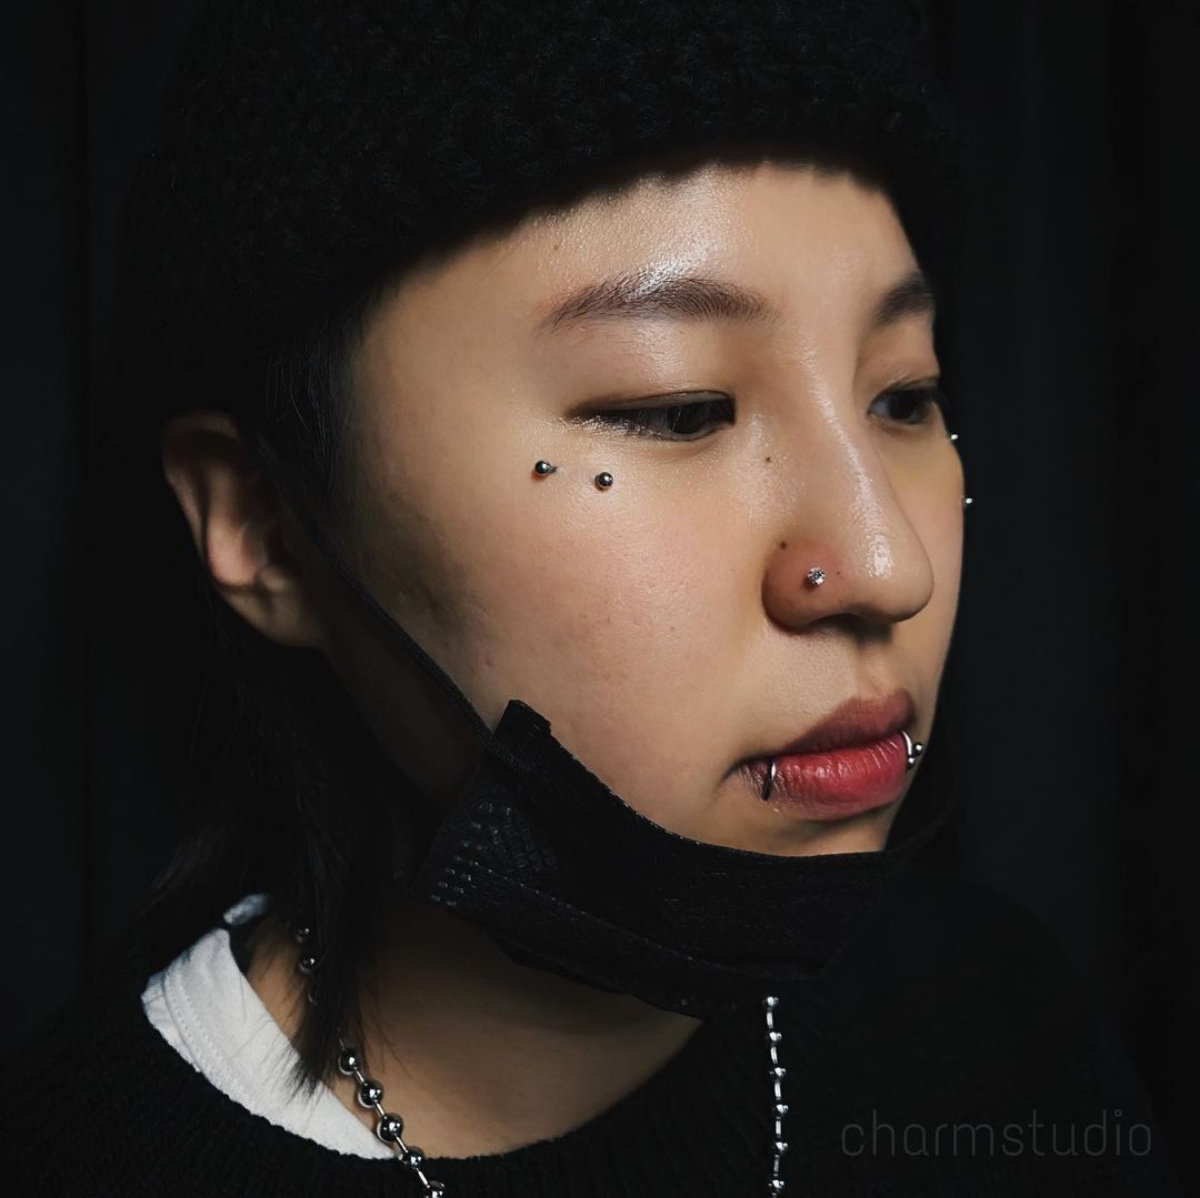
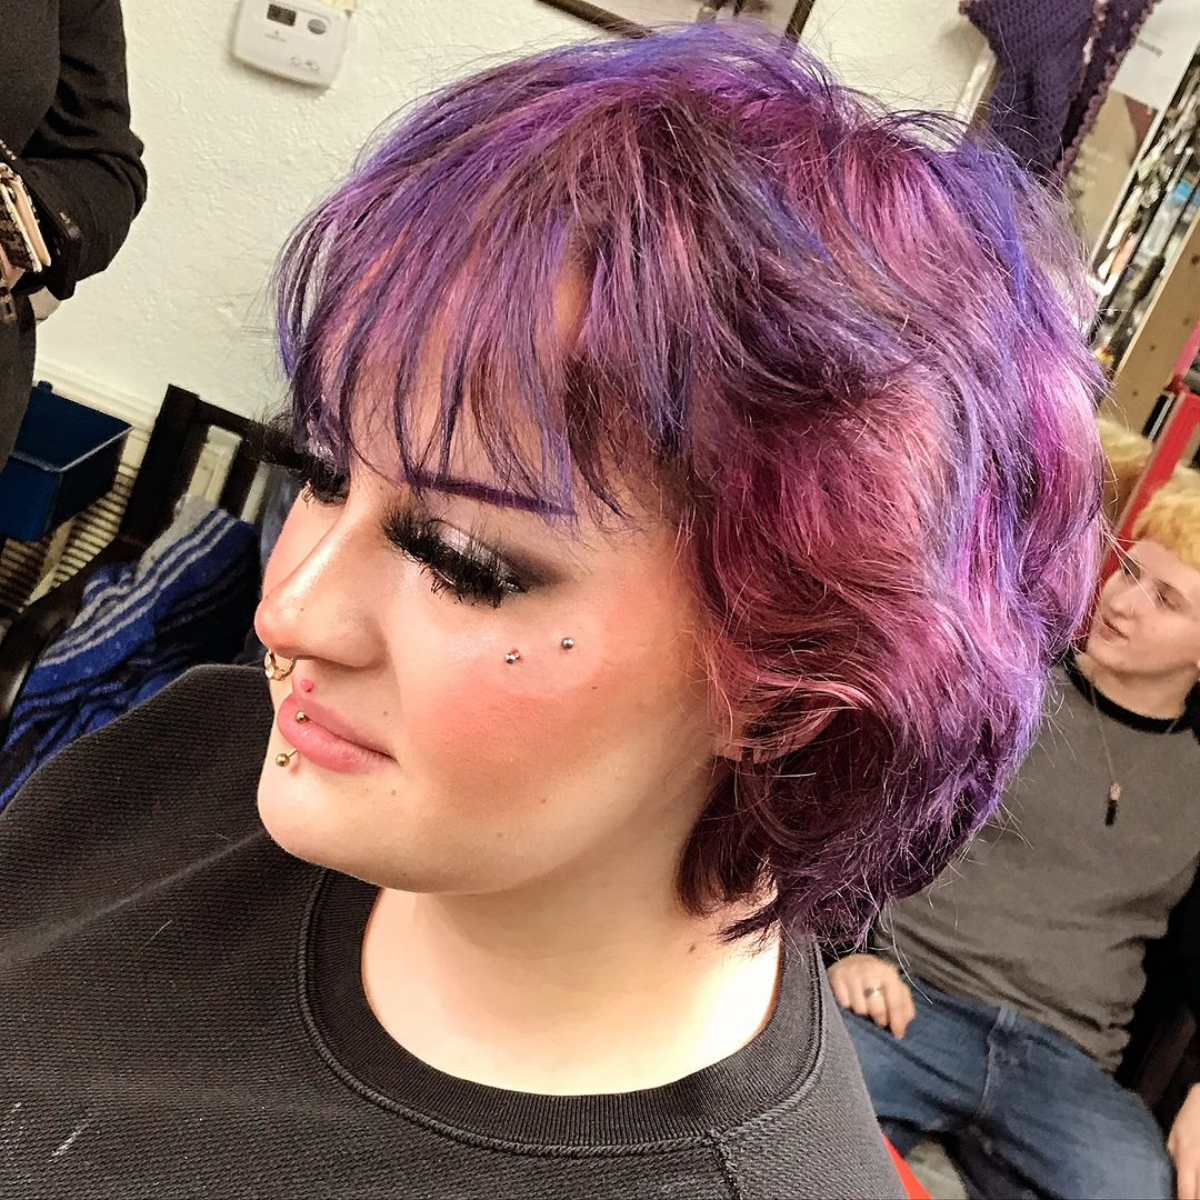
The Honest Truth About Anti-Eyebrow Piercings (Read This First!)
Over the years, I’ve seen countless piercing trends come and go, but some just have a unique, lasting appeal. The anti-eyebrow is definitely one of them. It’s this incredibly striking yet subtle piercing that sits high on the cheekbone, catching the light in a way that’s hard to ignore. But here’s the thing: it looks deceptively simple. To be frank, it’s one of the most technical and fragile piercings you can get.
In this article
This is not a decision to be made lightly. Unlike a standard lobe piercing that goes straight through tissue, the anti-eyebrow is a “surface piercing.” This means the jewelry goes in and out through the same flat plane of skin. Your body’s natural reaction? To see it as a splinter and try to push it out. Because of this, the rejection rate is notoriously high. You have to go into this accepting the reality that it might not be a forever piercing.

My goal here is to give you the real-deal, practical knowledge you need. We’ll get into the anatomy that makes or breaks it, what a safe procedure actually looks like, and the meticulous aftercare it demands. This isn’t just about cool new jewelry; it’s about understanding the commitment and working with your body for the best shot at success.
Why Your Face Shape is Everything
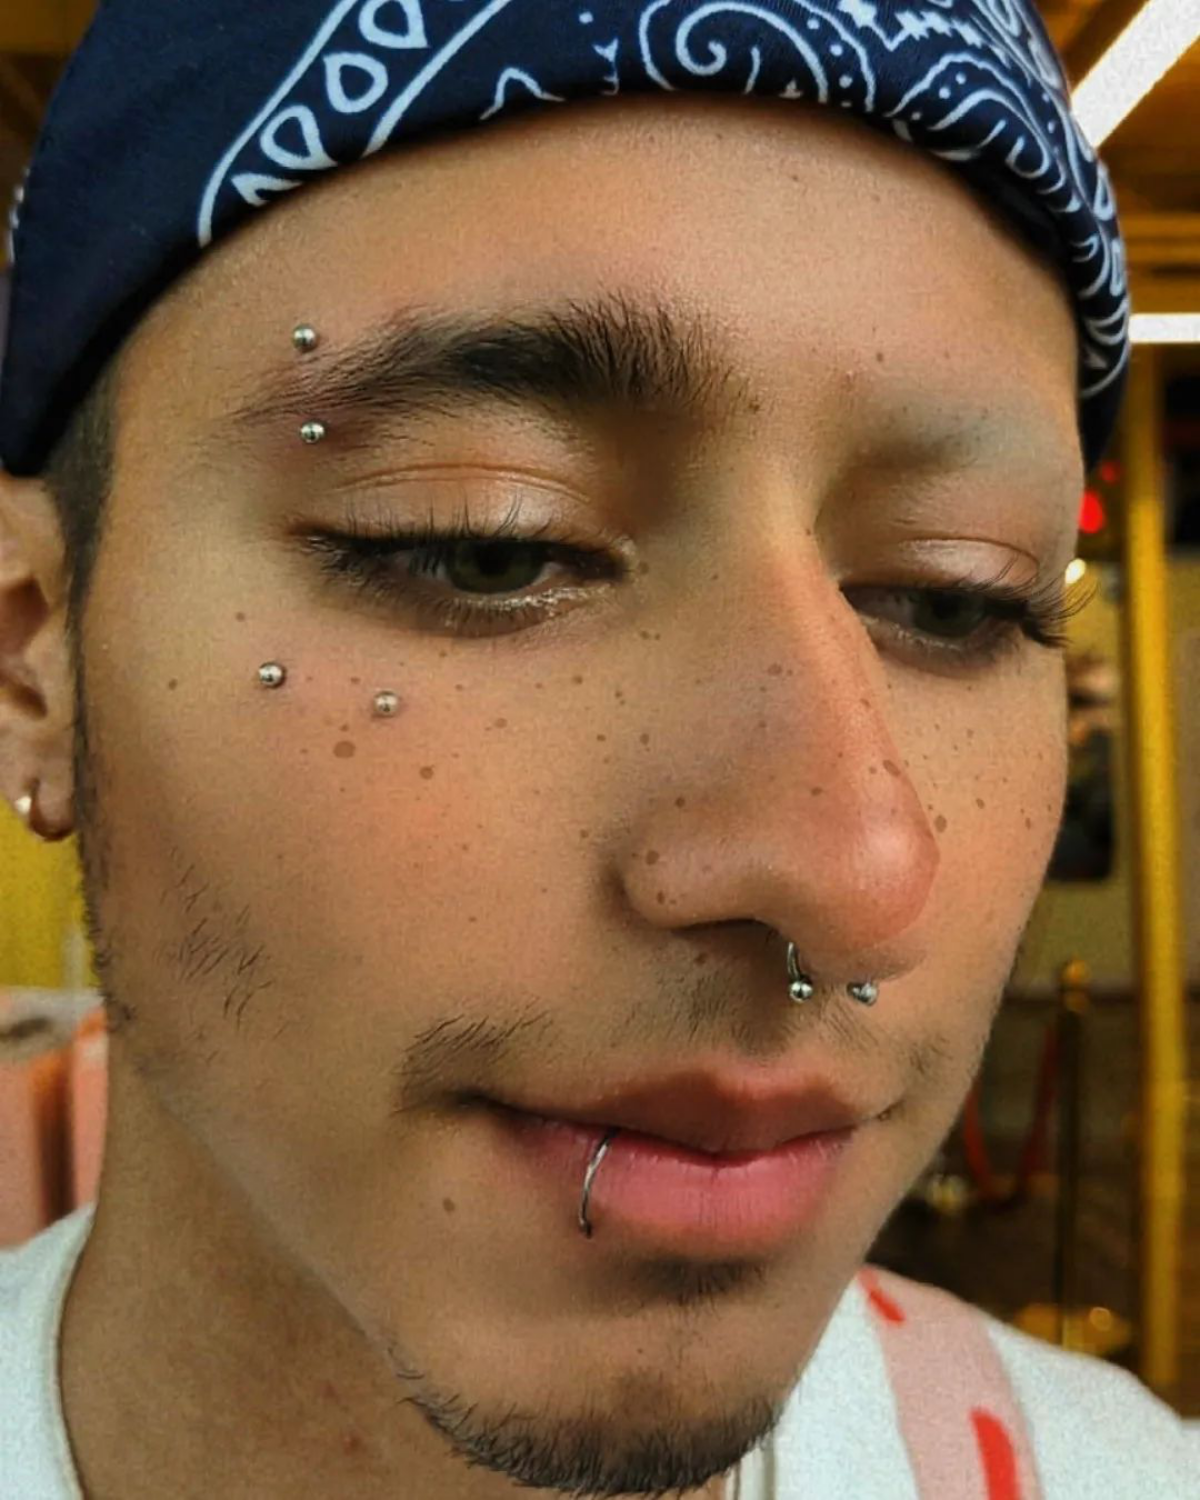
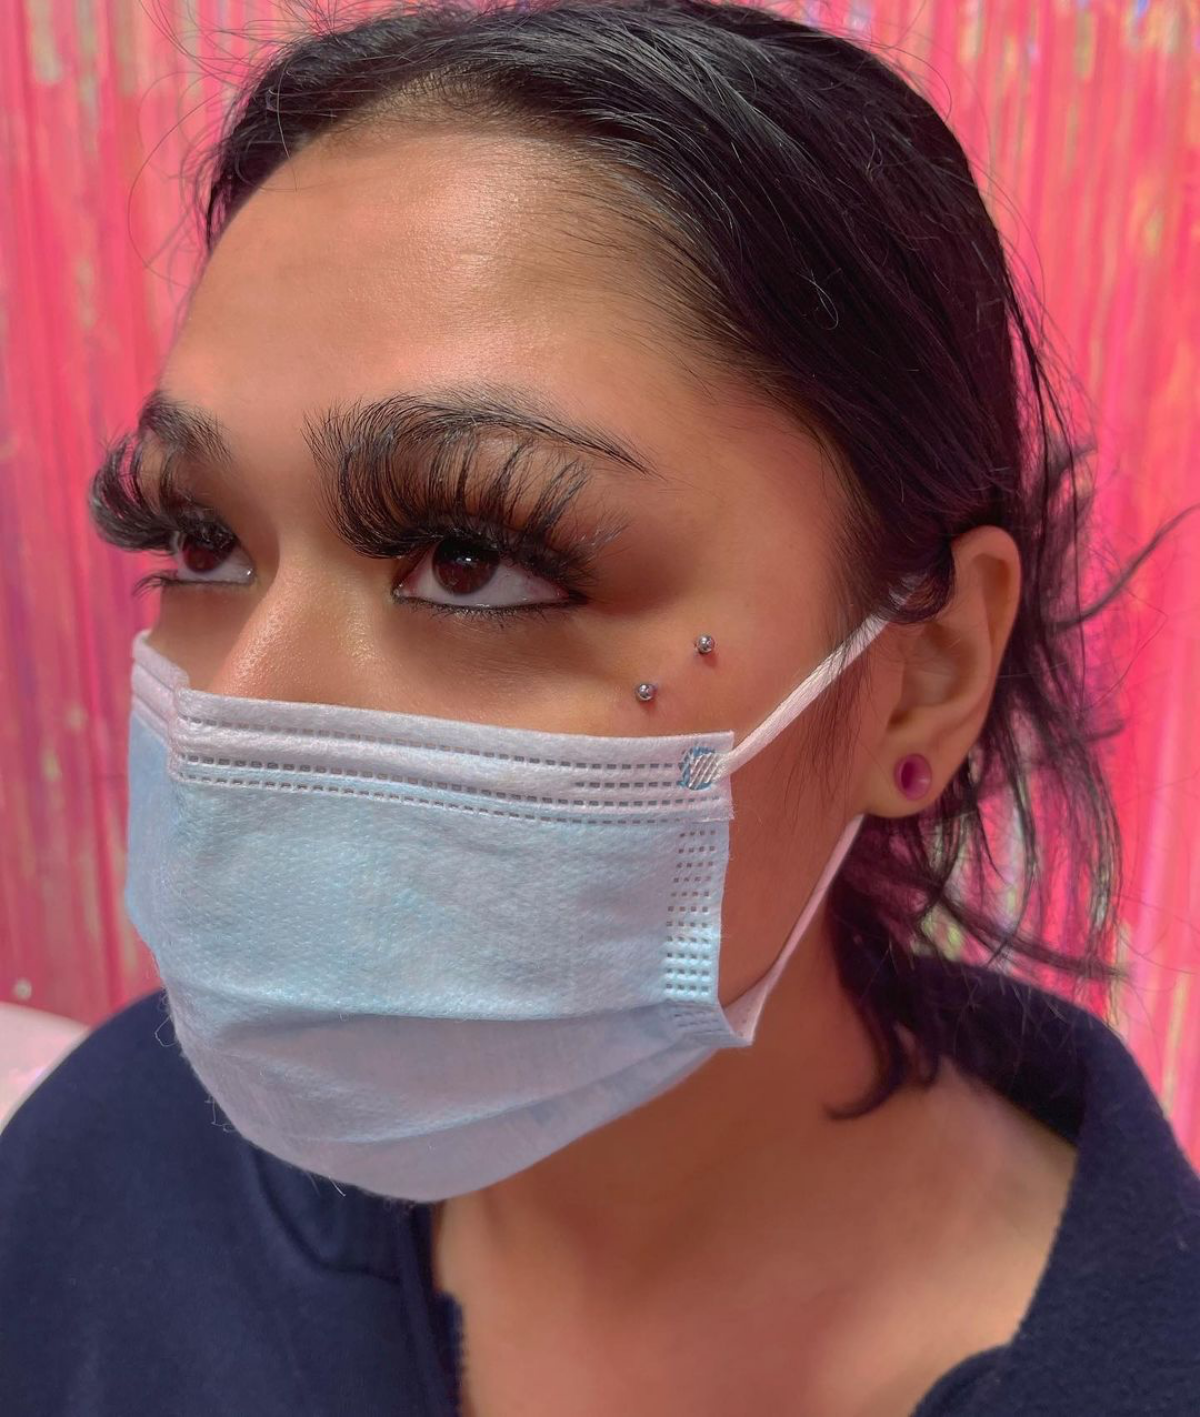
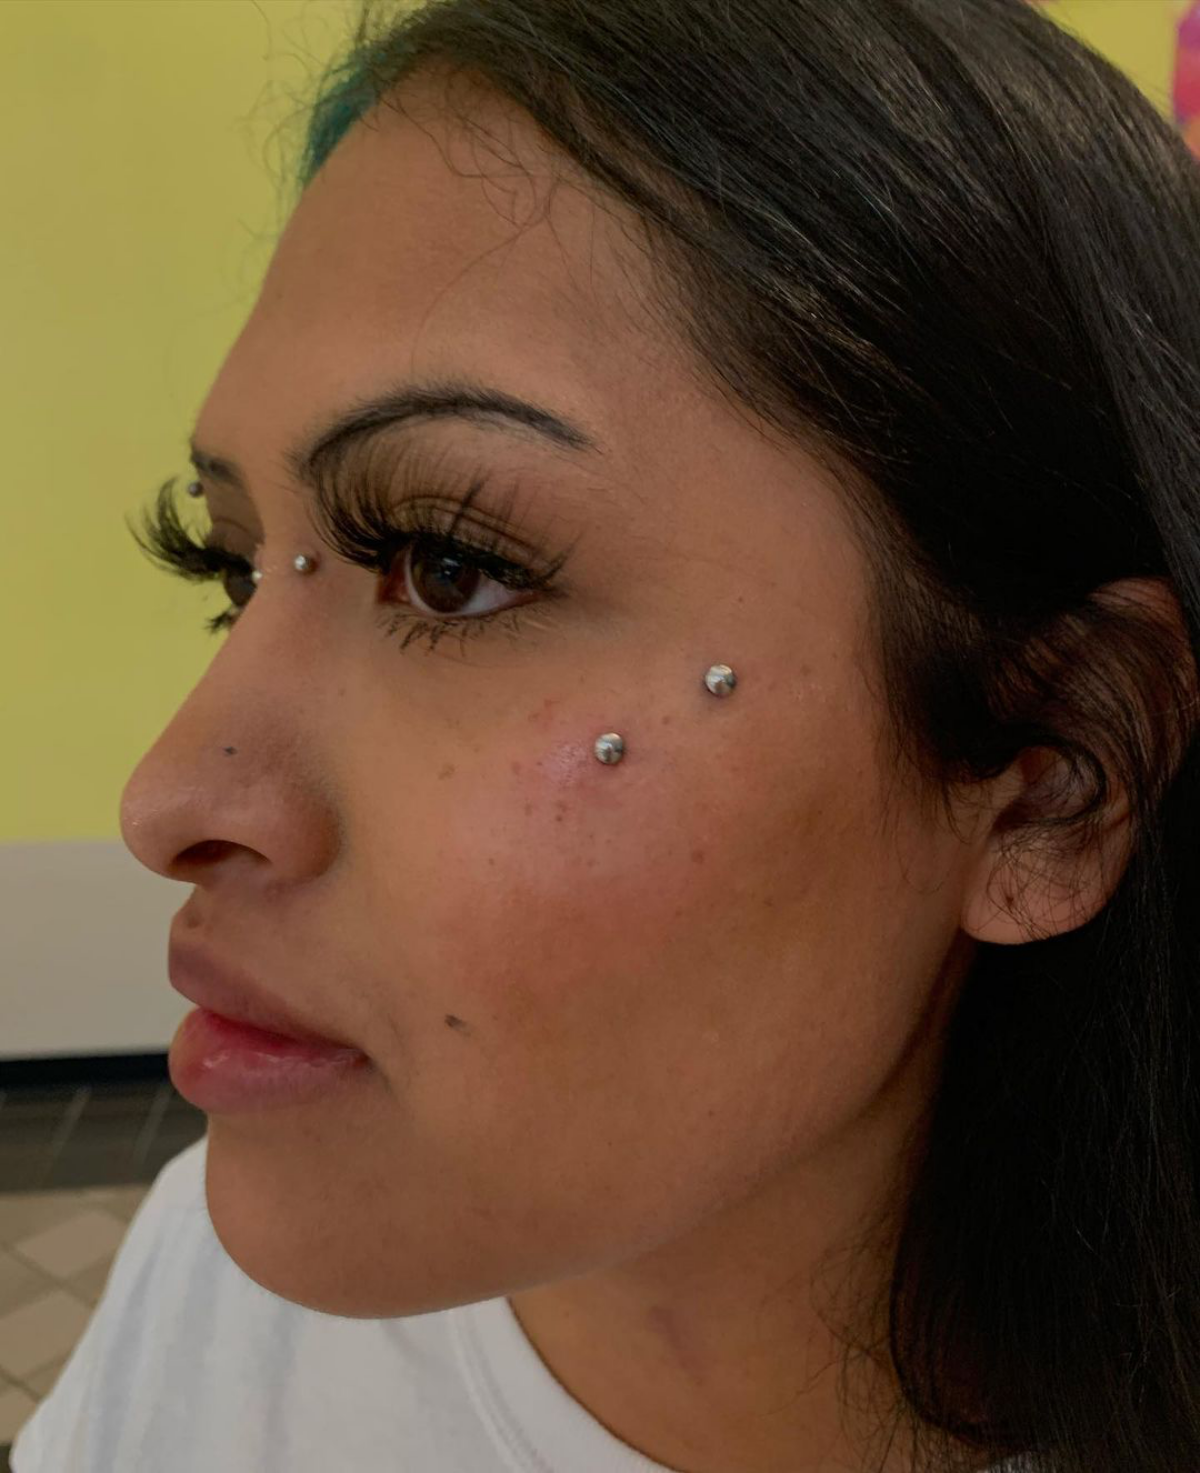
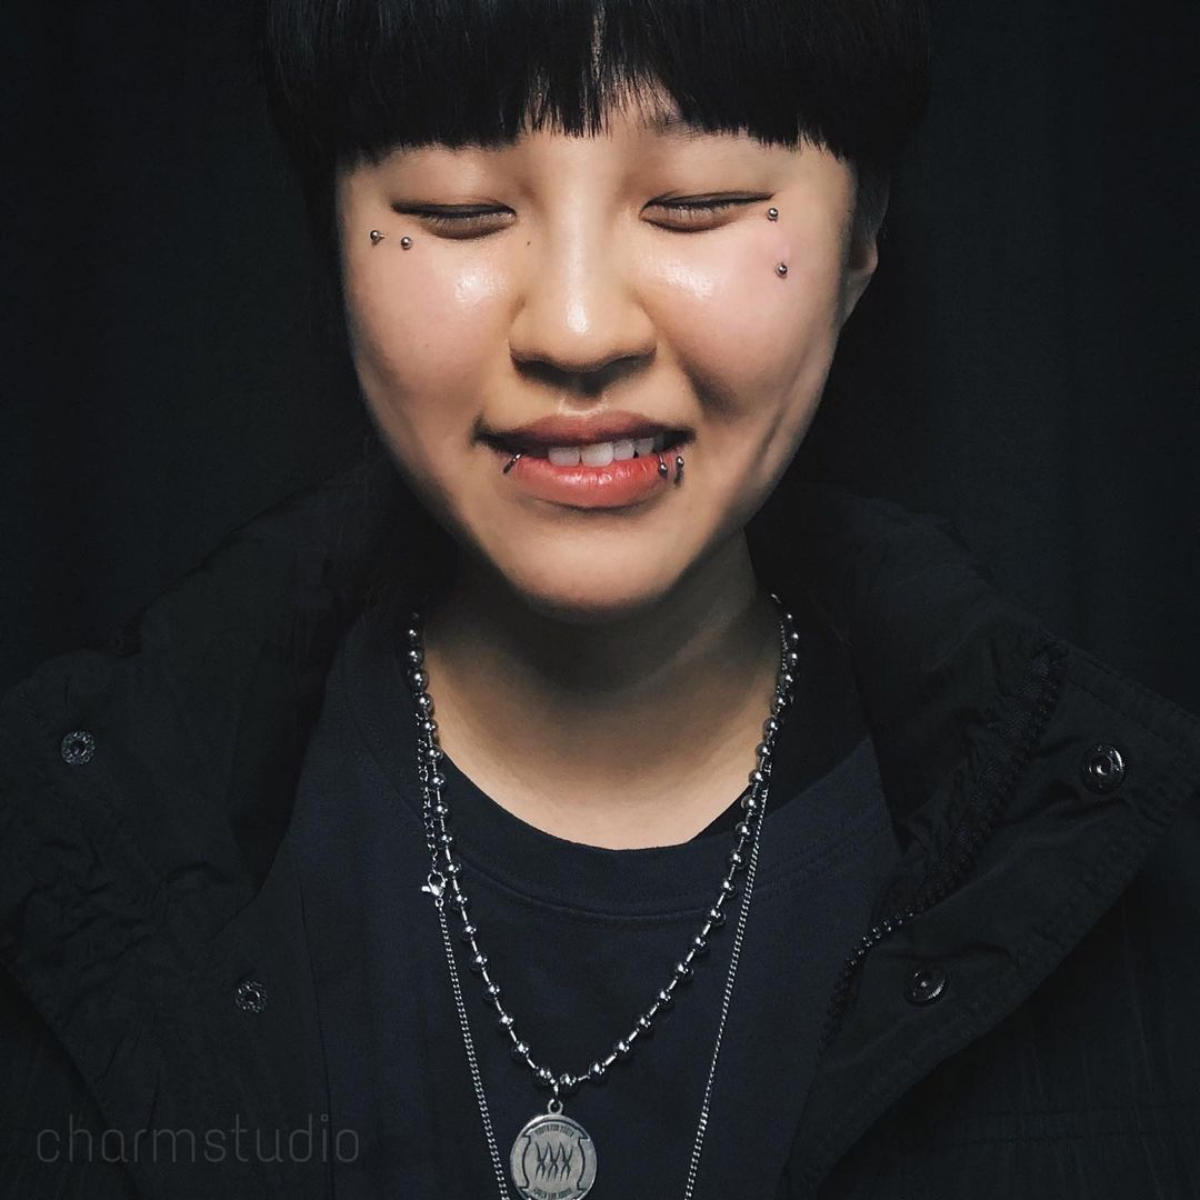
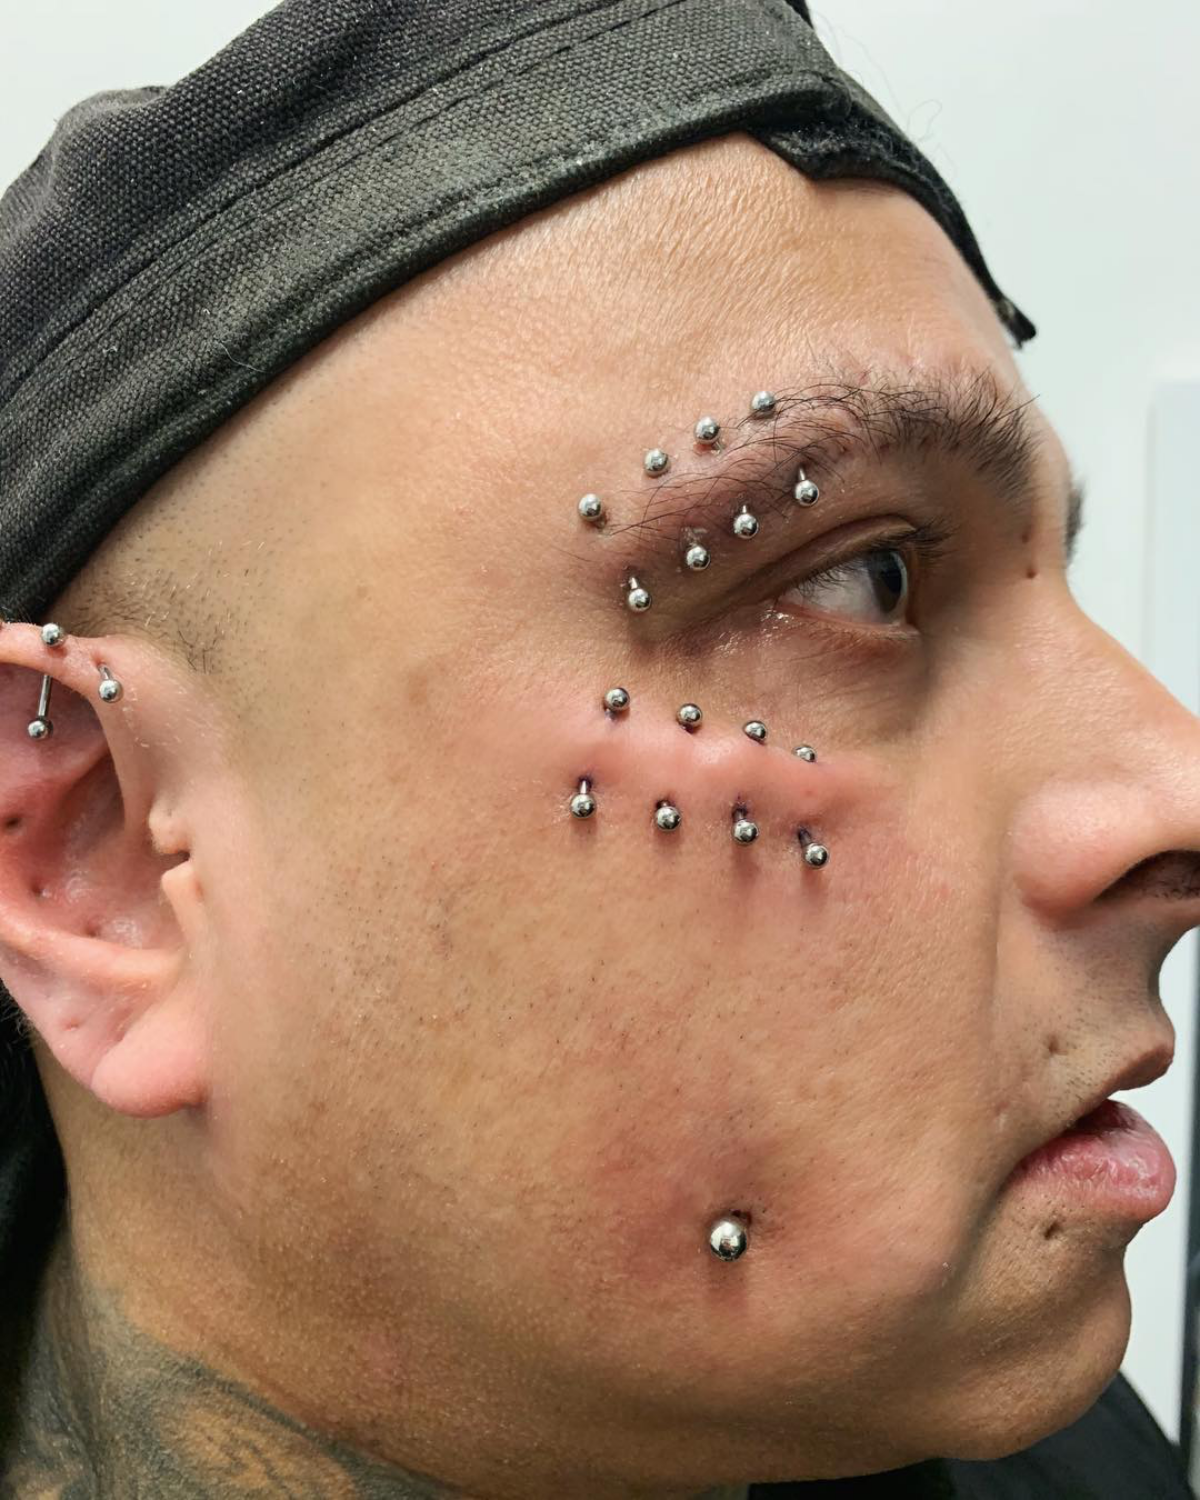
Before we even talk about needles and jewelry, we have to talk about the location. The anti-eyebrow is placed along the zygomatic arch—that’s your cheekbone. A skilled piercer won’t just plop it anywhere; they’ll assess the unique curves of your face to find a placement that’s both aesthetically pleasing and, more importantly, viable.
The success of this piercing almost entirely depends on having the right kind of tissue. You need enough loose, pliable skin over the bone. The pros do a simple “pinch test” to check. You can even try it yourself: gently pinch the skin on your high cheekbone where you’d want the piercing. Can you easily lift up a soft, squishy ridge of at least a quarter-inch of flesh, or does it feel really tight and close to the bone? That difference is what makes a good or bad candidate.
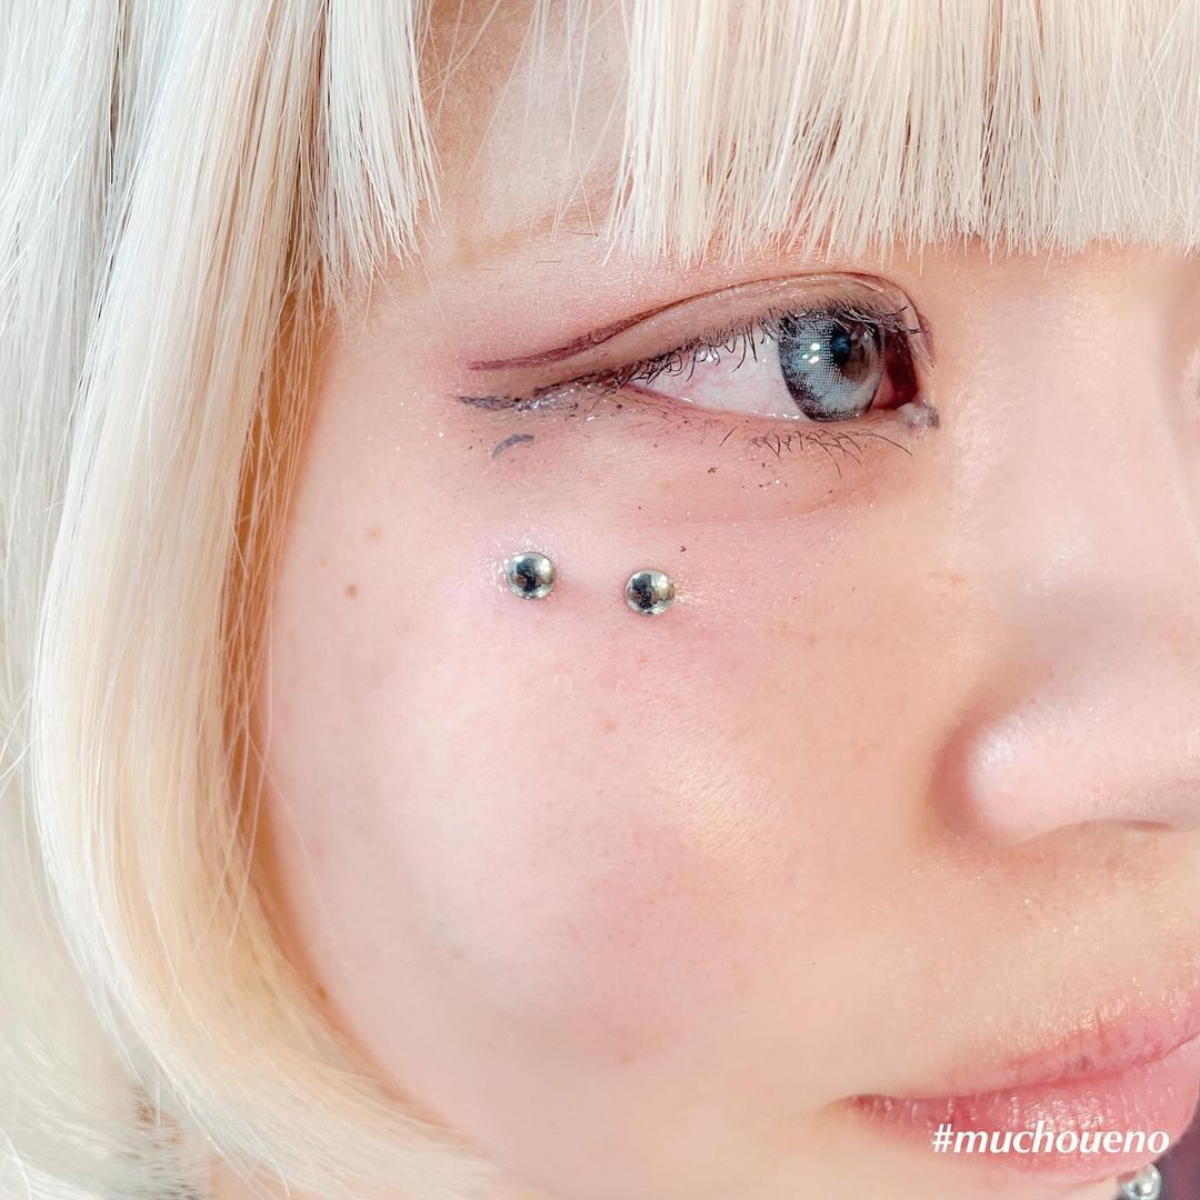
Think of it like a staple in a piece of paper. If the paper is loose, the staple sits fine. But if you pull the paper taut, the staple will start to tear its way out. Your skin is no different. The jewelry used, a 90-degree surface bar, acts just like that staple. (By the way, it’s a flat bar that sits under the skin with two posts that rise up at a right angle, NOT a curved barbell like you’d see in a navel piercing. A curved bar creates constant pressure and is guaranteed to reject). The jewelry has to rest in a relaxed pocket of tissue, free from constant tension from things as simple as smiling, squinting, or sleeping on your face.
Heads up! There’s also a major safety reason this needs a pro. The infraorbital nerve, which gives feeling to your lower eyelid and upper lip, runs right through this area. An inexperienced piercer who goes too deep could cause some serious, potentially permanent nerve damage. A professional’s deep understanding of facial anatomy is non-negotiable for your safety.

What a Safe Piercing Process Looks Like
Getting an anti-eyebrow piercing should feel calm, clean, and professional. If you feel rushed or the piercer seems dismissive of your questions, that’s your cue to walk out. Here’s what you should expect.
1. The Consultation (and The Cost)
First things first, find the right person. Look for a piercer with an extensive portfolio. And don’t just look at fresh piercings—they always look perfect. Ask to see photos of healed anti-eyebrow piercings that are at least a year old. That’s the real proof of their skill. A trustworthy piercer will also talk you through all the risks, including rejection and scarring.
Let’s talk money, because you need to be prepared. This is a specialized piercing. Expect to pay a service fee of anywhere from $60 to $100, depending on the studio’s location and the piercer’s experience. This fee does not usually include the jewelry. An implant-grade titanium surface bar will likely be another $50 to $90 on top of that. So, all in, you’re looking at $110 to $190 for a quality, safe procedure.

Oh, and a quick tip: If you wear glasses, bring them to your consultation! A great piercer will want to see where they sit on your face to ensure the piercing is marked in a spot that won’t get bumped and irritated all day long.
2. The Setup and Marking
Everything should be single-use or sterilized in an autoclave, and the piercer should open the sterile packages for the needle and jewelry right in front of you. The jewelry has to be implant-grade material, like ASTM F-136 titanium. It’s highly biocompatible, meaning your body is far less likely to have a bad reaction to it.
Marking is probably the most critical part of the whole process. After cleaning the area with a surgical scrub, the piercer will use a skin-safe marker to place two tiny dots for the entry and exit points. They’ll have you sit up, smile, frown, and make different faces to see how your skin moves. The goal is to find the “quietest” spot that will experience the least amount of movement. You should get to approve the marks in a mirror before anything else happens.
3. The Main Event
Some piercers use forceps, but many pros prefer a freehand technique for surface work, as it puts less stress on the tissue. They’ll ask you to take a deep breath in and exhale slowly. As you breathe out, they’ll pass the hollow needle through the skin from one mark to the other. You’ll feel a quick, sharp pinch and some definite pressure—most people put the pain around a 4 or 5 out of 10. It’s intense, but it’s over in a flash. The piercer then guides the surface bar in right behind the needle and screws on the ends. The whole thing takes just a few seconds.
Aftercare is Not a Suggestion, It’s a Requirement
Getting pierced is the easy part. The healing is where the real work begins. An anti-eyebrow can take a solid 6 to 12 months to fully heal, and even then, it remains delicate for life.
The Do’s of Healing
- Clean it simply. All you need is a sterile saline wound wash, which you can get for about $10-$15 at any pharmacy. Just make sure it ONLY contains 0.9% sodium chloride and water—no other additives. Lightly spray it on the piercing twice a day and let it air dry, or gently pat it dry with a clean paper towel.
- Leave it the hell alone (LITHA). Seriously. Besides cleaning, do not touch, twist, or fiddle with the jewelry. Your body is building a fragile tube of tissue (a fistula) inside; moving the jewelry just tears that new tissue.
- Be so, so careful. Towels, glasses, and shirt collars are now your enemies. When washing your face, work around the piercing. Try your best not to sleep on that side—a travel pillow can be a lifesaver here, as it forces you to sleep on your back. You can find one for about $20 online or at a travel store.
- Plan for a downsize. Good to know: After the initial swelling subsides (usually in 4-8 weeks), you’ll need to go back to your piercer for a “downsize.” They’ll swap the initial, slightly longer bar for a shorter one that sits more flush with your skin. This is a crucial step to prevent snags and future irritation.
The Absolute Don’ts
- No harsh chemicals. Never, ever use alcohol, hydrogen peroxide, antibacterial soap (like Dial), or ointments like Neosporin. They are way too harsh, kill off the healthy new cells, and will only cause major irritation.
- No swimming. Stay out of pools, hot tubs, lakes, and oceans for the entire healing period. They are full of bacteria just waiting to cause a nasty infection.
- Keep products away. Makeup, moisturizers, and sunscreens will clog the piercing channel and can lead to irritation bumps or infection. Keep a clear zone around the area.
- Don’t change the jewelry. Let your piercer do the first jewelry change during your downsize appointment. Changing it too early or improperly can ruin a perfectly happy piercing.
Is It Angry or Is It Infected? (And What About Rejection?)
Even with perfect care, surface piercings can be fussy. Knowing what you’re looking at is key.
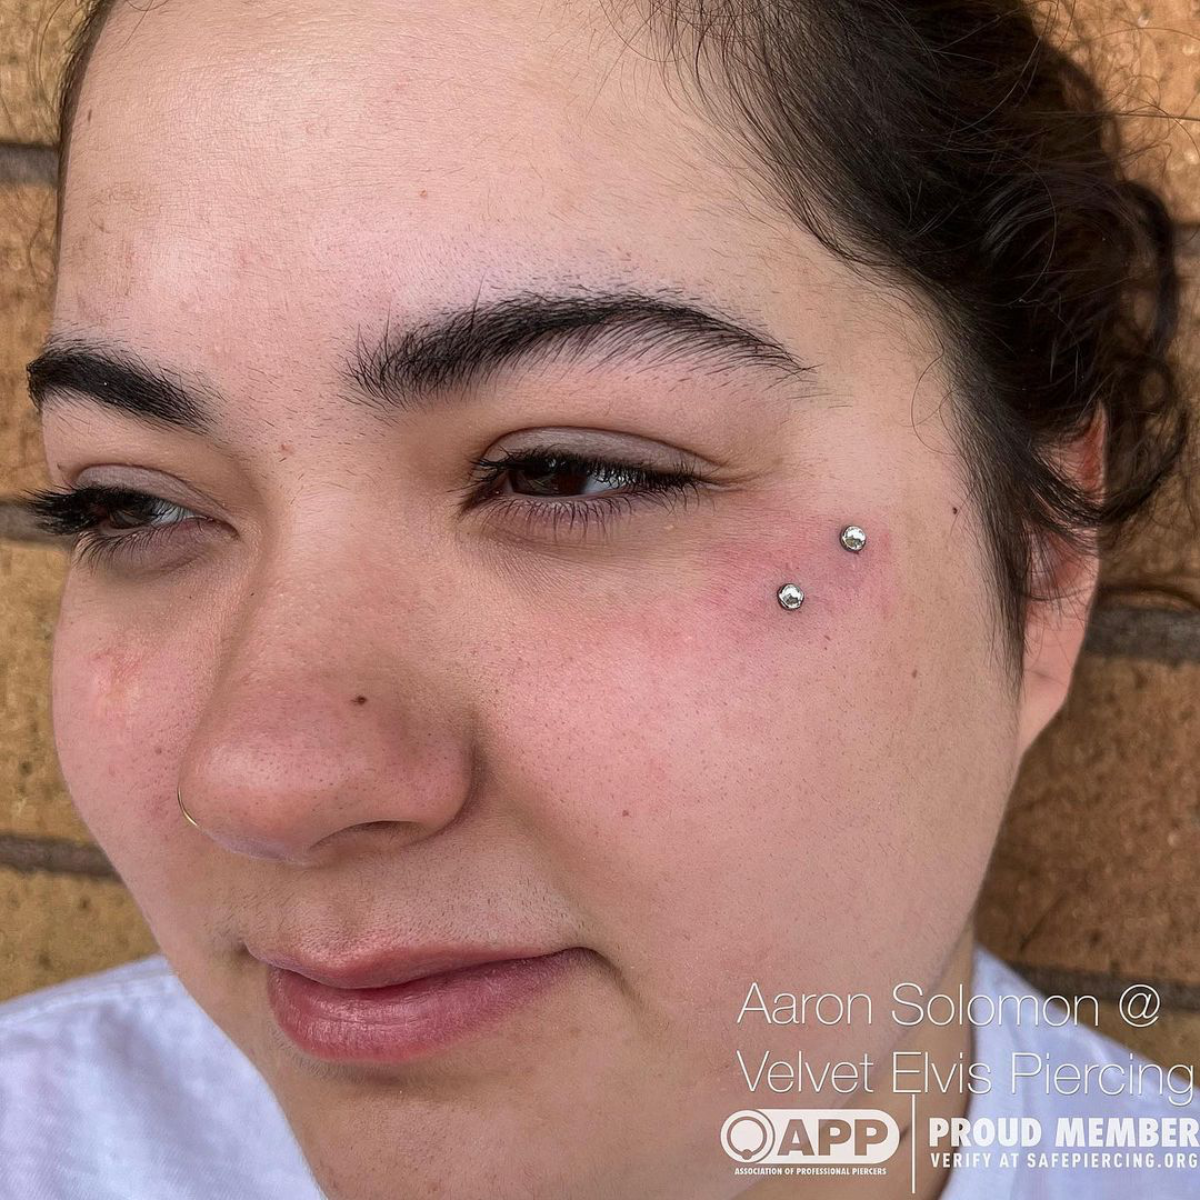
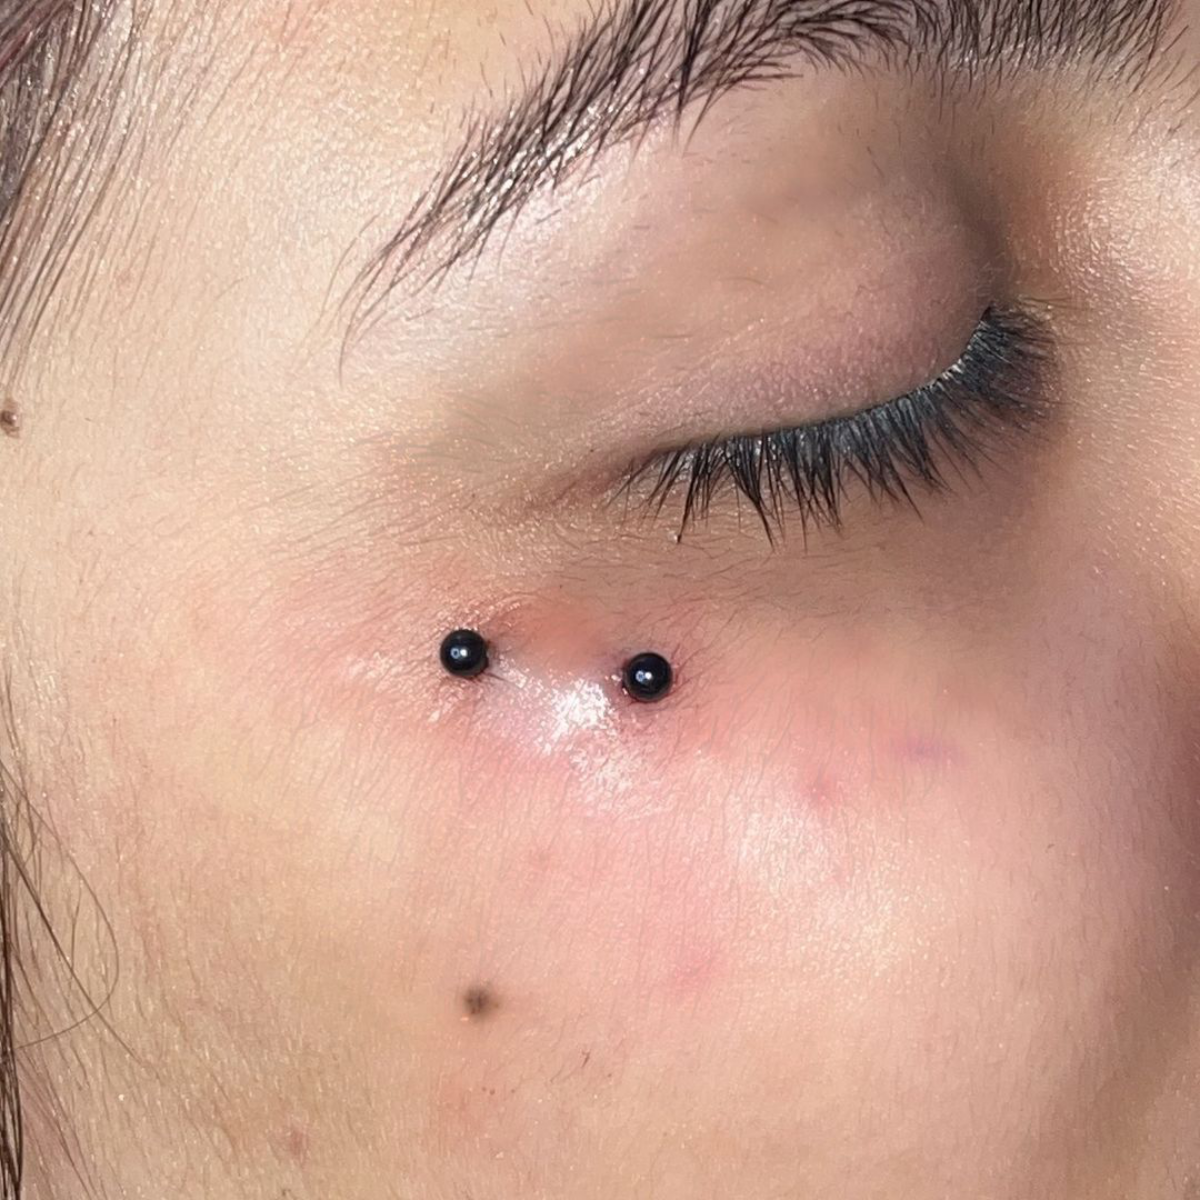
Normal healing and general irritation will involve some redness, mild swelling, and tenderness for the first few weeks. You may also see some clear or whitish fluid that dries into “crusties”—this is lymph fluid, and it’s a perfectly normal part of the process. If you snag it, you might get a little reddish irritation bump next to one of the holes. This is your piercing being angry, not infected.
An infection, however, is a whole different ball game. The signs are much more aggressive. Look for thick, opaque pus that’s yellow, green, or dark-colored. The area will likely have a radiating heat you can feel, and the pain will be more of a constant, throbbing ache. You might even see red streaks spreading out from the piercing site. If you see these signs, this is a medical issue. Do not try to self-treat; go see a doctor immediately.
Finally, let’s talk rejection. This is when your body slowly and methodically pushes the jewelry out. You’ll know it’s happening if you notice the skin over the bar getting thinner and redder. You’ll start to see more and more of the metal bar through your skin, and the entry holes might look like they’re stretching or moving. If you suspect this is happening, visit your piercer. It’s best to have them remove the jewelry before your body pushes it all the way out. This will seriously minimize the final scar. And yes, there will be a scar. Removed cleanly, it often heals into two small, dot-like marks. If it rejects fully, it can leave a more noticeable thin, discolored line. It’s just part of the risk you have to accept with this beautiful but demanding piercing.
Galerie d’inspiration

Implant-Grade Titanium (ASTM F-136): This is the non-negotiable standard for a new anti-eyebrow piercing. It’s nickel-free, lightweight, and biocompatible, significantly reducing the risk of irritation and rejection that this sensitive area is prone to.
Surgical Steel: Cheaper, but a gamble. This metal alloy often contains nickel, a common allergen that can provoke your body to push the piercing out. It’s simply not worth the risk for such a fragile placement.
For an anti-eyebrow, investing in quality titanium from a reputable brand like Anatometal or Industrial Strength isn’t an upgrade; it’s a necessity.
According to the Association of Professional Piercers (APP), proper placement is critical to the longevity of any surface piercing, as incorrect angles dramatically increase pressure on the tissue.
What does this mean for you? It means the piercer’s assessment is everything. They aren’t just looking for enough skin to pinch; they’re analyzing how your face moves when you smile and talk. The piercing must be placed parallel to the bone, in a spot with minimal movement, to avoid constant tension that inevitably leads to rejection.
Healing this piercing is a sensory experience. You’ll become hyper-aware of a part of your face you rarely thought about. It’s the subtle pressure when you smile, the caution you take when pulling a shirt over your head, and the careful ritual of a saline spray mist. It’s a delicate, daily negotiation with your own body, hoping it accepts this new, subtle glimmer on your skin.
Can my glasses or sunglasses cause my new piercing to reject?
Yes, and it’s a detail people often forget. If your frames rest on or even just brush against the jewelry, the constant, tiny micro-movements create irritation. This signals to your body that the piercing is a threat, encouraging it to push the jewelry out. Before getting pierced, put on your favorite pair of glasses and check the placement in the mirror. You need a clear, contact-free zone for the piercing to have any chance of survival.

- A dusting of sheer, shimmer-free powder can reduce excess shine around the piercing, making the jewelry the true focal point.
- Avoid applying liquid highlighter directly above the piercing, as it can migrate and irritate the area. Instead, apply it further up the cheekbone, toward the temple.
- Let the piercing shine on its own. Pairing it with heavy contour or blush underneath can create a visually cluttered and messy look.
Beyond the initial piercing fee, the real investment is in the aftercare and potential jewelry changes. To give your anti-eyebrow the best chance, factor these into your budget:
- Sterile Saline Solution: A can of NeilMed Piercing Aftercare or a similar sterile saline mist is essential for daily cleaning without irritating additives.
- Jewelry Downsizing: After the initial swelling subsides (around 4-8 weeks), you’ll likely need to see your piercer to have a shorter bar installed. This prevents snagging and is crucial for long-term health.


