Your Face Isn’t Going Anywhere: A Real-World Guide to Festival-Proof Makeup
I’ve been a professional makeup artist for over fifteen years, and let me tell you, nothing prepares you for the chaos of a music festival. My first big summer gig was a trial by fire. I spent an hour creating this gorgeous, intricate airbrushed design on a performer, only to watch it melt into a sad, colorful puddle by mid-afternoon. It was humbling, to say the least.
In this article
That day taught me a hard lesson: festival makeup isn’t just about looking cool. It’s an endurance sport for your face. It demands a totally different game plan, one that’s built on solid techniques, smart product choices, and a healthy respect for sun, sweat, and surprise rain showers.
So, this isn’t going to be another gallery of pretty pictures. This is the nitty-gritty guide I wish I had when I was starting out. It’s what I teach my team and what I use on clients who need a look to survive 12 hours of dancing. We’re going to cover how to build a look that’s not only stunning but also durable and, most importantly, safe for your skin.
First Things First: Prepping Your Canvas
Before you even think about color, the real work begins. A flawless, long-lasting look is built on a perfectly prepped base. Honestly, the number one mistake people make is just slapping makeup onto their bare face and hoping for the best. You’re setting yourself up for a makeup meltdown before you even leave the house.
Know Your Skin, Know Your Prep
Your skin type is the boss here—it dictates everything. You can’t use the same prep for oily and dry skin and expect it to hold up in extreme weather. It just won’t work.
- For Oily or Combo Skin: Your main enemy is oil, which loves to break down makeup. Start with a simple, gentle foaming cleanser, then follow up with a lightweight, oil-free moisturizer. And here’s the key: let that moisturizer sink in for a solid 5-10 minutes. If you apply primer right away, it just turns into a slippery mess with the moisturizer and won’t do its job.
- For Dry Skin: Your mission is to hydrate, hydrate, hydrate to prevent makeup from flaking or clinging to dry patches. Use a creamy, hydrating cleanser and a richer moisturizer with ingredients like hyaluronic acid. Again, give it time to fully absorb. A quick spritz of a hydrating facial mist before you prime can be a game-changer.
No matter what, start with a clean face. Any leftover dirt or oil will stop your primer and foundation from sticking properly.
Primer: The Unsung Hero of Longevity
Primer is, without a doubt, the most important product for making your makeup last. It creates a barrier between your skin and your makeup, smoothing everything out and giving your foundation something to grab onto.
Oh yeah, and not all primers are the same. Pros often use a couple of different types on one face.
- Gripping Primers: These feel a bit tacky and literally act like double-sided tape for your foundation. They’re fantastic for all-over use when you need serious staying power. For a great budget-friendly option, you can grab the e.l.f. Power Grip Primer for about $10. If you want to splurge, the Milk Makeup Hydro Grip is a pro favorite for around $38.
- Pore-Filling Primers: These are usually silicone-based and have a silky, slippery feel. They’re incredible for filling in fine lines and pores, especially around the nose and on the forehead. They create a super smooth canvas but aren’t always the best at controlling oil.
- Mattifying Primers: Built for oily skin, these contain ingredients that soak up excess oil all day. A little trick I use on almost everyone is to apply a mattifying primer just on the T-zone (forehead, nose, and chin), even on clients with dry skin. It’s a targeted solution for the area that gets shiny first.
Building a Base That Will. Not. Budge.
With your canvas prepped, it’s time to build the base. The secret here is thin layers. A single thick, heavy coat of foundation is a recipe for a cakey, sliding disaster. Multiple thin, well-blended layers are the way to go.
Look for foundations labeled “long-wear” or “water-resistant.” A lightweight serum foundation feels nice, but it won’t survive a festival. I tend to prefer long-wear liquids, like L’Oréal Infallible Fresh Wear (around $16) or the iconic Estée Lauder Double Wear (around $48), as they’re more flexible in the heat.
For application, please use a damp makeup sponge. A brush can leave streaks and often applies too much product. A damp sponge lets you build up coverage in controlled, paper-thin layers. Just remember to stipple or bounce it on the skin—don’t wipe! Wiping just pushes product around; stippling presses it into the skin for a seamless finish.
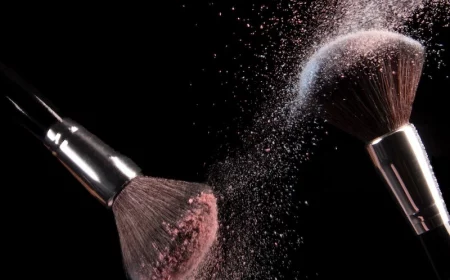
The Magic of Setting Powder
Setting your liquids and creams with powder isn’t optional; it’s a law of makeup physics. Powder absorbs moisture and oil, locking everything in place for a transfer-resistant finish.
For festival jobs, I only use finely milled, translucent loose powder. Pressed powders can sometimes look heavy and don’t absorb oil as well. You can find classic, budget-friendly options like Coty Airspun for under $10, or high-end versions like the famous Laura Mercier powder for about $43. Using your damp sponge, press the powder generously into areas that get oily or crease, like your T-zone and under your eyes. Let it “bake” for a few minutes before dusting off the excess with a big fluffy brush.
The Pro Secret: Layering Your Setting Spray
Most people use setting spray as the very last step. But the pros? We use it between layers. This is probably the most effective trick for a truly bulletproof face.
Here’s the sequence. By the way, this adds maybe 5 extra minutes to your routine but can buy you 5 extra hours of wear time.
- After skin prep, but before foundation, give your face a light mist of setting spray.
- Apply your foundation and concealer.
- Mist your face with setting spray again and let it dry completely.
- Press in your setting powder.
- Apply all your other powders (bronzer, blush, eyeshadow).
- As the final step, give your face a good, generous spray to lock it all down.
This method basically laminates each layer, creating a flexible but incredibly durable shield.
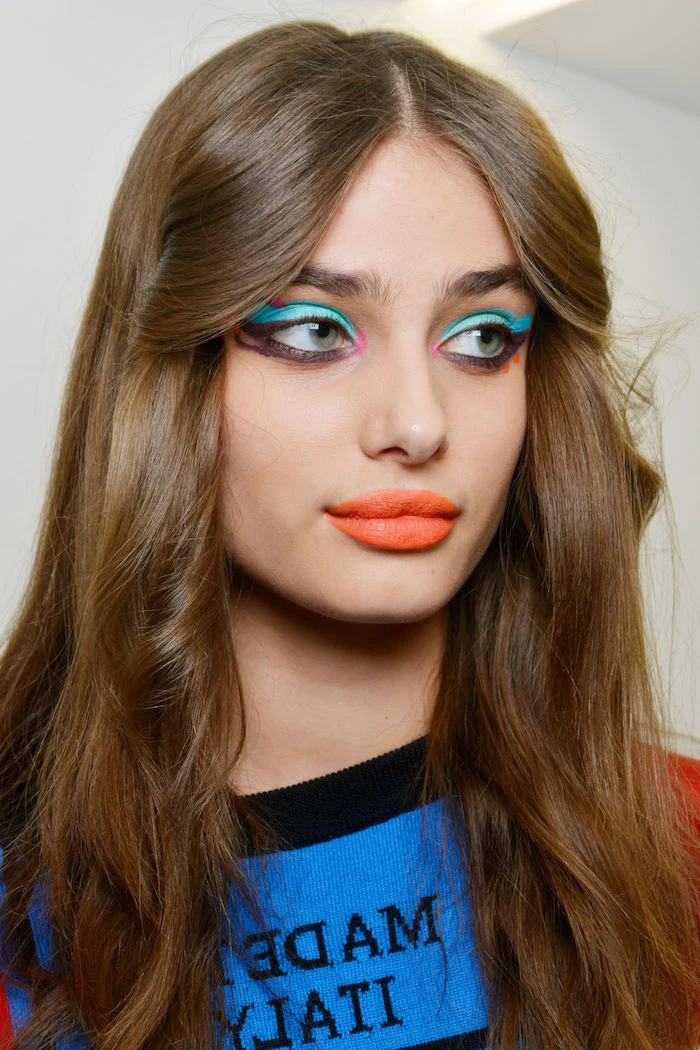
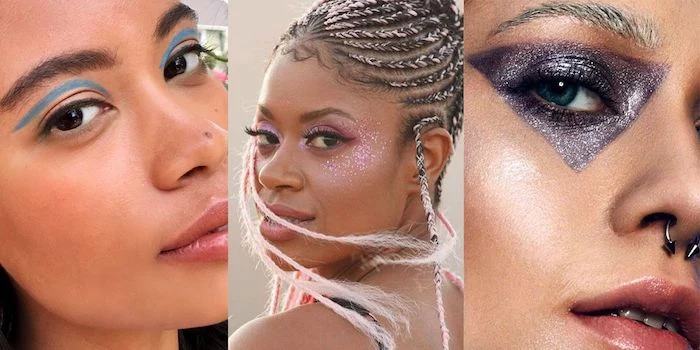
The Fun Part: Color, Glitter, and Gems
Okay, now for the artistry! But this is also where safety becomes a huge deal, especially with anything you put near your eyes.
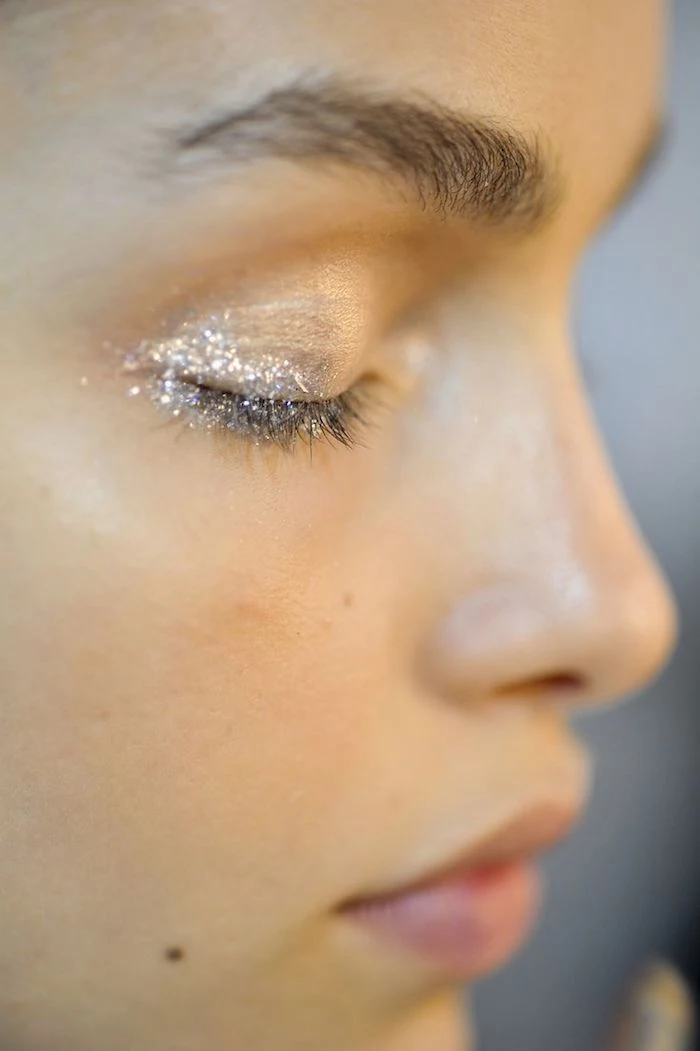
A Critical Warning About Glitter
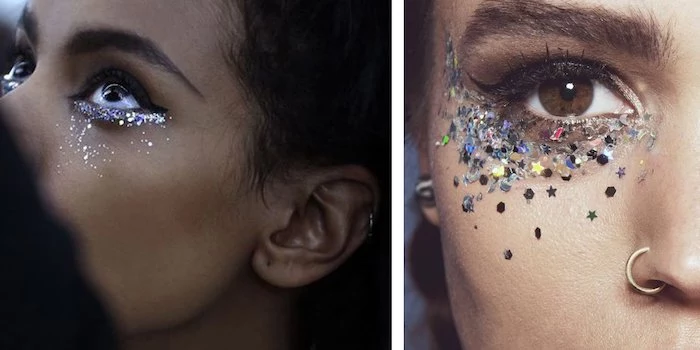
If you only listen to one piece of advice, let it be this: NEVER, ever use craft glitter on your face or body. I can’t say this loudly enough. Craft glitter is made of sharp-edged metal or plastic that can seriously scratch your cornea and cause permanent eye damage.
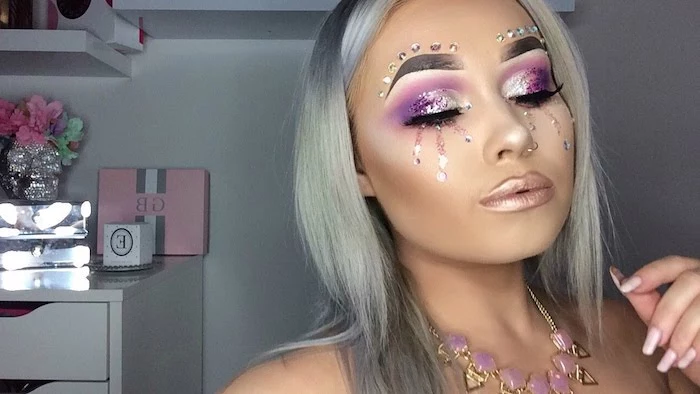
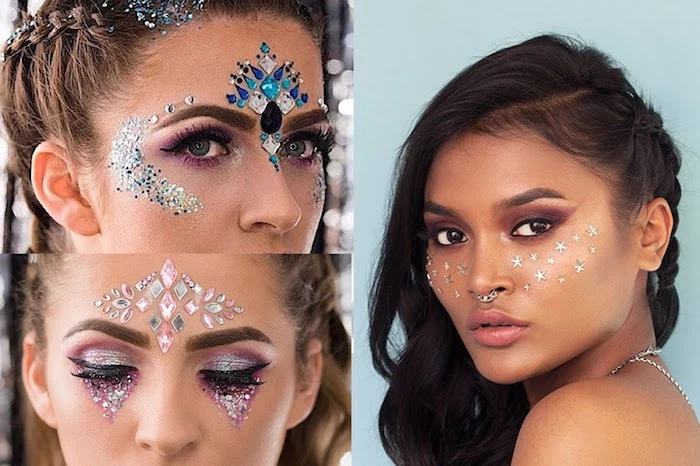
Always use cosmetic-grade glitter. It’s made from skin-safe plastic and cut into rounded shapes to prevent injury. You can tell the difference because reputable brands will always state it’s “cosmetic-grade” or “body-safe.” Look for it from brands like Lit Cosmetics or on pro makeup websites. If it’s in the scrapbook aisle at a craft store, leave it there!
Getting Things to Stick (The Right Way)
How you stick on your glitter and gems is just as important as the gems themselves. Eyelash glue is okay for tiny things, but for heavier pieces, you need something stronger.
- For Loose Glitter: Use a dedicated glitter primer or gel. It provides a tacky base that the glitter will grab onto.
- For Rhinestones and Gems: This is where you need to choose your adhesive wisely. Spirit gum is a traditional theatrical glue, but it gets brittle and can irritate the skin. Honestly, the gold standard is a prosthetic adhesive. It’s a medical-grade, water-based acrylic glue that’s skin-safe, dries clear, and stays flexible. You can find a small bottle of a pro favorite, Pros-Aide, online for about $10-$15, and it’s worth every penny.
A quick tip I learned the hard way: think about where you’re placing gems. I once put a big, beautiful rhinestone right on a singer’s smile line, and it flew off mid-song. Trust me, stick to flatter, less mobile parts of your face like the forehead, temples, or high on the cheekbones.
The Final Lockdown: Choosing a Real Sealant
Heads up! Not all setting sprays are created equal. Many popular sprays are just mists that melt powders into the skin for a dewier look. They feel nice, but they do very little to waterproof your makeup.
For a festival, you need a true makeup sealant. These are often sold by theatrical brands and form an actual protective film over your makeup. They often contain alcohol, which is what gives them their serious waterproofing power. Hold the bottle about 8-10 inches from your face, close your eyes tight, and spray until your face is visibly damp. Then, don’t touch it! Let it air dry completely (a handheld fan helps) so that film can form properly.
In a Rush? The 3-Step Lifesaver
Look, I get it. Sometimes you’re running late. If you only have time to do the bare minimum for longevity, focus on these three things:
- A Gripping Primer: After cleansing, get a good tacky primer on your skin. This is your foundation’s best friend.
- Setting Powder: After your foundation, press in a translucent powder, especially in your T-zone. Don’t skip this.
- A Real Sealant: Douse your face in a true makeup sealant (not just a hydrating mist!). This is the final armor.
These three steps will give you the most bang for your buck and dramatically increase your makeup’s wear time.
The Aftermath: Safe Removal and Skin Recovery
Taking this all off is just as important as putting it on. All those heavy-duty products can wreck your skin if you don’t remove them properly. A simple makeup wipe is not going to cut it here; you’ll just end up scrubbing and irritating your skin.
The best method is a “double cleanse.”
- First, an Oil Cleanse: Massage a cleansing oil or balm onto your dry, fully made-up face. The oil will break down everything—waterproof makeup, sunscreen, and even that strong prosthetic adhesive. Just work the oil around the edges of any gems until they loosen. Never pull them off!
- Second, a Water-Based Cleanse: Once everything is dissolved, add a little water to your face to emulsify the oil (it’ll turn milky), rinse, and then wash again with your regular gentle cleanser. This gets rid of any remaining residue.
Afterward, be nice to your skin. It’s been through a lot. Use a simple hydrating serum and moisturizer. Maybe a calming aloe mask. Just let your skin breathe and recover before you do it all again.
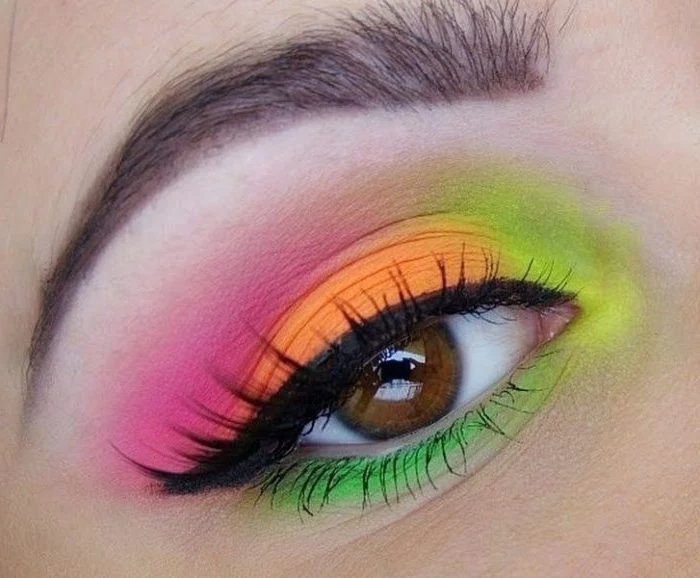
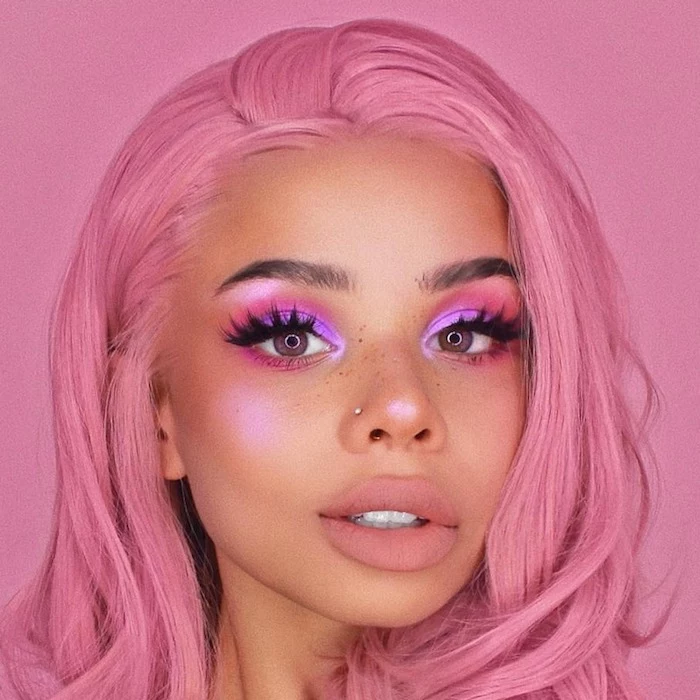
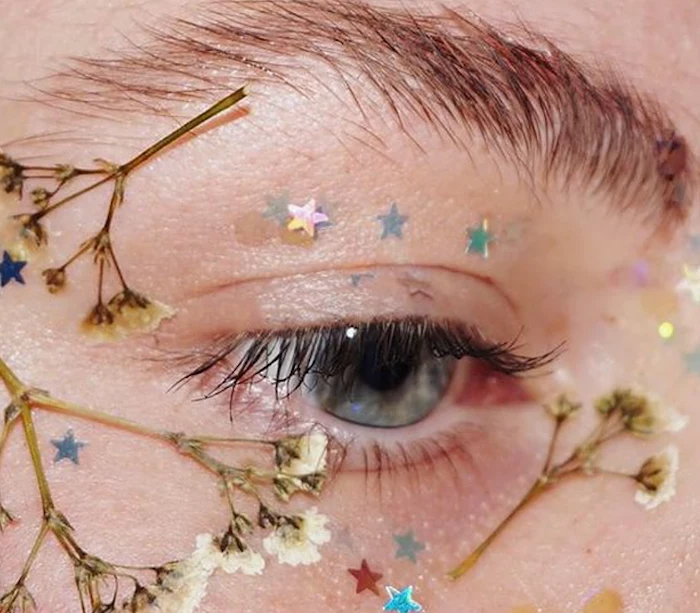
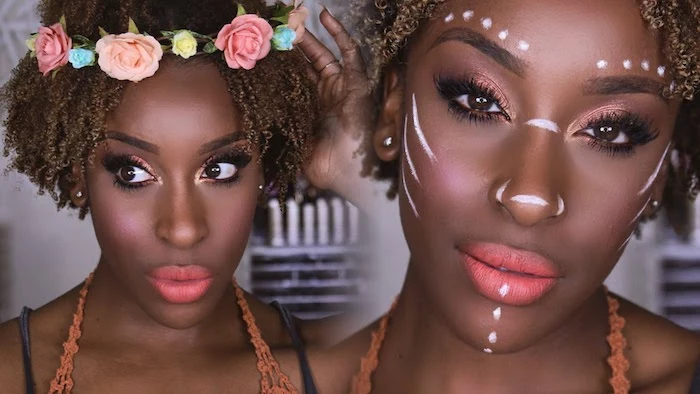
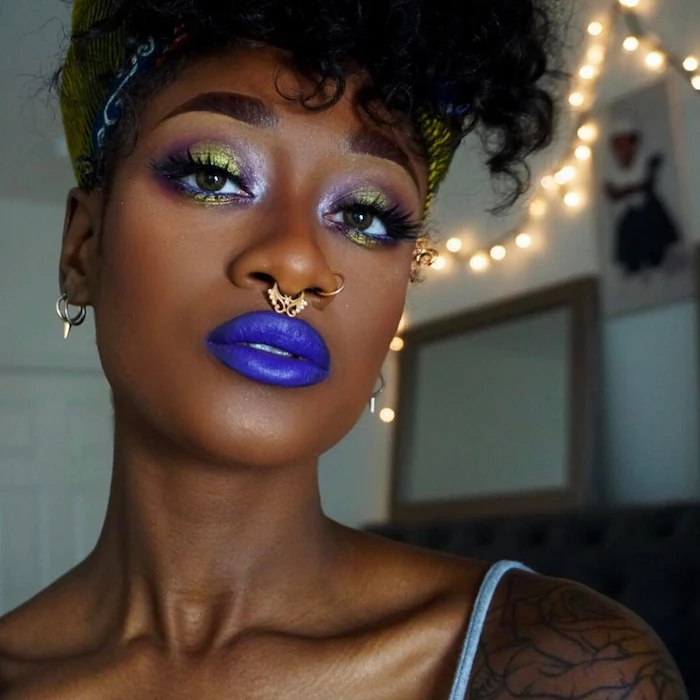
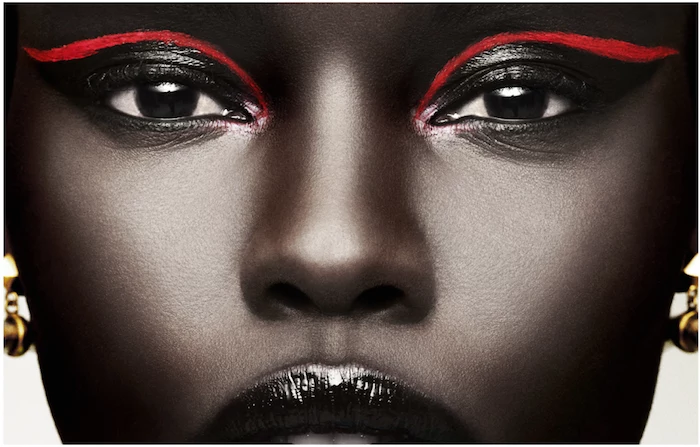
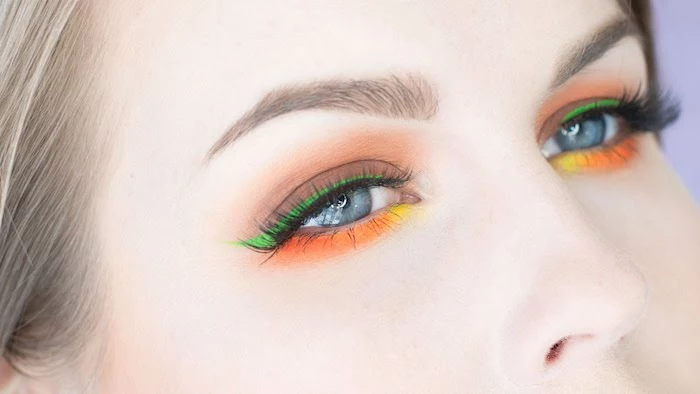
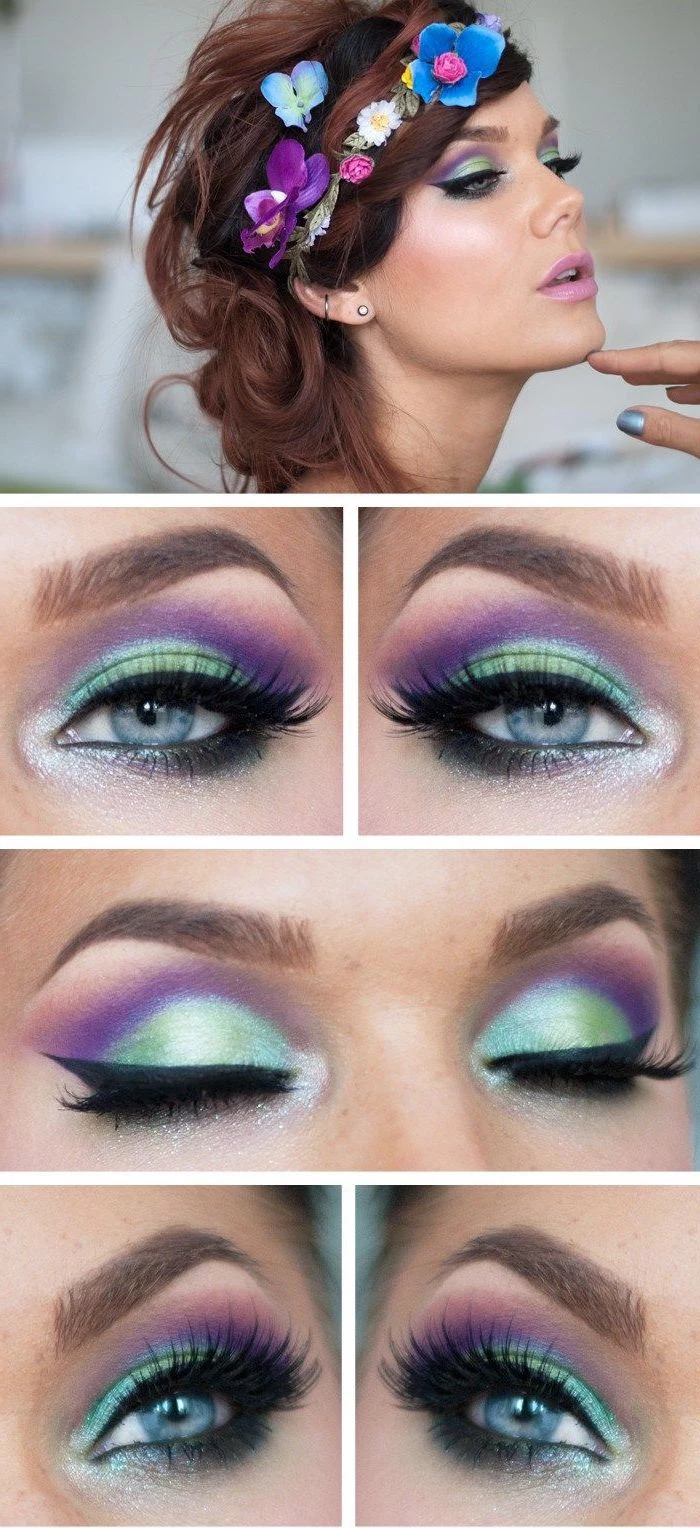
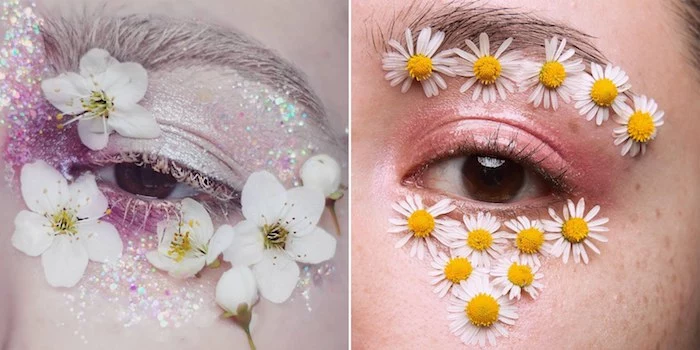
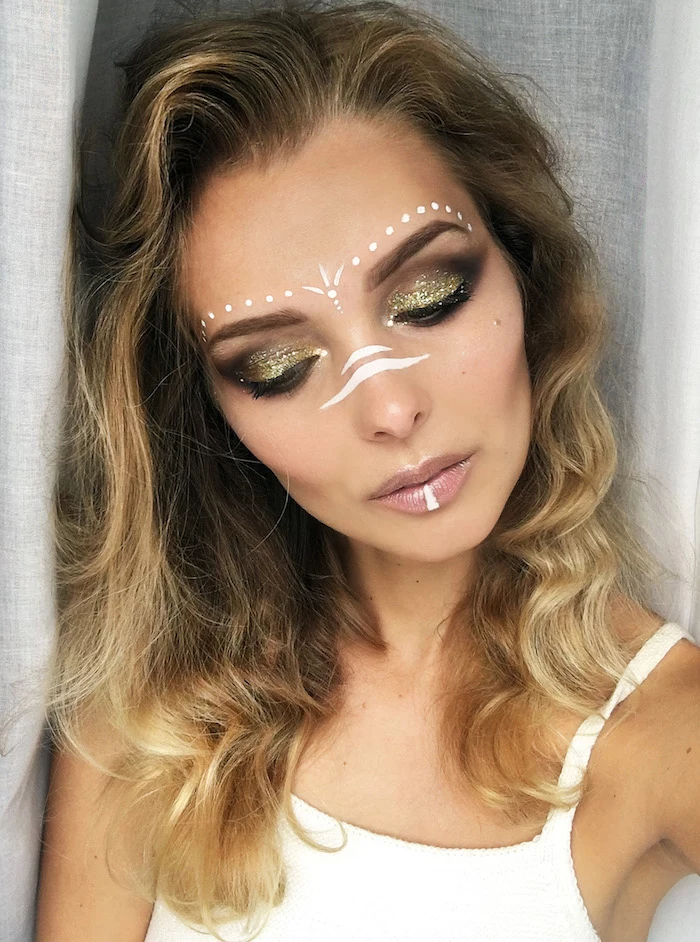
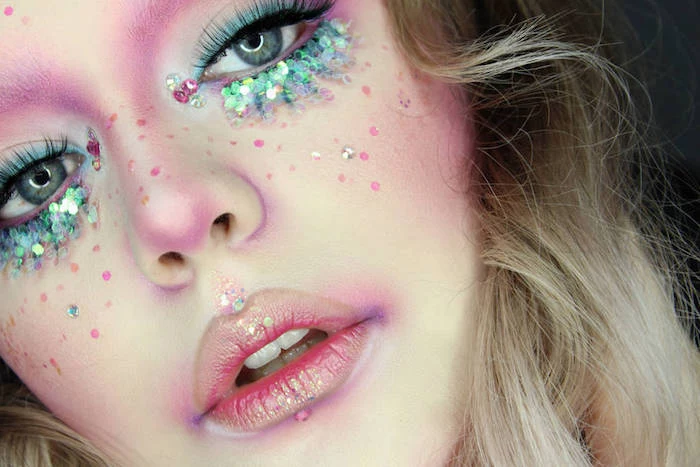
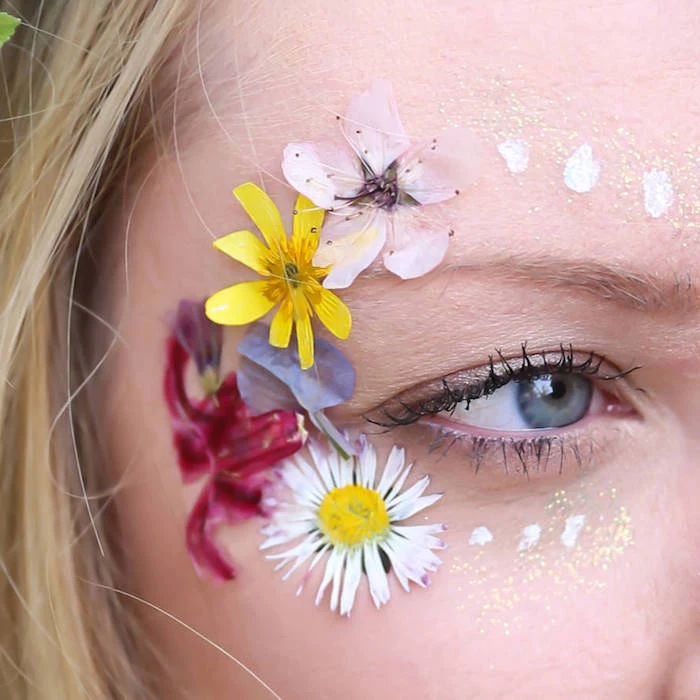
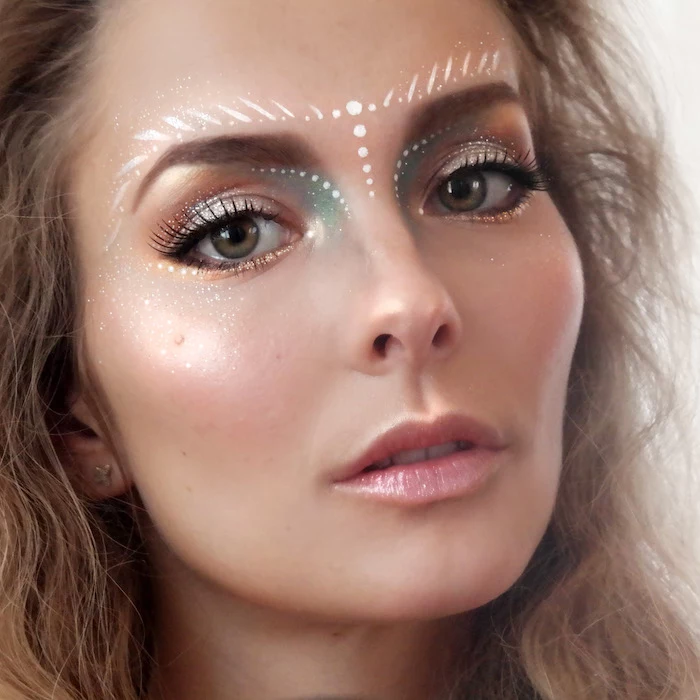
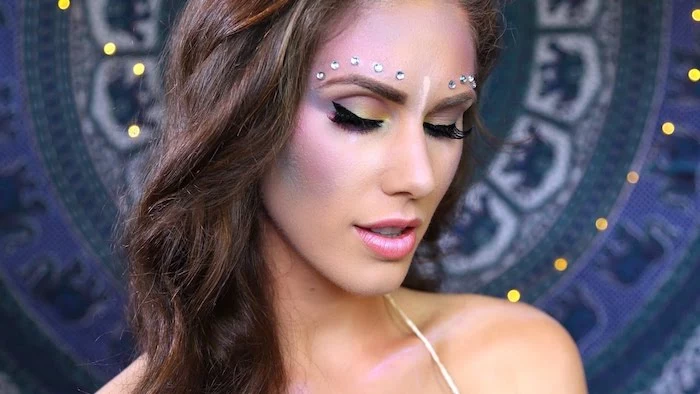
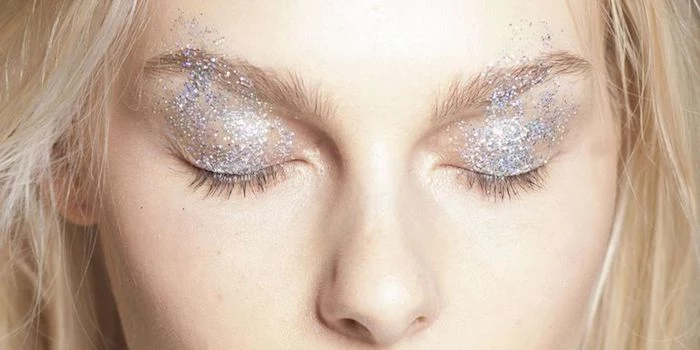
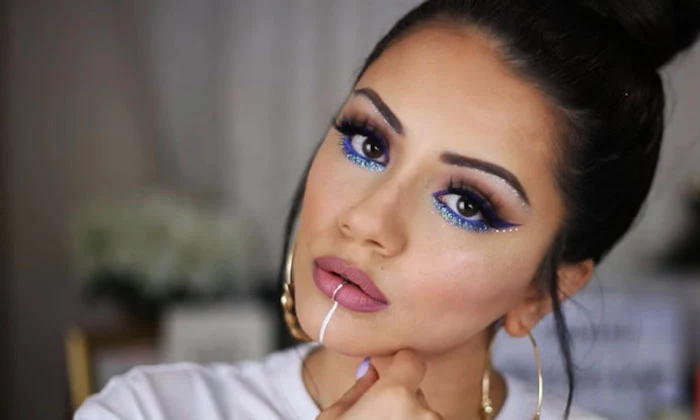
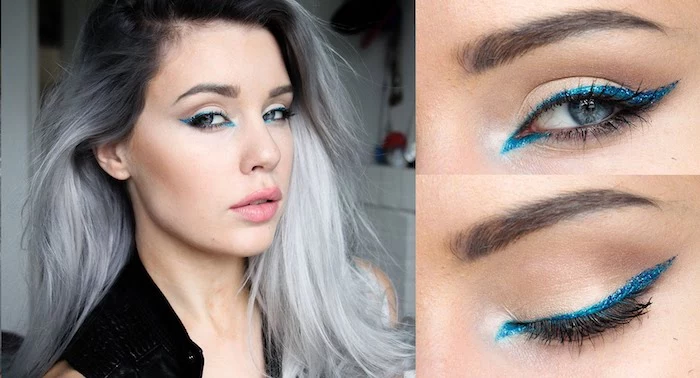
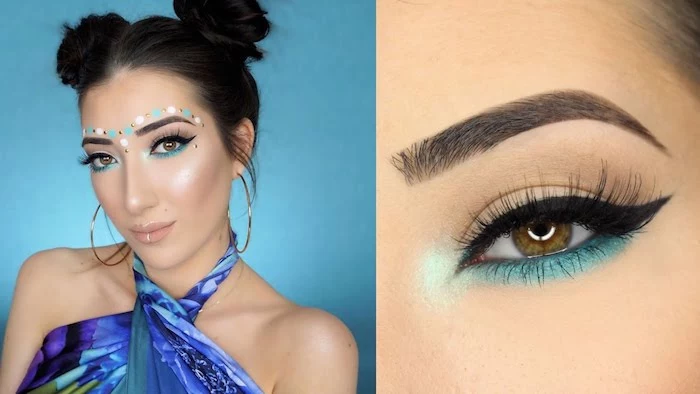
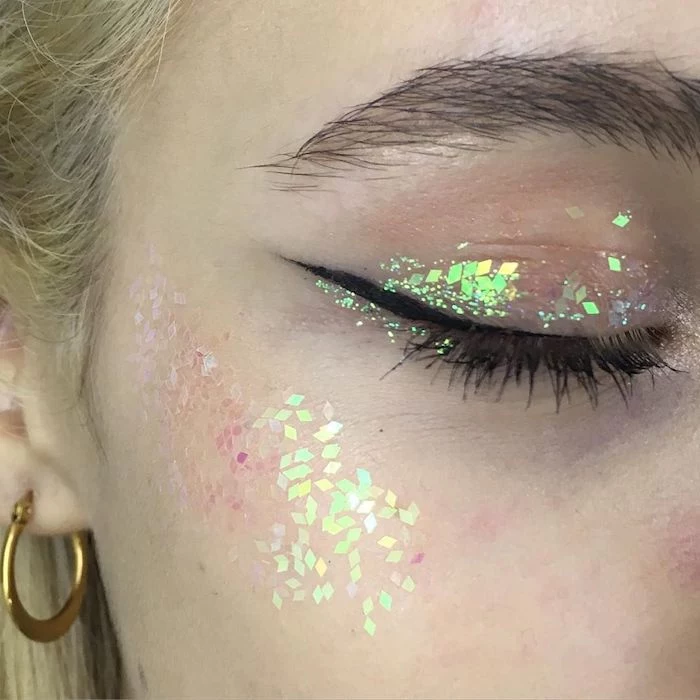
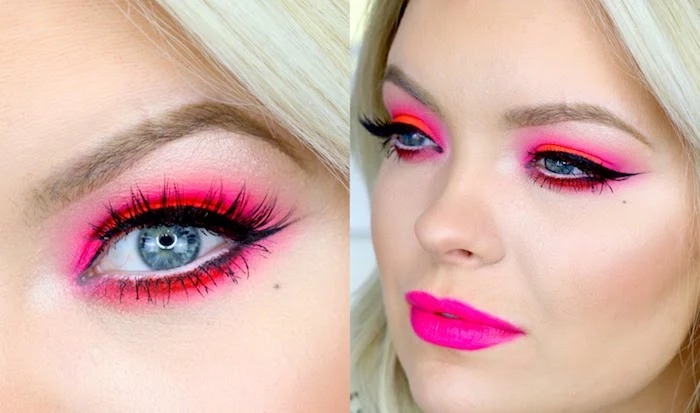
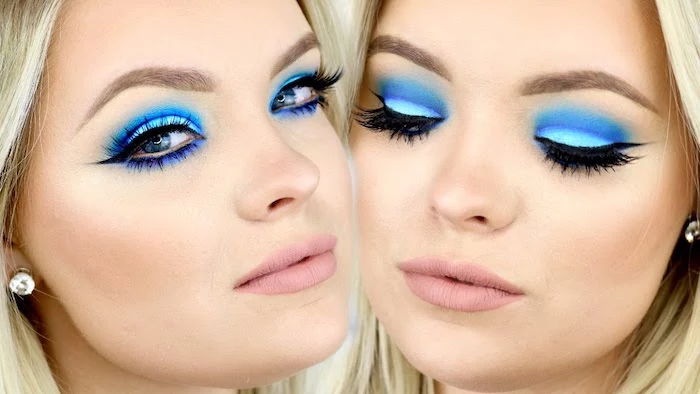
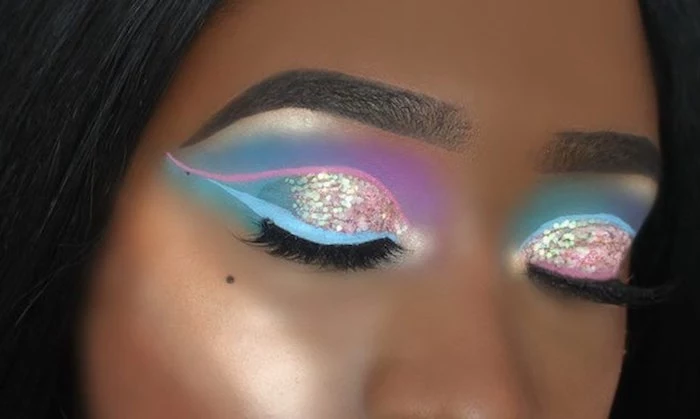
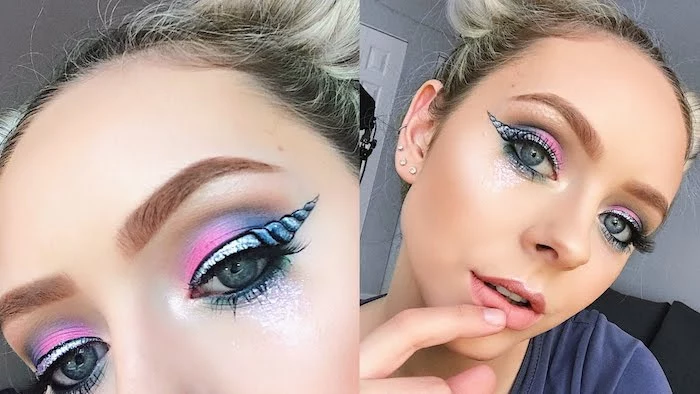
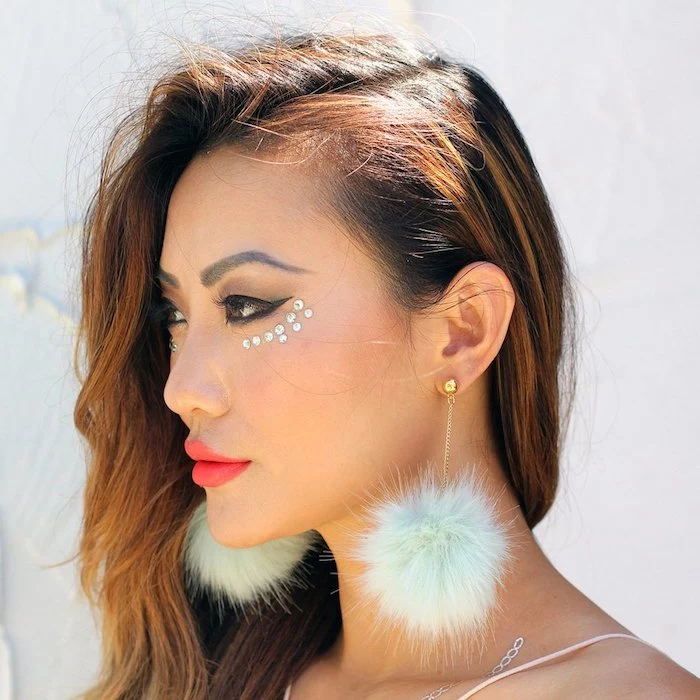
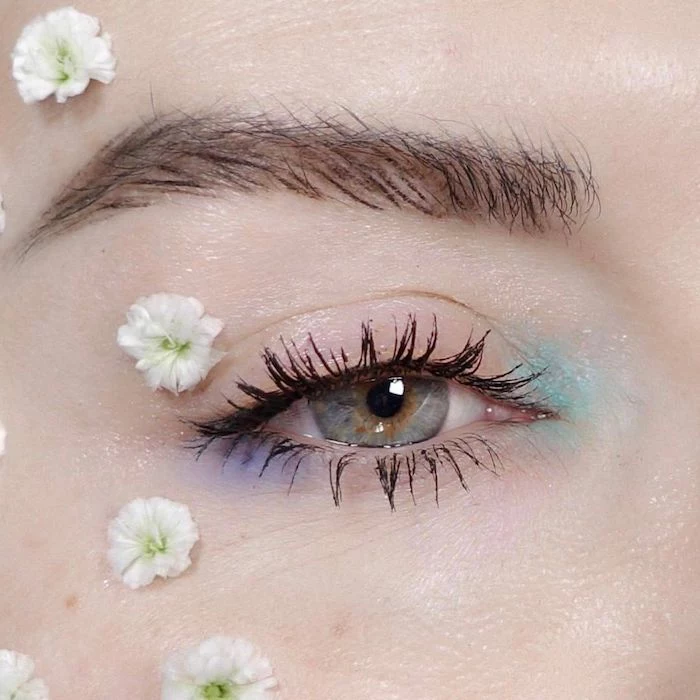
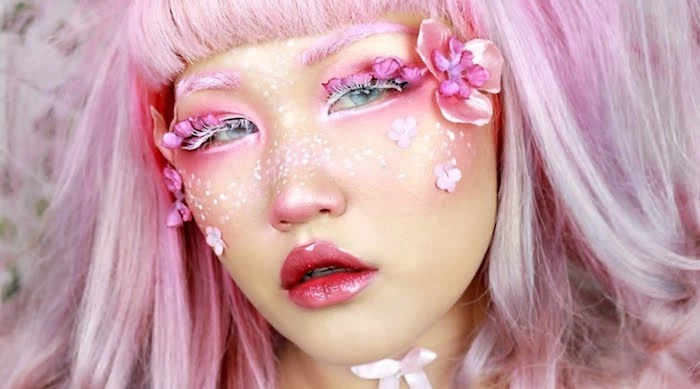
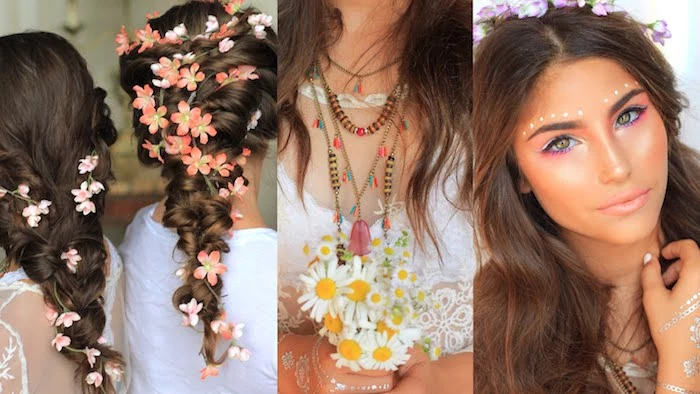
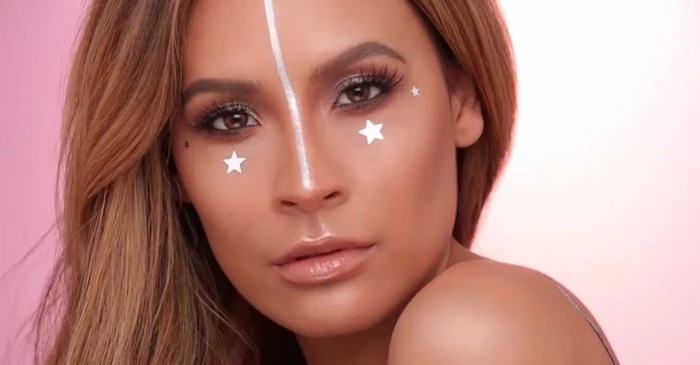
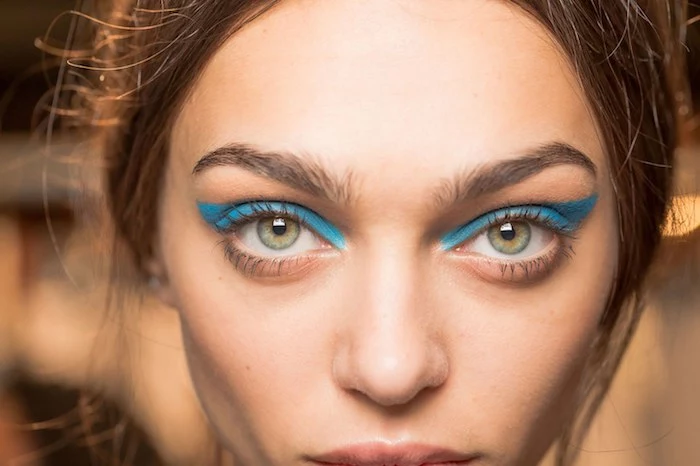
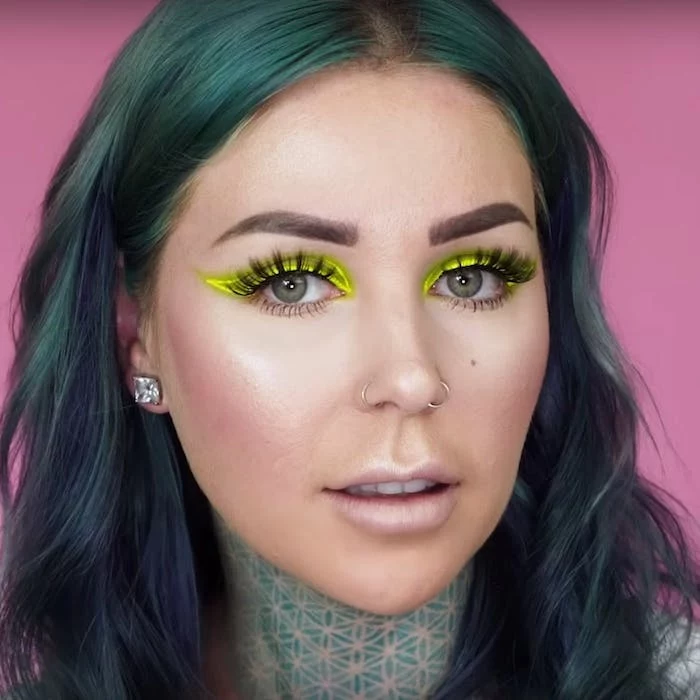
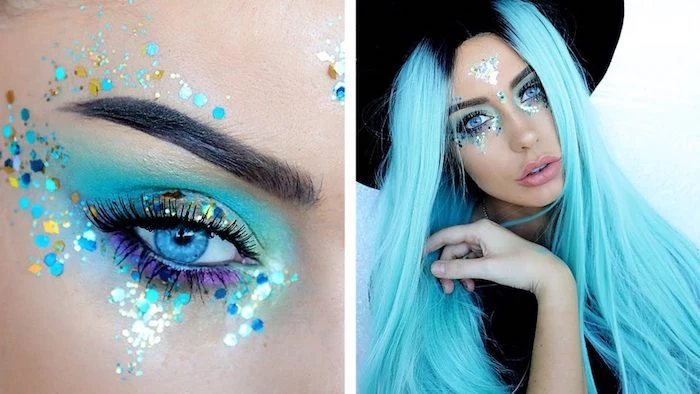
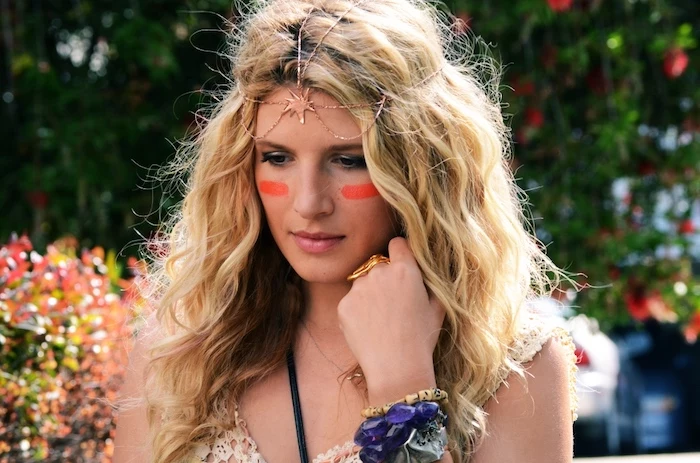
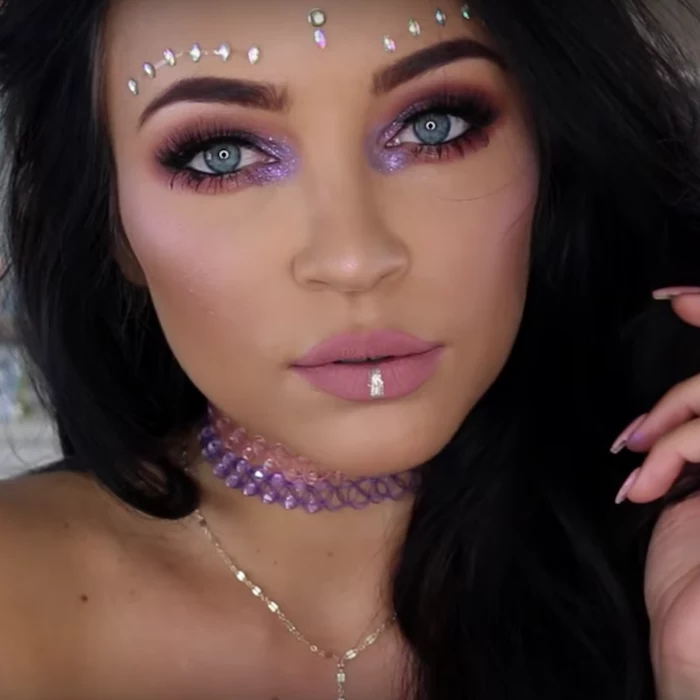
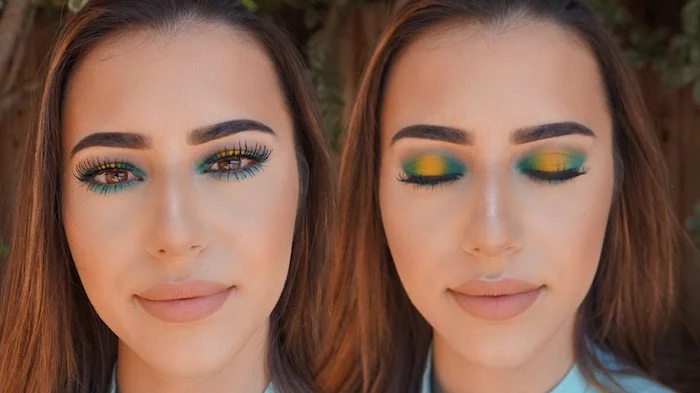
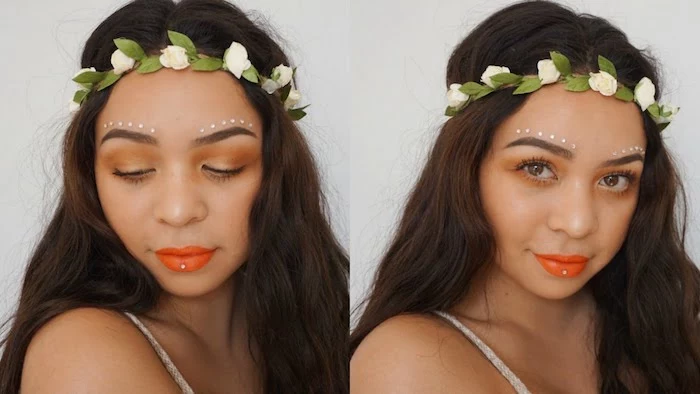
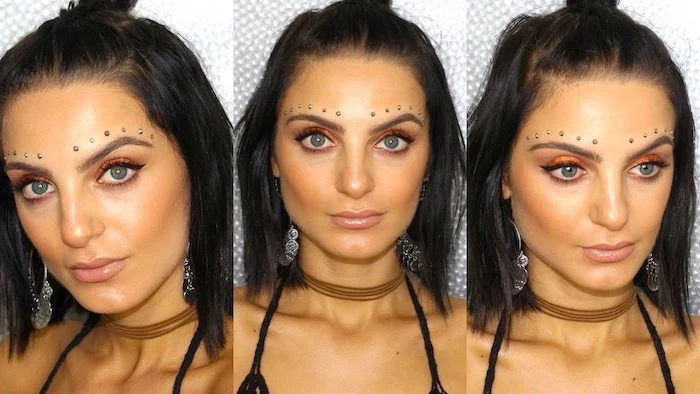
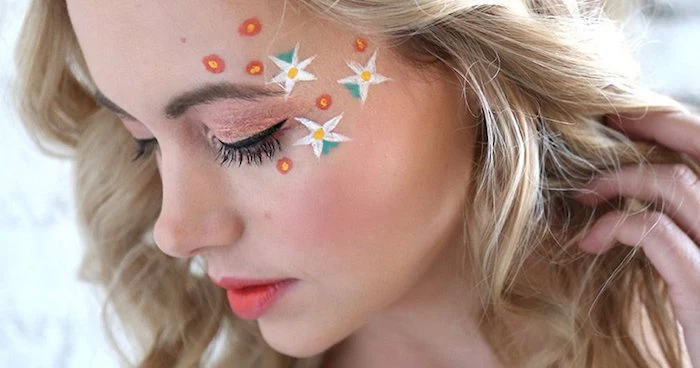
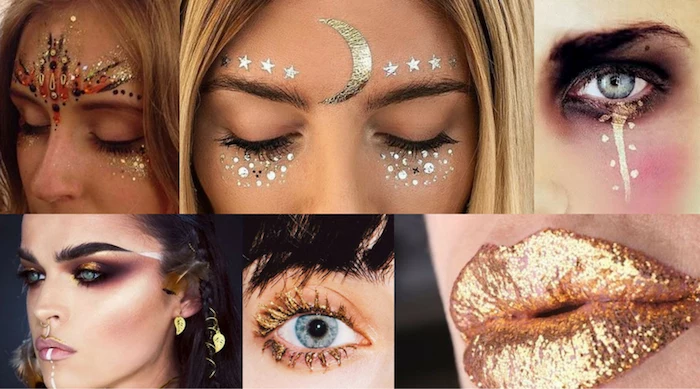
Inspiration Gallery
The essential touch-up kit: Forget your entire makeup bag. For quick fixes between sets, all you need is a tiny pouch with these essentials:
- Blotting papers (like those from Fenty Beauty) to absorb oil without disturbing makeup.
- A travel-size setting spray to re-hydrate and lock everything back in.
- The lipstick or gloss you’re wearing.
- A few cotton swabs for cleaning up smudges.

A good setting spray works by forming a flexible, breathable film over the makeup, which helps to shield it from sweat, humidity, and friction.
How do you make lipstick last through a day of singing, eating, and drinking?
The secret is layering. Apply a long-wear liquid lipstick like Maybelline’s SuperStay Matte Ink. Let it dry completely. Dust a tiny amount of translucent powder over your lips, then apply a second thin coat of the lipstick. This creates a nearly indestructible finish that won’t budge.
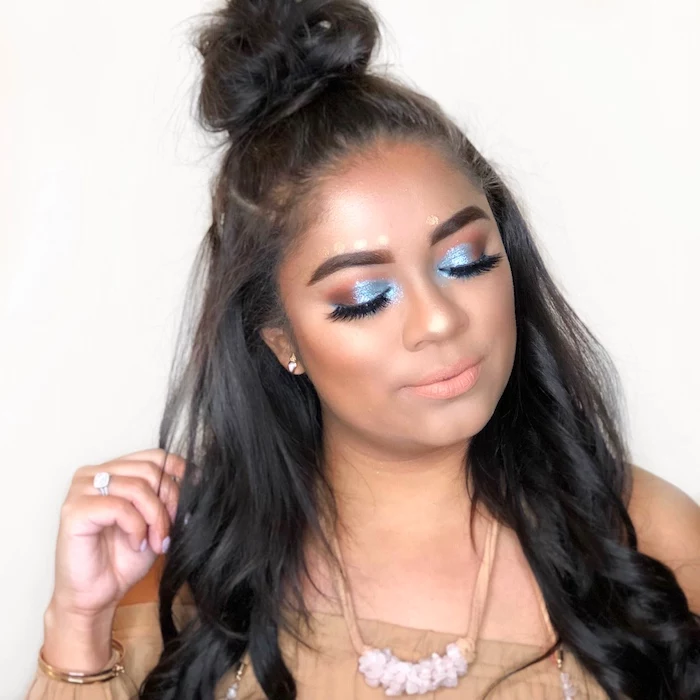
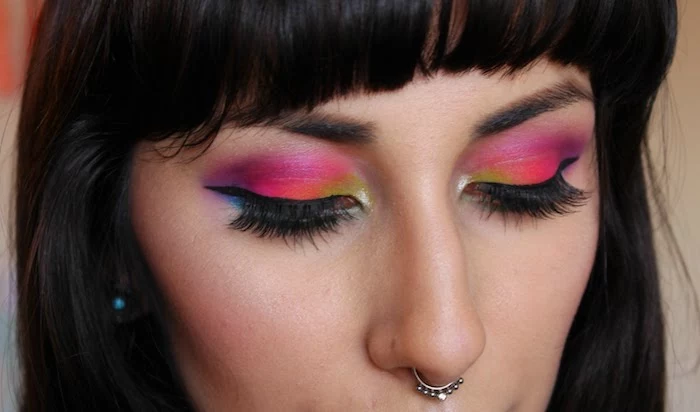
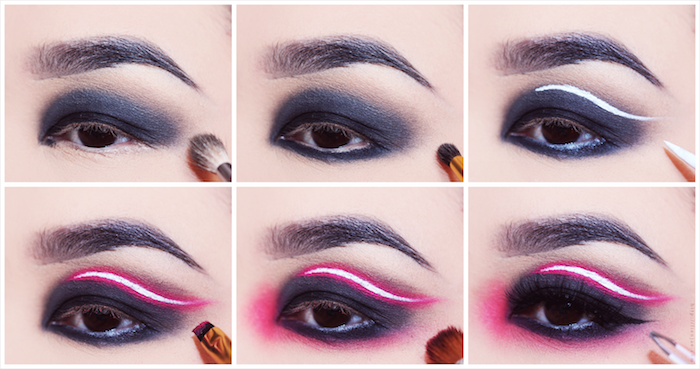
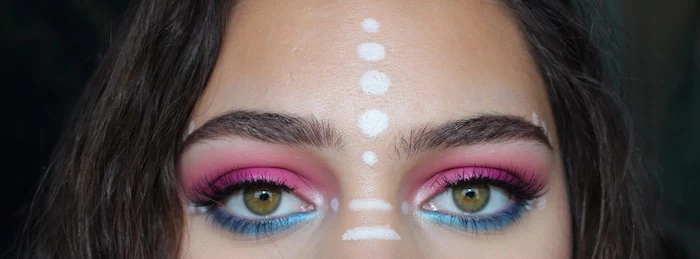
Cream Shadow: Offers intense, vibrant pigment and a dewy finish. Perfect for a bold, single-color look but can be prone to creasing in high heat if not set properly.
Powder Shadow: More versatile for blending and creating complex gradients. When applied over a quality primer like the NARS Smudge Proof Eyeshadow Base, it offers superior longevity.
For festivals, using a cream shadow as a base and setting it with a matching powder is the ultimate pro move for color that pops and stays.
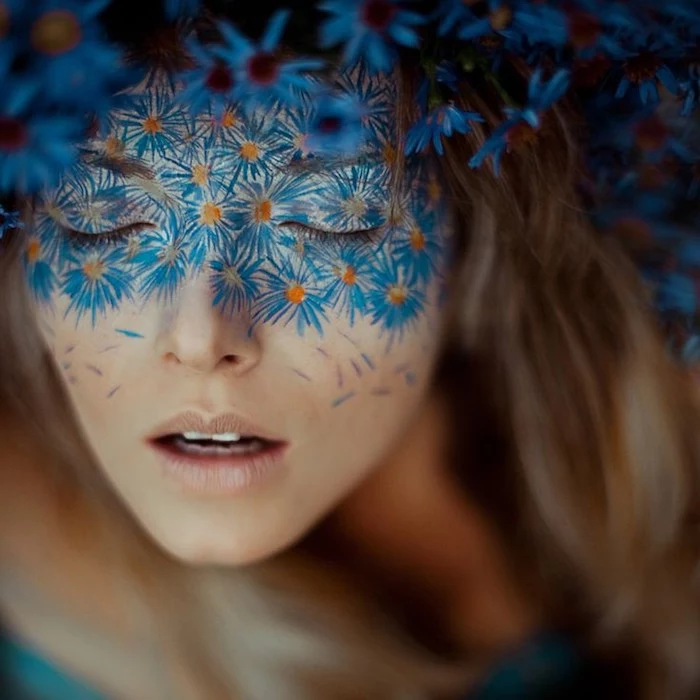
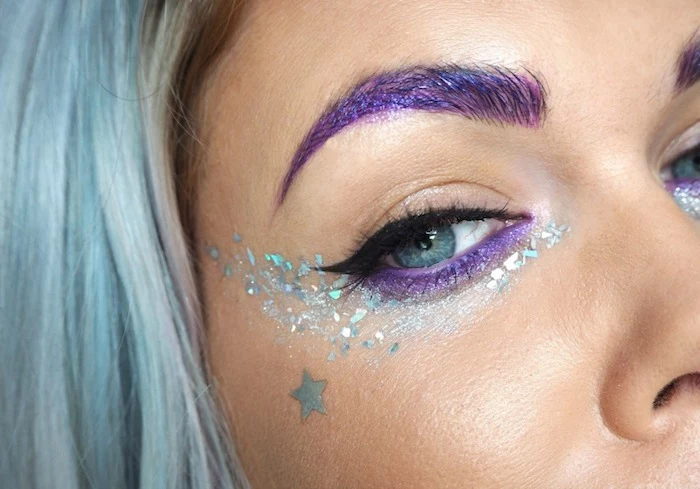
Let’s talk sparkle with a conscience. Traditional glitter is a microplastic that harms aquatic ecosystems. Switch to biodegradable alternatives made from eucalyptus cellulose. Brands like Today Glitter or Bio-glitter offer stunning, plant-based options that break down naturally, so your sparkle doesn’t leave a trace on the planet.

- Creates a waterproof, smudge-proof shield.
- Intensifies the pigment of any powder product.
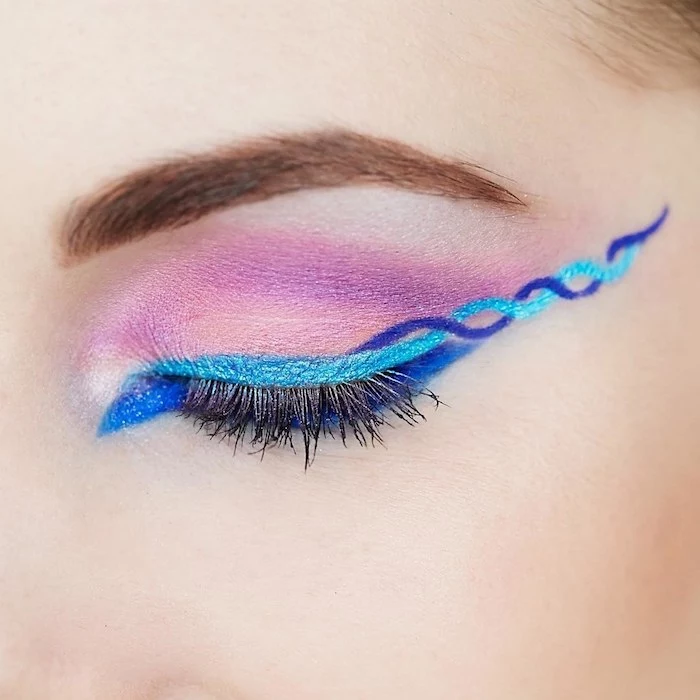
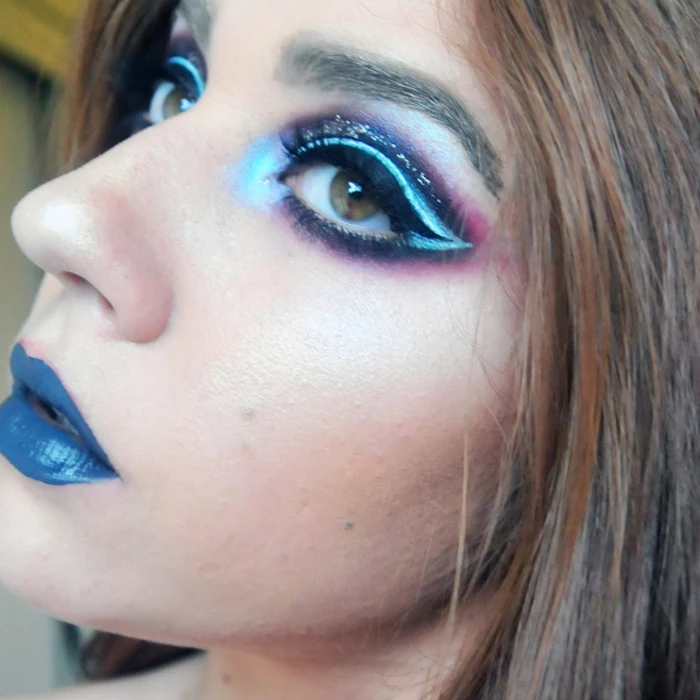
- Transforms regular eyeshadow into a graphic, liquid liner.
The secret? A mixing medium. A few drops of Inglot’s Duraline can revive dried-out gel liners and give any powder product superpowers for a look that truly lasts all day and night.
The final seal is critical: Don’t skip the setting spray. After all your makeup is done, hold a bottle of a powerful formula like Urban Decay’s All Nighter Setting Spray about 8-10 inches from your face and mist in an ‘X’ and ‘T’ formation. This locks everything in place, creating a barrier against the elements. It’s the difference between a look that lasts and a look that’s a memory by lunchtime.
Did you know the average person touches their face around 23 times per hour?
That’s hundreds of opportunities to smudge, smear, and wear away your carefully applied makeup. This is why transfer-proof formulas and setting sprays aren’t just a suggestion for festivals; they are an absolute necessity to combat subconscious habits.
For applying face gems that refuse to fall off, ditch the eyelash glue. Use a cosmetic-grade adhesive designed for prosthetics, like Pros-Aide. Here’s how:
- Apply a tiny dot of adhesive to the skin with a toothpick.
- Wait 30 seconds for it to become tacky.
- Use a wax-tipped pen or tweezers to press the gem firmly onto the tacky spot.
- They’ll survive sweat, dancing, and even a nap.

What’s the best way to remove stubborn glitter and heavy makeup without wrecking your skin?
Start with an oil-based cleanser or pure coconut oil. Massage it gently over your dry face. The oil will break down the makeup and loosen the glitter particles without harsh scrubbing. Then, use a soft, damp cloth (like a Face Halo) to wipe everything away before moving on to your regular gentle cleanser. Your skin will thank you.

One of the biggest mistakes: Using craft glitter on your face. It’s often made of metal or glass and cut hexagonally, with sharp edges that can cause micro-scratches on your skin and, even worse, permanently damage your eyes. Always, always use cosmetic-grade glitter specifically designed for skin application.
Your SPF is the most important part of your festival base layer. A broad-spectrum sunscreen with at least SPF 30, like Supergoop! Unseen Sunscreen, should be applied after your moisturizer and given a few minutes to set before your primer. Makeup with SPF is a nice bonus, but it’s never enough on its own for hours of direct sun exposure.
- Get vibrant, opaque color payoff in one swipe.
- Enjoy a comfortable, flexible finish that moves with your skin.
- Create intricate designs that won’t crack or fade.
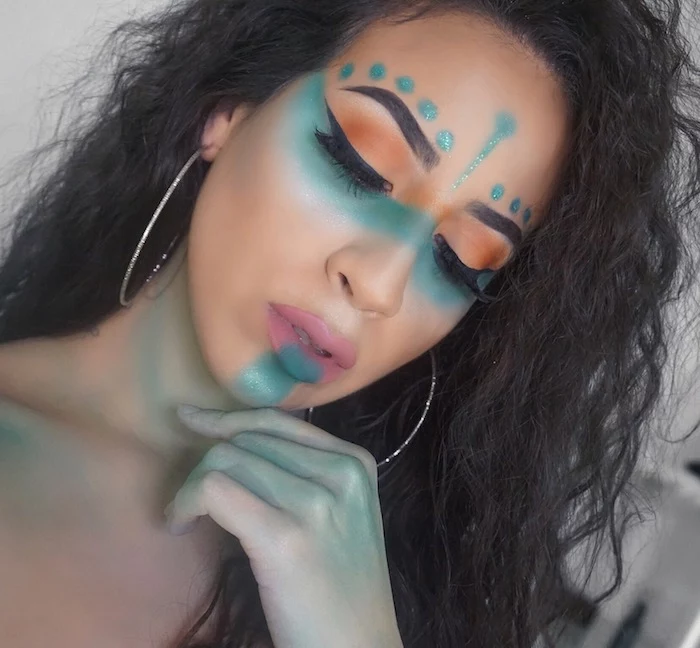
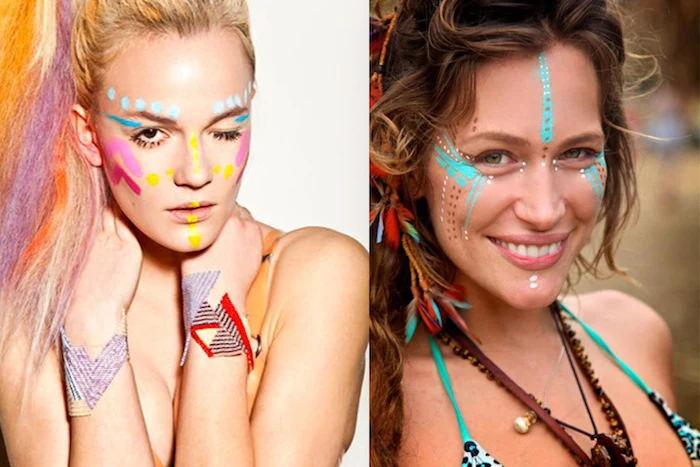
The secret? Water-activated face paints. Pro-quality cakes from brands like Mehron’s Paradise Makeup AQ or Kryolan’s Aquacolor are the key to those stunning, artistic festival looks that last. Just dip a fine brush in water, activate the paint, and get creative.

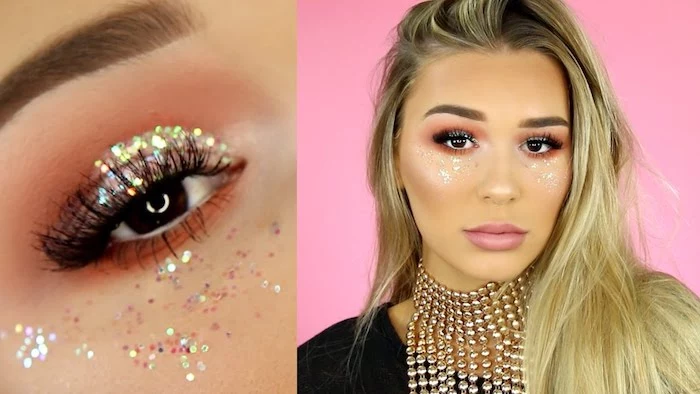
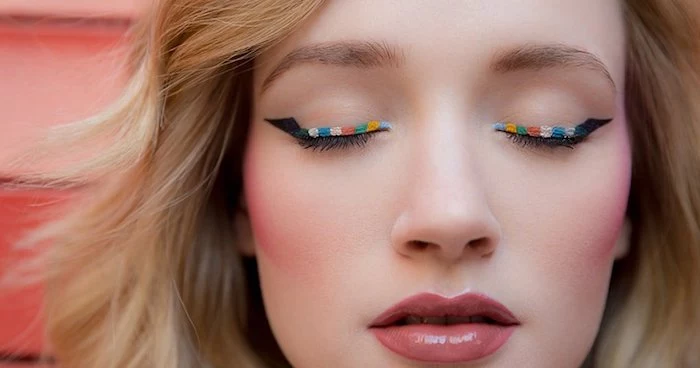
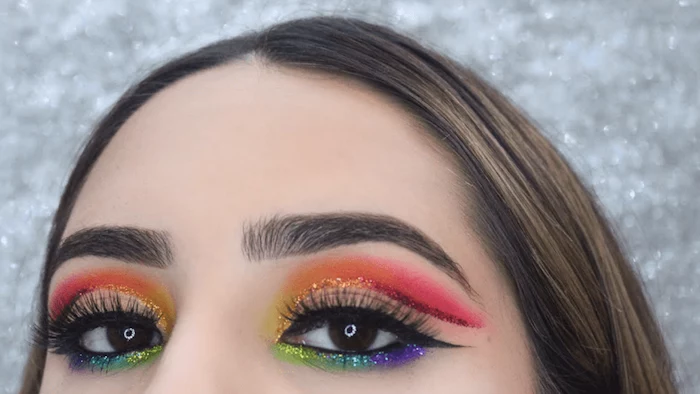
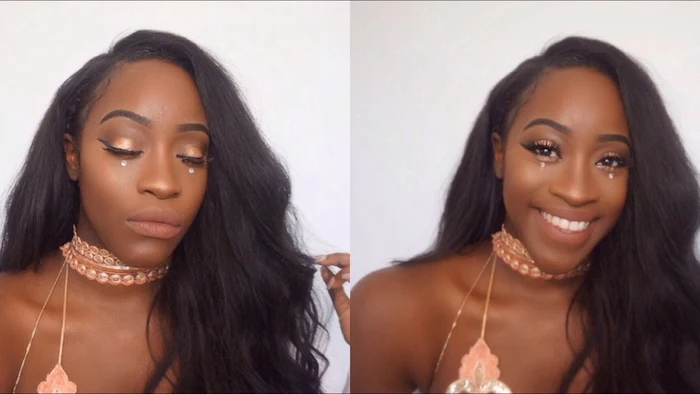
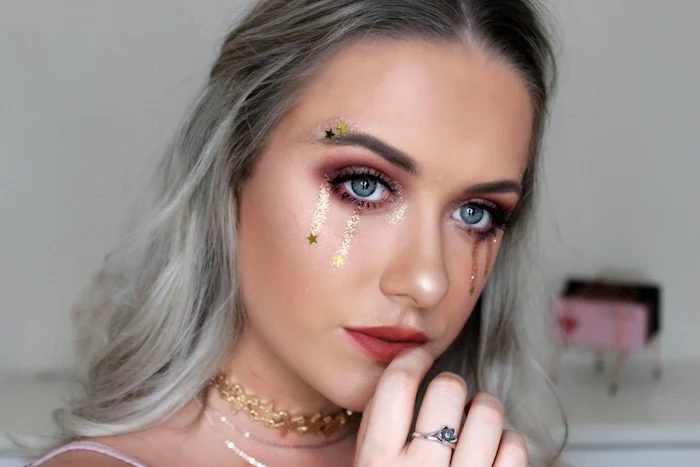
The ‘Glitter Tears’ effect is iconic, but it needs to be done right to last. After your base makeup is complete:
- Apply a thin layer of a clear, skin-safe glitter glue (like NYX’s Glitter Primer) in a teardrop shape from the outer corner of your eye downwards.
- While it’s still tacky, use a flat brush to press your chosen cosmetic glitter firmly onto the glue.
- Finish with a final mist of setting spray to lock it all in place.
Thinking of using neon pigments? Check the label. Many vibrant, fluorescent pigments are not officially approved for use in the immediate eye area due to potential staining or irritation. Use them for dramatic face or body art, but stick to eye-safe shadows for your lids.

Setting Spray: This is your workhorse. It’s designed to meld your makeup layers together and create a film that makes them long-lasting and transfer-resistant. Apply it *before* mascara.
Finishing Spray: This is for aesthetics. It’s usually applied last to give a specific finish—like dewy, glowing, or matte—and can help makeup look less powdery and more like real skin.
For a festival, you need a setting spray. A finishing spray is an optional extra.

A festival look is more than just makeup; it’s a form of self-expression that connects you to the collective energy of the event. The ritual of applying bold colors, graphic lines, and shimmering glitter becomes part of the transformation, helping you shed your daily persona and step into a world of music, art, and freedom.


According to dermatologists, a single day of intense, unprotected sun exposure can undo months of a dedicated skincare regimen.
This is a powerful reminder that while makeup is for the moment, sun protection is for life. Reapplying sunscreen throughout the day, even over makeup with a spray-on SPF, is crucial for your long-term skin health.


For a truly bulletproof application, try layering your setting spray. Apply your base makeup (foundation, concealer), then mist. Apply your powders (bronzer, blush), then mist again. This technique, used by pro artists, locks in each layer individually for maximum endurance.


Waterproof mascara is a non-negotiable. Look for formulas known for both their staying power and their ability to hold a curl against humidity.
- For Volume & Length: Maybelline’s Lash Sensational Sky High Waterproof is a viral favorite for a reason—it delivers on both fronts without flaking.
- For High-End Hold: Dior’s Diorshow Waterproof Mascara is a cult classic used by professionals for its incredible staying power and smudge-proof formula.


Can’t find the perfect shade of eyeliner for your look?
Make your own. Take any brightly colored eyeshadow pigment, scrape a small amount onto a clean surface, add a single drop of a mixing medium like Mehron’s Mixing Liquid, and combine with a liner brush. You’ll have a custom, waterproof liquid liner that perfectly matches your shadow.


- A gentle, milky cleanser to dissolve makeup and sunscreen without stripping the skin.
- A super-hydrating sheet mask with hyaluronic acid or aloe vera to calm and replenish moisture.
- A simple, fragrance-free moisturizer to soothe and repair your skin barrier.
This is your post-festival skin recovery trio. After days of heavy makeup, sun, and dust, your skin needs to be babied, not bombarded with harsh actives. Simplicity is key.
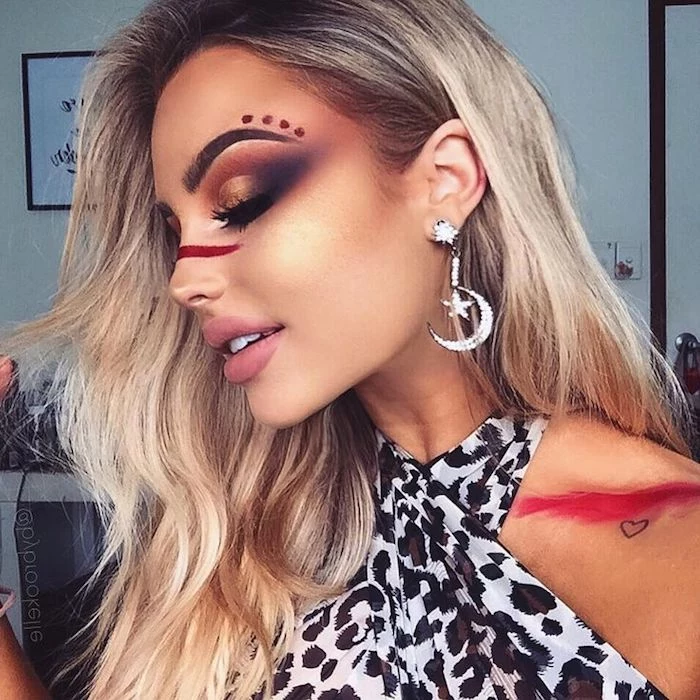
Budget Hack: A high-quality, long-wear liquid lipstick in a bold shade (think red, purple, or even blue) can be your most versatile tool. Use a fine-tipped art brush to apply it as a graphic eyeliner that will not budge. You can also sheer it out on your cheeks for a waterproof blush stain before it sets.

Go beyond the face. A dusting of gold or iridescent highlighter, like the Fenty Beauty Killawatt Freestyle Highlighter, across your collarbones and shoulders catches the light beautifully as you dance. It connects your face makeup to your overall look and creates a stunning, ethereal glow at sunset.