Finally Master Your Eyeshadow: The Pro Secrets No One Ever Tells You
So many people I’ve worked with over the years sit in my chair, look at a gorgeous eyeshadow look, and just sigh, saying, “I could never do that.” It’s a common feeling! Eyeshadow seems like this exclusive art form, but honestly, it’s not about some secret password or magic wand. It’s a craft, and a beautiful application comes down to understanding the basics: getting the canvas ready, building a solid structure, and blending like you mean it.
In this article
This isn’t about chasing fast-fashion trends that are gone in a month. This is about the rock-solid, foundational stuff that works on every person, for every occasion. My goal is to demystify it all so you can stop seeing eyeshadow as a challenge and start seeing it as a seriously fun tool for expression.
First Things First: Prepping Your Lids for Success
Before you even think about color, you have to prep the canvas. A lot of people assume primer is step one, but it actually starts with the skin itself. If your eyelid isn’t prepped correctly, you’re just setting yourself up for patchiness, creasing, and colors that look faded the second you put them on.

Your eyelid skin is super thin and it’s always moving. Plus, it can get oily. An oily lid will literally melt your eyeshadow into a muddy line in your crease. On the other hand, a dry lid can make powders look chalky and refuse to blend. The fix is simple: start by gently cleansing the area. A quick swipe of micellar water on a cotton pad is perfect for this. It zaps oil without leaving anything behind. Oh, and heads up! Avoid heavy, greasy eye creams right before you apply makeup; they can break down your hard work before you even leave the house.
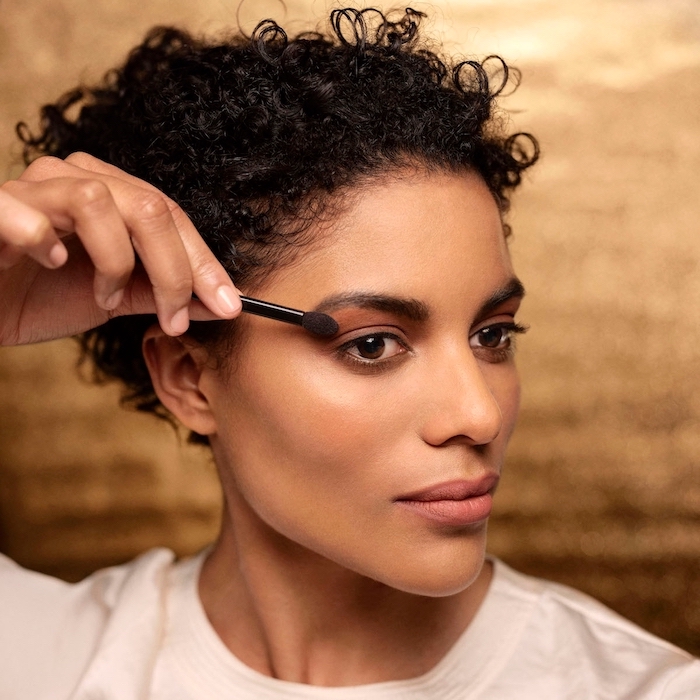
The Primer Power-Up
Let’s be real: eyeshadow primer is not a gimmick. It’s the single most important product for a look that lasts all day instead of just two hours. It creates a barrier between your skin’s oils and the makeup, and it gives the powder something to grip onto. It’s a total game-changer.
You’ve got a few options here, depending on your needs:
- Standard Primers: These usually go on clear and create a smooth film. They’re great all-rounders. For an amazing drugstore option, the Milani Eyeshadow Primer is a cult favorite and only costs about $7. If you want to splurge a bit, the classic Urban Decay Primer Potion (around $25) is famous for a reason.
- Tinted Primers: These have some color to them and are fantastic for canceling out any redness or veins on your lids. They create a perfect, neutral base so the color in the pan is the color you get on your eye.
- Sticky Primers: Sometimes called glitter glues, these have a much tackier finish. You save these for when you’re working with loose glitters or super-shimmery pigments to lock them in place and prevent fallout.
Whatever you choose, apply a very thin layer from your lash line to your brow bone. Too much primer is just as bad as none at all!

The Pro Secret: Set Your Primer!
Okay, lean in for this one. This is the step most tutorials skip, and it makes all the difference. After applying your primer, wait a minute for it to get tacky. Then, take a fluffy brush and a tiny bit of translucent setting powder (or even a matte eyeshadow that matches your skin tone) and lightly dust it all over the primed area. This creates a silky, smooth surface. Now you’re blending powder on top of powder, not trying to drag it across a sticky base. Trust me, this makes blending about a hundred times easier.
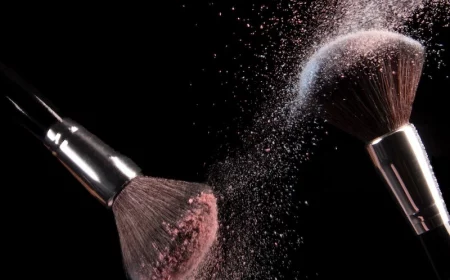
Let’s Talk Tools (and What You Actually Need)
You can have the most expensive eyeshadow palette in the world, but without the right brushes, you’re going to have a bad time. Forget those little sponge-tip things—we can do better. And honestly, the quality of your brushes matters more than the brand of your eyeshadow.
Before you even think about buying shadows, here’s a rough idea of what a starter kit will cost:
- Eyeshadow Primer: $7 – $25
- A good blending brush: $4 – $30
- A starter neutral palette: $10 – $60
Your Essential Brush Kit
You don’t need a 20-piece set. To start, you really only need a few key players:
- The Fluffy Blending Brush: If you buy ONE brush, this is it. It’s for diffusing color and softening harsh lines, not for packing on pigment. For an affordable option, e.l.f. makes a fantastic one for around $4. If you want a pro-level tool, a classic MAC 217S is an investment at about $28 but will last you forever if you treat it right.
- The Flat Shader Brush: This is a stiffer, flatter brush used to pat and press color onto your main eyelid for maximum color payoff.
- The Pencil Brush: A small, pointy brush for all the detail work, like smudging shadow along your lower lash line or popping a highlight in your inner corner.
- The Small Tapered Blending Brush: This is a smaller version of the big fluffy one. It’s for placing color precisely in the crease without it getting everywhere.
By the way, keeping your brushes clean is a non-negotiable. Dirty brushes don’t just perform poorly; they’re a breeding ground for bacteria that can cause nasty styes or pink eye. Spot-clean them with a spray after each use, and give them a deep wash with baby shampoo once a week. Lay them flat to dry so water doesn’t ruin the glue in the handle.
Understanding Your Ammo: Finishes and Formulas
The texture of an eyeshadow tells you where it wants to live on your eye. Using the wrong finish in the wrong place is a super common mistake. (A little tip: putting a heavy shimmer deep in your crease can actually make your eyes look smaller!)
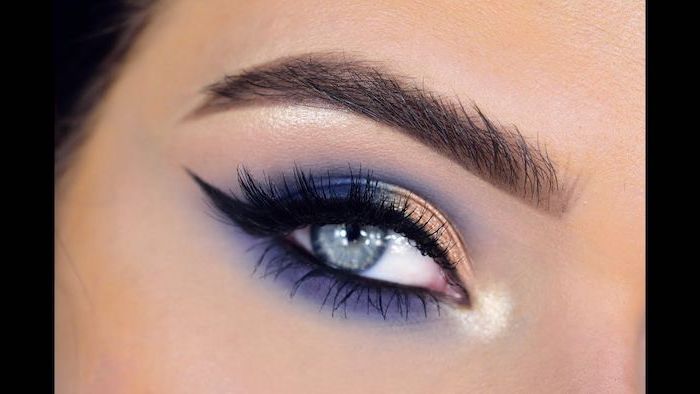
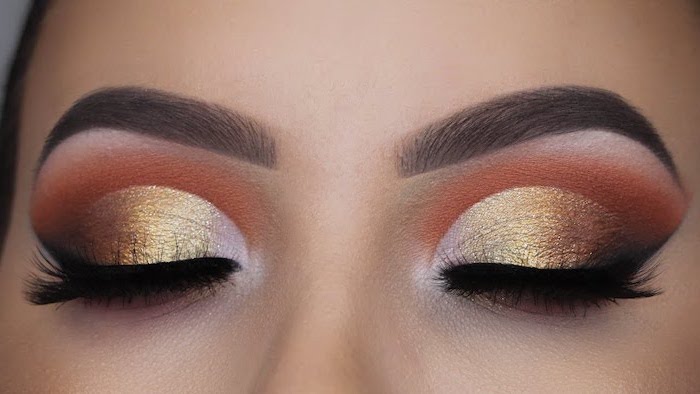
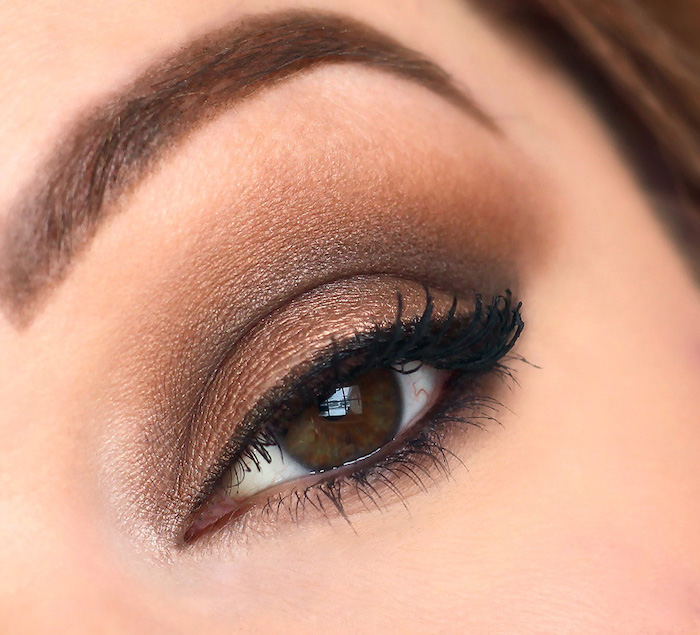
- Mattes: These have zero shine. They are the structural foundation of your look and are perfect for creating depth and shadow in the crease. A solid collection of neutral mattes is the backbone of any kit.
- Satins: These have a soft, gentle sheen. They’re beautiful on the lid or as a subtle highlight, especially on mature skin where high-shimmer can emphasize texture.
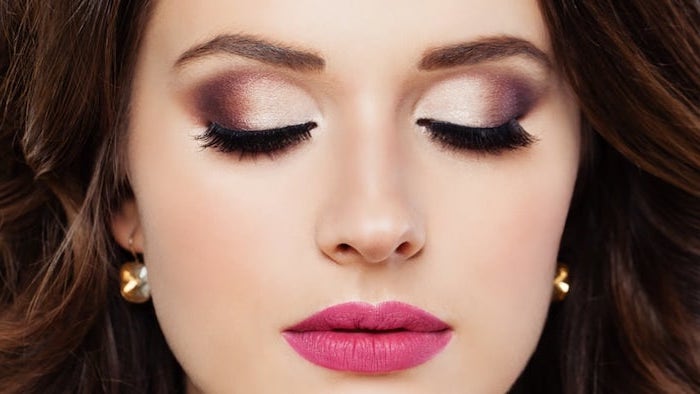
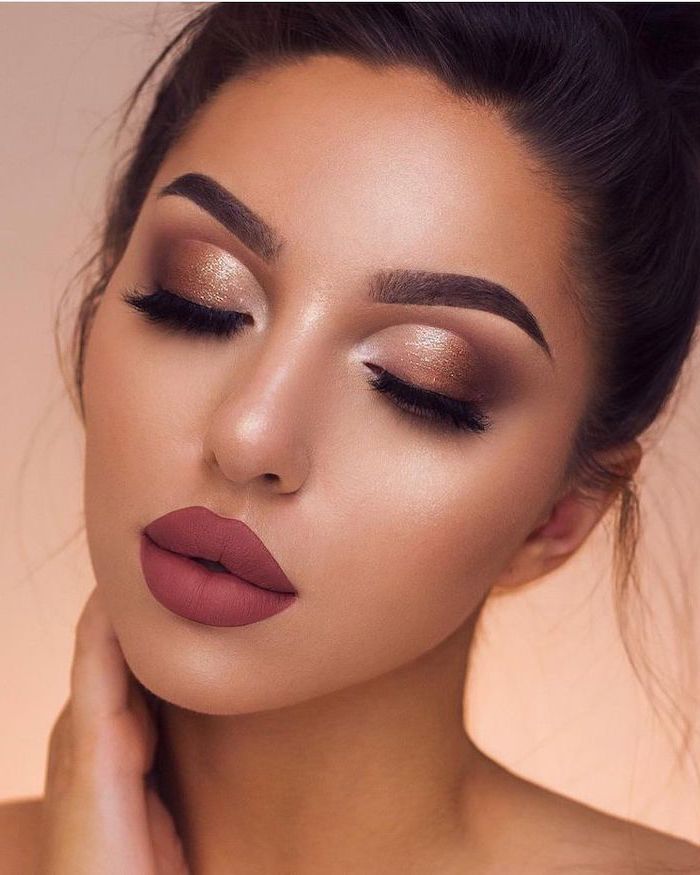
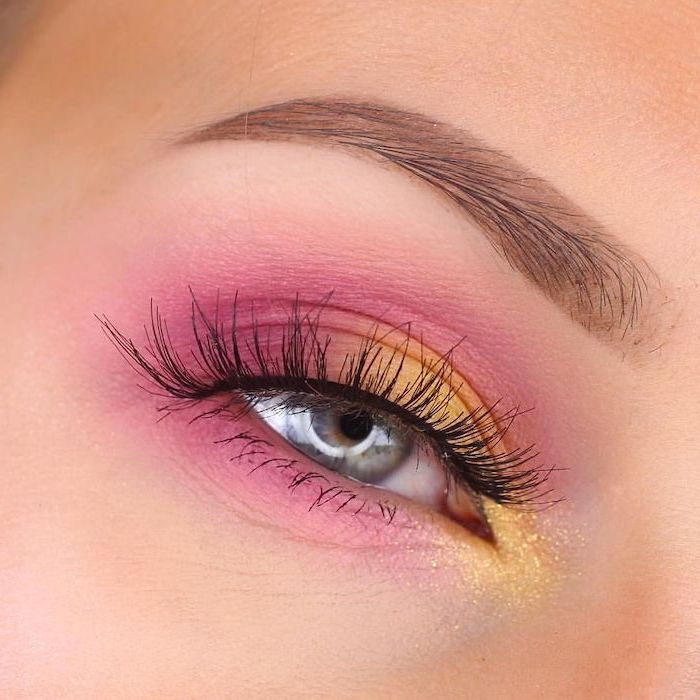
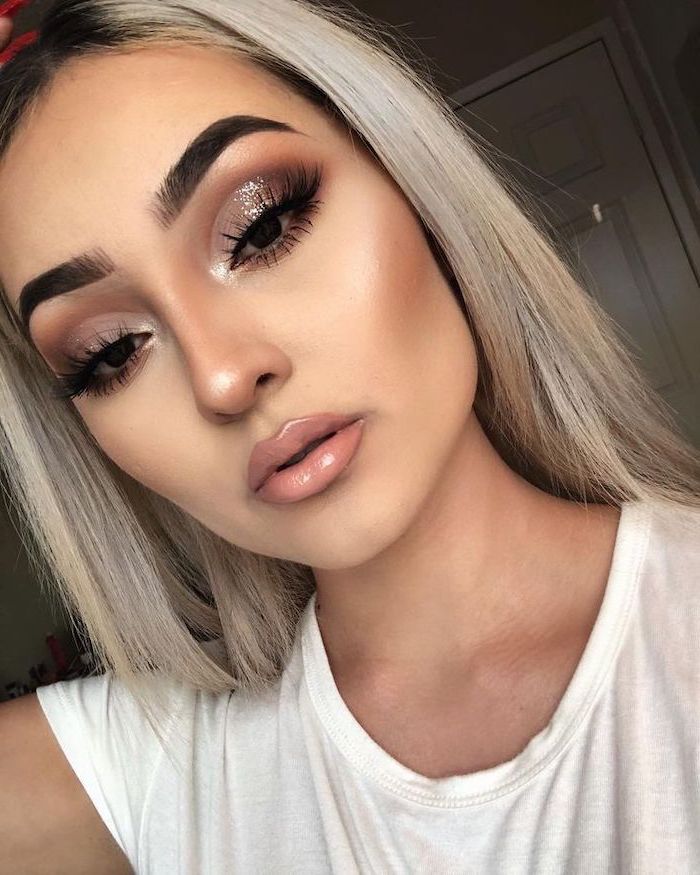
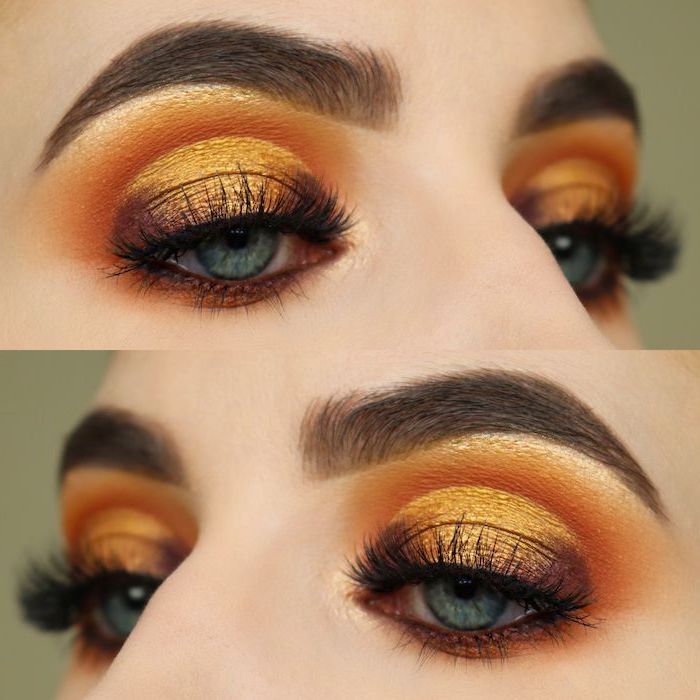
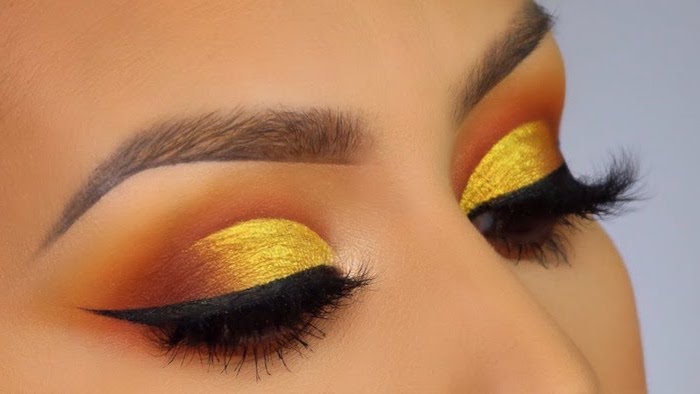
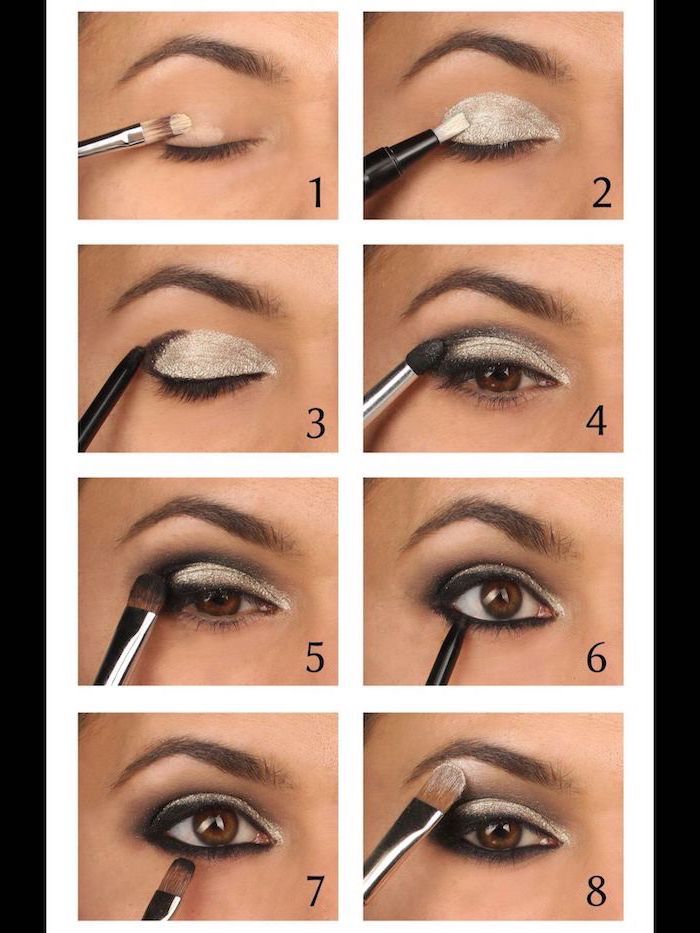
- Shimmers/Metallics: These reflect light and make your eyes pop. They belong right on the center of your mobile lid. Pat them on with a finger for the most intense, foiled look.
- Glitters: This is a whole other beast. ALWAYS use cosmetic-grade glitter, which is made of round particles that are safe for eyes. Never, ever use craft glitter—its sharp edges can seriously scratch your cornea.
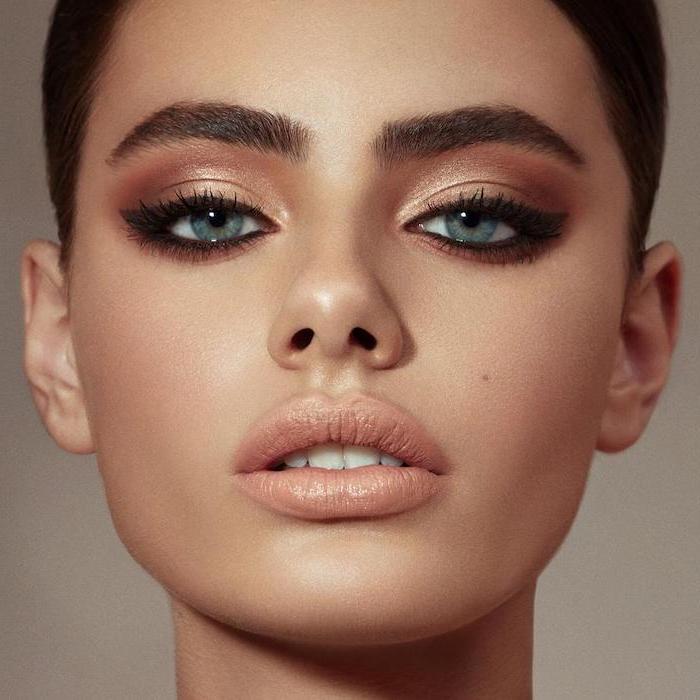
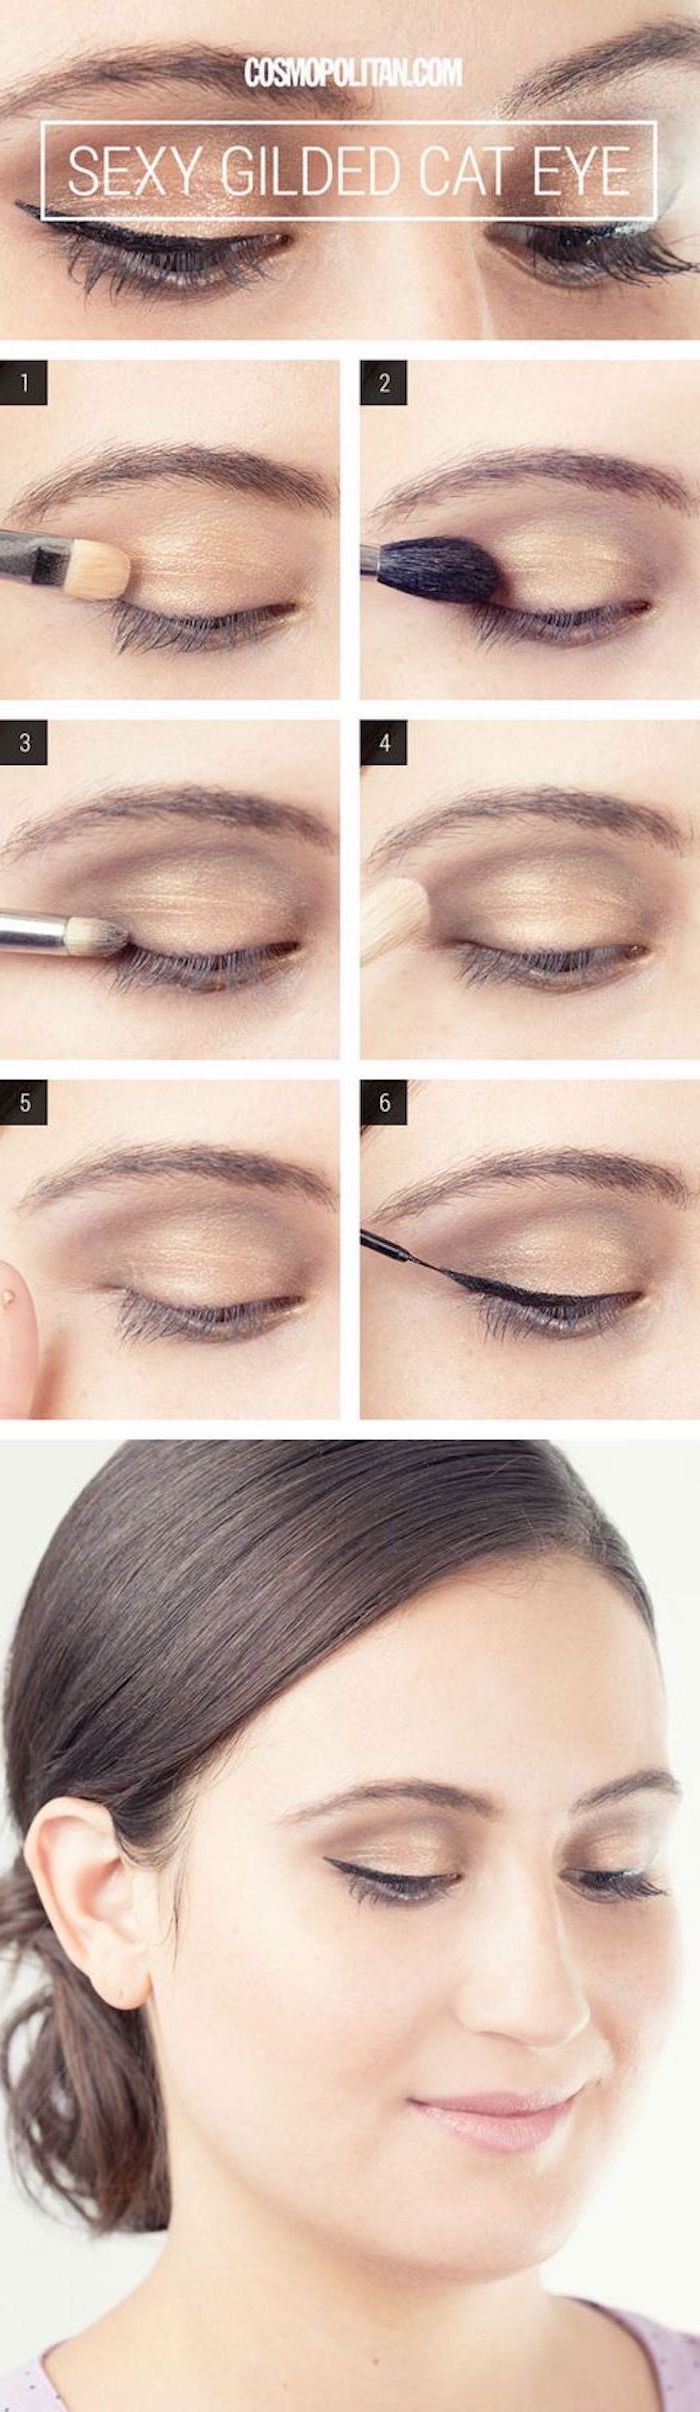
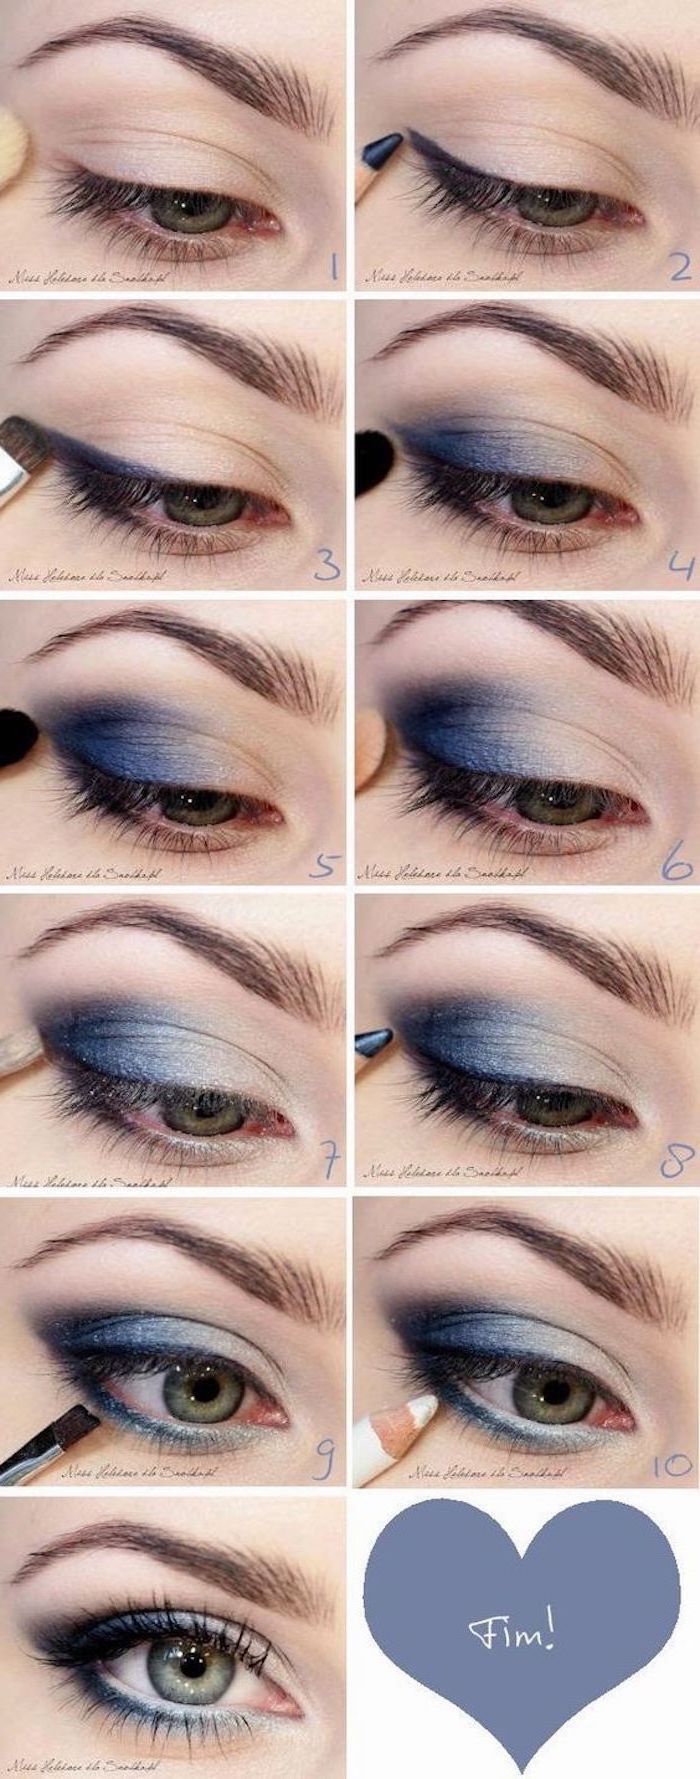
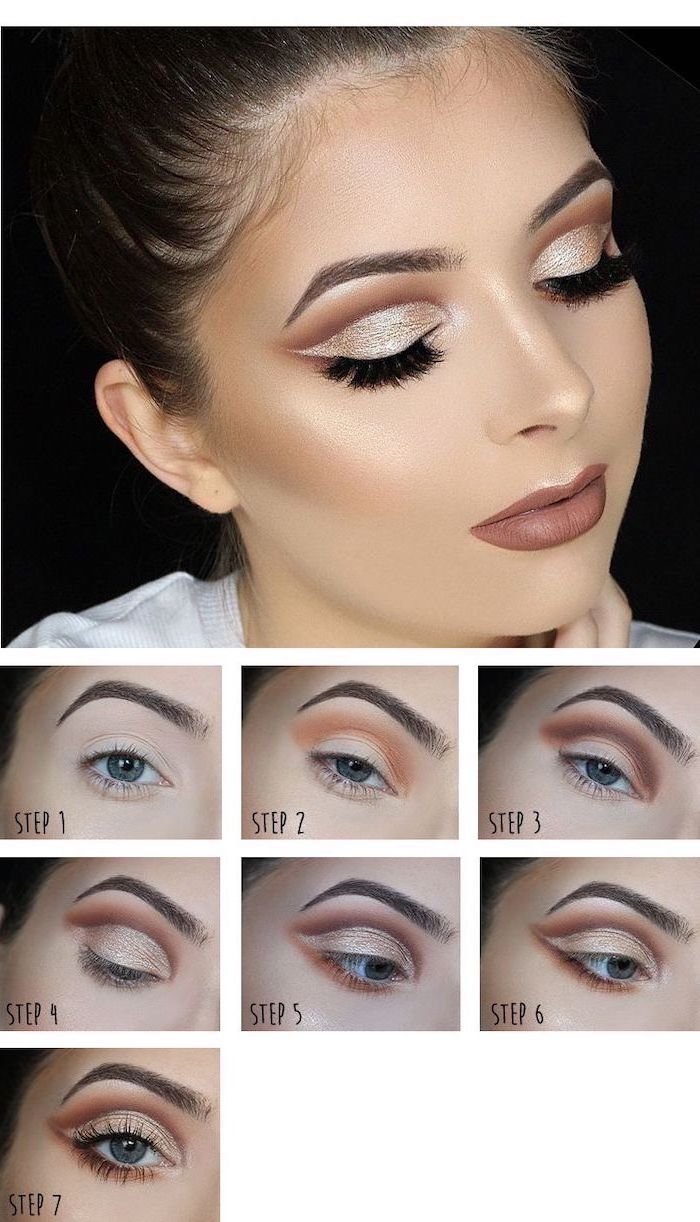
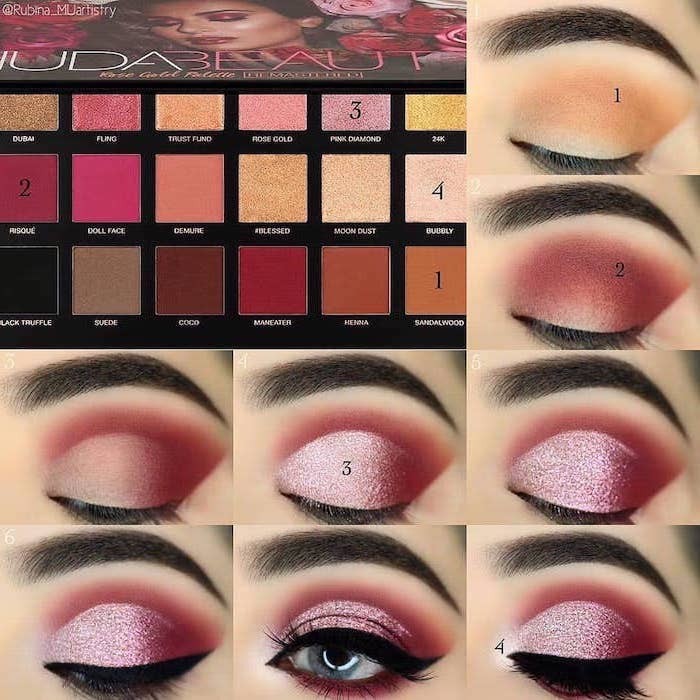
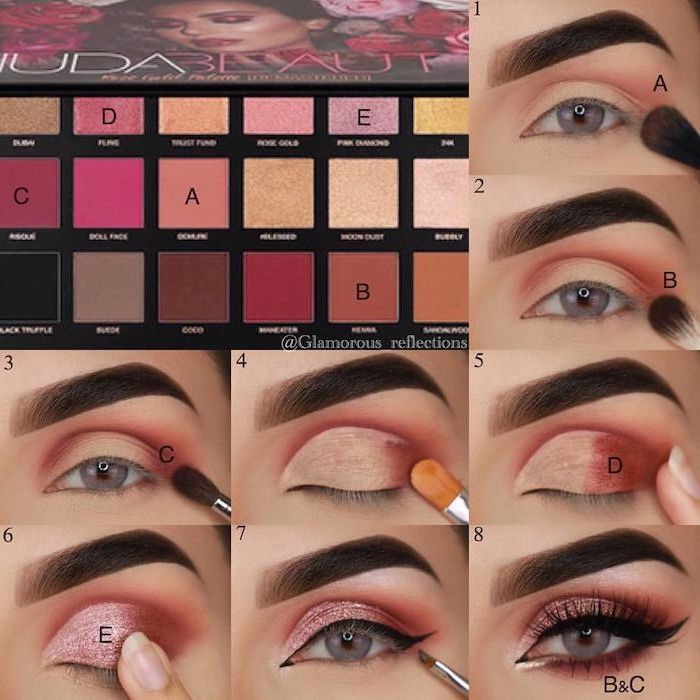
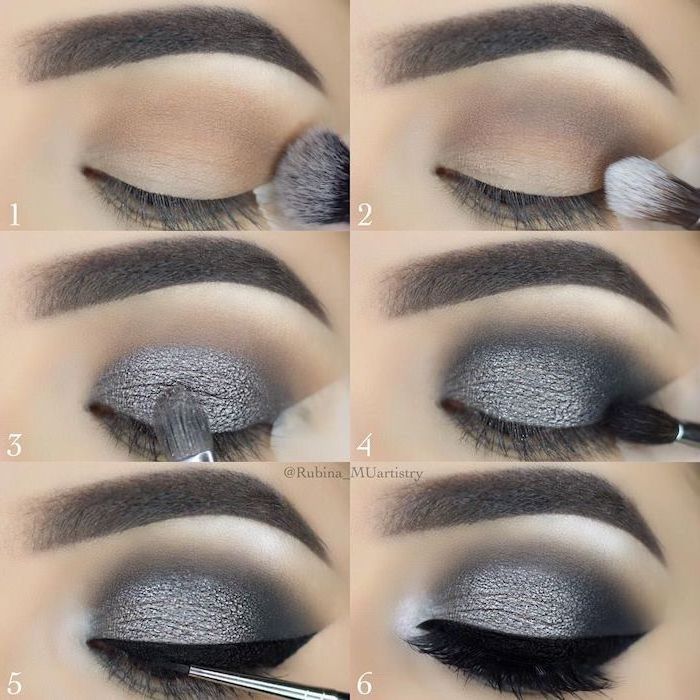
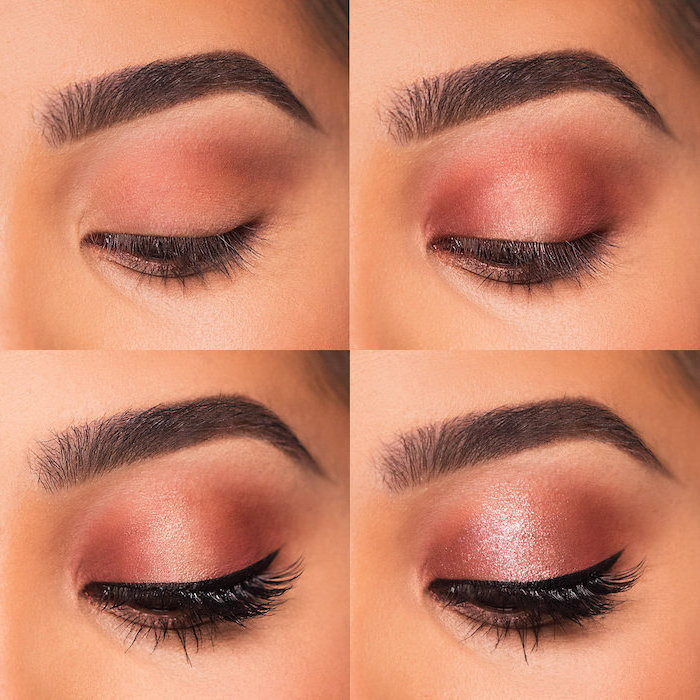
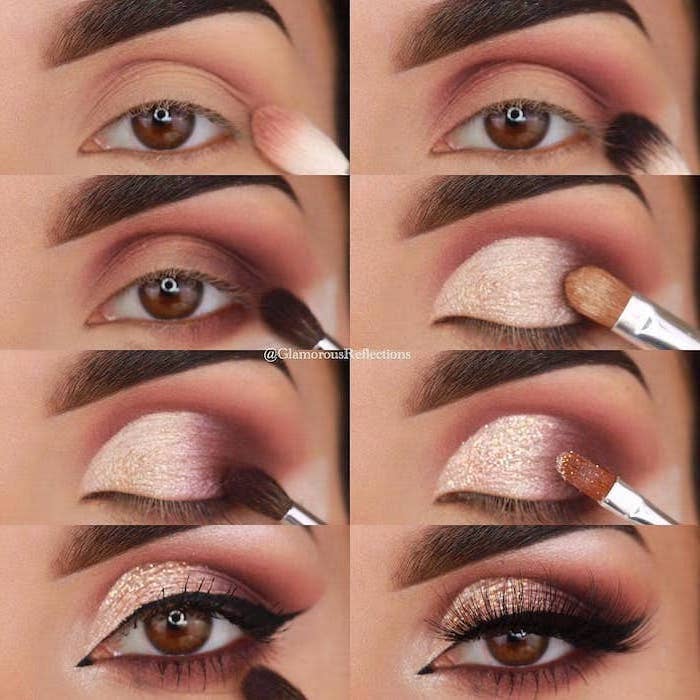
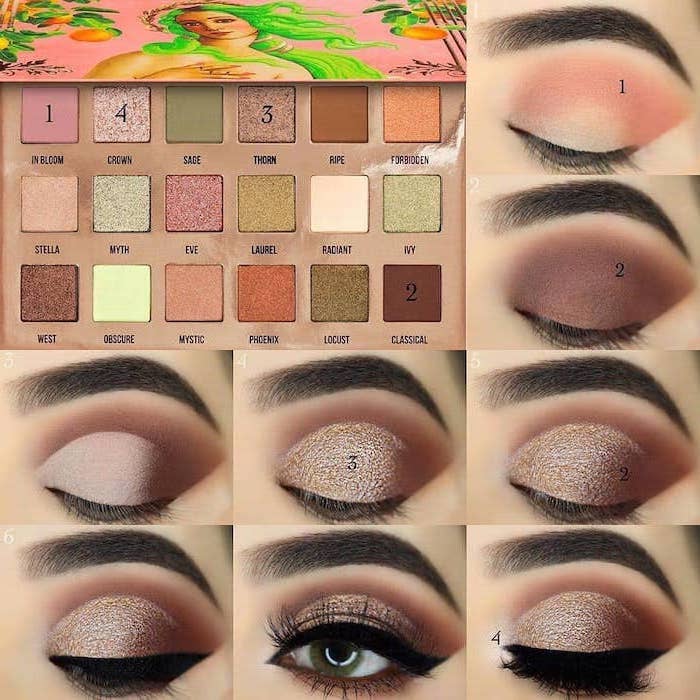
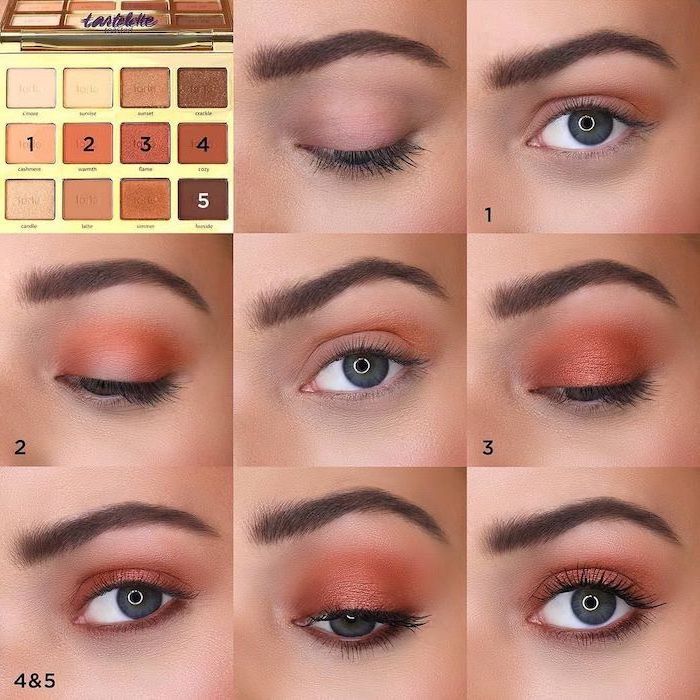
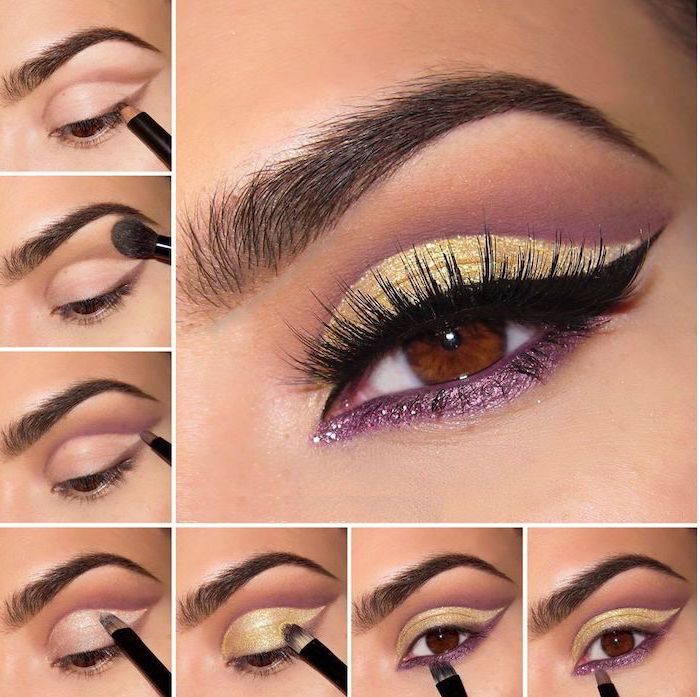
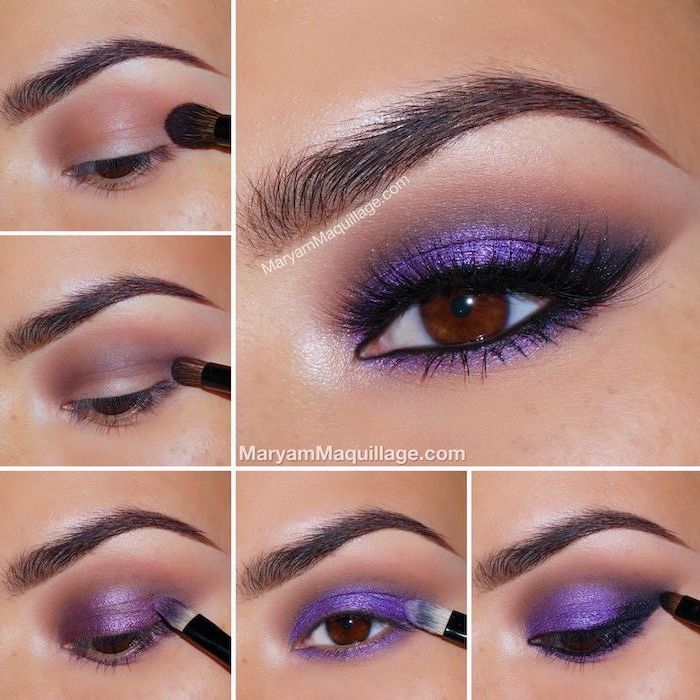
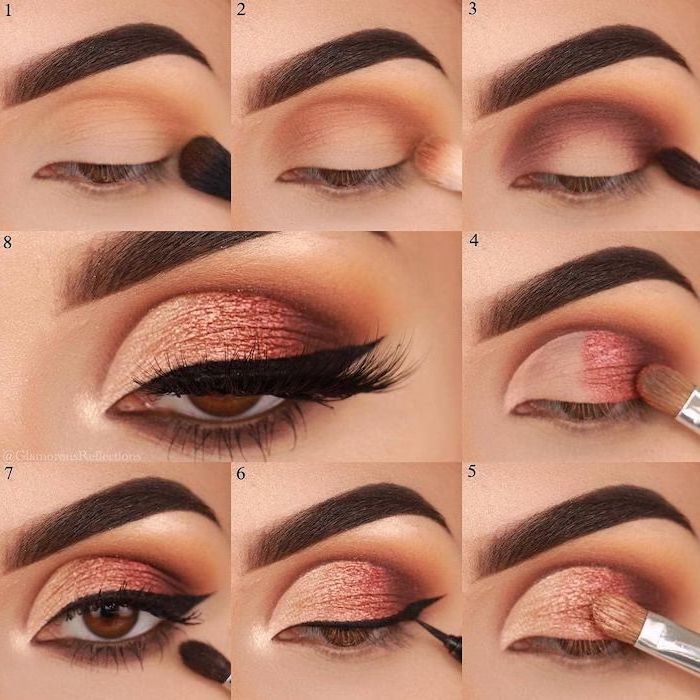
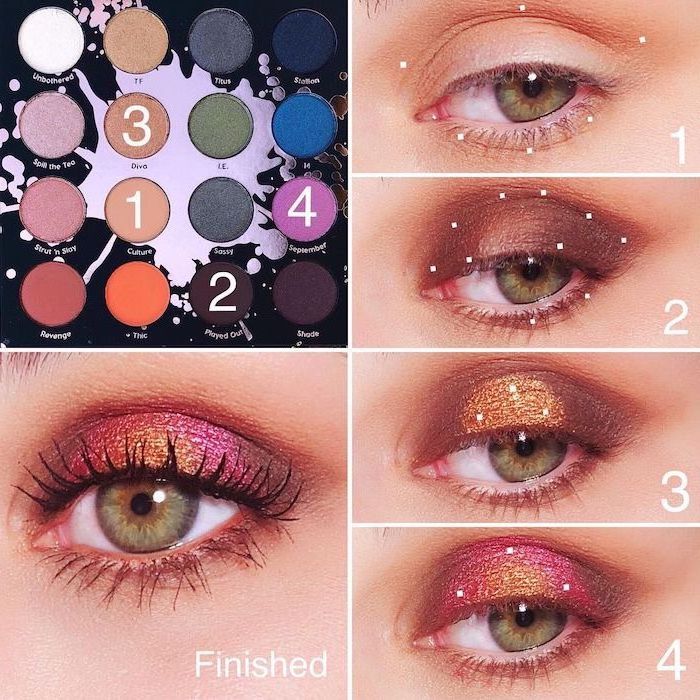
The Core 4-Step Method
This simple process is the foundation for almost any look. When you’re just starting, plan for about 15-20 minutes. Once you get the hang of it, you can do it in 5. The key is to build color in thin layers.
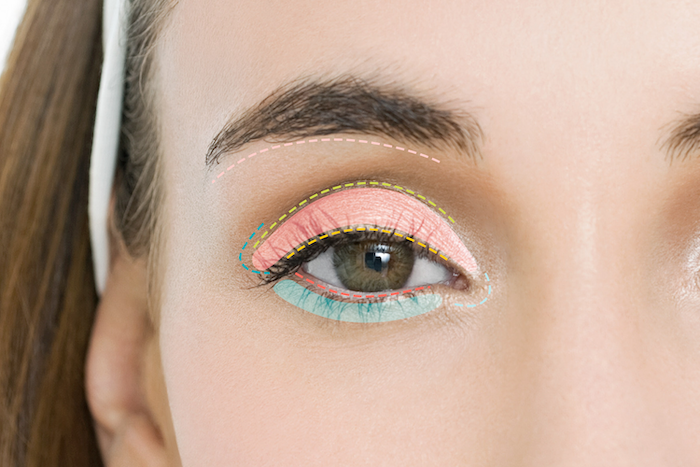
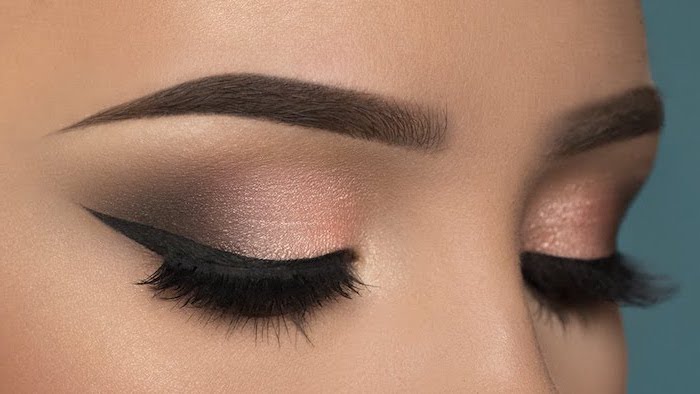
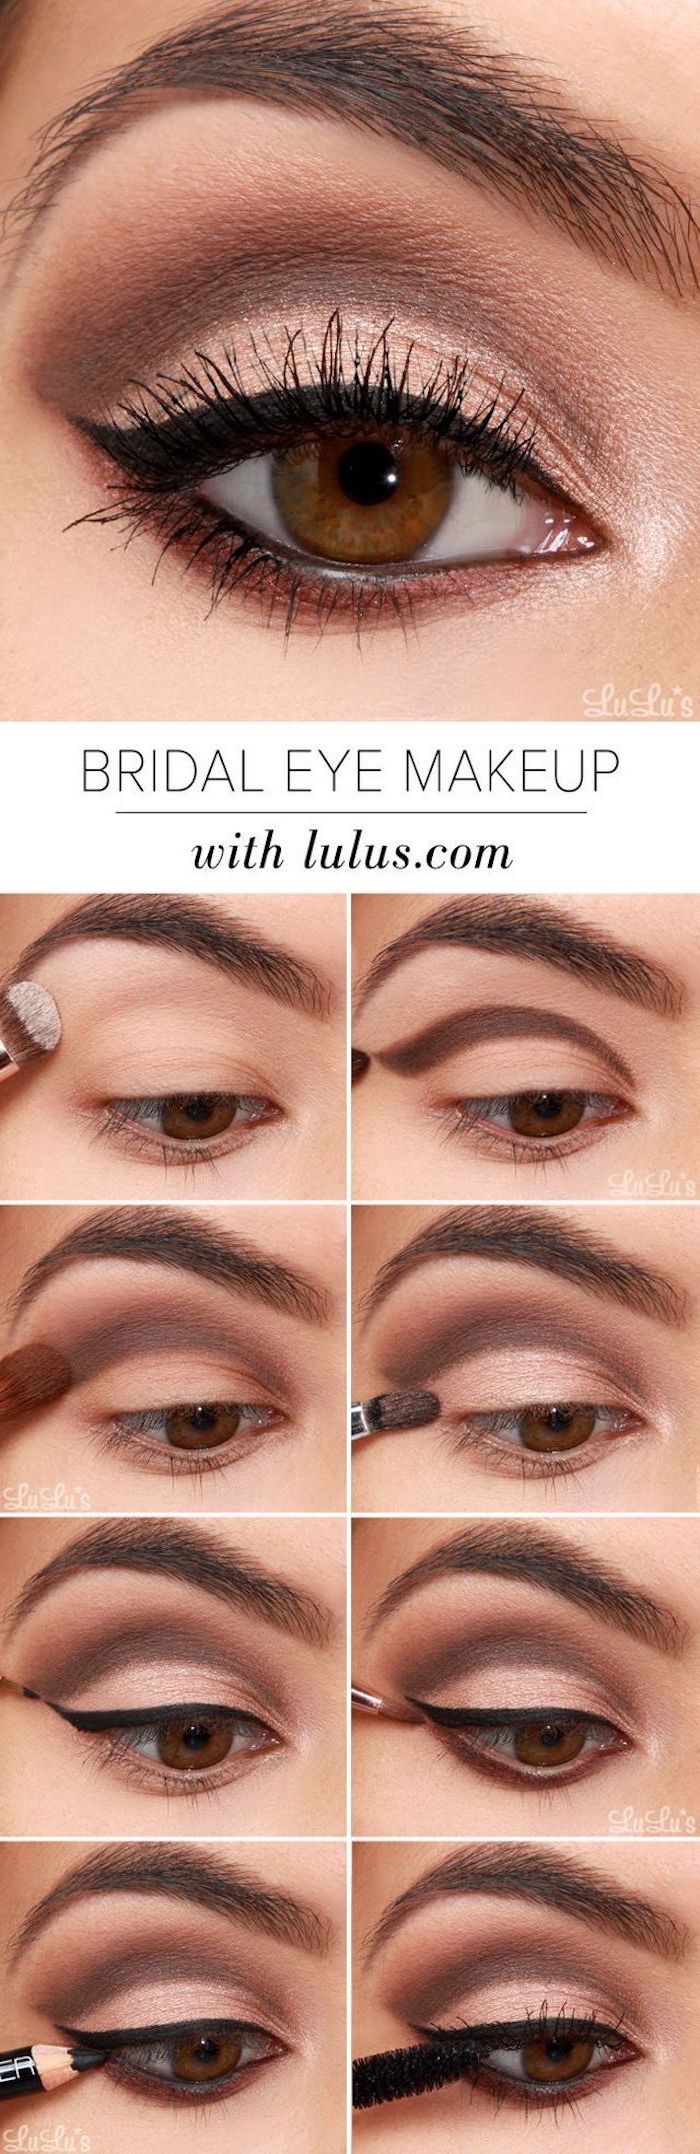
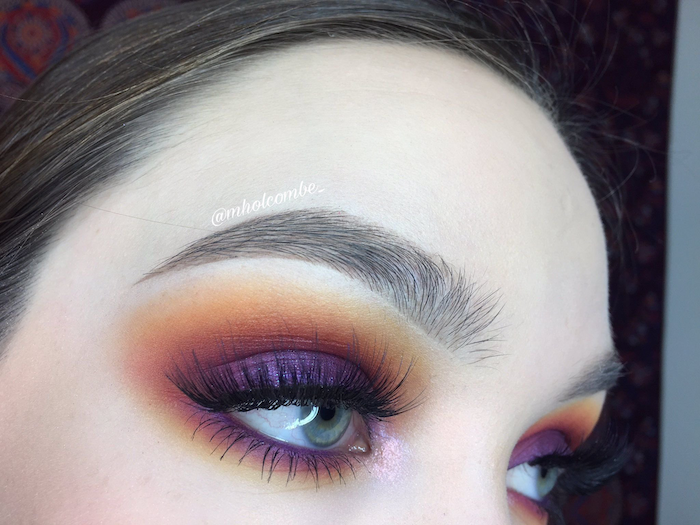
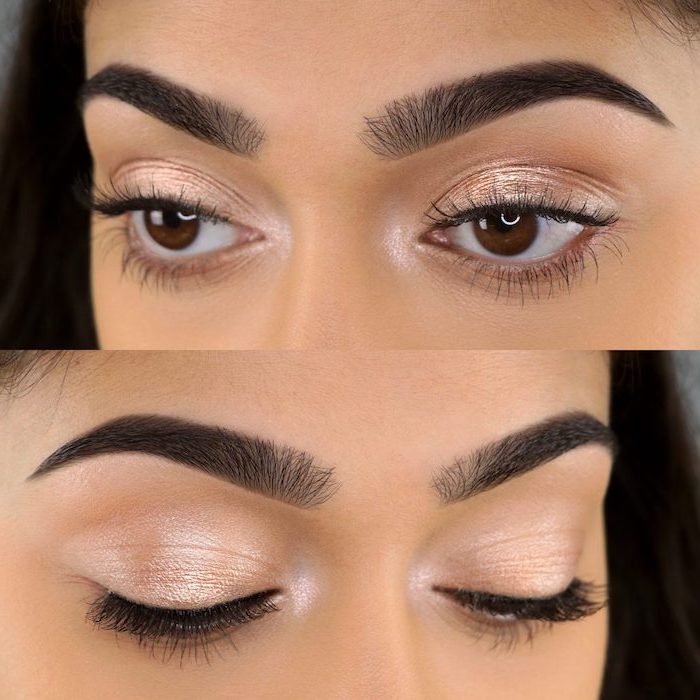
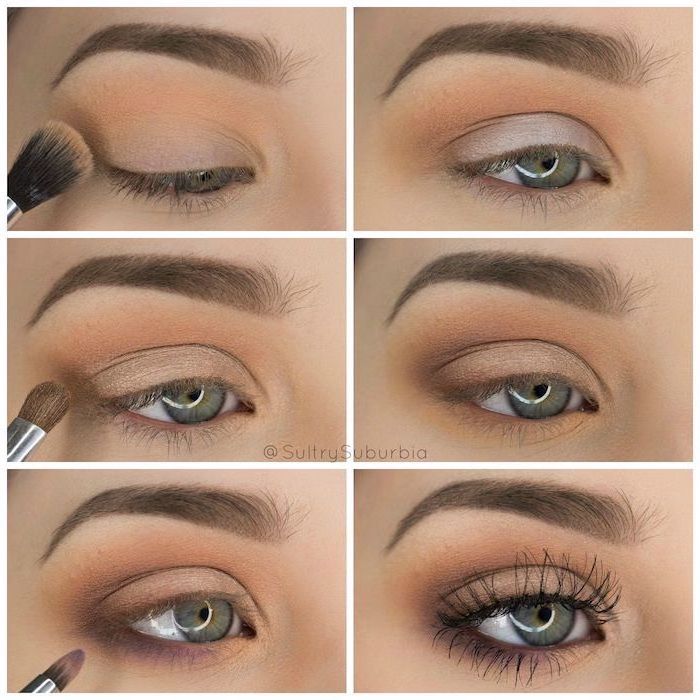
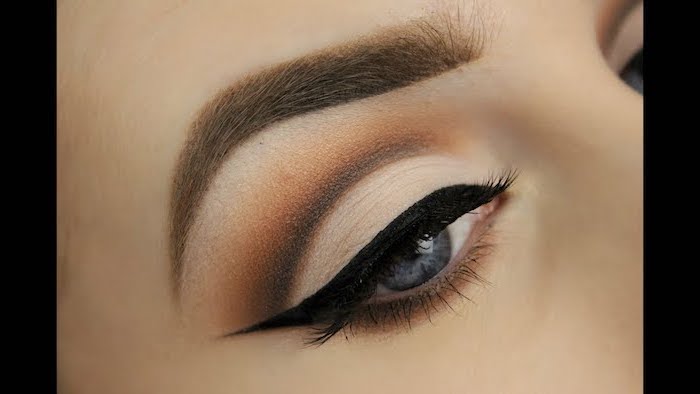
1. The Transition Shade. Grab your fluffy blending brush and a matte shadow that’s just 1-2 shades darker than your skin. If you have fair skin, think of a soft taupe or dusty rose. For olive skin, a warm terracotta works beautifully. For deep skin tones, a rich sienna is gorgeous. Looking straight into the mirror, sweep this into your crease with gentle back-and-forth motions. This creates the soft gradient that makes everything else blend seamlessly.
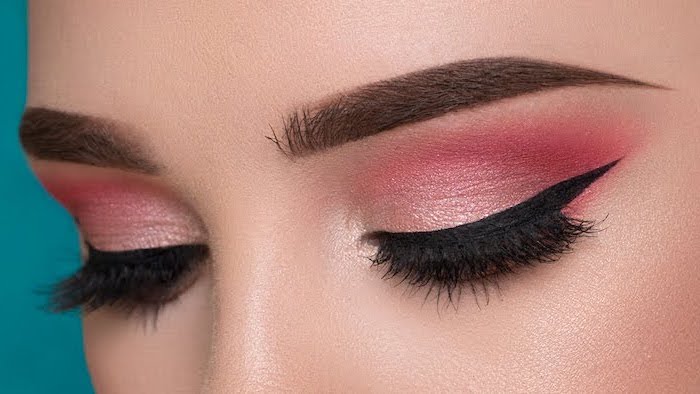
2. The Crease/Outer Corner. Now, take your smaller tapered brush and a deeper matte shade. Focus this on the outer third of your eye in a little “V” shape, from your lash line up into the crease. This is what builds dimension and sculpts the eye.
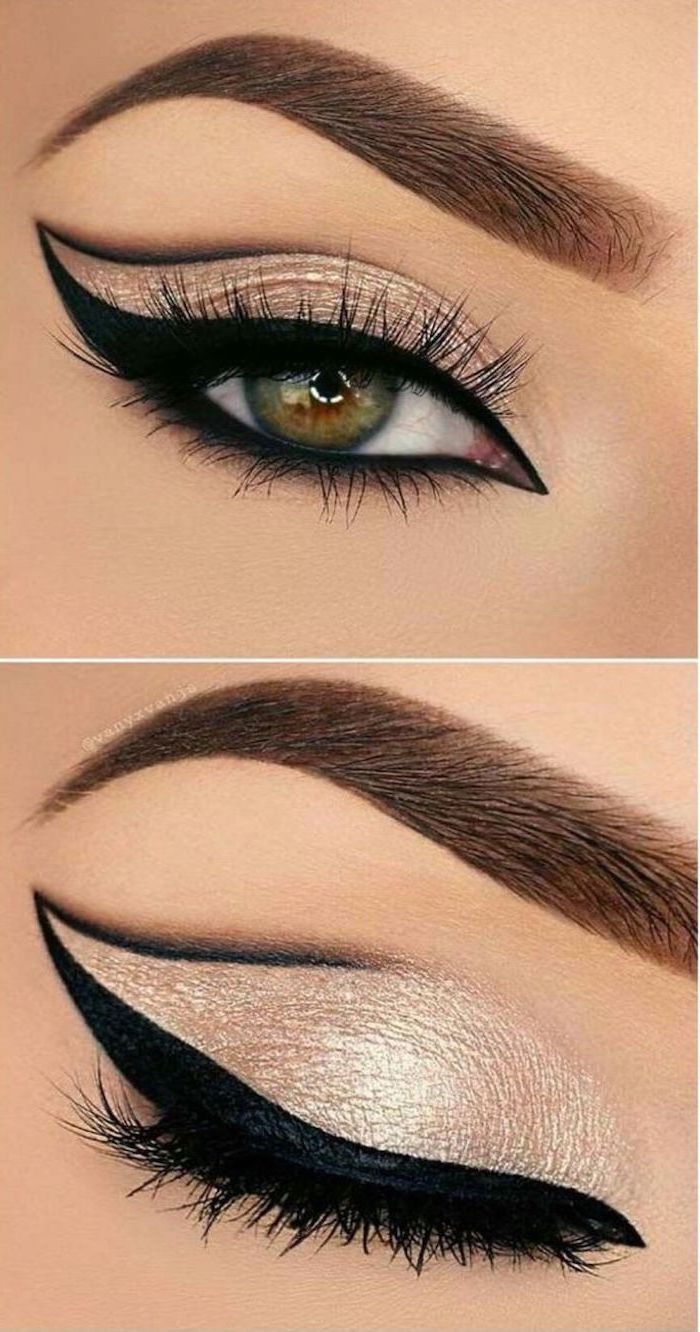
3. The Lid Shade. Using your flat shader brush, pat your main lid color (often a shimmer) onto the center of your lid, stopping where the deeper crease color begins. Patting gives you that intense color payoff. For a super metallic look, spritz your brush with a little setting spray first!
4. The Lower Lash Line. Don’t forget this! A bare lower lash line can make your eyes look unfinished and top-heavy. Use your pencil brush to gently smudge a bit of your crease colors along the lower lashes to tie the whole look together.
In a Rush? The 30-Second Pro Look
Okay, some mornings you have zero time. I get it. For a ridiculously fast and polished look, grab a cream shadow stick (the ones from Laura Mercier are iconic, but brands like Revlon and e.l.f. make great ones for under $10). Scribble it all over your lid, then use your finger to quickly blend out the top edge. Done. Seriously, that’s it.
Making It Work for YOUR Eye Shape
The real skill is learning to place light and shadow to flatter your unique eyes. Here’s how to adapt.
- For Hooded Eyes: This is a big one. With hooded eyes, an extra fold of skin covers your mobile lid. So, you have to create a new, higher crease. Look straight ahead into the mirror with your eyes relaxed—don’t raise your brows! Apply your transition and crease shades above your natural crease, onto the hood itself. This way, the color is actually visible when your eyes are open.
- For Monolids: Without a natural crease, the goal is to create a soft, vertical gradient. Apply the darkest color closest to your lash line and blend it upwards, fading into a medium shade, then a light shade near the brow. A smudgy eyeliner look is also stunning here.
- For Deep-Set Eyes: Your eyes are set a bit further back, so you want to bring them forward. Use lighter colors in the crease and focus bright, light-reflecting shimmers on the lid to make them pop.
Troubleshooting Common Problems
Even the pros mess up. Here’s how to fix things when they go sideways.
- Problem: Fallout speckles on my cheeks.
The Fix: First, always tap the excess powder off your brush. The easiest way to avoid this is to do your eye makeup before your foundation. If it’s too late, just use a clean, fluffy powder brush to gently whisk the particles away. - Problem: My blending looks patchy.
The Fix: This usually means you didn’t set your primer! Go back with a clean fluffy brush and a bit of skin-tone powder and gently buff the edges to smooth things out. - Problem: The colors turned muddy.
The Fix: You probably over-blended or used a dirty brush. Use a totally clean blending brush with no product on it to gently diffuse just the outer edges. - Problem: My colors don’t look bright enough.
The Fix: A lesser-known trick is to use a white or very light-colored base. Applying a white cream shadow or concealer all over the lid before your eyeshadow will make bright colors like blues, purples, and pinks seriously POP.
Finally, a quick safety note. Makeup expires! Look for the little symbol of an open jar—it’ll say something like “12M,” meaning it’s good for 12 months after opening. For eye products, this is crucial. Toss mascara after 3 months, no excuses. And please, never share eye makeup.
Mastering eyeshadow is a journey. So for this week, here’s a challenge: forget the whole four-step process. Just practice your transition shade. Get really, really good at that one step. Once you nail that, the rest becomes a playground. Be patient, keep your brushes clean, and remember—it’s just colored powder. It all washes off, so don’t be afraid to play.
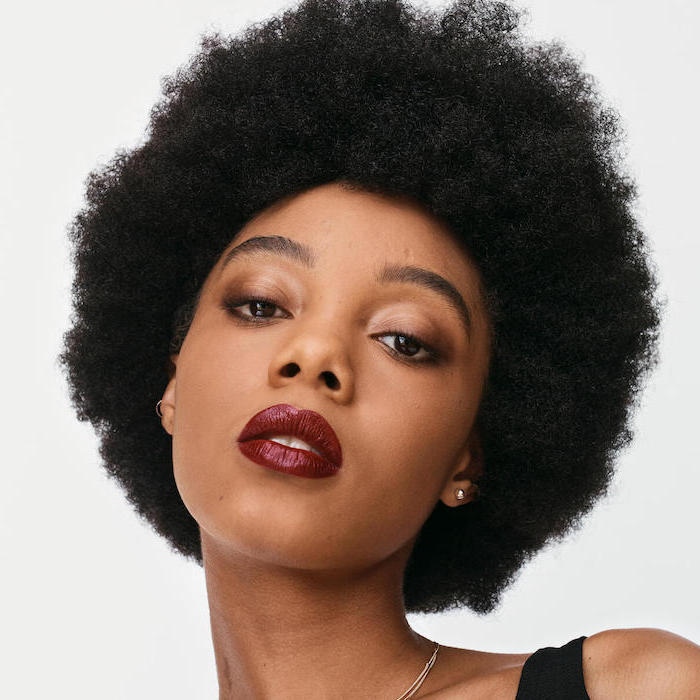
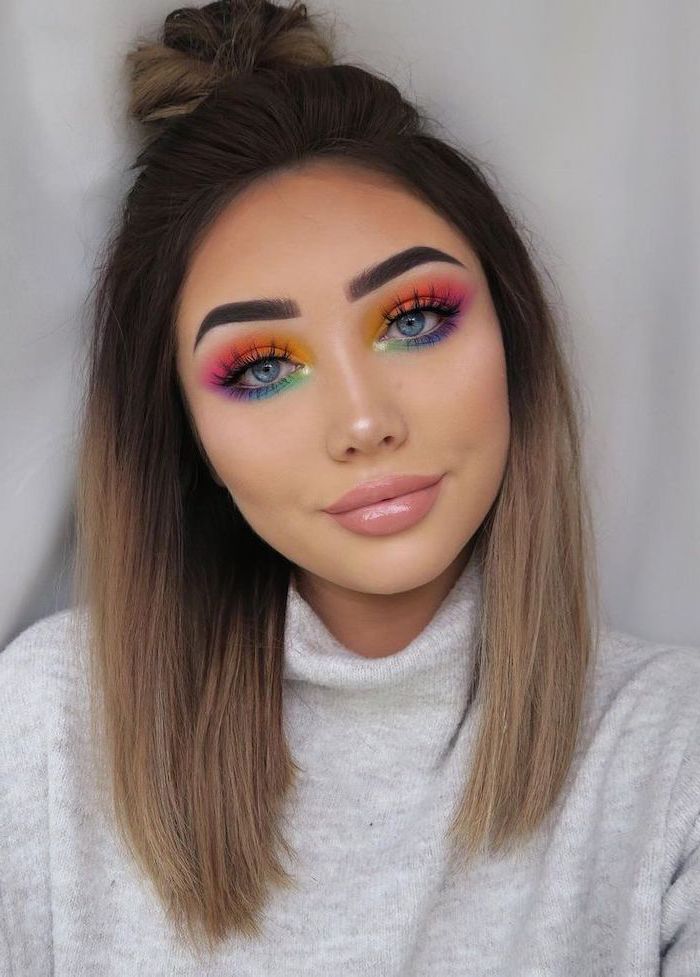
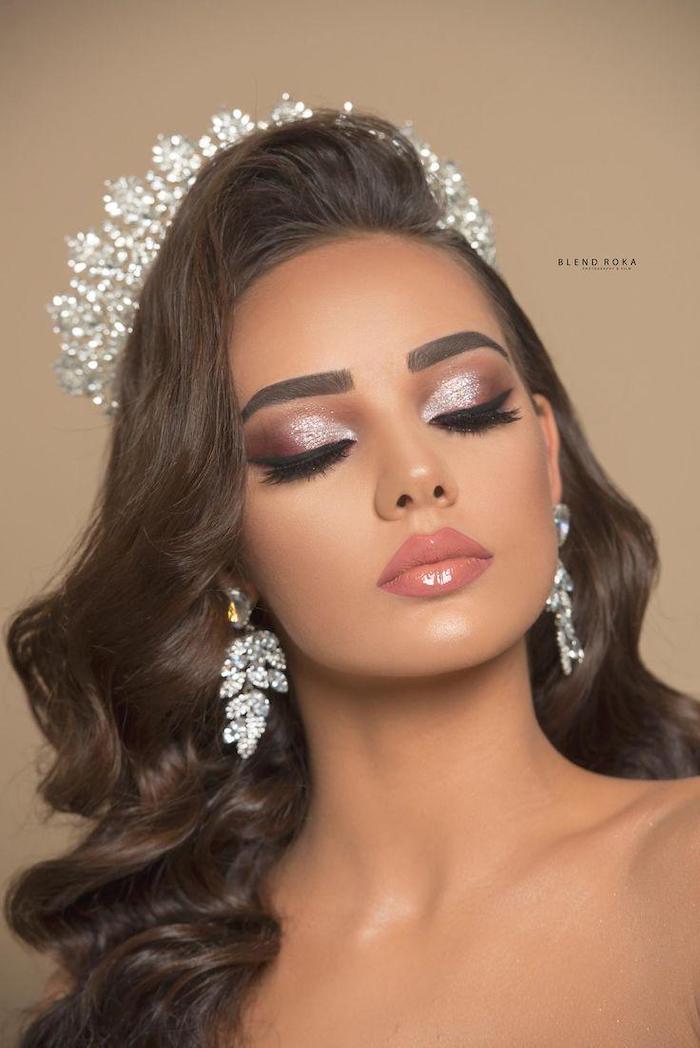
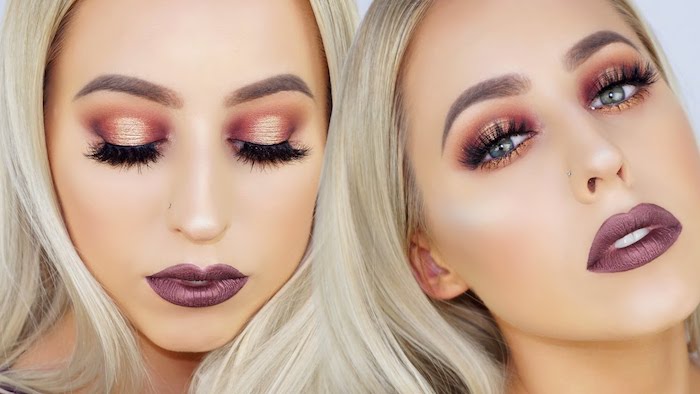
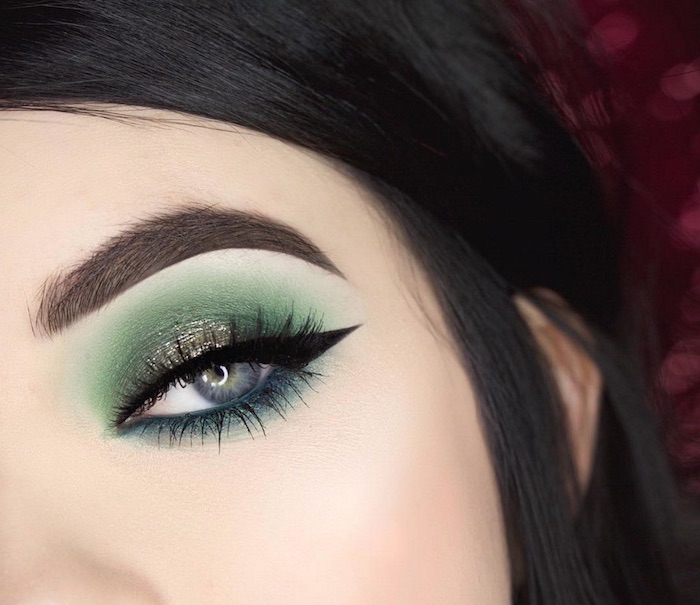
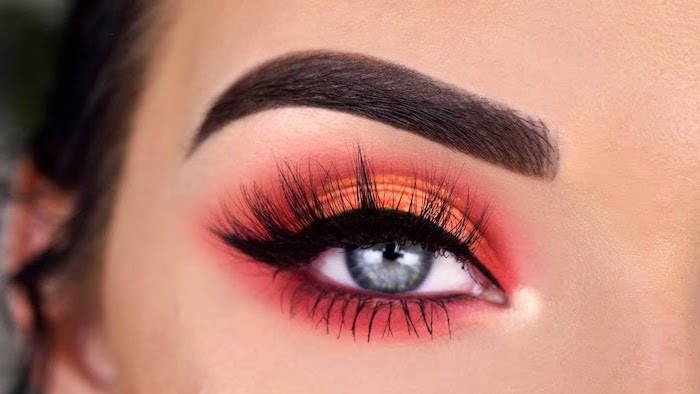
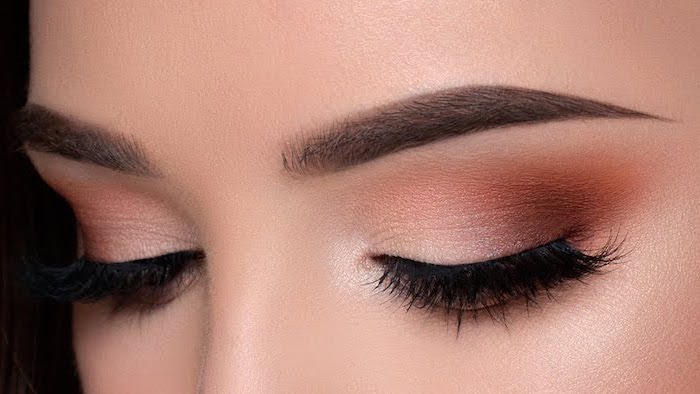
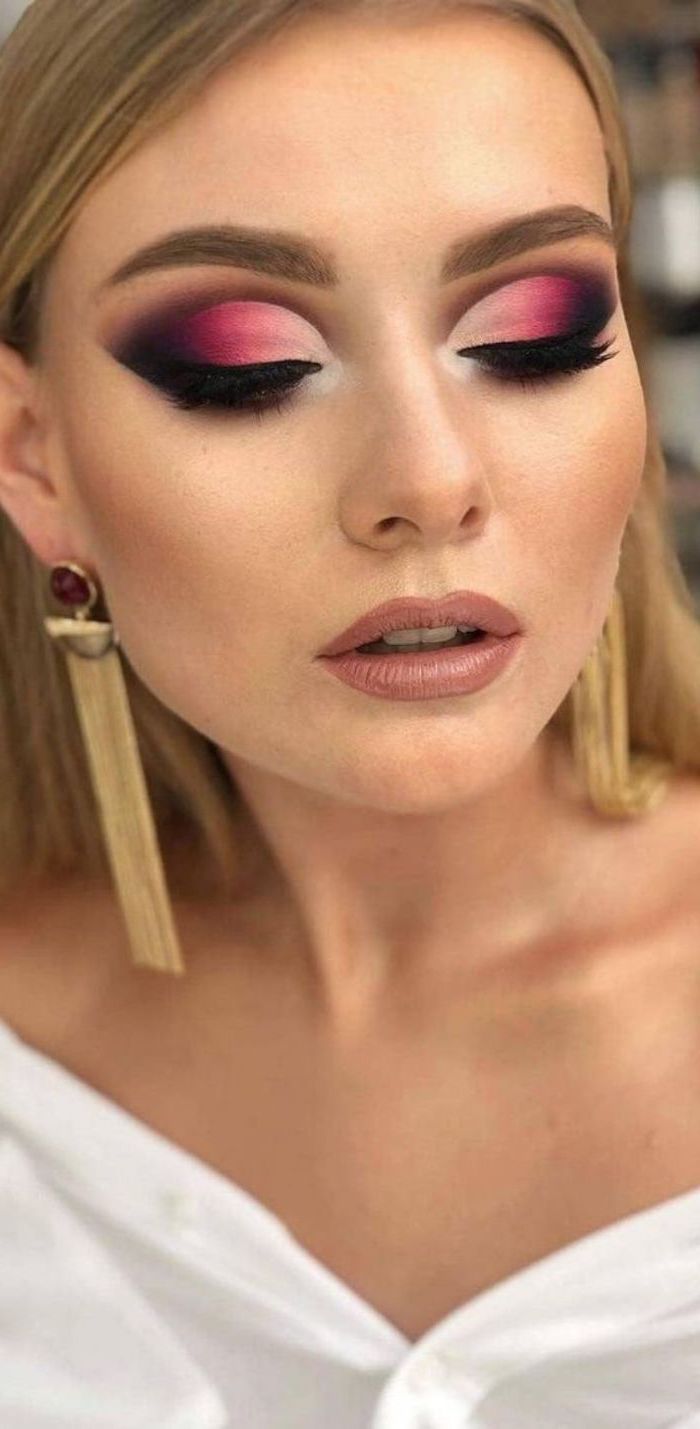
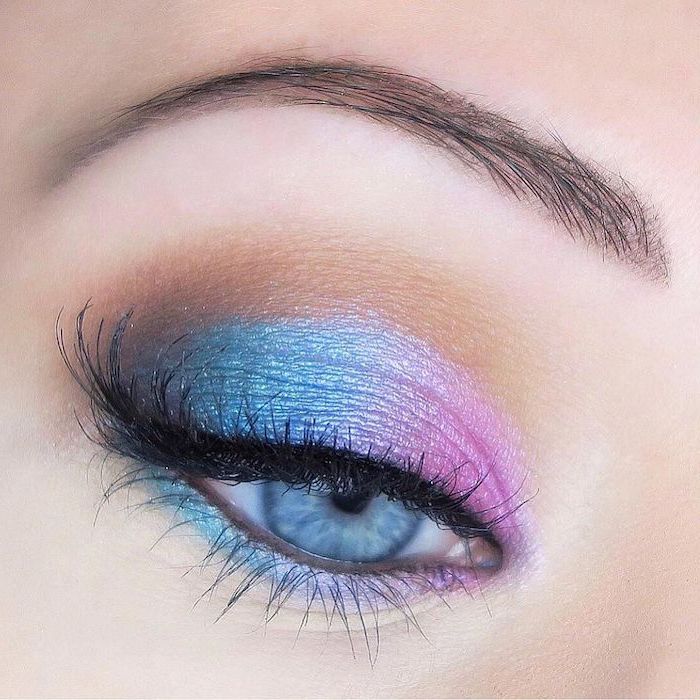
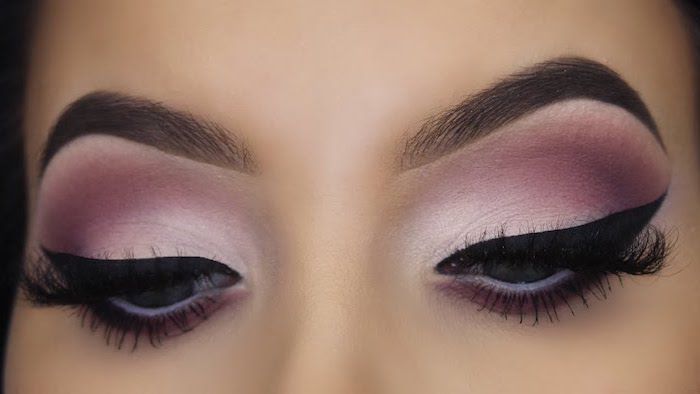
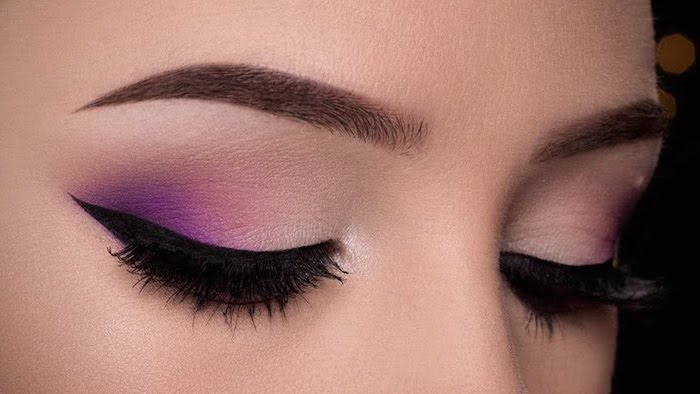
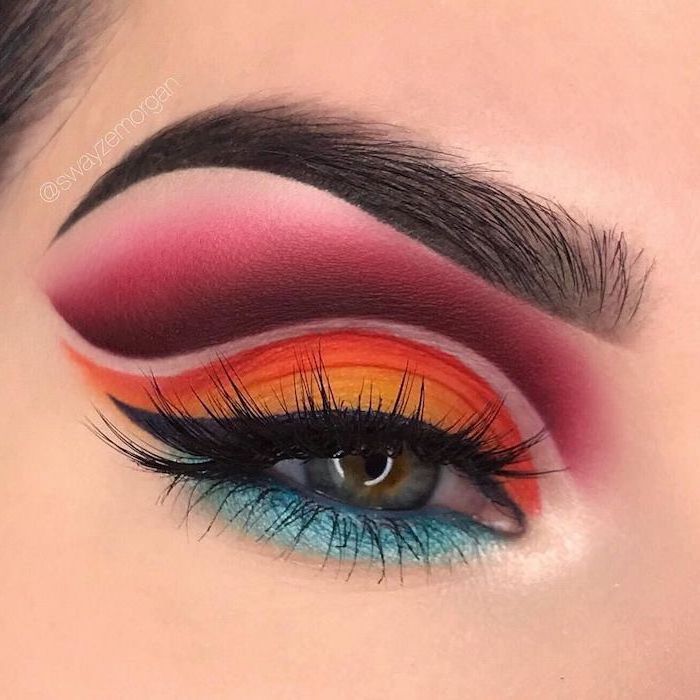
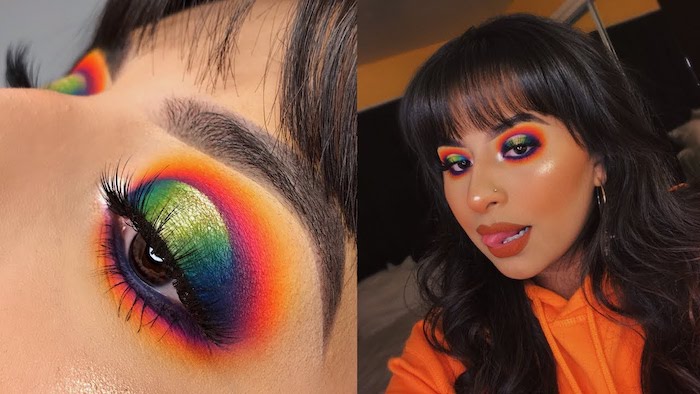
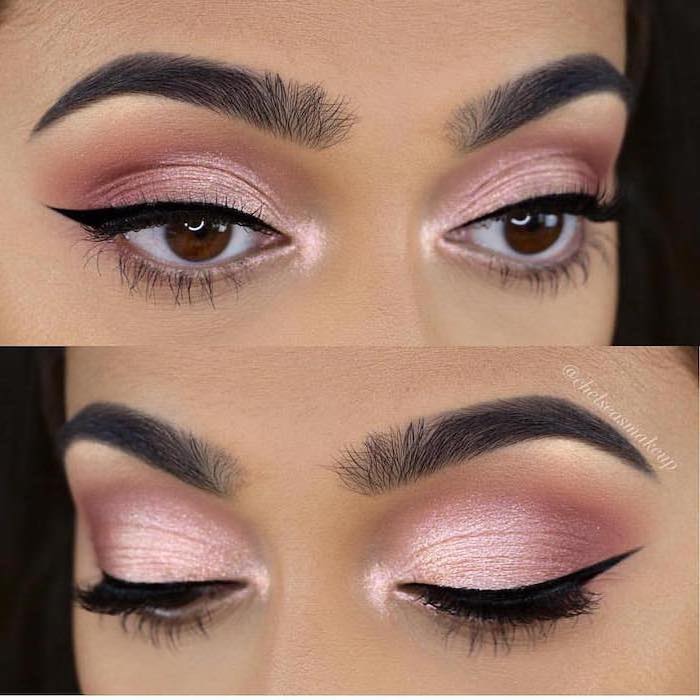
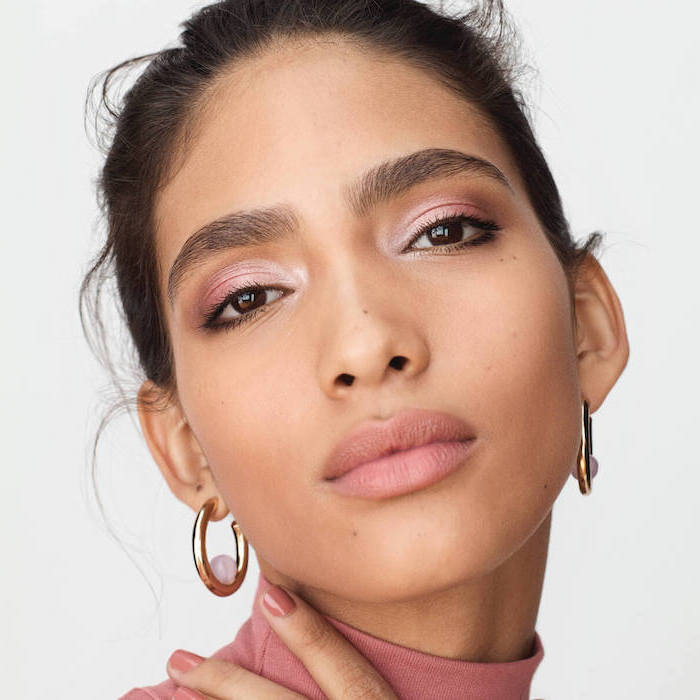
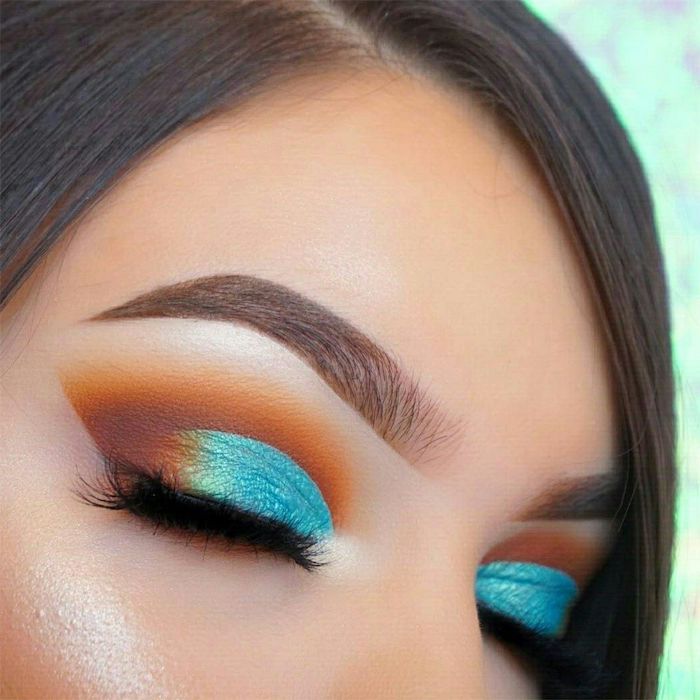
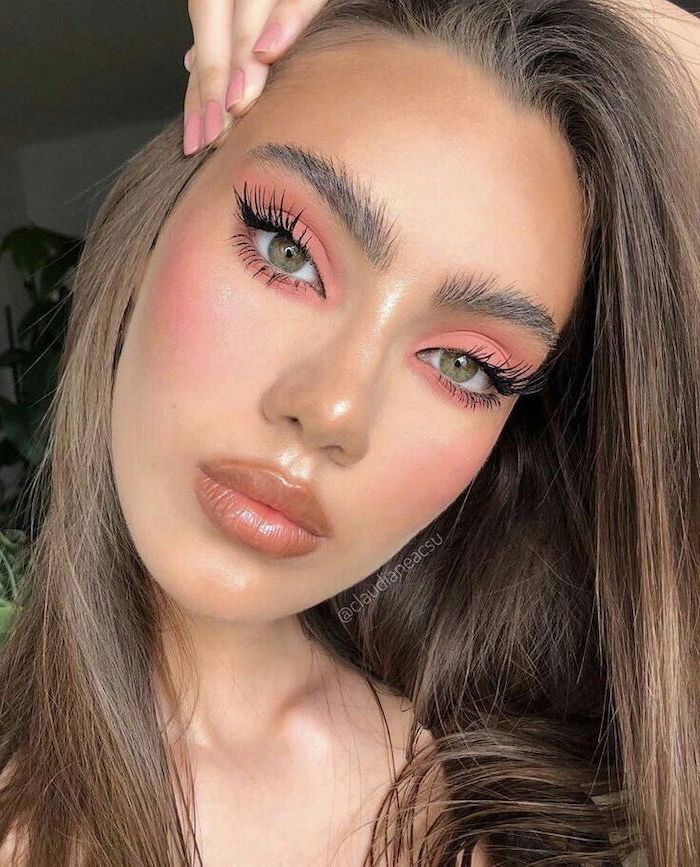
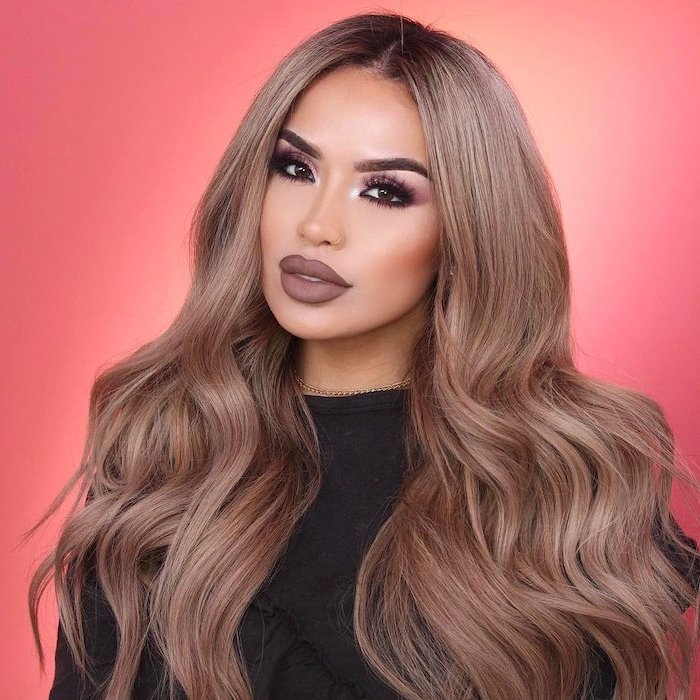
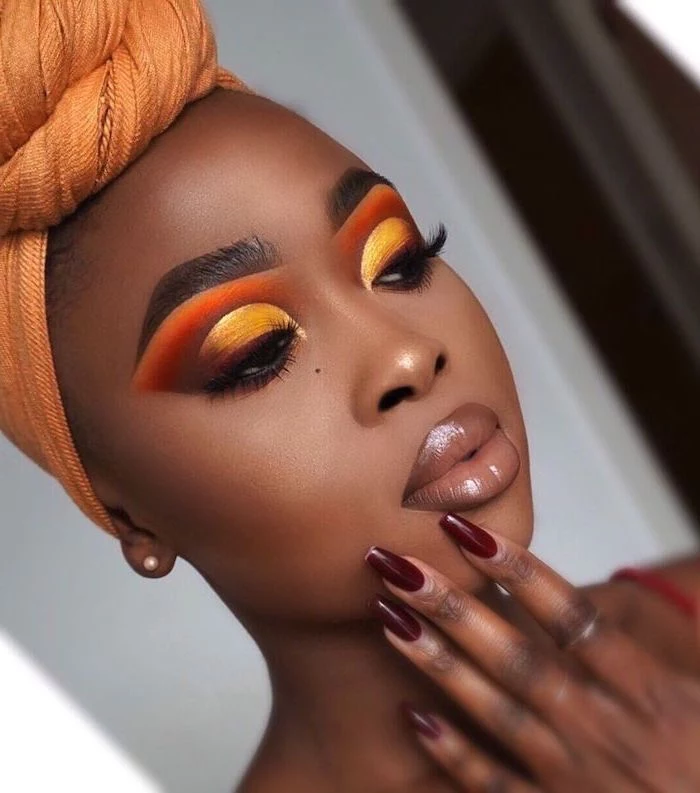
Inspiration Gallery
How do I make my eyeshadow look as vibrant on my lid as it does in the pan?
The secret is the base. Applying a shadow over a concealer or primer that hasn’t been set with powder will make it pop, but it can be hard to blend. For maximum intensity, lay down a base that matches your goal. A white or cream-colored base (like the NYX Jumbo Eye Pencil in ‘Milk’) will make brights sing, while a black base will transform shimmers and duochromes, revealing their complex undertones.

- Creates a seamless, professional-looking gradient.
- Prevents eyeshadow from looking like distinct, unblended stripes of color.
- Makes any look, from simple to dramatic, appear softer and more polished.
The key? A clean blending brush. After applying and blending your colors, take a completely clean, fluffy brush (like the Morphe M441) and use light, circular motions along the edges to diffuse any harsh lines without adding more product.
For packing on shimmer: A flat, synthetic brush is your best friend. Spritz it with a setting spray like MAC’s Prep + Prime Fix+ before dipping into the shadow for an intense, almost-foiled metallic finish.
For a soft, diffused crease: A tapered, natural-hair blending brush allows for precise placement and effortless blending all at once.
Ultimately, using the right tool for the job saves you time and frustration.
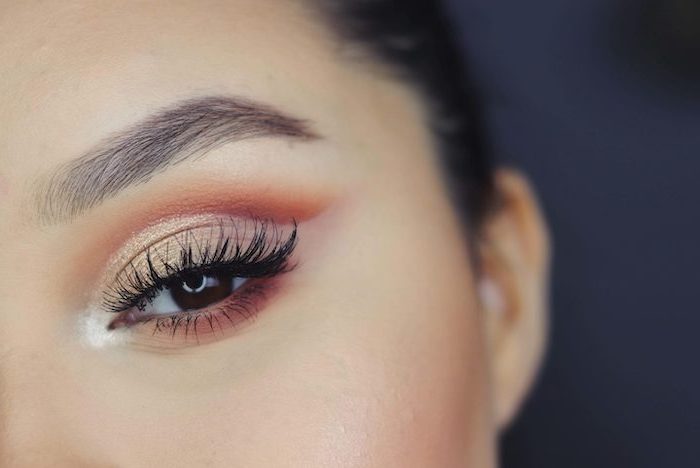
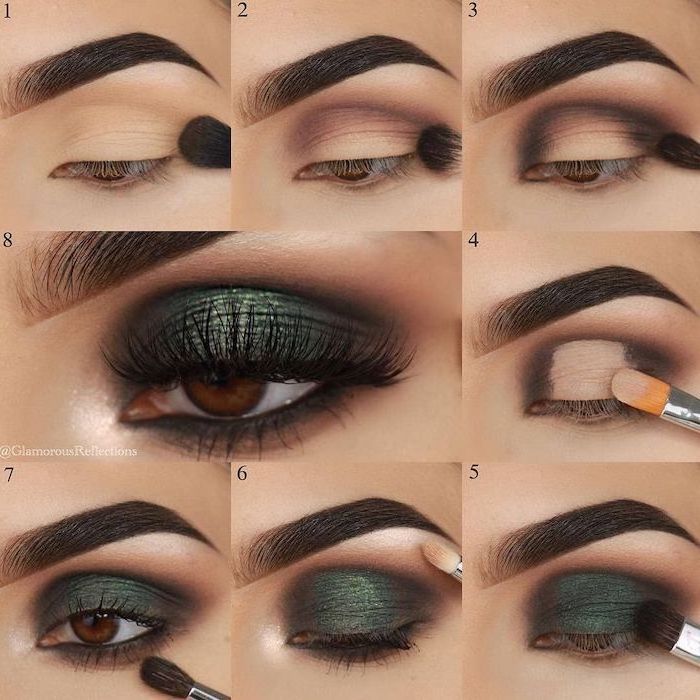
Don’t be afraid to mix textures. A common pro technique is to build the entire structure of the eye—crease, outer corner, lash line—with matte shadows. They absorb light and create dimension. Then, place a high-impact shimmer, satin, or glitter shadow right on the center of the lid as a final step. This creates a focal point and adds a sophisticated, multi-dimensional effect.
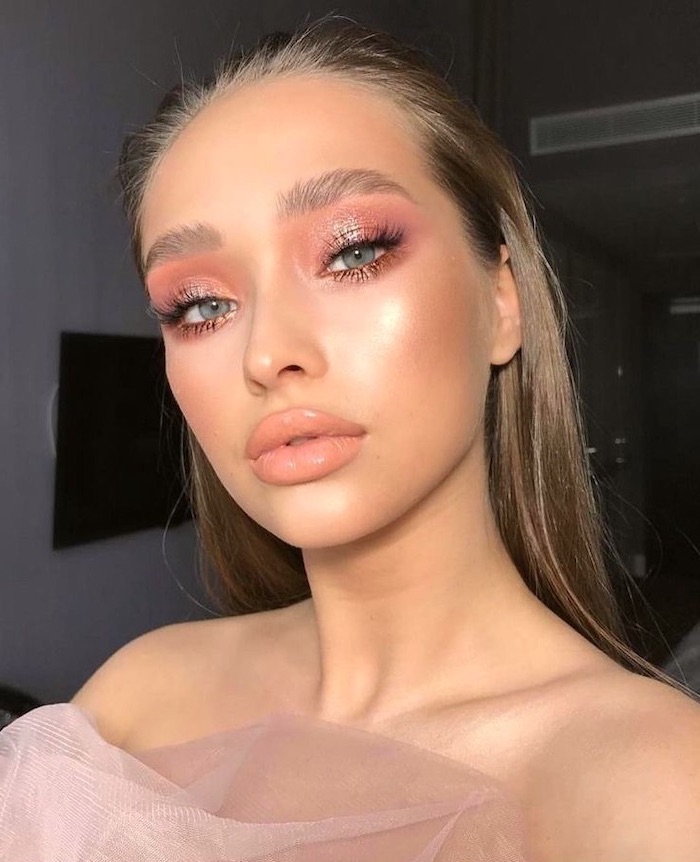
An often-overlooked hero: the transition shade. This is a neutral color, usually a soft tan, peach, or light brown a few shades deeper than your skin tone. Applied with a fluffy brush in and slightly above the crease, it acts as a bridge between your bold crease colors and your brow bone, ensuring a smooth, believable gradient rather than harsh, disconnected blocks of color.
- A fluffy blending brush (for transition and blending edges).
- A flat shader brush (for packing color on the lid).
- A small pencil brush (for precise work on the lower lash line or outer corner).
With just these three brushes, you can create almost any eye look. Brands like Real Techniques and BK Beauty offer high-quality, affordable sets that are perfect for starting your collection.
Accidentally dropped your favorite Viseart or Natasha Denona palette? Don’t despair. You can easily fix a shattered powder eyeshadow. Simply crush the broken pieces into a fine powder within the pan, add a few drops of rubbing alcohol, and mix to form a paste. Smooth it down with the back of a spoon and let it air-dry completely. It will be as good as new.


Did you know that many high-shimmer eyeshadows owe their sparkle to mica, a naturally occurring silicate mineral?
This is what gives them that beautiful, light-reflecting quality. However, the source of mica is a significant ethical concern in the beauty industry. Brands like Aether Beauty and RMS Beauty are known for their commitment to using only ethically and sustainably sourced mica, allowing you to sparkle with a clear conscience.
Is it better to do my eye makeup before or after my foundation?
Most professionals prefer to do eyes first. This allows for easy cleanup of any ‘fallout’—those pesky specks of shadow that fall onto your cheeks during application. You can simply wipe it away with a makeup wipe or micellar water without disturbing your perfectly blended foundation, concealer, and powder. It’s a simple switch in your routine that makes a world of difference.
The lower lash line is crucial for a balanced, complete look. Skipping it can make the eye look top-heavy. Gently sweep a small amount of your crease or outer corner color along the lower lashes with a pencil brush. For a brighter, wider-eyed look, apply a lighter shimmer to the inner portion of the lower lash line.
Cream Shadow: Offers a luminous, often dewy finish and is fantastic as a long-wearing base for powder shadows. Apply with fingers or a synthetic brush. Great for a quick, single-color look. Try the Charlotte Tilbury Eyes to Mesmerise pots.
Powder Shadow: The most versatile option, available in countless finishes. Best for intricate blending and creating complex, multi-toned looks. Requires brushes for application.
For the best of both worlds, use a cream shadow as a base to intensify the powder you layer on top.
To truly flatter your eye color, think in opposites on the color wheel.
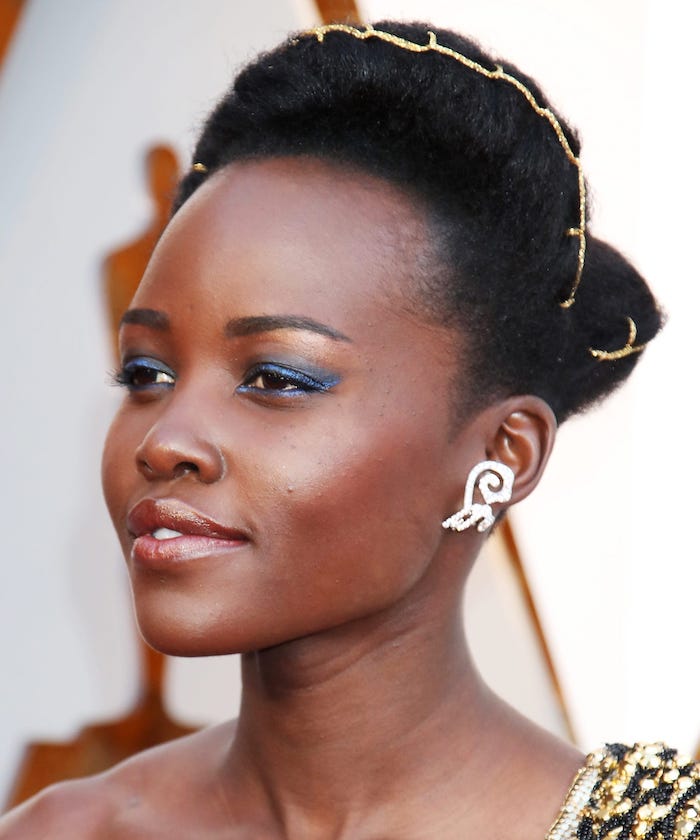
- Blue Eyes: Oranges, coppers, and warm browns create a stunning contrast.
- Green Eyes: Reds, purples, and rosy tones like cranberry and amethyst make green eyes pop.
- Brown Eyes: Lucky you! Nearly every color works, but teals, deep blues, and rich purples are especially striking.
A simple trick to create a ‘lifted’ eye shape is to think upwards. Imagine a line extending from your lower lash line up towards the end of your eyebrow. Keep all your blending and color application moving in this upward and outward direction. This prevents the shadow from dragging your eye down and creates a more awake, feline effect.
Eyeshadow palettes typically have a ‘period after opening’ symbol on the back, usually indicating a shelf life of 12 to 24 months.
While powders are less prone to spoilage than creams, they can still harbor bacteria over time, leading to potential eye infections. If a shadow’s texture changes, develops a film, or smells off, it’s time to part ways.
The single shadow challenge: You don’t always need a full palette. A single, high-quality shadow can create a chic, minimalist look. Use a wash of a sophisticated taupe like MAC’s
Can I get a great look with drugstore shadows?
Absolutely. The quality gap between high-end and drugstore has narrowed significantly. Brands like ColourPop are famous for their buttery, high-impact formulas at a fraction of the price. E.l.f. Cosmetics offers fantastic Bite-Size palettes that are perfect for travel or trying new color stories without a major investment. The technique is often more important than the price tag.
- As a soft, natural eyeliner when applied with a damp, angled brush.
- A matte brown can double as a brow powder if the shade is right.
- A contour shade can be used in the eye socket for a quick, sculpted look.
The secret is a product like Inglot’s Duraline. A single drop of this clear liquid can transform any powder eyeshadow into a long-lasting, waterproof liquid liner.
The glossy lid look is a high-fashion staple that’s surprisingly easy to achieve. After completing your eyeshadow look (a simple color wash works best), gently tap a clear, non-sticky eye gloss over the top. Avoid your crease to minimize smudging. The result is a chic, editorial effect. Just be sure to use a product made for eyes, like the Danessa Myricks Colorfix Glaze, not a lip gloss!
One of the biggest blending mistakes: using too much pressure. It’s tempting to press hard to move the pigment, but this leads to patchiness and muddying. The key is an extremely light touch. Hold your brush near the end of the handle, not close to the bristles, and let the very tips of the brush do the work with gentle, sweeping motions.
Want to create the illusion of a rounder, more open eye? Focus the light. Apply your deepest matte shades to the very outer and inner thirds of the eyelid, leaving the center bare. Then, press a bright, light-reflecting shimmer or metallic shade right onto that center spot. This ‘halo’ technique draws light to the middle of the eye, making it look larger and more spherical.
A 2015 study found that people touch their faces an average of 23 times per hour, with a significant portion of that contact being to the eyes, nose, or mouth.
This is why a good setting spray is non-negotiable for locking in your hard work. A fine mist, like the one from Urban Decay’s All Nighter spray, creates a flexible film that helps your eyeshadow resist smudging, fading, and transferring, even through an entire day of subconscious face-touching.

The 1960s cut crease, popularized by icons like Twiggy, is a masterclass in creating dimension. It involves carving out the socket of the eye with a sharp, dark line, creating a stark contrast with a pale lid. Today’s version is often softer, blended out for a ‘faux’ cut crease that gives the same eye-opening effect with a more modern, less graphic feel.
Natural Hair Brushes: Made from animal hair (like goat or squirrel), they have a cuticle that excels at picking up and blending powder products for a soft, airbrushed finish.
Synthetic Brushes: Made from nylon or other man-made fibers, they don’t absorb product, making them perfect for creams, liquids, and getting an intense color payoff from shimmers.
With modern technology, high-end synthetics from brands like Hourglass now rival the performance of natural hair, offering a cruelty-free option for every step.
To keep your colors true and your application smooth, clean your brushes regularly. For a deep clean, use a gentle soap (baby shampoo works well) and lukewarm water, gently massaging the bristles until the water runs clear. Reshape the brush head and lay it flat on a towel to dry. For quick switches between colors, a spray-on brush cleaner on a paper towel is a makeup artist’s essential.