The Real Deal on Protective Styles: A Braider’s Guide to Healthy Hair
I’ve been braiding hair for what feels like a lifetime. It all started on my front porch, practicing on anyone who would sit still long enough. Now, I run a busy salon, but after all this time, one truth has never, ever changed: a good protective style is about hair health first, and looks second. I’ve seen it all—from clients with hair that’s absolutely thriving to folks who need serious TLC after a bad experience somewhere else.
In this article
- First, Let’s Get a Little Nerdy: Why This Actually Works
- Prepping for Success: Don’t Skip This Step!
- How to Choose Your Best Style (The Pro Consultation)
- A Braider’s Breakdown: Box Braids vs. Knotless
- Making It Last: The Maintenance Plan
- The Grand Finale: How to Take Down Your Braids Without Breakage
- Galerie d’inspiration
A style that looks amazing but causes damage in a week? That’s not a protective style. It’s a problem.
The term “protective style” gets thrown around a lot, especially in the summer. But what does it really mean? It’s so much more than just getting your hair out of your face. A true protective style is designed to shield your hair from all kinds of daily stress—the pulling from combs, the friction from your clothes, and even the sun and wind. The ultimate goal is to cut down on breakage so you can finally see the length you’re gaining. Your hair is always growing, but if your ends are snapping off, you’ll feel like you’re stuck in a rut.

This guide is all about the practical, real-world knowledge that separates a beautiful, healthy protective style from a damaging one. We’ll get into how to pick the right style, what to look for in a stylist, and the absolute must-knows for keeping your hair safe and sound.
First, Let’s Get a Little Nerdy: Why This Actually Works
Before we even get to the pretty stuff, you need to understand what’s happening to your hair on a tiny level. Honestly, when you get the “why,” you can make better decisions for your hair, whether you’re in a salon chair or sitting in front of your mirror.
The Moisture Game
Imagine each strand of your hair is covered in tiny shingles, like on a roof. This is your hair’s cuticle. When your hair is healthy and moisturized, those shingles lie flat, sealing moisture inside. But when it’s dry or damaged, the shingles lift up, letting all that precious moisture escape. This makes hair feel rough, brittle, and leads to tangles and breakage.
A protective style groups those strands together, literally reducing the surface area exposed to the air. This slows down moisture loss. And by tucking away your ends—the oldest, most fragile part of your hair—you’re protecting them from catching on your sweater or pillowcase. That’s the secret to length retention right there.
Good to know: Don’t know your hair’s porosity? Try the spray bottle test. Just spritz a small section of clean, product-free hair with water. If the water beads up and sits on top, you likely have low porosity hair. If it soaks in almost instantly, you probably have high porosity. High porosity hair will need more frequent moisturizing with oils and creams to keep it from drying out inside the braids.
Let’s Talk About Tension
Okay, this is the big one. The single biggest risk with any style that adds hair is tension. Every hair on your head grows from a follicle in your scalp. When a braid is installed too tightly, it puts a constant, painful pull on that follicle. Your scalp will tell you it’s unhappy—you might see redness, feel sore, or get those little bumps. That’s inflammation, and it’s a huge warning sign.

If that tension continues, it can lead to traction alopecia, which is just a fancy term for hair loss caused by pulling. At first, it might be temporary, but over time, it can permanently damage the follicle. I’ve had consultations with clients who have thinning edges from years of tight styles. This is why technique is EVERYTHING. A style should feel secure, but it should never, ever hurt.
Prepping for Success: Don’t Skip This Step!
Before you even book an appointment or buy a single pack of hair, you need to set the stage for a healthy install. What you do beforehand matters just as much as the style itself.
First off, make sure your own hair is ready. It should be freshly washed, deep-conditioned, and thoroughly detangled. Starting with a clean, moisturized canvas is non-negotiable.
Next, let’s talk about the extension hair. Ever gotten braids and found your scalp was unbearably itchy a few days later? A common culprit is the alkaline coating that manufacturers put on synthetic hair. You can fix this easily!

Quick tip: Give your braiding hair an Apple Cider Vinegar (ACV) rinse before you use it. Just soak the hair in a bowl of warm water with about a cup of ACV for 20-30 minutes, then rinse it thoroughly with plain water and let it hang to dry completely. This removes that chemical coating and makes a world of difference for scalp sensitivity. When you’re at the beauty supply store, look for popular, reliable brands like X-Pression or Ruwa—they’re known for being lightweight and easier to work with.
How to Choose Your Best Style (The Pro Consultation)
The prettiest style on Pinterest can be the absolute wrong choice for you. A good consultation isn’t an upsell; it’s a diagnostic step to protect your hair. Be honest with yourself about these factors.
1. Your Hair’s Current Condition
Take a hard look at your hair. Is it shedding a lot? Feeling brittle? If your hair is already in a fragile state, a heavy style like long, traditional box braids could make things worse. You might need to focus on treatments for a few weeks first.
- Density and Texture: If you have low-density or very fine hair, heavy styles are a no-go. The weight is just too much. I’d guide a client with fine hair toward something lighter, like knotless braids or twists, and we’d use less extension hair.
- Porosity: As we mentioned, high porosity hair will need more attention inside the style. You’ll need to be diligent about spraying a light leave-in conditioner or using oil to keep it from getting crunchy and dry.
2. Your Real-Life Lifestyle
Your daily routine plays a huge role in what style will work for you.
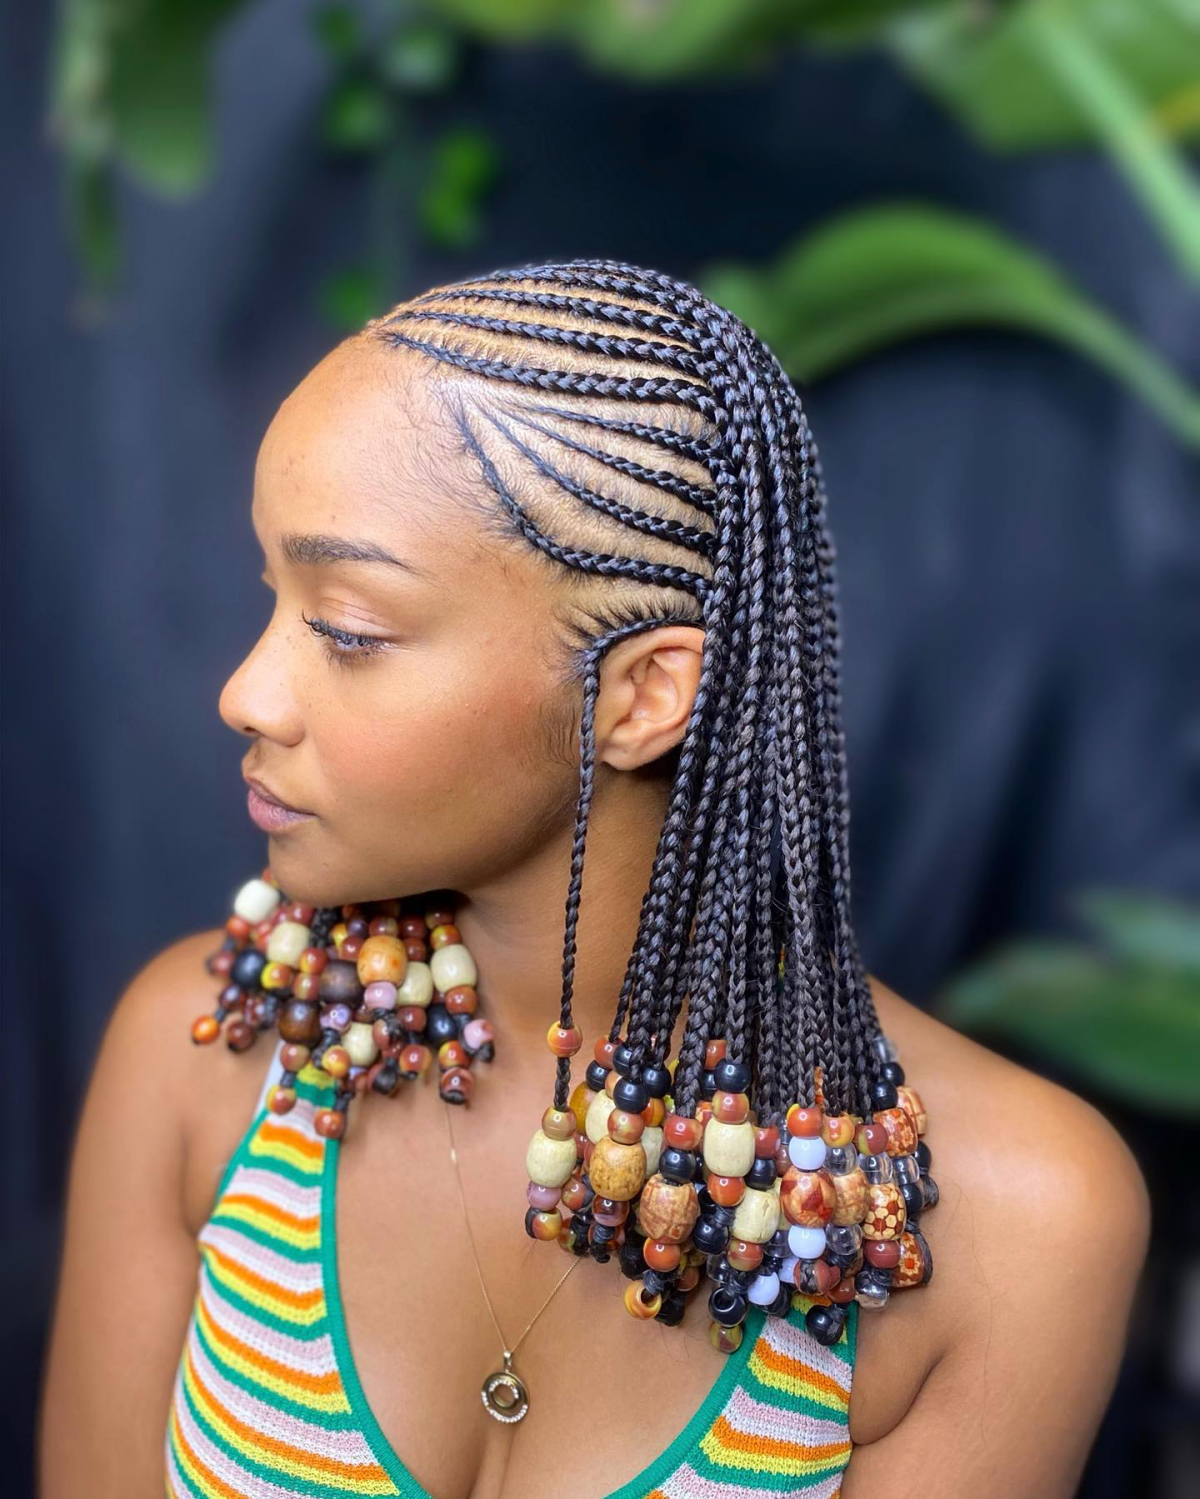
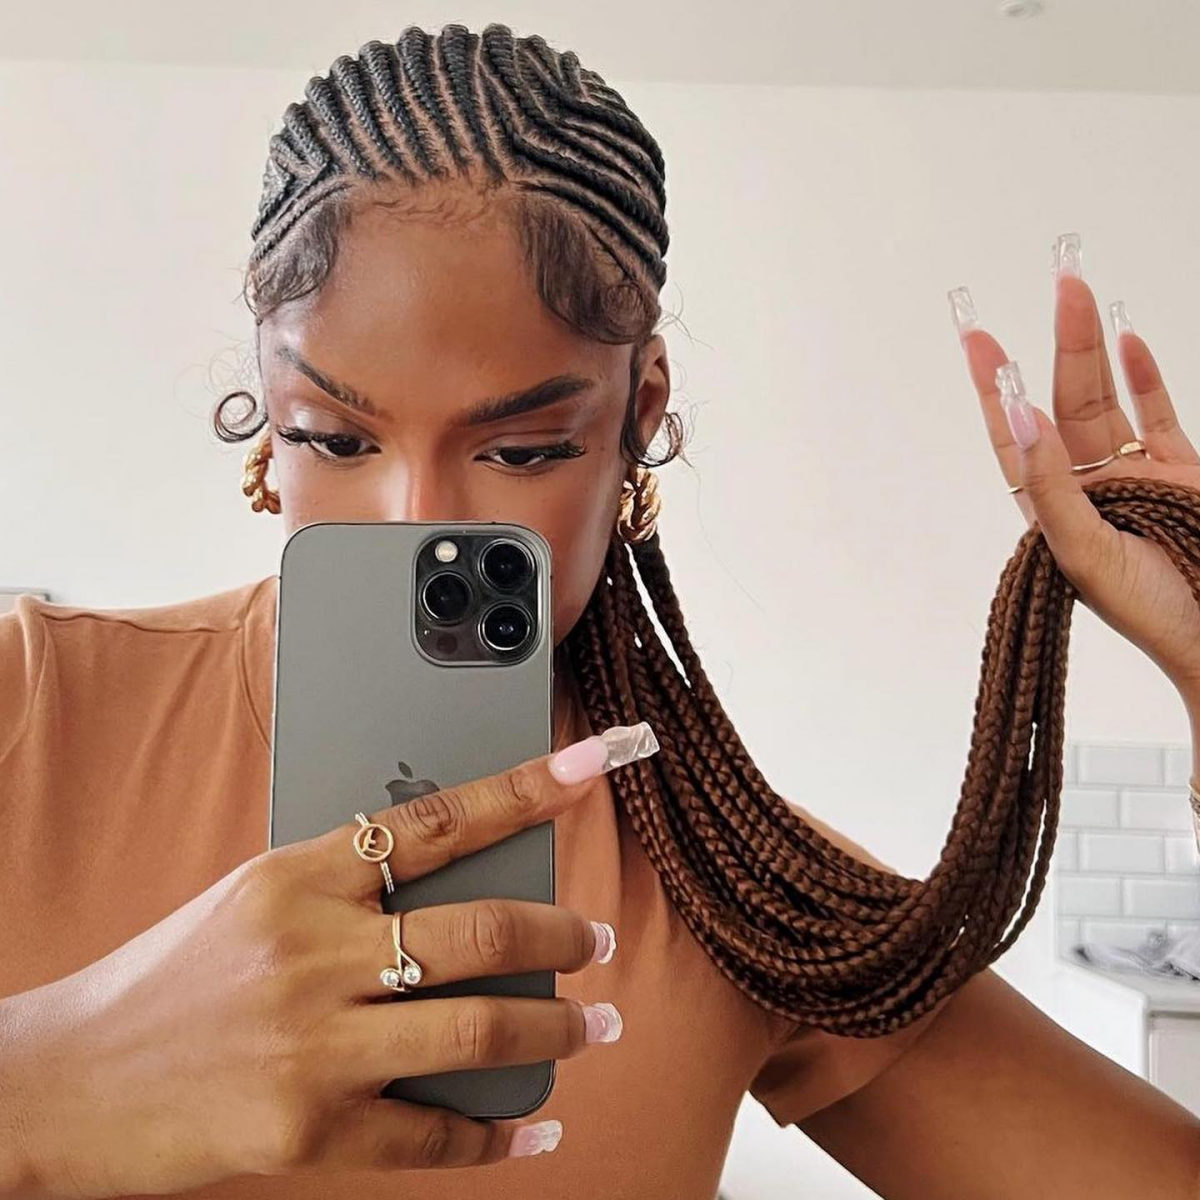
- Do you work out or sweat a lot? You need a style with easy scalp access for cleaning. Cornrows or medium-sized braids are great for this. Super-dense styles like faux locs can trap sweat, so you have to be extra careful. A great trick is to mix some witch hazel with water in a spray bottle and spritz your scalp after a workout. It cleanses without needing a full wash.
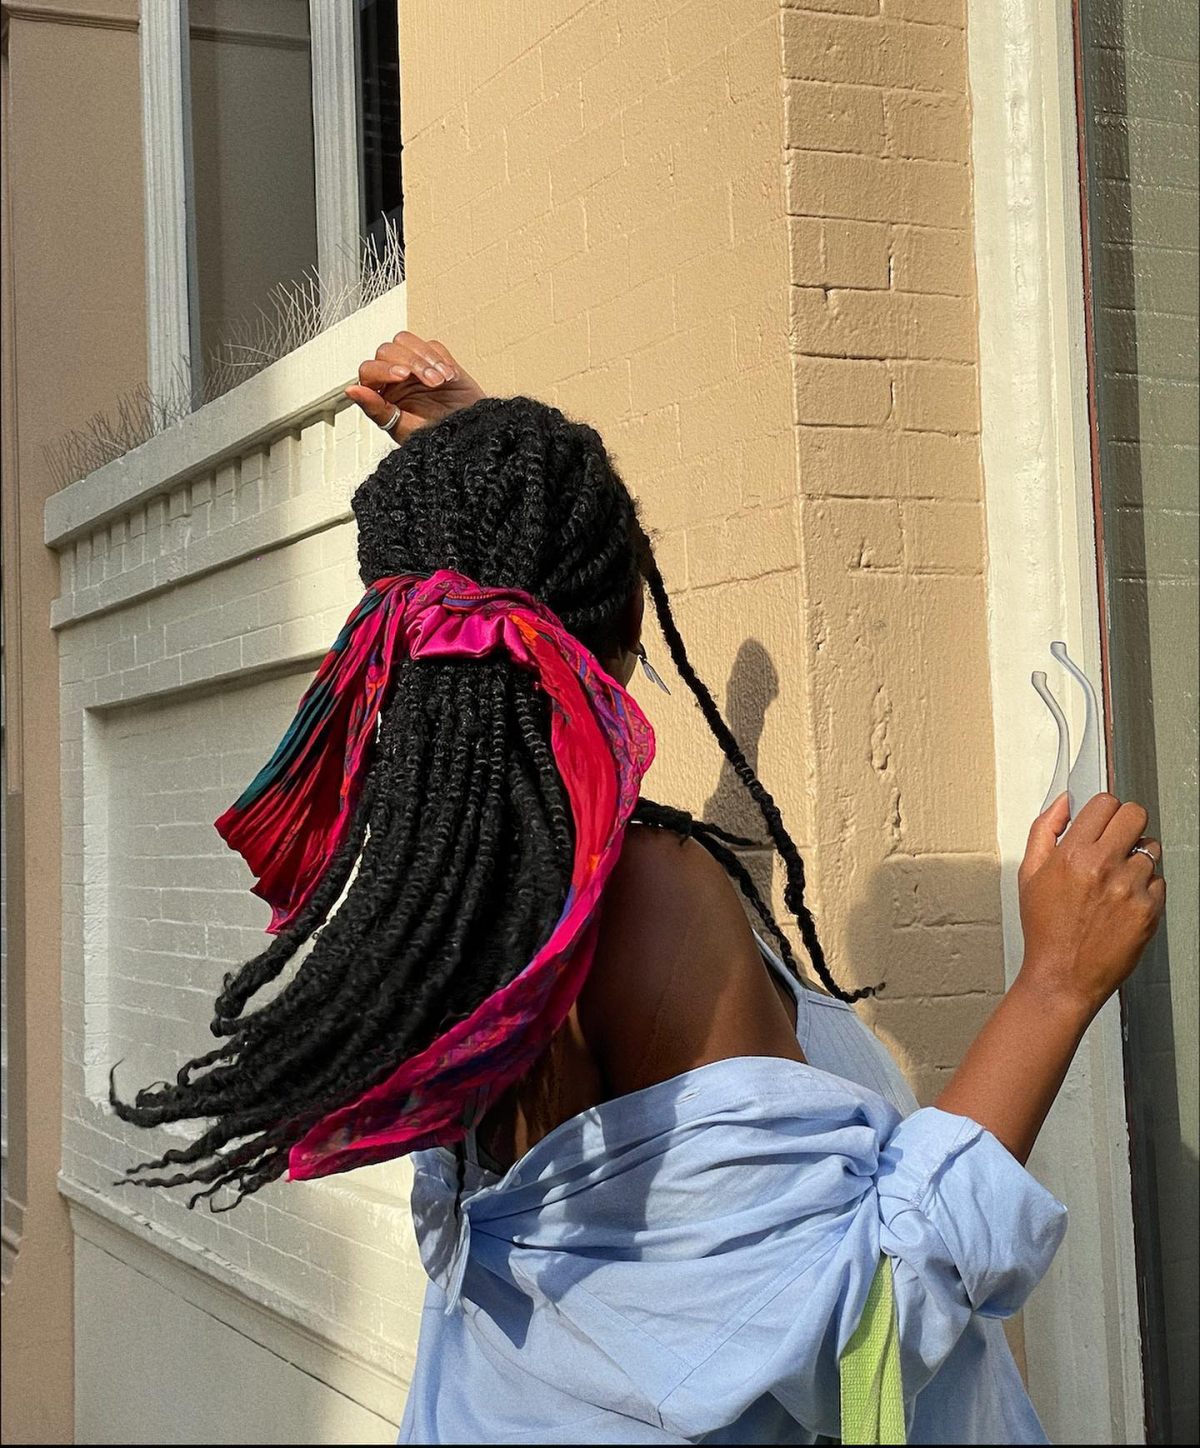
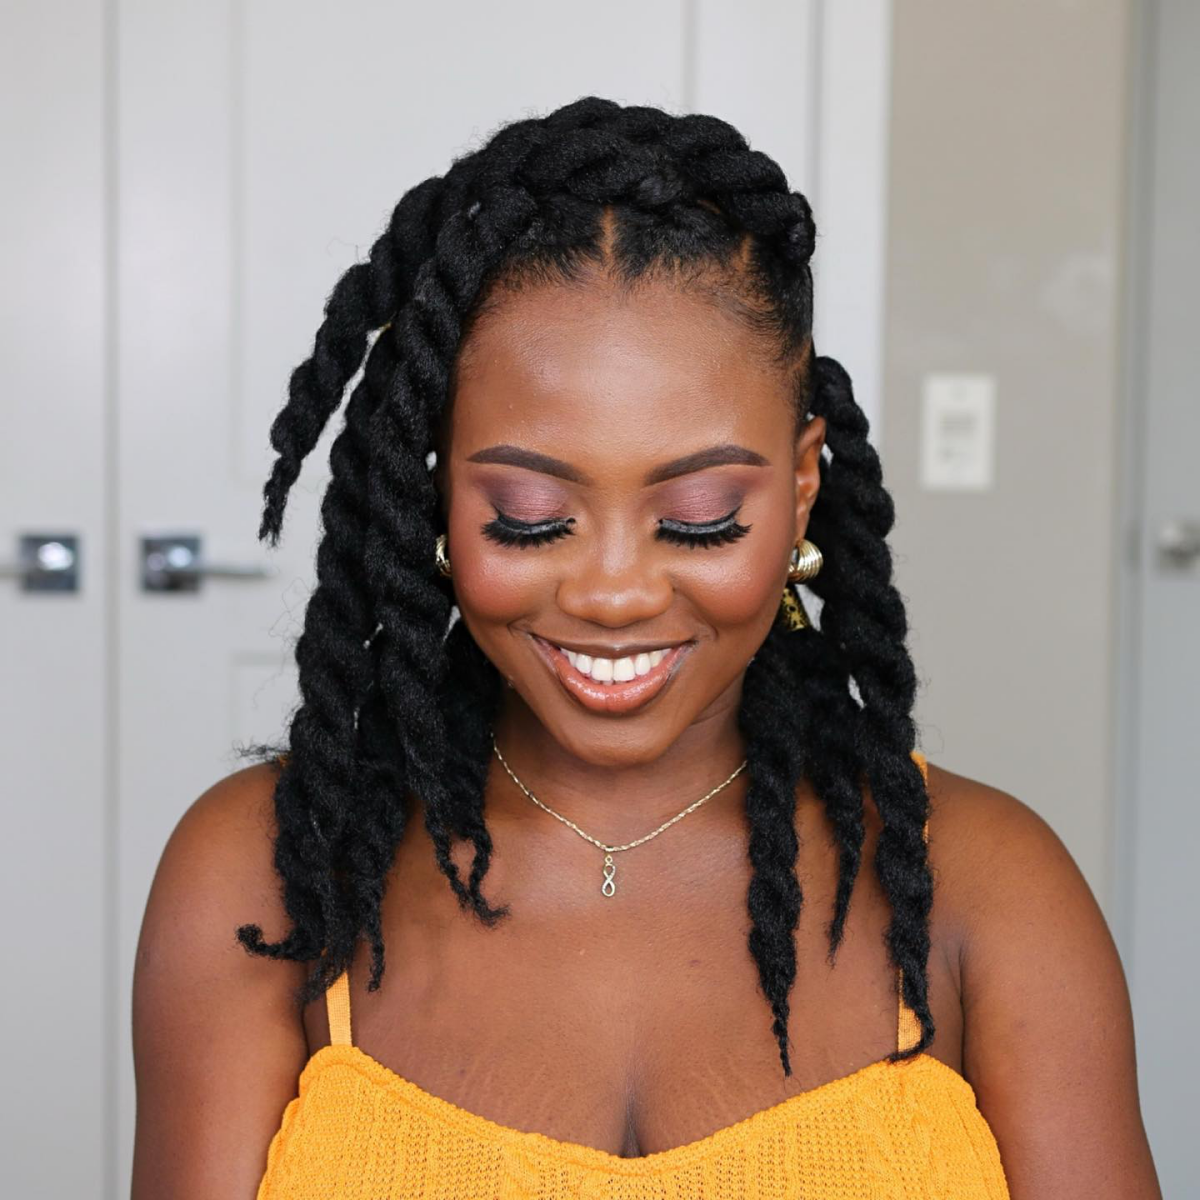
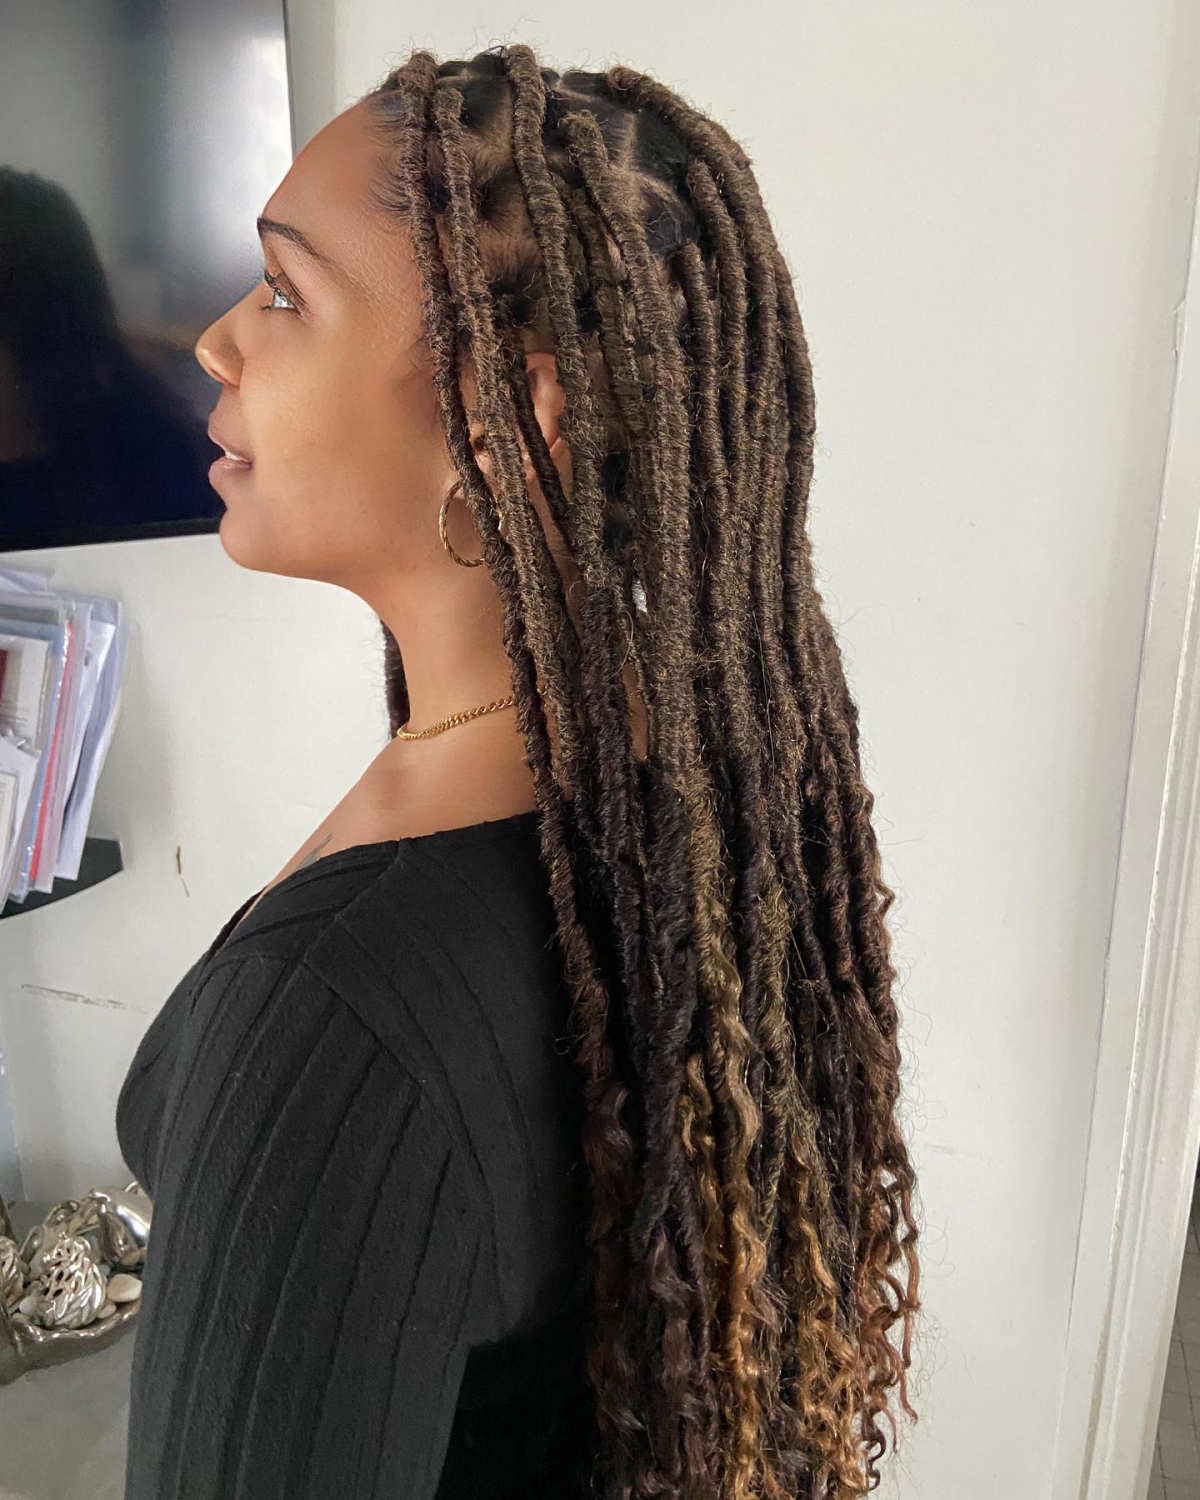
- Are you a swimmer? Chlorine and salt water are incredibly drying. Choose a style that’s easy to rinse through and dries relatively fast. Senegalese twists are often a better bet than thick locs, which can hold water for ages and risk getting that dreaded mildew smell. Trust me, you don’t want that.
3. Be Real About Time and Money
Quality protective styles are an investment of both time and cash. For small, waist-length braids, you should expect to be in the chair for 6 to 10 hours. I always tell my clients to clear their schedule, bring a book, and pack a lunch. Rushing your stylist is a recipe for sloppy work and potential pain.
Cost is a big indicator of quality. A super-low price can be a red flag. It might mean the stylist is inexperienced or cuts corners. To give you a ballpark, knotless box braids in a major city can range from $180 for a simple shoulder-length style to over $400 for super long, small braids. Traditional box braids might be a little less, maybe $150 to $350. Remember, you’re paying for skill and the health of your hair. A cheap install that causes breakage will cost you way more to fix in the long run.
A Braider’s Breakdown: Box Braids vs. Knotless
Let’s get into the nitty-gritty of the two most popular styles. They might look similar from a distance, but they are worlds apart in technique and impact.
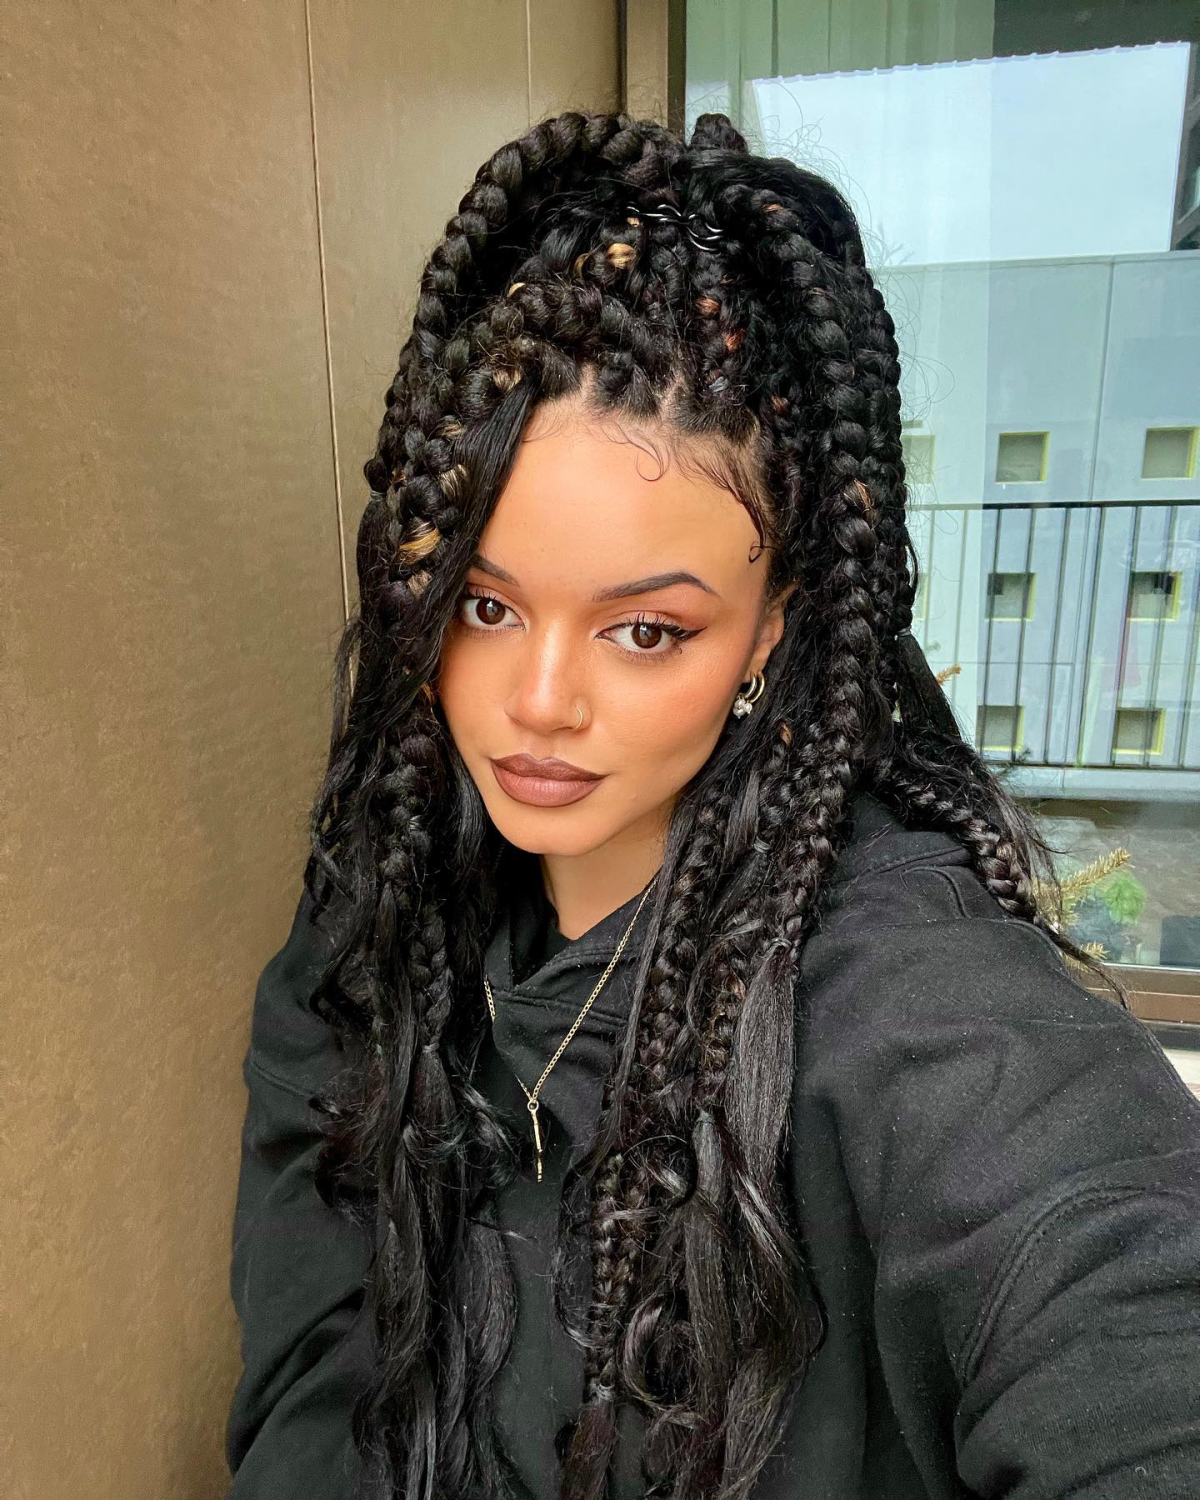
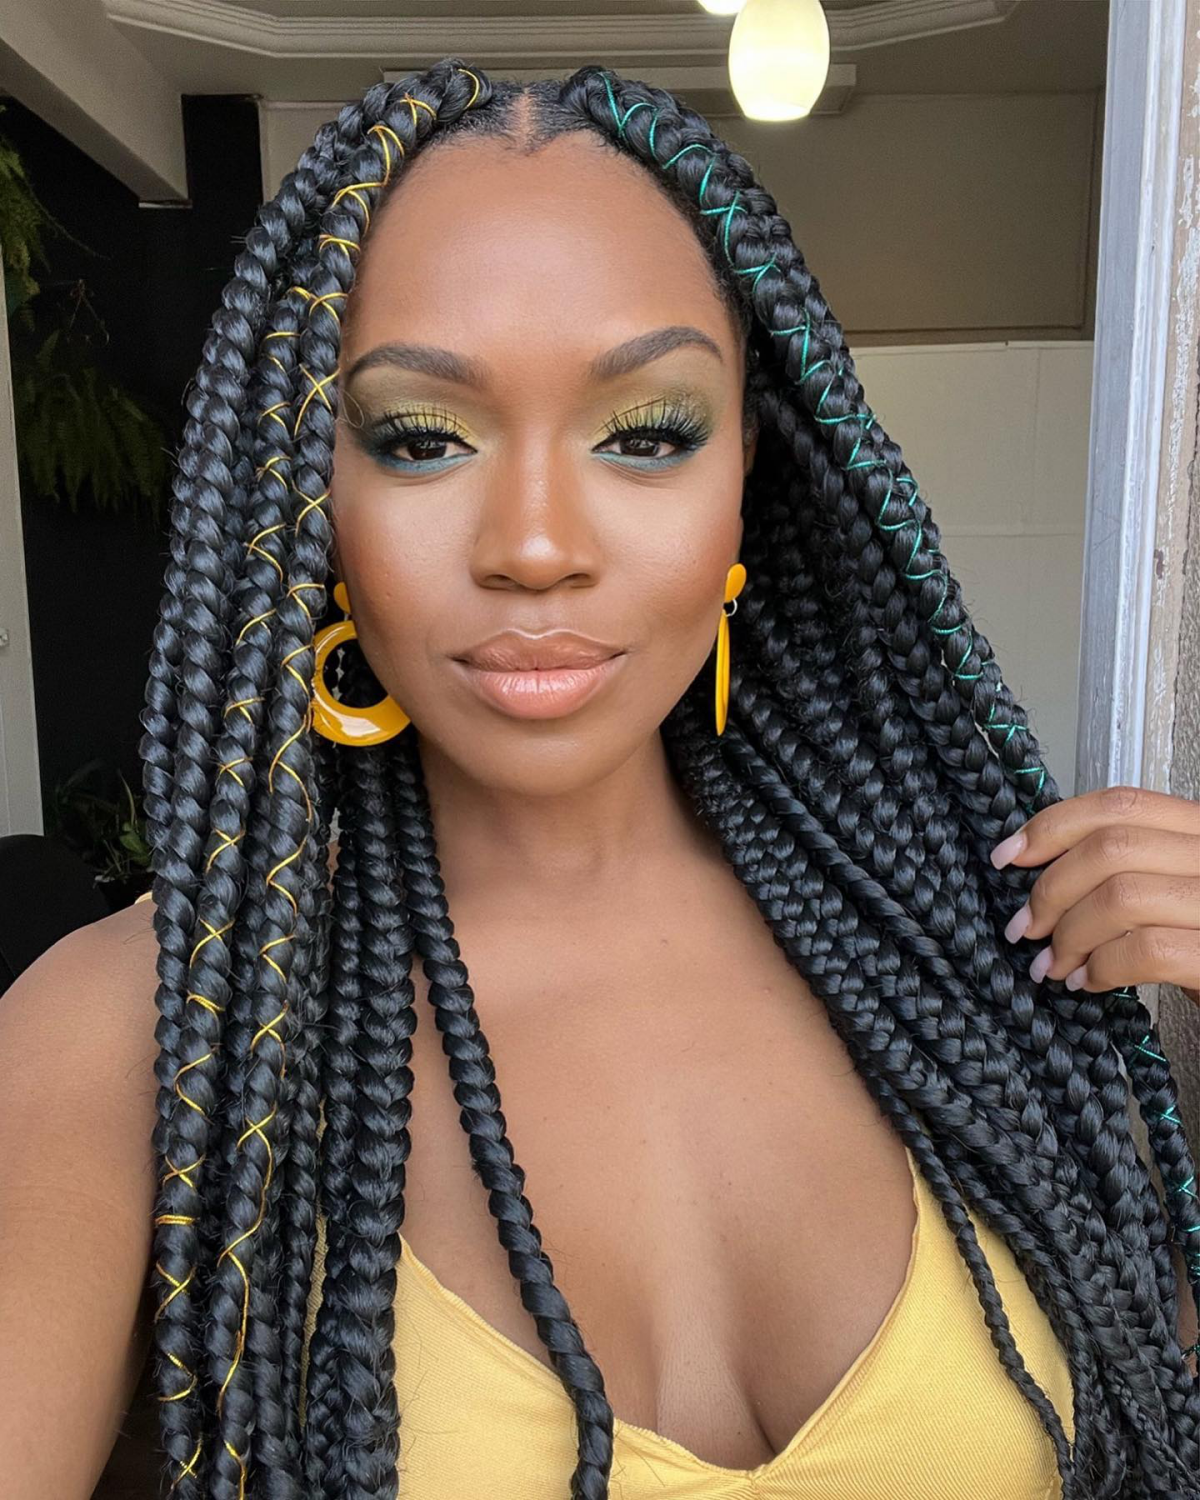
The Classic: Traditional Box Braids
This is the timeless style where hair is sectioned into boxes and the extension is anchored right at the root with a small knot. They’re incredibly versatile and have been a go-to for generations.
The biggest thing to watch for is the parting grid—it needs to be clean and precise, not just for looks, but to ensure the weight is distributed evenly. A heavy braid on a tiny section of hair is a fast track to damage. The main risk here is that initial knot at the base. It can put a lot of tension on the scalp, especially for the first few days. It should feel snug, not like you have a migraine. If you can’t turn your head freely, they are too tight.
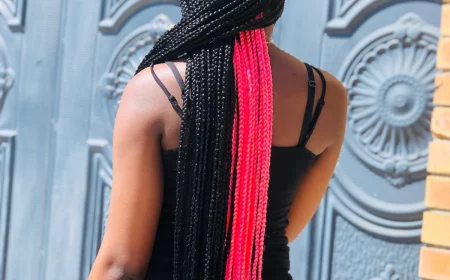
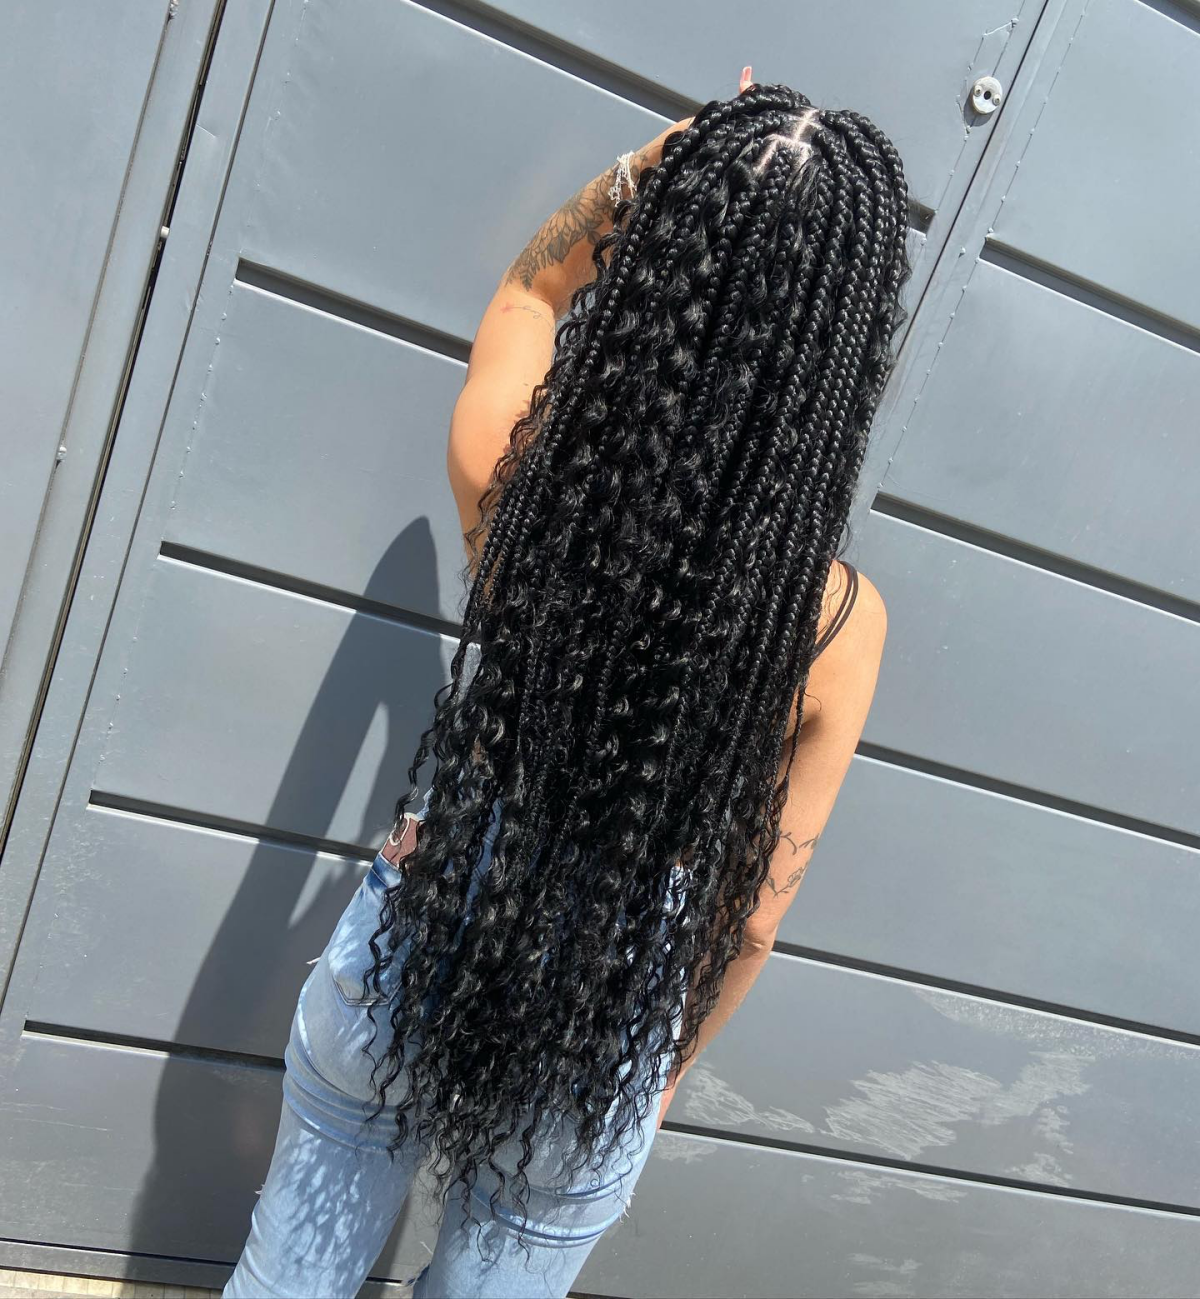
The Modern Method: Knotless Braids
This is my personal recommendation for most people, especially if you have a sensitive scalp or finer hair. Here, the braid is started with your own hair, and the extension hair is fed in gradually down the shaft. There’s no knot at the base.
The result? They are far more flexible and lightweight from day one. There’s virtually no tension at the root, which is a game-changer for scalp health. The braids lay flat immediately and have a more natural-looking start. From my experience, people who switch to knotless rarely go back.
So, Which One Is for You?
Let’s break it down. If you’re looking at tension level, knotless wins, hands down. It’s much gentler on the scalp. For cost and install time, traditional box braids are usually a bit cheaper and faster because the knotting technique is quicker than the feed-in method. However, the extra hour or two and the higher price tag for knotless braids (maybe a $40-$80 difference) is, in my opinion, a small price to pay for avoiding potential hair loss.
For hair types, knotless is the clear winner for fine or lower-density hair. Traditional box braids are better suited for medium to high-density hair that can handle the anchor knot. Ultimately, the comfort and safety of knotless make it the superior choice for most people today.
Making It Last: The Maintenance Plan
Okay, so you’ve got your beautiful new style. How do you take care of it? Don’t let all that time and money go to waste!
You absolutely must keep your scalp clean and your hair moisturized. Once or twice a week, spritz your hair with a light, water-based leave-in conditioner or just plain water, and then seal it with a light oil like jojoba or almond oil. Focus on the length of the braids and your exposed hair.
And please, don’t keep your style in for too long! I’ve seen people try to stretch a style for three months, and the takedown is always a nightmare of matting and breakage. The sweet spot is generally 4 to 8 weeks, tops. After that, the new growth can start to tangle and put stress on your hair.
The Grand Finale: How to Take Down Your Braids Without Breakage
This is where so much progress can be lost. Be patient! Ripping through your braids will cause more breakage than the style ever prevented. Set aside a few hours, put on a good show, and get your kit ready.
Here’s your Protective Style Takedown Kit: – A bottle of cheap, slippery conditioner (you’ll use a lot) – A spray bottle filled with water – A rat-tail comb for detangling – Small scissors for snipping the ends
First, snip the end of each braid, well below where your own hair ends. Then, begin unraveling from the bottom up. Once a braid is out, DO NOT comb it yet. Apply a generous amount of that cheap conditioner and water to the section to give it slip. Then, gently begin to finger-detangle from the tips of your hair up to the root. You will see a ball of shed hair—this is normal! It’s all the hair that would have naturally shed over the past several weeks. Only after finger-detangling should you go in with a comb.
Work in small sections, one braid at a time. It’s tedious, but your hair will thank you for it. After all that work protecting your hair, the last thing you want to do is ruin it in the final hour.
Galerie d’inspiration
How do you keep your scalp from getting itchy and flaky while in braids?
The secret isn’t to wash your hair like you normally would, which can cause frizz and unraveling. Instead, focus on targeted cleansing. Mix a bit of shampoo with water in a spray bottle and lightly mist your scalp, or use a specialized nozzle applicator. Gently massage with the pads of your fingers (not your nails!) and then rinse carefully. For a water-free option, apply a product like African Pride’s Braid & Scalp Cleansing Rinse or simple witch hazel on a cotton pad and wipe along your parts. Finish with a light, non-greasy oil like jojoba to soothe the skin.
Traction alopecia, a form of hair loss caused by prolonged or repeated tension on the hair root, can be permanent if not addressed early.
This is the number one risk of a poorly installed protective style. If you feel pinching, pain, or see small bumps forming around your hairline within the first 48 hours, speak up immediately. A good stylist will prioritize your scalp health over a super-tight look. Your edges are precious—never sacrifice them for a style.

Before you even sit in the chair, your hair needs its own prep day. A successful protective style is built on a healthy foundation. Skipping these steps can lead to dryness and breakage under your beautiful new braids or twists.
- Clarify Thoroughly: Start with a clean slate. Use a clarifying shampoo to remove all product buildup, allowing moisture to penetrate deeply.
- Deep Condition: This is non-negotiable. Slather on a rich, moisturizing deep conditioner, like SheaMoisture’s Manuka Honey & Mafura Oil Intensive Hydration Masque. Let it sit for at least 30 minutes, preferably with heat, to infuse your strands with moisture.
- Trim Your Ends: Get rid of those split ends before they’re tucked away. This prevents them from traveling up the hair shaft and causing more damage while your hair is styled.
Kanekalon Hair: The industry standard for braiding. It’s a synthetic fiber known for being lightweight, heat-sealable (you can burn the ends to seal them), and available in every color imaginable. It’s also very affordable. However, it can sometimes feel rough and cause scalp irritation for those with sensitive skin.
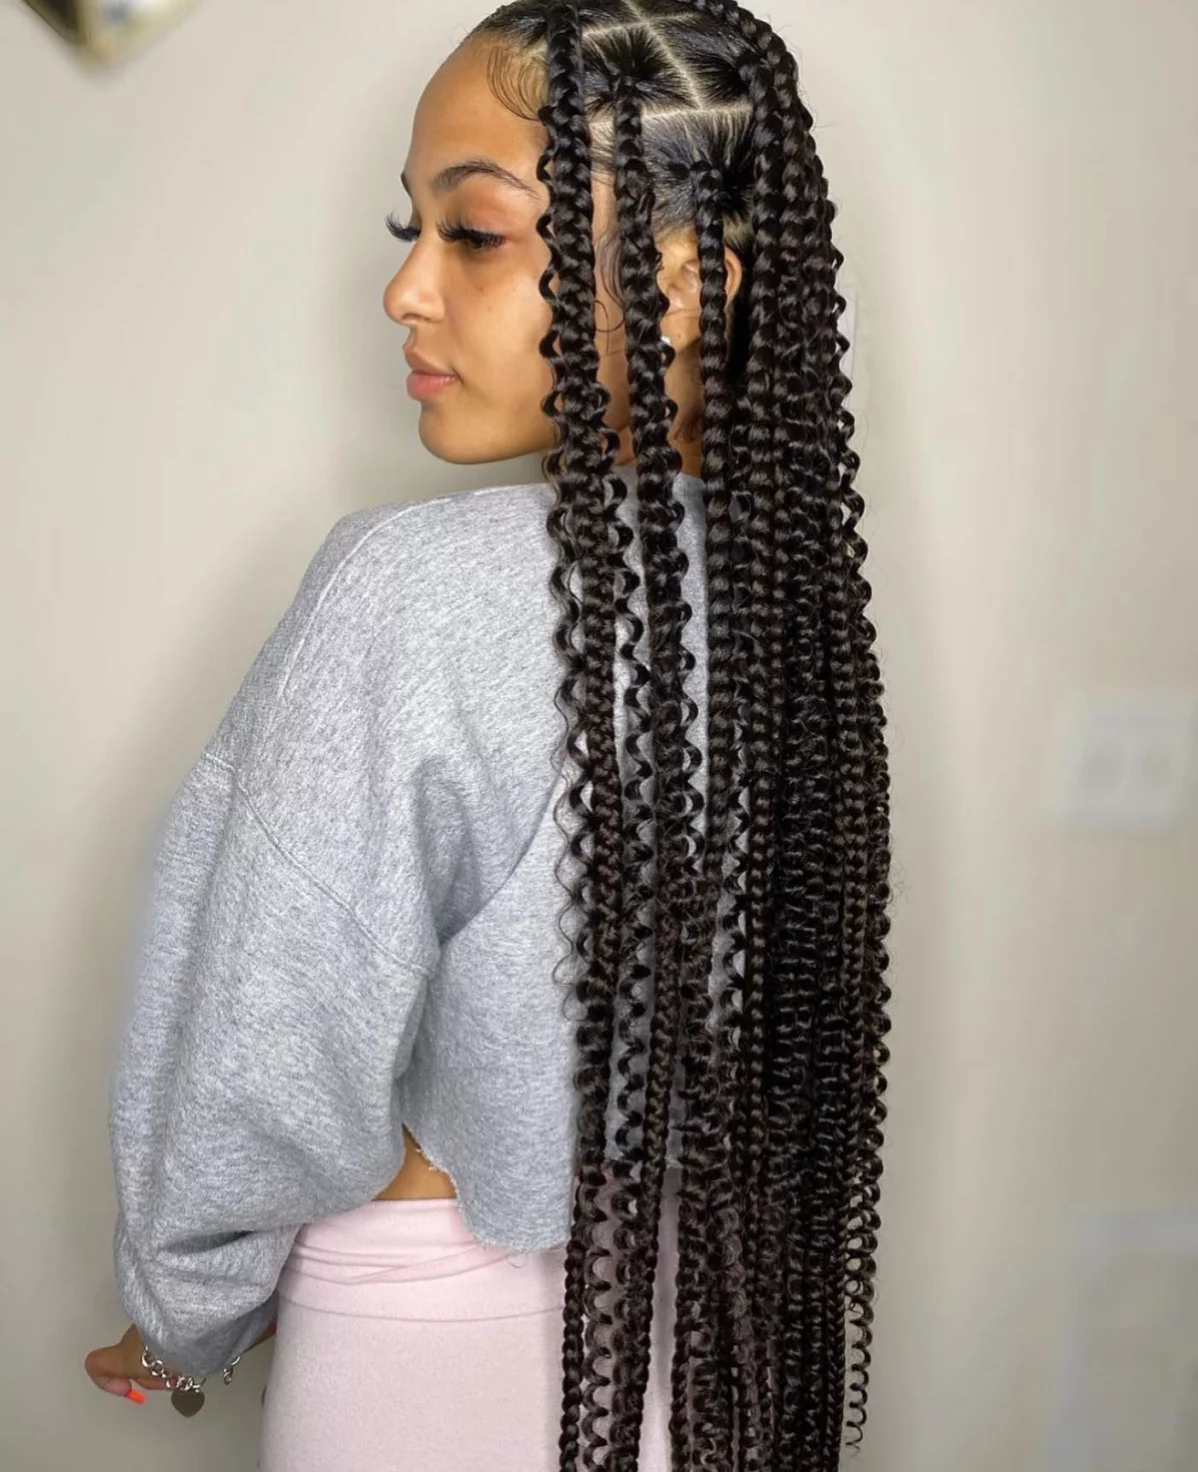
Pre-Stretched Human Hair: A luxury option that offers a more natural look and feel. It’s significantly softer, lighter, and can be curled or straightened just like your own hair. The downside is the much higher price point and it requires more care to prevent tangling.
For classic box braids or twists, pre-stretched Kanekalon is usually the go-to. For styles like goddess locs or bohemian braids where loose, curly ends are the star, integrating human hair is a worthy investment.

Did you know that the average person sheds 50-100 hairs per day? When your hair is in a protective style for 6 weeks, that’s over 2,000 hairs waiting to come out.
This is why you see a seemingly alarming amount of shed hair during the take-down process. Don’t panic! It’s normal. The key is to be extremely gentle. Work in small sections, use a product with lots of slip (like a detangling spray or a creamy conditioner), and slowly work your way from the ends up to the roots with a wide-tooth comb. Rushing this stage is where real damage happens.
A crucial point: The takedown is just as important as the installation. Ripping through your braids will undo all the good work and length retention you’ve achieved. Be patient. Generously apply a product like The Doux’s Mousse Def or even a simple mix of water and conditioner to each braid as you unravel it. This softens buildup and provides the slip needed to gently separate the shed hair from the healthy hair without causing breakage.