The Real Talk on Men’s Braids: A Pro’s Guide to Getting It Right
I’ve been standing behind a styling chair for what feels like a lifetime. In all that time, I’ve seen countless trends pop up and then fade away. But braids… braids are different. They’re not just a hairstyle. For a lot of guys, they’re a statement, a piece of their identity, and honestly, just a super practical way to manage their hair.
In this article
This isn’t stuff I learned from a magazine. It’s from thousands of hours with my hands in hair, from deep conversations with my clients, and from training the next generation of stylists. My goal here isn’t to just throw a gallery of cool pictures at you. It’s to give you the real shop talk—the stuff we discuss long after the doors are closed. We’re talking about the craft, the health of your hair, and how to make a choice that truly works for you.
First Things First: Is Your Hair Ready?
Before we even pick up a comb, we have to talk about the canvas: your hair. You can’t build a strong house on a shaky foundation, right? The same goes for braids. So many guys come in with a picture they found online, but their hair just isn’t ready for that kind of tension or style. A good stylist will always be honest with you about this. Your hair’s health has to come first, period.

Heads up, you’ll generally need at least 3 to 4 inches of hair for most braided styles. This gives the braider enough length to create a secure base without pulling too hard on your scalp. If you’re not sure, just go for a consultation.
I always start by figuring out the hair type. You’ve probably heard of the grading system from Type 1 (straight) to Type 4 (coily). This isn’t about “good” or “bad” hair; it’s just about structure. Tightly coiled hair, for example, is often more fragile and gets dry faster because the natural oils from your scalp have a tougher journey traveling down the hair shaft. Knowing this helps me figure out how much tension the hair can handle and what styles will actually protect it.
Next up is porosity—basically, how well your hair absorbs and holds onto moisture. High porosity hair soaks up water like a sponge but loses it just as fast. Low porosity hair has a tightly sealed outer layer, making it tough for moisture to get in. If I slather a heavy grease on low porosity hair, it’s just going to sit there and cause buildup. But for high porosity hair, a light mist is like putting a drop of water in the desert; it needs heavier, sealing oils to lock that moisture in.

And finally, we gotta look at the scalp. A flaky, irritated, or super oily scalp needs to be addressed before braiding. Braids will only trap product and dead skin, making things worse. I once had a client who insisted on getting intricate cornrows despite having some serious dandruff. I had to refuse. I sent him home with a recommendation for a medicated shampoo (Nizoral is a solid, affordable option you can find at most drugstores for about $15) and told him to come back in two weeks. He did, his scalp was healthy, and his braids looked incredible and lasted way longer. Never ignore the soil your hair grows from.
Finding a Braider Who Knows Their Stuff
Look, the person braiding your hair matters. A lot. So how do you find someone you can trust? Start with their portfolio—check their social media. Are the parts clean? Do the braids look neat but not painfully tight? A huge red flag is seeing a bunch of pictures with those little red bumps around the hairline. That’s a sign of too much tension, which can lead to permanent hair loss called traction alopecia. It’s no joke.
When you go for a consultation, ask a few questions:
- What kind of braiding hair do you use? A pro will have an opinion. Many prefer quality, pre-stretched Kanekalon hair like X-Pression because it’s lightweight and less irritating.
- How do you manage tension? If they say anything like “beauty is pain,” walk out. The right answer involves words like “secure, not tight,” or “I focus the grip on the hair, not the scalp.”
- What’s your recommendation for my hair type? They should be able to look at your hair and give you a thoughtful answer, not just agree to whatever you want.
And before you show up to your appointment, do your braider a favor with this quick pre-appointment checklist. It saves a ton of time. One, wash and fully detangle your hair the day of or the night before. Two, show up with your hair free of any heavy oils or grease. And three, have a few inspiration pictures ready, but be open to your stylist’s expert advice.

The Art of the Braid: It’s All in the Details
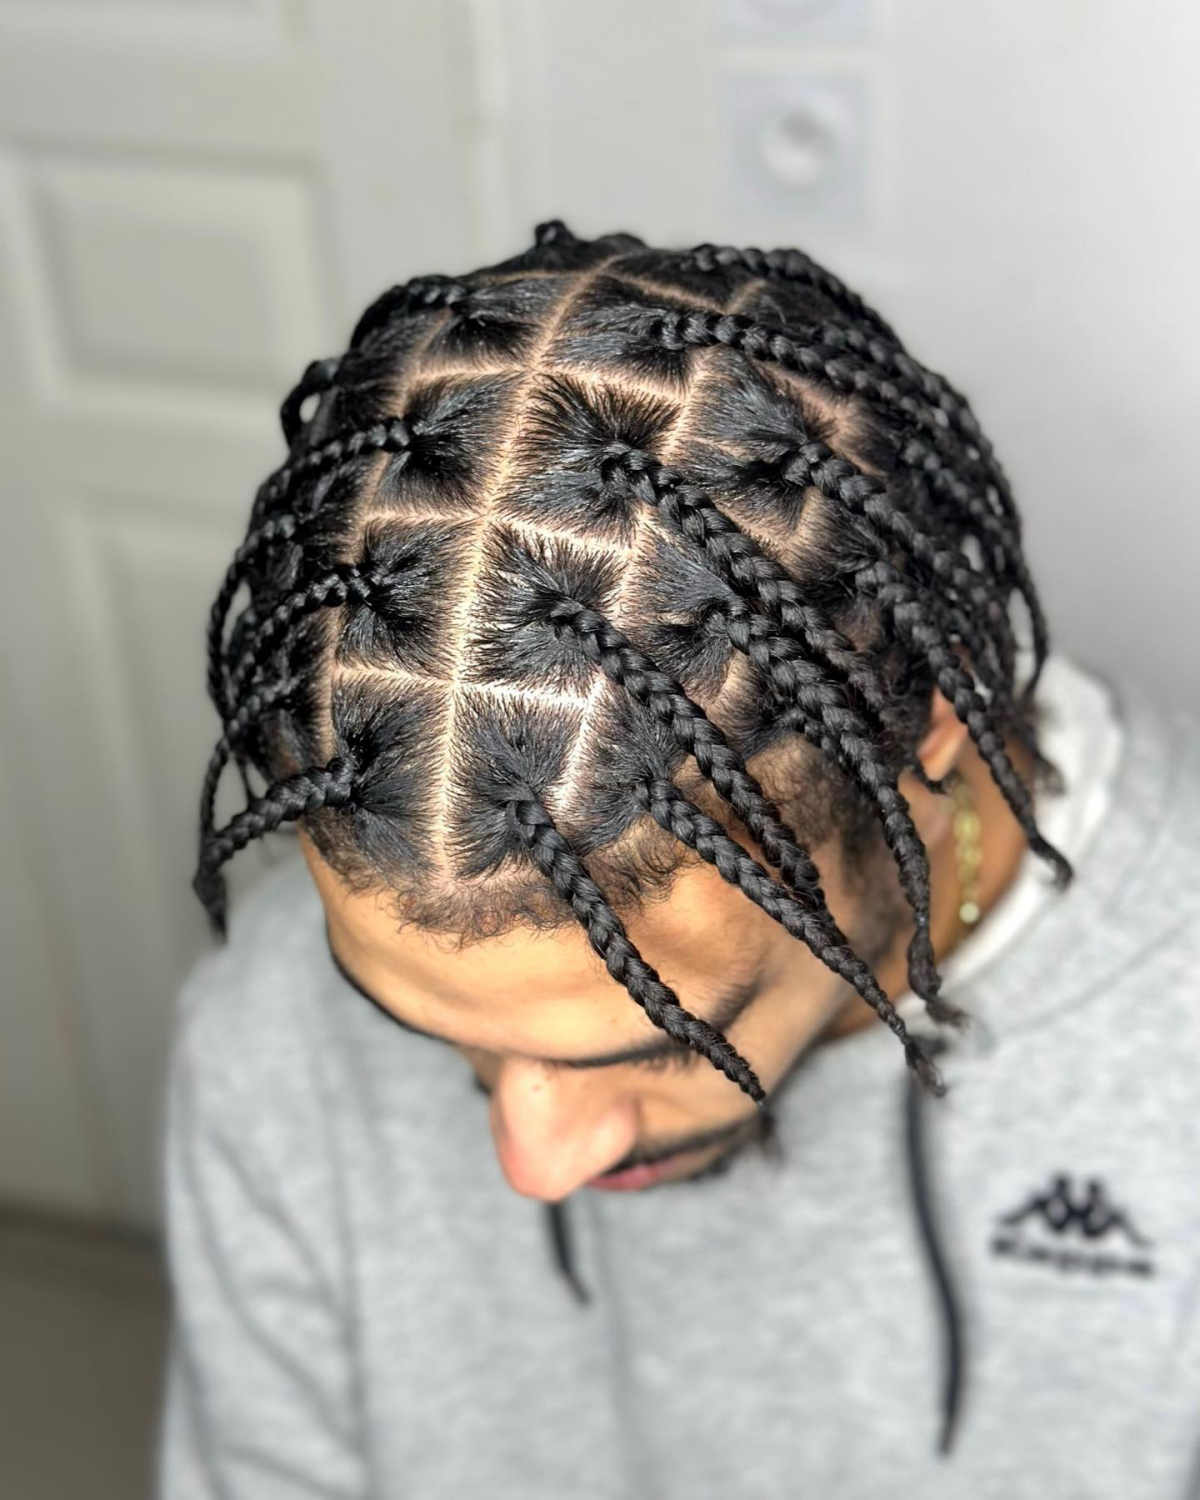
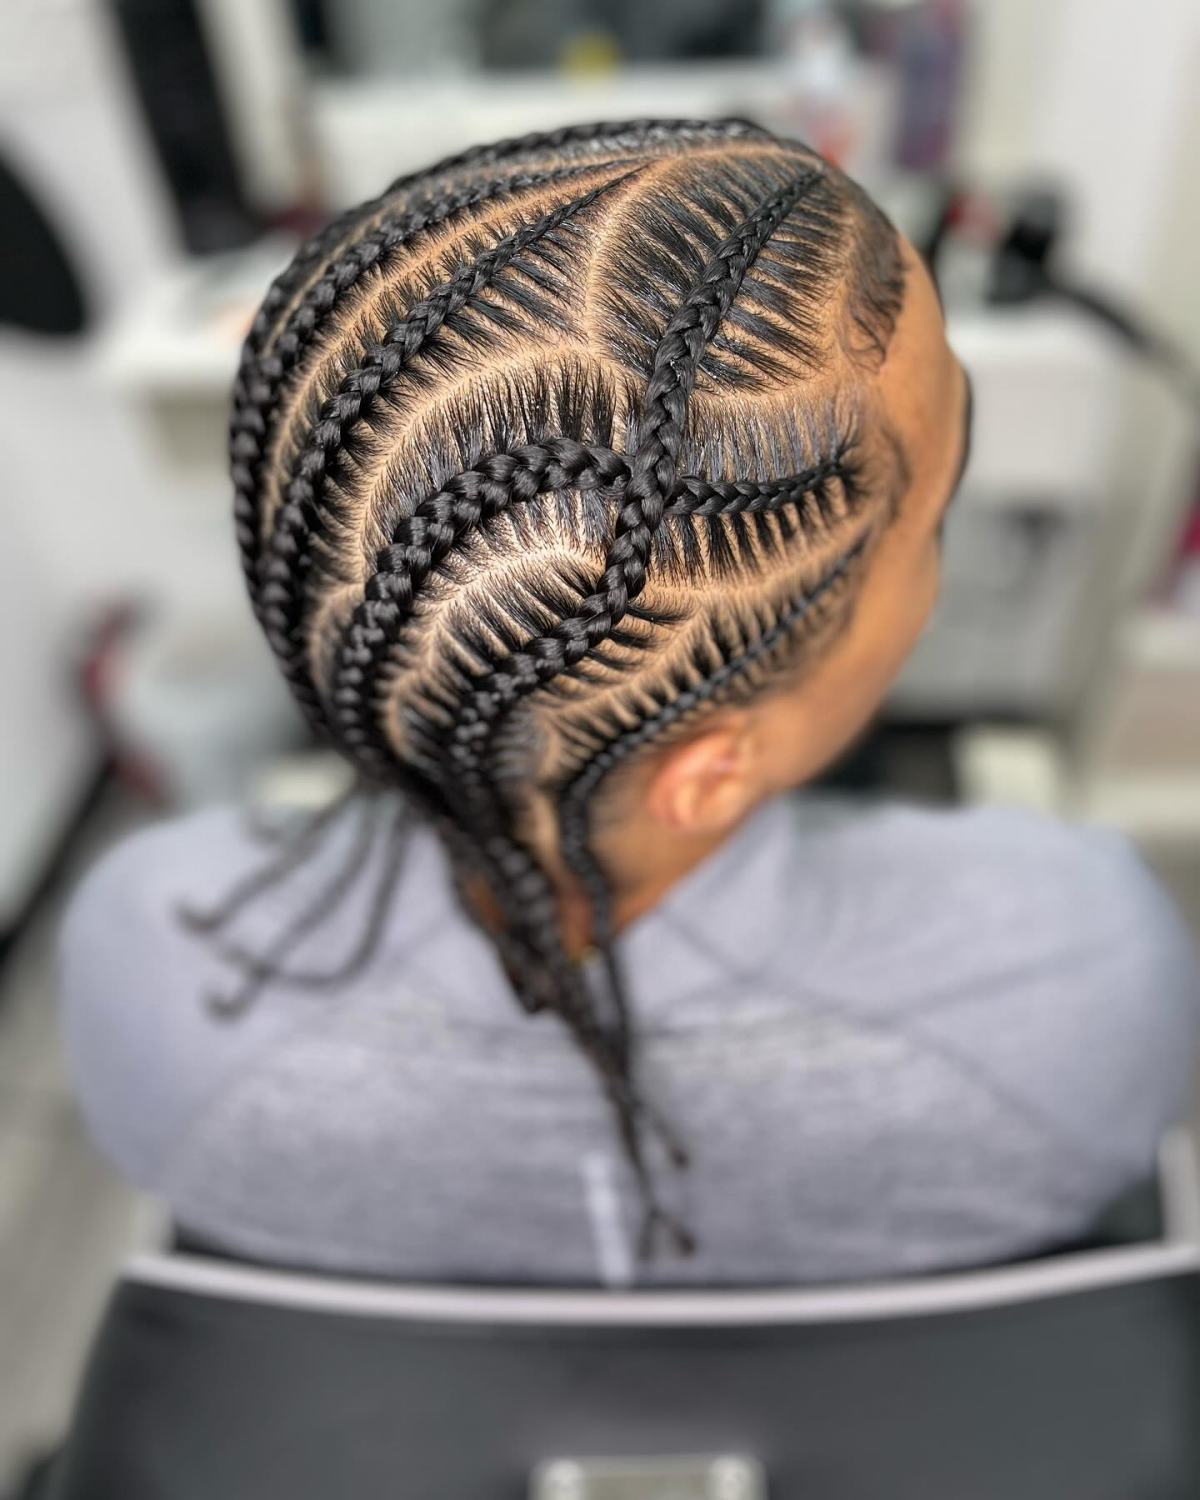
The line between a great braid job and a damaging one is all about technique. Parting is everything. Clean parts are the signature of a professional. They’re not just for looks; a clean grid for box braids ensures the weight is distributed evenly, preventing breakage. For cornrows, those clean lines are the blueprint for the whole style. A good rat-tail comb is a braider’s best friend here.
Now let’s talk about tension. I can’t say this enough: braids should be firm, but they should never, ever hurt. If you feel sharp pain, get a headache, or see those little bumps, the braids are too tight. A good braider knows how to create a secure hold without yanking your hair from the root. You should be able to sleep comfortably the night you get them done. Simple as that.
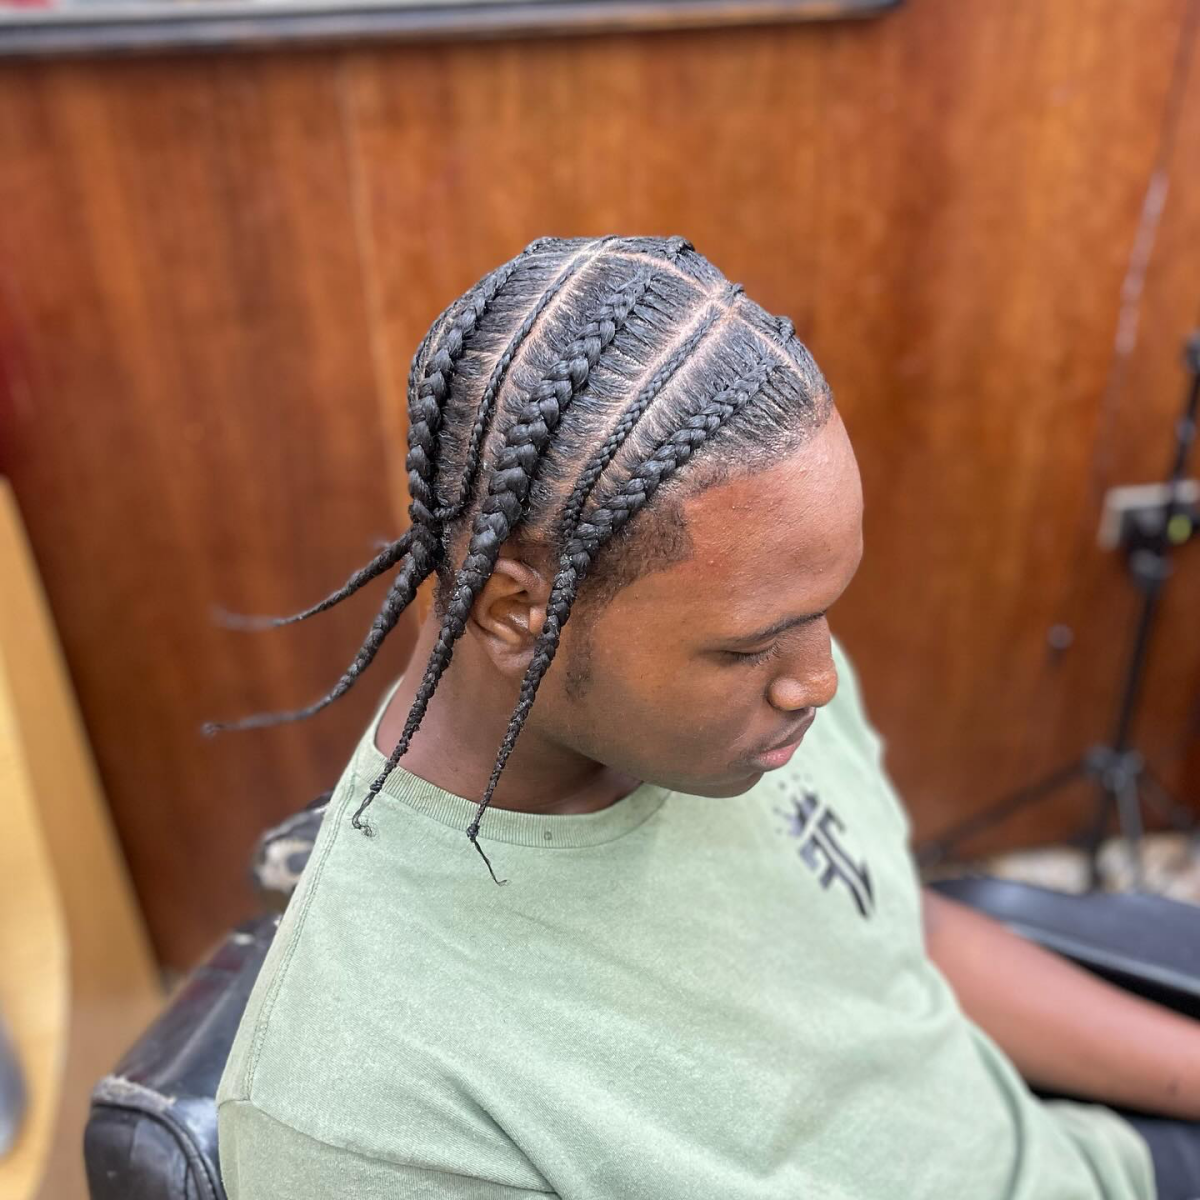
When we add extension hair, the technique is key. For traditional box braids, there’s a small knot at the base. It’s secure, but it can create a point of tension. The more modern approach is knotless braids. With these, we start braiding with your natural hair and then “feed in” the extension hair as we go. The result is a flatter, lighter braid that’s much gentler on your scalp. It takes more time and skill, so yes, it costs more, but the comfort is totally worth it.

By the way, some people find the synthetic hair a bit itchy. A quick pro tip: ask your stylist (or do it yourself) to give the braiding hair a quick rinse in an apple cider vinegar and water solution before installing. It removes the alkaline coating and can be a total game-changer for sensitive scalps.
Let’s Talk Styles, Time, and Money
Alright, let’s break down the most common styles so you know what you’re getting into in terms of time in the chair and what it’ll cost you. Prices can vary a lot based on your city and the stylist’s experience, but here are some realistic ballparks.
-
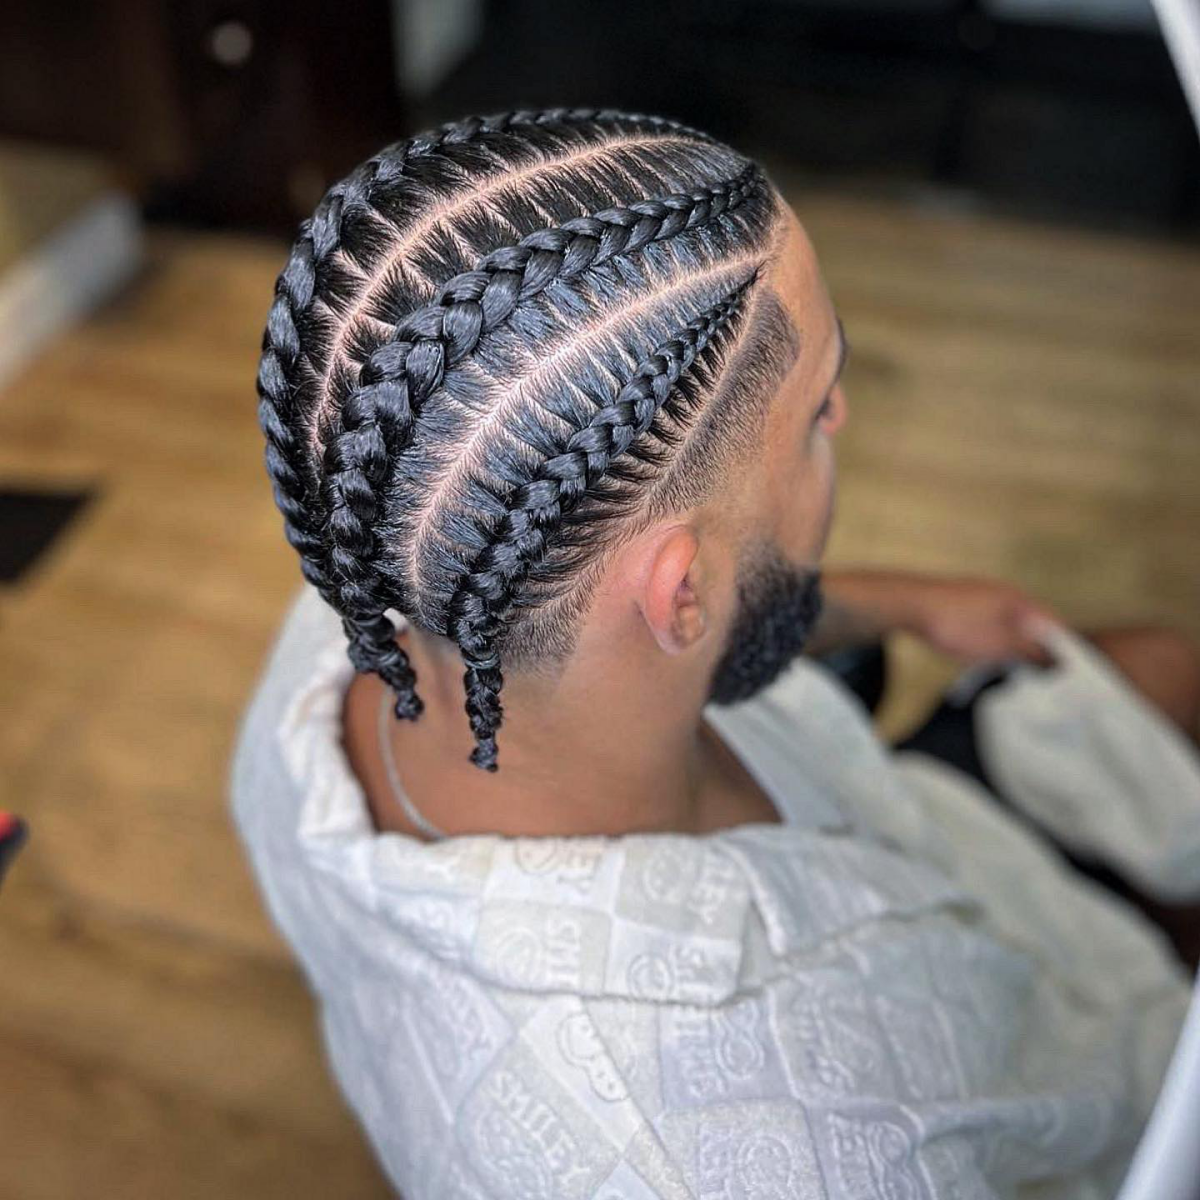
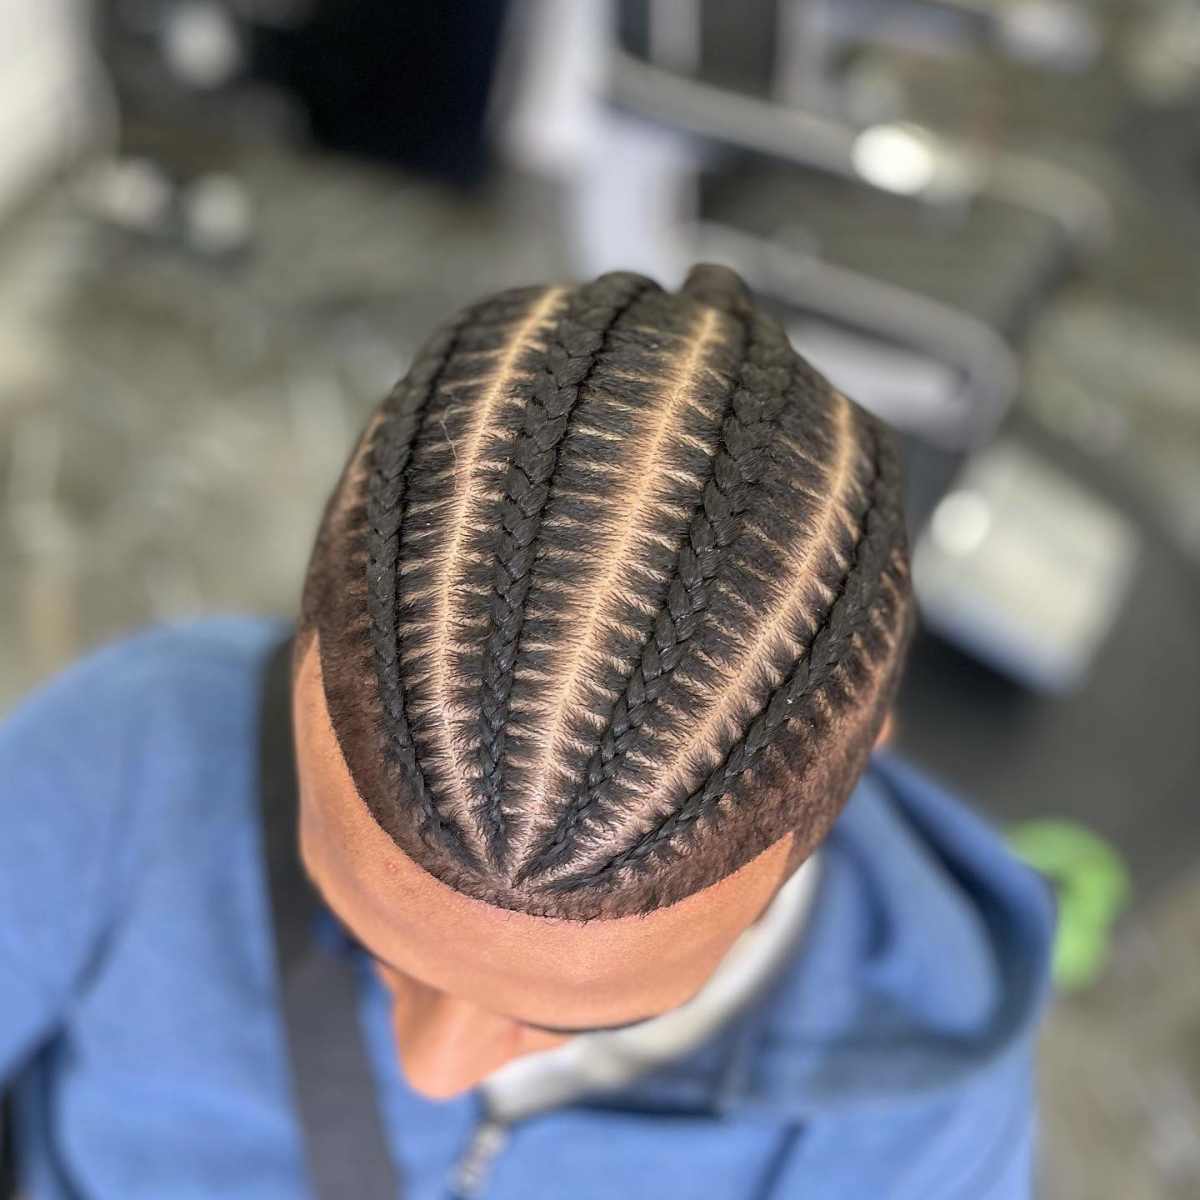
Basic Straight-Back Cornrows: This is your classic, foundational style. They’re quick to install, usually under an hour, and are a great entry point if you’re new to braids. They’re perfect for wearing under hats or helmets. Expect to pay around $60-$100.
-
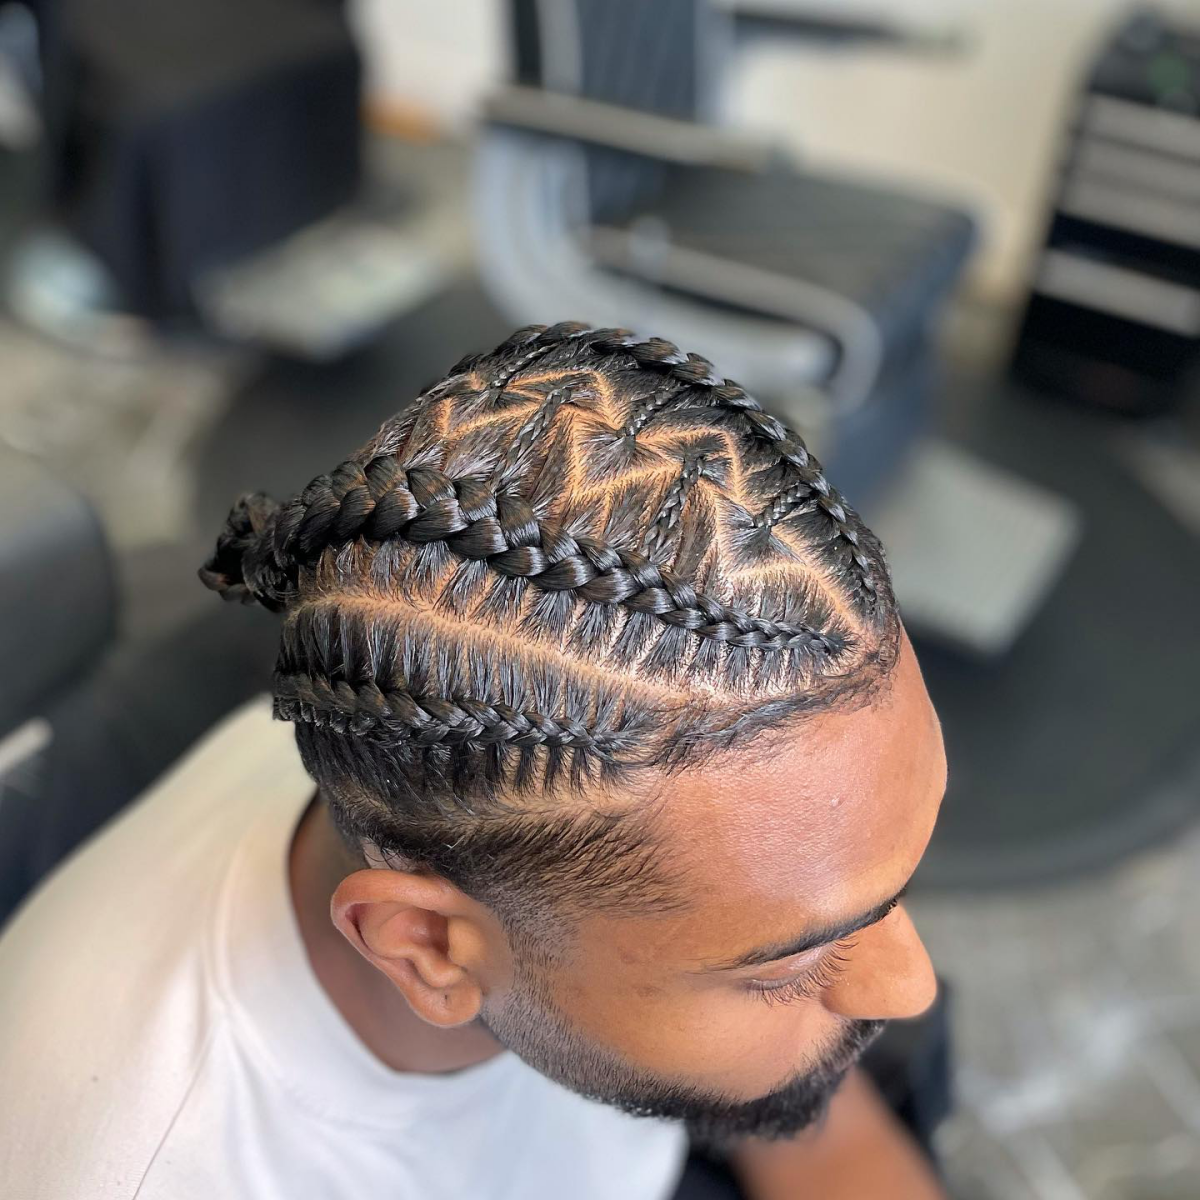
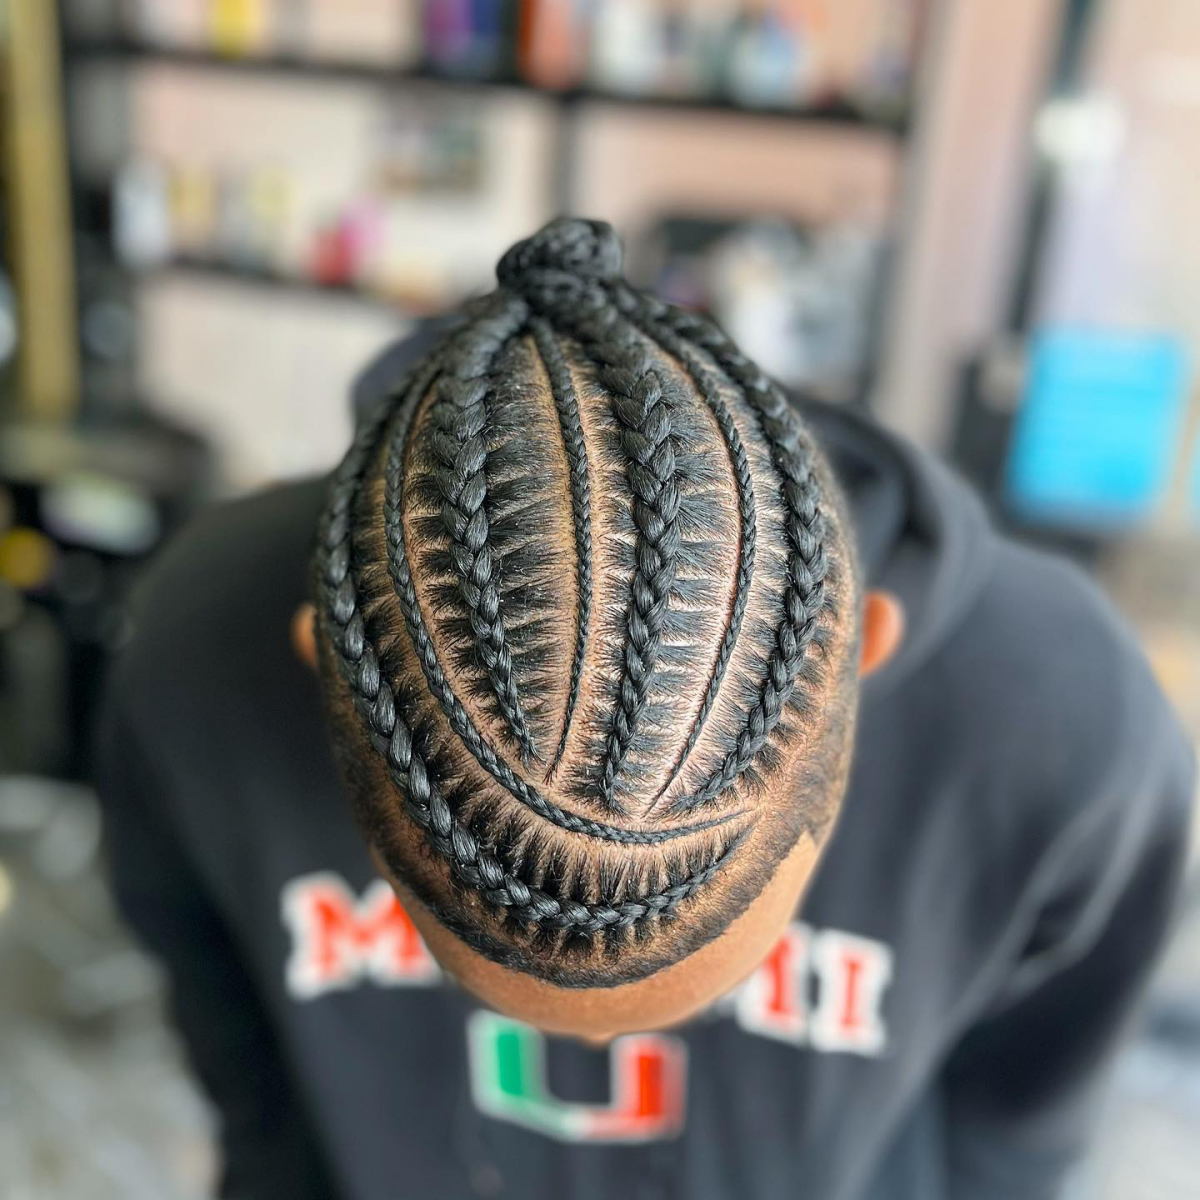
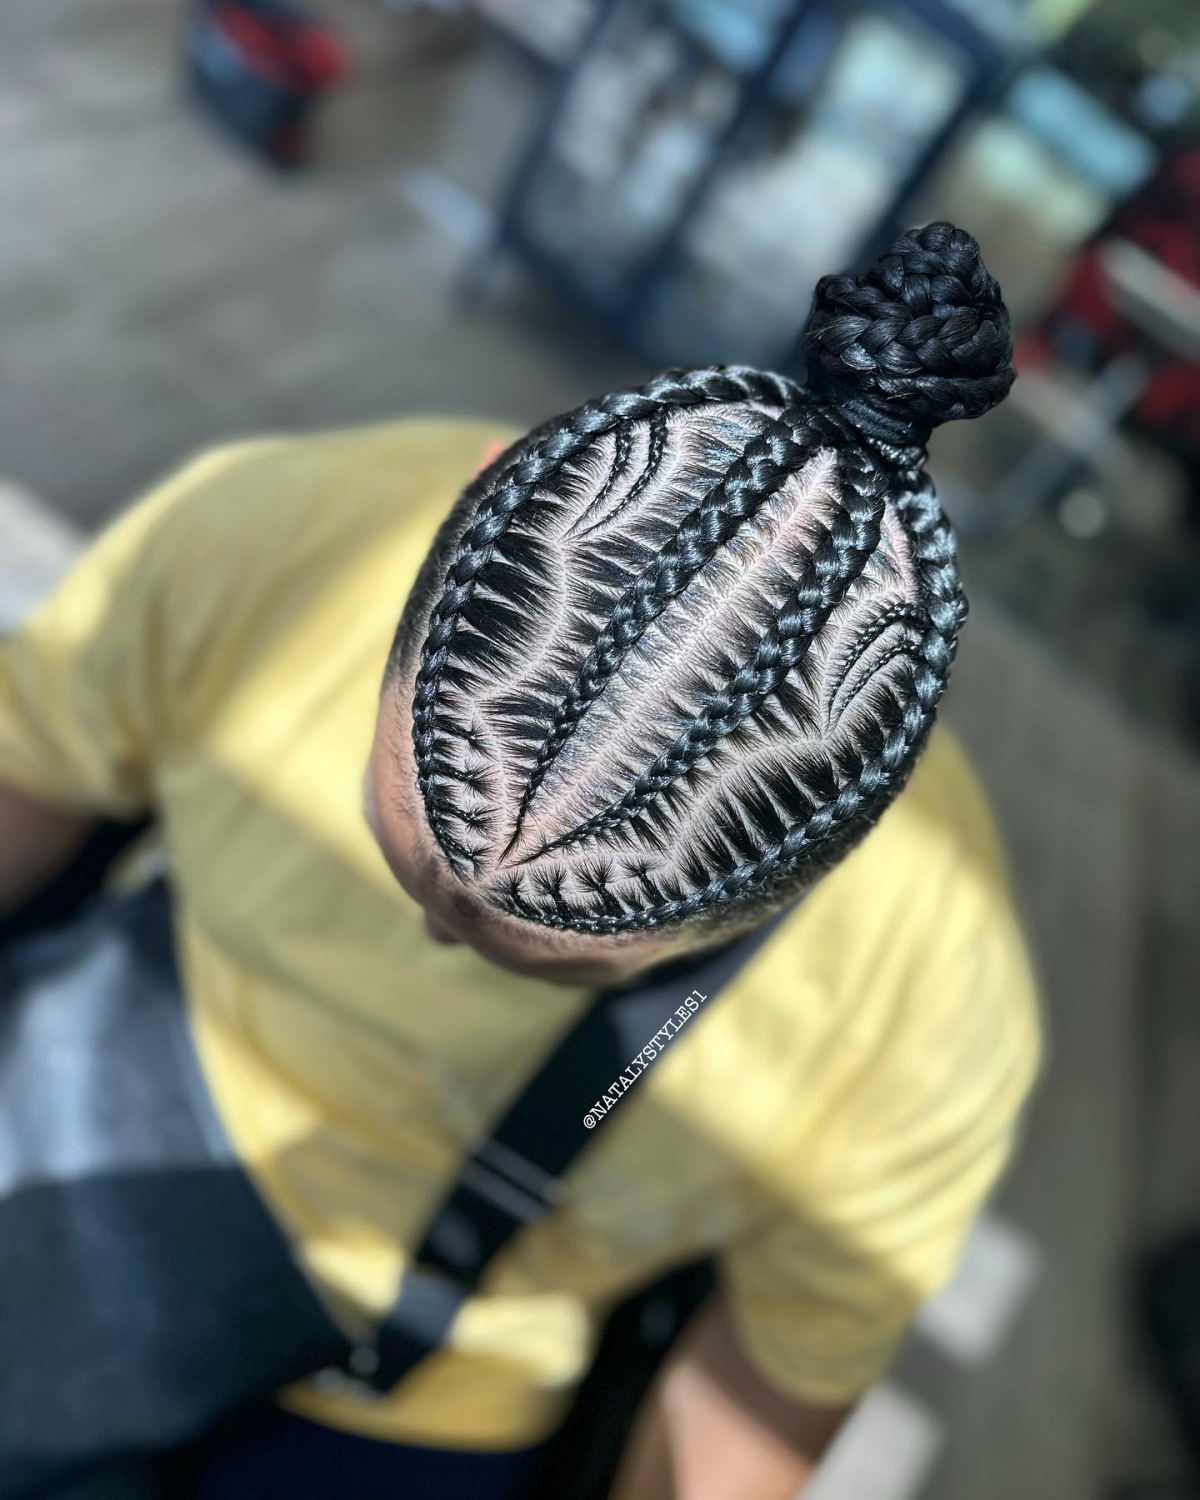
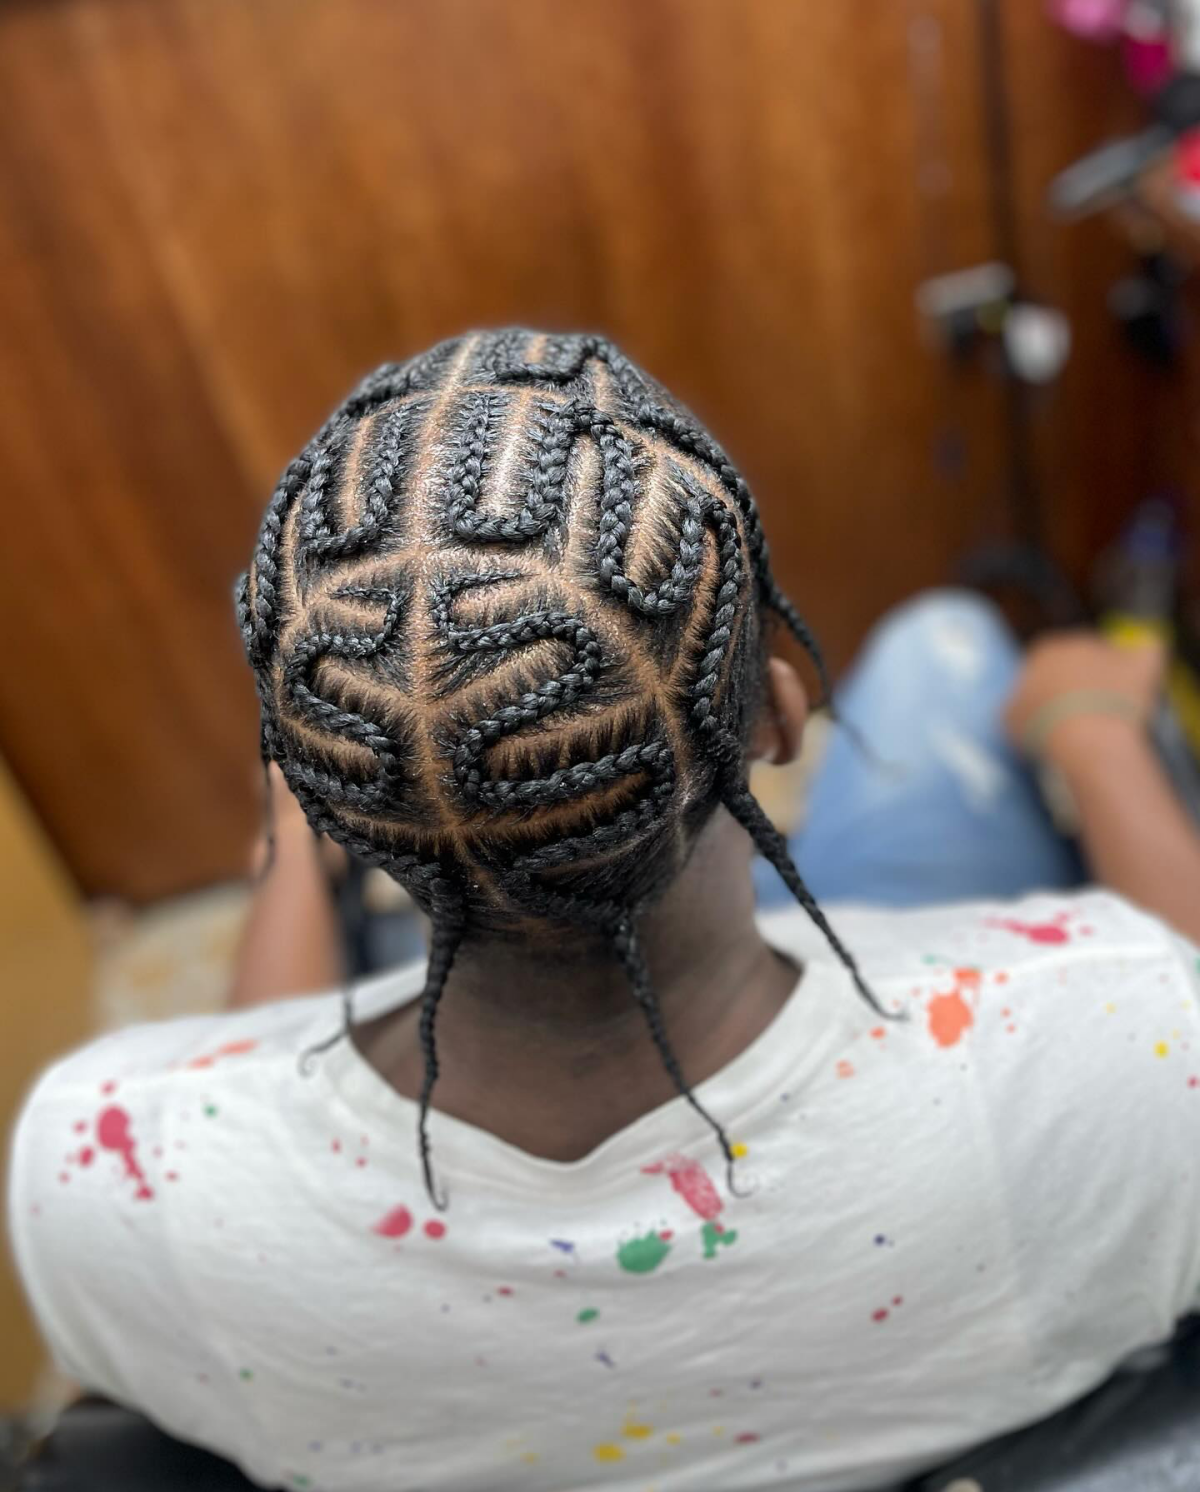
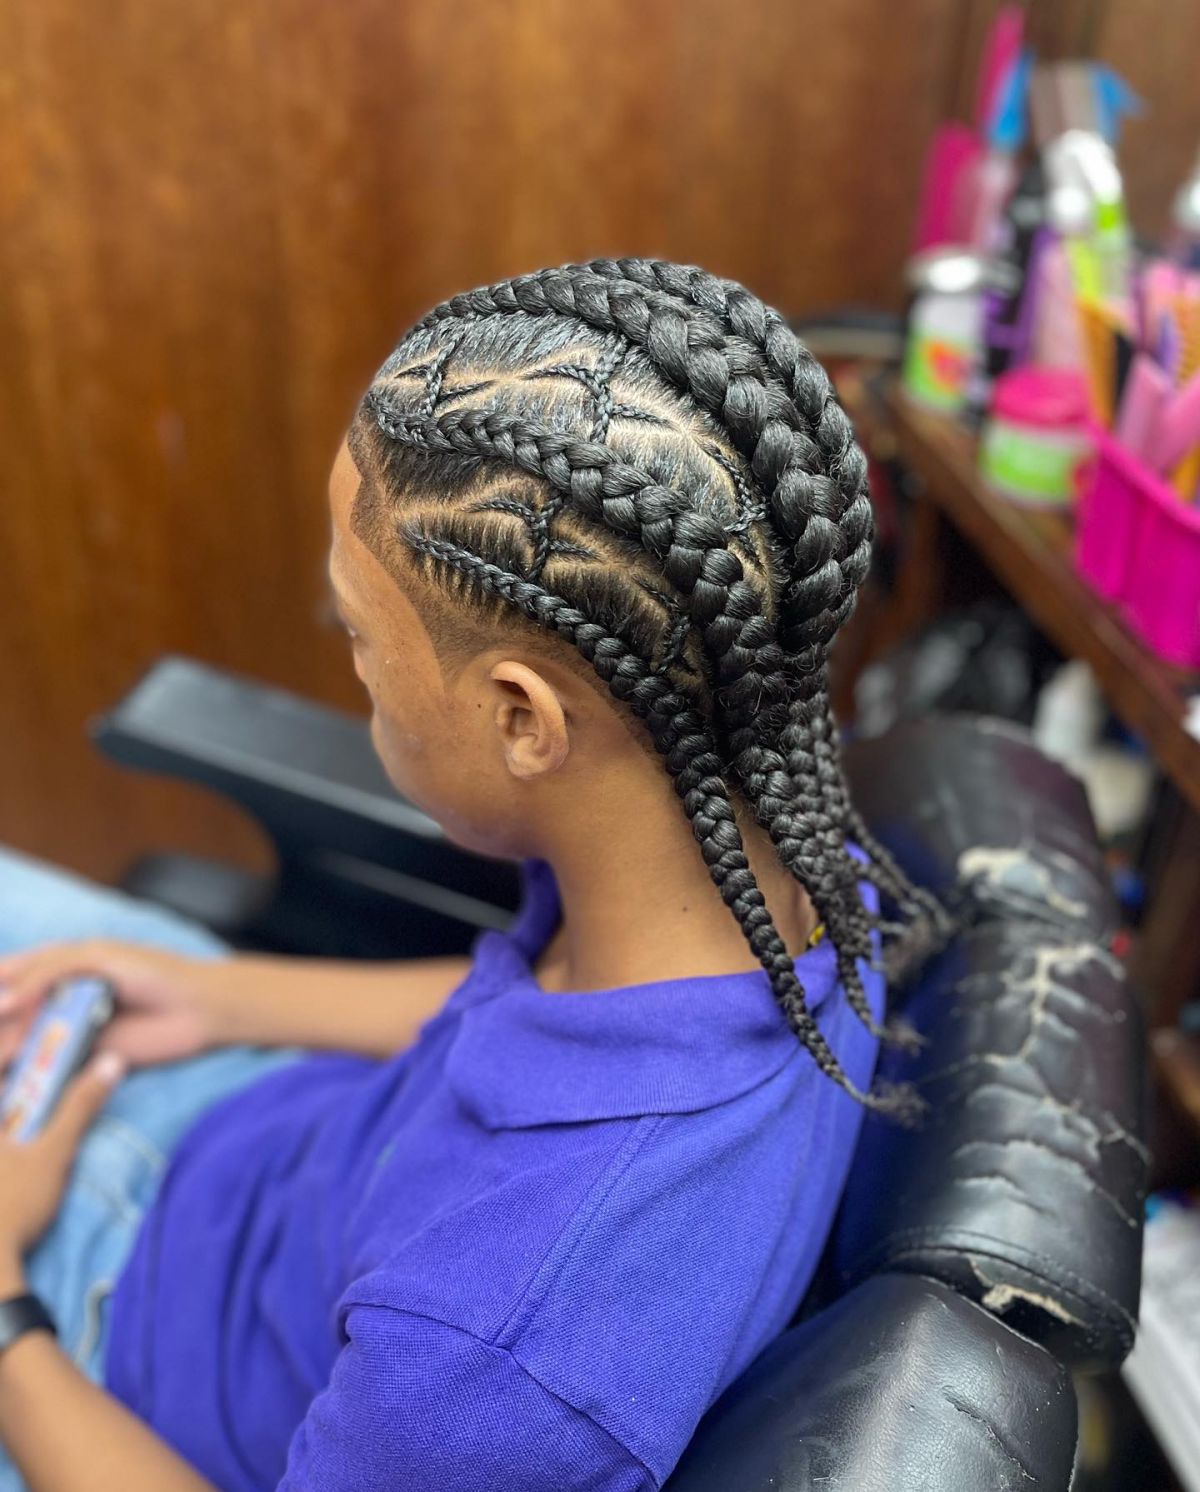
Freestyle/Intricate Cornrows: This is where the artistry comes in, with curves and geometric patterns. A complex design can take 2-4 hours. Because of the skill involved, the price goes up significantly. You’re looking at $120-$250 or more for custom work.
-
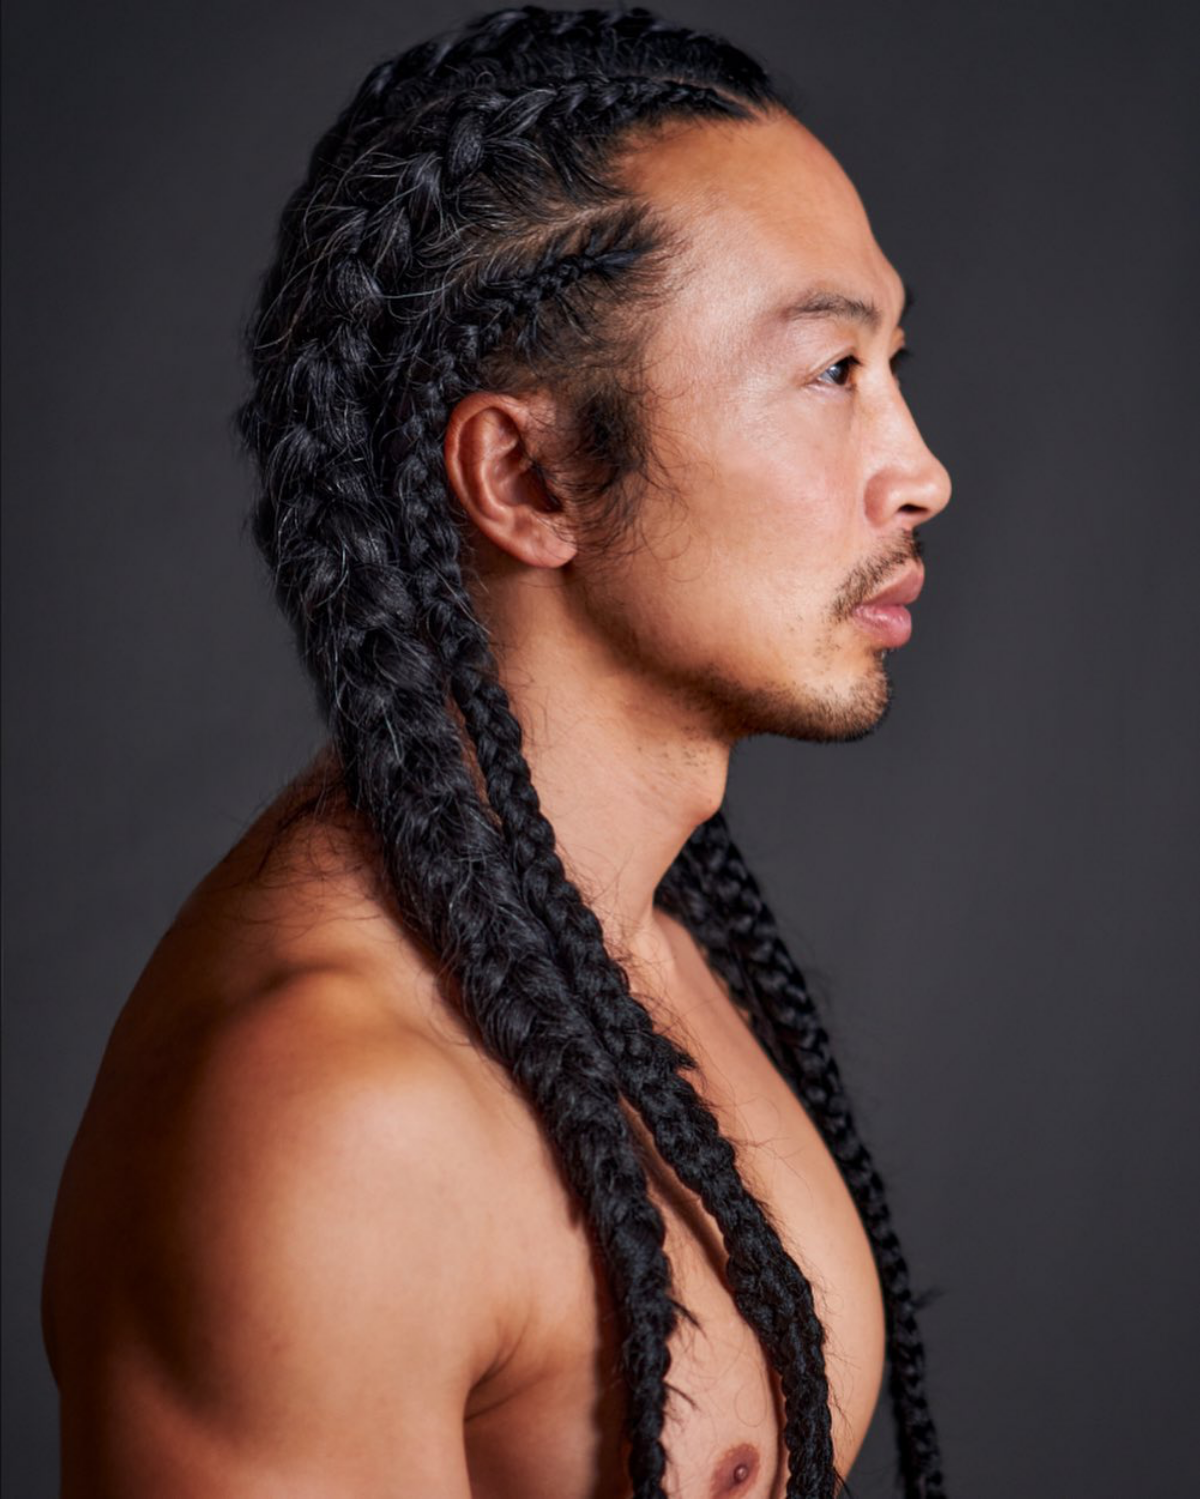
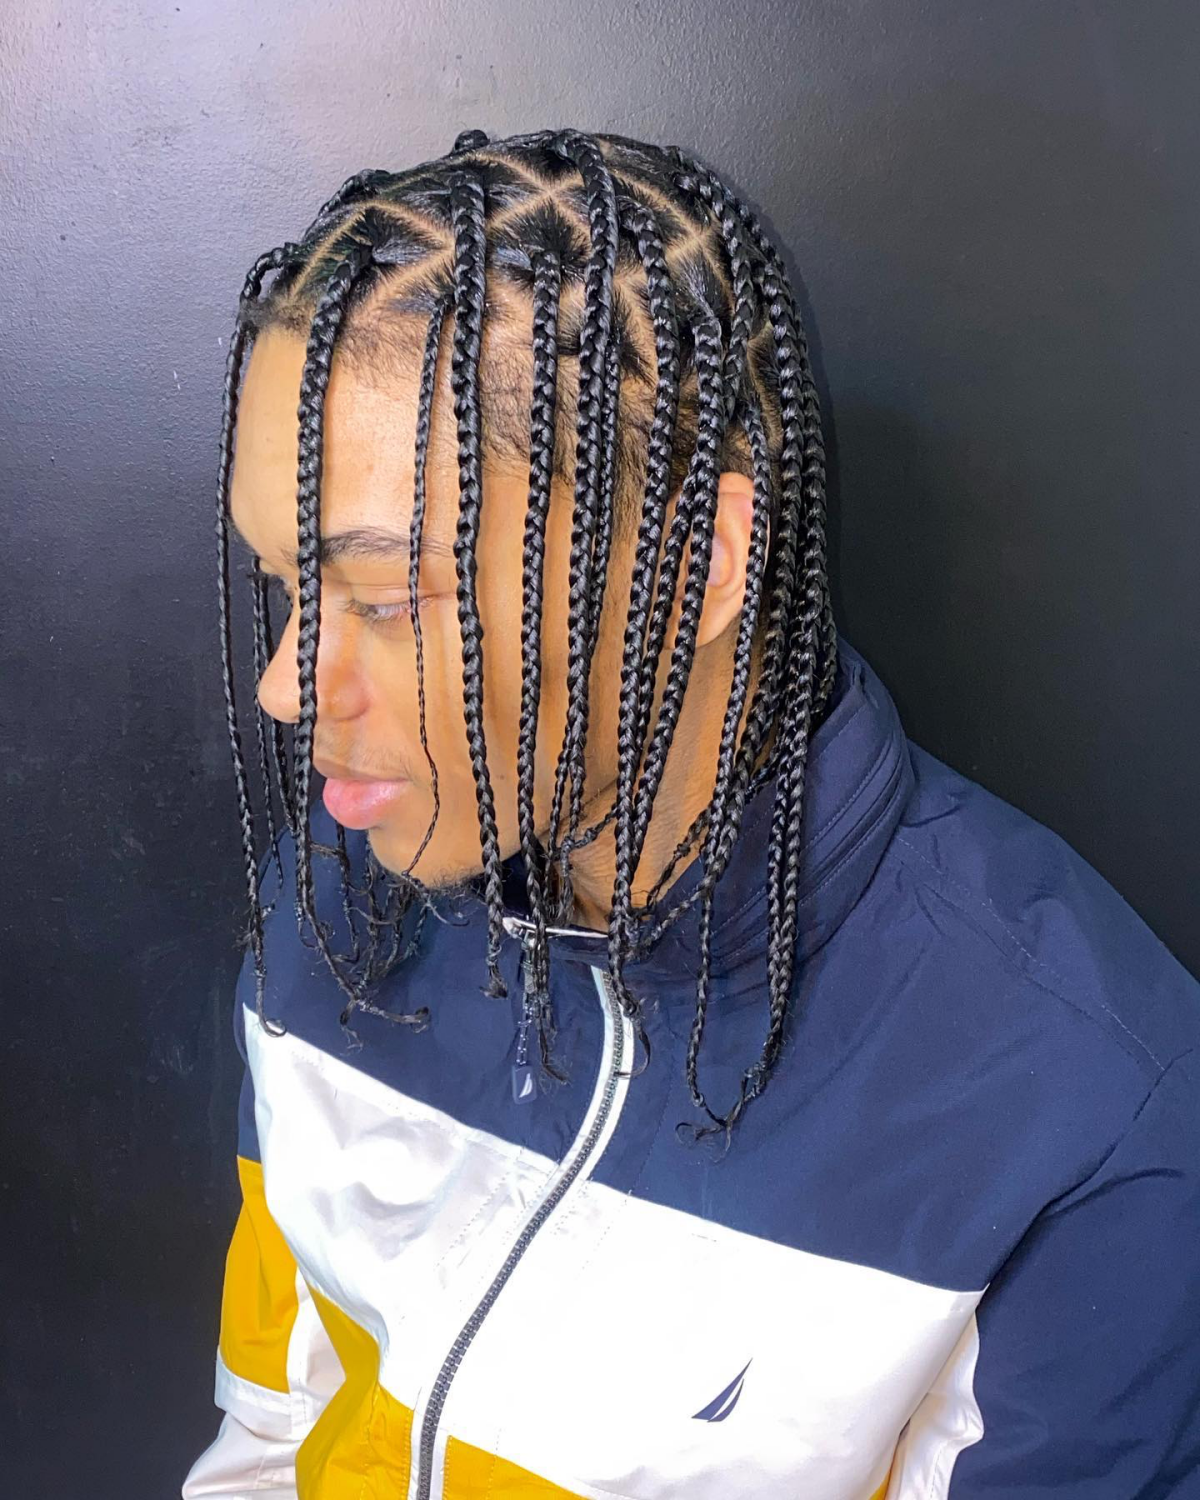
Traditional Box Braids: These are individual braids with a small knot at the base. They’re very durable and offer a lot of styling freedom. A full head of medium-sized box braids can be a long session, easily 4-8 hours. Cost can range from $180-$350 depending on the size and length.
-
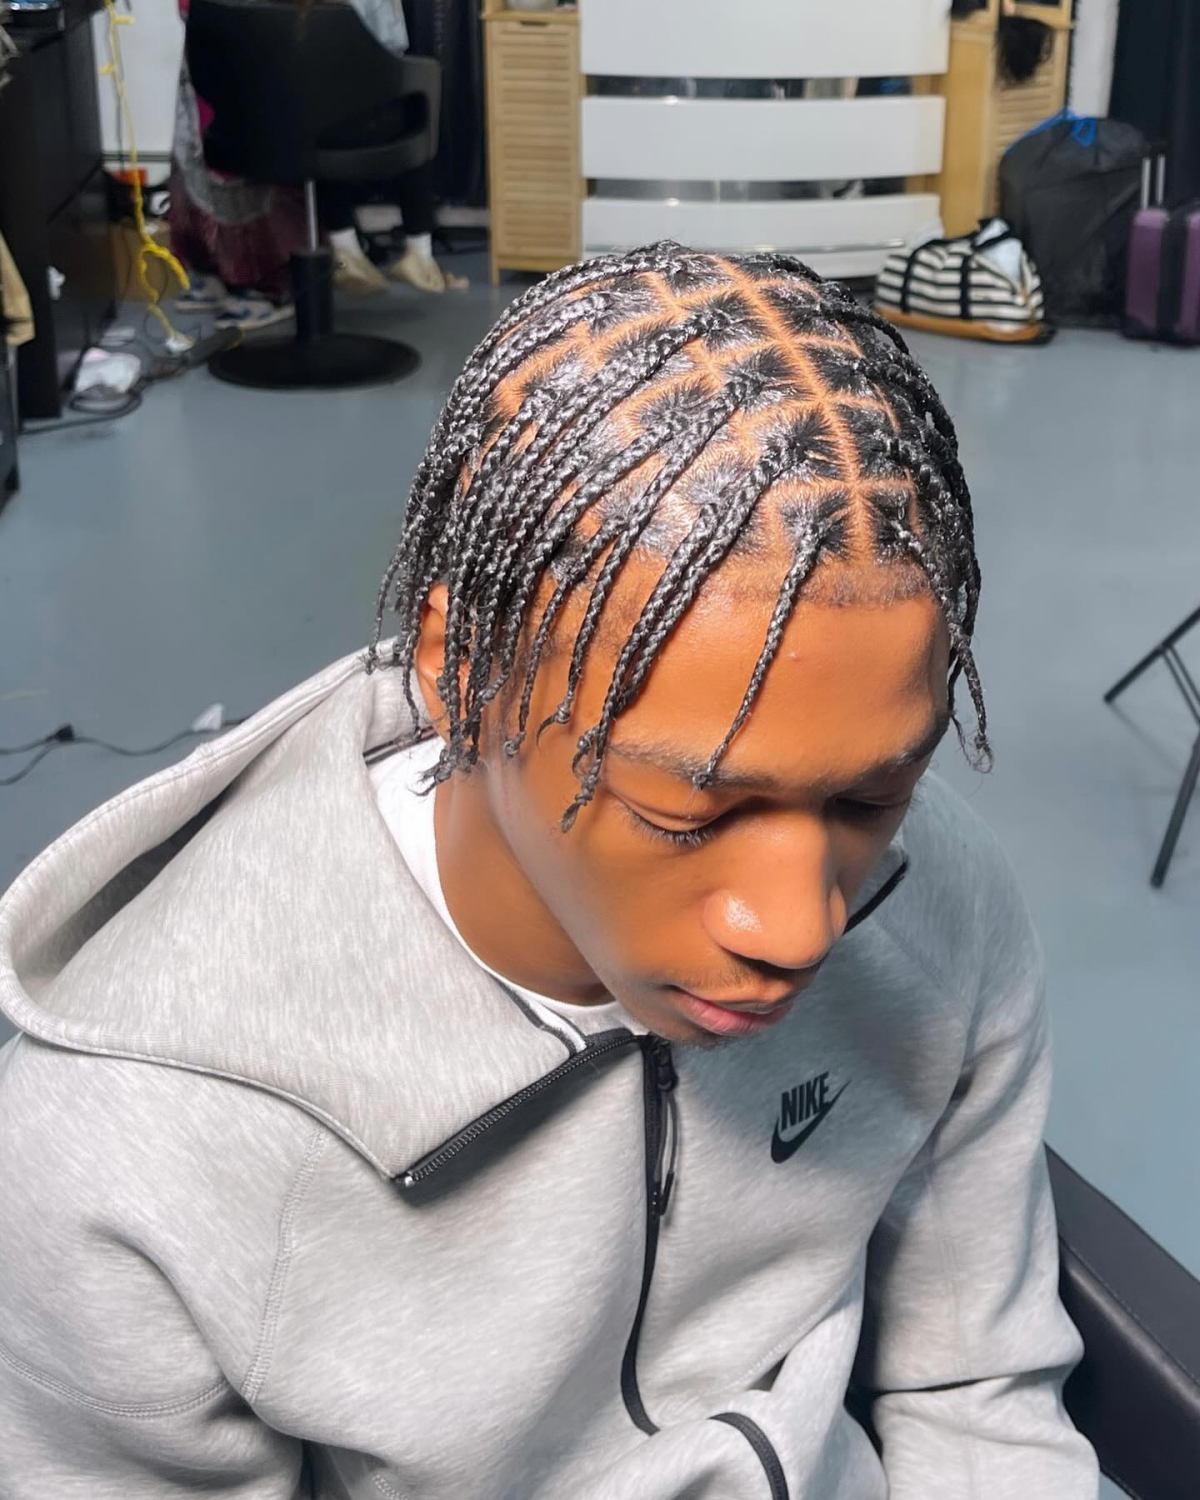
Knotless Box Braids: The most popular choice in my shop right now, and for good reason. They’re lighter, more flexible from day one, and put way less stress on your scalp. The process is more detailed, so it takes longer and costs more. Plan for a starting price around $220, easily going up to $400+ for smaller or longer braids. In my opinion, the scalp-health benefits make them worth every penny.
-
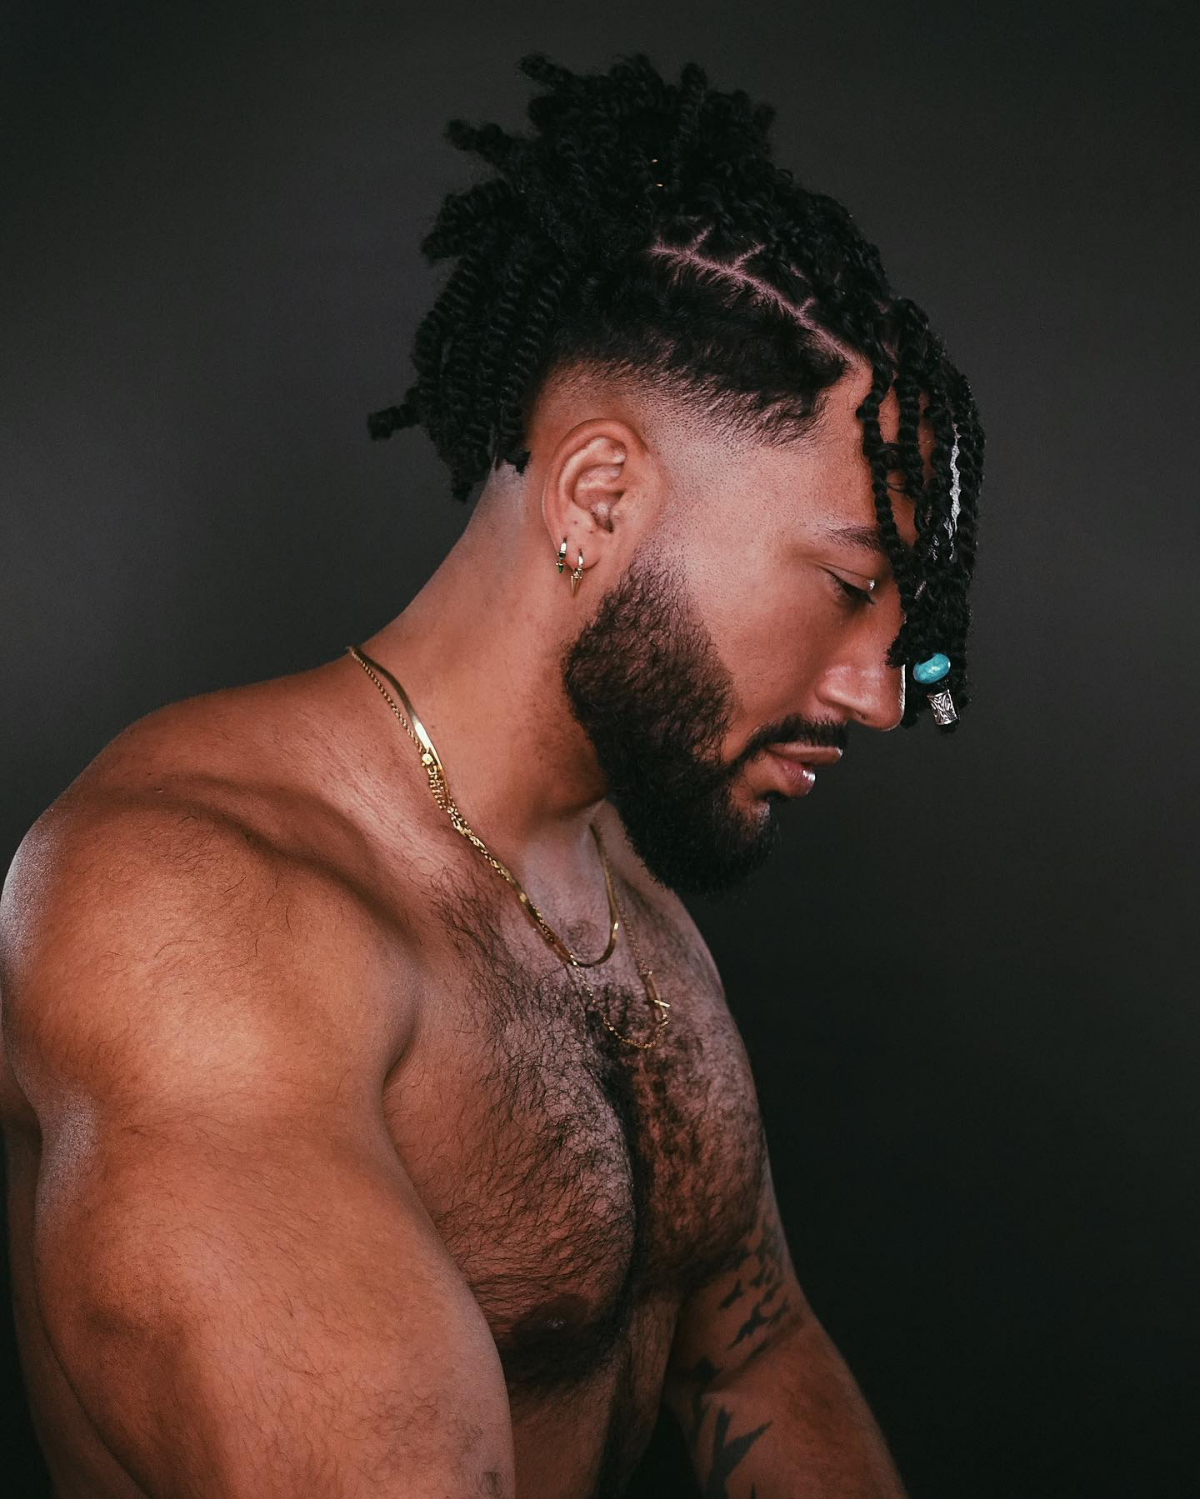
Two-Strand Twists: Instead of a three-strand braid, these use two strands for a different, often fuller-looking texture. They’re generally lighter than braids but might not last quite as long. Installation time and cost are similar to box braids, maybe slightly less.

Oh yeah, and then there are locs. I have to be crystal clear: locs are a permanent commitment, not a temporary style like braids. You don’t “take out” locs—you either grow them out or cut them off. It’s a beautiful journey, but it’s a completely different conversation.
Your Maintenance Plan: Keeping Braids Fresh
Getting the braids is just step one. Taking care of them determines how good they look and, more importantly, the health of your hair when you take them out.
First, you’ll need a small maintenance kit. Nothing crazy. Just a good sulfate-free shampoo (around $15), a quality water-based leave-in spray (Mielle’s is a fantastic choice for about $12), some light Jojoba or Grapeseed oil for your scalp ($10), and the single most important tool: a good silk or satin durag, which will set you back about $20. It’s a small investment that pays off big.
Here’s the routine:

- Washing (Every 1-2 Weeks): Focus on the scalp. Dilute your shampoo with water in a squeeze bottle, apply it directly to your parts, and gently massage with your fingertips. Let the suds run down the braids, then gently squeeze the water out. Don’t scrub the braids themselves.
- Moisturizing (A few times a week): Mist your hair with a light, water-based leave-in conditioner. You can seal it with a very light oil on the scalp to keep things from getting dry.
- Night Care (Every single night): The #1 thing you can do for your braids? Wear a durag or sleep on a silk/satin pillowcase. Seriously. It’s non-negotiable. Cotton sucks the moisture out of your hair and causes friction that leads to frizz. This one step will easily double the life of your style.
Troubleshooting Common Braid Problems
- Problem: The itch is unbearable. Cause: It’s usually one of three things: simple dryness, product buildup, or a mild reaction to the synthetic hair. Solution: For quick relief, spray your scalp with witch hazel or a mix of water and a few drops of tea tree oil. Avoid piling on heavy grease, which just clogs your pores.
- Problem: There’s white gunk at the base of my braids. Cause: That’s just a mix of product, sweat, and dead skin cells. It happens. Solution: You need to clarify. Use a cloth dipped in diluted shampoo to gently clean your parts without messing up the whole style.
The Takedown: Don’t Ruin Your Hair Now
I tell my clients the 4-6 week rule. Don’t leave your braids in for more than six weeks, eight at the absolute max. Any longer, and your new growth starts to mat and tangle with the braided hair, leading to a nightmare of breakage during takedown. Don’t be lazy here.
Set aside a few hours for the takedown process. First, cut the end of each braid, making sure you cut way below where your natural hair ends. Then, drench your hair in a mix of water, cheap conditioner, and oil—you want it to be super slippery. Use a rat-tail comb to gently unbraid each section. Once a braid is out, gently finger-detangle that section before a comb ever touches it.
You’re going to see a lot of shed hair. Don’t panic! The average person loses 50-100 hairs a day. During takedown, you’re just seeing weeks’ worth of that natural shedding all at once. It’s totally normal. After everything is out and detangled, give your hair a good wash and a deep conditioning treatment. Let your hair breathe for at least a week before getting your next set. Trust me, it needs the break.
Galerie d’inspiration
That fresh-out-the-chair tightness is real, but it should ease up within 24-48 hours. If the tension is causing headaches or visible bumps (stress bumps), it’s too tight. Don’t be shy about telling your stylist. A quick fix at home can be a warm, damp towel gently pressed against your scalp or a light spritz of leave-in conditioner to soothe the skin.
What’s the one thing that separates a style that lasts from one that gets frizzy in a week?
Nighttime protection. It’s non-negotiable. Your cotton pillowcase is a moisture thief and creates friction that leads to frizz and breakage. Invest in a quality satin or silk durag or bonnet. It keeps your braids smooth, locks in moisture, and protects your edges, making your investment in the style last so much longer.
Braids have been a part of African culture for at least 5,000 years, with some of the earliest depictions found in Saharan rock art.
So when you’re getting braids, you’re not just getting a hairstyle. You’re connecting with a deep, powerful history of identity, status, and artistry that has spanned millennia and continents. It’s a legacy woven directly into your hair.
Knotless Box Braids: The braider starts with your natural hair and feeds in the extension pieces gradually. This creates a flatter, more flexible base that puts significantly less tension on the scalp.
Traditional Box Braids: The extension is secured by forming a knot at the base of the braid. This gives a very distinct and classic look but can create more initial tension.
If you have a sensitive scalp or fine hair, knotless is your best friend.

Your scalp is the garden, your hair is the plant. Don’t get so focused on the braids that you forget the soil. Product buildup, sweat, and dead skin cells can clog follicles and lead to itchiness or flakes. A light, non-greasy scalp oil is key.
- Apply a few drops of an oil like Mielle’s Rosemary Mint Scalp Oil directly to your parts every 2-3 days.
- Gently massage it in with the pads of your fingers, not your nails.
- This stimulates blood flow and keeps the scalp healthy and moisturized.
Don’t skip wash day! A clean scalp is crucial for hair health. But how you wash matters.
- Dilute your shampoo with water in an applicator bottle to easily apply it directly to the scalp.
- Gently massage your scalp with your fingertips. Let the suds run down the length of the braids—don’t rough them up.
- Rinse thoroughly. Leftover shampoo is a major cause of itchiness. Pat dry with a microfiber towel or an old t-shirt to minimize frizz.
- Reduced frizz and flyaways
- Protected edges from breakage
- Maintained moisture balance
The secret? A simple, high-quality satin durag worn every single night. It’s the single most effective tool for extending the life of your braids and protecting your hair’s health while you sleep.
Think beyond just the braids. Small details can completely change your look. Consider adding a few metallic cuffs, wooden beads, or a wrap of colored string to a couple of braids. It’s a low-commitment way to personalize your style and make it uniquely yours without needing a whole new appointment.
How long can I really keep my braids in?
The sweet spot is typically 4 to 6 weeks. Pushing it to 8 weeks is possible if your hair is healthy and you’re diligent with your care routine. Anything longer is risky. Your natural hair, which sheds daily, gets trapped in the braids. Keeping them in too long can lead to severe matting and potential breakage when you finally take them down.

Traction alopecia is a form of hair loss caused by prolonged or repetitive tension on the hair root. And it can be permanent.
This is why finding a stylist who prioritizes hair health over an ultra-tight look is critical. Your braids should be secure, not painful. If you see persistent redness, bumps, or thinning around your hairline, it’s a red flag. Give your hair a break between styles to allow your follicles to recover.

Important point: The price of braids reflects time, skill, and the health of your hair. A stylist charging significantly less might be cutting corners—rushing the process, using cheap extensions that irritate the scalp, or pulling too tightly, which can lead to damage. A good braider is an investment in your hair’s future, not just a one-time style.
- Show up with your hair washed, detangled, and fully dry.
- Avoid using any heavy oils or conditioners beforehand; your stylist needs a clean canvas.
- Have a few reference photos, but be open to your stylist’s expert opinion on what will work for your hair type and face shape.

Let’s talk flyaways and frizz control between appointments. What’s the right tool for the job?
Light Hold Mousse: For overall frizz control, a foaming mousse like The Doux’s Mousse Def is fantastic. Apply a light layer over the braids and tie down with a durag until dry. It provides a flexible hold without heavy buildup.
Strong Hold Edge Control: For a sharp lineup and crisp parts, a gel-pomade like Shine ‘n Jam Magic Fingers is the industry standard. Use it sparingly, only where needed, to avoid flaking.
The Take-Down is as important as the Install.
Be patient. Don’t just rip them out. First, lightly mist your braids with a mix of water and a slippery conditioner to give them some slip. Use a rattail comb to gently unbraid from the bottom up. Once a braid is out, you’ll see a ball of shed hair at the base. Gently work it out with your fingers *before* you put a comb or water on it to prevent matting.

My hairline looks a bit thin. Can I still get braids?
This is a conversation to have with a trusted stylist. If you have a naturally fine or receding hairline, styles with extreme tension like tight, small cornrows pulled straight back might accentuate it or cause further stress. A good stylist might suggest knotless braids, starting them a bit further back from the hairline, or opting for a style with a fade where the top is braided, reducing overall tension on the most fragile areas.
Growing your hair out for braids requires patience, especially during that ‘in-between’ stage. Don’t give up. This is the perfect time to focus on hair health.
- Get regular trims to snip off split ends.
- Focus on deep conditioning treatments to keep hair strong.
- Wear protective styles that don’t require length, like two-strand twists or finger coils, to keep hair manageable and protected while it grows.