How to Build an Outdoor Shower That Won’t Wreck Your House
I’ve been a plumber for a long, long time, and I can tell you that I’ve installed just about every kind of outdoor shower you can imagine. I’ve put in those simple, cold-water rinse-offs on beach houses and some seriously fancy, spa-like setups in suburban backyards. There’s just something special about showering under the open sky.
In this article
But I’ve also been the guy they call to fix the disasters. I’ve seen rotted house siding, flooded basements, and decks so slippery they were basically a lawsuit waiting to happen. An outdoor shower is a fantastic addition to your home, but it can turn into a costly nightmare if it isn’t planned and built with care.
So, this isn’t going to be one of those guides with just pretty design photos. This is the real-world, practical advice on how to build a shower that’s safe, durable, and actually works for years. We’re talking about the stuff that matters—from the plumbing in the ground to the type of screws you use. Getting these foundations right is everything.
First Things First: Plan It Out (Don’t Skip This!)
Before you even think about buying a single pipe or board, you need to have a serious chat with yourself. Answering a few key questions upfront will dictate the cost, complexity, and ultimate success of your project. Trust me, rushing this stage is the number one mistake people make.
1. What’s This Shower Actually For?
Be honest. Is this just for rinsing off chlorine after a swim, or do you want a full-blown shower for daily bathing in the summer? A cold-water-only station is dramatically simpler and cheaper to build. If you want hot water for a comfortable wash, the plumbing gets more involved and the cost goes up. Oh, and if you plan on washing a muddy dog, you’ll definitely want a handheld sprayer and a floor that’s a breeze to clean. Your shower’s purpose guides every single decision you’ll make from here on out.
2. Where Should It Go?
Location, location, location. This is probably the most critical factor. The absolute ideal spot is on an exterior wall that backs right up to a bathroom, laundry room, or kitchen. Why? Because it gives you the easiest, cheapest access to existing hot and cold water lines. Shorter pipe runs mean lower costs and better water pressure. If you want to put it at the far end of your yard, just know that you’re signing up for a lot more work and expense, digging long trenches for both the water supply and the drain.
3. Where Does the Water Go?
Water needs a safe place to drain. This is non-negotiable. Poor drainage is the root cause of most outdoor shower problems—it can create a muddy swamp, undermine your home’s foundation, or turn the area into a hazardous, slippery mess. Letting water just pool on the ground is not a real option. We’ll dive deep into drainage systems later, but for now, take a look at your yard. Do you have sandy soil that drains in a flash, or heavy clay that holds water forever? Is the area sloped away from your house? The answers will point you toward the right drainage method.

4. How Much Privacy Do You Need?
Take a walk around your proposed shower spot and look around. Seriously. Check the sightlines from your neighbors’ windows, the street, and any public areas. A simple lattice screen might be plenty for a poolside rinse-off, but a true bathing shower will need a solid, tall enclosure with a proper door. Quick tip: don’t forget to look up! A neighbor’s second-story window can offer a perfect view of your new shower if you’re not careful.
5. Do You Need a Permit? (Spoiler: Probably)
Before you dig a single hole, call your local building department. I can’t stress this enough. Regulations vary wildly from town to town. A standalone cold-water shower might not need a permit, but the moment you tie into your home’s main water supply or its sanitary drain line, you almost certainly will. This isn’t optional. Trying to skip the permit can create massive headaches with your homeowner’s insurance and when you eventually try to sell your home.
The Guts of the System: Plumbing Done Right
The plumbing is the heart of your shower. Understanding the basics will help you build a system that works or, at the very least, have an intelligent conversation with a plumber. The biggest challenge, especially if you live anywhere with a real winter, is preventing pipes from freezing and bursting.
The Freeze Problem Is a Big Deal
Every spring, like clockwork, I get calls to repair burst pipes from outdoor plumbing that wasn’t winterized correctly. When water freezes, it expands with incredible force—enough to easily split copper pipes and crack fittings. This can lead to some seriously expensive water damage.
The absolute best way to handle this is with a stop-and-waste valve. This special valve gets installed on the water line inside the warm part of your house, before the pipe heads outside. Here’s a foolproof way to winterize it—takes less than a minute:
- Step 1: Head inside and find the shut-off valve for the shower. Turn the handle all the way off.
- Step 2: Place a small bucket under the valve. You’ll see a little cap on the side—that’s the ‘waste’ part. Unscrew it, and the water in the outdoor pipe will drain into your bucket.
- Step 3: Go outside and turn the shower handle to the ‘on’ position. This lets air into the line and pushes out the last few drops.
- Step 4: Once it stops dripping, you’re all set for winter!
Getting Water to the Shower
You’ve got two main routes to get water flowing.
- From a Hose Bibb (Cold Water Only): This is the simplest, quickest DIY method. You can literally build a functional rinse station in an hour for under $50. Just unscrew your existing outdoor spigot, install a brass Y-splitter (about $10 at any hardware store), and run a garden hose to a shower wand. It’s not fancy, but it works!
- From Interior Pipes (Hot and Cold): This is the professional way to do it. It involves tapping into the 1/2-inch hot and cold water lines inside your home. PEX tubing is fantastic for this; it’s flexible, easier to work with than rigid copper, and has some resistance to freeze-cracking (though you still must drain it). Heads up: this requires some real plumbing skills. If you’re not comfortable using tools like a PEX crimper and rings, this is the perfect time to call in a pro.
Choosing Your Shower Fixtures
Outdoor fixtures get hammered by the elements. Don’t cheap out and use indoor fixtures here. Look for valves made of solid brass. For the finish, unlacquered brass is a brilliant choice because it develops a beautiful, natural patina over time instead of flaking or peeling. If you live anywhere near the coast, I’d strongly recommend marine-grade 316 stainless steel. Salt air is incredibly corrosive and will absolutely destroy standard chrome and even lower-grade stainless steel in a season or two.
A Solid Base: The Floor and Drain System
The shower floor has to be safe, comfortable on bare feet, and—most importantly—built to manage water. The floor and the drain are a team; one without the other is a complete failure.
Flooring Materials: A Quick Rundown
- Wood Decking: This is a popular and great-looking option. Pressure-treated pine is your budget choice, running about $4-$6 per square foot for the wood. It works, but it can splinter and needs sealing every couple of years. Cedar is a nice step up, but my top picks are tropical hardwoods like Ipe or Teak. They are incredibly dense and resistant to rot. They’re an investment, for sure—often $15-$25 per square foot—but they will last for decades with minimal fuss. No matter what wood you use, make sure you build the platform on a small frame to allow for air circulation underneath.
- Poured Concrete: A concrete slab is bomb-proof. It should be at least 4 inches thick and sloped about 1/4 inch per foot toward the drain. The key is to give it a broom finish. Right before it fully cures, you just drag a stiff broom across the surface to create a grippy, non-slip texture. A smooth finish on a shower floor is just asking for a fall.
- Stone or Pavers: This can create a beautiful, rustic look. Set the pavers on a level base of compacted gravel and sand. Filling the gaps with pea gravel not only looks great but also creates a permeable surface where water can drain right through.
Drainage Systems That Actually Work
For most homes, you need a dedicated drainage system. Here are the best options:
- The Dry Well: This is my go-to for most jobs. It’s basically a big hole in the ground (at least 10 feet from your foundation!) that you fill with coarse gravel or a pre-made plastic drainage pit, which you can buy for around $100-$150. Water from the shower floor pipes into this underground pit and slowly soaks into the surrounding soil. For a typical shower, a 3x3x3 foot pit is usually plenty.
- French Drain: If you have soil that drains poorly, a French drain is a great solution. It’s a shallow, gravel-filled trench with a perforated pipe that actively carries water away from the shower to a lower point in your yard.
- Connecting to the Sewer: This is the most effective, but also the most complex and expensive, option. This is absolutely not a DIY job. A licensed plumber has to make this connection to install a proper P-trap (to block sewer gases) and ensure it meets all local codes.
Walls and Enclosures for Privacy and Style
The enclosure is what makes your shower feel like a real room. The main thing here is to use materials that can handle constant moisture and sun.
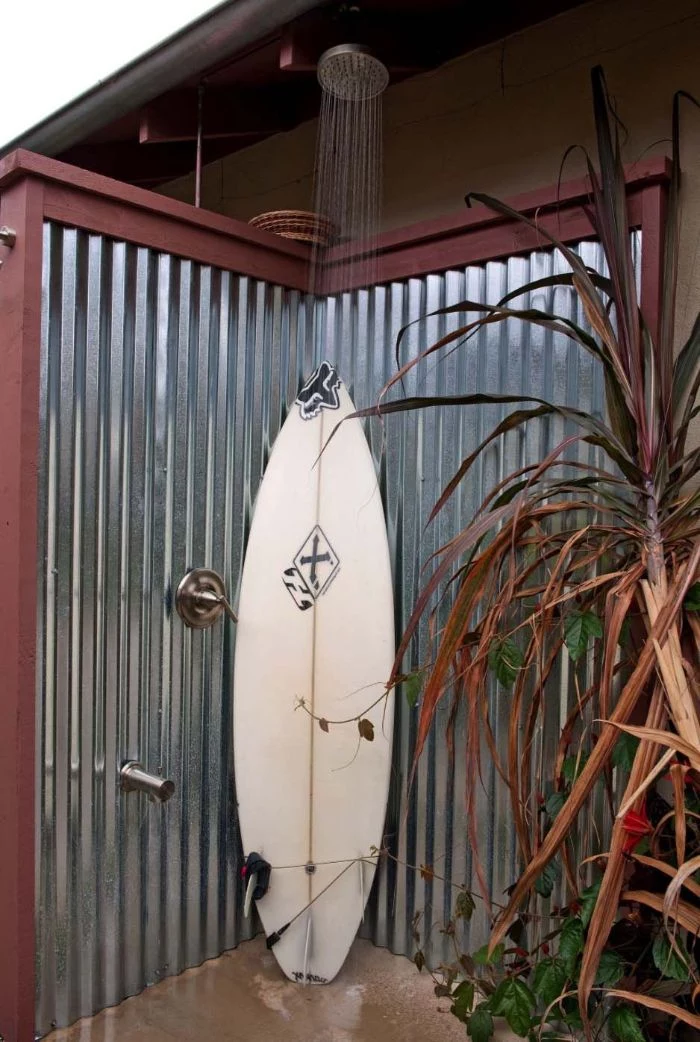
When it comes to materials, wood choices like Ipe, Teak, and Cedar are fantastic. A little pro tip: use 305 or 316 grade stainless steel screws for assembly. Regular screws will rust and leave ugly black streaks running down your beautiful wood. Corrugated metal can also offer a cool, modern look and is quite durable and cheap.
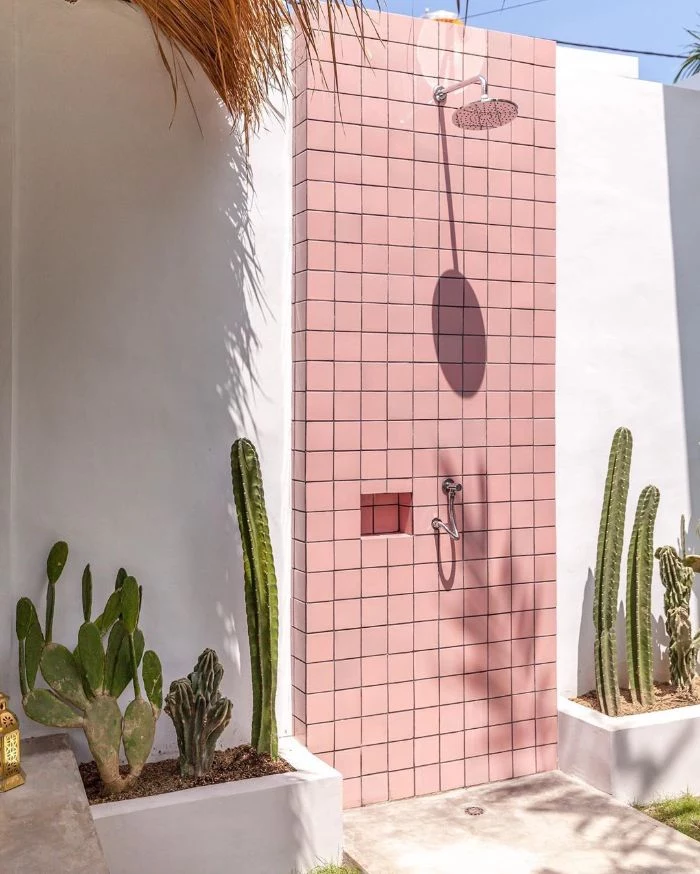
By the way, I once had a client who insisted on using regular indoor tile adhesive for their outdoor shower wall. A year later, I was back at their house, chipping off tiles that were literally falling off in big sheets. Don’t be that person! If you’re tiling, it must be installed on cement backer board with a proper waterproof membrane, just like an indoor shower. Use porcelain tile, as it absorbs very little water.
One more crucial detail: if you attach a wall to your house, you MUST install proper flashing. This is a waterproof barrier that tucks under your house siding and goes over the new shower wall, directing water away. Skipping this step is a guaranteed way to get water behind your siding, leading to thousands in rot repair down the road.
Cool Add-Ons and Troubleshooting
Once you’ve got the basics down, you can think about some upgrades.
- Foot Wash: Adding a second, lower spigot is a simple but incredibly useful feature, especially if you’re near a beach or pool.
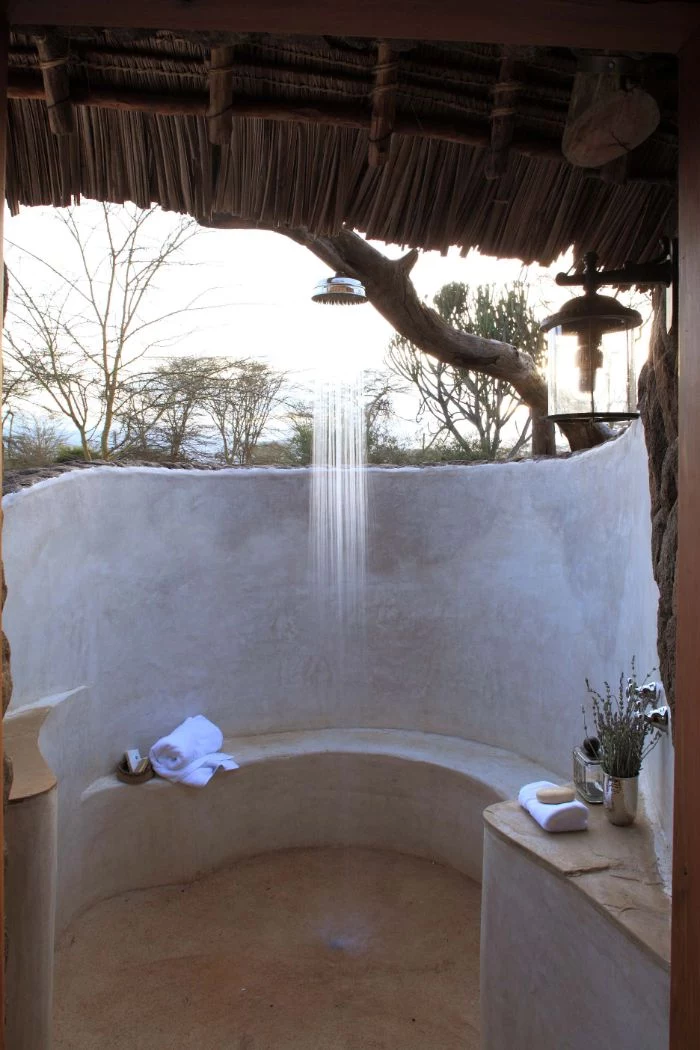
- Benches and Niches: A built-in bench is great for comfort, and a recessed niche is perfect for holding soap. Just remember to slope the bottom surface of the niche slightly so water drains out.
- Lighting: Want to use your shower at night? You’ll need a licensed electrician. All fixtures must be rated for wet locations, and the wiring needs to be protected by a Ground Fault Circuit Interrupter (GFCI). This is one area where you absolutely cannot cut corners.
Fixing Common Problems
- Low Pressure? Before you panic, just unscrew the shower head and clean it. Mineral deposits are the usual culprit.
- Slow Draining? The drain cover is probably clogged with hair and leaves. If cleaning that doesn’t fix it, your dry well might be saturated from heavy rain.
- A Constant Drip? This is usually just a worn-out washer or cartridge inside the valve. It’s an easy and cheap fix, but make sure you turn off the water supply before you start taking things apart!
A Final Word on Doing It Right
Building an outdoor shower is an incredibly rewarding project. But it’s also a project where cutting corners will come back to bite you. A slippery floor can cause a serious fall. Bad wiring around water can be fatal. A slow leak inside a wall can cause unbelievable damage.
Be honest about your skill level. Most people can handle building the enclosure and the floor. Far fewer are equipped to safely tackle the plumbing and electrical tie-ins. There is absolutely no shame in hiring a licensed pro for those critical parts. In my experience, the money you spend on a few hours of professional help is the best investment you can make in the safety and longevity of your shower.
So, take your time with the planning. Use the right materials, not just the cheapest ones. And build it on a solid, well-drained foundation. If you do that, you’ll have a beautiful outdoor shower that brings a little bit of joy to your life for many, many years.
Inspirational Gallery
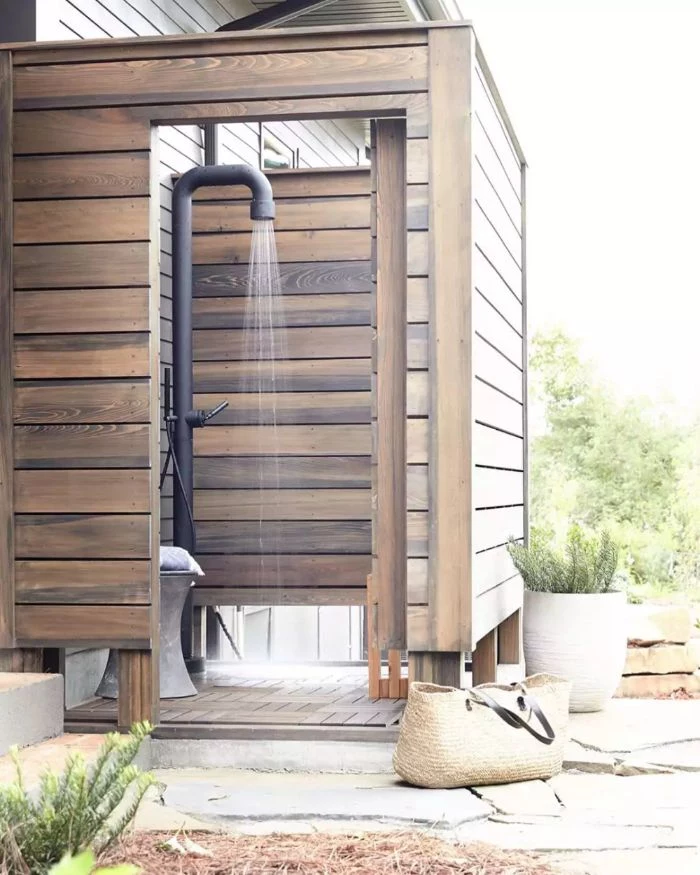
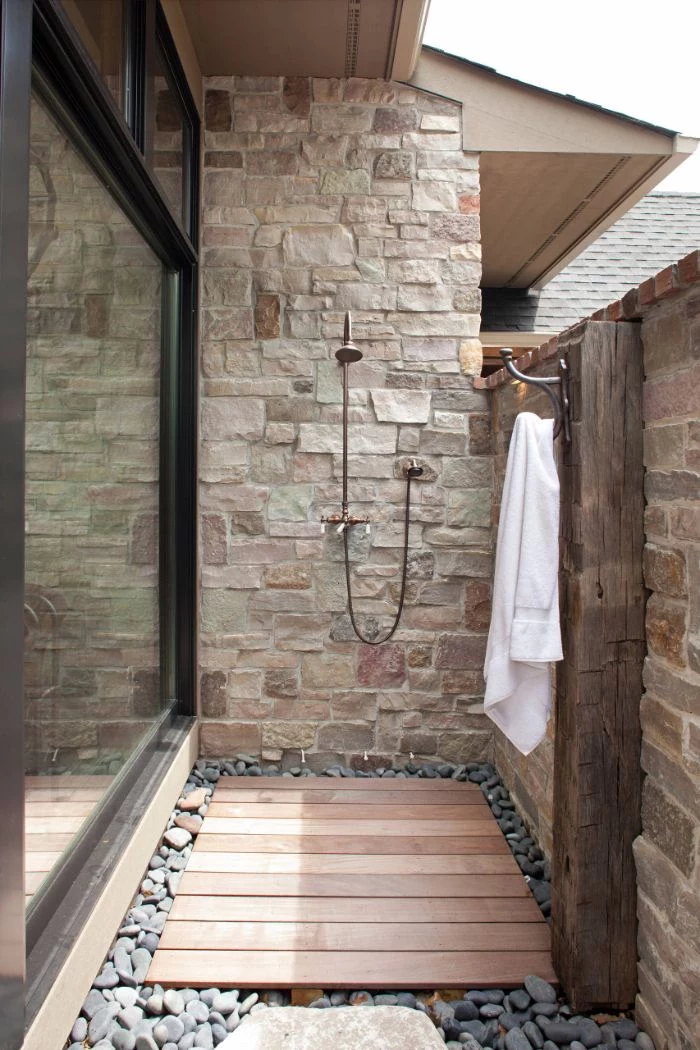
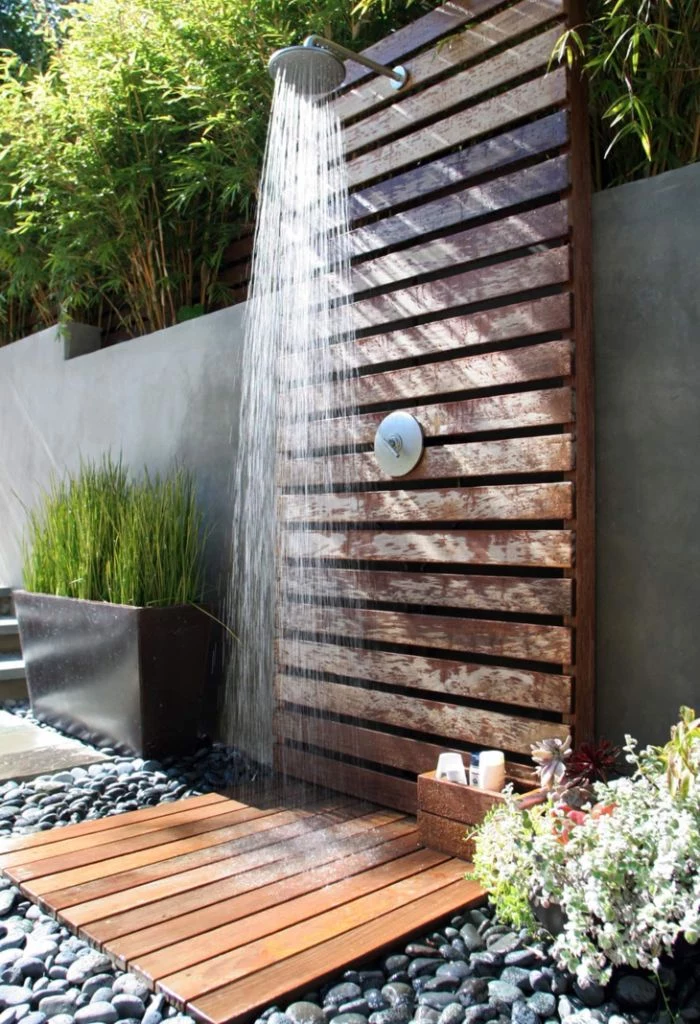
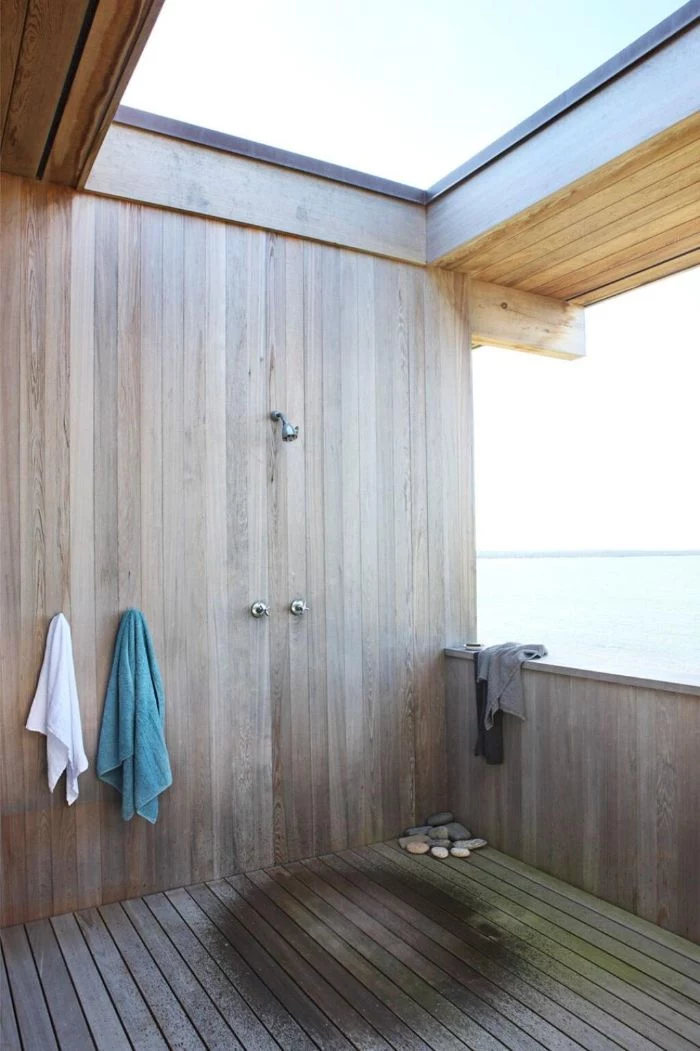
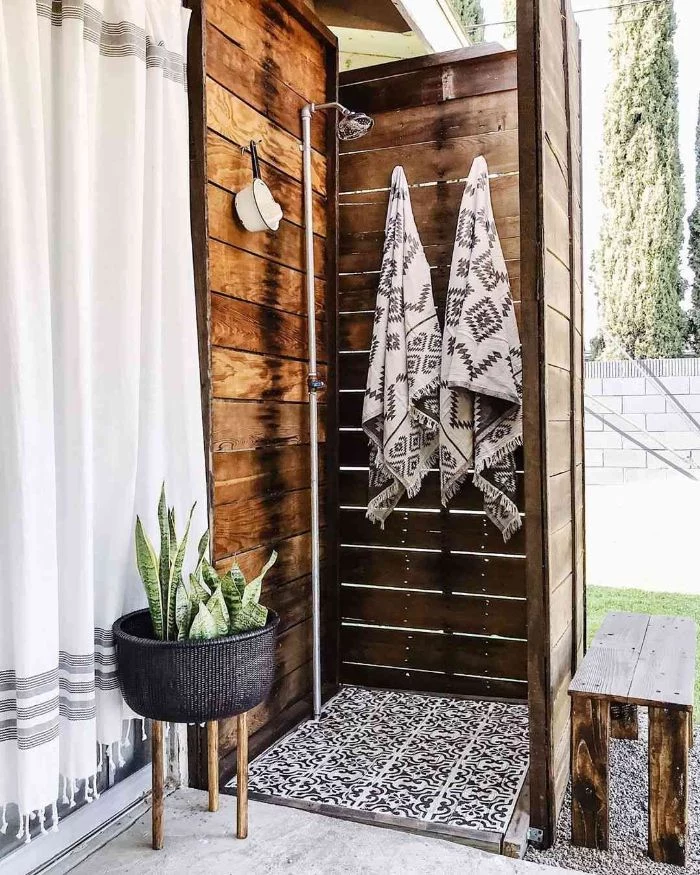
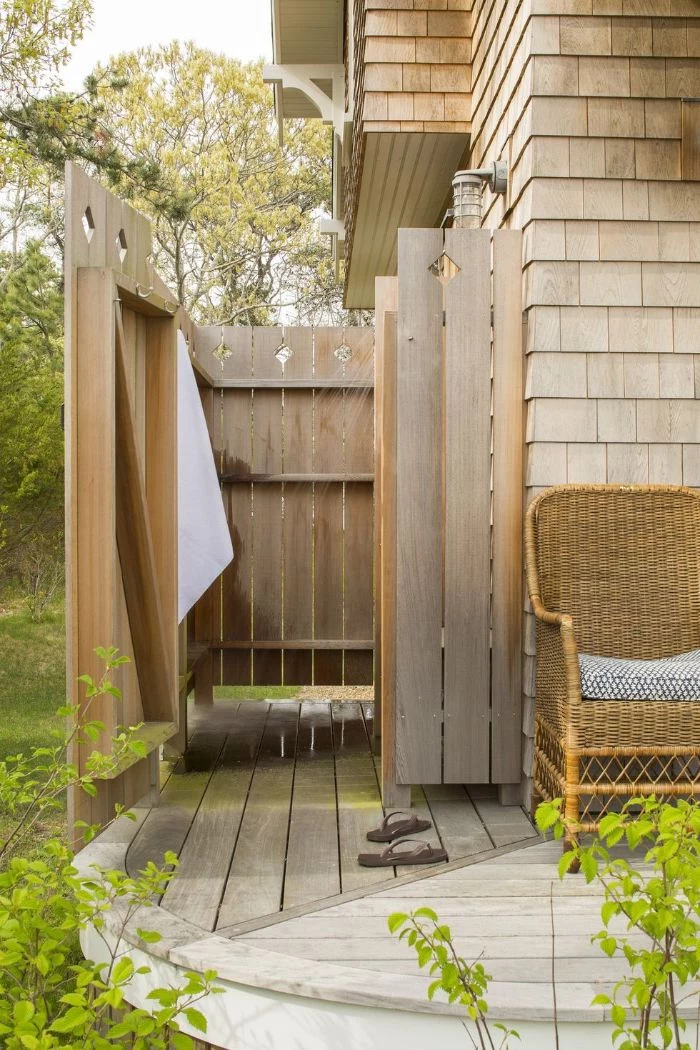
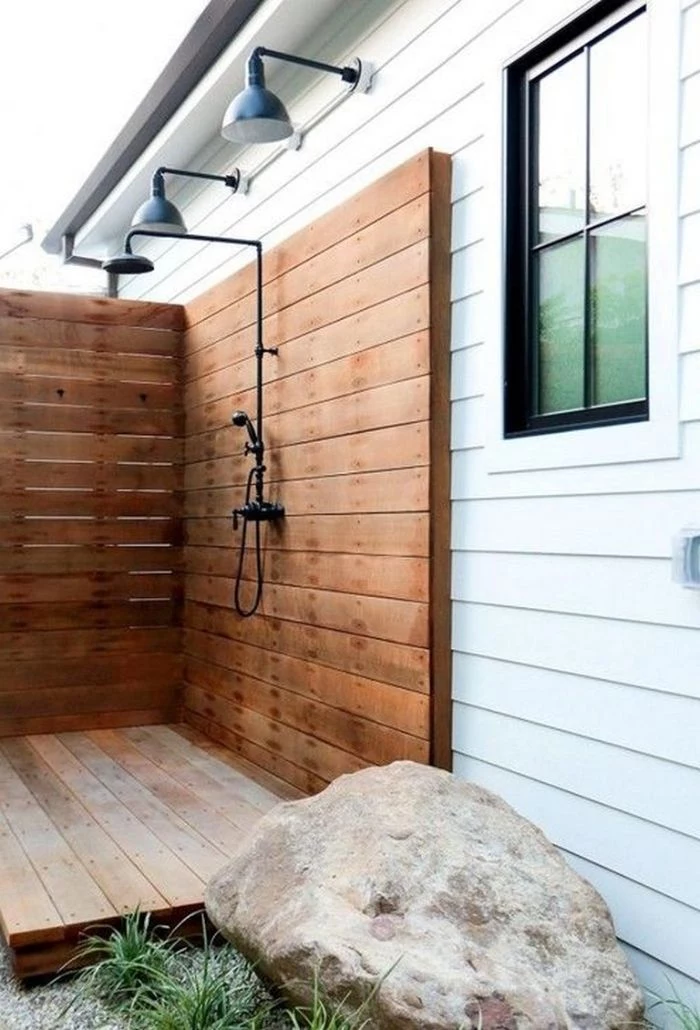
When selecting wood for your shower floor and walls, consider Ipe. This Brazilian hardwood is incredibly dense and naturally resistant to rot, insects, and decay, even without treatment. Its deep, rich color weathers to a beautiful silver-gray over time, but can be maintained with annual oiling. It’s a significant investment upfront, but its longevity often makes it more cost-effective than replacing cheaper woods like pine every few years.
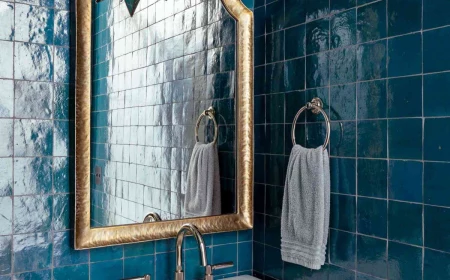
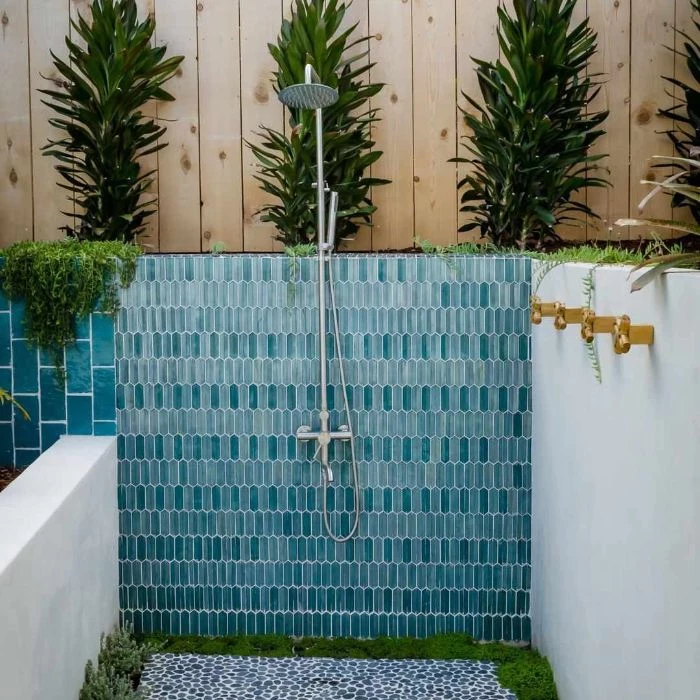
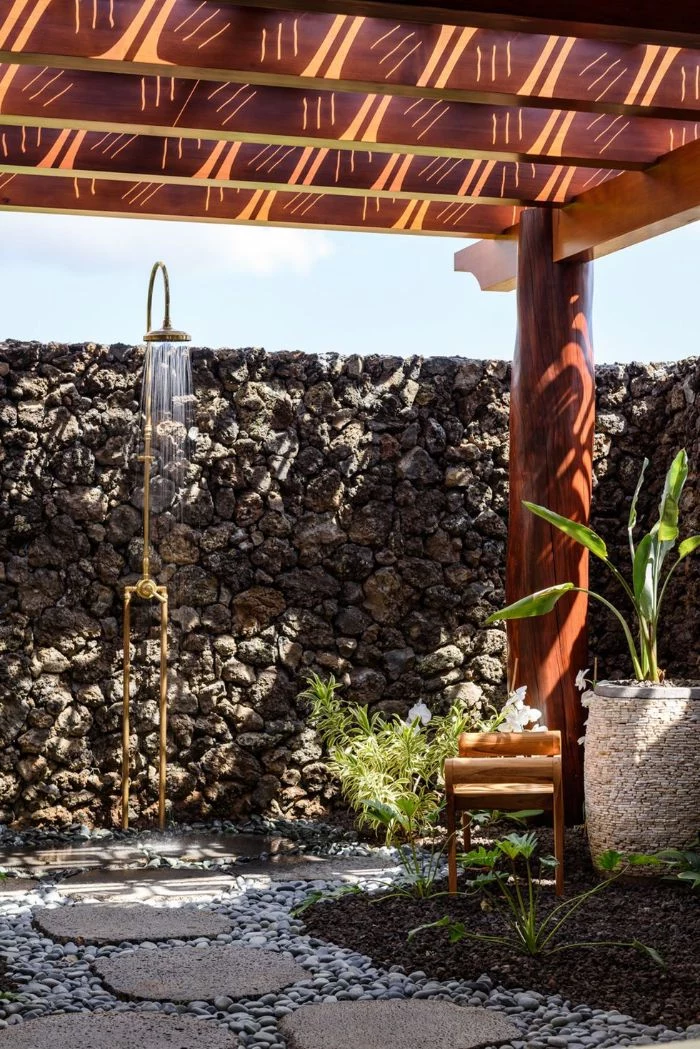
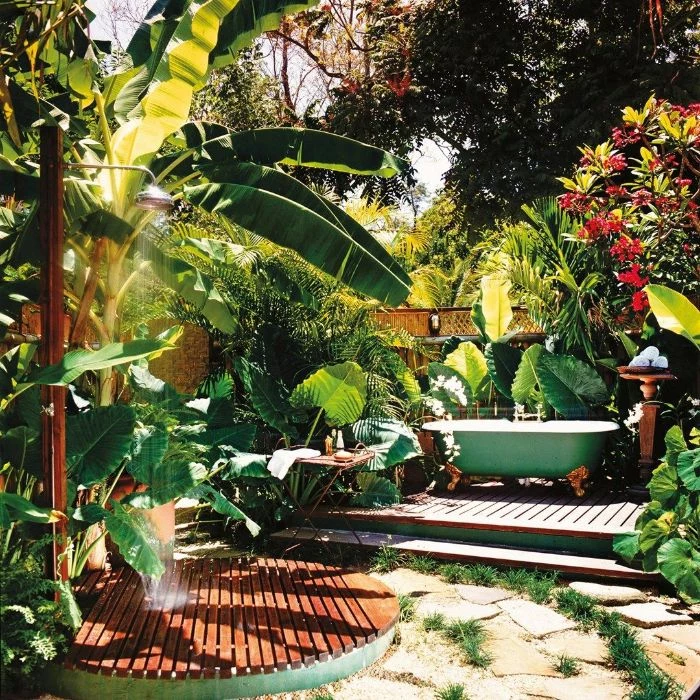
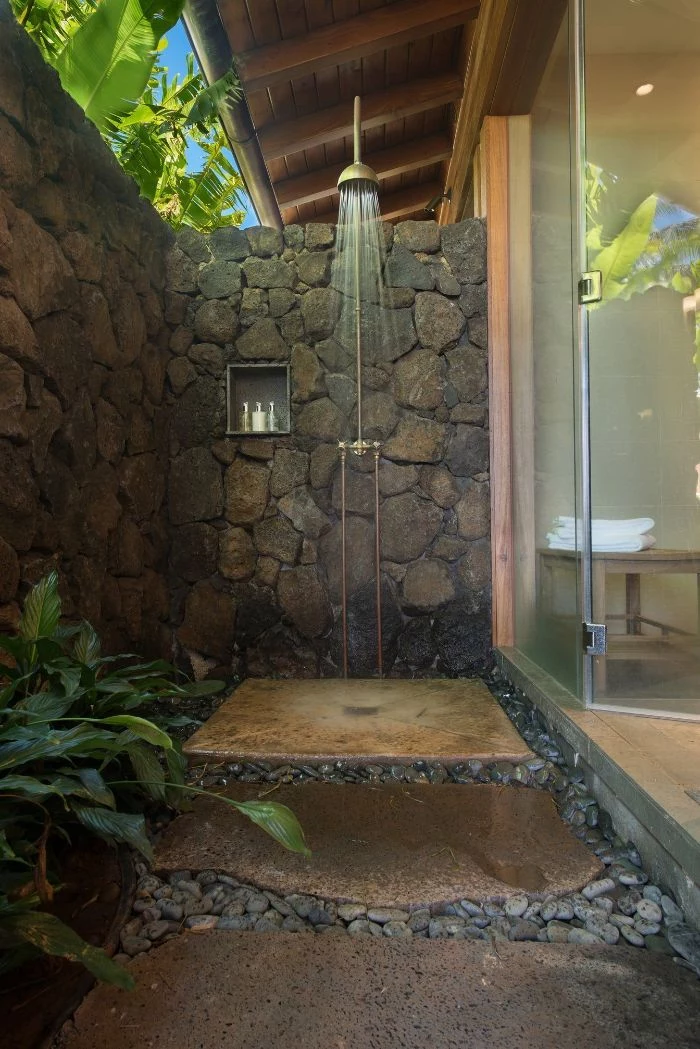
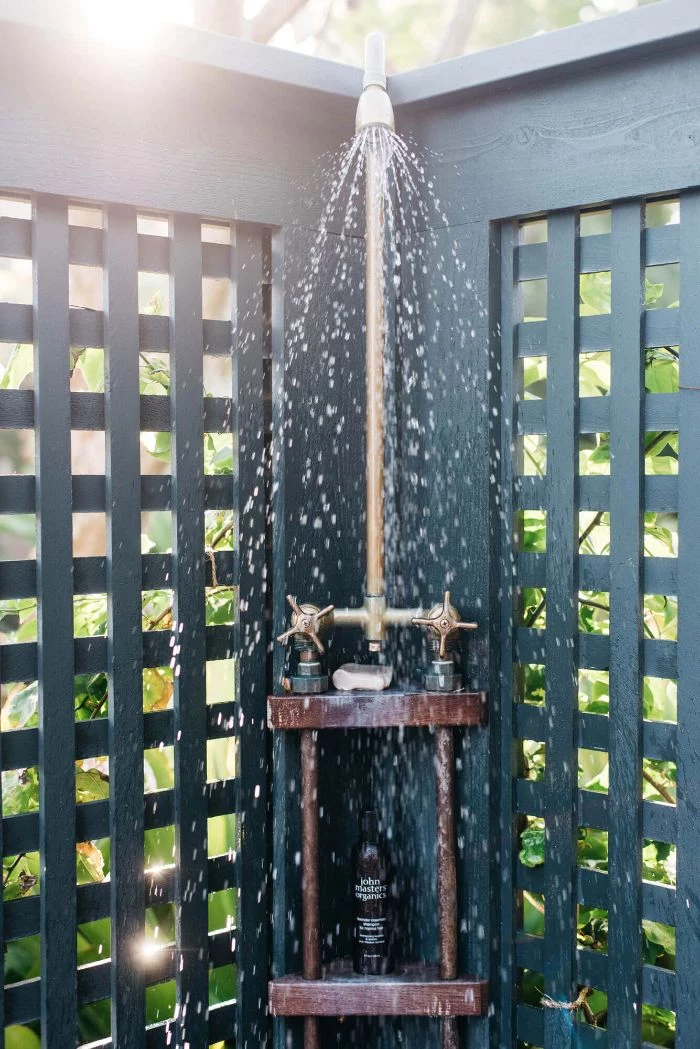
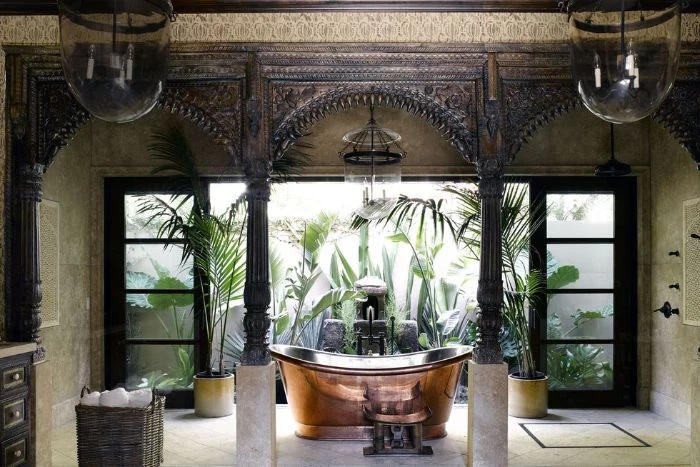
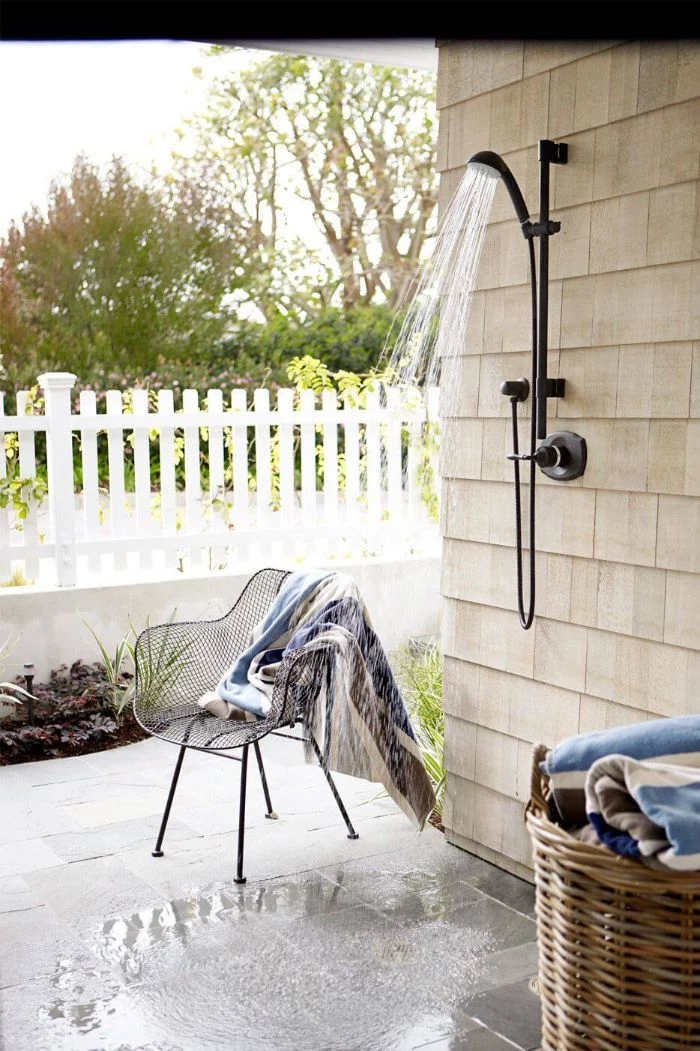
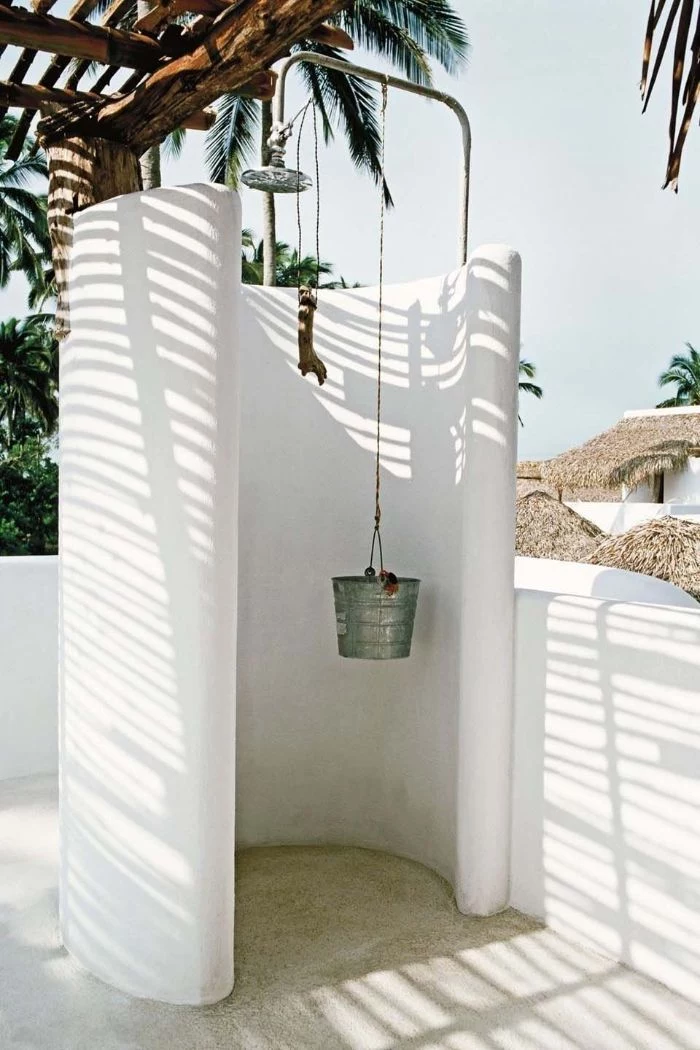
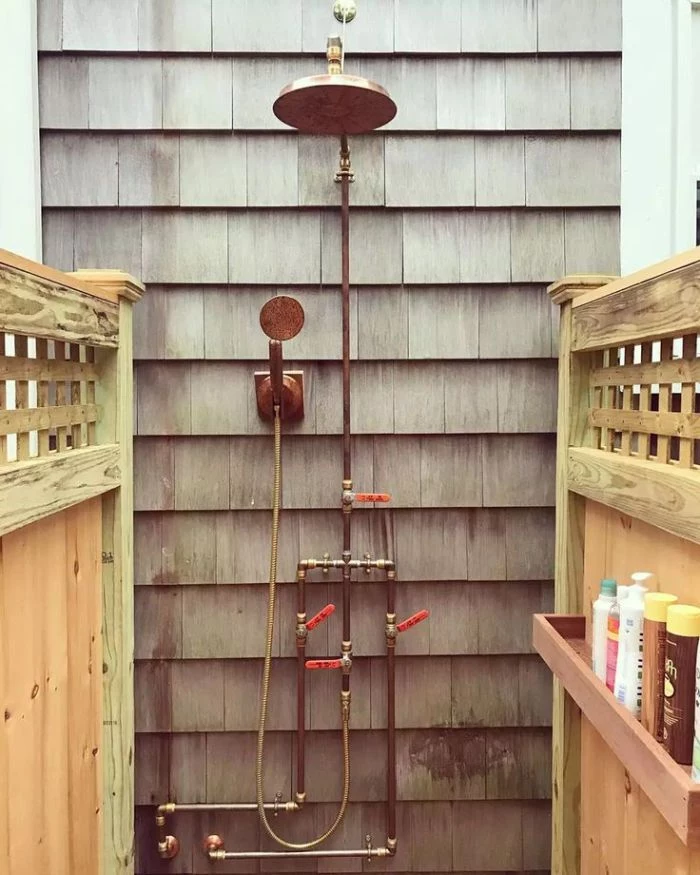
The Patina Promise: Unlacquered brass fixtures are a top choice for outdoor showers for a reason. Initially shiny, they will develop a unique, deep brown patina when exposed to the elements. This living finish doesn’t just look beautifully authentic in a garden setting; it’s also incredibly durable and corrosion-resistant. Don’t fight the aging process—embrace it for a look that gets better with time.
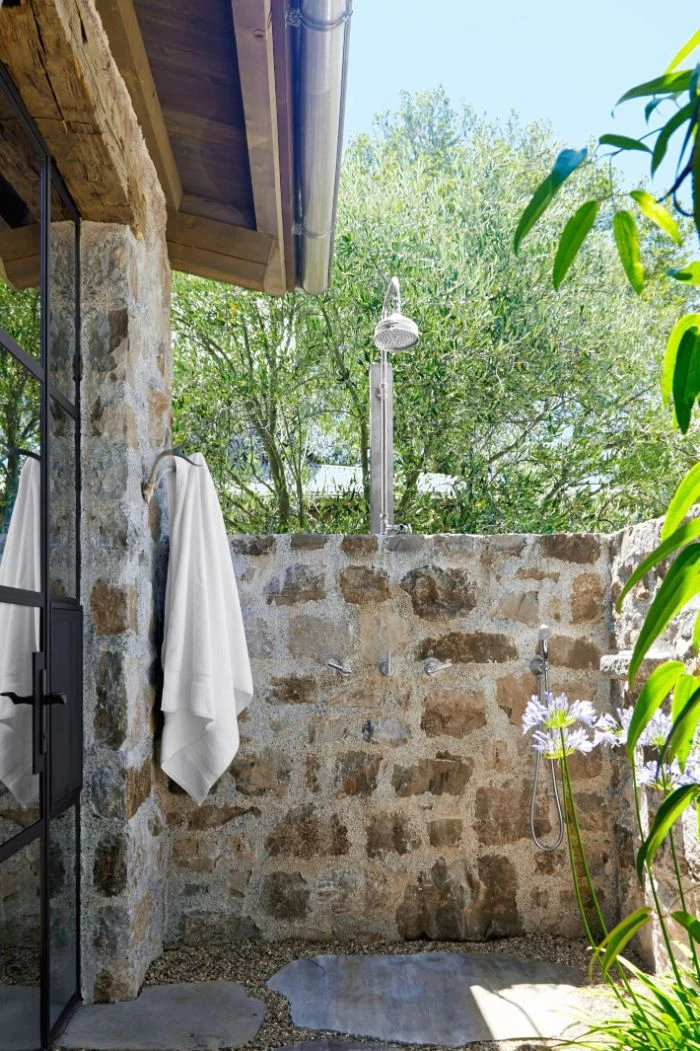
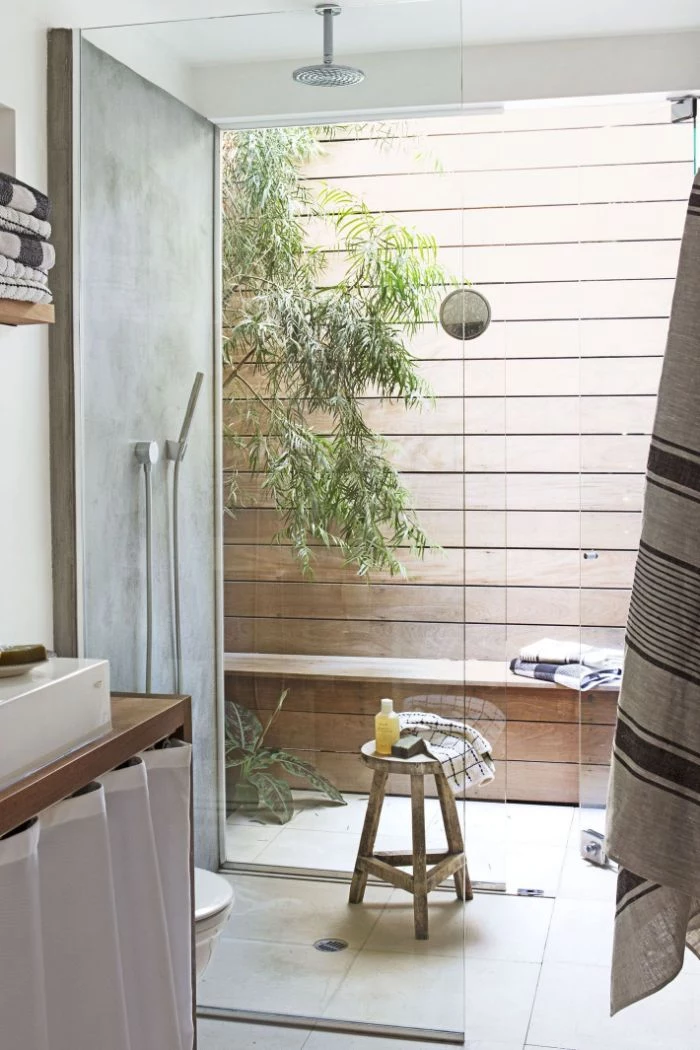
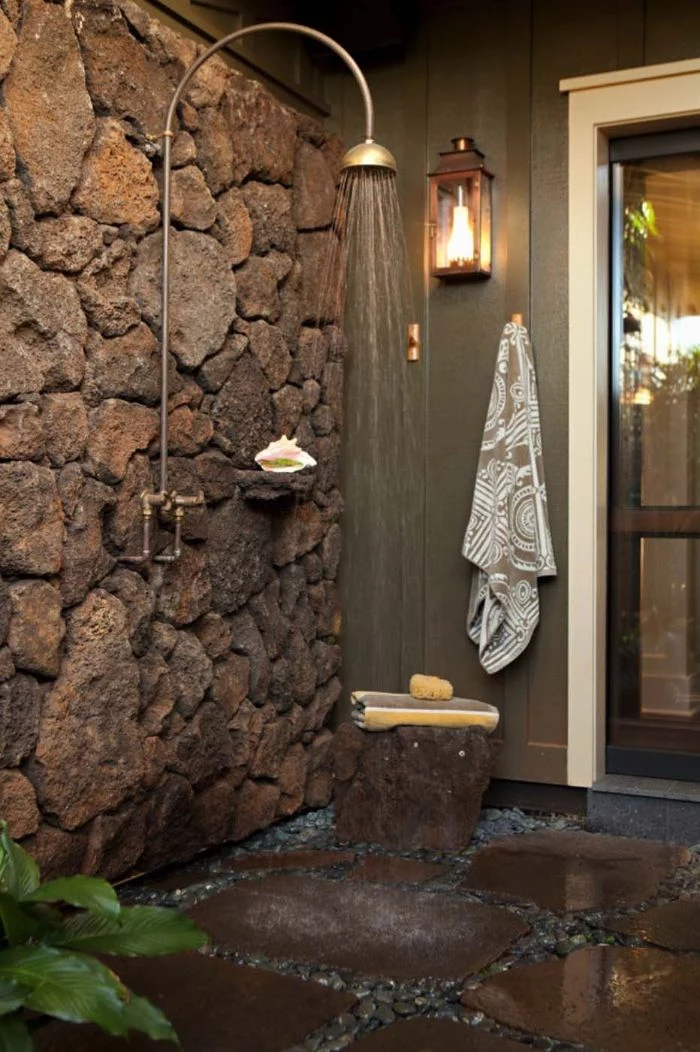
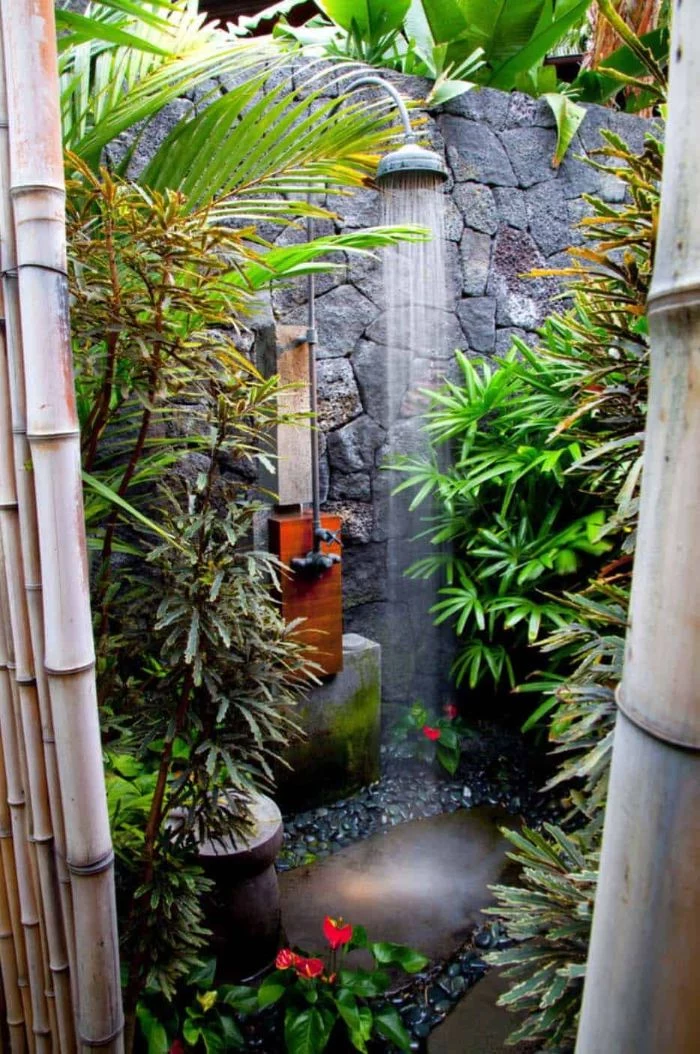
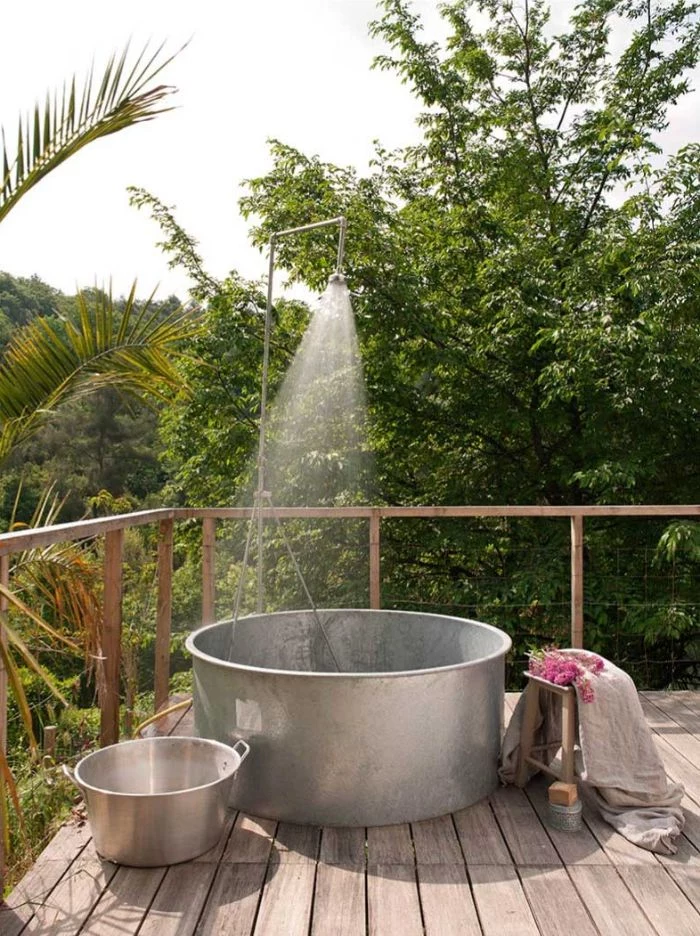
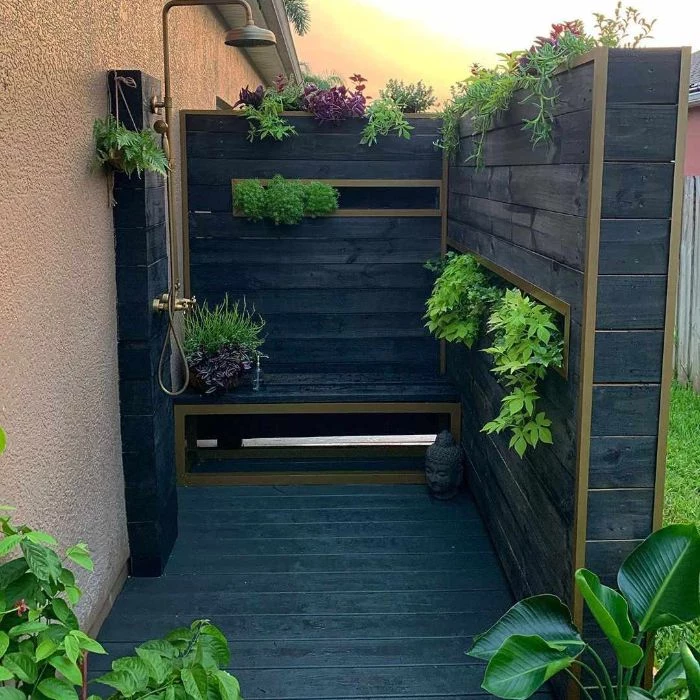
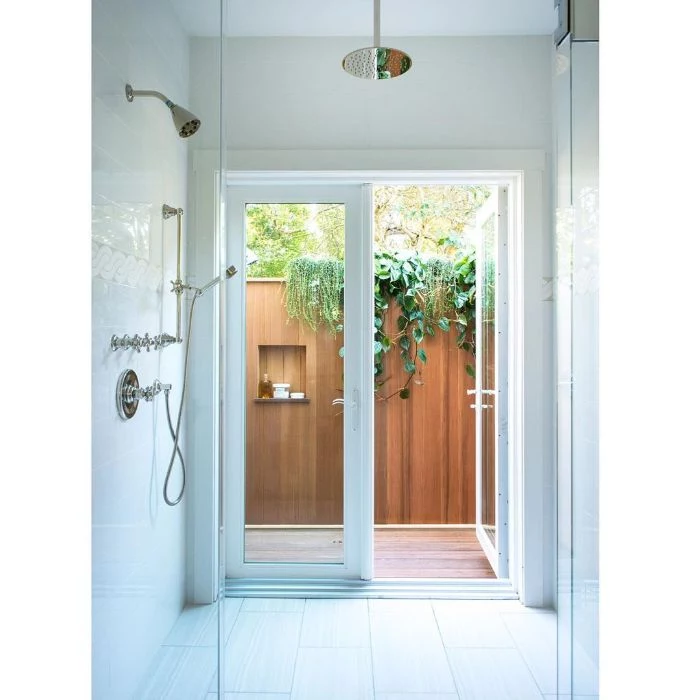
More than just a rinse-off, an outdoor shower should feel like a secret garden escape. Frame it with fragrant climbers like jasmine or star-of-the-sea, and use large-leafed plants like hostas at the base to soften the edges and enhance the feeling of privacy.
Don’t let winter ruin your plumbing. If you live in a climate with freezing temperatures, winterizing is non-negotiable. Here’s a quick checklist:
- Shut off the water supply lines to the shower.
- Open the hot and cold valves on the shower to let any remaining water drain out.
- Use an air compressor to blow any trapped water out of the lines and the shower head itself.
- Consider quick-disconnect fittings for the shower head so you can store it indoors.
Can I use a standard indoor shower fixture outside?
While possible, it’s not ideal. Indoor fixtures often have components susceptible to rust and UV degradation. Look for fixtures specifically rated for outdoor use, often made from marine-grade stainless steel (like 316L), brass, or copper. Brands like Jee-O or Tofinho Towel Co. specialize in robust, stylish outdoor models designed to withstand sun, rain, and salt spray.
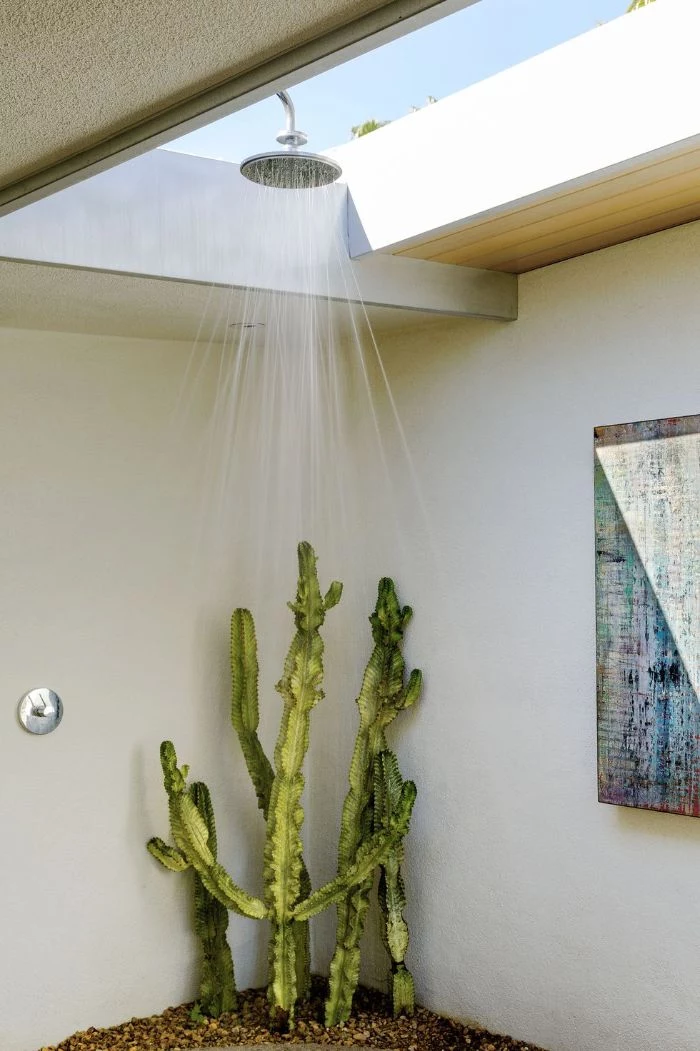
Rain Shower Head: Delivers a luxurious, drenching experience, perfect for a spa-like feel under the open sky. Best for rinsing off, less so for targeted washing.
Handheld Sprayer: Offers unmatched practicality for washing sandy feet, muddy pets, or cleaning the shower enclosure itself. Ideal for a family-focused setup.
For the best of both worlds, consider a system with both a fixed head and a separate handheld wand.
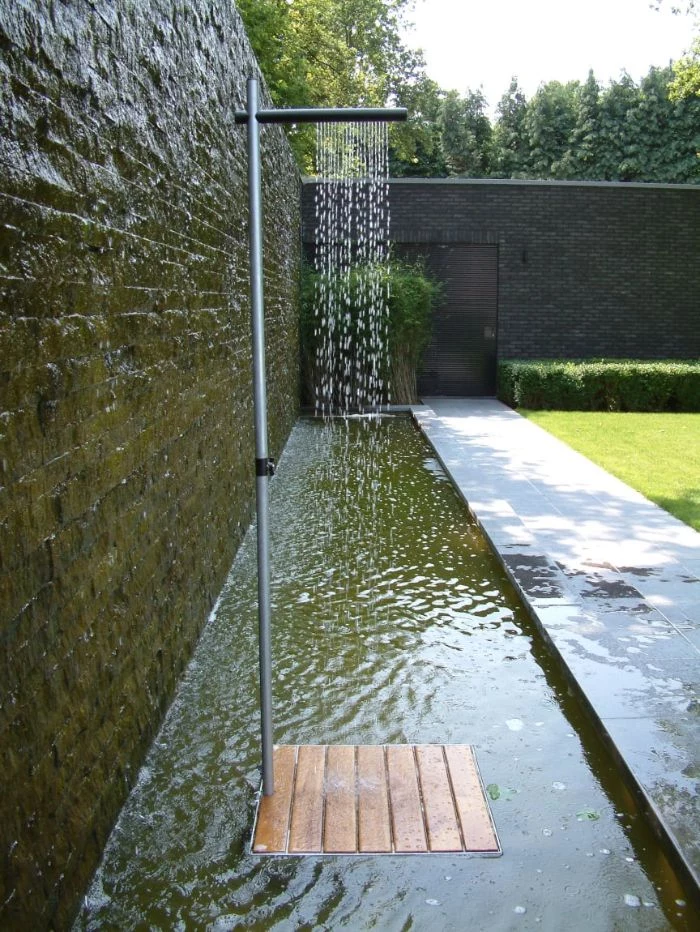
- Prevents soggy, muddy ground.
- Directs greywater away from your home’s foundation.
- Looks seamless and integrated.
The secret? A French drain. This simple trench filled with gravel and a perforated pipe is one of the most effective ways to manage drainage, channeling water away to a safer part of your yard.
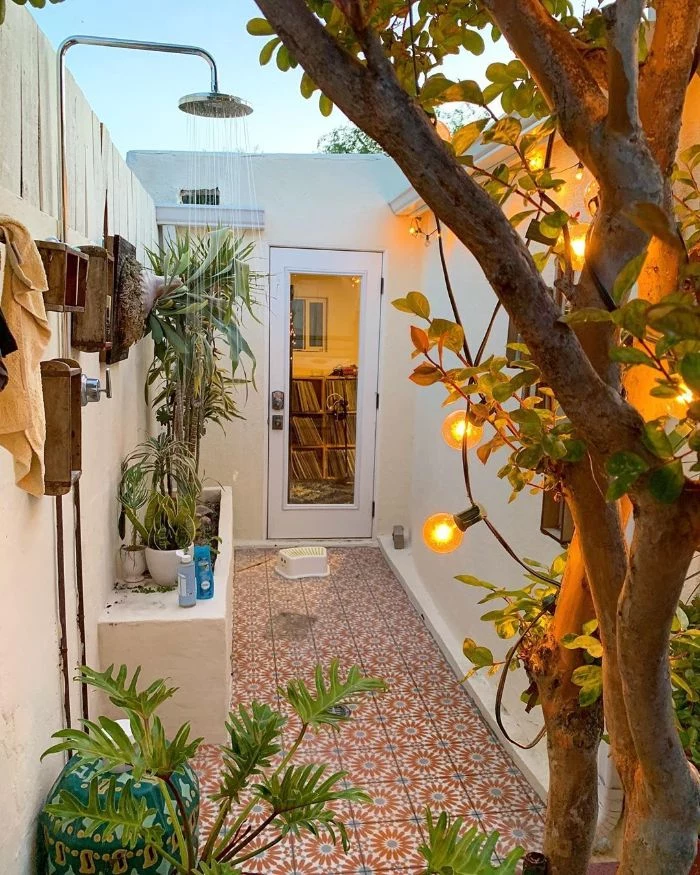
Lighting transforms your shower from a daytime-only utility to a magical evening experience. Opt for low-voltage LED landscape lighting. Use a combination of downlights mounted high on a wall or pergola for task lighting, and subtle uplights at the base of nearby plants to create depth and a soft, ambient glow without blinding you.
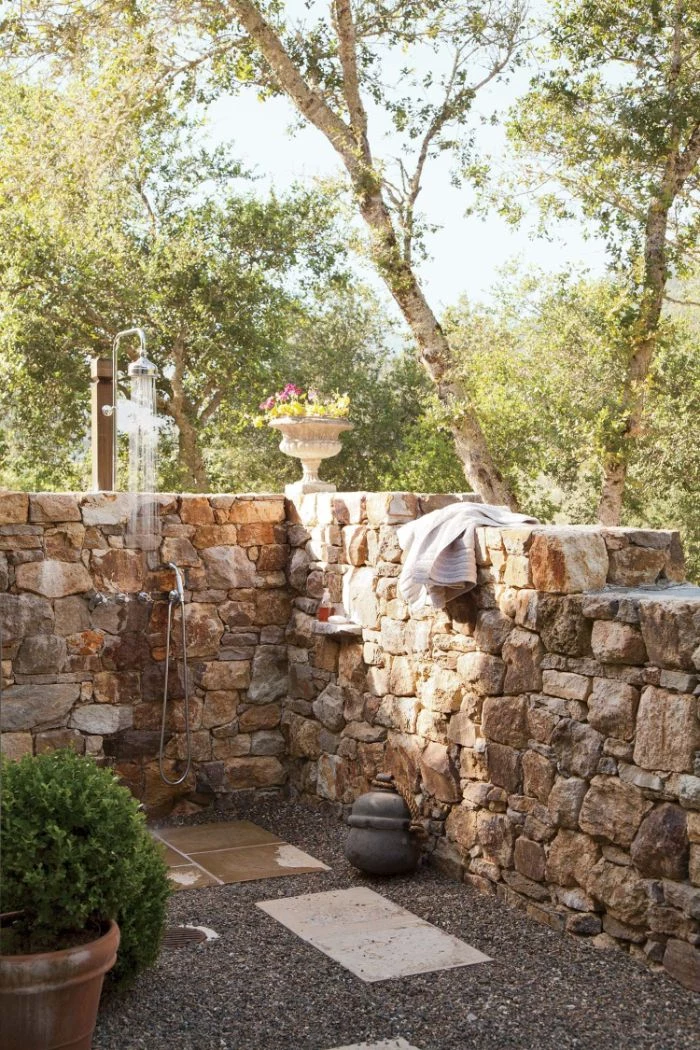
A single mature Japanese maple tree can add over $2,000 to your property value.
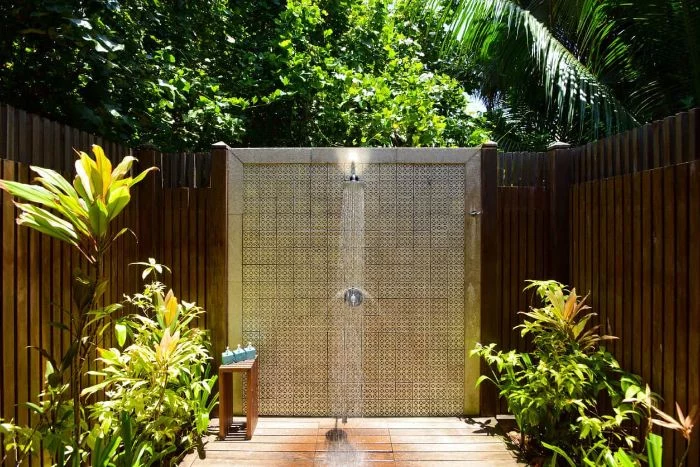
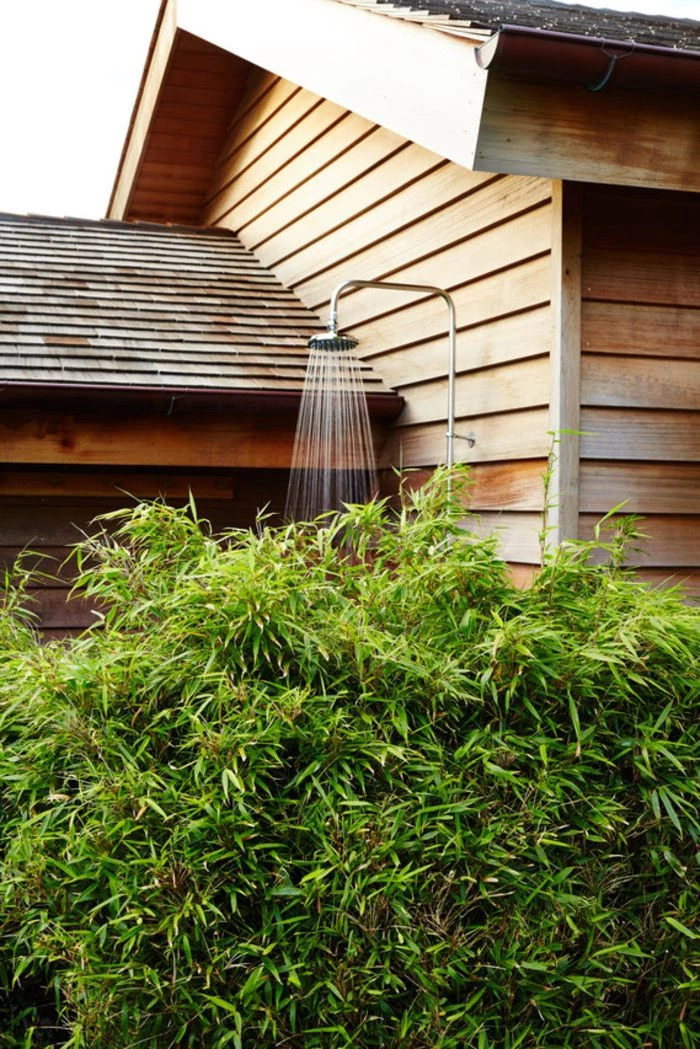
When planning your shower’s location, think like a landscape designer. Situating it near a beautiful specimen tree or a flowering bank of hydrangeas not only provides natural privacy but also elevates the entire experience, making it an integral and valuable part of your garden design.
A common mistake: Forgetting about soap. Where will you put the bottle? A recessed niche tiled to match the wall is a sleek, built-in solution. For something simpler, add a small teak or stainless steel corner shelf. Avoid materials that will rust or get slimy. A simple, well-placed hook for a shower pouf is also a thoughtful touch.
For ultimate comfort, a dedicated tankless water heater is the gold standard for a hot-water outdoor shower. A small electric model, like those from EcoSmart or Stiebel Eltron, can be installed near the shower itself. It heats water on demand, so you’re not wasting energy keeping a large tank hot, and you’ll never run out of hot water mid-lather.
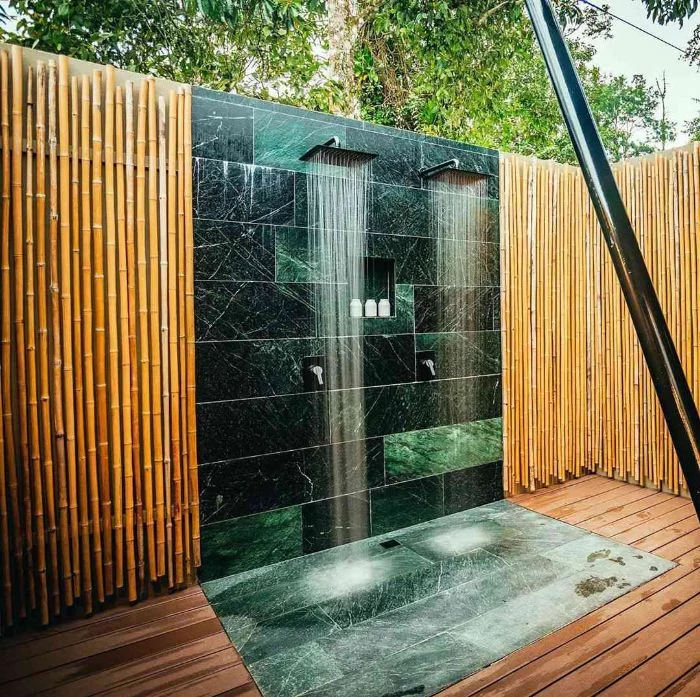
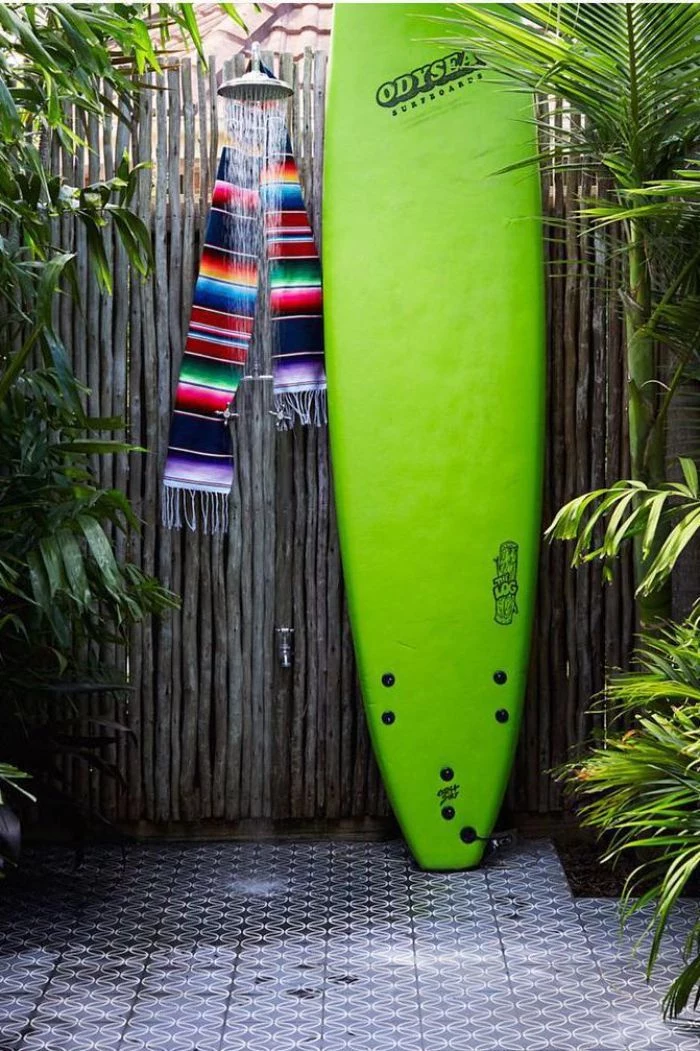
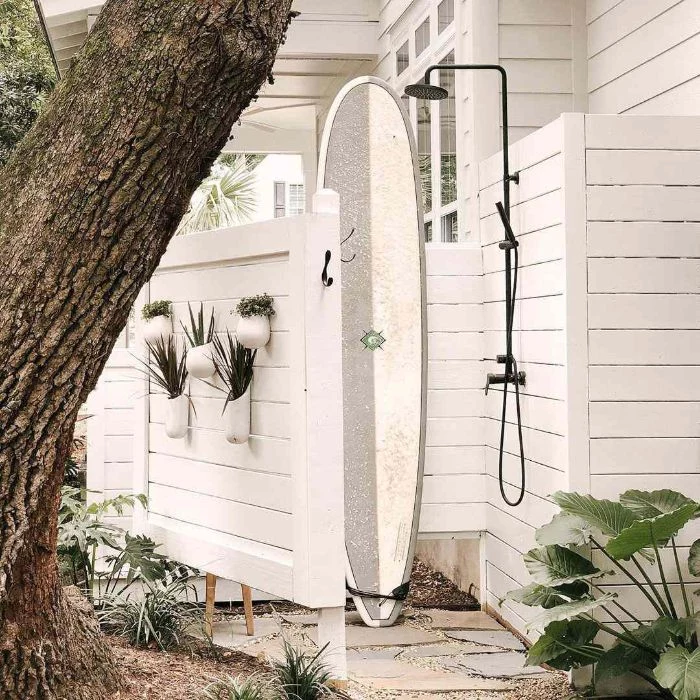
Creating the perfect enclosure is a balancing act between privacy and openness. Consider these materials:
- Western Red Cedar: Lightweight, easy to work with, and naturally resistant to rot and insects.
- Corrugated Metal: Offers an industrial-chic or modern farmhouse vibe. It’s durable and provides total privacy.
- Live Plants: A screen of fast-growing bamboo or tall grasses creates a living wall that blends seamlessly with the garden.
What about the environmental impact of soap and shampoo runoff?
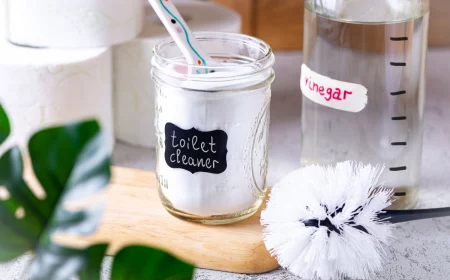
A valid concern. To minimize impact, direct your drainage toward a gravel-filled dry well or a vegetated area away from ponds or streams. Most importantly, switch to biodegradable, phosphate-free soaps and shampoos. Brands like Dr. Bronner’s or Sea to Summit offer eco-friendly options perfect for guilt-free outdoor cleansing.

Teak Mat: Feels warm and comfortable underfoot, provides excellent grip, and can be removed for easy cleaning of the surface below. It requires occasional oiling to maintain its color.
Flat River Stones: Creates a natural, zen-like massage for your feet. They must be set properly in mortar over a concrete base to ensure they don’t become loose or wobbly.
For a spa feel, go with stone. For practicality and warmth, choose teak.

The U.S. Environmental Protection Agency reports that switching to a WaterSense-labeled shower head can save a family more than 2,700 gallons of water per year.
This matters outdoors, too. Look for an outdoor-rated shower head with the WaterSense label. You’ll get a satisfying spray while conserving water and minimizing runoff, which is better for your landscape and the planet.
Your outdoor shower’s flooring is a critical safety feature. Beyond aesthetics, it must provide excellent grip when wet. Flamed granite, slate with a natural cleft finish, or textured composite decking are all superior choices to smooth tile or standard wood, which can become extremely slippery when combined with soap and water.
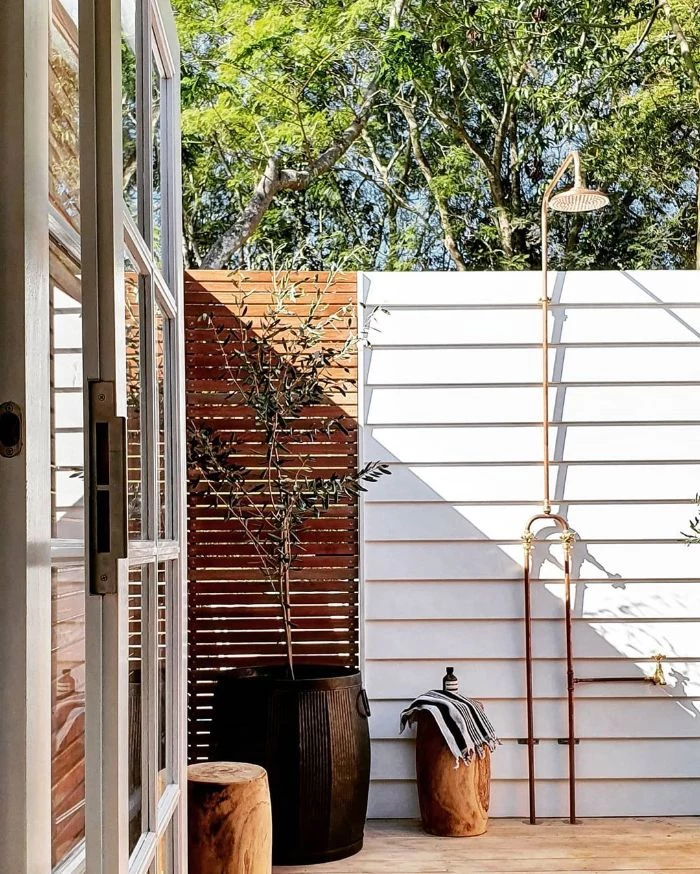
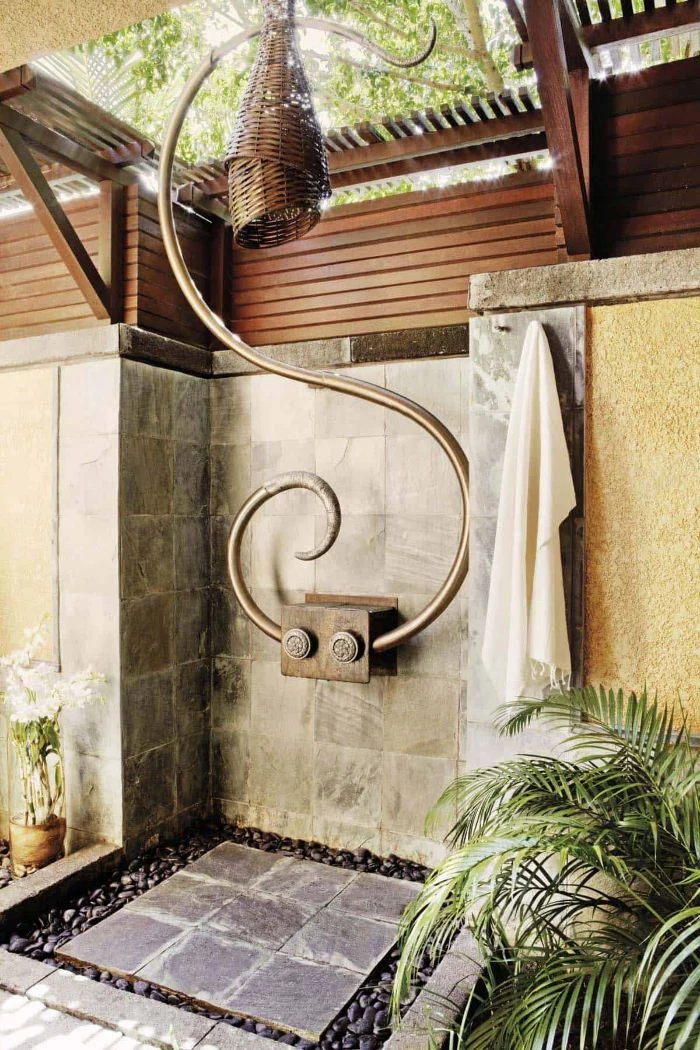
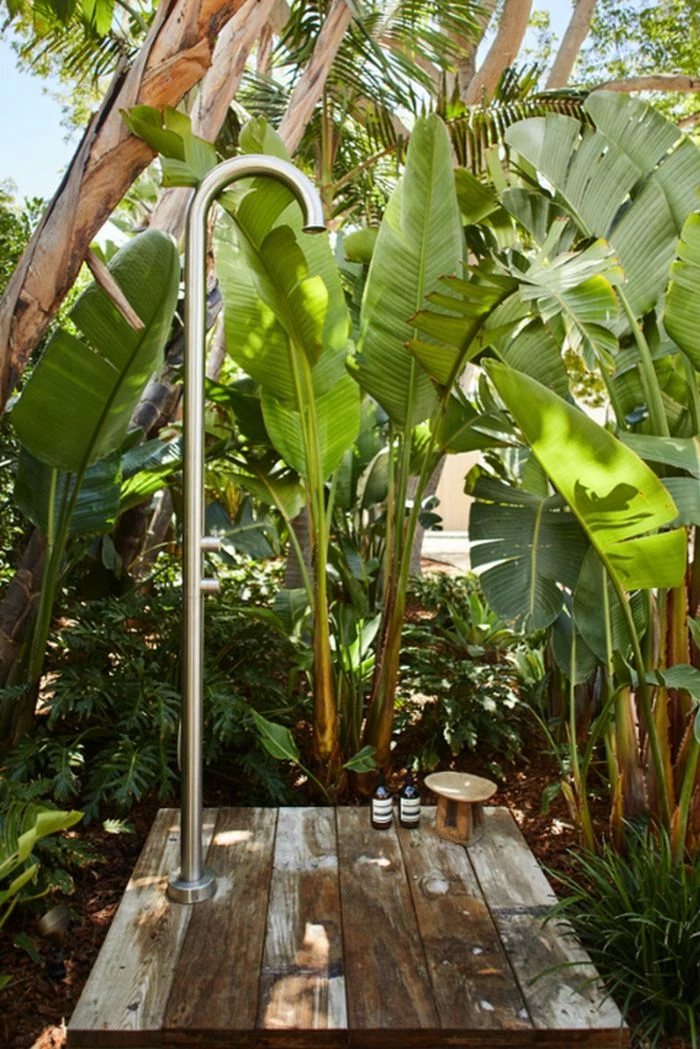
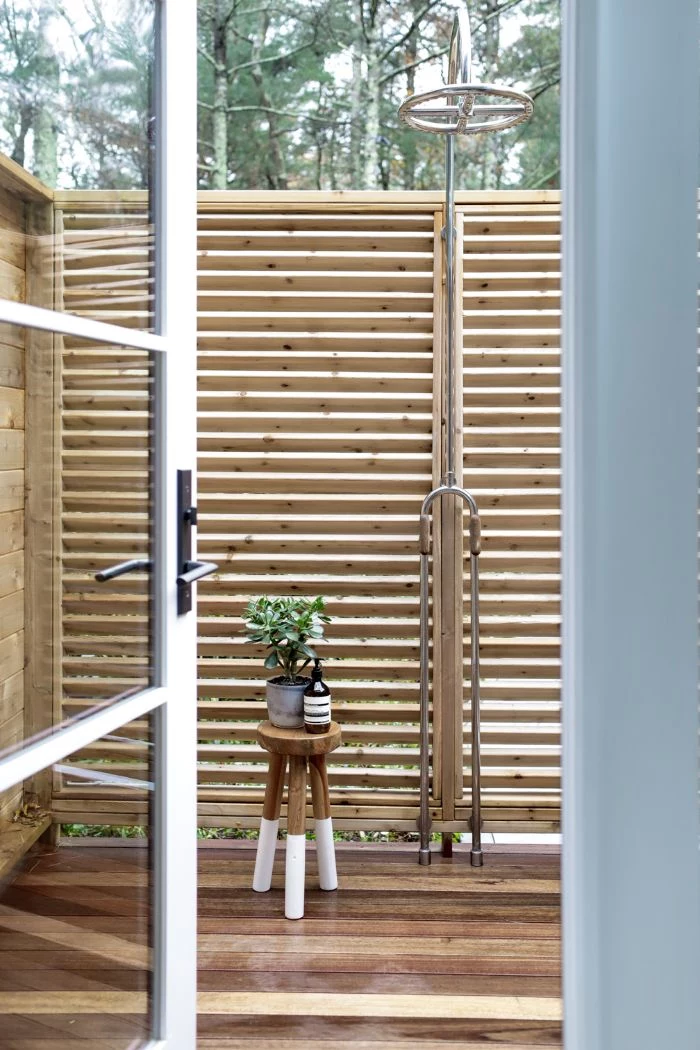
For a touch of pure Scandinavian design, look to the ‘Vals’ outdoor shower by VOLA. Its minimalist stainless steel pipe and simple, iconic controls epitomize functional beauty. It’s an investment piece that acts as a sculptural element in your garden, proving that utilitarian fixtures can also be high design.
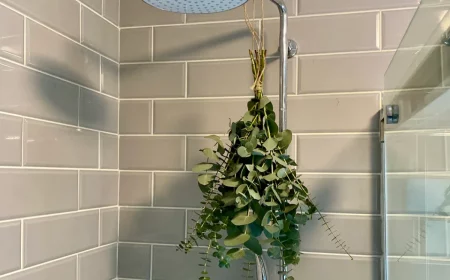
- Provides a warm, aromatic scent when wet.
- Naturally repels moths and other insects.
- Creates a rustic, cabin-like aesthetic.
The material? Eastern Aromatic Cedar. Using it for the enclosure walls or even a simple bench adds a sensory dimension to your shower that goes far beyond the visual.
An often-overlooked detail: wind direction. Before you finalize the location, spend some time in the proposed spot on a breezy day. A prevailing wind can make even a hot shower feel chilly and can blow water onto nearby windows or outdoor furniture. A well-placed privacy screen or wall can serve as an effective windbreak.
Is a prefabricated kit a good option?
It can be. Kits from companies like Vita or Outdoor Shower Company offer a streamlined solution, bundling the enclosure and plumbing hardware. They are often faster to install and can be a good choice if you’re not a confident DIYer. However, you’ll sacrifice the custom look and site-specific integration of a fully custom-built shower.
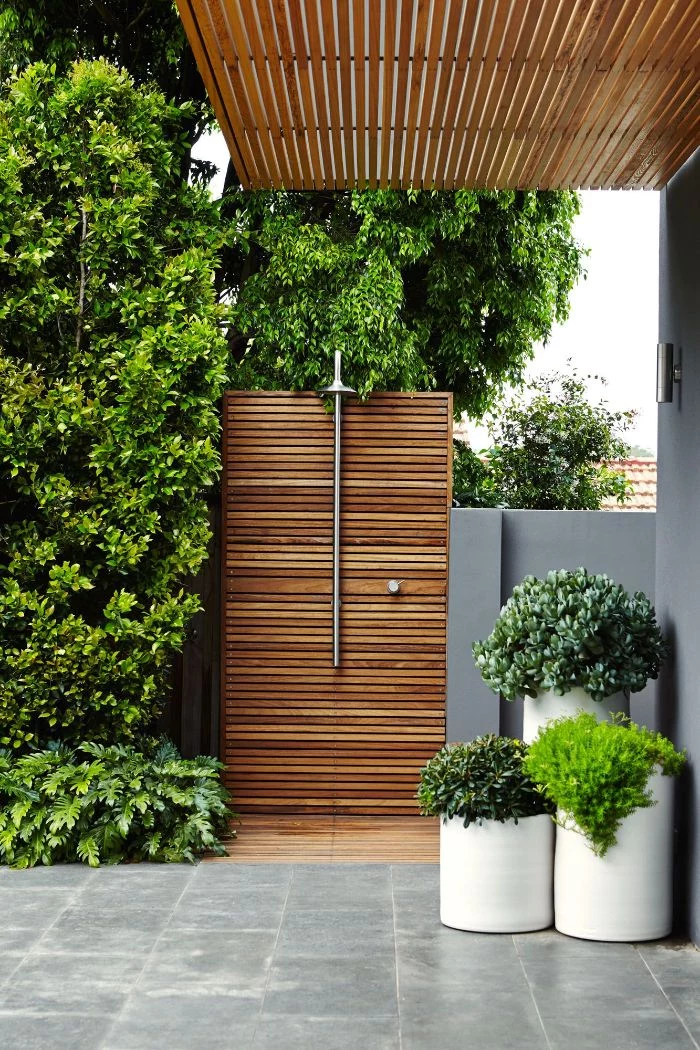
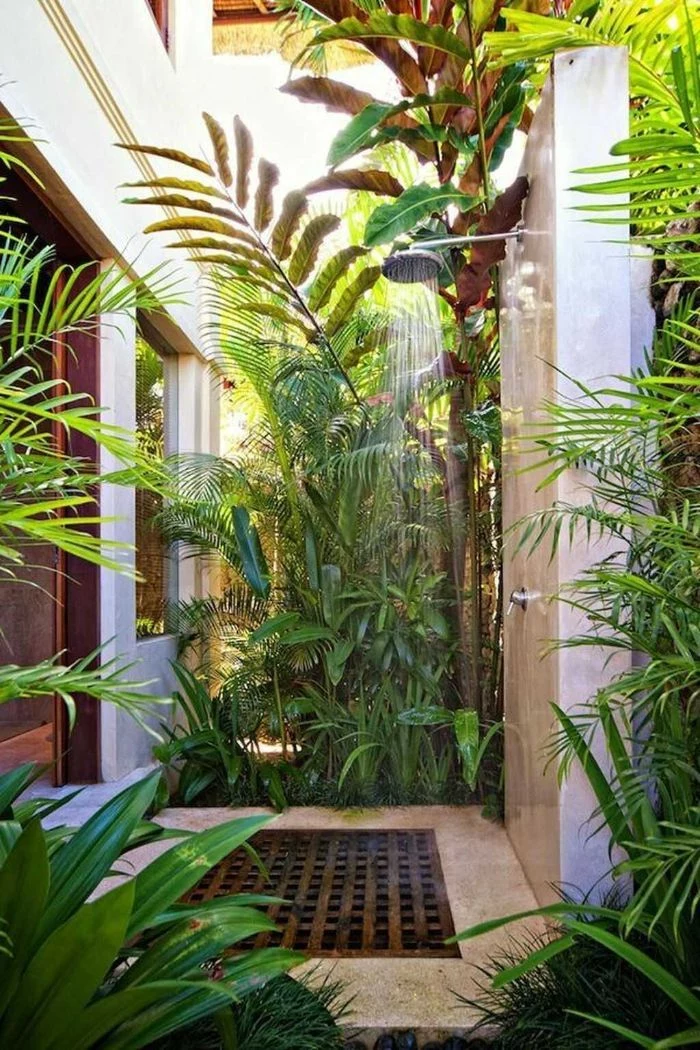
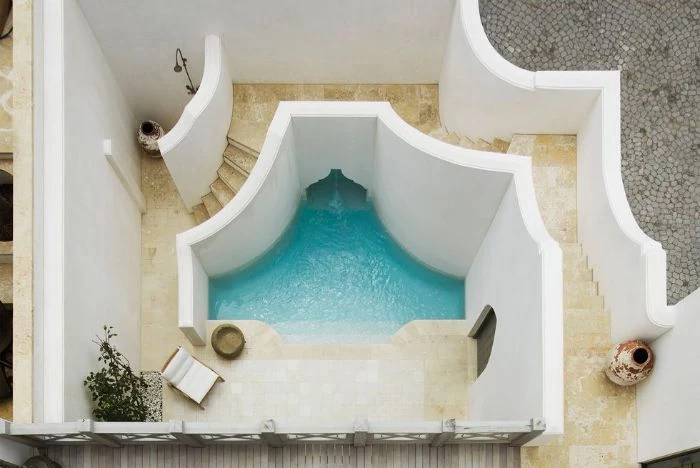
In Japanese garden design, the concept of ‘Miegakure’ means ‘hide and reveal’. It’s about providing partial glimpses that arouse curiosity and make a space feel larger and more mysterious.
Apply this to your outdoor shower. Instead of a solid, imposing enclosure, use slatted panels or a screen with strategic gaps. This creates intriguing views from the garden while still ensuring privacy for the user, making the shower a feature to be discovered.
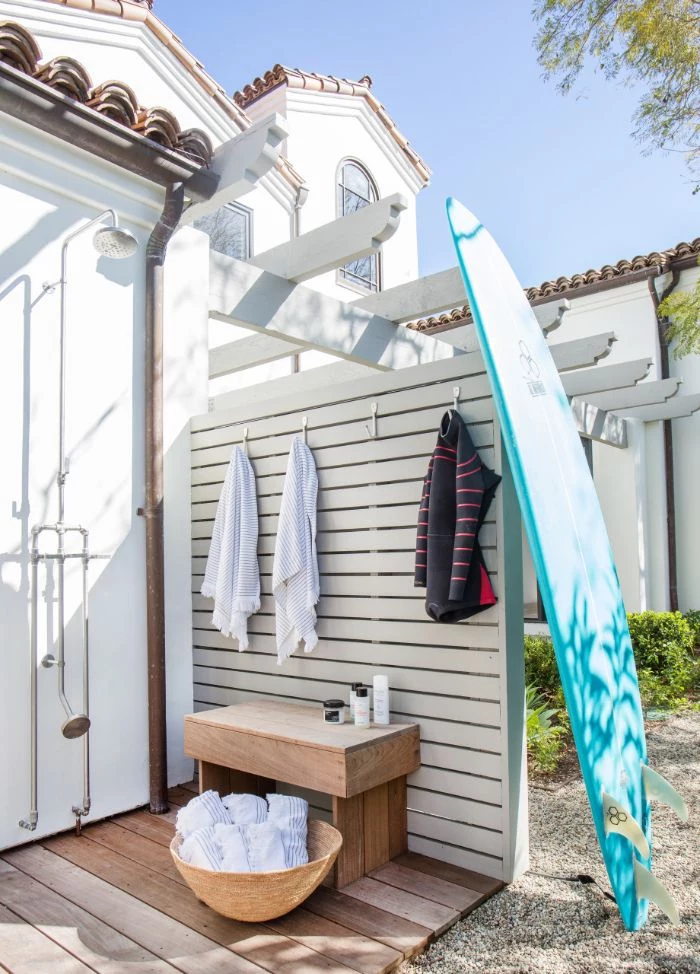
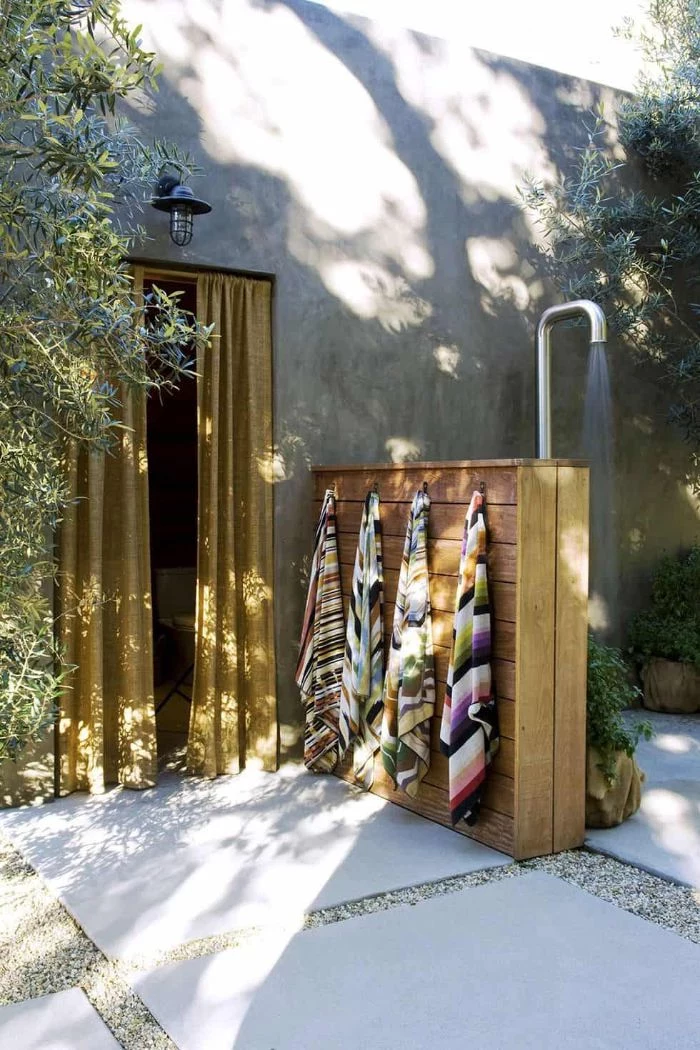
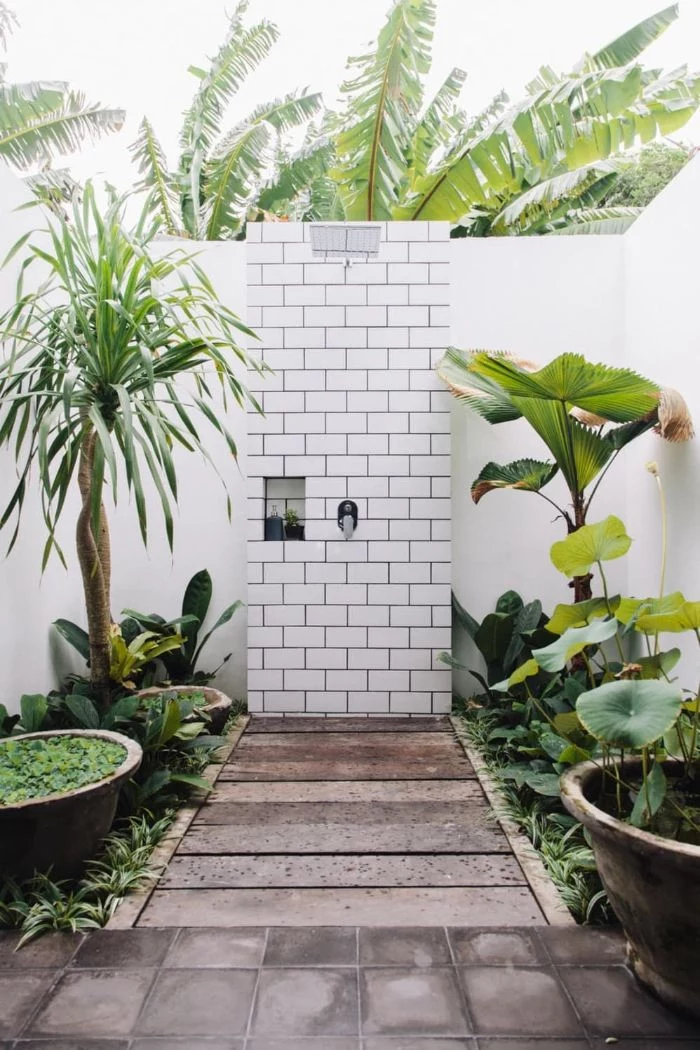
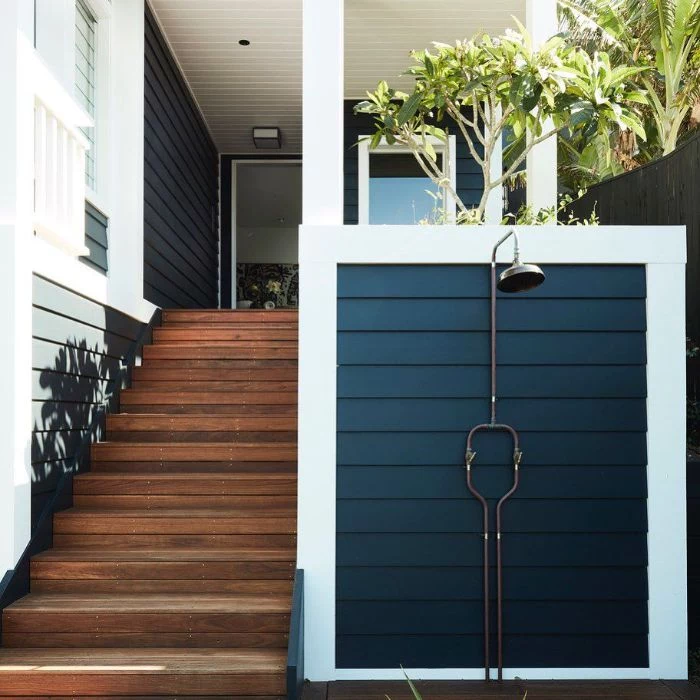
Don’t forget the entrance. Create a dedicated, clean transition zone to your shower. A small deck platform or a series of large, flat flagstones will prevent you from tracking mud and grass into the shower area. It’s also the perfect spot to kick off your sandals and place a dry towel.
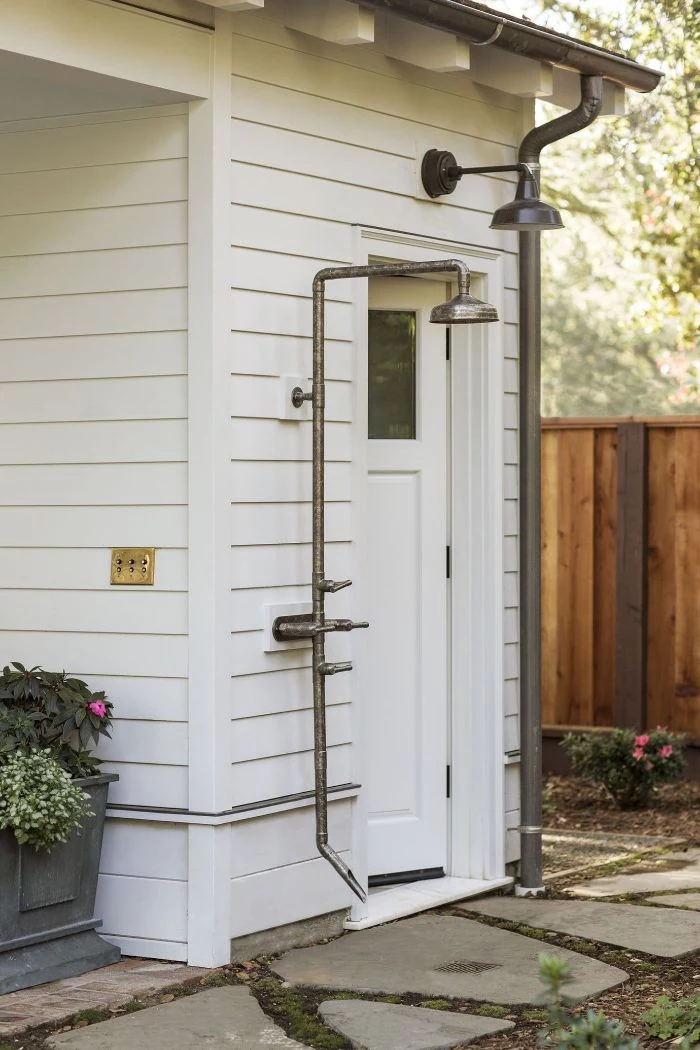
If your shower is attached to the house, protecting your siding is paramount. Create an air gap by mounting a waterproof barrier, like a sheet of HardieBacker cement board, to the wall first. Then, install your decorative finish (like tile or wood slats) over that. This ensures any moisture that gets behind the finish can dry out instead of seeping into your home’s structure.
A small addition with big impact: a dedicated foot wash spout. A low-mounted, simple tap is invaluable for a quick rinse of sandy toes or muddy boots without having to take a full shower. It’s a feature that costs little to add during construction but boosts daily convenience immensely, especially for beach houses or homes with pools.
Think about the journey. The path leading to your outdoor shower should build anticipation. A simple flagstone walkway winding through lavender bushes, or a narrow boardwalk flanked by ornamental grasses, transforms the simple act of taking a shower into a deliberate, multi-sensory ritual that begins the moment you step outside.