DIY Industrial Pipe Furniture: Your No-Nonsense Guide to Building with Style
I’ve spent more time in my workshop than I can count, turning raw, heavy materials into things people can actually use. And honestly, there’s nothing quite like working with industrial pipe. It’s got this honest, rugged character that you just can’t get from a flat-pack box. But let’s be real, when I started, I made every mistake in the book. I’m talking wobbly shelves, rust stains on the wall, and projects so heavy they needed a team of four to move. Those lessons were tough, but they taught me how to do it right.
In this article
So, today, I want to walk you through all of it. This isn’t just a single project plan. It’s about really understanding the materials, nailing the techniques, and getting into the right mindset to build something that feels solid, looks incredible, and will genuinely last a lifetime.
Getting to Know Your Materials: Pipe, Fittings, and Finishes
Your project’s success is decided long before you ever screw two pipes together. It happens when you’re standing in the hardware store aisle. Knowing what you’re looking at is the key to getting the look you want and making sure your creation doesn’t fall apart.
Pipe Types: The Two Main Choices
You’ll mainly see two options for this kind of project: black malleable iron pipe and galvanized pipe. They were made for different things, and that changes how you have to work with them.
Black Malleable Iron Pipe: This is my go-to for almost all indoor furniture. It has that classic dark gray, almost black, industrial vibe. It was originally designed to carry natural gas, which means it comes from the factory with a light coating of oil or grease to stop it from rusting in the warehouse. That coating is your first job. You absolutely must clean it all off. If you don’t, no paint or sealer will stick properly. Worse, that grease can slowly seep out over time and ruin books, clothes, or even your walls. I learned that the hard way after a greasy pipe left a permanent smudge on a brand-new white wall. Once it’s clean, you have to seal it, because it will rust if left bare.

Galvanized Steel Pipe: This one has that brighter, mottled, silvery-gray finish. It’s a steel pipe that’s been dipped in molten zinc, which makes it super resistant to rust. It was made for carrying water. The big plus here is that you often don’t need to seal it for indoor projects. The downside? The finish can be a bit inconsistent, sometimes with little lumps or sharp spots from the galvanizing process. It has a more modern, sometimes sterile look that might not be what you’re going for. Oh, and it’s usually about 10-15% more expensive than black pipe.
For that warm, authentic industrial look, I almost always recommend black pipe. The extra hour or two of cleaning and sealing is totally worth it.
Pipe Sizing Explained
Pipe sizes can be a little confusing. That number you see, like 1/2-inch or 3/4-inch, is the Nominal Pipe Size (NPS). It roughly refers to the inside diameter. The important thing to know is that the outside diameter is always larger. For example, a 3/4″ NPS pipe actually has an outside diameter of about 1.05 inches. Why does this matter? Because you need to know the true outside diameter when you’re drilling holes in your wood shelves. Pro tip: Always measure the actual pipe you bought before you drill anything!
You might also see something called a “Schedule” number, like Schedule 40. For furniture, Schedule 40 is the standard you’ll find at places like Home Depot or Lowe’s, and it’s more than strong enough. Anything else is just overkill.
For most projects like bookshelves or coffee tables, 1/2″ or 3/4″ pipe is the sweet spot for strength and looks. 1″ pipe can look pretty chunky and is best for really large, statement pieces.
The World of Fittings
Fittings are the connectors that let you build cool shapes. They all use a tapered thread, which means they get tighter and form a stronger joint the more you screw them in.
- Flange: The flat, round piece with screw holes. This is your anchor. It’s essential for creating stable feet for a table or for mounting a shelf securely to a wall.
- 90-Degree Elbow: For making sharp corners.
- Tee: A T-shaped piece that joins pipes. This is the workhorse for building the ‘rungs’ on a shelving unit.
- Coupling: A simple tube that connects two pipes end-to-end to make a longer piece.
- Cap: Screws on the end of a pipe to give it a clean, finished look.
- Union: This is the secret weapon! A union is a special three-part fitting that lets you easily disconnect a section of your project without having to unscrew the whole thing. If your design forms a closed square or rectangle, you will NEED a union to make the final connection. Trust me on this.
Your Toolkit and Workspace Setup
You don’t need a pro-level workshop, but a few key tools will make the process way smoother and safer. Fighting with the wrong tools is just a waste of time.
Essential Tools
- Pipe Wrenches: You need at least one good 14-inch pipe wrench, but having two is a game-changer. It lets you hold one part steady while you tighten another, giving you way more control.
- Bench Vise: Not 100% required, but if you have one, use it. Clamping a pipe in a vise frees up both of your hands and makes assembly so much easier.
- Drill/Driver: A must-have for making holes in your wood and driving screws into the wall flanges.
- Stud Finder: This is not optional, it’s a critical safety tool. For anything mounted on a wall, you have to find the wood studs. More on why this is a big deal later.
- Level: A 24-inch or 48-inch level is what you need to make sure your shelves aren’t sloped.
- Safety Gear: Always wear safety glasses, especially when drilling. And grab some heavy-duty gloves for handling greasy pipes and saving your knuckles during assembly.
A Game-Changing Tip for Beginners
Heads up! The single most useful thing to know is that most big-box hardware stores (like Home Depot or Lowe’s) have a machine that can cut and thread pipes for you. Often they’ll do it for a very small fee, or even for free. This means you can get the exact custom lengths you need for your project without owning any expensive equipment. This makes complex projects possible for anyone.
Prepping Your Materials (The Messy Part)
Don’t even think about doing this on your living room carpet. The cleaning process, especially for black pipe, is messy. I always do this in the garage or outside on a drop cloth. Plan for this to take about an hour or two.
To get the grease off, you’ll need a good degreaser. For really tough jobs, mineral spirits or acetone work fast (just make sure you have good ventilation!). For a less intense option, a bucket of hot water with a strong soap like Simple Green and some scrub pads works great. Just put on your gloves, soak a rag, and wipe down every single piece. Use a little brush to get inside the fittings. Once they’re clean, give them a final wipe with rubbing alcohol to remove any last bit of film and let them dry completely.
Protecting Your Work: Sealing and Finishing
Bare black pipe will rust. It’s not a question of if, but when. Sealing it is what turns your pile of parts into a real piece of furniture.
My Go-To Method: Clear Coats
I love the raw look of the metal, so I almost always use a clear coat. My favorite is a matte or satin clear enamel spray paint designed for metal. My go-to is Rust-Oleum’s 2X Ultra Cover in a Matte Clear finish. It’s durable and doesn’t leave a glossy, plastic-y look.
The trick is to apply two or three thin coats instead of one thick one. Hold the can about 10-12 inches away and use a smooth, sweeping motion. Let the final coat cure for a full 24 hours before you even think about assembling it. This makes the finish much harder and less likely to scratch.
Painting for a Different Vibe
If you want a solid black or any other color, that works too. The key to a good paint job on metal is primer. I use a self-etching primer, which basically micro-etches the metal so the paint has something to really grab onto. One coat of primer, then a couple of thin coats of your color, and you’re good to go.
Choosing and Prepping Your Wood
The wood you pick is just as important as the pipe. The contrast between the cold, hard metal and the warm, natural wood is what makes this style so awesome.
Wood Options
- Pine or Fir: These are your budget-friendly options. They’re easy to find and work with. They will get dinged and scratched over time, but that can honestly add to the rustic charm.
- Oak or Maple: These hardwoods are way more durable and dense. They have a tighter grain and give off a more refined, high-end vibe. They also cost a lot more.
- Reclaimed Lumber: My personal favorite. Using wood from old barns or buildings gives you instant character—nail holes, saw marks, and all. You can find it at specialty lumberyards. Just be sure to check it carefully for pests or hidden nails before you cut into it.
Prepping the Shelves
A little prep work makes a huge difference. Start by sanding with 120-grit sandpaper to smooth things out, then finish with 220-grit for a silky-smooth surface. If your pipes need to pass through the shelves, use a Forstner or spade bit that is just slightly larger than your pipe’s outside diameter—maybe by 1/16th of an inch. Drill a test hole in a scrap piece first! Finally, stain and seal the wood. I like using a wipe-on polyurethane because it’s easy to apply and gives a durable, natural-looking satin finish.
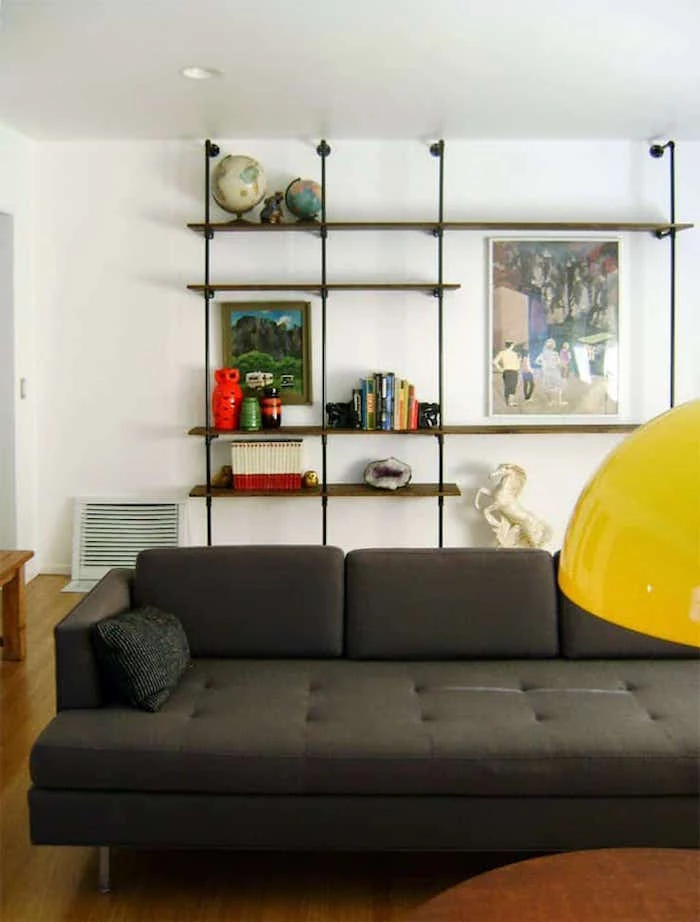
Let’s Build! A Wall-Mounted Bookshelf Project
Okay, let’s put it all together. Building a wall-mounted shelf is a classic project that uses all these techniques. Plan for this to be a weekend project, factoring in the 24-hour drying time for the sealer.
Step 1: Design and Shopping List
Sketch it out first. Decide on the height, width, and number of shelves. A common mistake is forgetting to account for the threads. About 1/2 inch of pipe disappears into the fitting on each end. So, for a 12-inch space between shelves, you need a 13-inch pipe. Here’s a sample shopping list for a 3-shelf, 3-foot-wide unit using 3/4″ pipe:
- (6) 3/4″ Floor Flanges
- (6) 3/4″ Tees
- (6) 3/4″ Caps (to use as feet on the bottom flanges)
- (4) 36″ pipes (for the shelves)
- (8) 12″ pipes (for the vertical supports)
- (4) 4″ pipes (for the top section)
- (3) Wood shelves, cut to about 40″ long
Budget Check: For a project this size, expect to spend around $150 to $250 on all the pipes and fittings, depending on your location. The wood will be an additional cost.
Step 2: Clean, Finish, and Prep All Your Parts
Do all your messy work before you build. Clean and seal every single pipe and fitting. Sand, drill, and stain your wood shelves. Let everything dry and cure completely. Trust me, trying to do this after it’s assembled is a nightmare.
Step 3: Assemble on the Floor
It’s so much easier to build the ‘ladders’ on the floor first. Screw the pipes and fittings together, but only hand-tighten them for now. This leaves you a little wiggle room for adjustments. As you build the vertical sections, slide your wood shelves on.
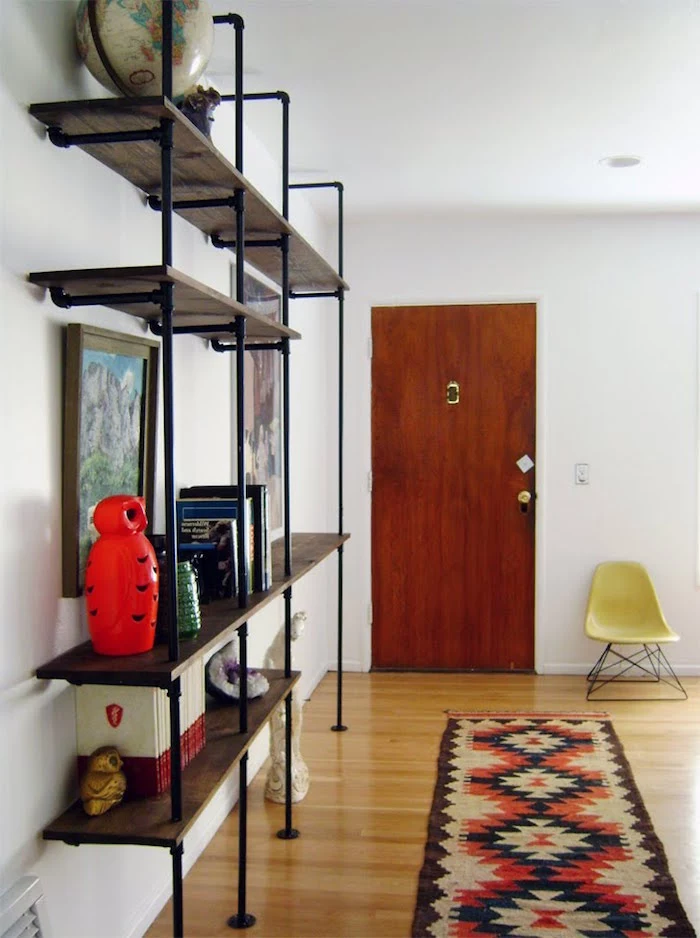
Step 4: The Most Important Safety Step—Mounting to Studs
I cannot stress this enough. A finished pipe and wood bookshelf is incredibly heavy. Drywall alone will not hold it. The screws will rip out, and the whole thing will crash down. It’s incredibly dangerous and will ruin your wall.
You MUST anchor the flanges into the solid wood studs inside your wall. Use an electronic stud finder to locate the studs (they’re usually 16 inches apart) and mark their locations. You need to plan your design so your vertical pipes line up with these studs.
What if the studs aren’t in the perfect spot? It happens. The pro solution is to first mount a horizontal board (like a 1×6, painted to match your wall) directly to the studs. Then, you can mount your pipe flanges anywhere you want along that board. It’s one extra step that guarantees a rock-solid foundation. Do not, under any circumstances, use those little plastic drywall anchors for a heavy project like this.
Step 5: Mounting and Final Tightening
This is a two-person job. Get a helper to lift the unit into place. Use your level to get the verticals perfectly straight up and down. Secure the top flanges to the wall first, driving 2.5-inch or 3-inch screws deep into the center of the studs. Once the top is secure, do the bottom.
Now, place your level on each wood shelf. Because you only hand-tightened everything, you can slightly twist the pipes and fittings to get each shelf perfectly level. Once it’s all aligned, go back with your pipe wrench and give every connection a final quarter-turn to lock it solid.
Troubleshooting and Pro Tips
Even when you do everything right, you can hit a snag. Here’s how to handle a few common issues.
- The ‘Impossible’ Last Connection: If you build a closed rectangle, you’ll find you can’t screw in the last piece because the threads work against each other. This is where that secret weapon—the union fitting—saves the day. It allows you to connect that final piece without having to turn the entire assembly.
- Wobbly Furniture: If a table leg is wobbly, it’s usually because one pipe isn’t screwed in as far as the others. Unscrew the flange on the bottom of the wobbly leg by a half-turn or so until it sits flat.
- Lining Up Fittings: You might get frustrated that when a fitting is tight, it’s facing the wrong way. That’s normal. You can either crank it a little harder to get it to the right spot, or back it off and wrap the threads with a few layers of Teflon tape to make it feel tight in the right position. But honestly, a little variation is part of the industrial charm.
Building with industrial pipe takes a bit of muscle and patience, but it’s one of the most rewarding DIY projects out there. You get to create something totally custom, incredibly strong, and full of character that you just can’t buy in a store.
Inspirational Gallery
The #1 Beginner’s Mistake: Forgetting the fittings! When you measure for your pipes, remember that each fitting (elbows, tees, flanges) adds length. A standard 1/2-inch tee can add about an inch to your total dimension. Always dry-fit your pieces and measure the *total* assembly before committing to final pipe cuts. This small step saves you from a project that’s too big—or too small—for your space.
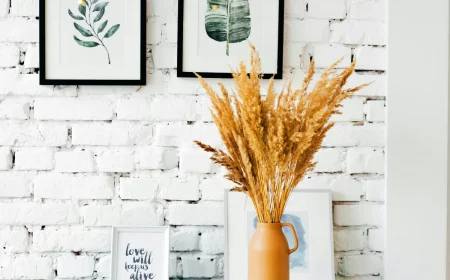
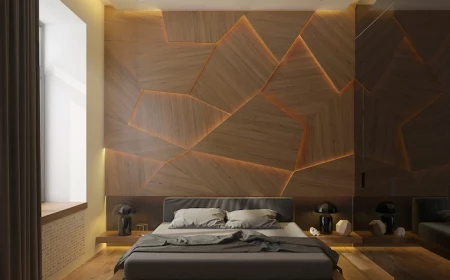
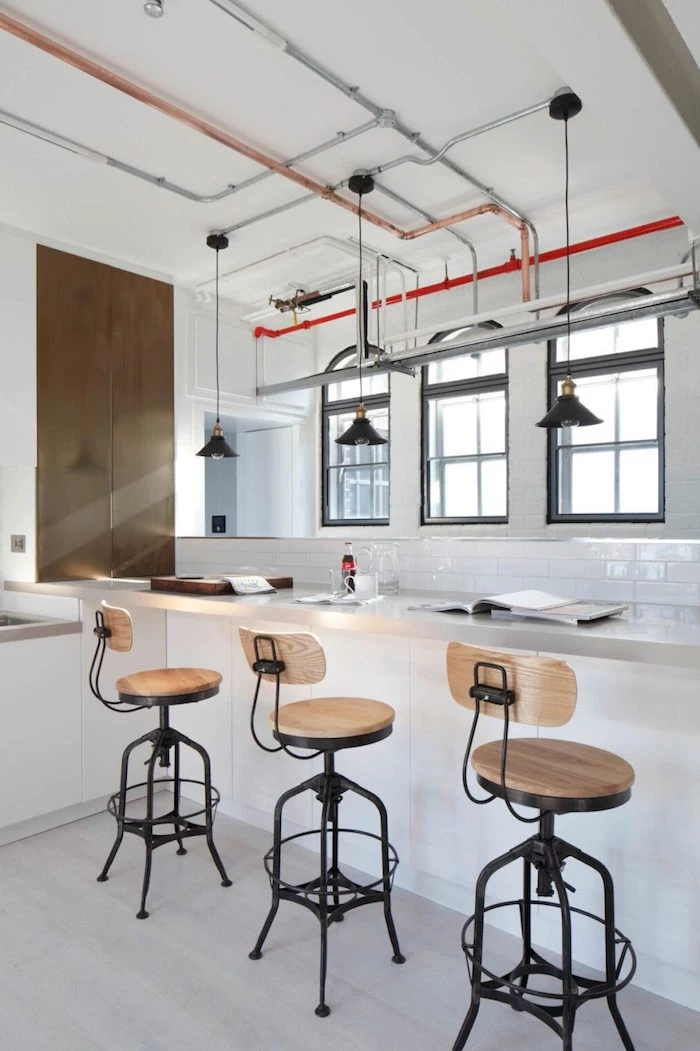
Can this rugged style feel warm and inviting?
Absolutely. The key is balance. Soften the hard lines of the metal with natural elements. Place lush, green plants like a Pothos or a Snake Plant on the shelves. Use warm-toned wood like acacia or walnut for the surfaces. Pair a pipe-frame bed with soft linen bedding, or place a chunky knit throw over a pipe-legged bench. The contrast is what creates a dynamic, personal, and surprisingly cozy atmosphere.
An estimated 90% of all steel ever produced is still in use today, thanks to its recyclability.
When you build with steel pipes, you’re not just creating furniture; you’re participating in an incredible cycle of reuse. Your bookshelf or coffee table has a history and a future. It’s a testament to materials built to last, not to be discarded—a powerful statement in a disposable world.
For a truly professional and durable dark finish on black pipe, think beyond spray paint. Gun bluing, a chemical process used to protect firearms from rust, creates a deep, matte-black patina that bonds with the metal itself. Products like Birchwood Casey’s Perma Blue are easy to apply with a cloth after cleaning the pipe thoroughly. It won’t chip or peel like paint and gives an authentic, industrial-grade finish that’s hard to beat.
- A deep, rich, almost-black finish.
- Incredible resistance to scratches and chipping.
- A subtle sheen that looks more authentic than paint.
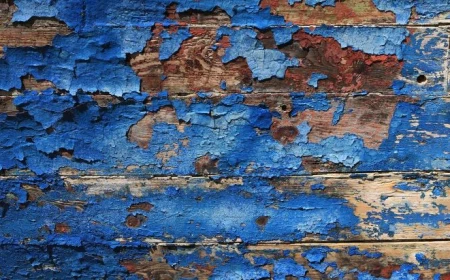
The secret? A technique borrowed from classic gunsmithing. By applying a few coats of boiled linseed oil to a heated pipe (gently warmed with a heat gun, never a direct flame), you can achieve a stunning polymerized finish. The oil cures *into* the metal’s surface, creating a durable and beautiful seal.
New Pine Shelves: Affordable, readily available, and a blank canvas. You can stain it, paint it, or give it a distressed look yourself. It’s the perfect choice for a clean, uniform look or for those on a tighter budget.
Reclaimed Wood: Offers instant character. Old nail holes, saw marks, and a rich patina tell a story. It’s often more durable and stable than new wood, but requires more searching and can be more expensive.
For your first project, start with new pine from a store like Home Depot or Lowe’s to master the basics before investing in unique reclaimed planks.
The article mentions cleaning the factory grease off black pipes, and it’s a non-negotiable step. Here’s a simple but effective workshop recipe for the job:
- Mix hot water with a generous squirt of a strong degreasing dish soap like Dawn.
- Add a splash of white vinegar to help cut through the grime.
- Use a stiff nylon brush or a Scotch-Brite pad to scrub every inch of the pipes and fittings.
- Rinse thoroughly with clean water and dry immediately to prevent flash rust.
“The industrial look isn’t just an aesthetic; it’s a philosophy. It celebrates the beauty of function, the honesty of materials, and the history embedded in objects.” – Design Historian on Loft Culture
Don’t just think in black and silver. The industrial look gets a modern twist with color. A coat of the right spray paint can completely transform your project. Imagine:
- Matte White: Paired with light-colored wood like birch or maple, it creates a clean, Scandinavian-industrial hybrid look.
- Brushed Gold or Brass: Instantly elevates the piece, adding a touch of Art Deco glamour. Perfect for a bar cart or accent table. Try Rust-Oleum’s “Metallic” line for a convincing finish.
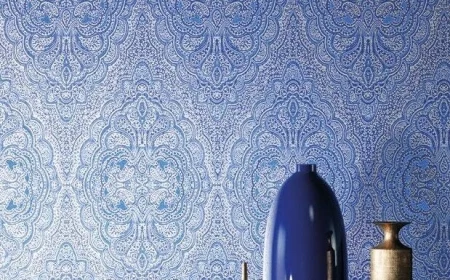
- Bold Color: A fire-engine red or a deep navy blue can turn a simple shelf into a statement piece, especially in a child’s room or creative studio.
Once the last pipe is tightened and the wood is in place, step back. There’s a unique satisfaction that comes from creating something so solid with your own hands. Run your hand over the cool, unyielding metal, then feel the contrasting warmth and grain of the wood. This isn’t just furniture; it’s a functional sculpture you built. It feels permanent, grounded, and honest—a direct reflection of the effort and raw materials that went into it.