DIY Easter Baskets: A Crafter’s Guide to Making Baskets That Actually Last
I’ve spent a lifetime working with my hands, and some of my best memories are of making Easter baskets with my own kids. It was never just about finding something to hold candy; it was about starting a tradition. A well-made basket, one you craft yourself, becomes part of your family’s story, brought out year after year.
In this article
There are tons of tutorials out there for quickly gluing stuff onto a cheap store-bought basket, and that’s perfectly fine if you’re in a pinch. But if you want to learn the real craft of building a basket from scratch—one that feels sturdy and personal—you’re in the right place. We’re going to skip the fleeting trends and focus on timeless techniques that work.
So, which project is the right fit for you? Let’s break it down before we dive in.
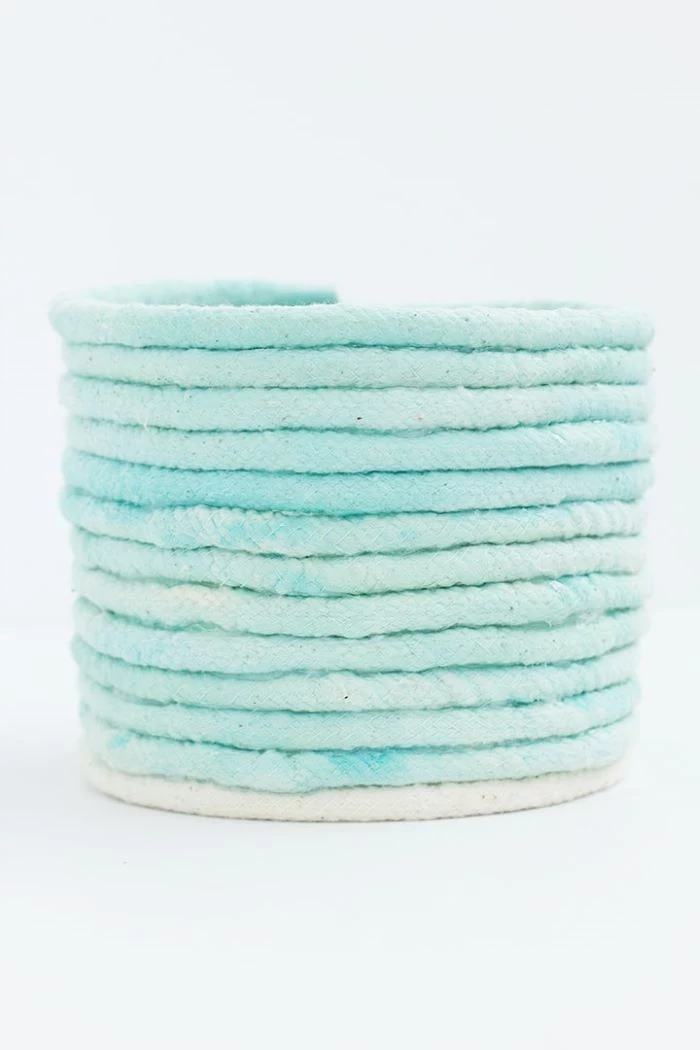
- The Classic Coiled Rope Basket: This one is a true stunner and super durable. I’d rate it medium difficulty. Plan for about 3-4 hours and a budget of around $25-$35 for a good-sized basket. The result? Totally kid-proof and built to last for years.
- The No-Sew Fabric-Covered Box: This is your best bet for a clean, professional look without a sewing machine. It’s very beginner-friendly. You can knock this out in under 2 hours for about $20-$30. It’s surprisingly sturdy and great for kids.
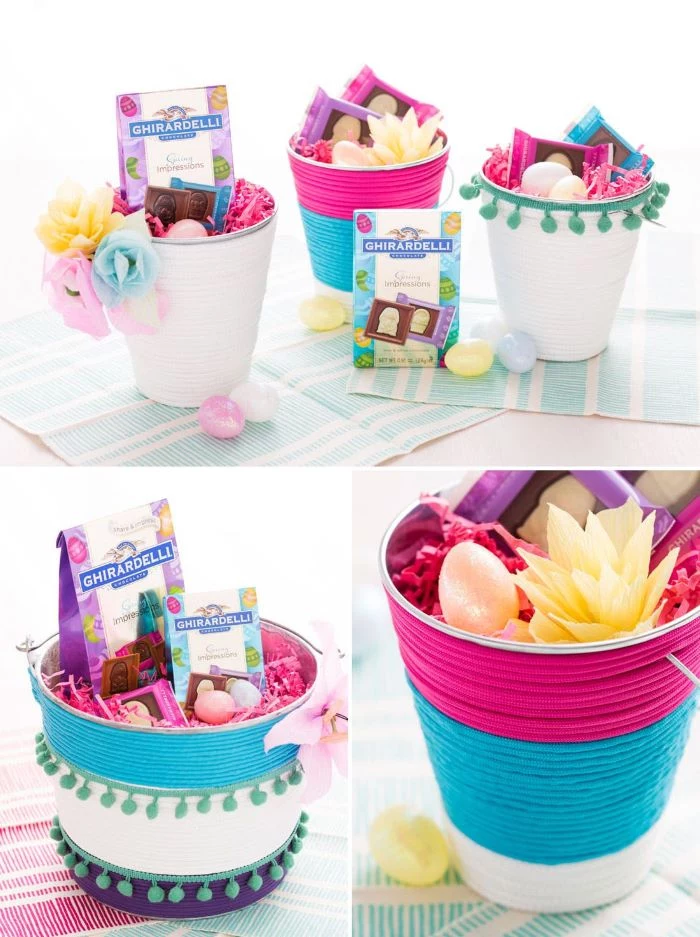
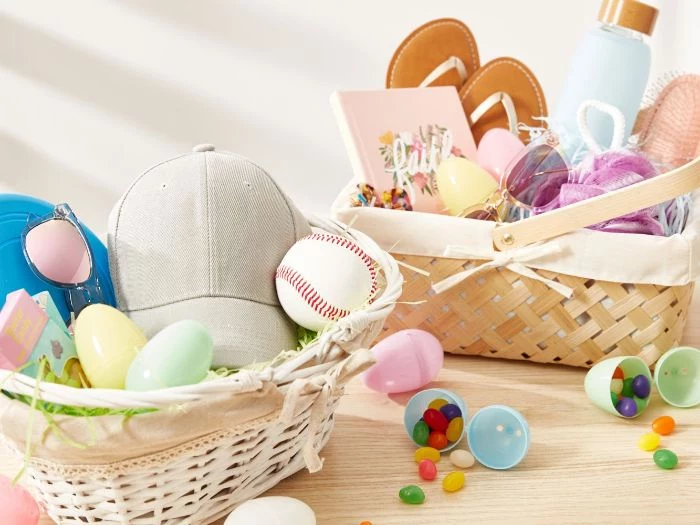
- The Embellished Store-Bought Basket: Perfect if you’re short on time but still want a personal touch. The difficulty is super easy, the time commitment is under an hour, and the cost is whatever you spend on the basket plus $10-$15 for decorations. Durability depends on the basket you buy!
- The Stiffened Yarn Basket: This is more of an art project. It’s easy but very messy, and the result is beautiful but delicate. It’s a cheap project, under $15, but it’s decorative only. It won’t stand up to a real Easter egg hunt.
The Foundation: Picking Your Materials and Tools
A good project starts with good materials. Trust me, cheaping out on the rope or glue will only lead to frustration. Let’s go through the essentials I always keep on hand.
Choosing Your Rope and Cording
The body of your basket is the rope, and the type you pick makes a huge difference in the final look and feel.
- Cotton Filler Cord: This is my go-to for coiled baskets. I like a 3/8-inch diameter (that’s about 10mm). It’s soft enough to shape easily but beefy enough for strong walls. The natural off-white is lovely, but it also takes dye incredibly well for custom colors. You can find it by the yard at JOANN, Michael’s, or other big craft stores.
- Jute or Sisal Rope: If you’re going for a rustic, earthy vibe, these are great. They’re a bit stiffer and rougher to handle, and the fibers can get a little messy. But the trade-off is a very strong, rigid basket.
- Synthetic Rope: Honestly, I tend to avoid ropes made from nylon or polypropylene for these projects. They come in bright colors, which is tempting, but they have a slippery, plastic feel that makes it hard for glue to get a solid grip.
Pro Tip: Always buy more rope than you think you need. Running out midway through a coil is the worst. For a medium basket (around 8 inches across), I budget for at least 15 to 20 yards of cord, which will likely cost you between $20 and $30 depending on sales.
Adhesives: What Really Holds It Together
A basket is only as strong as its seams. Hot glue is the star here, but not all glue guns are created equal.
- High-Temperature Hot Glue Gun: This is non-negotiable for bonding rope. A high-temp gun melts the glue hotter and thinner, allowing it to sink into the rope fibers for a bond that won’t quit. A low-temp gun (the kind often used for kids’ crafts) creates a weak bond that will pop apart under pressure. A decent one costs about $15-$20.
- Quality Glue Sticks: Stick with a reputable brand. I’ve had good luck with Gorilla or AdTech sticks; they bond strong and don’t yellow over time. You can also find fabric-specific glue sticks that stay a bit more flexible once they cool.
- Fabric Glue: For the fabric-covered box, you’ll want a dedicated fabric glue like Fabri-Tac. It gives you a smooth, even hold without the lumps and bumps you’d get from hot glue. It takes longer to dry, so patience is key.
Quick Tip: Hot Glue Hacks
Got those annoying, wispy “spiderwebs” of glue all over your finished project? Don’t pick at them! Just hit them with a quick blast from a hairdryer on a low setting. They’ll instantly shrivel up and disappear. It’s a game-changer.
Project 1: The Classic Coiled Rope Basket
This is a foundational craft. Once you get this down, you can make baskets of any shape or size. It takes some patience, but the result is so rewarding. This is a great project for a focused weekend afternoon.
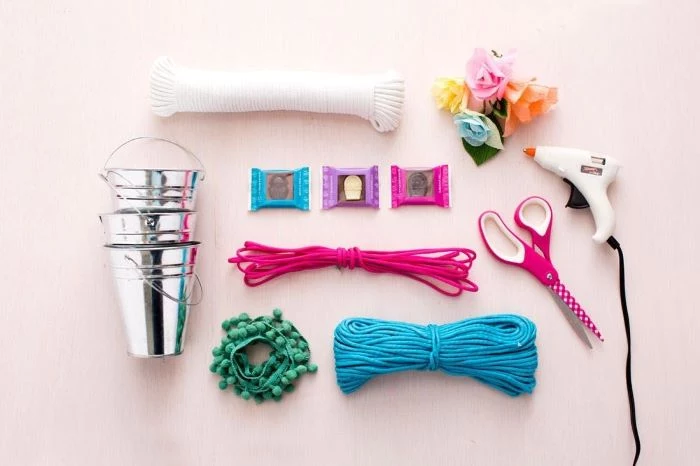
Materials & Tools:
- 15-20 yards of 3/8-inch cotton filler cord
- High-temperature hot glue gun and plenty of glue sticks
- A sturdy bowl or small bucket (optional, but super helpful as a form)
- Sharp scissors
- Silicone finger protectors (Seriously, get these. They cost a few bucks and will save you from burns.)
Heads up! High-temp hot glue is no joke and can cause nasty burns. Always work carefully and keep a small bowl of cold water nearby just in case. The silicone finger protectors let you press the hot coils together without sizzling your fingertips.
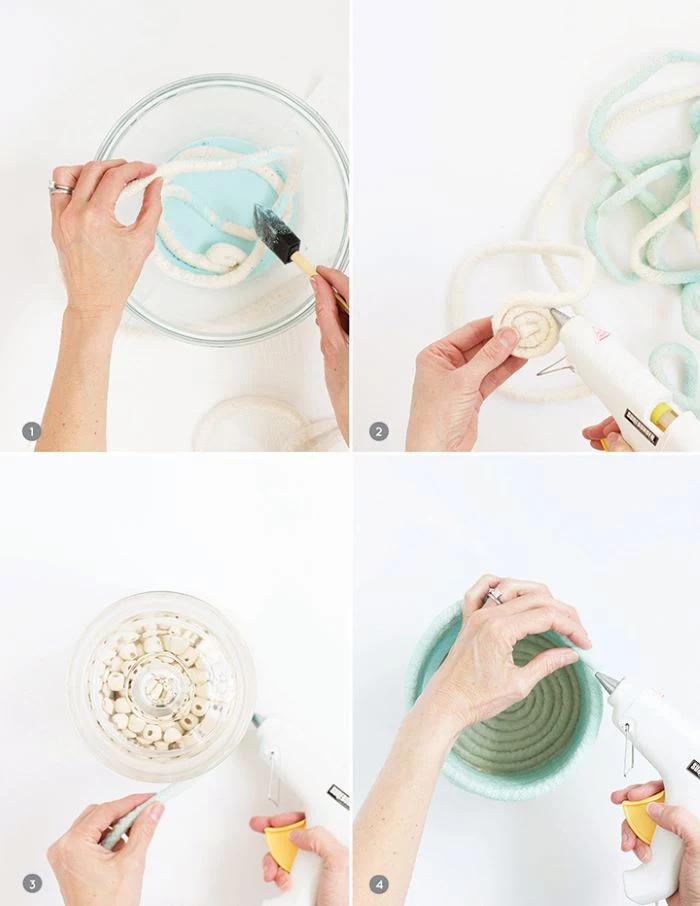
Step-by-Step Instructions:
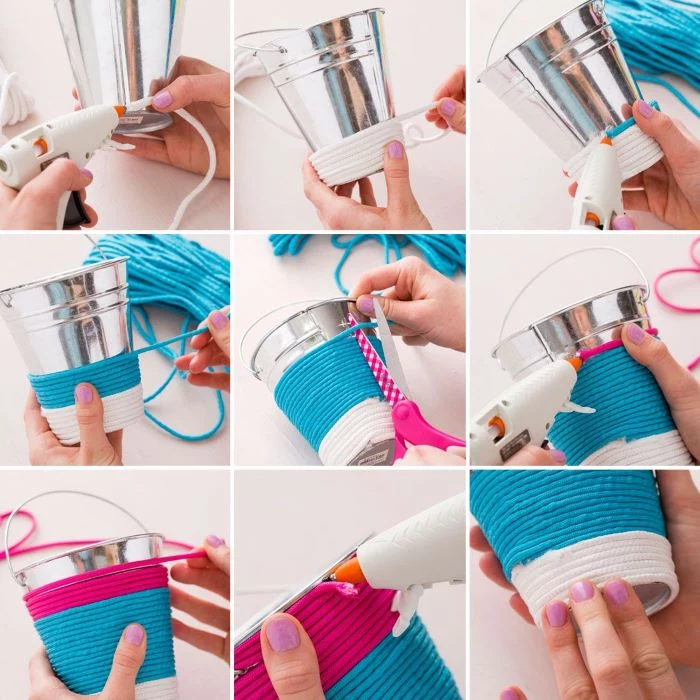
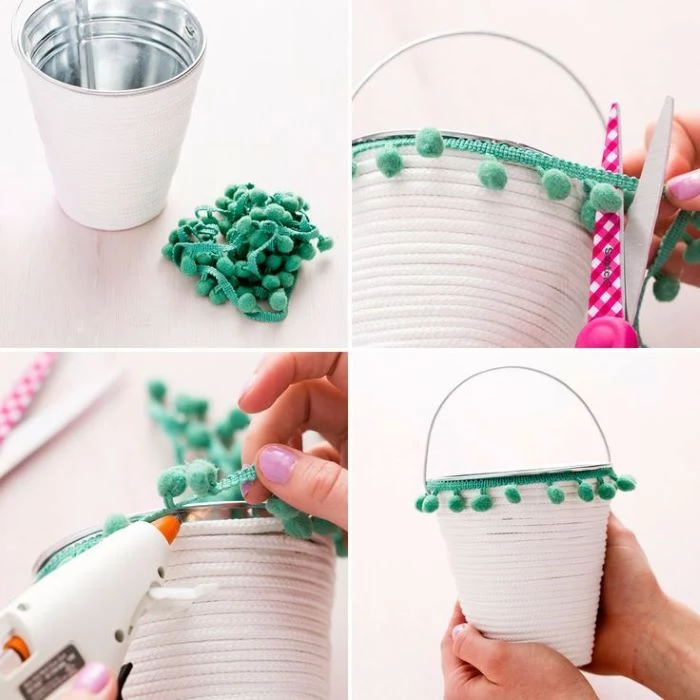
- Start the Base: Take the end of your rope and start coiling it into a tight little spiral. Apply a thin, continuous bead of hot glue to the inner edge of the rope as you add it, pressing it firmly against the growing spiral.
- Keep It Flat: This is critical. After every couple of coils, place the spiral on your workbench and press down firmly to ensure it’s perfectly flat. A wobbly base means a wobbly basket. Keep going until your base is the diameter you want, maybe 7 or 8 inches.
- Build the Walls: Now it’s time to build up. Apply glue to the top edge of the outermost coil and begin placing the new rope directly on top of it. This is where a form, like a mixing bowl, is really handy. You can place it on your base and coil around it to keep the walls straight and symmetrical.
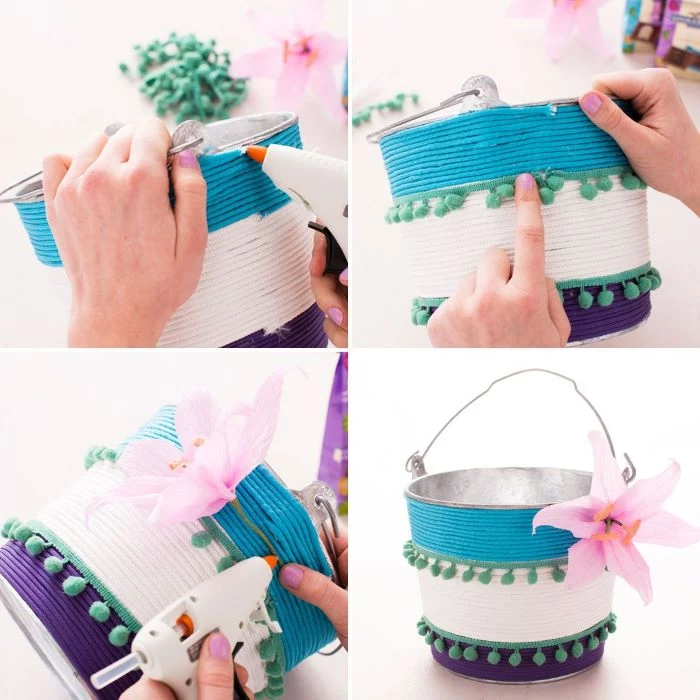
- Want Custom Colors? You can dye your cotton rope before you start! It’s easy. Just follow the instructions on a bottle of liquid Rit dye in a bucket of hot water. Adding a cup of salt for cotton helps the color absorb, and a splash of white vinegar when you rinse helps set it. Let it dry completely before you start coiling.
- Finish the Rim: When your basket is tall enough, cut the rope at a slight angle. Apply a good amount of glue to this tapered end and press it firmly into the wall for a smooth, clean finish. No one wants a frayed, blunt end sticking out.
- Attach the Handle: Cut a piece of rope for the handle (18-20 inches is a good start). Apply a generous bead of glue to one end and press it firmly to the inside of the basket, making sure it covers at least two or three rows of the wall coils. Don’t just stick it to the top rim! Hold it for a good 30 seconds until the glue sets. Repeat on the other side. For a truly bomb-proof handle, use a curved upholstery needle and some heavy-duty thread (or even colorful embroidery floss) to add a few stitches through the handle and the basket wall.
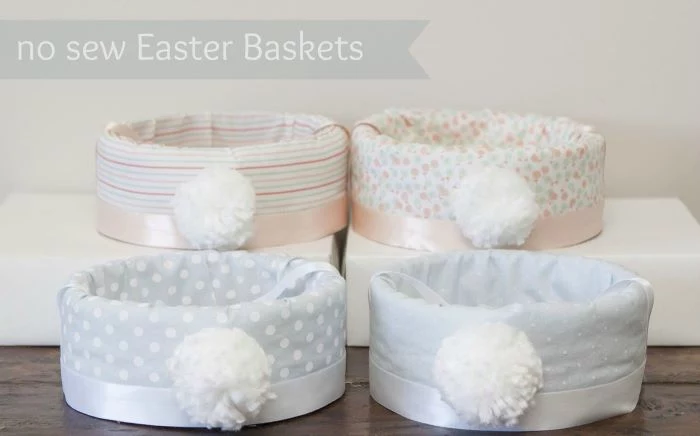
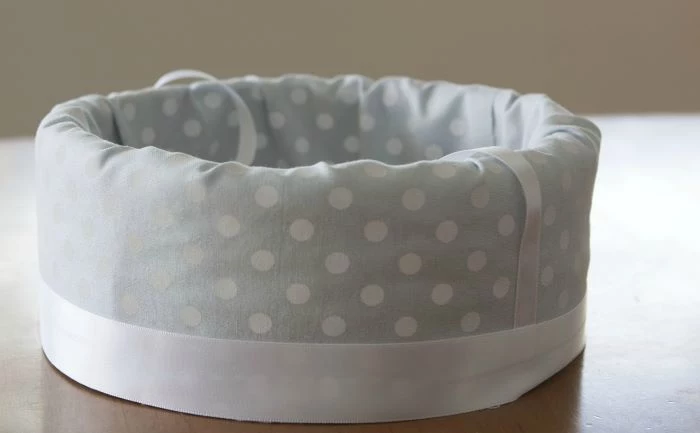
Project 2: The No-Sew Fabric-Covered Box
This project is perfect for getting a clean, tailored look without any sewing. It’s surprisingly durable and a fantastic choice for a beginner. Expect to spend about $20-$30 on materials, mainly for the box and a half-yard of fabric.
Materials & Tools:
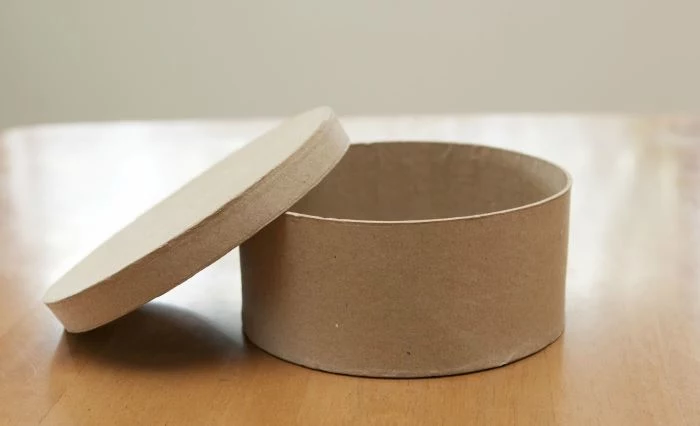
- A round paper-mache craft box with a lid (an 8-inch one costs about $10-$12 at a craft store)
- 1/2 yard of sturdy cotton fabric (quilting cotton is perfect)
- 1/2 yard of thin cotton batting
- Quality fabric glue (like Fabri-Tac)
- Sharp fabric scissors and a measuring tape
- 1 yard of wide ribbon for the handle
- A hot glue gun (just for the handle)
Step-by-Step Instructions:
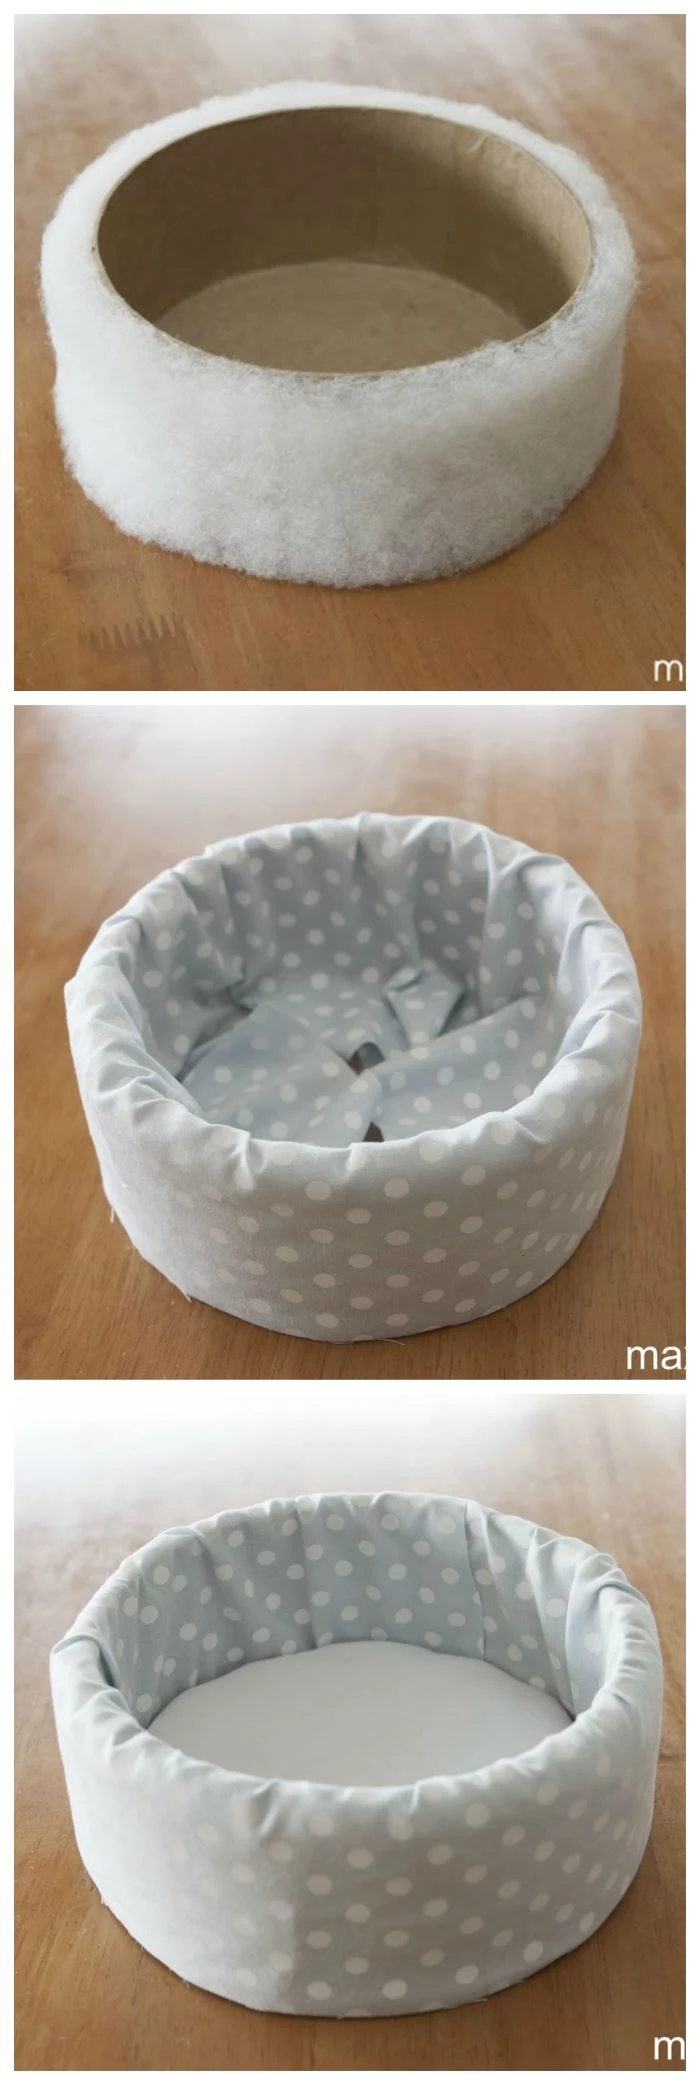
- Pad the Box: Cut a piece of batting to fit around the outside of your box. Apply a thin layer of fabric glue and wrap the batting around, trimming any excess. This padding gives the basket a soft, high-end feel.
- Measure and Cut: Measure the height and circumference of your box. Add 1 inch to both measurements and cut your fabric to size. This gives you extra fabric to fold for clean edges.
- Cover the Sides: Lay your fabric face down and iron a 1/2-inch fold along one of the long edges. This will be your clean top edge. Now, paint an even coat of fabric glue onto the batting and carefully wrap the fabric around the box, starting with the raw edge. The clean, folded edge should be flush with the top of the box.
- Finish the Bottom and Inside: Snip the excess fabric at the bottom every inch or so to create tabs. Fold these tabs onto the bottom of the box and glue them down. Now, fold the extra fabric at the top over the rim to the inside and glue it down.
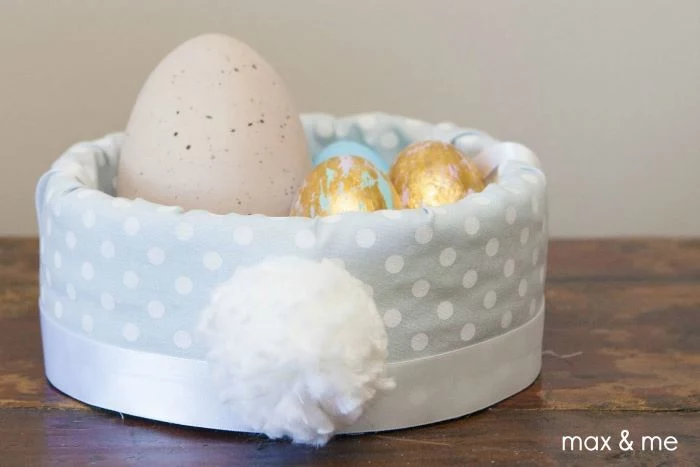
- Make the Liner Bottom: Trace the box’s lid onto a piece of cardboard, batting, and your fabric. Cut out the three circles. Glue the batting to the cardboard, then cover it with the fabric circle, wrapping and gluing the fabric edges to the back of the cardboard. Push this neat, padded disc into the bottom of your basket to hide all the raw edges.
- What About the Lid? You can cover the lid to match! Just repeat the process: trace the lid onto your fabric with about an inch of extra space all around. Glue the fabric to the top, snip the overhang into tabs, and glue them neatly to the underside of the lid.
- Attach the Handle: Use your hot glue gun for this. Glue the ends of your ribbon securely to the inside of the sturdy paper-mache box, not just the fabric. To make it look extra tidy, you can glue a little square of matching fabric over the ribbon ends on the inside.
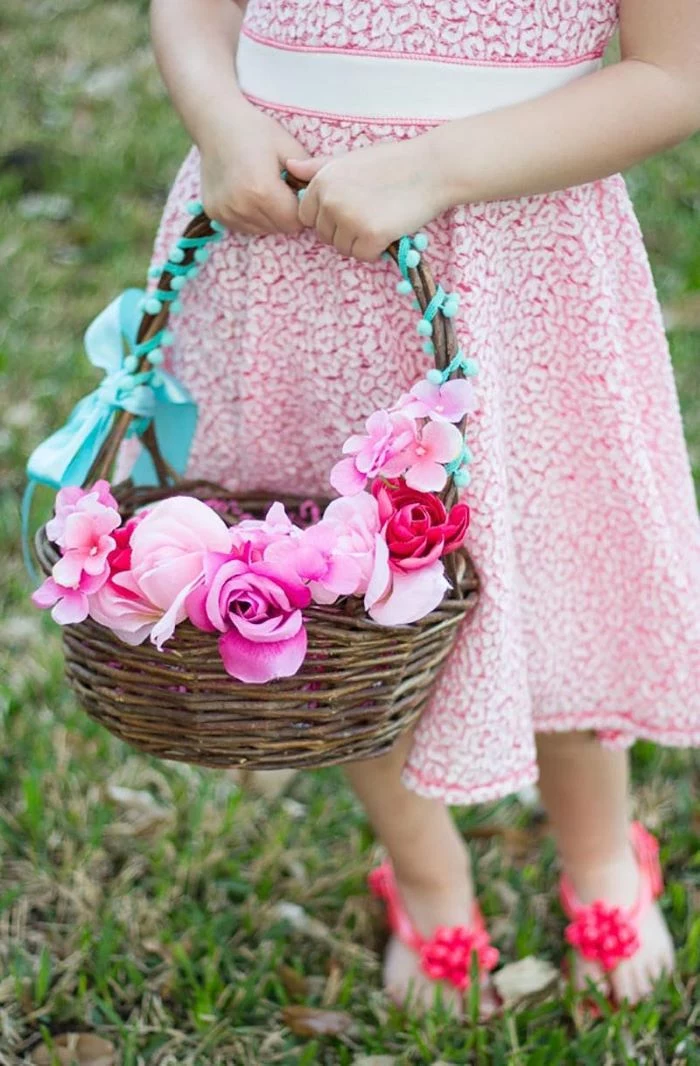
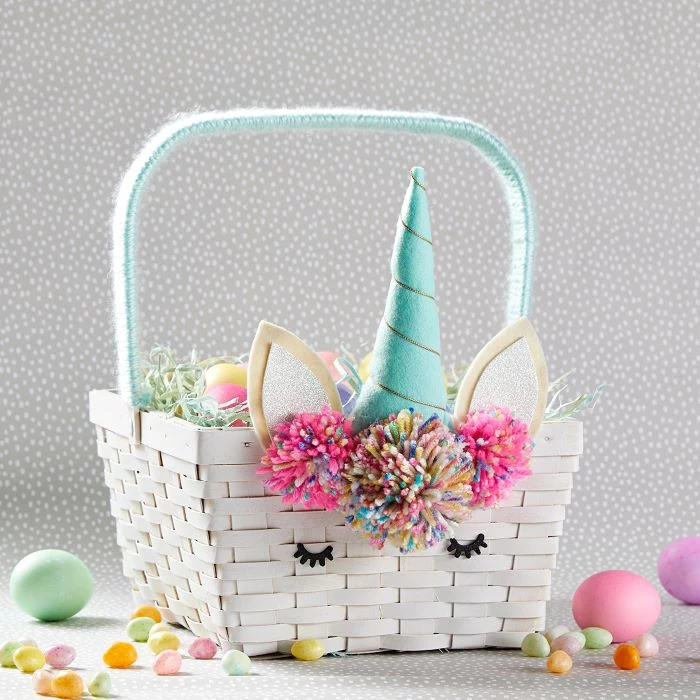
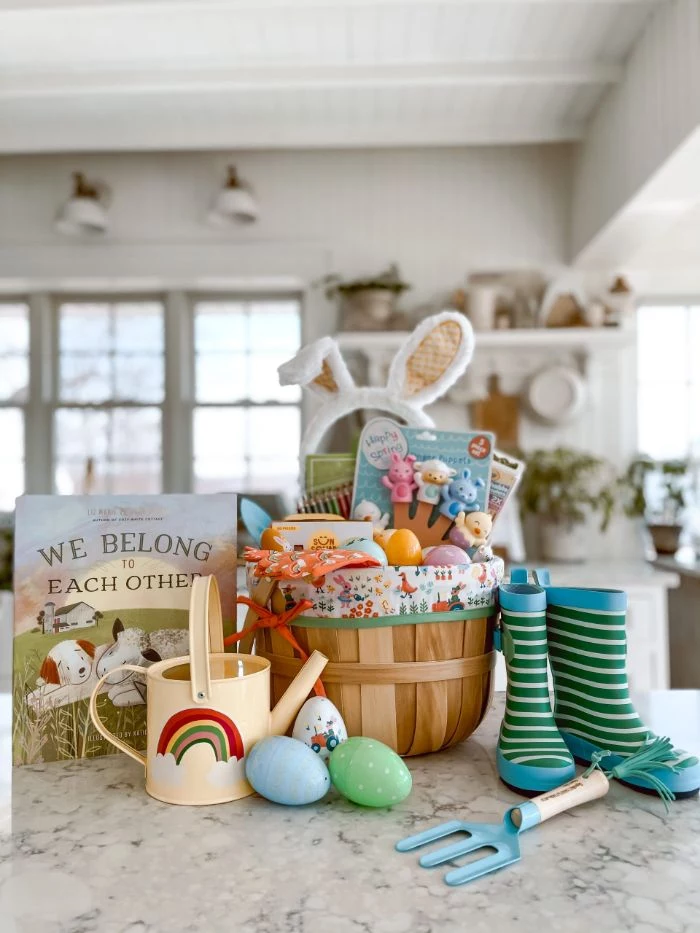
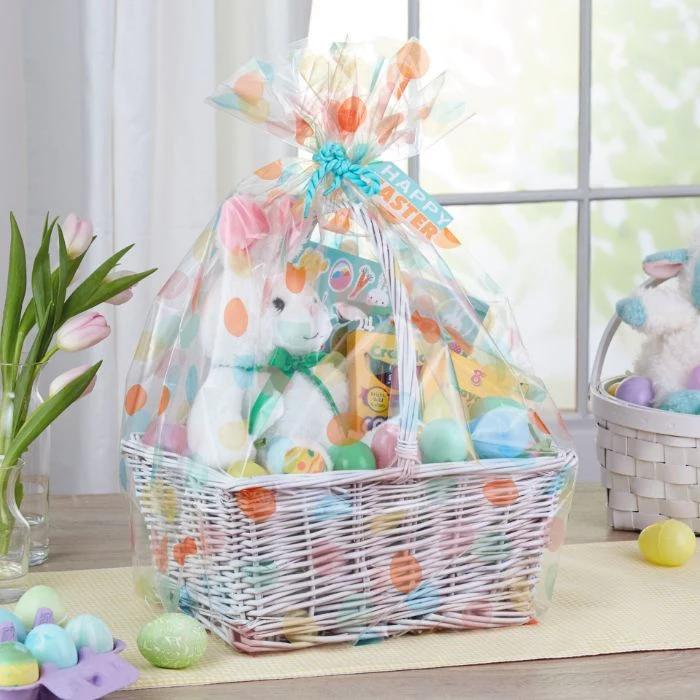
Project 3: The Quick Embellished Basket
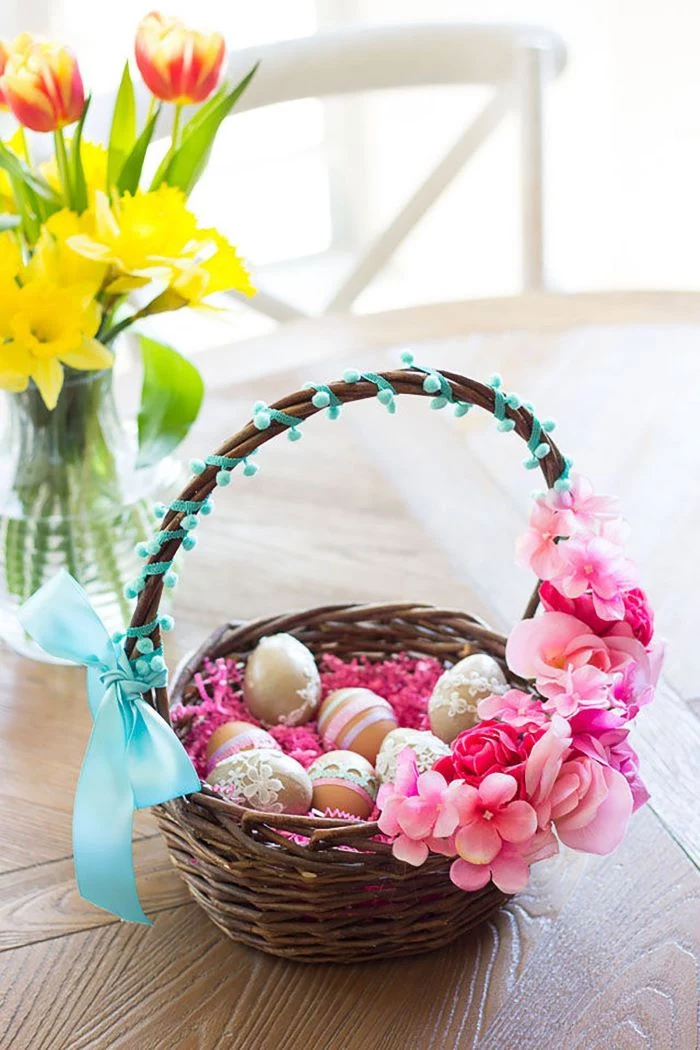
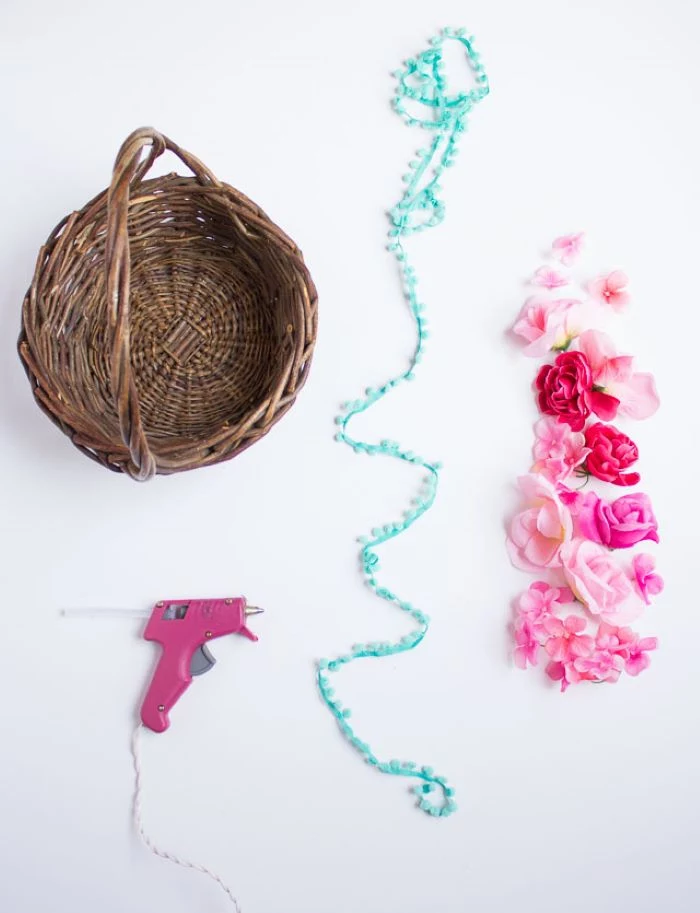
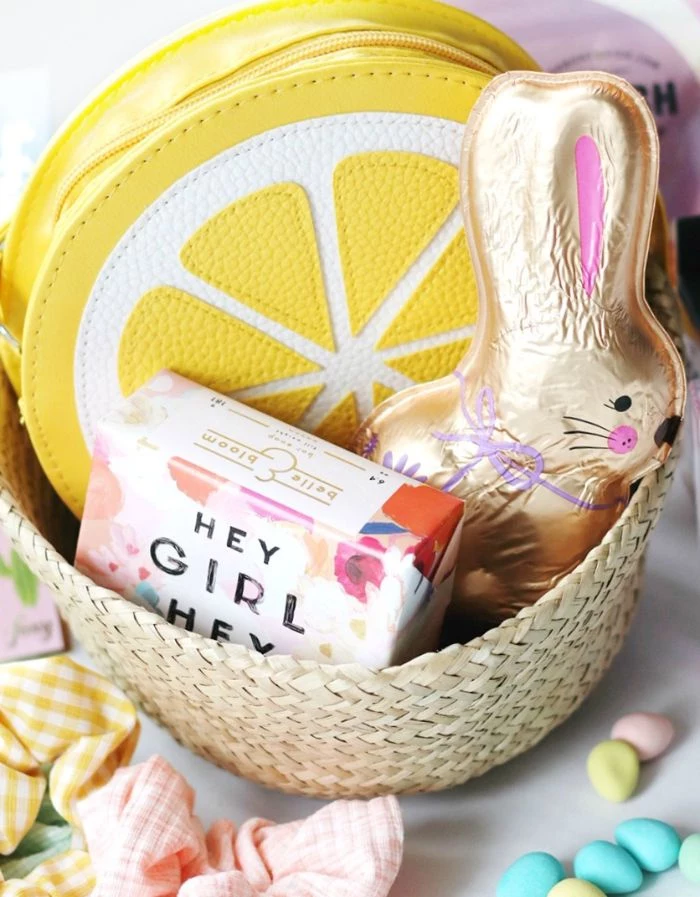
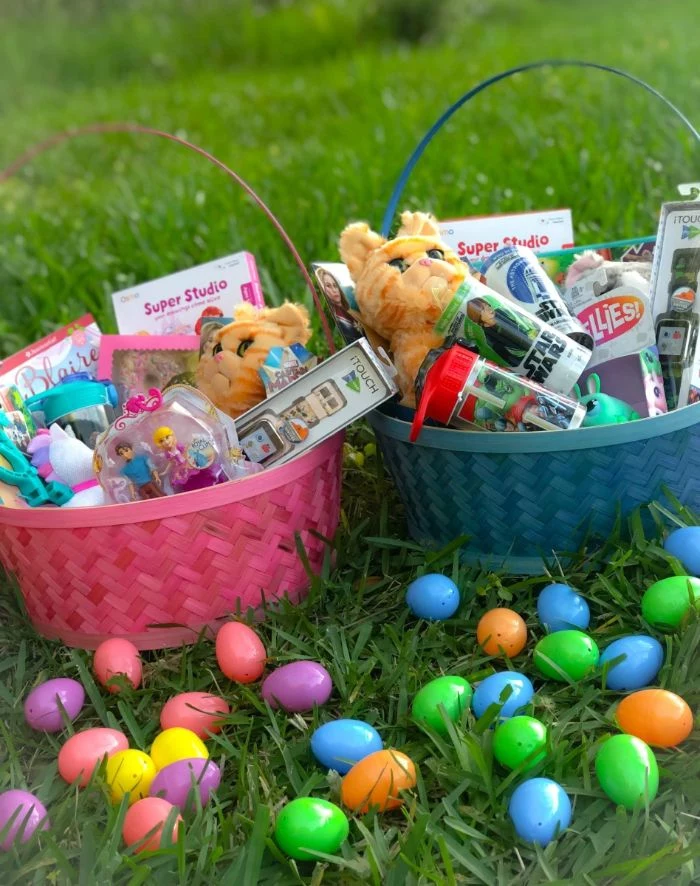
Hey, there’s no shame in starting with a good quality store-bought wicker or seagrass basket. Sometimes the smartest move is to improve on a solid foundation. This is all about adding personal touches that will actually stay put.
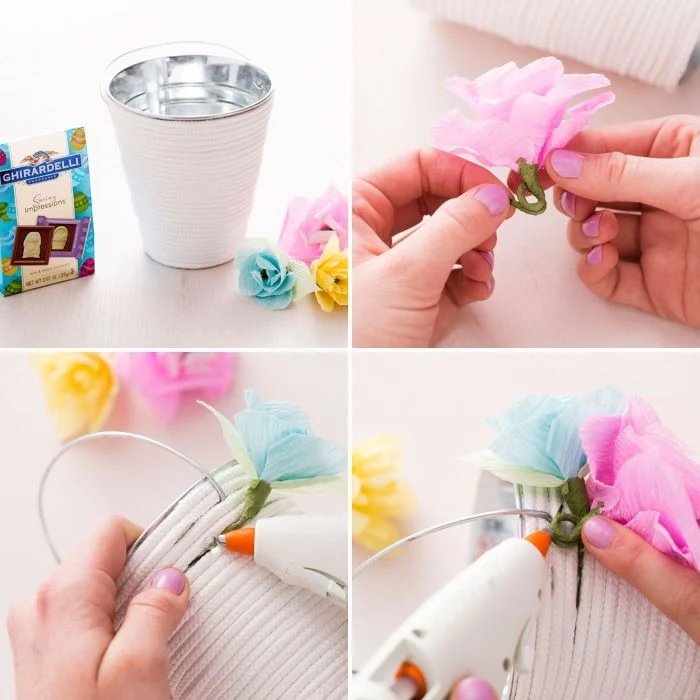
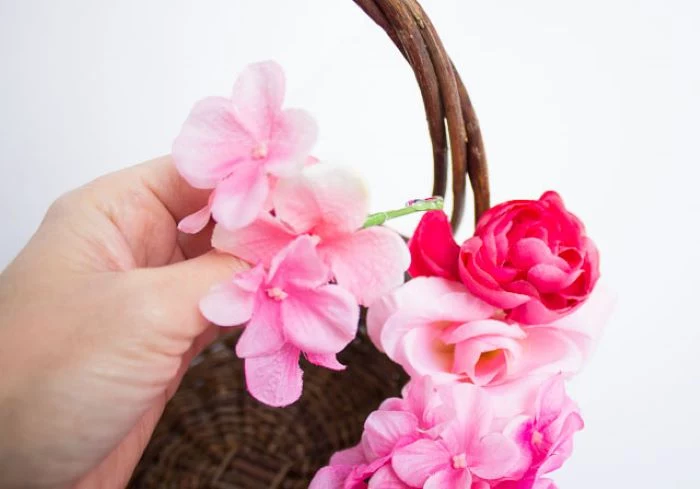
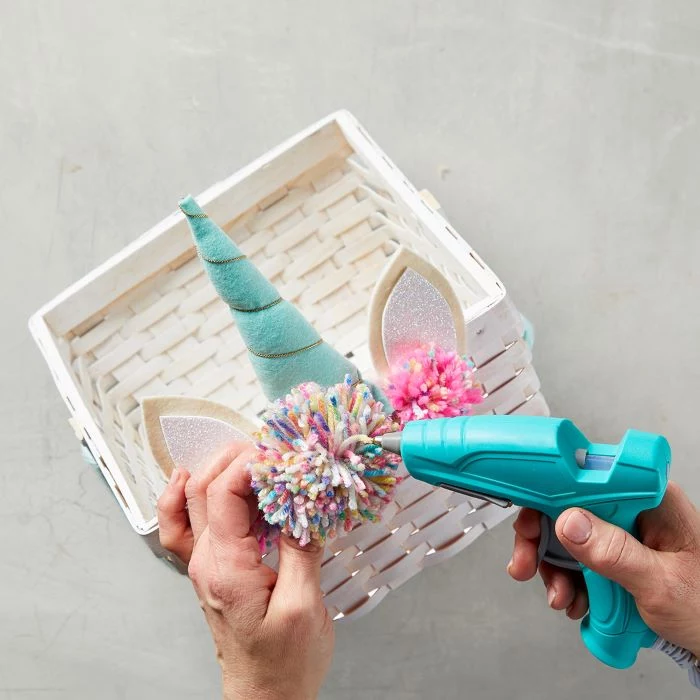
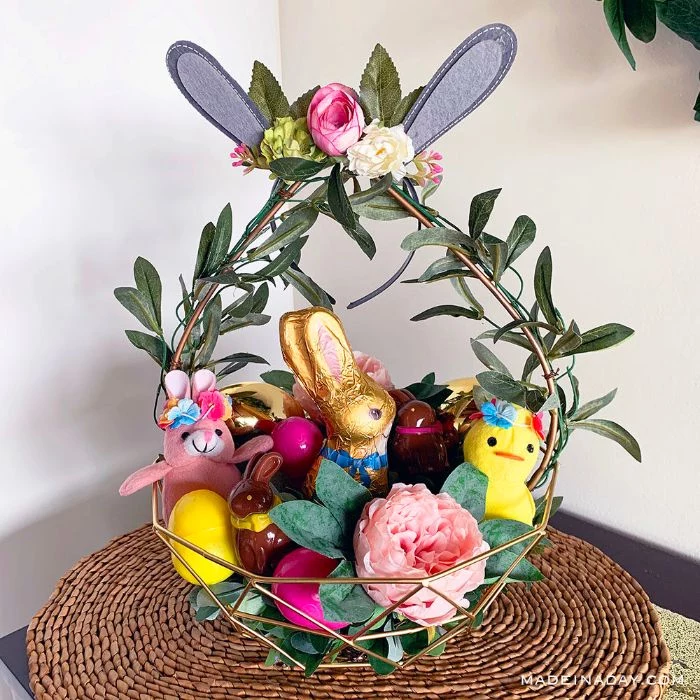
- Faux Flowers: Don’t just glue the flower heads on! Use wire cutters to leave about 2 inches of stem. Weave that stem through the basket’s wicker, then add a dab of hot glue right at the insertion point to lock it in. This mechanical bond is way stronger than just surface glue.
- Yarn Pom-Poms: Use a plastic pom-pom maker for dense, sturdy poms. When you tie them off, leave the two tying strands super long. Use those strands to tie the pom-pom directly to the basket’s weave, then add a dot of glue underneath to stop it from wiggling around.
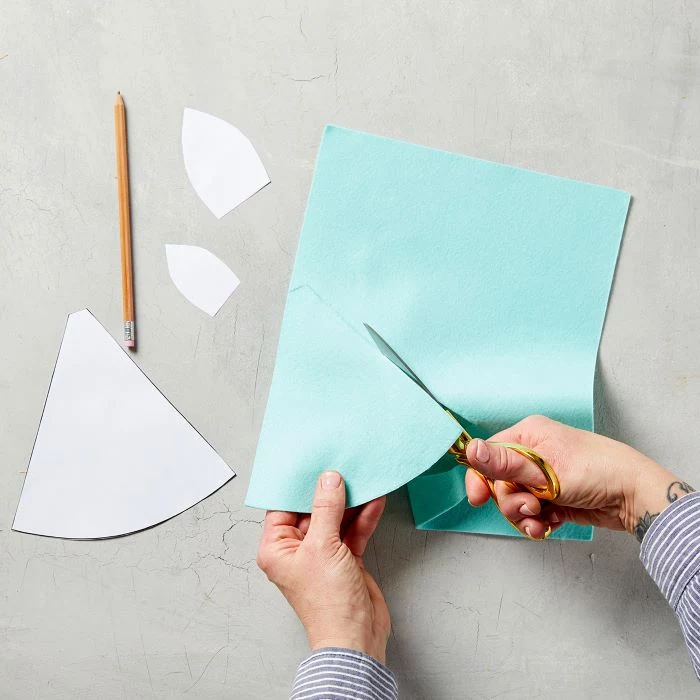
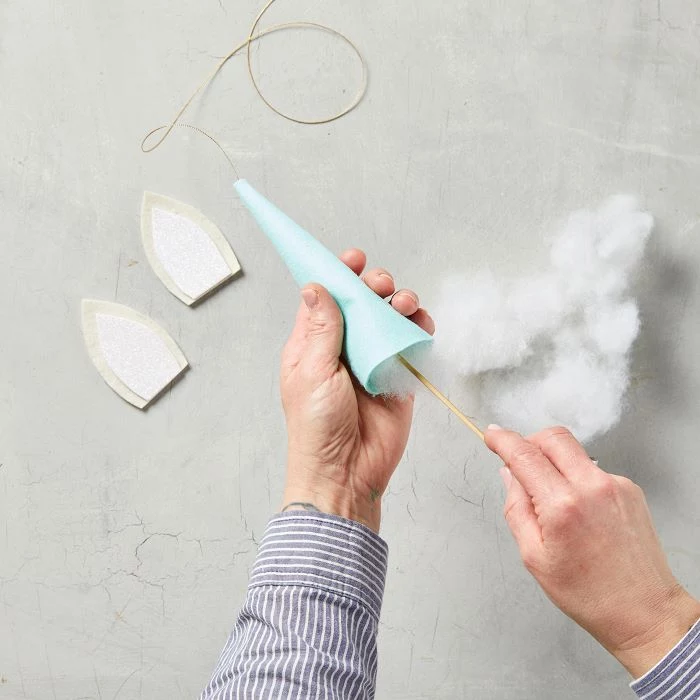
- Felt Creations (like a Unicorn Horn): To make a felt horn or ears sturdy, stuff them TIGHTLY with polyfill. A loosely stuffed horn will just flop over sadly. When you attach them, put a generous amount of hot glue on the base and press firmly onto the wicker. For something that will really last, I’d even add a few stitches with a needle and thread through the bottom of the felt and the basket itself.
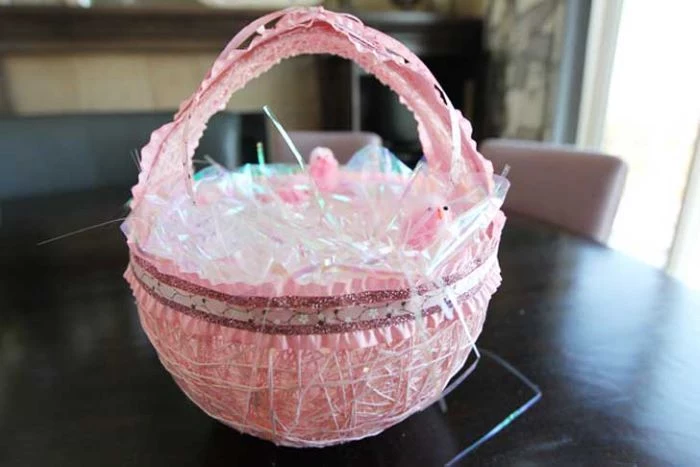
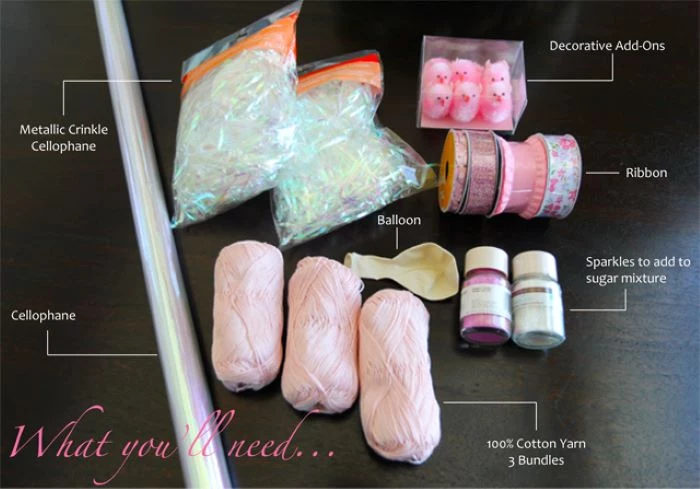
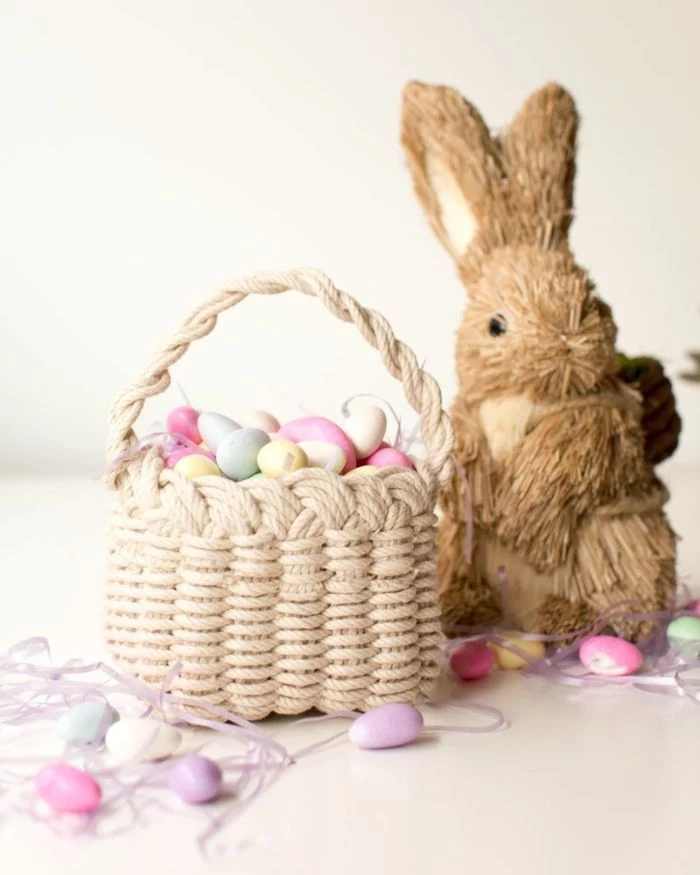
Project 4: The Experimental Stiffened Yarn Basket
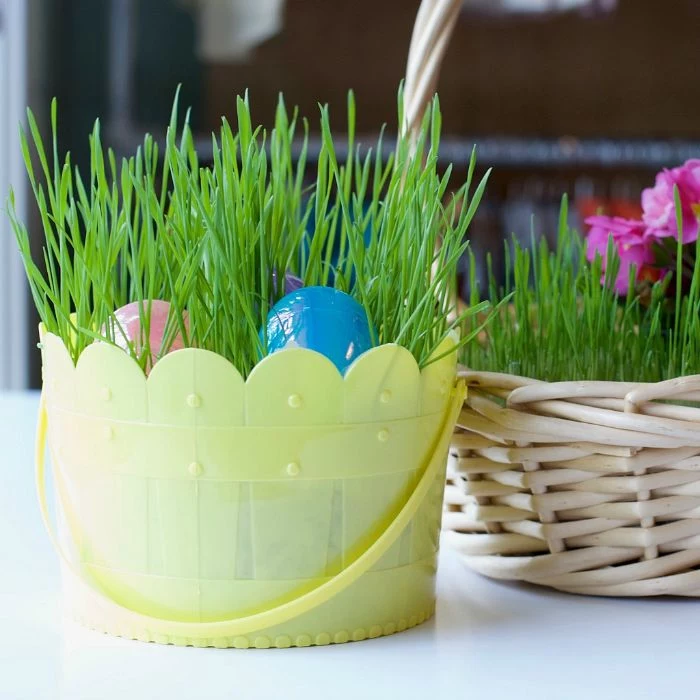
Alright, let’s talk about this last one. It creates a beautiful, delicate basket, but I have to be honest: it is NOT for heavy-duty use. Think of it as a pretty centerpiece for a few plastic eggs or some cellophane grass, not something to be carried around.
The magic here is a fabric stiffening agent, which you can buy at any craft store (like Stiffy). It’s a polymer-based liquid that dries hard and moisture-resistant. You can use a homemade sugar-water mix, but it can get sticky in humid weather and might attract bugs. For a keepsake, go with the commercial stuff.
A quick cleanup tip: This is a gloriously messy process. Cover your workspace with a disposable plastic tablecloth or a flattened cardboard box. You’ll thank me later.
Instructions & Important Disclaimers:
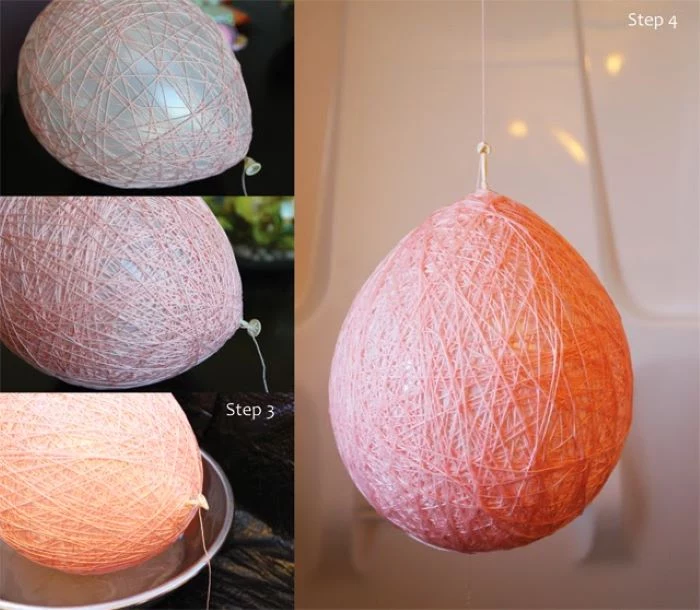
- Prep your form: Inflate a balloon to the size you want your basket bowl to be.
- Wrap it up: Tie your yarn (cotton works best) to the balloon’s knot and just start wrapping randomly. The more you wrap, the stronger it will be.
- Get it soaked: Pour your stiffener into a bowl and roll the yarn-covered balloon in it until every single strand is saturated. Dry spots are weak spots.
- Let it dry: Hang the balloon to dry for at least 24-48 hours. It needs to be bone-dry and hard to the touch. If you rush this, it will collapse.
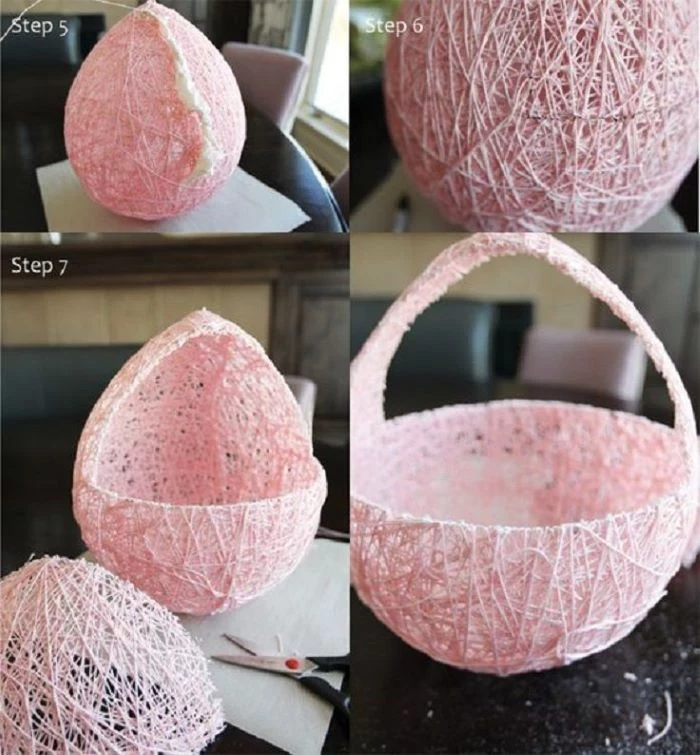
- The Big Pop: Once it’s totally dry, pop the balloon and gently pull the deflated plastic out from between the yarn strands.
- Shape it: You’ll have a yarn sphere. Use sharp scissors to cut it in half. One half is your basket! You can use a strip from the other half to create a handle, gluing it to the inside.
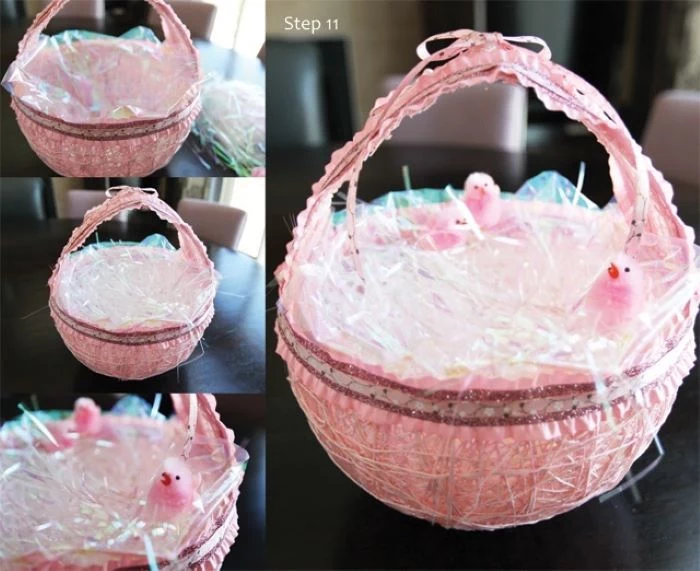
My two cents: This is a really fun craft, but treat it like a decoration. It’s fragile! It will likely break if a kid tries to carry it around full of candy. It’s for looking pretty on a table.
Final Thoughts on Making Things That Matter
Building something with your own hands is a powerful thing. Whether you go for a sturdy rope basket that’ll last a decade or a beautifully decorated box, you’re creating more than a container for treats. You’re making a memory.
So take your time, choose good materials, and don’t be afraid to mess up. Every crafter has a bin of failed experiments—that’s how we learn. The skills you practice here are the foundation of all good crafting. I hope you find as much joy in the process as you do in the final product.
Now it’s your turn! Pick a project, give it a shot, and if you’re on social media, I’d love to see what you create. It’s always a thrill to see these ideas come to life in someone else’s hands.
Inspirational Gallery
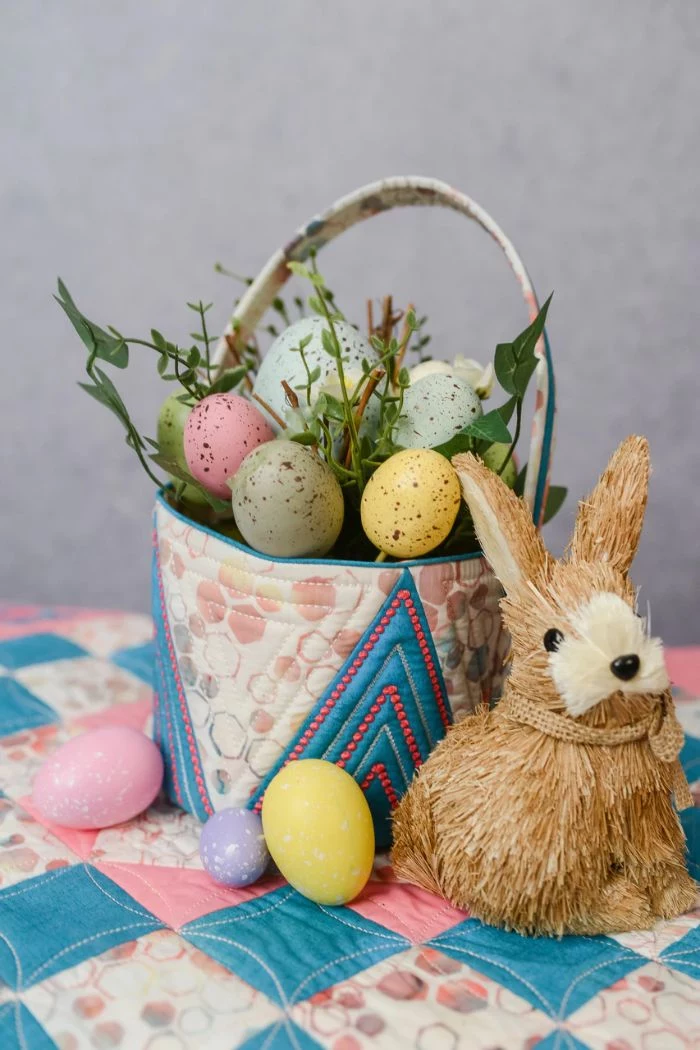
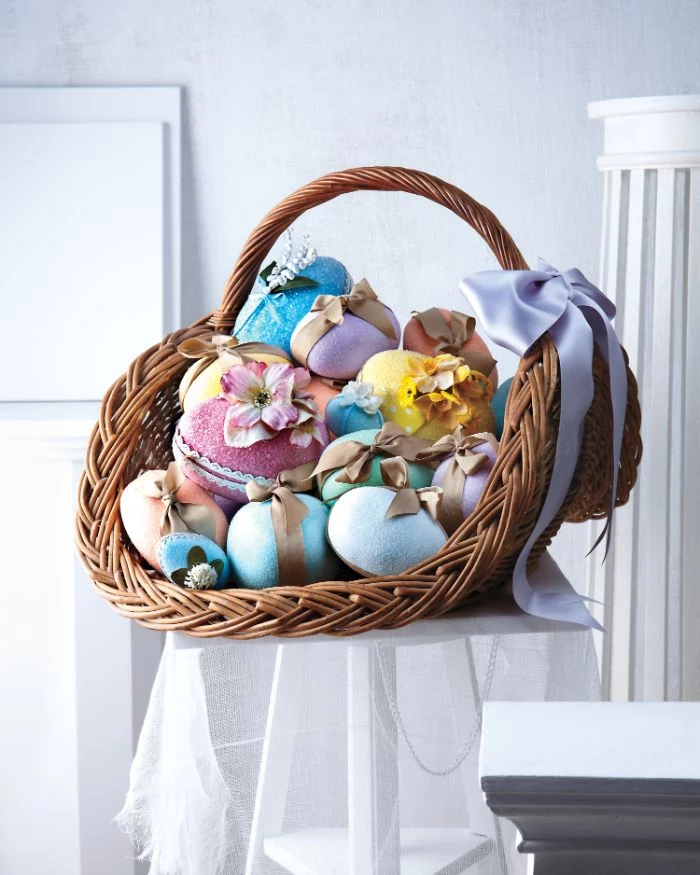
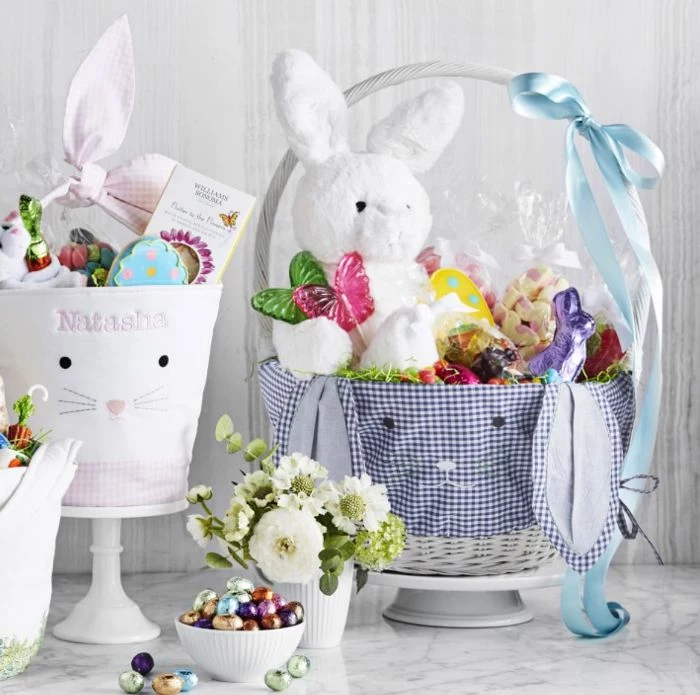
Don’t underestimate the power of a liner! A simple circle of felt or a custom-sewn fabric insert not only hides the interior base but also adds a professional pop of color. It’s the secret to making your DIY basket look truly high-end.
- A sturdy, flat base is non-negotiable. For coiled rope baskets, start by coiling the first few rows on a flat table to prevent a wobbly bottom.
- When covering a box with fabric, use a bone folder or a credit card to press the fabric firmly into the corners for crisp, clean lines.
- Always pre-wash your fabrics to prevent any shrinking or color bleeding later on, especially if you plan to spot-clean your basket in the future.
The handle is the most-handled part. To ensure it lasts, consider reinforcing it. For rope baskets, work the ends of the handle rope at least four rows down into the basket’s sides. For fabric baskets, use an extra layer of heavy-duty fusible interfacing, like Pellon Peltex 71F, just for the handle strap.
For no-sew fabric projects, the glue is your best friend. But which one to choose?
Spray Adhesive (like 3M Super 77): Offers the most even, thin coverage, which is perfect for preventing lumps on large, flat surfaces. Work in a well-ventilated area!
Fabric Glue (like Aleene’s Fabric Fusion): Provides a permanent, flexible bond that’s great for seams and edges. It’s also washable if you plan to use the basket for more than just display.
For most box-covering projects, a combination works best: spray for the main panels and a line of fabric glue for the critical edges.
How do I choose the right color palette?
Move beyond standard pastels for a more personalized look. Think thematically! A
- A perfectly smooth finish.
- No visible glue marks.
- Incredibly durable and water-resistant.
The secret? Mod Podge. For yarn or fabric-stiffened baskets, applying two to three thin coats of Mod Podge (Matte or Gloss, your choice!) creates a protective, rigid shell that elevates the final look and feel far beyond a simple sugar-water solution.
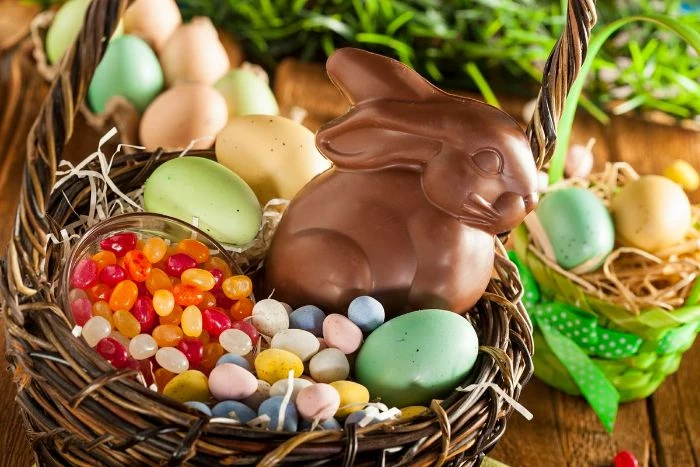
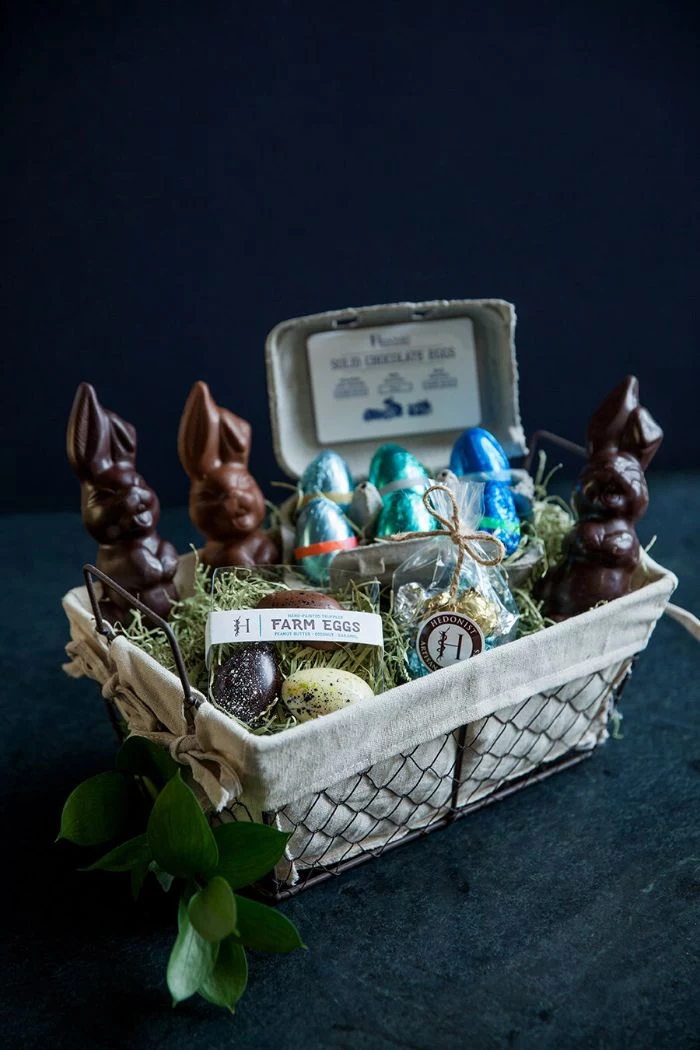
Think about the filling *before* you decide on the size. A small, delicate yarn basket is perfect for a few gourmet chocolates or a piece of jewelry, while a larger coiled rope basket is needed to hold a stuffed animal, a book, and a collection of painted eggs. A mismatch in scale is a common first-timer mistake.
A 2021 survey by the Craft & Hobby Association found that over 63% of U.S. households participated in at least one crafting activity. DIY projects like these Easter baskets are more than a hobby; they’re a mainstream form of personal expression.
This surge in crafting means access to better materials is easier than ever. Look beyond big-box stores to specialty online shops on Etsy for hand-dyed yarns or custom-printed fabrics to make your basket truly one-of-a-kind.
Hot Glue Gun: Fast, easy, and great for attaching bulky embellishments like silk flowers or pom-poms. Best for projects where the bond isn’t under constant strain.
High-Temp Gorilla Glue Sticks: A superior alternative for structural work, like the coils of a rope basket. It creates a much stronger, more weather-resistant bond than standard craft glue.
For durability, always choose a high-temperature gun and quality glue sticks.
Let’s talk texture. Combining different materials is a pro-level move that adds incredible depth. Imagine a classic cotton rope basket, but with a handle wrapped in soft suede lace. Or consider weaving a few rows of chunky merino wool or recycled sari silk ribbon into your design. This tactile variety makes the basket not just a container, but a sensory art piece.
My fabric keeps wrinkling and bubbling on my no-sew box basket. What am I doing wrong?
This usually happens when too much glue is applied at once. Work in small sections. Apply a thin, even layer of your adhesive (like Aleene’s Tacky Glue) to the box, not the fabric. Smooth the fabric from the center outwards using a plastic scraper or an old gift card to push out any air bubbles as you go. Patience here is key!
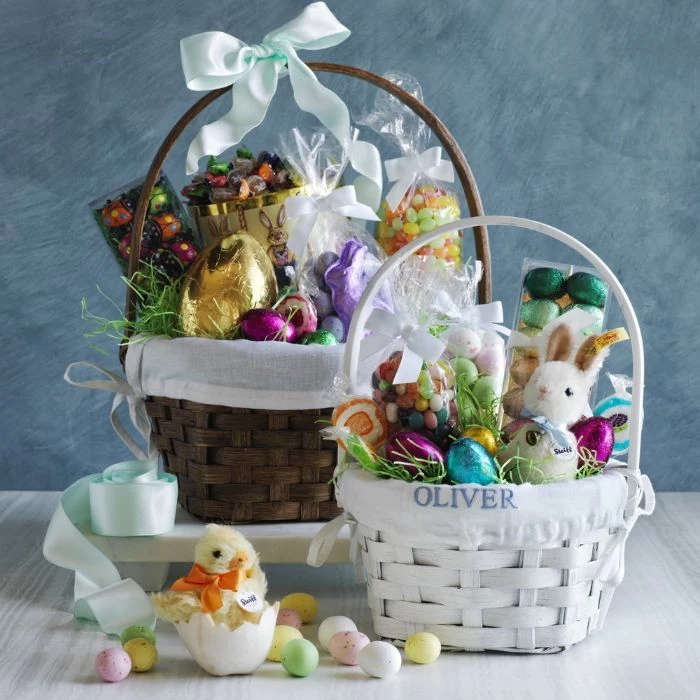
For an heirloom-quality touch, add a personalized tag. A small, laser-cut wooden tag with the child’s name and the year, tied on with a silk ribbon, instantly turns a beautiful craft into a cherished family memento. You can find dozens of makers on sites like Etsy who create these custom tags for a very reasonable price.
A common mistake is forgetting to finish the raw edges of your fabric, leading to fraying over time. A simple solution is a product called Fray Check by Dritz. Apply a thin line to any cut edge before gluing. It dries clear and flexible, ensuring your fabric-covered basket looks pristine for years to come.
- For rope or fabric baskets: Spot clean only. Use a damp cloth with a tiny bit of gentle soap. Don’t submerge it.
- For stiffened yarn baskets: Dust gently with a soft brush or a can of compressed air. Keep away from moisture!
- Storage: To maintain its shape, stuff the basket with tissue paper and store it in a plastic bag in a cool, dry place.
Did you know the first machine for making coiled baskets was patented in 1902? While we use a simple sewing machine or even just a glue gun today, the fundamental technique of coiling a core material and stitching it together is a craft that spans centuries and cultures.

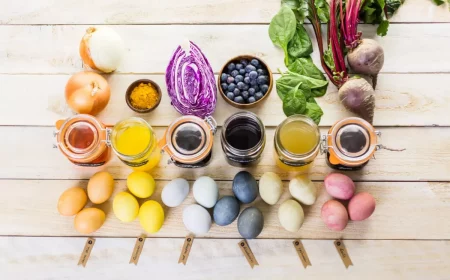
Want to go all-natural with your colors? You can dye your own cotton rope or fabric with kitchen staples.
- Yellow: Simmer with yellow onion skins.
- Pink/Red: Use chopped beets or avocado pits and skins.
- Blue/Purple: Try red cabbage or blackberries.
Just simmer your material in the dye bath, add a mordant like vinegar or salt to help set the color, and let it dry completely before crafting.
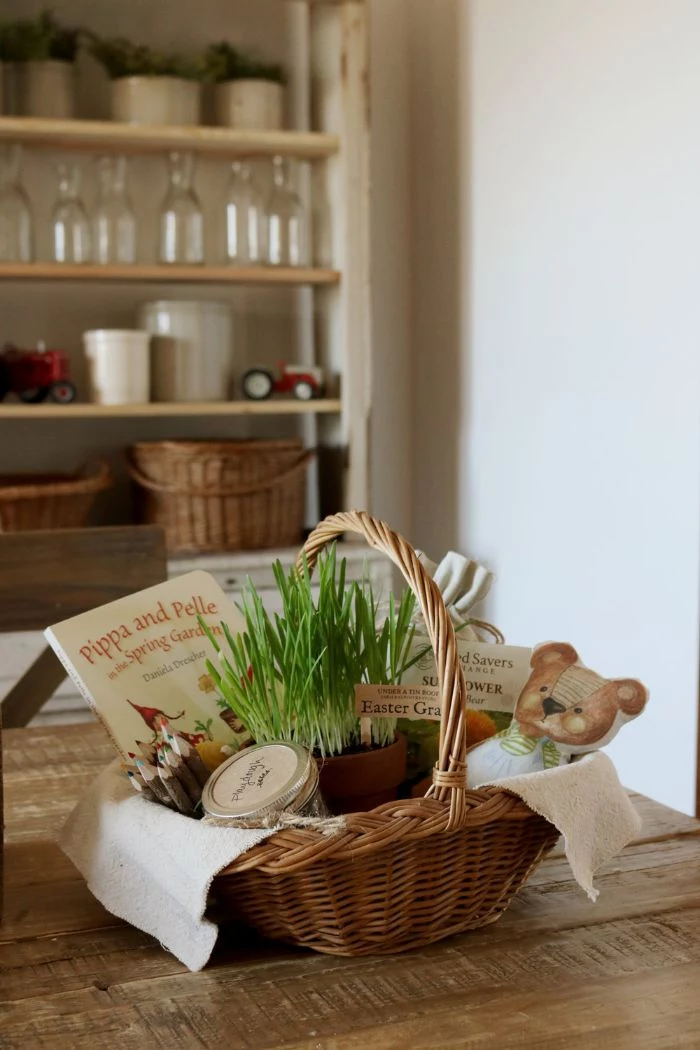
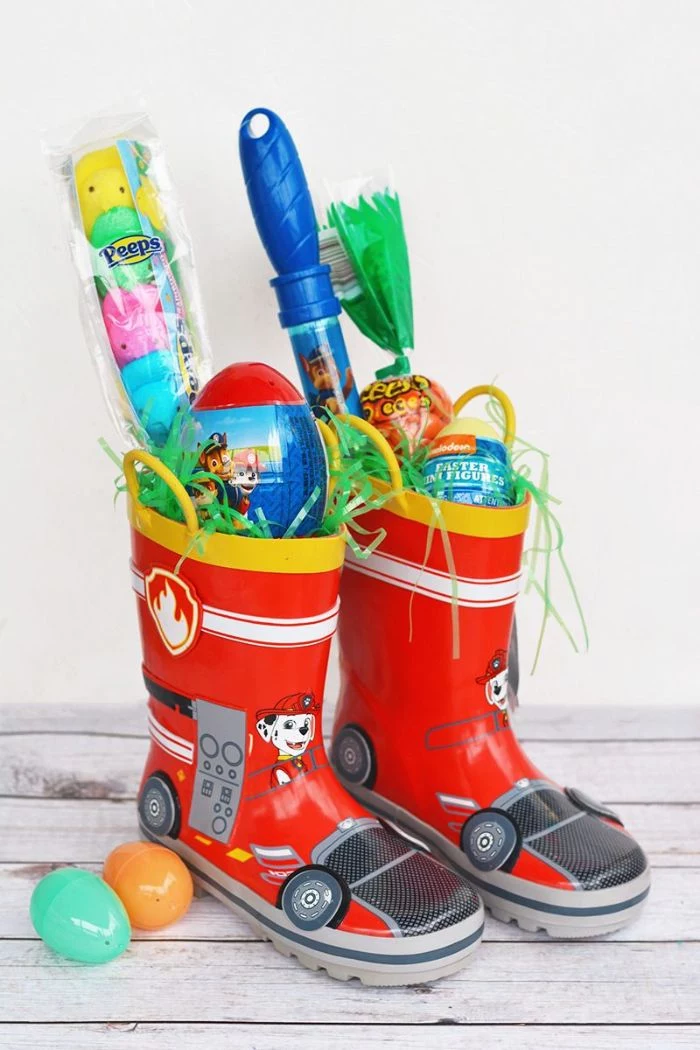
A theme makes it special. Instead of just colors, think of a story. For a little adventurer, line the basket with a map-print fabric and add a small, functional compass to the handle. For a budding artist, fill the basket with high-quality colored pencils and a sketchbook, and embellish the outside with felt shapes of paintbrushes and palettes.
Don’t throw away old textiles! A sturdy but stained pair of jeans can be cut into strips and braided to create a rustic, durable basket handle. An old floral bedsheet is perfect for a no-sew box lining. This not only saves money but adds a layer of personal history to your creation.
Sharp Fabric Scissors: Using dull scissors will snag and stretch your fabric. A good pair of Fiskars is a worthy investment. Never use them on paper!
Rotary Cutter and Mat: For perfectly straight, clean cuts on fabric, nothing beats a rotary cutter. It’s the secret to professional-looking edges on no-sew projects.
Silicone Finger Guards: If you’re working with a hot glue gun for a coiled basket, these are an absolute lifesaver. They prevent burns and let you press down on hot glue seams with confidence.
My coiled rope basket is starting to look like the Leaning Tower of Pisa! How do I keep the walls straight?
This happens when you’re not keeping your work consistently angled. As you add a new row, make sure you are holding it directly on top of the previous row, not slightly to the inside or outside. Every few rows, place the basket on the table and check it from all sides to ensure the walls are rising vertically.
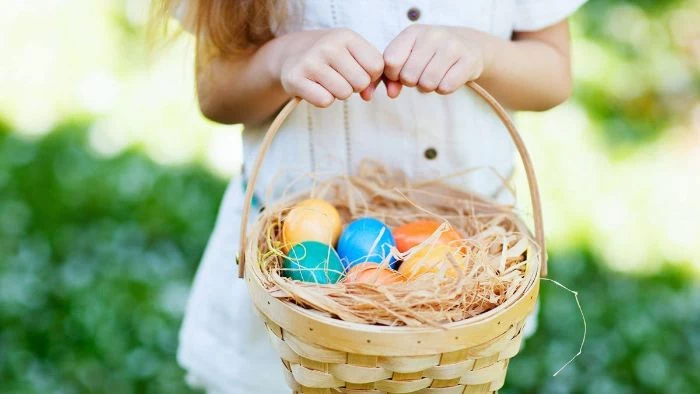
The experience is part of the gift. Making a basket *with* your child is a memory in itself. Give them age-appropriate tasks: younger kids can choose the fabric or place pom-poms, while older kids can help with gluing or braiding. The small imperfections from their help are what will make you smile when you pull it out next year.
- Perfectly even spacing between stitches.
- A tight, sturdy construction that doesn’t feel loose.
The secret for machine-sewn rope baskets? A walking foot attachment and a heavy-duty needle (size 100/16). The walking foot feeds the bulky layers of rope evenly, preventing puckering, while the strong needle punches through without breaking.
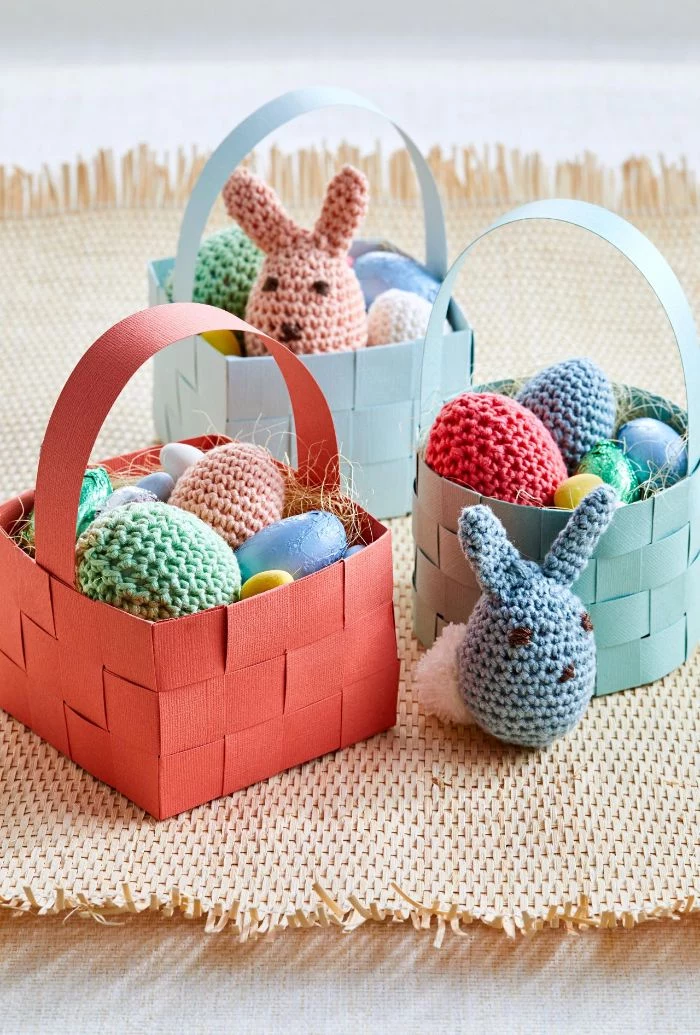
Upcycled T-Shirt Yarn: Soft, stretchy, and colorful. Cut old t-shirts into a continuous strip to create yarn. It’s perfect for crocheted or finger-knitted Easter baskets that are incredibly soft to the touch.
Natural Jute or Sisal Rope: For a rustic, farmhouse aesthetic. It’s stiffer to work with than cotton but creates a very rigid and durable basket. The natural texture pairs beautifully with simple linen or canvas accents.
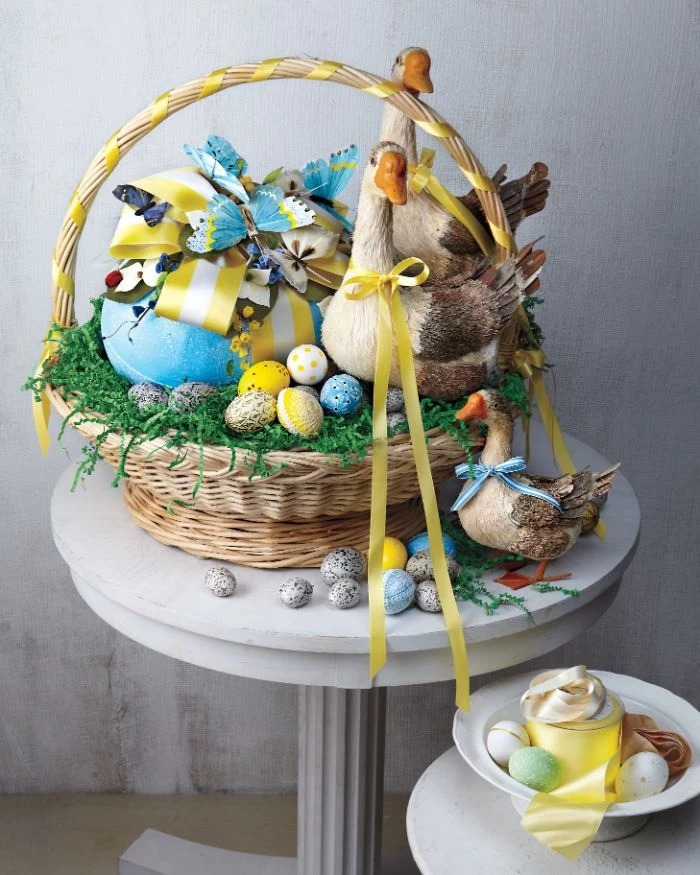
The final, often-overlooked detail is scent. Before adding the filler grass, tuck a small sachet of dried lavender or a few cotton balls with a drop of vanilla essential oil at the bottom. This subtle fragrance creates a delightful sensory surprise when the basket is opened on Easter morning.