My Workshop Secrets for Awesome (and Easy) Family Easter Crafts
For what feels like a lifetime, I’ve had the absolute joy of running craft workshops for families. I’ve seen that priceless look on a kid’s face when they transform a heap of paper and glue into a charmingly lopsided bunny. But oh yeah, I’ve also seen the meltdowns when a project just isn’t working out. So, this guide is packed with all the little secrets I’ve picked up along the way.
In this article
This isn’t about making decorations that look like they came straight from a fancy store. Nope. It’s all about the fun of making stuff together, picking up a few new skills, and, honestly, embracing the happy mess that’s bound to happen.
First, we’ll tackle the basics: how to set up your crafting zone, pick the right supplies without getting overwhelmed, and understand why some glues are magic and others are… well, not. Then, we’ll dive into some classic projects. I’ll give you the step-by-step, the troubleshooting tips I’ve learned from seeing it all, and some easy ways to tweak each craft for different ages. This is the exact advice I share with families at my workshop tables.
1. The Foundation: Your Crafting Zone & Supplies
Before you even dream of pompoms or paper plates, a little prep can make all the difference. A great craft session starts with a smart setup. It’s the secret to keeping stress low and the fun factor high.
Setting Up for Success
First thing’s first: pick a dedicated spot. The kitchen table is usually a winner. Go ahead and cover it with an old plastic tablecloth or a few layers of newspaper. This one simple step totally removes the fear of spills and stains, which I swear is the number one fun-killer for parents. When you’re not worried about the table, you’ll be way more relaxed about letting the kids really experiment.
Keep a roll of paper towels and a damp cloth handy, because sticky fingers are a guarantee. Having a little cleanup station right there makes it a total non-issue. Heads up! For the really messy stuff involving paint or starchy glue, I highly recommend putting an old sheet or a plastic drop cloth on the floor. It’ll save you from scrubbing on your hands and knees later.
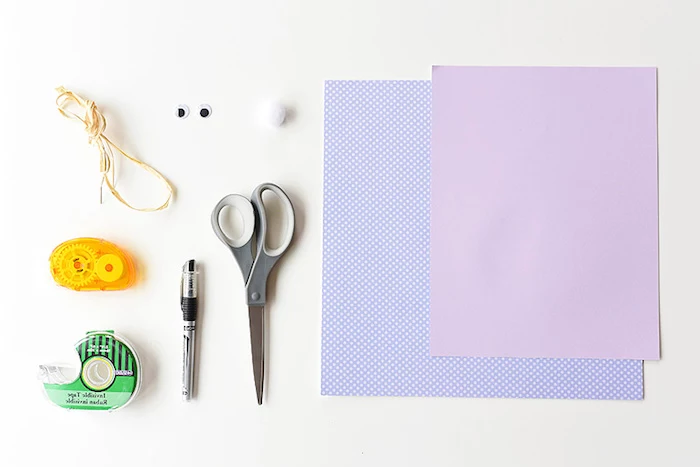
Let’s Talk Tools and Materials
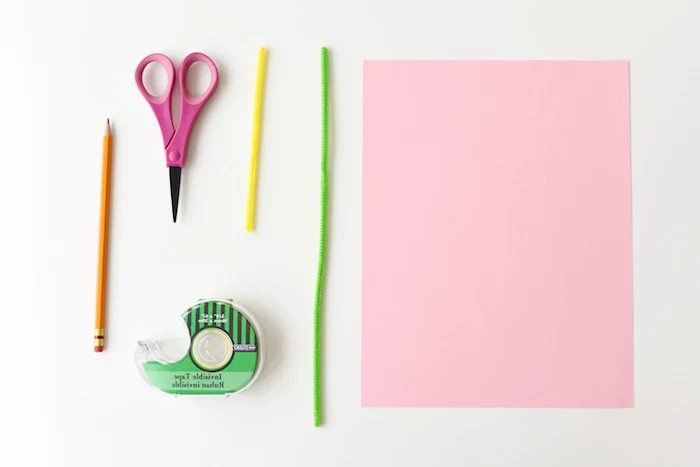
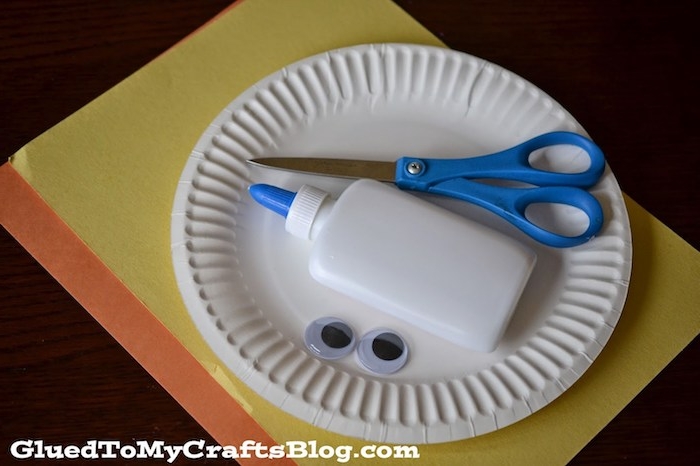
Walking into a craft store can feel like a sensory overload. Let’s break down the essentials you actually need. Using the right tool for the job is a fantastic lesson to teach kids from the get-go.
The Right Glue for the Job
Okay, let’s have a real chat about adhesives, because this is where a lot of projects fall apart (literally). There’s a glue for every purpose, and knowing the difference is a game-changer.
- All-Purpose White Glue (PVA): This is your classic, non-toxic workhorse. It’s perfect for paper, cardboard, and most lightweight embellishments. For covering bigger areas, you can thin it out with a little water (about 4 parts glue to 1 part water) to make it more spreadable. Its only downside? It needs time to dry. We’re talking several hours for a really solid bond, so patience is a must. You can grab a big bottle for under $5, and it’ll last you a while.
- Glue Sticks: These are fantastic for paper-on-paper projects and are the best choice for toddlers and little kids because they’re so low-mess. Just know their limits. They don’t have the muscle to hold heavier things like pompoms, buttons, or fabric.
- Hot Glue Gun (Adults Only!): This is the tool for an almost instant, super-strong bond. It’s my go-to for attaching 3D objects, like sticking a pompom tail on a cardboard bunny. But please, this is strictly for grown-up hands. The tip and the glue get incredibly hot and can cause nasty burns. Always use it with caution and keep it far away from curious little fingers.
Quick Tip for Cleanup: Got that standard white glue on a t-shirt? Let it dry completely, then scrape off as much as you can. Soak the spot in a mix of cool water and a little bit of laundry detergent before tossing it in the wash.
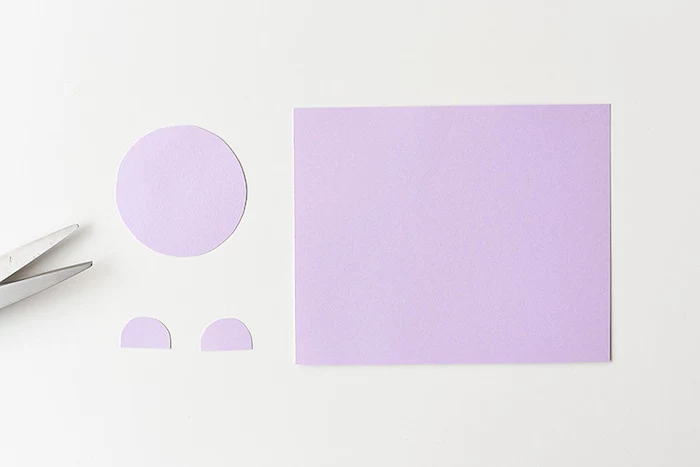
Paper and Cardstock: Your Blank Canvas
- Construction Paper: It’s cheap, it’s colorful, and it’s a kid-craft classic for a reason. Its slightly rough texture is perfect for folding and tearing. Just be aware that its color will fade in direct sunlight, so it’s best for decorations you don’t plan to keep forever.
- Cardstock: This is basically a heavier, sturdier paper that’s great for projects that need to stand up or hold their shape. You’ll see it sold by weight, usually from 65 lb to 110 lb. The 65 lb is great for folding, while the heavier 80-110 lb stuff is what you want for a solid base, like for our Cotton Ball Lamb. For projects you want to keep, look for “acid-free” cardstock to stop it from yellowing over time. You can find packs at any craft store or even places like Target.
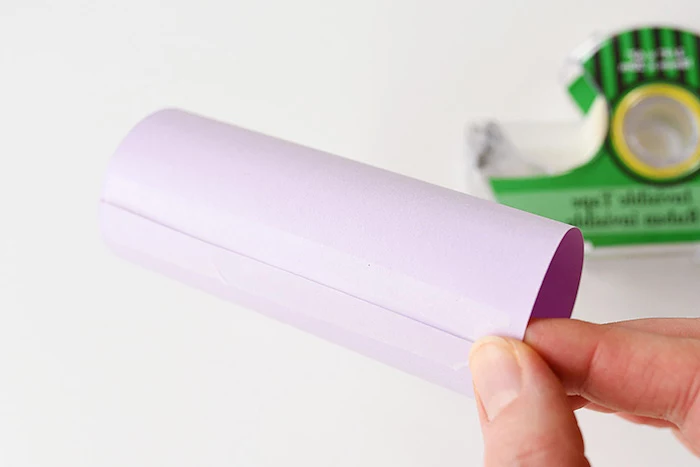
- Recycled Goodies: Don’t forget about the treasure trove in your recycling bin! Toilet paper rolls, egg cartons, and cereal boxes are amazing—and free—resources for building all sorts of things.
Cutting Tools: A Quick Lesson in Safety
- Blunt-nosed Scissors: These are a must-have for kids under 6. They’ll cut paper just fine but are much less likely to cause an injury.
- Pointed Kids’ Scissors: Once kids are around 6-10, these offer more precision for cutting out detailed shapes. Supervision is still your best friend here. A common mistake I see is kids trying to move the scissors around the paper. The real trick? Teach them to hold the scissors mostly still and turn the paper with their other hand. It makes for a much smoother cut.
- Adult Scissors or Craft Knives: For thick cardboard or super-precise cuts, a grown-up should definitely take over. Never, ever let a child use a craft knife.
2. Core Techniques to Level-Up Your Crafts
Before you dive into a whole project, just mastering a couple of simple techniques can make a world of difference. Think of these as the building blocks for just about any craft you can imagine.
The Secret to a Perfect Pompom
A fluffy, dense pompom is a true joy. A sad, sparse one? A total letdown. The secret is all in the wrapping and the knot.
Basically, a pompom is just a bunch of yarn strands cinched together tightly in the middle. The fluffier it is, the more yarn you packed in. Its durability all comes down to how tight you tie that center knot. If it’s loose, the strands will pull right out.
The Foolproof Cardboard Donut Method:
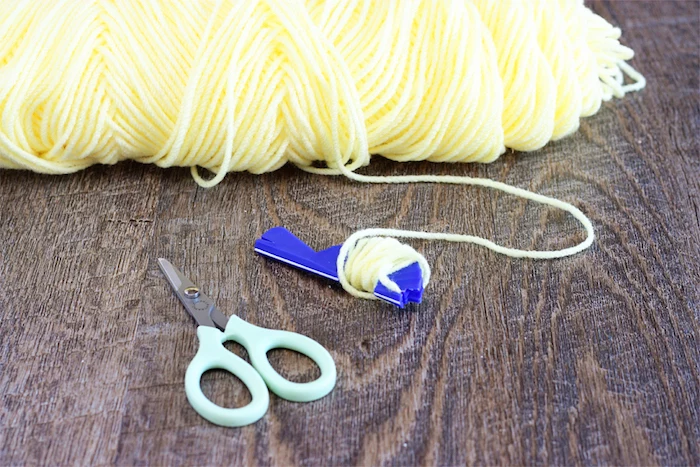
- Make Your Form: Cut two identical donut shapes out of sturdy cardboard (a cereal box is perfect). For a standard 2-inch pompom, I aim for an outer circle of 3 inches and an inner hole of 1 inch. The bigger the cardboard ring, the denser your pompom.
- Wrap It Up: Hold the two cardboard rings together and start wrapping your yarn around them, going from the outside edge down through the center hole. And don’t be shy! For a really dense pompom, you’ll want to wrap it at least 100 times. Keep wrapping until the hole in the middle is almost full. A standard skein of yarn should give you enough for about 10-15 chicks.
- The Big Snip: Carefully slide the tip of some sharp scissors between the two pieces of cardboard. Snip the yarn all the way around the outer edge. The cardboard will hold all the little pieces in place for you.
- The Knot (This is Key!): Cut a separate 12-inch piece of strong string. Slide it between the two cardboard rings, right where you just cut. Pull it as TIGHT as you possibly can and tie a secure double knot. Seriously, get a grown-up to use their muscle on this part. It’s the most important step.
- The Finish: Gently rip and pull the cardboard rings away. Your pompom will look a bit wild. Just fluff it up and give it a little haircut, trimming any scraggly ends until it’s a nice, round ball.
Troubleshooting: If your pompom falls apart, the center knot wasn’t tight enough. If it looks gappy and sad, you didn’t wrap enough yarn. Simple as that!
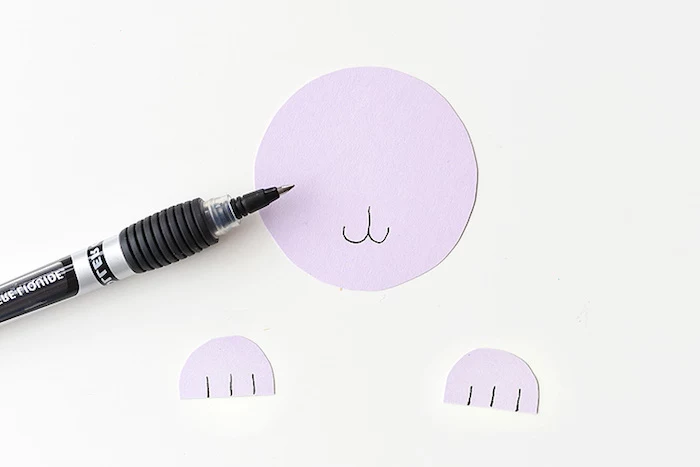
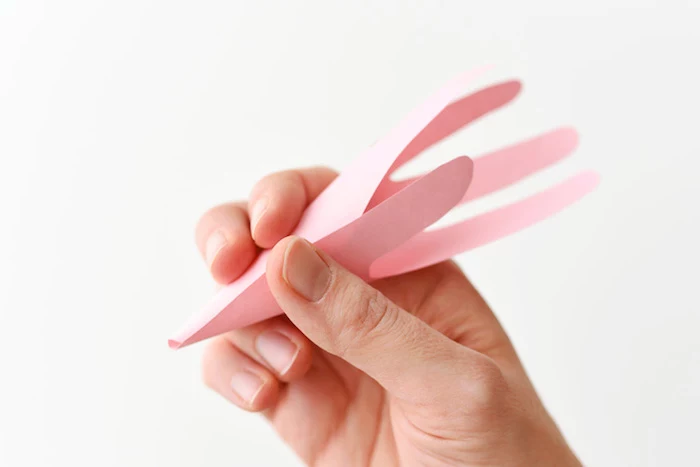
Mastering Folds and Curls
Want your paper crafts to look clean and polished? The trick is to score the paper before you fold it. Just take a ruler and a blunt tool—like a butter knife or a dried-up ballpoint pen—and press firmly along the line you want to fold. This creates a perfect channel that makes folding a breeze. It’s a game-changer.
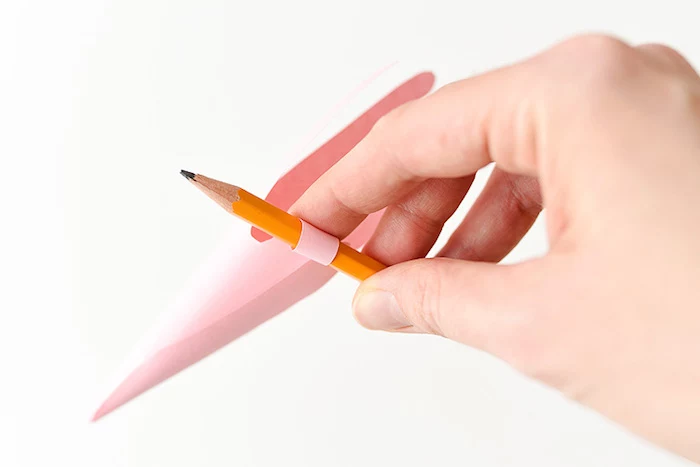
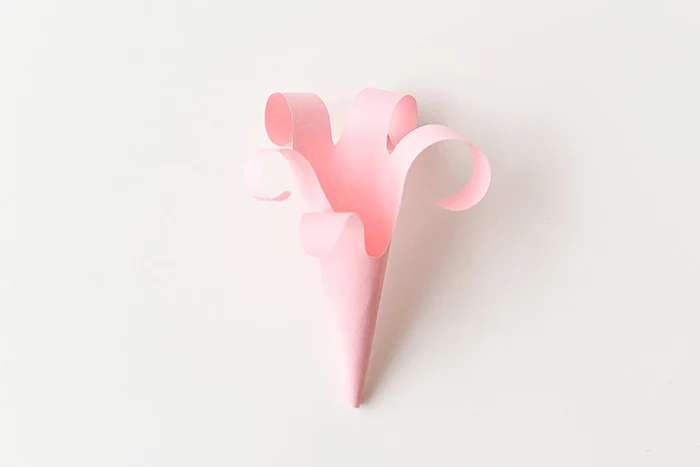
And for creating those cute, natural-looking curls for whiskers or petals? Don’t just crease the paper. Gently wrap the paper strip around a pencil, hold it for a few seconds, and then slide it out. Voila! A soft, lasting curl.
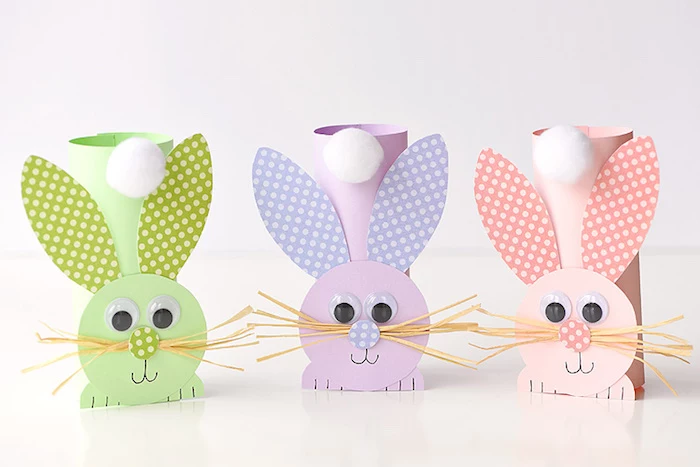
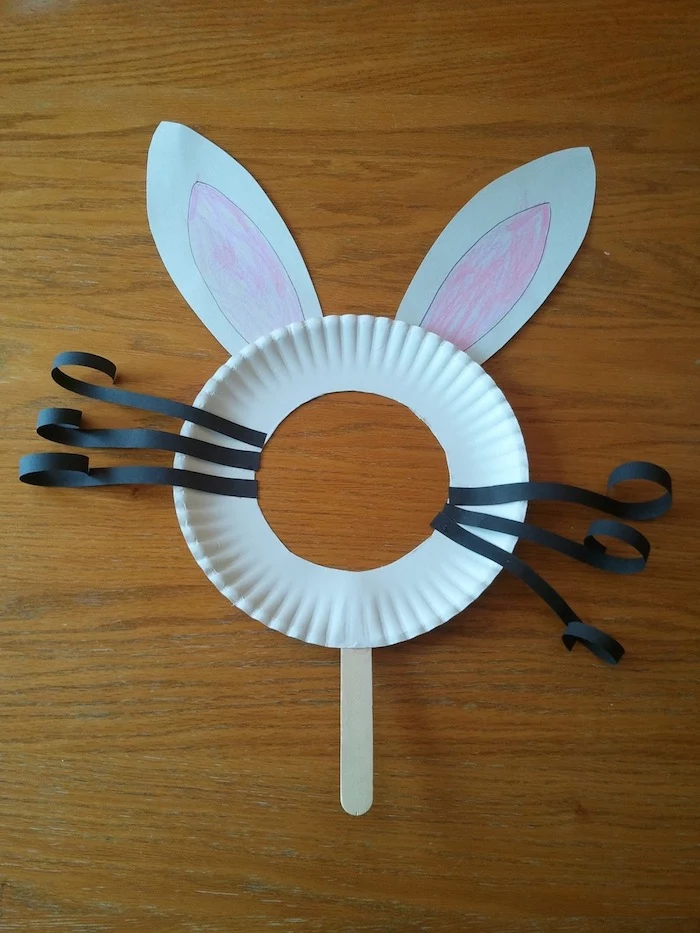
3. Our Favorite Easter Craft Projects
Okay, let’s put those skills to use! I’ve picked a few classic Easter crafts and broken them down with all the little details you won’t get from a quick blog post.
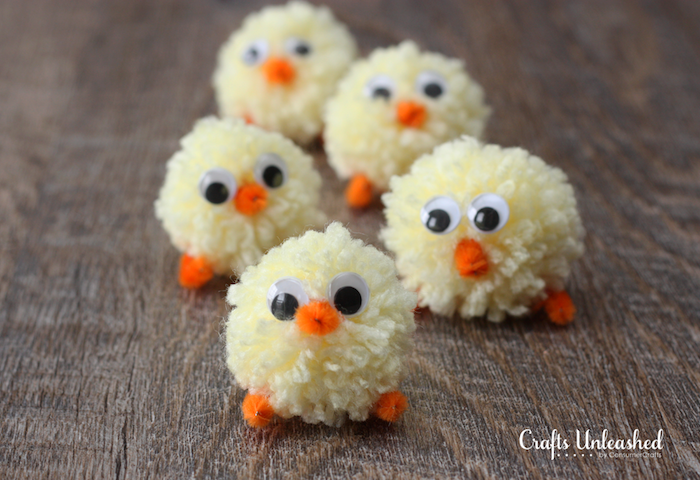
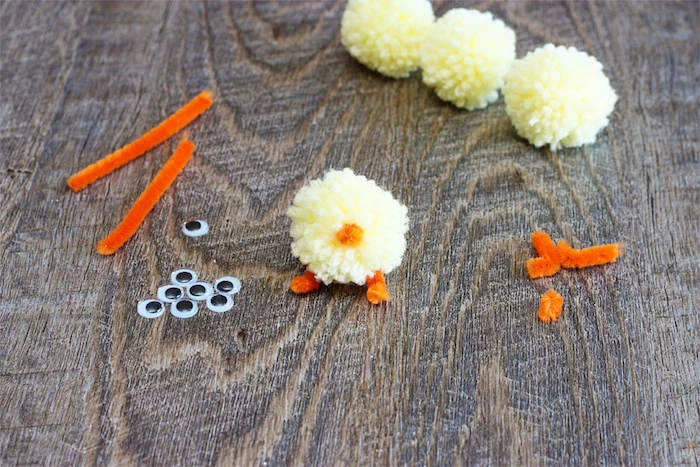
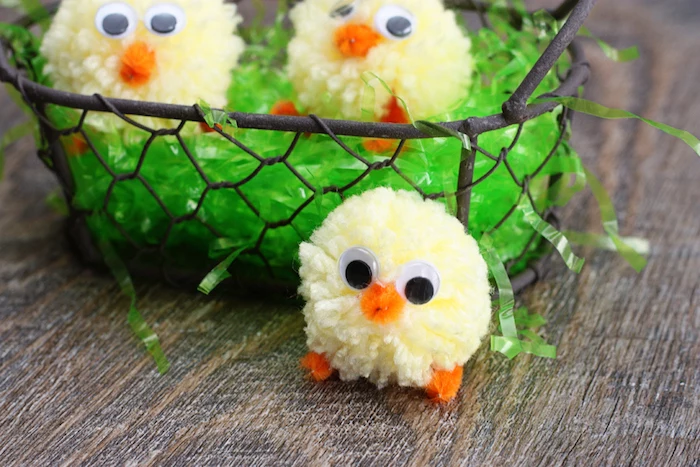
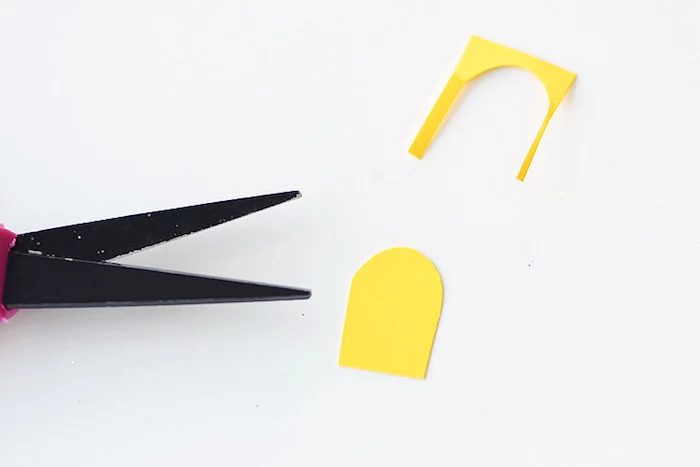
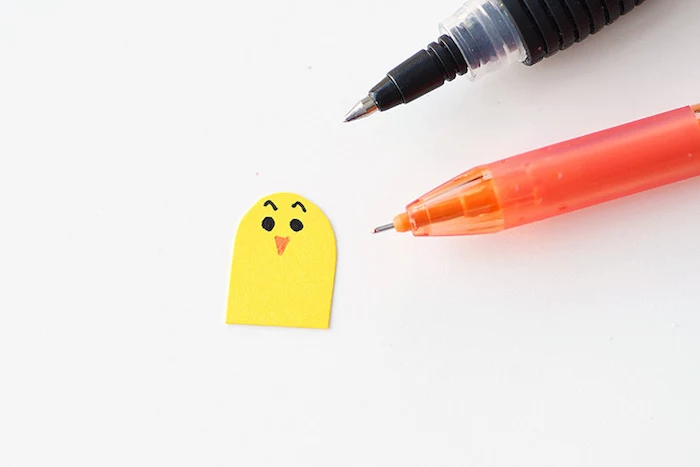
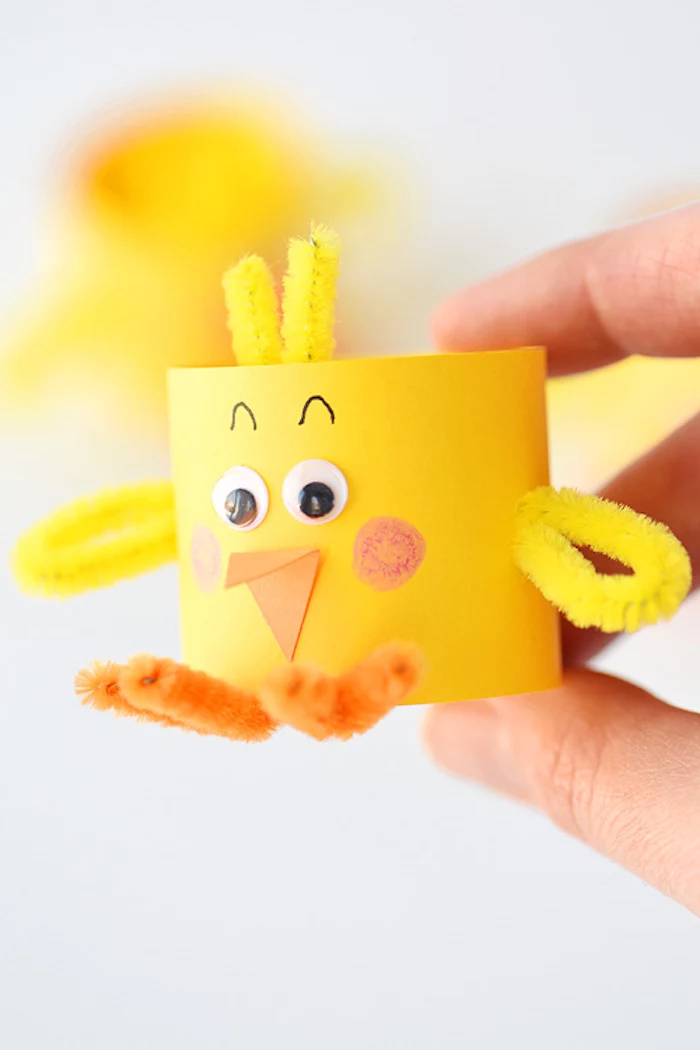
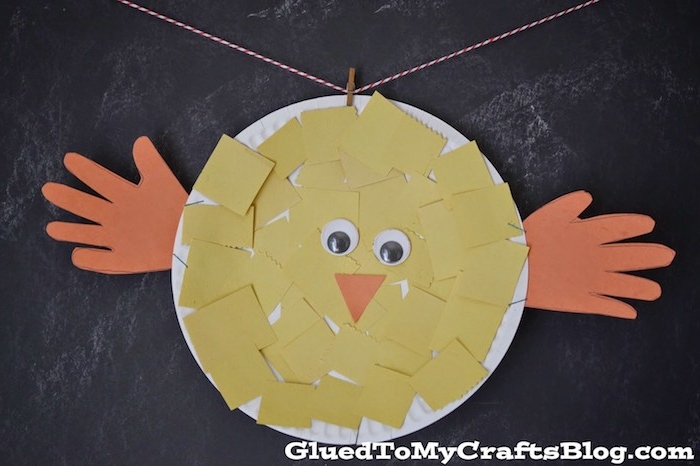
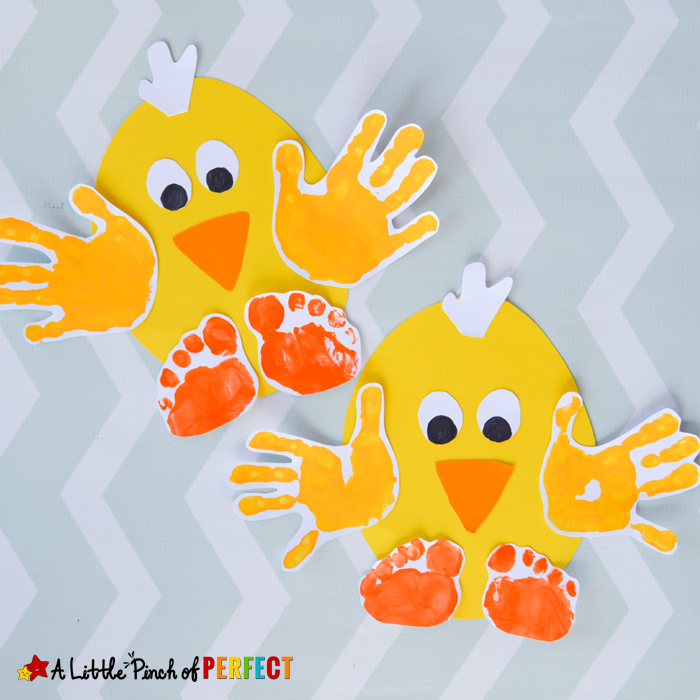
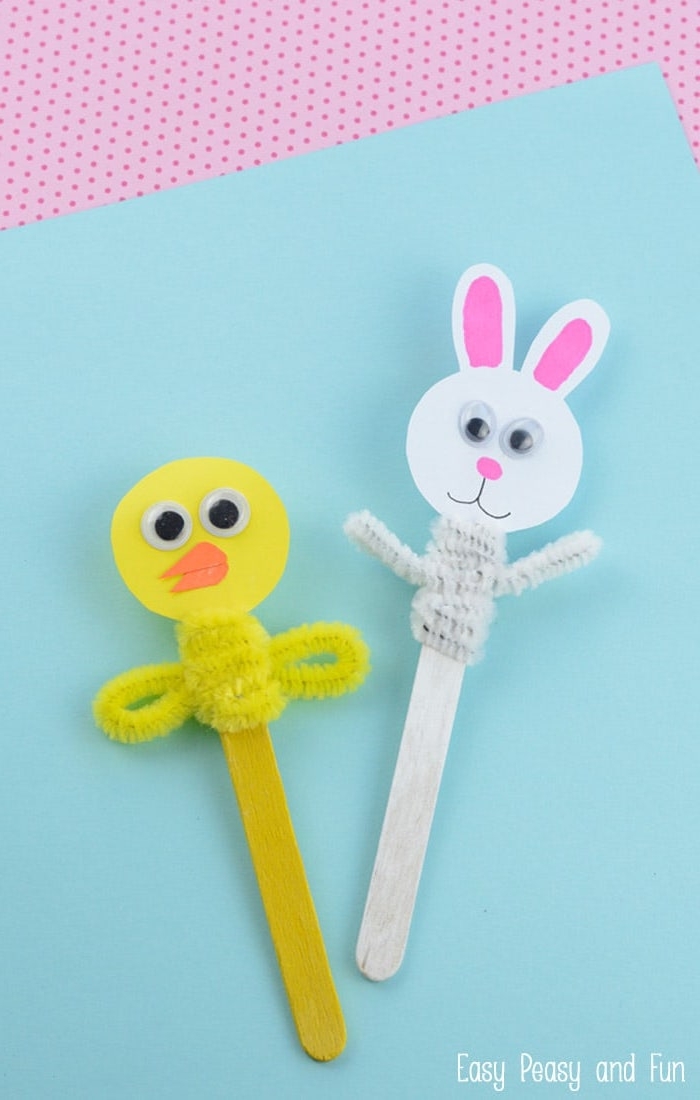
Project 1: The Adorable Pompom Chick
This is a workshop all-star. It’s quick, cute, and combines different textures, making it great for developing fine motor skills.
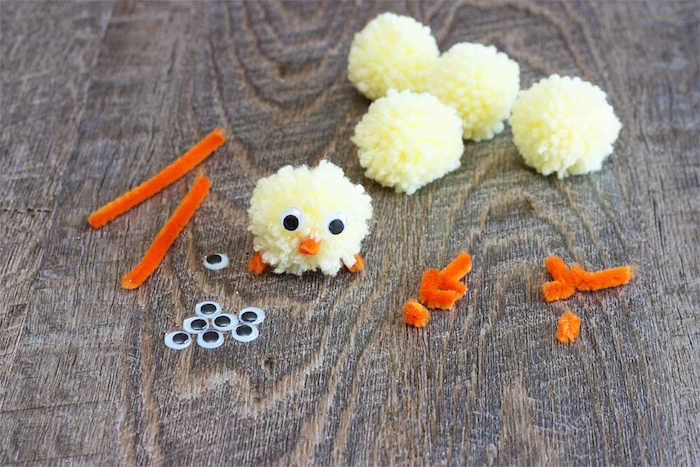
- Skill Level: Ages 5+ (with adult help for the pompom knot and any hot gluing).
- Time Estimate: 20-30 minutes per chick.
- What it’ll cost you: Under $5 if you already have glue. A skein of yellow yarn is usually just a few dollars.
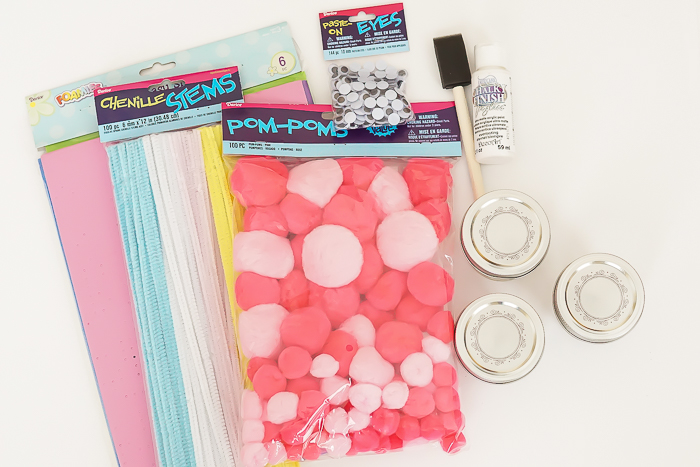
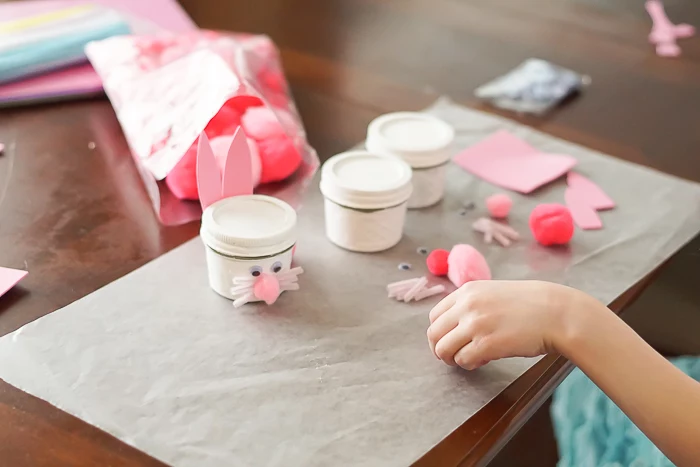
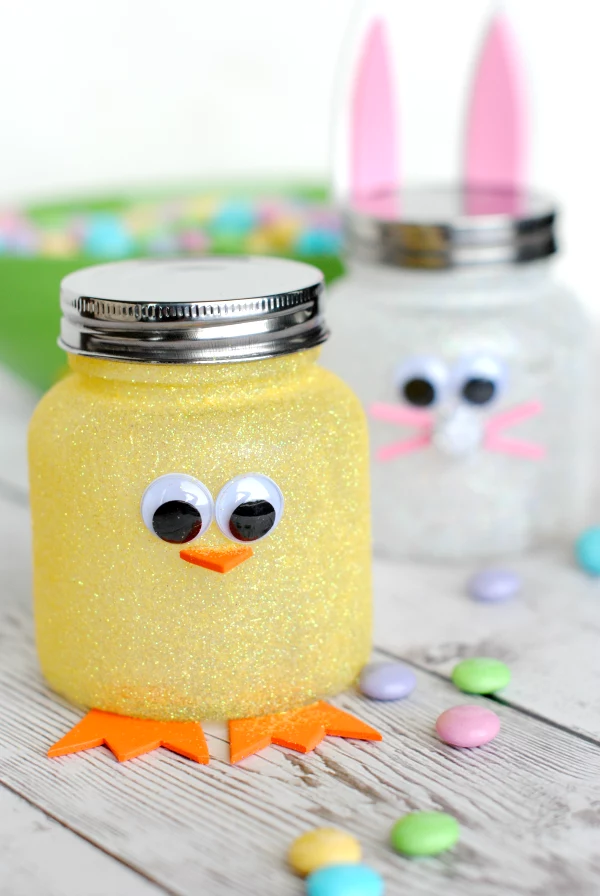
- Materials: Yellow yarn, sturdy cardboard, sharp scissors, orange pipe cleaners, small googly eyes, white glue or a hot glue gun (for adult use).
- Toddler Task: While older kids make the pompom, a toddler can be in charge of picking out the googly eyes or handing you the pre-cut pipe cleaner pieces.
Instructions:
- Make Your Pompom: Follow the method above to create a dense, 2-inch yellow pompom. Remember to pull that center knot super tight!
- Form the Beak & Legs: Cut a 1-inch piece of orange pipe cleaner and fold it into a ‘V’ for the beak. Cut a 3-inch piece and bend it into a wide ‘M’ for the legs.
- Assembly Time: Part the yarn fibers on your pompom to find the dense center. For a kid-safe version, use a generous dot of white glue and press the beak and legs into it. For an instant, rock-solid bond, an adult can use a hot glue gun.
- Final Touches: Add two googly eyes with a tiny speck of white glue. If you used white glue for assembly, let the chick sit undisturbed for at least an hour to fully set. Patience is key!
Pro Tip: If you’re making a whole flock, work assembly-line style! Make all your pompoms first, then cut all your beaks and legs, then do all the gluing at once. It’s so much faster.
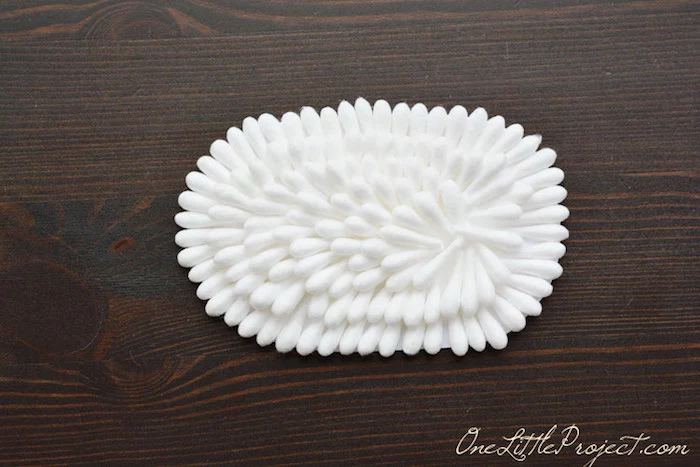
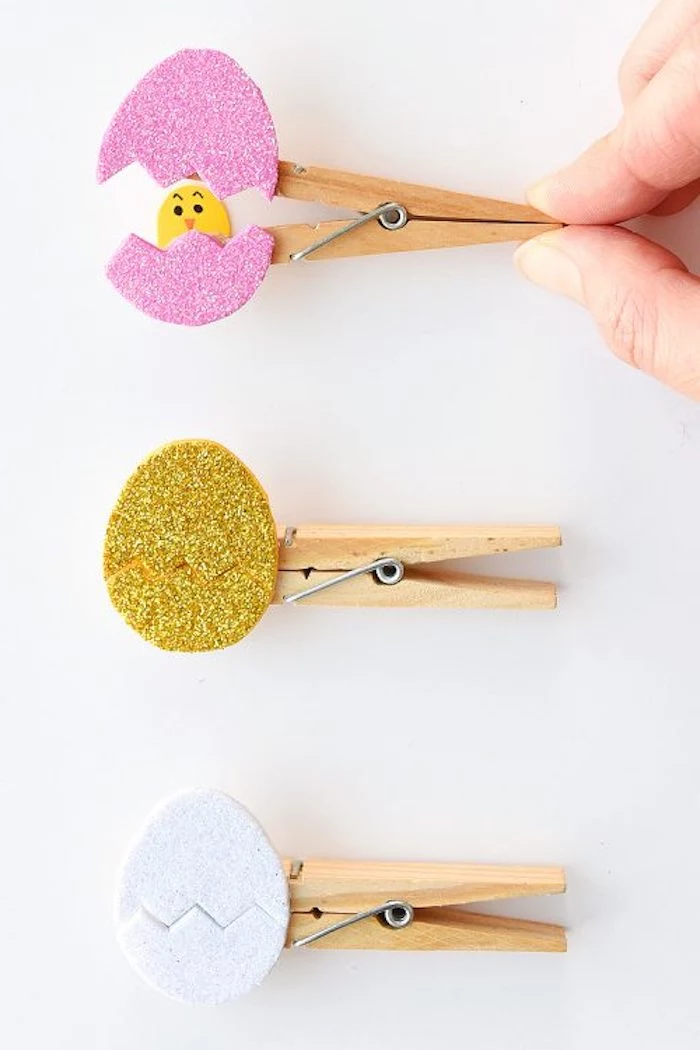
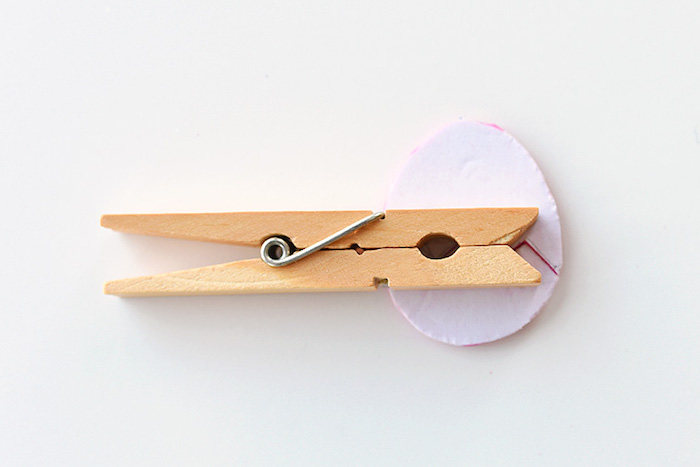
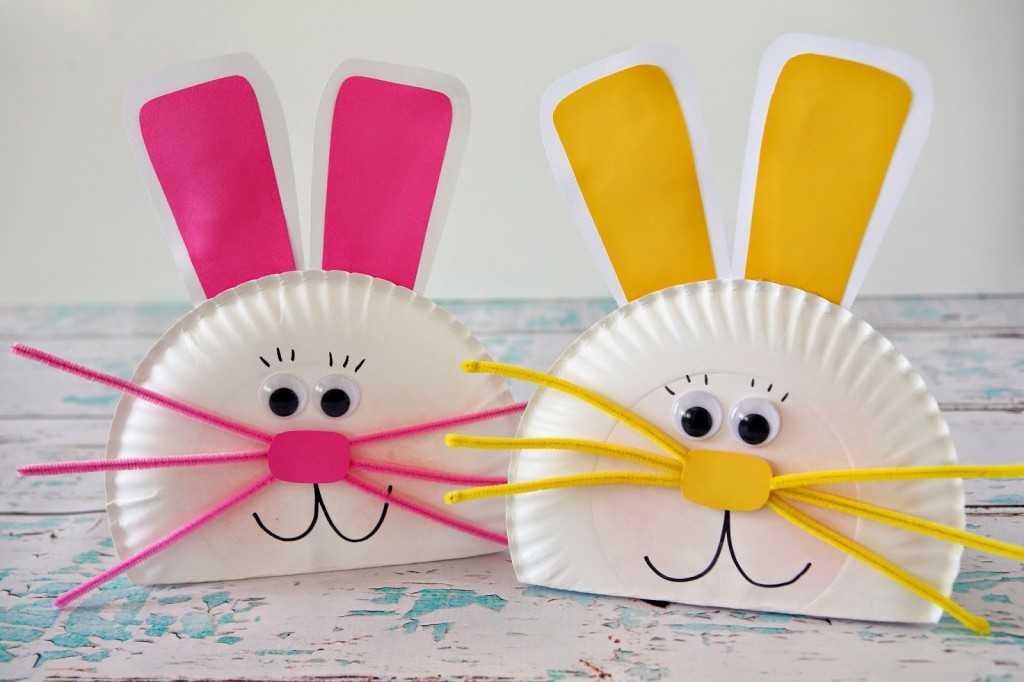
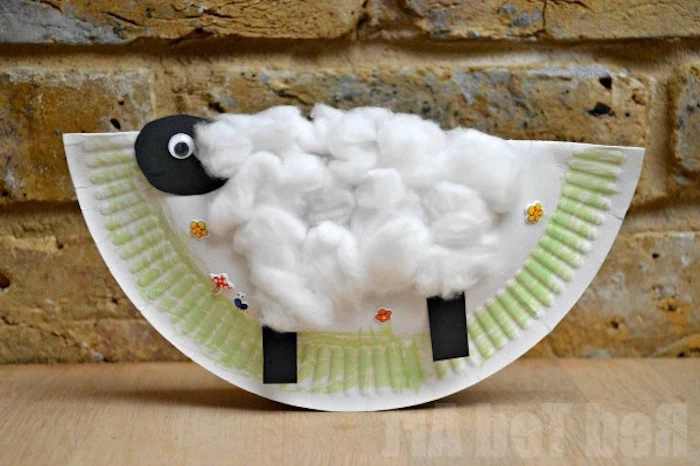
Project 2: The Fluffy Cotton Ball Lamb
This craft is a fantastic sensory activity for younger kids and, with a few tricks, can be made surprisingly charming.
- Skill Level: Ages 4+ (with adult help for cutting the cardboard).
- Time Estimate: 25-35 minutes.
- What it’ll cost you: Probably under $3. You’re just using cardstock, cotton balls, and clothespins.
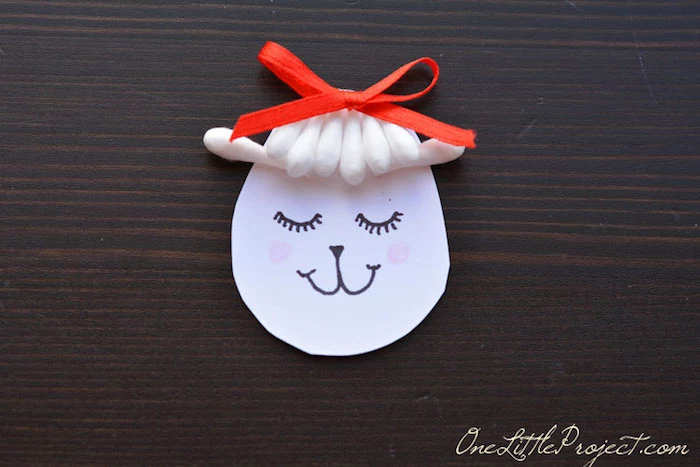
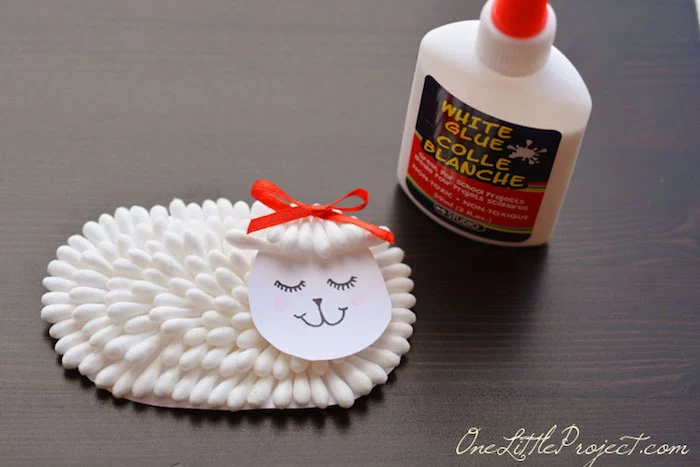
- Materials: A sheet of heavy white cardstock (80 lb or so), about 15 jumbo cotton balls, two wooden clothespins, white glue, and a black marker.
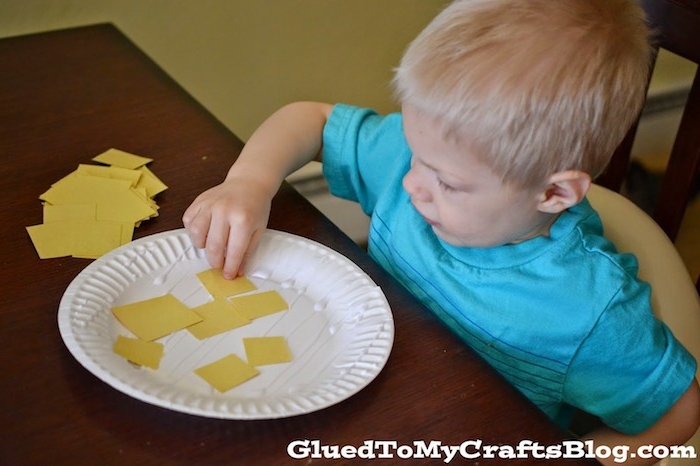
- Toddler Task: This is their moment to shine! Their job can be to pull the cotton balls apart to make them fluffy or to stick the fluffed cotton onto the gluey body.
Instructions:
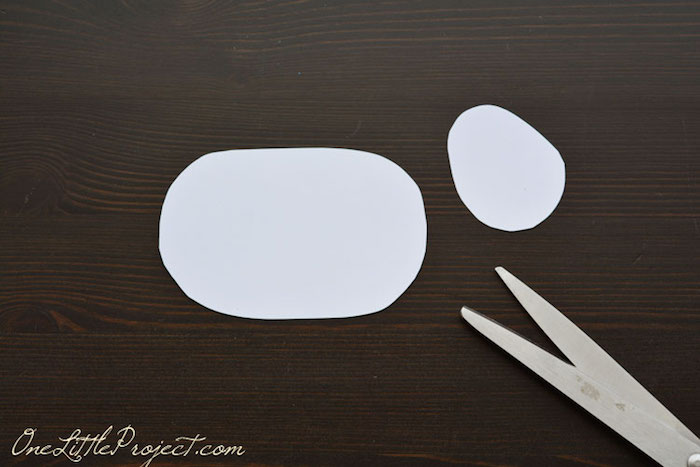
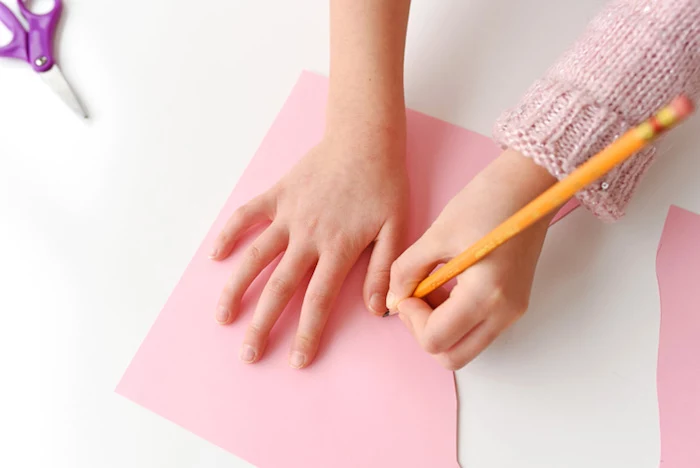
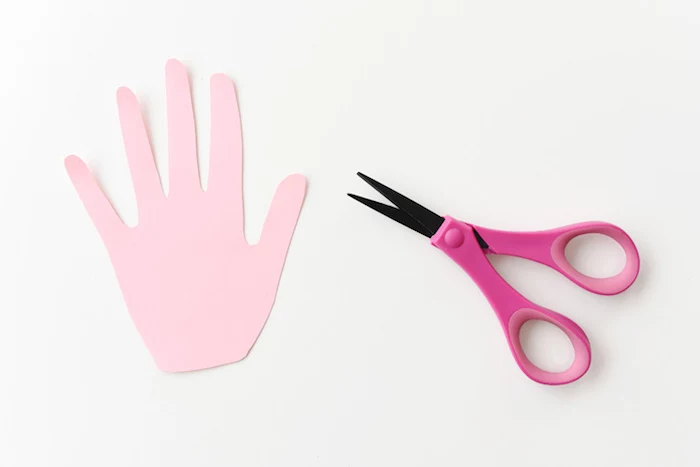
- Create the Body & Head: On the cardstock, draw and cut out a fluffy, cloud-like shape for the body (about 5 inches long) and a smaller oval for the head (about 2 inches). Pre-cutting these is a great prep step for younger kids.
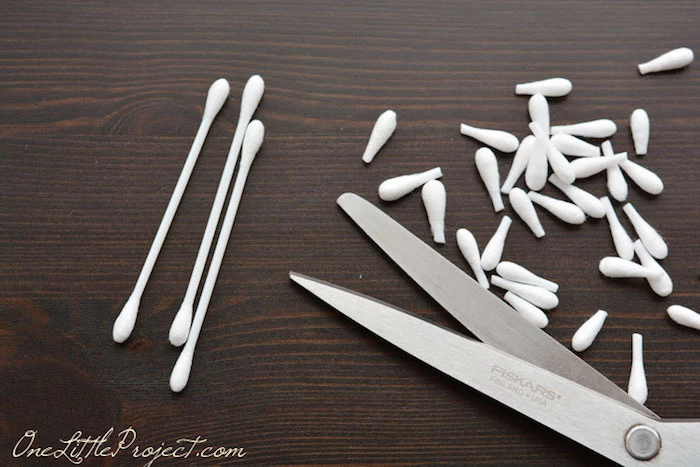
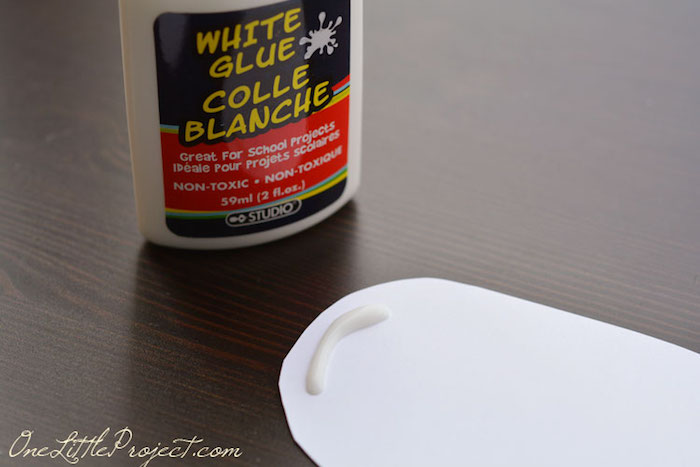
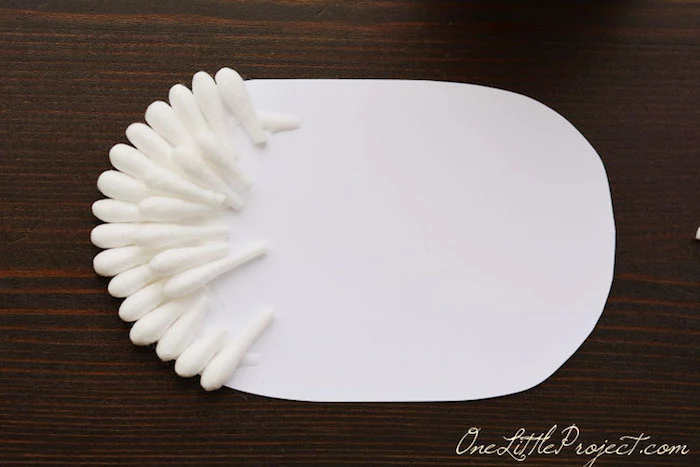
- Build the Woolly Coat: Now for the fun part. Spread a thin layer of white glue on the body. Gently pull the cotton balls apart to make them fluffier and press them onto the glue, overlapping them a bit so no cardstock shows through. This gives it a much richer ‘fleece’ texture.
- Make the Face: On the smaller head shape, draw a simple face with a black marker. Glue a couple of cotton wisps to the top of its head for a fluffy hairdo.
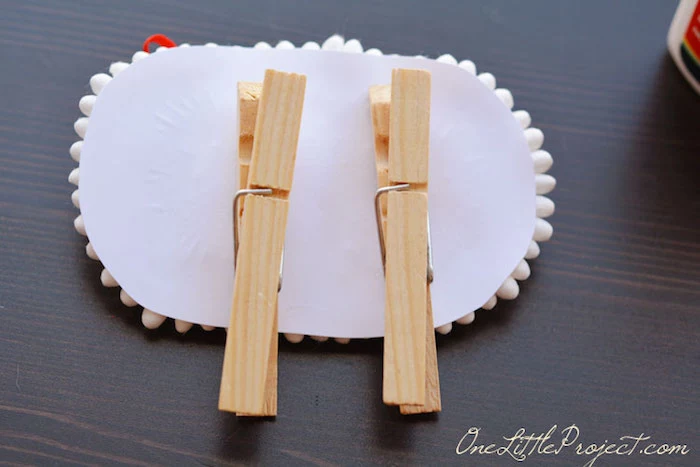
- Assemble the Lamb: Glue the head onto the body. Now, for the legs, apply a thick line of glue along the top of each clothespin and press them onto the back of the lamb.
Lesser-known Trick: Clothespin legs can get wobbly and dry crooked. A common mistake is just leaving it to dry. Instead, lay the lamb on its back for at least two hours so gravity helps create a strong bond. For a super-stable lamb, clip a binder clip across the two clothespins while they dry to hold them perfectly parallel!
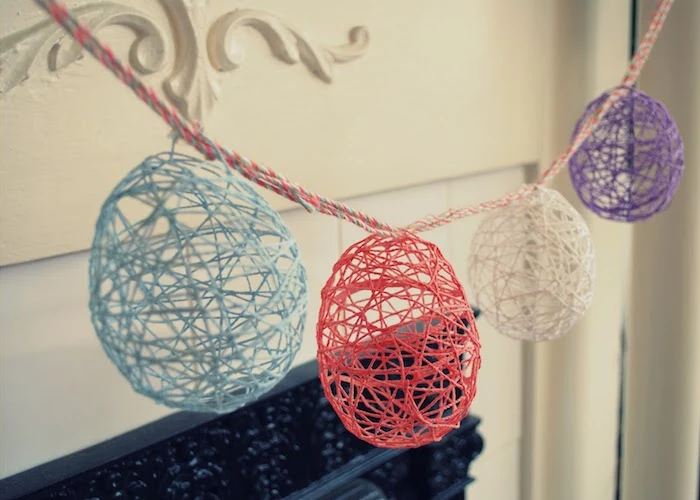
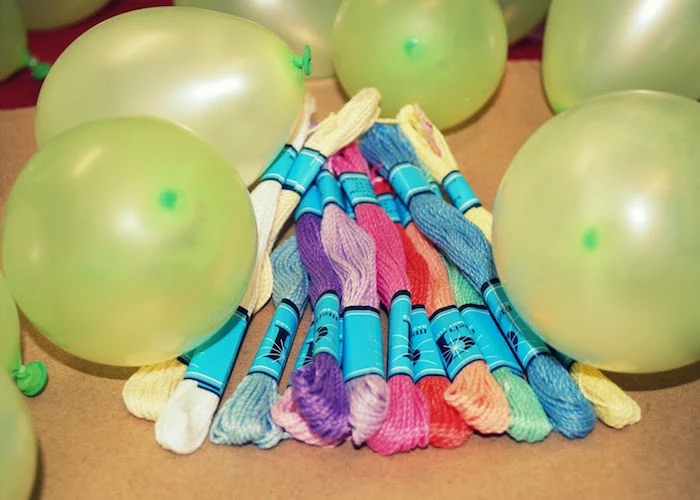
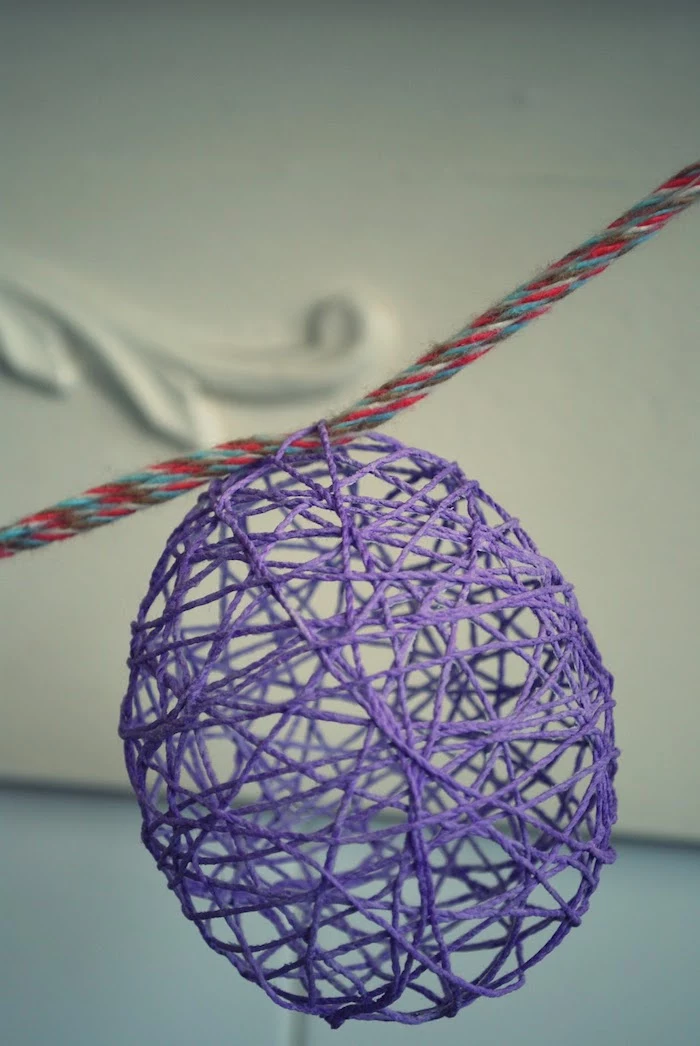
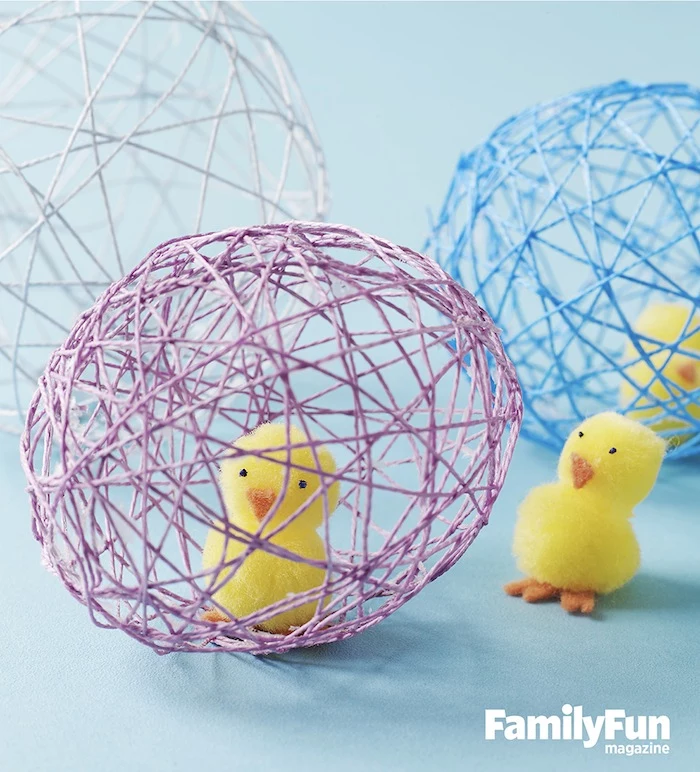
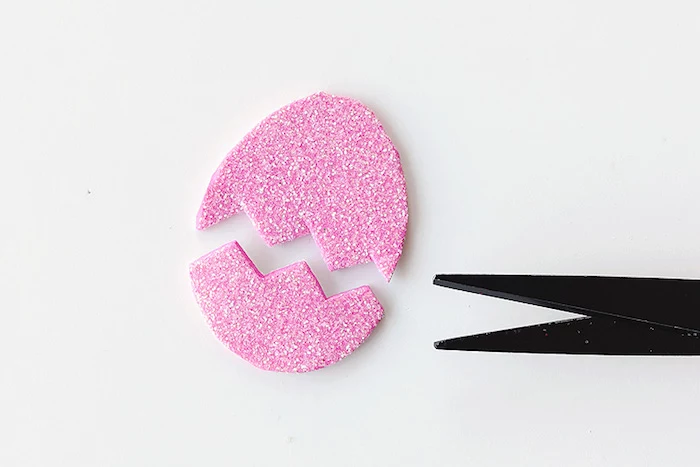
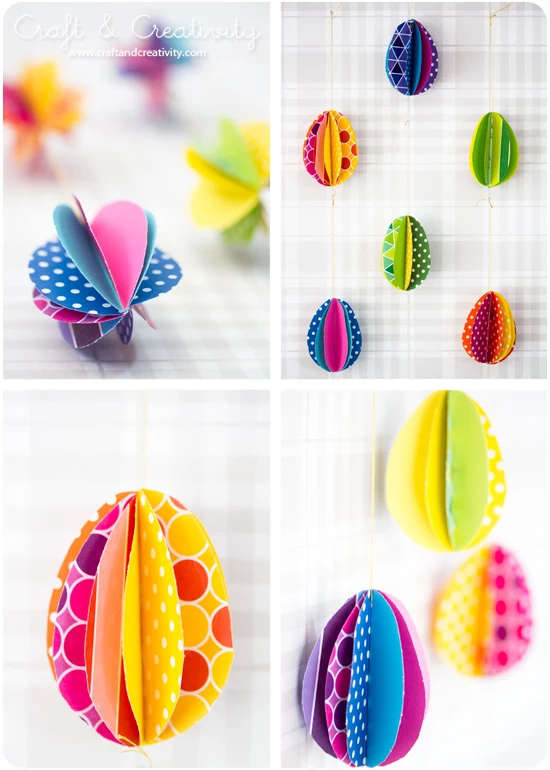
Project 3: Magical Thread-Wrapped Eggs
This project is messy, magical, and a fantastic lesson in basic science. It looks impressive, but the process is actually pretty simple… it just requires patience.
- Skill Level: Ages 8+ (needs a bit of dexterity).
- Time Estimate: 30 minutes of active work, but a full 24 hours of drying time.
- What it’ll cost you: Around $10 for balloons and a few colors of crochet thread.
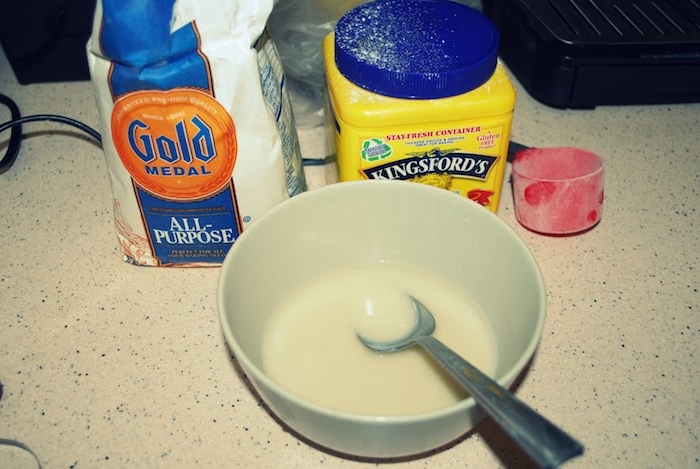
- Materials: Small water balloons, cotton crochet thread or embroidery floss, cornstarch, water, and a disposable bowl.
- Toddler Task: They can help pick the thread colors and watch the magic happen!
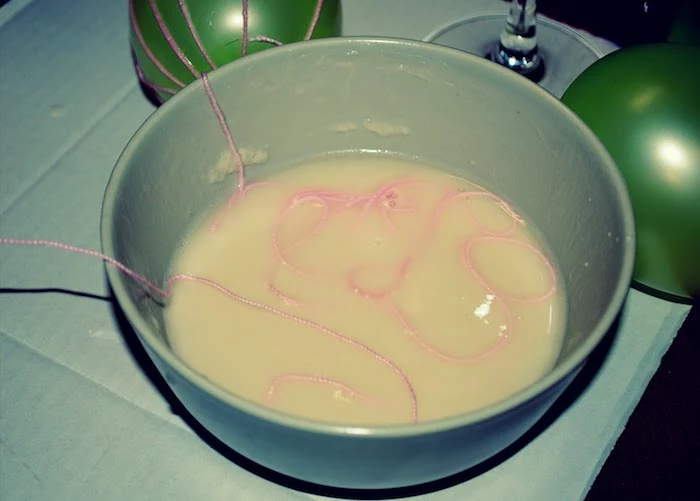
The Science-y Bit: We’re basically making a simple composite material. The starchy glue soaks into the cotton thread, and as the water evaporates, the starch hardens around the thread, creating a rigid, lightweight shell.
Instructions:
- Prep Your Glue: In a disposable bowl, mix about a half-cup of cornstarch with a quarter-cup of water until you get a smooth paste, like thin pancake batter. No cornstarch? No problem. A mix of 2 parts white glue to 1 part water works great, too!
- Inflate the Balloons: Blow up a few small balloons until they’re about the size of an egg.
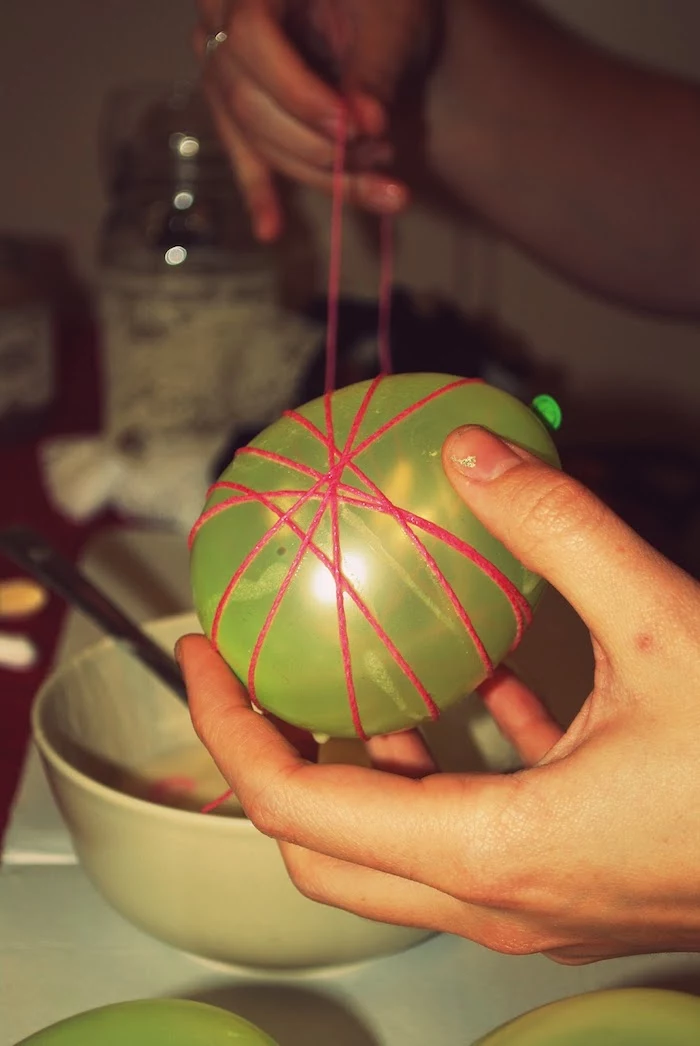
- Get Messy: Unwind a long piece of thread (5-6 feet) and dunk it in the glue mixture. Squeegee the excess off with your fingers, then start wrapping the sticky thread all around the balloon in a random pattern. Over, under, diagonally—the more it crisscrosses, the stronger the shell will be.
- Dry Completely: Tie a clean string to the balloon knot and hang them up to dry. Put newspaper underneath to catch drips. They need to dry for at least 24 hours until they’re totally stiff. Don’t rush this!
- The Big Reveal: Once they’re bone dry, use a pin to pop the balloon! It will pull away from the inside, and you can carefully fish it out through one of the gaps.
Cleanup & Troubleshooting: I learned this the hard way. If you pop the balloon before the shell is 100% dry, it will collapse. It’s a total bummer. Patience is the only fix. To clean up the starchy glue, just use warm, soapy water. It dissolves easily.
4. Final Thoughts on Fun and Safety
The whole point here is to make happy memories, and a big part of that is making sure everyone stays safe and has a good time.
Safety First, Always
- Supervision is Key: An adult should always be actively watching, especially with little ones.
- Choking Hazards: Googly eyes, beads, and other tiny bits are a risk for kids under 3. For toddlers, just draw the faces on with a marker instead.
- Tool Rules: Manage the scissors, and keep hot glue guns and craft knives in grown-up hands only.
A Quick Word on Perfection
From all my years teaching, the single most important lesson I can share is this: please let go of the idea of a perfect result. A kid’s creation is supposed to have crooked lines, way too much glue, and lopsided features. That’s not a flaw; it’s the signature of their own creativity. The real value is the time you spend together and the pride they feel in making something all by themselves.
So embrace the beautiful, happy mess. That’s where the best memories are made.
And hey, I have a little challenge for you: try making a craft using ONLY recycled materials from this guide! Show me your toilet paper roll bunnies or your cereal box creations. I’d love to see them! #HappyMessCrafts
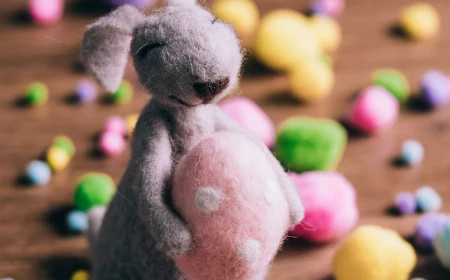
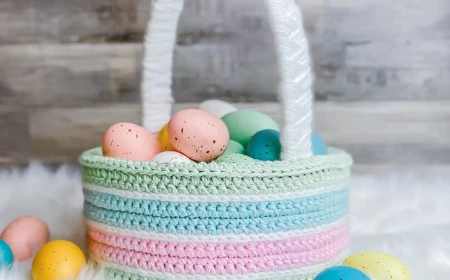
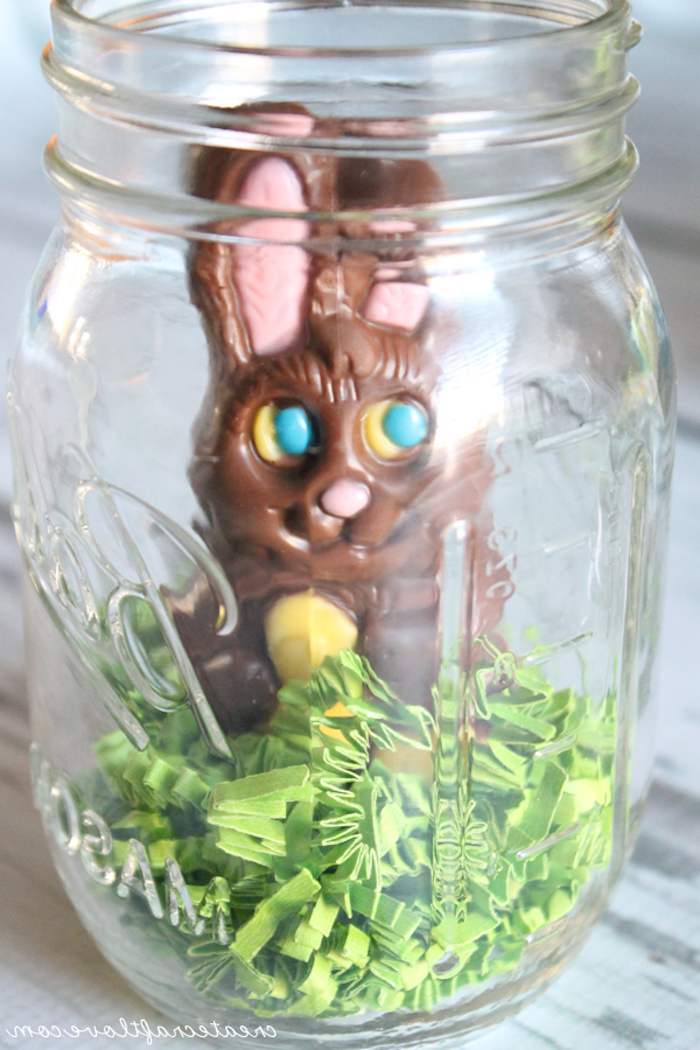
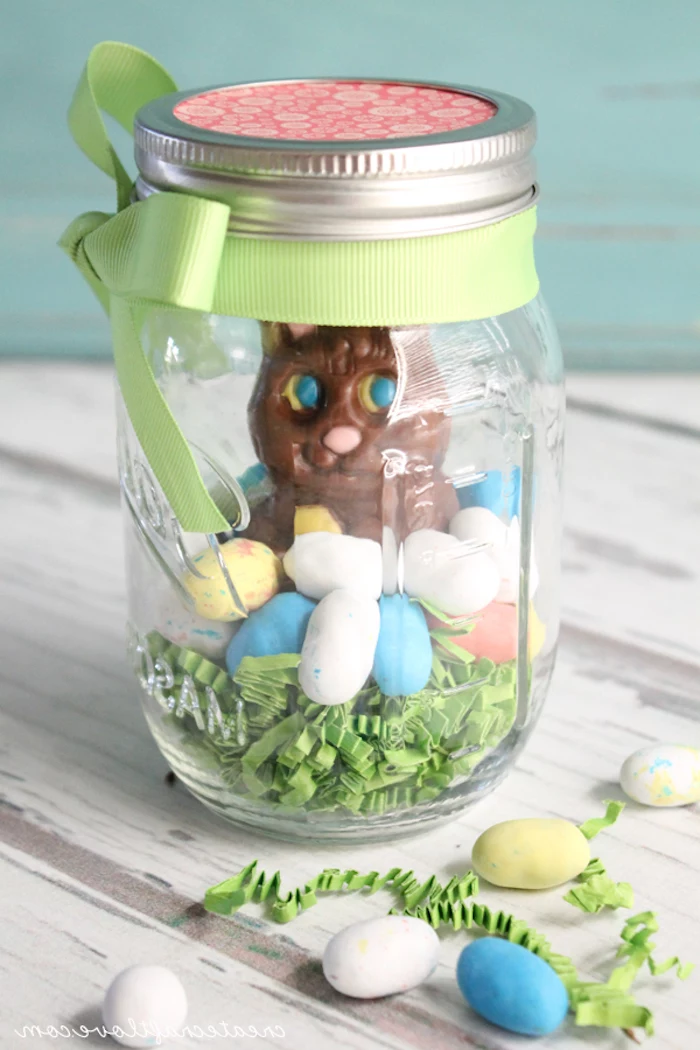
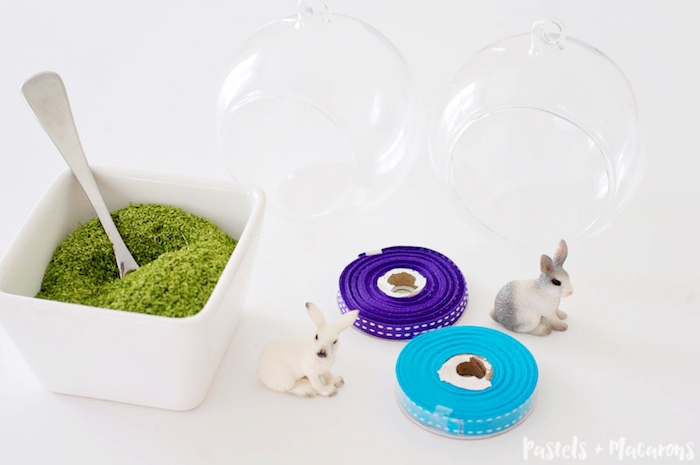
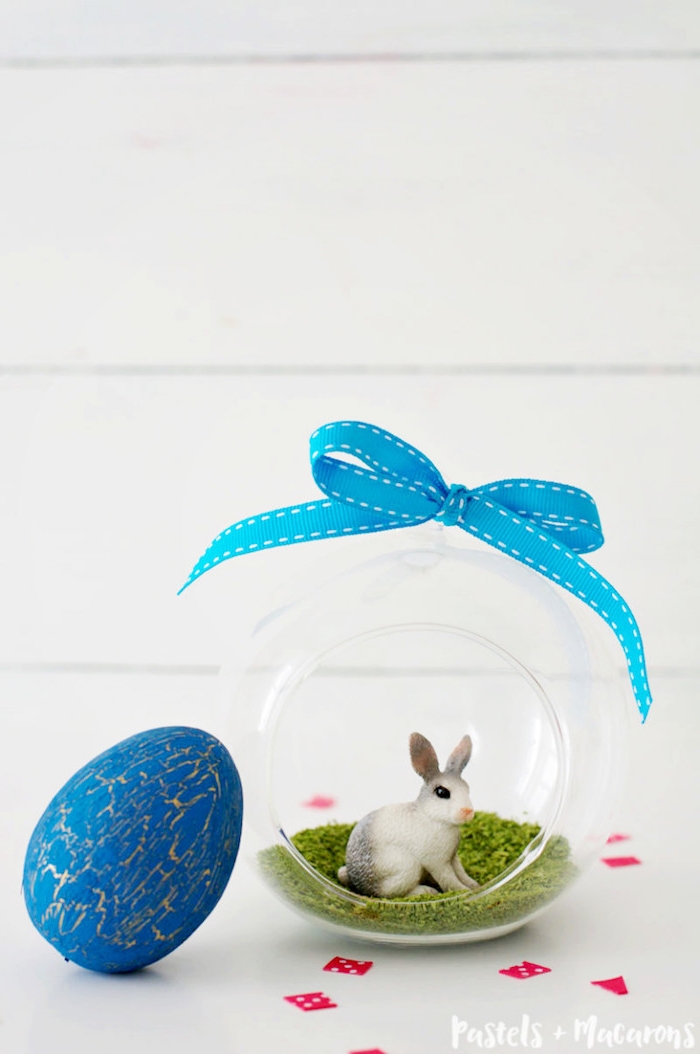
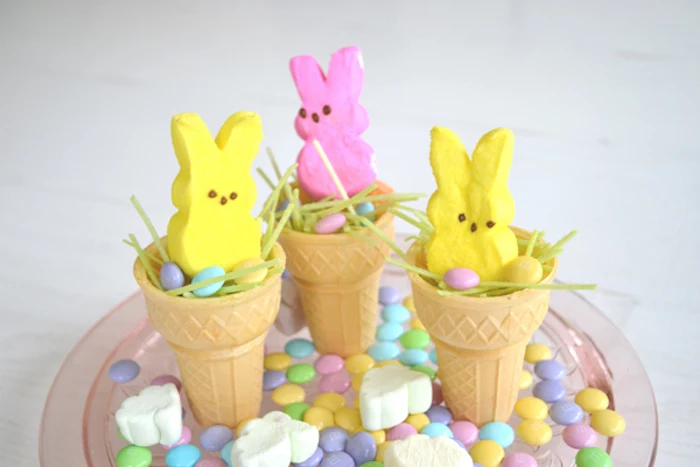
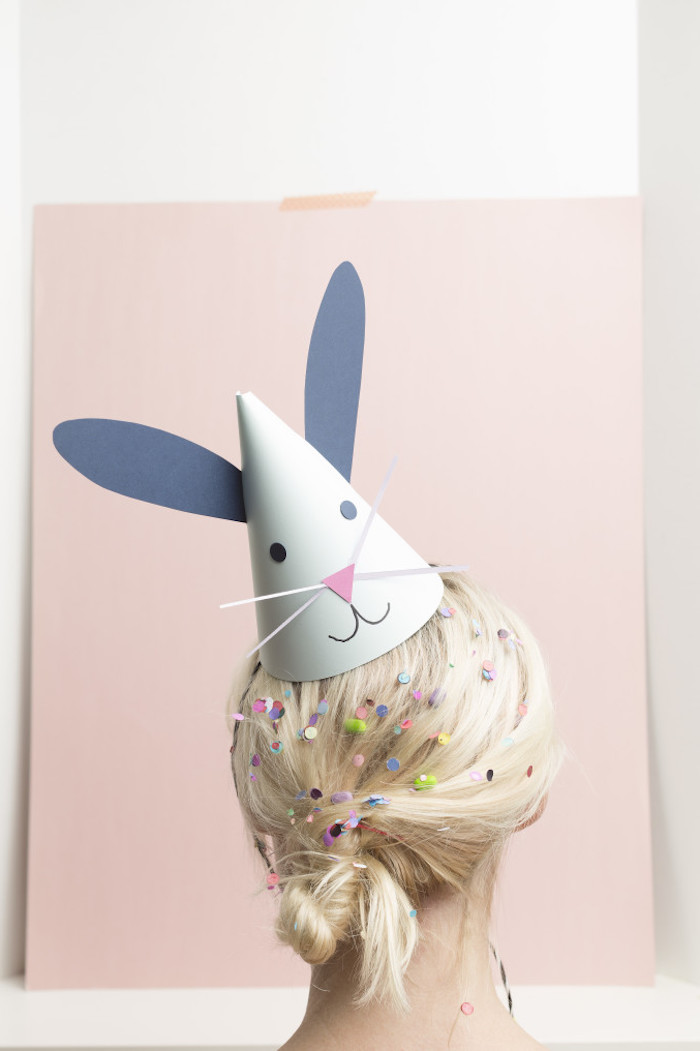
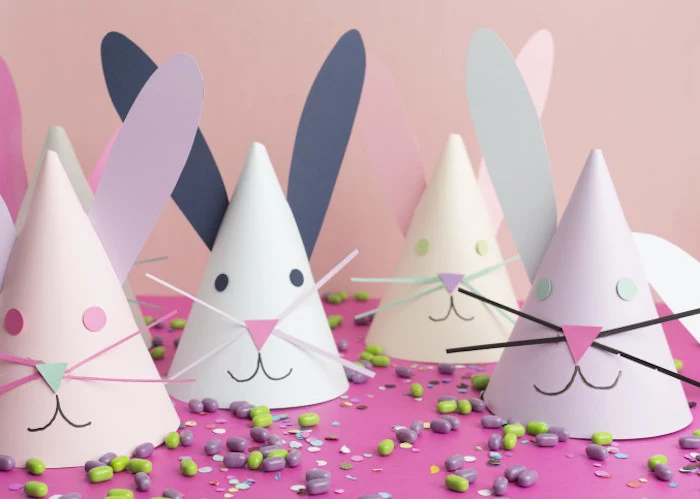
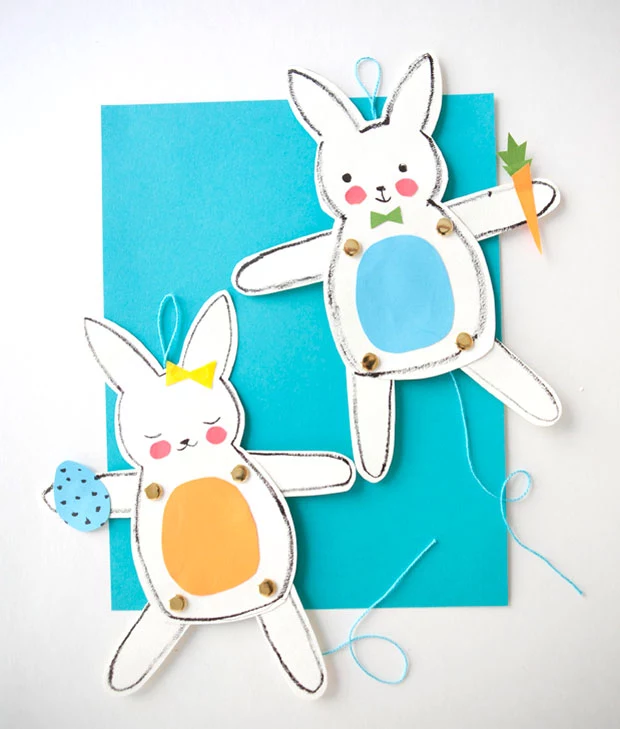
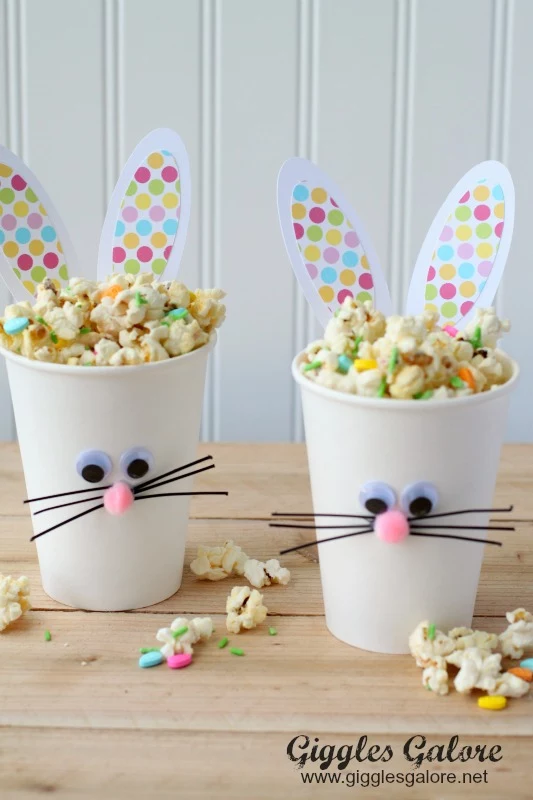
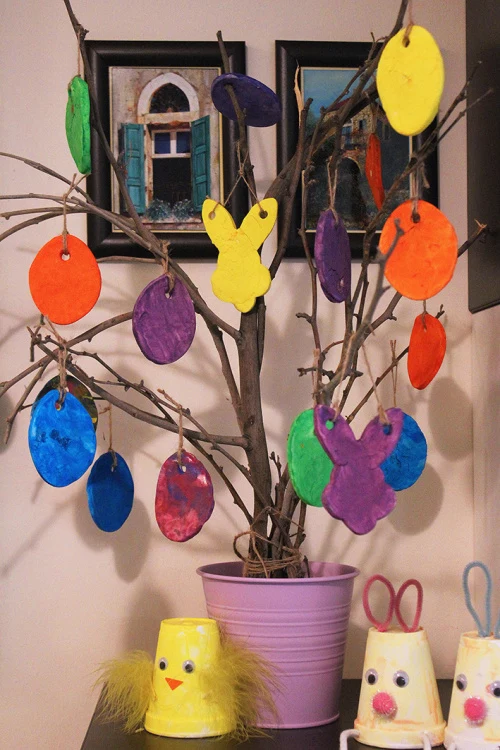
Inspirational Gallery
Don’t underestimate the power of a good spritz! Keep a small spray bottle of water on your craft table. It’s perfect for slightly dampening paper to make it easier to fold for origami-style bunnies, and it’s a miracle worker for reactivating dried-out washable markers from brands like Crayola.

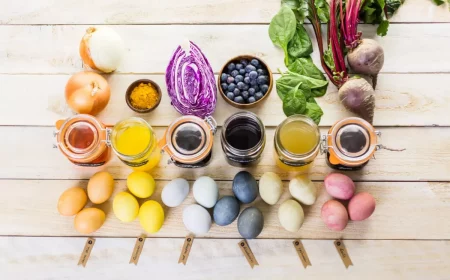
- Create vibrant, all-natural egg dyes using kitchen staples.
- Boil eggs with yellow onion skins for a deep orange or red.
- Use frozen blueberries for a lovely purplish-blue hue.
- A bit of turmeric in the water will yield a sunny yellow.
- Spinach creates a soft, leafy green.
The secret? Add a splash of white vinegar to the water to help the color set.
The glue dilemma: For paper-on-paper projects, a simple glue stick (like UHU or Pritt) is perfect for little hands and reduces mess. But when you’re adding texture—think pompoms, googly eyes, or yarn—you need something with more grip. Elmer’s School Glue or a good quality PVA craft glue is your best friend here, ensuring those fluffy bunny tails actually stay on!

According to a study in the journal *Parenting: Science and Practice*, engaging in creative activities with a parent strengthens family bonds and improves a child’s emotional regulation.
So, that ‘happy mess’ on your kitchen table is more than just fun—it’s actively building a resilient and connected family. Every dropped pompom and lopsided bunny ear is a small investment in your child’s well-being.
My child gets frustrated when their creation doesn’t look ‘perfect.’ How can I help?
Shift the focus from the result to the story. Instead of saying, ‘Let’s make a perfect bunny,’ try, ‘Let’s make a bunny with a fun personality!’ Celebrate the quirks. ‘Oh, this one has one long ear? He must be a great listener!’ This reframes imperfections as unique character traits, making the process about imagination, not imitation.
For a wonderfully sensory experience, try making your own textured paint. Simply add a bit of fine sand or salt to standard tempera paint. When it dries, it leaves a rough, tactile surface that’s fascinating for kids to touch. It’s perfect for giving a ‘woolly’ feel to a paper plate lamb.

Air-Dry Clay: Soft, pliable, and requires no baking. Brands like Crayola Model Magic are lightweight and crack-resistant, perfect for making small ornaments that little kids can easily handle and paint once dry.
Salt Dough: A classic DIY recipe (flour, salt, water) that you can bake for a hard, durable finish. It’s heavier and more rustic, ideal for creating lasting keepsakes like handprint ornaments.
For quick, easy fun with young children, air-dry clay is the winner. For a more traditional and budget-friendly craft, salt dough is unbeatable.
Before you start, create a ‘drying zone.’ This can be a separate baking sheet, a flattened cardboard box, or a corner of a counter covered in newspaper. Announce at the beginning that this is the special spot where all wet, painty, or gluey creations go to rest. This prevents smudging and the temptation to handle projects before they’re ready.

The word ‘Pysanky,’ for the famous Ukrainian decorated eggs, comes from the verb ‘pysaty,’ meaning ‘to write.’ The designs are not painted on, but ‘written’ with beeswax.
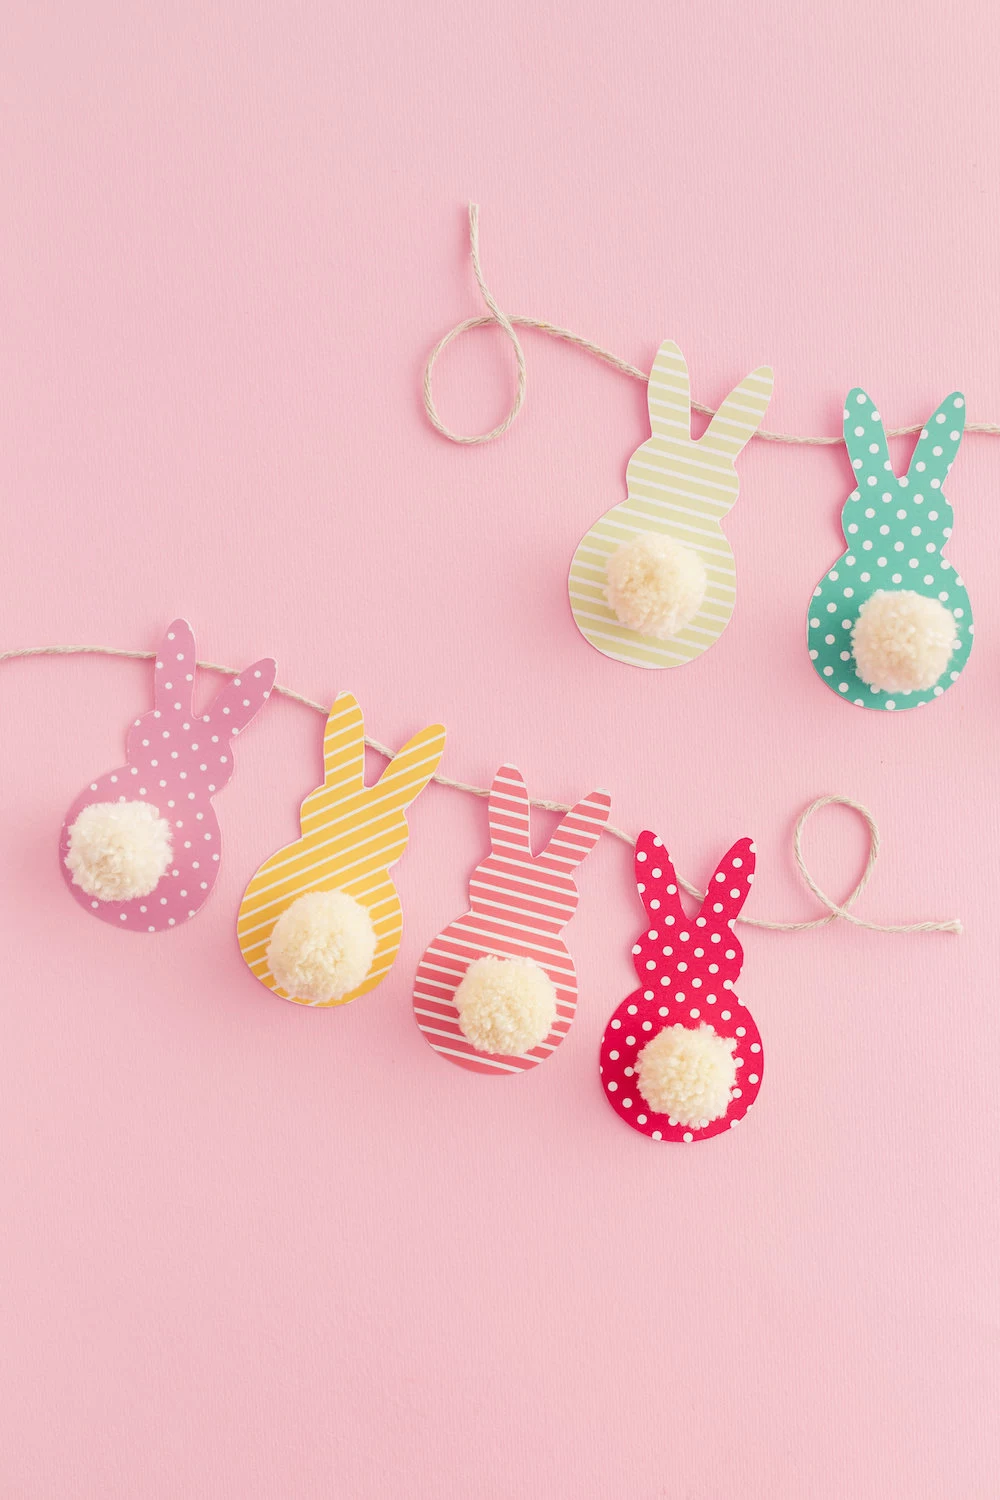
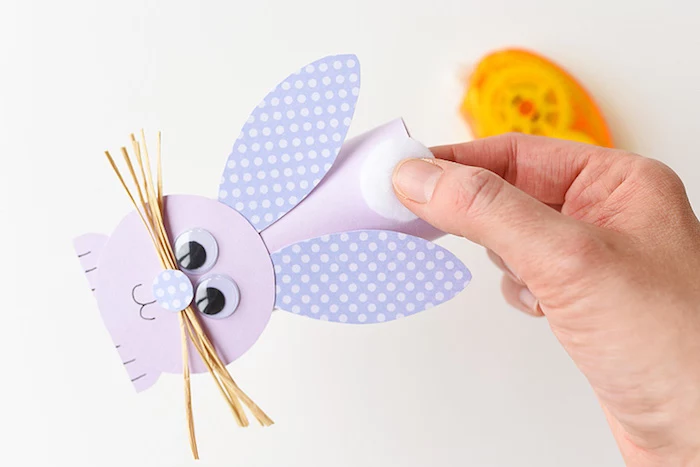
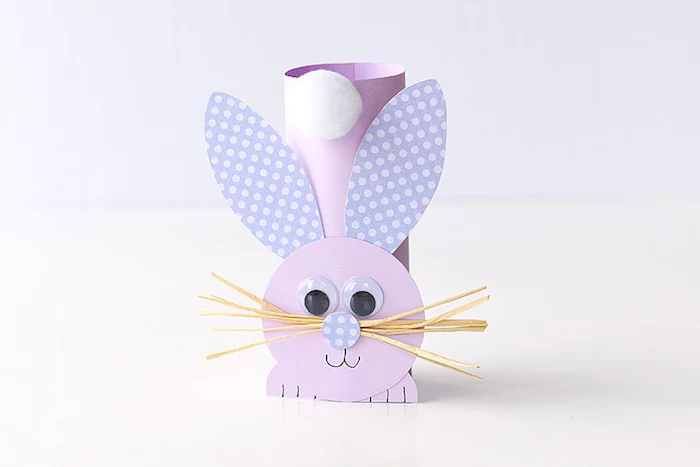
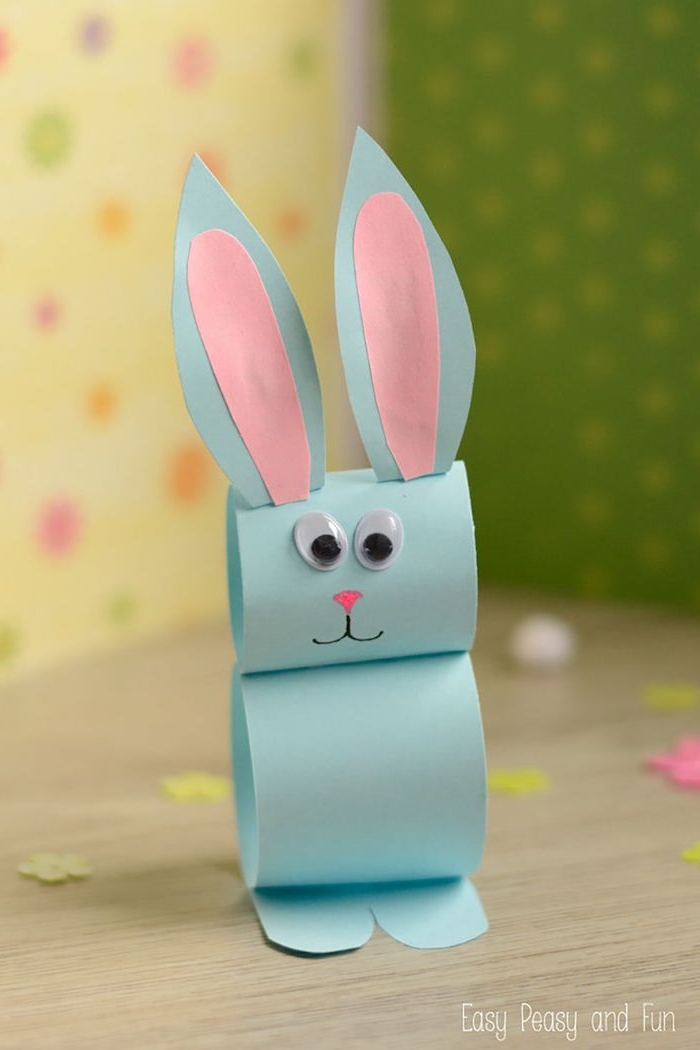
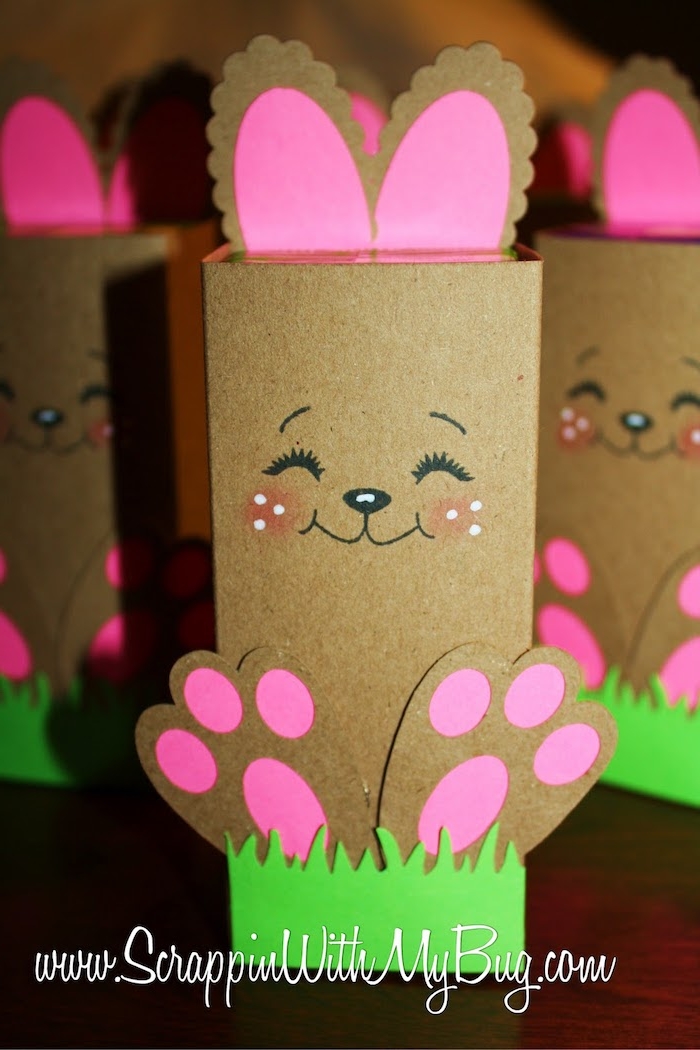
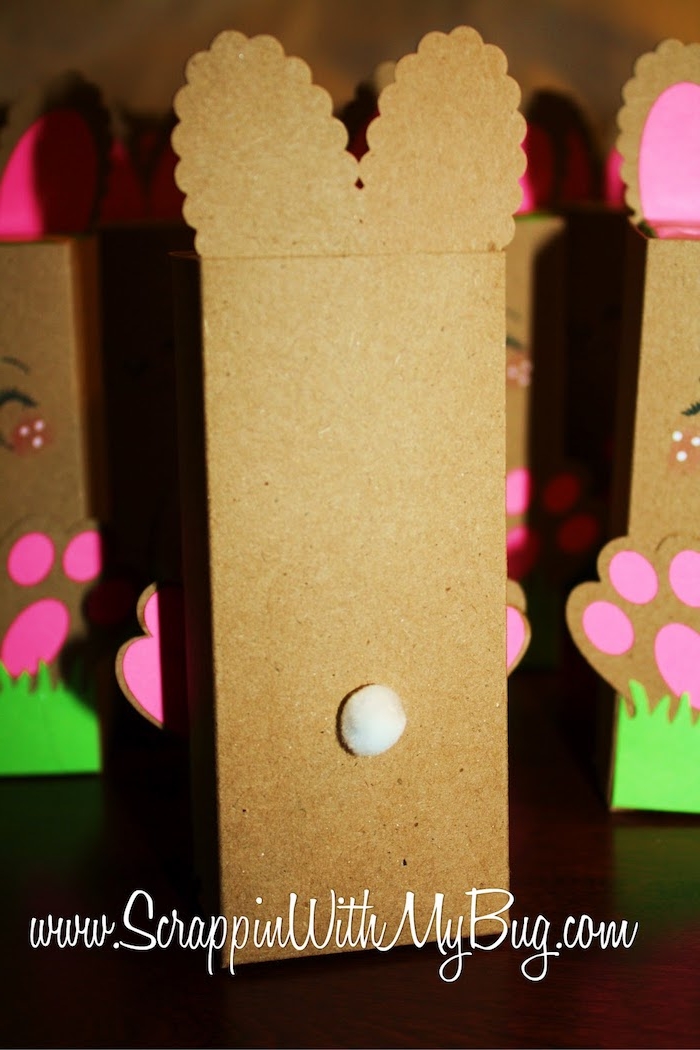
Transform old toilet paper rolls into a whole warren of Easter bunnies. It’s a classic for a reason!
- First, paint the roll in a pastel color and let it dry.
- Cut out two long ear shapes from construction paper and glue them to the inside of the roll.
- Use a marker to draw on a face and whiskers.
- Finish by gluing on a small cotton ball for a tail.
One crucial tip for painting with toddlers: Less is more. Instead of handing them the whole bottle of paint, squeeze small puddles of just two or three complementary colors onto a paper plate. This prevents them from mixing everything into a single brown color right away and reduces overwhelming choices.

- They create a unique, shiny, and vibrant finish.
- There are absolutely no spills or stains.
- The process is incredibly fast and mess-free.
The secret? Temporary tattoos! Apply them to plain, hard-boiled eggs just as you would to skin. They wrap perfectly around the curve of the egg, creating intricate designs in seconds.
Think beyond bunnies and chicks! The arrival of spring brings a whole world of nature to life. Try making twiggy nests from foraged garden materials, crafting colorful butterflies from coffee filters and pipe cleaners, or creating little fingerprint ladybugs on a painted leaf.

How can I display all their wonderful creations without my house looking like a craft store exploded?
Designate an ‘Easter Tree.’ Find a nice branch from the garden, place it in a heavy vase or jar, and let the kids hang their paper bunnies, clay ornaments, and decorated eggs from it using loops of string. It contains the creativity in one beautiful, evolving centerpiece.
Did you know? The soft, fuzzy texture of chenille pipe cleaners was originally designed in the early 20th century for cleaning tobacco pipes. Their crafting potential was a happy accident!
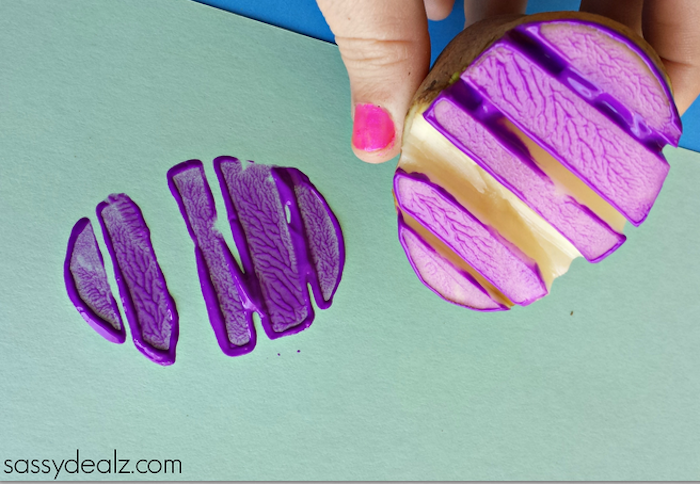
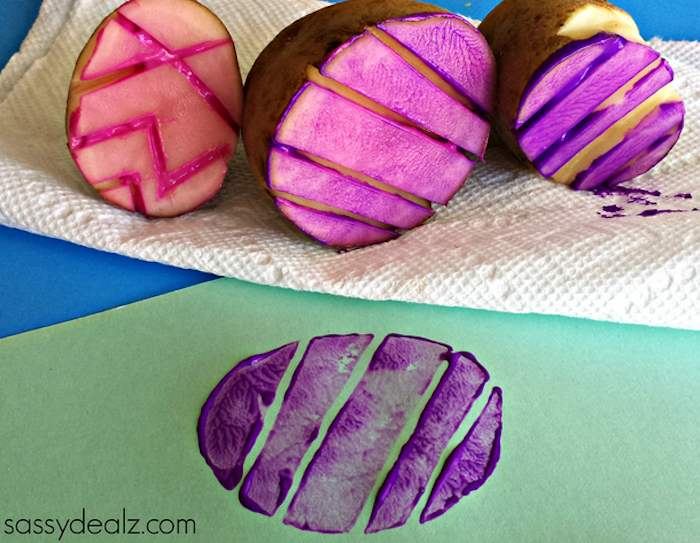
For an easy win, try potato stamping. Cut a potato in half, and have an adult carefully carve a simple shape—like an oval for an egg or a circle for a bunny’s head—into the flat side. Give your child a shallow dish of paint and let them stamp away on paper to create their own wrapping paper or Easter cards.
Sharpie Markers: Great for detailed line work on hard, non-porous surfaces like plastic or painted wooden eggs. They are permanent, so best for older kids with steady hands.
Posca Paint Pens: These opaque, water-based pens are fantastic for layering colors. They work on almost any surface—paper, wood, real eggshells—and mistakes can often be wiped away quickly if caught. A more forgiving option for all ages.
- Go on a ‘nature walk’ in your own backyard or a local park.
- Collect fallen twigs to build mini nests or use as arms for a sock bunny.
- Gather interesting leaves to use as stencils with paint.
- Find small, flat stones to paint as ladybugs or tiny Easter eggs.
- Press flowers to glue onto homemade cards.
Let the crafts tell a story. After you’ve made a few sock bunnies or paper plate sheep, gather them together. Ask your child: ‘What’s this bunny’s name? Where are they going on an adventure?’ This extends the creative play far beyond the crafting session itself, turning their creations into characters in a world of their own making.
‘The most effective way to foster creativity is not to praise the outcome, but to praise the effort and the courage to try something new.’ – A core principle shared by child development experts.
Important reminder: Embrace the wonky. A bunny with crooked ears, a lamb with three legs, an egg with more glitter than shell—these are not mistakes. They are the authentic, joyful marks of your child’s hands and imagination. These are the details you’ll smile about years from now.
Are my older kids and teens too cool for Easter crafts?
Not at all! Just level up the projects. Introduce them to needle felting to create detailed wool animals, try intricate string art using nails and embroidery floss on a piece of wood, or get some fine-tipped paint pens for hyper-detailed egg decorating inspired by traditional Pysanky. The key is to offer a challenge that feels more ‘art project’ than ‘kid craft’.
Don’t throw away your paper scraps! Keep a small box for all the off-cuts from your projects. These colorful little bits are perfect for creating mosaic-style art on a new piece of paper, or for shredding to use as ‘nesting material’ in a diorama. It’s a great lesson in resourcefulness.
- A roll of clear packing tape for reinforcing torn paper.
- Baby wipes for cleaning up gluey hands (they work better than dry towels!).
- A hairdryer (on low!) for speeding up paint drying between layers.
- A handful of clothespins to hold freshly glued parts together.
Keep this ‘Oops Kit’ handy to solve the most common craft emergencies in seconds.
Introduce a ‘Grand Finale’ to your craft session. Once everything is dry, take a moment to admire all the work. Let each child present their favorite piece and tell you about it. Then, take a photo of them holding their creation. This simple ritual builds immense pride and beautifully concludes the creative time together.